

Help Guide
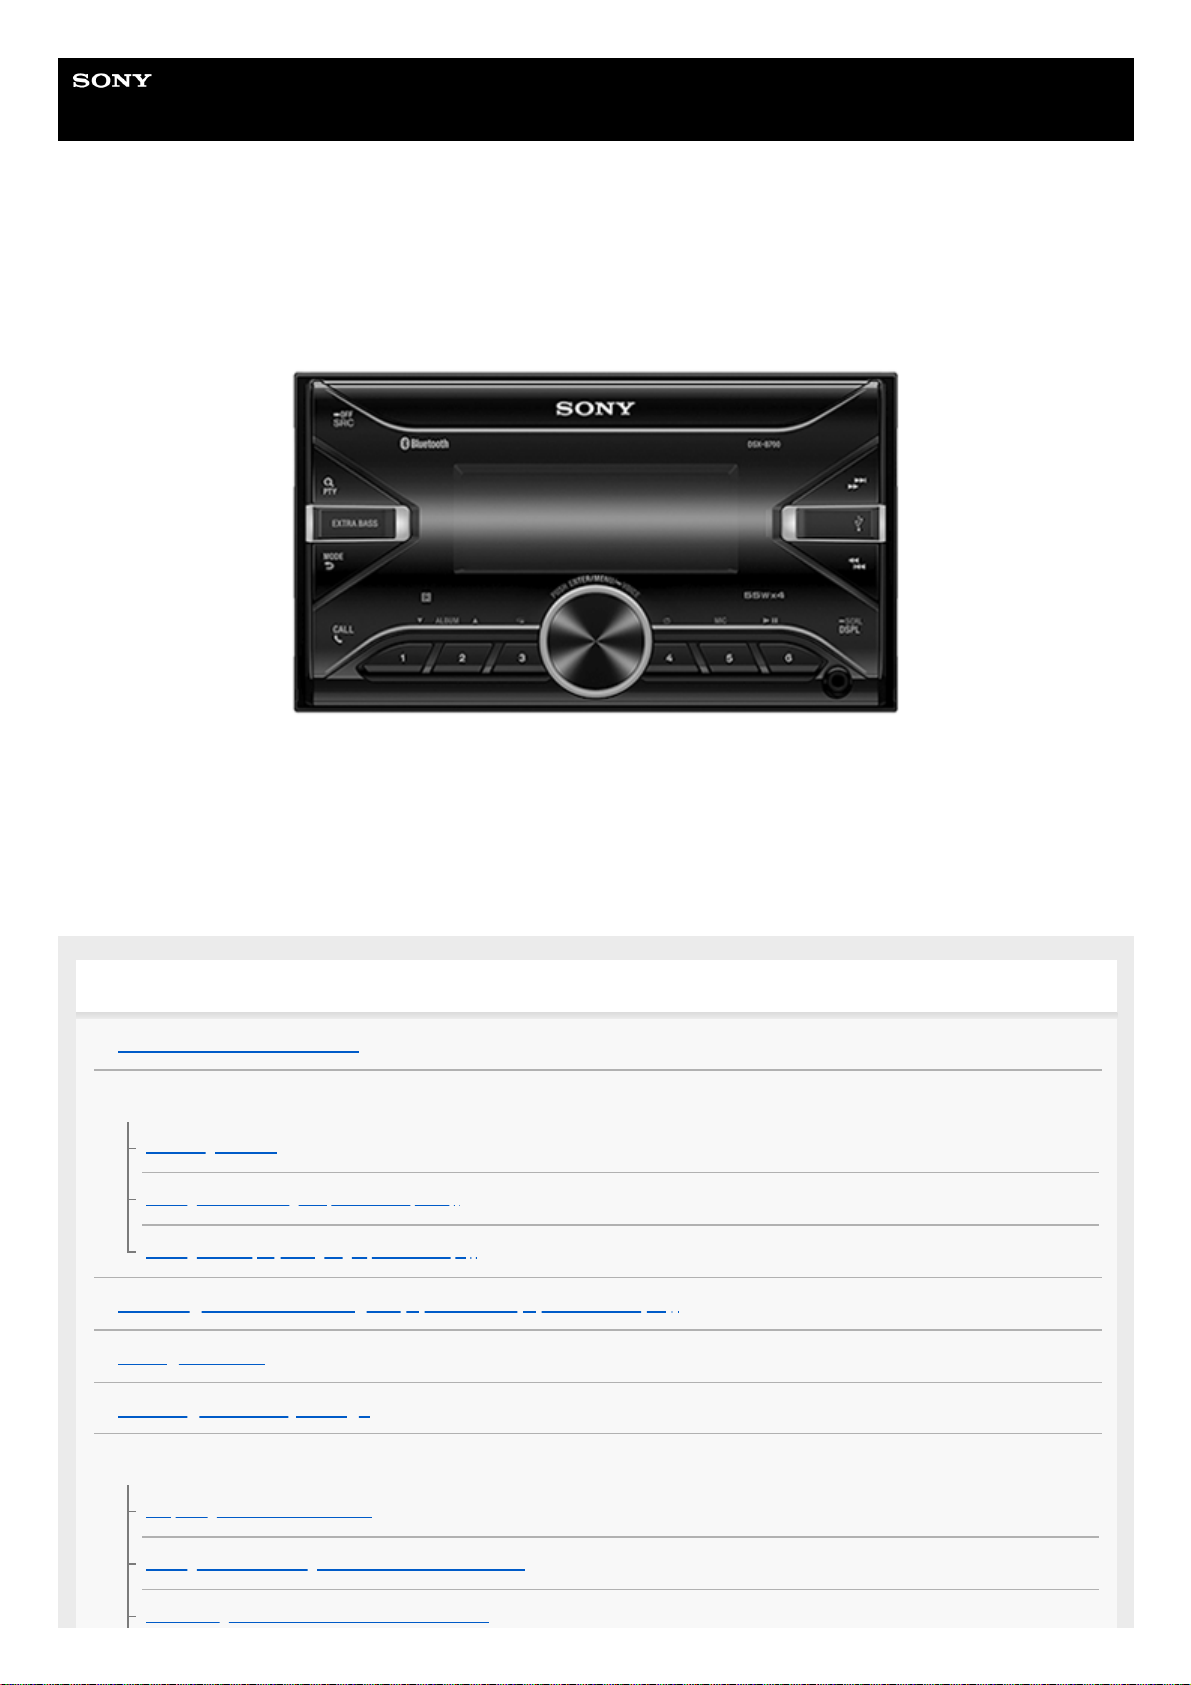
In-Car Receiver
DSX-B700/DSX-B700W/DSX-B710D
Use this manual if you encounter any problems, or have any questions.
Getting Started
Guide to Parts and Controls
Resetting the Unit
Resetting the Unit
Setting the Area/Region (DSX-B700(EUR))
Setting the Display Language (DSX-B700(E))
Switching the FM/AM Tuning Step (DSX-B700(E)/DSX-B700(IN))
Setting the Clock
Checking the Battery Voltage
Preparing a BLUETOOTH Device
Preparing a Bluetooth® Device
Pairing and Connecting with a BLUETOOTH Device
Connecting with a Paired BLUETOOTH Device
1
Connecting with an iPhone/iPod (BLUETOOTH Auto Pairing)
Connecting a USB Device
Connecting Other Portable Audio Device
Radio
Listening to the Radio
Using Radio Data System (RDS)
Setting AF and TA (DSX-B700(EUR)/DSX-B710D)
Selecting Program Types (PTY)
SiriusXM Radio (DSX-B700(UC))
Listening to the SiriusXM Radio
Selecting Channels for SiriusXM
Selecting Channels from Categories
Setting a Parental Control
DAB/DAB+ Radio (DSX-B710D)
Listening to the DAB/DAB+ Radio
Receiving DAB
Receiving DAB
Searching for a Station by Station Name
Searching for a Station by Name (“Quick-BrowZer™”)
Searching for a Station by Station Group
Updating the Station List (Auto tune)
Setting DAB Announcements
Selecting Program Types (PTY)
Playback
Playing a USB Device
Playing a BLUETOOTH Device
Searching and Playing Tracks
Repeat Play and Shuffle Play
Searching a Track by Name (“Quick-BrowZer”)
2
Searching by Skipping Items (Jump mode)
Pandora® (DSX-B700(UC)/DSX-B700W)
About Pandora®
Setting up Pandora®
Streaming Pandora®
Available Operations in Pandora®
“Thumbs” Feedback
Using the Station List
Bookmarking
Handsfree Calling
Preparing a Mobile Phone
Receiving a Call
Making a Call
Making a Call
Making a Call from the Phonebook
Making a Call from the Call History
Making a Call by Phone Number Input
Making a Call by Redial
Making a Call by Voice Tags
Available Operations during Call
Useful Functions
“Sony | Music Center” with iPhone/Android™ Smartphone
“Sony | Music Center” with iPhone/Android™ Smartphone
Establishing the “Sony | Music Center” Connection
Selecting the Source or Application
Using Voice Recognition (Android Smartphone Only)
Using “Siri Eyes Free”
Settings
Basic Setting Operation
3
General Setup (GENERAL)
Sound Setup (SOUND)
Display Setup (DISPLAY)
BLUETOOTH Setup (BLUETOOTH)
“Sony | Music Center” Setup (SONY APP)
Additional Information
Canceling the Demonstration Mode
Updating the Firmware
Precautions
Maintenance
Specifications
Copyrights
Troubleshooting
Troubleshooting
General
No power is being supplied to the unit. (DSX-B700(UC)/DSX-B700(E)/DSX-B700(IN)/DSX-B700W)
No sound or the sound is very low.
No beep sound.
The contents of the memory have been erased.
Preset stations and correct time are erased. / The fuse has blown. / Makes a noise when the position of the ignition is switched.
During playback or reception, the demonstration mode starts.
The display disappears from/does not appear in the display window.
The display disappears while the unit is operating. (DSX-B700(E)/DSX-B700(IN))
The display/illumination flashes.
The operation buttons do not function.
The clock set automatically is not accurate.
Radio
The radio reception is poor. / Static noise occurs.
The stations cannot be received.
4
Preset tuning is not possible.
65 MHz to 74 MHz in FM3 cannot be tuned in. (DSX-B700(EUR))
RDS
PTY displays [- - - - - - - -].
RDS services cannot be received (when [AREA] is set to [RUSSIA]). (DSX-B700(EUR))
The SEEK starts after a few seconds of listening. (DSX-B700(EUR)/DSX-B710D)
No traffic announcements. (DSX-B700(EUR)/DSX-B710D)
Program service name flashes. (DSX-B700(EUR)/DSX-B710D)
DAB/DAB+ Radio reception (DSX-B710D)
DAB stations cannot be received.
No traffic announcements.
USB playback
You cannot play items via a USB hub.
A USB device takes longer to play.
The sound is intermittent.
The audio file cannot be played.
Operations for skipping an album, skipping items (Jump mode), and searching a track by name (“Quick-BrowZer”) cannot be
performed.
The sound cannot be output during playback in Android mode.
BLUETOOTH
The connecting device cannot detect this unit.
Connection is not possible.
The name of the detected device does not appear.
No ringtone.
The talker’s voice cannot be heard.
A call partner says that the volume is too low or high.
Echo or noise occurs in phone call conversations.
The phone is not connected.
The phone sound quality is poor.
The volume of the connected audio device is low (high).
The sound skips during playback of a BLUETOOTH audio device.
5
5-004-923-11(4) Copyright 2019 Sony Corporation
The connected BLUETOOTH audio device cannot be controlled.
Some functions do not work.
A call is answered unintentionally.
Pairing failed due to a timeout.
Cannot pair.
BLUETOOTH function cannot operate.
No sound is output from the car speakers during handsfree call.
“Siri Eyes Free” is not activated.
“Sony | Music Center” operation
Application name is mismatched with the actual application in “Sony | Music Center”.
While running the “Sony | Music Center” application via BLUETOOTH, the display automatically switches to [BT AUDIO].
The “Sony | Music Center” application is automatically disconnected when the display switches to [IPOD].
The “Sony | Music Center” connection is automatically disconnected when the USB mode of the unit is changed to [ANDROID].
Pandora® operation (DSX-B700(UC)/DSX-B700W)
Pandora® connection is not possible.
Messages
General
USB Device Playback
RDS Operation (DSX-B700(EUR)/DSX-B710D)
DAB/DAB+ Radio Reception (DSX-B710D)
BLUETOOTH Function
“Sony | Music Center” Operation
Pandora® Operation (DSX-B700(UC)/DSX-B700W)
SiriusXM Operation (DSX-B700(UC))
Steering Wheel Remote Control Operation
Firmware Update Operation
Customer Support Websites
About the “Support by Sony” App
6
Help Guide
In-Car Receiver
DSX-B700/DSX-B700W/DSX-B710D
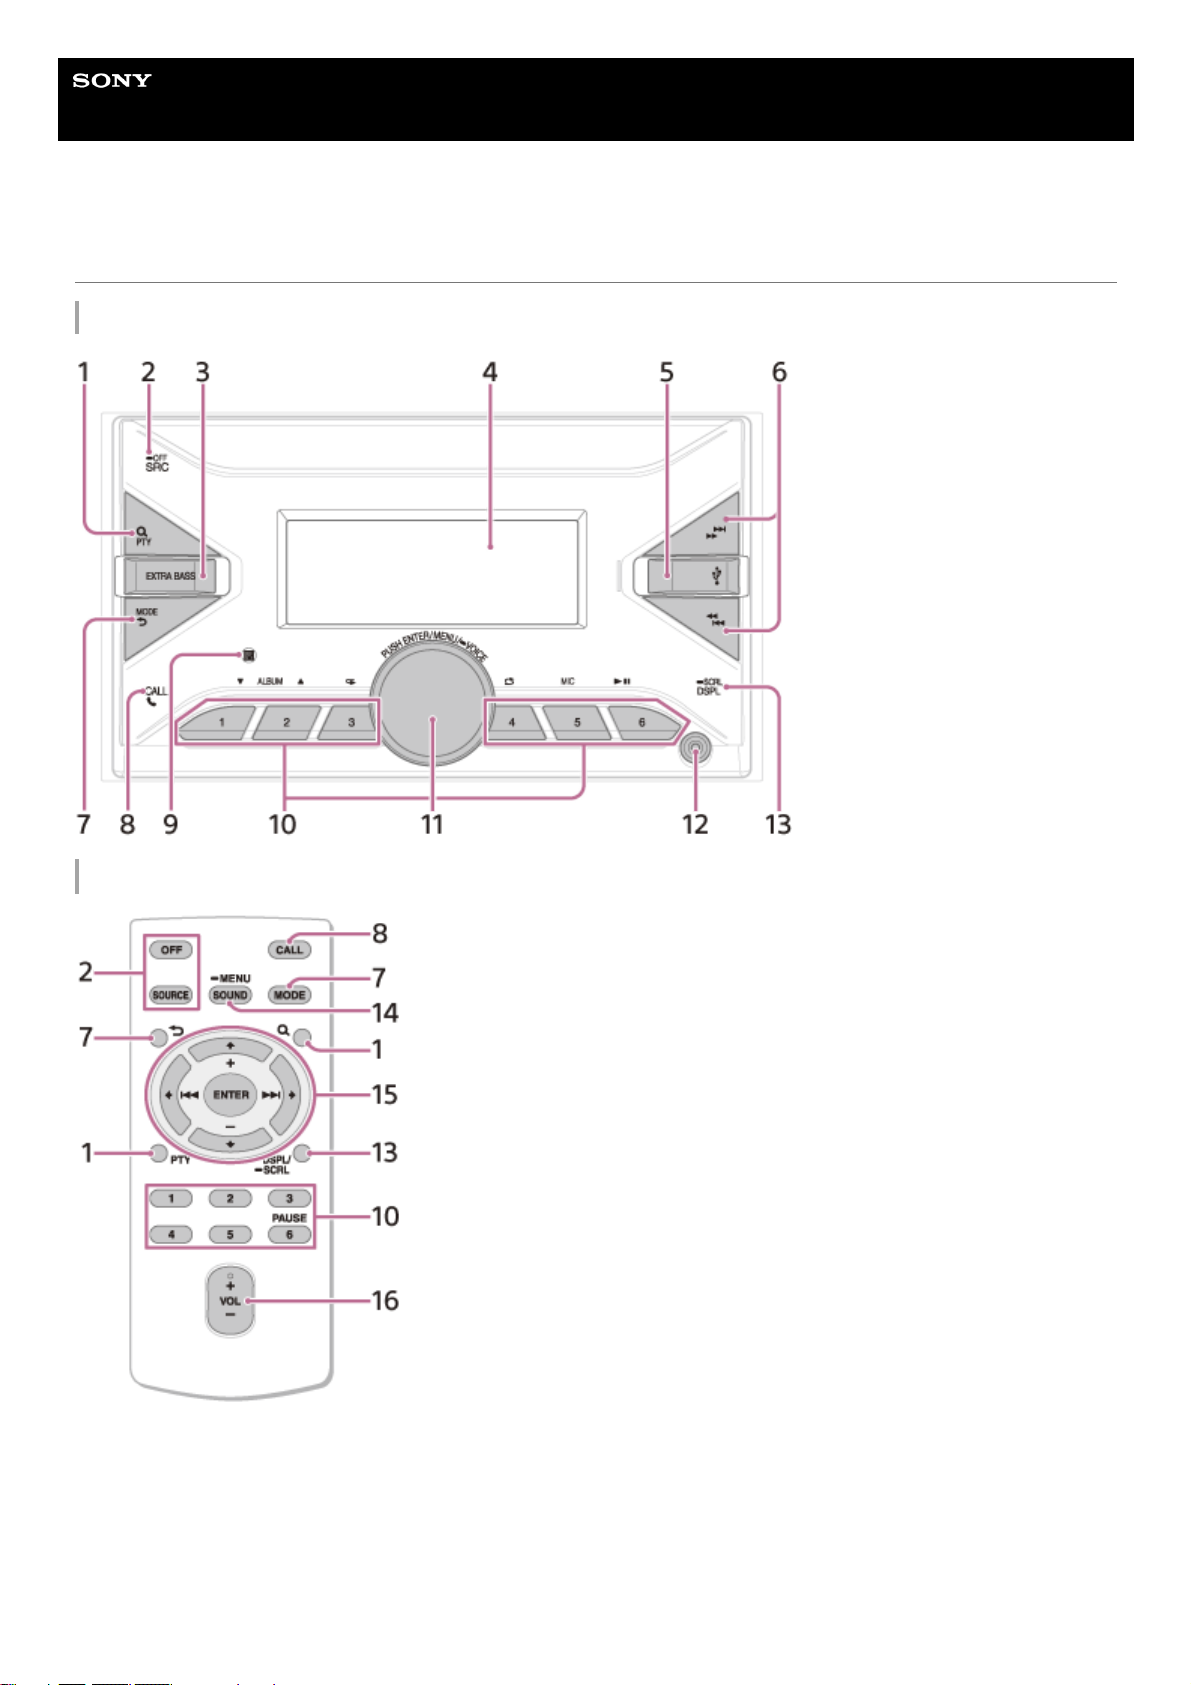
Guide to Parts and Controls
Main unit
Remote commander (DSX-B700(UC)/DSX-B700(E)/DSX-B700(IN)/DSX-B700W)
The VOL (volume) + button has a tactile dot.
Remove the insulation film before use.
7
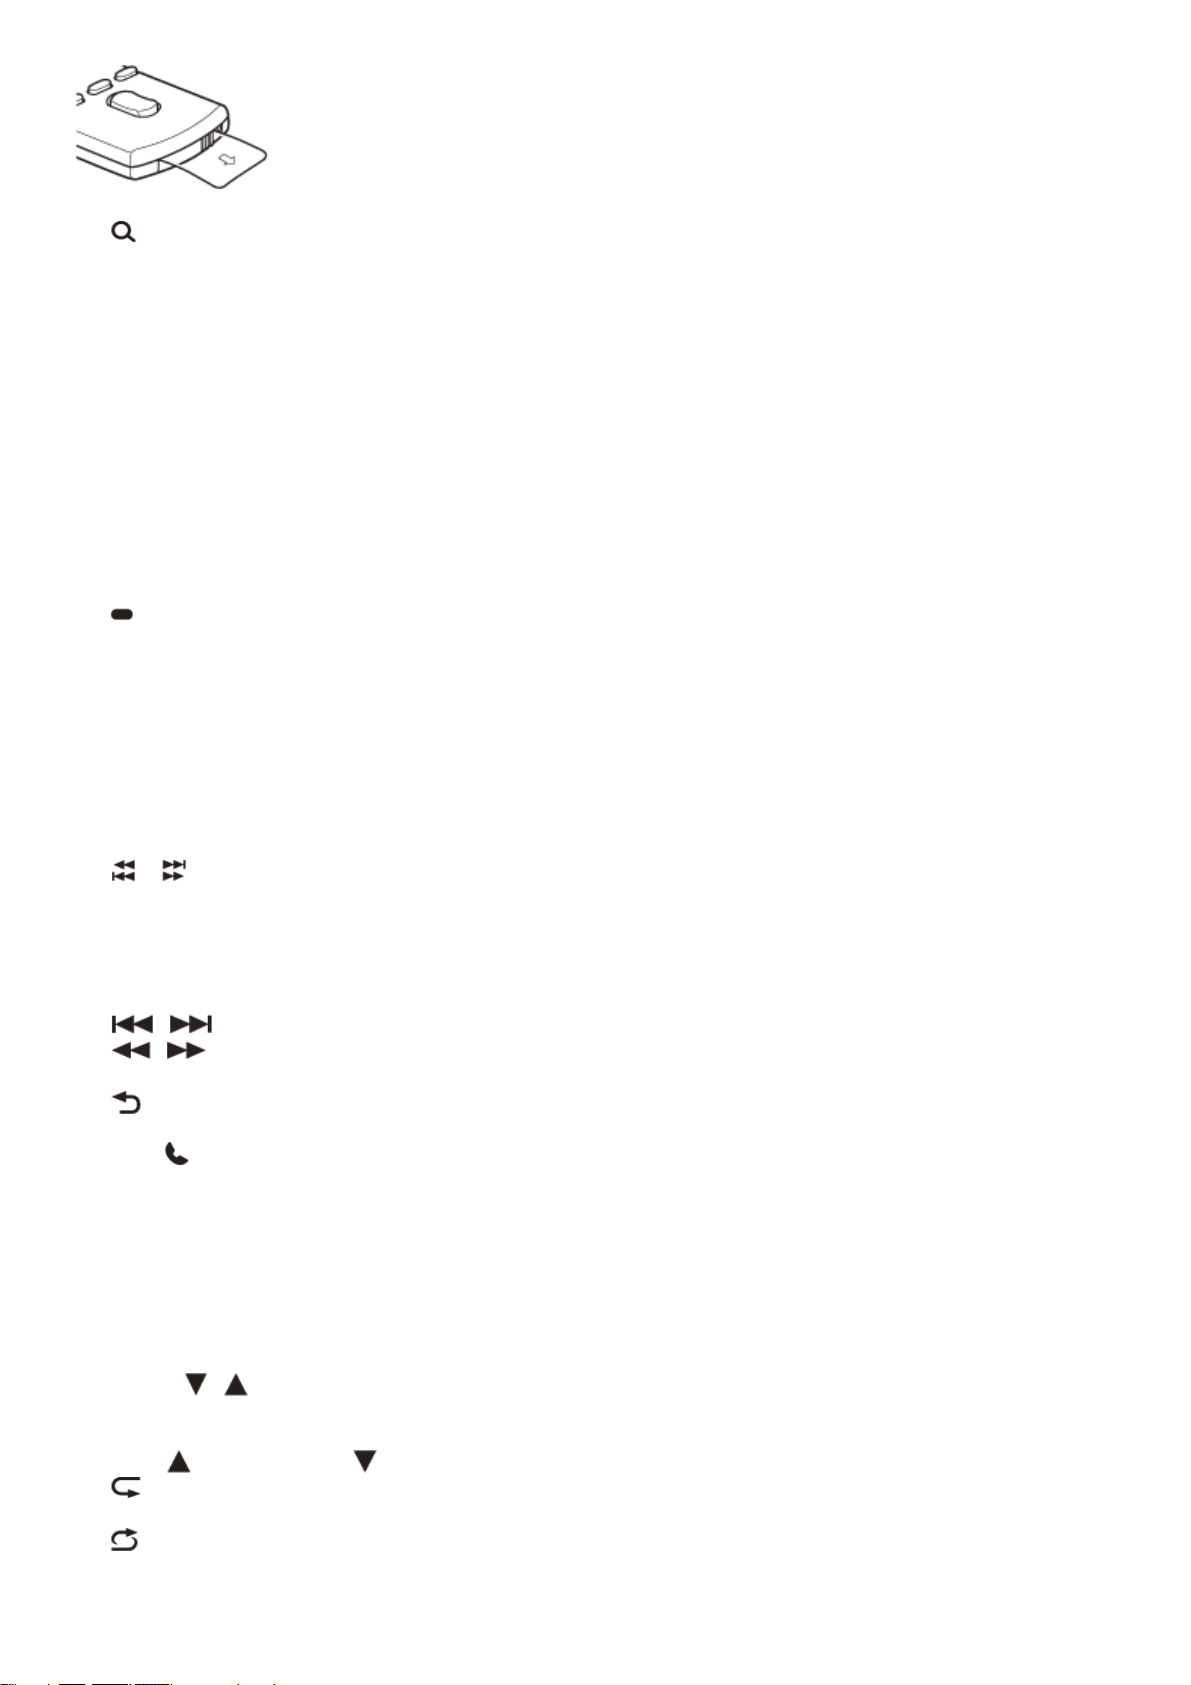
(browse)
During playback:
Enters the browse mode.
(Not available when a USB device in Android mode or iPod is connected.)
During DAB reception (DSX-B710D):
Enters the browse mode.
PTY (program type)
During FM reception:
Selects PTY in RDS.
During DAB reception (DSX-B710D):
Press twice within 2 seconds to select PTY.
Press and hold for more than 2 seconds to perform an auto tune to update the station list.
1.
SRC (source)
Turns on the power.
Changes the source.
OFF
Press and hold for 1 second to turn the source off and display the clock.
Press and hold for more than 2 seconds to turn off the power and the display.
If the unit is turned off and the display disappears, operation by the remote commander is not available (DSXB700(UC)/DSX-B700(E)/DSX-B700(IN)/DSX-B700W).
2.
EXTRA BASS
Reinforces bass sound in synchronization with the volume level. Press to change the EXTRA BASS setting: [1], [2],
[OFF].
3.
Display window4.
USB port5.
/ (SEEK –/+)
During radio reception:
Tunes in radio stations automatically. Press and hold to tune manually.
During DAB reception (DSX-B710D):
Selects a station. Press and hold to search for a station group.
(Available only when [SEEK BY] is set to [STATION GP].)
/ (previous/next)
/ (fast-reverse/fast-forward)
6.
MODE
(back)
Returns to the previous display.
7.
CALL
Enters the call menu. Receives/ends a call.
Press and hold for more than 2 seconds to switch the BLUETOOTH signal.
8.
Receptor for the remote commander9.
Number buttons (1 to 6)
Receives preset radio stations. Press and hold to preset stations.
During DAB reception (DSX-B710D):
Receives preset DAB stations or radio stations.
Press and hold to preset DAB stations or radio stations.
ALBUM
/
Skips an album for audio device. Press and hold to skip albums continuously.
(Not available when a USB device in Android mode or iPod is connected.)
Press
to thumbs up, or to thumbs down in Pandora® (DSX-B700(UC)/DSX-B700W).
(repeat)
(Not available when a USB device in Android mode is connected.)
(shuffle)
(Not available when a USB device in Android mode is connected.)
10.
8

5-004-923-11(4) Copyright 2019 Sony Corporation
MIC (microphone)
(play/pause)
Control dial
Adjusts the volume.
PUSH ENTER
Enters the selected item.
Press SRC (source), rotate then press to change the source (timeout in 2 seconds).
MENU
Opens the setup menu.
VOICE
Press and hold for more than 2 seconds to activate voice dial, voice recognition (Android smartphone only), or the
Siri function (iPhone only).
11.
AUX input jack12.
DSPL (display)
Changes display items.
SCRL (scroll)
Press and hold to scroll a display item.
13.
SOUND
Opens the SOUND menu directly.
MENU
Press and hold to open the setup menu.
14.
/ / / (left/up/down/right)
Selects a setup item, etc.
ENTER
Enters the selected item.
Press and hold for more than 2 seconds to establish or terminate the “Sony | Music Center” function.
/ (previous/next)
+/– (album +/–)
15.
VOL (volume) +/–16.
9
Help Guide
In-Car Receiver
DSX-B700/DSX-B700W/DSX-B710D
Resetting the Unit
Before operating the unit for the first time, after replacing the car battery, or changing the connections, you must reset the
unit.
Note
Resetting the unit will erase the clock setting and some stored contents.
5-004-923-11(4) Copyright 2019 Sony Corporation
Press and hold DSPL (display) and CALL
for more than 2 seconds.
1
10

Help Guide
In-Car Receiver
DSX-B700/DSX-B700W/DSX-B710D
Setting the Area/Region (DSX-B700(EUR))
After resetting the unit, the area/region setting display appears.
This setting can be configured in the general setup menu.
Related Topic
General Setup (GENERAL)
5-004-923-11(4) Copyright 2019 Sony Corporation
Press ENTER while [AREA] is displayed.
The area/region currently set appears.
1
Rotate the control dial to select [EUROPE] or [RUSSIA], then press it.
2
Rotate the control dial to select [YES] or [NO], then press it.
If the setting area/region is changed, the unit is reset, then the clock is displayed.
3
11
Help Guide
In-Car Receiver
DSX-B700/DSX-B700W/DSX-B710D
Setting the Display Language (DSX-B700(E))
After resetting the unit, the display language setting display appears.
This setting can be configured in the general setup menu.
Related Topic
General Setup (GENERAL)
5-004-923-11(4) Copyright 2019 Sony Corporation
Press ENTER while [LANGUAGE] is displayed.
The display language currently set appears.
1
Rotate the control dial to select [ENGLISH] or [SPANISH], then press it.
The setting is complete and the clock is displayed.
2
12

Help Guide
In-Car Receiver
DSX-B700/DSX-B700W/DSX-B710D
Switching the FM/AM Tuning Step (DSX-B700(E)/DSX-B700(IN))
Set the FM/AM tuning step of your country. This setting appears only while the source is off and the clock is
displayed.
5-004-923-11(4) Copyright 2019 Sony Corporation
Press MENU, rotate the control dial to select [GENERAL], then press it.
1
Rotate the control dial to select [TUNER STEP], then press it.
2
Rotate the control dial to select from [50K/9K], [100K/10K] or [200K/10K], then press it.
3
13
Help Guide
In-Car Receiver
DSX-B700/DSX-B700W/DSX-B710D
Setting the Clock
To display the clock
Press DSPL (display).
To set the clock automatically
Select [AUTO <RDS>] in step 3.
For DSX-B710D:
Select [AUTO <DAB>] in step 3.
5-004-923-11(4) Copyright 2019 Sony Corporation
Press MENU, rotate the control dial to select [GENERAL], then press it.
1
Rotate the control dial to select [CLOCK], then press it.
2
Rotate the control dial to select [MANUAL], then press it.
The hour indication flashes.
3
Rotate the control dial to set the hour and minute.
To move the digital indication, press
/ (SEEK –/+).
4
After setting the minute, press MENU.
The setup is complete and the clock starts.
5
14

Help Guide
In-Car Receiver
DSX-B700/DSX-B700W/DSX-B710D
Checking the Battery Voltage
You can check the current battery voltage. (Not available while the source is off and the clock is displayed.)
5-004-923-11(4) Copyright 2019 Sony Corporation
Press DSPL (display) repeatedly until the battery voltage display appears.
1
15
Help Guide
In-Car Receiver
DSX-B700/DSX-B700W/DSX-B710D
Preparing a Bluetooth® Device
You can enjoy music, or perform handsfree calling depending on the BLUETOOTH compatible device such as a
smartphone, mobile phone and audio device (hereafter “BLUETOOTH device” if not otherwise specified). For details on
connecting, refer to the operating instructions supplied with the device. Before connecting the device, turn down the
volume of this unit; otherwise, loud sound may result.
5-004-923-11(4) Copyright 2019 Sony Corporation
16
Help Guide
In-Car Receiver
DSX-B700/DSX-B700W/DSX-B710D
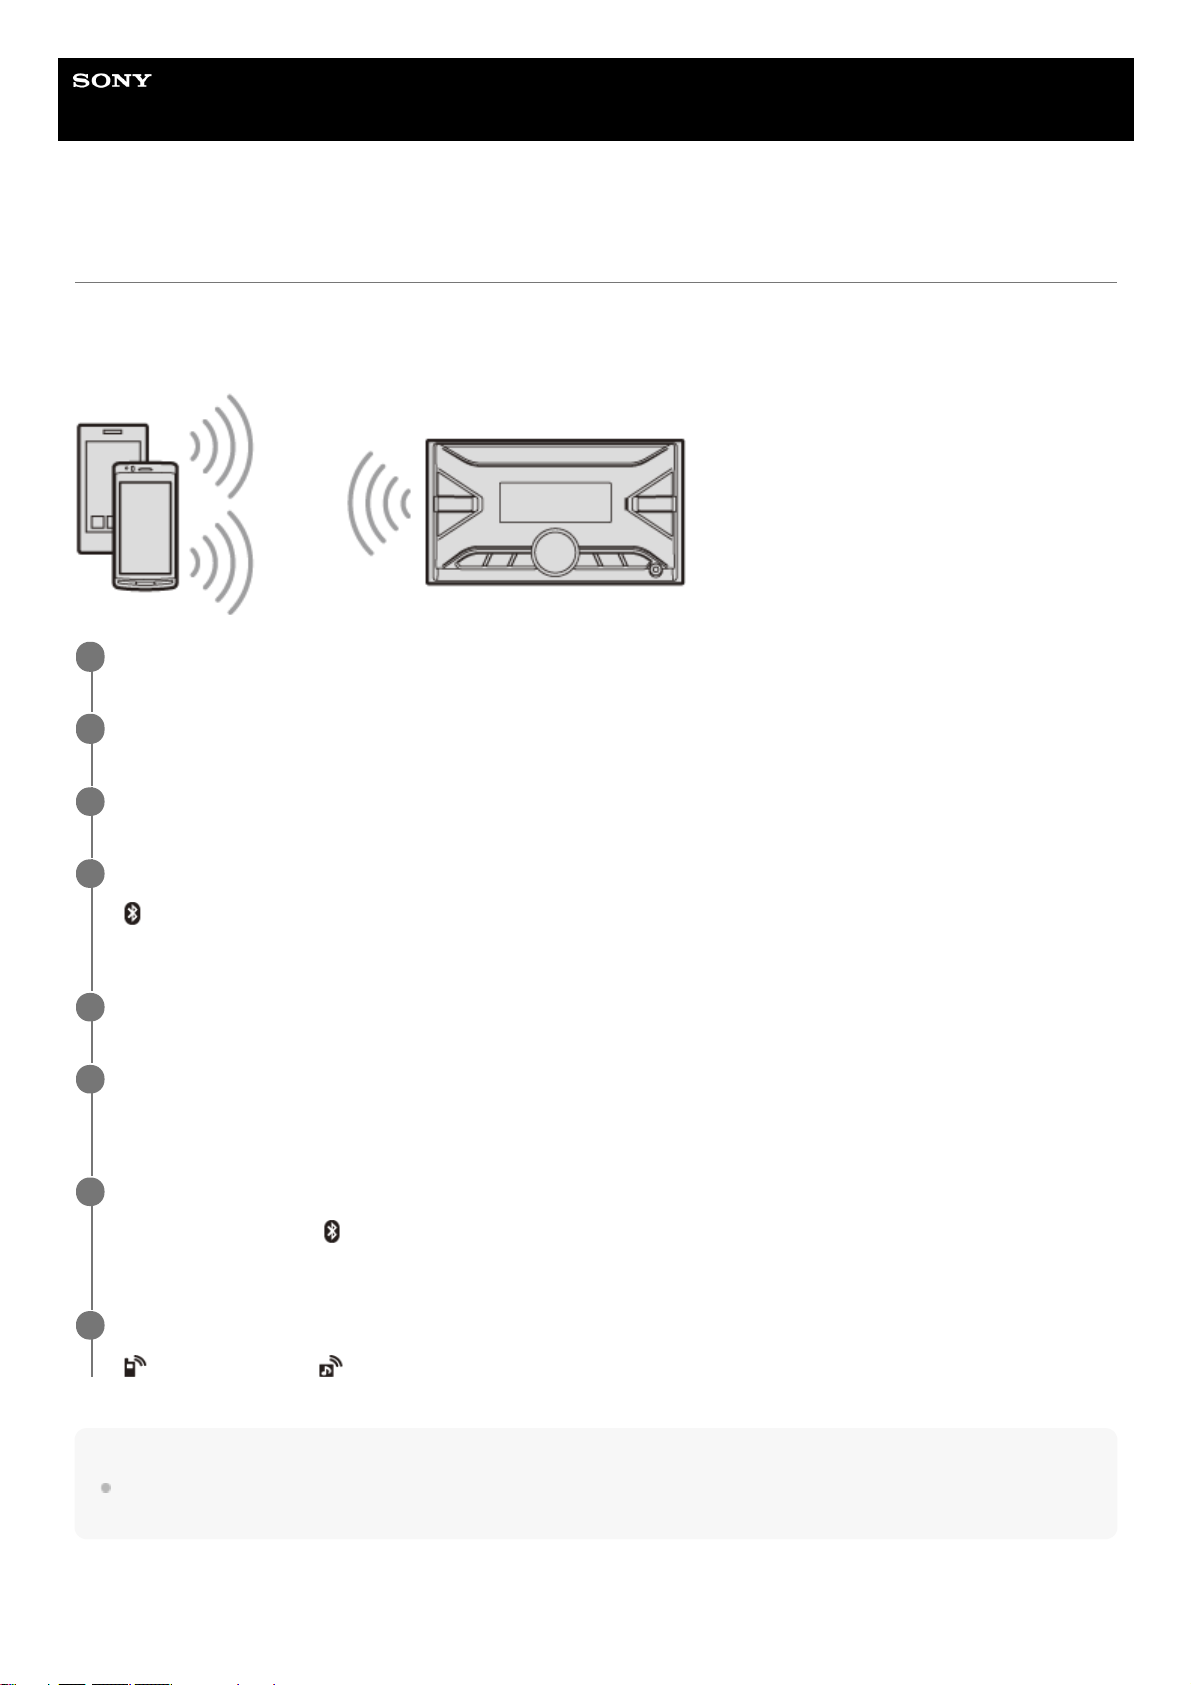
Pairing and Connecting with a BLUETOOTH Device
When connecting a BLUETOOTH device for the first time, mutual registration (called “pairing”) is required. Pairing
enables this unit and other devices to recognize each other. This unit can connect two BLUETOOTH devices (two mobile
phones, or a mobile phone and an audio device).
Note
While connecting to a BLUETOOTH device, this unit cannot be detected from another device. To enable detection, enter the
pairing mode and search for this unit from another device.
To start playback
Press SRC (source) to select [BT AUDIO].
Place the BLUETOOTH device within 1 m (3 ft) of this unit.
1
Press MENU, rotate the control dial to select [BLUETOOTH], then press it.
2
Rotate the control dial to select [PAIRING], then press it.
3
Rotate the control dial to select [DEVICE 1]* or [DEVICE 2]*, then press it.
(BLUETOOTH) flashes while the unit is in pairing standby mode.
4
[DEVICE 1] or [DEVICE 2] will be changed to the paired device name after pairing is complete.
*
Perform pairing on the BLUETOOTH device so it detects this unit.
5
Select your model name shown in the display of the BLUETOOTH device.
Repeat from step 2 if your model name does not appear.
6
If passkey* input is required on the BLUETOOTH device, input [0000].
When pairing is made,
(BLUETOOTH) stays lit.
7
Passkey may be called “Passcode”, “PIN code”, “PIN number” or “Password”, etc., depending on the device.
*
Select this unit on the BLUETOOTH device to establish the BLUETOOTH connection.
(mobile phone) or (audio) lights up when the connection is made.
8
17

To disconnect the paired device
Perform steps 2 to 4 to disconnect after this unit and the BLUETOOTH device are paired.
Related Topic
Playing a BLUETOOTH Device
5-004-923-11(4) Copyright 2019 Sony Corporation
18
Help Guide
In-Car Receiver
DSX-B700/DSX-B700W/DSX-B710D
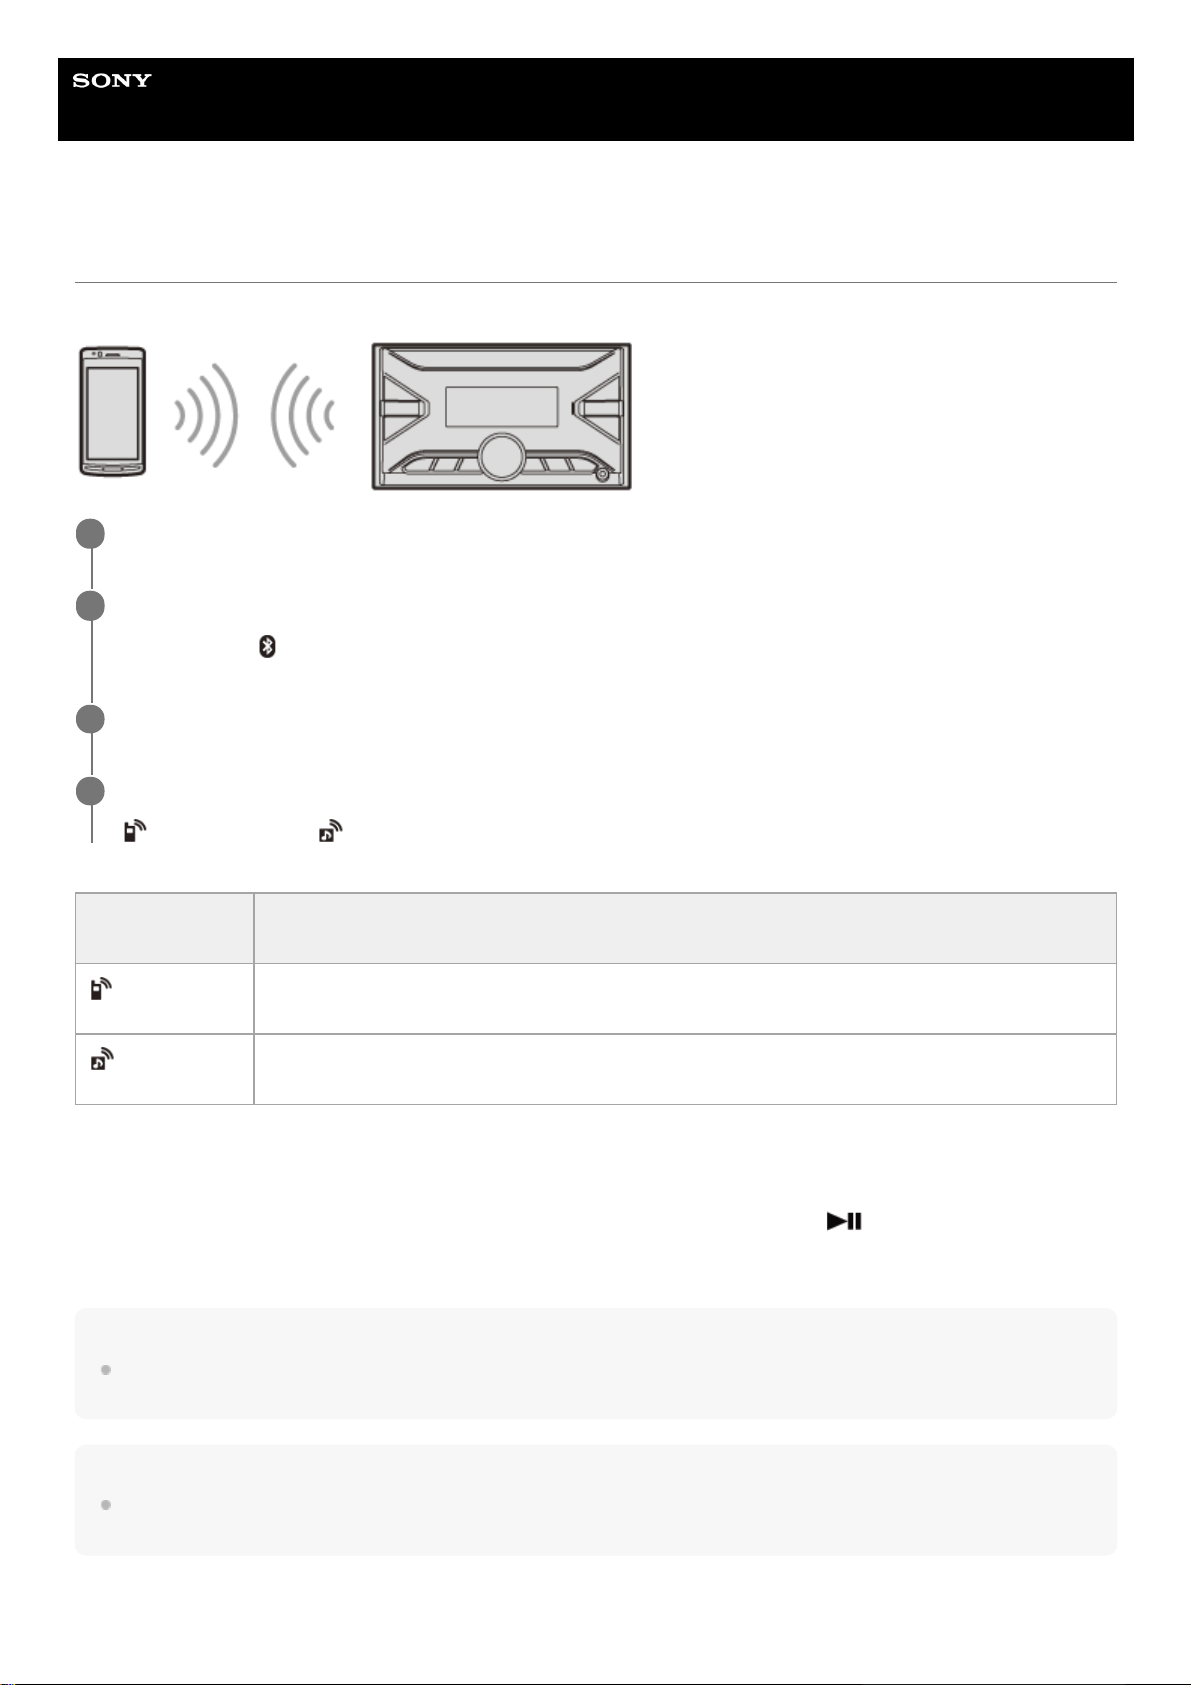
Connecting with a Paired BLUETOOTH Device
To use a paired device, connection with this unit is required. Some paired devices will connect automatically.
To connect the last-connected device from this unit
Activate the BLUETOOTH function on the BLUETOOTH device.
To connect with the audio device, press SRC (source) to select [BT AUDIO] and press
(play/pause).
To connect with the mobile phone, press CALL (only available when there is no audio device or mobile phone connected
to the unit).
Hint
With BLUETOOTH signal on: when the ignition is turned to on, this unit reconnects automatically to the last-connected mobile
phone.
Note
While streaming BLUETOOTH audio, you cannot connect from this unit to the mobile phone. Connect from the mobile phone to
this unit instead.
To capture your voice during handsfree calling
Press MENU, rotate the control dial to select [BLUETOOTH], then press it.
1
Rotate the control dial to select [BT SIGNAL], then press it.
Make sure that
(BLUETOOTH) lights up.
2
Activate the BLUETOOTH function on the BLUETOOTH device.
3
Operate the BLUETOOTH device to connect to this unit.
(mobile phone) or (audio) lights up.
4
Icon in the
display
Detail
(mobile phone)
Lights up when handsfree calling is available by enabling the HFP (Handsfree Profile).
(audio)
Lights up when the audio device is playable by enabling the A2DP (Advanced Audio Distribution
Profile).
19

You need to install the microphone (supplied).
5-004-923-11(4) Copyright 2019 Sony Corporation
20

Help Guide
In-Car Receiver
DSX-B700/DSX-B700W/DSX-B710D
Connecting with an iPhone/iPod (BLUETOOTH Auto Pairing)
When an iPhone/iPod with iOS5 or later installed is connected to the USB port, the unit is paired and connected with the
iPhone/iPod automatically. To enable BLUETOOTH Auto Pairing, make sure [AUTO PAIR] in [BLUETOOTH] is set to
[ON].
Note
BLUETOOTH Auto Pairing is not possible if the unit is already connected to two BLUETOOTH devices. In this case, disconnect
one of the devices, then connect the iPhone/iPod again.
If BLUETOOTH Auto Pairing is not established, perform pairing and make the BLUETOOTH connection with the iPhone/iPod, as
with other BLUETOOTH device.
Related Topic
BLUETOOTH Setup (BLUETOOTH)
Preparing a Bluetooth® Device
Pairing and Connecting with a BLUETOOTH Device
Connecting with a Paired BLUETOOTH Device
5-004-923-11(4) Copyright 2019 Sony Corporation
Activate the BLUETOOTH function on the iPhone/iPod.
1
Connect the iPhone/iPod to the USB port.
Make sure that (BLUETOOTH) lights up on the display of the unit.
2
21
Help Guide
In-Car Receiver
DSX-B700/DSX-B700W/DSX-B710D
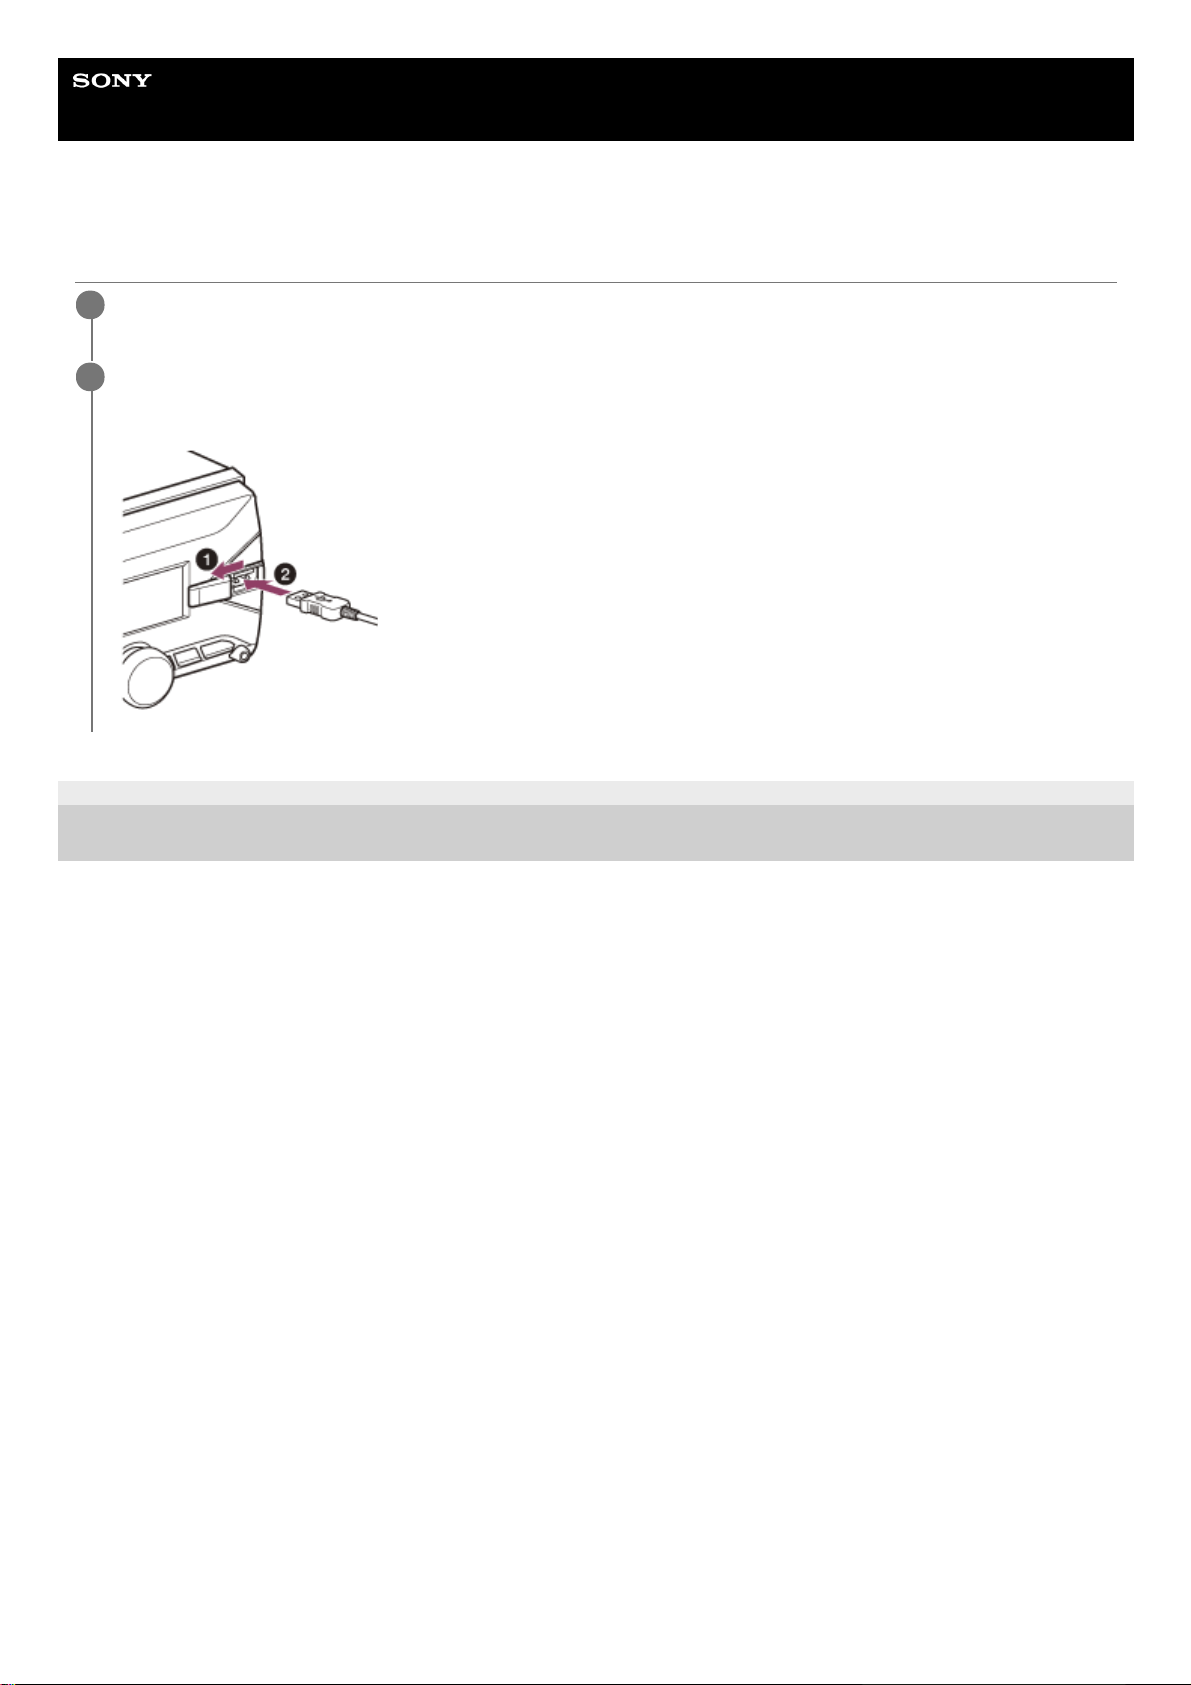
Connecting a USB Device
5-004-923-11(4) Copyright 2019 Sony Corporation
Turn down the volume on the unit.
1
Connect the USB device to the unit.
To connect an iPod/iPhone, use the USB connection cable for iPod (not supplied).
2
22

Help Guide
In-Car Receiver
DSX-B700/DSX-B700W/DSX-B710D
Connecting Other Portable Audio Device
To match the volume level of the connected device to other sources
Start playback of the portable audio device at a moderate volume, and set your usual listening volume on the unit.
Press MENU, then select [SOUND]
[AUX VOLUME].
Related Topic
Sound Setup (SOUND)
5-004-923-11(4) Copyright 2019 Sony Corporation
Turn off the portable audio device.
1
Turn down the volume on the unit.
2
Connect the portable audio device to the AUX input jack (stereo mini jack) on the unit with a connecting
cord (not supplied)*.
3
Be sure to use a straight type plug.
*
Press SRC (source) to select [AUX].
4
23
Help Guide
In-Car Receiver
DSX-B700/DSX-B700W/DSX-B710D
Listening to the Radio
Make sure that the tuning step is properly set according to your area/region (DSX-B700(E)/DSX-B700(IN)).
Press SRC (source) to select [RADIO].
To preset stations automatically (BTM)
To tune to a station
To preset a station
While receiving the station that you want to preset, press and hold a number button (1 to 6) until [MEMORY] appears.
To receive preset stations
Select the band, then press a number button (1 to 6).
Related Topic
Switching the FM/AM Tuning Step (DSX-B700(E)/DSX-B700(IN))
General Setup (GENERAL)
5-004-923-11(4) Copyright 2019 Sony Corporation
Press MODE to change the band*.1.
Press MENU, rotate the control dial to select [GENERAL], then press it.2.
Rotate the control dial to select [BTM], then press it.
The unit presets stations in order of frequency on the number buttons.
3.
The following bands can be selected:
DSX-B700(UC)/DSX-B700(E)/DSX-B700(IN)/DSX-B700W: FM1, FM2, FM3, AM1, AM2.
DSX-B700(EUR)/DSX-B710D: FM1, FM2, FM3, AM/LW.
*
Press MODE to change the band*.1.
Perform tuning.
To tune manually
Press and hold
/ (SEEK –/+) to locate the approximate frequency, then press / (SEEK –/+)
repeatedly to finely adjust to the desired frequency.
To tune automatically
Press
/ (SEEK –/+).
Scanning stops when the unit receives a station.
2.
The following bands can be selected:
DSX-B700(UC)/DSX-B700(E)/DSX-B700(IN)/DSX-B700W: FM1, FM2, FM3, AM1, AM2.
DSX-B700(EUR)/DSX-B710D: FM1, FM2, FM3, AM/LW.
*
24
Help Guide
In-Car Receiver
DSX-B700/DSX-B700W/DSX-B710D
Setting AF and TA (DSX-B700(EUR)/DSX-B710D)
Alternative Frequencies (AF) continuously retune the station to the strongest signal in a network, and Traffic
Announcement (TA) provides current traffic information or traffic programs (TP) if received.
To preset RDS stations with the AF and TA setting
You can preset RDS stations along with an AF/TA setting. Set AF/TA, then preset the station with BTM or manually. If
you preset manually, you can also preset non-RDS stations.
To receive emergency announcements
With AF or TA on, emergency announcements will automatically interrupt the currently selected source.
To adjust the volume level during a traffic announcement
Level will be stored into memory for subsequent traffic announcements, independently from the regular volume level.
To stay with one regional program (REGIONAL)
When the AF and REGIONAL functions are on, you will not be switched to another regional station with a stronger
frequency. If you leave this regional program’s reception area, set [REGIONAL] in [GENERAL] to [REG-OFF] during FM
reception.
(This function does not work in the UK and some other areas.)
Local Link function (UK only)
This function enables you to select other local stations in the area, even if they are not preset on your number buttons.
During FM reception, press a number button (1 to 6) on which a local station is preset. Within 5 seconds, press again a
number button of the local station. Repeat this procedure until the local station is received.
Related Topic
General Setup (GENERAL)
5-004-923-11(4) Copyright 2019 Sony Corporation
Press MENU, rotate the control dial to select [GENERAL], then press it.
1
Rotate the control dial to select [AF/TA], then press it.
2
Rotate the control dial to select [AF-ON], [TA-ON], [AF/TA-ON] or [AF/TA-OFF], then press it.
3
25
Help Guide
In-Car Receiver
DSX-B700/DSX-B700W/DSX-B710D
Selecting Program Types (PTY)
Type of programs
DSX-B700(E)/DSX-B700(IN)/DSX-B700(EUR)/DSX-B710D:
DSX-B700(UC)/DSX-B700W:
5-004-923-11(4) Copyright 2019 Sony Corporation
Press PTY during FM reception.
1
Rotate the control dial to select [PTY MUSIC] or [PTY TALK], then press it.
The unit starts to search for a station broadcasting the selected program type.
2
PTY
TALK
NEWS (News), AFFAIRS (Current Affairs), INFO (Information), SPORT (Sport), EDUCATE (Education),
DRAMA (Drama), CULTURE (Culture), SCIENCE (Science), VARIED (Varied), WEATHER (Weather),
FINANCE (Finance), CHILDREN (Children’s Programmes), SOCIAL (Social Affairs), RELIGION (Religion),
PHONE IN (Phone In), TRAVEL (Travel), LEISURE (Leisure), DOCUMENT (Documentary)
PTY
MUSIC
POP M (Pop Music), ROCK M (Rock Music), EASY M (Easy Listening Music), LIGHT M (Light Classical
Music), CLASSICS (Serious Classical Music), OTHER M (Other Music), JAZZ (Jazz Music), COUNTRY
(Country Music), NATION M (National Music), OLDIES (Oldies Music), FOLK M (Folk Music)
PTY
TALK
NEWS (News), INFORM (Information), SPORTS (Sports), TALK (Talk), LANGUAGE (Foreign Language),
REL TALK (Religious Talk), PERSNLTY (Personality), PUBLIC (Public), COLLEGE (College), HABL ESP
(Spanish Talk), WEATHER (Weather)
PTY
MUSIC
ROCK (Rock), CLS ROCK (Classic Rock), ADLT HIT (Adult Hits), SOFT RCK (Soft Rock), TOP 40 (Top 40),
COUNTRY (Country), OLDIES (Oldies), SOFT (Soft), NOSTALGA (Nostalgia), JAZZ (Jazz), CLASSICL
(Classical), R & B (Rhythm and Blues), SOFT R&B (Soft Rhythm and Blues), REL MUSC (Religious Music),
MUSC ESP (Spanish Music), HIP HOP (Hip-Hop)
26
Help Guide
In-Car Receiver
DSX-B700/DSX-B700W/DSX-B710D
Listening to the SiriusXM Radio
To activate your SiriusXM Subscription
Only SiriusXM brings you more of what you love to listen to, all in one place. Get over 140 channels, including
commercial-free music plus the best sports, news, talk, comedy and entertainment. Welcome to the world of satellite
radio. A SiriusXM Connect Vehicle Tuner and Subscription are required. For more information, visit www.siriusxm.com
After installing your SiriusXM Connect Vehicle Tuner and antenna (aerial), press SRC (source) to select [SIRIUS XM].
You should be able to hear the SiriusXM preview channel on Channel 1. After verifying that you can hear the preview
channel, select Channel 0 to find the Radio ID of your tuner. In addition, the Radio ID is located on the bottom of the
SiriusXM Connect Vehicle Tuner and its packaging. You will need this number to activate your subscription. Write the
number down for reference.
Note
The SiriusXM Radio ID does not include the letters I, O, S or F.
In the USA, you can activate online or by calling SiriusXM Listener Care:
Online: Visit www.siriusxm.com/activatenow
Phone: Call 1-866-635-2349
In Canada, you can activate online or by calling SiriusXM Listener Care:
Online: Visit www.siriusxm.ca/activatexm
Phone: Call 1-877-438-9677
As part of the activation process, the SiriusXM satellites will send an activation message to your tuner. When your radio
detects that the tuner has received the activation message, your radio will display: [SUBSCRIP UPDATED - PRESS
ENTER TO CONTINUE]. Once subscribed, you can tune to channels in your subscription plan.
Note
The activation process usually takes 10 to 15 minutes, but may take up to an hour.
Your radio will need to be turned on and receiving the SiriusXM signal to receive the activation message.
5-004-923-11(4) Copyright 2019 Sony Corporation
27

Help Guide
In-Car Receiver
DSX-B700/DSX-B700W/DSX-B710D
Selecting Channels for SiriusXM
To select channels with rapid browse mode
Press and hold
(up) or (down) of remote commander for more than 2 seconds after [CHANNEL] selected, then
press ENTER.
5-004-923-11(4) Copyright 2019 Sony Corporation
Press
(browse).
1
Rotate the control dial to select [CHANNEL], then press it.
2
Rotate the control dial to select the desired channel, then press it.
3
28
Help Guide
In-Car Receiver
DSX-B700/DSX-B700W/DSX-B710D
Selecting Channels from Categories
To preset channels
While receiving the channel that you want to preset, press and hold a number button (1 to 6) until [MEMORY] appears.
To receive the preset channel, press MODE to select the Band you want ([SXM1], [SXM2] or [SXM3]), then press a
number button (1 to 6). (Each Band can preset up to 6 channels.)
5-004-923-11(4) Copyright 2019 Sony Corporation
Press
(browse).
1
Rotate the control dial to select [CATEGORY], then press it.
2
Rotate the control dial to select the desired category, then press it.
The channel list appears.
3
Rotate the control dial to select the desired channel, then press it.
4
29
Help Guide
In-Car Receiver
DSX-B700/DSX-B700W/DSX-B710D
Setting a Parental Control
The parental control feature allows you to limit the access to SiriusXM channels with mature content. When enabled, the
parental control feature requires you to enter a passcode to tune to the locked channels. Information on setting up the
passcode and locking channels can be found below.
To unlock the channels
To change the passcode
To change display items
Press DSPL (display) repeatedly until the desired display items appear.
5-004-923-11(4) Copyright 2019 Sony Corporation
Press MENU and rotate the control dial.
1
Select [GENERAL]
[PARENTAL] [LOCK SELECT] [LOCK-ON].
2
Enter the passcode by rotating the control dial on the unit or pressing
/ (up/down) on the remote
commander.
To move the entry position, press
/ (SEEK –/+) on the unit or / (left/right) on the remote
commander.
The initial passcode is [0000].
3
After entering the passcode, press ENTER.
4
Press MENU and rotate the control dial.1.
Select [GENERAL]
[PARENTAL] [LOCK SELECT] [LOCK-OFF].2.
Press MENU and rotate the control dial.1.
Select [GENERAL]
[PARENTAL] [CODE EDIT].2.
Enter the current passcode on the current passcode input display, then press ENTER.
The initial passcode is [0000].
3.
Enter your new 4-digit passcode on the new passcode input display, then press ENTER.4.
30
 Loading...