

Sony DRX-820UL-T User Manual

2-680-628-11 (1)
DVD/CD
Rewritable Drive
4J.B8A04.001
Operating Instructions
JP
FR
DE
ES
IT
CS
DRX-820UL-T
© 2006 Sony Corporation

Safety
Regulations
WARNING
You are cautioned that any changes or
modifications not expressly approved in this
manual could void your authority to operate
this equipment.
To reduce the risk of fire or electric shock, do
not expose this apparatus to rain or moisture.
To avoid electrical shock, do not open the
cabinet. Refer servicing to qualified personnel
only.
CAUTION:
As the laser beam in the DRX-820UL-T is
harmful to the eyes, do not attempt to
disassemble the cabinet. Refer servicing to
qualified personnel only.
The use of optical instruments with this
product will increase eye hazard.
The use of controls or adjustments or
performance of procedures other than those
specified herein may result in hazardous
radiation exposure.
The DRX-820UL-T is classified as a CLASS 1
LASER PRODUCT.
The CLASS 1 LASER PRODUCT label is
located on the enclosure.
Bei diesem DRX-820UL-T handelt es sich um
ein Laser-Produkt der Klasse 1.
Das Etikett mit der Aufschrift LASER
KLASSE 1 PRODUKT befindet sich auf
Gehäuse
.
CLASS 1
LASER PRODUCT
LASER KLASSE 1
PRODUKT
LUOKAN 1 LASERLAITE
KLASS 1 LASER APPARAT
dem
FCC Compliance:
This equipment has been tested and found to
comply with the limits for a Class B digital
device, pursuant to Part 15 of the FCC Rules.
These limits are designed to provide reasonable
protection against harmful interference in a
residential installation. This equipment
generates, uses, and can radiate radio
frequency energy and, if not installed and used
in accordance with the instructions, may cause
harmful interference to radio communications.
However, there is no guarantee that
interference will not occur in a particular
installation. If this equipment does cause
harmful interference to radio or television
reception, which can be determined by turning
the equipment off and on, the user is
encouraged to try to correct the interference by
one or more of the following measures:
• Reorient or relocate the receiving antenna.
• Increase the separation between the
equipment and receiver.
• Connect the equipment into an outlet on a
circuit different from that to which the
receiver is connected.
• Consult the dealer or an experienced radio/
TV technician for help.
The shielded interface cable recommended in
this manual must be used with this equipment
in order to comply with the limits for a digital
device pursuant to Subpart B of Part 15 of FCC
Rules.
Notes:
If you have any questions about this product,
you may call the telephone number listed on
the “Product and Support Information” page.
The telephone number below is not for
customer
service but only for official purpose.
Declaration of Conformity
Trade Name: SONY
Model No.: DRX-820UL-T
Responsible Party: Sony Electronics Inc.
Address: 16530 Via Esprillo,
Telephone No.: 858-942-2230
This device complies with Part 15 of the FCC
Rules. Operation is subject to the following two
conditions:
(1) This device may not cause harmful
interference, and
(2) This device must accept any interference
received, including interference that may
cause undesired operation.
San Diego, CA 92127
U.S.A
2
CE Sicherheitsbestimmungen
Diese Ausrüstung erfüllt die Europäischen EMC-Bestimmungen für die Verwendung in
folgender / folgenden Umgebung(en):
• Wohngegenden
• Gewerbegebiete
• Leichtindustriegebiete
(Diese Ausrüstung erfüllt die Bestimmungen der Norm EN55022, Klasse B.)
CAUTION
The mains plug on this equipment must be used to disconnect mains power.
Please ensure that the socket outlet is installed near the equipment and shall be easily
Accessible.
Achtung
Zur Trennung vom Netz ist der Netzsecker aus der Steckdose zu ziehen, welche sich in der
Nähe des Gerätes befinden muß und leicht zugänlich sein soll.
Compliance Statements
Disposal of Old Electrical & Electronic Equipment (Applicable in the European
Union and other European countries with separate collection systems)
This symbol on the product or on its packaging indicates that this product shall
not be treated as household waste. Instead it shall be handed over to the applicable
collection point for the recycling of electrical and electronic equipment. By
ensuring this product is disposed of correctly, you will help prevent potential
negative consequences for the environment and human health, which could
otherwise be caused by inappropriate waste handling of this product. The
information about recycling of this product, please contact your local Civic Office, your
household waste disposal service or the shop where you purchased the product.
recycling of materials will help to conserve natural resources. For more detailed
3

Table of Contents
Safety Regulations .......................... 2
Compliance Statements .................. 3
Introduction
Unpacking the Package Contents ... 6
Features ........................................... 6
System Requirements .....................7
Part Names and Functions .............. 8
Setup
Placing the Drive ..........................10
Using the Drive Vertically ......... 10
Using the Drive Horizontally ..... 10
Connection through i.LINK .......... 11
Before Connection .....................11
Installation ..................................11
Disconnection .............................13
Connection through USB .............14
Before Connection .....................14
Installation ..................................14
Disconnection .............................15
Operation
Using the Drive .............................16
Supplied Software .......................16
Using Generic Software with the
Drive ...........................................17
Compatible Discs ..........................18
Recommended Writable Discs ...20
Writable Disc Features ...............21
Precautions on Writing/
Playing Discs ................................25
Maximizing Performance ..............27
Reaching the Highest Possible Data
Transfer Rate ..............................27
Updating the Firmware ...............27
Turbo Boost Function .................27
Miscellaneous
Precautions for Use .......................28
Specifications ................................29
Support Overview .........................31
User Support Web Site ...............31
Update the Drive Firmware ........31
Product and Support
Information .................................31
4

• is a trademark of Sony Corporation.
• Pentium is a registrated trademark of Intel Corporation.
• Microsoft, MS, MS-DOS and Windows are registered trademarks of Microsoft Corporation.
• Macintosh, Mac OS, Power Macintosh, FireWire and iDVD are trademarks of Apple Computer,
Inc., registered in the U.S. and other countries.
• Other system and product names used herein are registered trademarks or trademarks of their
❑ Our product warranty is valid only when the supplied accessories (including software) are
used in the specified or recommended system environment, in accordance with the
documentation, and applies only to this DVD/CD rewritable drive. Our customer service
and user support apply only under these product warranty conditions.
❑ Please note that we cannot accept responsibility for failure of the computer or other
devices, incompatibility with special hardware, operating problems caused by improper
installation of software, loss of data, discs or other accidental or incidental damage that
might occur when using this product.
❑ The guarantee and user support for this product are valid only within the countries or sales
regions specified on the warranty card.
❑ Copyright laws prohibit the copying in part or in full of the supplied software and
documentation, or loaning the software, without obtaining permission of the copyright
holder.
❑ We cannot accept responsibility for any direct or indirect financial damage or loss of profit
that might occur when using the supplied software.
❑ The supplied software can only be used with this product.
❑ Specifications of the supplied software may be changed without notice in the interest of
product improvement.
Please Record Responsibly
Before copying anything onto a disc, please be sure that you are not violating copyright
laws. Most software companies allow you to make a backup or archive copy of software.
Check your software’s license agreement for details.
About i.LINK
These operating instructions include IEEE1394 and FireWire in the expression i.LINK.
5
B Introduction
Unpacking the
Package Contents
Please verify that the package contains the
following when unpacking.
If any of these items appear to be missing
and/or damaged, please contact your dealer.
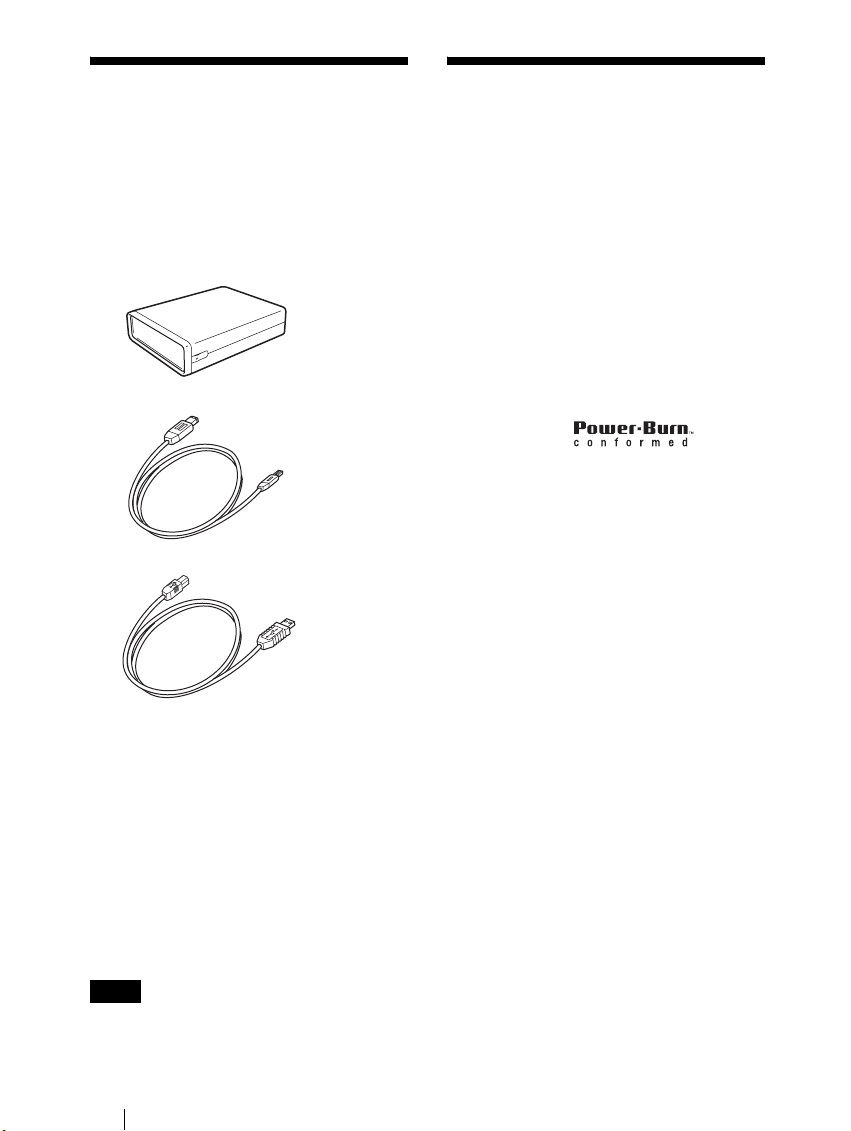
•Drive
• i.LINK cable (6-pin to 4-pin)
• Hi-Speed USB cable
Features
This product offers the following features.
❑ An external DVD/CD rewritable drive
with i.LINK (IEEE1394) and Hi-Speed
USB (USB 2.0-compliant) interfaces for
computers.
❑ Can be used horizontally or vertically.
❑ The drive can write to DVD+R
Double Layer and DVD-R Dual Layer
discs.
❑ You can write at a maximum of 16x
when using high speed DVD+R, DVDR discs.
❑ The drive can write to DVD-RAM discs.
❑ Features the
technology to prevent buffer underrun
errors.
• Quick start guide
• Operating instructions (this document)
• AC power cord
• AC adapter (MPA-AC1)
• Software Quick Start Guide (for Windows)
• Software Quick Start Guide
(for Macintosh)
• Software disc (for Windows)
• Software disc (for Macintosh)
•Stand
• Warranty card
Note
Make sure that you back up the supplied
software disc on another disc because the
software disc is not distributed independently.
6

System
Requirements
The drive should be used with a system that
meets the following requirements
Windows
❑ PC/AT-compatible computer
❑ CPU: Pentium III, 800 MHz or higher
(with Nero Vision Express: Pentium 4,
1.6 GHz recommended)
❑ RAM: 256 MB or higher
❑ 1 GB (with Nero Vision Express:
10 GB) free hard disk space
❑ Operating system:
Windows 2000 Professional
(referred to as Windows 2000),
Windows XP Home Edition or
Windows XP Professional
(referred to as Windows XP)
❑ i.LINK or USB connector
Macintosh
❑ A Power Macintosh G3 or later capable
of running Mac OS X 10.2 or later
❑ RAM: 256 MB or more
❑ 200 MB or more available hard disk
space
❑ Operating system: Mac OS X 10.2 or
later
❑ FireWire or USB connector
1)
.
Notes
• These operating instructions include IEEE1394
and FireWire in the expression i.LINK.
• You must use discs that are compatible with the
write speed you have selected.
• Writing speed may automatically be adjusted
depending on the disc, specified disc speed, or
disc conditions such as weight imbalance and
eccentricity.
• System should meet following requirements in
order to use USB 2.0 operation with this device.
− Hi-Speed USB (USB 2.0-compliant)
interface cable (included).
− System equipped with a Hi-Speed USB (USB
2.0-compliant) connector or PCI adapter
card, and running the USB 2.0 EHCI device
1)
driver
.
1)
The USB 2.0 EHCI driver software is
supplied with currently available PCI
adapter cards that conform to USB 2.0.
You can also use the USB 2.0 EHCI driver
software supplied with Windows 2000 SP4
and Windows XP SP1.
For details, contact your USB 2.0 adapter
dealer or consult the Microsoft
Corporation Web site.
• When connected to a product that does not
support Hi-Speed USB, the maximum transfer
rate is limited to 12 Mbps (equivalent to a USB
1.1 transfer rate).
• For a Macintosh, depending on the
specifications of your computer, you may not be
able to achieve the proper read/write speeds
because the USB transfer rate is limited.
• You cannot use the i.LINK and USB interfaces
simultaneously.
Introduction
1)
The above requirements are the minimum
necessary requirements to write to disc
normally. Under actual operating conditions,
the requirements imposed by your software
must also be met. For details, refer to your
software documentation.
7

Part Names and Functions
Front Panel
1234
Rear Panel
5
6
7
8
9
8

A Busy indicator
Indicates the drive status.
Lit: The drive is reading data,
playing back an audio CD, or
writing packets.
Blinking:
The drive is writing data
(disc-at-once, track-at-once),
formatting a disc, or
1)
deleting
data from a disc.
Off: The drive is in a state other
1)
Some drives indicate this state with the lit
indicator.
than those outlined above.
E Power Switch
Press to turn the drive on or off.
F USB Connector
Used with a USB cable to connect the
drive to a computer.
G i.LINK S400 Connector (6-pin)
Used with an i.LINK cable to connect
the drive to a computer.
H i.LINK S400 Connector (4-pin)
Used with an i.LINK cable to connect
the drive to a computer.
Introduction
B Eject button
Press to open and close the disc tray.
C Emergency eject hole
If you cannot open the disc tray with the
eject button, turn off the drive, and then
insert a thin, elongated object into this
hole to eject the disc tray manually.
D Disc tray
Insert discs here, label side up.
Hint
When you insert a disc into the drive, make
sure that it is under the four pins. When using
the drive vertically, make sure that you set the
disc inside the two lower pins.
I DC IN Jack
Connect the supplied AC power cord to
the AC power adapter. Connect this
assembly to the DC IN jack, and then
connect the whole to the AC outlet.
9
B Setup
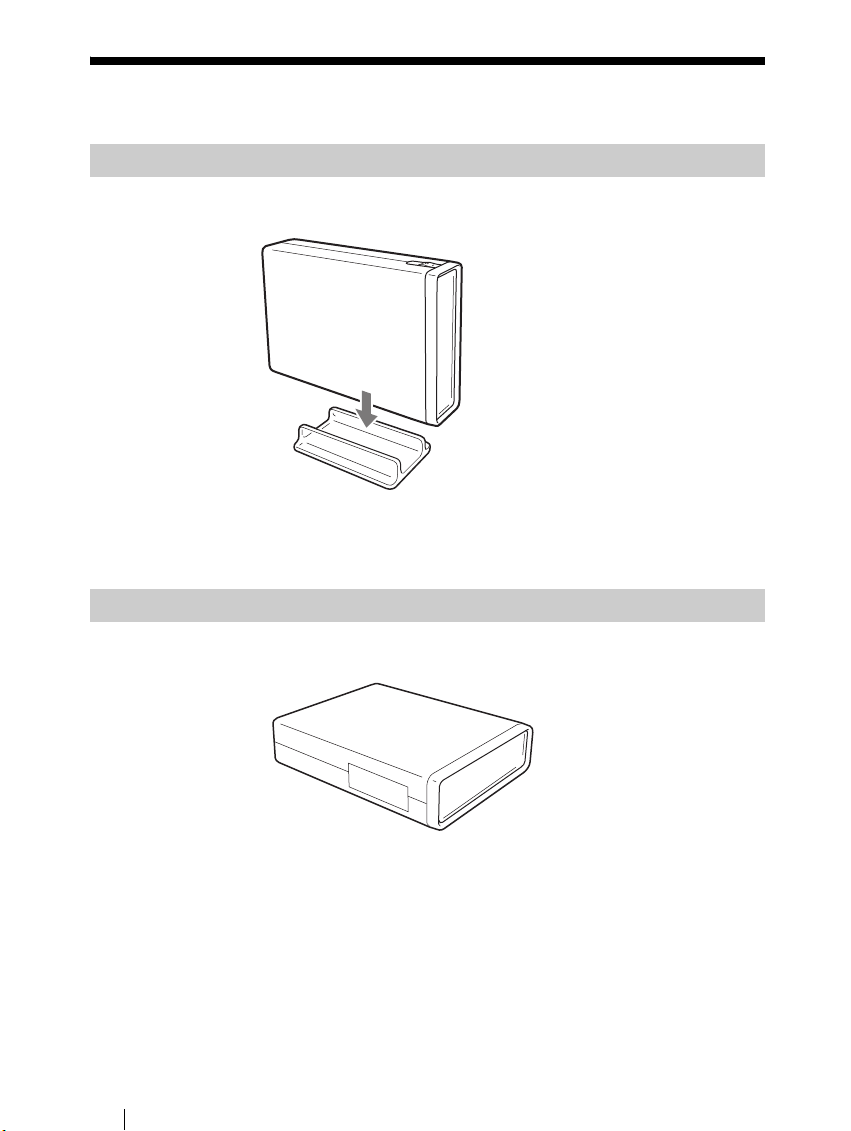
Placing the Drive
Using the Drive Vertically
Attach the supplied stand as illustrated below to use the drive vertically.
Position the drive so that the stand straddles the two anti-vibration pads on the
drive bottom and then press it into place.
Using the Drive Horizontally
10
Place the drive as illustrated below to use the drive horizontally.

Connection through i.LINK
Note
This product including bundled software functions properly under Windows XP, Windows
2000, and Mac OS X (10.2 or later).
It may not fulfill all functional and performance specification under other OS (operating
system) environment.
Before Connection
• Refer to the list of contents to verify that the package contents are complete.
• If your computer is not equipped with an i.LINK connector, install an i.LINK
interface card.
• Check the type of i.LINK connector provided with your computer’s i.LINK
interface and obtain a compatible i.LINK cable.
i.LINK S400 connector (6-pin)
i.LINK S400 connector (4-pin)
• Have the manual for your computer handy.
Installation
Setup
These instructions apply to most commonly used computers.
CAUTION
Using the wrong type of cable with this product can cause it to malfunction. Follow the
instructions when connecting the product.
11
 Loading...