

Page 1

2-023-785-11(2)
Display Side
Hi-Fi Component
System
Operating Instructions
DHC-NXM4D
DHC-NXM2D
©2004 Sony Corporation
Page 2

WARNING
To prevent fire or shock hazard, do not
expose the unit to rain or mo ist u r e.
To prevent fire, do not cover the ventil at ion of the
apparatus with news papers, table-cloths, curtains, etc.
And don’t place lighted candle s on the apparatus.
To prevent fire or shock hazard, do not place obje c ts
filled with liquids, such as vases , on the ap pa ratus.
Do not install the appliance in a confined space,
such as a bookcase or built-in cabi ne t.
This appliance is
classified as a CLASS 1
LASER product. This
marking is locat ed on the
rear exterior.
Don’t throw away the battery with
general house waste, dispose of it
correctly as chemical was te.
1)
This system incorporat es Dol by
Logic (II) adaptive matrix surround decode r , and
2)
Digital Surround System.
DTS
1)
Manufactured under license from Dolby
Digital, Dolby Pro
Laboratories.
“Dolby”, “Pro Logic”, and the double-D symbol are
trademarks of Dolby Laborat ories.
2)
Manufactured under license from Digital Theater
Systems, Inc. “DTS” and “DTS Digital Surround”
are registered trademar ks of Digi t al T he ater
Systems, Inc.
ENERGY STAR
®
ENERGY STAR® is a U.S.
registered mark. As an E
®
TAR
partner, Sony Corporation
S
has determined that this produc t
meets the E
NERGY STAR
NERGY
®
guidelines for energy efficien cy.
GB
2
Page 3

Table of Contents
How to use this manual...........................5
Playable discs..........................................5
Getting Started
Hooking up the system............................7
Positioning the speakers........................11
Setting the clock....................................12
Performing QUICK SETUP .................13
DVD/VIDEO CD/CD/MP3/JPEG
– Play
Loading a disc........................ ... .... ........15
Playing a disc........................................15
— Normal Play/Shuffle Play
Playing DVDs using the menu..............18
Playing VIDEO CDs with PBC functions
(Ver. 2.0).........................................18
— PBC Play
Playing repeatedly.................................19
— Repeat Play
Creating your own program.................. 20
— Program Play
Using the on-screen display to search...22
DVD – Various functions
Changing the sound/subtitle/
language.......................................... 25
Adjusting the angle/imag e....................28
Restricting disc playback......................31
— CUSTOM PARENTAL
CONTROL/PARENTAL
CONTROL
Speaker settings ....................................35
— SPEAKER SETUP
Tuner
Presetting radio stations........................38
Listening to the radio ............................39
— Preset Tuning
— Manual Tuning
Tape – Play
Loading a tape......................................41
Playing a tape............. ... ........................41
Tape – Recording
Recording your favorite CD tracks on
a tape ..............................................42
— CD-TAPE Synchro Recording
Recording on a tape manually.............. 43
— Manual Recording
Sound Adjustment
Adjusting the sound..............................44
Selecting the surround effect................45
Singing along: Karaoke........................46
Timer
Falling asleep to music.........................48
— Sleep Timer
Waking up to music..............................48
— Play Timer
Timer recording radio programs........... 49
— Rec Timer
Display
Turning off the display......................... 50
— Power Saving Mode
Adjusting the brightness of the display
back light........................................51
Viewing information about the disc in
the display ......................................51
Viewing information about the disc in
the on-screen display......................53
Checking the date information ............. 54
continued
GB
3
Page 4

Optional Components
Hooking up optional com po nents.........55
Listening to audio from a connected
component ......................................56
Enjoying the 5.1 channel sound with the
optional amplifier...........................57
(DHC-NXM2D only)
Recording audio from a connected
component ......................................57
Recording on a connected
component ......................................57
Troubleshooting
Problems and remedies.........................58
Messages...............................................63
Additional Information
Precautions............................................65
Specifications........................................67
Language code list ................................70
List of items that can be displayed and
selected by disc type.......................71
System setup item list ...........................72
Glossary................................................73
List of button locations and refer e nce
pages...............................................77
GB
4
Page 5

How to use this manual
• This manual mainly explains operations u sing
the remote, but the same operations can also
be performed us in g t he buttons on the unit
having the same or similar names.
• The OSD (on-screen display) may vary
depending on the country model.
• The English OSD screen (on-screen display)
is used for illustration purposes only.
• The following symbols are used in this
manual.
Symbol Meaning
Functions that can be used with
DVDs
Functions that can be used with
VIDEO CDs
Functions that can be used with
audio CDs
Functions that can be used with
MP3 audio tracks
Functions available for JPEG
files
Playable discs
Format of discs Disc logo
CD-R/CD-RW
(audio data/MP3 files/
JPEG files)
The “DVD VIDEO” logo is a trademark.
Region code of DVDs you can
play on this system
Your system ha s a region code printe d on the
back of the unit and will only play DVDs labeled
with identical region code.
DVDs labeled will also be played on this
system.
If you try to play any ot her DVD, the message
“Playback prohibited by area limitations.” will
appear on the TV screen. Depending on the
DVD, no region code indication may be labeled
even though playing the DVD is prohibited by
area restrictions.
Region code
ALL
X
MODEL NO. HCD-NXMXX
DVD DECK RECEIVER
AC: 00V 00Hz 00W
SERIAL NO:
You can play back the following discs on this
system. Other discs cannot be playe d back.
List of playable discs
Format of discs Disc logo
DVD VIDEOs
VIDEO CDs
Audio CDs
Discs that this system ca nnot
play
• CD-ROMs (except for ext ension “.MP3” ,
“.JPG” or “.JPEG”)
• CD-Rs/CD-RWs other than those record ed in
the following formats:
– music CD format
– video CD format
– MP3 (MPEG1 Audio Layer-3)/JPEG
format that conforms to ISO9660* Level 1/
Level 2 or Joliet
• Data part of CD-Extras
• Super Audio CDs
• DVD-RWs in VR (Video Recording) mode
• DVD-ROMs
• DVD-RAMs
• DVD Audio discs
• A DVD with a different region code.
continued
GB
5
Page 6

• Progressive JPEG format file
• Discs with non-standard shapes (e.g., heart,
square, star) ca nnot be played on this un it.
Attempting to do so may damage the unit. Do
not use such discs.
• A disc with paper or stickers on it.
• A disc that has the adhesive, cellophane tape,
or a sticker still left on it.
* A logical format of files and folders on a CD-ROMs,
defined by ISO (International Organiz a tion for
standardization)
Notes about CD-R/CD-RW/
DVD-R/DVD-RW (Video mode)/
DVD+R/DVD+RW
• In some cases, CD-Rs, CD-RWs, DVD-Rs,
DVD-RWs (Video mode) (DVD-RWs
created in video mode have the same for m at
as a DVD VIDEO), DVD+R or DVD+RW
cannot be played on t hi s s ystem depending
upon the recording quality or physical
condition of the disc, or the characteristics of
the recording device. Further m ore, the disc
will not play if it has n ot been correctly
finalized. For more information, see the
operating instructions for the recording
device.
• A disc recorded i n packet write format cann ot
be played.
Note on playback operations
of DVDs and VIDEO CDs
Some playback operations of DVDs and VIDEO
CDs may be intentionally set by software
producers. Since this system plays DVDs and
VIDEO CDs according to the disc con t ent s the
software producers designed, som e playback
features may not be availa bl e. Also, refer to the
instructions supplied with the DVDs or VIDEO
CDs.
Music discs encoded with
copyright protection
technologies
This product is designed to playback discs that
conform to the Compact Disc (CD) standard.
Recently, various music discs encoded with
copyright protect io n technologies are mar keted
by some record companies . Plea se be awar e that
among those discs, there are some that do not
conform to the CD standard and may not be
playable by this prod uct.
Cautions when playing a disc
that is recorded in Multi
Session
• This system can play Multi Session CDs
when an MP3 audio track is contained in the
first session. Any su bsequent MP3 audio
tracks recorded in later sessions can also be
played back.
• This system can play Multi Session CDs
when a JPEG image file is contained in the
first session. Any s ubsequent JPEG image
files recorded in later sessions can also be
played back.
• If audio tracks and images in music CD
format or video CD format are recorded in the
first session, only the first se ss ion will be
played back.
• CD-R and CD-RW discs recorded in multisession that have not ended by “closing the
session” are not supported.
Copyrights
This product i nc orporates copy right protect i on
technology that is protected by U.S. patents and
other intellectu al property rights. Use of this
copyright protect io n technology must be
authorized by Macrovision, and is intended for
home and other limited viewing uses only unles s
otherwise author i zed by Macrovision. Reverse
engineering or disassembly is prohibi t ed.
GB
6
Page 7

Getting Started
Hooking up the system
Perform the following procedures 1 to 6 to hook up your system using the supplied cords and
accessories. D HC-NXM4D is used for illust ration purpose .
Getting Started
FM antenna
Surround speaker
(Right)*
AM loop antenna
Surround speaker
(Left)*
Center speaker*
Front speaker (Right)
* DHC-NXM4D only
Sub woofer
Front speaker (Left)
continued
GB
7
Page 8

1 Connect the speakers and sub woofer.
Be sure to match the appropriate speaker
cords from th e speaker terminals to the
corresponding SPEAKER terminals on the
unit.
Main unit
Speakers
Black (#)
3 Connect the video input jack of your TV
to the VIDEO OUT jack with the
supplied video cable .
VIDEO
S VIDEO
OUT
O
UT
When using a TV
Turn on the TV and select the video input so that you
can view the pictures from this system.
When connecting a video deck
Connect the TV and the video deck using video a nd
audio cords (not supplied) as shown below.
Black (#)
2 Connect the FM and AM antennas.
Set up the AM loop antenna, then connect
it.
M
Ω
75
M
F
IA
X
A
O
C
Extend the FM lead antenna horizontally
Note
Keep the antennas away from the speaker cords.
A
L
AM loop antenna
TV
Video deck System
Do not connect
directly.
If you connect a video deck between this system and the
TV, you may experience video leakage when watching
the video signal f ro m this system. Do not connect a
video deck between this system and the TV.
Note
Do not place the TV on this system.
Tip
For even higher quality video ima g e s:
– Use an optional component video cord to connect the
COMPONENT VIDEO input jacks on your TV to
the COMPONENT VIDEO OUT jacks of this
system. If your TV is compatible with progr e ssi ve
format file signals, use this connection and set
“COMPONENT OUT” to “PROGRESSIVE” in
“Adjusting the TV screen” (page 29).
– You can use an optional S video cord to connect the
S VIDEO input jack on your TV to the S VIDEO
OUT jack.
GB
8
Page 9

4 For models with a voltage selector, set
VOLTAGE SELECTOR to the local
power line voltage.
Depending on the model , the V O LTAGE
SELECTOR may differ.
VOLTAGE SELECTOR
220–240V
*
120V
* Saudi Arabian model: 120 – 127 V
5 Connect the power cord to a wall
outlet.
The demonstration appears in the display.
When you press
?/1, the system turns on
and the demonstration automatically ends.
If the supplied adapter on the plug does not
fit your wall outlet, detach it from the plug
(only for models equipped with an adapter).
6 (Except for Latin American models)
Set the color system to PAL or NTSC
depending on the color system of your
TV.
The color syst em is factor y set to NTSC f or
region code 3 model s, and PAL for other
region code models. Each time you per form
the procedure belo w , t he color system
changes as follows:
NTSC y PAL
1 Press ?/1 to turn off the system.
2 Press ?/1 on the unit while holding
down X on the unit.
The system turns on and the color
system is changed.
Notes
• The type of speakers supplied varies according to the
model you purchased (see “Specifications” on
page 67).
• Do not place the surround speakers on top of a TV.*
This may cause distortion of the colors in the TV
screen.
• Be sure to connect both left and right surround
speakers.* Otherwise, the sound w ill not be heard.
• You cannot set the color system in Power Saving
Mode (page 50).
• When you play back a VIDEO CD recorded in a
different color system from the one you set to the
unit, the picture image may be dis tor te d.
* DHC-NXM4D only
Setting the speakers
After hooking up the s ystem, we rec om m end to
place the system as follows:
Sub woofer
Front speaker
(Left)
Front speaker
(Left)
Main unit
Front speaker
(Right)
Front speaker
(Right)
Getting Started
Sub woofer
Main unit
continued
GB
9
Page 10

When placing the fr ont speakers on top o f th e
sub woofer and the main unit, be sure to place
the foot of the front speakers to fit in the hollows
on top of the sub woo fe r and the main unit.
Inserting two R6 (size AA)
batteries into the remote
e
E
E
e
To prevent the speakers from
falling
When you plac e t he f ro nt spea ke rs on t op of t he
sub woofer and the main unit, place the speaker
support at the back side of the sub woofe r an d
the main unit with the front speakers. Tighten
the screws (1) lightly to temporarily fix the
speaker support, tighten the other s cr ew s to fix
(2), then tighten the first screws (1) firmly.
Screw (1)*
Screw (2)*
* Screw type
3 3.5 ×14 for the front speakers (1)
Speaker support
3 3 ×8 for the main unit and the sub woofer (2)
Note
Before carrying or moving the system, remove the
speaker supports.
To connect optional components
See page 55.
Operating a Sony TV
You can use the following buttons on the remote
to operate a Sony T V .
To Press
Turn the TV on or off TV ?/1
Switch the TV’s input sourc e
between the TV and other input
sources
Change the TV channels TV CH +/–
Adjust the volume of the TV
speaker(s)
Note
If you do not use the remote for a long period of time,
remove the batteries to avoid possible damage from
battery leakage and corrosion.
Tip
With normal use, the batteries should last for about six
months. When the remote no longer operates the
system, replace both ba tteries with new ones.
TV/VIDEO
TV VOL +/–
10
GB
Page 11

Attaching the speaker pads
(DHC-NXM4D only)
Attach the supplied speaker pads to the bottom
of the speakers to stabilize the speakers and
prevent them from sl ip pi ng.
Center speaker (4)
Surround speaker (Left (4)/Right (4))
When carrying this system
Perform the following procedure to protect
the DVD mechanism.
Use buttons on the unit for the operation.
1 Press ?/1 to turn on the system, then
press DVD.
2 Make sure that all discs are removed
from the system.
3 Hold down x, then press DVD until
“Please Wait” appears.
Check that “STANDBY” then “LOCK”
appears.
4 Unplug the power cord.
Positioning the speakers
1 Place the front speakers at an angle of
45 degrees from your listening
position.
Front
speaker
(L)
Surround speaker
(L)*
* DHC-NXM4D only
Center speaker*
Sub woofer
45˚
Surround speaker
(R)*
Front
speaker
(R)
2 Place the center speaker at about the
same height as the front speakers.
Align the center speaker with the front
speakers or place it sli ghtly behind the f ront
speakers.
3 Place the surround speakers.
Getting Started
20˚
Position the surround speakers wit hi n the
respective gray ranges.
Positioning bo th surround speake rs the
same distance from the listeni ng position is
effective.
continued
11
GB
Page 12

4 Place the sub woofer.
To obtain a better bass reproducti on, we
recommend you to place the sub woofer on
a solid floor whe re reso na nce is un lik el y to
occur.
Notes
• Do not place the surround speakers on top of a TV.*
This may cause distor tion of the colors in the TV
screen.
• Always place the sub woofer vertically, kee p in g it a
few centimeters away from the wall.
• If the sub woofer is placed in the center of a room, the
bass could be extremely weak ened. This is due to the
influence of the standing wave of th e room . If th is
happens, move the sub woofer away from the center
of the room or eliminate the caus e of the sta nding
wave, by placing a bookshelf against the wall, etc.
* DHC-NXM4D only
Speaker settings
To enjoy DVDs and other discs with multichannel sound an d D olby surround effects, the
speakers need to be adjusted. Set the di stance
from the listening position to the speakers, and
the balance and level. Then use the test tone to
adjust the volume of each speaker to the same
level.
For details, see “Speaker settings ” on page 35.
Setting the clock
Use buttons on the remote for the operation.
1 Press ?/1 to turn on the system.
2 Press CLOCK/TIMER SET.
3 Press M or m repeatedly to set the hour.
4 Press ,.
5 Press M or m repeatedly to set the
minute.
6 Press ENTER.
The clock starts working.
To adjust the clock
1 Press CLOCK/TIMER SET.
2 Press M or m to selec t “CLOCK SE T”, then
press ENTER.
3 Do the same procedures as step 3 to 6
above.
Notes
• The clock settings are canceled when you disconnect
the power cord or if a power failure occurs.
• You cannot set the clock in Power Saving Mode
(page 50).
12
GB
Page 13

Performing QUICK SETUP
You can set the initial settings of LANGUAGE
SETUP, ROOM SIZE, LISTENING
POSITION and TV TYPE step by step.
After performing the Quick Setup, th e system is
ready for playing back of movies, mu si c CDs,
etc. To perform further speak er s settings, see
“Speaker settings” on page 35.
The Asian model is used for illustration
purposes only.
For DHC-NXM4D
1 Turn on your TV and select the video
input.
2 Press ?/1 to turn on the system.
3 Press FUNCTION + or – repeatedly (or
DVD on the unit) to switch t he functi on
to DVD.
The guide message appears on the TV
screen.
Note
When a disc is in the sy ste m or the disc tray
opens, the guide message does not appear on the
TV screen.
4 Press ENTER.
“LANGUAGE SETUP” appears.
LANGUAGE SETUP
ENGLISH
CHINESE1
CHINESE2
OTHERS
The language you select in “LANGUAGE
SETUP” is for “OSD”, “DVD MENU” and
“SUBTITLE” (page 27).
When “OTHERSt” appears, you ca n
select “OTHERSt” to select the language
from the language code list using the
number buttons (page 70). The selected
language code (4-digit) is displayed the
next time you select “OTHERSt”. You
can select the language for the DVD menu
(“DVD MENU”) and the language of the
subtitle (“SUBTITLE” ).
5 Press M or m repeatedly to select a
language, then press ENTER.
The setting is selected.
“ROOM SIZE” appears.
ROOM SIZE
FRONT:
m
SMALL
1 . 6
SURROUND:
m
1 . 6
6 Press M or m repeatedly to select a
suitable room size from “SMALL”,
“MEDIUM” or “LARGE”, then press
ENTER.
The setting is selected and “LISTENING
POSITION” appe ar s.
LISTENING POSITION
FRONT:
m
1 . 6
SURROUND:
m
1 . 6
The “LISTENING POSITION” number
you can select varie s, depending on the
“ROOM SIZE” setting.
SMALL Three positions
MEDIUM Four positions
LARGE Five positions
7 Press M or m repeatedly to select a
suitable listening position, then press
ENTER.
The setting is selected and “TV TYPE”
appears.
TV TYPE
4 : 316 : 9
continued
13
Getting Started
GB
Page 14

8 Press < or , repeatedly to select a
TV type connecting to the system, then
press ENTER.
“QUICK SETUP” is complete.
For DHC-NXM2D
1 Turn on your TV and select the video
input.
2 Press ?/1 to turn on the system.
3 Press FUNCTION + or – repeatedly (or
DVD on the unit) to switch the funct ion
to DVD.
The guide message appears on the TV
screen.
Note
When a disc is in the system or the disc tray
opens, the guide message does not appe ar on the
TV screen.
4 Press ENTER.
“LANGUAGE SETUP” appears.
LANGUAGE SETUP
ENGLISH
CHINESE1
CHINESE2
OTHERS
The language you select in “LANGUAGE
SETUP” is for “OSD”, “DVD MENU” and
“SUBTITLE” (page 27).
When “OTHERSt” appears, you can
select “OTHERSt” to select the language
from the language code list using the
number button s (page 70). The selected
language code (4-digit) is displa yed the
next time you select “OTHERSt”. You
can select the language for the DVD menu
(“DVD MENU”) and the language of the
subtitle (“SUBTITLE”).
5 Press M or m repeatedly to select a
language , t hen press ENTER.
The setting is selected.
“TV TYPE” appears.
6 Press < or , repeatedly to select a
TV type connecting to the system, then
press ENTER.
“QUICK SETUP” is complete.
If you make a mistake
Press O RETUR N , then select the item again.
To quit QUICK SETUP
Press DVD SETUP.
To change settings of QUICK
SETUP
1 Press DVD SETUP in stop mode.
The Setup Display appears.
2 Press M or m repeatedly to select “SET UP”,
then press ENTER.
3 Press M or m repeatedly to select “QUICK”,
then press ENTER.
“LANGUAGE SETUP” appears.
4 Change each setting following the same
procedures from step 5.
Notes
• Onl y when you turn on the system fo r the firs t time ,
or after performing “RESET” (page 63), the guide
message appears.
• Whe n you se lec t “4 :3” in “ TV T YPE” , “4:3
LETTER BOX” is selected (page 29).
• For DH C-NXM 4D, depending on selected position
in “LISTENING POSITION” or “ROOM SIZE”, the
distance and level of each speaker will be set
automatically.
• When a disc is in the system, the guide message does
not appear on the TV screen. To perform QUICK
SETUP, press DVD Z to remove the disc, press ?/1
to turn the system off, then press ?/1 again to turn
the system on.
• If you want to change each setting, see “DVD –
Various functions” on page 25.
• For DHC-NXM4D, the illustrations displayed for
“ROOM SIZE” and “LISTENING POSITION” are
only examples and may differ from the actua l r oom
size and layout. The settings for “SPEAKER
SETUP” (page 35) do not ap pe ar on the se dis p la ys.
14
GB
Page 15

DVD/VIDEO CD/CD/MP3/JPEG – Play
Loading a disc
Use buttons on the unit for the operation.
1 Press DISC 1 – 5 to select the disc tray.
When no disc is in th e di sc tray you
selected, “No Disc” appears. Perform step 2
while “DISC-1” (eg., 2 – 5) flashes.
2 Press DVD Z.
3 Place a disc with the label side up on
the disc tray.
When you pl ay
a 8 cm disc,
place it on the
inner circle of
the tray.
4 Press DVD Z again to close the disc
tray.
Notes
• Do not use a disc with tape, seals or paste on it as this
may cause malfunction.
• Do not forcibly press the disc tray closed with your
finger, as this may cause malfunc tion.
Playing a disc
— Normal Play/Shuffle Play
Before playing a DVD, VIDEO CD or JPEG,
turn on your TV and sel ec t the video input.
Depending on the DVD or VIDEO CD, some
operations may be different or restricted. Refer
to the operating instructions supplied with the
disc.
Example: When a DVD disc is loaded
Title or chapter
number
DISC TITLE
DVD
Disc tray
number
Disc presence
indicator
Example: When a CD disc is loaded
DISC
CD
Disc tray
number
Disc presence
indicator
1 2 3
1 2 3
Playing time
4 5
Playing timeTrack number
4 5
A B
A B
DVD/VIDEO CD/CD/MP3/JPEG – Play
Example: When a JPEG disc is loaded
File number
JPEG DISC
1 2 3
Disc tray
number
4 5
Disc presence
indicator
A B
continued
15
GB
Page 16

1 Press FUNCTION + or – repeatedly (or
DVD on the unit) to switch the funct ion
to DVD.
2 Press PLAY MODE repeatedly in stop
mode until the mode you want appears
in the display.
Select To play
ALL DISCS
(Normal Play)
1DISC
(Normal Play)
ALBM
(Normal Play)
ALL DISCS
SHUF
(Shuffle Play)*
1DISC SHUF
(Shuffle Play)*
ALBM SHUF
(Shuffle Play)*
PGM
(Program Play)*
* You canno t pe rform Shuffle Play and Program
Play with DVD and JPEG.
All discs in the disc tra y
continuously.
The tracks on the disc you
have selected in original
order.
All MP3 audio tracks or
JPEG image files in the
album on the disc you have
selected in original order .
When playing a non-MP3/
JPEG disc, Album Play
performs the same operation
as 1DISC Play.
All tracks on all dis cs in
random order.
All tracks on the disc you
have selected in random
order.
The MP3 audio tracks in the
album on the disc you have
selected in random order.
When playing a non-MP3
disc, Album Shuffle Play
performs the same operation
as 1DISC SHUF Play.
The tracks on all discs in the
order you want them to be
played (see “Creat in g y o ur
own program” on page 20).
3 Press nN.
Notes
• Yo u ca nnot change the play mode during play.
• “ALB M” or “ALBM S HUF ” appe a rs even if you
have selected a non-MP3/JPEG di sc or MP3/ JP EG
disc with no albums . I n this case, Album Play or
Album Shuffle Play performs the same operation as
1DISC play or 1DISC SHUF Play, respectively.
Tips
• When DVD function is selected when you load a
DVD, the disc playbacks automatically.
• You can change the play mode between 1DISC, ALL
DISCS and ALBM using the on-screen display as
follows:
1 Press DVD DISPLAY in stop mode.
The Control Menu appears.
2 Press M or m to sele ct “PLAY MODE”, then pres s
ENTER.
3 Press M or m to select desired play mode, then
press ENTER.
Other operations
To Do this
Stop play Press x.
Pause
(Except for
JPEG)
Select a track,
image or chap ter
Select an album
of MP3 or JPEG
Locate a point
quickly in fast
forward or fast
reverse (Lock
Search) (Except
for MP3/JPEG)
Find a point in a
track (Except for
MP3/JPEG)
Watch frame by
frame
(Slow-motion
Play) (DVD/
VIDEO CD
1)2)
only)
2)
2)
1)
Press X.
Press X again to resume play.
Press . or > repeatedly
during play or pause.
Press ALBUM + or – repeatedly
after step 2.
Press m or M on the remote
during play.
For DVD or VIDEO CD, each
time you press the button,
searching speed changes as
follows:
1 (slow) y 2 (faster than 1)
For CD, searching speed does not
change (1 (slow) play).
To return to Normal Play, press
nN.
Keep pressing m or M on the
unit during playback and release it
at the desired point.
Press X during play, then press
SLOW or
press the button, the playback
speed changes as follows:
Playback direction
2 y y 1 y
Opposite dir e c ti o n ( D VD on l y)
2 y 1
To return to Normal Play, press
y. Each time you
nN.
16
GB
Page 17

To Do this
Enjoy the Slide
show (only one
direction) (JPEG
only)
Press M while displaying a
JPEG image.
Each time you press M during
Slide show, the interval time of
Slide show changes.
To return to Normal Play, press
nN.
Rotate the
current image
(JPEG only)
Select a disc in
stop mode
Switch to DVD
function from
another source
Remove a disc Press DISC 1 – 5 on the unit, then
1)
There may be some disturbance in the video image.
2)
No sound is output.
3)
You cannot rotate the image durin g Sli de show.
Press nN to return to Normal Play before this
operation.
Notes
• If DVD playback is paused for approximately one
hour, the syste m au tomatically turns off.
• Depending on the DVD or VIDEO CD, some
operations may be restricted.
• 2 chan nel sound is heard when using headphones.
• Maxi mum number of albums on a disc: 99 (The
maximum number of MP3 audio tra cks or JPEG
image files that can be contained on an album is 250.)
• For MP3 audio track and JPEG image file, playback
is possible up to 8 levels.
• An album tha t does not include an MP3 audio track
or JPEG image file is skipped.
• If you p ut the extension “.MP3” to data n ot in MP3
format, the system cannot recognize the data
properly and will generate a loud noise which could
damage your speaker system.
• When playing the data disc (CD-ROM/CD-R/CDRW) contained MP3 audio tracks and JPEG image
files, select “CU S T O M S E T U P ” f r o m the setup
items, then set “DATA CD PRIORITY” (page 28).
• The fo llowing discs take a longer time to start
playback.
– a disc recorded with complicat ed tree structure.
– a disc recorded in Multi Sessi on.
– a disc to which data can be added (non-finalized
disc).
Press < or ,.
Each time you press ,, the image
3)
turns clockwise by 90º.
Each time you press <, the image
turns countercloc kw ise by 90º.
Press DISC SKIP (or DISC 1 – 5
on the unit).
Press DISC 1 – 5 on the unit
(Automatic Source selection) .
press DVD Z on the unit.
Tip
When disc access takes a long time, set “DVD
POWER ON” by DVD power manage function
(page 39).
Resuming playback from the
point you stopped the disc
— Resume Play (Except for JPEG)
This system memorizes the point where you
stopped the disc so you can resume from th at
point. Resume Play is not canceled when you
turn off the system.
1 While playing a disc, press x to stop
playback.
“RESUME” appears in the display. If
“RESUME” does not appear, Resume Play
is not available.
2 Press nN.
The player starts playback from the point
you stopped the disc in step 1.
Notes
• You cannot perform Resume Play during Shuffl e
Play or Program Play.
• Depending on where you stopped the disc, the
system may resume playback from a different point.
• Resume play is canceled when:
– you press x or DISC SKIP in stop mode.
– you disconnect the power cord.
– you open the disc tray.
– you change the play mode.
– you change the settings using the DVD DISPLAY
or DVD SETUP button.
Playing a track by entering the
track number (on the remote
only)
Press the number button(s) to enter the track
number of the track you want to play. (To enter
the MP3 audio track number, press ALBUM +
or – repeatedly t o select the desired album
before entering the number.)
To enter a track number over 10
1 Enter the corresponding digits .
To enter 0, press 10/0.
2 Press ENTER.
Example:
To play track number 30, press 3 and 10/0, then pr es s
ENTER.
To play MP3 track number 100, press 1, 10/0 and
10/0, then press ENTER.
DVD/VIDEO CD/CD/MP3/JPEG – Play
17
GB
Page 18

Playing DVDs using the
Playing VIDEO CDs with
menu
Some DVDs have menus to help you enjoy the
DVDs. You can play DVDs using these menus
on the TV screen.
• Using the DVD top menu
A DVD is divided into long sections of a picture
or a music fea ture call ed “titl es”. When you play
a DVD which contains several titles, you can
select the title you want using the menu.
• Using the DVD menu
Some DVDs allow you to select the disc
contents using a me nu. When you play these
DVDs, you can select items such as the language
for the subtitles and the language for th e sound
using the DVD menu.
1 Press DVD TOP MENU or DVD MENU.
The menu appears on the TV screen. The
contents of the menu vary from disc to disc.
2 Press M/m/</, or the number
buttons to select the title or item you
want to play.
3 Press ENTER.
Note
If the DVD top menu or a DVD menu is displayed
during DVD playback for approximately one hour, the
system automatically turns off.
PBC functions (Ver. 2.0)
— PBC Play
You can use PBC* menus on your TV screen to
enjoy the disc’s interact iv e so ftware. The menu
format and structure may differ depending on
each disc.
* PBC: Playback Control
1 Press nN to start playing a VIDEO
CD with PBC functions (Ver. 2.0).
The PBC menu appears on the TV s cr ee n.
2 Press M/m or the number buttons to
select the item number you want.
3 Press ENTER.
4 Continue playback according to the
instructions on the menus to enjoy
interactive playback.
Refer to the operating inst ructions suppl ied
with the disc, as the operating procedure
may differ according to the VIDEO CD.
To go back to a previous menu
Press O RETURN.
Notes
• Depe ndi ng on the VID EO CD, the menu doe s not
appear in step 1.
• Depending on the VIDEO CD, “Press ENTER” in
step 3 may appear as “Press nN” in the operating
instructions supplied with the disc. In this case, press
nN.
Tip
You can cancel playback with PBC functions.
1 In stop mode, press . or >, or the number
buttons to select a track.
2 Press nN.
“Play without PBC” appears on the TV screen a nd
playback starts fro m the selected track. Sti ll images,
such as the menu screens, will not be shown.
To return to PBC playback, press x twice, then press
nN.
18
GB
Page 19

Playing repeatedly
— Repeat Play
You can play all t he titles/ tracks /files o r a si ngle
title/chapter/track on a disc repeatedly.
Using the front panel di spla y
Press REPEAT during play until “REP” or
“REP1” appears.
REP: For all the tracks/files1) on the disc(s)2), up
to five times.
REP1: For a single title3)/chapter3)/track only.
1)
During Slide show only
2)
When “ALBM” is selected for MP3 or JPE G, all t he
tracks/files in the album are repeated.
3)
For DVD, you can check whether a title or chapter is
being repeatedly played on the TV scr een.
To cancel Repeat Play
Press REPEAT repeatedly until both “REP” and
“REP1” disappear.
Notes
• Depending on the DVD, you cannot perform Repeat
Play.
• You can not pe r fo rm Repe a t Pla y dur ing P BC
playback of VIDEO CDs (page 18).
• You cannot select “REP1” during Program Play and
displaying a JPEG image.
• Whe n you se le c t “R EP 1” , that title/chapter/track is
repeated endlessly until “REP1” is canceled.
• You cannot select “REP” and “ALL DISCS SHUF”
at the same time.
Using the on-screen display
1 Press DVD DISPLAY during play.
The Control Menu ap pears.
2 Press M or m repeatedly to select
“REPEAT”, then press ENTER.
If you do not select “OFF”, the “REPEAT”
indicato r lights up in green.
3 Press M or m repeatedly to select the
Repeat Play setting.
The default s etting are underl ined.
x When playing a DVD
•OFF: does not play repeatedly.
1)
•ALL
: repeats all the titles.
• TITLE: repea ts the cu rren t t itl e on a d is c.
• CHAPTER: repeats the curren t ch apter.
x When playing a VIDEO CD/CD/MP3
when Program Play is set to OFF
•OFF: does not play repeatedly.
1)
•ALL
: repeats all the tracks on a disc, or
all the tracks in th e current album
2)
.
• TRACK: repeats the current track.
x When playing a JPEG
•OFF: does not play repeatedly.
• ALL: repeats all the files on the disc, or
repeats the current album
x When Program Play is set to ON
2)
.
•OFF: does not play repeatedly.
• ALL: repeats Program Play.
4 Press ENTER.
Repeat Play starts .
1)
When “SHUFFLE (ALL)” is selected, you can select
the Repeat Play of “TITL E”, “CHAPTE R” or
“TRACK” only, and “ALL” will not appear.
2)
When “CONTINUE (ALBUM)” is selected for MP3
or JPEG or “SHUFFLE (ALBUM)” is selected for
MP3.
To cancel Repeat Play
Select “OFF” in step 3.
To turn off the Control Menu
Press DVD DISPLAY repeatedly until the
Control Menu disappears.
Notes
• Depending on the DVD, you cannot perform Repeat
Play.
• You cannot perform Repeat Play during PBC
playback of VIDEO CDs (page 18).
• If you select “ALL”, the program repeats up to five
times.
Tips
• You can set Repeat Play when the playback is
stopped. Press REPEAT repeatedly to select the
setting, then pres s nN to st art Rep eat Play.
• You can quickly display the “REPEAT” status. Press
REPEAT.
DVD/VIDEO CD/CD/MP3/JPEG – Play
19
GB
Page 20

Creating your own program
— Program Play
You can make a prog ram of up to 25 steps.
You can synchro re cord th e pr ogra mmed trac ks
onto a cassette tape (page 43).
Using the front panel display
1 Press FUNCTION + or – repeatedly (or
DVD on the unit) to switch the funct ion
to DVD.
2 Press PLAY MODE repeatedly in stop
mode until “PGM” appears.
3 Press DISC SKIP (or DISC 1 – 5 on the
unit) to select a disc.
To program all the tracks on a disc at once,
proceed to step 5 with “AL” displayed.
4 Press . or > repeatedly until the
desired track number appears.
When program m i ng an MP3, press
ALBUM + or – to select album, then press
. or > repeatedly until the desired
track number appears.
Selected track number
DISC
CD
1 2 3
4 5
PGM
A B
Disc tray number
5 Press ENTER.
The disc, album or track i s p rogrammed.
The program step number appears,
followed by the disc tray number.
“AL”, the album nu m ber or the track
number appears.
Selected track number
DISC
CD
1 2 3
Disc tray number
Step number
4 5
PGM
A B
6 Program additional discs, albums or
tracks.
To program Repeat steps
Other discs 3 and 5
Other tracks or albums
on the same disc
Other tracks or albums
on other discs
4 and 5
3 to 5
7 Press nN.
Program Play st arts.
To clear a programmed step from
the end of a program
Press CLEAR in step 6.
Note
When you switch the play mode to “PGM” while
“REP1” is select ed, “REP 1” is a uto mati ca lly canc ele d.
Tip
The program you made remains afte r Pr ogr am Play
finishes. To play the same pr o gr am ag ain, press
FUNCTION + or – repeatedly (or DVD on the unit) to
switch the function to DVD, then press
nN.
Using the on-screen display
1 Press FUNCTION + or – repeatedly (or
DVD on the unit) to switch the function
to DVD.
2 Press PLAY MODE repeatedly in stop
mode until “PGM” appears in the
display.
The Program Display appears on the TV
screen.
Program
1
2
3
4
5
6
7
8
9
10
20
GB
Page 21

3 Press ,.
The disc list appears.
Program
1
Disc
2
DISC 1 (CD)
3
DISC 2 (– – – – –)
4
DISC 3 (MP3)
5
DISC 4 (CD)
6
DISC 5 (MP3)
7
8
9
10
4 Press M or m repeatedly to select a
disc.
To program all the tracks on a disc at once,
press ENTER after sel ecting the desired
disc, then proceed to st ep 7.
5 Press ,.
The album or track list appears.
Program
1
Disc
2
Track
DISC 1 (CD)
3
ALL TRACKS
DISC 2 (– – – – –)
4
5
6
7
8
9
10
1
DISC 3 (MP3)
2
DISC 4 (CD)
3
DISC 5 (MP3)
4
5
6
7
8
9
TRACK1
TRACK2
TRACK3
TRACK4
TRACK5
TRACK6
TRACK7
TRACK8
TRACK9
When the list of all tracks cannot be
displayed on the w in dow, the jump bar
appears. Pr ess , to select the jump bar
icon, and then scroll the jump bar to display
the rest of the lis t using M or m. Press < or
O RETURN to return to the track list.
6 Select the album or track you want to
program.
x When programming a VIDEO CD or
CD
For example, select track “6”.
Press M/m or the number buttons to select
“6”, then press ENTER.
Program
1
DISC 1 (CD) – TRACK 6
2
3
4
5
6
7
8
9
10
To program all the tracks on a disc, press M
or m to select “ALL TRACKS”, then press
ENTER.
x When programming an MP3
For example, select track “3” of album “2”.
Press M or m to select “2”, then press ,.
To program all the tracks of an album, p ress
M or m to select “ALL TRACKS”, then
press ENTER.
Program
1
Disc
2
Album
Track
DISC 1 (CD)
3
ALL ALBUMS
ALL TRACKS
DISC 2 (– – – – –)
4
1 ROOT
1
5
6
7
8
9
10
DISC 3 (MP3)
DISC 4 (CD)
DISC 5 (MP3)
2
3
Classic
Jazz
Pops
Next, press M/m or the number butto ns t o
select “3”, then press ENTER.
Program
1
DISC 3 (MP3) – ALBUM2 – TRACK3
2
3
4
5
6
7
8
9
10
To program all the a lb um s on a disc, press
M or m to select “ALL ALBUMS”, then
press ENTER.
7 To program other discs, albums or
tracks, repeat steps 3 to 6.
8 Press nN.
Program Play star ts .
DVD/VIDEO CD/CD/MP3/JPEG – Play
continued
21
GB
Page 22

Other operations
To Do this
Cancel Program Play Press PLAY MODE
Turn off the Program
Display
Check the program When the list of all
Clear a programmed
step from the end of
program
Notes
• Program Play function is not available for DVD and
JPEG.
• Whe n you switch the play mode to “PGM” while
“REP1” is selected, “REP1” is automatically
canceled.
Tip
The program you made remains after Progr a m P lay
finishes. To play the same program ag ai n, pre ss
FUNCTION + or – repeatedly (or DVD on the unit) to
switch the function to DVD, then press
repeatedly in stop mode
until “PGM” disappears.
Press PLAY MODE i n sto p
mode.
programmed steps cannot
be displayed on the
window, press < to select
the jump bar icon, and then
scroll the jump b ar to
display the rest of the list
using M or m. Press , or
O RETURN to return to
the programmed step list.
Press CLEAR in step 7.
nN.
Using the on-screen display to search
You can search for a title (DVD), chap te r
(DVD), track (CD, VIDEO CD, MP3), index
(VIDEO CD), album (MP3, JP E G) and file
(JPEG). As titles, tracks, albums and files are
assigned unique numbers on the disc, yo u can
select the de sired one from the Contro l Menu.
Also chapters and indexes are assigned unique
numbers on the di sc, so you can select t he
desired one by entering its number. Or, you can
search for a particula r poin t using the ti me co de
(Time Search).
Searching for a title/track/
album/file
1 Press DVD DISPLAY.
The Control Menu appears.
2 Press M or m repeatedly to select the
search method.
x When playing a DVD
“TITLE”
x When playing a VIDEO CD without
PBC function
“TRACK”
x When playing a CD
“TRACK”
x When playing an MP3
“ALBUM” or “TR A C K ”
x When playing a JPEG
“ALBUM” or “FILE”
22
GB
Page 23

3 Press ENTER.
The list of contents in the disc appears.
1:CD
HIGHWAY1:
VIEW POINT
2:
MY CHILDREN
3:
DANCING
4:
GOOD TASTE
5:
DESTINATION
6:
MARATHON
7:
PLACE-KICK
8:
TAKE IT EASY
9:
PORT TOWER
10:
STANDARD
11:
LADY
12:
CD
When the list of all tracks or albums cannot
be displayed on the window, the jump bar
appears. Pr ess , to select the jump bar
icon, and then scroll the jump bar to display
the rest of the lis t using M or m. Press < or
O RETURN to return to the track or the
album list.
4 Press M or m repeatedly to select the
desired title, track, album or file, then
press ENTER.
Playback starts from the selected track, etc.
Searching for a chapter/index
1 Press DVD DISPLAY.
The Control Menu ap pears.
2 Press M or m repeatedly to select the
search method.
x When playing a DVD
“CHAPTER”
x When playing a VIDEO CD without
PBC function
“INDEX”
“** (**)” is sele ct ed (** refers to a
number).
The number in parentheses indic ates the
total num ber of chapters or ind e xes.
1:DVD
1 2 ( 2 7 ) MAKING SCENE
)
1 8 ( 3 4
T
1 : 3 2 : 5 5
DVD
3 Press ENTER.
“** (**)” change s t o “– – (**)”.
1:DVD
1 2 ( 2 7 ) MAKING SCENE
)
– – ( 3 4
T
1 : 3 2 : 5 5
DVD
4 Press M or m repeatedly, or press the
number buttons to select the chapter
or index number you want to search.
If you make a mistake, p re ss C LEA R to
cancel the number, then select anot her
number.
5 Press ENTER.
The playback star ts from the selected
number.
To turn off the Control Menu
Press DVD DISPLAY repeatedly until the
Control Menu disappears.
To cancel searching
Press O RETURN.
To search for a particular point
using the time code
— Time Search
For example, se ar ch for the playing tim e of the
current title on a DVD.
1 In step 2, select “TIME”.
“T
**:**:**” (playing time of the current title)
is selected.
2 Press ENTER .
– –:– –:– –” appears above “T **:**:**”.
“T
3 Input the time code using the number
buttons, then press ENTER.
For example, to find the scene at 2 hours, 10
minutes, and 20 seconds after the
beginning, enter “2:10:20”.
DVD/VIDEO CD/CD/MP3/JPEG – Play
continued
23
GB
Page 24

Notes
• Th e ti tle , chap t er or tr ack num ber displayed on the
TV screen is recorded data on the disc.
• You cannot search a scene of a VIDEO CD.
• When playing a VIDEO CD with PBC functions, the
index search function does not work.
• The time search function does not work on a VIDEO
CD (when the PBC function is on).
• If you play a DVD, input the playing time of the
current title using the tim e code . If yo u pla y a C D,
VIDEO CD or MP3, inpu t the pla ying time of the
current track using the ti me code.
Tip
You can change the display to show playing time or
remaining time. For details, see “Viewing information
about the disc in the on-screen display” on pa ge 53.
24
GB
Page 25
DVD – Various functions
Tip
You can select the audio setting by pressing AUDIO.
Each time you press the button, the s et ti n g chan g e s .
Changing the sound/ subtitle/language
Changing the sound (DVD
only)
If a DVD is recorded with multilingual tracks,
you can select the language you want whil e
playing the DVD. If the DVD is recorded in
multiple audio formats (PCM, Dolby Digital,
MPEG audio or DTS), you can select the audio
format you want while playing the DVD.
1 Press DVD DISPLAY during play.
The Control Menu ap pears.
2 Press M or m repeatedly to select
“AUDIO”, then press ENTER.
The options for “A U DIO” appear.
3 Press M or m repeatedly to select the
audio signal you want.
Depending on the DVD, the choice of the
language and audio f o r m at varies.
When a 4-digit code is di splayed, it
represents the language code (see
“Language code list” on page 70). When
the same language is displayed twice or
more times, the DVD is recorded in
multiple audio formats.
4 Press ENTER.
To turn off the Control Menu
Press DVD DISPLAY repeatedly until the
Control Menu disa ppears.
Notes
• For DHC-NXM2D, when you play a DVD with the
audio other than 2 channels, the soun d is co mposed
into 2 channels and outpu t from the sy stem sp eake rs.
• For discs not recorded in multiple audio format, you
cannot change the sound.
• During DVD playback, the sound may change
automatically.
Displaying the audio
information of the disc (DVD
only)
When you select “AUDIO”, the channels being
played are displayed on the TV screen.
For example, in Dolby Digital format, multiple
signals ranging from monaural to 5.1 channel
signals can be recorded on a DVD. Depending
on the DVD, the number of recorded channels
may differ.
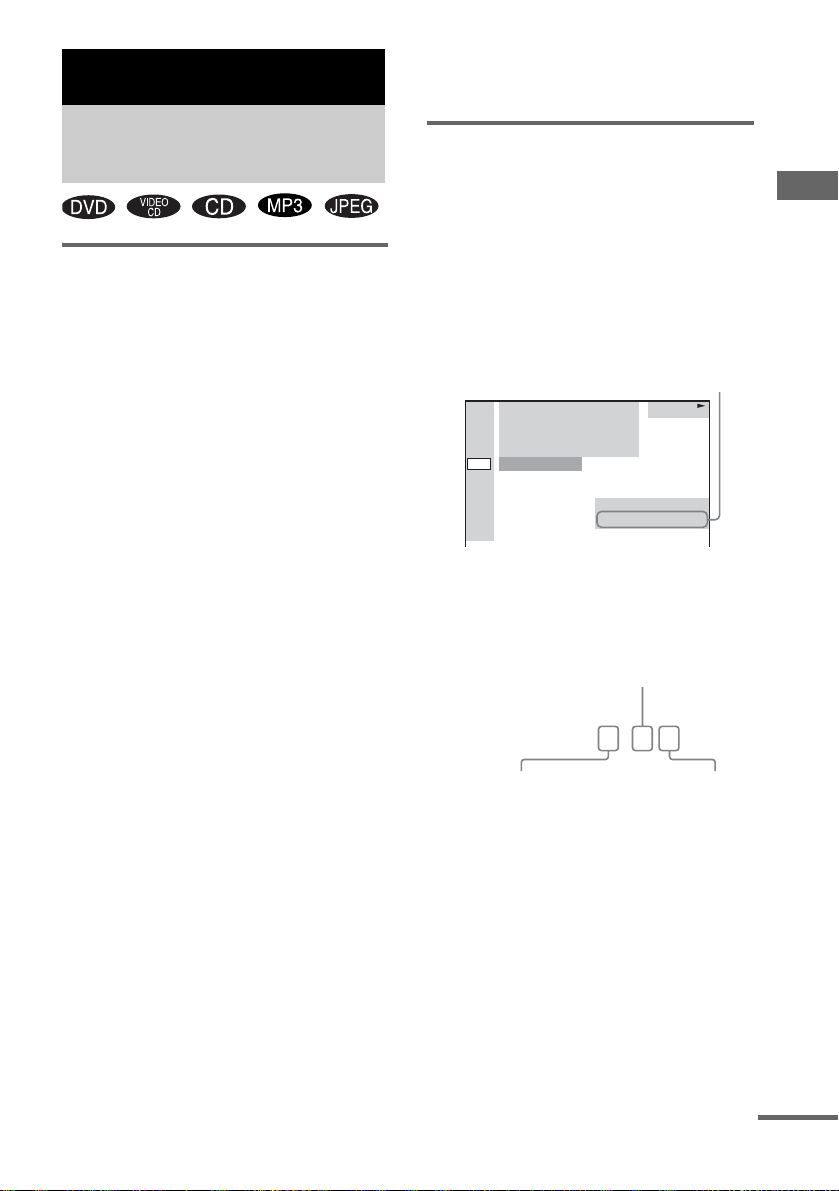
Current audio format*
1:DVD
1 2 ( 2 7 ) MAKING SCENE
)
1 8 ( 3 4
T
1 : 3 2 : 5 5
1: ENGLISH
PROGRAM FORMAT
DOLBY DIGITAL 3/2.1
* “PCM”, “DTS” or “DOLBY DIGITAL” is
displayed. For “DOLBY DIGITAL”, the channels
in the playing track are dis pla y ed numerically as
follows:
For Dolby Digital 5.1 ch:
Surround component 2
DOLBY DIGITAL
Front component 2 +
Center component 1
3 / 2 . 1
LFE (Low Fr equency
Effect) component 1
DVD
DVD – Various functions
continued
25
GB
Page 26
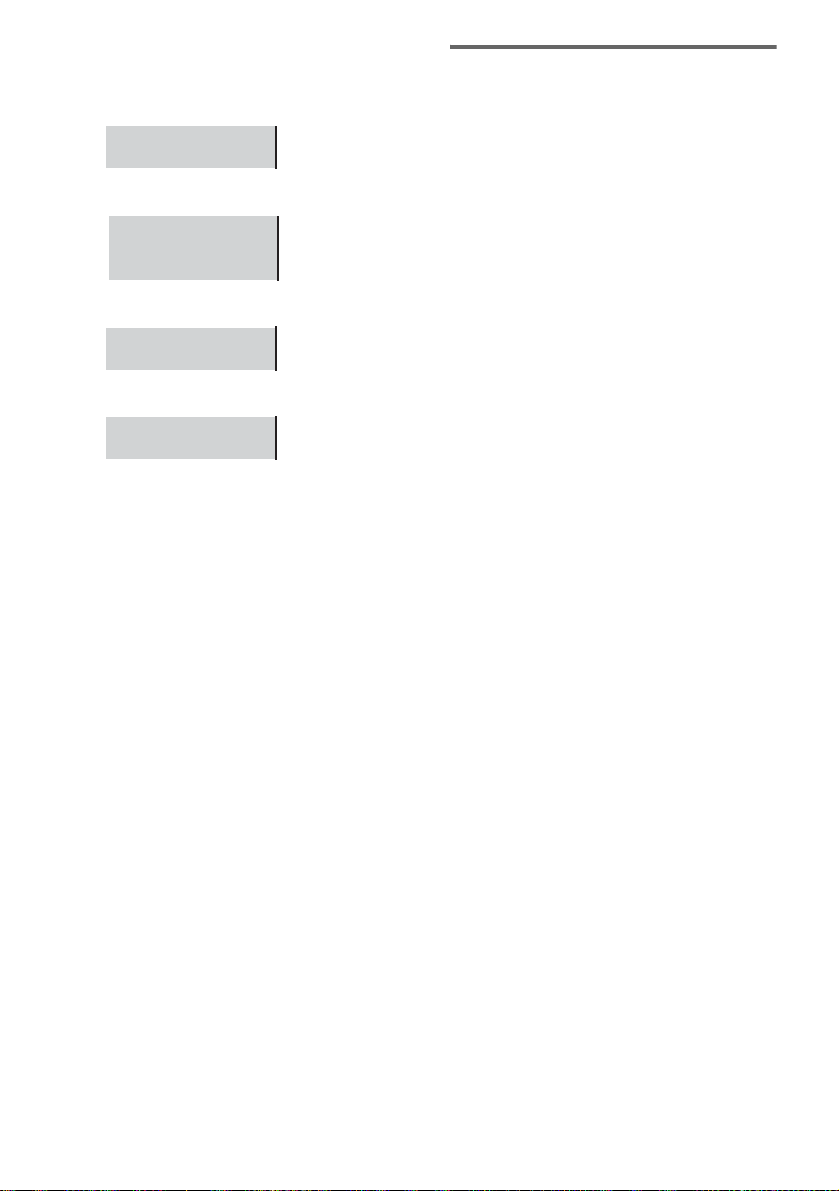
The display examples are as
follows:
• PCM (stereo)
PROGRAM FORMAT
PCM 48kHz 24bit
• Dolby Surrou nd
PROGRAM FORMAT
DOLBY DIGITAL 2/0
DOLBY SURROUND
• Dolby Digital 5.1 ch
PROGRAM FORMAT
DOLBY DIGITAL 3/2.1
•DTS
PROGRAM FORMAT
DTS 3/2.1
Displaying the subtitles (DVD
only)
With DVDs on which multilingual subtitles are
recorded, you ca n change the subtitle language
while playing a DVD, or turn the subtitl es on o r
off whenever you w ant.
For example, you c an select the language you
want to master and turn the subtitles on for better
understanding.
1 Press DVD DISPLAY during play.
The Control Menu appears.
2 Press M or m repeatedly to select
“SUBTITLE”, then press ENTER.
The options for “SUBTITLE” appear.
3 Press M or m repeatedly to select the
language you want, then press ENTER.
The subtitles are di splayed in the selected
language.
When a 4-digit cod e is di splayed, it
represents the language code (see
“Language code list” on page 70).
To cancel the SUBTITLE setting
Select “OFF” in step 3.
To turn off the Control Menu
Press DVD DISPLAY repeatedly until the
Control Menu dis appears.
Note
Depending on the DVD, you may not be able to change
the subtitles even if multilingual subtitles are recorded
on the DVD.
Tip
You can select the subtitle language by pressing
SUBTITLE. Each time you press the button , the
language changes.
26
GB
Page 27

Changing the screen display
language, DVD menu
language and audio track
auto selection mode
— LANGUAGE SETUP/CUSTOM
SETUP
1 Press DVD SETUP in stop mode.
The Setup Disp l ay appears.
2 Press M or m repeatedly to select
“LANGUAGE SETUP” or “CUSTOM
SETUP”, then press ENTER.
Select Setup item
LANGUAGE SETUP OSD
DVD MENU
AUDIO
SUBTITLE
CUSTOM SETUP TRACK SELECTION
AUDIO DRC
DATA CD PRIORITY
JPEG DATE
3 Press M or m repeatedly to select an
item, then press ENTER.
4 Press M or m repeatedly to select a
setting, then press ENTER.
Note
When the selected language is not recorded on the
DVD, one of the recorded languages is automatically
selected (e x cept for “OS D ”).
Tips
• You can reset all the DVD settings except for
Parental Control by perform ing the operations
described under “To return the DVD setup to the
default settings*, perform reset as follows:”
(page 63).
• If you select “OTHERSt” in “DVD MENU”,
“AUDIO” or “SUBTITLE”, select and enter the
language code from the language cod e list using the
number buttons (page 70). The selected language
code (4-digi t) is displaye d th e next time you sele ct
“OTHERSt”.
* Except for Parental Control settings
x OSD (on-screen display)
Switches the display language on the TV screen.
Select the language from the displayed l ist.
x DVD MENU (DVD only)
Select the language for the DVD menu.
x AUDIO (DVD only)
Switches the language of the sound track. Select
the language fro m the di splayed list.
x SUBTITLE (DVD only)
Switches the language of the subtitle. Select the
language from the displayed list.
x TRACK SELECTION (DVD only)
Gives the priority to the sound track whic h
contains the highest number of channels when
you play a DVD on which multiple audio
formats (PCM, MPEG audio, DTS or Dolby
Digital form at) are recorded.
The default setting is underlined.
OFF No priority given.
AUTO Priority given.
Notes
• When you set to “AUTO”, the language setting may
change. The “TRACK SELECTION” setting has
higher priority than the “AU DIO” setting in
“LANGUAGE SETUP”.
• If PCM, MPEG audio, DTS and Dolby Digital sound
tracks have the same number of channels, the system
selects PCM, DTS, D olby Digital and MPEG audio
sound tracks in this order.
• Depending on the DVD, the audio channel with
priority may be predetermined. In thi s case, yo u
cannot give priority to the DTS, Dolby Digita l or
MPEG audio format by selecting “AUTO”.
x AUDIO DRC (Dynamic Range
Compression)
Narrows the d ynamic range of the soundtrack.
Useful for watc hing movies at low volume late
at night.
The default setting is underlined.
OFF No compression of dynamic
STANDARD
MAX Narrows the dynamic range fully.
Note
AUDIO DRC only works in Dolby Digital.
range.
Reproduces the sound track with
the kind of dynamic range that the
recording engineer intended.
DVD – Various functions
continued
27
GB
Page 28
x DATA CD PRIORITY (MP3, JPEG only)
Set priority data you want to play, when you
play the data disc (CD-ROM/CD-R/CD-RW)
contained MP3 au di o tr acks and JPEG image
files.
The default setting is underlined.
MP3
JPEG If a JP E G f ile exists on the disc,
x JPEG DATE
Change the date in formation order of a JPEG
image in the Contro l Menu as:
The default setting is underlined.
MM/DD/YYYY
YYYY/MM/DD
DD/MM/YYYY
YYYY/DD/MM
YYYY: Year
MM: Month
DD: Day
If an MP3 file exists on the disc,
the system recognises the disc as
an “MP3 Disc”. If only JPEG files
exist on the disc, the system
recognises the disc as a “JPEG
Disc”.
the system recogni ses the dis c as a
“JPEG Disc”. If only MP3 files
exist on the disc, the system
recognises the disc as an “MP3
Disc”.
Adjusting the angle/image
Changing the angles (DVD
only)
When playing a DVD on which various angles
(multi-angles) for a scene are recorded, the
“ANGLE” indicator lights up in green on the TV
screen. Thi s me ans that you can chan ge the
viewing angle.
For example, while playing a scene of a train in
motion, you can display the view from either th e
front of the train, the left window of the train or
from the right window without having the train’s
movemen t interrup ted.
1 Press DVD DISPLAY during play.
The Control Menu appears.
2 Press M or m repeatedly to select
“ANGLE”.
The angle number appears. The number in
parentheses indicates the total number of
angles. The “ANGLE” indicator lights up in
green when angles are recorded on the disc.
3 Press ENTER.
The angle number ch anges to “–”.
4 Press the number buttons or M/m to
select the angle you want, then press
ENTER.
The angle is changed to t he selected angle.
To turn off the Control Menu
Press DVD DISPLAY repeatedly until the
Control Menu dis appears.
Note
Depending on the DVD, you may not be able to change
the angles even if multi-angles are recorded on the
DVD.
Tip
You can select the angle by pressing ANGLE. Each
time you press the button, the angle changes.
28
GB
Page 29
Adjusting the TV screen
— SCREEN SETUP/CUSTOM SETUP
• 16:9
1 Press DVD SETUP in stop mode.
The Setup Disp l ay appears.
2 Press M or m repeatedly to select
“SCREEN SETUP” or “CUSTOM
SETUP”, then press ENTER.
Select Setup item
SCREEN SETUP TV TYPE
SCREEN SAVER
BACKGROUND
COMPONENT OUT
CUSTOM SETUP VCD COLOR
* Except for Latin American model
SYSTEM*
3 Press M or m repeatedly to select an
item, then press ENTER.
4 Press M or m repeatedly to select a
setting, then press ENTER.
x TV TYPE (DV D only)
Select the aspect rati o of the connected TV.
The default setting varies, depending on the
country model.
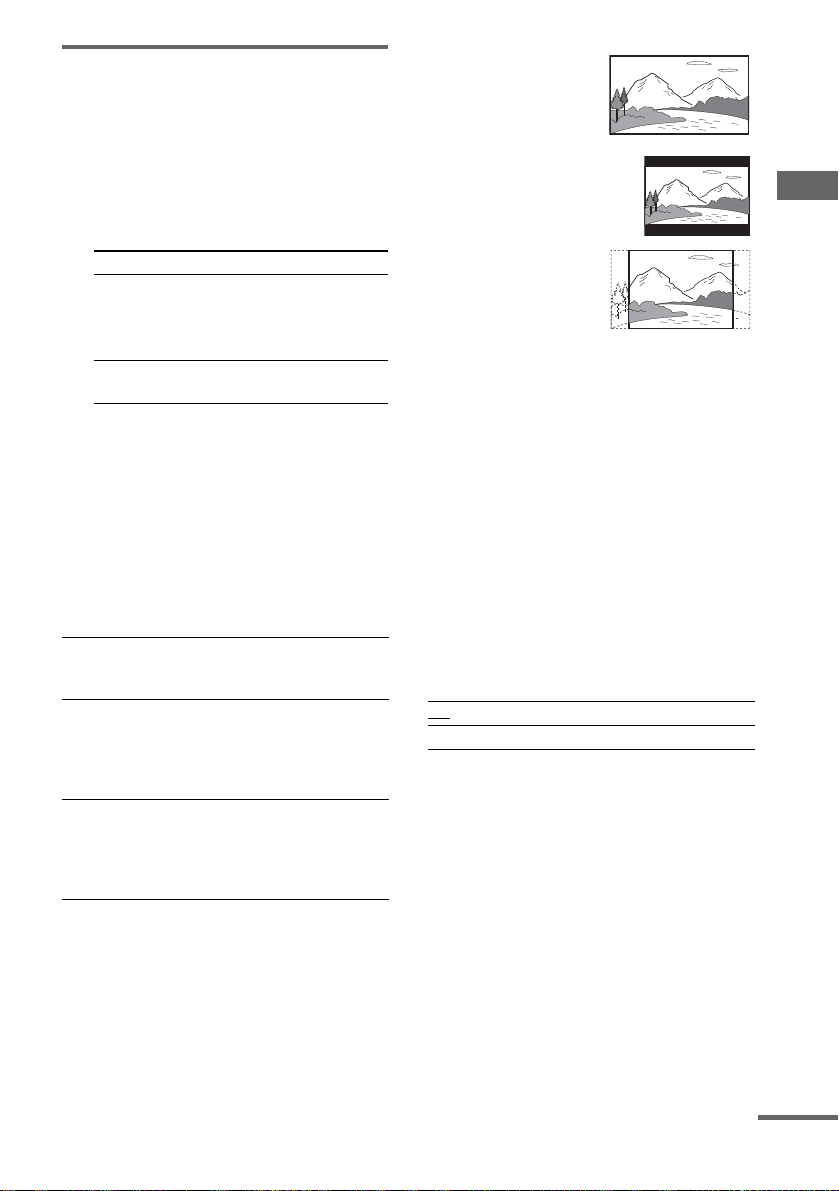
16:9 Select this whe n you connect a
4:3 LETTER
BOX
4:3 PAN SCAN Select this when you connect a 4:3
wide-scr een TV or a TV wi th a
wide mode function.
Select this when you connect a 4:3
screen TV. This setting displays a
wide picture with bands displayed
on the upper and lower portions of
the screen.
screen TV. This setting displays
the wide picture on the entire
screen and cuts off the po r tions
that do not fit.
• 4:3 LETTER BOX
DVD – Various functions
• 4:3 PAN SCAN
Note
Depending on the DVD, “4:3 LETTER BOX” may be
selected automatically instead of “4:3 PAN SCAN” or
vice versa.
x SCREEN SAVER
Turn on and off the screen saver. If you turn on
the TV screen saver, the screen saver image
appears when you leave the player in pause or
stop mode for 15 minutes or when you play a
CD, disc with MP3 audio tracks or JPEG image
files (except for during Slide show) for more
than 15 minutes . The screen saver w i ll help
prevent your di splay device fr o m be coming
damaged (gho st ing). Press any DVD-r elated
button to turn off the screen saver.
The default setting is underlined.
ON Turns on the screen saver.
OFF Turns off the screen saver.
continued
29
GB
Page 30
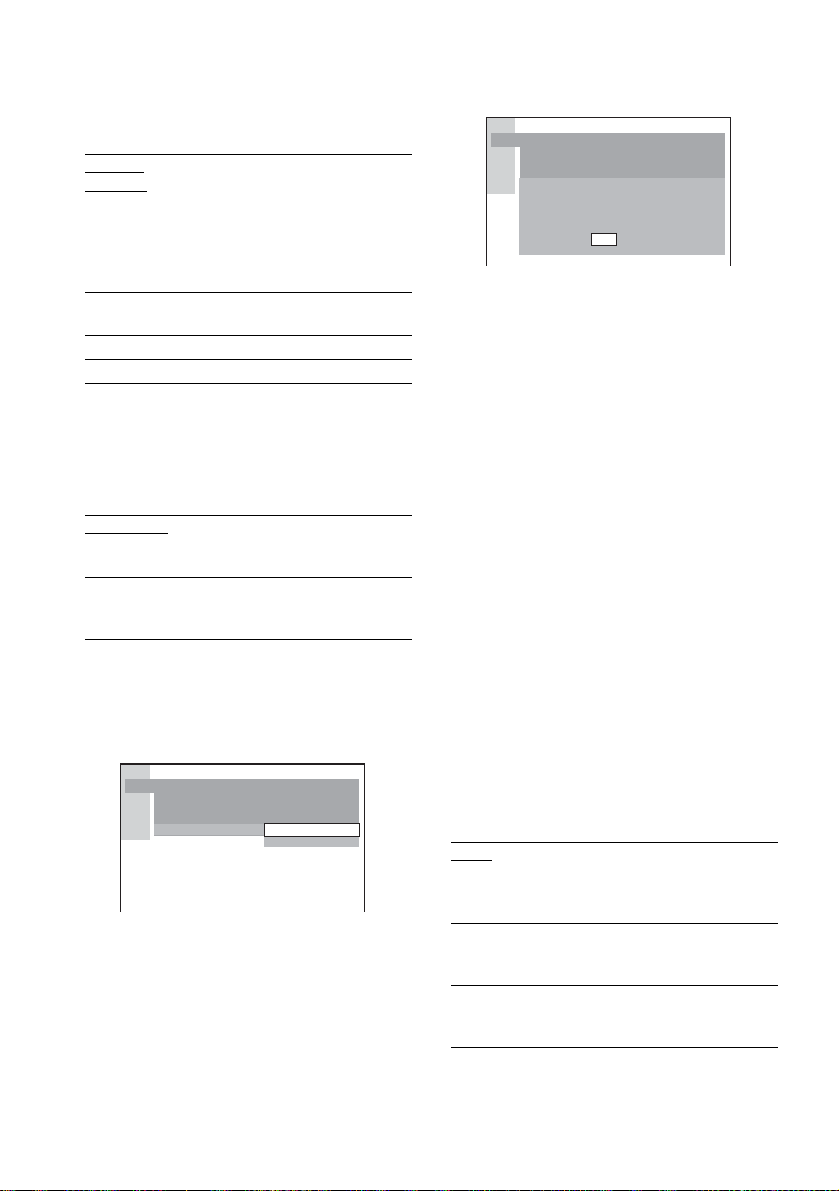
x BACKGROUND
Select the ba ckground col or or pictur e on the TV
screen when the pla yback is stopped or while
playing a CD.
The default setting is underlined.
JACKET
PICTURE
GRAPHICS 1 – 5 The preset picture stored in the
BLUE The background color is blue.
BLACK The background color is black.
The jacket picture (still picture)
appears in the background, but
only when the jacket picture is
already recorded on the disc (CDEXTRA, etc.). If the disc does not
contain a jacket picture, the
“GRAPHICS 1” picture appears.
system appears in the background.
x COMPONENT OUT
Change the type of signal output from the
COMPONENT VIDEO OUT jacks on the
system.
The default setting is underlined.
INTERLACE
PROGRESSIVE Select this when you have a TV
Select this when you are
connected to a standard (in terlace
format) TV.
that can accept progressive
signals.
To set to “PROGRESSIVE”
1 Press M or m repeatedly to select
“COMPONENT OUT” in “SCREEN
SETUP”, then press ENTER.
SCREEN SETUP
TV TYPE:
SCREEN SAVER:
BACKGROUND:
COMPONENT OUT:
JACKET PICTURE
16:9
INTERLACE
PROGRESSIVE
ON
2 Press M or m repeatedly to select
“PROGRESSIVE”, then press ENTER.
The display for confirming appears.
SCREEN SETUP
TV TYPE:
SCREEN SAVER:
BACKGROUND:
COMPONENT OUT:
Does your TV accept progressive
signals?
YES
NO
JACKET PICTURE
16:9
ON
3 Press M or m repeatedly to select
“YES”, then press ENTER.
The type of output sign al changes to
progressive fo r m at.
To force the system to switch to
interlace when PROGRESSIVE is
selected
Make sure the function is se t to DVD, the n hold
down
x on the unit and press DISPLAY.
Notes
• “PROGR ES SIVE ” does not work for PAL signals.
Even if you set “COMPONENT OUT” to
“PROGRESSIVE”, the output signal is
automaticall y sw itched to interlac e f or m a t f o r PA L
signals.
• When “COMPONENT OUT” is set to
“PROGRESSIVE”, no video signal is output fr om
the VIDEO OUT or S VIDEO OUT jack.
• The display for confirming does not appear when you
select “INTERLACE”.
x VCD COLOR SYSTEM (except for Latin
American model)
Select the color system when you play a VIDEO
CD.
The default setting is underlined.
AUTO Outputs the video signal in the
PAL Changes the video signal of an
NTSC Changes the video signal of a PAL
system of the disc, either PAL or
NTSC. If your TV uses a DUAL
system, select AUTO.
NTSC disc and outputs it in th e
PAL system.
disc and outputs it in the NTSC
system.
30
GB
Page 31
Notes
• You cannot change the col or sy stem of the di sc it self.
• Exce pt f or Latin Ame r ic a n mode l, you can change
the color system of this un it a cco r ding to the
connected TV (page9).
Tip
You can reset all the DVD settings except for Parental
Control by performing the operations described under
“To return the DVD setup to the default settings*,
perform reset as follows:” (page 63).
* Except for Parental Control settings
Restricting disc playback
— CUSTOM PARENTAL CONTROL/
PARENTAL CONTROL
Preventing playback of
specific discs
— CUSTOM PARENTAL CONTROL
You can set the playback restrictions so that the
system will not play inappropriate discs. You
can set the same Cust om Parental Contro l
password for up to 25 discs. W hen you set the
twenty-sixth disc, the playback restriction for
the first disc is canceled.
1 Insert the disc you want to lock.
If the disc is playing, press x to stop play.
2 Press DVD DISPLAY in stop mode.
The Control Menu a ppears.
3 Press M or m repeatedly to select
“CUSTOM PARENTAL CONTROL”,
then press ENTER.
The “CUSTOM PARENTAL CONTROL”
is selected.
4 Press M or m repeatedly to select
“ONt”, then press ENTER.
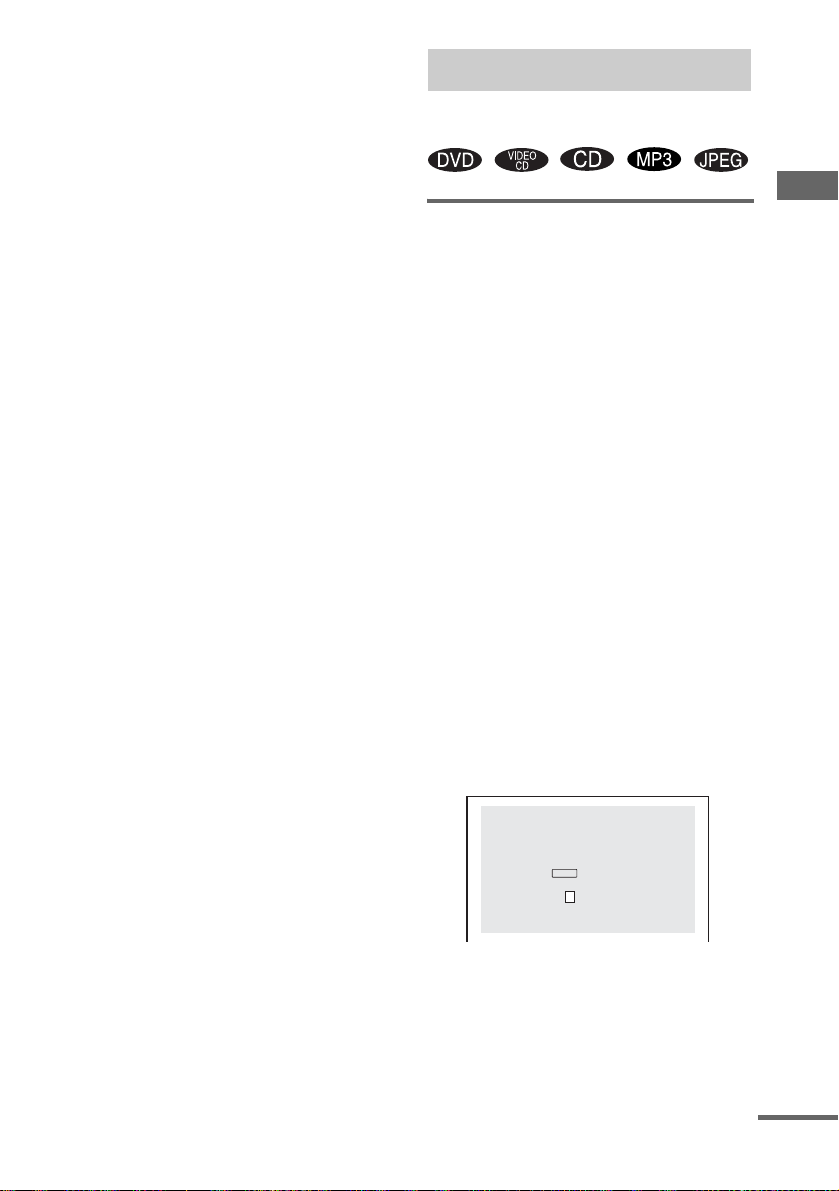
x If you have not entered a password
The display f or regi ste ri ng a ne w pa ss wor d
appears.
DVD – Various functions
CUSTOM PARENTAL CONTROL
Enter a new 4-digit password,
ENTER
.
then press
– – –
Enter a 4-digit password using t he number
buttons, then press ENTER.
The display for conf irm i ng t he password
appears.
continued
31
GB
Page 32
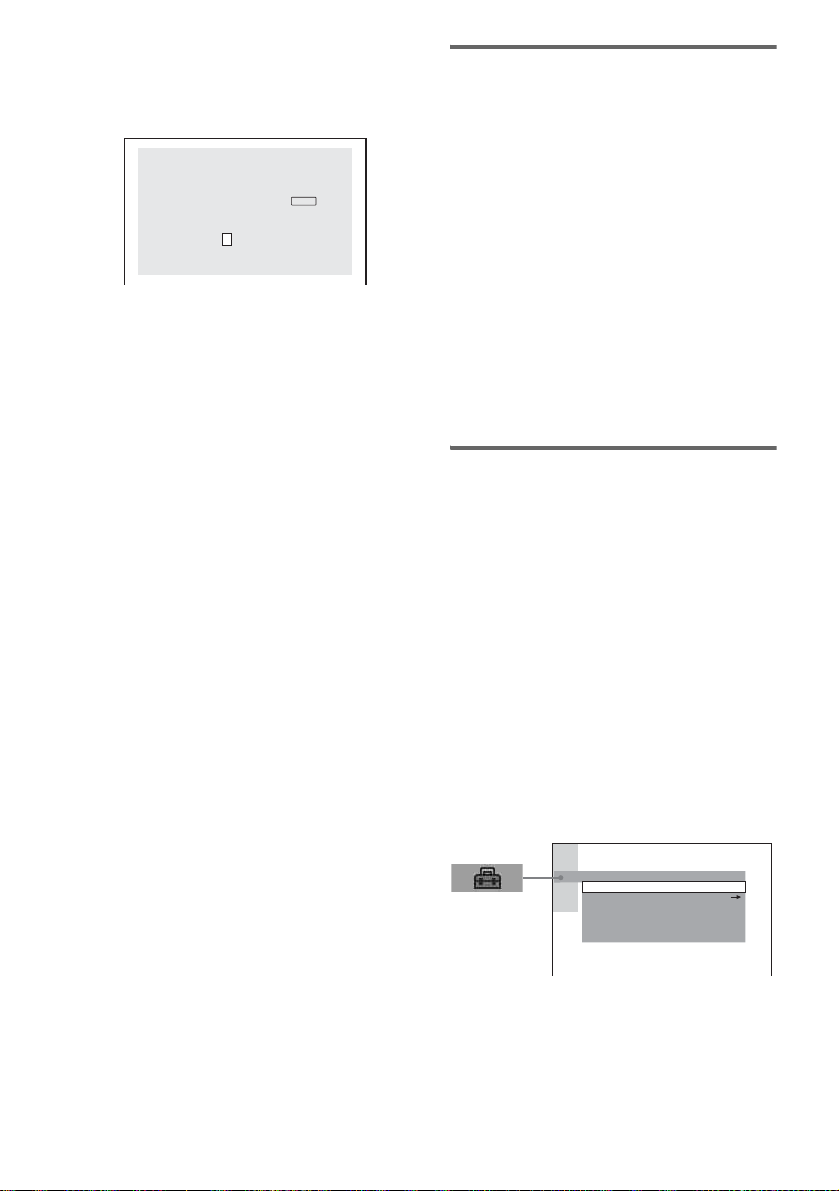
x When you have already registered a
password
The display for enteri ng the password
appears.
CUSTOM PARENTAL CONTROL
Enter password, then press .
ENTER
– – –
5 Enter or re-ent er your 4- digit pa ssword
using the number buttons, then press
ENTER.
“Custom parental control is set.” appears
and the scre en returns to the Control M enu.
If you make a mistake entering your
password
Press < before you press ENTE R and
input the correct number.
If you make a mistake
Press O RETURN, then start from st ep 3 again.
To turn off the Control Menu
Press O RETURN, then press DVD DISPLAY
repeatedly until the Control Menu disappears.
To turn off the Custom Parental
Control function
1 In step 4, select “OFFt”, then press
ENTER.
2 Enter your 4-digit password using the
number buttons, then press ENTER.
To change the password
1 In step 4, select “PASSWORDt”, then
press ENTER.
The display for entering the password
appears.
2 Enter your 4-digit password using the
number buttons, then press ENTER.
3 Enter a new 4-digit password using the
number buttons, then press ENTER.
4 To confirm your password, re-enter it using
the number buttons, then press ENTER.
Playing the disc for which
Custom Parental Control is
set
1 Insert the disc for which Custom
Parental Control is set.
The “CUSTOM PARENTAL CONTROL”
display appears.
2 Enter your 4-digit password using the
number buttons, then press ENTER.
The system is ready for playback.
Tip
If you forgot your password, enter the 6-dig it num be r
“199703” using the number buttons when the
“CUSTOM PARENTAL CONTROL” display asks
you for your password, then press ENTER. The display
will ask you to enter a new 4-digit password.
Limiting playback by children
(DVD only)
— PARENTAL CONTROL
You can limit the playback of some DVDs
according to a predetermined level s u ch as the
age of the users. The same password is used for
both Custom Parental Control and Parental
Control.
When a limited scene is played back, that scene
is cut or replaced wi t h a preset other scene .
1 Press DVD SETUP in stop mode.
The Setup Display appears.
2 Press M or m repeatedly to select
“CUSTOM SETUP”, then press ENTER.
The “CUSTOM SETUP” display appears.
CUSTOM SETUP
VCD COLOR SYSTEM: AUTO
PARENTAL CONTROL
“VCD COLOR SY STEM” does n ot a ppe ar
on Latin American model.
OFFTRACK SELECTION:
STANDARDAUDIO DRC:
MP3DATA CD PRIORITY:
MM/DD/YYYYJPEG DATE:
32
GB
Page 33
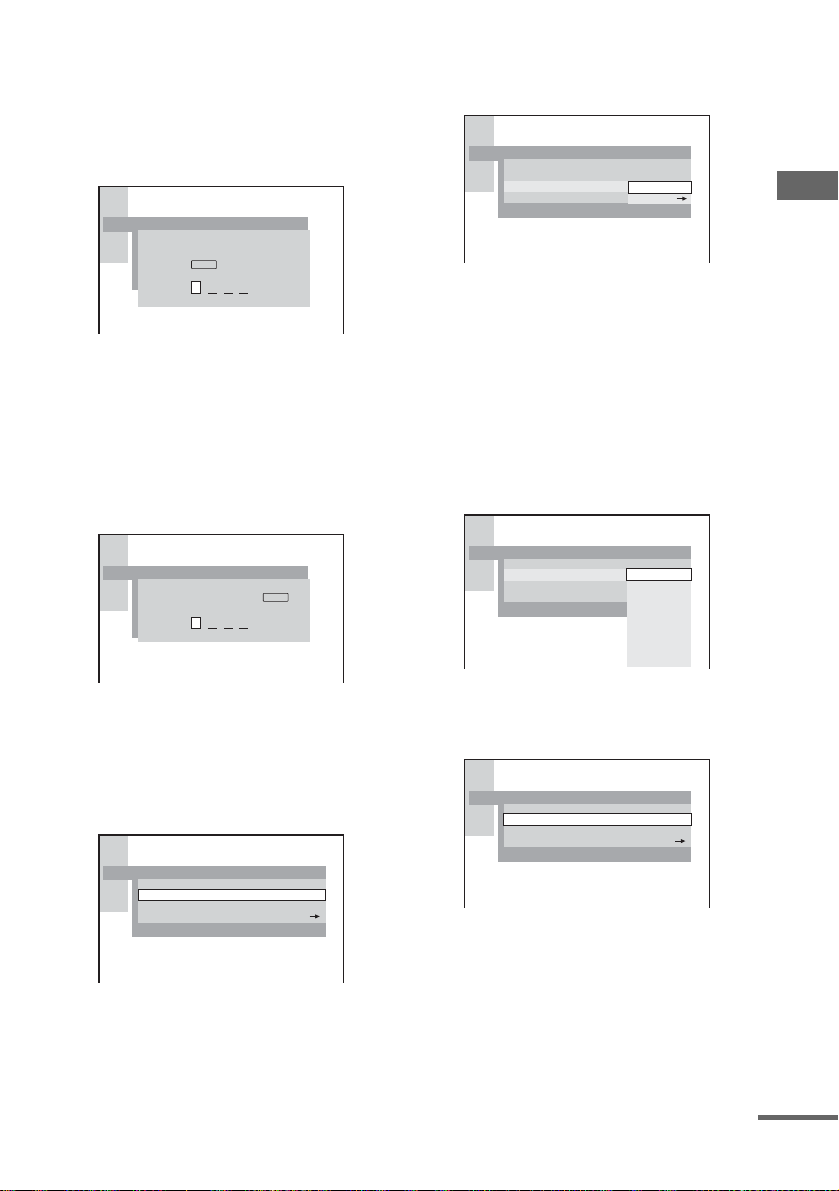
3 Press M or m repeatedly to select
“PARENTAL CONTROLt”, then press
ENTER.
x If you have not entered a password
The display for registering a new password
appears.
CUSTOM SETUP
PARENTAL CONTROL
Enter a new 4-digit password,
ENTER
then press
.
Enter a 4-digit password using the number
buttons, then press ENTER.
The display for confirming the password
appears.
x When you have already registered a
password
The display for entering the password
appears.
CUSTOM SETUP
PARENTAL CONTROL
Enter password, then press
ENTER
.
5 Press M or m repeatedly to select
“STANDARD”, then press ENTER.
The options for “STANDARD” appear.
CUSTOM SETUP
PARENTAL CONTROL
LEVEL:
STANDARD:
CHANGE PASSWORD
OTHERS
OFF
USA
6 Press M or m repeatedly to select a
geographic area as the playback
limitation level, then press ENTER.
The area is selected.
When you select “OTHERSt”, select and
enter the standard code in the tab le on
page 34 using the number bu ttons.
7 Press M or m repeatedly to select
“LEVEL”, then press ENTER.
The options for “LEVEL” appear.
CUSTOM SETUP
PARENTAL CONTROL
STANDARD:
CHANGE PASSWORD
OFFLEVEL:
8:
NC17
7:
R
6:
5:
PG13
4:
PG
3:
2:
G
1:
DVD – Various functions
4 Enter or re-enter your 4-digit password
using the number buttons, then press
ENTER.
The display for set ti ng the playback
limitation level and changing the password
appears.
CUSTOM SETUP
PARENTAL CONTROL
LEVEL: OFF
STANDARD:
CHANGE PASSWORD
USA
8 Press M or m repeatedly to select the
level you want, then press ENTER.
The Parental Control setting is completed.
CUSTOM SETUP
PARENTAL CONTROL
STANDARD:
CHANGE PASSWORD
The lower the value, the more strict the
limitation.
If you make a mistake
Press < or O RETURN to go back to the
previous screen.
PG134:LEVEL:
USA
continued
33
GB
Page 34

To turn off the Parental Control
function and play the DVD after
entering your password
Set “LEVEL” to “OFF” in step 8.
To change the password
1 In step 5, select “CHANGE
PASSWORDt” , then press ENTER.
The display for entering the password
appears.
2 Follow step 3 to enter a new password.
Playing the disc for which
Parental Control is set
1 Insert the disc and press nN.
The “PARENTAL CONTROL” display
appears.
2 Enter your 4-digit password using the
number buttons, then press ENTER.
Playback starts.
Notes
• When you play DVDs which do not have the Parental
Control function, playback cannot be limited on this
system.
• Depending on the DVD, you may be asked to change
the parental control level w hile pla ying the disc. In
this case, enter your password, then change the level.
If the Resume Play mode is canceled, the level
returns to the original level.
Tip
If you forgot your password, remove the disc a nd
repeat steps 1 to 3 of “Limiting playba ck by children
(DVD only)” (page 32). When you are asked to enter
your password, enter “199703” using the number
buttons, then press ENTER. The disp lay will ask yo u
to enter a new 4-digit password. After you enter a new
4-digit password, replace the disc in the system and
nN. When the “PARENTAL CONTROL”
press
display appears, enter your new password.
Area code
Standard Code number
Argentina 2044
Australia 2047
Austria 2046
Belgium 2057
Brazil 2070
Canada 2079
Chile 2090
China 2092
Denmark 2115
Finland 2165
France 2174
Germany 2109
Hong Kong 2219
India 2248
Indonesia 2238
Italy 2254
Japan 2276
Korea 2304
Malaysia 2363
Mexico 2362
Netherlands 2376
New Zealand 2390
Norway 2379
Pakistan 2427
Philippines 2424
Portugal 2436
Russia 2489
Singapore 2501
Spain 2149
Sweden 2499
Switzerland 2086
Taiwan 2543
Thailand 2528
United Kingdom 2184
34
GB
Page 35

Speaker settings
— SPEAKER SETUP
To obtain the best po ssible surround sound, set
the speakers you have connected and their
distance from your listening position.
Then use the test tone to adjust the volume and
the balance of the sp eakers to the same level.
Setting the speakers
1 Press DVD SETUP in stop mode.
The Setup Disp l ay appears.
2 Press M or m repeatedly to select
“SPEAKER SETUP”, then press
ENTER.
3 Press M or m repeatedly to select
“SIZE” or “DISTANCE”, then press
ENTER.
4 Press M or m repeatedly to select the
setup item, then press ENTER.
5 Press M or m repeatedly to select or set
a setting, then press ENTER.
To return to the default settings
Select the item to be returned to the default
setting and press CLEAR.
x SIZE
When you do not co nnect center, surroun d
speakers or sub woofer, or you move the
surround speakers, set the parameters for
CENTER, SURROUND and SUBWOOFER.
Since the front speakers setting is fixed, you
cannot change them.
The default sett i ngs are underlined.
FRONT YES
CENTER* YES: Normally select this
SURROUND* YE S
SUBWOOFER YES
* DHC-NXM4D only
Notes
• When adjusting speakers, the sound may cut off for a
moment.
• Depending on the settings of oth e r speakers, the sub
woofer may output excessive sound.
• When connecting a sub woofer, make sure to se t the
“SUBWOOFER” se tting to “YES”. If set to
“NONE”, no sound is output from the sub woofer.
• When you play a DVD that does not have sub woofer
output recorded, note that no sound is produced from
the sub woofer, even if “SUBWOOFER” is set to
“YES”.
position.
NONE: Select this when a center
speaker is not used.
: Normally select this
position.
NONE: Select this when
surround speakers are not used.
: Select this when a sub
woofer is used.
NONE: Select this when a sub
woofer is not used.
DVD – Various functions
continued
35
GB
Page 36
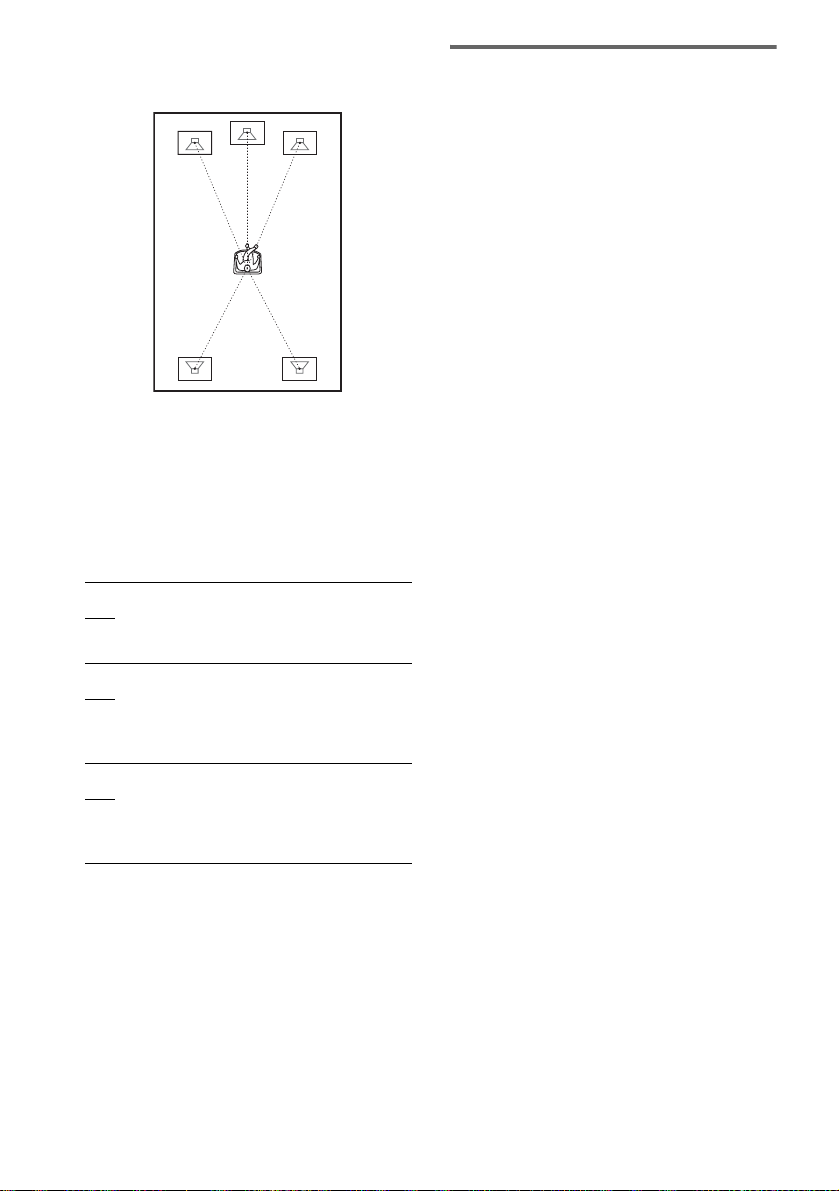
x DISTANCE (DHC-NXM4D only)
The default distance setting for the speakers in
relation to the listening po sition is s hown below.
1.6m
1.6m 1.6m
1.6m 1.6m
Be sure to change the value in the Setup Display
when you move the speakers.
When you set the di st ance using the “QU ICK
SETUP” (page 13), the settings are
automatically displayed.
Any items that are set to “NONE” in the “SIZE”
setting will not appear.
The default settin gs are underlined.
FRONT
1.6m
CENTER
1.6m
SURROUND
1.6m
Notes
• When adjusting speakers, the sound may cut off for a
moment.
• If eac h of the front a nd sur round speakers are not
placed at an equal distance from your listening
position, set the distance of the closest speaker.
• Do no t pla c e th e surr ound speakers farther away
from your listening position than the front speakers.
Front speaker distance from the
listening position can be set in
0.2 meter increments from 1.0 to
7.0 meters.
Center speaker distance can be
moved up to 1.6 meters closer to
the listening position, from the
front speakers in 0.2 me ter
increments.
Surround speaker distance can be
moved up to 4.6 meters closer to
the listening position, from the
front speakers, in 0.2 meter
increments.
Adjusting the speaker vol ume
and level
For DHC-NXM4D
1 Press DVD SETUP in stop mode.
The Setup Display appears.
2 Press M or m repeatedly to select
“SPEAKER SETUP”, then press
ENTER.
3 Press M or m repeatedly to select
“TEST TONE”, then press ENTER.
4 Press M or m repeatedly to select “ON”,
then press ENTER.
You will hear the test tone from each
speaker in seque nce.
5 Press M/m/</, repeatedly to adjust
the value of “LEVEL” and “BALANCE”
from your listening pos ition.
The test tone is emitted from the selected
speaker.
6 Press ENTER when you finish
adjusting.
7 Press M or m repeatedly to select
“TEST TONE”, then press ENTER.
8 Press M or m repeatedly to select
“OFF”, then press ENTER.
Tip
To adjust the balance or the level without listening to
the test tone, select “B ALANCE ” or “LEV EL” in st ep
3 and press ENTER, then adjust the balance or level
using M or m and press ENTER.
For DHC-NXM2D
1 Press DVD SETUP in stop mode.
The Setup Display appears.
2 Press M or m repeatedly to select
“SPEAKER SETUP”, then press
ENTER.
3 Press M or m repeatedly to select
“LEVEL”, “BALANCE” or “LFE”, then
press ENTER.
4 Press M or m repeatedly to adjust the
level or balance or select a setting,
then press ENTER.
36
GB
Page 37
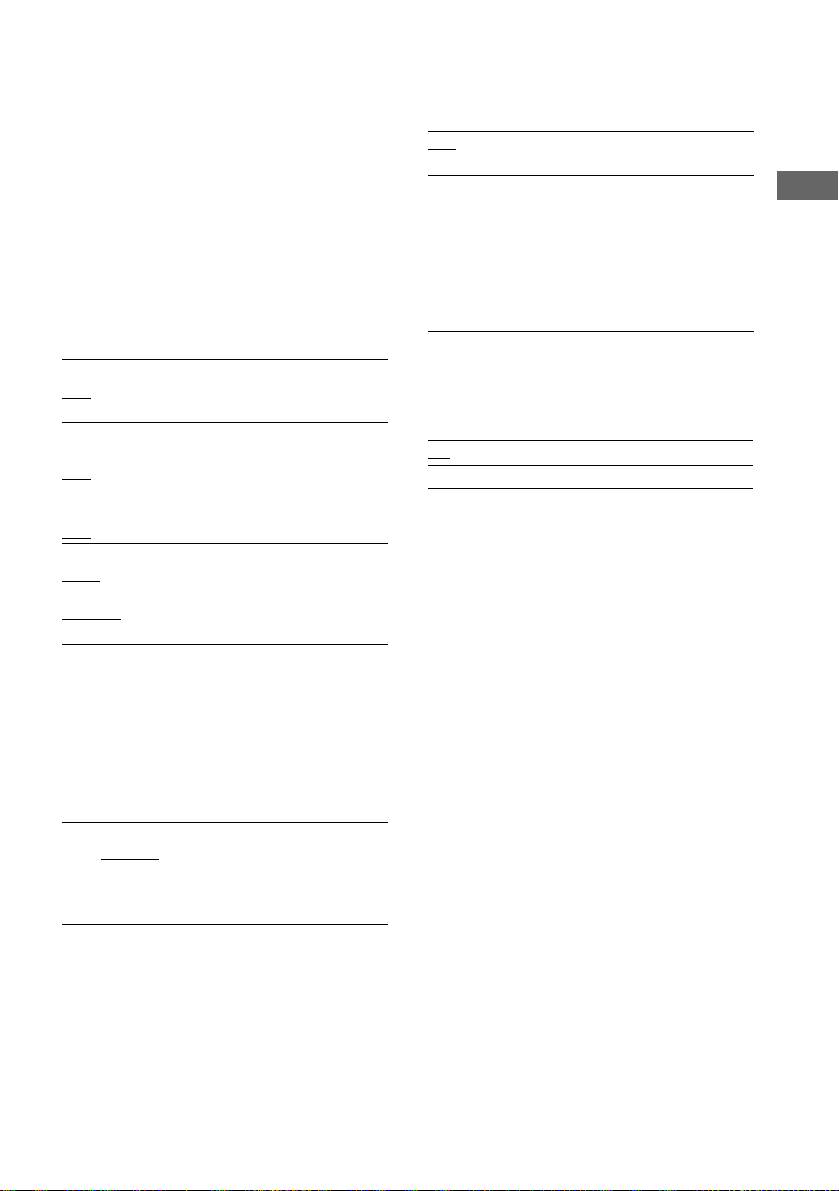
To return to the default settings
Select the item to be returned to the default
setting an d press CLEAR.
To change the volume of all
speakers at one time
Adjust using VOL U ME + or –.
x LEVEL
You can vary the level of each speaker as
follows. For DHC-NXM4D, be sure to set
“TEST TONE” to “ON” for easy adjustm ent.
Any items that are set to “NONE” in the “SIZE”
setting will not appear.
The default settings are underlined.
CENTER*
0 dB
SURROUND
LEFT*
0 dB
SURROUND
RIGHT*
0 dB
SUBWOOFER
+2 dB
(for DHC-
NXM4D)
LEVEL 2
DHC-NXM2D)
Adjust the level of the center
speaker (–6 dB to +6 dB, 1 dB
increments).
Adjust the level of the surround
speaker (–6 dB to +6 dB, 1 dB
increments).
Adjust the leve l of the sub woof er
(–10 dB to +10 dB for DHCNXM4D, LEVEL 3 – 1 for DHCNXM2D).
(for
x TEST TONE (DHC-NXM4D only)
The speakers will emit a test tone to adjust
“BALANCE” and “LE V EL”.
The default setting is underlined.
OFF The test tone is not emitted from
ON The test tone is emitted fro m each
the speakers.
speaker in sequence while
adjusting balance or level. When
you select one of the “SPEAKER
SETUP (LEVEL or
BALANCE)” items, the test tone
is emitted from the s el ected
speaker.
x LFE (DHC-NXM2D only)
You can enjoy low f re quency effect with LFE
channel recorded on discs.
The default setting is underlined.
ON
OFF The LFE channel is not output.
Note
If there is excessive wow or flutter when recording
audio from a DVD, set “LFE” to “OFF”.
The LFE channel is output.
DVD – Various functions
* DHC-NXM4D only
x BALANCE
You can vary the balance of the left and right
speakers as follows. For DHC-NXM4D, be sure
to set “TEST TONE” to “ON” for easy
adjustment.
The default set ting is underl i ned.
FRONT
– – – (CENTER
Adjust the balance betwe en the
)
front left and right speak e r s
(6 steps left or right).
The center position is shown as
“– – –”.
37
GB
Page 38
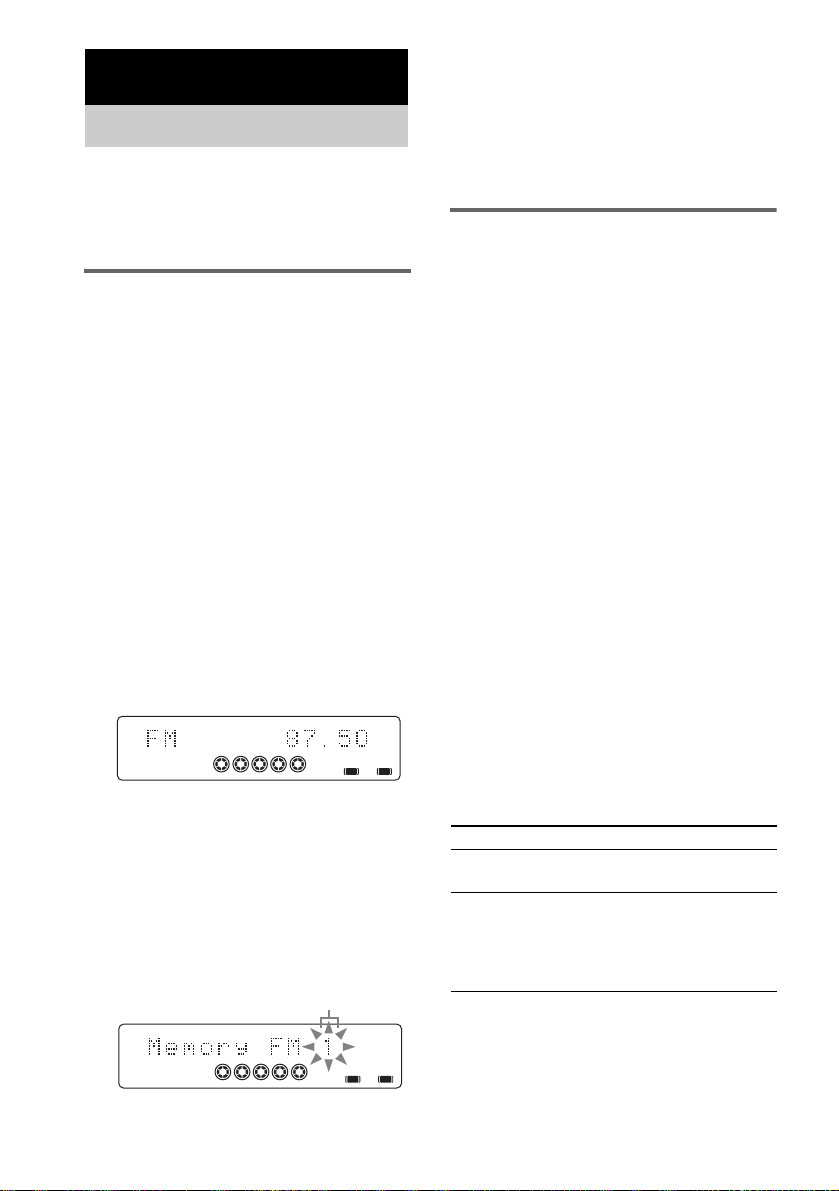
Tuner
Presetting radio stations
You can preset up to 20 FM stations and 10 AM
stations. You can th en tune in any of those
stations simply by sel e ct ing the corresponding
preset number.
Automatic tuning preset
You can automatically tune in all of t he st ations
that can be receiv ed in your area and the n st ore
the radio frequency of the desired stations.
1 Press FUNCTION + or – repeatedly (or
TUNER/BAND on the unit) to switch the
function to TUNER.
2 Press BAND (or TUNER/BAND on the
unit) repeatedly to select “FM” or
“AM”.
3 Press TUNING MODE repeatedly until
“AUTO” appears.
4 Press TUNING + or –.
The frequency changes as the system scans
for a station. Scanning stops automatically
when a station is tuned in. At that time,
“TUNED” and “STEREO” (for an FM
stereo program ) a ppear.
AUTO
TUNED
MHz
1 2 3
4 5
If “TUNED” does not appear and the
scanning does not stop
Set the freque ncy of the desired radio
station as described in “Manual tuning
preset”.
A B
5 Press TUNER MEMORY.
A preset numbe r fl ashes. Perform steps 6
and 7 while the preset number flash es.
Preset number
ST AUTO
TUNED
MHz
1 2 3
4 5
A B
6 Press TUNING + or – repeatedly to
select the desired preset number.
7 Press ENTER.
“Complete! ” appears.
8 Repeat steps 2 through 7 to store other
stations.
Manual tuning preset
You can manually tune in and store the radio
frequency of the desired stations.
1 Press FUNCTION + or – repeatedly (or
TUNER/BAND on the unit) to switch the
function to TUNER.
2 Press BAND (or TUNER/BAND on the
unit) repeatedly to select “FM” or
“AM”.
3 Press TUNING MODE repeatedly until
“AUTO” and “PRESET” di sappear from
the display.
4 Press TUNING + or – repeatedly to tune
in the desired station.
5 Press TUNER MEMORY.
A preset number flashes. Perform steps 6
and 7 while the preset number flashes.
6 Press TUNING + or – repeatedly to
select the desired preset number.
7 Press ENTER.
“Complete! ” appears.
8 Repeat steps 2 through 7 to store other
stations.
Other operations
To Do this
Tune in a station
with a weak signal
Set another station
to the existing
preset number
Follow the procedure described
in “Manual tuning preset”.
Start over from step 2. After
step 5, press TUNING + or –
repeatedly to select the preset
number you want to store the
other station.
38
GB
Page 39
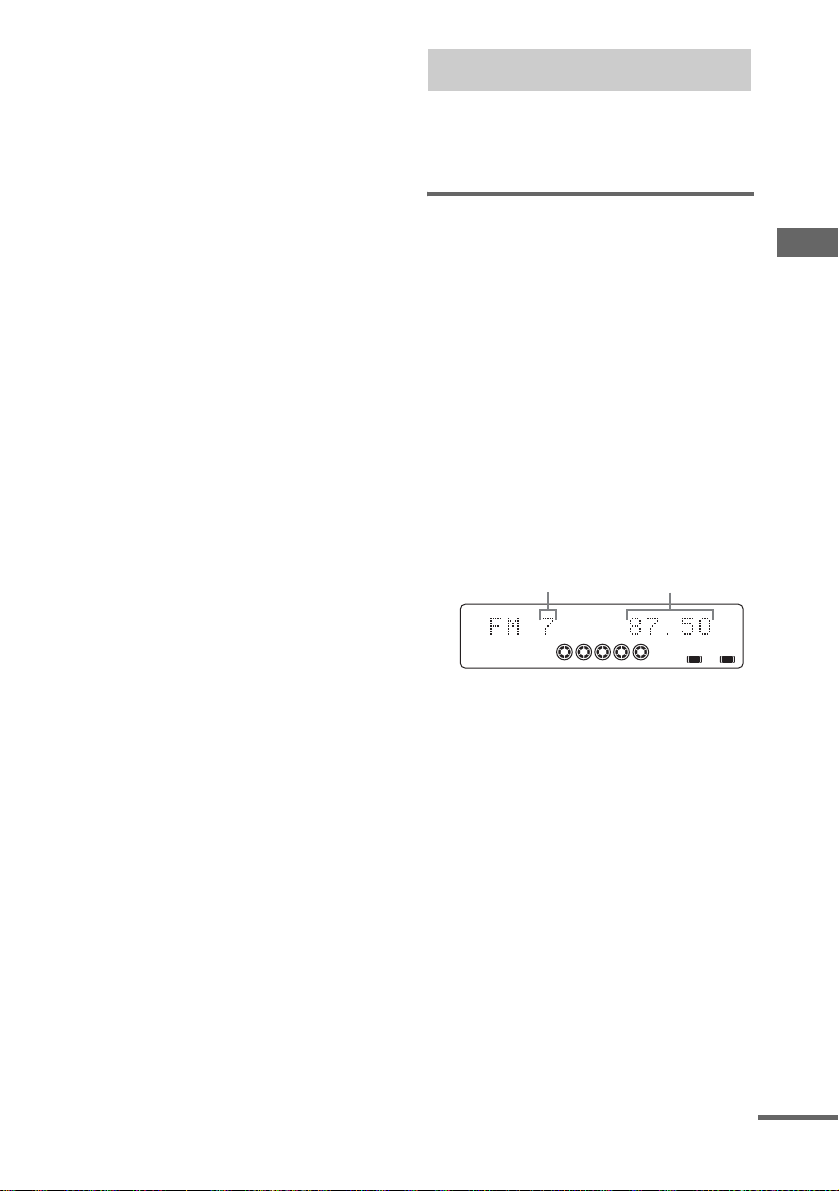
To improve tuner reception
When tuner reception is poor, set DVD player
power off by DVD pow er manage functio n.
DVD power is factory set to on.
Use buttons on the unit for the operation.
1 Press DVD.
2 Press ?/1 to turn off th e sy s te m.
3 Press ?/1 while holding x.
“DVD POWER OFF” appears.
To set DVD power on
Repeat the procedure above and “DVD POWER
ON” appears.
Notes
• When “DVD POWER OFF” is selected, DVD access
time is increased.
• You can not c ha nge the setting in Power Saving
Mode (page 50).
To change the AM tuning interval
(except for Saudi Arabian model)
The AM tuning interval is factory-preset to
9 kHz (or 10 kHz for some areas). To change the
AM tuning interval, tune in any AM station fir st,
then turn off the system. While holding x on t he
unit, press ?/1 on the unit. When you change
the interval, all the AM preset stations are
erased. To reset the i nterval, repeat the same
procedure.
Note
You cannot change the AM tuning interval in Powe r
Saving Mode (page 50).
Tips
• The pr es et sta tions are retained for about half a day
even if you disconnect the power cord or if a power
failure occurs.
• To im pr ove br oad cast reception, adjust the supplied
antennas, or connect a commercially available
external antenna.
Listening to the radio
You can listen to a radio station either by
selecting a preset station, or by manually tuning
in the station.
Listening to a preset station
— Preset Tuning
Preset radio stations in th e tuner’s memory first
(see “Presetting radio stati o ns” on page 38).
1 Press FUNCTION + or – repeatedly (or
TUNER/BAND on the unit) to switch the
function to TUNER.
2 Press BAND (or TUNER/BAND on the
unit) repeatedly to select “FM” or
“AM”.
3 Press TUNING MODE repeatedly until
“PRESET” appears.
4 Press TUNING + or – repeatedly to
select the desired preset station.
FrequencyPreset number
AUTO PRESET
TUNED
MHz
1 2 3
4 5
To select the desired preset
number using the number buttons
Press number buttons instead of performing step 4. To
enter preset number 10 or higher, press >10 and the
corresponding number butt ons. To ent e r 0, press 10/0.
A B
Tuner
continued
39
GB
Page 40

Listening to non-preset radio
station
— Manual Tuning
1 Press FUNCTION + or – repeatedly (or
TUNER/BAND on the unit) to switch the
function to TUNER.
2 Press BAND (or TUNER/BAND on the
unit) repeatedly to select “FM” or
“AM”.
3 Press TUNING MODE repeatedly until
“AUTO” and “PRESET” disappear from
the display.
4 Press TUNING + or – repeatedly to tune
in the desired station.
Notes
• Th e OSD doe s not a ppea r on th e TV scr een exc ept
for DVD function.
• When switching to DVD function from TUNER
function, a longer time may be requi red to acce ss the
disc. For DHC-NXM4D, the same thing may happen
when switching to TAPE, VIDEO or SAT function
from TUNER function. In this case, set “DVD
POWER ON” by DVD power manage function
(page 39).
Tips
• To improve broadcast reception, adjust the supplied
antennas, or connect a commercially available
external antenna.
• When an FM stereo program has static noise, press
FM MODE repeatedly until “MONO” appears.
There will be no stereo effect, bu t th e reception will
improve.
• Press TUNING MODE repeatedly until “AUTO”
appears in step 3 above, then press TUNING + or –.
The frequency indication changes and scanning stops
when the system tunes in a station (Automatic
Tuning).
• To record the radio programs, use manual recording
(pages 43 and 49).
40
GB
Page 41
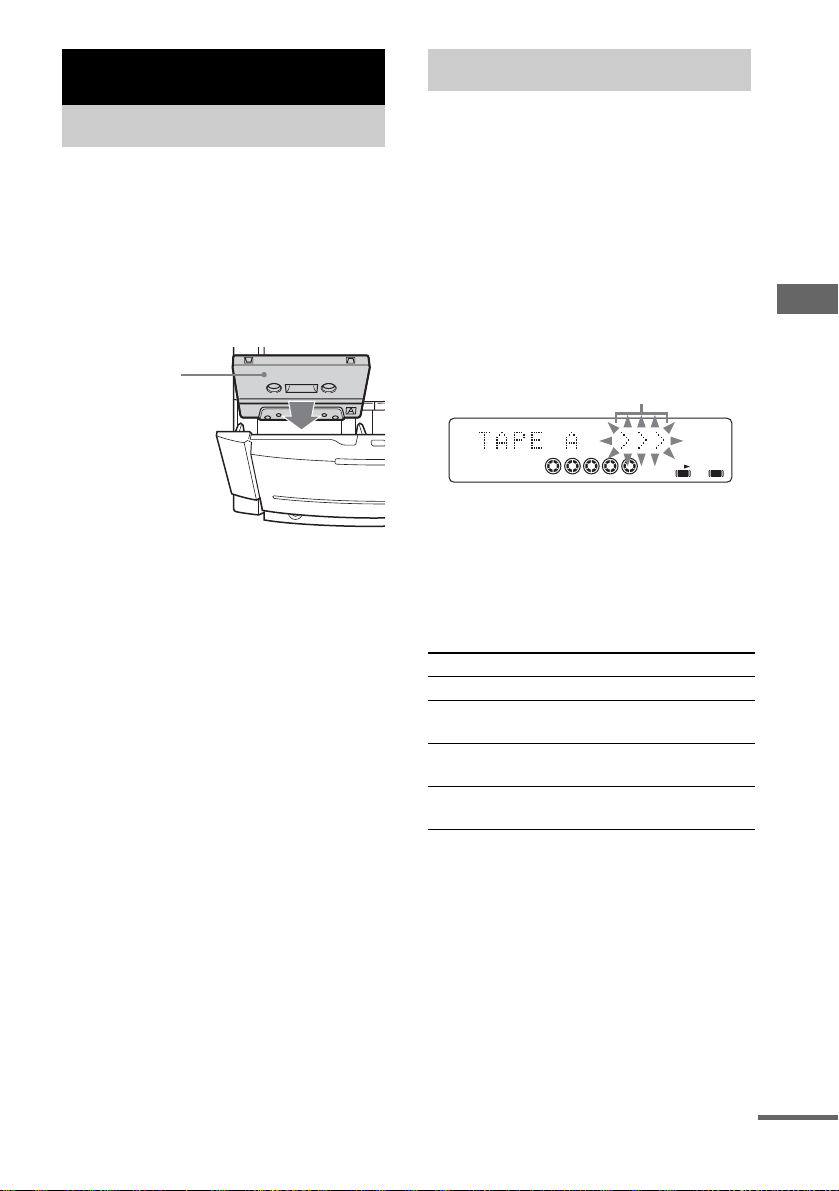
Tape – Play
Loading a tape
Use buttons on the unit for the operation.
1 Press TAPE A/B repeatedly to select
deck A or B.
2 Press A TAPE Z or TAPE Z B.
3 Load a recorded/recordable tape in
deck A or B with the side you want to
play/record facing forward.
With the side
you want to
play/record
facing forward.
Playing a tape
You can use TYPE I (normal) tape.
1 Load a tape.
2 Press PLAY MODE repeatedly to select
“g” to play one side. Select “j”
play both sides.
To play both deck s i n succession, press
PLAY MODE repeatedly until “RELAY”
(Relay Play)2) appears in the disp lay.
1)
to
3 Press nN.
Press the butto n again to play the reverse
side. The tape starts pl ayi ng.
Playing direction
1 2 3
4 5
1)
The tape deck stops automatically after repeating the
sequence five times.
2)
Relay Play always follows this cyclic sequence up to
five times, then stop s:
Deck A (front side) t Deck A (reverse side) t
Deck B (front side) t Deck B (reverse side)
Other operations
To Do this
Stop play Press x.
Pause Press X.
Fast-forward or
rewind
Remove a tape Press A TA PE Z or TAPE Z B on
Press X again to resume play.
Press m or M.
the unit.
RELAY
A B
Tape – Play
Tip
If you select either deck A or B and press nN, X,
m or M when no tape is in that deck, the system
automatically switches to the tape in the other deck and
starts that operation.
continued
41
GB
Page 42

Searching for the beginning of
the current or the next track
(AMS)*
To go forward
Press > during playback.
Each time you press the button, the search
direction, + (fo rw ard), and numbe r of tr acks
being skipped (1 to 9) appear.
To go back
Press . dur in g pl ayback.
Each time you press the button, the search
direction, – (back), and number of tracks being
skipped (1 to 9) appea r.
* AMS: Automatic Music Sensor
Note
The AMS function may not operate correctly under the
following circumstances:
– When the unrecorded space between songs is less
than 4 seconds long.
– When the system is placed near a television.
Tip
When a tape is inserted, corresponding forward (N)/
reverse (n) indicator s light.
Tape – Recording
Recording your favorite CD tracks on a tape
— CD-TAPE Synchro Recording
You can record a who l e disc (VIDEO CD, CD,
MP3) on a tape.
You can use TYPE I (normal) tape. The
recording level is adjusted automatically.
Use buttons on the unit for the operation.
1 Load a recordable tape into deck B,
then press TAPE A/B repeatedly to
select deck B.
2 Press PLAY MODE on the remote
repeatedly to select “g” to record on
one side. Select “j” (or “RELAY”) to
record on both sides.
3 Press nN repeatedly to select
recording side, then press
If you select both sides recording or fr ont
side recording, press nN to light up the
N indicator, then press x. If you record
on the reverse side, press nN again to
light up the n indicator, then press x.
x.
4 Press DVD and load a disc you want to
record.
If you have already l oaded the disc, press
DISC SKIP on the remote to select the disc.
When you want to record an album from an
MP3 disc, be sure to press ALBUM + or –
to select the desi red album before
proceeding.
5 Press CD SYNC.
Deck B stands by for recording.
“REC” flashes.
6 Press z START.
Recording starts.
To stop recording
Press x.
42
GB
Page 43

To record a VIDEO CD/CD/MP3 by
specifying track order
You can record only your favorite tracks us i ng
Program Play. Between steps 4 and 5, perform
steps 2 to 6 of “Creatin g your own program”
(page 20).
Notes
• CD Synchro Recording is not available with DVDs
and JPEG files.
• You cannot listen to other sources while reco rd ing.
• When you pr e ss CD S YNC in step 5, th e surround
effect may automatically change (see “Selecting the
surround effect” on page 45) .
• If the play mode is set to Repeat Play or Shuffle Play,
it automatical ly sw itches to Normal Play in step 5.
• When you record from a VIDEO CD, playback with
PBC functions is a ut o matically cancele d.
Tip
If you select both sides recording and the tape reaches
the end of the front side part-way through a track, the
entire track is recorded again from the beginning of the
reverse side.
Recording on a tape manually
— Manual Recording
You can record just the portions you like from a
disc (DVD, VIDEO CD, CD, MP3), tape or
radio program on a t ape.
You can also record from connected
components (see “ H ooking up optional
components” on page 55).
Use buttons on the unit for the operation.
1 Load a recordable tape into deck B,
then press TAPE A/B repeatedly to
select deck B.
2 Press PLAY MODE on the remote
repeatedly to select “g” to record on
one side. Select “j” (or “RELAY”) to
record on both sides.
3 Press nN repeatedly to select
recording side, then press
If you select both sides recording or fr ont
side recording, press nN to lig ht up th e
N indicator, then press x. If you record
on the reverse s id e, press nN again to
light up the n indicator, then press x.
x.
4 Press one of the following buttons to
select the desired source to record.
• DVD: To record from this system’s CD/
DVD player.
• TAPE A/B: To record from this system’s
tape deck A.
• TUNER/BAND: To record from this
system’s tuner.
• VIDEO/SAT: To record from the
connected optio nal component to
VIDEO/SAT IN L/R jacks.
5 Press z START.
Deck B stands by for recording.
“REC” flashes.
6 Press z START, then start playing the
desired source to record.
Recording starts .
Tape – Recording
continued
43
GB
Page 44

To stop recording
Press x.
Notes
• Yo u cannot listen to other sources while recor ding.
• When you press z START in step 5, the surround
effect may automatically chan g e (s ee “Selecting the
surround effect” on page 45).
Tips
• When you record on both sides, be sure to start from
the front side. If you start from the reverse side,
recording stops at the end of the revers e side .
• For rec ord ing from the tuner:
If noise is heard while recordi ng from the tuner,
move the respective ante nna to reduce the noise.
• If TAPE B is selected in step 4, silence is recorded.
Sound Adjustment
Adjusting the sound
Generating a more dynamic
sound (Dynamic Sound
Generator X-tra)
Press DSGX on the unit.
Each time you press t he button, the display
changes as follows:
DSGX ON y DSGX OFF
Adjusting the bass and treble
You can adjust the bass and treble to enjo y more
powerful sound.
Use buttons on the unit for the operation.
1 Turn SOUND MODE control to select
“BASS LEVEL” or “TREBLE LEVEL”.
Each time you turn the control, the display
changes as follows:
SOUND FIELD y BASS LEVEL y
TREBLE LEVEL
2 Turn SOUND SELECT control to adjust
the level.
To exit the bass and treble
settings
If you do not perform any operations for
4 seconds, the display automatically returns to
the original display.
44
GB
Page 45
Selecting the surround effect
Press SOUND FIELD + or – repeatedly to
select the effect you desire.
Each time you press th e button, the display
changes cycl i cally as follows:
Tip
You can select the surround effect using the buttons on
the unit. Turn SOUND MODE control to select
“SOUND FIELD”, then turn SOUND SELECT
control to select the effect you de sire.
x For DHC-NXM4D
When the headphones are not connected
SBS MULTI1) y A.F.D. AUTO1) y
PRO LOGIC
PLII MUSIC
SURROUND y 2CH SURROUND y
2CH STEREO
x For DHC-NXM4D
When the headphones are connected
HP 2CH y HP SURROUND y HP
VIRTUAL
x For DHC-NXM2D
2CH STEREO y 2CH SURROUND y
VIRTUAL
1)
These sound fields can be selected except when
– t he sy ste m is in stand by for recording or is
– a microphone is connected.
– the pi tc h of the music is adjusted with KEY
– Karaoke mode is selected.
– tune r function and “DVD POWER OFF” are
2)
This sound field can be selected during DVD
function except when
– t he sy ste m is in stand by for recording or is
– a microphone is connected.
– the pi tc h of the music is adjusted with KEY
– Karaoke mode is selected.
1)
1)
1)
2)
recording.
CONTROL
selected.
recording.
CONTROL
y PLII MOVIE1) y
y LINK y LINK
#/2.
#/2.
• SBS MULTI: Sound Broad System Multi
mode. This mode let s yo u enjoy audio
playback of all ty pes of discs from m ul ti ple
speakers.
• A.F.D. AUTO: Auto Format Direct Auto
• PRO LOGIC: Perform s Pr o Lo gi c decoding.
The source recorded in 2 channels is decoded
into 4.1 channels.
• PL II MOVIE: Performs Pro Logic II movie
mode decoding. This setting is ideal for
movies encoded i n D olby Surround. In
addition, this mode can reproduce so und in
5.1 c hannels when watchi ng videos of
overdubbed or old m ovies.
• PL II MUSIC: Performs the Pro Logic II
music mode decoding. This settin g is ideal for
normal stereo sources such as CDs .
• LINK: The front speaker channels are output
at both the front and surround speaker.
• VIRTUAL: Creates 5 sets of virtual speakers
surrounding the listener from a single pair of
actual surround speakers.
Notes
• For DHC-NXM4D, if “NONE” is selected in
surround speaker setup, no sound will be output from
the surround speakers even if “LINK” or “LINK
SURROUND” is selected.
• For some discs, the surround effect may not be as
much as expected.
Sound Adjustment
45
GB
Page 46
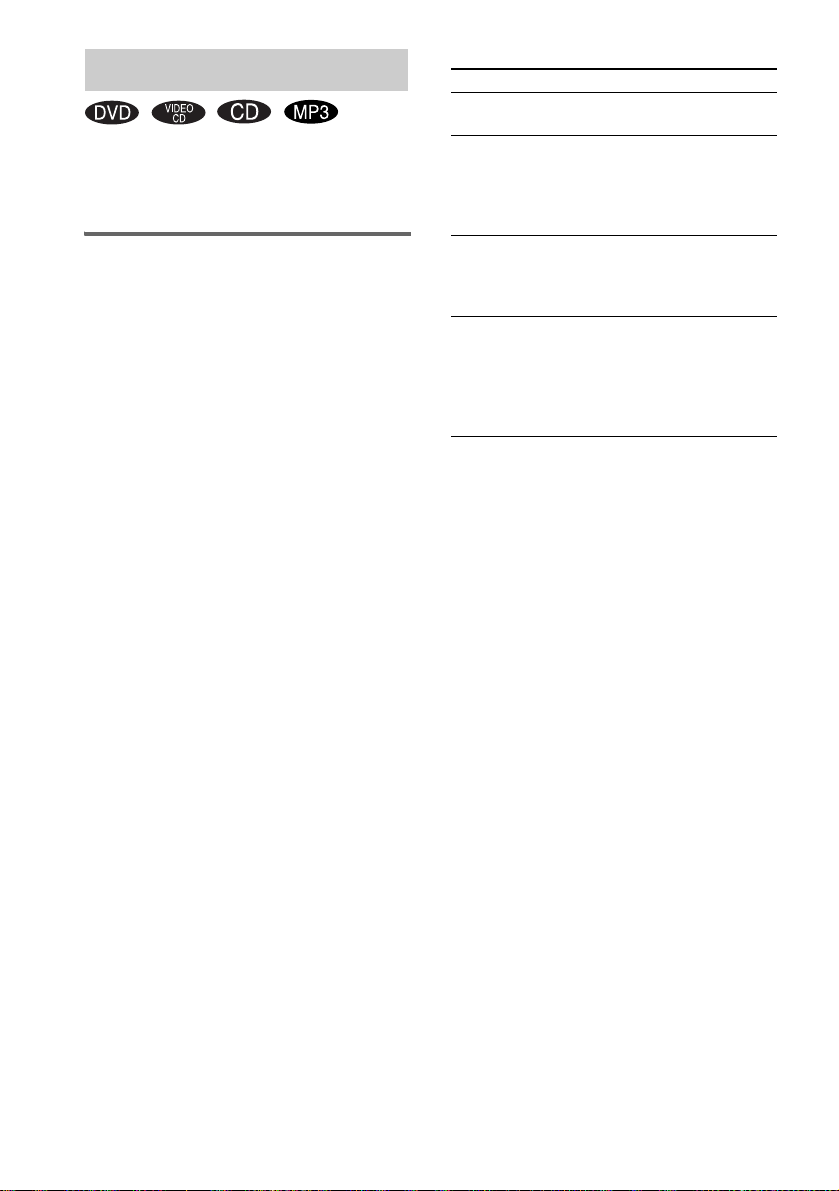
Singing along: Karaoke
You can sing along by turning down the singer’s
voice. You need to connect an optional
microphone.
Enjoying Karaoke
Use buttons on the unit for the operation.
1 Turn MIC LEVEL to MIN to turn down
the microphone control level.
2
Connect an optional microphone to
MIC1
or
MIC2
jack.
3 Press KARAOKE/MPX on the remote
repeatedly to obtain the karaoke effect
you desire.
Each time you press the butto n, the display
changes cycli cal l y as follows:
KARAOKE PON t MPX L
1)
MPX R
t KARAOKE OFF
1)
t
2)
To sing karaoke of multiplex CD, select
“MPX L” or “MPX R ”.
4 Start playing the music.
5 Adjust the microphone volum e by
turning MIC LEVEL.
Other operations
To Do this
Use VIDEO
CDs or DVDs
Cancel karaoke
mode
Adjust the
microphone
3)
echo
Adjust the pitch
of music
1)
Except for DVD
2)
Karaoke mode is canceled.
3)
Except for Latin American model
Notes
• Microphone does not function while the tape deck is
performing the AMS operation (page 42).
• The instrumental sound may be reduced as well as
the singer’s voice whe n the sound is recorded in
monaural.
• The singer’s voice may not be reduced when:
– only a few instruments are playing.
– a duet is being played.
– the source has strong echoes or chorus.
– the singer’s voice deviates from the center.
– the voice on the source is singing in high soprano
or tenor.
• Whe n you c onne c t the microphone, the surround
effect may automatically change (see “Selecting the
surround effect” on page 45) .
• If the disc changes, karaoke mode is canceled.
• With some songs, vocals may not be canceled when
you select “KARAOKE PON”.
• If you select “KARAOKE PON”, BASS LEVEL and
TREBLE LEVEL are set to 0 dB. And even if you
select “KARAOKE OFF” after selecting
“KARAOKE PON”, BASS LEVEL and TREBLE
LEVEL are still 0 dB.
Turn on your TV and switch it to
the appropriate video input.
Turn MIC LEVEL to MIN and
disconnect the microphone from
MIC1 or MIC2 jack, then press
KARAOKE/MPX on the remote
repeatedly until “
Turn ECHO LEVEL to adjust the
echo effect. To cancel the
echoing, turn ECHO LEVEL to
MIN.
Press KEY CONTROL
the remote to suit your vocal
range.
You can adjust the key higher or
lower in 13 halftone steps (
#6).
m” disappears.
# or 2 on
26 –
46
GB
Page 47

Mixing and recording sounds
You can “mix” sounds by playing on e of the
components and si nging or speaking int o a
microphone (not supplied).
The mixed sound can be recorded on a tape.
Use buttons on the unit for the operation.
1 Prepare the source you want to mix.
2 Load a recordable tape in deck B, and
press TAPE A/B repeatedly to select
deck B.
3 Press PLAY MODE on the remote
repeatedly to select “g”
one side. Select “j” (or “RELAY”) to
record on both sides.
to record on
4 Press nN repeatedly to select
recording side, then press
If you select bo t h si des recording or front
side recording, press nN to light up the
N indicator, then press x. If you record
on the reverse side, pr ess nN again to
light up the n indicator, then press x.
x.
5 Press the function button of the source
you want to record (e.g., DVD).
When you want to re cor d from TAPE A,
press TAPE A/B repeatedly until TAPE A
is selected.
6 Press z START.
Deck B stands by for recording.
“REC” flashes.
7 Press z START, and then start singing,
speaking or playing the desired
source.
Recording starts.
To stop recording
Press x.
Notes
• When you se lec t any funct ion othe r than DVD in
step 5, karaoke and key control settin gs are cancel ed.
• Microphone does not function while the tape deck is
performing the AMS operation (page 42).
Tips
• If acoustic feedback (howling) occurs, move the
microphone away from the speakers or change the
direction of the microphone.
• If you want to record your voice through the
microphone only, you can do so by selecting the
DVD function and not playing a disc.
• When high level sound signals are input, the system
automatically adju sts the recording level to pre ve n t
distortion of the recorded sound signal (Auto Level
Control function).
Sound Adjustment
47
GB
Page 48

Timer
Falling asleep to music
— Sleep Timer
You can set the system to turn off after a certain
time, so that you can fall asleep to music.
Press SLEEP.
Each time you press the button, the minute
display (the turn-off time) changes cyclically as
follows:
AUTO* t 90min t 80min t 70min
t … t 10min t OFF
* The system automatically turns off in 100 minutes or
after the current disc or tape finishes playing.
Other operations
To Press
Check the
remaining time*
Change the time
to turn off
Cancel the Sleep
Timer Function
* You cannot check the remaining time if you select
“AUTO”.
Note
Do not set to “AUTO” during Synchro Recording on a
tape.
Tip
You can use the Sleep Timer, ev en if you have not set
the clock.
SLEEP once.
SLEEP repeat edly to select the
time you want.
SLEEP repeatedly until “OFF”
appears.
Waking up to music
—Play Timer
You can wake up to musi c at a preset time. Make
sure you have s et t he clock (see “Setting the
clock” on page 12).
Use buttons on the remote for the operation.
1 Prepare the sound source you want to
play.
• DVD: Load a disc. To start from a
specific track, m ake a program (see
“Creating your ow n pr ogram” on
page 20).
• Tape: Load a tape.
• Tuner: Tune in the preset radio station
(see “Liste nin g to the radi o” on pa ge 39).
2 Press VOLUME + or – to adjust the
volume.
3 Press CLOCK/TIMER SET.
4 Press M or m repeatedly to select
“PLAY SET?”, then press ENTER.
“ON” appears and the hour indication
flashes.
5 Set the time to start playing.
Press M or m repeatedly to set the hour, th en
press ,.
The minute indication flashes.
Press
M or m repeatedly to set the minute,
then press ENTER.
6 Set the time to stop playing following
the same procedure as step 5.
7 Press M or m repeatedly until the
desired sound source appears.
Each time you press the button, the display
changes cyclical l y as follows:
t
TUNER y DVD PLAY
t
TAPE PLAY
T
T
48
8 Press ENTER.
The type of timer (“PLAY TIMER”), the
start time, the stop time, and the sound
source appear in tu rn, before the origin al
display returns.
GB
Page 49

9 Press ?/1 to turn off the system.
Other operations
To Do this
Check the setting 1 Press CLOCK/TIMER
Change the setting Start over from step 1.
Cancel the timer
Notes
• You cannot activate the Play Timer and Rec Timer at
the same time.
• If you use the Play Timer and the Sleep Timer at the
same time, the Sle ep Timer has priority .
• The system turns on 15 seconds before the preset
time. Do not operate the system from the time the
system turns on until the play starts.
• If the system is on 15 seconds before the preset time,
the Play Timer will not be activated .
• You cannot use the optional component connected to
VIDEO/SAT IN L/R jacks as the sound source for
Play Timer.
SELECT.
2 Press M or m repeatedly
until “PLAY SELECT?”
appears, then press ENTER.
1 Press CLOCK/TIMER
SELECT.
2 Press M or m repeatedly
until “TIMER OFF?”
appears, then press ENTER.
Timer recording radio programs
—Rec Timer
You can record a pr eset radio station fr o m a
specified time.
To timer record, you must fi rst preset the ra dio
station (see “Presetting radio stat io ns” on
page 38) and set the clock (s ee “Setting th e
clock” on page 12).
Use buttons on the remote for the operation.
1 Tune in the preset radio station (see
“Listening to a preset station” on
page 39).
2 Press CLOCK/TIMER SET.
“PLAY SET?” appears.
3 Press M or m repeatedly to select “REC
SET?”, then press ENTER.
“ON” appears a nd t he hour indication
flashes.
4 Set the time to start recording.
Press M or m repeatedly to set the hour, then
press ,.
The minute indication flashes.
Press
M or m repeatedly to set the minute,
then press ENTER.
5 Set the time to stop recording following
the same procedure as step 4.
The type of timer (“REC TIMER”), the start
time, the stop time, and the preset radio
station to be recorded (e.g., “TUNER FM
5”) appear in turn, before the original
display returns.
6 Load a recordable tape into deck B.
7 Press ?/1 to turn off the system.
Timer
continued
49
GB
Page 50

Other operations
To Do this
Check the setting 1 Press CLOCK/TIMER
Change the setting Start over from step 1.
Cancel the time r
Notes
• You cannot activate the Play Timer and Rec Timer at
the same time.
• If you use the Rec Timer and the Sleep Timer at the
same time, the Sleep Ti mer has priority.
• Th e system turns on 15 seconds before the pre se t
time. Do not operat e the system from the time the
system turns on until the play st ar t s.
• If the system is on 15 seconds before the preset time,
the Rec Timer will not be activated.
• Th e vol ume is reduced to minimum during
recording.
• Note that if the Rec Timer is set at the same time as
the Play Timer sound source is se t to ta pe , the Rec
Timer sound may be recorded onto the ta pe.
SELECT.
2 Press M or m repeatedly
until “REC SELECT?”
appears, then press ENTER.
1 Press CLOCK/TIMER
SELECT.
2 Press M or m repeatedly
until “TIME R OFF?”
appears, then press ENTER.
Display
Turning off the display
— Power Saving Mode
The demonstration display (display window and
buttons lighting a nd f la shing even when the
system power is off) and the clock display can
be turned off to minimize the amount of power
consumed during standby (Power Saving
Mode).
Press DISPLAY repeatedly while the
system is off until the demonstration
display or the clock display disappears.
To cancel Power Saving Mode
Press DISPLAY while the system is off. Each
time you p ress the button, the di splay switches
cyclically as fo ll ows:
Demonstration display t Clock display* t
No display (Power Saving Mode)
* “– –:– –” appears if you ha ve not se t the cl oc k.
Tips
• The timer continues to operate in Power Saving
Mode.
?/1 indicator lights up even in Power Saving Mode.
•
50
GB
Page 51

Adjusting the brightness
Viewing information
of the display back light
Press DIMMER on the unit repeatedly to
select the desired setting while the system
is on.
The display changes cyclically as follow s:
DIMMER OFF t DIMMER 1 t DIMMER 2
t DIMMER 3*
* DIMMER 3 is the darkest.
about the disc in the
display
You can check the playing time and remaining
time of the current track or that of the disc.
When a DVD/CD -TEXT disc or a disc with
MP3 audio tracks or JPEG image f ile is loaded,
you can also c heck the inform ation recorded on
disc, such as the titles.
When the unit detects DVD/CD-TEXT discs,
the “TEXT” indication appears in the display.
When the unit detects MP3 discs, the “MP3”
indication appears in the display.
Checking the r emaining time
and titles (DVD/VIDEO CD/CD/
MP3/JPEG)
Press DISPLAY during Normal Play.
Each time you press the button, the display
changes cyclically as follows:
x When playing a DVD
Elapsed playing time of the current title t
Remaining time of the current title t
Elapsed playing time of the current chapter t
Remaining time of the current chapter t
Title1) t Clock display (for eight seconds) t
Bass level (for eight seconds) t Treble level
(for eight seconds) t Sound field status (fo r
eight seconds ) t Karaoke effect status (for
eight seconds)
x When playing a CD/VIDEO CD without
PBC function
Elapsed playing time of the current track t
Remaining time of the current track t
Elapsed playing time of the disc3) t
Remaining time of the disc
Clock disp lay (for eight seconds) t Bass level
(for eight seconds) t Treble level (for eight
seconds) t Sound field status (for eight
seconds) t Karaoke effect status (for eight
seconds)
2)
3)
t Track title1) t
2)
Display
continued
51
GB
Page 52

x When playing a VIDEO CD with PBC
functions (Ver. 2.0)
Elapsed playing time on the current scene4) t
Clock display (for eight seconds) t Bass level
(for eight seconds) t Treble level (for eight
seconds) t Sound field status (for eight
seconds) t Karaoke effect stat us (for eight
2)
seconds)
x When playing an MP3
Elapsed playing time of the current track t
Remaining time of the current track t Track
1)5)
title
t Album name1) t Clock display (for
eight seconds) t Bass level (for eight seconds)
t Treble level (for eight seconds) t Sound
field status (for ei ght seconds) t Karaoke
effect status (for eight seconds)
2)
x When playing a JPEG
Current file number t File name1) t Album
1)
t Clock display (for eight seconds) t
name
Bass level (for eigh t sec o nds) t Treb le level
(for eight seconds) t Sound field status (for
eight seconds) t Karaoke effect status (for
eight seconds)
1)
Only alphabet letters and numbers can be displayed.
In addition, nothing is displayed for discs without
DVD/CD text and file/album name.
2)
When Karaoke effect is activated.
3)
These are not displayed during Shuffle Play or
Program Play.
4)
May not appear with still images.
5)
When you play back a track with an ID3 tag ver. 1.0
or ver. 1.1, the ID3 tag appears. The ID3 tag displays
only the track title infor mation.
2)
Checking the total playing
time and titles (DVD/VIDEO
CD/CD/MP3/JPEG)
Press DISPLAY in stop mode.
Each time you press t he button, the display
changes cyclical l y as follows:
x When a DVD/VIDEO CD/CD/MP3/JPEG is
in Normal Play mode
Total playing time of the current disc or total
album number of the disc
of the current alb u m
4)
or album name4) t Clock display (for
label
eight seconds) t Bass level (for eight seconds)
t Treble level (for eight seconds) t Sound
Field status (for eight seconds) t Kar aoke
effect status (for eight seconds)
1)
For discs with MP3 audio tracks in Normal P lay or
Shuffle Play mode or JPE G image files in Norma l
Play mode
2)
For discs with MP3 audio tracks in Album Play or
Album Shuffle Play mode or JPEG imag e files in
Album Play mode
3)
For discs with DVD/CD text
4)
For discs with MP3 audio tracks or JPEG image
files, album titles or volume la be l ma y not be
displayed depending on the play mode.
5)
When Karaoke effect is activated.
x When a VIDEO CD/CD/MP3 is in Program
Play mode
The last track number of the program t
Program step number t Disc title
2)
or album name2) or track title
label
display (for eight seconds) t Bass level (for
eight seconds) t Treble level (for eight
seconds) t So und Field status (for ei ght
seconds) t Karaoke effe ct status (for eight
3)
seconds)
1)
For discs with CD text
2)
For discs with MP3 audio tracks
3)
When Karaoke effect is activated.
1)
or total track number
2)
t Disc title3) or volume
5)
1)
or volume
1)2)
t Cl ock
52
GB
Page 53
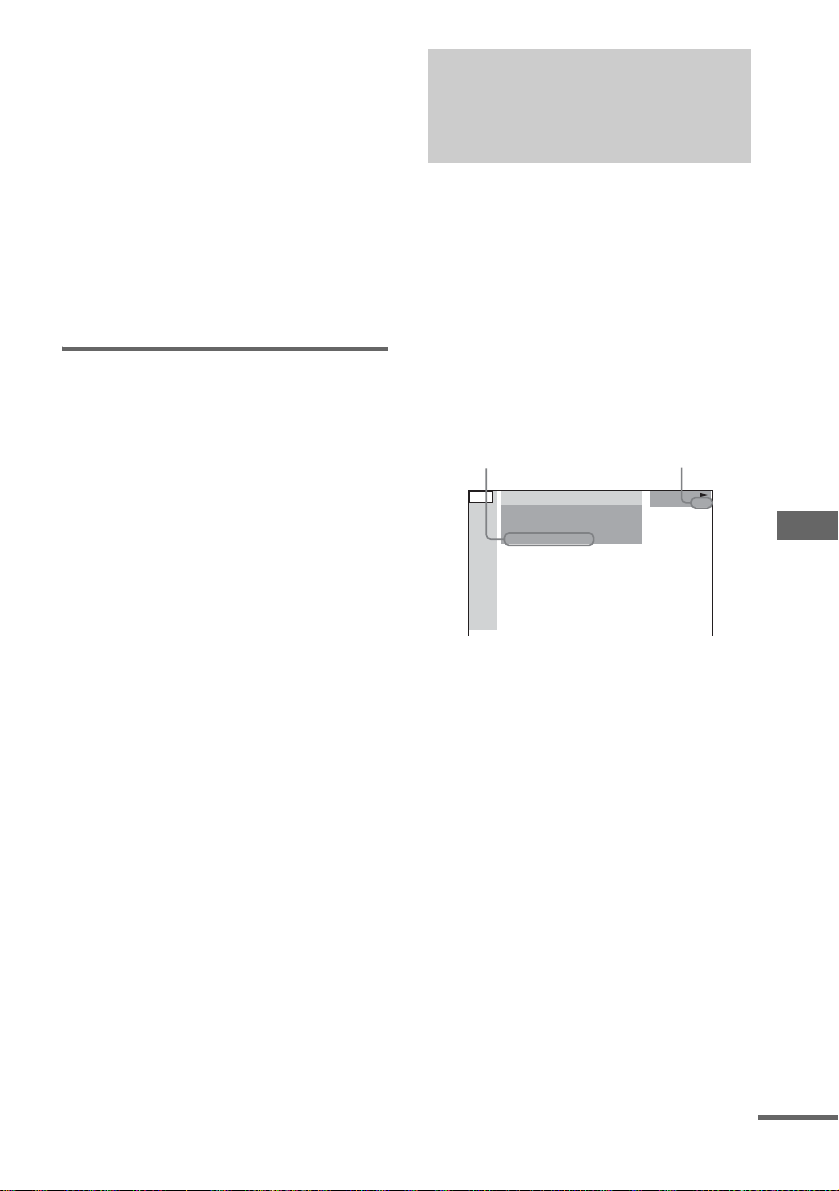
Notes
• Depending on the DVD, the disc information may
not be displayed.
• Depending on the disc, some DVD/CD-TEXT
information may not appear.
• Wit h formats other than ISO9660 level 1 and 2,
folder names or file names may not be displayed
correctly.
Tips
• You can check the playing time of the disc using the
Control Menu (see “ V iewing information about the
disc in the on-screen display” on page 53).
• When pla ying VIDEO CDs with PBC functions,
only the playing time of the scene is displayed.
Checking the tuner
information (T U NE R)
Press DISPLAY while listening to the radio.
Each time you press th e button, the display
changes cycl i cally as follows:
Preset number* and frequency t Clock display
(for eight seconds) t Bass level (for eight
seconds) t Treble level (for eight seconds) t
Sound Field status (f or eight seconds)
* Preset number is dis pla yed only if you preset radio
stations (page 38).
Viewing information
about the disc in the onscreen display
You can check the playing time and remaining
time of the current title, chapter or track.
You can also check the DVD/CD text and file/
album name recorded on the disc.
1 Press DVD DISPLAY during play.
The Control Menu a ppears.
2 Press DISPLAY to change the time
information.
The display and the ki nds of time that you
can change depe nd on the disc you are
playing.
Time information Disc type
1: DVD
1 2 ( 2 7 ) MAKING SCENE
)
1 8 ( 3 4
T
1 : 3 2 : 5 5
DVD
Display
x When playing a DVD
• T **:**:**
Elapsed playing time of the current title
• T–**:**:**
Remaining time of the current title
• C **:**:**
Elapsed playing time of the current chapter
• C–**:**:**
Remaining time of the current chapter
• **:**:**
Elapsed playing time of the menu or current
title without chapter
x When playing a VIDEO CD with PBC
functions (Ver. 2.0)
• **:**
Elapsed playing time of the current scene
continued
53
GB
Page 54
x When playing a CD/VIDEO CD without
PBC function
• T **:**
Elapsed playing time of the current track
• T–**:**
Remaining time of the current track
• D **:**
Elapsed playing time of the current disc
• D–**:**
Remaining time of the current disc
x When playing an MP3
• T **:**
Elapsed playing time of the current track
• T–**:**
Remaining time of the current track
To turn off the Control Menu
Press DVD DISPLAY repeatedly until the
Control Menu disappears.
Notes
• On ly a lpha be t le tt ers and numbers can be displayed.
• Dep e nding on the disc being played, the syste m can
only display a limited number of characters. Also,
depending on the disc, all text cha r acte r s a re not
displayed.
• With formats other than ISO9660 level 1 and 2,
folder names or file names ma y not be displayed
correctly.
Checking the date information
You can check th e da te in forma tio n duri ng pl ay
when the Exif* tag is recorded in the JPEG
image data.
Press DVD DISPLAY during play.
The Control Menu appears.
Date information
1:MOUNTAIN
FAMILY
) BIRTHDAY
1 ( 2 0
1 / 1 / 2004
* “Exchangeable Image File Format” is a digital
camera image format defined by th e Japa n
Electronics and Information Technology Industries
Association (JEITA).
Note
If there is no date information or data is dam ag ed on
the disc, the system cannot display the date
information.
Tip
You can change the date information order by selecting
“JPEG DATE” setting in “CUSTOM SETUP”
(page 28).
JPEG
54
GB
Page 55
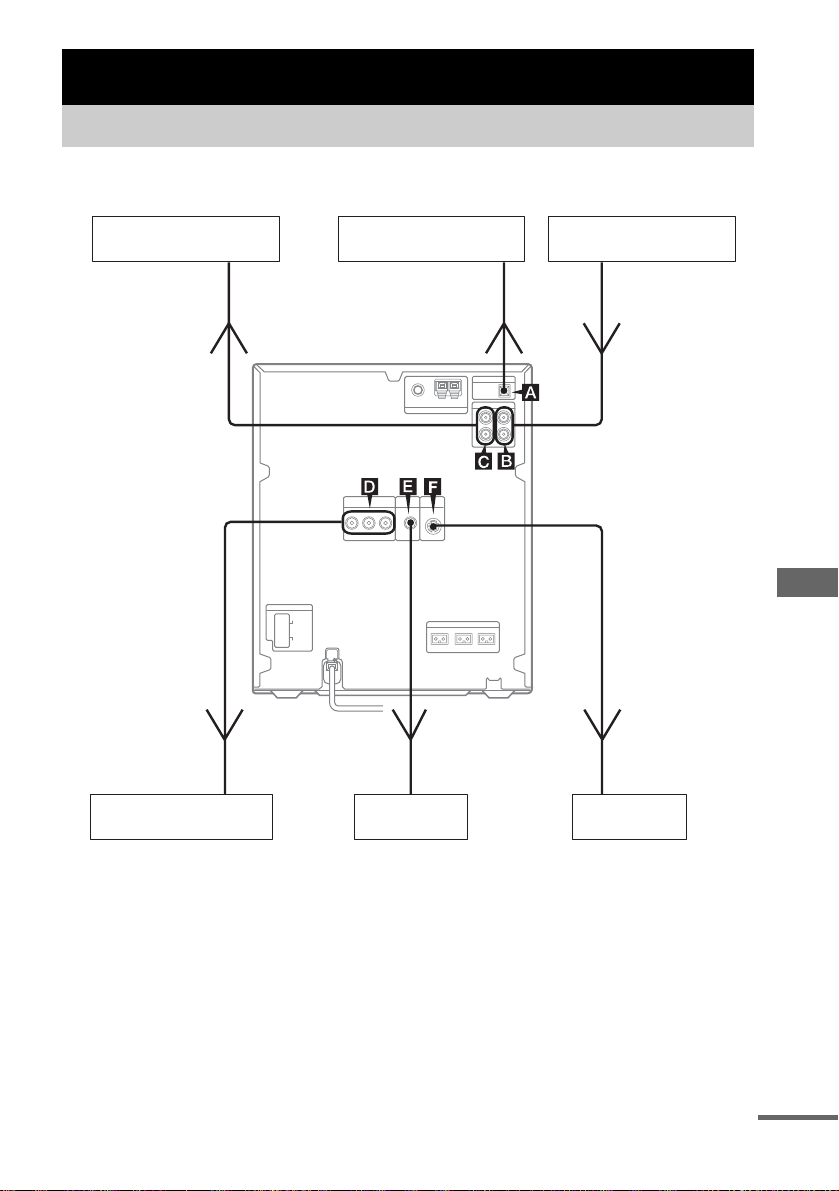
Optional Components
Hooking up optional components
To enhance your system, you can connect optional components. Refer to the operating instruc tio n s
provided with each com ponent. DHC-NXM2D i s used for illustration purpose.
VCR or MD deck
To the audio input
jack of the connected
component
To the component
video input jack of
the TV or projector
TV or projector
Amplifier
To the digital input jack of
the digital component
To the video
input jack of a TV
TV
VCR or satellite tuner, etc.
From the audio output
jack of the connected
component
Optional Components
To the S video input
jack of the TV
TV
A DIGITAL OUT jack (DHCNXM2D only)
Use a digital optical cord (square, not supplied)
to connect an amplifier with a digital optical
input jack. Sound is then output when the system
function is set to DVD. By connecting this
system to the optical input jack of the optional
amplifier equipp ed with Dolby Digita l or D T S
decoder, you can enjoy the 5.1 channel sound. If
the jack is covered with a cap, remove it before
use.
Note
When playing a CD-DA, VIDEO CD or MP3 audio
tracks, you cannot output digital audio.
B VIDEO/SAT IN L/R jacks
Use audio cords (not supplied) to conn e ct an
optional analog component (VCR or satellite
tuner, etc.) t o these jacks. You can then recor d or
listen to from the component through this
system.
continued
55
GB
Page 56

C VIDEO/SAT OUT L/R jacks
Use audio cords ( n ot supplied) to connect an
optional analog component (VCR or MD deck,
etc.) to these j acks. You ca n then outp ut audio to
the component from this system.
D COMPONENT VIDEO OUT
jacks
Use an optional vi deo cord to connect a TV. If
your TV accept progressive format file signals,
you must use this connection and set
“COMPONENT OUT” to “PROGRESSIVE” in
“Adjusting the TV scr een” (page 29).
E VIDEO OUT jack
Use a video cable (su pplied) to connect the
video input of TV to this jack.
F S VIDEO OUT jack
Use an S video cord (not supplied) to connect an
optional TV to this jack. You can enjoy higher
quality video images.
Listening to audio from a connected component
Use buttons on the unit for the operation.
1 Connect audio cords.
See “Hooking up optional components” on
page 55.
2 Press VIDEO/SAT to switch the
function to VIDEO or SAT.
Start playing the connected component.
Notes
• If you cannot select “SAT” by pressing VIDEO/SAT
repeatedly, hold down VIDEO/SAT and then press
?/1 while the power is on. The function will change
from “VIDEO” to “SAT”, and “SAT” wil l appear in
the display. To change back to “VIDEO”, repeat the
same procedure.
• If the sound is distorted or too loud when “VIDEO”
is selected or you want to switch back to “SAT”,
repeat the operation descri be d abo ve to switch to
“SAT”.
• You cannot switch the VIDEO/SAT function in
Power Saving Mode (page 50).
56
GB
Page 57

Enjoying the 5.1 channel
Recording on a connected
sound with the optional
amplifier
(DHC-NXM2D only)
1 Connect a digital optical cord.
See “Hooking up optional components” on
page 55.
2 Connect 6 speakers to an AV amplifier
equipped with a decoder.
For the speaker placement, refer to th e
operating instructions supplied with the
connected amplifier.
3 Switch the output to 5.1 channel Dolby
Digital sound or 5.1 channel DTS
sound.
See “Changing the sound/subtitle/
language” on page 25.
Tip
You cannot use the surround effect of this syste m.
Recording audio from a connected component
1 Connect audio cords.
See “Hooking up optional components” on
page 55.
2 Start recording manually.
See “Recording on a tape m anually” on
page 43.
component
Making an analog recording
1 Connect audio cords.
See “Hooking up optional components” on
page 55.
2 Start recording.
Refer to the operating instructions provided
with the connected component.
Making an analog recording
from a VIDEO CD to a video
tape
1 Connect optional audio cords from the
VIDEO/SAT OUT L/R (audio) jacks and
the supplied video cable from the
VIDEO OUT jack to your VCR.
2 Start recording.
Refer to the operating instructions provided
with the connected component.
Note
If you connect a video deck between this system and
the TV, you may experience video leakage when
watching the video signal from thi s syst em . Do not
connect a video deck between this sys te m and the T V.
Optional Components
57
GB
Page 58
Troubleshooting
Problems and remedies
Should you encounter a problem with your
system, do the following:
1 Make sure the power cord and speaker
cords are correctly and firmly connected.
2 Find your problem in the troubleshooting
checklist below and take the indicated
corrective action.
If the problem persists after doing all of the
above, consult yo ur nearest Sony dealer.
When the ?/1 indicator flashes
Immediately unplug the power co rd and
check the follow i ng i tems.
• If your system has a voltage selector, is the
voltage selector set to the correct voltage?
Check the voltage for your region, the n
make sure the voltage selector is set
correctly.
• Are the + and – speaker cords shor tcircuited?
• Are you using th e supplied speakers?
• Is anything blocking the ventilation holes
on the rear of the system?
Check all the above items and fix any
problems found. After ?/1 indicator
stops flashing, reconnect the power cord
and turn on the sys t em. If the indicator still
flashes, or if the cause of the problem cannot
be found even after checking all the above
items, consult yo ur nearest Sony dealer.
General
The display starts flashing as soon as you
plug in the power cord even though you have
not turned on the system (see step 5 of
“Hooking up the system” (page 7)).
•Press ?/1 while the system is off. The
demonstration disappe ars.
“– –:– –” appears in the displa y .
• A power interruption has occurred. Set the clock
(page 12) and timer set tings (pages 48 and 49)
again.
The clock setting/radio presetting/timer is
canceled.
• Redo the following:
– “Setting the clock” (page 12)
– “Presetting radio stations” (page38)
– “Falling asleep to music” (page 48) and
“Waking up to music” (page48)
– “Timer recording r ad io progr a ms ” (pa ge 49)
There is no sound.
• Press VOLUME + or turn VOLUME control on
the unit clockwise.
• Make sure the headphones are not connected.
• Check the speaker connections (page8).
• Ther e is no aud io out put dur ing Rec Timer.
• The system is in pause mode or in slow-motion
play mode. Press nN to return to normal pla y
mode.
There is severe hum or noise.
• Move the system away from the source of noise.
• C onne c t the system to a different wal l outlet.
• Install a noise filter (comme r ci ally available) to
the power cord.
The timer cannot be set.
• Set the clock again (page 12).
The timer does not function.
• Check the timer setting and set the correct time
(pages 48 and 49).
• Cancel the Sleep Timer Function (page 48).
The remote does not function.
• Rem ove the obst acle .
• Move the remote closer to the system.
• Point the remote at the system’s sensor.
• Replace the batteries (R6/size AA).
• Locate the system away from the fluoresce nt light.
58
GB
Page 59
There is acoustic feedback.
• Reduce the volume.
• Move the microphone away from the speakers or
change the direction of the microphone.
The color irregularity on a TV screen persists.
• Turn of f the TV set onc e , then turn it on after 15
to 30 minutes. If the color irregularity still
persists, place t he s pe ak ers farther away from the
TV set.
The sound from the connected source is
distorted.
• If “VIDEO” appears in the display when you press
VIDEO/SAT on the unit, switch the display to
“SAT” (see “Listening to audio fro m a conn ected
component” on page 56).
“CANNOT LOCK” appears in the display.
•Press ?/1 to turn off the system and press again
to turn on. Then follow the sam e procedures in
“When carrying this system” (page 11).
If “CANNOT LOCK” still appears in the display,
contact your Sony dealer or local authorized Sony
service facility.
Speakers
Sound comes from one channel or
unbalanced left and right volume.
• Check the speaker connection and speaker
placement.
• The source being played back is monaural.
• Adjust the balance parameters (pag e 36).
The sound comes from the center speaker
only. (DHC-NXM4D only)
• Depending on the disc, the sound may come from
the center speaker only.
There is no sound from the sub woofer.
• Make sure that the SUBWOOFER setting is set to
“YES” (page 35).
• No soun d is produc e d from the sub woof e r when
you play a DVD that does not have sub woofer
output recorded.
There is no sound from the center speaker.
(DHC-NXM4D only)
• Set the center speaker level to the appropriat e
level.
There is no sound from the surround
speakers. (DHC-NXM4D only)
• Set the surround speakers level to the appropriate
level.
• The software being played back has limited sound
effects. Check the volume with the test tone.
Sound lacks bass.
• Check that the speaker’s + and – jacks are
connected correctly.
DVD/VIDEO CD/CD/MP3/JPEG
player
The disc tray does not open and “LOCKED”
appears.
• Contact your Sony dealer or local authorized Sony
service facility.
The disc tray does not close.
• Place the disc correctly.
• Always close the tray by pressing DVD Z on the
unit. Trying to press the tray closed with your
fingers may cause problems with the pla ye r.
The disc does not eject.
• You cannot eject the disc during CD Synchr o
Recording. Press x to cancel the CD Synchro
Recording, then press DVD Z on the unit to eject
the disc.
• Consult your nearest Sony dealer.
Play does not start.
• Open the disc tray and check whether a disc is
loaded.
• Wipe the disc clean (page 66).
• Replace the disc.
• Place the disc that this system can play (page 5).
• Place the disc correctly.
• Place the disc in the tray with the label side up.
• Remove the disc and wipe away the moisture on
the disc, then leav e the syst em turned o n for a few
hours until the moisture e va por a te s.
• Press nN to start play.
• The region code on the DVD does not match the
system.
• Cancel the Custom Parental Control function
(page 32).
Disc access takes a long time.
• Set “DVD POWER ON” by DVD power manage
function (page 39).
Troubleshooting
continued
59
GB
Page 60

The sound skips.
• W ipe the disc clean (page 66).
• Replace the disc.
• Try moving the system to a place without
vibration (e.g., on top of a stable stand).
• Try moving the speakers away from the s ystem, or
placing them on separate stands. When you listen
to a track with bass sounds at high volum e , the
speaker vibration may cause th e sou nd to skip.
Play does not start from the first track.
• Press PLAY MODE repeatedly until both “PGM”
and “SHUF” disappear to return to Normal Play.
• Resume Play has been selected. Press x in stop
mode, then start playback (page 17).
• The title, DVD or PBC menu automatically
appears on the TV screen.
Playback starts automatically.
• The DVD features an auto playback function.
Playback stops automatically.
• Some discs may contain an auto pause sign al .
While playing such a disc, the playb ack st o ps at
the auto pause signal.
The system turned off during DVD playback.
• If app ro xim at e ly one hour pas se s with DVD
playback paused or with the DVD top menu or a
DVD menu displayed during DVD playback, the
system automaticall y tu rn s off.
You cannot perform some functions such as
Stop, Search, Slow-motion Play, Repeat Play,
Shuffle Play or Program Play.
• Depending on the disc, you may not be able to do
some of the operations above. Refer to the
operating instructions supplied with the disc.
MP3 audio track cannot be played back.
• Re co rd ing was not performed according to the
ISO9660 level 1 or level 2 format, or Joliet in the
expansion format.
• The MP3 audio track does not have the extension
“.MP3”.
• Th e data is not stored in MP3 format.
• Di sc s con taining files other than MPEG1 Audio
Layer-3 files cannot be played.
• Set “DATA CD PRIORITY” to “MP3” in the
“CUSTOM SETUP” setting ( pa ge 27).
• Playback is possible up to 8 levels.
• Th e dis c contains more than 99 albums (the
maximum number of MP3 audio tracks that can be
contained on an album is 250).
MP3 audio tracks take longer to play back than
others.
• After the system reads all tracks on the discs,
playback may take more time than usual if:
– the number of albums or tracks on the disc is
very large.
– the album and track or ga niz ation structure is
very complex.
The JPEG image file cannot be played.
• The DATA CD is not recorded in JPEG format
that conforms to ISO9660 Level 1/Level 2 or
Joliet.
• The JPEG image file does not have the extension
“.JPG” or “.JPEG”.
• The data is not formatted in JPEG even though it
has the extension “.JPG” or “.JPEG”.
• Length or width of image is more than 4720 dots.
• Set “DATA CD PRIORITY” to “JPEG” in the
“CUSTOM SETUP” setting (page 27).
• Pla yba c k is possible up to 8 levels.
• Pro gr es sive JP EG fo rma t f ile s c an not be pla ye d
on this system.
• JPEG image files with a high width to length ratio
cannot be played.
• The disc c onta ins more than 99 albums (the
maximum number of JPEG image files that can be
contained on an album is 250).
The album title, track title and ID3 tag do not
appear correctly.
• Use a disc that conforms with ISO9660 level 1,
level 2, or Joliet in the expansion for ma t.
• The ID3 tag displays only the track title
information and applies only to version 1.0 or
version 1.1.
The disc title, album ti tle, track title and ID3 tag
appear as spaces. The CD char acters appear
as spaces.
• The ch ara ct e r code s tha t c an be dis pla ye d by this
system are numbers and alphabet only. Other
characters appear as spaces.
The sound loses stereo effect when you play a
DVD, VIDEO CD, CD or MP3.
• Select “KARAOKE OFF” in step 3 of “Singing
along: Karaoke” (page 46).
• Make sure the system is connected appropriately.
60
GB
Page 61
The surround effect is difficult to hear when
you are playing a Dolby Digital or MPEG audio
sound track.
• Make sur e the so und f ie ld func tion is on
(page 45).
• Check the speaker connections and s ettin g (pages
7 and 35).
• Depending on the DVD, the output signal may not
be the entire 5.1 channel. It may be monaural or
stereo even if the sound track is recorded in Dolby
Digital or MPEG audio format.
The recording was not done properly when
making a digital recording from the CD/DVD
player of this system to an opti onal
component connected to the DIGITAL OUT
jack. (DHC-NXM2D only)
• The DIGITAL OUT jack of this system is not to
be used for recording. Make an analog recording
on an optional component connected to the
VIDEO/SAT OUT L/R jacks.
There is excessive wow or flutter when
recording audio from a DVD.
• Set “LFE” under “SPEAKER SETUP” to “OFF”
(page 37).
Picture
There is no picture.
• Press DVD.
• Check that the system is connected securely.
• The video cable is damaged. Replace it with a new
one.
• Make sure you connect the system to the video
input jack of your TV (p a ge 8).
• Make sure you turn on the TV and operate the TV
correctly.
• Make sure you select the video input on the TV so
that you can view the pictures from the system.
• When you pla y a VIDEO CD , make sure you se t
the color system correctly, acc or ding to your TV
(color) system (except for Latin American
model).
• Make sure you connect the system and your TV
using only the supplied video cable so that you can
view game images.
• To fo rc e the system to switch to inte r la ce when
PROGRESSIVE is selected, make sur e the
function is set to DVD, then hold down x on the
unit and press DISPLAY.
Picture noise appears.
• Clean the disc.
• If video from this system has to go through your
VCR to get to your TV, the copy-protection
applied to some DVD programs co uld a ffec t
picture quality. If you still e xpe r ien c e probl em s
after checking your connections, please try
connecting this system dir e c tly to your TV’s
S video-input, if your TV is eq uipped with this
input (page 8).
• When you play a VIDEO CD, the color system is
different. Set th e c o lor system to match your TV
(page 30) (except for Latin American model).
The aspect ratio of the screen cannot be
changed even though you set “TV TYPE” in
“SCREEN SETUP” in the Setup Dis pla y when
you play a wide picture.
• The aspect ratio is fixed on your DVD.
• If you connect the system with the S video cable,
connect directly to the TV. Otherwise, you may
not change the aspect ratio.
• Depending on the TV, you may not change the
aspect ratio.
Messages do not appear on the screen in the
language you want.
• Select the language you want for the on-screen
display in “OSD” under “LANGUAGE SETUP”
in the Setup Display (page 27).
The language for the sound track cannot be
changed.
• Multilingual tracks are not recorded on the DVD
being played.
• The DVD prohibits changing the language for the
sound track.
The subtitle language cannot be changed.
• Multilingual subtitles are not recorded on the
DVD being played.
• The DVD prohibits changing the subtitles.
The subtitle cannot be turned off.
• The DVD prohibits turning off subtitles.
The angles cannot be changed.
• Multi-angles are not recorded on the DVD being
played.
• The DVD prohibits changing the angles.
Troubleshooting
continued
61
GB
Page 62

Tuner
Severe hum or noise/stations cannot be
received. (“TUNED” or “STEREO” flashes in
the display)
• Se t the pr ope r band a nd frequency (page 38).
• Connect the antenna properly (page 8).
• Find a place and an orientation that provide good
reception, then set up the antenna again. If you
cannot obtain good reception, we recommend you
connect a commercially avai lable external
antenna.
• The supplied FM lead antenna receives signals
along its entire length, so make sure you extend it
fully.
• Locate the antennas as far away from th e speaker
cords as possible.
• Consult your nearest Sony dealer if the supplied
AM antenna has come off the plastic st an d.
• Try turning off surrounding electrical equipme nt.
• Set “DVD POWER OFF” by DVD power manage
function (page 39).
A stereo FM program cannot be received in
stereo.
• Press FM MODE until “MONO” disappears.
Tape deck
The tape does not record or play, or there is a
decrease in sound level.
• Th e hea d s are dir ty. Cl ea n them (page 66).
• Th e recor d/playback heads are magneti zed.
Demagnetize them (page66).
The tape does not erase completely.
• Th e recor d/playback heads are magneti zed.
Demagnetize them (page66).
There is excessive wo w or flutter, or the sound
drops out.
• The capstans or pinch rollers are dirty. Clean them
(page 66).
Noise increases or the high frequencies are
erased.
• Th e recor d/playback heads are magneti zed.
Demagnetize them (page66).
The tape does not record.
• No cassette is loaded. Load a cassette.
• The ta b has b een r em ove d f ro m the cassette.
Cover the broken tab with adhesive ta pe
(page 66).
• The ta pe has wou nd to the en d.
Switching to tape function from tuner takes a
long time until sound comes out.
• Set “DVD POWER ON” by DVD power manage
function (page 39).
Optional components
There is no sound.
• Refer to General item “There is no sound.”
(page 58) and check th e condition of the system.
• Connect the component properly (page 55) while
checking:
– if the cords are connected properly.
– if the cord plugs are firmly inserted all the way.
• Turn on the c onne c ted com ponent.
• Refer to the operating instructions supplied with
the connected component and start playing.
Switching to VIDEO or SAT function from
tuner takes a long time until sound comes out.
• Set “DVD POWER ON” by DVD power manage
function (page 39).
If the system still does not
operate properly after performing
the above measures, reset the
system as follows:
Use buttons on the unit for the operation.
1 Press ?/1 to turn off the system.
2 Press DISPLAY repeatedly until the
demonstration display or the clock display
appears.
3 Disconnect the power cord.
4 Reconnect the power cord.
5 Press x, DIMMER and ?/1 at the same
time.
The system is reset to the f actory setting s except
for DVD settings. You should set the settings
you made, such as the preset stations, clock, and
timer.
62
GB
Page 63
To return the DVD setup to the
default settings*, perform reset
as follows:
1 Press DVD SETUP in stop mode.
2 Press M or m repeatedly to select “SET UP”,
then press ENTER.
3 Press M or m repeatedly to select “RESET”,
then press ENTER.
4 Press M or m repeatedly to select “YES”,
then press ENTER.
It takes a few seconds to complete. Do not
press ?/1 when resetting the system.
* Except for Parental Control settings
Messages
One of the follow i ng m essages may appear or
flash in the displ ay during operation.
DVD/VIDEO CD/CD/MP3/JPEG
Cannot Play
• A disc that cannot be played was inserted
(page 5).
• A disc with an unsupported Region code was
inserted.
Data Error
The JPEG file is an unsupported forma t.
No Disc
There is no disc in the unit.
Not in Use
You pressed an invalid button.
Play Limit
The MP3 file cannot be played.
Please Wait
The system is initi a liz ing itself.
Push STOP!
You pressed PLAY MODE or CD SYNC on the
unit during play.
Step FULL!
You tried to program 25 or more tracks (steps).
Troubleshooting
Tape
No Tab
You cannot record the tape beca use the tab has been
removed from the cassette.
No Tape
There is no tape in the tape deck.
continued
63
GB
Page 64

Timer
OFF TIME NG!
The Play Timer or Rec Timer start and end times are
set to the same time.
PUSH SELECT!
You tried to set the clock or timer during timer
operation.
SET CLOCK!
You tried to select the timer with the clock not set .
SET TIMER!
You tried to select th e timer with the timer n ot set.
64
GB
Page 65
Additional Information
Precautions
On operating voltage
Before operating the system, check that the operating
voltage of your system is identical with the voltage of
your local power supply.
On safety
• The unit is not di sc onne c te d from the A C power
source (mains) as long as it is connec te d to the wall
outlet, even if the unit itse lf has been turned off.
• Unpl ug the system from the wall outlet (mains ) if it
is not to be used for an extended period of time. To
disconnect the power cord (mains le ad), pull it out by
the plug. Never pull the c or d itse lf .
• Should any solid object or liquid fall into the system,
unplug the system and have it checked by qua lified
personnel before operating it any furthe r .
• AC power cord must be changed only at the qualified
service shop.
On placement
• Do not place the system in an inclined position.
• Do not place the system in locations where it is;
– Extremely hot or cold
– Dusty or dirty
– Very hum id
– Subject to vibrations
– Subject to direct sunlight.
• Use caution when placing the unit or speakers on
surfaces that have been specially treat ed (wi th wa x,
oil, polish, etc.) as staining or discolo ration of the
surface may result.
On heat buildup
• Although the system heats up during operation, this
is not a malfunction.
• P lace the system in a location wit h adequate
ventilation to prevent heat buildup in the system.
• If you continuously use this system at a high volume,
the cabinet temperature of th e to p, si de and bot tom
rises considerably. To avoid burning yourself, do not
touch the cabinet.
• To pre ven t a m al fu nc tion, do not cover the
ventilation hole for the cooling fan .
In case color irregularity is observed
on nearby a TV screen
With the magneti cally shield ed type of spe aker system,
the speakers can be installed near a TV set. Howe ve r,
color irregularity may still be observe d on the TV
screen depending on the type of your TV se t.
If color irregularity is observed…
Turn off the TV set, then turn it on after 15 to 30
minutes.
If color irregularity is observed
again…
Place the speakers farther away from the TV set.
IMPORTANT NOTICE
Caution: This syste m is capable of holding a still
video image or on-screen display image on your
television screen indefinitely. If you leave the still
video image or on-screen display image displayed
on your TV for an extended period of time you risk
permanent damage to your tel ev isi on sc ree n .
Projection televisions are especially susceptible to
this.
On operation
• If the system is brought directly from a cold to a
warm location, or is placed in a very damp room,
moisture may condense on the lens inside the CD/
DVD player. Should this occur, the system will not
operate properly. Remove the disc and leave the
system turned on for about an hour until the moisture
evaporates.
• When you move the system, take out any disc.
If you have any questions or problems concerning your
system, please consult your ne are st S ony de a le r .
Additional Information
continued
65
GB
Page 66
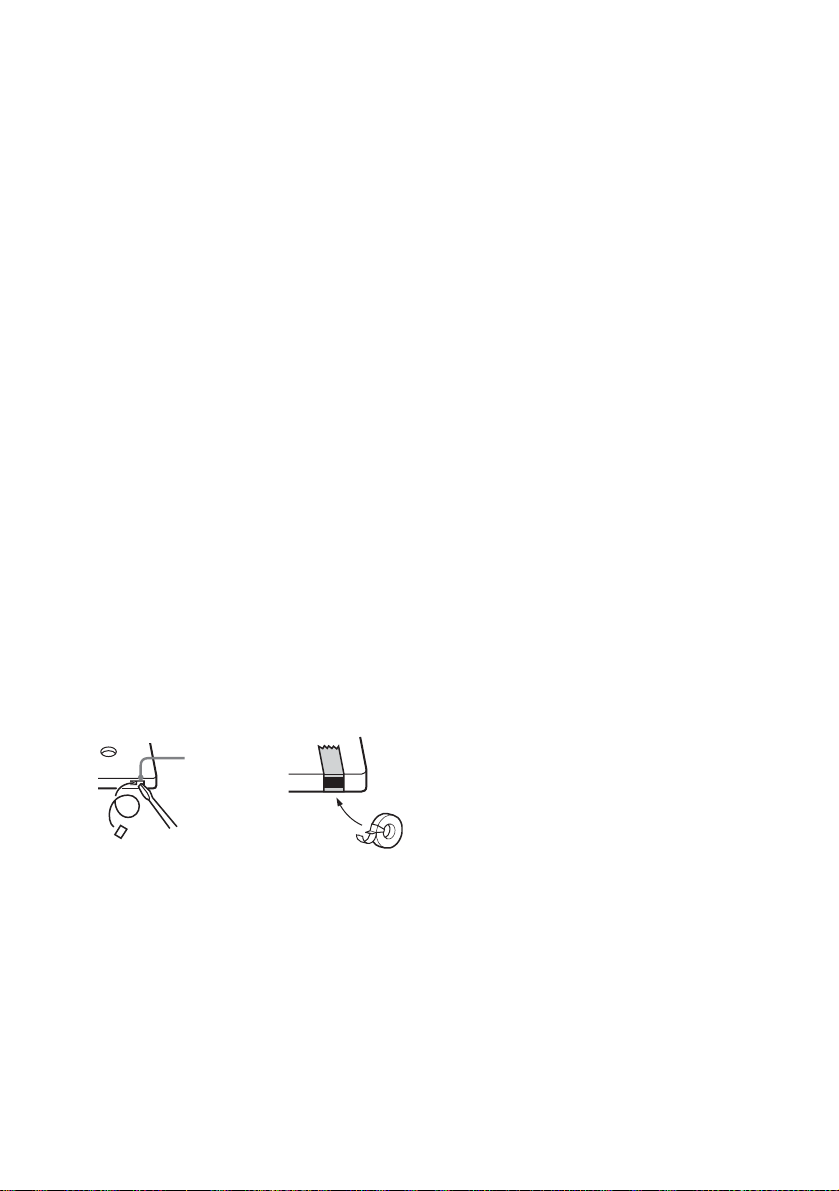
Notes on discs
• Before playing, clean the disc with a cleaning cloth.
Wipe the disc from the center out .
• Do not use solvents such as benzine, thinner,
commercially available cl ean ers or anti-static spray
intended for vinyl LPs.
• Do no t ex pose the disc to direct sunlight or heat
sources such as hot air ducts, nor leav e it in a car
parked in direct sunlight.
• Do not use discs encircled with a protection ring.
This may cause a malfunction to the system.
• Whe n using discs that have glue or similar tacky
substance on the label side of the disc or that use d a
special ink when the label wa s p rin ted, there is a
chance that the disc or label may become attach ed to
parts inside this unit. When this occurs, it may not be
possible to remove the disc, and may also cause this
unit to malfunction. Be sure to check that the label
side of the disc is not sticky before using.
The following types of disc should not be used:
– Rental or used discs with attach ed seal s where th e
glue extends beyond the seal. The perimeter of the
seal on the disc is tacky.
– Discs that have labels printed using a special ink
that feels tacky when touched.
Cleaning the cabinet
Clean the cabinet, panel and co ntro ls with a soft cloth
slightly moistened wi th mild dete rgent soluti on. Do not
use any type of abrasive pad, scouring powder or
solvent such as thinner, benzine or alcohol.
To save a tape permanently
To prevent a tape from being accidentally recorded
over, break off the cassette tab from side A or B as
illustrated.
When using a tape longer than
90 minutes
The tape is very elastic. Do not change the tape
operations such as play, stop, and fast-winding
frequently. The tape may get entangled in the tape
deck.
Cleaning the tape heads
Clean the tape heads after every 10 hours of use . Be
sure to clean the tape heads before you sta r t an
important recording or after playing an old tape. Use a
separately sold dry-type or wet-type cleaning cassette.
For details, refer to th e instructions of the cleaning
cassette.
Demagnetizing the tape heads
Demagnetize the tape h ead s and the metal parts that
have contact with the tape after every 20 to 30 hours of
use with a separately sold demagnetizing cassette. For
details, refer to the instructions of the dem agnetizing
cassette.
66
Break off the
cassette tab
If you later want to reuse the tape for recording, cover
the broken tab with adhesive tape .
Before placing a cassette in the tape
deck
Take up any slack in the tape. Otherwise, the tape may
get entangled in the parts of the tape deck and become
damaged.
GB
Page 67

Specifications
Main unit
Amplifier section
DHC-NXM4D
The following measured at AC 120, 127, 220, 240 V,
50/60 Hz
DIN power output (rated): 60 + 60 watts
(6 ohms at 1 kHz, DIN)
Continuous RMS power output (reference)
Front speaker: 75 + 75 watts
(6 ohms at 1 kHz, 10%
THD)
Center speaker: 40 watts (6 ohms at 1 kHz,
10% THD)
Surround speaker: 40 + 40 watts
(6 ohms at 1 kHz, 10%
THD)
Sub woofer: 120 watts
(4 ohms at 100 Hz, 10%
THD)
DHC-NXM2D
The following measured at AC 120, 127, 220, 240 V,
50/60 Hz
DIN power output (rated): 60 + 60 watts
(6 ohms at 1 kHz, DIN)
Continuous RMS power output (reference)
Front speaker: 75 + 75 watts
(6 ohms at 1 kHz, 10%
THD)
Sub woofer: 120 watts
(4 ohms at 100 Hz, 10%
THD)
Inputs
VIDEO/SAT IN (phono jacks):
voltage 250/450 mV,
impedance 47 kilohms
MIC1/MIC2 (phone jacks):
sensitivity 1 mV,
impedance 10 kilohms
Outputs
VIDEO/SAT OUT (phono jacks):
voltage 250 mV,
impedance 1 kilohm
VIDEO OUT (phono jack):
max. output level
1 Vp-p, unbalanced, Sync
negative, load impedance
75 ohms
S VIDEO OUT (4-pin/mini-DIN jack):
COMPONENT VIDEO OUT:
DIGITAL OUT (Square optical connector jack, rear
panel) (DHC-NXM2D only)
Wavelength: 660 nm
PHONES (stereo mini jack):
FRONT SPEAKER: Use only the supplied
SURROUND SPEAKER (DHC-NXM4D only):
CENTER SPEAKER (DHC-NXM4D only):
SUB WOOFER SPEAKER:
Y: 1 Vp-p, unbalanced,
Sync negative,
C: 0.286 Vp-p, load
impedance 75 ohms
Y: 1 Vp-p, 75 ohms
B, PR: 0.7 Vp-p, 75 ohms
P
accepts headphones of
8ohms or more
speaker SS-NXM4D
Use only the supplied
speaker SS-RS400S
Use only the supplied
speaker SS-CT400S
Use only the supplied
speaker SS-WG4D
Disc player section
System Compact disc and di gital
Laser Semiconductor laser
Frequency response DVD (PCM 48 kHz):
Video color system format
audio and video system
(DVD: λ=650 nm,
CD: λ=780 nm)
Emission duration:
continuous
2 Hz – 22 kHz (±1 dB)
CD: 2 Hz – 20 kHz (±1 dB)
Latin American model:
NTSC
Other models: NTSC, PAL
Tape deck section
Recording system 4-track 2-channel stereo
Frequency response 50 – 13,000 Hz (±3 dB),
Wow and flutter ±0.15% W.Peak (IEC)
using Son y TYPE I
cassette
0.1% W.RMS (NAB)
±0.2% W.Peak (DIN)
Additional Information
continued
67
GB
Page 68

Tuner section
FM stereo, FM/AM superheterodyne tuner
FM tuner section
Tuning range 87.5 – 108.0 MHz
(50 kHz step)
Antenna FM lead antenna
Antenna terminals 75 ohms unbalanced
Intermediate frequency 10.7 MHz
AM tuner section
Tuning range
Latin American models: 530 – 1,710 kHz
(with the interval set a t
10 kHz)
531 – 1,710 kHz
(with the interval set a t
9kHz)
Saudi Arabian models: 531– 1,602 kHz
(with the interval set a t
9kHz)
Other models: 531 – 1,602 kHz
(with the interval set a t
9kHz)
530 – 1,710 kHz
(with the interval set a t
10 kHz)
Antenna AM loop antenna
Antenna terminals External antenna terminal
Intermediate frequency 450 kHz
Speaker
Front speaker SS-NXM4D
Speaker system 2-way, 3-unit, bass- r e flex
type, magnetica lly
shielded type
Speaker units
Woofer: 13 cm ×2, cone type
Tweeter: 5 cm, cone type
Nominal impedance 6 ohms
Dimensions (w/h/d) Approx. 180 × 390 ×
285 mm
Mass Approx. 5.0 kg net per
speaker
Surround speaker SS-RS400S for
DHC-NXM4D
Speaker system 2-way, 2-unit, bass-reflex
type
Speaker units
Woofer range: 8 cm, cone type
Tweeter: 4 cm, cone type
Nominal impedance 6 ohms
Dimensions (w/h/d) Approx. 105 × 200 ×
120 mm
Mass Approx. 0.9 kg net per
speaker
Center speaker SS-CT400S for
DHC-NXM4D
Speaker system 2-way, 2-unit, bass-reflex
type, magnetically
shielded type
Speaker units
Woofer range: 8 cm, cone type
Tweeter: 4 cm, cone type
Nominal impedance 6 ohms
Dimensions (w/h/d) Approx. 255 × 105 ×
120 mm
Mass Approx. 1.1 kg net per
speaker
Sub woofer speaker SS-WG4D
Speaker system 1-unit, bass-reflex type,
magnetically sh ie lded type
Speaker units
Woofer: 18 cm, cone type
Nominal impedance 4 ohms
Dimensions (w/h/d) Approx. 230 × 290 ×
445 mm
Mass Approx. 7.5 kg net per
speaker
68
GB
Page 69

General
Power requirements
Australian model: 230 – 240 V AC, 50/60 Hz
Saudi Arabian model: 120 – 127 V or
Mexican model: 127 V AC, 60 Hz
Thai model: 220 V AC, 50/60 Hz
Other models: 120 V or 220 – 240 V AC,
Power consumption
DHC-NXM4D 315 watts
DHC-NXM2D 220 watts
Dimensions (w/h/d)
DHC-NXM4D/NXM2D Approx. 230 × 290 ×
Mass
DHC-NXM4D Approx. 7.0 kg
DHC-NXM2D Approx. 6.9 kg
220 – 240 V AC,
50/60 Hz
Adjustable wit h v oltage
selector
50/60 Hz
Adjustable wit h v oltage
selector
355 mm
Supplied accessories: Remote Commander (1)
R6 (size AA) batteries (2)
AM loop antenna (1)
FM lead antenna (1)
Video cable (1)
Speaker pads
DHC-NXM4D (12)
Speaker cords
DHC-NXM4D (6)
DHC-NXM2D (3)
Speaker support (2)
Screw 3 3.5 × 14 (4)
Screw 3 3 × 8 (4)
Design and specifications are subject to change
without notice.
Additional Information
69
GB
Page 70

Language code list
g
For details, see pages 13, 25, 26 and 27.
The language spellings conform to the ISO639: 1988 (E/F) standard.
Code Language Code Language Code Language
1027 Afar
1028 Abkhazian
1032 Afrikaans
1039 Amharic
1044 Arabic
1045 Assamese
1051 Aymara
1052 Azerbaijani
1053 Bashkir
1057 Byelorussian
1059 Bulgarian
1060 Bihari
1061 Bislama
1066 Bengali; Bangla
1067 Tibetan
1070 Breton
1079 Catalan
1093 Corsican
1097 Czech
1103 Welsh
1105 Danish
1109 German
1130 Bhutani
1142 Greek
1144 English
1145 Esperanto
1149 Spanish
1150 Estonian
1151 Basque
1157 Persian
1165 Finnish
1166 Fiji
1171 Faroese
1174 French
1181 Frisian
1183 Irish
1186 Scots Gaelic
1194 Galician
1196 Guarani
1203 Gujarati
1209 Hausa
1217 Hindi
1226 Croatian
1229 Hungarian
1233 Armenian
1235 Interlingua
1239 Interlin
ue
1245 Inupiak
1248 Indonesian
1253 Icelandic
1254 Italian
1257 Hebrew
1261 Japanese
1269 Yiddish
1283 Javanese
1287 Georgian
1297 Kazakh
1298 Greenlandic
1299 Cambodian
1300 Kannada
1301 Korean
1305 Kashmiri
1307 Kurdish
1311 Kirghiz
1313 Latin
1326 Lingala
1327 Laothian
1332 Lithuanian
1334 Latvian; Lettish
1345 Malagasy
1347 Maori
1349 Macedonian
1350 Malayalam
1352 Mongolian
1353 Moldavian
1356 Marathi
1357 Malay
1358 Maltese
1363 Burmese
1365 Nauru
1369 Nepali
1376 Dutch
1379 Norwegian
1393 Occitan
1403 (Afan) Oromo
1408 Oriya
1417 Punjabi
1428 Polish
1435 Pashto; Pushto
1436 Portuguese
1463 Quechua
1481 Rhaeto-Romance
1482 Kirundi
1483 Romanian
1489 Russian
1491 Kinyarwanda
1495 Sanskrit
1498 Sindhi
1501 Sangho
1502 Serbo-Croatian
1503 Singhalese
1505 Slovak
1506 Slovenian
1507 Samoan
1508 Shona
1509 Somali
1511 Albanian
1512 Serbian
1513 Siswati
1514 Sesotho
1515 Sundanese
1516 Swedish
1517 Swahili
1521 Tamil
1525 Telugu
1527 Tajik
1528 Thai
1529 Tigrinya
1531 Turkmen
1532 Tagalog
1534 Setswana
1535 Tonga
1538 Turkish
1539 Tsonga
1540 Tatar
1543 Twi
1557 Ukrainian
1564 Urdu
1572 Uzbek
1581 Vietnamese
1587 Volap k
1613 Wolof
1632 Xhosa
1665 Yoruba
1684 Chinese
1697 Zulu
1703
Not specified
70
GB
Page 71
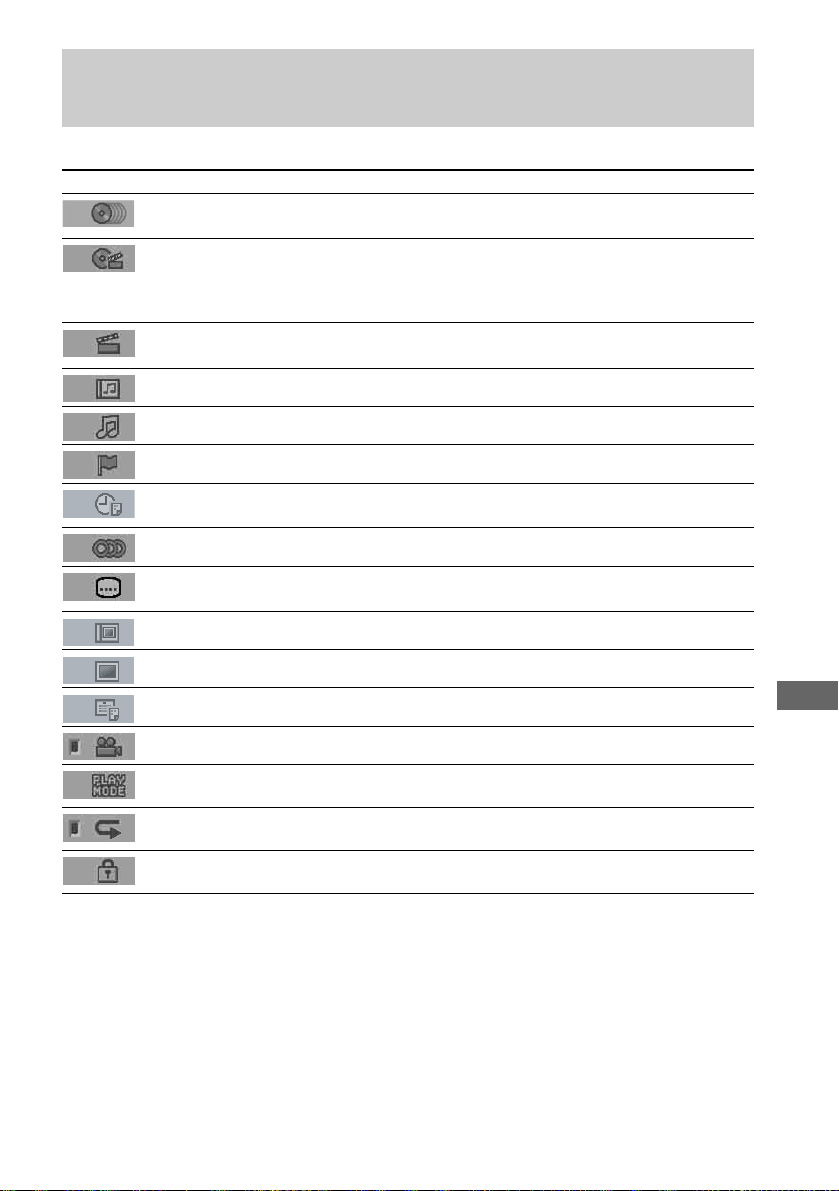
List of items that can be displayed and selected by disc type
When you press DVD DISPLAY, the following control menu items are displayed.
Control Menu items Function
DISC Displays the disc name or disc type inserted into the system.
Selects the disc to be pla yed.
TITLE (DVD only)
SCENE (VIDEO CD in PBC
playback only)
TRACK (VIDEO CD only)
CHAPTER (DVD only)
INDEX (VIDEO CD only)
ALBUM (MP3 only) Selects the album (MP3) to be played.
TRACK (CD or MP3 only) Select s the track ( CD or MP 3) to be pla ye d.
INDEX (CD only) Di spla ys the index (CD).
TIME Checks the elapsed time and the remaining playback time.
AUDIO (DVD only) Changes the audio setting.
SUBTITLE (DVD only) Displays the subtitles.
ALBUM (JPEG only) Selects the album (JPEG) to be played.
Selects the title (DVD) or the track (VIDEO CD) to be played.
Displays the scene (VIDEO CD in PBC playback).
Selects the chapter (DVD) or the index (VIDEO CD) to be played.
Inputs the time code for picture and music searching.
Changes the subtitle langua ge .
FILE (JPEG only) Selects the file (JPEG) to be pla ye d.
DATE (JPEG only) Displays the date information.
ANGLE (DVD only) Changes the angle.
PLAY MODE Selects the play mode (Normal Play/Shuffle Play/Program Play)
REPEAT Plays the entire disc (all titles/all tracks/all files), one title/chapter/
CUSTOM PARENTAL
CONTROL
Tips
• Each time you press DVD DISPLAY, the Control Menu display changes cyclically as follows:
Control Menu display t Control Menu di splay off
• The Control Menu items differ depending on the disc.
• The “REPEAT” indicator lights up in green when you selec t a ny ite m except “OFF”.
• The “ANG LE” indicator lights up in green only when mult iple angles are recorded on the disc.
for the disc.
album/track or contents o f progra m repeatedly.
Sets the disc to prohibit playba c k.
Additional Information
71
GB
Page 72
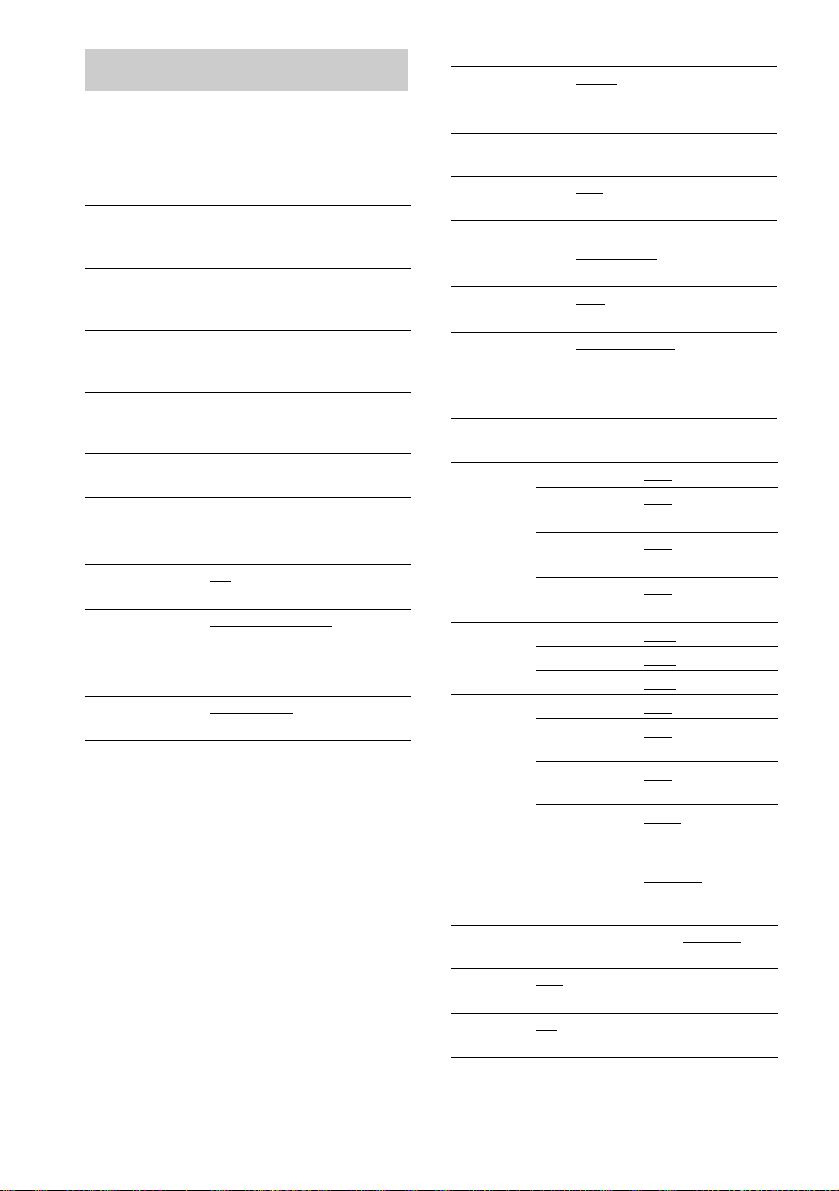
System setup item list
When you press DVD SETUP, the following
settings are displayed.
The default settin gs are underlined.
LANGUAGE SETUP (page 27)
OSD Select the language you want to
DVD MENU Select the language you want to
AUDIO Select the language you want to
SUBTITLE Select the language you want to
SCREEN SETUP (pa ge29)
TV TYPE
1)
SCREEN SAVER O N
BACKGROUND JACKET PICTURE
COMPONENT
OUT
use from the displayed language
list.
use from the displayed language
list.
use from the displayed language
list.
use from the displayed language
list.
16:9
4:3 LETTER BOX
4:3 PAN SCAN
OFF
GRAPHICS 1 – 5
BLUE
BLACK
INTERLACE
PROGRESSIVE
CUSTOM SETUP (pages 27, 29, 32)
VCD COLOR
2)
SYSTEM
AUTO
PAL
NTSC
PARENTAL
CONTROLt
TRACK
SELECTION
OFF
AUTO
AUDIO DRC OFF
STANDARD
MAX
DATA CD
PRIORITY
MP3
JPEG
JPEG DATE MM/DD/YYYY
YYYY/MM/DD
DD/MM/YYYY
YYYY/DD/MM
SPEAKER SETUP (page 35)
SIZE FRONT YES
3)
CENTER
YES
NONE
SURROUND
3)
YES
NONE
SUBWOOFER YES
NONE
DISTANCE3)FRONT
CENTER
SURROUND
LEVEL CENTER
SURROUND
3)
LEFT
SURROUND
RIGHT
SUBWOOFER +2 dB
3)
1.6m (1.0 m – 7.0 m)
1.6m (1.0 m – 7.0 m)
1.6m (1.0 m – 7.0 m)
3)
0 dB (–6 dB – +6 dB)
0 dB (–6 dB – +6 dB)
0 dB (–6 dB – +6 dB)
(DHC-NXM4D:
–10 dB – +10 dB)
LEVEL 2
(DHC-NXM2D:
LEVEL 3 – 1)
BALANCE FRONT – – – (CENTER
(6 steps left or right)
TEST
TONE
LFE
OFF
3)
ON
4)
ON
OFF
)
72
GB
Page 73

SET UP (pages 13, 63)
QUICK
RESET YES
NO
1)
The default settings vary, depending on the country
model.
2)
Except for Latin American model
3)
DHC-NXM4D only
4)
DHC-NXM2D only
Glossary
Album
Section of a mus i c piece on a data CD
containing MP3 audio tracks or JPEG image
files.
Auto Pause
An automatical pauses according to the signal
encoded on the disc while playing a VIDEO CD.
If the CD/DVD player does n ot resume play for
a long time, press
manually.
Chapter
Sections of a picture or a music piece on a DVD
that are smaller than titles. A title is composed of
several chapters. Each chapter is assign ed a
chapter number enabling you to locate the
chapter you want .
Dolby Digital
This sound format for movie theaters is more
advanced than Dolby Surround Pro Logic. In
this format, the surround speakers output stereo
sound with an expa nded frequency range and a
sub woofer channel for deep bass i s
independently provided. This format is also
called “5.1” because the sub woofer channel is
counted as 0.1 channel (since it functions only
when a deep bass effect is needed). All six
channels in th is format are recorded separately
to realize superior channel separation.
Furthermore, si nce all the signals are processed
digitally, less si gnal degradation oc curs.
Dolby Pro Logic II
Dolby Pro Logic II creates five full-bandwi dt h
output ch annel s f rom t wo- channe l so urc es. This
is done using an ad vanced, high-p urity matrix
surround deco der that extracts the sp at ial
properties of the original recording withou t
adding any new sounds or tonal colorations.
Movie mode
The Movie mode is for use with stereo televi sion
shows and all programs encoded in Do lby
Surround. The result is enhanced soundfield
directionality that approaches the quality of
discrete 5.1-channel sound.
nN to resume play
Additional Information
continued
73
GB
Page 74

Music mode
The Music mode is for use with any stereo music
recordings, and provides a wide and deep sound
space.
Dolby Surround Pro Logic
As one method of de coding Dolby Surround,
Dolby Surround Pro Logic produces four
channels from t w o- channel sound. Com pared
with the former Dolby Surr ound system, Dolby
Surround Pro Logic reproduces left-to-right
panning more naturally and localizes sounds
more precisely. To take full advantage of Dolby
Surround Pro Logic, you should have one pair of
surround speakers and a center speaker. The
surround speakers output monaural sound.
DTS
Digital audio compression technology that the
Digital Theater Syst em s , Inc. developed. This
technology conforms to 5.1-channel surround.
The surround ch annel is stereo and t here is
discrete sub woofer channe l in this for mat. DTS
provides the sam e 5. 1 di screte channels of high
quality digital audio . Th e good channel
separation is realized because the all channel
data is recorded discrete and processed in
digital.
DVD
A disc that contains up to 8 hours of moving
pictures ev en though its diameter i s the same as
a CD.
The data capacity of a single-layer and singlesided DVD, at 4.7 GB (Giga Byte), is 7 times
that of a CD. Furthermore, the data capacity of a
dual-layer and single-sided DVD is 8.5 GB, a
single-layer and double-sid ed DVD 9.4 GB, and
a dual-layer and double-sided DVD 17 GB.
The picture data uses the MPEG 2 format, one of
the worldwide standards of dig ita l co mpr es sion
technology. The picture data is compressed to
about 1/40 of its original size. The DVD also
uses the variable rate coding technology that
changes the data to be allocated according to the
status of the picture.
The audio data is re corded in Dolby Digi ta l as
well as in PCM, allowing you to enjoy more
realistic audio presence.
Furthermore, various advanced functions such
as the multi-angle, multilingual, and Parental
Control functions are provided with the DVD.
File
Section of a picture on a data CD containing
JPEG image files.
Film based software, Video based
software
DVDs can be classified as Film based or Video
based software. Film based DVDs contain the
same images (24 frames per second) that are
shown at movie theaters. Video based DVDs,
such as television dramas or sit-coms, displays
images at 30 frames (or 60 fields) per second.
Index (CD) / Video Index (VIDEO CD )
A number that divides a track into sections to
easily locate the point you want on a VIDEO CD
or a CD. Depending on the disc, no indexes may
be recorded.
Interlace format
(Interlaced scanning)
The Interlace fo r mat is the NTSC standard
method for displaying TV images at 30 frames
per second. Each fr am e is scanned twice alternately between the even numbered scanning
lines and then odd nu m bered scanning line s, at
60 times per second.
Menu Playback
Playback using the menu screens recorded on
VIDEO CDs with PBC functions. You can enjoy
simple interactive software using the menu
playback function.
Multi-angle function
Various angles, or vi ewpoints of the video
camera, for a scene are recorded on some DVDs.
Multilingual function
Several languages for the sound or subtitles in a
picture are recorded on some DVDs.
Multi Session
This is a recording method that enables adding
of data using the Track-At-Once method.
Conventional CDs begin at a CD control area
called the Lead-in an d end at an area called
Lead-out. A Multi Session CD is a CD having
multiple sessions, with each segment from
Lead-in to Lead-out regarded as a single session.
CD-Extra: This forma t recor ds aud io (audio CD
data) on the tracks in session 1 and data on the
tracks in session 2.
74
GB
Page 75
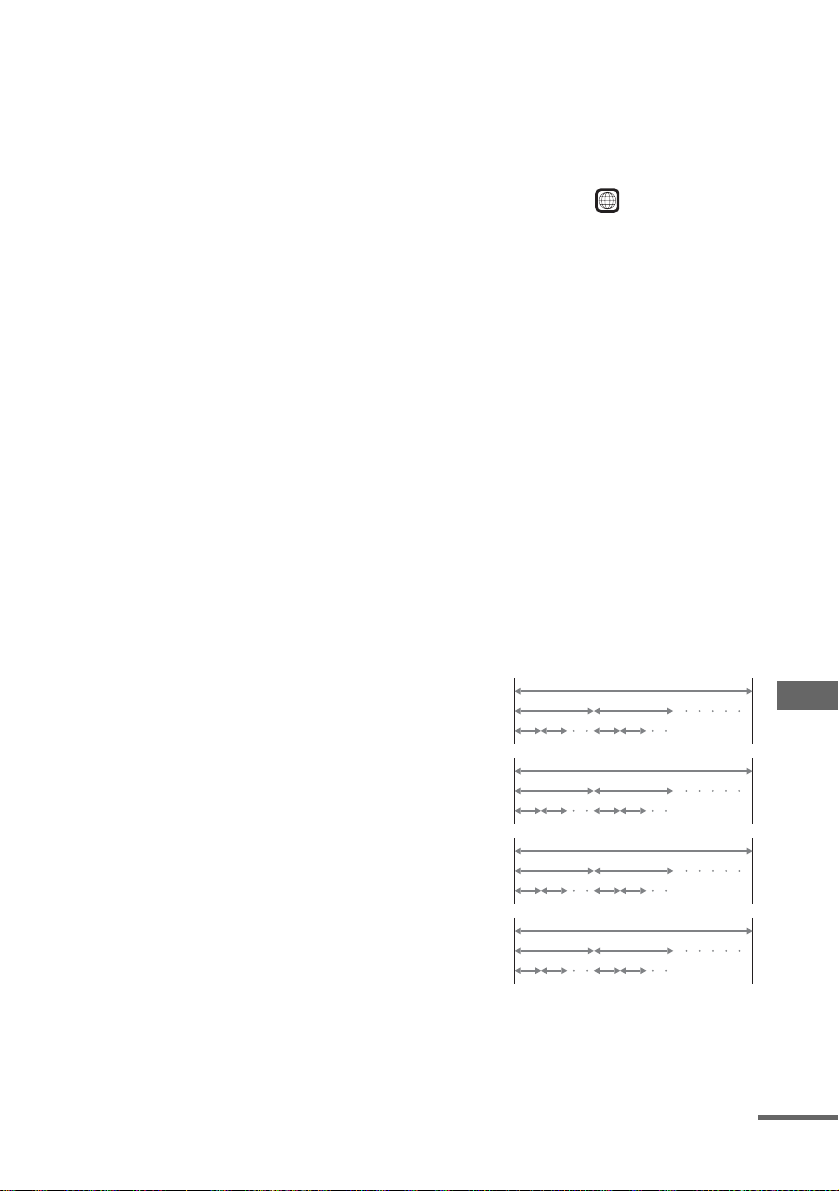
Parental Control
A function of the DVD to limit playback of the
disc by the age of th e users according t o t he
limitation level in each country/region. The
limitation varies from disc to disc; when it is
activated, playback is completely prohibited,
violent scenes are skipped or replaced with other
scenes and so on.
Playback Control (PBC)
Signals encoded on V IDEO CDs (Versi on 2.0)
to control pla yback. By using menu s creens
recorded on VIDEO CDs with PBC functions,
you can enjoy playing simple interactive
programs, programs with search funct ions, and
so on.
This system confo rms to Ver. 1.1 an d Ver. 2.0 of
VIDEO CD standards. You can enjoy two kinds
of playback depending on the disc type.
VIDEO CDs without PBC functions
(Ver. 1.1 discs)
Enjoy video p layb ack ( movin g pict ures ) as wel l
as music.
VIDEO CDs with PBC functions
(Ver. 2.0 discs)
Play interactive software using menu screens
displayed on the TV scree n (PBC Playback), in
addition to the vi deo pl ayback func tions of Ver.
1.1 discs. Moreove r, you can play high-
resolution still pictures, if they are included on
the disc.
Progressive format
Compared to the Interlace format that alternately
shows every other line of an image (field) to
create one frame, the Pr ogressive format show s
the entire image at once as a single frame . T hi s
means that while the Interlace f ormat can show
30 frames (60 fields) in one second, the
Progressive format can show 60 frames in one
second. The overall picture quality increases and
still images, text, and horizontal lines app ear
sharper. This player is compatible with 525
progressive format.
Region Code
This system is used to protect copyri ghts. A
region number is allocated on each DVD system
or DVD disc according to the sales r egion. Eac h
region code is shown on the sy stem as well as on
the disc packaging. The system can play the
discs that match its region code. The system can
also play discs with the “ ” mark. Even when
ALL
the region code is not shown on the DVD, the
region limit may still be activated.
Scene
On a VIDEO CD with PBC functions (page 18),
the menu screens, moving pictures, and still
pictures are divided into sections called
“scenes”. Each scene is assigned a scene number
enabling you to lo cate the scene you wan t.
Title
The longest se ct ions of a picture or a music
piece on a DVD; a movie, etc., for a pictur e
piece on video so ftw are ; or an a lbum , et c., for a
music piece on audio software. Each title is
assigned a title num ber enabling you to locat e
the title you want.
Track
Sections of a picture or a music piece on a C D ,
VIDEO CD, MP3 or J P E G. Each track is
assigned a track number enabling you to locate
the track you want.
Disc
DVD
structure
VIDEO CD
or CD
structure
MP3
structure
JPEG
structure
Title
Chapter
Track
Index
Album
Track
Album
File
Disc
Disc
Disc
Additional Information
continued
75
GB
Page 76

VIDEO CD
A compact disc that contains moving pictures.
The picture data uses the MPEG 1 format, one of
the worldwide standards for d igital compression
technology. The picture data is compressed to
about 1/14 0 of it s or ig in al siz e . Con se que nt ly, a
12 cm VIDEO CD c an co nta in u p t o 74 m i nut es
of moving pictures.
VIDEO CDs also contain compact audio data.
Sounds outside the r ange of human hearing are
compressed while the sounds we can hear are
not compressed. VIDEO CDs can hold 6 times
the audio information of conventional audio
CDs.
There are 2 versions of V IDEO CDs.
• Version 1.1: You can play only moving
pictures and soun ds.
• Version 2.0: You can play high-resolution
still pictures and enjoy PBC functions.
This system conforms to both versions.
76
GB
Page 77
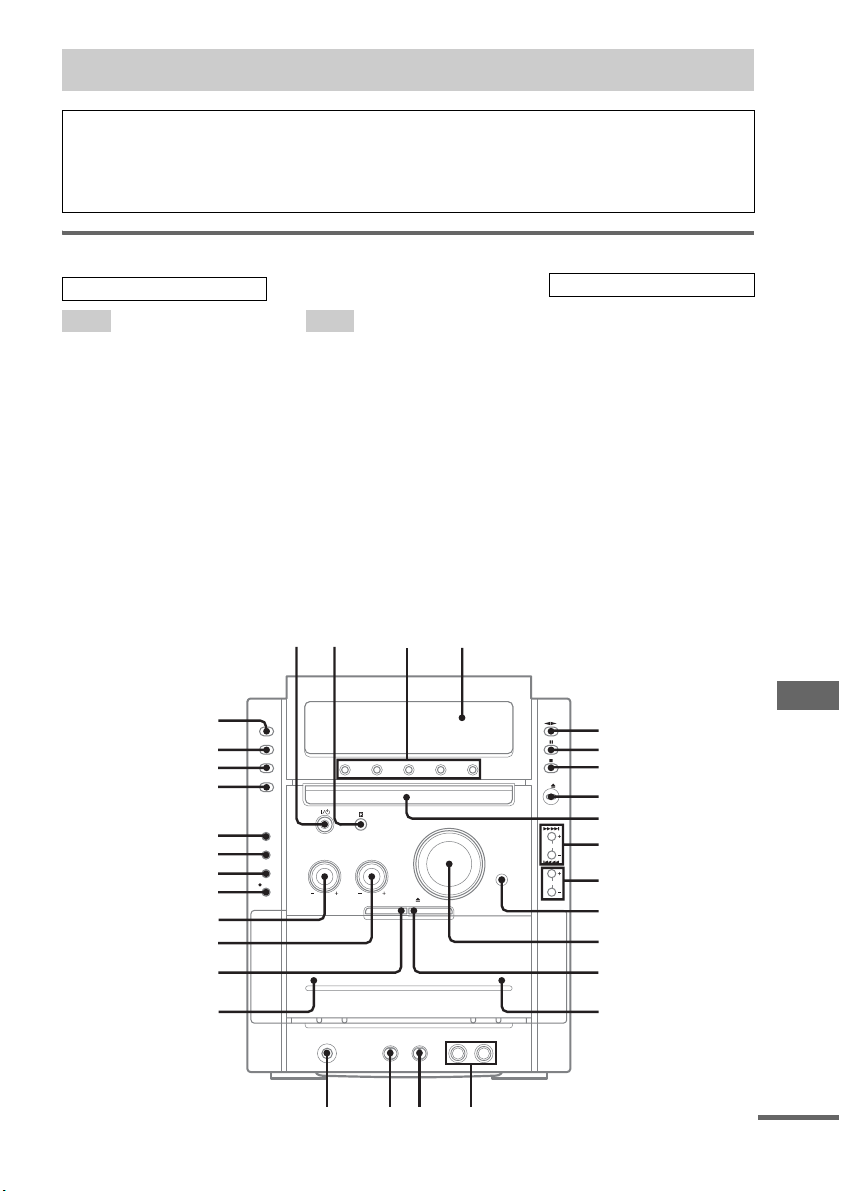
List of button locations and reference pages
12 3 4
q
q
q
q
How to use this page
Use this page to find the location of buttons and other
parts of the system that are mentioned in the text.
Main unit
ALPHABETICAL ORDER
A – D E – Z
ALBUM +/– qa (16, 20, 42)
CD SYNC wg (42)
Deck A w; (41)
Deck B qg (41, 42, 43)
DIMMER wh (51, 62)
DISC 1 – 5 3 (15, 17, 20)
Disc tray 9 (15)
DISPLAY wj (30, 50, 51, 53, 62)
Display window 4
DSGX qs (44)
DVD ea (11, 13, 16, 20, 39, 42,
43)
DVD MENU qa (18)
DVD TOP MENU qa (18)
ECHO LEVEL qj (46)
MIC1/MIC2 jacks qh (46)
MIC LEVEL qk (46)
PHONES jack ql
Remote sensor 2
SOUND MODE control wd (44,
45)
SOUND SELECT control ws (44,
45)
TAPE A/B wl (41, 42, 43, 47)
TUNER/BAND e; (38, 39, 43)
TUNING +/– 0 (38, 39)
VIDEO/SAT wk (43, 56)
VOLUME control qd (37)
ea
e;
wl
wk
wj
wh
wg
wf
wd
ws
wa
Illustration number
r
TAPE A/B wl (41, 42, 43, 47)
RR
Name of button/part Reference page
BUTTON DESCRIPTIONS
?/1 (power) 1 (9, 39, 62)
nN (play) 5 (16, 34, 41, 42)
X (pause) 6 (9, 16, 41)
x (stop) 7 (11, 16, 30, 39, 41,
42, 47, 62)
DVD Z (open/close) 8 (14, 15)
.m/M> (rewind/fast
forward, go back/go forward)
0 (16, 41)
TAPE Z B (eject) qf (41)
A TAPE Z (eject) wa (41)
z START (record) wf (42, 47)
5
6
7
8
9
0
qa
qs
qd
qf
Additional Information
w;
h
j
l
k
qg
continued
77
GB
Page 78
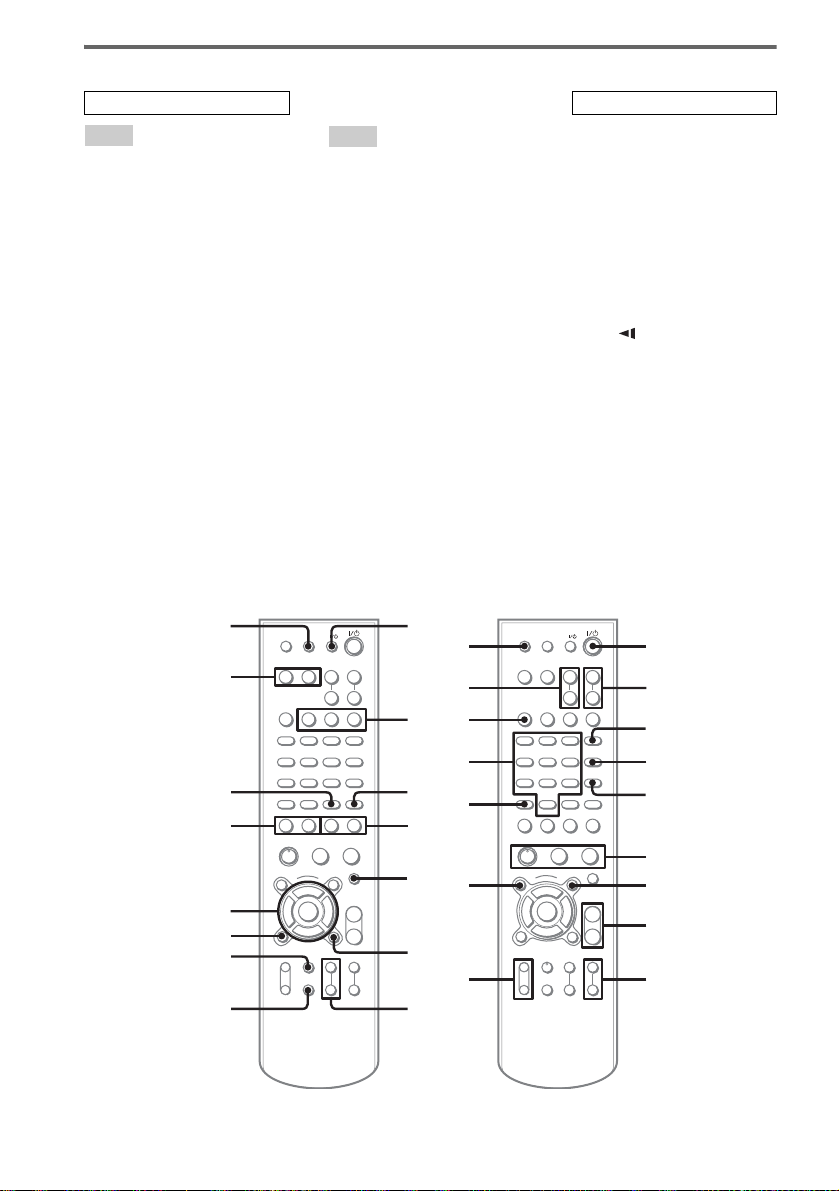
Remote control
ALPHABETICAL ORDER
A – E
ALBUM + 7 (16, 20)
ALBUM – qa (16, 20)
ANGLE qk (28)
AUDIO qk (25)
BAND wg (38, 39)
CLEAR wl (20, 23, 35)
CLOCK/TIMER SELECT e;
(49, 50)
CLOCK/TIMER SET e; (12, 48,
49)
DISC SKIP wf (17, 20, 42)
DISPLAY wa (50, 51, 53)
DVD DISPLAY wh (16, 19, 22,
25, 28, 31, 53, 54)
DVD MENU 7 (18)
DVD SETUP ws (14, 17, 27, 29,
32, 35, 63)
DVD TOP MENU qa (18)
ENTER wj (12, 13, 16, 18, 19, 20,
23, 25, 28, 31, 35, 38, 48, 49,
63)
ea
e;
wl
wk
wj
wh
wg
wf
F – Z
FM MODE 5 (40)
FUNCTION +/– 0 (13, 16, 20,
38, 39)
KARAOKE/MPX qf (46)
Number buttons qd (13, 17, 18,
21, 23, 27, 32)
PLAY MODE 4 (16, 20, 41, 42,
43, 47)
REPEAT 5 (19)
SLEEP qh (48)
SOUND FIELD +/– wd (45)
SUBTITLE qk (26)
TUNER MEMORY 3 (38)
TUNING MODE 4 (38, 39)
TUNING +/– wk (38, 39)
TV CH +/– qg (10)
TV/VIDEO ea (10)
TV VOL +/– 2 (10)
VOLUME +/– 8 (37, 48)
qj
+–+
–
qk
ql
O
+–
y
y
XbB
V
v
+
–+–
mM.>
+––
bB
w;
x
wa
+
ws
wd
qh
qf
qd
qs
qa
BUTTON DESCRIPTIONS
?/1 (power) 1 (9, 49)
nN (play) 6 (16, 34, 41)
X (pause) 6 (16, 41)
x (stop) 6 (16, 31, 41)
KEY CONTROL
>10 qs (39)
TV ?/1 qj (10)
O RETURN ql (14, 18, 32)
m (rewind) w; (16, 41)
M (fast forward) w; (16, 41)
SLOW /y w; (16)
M/m/</, wj (12, 16, 25, 48,
63)
. (go back) wk (16, 42)
> (go forward) wk (16, 42)
1
+–+
2qg
–
3
4
5
O
+–
y
y
mM.>
XbB x
V
v
+
–+–
+–
bB
6
7
+
8
–
90
#/2 9 (45)
78
GB
Page 79

Page 80

Sony Corporation Printed in Malaysia
 Loading...