

Page 1
2-586-657-11 (1)
FM/AM
Compact Disc Player
Operating Instructi on s
Mode d’emploi
Manual de instrucciones
Owner’s Record
The model and serial numbers are located on the bot tom of the unit.
Record these numbers in the spa ce provided below.
Refer to these numbers whenever you call upon your Sony dealer regarding this produc t.
Model No.
For installation and connections, see the supplied installation/connections manual.
En ce qui concerne l’installation et les connexions, consulter le manuel
d’installation/raccordement fourni.
Para obtener información sobre la instalación y las conexiones, consulte el ma nua l
de instalación/conexiones suministrado.
Serial No.
US
FR
ES
CDX-M7815X
CDX-M7810
© 2005 Sony Corporation
Page 2
Welcome !
t
Warning
Thank you for purchas in g t hi s Sony Compact
Disc Player. You can enjoy your drive with the
following functions .
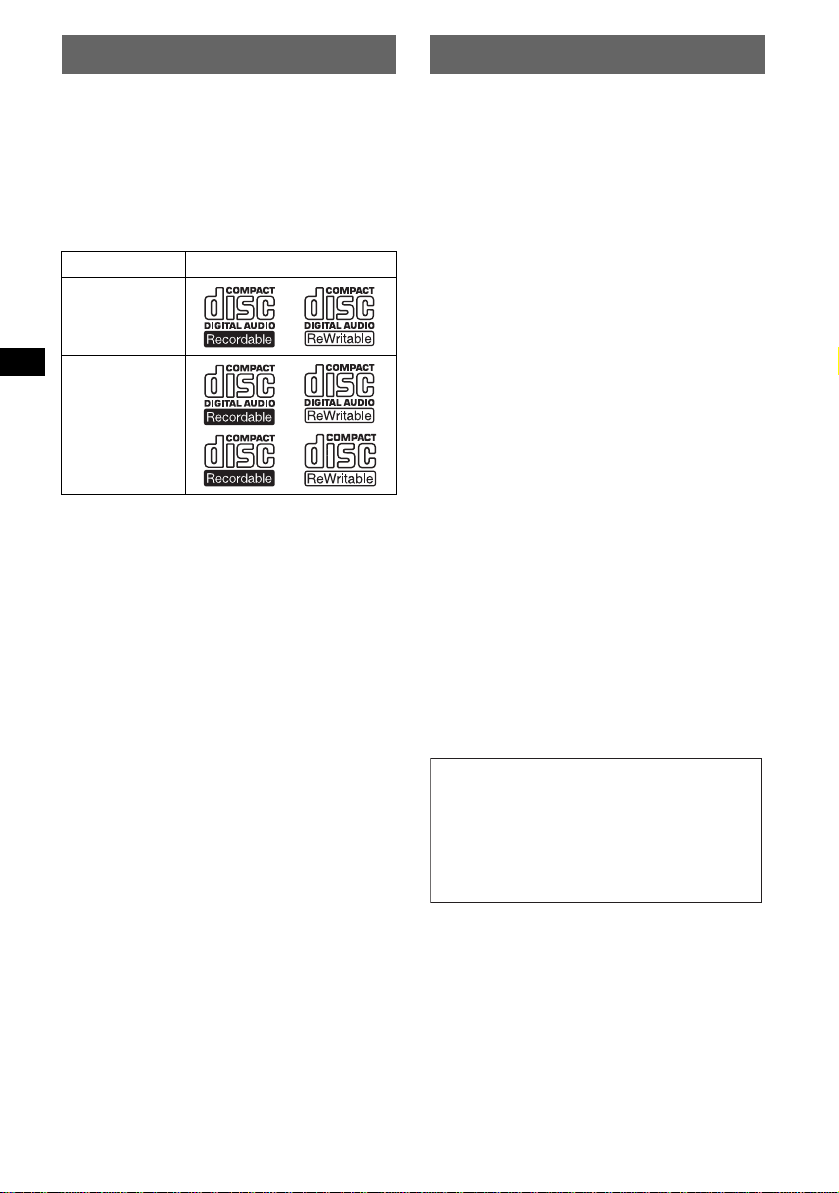
• CD playback
You can play CD-DA (also containi ng CD
TEXT*), CD-R/CD-RW (MP3 files also
containing Multi Session (page 14)) and
ATRAC CD (ATRAC3 and ATRAC3plus
format (page 15)).
Type of dis c s Label on the disc
CD-DA
MP3
AT RAC CD
• Radio reception
–You can store up to 6 stations per band (FM1,
FM2, FM3, AM1 and AM2).
–BTM (Best Tuning Memory): the unit selects
strong signal stations and stores them.
–You can assign a name to each rad io station,
store it in memory , and display station names
on the list.
• Sound adjustment
–EQ7: You can select an equalizer curve for 7
music types.
–DSO (Dynamic Soundstage Organizer):
creates a more ambient sound field, using
virtual speaker s ynthesis, to enhanc e th e
sound of speakers , even if they ar e installed
low in the door .
–BBE MP: improves digitally compressed
sound such as MP 3. For detai ls, see the
following explan at io n.
• Image setti ng
You can set various display images on the unit.
– Space Producer: creates animated on-screen
patterns in time with the music.
• Optional unit operation
Y ou can also control optional CD/MD changers
and optional Sony port able devices in addition
to playing with this unit.
* A CD TEXT disc is a CD-DA that includes
information such as disc, artist and track name.
This equipment has been tested and found to
comply with the limits for a Class B digital
device, pursuant to Part 15 of the FCC Rules.
These limits are designed to provide reasonable
protection against harmful interference in a
residential installation. This equipment
generates, uses, and can radiate radio frequency
energy and, if not installed and used in
accordance with the instructions, may cause
harmful interference to radio communications.
However, there is no guarantee that interference
will not occur in a particular installation. If this
equipment does cause harmful interference to
radio or television reception, which can be
determined by turning the equipment off and on,
the user is encouraged to try to correct the
interference by one or more of the following
measures:
– Reorient or relocate the receiving antenna.
– Increase the separation between the equipment
and receiver.
– Connect the equipment into an outlet on a
circuit different from that to which the receiver
is connected.
– Consult the dealer or an experienced radio/TV
technician for help.
You are cautioned that any changes or
modifications not expressly approved in this
manual could void your authority to operate this
equipment.
CAUTION
The use of optical instruments with this produc
will increase eye hazard.
Warning if your car’s ignition has no
ACC position
After turning the ignition off, be sure to press
and hold (OFF) on the unit until the display
disappears.
Otherwise, the display does not turn off and
this causes battery drain.
2
Page 3

Table of Contents
Getting Started
Resetting the unit. . . . . . . . . . . . . . . . . . . . . . . . 4
Setting the clock . . . . . . . . . . . . . . . . . . . . . . . . 4
DEMO mode . . . . . . . . . . . . . . . . . . . . . . . . . . . 4
Detaching the front panel . . . . . . . . . . . . . . . . . 4
Attaching the front panel . . . . . . . . . . . . . . . 5
Inserting the disc in the unit . . . . . . . . . . . . . . . 5
Ejecting the disc . . . . . . . . . . . . . . . . . . . . . . 5
Adjusting the angle of the front panel. . . . . . . . 5
Location of controls and basic
operations
Main unit . . . . . . . . . . . . . . . . . . . . . . . . . . . 6
Card remote commander RM-X143A . . . . . 6
CD
Display items . . . . . . . . . . . . . . . . . . . . . . . . 8
Repeat and shuffle play . . . . . . . . . . . . . . . . 8
Radio
Storing and receiving stations . . . . . . . . . . . . . . 8
Storing automatically — BTM . . . . . . . . . . 8
Storing manually . . . . . . . . . . . . . . . . . . . . . 8
Receiving the stored stations . . . . . . . . . . . . 8
Tuning automatically . . . . . . . . . . . . . . . . . . 9
Receiving a station through a list
— LIST . . . . . . . . . . . . . . . . . . . . . . . . . . . . 9
Other functions
Changing the sound settings. . . . . . . . . . . . . . . 9
Adjusting the sound characteristics . . . . . . . 9
Adjusting the eq ualizer curve
— EQ7 Tune . . . . . . . . . . . . . . . . . . . . . . . . 9
Labeling a station/disc . . . . . . . . . . . . . . . . . . 10
Adjusting menu items — MENU. . . . . . . . . . 10
Using optional equipment. . . . . . . . . . . . . . . . 12
CD/MD changer . . . . . . . . . . . . . . . . . . . . 12
Rotary commander RM-X4S . . . . . . . . . . 12
Auxiliary audio equipment . . . . . . . . . . . . 13
Additional Information
Precautions . . . . . . . . . . . . . . . . . . . . . . . . . . . 14
Notes on discs . . . . . . . . . . . . . . . . . . . . . . 14
About MP3 files . . . . . . . . . . . . . . . . . . . . 14
About ATRAC CD . . . . . . . . . . . . . . . . . . 1 5
Maintenance . . . . . . . . . . . . . . . . . . . . . . . . . . 15
Removing the unit. . . . . . . . . . . . . . . . . . . . . . 16
Specifications . . . . . . . . . . . . . . . . . . . . . . . . . 16
Troubleshooting . . . . . . . . . . . . . . . . . . . . . . . 17
Error displays/Messages . . . . . . . . . . . . . . 18
The BBE MP process
R
improves digitally
MP3, by restoring and enhancing the higher
harmonics lost through compression. BBE MP
works by generating even-order harmonics from
the source material, effectively recovering
warmth, detail and nuance.
compressed sound, such as
The “XM Ready” logo indicates that
this product will control an XM tuner
module (sold separately). Please see
your nearest authorized Sony dealer for
details on the XM tuner module.
SonicStage and its logo are trademarks of S ony
Corporation.
ATRAC, ATRA C3, ATRA C 3p lu s a n d t he i r l og os
are trademarks of Sony Corporation.
3
Page 4

Getting Started
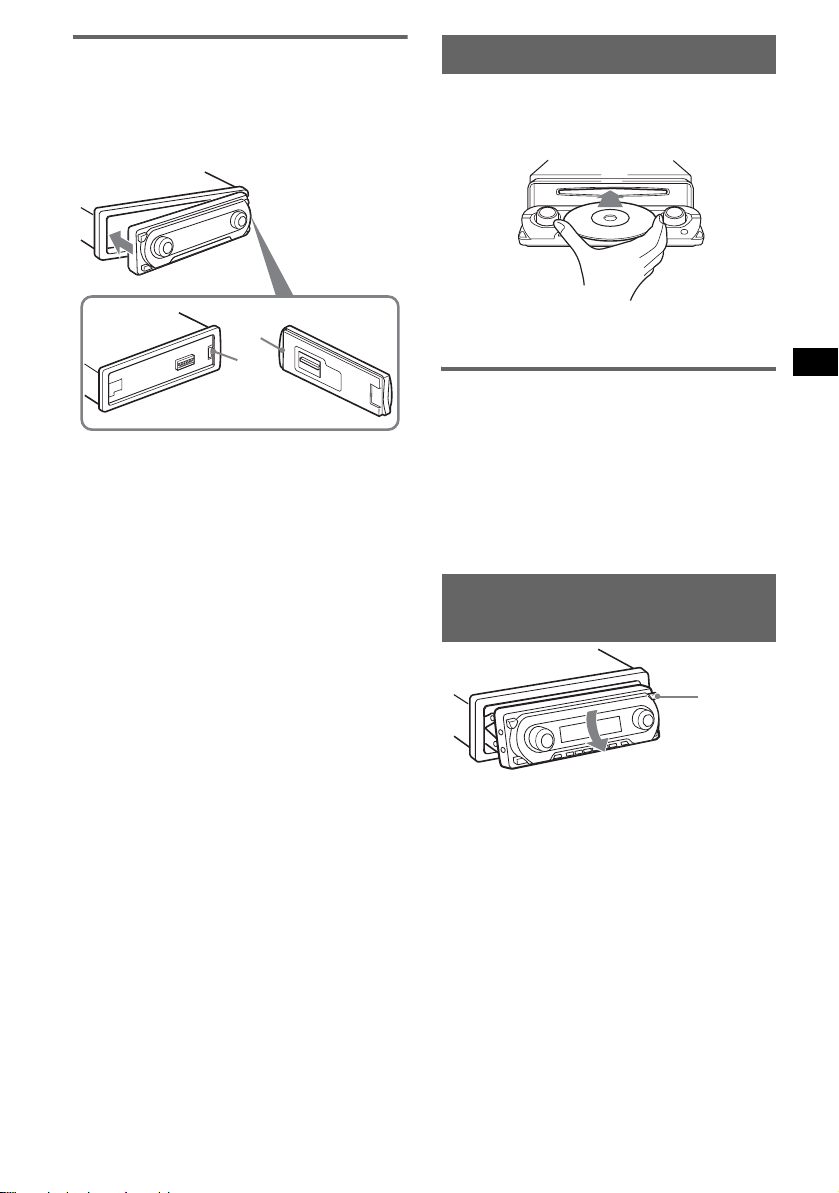
Detaching the front panel
Resetting the unit
Before operating the unit for the first time, or
after replacing the car battery or chan gi ng the
connections, you must reset the unit.
Detach the front panel and press the RESET
button with a pointed object, such as a ball-point
pen.
Note
Pressing the RESET button will er ase the clock setting
and some stored contents.
RESET button
Setting the clock
The clock uses a 12-hour digital indication.
1 Press (MENU).
2 Rotate the SEEK control dial until
“Setup” appears, then press (ENTER).
3 Rotate the SEEK control dial until
“Clock Adjust” appears, then press
(ENTER).
The clock adjustment display appears.
4 Rotate the SEEK control dial to set the
hour and minute.
To move the digital indication, press
(ENTER).
5 After setting the minute , p re ss
(ENTER).
The clock starts.
To display the clock during playback/r eception,
set “Clock on” (page 11).
With the card remote commander
In steps 2 to 4: press M or m instead of the SEEK
control dial; in step 4: press < or , instead of
(ENTER).
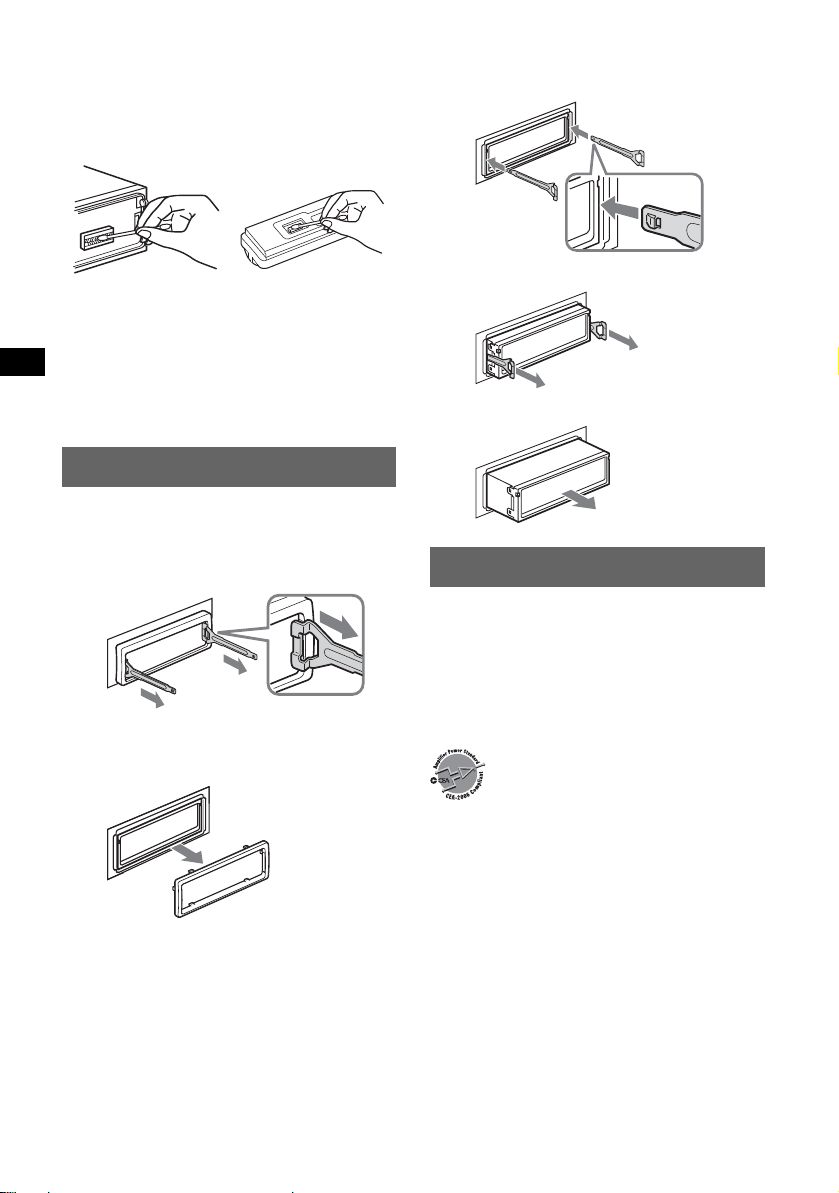
You can detach the front panel of this unit to
prevent theft.
Caution alarm
If you turn the ignition switch to the OFF
position without detaching the front panel, the
caution alarm will sound for a few seconds.
The alarm will only sound if the built-in
amplifier is used.
1 Press (OFF).
The unit is turned off.
2 Press .
The left of the front panel is released.
3 Slide the front panel to the left, then
gently pull out the front panel towards
you.
(OFF)
2
1
Notes
• Do not drop or put excessive pressure on the front
panel and display window.
• Do not subject the front panel to heat/high
temperature or moisture. Avoid leaving it in a parked
car or on a dashboard/rear tray.
Tip
When carrying the front panel, use the supplied front
panel case.
DEMO mode
When the unit is turned off, the clock is
displayed first, then demonstration (DEMO)
mode starts the demonstration display.
T o cancel the DEMO mode, set to “Demo off” in
menu (page 11) while the unit is turned off.
4
Page 5
Attaching the front panel
Place the hole A of th e front panel onto the
spindle B on the unit, then lightly push the left
side in.
Press (SOURCE) on the unit (or insert a disc) to
operate the unit.
Inserting the disc in the unit
1 Press Z.
The front panel slides down automatically.
2 Insert the disc (la bel si de u p).
A
B
Note
Do not put anything on the inner surface of the front
panel.
The front panel slides up automatically, then
playback starts automatically.
Ejecting the disc
1 Press Z.
The front panel slides down automatically,
then the disc is ejected.
2 Press Z to close the front panel.
Note
The front panel slides up automatically after 15
seconds of the front panel sliding down.
Adjusting the angle of the front
panel
ANGLE
1 Press and hold (ANGLE) repeatedly
until the front panel is angled
accordingly.
The front panel can be set to 3 positions.
To return the front panel to its default position,
press and hold (ANGLE) repeatedly until the
front panel is returned to its default positio n.
Tips
• After the front panel slides down (to insert the disc),
it returns to the position you set again automatically.
• The front panel angle you set is stored in the unit.
When the ignition is turned off, the front panel
returns to its default position. When the ignition is
turned on, the front panel moves to the angle you
set.
5
Page 6
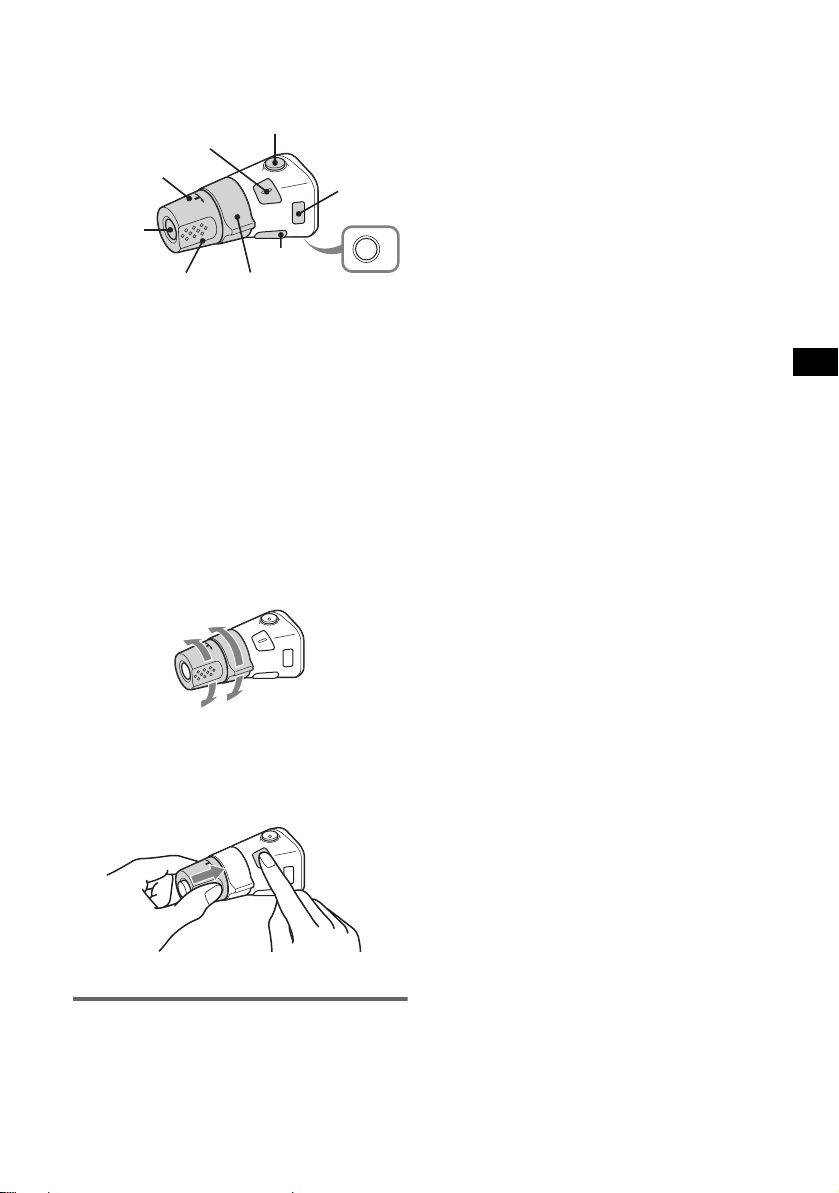
Location of controls and basic operations
Main unit
12 3 4 6578
OFF
MODE
VOL
PUSH SOUND PUSH ENTER
9
Card remote commander
RM-X143A
qh
qd
qa
qj
7
SCRL
DSPL
REP SHUF
1
2
BBE MP PAUSE
4
5
MODE
EQ7 DSO
+
DISC
MENU
q;
SOURCE
–
SEEK
qk
SOUND
DISC
–
ql
+
2
VOL
–
w;
6
REP SHUF BBE MP PAUSE
SOURCE DSPL1
OPEN/CLOSE
2534
wa
3
6
1
CAT
LIST
SEEK
ENTER
+
ws
wd
wf
6
ATTOFF
wg
ANGLE
+
–
6
qaq; qs qd qf qg
SEEK
MENU
IMAGE
CDX-M7815X
CDX-M7810
Refer to the pages listed for details. The
corresponding buttons on the card remote
commander control the same functions as those
on the un it.
A MODE button 8, 12
To select the radio band (FM/AM)/select the
1
unit*
.
B OFF button
To power off/stop the sourc e.
C VOL (volume) control dial/SOUND
button 9
To adjust volume (rotate); select sound items
(press).
D Display window
E Disc slot 5
To insert the disc.
F SEEK control dial/ENTER button
To select items (rotate); complete a setting
(press).
Radio:
To tune in stations: press (ENTER)
repeatedly to select “SEEK,” “MANUAL,”
or “PRESET,” then rotate the SEEK control
dial until the desi r ed station appears.
CD:
To skip tracks or groups: press (ENTER)
repeatedly t o select ./> or “GROUP,”
then rotate the SEEK control dial until the
desired track or group appears.
G MENU button
To enter menu.
H Z (eject)/ANGLE button 5
To eject the disc/slide down the front panel
(press); angle th e front panel in 3 positions
(press and hold).
Page 7

I (front panel release) button 4
J SOURCE button
To power on/change th e source (Radio/CD/
2
MD*
/AUX*3).
K Number buttons
Radio:
To receive stored stations (press); store
stations (press and hold).
CD/MD*
2
:
(1): REP 8
(2): SHUF 8
(5): BBE MP*
4
3
To activate the BBE MP function, set “BBE
MP-on.” To cancel, set “BBE MP-off.”
(6): PAUSE*
4
To pause playback. To cancel, press again.
L RESET button 4
M DSPL (display) button 8, 10
To change display items.
N Receptor
To receive signals from the card rem ote
commande r or wireless rotary command er.
O IMAGE button 2
To select the display image.
Space Producer mo de t Movie mode 1-2
t Spectrum analyzer mode 1-5 t
Wall paper mode 1-3 t normal pl ay/
reception mode
The following buttons on th e card remote
commander have also different buttons/functions
from the unit.
qh SCRL (scroll) button 8
To scroll the display item.
qj EQ7 (equalizer) button
To select an equalizer type (Xplod, Vocal,
Club, Jazz, New Age, Rock, Custom or off).
qk </, (SEEK –/+) buttons
Radio:
To tune in stati ons automatical ly (press); f ind
a station manuall y (press and hold).
CD:
To skip tracks (press); skip tra cks
continuously (press, then press again within
about 1 second and hol d) ; fast-forward/
reverse a track (press and hold).
ql SOUND button 9
To select sound items.
w; VOL (volume) +/– button
To adjust volume.
wa OPEN/CLOSE button
To open/close the front panel.
ws DSO button 2
To select the DSO mode (1, 2, 3 or off). The
larger the number, the more enhanced the
effect.
wd LIST/CAT*
5
button 9, 12
To list up.
wf M/m (DISC +/–) buttons
To select preset stations/skip groups (pr es s);
skip groups continuously (press and hold).
wg ATT (attenuate) button
To attenuate the sound. To cancel, press
again.
*1 When a CD/MD changer is connected.
*2 When an MD changer is connected.
*3 When an optional Sony portable device is
connected.
*4 When playing back on this unit.
*5 When the XM tuner is connected.
Note
If the unit is turned off and the display disappears, it
cannot be operated with the card remote commander
unless (SOURCE) on the unit is pressed, or a disc is
inserted to activate the unit first.
Tip
For details on how to replace the battery, see
“Replacing the lithium battery of the card remote
commander” on page 15.
7
Page 8
CD
For details on connecti ng to a CD/MD changer,
see page 12.
Display items
Example: wh en you select the normal play mode
by pressing (IMAGE) repeatedly (page 7).
ABC
D
A Source
B MP3/ATRAC3 plus indication
C Clock*
D BBE indication
E Group number/Track number /Elapsed
*1 When the clock mode is set to “on” (page 11).
*2 When playing an MP3, ID3 tag is displayed and
To change display items E, press (DSPL);
scroll display items E, press (SCRL) on the
card remote comm ander or set to “A.Scroll on”
(page 11).
Tip
Displayed items will differ , de pending on the disc type,
recorded format and settings. For details on MP3, see
page 14; ATRAC CD, see page 15.
1
playing time, Disc/artist name, Group name,
Track na me, Text information*
when playing a ATRAC CD, text information written
by SonicStage, etc. is displayed.
Repeat and shuffle play
1 During playback, press (1) (REP) or
(2) (SHUF) repeatedly until the
desired setting app ears.
Select To play
REP-Track track repeate dly.
REP-Group* group repeat edly.
SHUF-Group* group in random or der.
SHUF-Disc disc in random order.
* When an MP3/ATRAC CD is played.
To return to normal pl ay mode, select “REP - off”
or “SHUF-off.”
E
2
Radio
Storing and receiving stations
Caution
When tuning in stat i ons while driving, use Best
Tuning Memory (BTM) to prevent an accident.
Storing automatically — BTM
1 Press (SOURCE) repeatedly until
“TUNER” appears.
To change the band, pr es s (MODE)
repeatedl y. You can select from FM1, FM2,
FM3, AM1 or AM2.
2 Press (MENU).
3 Rotate the SEEK control dial until
“Edit” appears, then press (ENTER).
4 Rotate the SEEK control dial until
“BTM” appears, then press (ENTER).
The unit stores stations in order of frequency
on the number buttons.
A beep sounds when the setting is stored.
With the card remote commander
In steps 3 and 4: press M or m instead of the SEEK
control dial.
Storing manually
1 While receiving the st at io n th at you
want to store, press and hold a
number button ((1) to (6)) until
“Memory” appears.
The number button indication appears in the
display.
Note
If you try to st or e a no t her s t at io n o n t he same n um be r
button, the previous stored station will be replaced.
Receiving the stored stations
1 Select the band, then press a number
button ((1) to (6)).
Tip
Another way to receive the stored stations is to press
(ENTER) repeatedly until “PRESET” a ppears, then
rotate the SEEK control dial until the desired preset
number appears.
8
Page 9
Tuning automatically
1 Select the band, then pre ss (ENTER)
repeatedly until “SEEK” appears, then
rotate the SEEK control dial to search
for the station.
Scanning stops when the unit receives a
station. Repeat t hi s procedure until the
desired station is received.
Tip
If you know the frequency of the station you want to
listen to, press (ENTER) repeatedly until “MANUAL”
appears, then rotate the SEEK control dial until the
desired frequency appears.
Receiving a station through a list
— LIST
You can list up the frequency or th e name. For
details on labeling a s ta tion, see page 10.
1 Select the band, then pre ss (MEN U).
2 Rotate the SEEK control dial until
“List” appears, then pres s (ENTER).
The frequency or station name appears.
3 Rotate the SEEK dial until the desired
station appears.
4 Press (ENTER) to receive the station.
The display returns to normal reception
mode.
With the card remote commander
Select the band, then press (LIST). Press M or m
repeatedly until the desired station appears, then
press (ENTER).
Other functions
Changing the sound settings
Adjusting the sound
characteristics
You can adjust the equalizer, DSO, bass, treble,
balance, fader and subwoofer volume.
1 Select a source, then press (SOUND)
repeatedly to select the desired item.
The item changes as follows:
EQ7 t DSO t BAS (bass) t
TRE (treble) t BAL (left- ri ght) t
FAD (front-rear) t SUB (subwoofer
volume)*
* “ ∞” is displayed at the lowest setting, and can be
adjusted up to 20 steps.
2 Rotate the VOL control dial repeatedly
to adjust the selected item.
After 3 seconds, the setting is complete and
the display returns to normal play/reception
mode.
Note
Adjust within 3 seconds of selecting the item.
With the card remote commander
In step 2: press < or , instead of the VOL control
dial.
Adjusting the equalizer curve
— EQ7 Tune
You can adjust and store the equalizer settin gs
for different tone ranges.
1 Select a source, then press (MENU).
2 Rotate the SEEK control dial until
“Sound” appears, then press (ENTER).
3 Rotate the SEEK control dial until
“EQ7 Tune” appears, then press
(ENTER).
4 Rotate the SEEK control dial to select
the desired equalizer type, then press
(ENTER).
5 Rotate the SEEK control dial to adjust
the desired volume level.
The volume level is adjustable in 1 dB steps,
from –10 dB to +10 dB.
continue to next page t
9
Page 10
6 Press (ENTER) to move to the next
frequency.
The frequency changes as follows:
62Hz t 157Hz t 396Hz t 1.0kHz t
2.5kHz t 6.3kHz t 16kHz
Repeat steps 5 and 6 t o adjust the equalizer
curve.
The confirmation dialo g appears after
adjusting “16kHz” and pressing (ENTER).
7 Rotate the SEEK control dial to select
“YES,” then press (ENTER).
The setting is complete and the d isplay
returns to normal play/reception mode.
To restore the facto ry-set equalizer c urve, press
and hold (ENTER) in step 5 or 6, then rotate the
SEEK con trol dial to select “YES.”
With the card remote commander
In steps 2, 3 and 5: press M or m instead of the SEEK
control dial; in steps 4 and 7: press < or , instead
of the SEEK control dial; in step 6: press < or ,
instead of (ENTER).
The confirmation dialog appears after
entering the far right character and pressing
(ENTER).
5 Rotate the SEEK control dial to select
“YES,” then pres s (ENTER).
The setting is complete and the display
returns to the no rmal reception/play mode.
To display the name, press (DSPL) during
reception/playback.
Tips
• To correct or erase a character, overwrite or enter
“.”
• The Disc Memo always takes priority over any
prerecorded title.
• You c an lab el a dis c on the un i t if a c ha ng e r wi t h the
CUSTOM FILE function is connected.
• “REP-Track” and all shuffle play are suspended until
the labeling is complete.
With the card remote commander
In steps 2 to 4: press M or m instead of the SEEK
control dial; in step 4: press < or , to move the
digital indication; in step 5: press < or , i nste ad of
the SEEK control dial.
Labeling a station/disc
When you receive a station, or play a disc in a
CD changer with the CUSTOM FILE function,
you can label each st at i on/ di sc with a custom
name up to 8 characters (Station Memo/Disc
Memo).
If you label a station/disc, the name appears on
the list (page 9 or 12).
1 While receiving a station or playing a
disc that you want to label, press
(MENU).
2 Rotate the SEEK control dial until
“Edit” appears, then press (ENTER).
3 Rotate the SEEK control dial until
“Name Edit” appears, then press
(ENTER).
4 Rotate the SEEK control dial until the
desired character app ears.
The character c hanges as follows:
A y B y C ... y 0 y 1 y 2 ... y +
y – y ... y (blank space) y A
To move the digital indication, press
(ENTER).
Repeat this opera t io n until the entire name is
entered.
10
Deleting the custom name
1 Select the radio, or the unit that h as stored the
custom name you w ant to delete, then press
(MENU).
2 Rotate th e S EEK control dial until “Edit”
appears, then press (ENTER).
3 Rotate th e S EEK control dial until “Name
Delete” appear s, th en press (ENTER).
The stored name wi ll appear.
4 Rotate th e S EEK cont rol dial to se lect the
name you want to delete .
5 Press (ENTER).
The confirmation dialo g appears.
6 Rotate th e S EEK control dial to se lect “YES,”
then press (ENTER).
The name is deleted, and “Continue” appe ar s
if the other names are stored. If you want to
delete other names, rotate the SEEK control
dial to select “YES,” then repeat steps 4 to 6.
7 Press (MENU).
The unit returns t o normal reception / play
mode.
With the card remote commander
In steps 2 to 4: press M or m instead of the SEEK
control dial; in step 6: press < or , instead of the
SEEK control dial.
Adjusting menu items — MENU
1 Press (MENU).
2 Rotate the SEEK control dial until the
desired men u item appears, then
press (ENTER).
The items changes as follows:
Page 11
Setup y Display y Receive Mode
y Sound y Edit y List
3 Rotate the SEEK control dial until
desired setting item appea rs, then
press (ENTER).
The digital indication moves to the right
(setting select i on) side.
4 Rotate the SEEK control dial to select
the setting, then press (ENTER).
The setting is complete.
5 Press (MENU).
The display returns to normal play/reception
mode.
Note
Displayed items will differ, depending on the source
and setting.
With the card remote commander
In steps 2 and 3: press M or m instead of the SEEK
control dial; in step 4, press < or , instead of the
SEEK control dial.
The following items can be set (follow the page
reference for details):
“
z” indicates the default settings.
Setup
Clock Adjust (page 4)
Beep
To set “on” (z) or “off.”
1
AUX-A*
T o turn the AUX source display “on” (
(page 13).
Display
Clock (Clock Inform ation)
To display the clock and the display items/image
at the same time.
–“on”: to display at the same time.
–“off” (
A.IMG (Auto Image)
Auto Image mode automatically steps (every 1 0
seconds) through the display images.
–“off” (
–“SA”: to step repeatedly through the display
–“Movie”: to step repeatedly through the
–“All”: to step repeatedly through the display
(AUX Audio)
z) or “off”
z): to not display at the same time.
z): to not change the image
automatically.
images of Spectrum analyzer.
display images of Movie mode.
images in all display modes.
Info (Display Information)
To display the items (depending on the source,
etc.) at the middle of the display while a image
is displayed.
–“on” (
z): to display the items.
–“ off”: to not display any items.
Dimmer
To change the brightness of the display.
–“Auto” (
z): to dim the display automatically
when you turn lights on.
–“ on”: to dim the display.
–“off”: to deactivate the dimmer.
1
Demo*
(Demonstration)
To set “on” (z) or “off” (page 4).
A.Scroll (Auto Scroll)
To scroll long disp layed item au tomatically
when the disc/group/track is changed.
–“on”: to scroll.
–“off” (
z): to not scroll.
Receive Mode
Local (Local seek mode)
–“ on”: to only tune into stations with stronger
signals.
–“off” (
z): to tune normal reception.
Mono (Monaural mode)
T o improve poor FM recepti on, select monaural
reception mode.
–“ on”: to hear stereo broadcasts in monaural.
–“off” (
z): to hear stereo broadcast in stereo.
IF
–“Auto” (z): to narrow automatically the
reception frequency to eliminate noise.
–“Wide”*
2
: to always hear FM stereo
broadcasts in stereo and with full the
frequency signal reception.
Sound
EQ7 Tune (page9)
HPF (High Pass Filter)
To select the front/rear speaker cut-off
frequency: “off” (
LPF (Low Pass Filter)
To select the subwoofer cut-off frequency: “off”
(
z), “125Hz” or “78Hz.”
Loudness
To enhance bass and treble at lower volume.
–“on”: to reinforce bass and treble.
–“off” (
z): to not reinforce bass and treble.
AUX Level
To adjust the volume level for each connected
auxiliary equipment (page 13). This setting
negates the need to adjust the volume level
between sources.
z), “78Hz” or “125Hz.”
continue to next page t
11
Page 12
Edit
Name Edit (page 10)
Name Delete (page 10)
BTM (page 8)
*1 When the unit is turned off.
*2 In such cases, some FM stereo broadcasts may
become monaural while in the stereo reception
mode.
Using optional equipment
CD/MD changer
Selecting the changer
1 Press (SOURCE) repeatedly until “CD” or
“MD” appears.
2 Press (MODE) repeatedly until the de sired
changer appear s.
Unit
number
Playback starts.
* When MDLP disc is played.
Skipping discs
1 During playback, press (ENTER) until
“DISC” appears.
2 Rotate the SEEK control dial until the desired
disc appears.
Disc
number
LP2/LP4
indication*
Select T o play
REP-Disc*1disc repeat ed l y.
SHUF-
Changer*
SHUF-All*
tracks in the changer in random
1
order.
2
tracks in all units in random
order.
*1 When one or more CD/MD changers are
connected.
*2 When one or more CD changers, or two or more
MD changers are connected.
T o r eturn to normal play mode, select “R EP-off”
or “SHUF-off.”
Tip
“SHUF-All” will not shuffle tracks between CD units
and MD changers.
Locating a disc by name — LIST
You can select a disc from the list when
connecting a CD ch anger with the CUSTOM
FILE function or an MD c hanger.
If you assign a nam e t o a di sc, the name appear s
on the list. For details on labeling a disc, see
page 10.
1 During play back, press (MENU).
2 Rotate th e S EEK control dial until “List”
appears, then press (ENTER).
The disc number or di sc name appears.
3 Rotate th e S EEK cont rol dial unti l the desir ed
disc appears.
4 Press (ENTER) to play the disc.
The display returns to normal play mode.
With the card remote commander
During playback, press (LIST). Press M or m
repeatedly until the desired disc appears, then press
(ENTER).
Skipping groups and discs with the
card remote commander
1 During playback, press M or m.
T o skip Press M or m.
group and release (hold for a
moment).
group
continuously
within 2 second s of first
releasing.
discs repeatedly.
discs
continuously
then, press ag ain within 2
seconds and hold .
Repeat and shuffle play
1 During playback, press (1) (REP) or (2)
(SHUF) repeatedly until the desired setting
appears.
12
Rotary commander RM-X4S
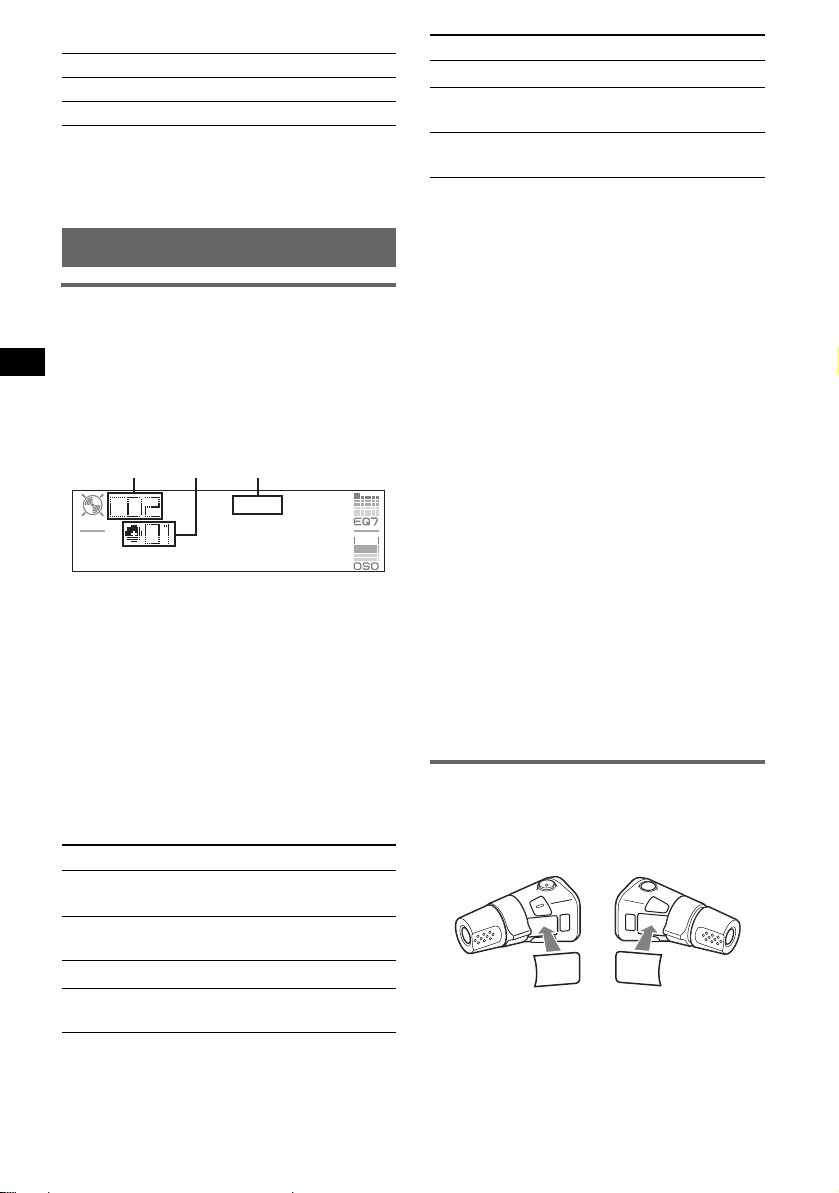
Attaching the label
Attach the indicat io n l abel depending on how
you mount the rotary commander.
D
S
D
N
U
SO
E
D
O
M
L
P
S
D
P
L
M
O
D
E
S
O
U
N
D
Page 13
Location of controls
The corresponding buttons on the rotary
commander control the same functions as those
on this unit or the card remote commander .
SOUND
PRESET/
DISC
SOURCE
VOL
ATT
DSPL
SEEK/AMS
MODE
OFF
OFF
The following controls on the rotary commander
require a different operation from the unit.
• PRESET/DISC control
To control radio/CD, the same as M or m on
card remote commander (push in and rotate).
• VOL (volume) control
The same as the volume control d ial on th e unit
(rotate).
• SEEK/AMS control
To control radio/CD, the same as < or , on
card remote commander (rotate, or rotate and
hold).
Changing the operative direction
The operative direction of the controls is factoryset as shown below.
To increase
Note
When connecting a portable device, be sure BUS
CONTROL IN is not connected. If a device is
connected to BUS CONTROL IN, “AUX” cannot be
selected with (SOURCE).
Tip
When connecting both a portable device and a
changer, use the optional AUX-IN selector.
Selecting auxiliary equipment
1 Press (SOURCE) repeatedly until “AUX”
appears.
Operate by the port able device itself.
To adjust the volume level of auxiliary
equipment, see “AUX Level” on page 11.
To decrease
If you need to mount the rotary commander on
the right hand side of the steering column, you
can rev erse the operative direction.
1 While pushing the VOL control, press and
hold (SOUND).
Auxiliary audio equipment
You can connect optional Sony portable devices
to the BUS AUDIO IN/AUX IN terminal on the
unit. If the chan ger or other device is not
connected to the te rminal, the unit allows y o u to
listen to the portable device on your car speakers.
13
Page 14
Additional Information
Precautions
• If your car has been parked in direc t sunl ig ht ,
allow the unit to cool off before operati ng i t.
• Power antenna wi ll ex tend aut omatica lly whil e the
unit is operating.
Moisture condensation
On a rainy day or in a very damp area , moi s ture
condensation may occur insid e the le nse s and
display of the unit. Should this occur, the unit will
not operate properly. In such a case, remove the disc
and wait for about an hour until the moisture has
evaporated.
To maintain high sound quality
Be careful not to splash juice or other soft drinks
onto the unit or discs.
Notes on discs
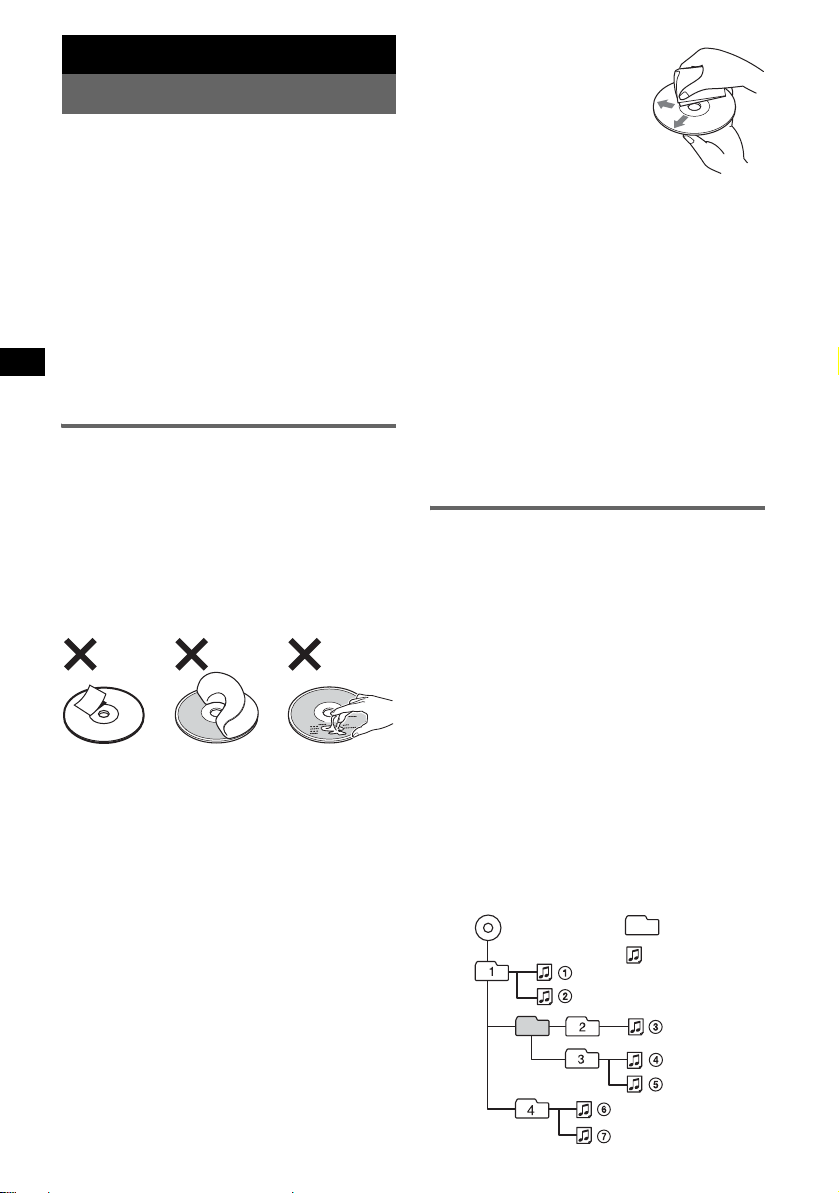
• To keep a disc clean, do not touch its surfa ce.
Handle the disc by its edge.
• Keep your discs in their cases or disc magazi ne s
when not in use.
• Do not subject discs to hea t /hi gh temperature.
Avoid leaving them in a parked car or on a
dashboard/rear tray.
• Do not attach labels, or us e di scs w it h sticky ink/
residue. Such discs may stop spinning when used,
causing a malfunction, or may ruin the disc.
• Do not use any discs with labels or stickers
attached.
The followin g ma lfu ncti ons ma y r esult fro m usi ng
such discs:
– Inabilit y to eject a disc (due to a label or st icker
peeling off and jamming the eject mechanism).
– Inability to read aud io data correctly (e.g.,
playback skipping, or no playback) due to heat
shrinking of a sticker or label causing a disc to
warp.
• Discs with non-standard shapes (e.g., heart,
square, star) cannot be played on this unit.
Attempting to do so may damage the unit. Do not
use such discs.
• You cannot play 8 cm (3
1
/4 in) CDs.
• Before playi ng, clean the discs
with a commercially available
cleaning cloth. Wipe each disc
from the center out. D o not us e
solvents suc h as benzine,
thinner, commercially available
cleaners, or antistatic spray
intended for analog discs.
Notes on CD-R/CD-RW discs
• Some CD-Rs/C D-RWs (depending on the
equipment used for its recording or the condition
of the disc) may not play on this unit.
• You cannot play a CD-R/a CD-RW that is not
finalized.
Music discs encoded with copyright
protection technologies
This product is designed to pla y ba ck discs that
conform to the Compact Disc (CD) standard.
Recently, various music discs encoded with
copyright protection tec hnologies are marketed by
some record co mpanie s. Plea se be aw are th at a mong
those discs, there are some that do not conform to
the CD standard and may no t be pla ya ble by this
product.
About MP3 files
MP3, which stands for MPEG-1 Audio Layer-3, is a
music file compression format standard. It
compresses audio CD data to approximately 1/10 of
its original size.
• The unit is compati ble with the ISO 9660 level 1/
level 2 format, Joliet/Romeo in the expansion
format, ID3 tag version 1.0, 1.1, 2.2, 2.3 and 2. 4,
and Multi Session.
• The maximum num be r of:
– folders (groups): 150 (including root and empty
folders).
– MP3 files (tracks) and folders contained in a
disc: 300 (if a folder/file names contain many
characters, th is number may become less than
300).
– displayable characters for a folder/file name is
32 (Joliet), or 32/64 (Romeo); ID3 tag i s 15 /3 0
characters (1.0, 1.1, 2.2 and 2. 3), or 63/ 126
characters (2.4).
Playback order of MP3 files
MP3
Folder
(group)
MP3 file
(track)
14
Page 15
Notes
• Be sure to finalize the disc before using on the unit.
• When naming an MP3 file, be sure to add the file
expansion “.mp3” to the file name.
• If you play a high-bit-rate MP3, such as 320 kbps,
sound may be intermittent.
• During playback of a VBR (variable bit rate) MP3 file
or fast-forward/reverse, elapsed playing time may
not display accurately.
• When the disc is recorded in Multi Session, only the
first track of the first session format is recognized
and played (any other format is skipped). The
priority of the format is CD-DA, ATRAC CD and
MP3.
– When the first track is a CD-DA, only CD-DA of the
first session is played.
– When the first track is not a CD-DA, an A TRAC CD
or MP3 session is played. If the disc has no data in
any of these formats, “NO Music” is displayed.
About ATRAC CD
ATRAC3plus format
ATRAC3, which stands for Adaptive Transform
Acoustic Coding3, is audio compression
technology. It compresses audio CD data to
approximately 1/10 of its original s i ze.
ATRAC3plus, whic h is a n exten de d form at of
ATRAC3, compresses t he a udio CD data to
approximately 1/20 of its original siz e . The unit
accepts both ATRAC3 and ATRAC3plus format.
ATRAC CD
ATRAC CD is recorded audio CD data which is
compressed to ATRAC3 or ATRAC3plus format
using authorized software, such as SonicStage 2.0 or
later, or SonicStage Simple B ur n er.
• The maximum number of:
– folders (groups): 255
– files (tracks): 999
• The characters for a fo lder/file name and text
informat io n written by SonicStage is d isplayed.
For details on ATR AC CD, see the Son ic Sta ge or
SonicStage Simple Burner manual.
Note
Be sure to create the ATRAC CD using authorized
software, such as SonicStage 2.0 or later, or
SonicStage Simple Burner 1.0 or 1.1, which are
supplied with Sony Network products.
If you have any questions or problems concerning
your unit that are not covered in this manual, consult
your nearest Sony dealer.
When the battery becomes weak, the range of the
card remote commander be com es shorter. Replace
the battery with a new CR2025 li thium battery. Use
of any other battery may present a risk of fire or
explosion.
x
+ side up
Notes on the lithium battery
• Keep the lithium battery out of the reach of children.
Should the battery be s wallowed, immediately
consult a doctor.
• Wipe the battery with a dry cloth to assure a good
contact.
• Be sure to observe the correct polarity when
install ing the battery.
• Do not hold the battery with metallic tweezers,
otherwise a short-circuit may occur.
WARNING
Battery may explode if mistreated.
Do not recharge, disassemble, or dispose of
in fire.
Fuse replacement
When replacing the fuse, be
sure to use one match ing the
amperage rating stat ed on the
original fuse. If the fuse blows,
check the power connection and
replace the fuse. If the fuse
blows again after replacement,
there may be an internal
malfunction. In such a case,
consult your nearest Sony
dealer.
continue to next page t
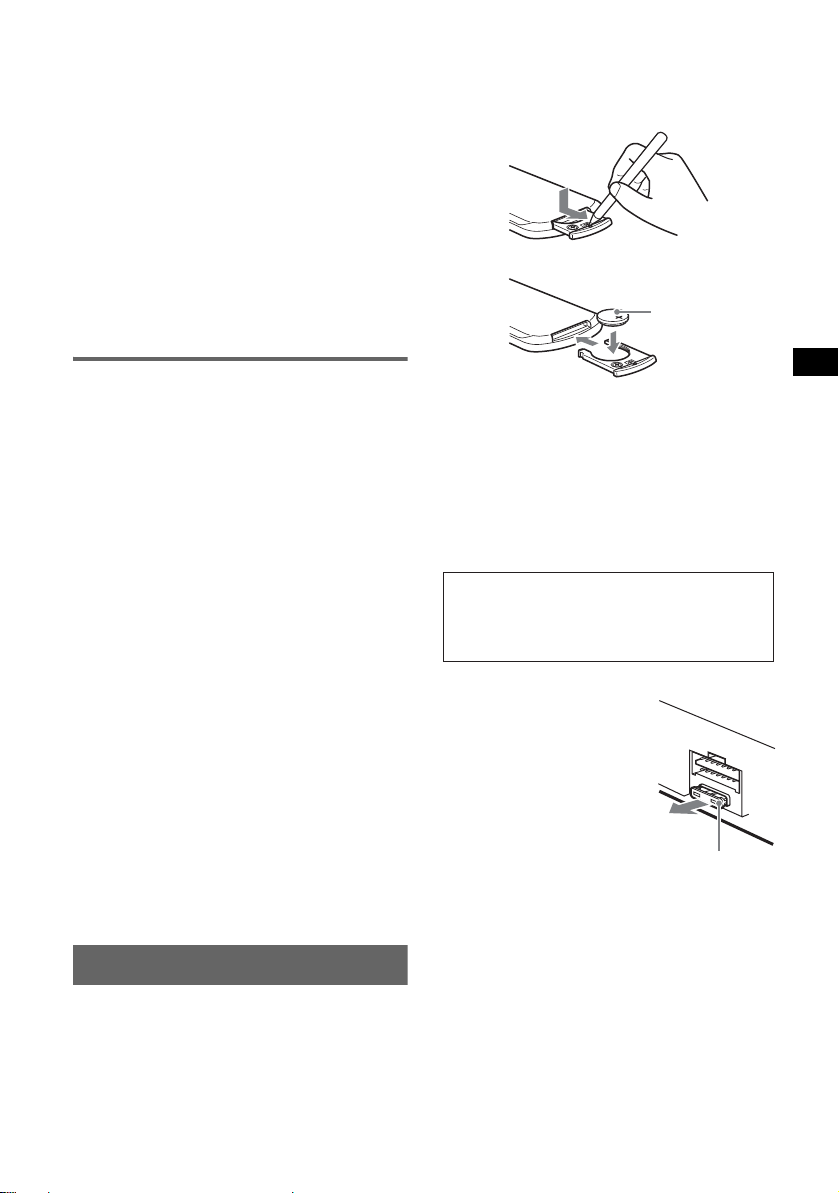
Fuse (10A)
Maintenance
Replacing the lithium battery of the
card remote commander
Under normal conditions, the battery will last
approximately 1 year. (The serv i ce life may be
shorter, depending on the conditions of use.)
15
Page 16
Cleaning the connectors
The unit may not function properly if the connectors
between the unit and the front panel are not clean. In
order to prevent this, detach the front panel (page 4)
and clean the connec tors with a cotton swab dipped
in alcohol. Do not apply too much force. Otherwise,
the connectors may be damaged.
2 Remove the unit.
1Insert both release keys simultane ously
until they click.
Hook facing
inwards.
Main unit
Notes
• For safety, turn off the ignition before cleaning the
connectors, and remove the key from the ignition
switch.
• Never touch the connectors directly with your fingers
or with any metal device.
Back of the front
panel
Removing the unit
1 Remove the protection collar.
1 Detach the front panel (page 4).
2 Engage the release keys together with the
protection collar.
Orient the re lease
keys as shown.
3 Pull out the release keys to remove the
protection collar.
2Pull the release keys to unseat the unit.
3Slide the unit ou t o f the moun ting.
Specifications
AUDIO POWER SPECIFICATIONS
POWER OUTPUT AND TOTAL HARMONIC
DISTORTION
23.2 watts per channel minimum continuous
average power into 4 ohms, 4 channels driven
from 20 Hz to 20 kHz with no more than 5% total
harmonic distortion.
CEA2006 Standard
Power Output: 17 Watts RMS × 4 at
4 Ohms < 1% THD+N
SN Ratio: 82 dBA
(reference: 1 Watt into 4 Ohms)
16
CD Player section
Signal-to-noise ratio: 120 dB
Frequency response: 10 – 20,000 Hz
Wo w and flu tter : Below measurable limit
Tuner section
FM
T uning range: 87.5 – 107.9 MHz
Antenna terminal: External antenna connector
Intermediate frequency : 10.7 MHz/450 kHz
Usable sensitivity: 9 dB f
Selectivity: 75 dB at 400 kHz
Signal-to-noise ratio: 67 dB (stereo), 69 dB (mono)
Harmonic distortion at 1 kHz: 0.5 % (stere o),
0.3 % (mono)
Separation: 35 dB at 1 kHz
Frequency response: 30 – 15,000 Hz
Page 17

AM
Tuning range: 530 – 1,710 kHz
Antenna terminal: External antenna connector
Intermediate frequency : 10.7 MHz/450 kHz
Sensitivity: 30 µV
Power amplifier section
Outputs: Speaker outputs (su r e sea l con ne ctor s)
Speaker impedance: 4 – 8 ohms
Maximum power output: 52 W × 4 (at 4 ohms)
General
Outputs:
Audio outputs terminal (fron t/rear)
Subwoofer output terminal (mono)
Power antenna relay control terminal
Power amplifier control terminal
Inputs:
Telephone ATT control terminal
Illumination control terminal
BUS control input ter minal
BUS audio input/AUX IN terminal
Remote controller input terminal
Antenna input terminal
Tone controls:
Bass: ±10 d B a t 62 Hz
Treble: ±10 dB at 16 kHz
Loudness:
+8 dB at 100 Hz
+2 dB at 10 kHz
Power requirements: 12 V DC car battery
(negative ground)
Dimensions: Approx . 178 × 50 × 188 mm (7
1
7
/2 in) (w/h/d)
Mounting dimensions: Approx. 182 × 53 × 162 mm
1
(7
/4 × 21/8 × 61/2 in) (w/h/d)
Mass: Approx. 1.6 kg (3 lb 9 oz)
Supplied accessorie s:
Card remote commander: RM-X 143A
Parts for installation and connectio ns (1 set )
Front panel case (1)
Optional accessories/equipment:
Rotary commander: RM-X6S
BUS cable (supplied with an RCA pin cord):
RC-61 (1 m), RC-62 (2 m)
CD changer (10 discs): CDX-757MX
CD changer (6 discs): CDX-T69
MD changer (6 discs): MDX-66XLP
Source selector: XA-C30
AUX-IN selector: XA-300
1
/8 × 2 ×
US and foreign patents licensed from Dolby
Laboratories.
Note
This unit cannot be connected to a digital preamplifier
or an equalizer which is Sony BUS system compatible.
Design and specifications are subject to change
without notice.
• Lead-free solder is used for soldering certain
parts. (more than 80 %)
• Halogenated flame retardants are not used in the
certain printed wiring boards.
• Halogenated flame retardants are not used in
cabinets.
• VOC (Volatile Organic Compound)-free vegetable
oil based ink is used for printing the carton.
• Packaging cushions do not use polystyrene foam.
Troubleshooting
The following checklist will help you remedy
problems you may encounte r wit h your unit.
Before going through the checklist below, check the
connection and operating procedures.
General
No power is being supplied to the unit.
• Check the connectio n. I f e v ery thin g i s in or der , chec k
the fuse.
• If the unit is turned off and the disp lay disappears, it
cannot be operated with the remote commander.
t Turn on the unit.
The power antenna does not extend.
The power antenna does not have a relay box.
No sound.
• The volume is too low.
• The ATT function is activated, or the Telephone ATT
function (when the interface cable of a car telep hone
is connected to the ATT lead) is activated.
• The position of the fader control (FAD) is not set for
a 2-speaker system.
• The CD changer is incompatible with the disc format
(MP3/ATRAC CD).
t Play back with a Sony MP3 compatible CD
changer, or this unit.
No beep sound.
• The beep sound is canceled (page 11).
• An optional power amplifier is connected and you are
not using the built-in amplifier.
The contents of the memory have be en erased.
• The RESET button has been pressed.
t Store again into the memo ry.
• The power connecting lead or battery has been
disconnected.
• The power connecting lead is not connected properly.
Stored stations and correct time are erased.
The fuse has blown.
Makes noise when the position of the ignition
key is switched.
The leads are not ma tc hed correctly with th e c ar ’s
accessory power conne cto r.
continue to next page t
17
Page 18

The display disappears from/does not appear
in the display window.
• The dimmer is se t “D immer on” (page 11).
• The angle of the front panel is not prop er.
tAdjust the angle of the front pan el by pressing
and hold (ANGLE) (page 6).
• The display disappears if you press and hold (OFF).
tPress and hold (OFF) again until the display
appears.
• The connectors are dirty (page16).
DSO does not function.
Depending on the type of car interior or type of music,
DSO may not have a desirable effect.
The images change automatically.
In Auto Image mode, the selecte d ima ge cannot be
displayed.
t To display selected image only, set to “A.IMG off”
(page 11).
Any display items do not display.
t Set to “Info on” (page 11).
CD/MD playback
The disc cannot be loaded.
• Another disc is already loaded.
• The disc has been forcibly inserted upside down or in
the wrong way.
The disc does not playback.
• Defective or dirty disc.
• The CD-Rs/CD-RWs are not for audio use (page 14).
MP3 files cannot be played back.
The disc is incompatible with the MP3 fo rm at and
version (page 14).
MP3 files take longer to play back than others.
The following discs take a longer time to star t
playback.
– a disc recorded with a complicated tree structure.
– a disc r e cor d e d in Multi Session.
– a disc to whic h dat a can be adde d.
The A TRAC CD cannot play.
• The disc is not created by authorized software, such
as SonicStage or SonicStage Simple Burner.
• Tracks that are not included in the group cannot be
played.
The display items do not scroll.
• For discs with very many characters, thos e may not
scroll.
• “A.Scroll” is set to off.
tSet to “A.Scroll on” (page 11) or press (SCRL)
on the card remote comm ander.
The sound skips.
• Installation is not correct.
tInstall the unit at an angle of less than 45° in a
sturdy part of the car.
• Defective or dirty disc.
The operation buttons do not function.
The disc will not eject.
Press the RESET button (page 4).
“MS” or “MD” does not appear on the source
display when both the optional MGS-X1 and
MD changer are connected.
This unit recognizes MGS-X1 as an MD unit.
t Press (SOURCE) until “MS” or “MD” appears,
then press (MODE) repeatedly.
Radio reception
The stations cannot be received.
The sound is hampered by noises.
• Connect a power antenna control lead (blue) or
accessory power supply lead (red) to the power
supply lead of a car’s antenna booster (only when
your car has buil t-in FM/AM antenna in th e rear/side
glass).
• Check the connection of the car antenna.
• The auto antenna will not go up.
t Check the connection of the power antenna
control lead.
• Check the frequency.
• When the DSO mode is on, the sound is sometimes
hampered by noises.
t Set the DS O mode to “off” (page 7).
Preset tuning is not possible.
• Store the correct fre que ncy in the memory.
• The broadcast signal is too weak.
Automatic tuning is not possible.
• The local seek mode is set to “on.”
t Set to “Local off” (page 11).
• The broadcast signal is too weak.
t Perform manu al tuning.
During FM reception, the “ST” indication
flashes.
• Tune in the frequency accurately.
• The broadcast signal is too weak.
t Set to “Mono on” (page 11).
An FM program broadcast in stereo is heard in
monaural.
The unit is in monaural reception mode.
t Set to “Mono off” (page 11).
Interference occurs during FM reception.
IF mode is set to “Wide.”
t Set to “IF A u to” (page 1 1) .
Error displays/Messages
1
Blank*
Tracks have not been recorded on the MD.*
t Play an MD with recorded tracks.
1
Error*
• The disc is dirty or inserted upside down.*
t Clean or insert the disc correctly.
• The disc cannot play becaus e of some problem.
t Insert another disc.
2
2
18
Page 19

Failure (Illuminates until any button is pressed.)
The connection of speakers/amplifiers is incorrect.
tSee the installat ion gui de manual of this model to
check the connection.
FAILURE (Illuminates for about 1 seco nd.)
When the X M tuner is connected, storing an XM radio
channel into a preset fai led.
tBe sure to receive the channel that you want to
store, then try it again.
Load
The changer is loading the disc.
tWait until loading is complete.
Local Seek +/–
The local seek mode is on during automatic tuning.
NO Data
All custom names have been delete d, or non e a re
stored.
NO Disc
The disc is not inserted in the CD/MD changer.
tInsert discs in the changer.
NO Disc Name
A disc name is not wri tten in the track.
NO Group Name
A group name is not written in the track.
NO ID3 Tag
ID3 tag information is not written in the MP3 file.
NO Info
Text information is not written in the AT R AC3/
ATRAC3plus file.
NO Magazine
The disc magazine is no t inse r te d in the CD changer.
tInsert the ma ga zine in the changer.
NO Music
The disc is not a music fil e.
tInsert a music CD in this unit or MP3 playable
changer.
NO Track Name
A track name is not writte n in the tr a ck.
Not Read
The disc information has not been read by the unit .
tLoading the dis c, the n se le c t it on the list.
Not Ready
The lid of the MD changer is open or the MDs are not
inserted properly.
tClose the lid or inse rt the MD s pr ope r ly.
Offset
There may be an internal malf unc tion.
tCheck the connection. If the error indication
remains on in the display, consult your nearest
Sony dealer.
Read
The unit is reading all trac k and group information on
the disc.
tWait until reading is complete and playback starts
automatically. Depending on the disc structure, it
may take more than a minute.
Push Reset
The CD unit and CD/MD changer canno t be opera ted
because of some problem.
tPress the RESE T butt on ( page 4).
“” or “”
During fast-forward or reverse, you have reached the
beginning or the end of the disc and you cannot go any
further.
“s”
The character cannot be displaye d with the unit.
*1 If an error occurs during playback of a CD or MD,
the disc number of the CD or MD does not appear
in the display.
*2 The disc number of the disc causing the error
appears in the display.
If these solutions do not help improve the situation,
consult your nearest Sony dealer.
If you take the unit to be repaired because of CD
playback trouble, bring the disc that was used at th e
time the problem beg an .
19
Page 20

Félicitations !
Nous vous remercions d’avoir fait l’acquisition
de ce lecteur de disq ues compacts Sony. Ce
lecteur vous offre les fonctions suivantes.
• Lecture de CD
Possibilité de lecture de CD-DA (conte na nt
également des informations CD TEXT*), de
CD-R/CD-RW (fichiers MP3 contenant
également des multisessions (page 15)) et de
CD ATRAC (format AT RAC3 et ATRAC3plus
(page 16)).
Type de
disques
CD-DA
MP3
CD ATRAC
Symbole indiqué sur le
disque
• Réception radio
–Vous pouvez mémoriser jusqu’à 6 stations par
bande de fréquences (FM1, FM2, FM3, A M1
et AM2).
–BTM (mémorisation des meilleurs accords) :
l’appareil sélectionne des stations émettant un
signal fort et les mémorise.
–Vous pouvez affecter un nom à chaque station
radio, l’enregistrer dans la mémoire et
afficher les noms de stations dans la liste.
• Réglages du son
–EQ7 : vous pouvez choisir une courbe
d’égaliseur pour 7 types de musique.
–DSO (Dynamic Soundstage Organizer) :
création d’un son mi eux réparti, à l’aide d’ un
haut-parleur virtuel, afin de renforcer le son
des haut-parleurs, même s’ils sont installés
dans la partie inférieure de la portière.
–BBE MP : amélioration des sons compressés
numériquement comme les fichiers MP3.
Pour plus de détails, reportez-vous à
l’explication suivante.
• Réglage de l’image
Vous pouvez r égler divers motifs d’affichage
sur l’appareil.
– Mode Space Producer : crée des motifs animés
sur l’écran sur le rythme de la musique.
• Pilotage d’appareils en option
En plus de la fonction de lecture, cet appareil
vous permet également de piloter des
changeurs CD/MD en option ou des appareils
portables Sony en option.
2
* Un disque CD TEXT est un CD-DA contenant des
informations telles que le nom du disque, le nom de
l’artiste et le nom des plages.
ATTENTION
L’utilisation d’instruments optiques avec ce
produit augmente les risques pour les yeux.
Avertissement si le contact de votre
véhicule ne comporte pas de position
ACC
Après avoir coupé le moteur, n’oubliez pas de
maintenir la touche (OFF) enfoncée sur
l’appareil jusqu’à ce que l’affichage
disparaisse.
Sinon, l’affichage n’est pas désactivé et la
batterie du véhicule se décharge.
Le processus BBE MP
R
améliore le son compressé
numériquement, tel qu
’
un
MP3, en restaurant et en améliorant les
harmoniques supérieures perdues lors de la
compression. BBE MP génère des harmoniques
paires depuis le matériel source, récupérant
efficacement la chaleur, les détails et les
nuances.
Le logo « XM Ready » indique que ce
produit permet de contrôler un module
de syntonisation XM (vendu
séparément). Veuillez consulter votre
détaillant agréé Sony pour plus de détails
sur les modules de syntonisation XM.
L’appellation et le logo SonicStage sont des
marques de comm erce de Sony Corporat io n.
ATRAC, ATRAC3, ATRAC3plus et leurs logos
sont des marques de commerce de Sony
Corporation.
Page 21

Table des matières
Préparation
Réinitialisation de l’appareil . . . . . . . . . . . . . . . 4
Réglage de l’horloge . . . . . . . . . . . . . . . . . . . . . 4
Mode DEMO. . . . . . . . . . . . . . . . . . . . . . . . . . . 4
Retrait de la façade . . . . . . . . . . . . . . . . . . . . . . 4
Installation de la façade . . . . . . . . . . . . . . . . 5
Insertion du disque dans le lecteur . . . . . . . . . . 5
Éjection du disque . . . . . . . . . . . . . . . . . . . . 5
Réglage de l’angle de la façade. . . . . . . . . . . . . 5
Emplacement des commandes et
opérations de base
Appareil principal . . . . . . . . . . . . . . . . . . . . 6
Mini-télécommande RM-X143A . . . . . . . . . 6
CD
Rubriques d’affichage . . . . . . . . . . . . . . . . . 8
Lecture répétée et lecture aléatoire . . . . . . . 8
Radio
Mémorisation et réception des stations. . . . . . . 9
Mémorisation automatique des stations
— BTM . . . . . . . . . . . . . . . . . . . . . . . . . . . . 9
Mémorisation manuelle . . . . . . . . . . . . . . . . 9
Réception des stations mémorisées . . . . . . . 9
Recherche automatique des fréquences . . . . 9
Réception d’une station à partir d’une liste
— LIST . . . . . . . . . . . . . . . . . . . . . . . . . . . . 9
Autres fonctions
Changement des réglages du son . . . . . . . . . . 10
Réglage des caractéristiques du son . . . . . 10
Réglage de la courbe de l’égaliseur
— EQ7 Tune . . . . . . . . . . . . . . . . . . . . . . . 10
Identificatio n d’une station de radi o/ d’un
disque . . . . . . . . . . . . . . . . . . . . . . . . . . . . . . . 10
Réglage des param ètres du menu
— MENU . . . . . . . . . . . . . . . . . . . . . . . . . . . . 11
Avec un équipement en option. . . . . . . . . . . . 13
Changeur CD/MD . . . . . . . . . . . . . . . . . . . 1 3
Satellite de commande RM-X4S . . . . . . . . 14
Raccordement d’appareils audio
auxiliaires . . . . . . . . . . . . . . . . . . . . . . . . . 14
Informations complémentaires
Précautions . . . . . . . . . . . . . . . . . . . . . . . . . . . 15
Remarques sur les disques . . . . . . . . . . . . 15
À propos des fichiers MP3 . . . . . . . . . . . . 15
À propos des CD ATRAC . . . . . . . . . . . . . 16
Entretien . . . . . . . . . . . . . . . . . . . . . . . . . . . . . 1 6
Démontage de l’appareil. . . . . . . . . . . . . . . . . 17
Caractéristiques techniques. . . . . . . . . . . . . . . 17
Dépannage . . . . . . . . . . . . . . . . . . . . . . . . . . . 1 8
Affichage des erreurs et messages . . . . . . 20
3
Page 22

Préparation
Mode DEMO
Réinitialisation de l’appareil
Avant la pre m ière mise e n service de l’ a ppareil,
après avoir remplacé la batterie du véhicule ou
modifié les raccordements, vous devez
réinitialiser l’appareil.
Retirez la façade, pui s appuyez sur la touche
RESET avec un objet pointu comme un sty l o à
bille.
Remarque
Une pression sur la touche RESET remet l’heure à
zéro et efface certaines informations mémorisées.
To uche RESET
Réglage de l’horloge
L ’horloge numérique fonctionne suivant un cycle
de 12 heures.
1 Appuyez sur (MENU).
2 Tournez la molette de sélection SEEK
jusqu’à ce que « Setup » s’affiche,
puis appuyez sur (ENTER).
3 Tournez la molette de sélection SEEK
jusqu’à ce que « Clock Adjust »
s’affiche, puis appuyez sur (ENTER).
L’écran de réglage de l’horloge apparaît.
4 Tournez la molette de sélection SEEK
pour régler les heures et les minutes.
Appuyez sur (ENTER) pour déplacer
l’indication numérique.
5 Appuyez sur (ENTER) après avoir
réglé les minutes.
L’horloge démarre .
Pour afficher l’horloge en cours de lecture/
réception, réglez « Clock on » (page 12).
Avec la mini-télécommande
Aux étapes 2 à 4 : appuyez sur M ou m au lieu
d’utiliser la molette de sélection SEEK ; à l’étape 4 :
appuyez sur < ou , au lieu de (ENTER).
Lorsque l’appareil est hors tension, l’horloge est
affichée en premier, puis l’écran du mode de
démonstration (DEMO) apparaît.
Pour annuler le mode DEMO, réglez « Demo
off » dans le menu (page 12) lors de la mise hors
tension de l’ ap pareil.
Retrait de la façade
Vous pouvez retirer la façade de cet appareil pour
le protéger du vol.
Alarme d’avertissement
Si vous mettez la clé de contact en position OFF
sans ôter la façade , l’a larme d’avertissement
retentit pe ndant quelques secondes.
L’alarme est émise uniquement lorsque
l’amplificateur intégré est utilisé.
1 Appuyez sur (OFF).
L’appareil est mis hors tension.
2 Appuyez sur .
Le côté gauche de la façade se détache.
3 Faites glisser la façade vers la gauche,
puis tirez doucement la façade vers
vous.
(OFF)
2
1
Remarques
• N’exercez pas de pression excessive sur la façade
et la fenêtre d’affichage et ne l’échappez pas.
• N’exposez pas la façade à une température ou à un
taux d’humidité élevée. Évitez de la laisser dans un
véhicule en stationnement ou sur le tableau de bord
ou la plage arrière.
Conseil
Lorsque vous transportez la façade, glissez-la dans
l’étui fourni à cet effet.
4
Page 23

Installation de la façade
Enfilez l’orifice A de la façade sur la tige B de
l’appareil, puis poussez doucement sur le côté
gauche pour l’engager en position.
Appuyez sur (SOURCE) sur l’appareil (ou
insérez un disque) pour le faire fonct io nner.
Éjection du disque
1 Appuyez sur Z.
La façade bascule a ut o m atiquement vers le
bas et le disque est éjecté.
2 Appuyez sur Z pour fermer la façade.
Remarque
La façade se referme automatiquement après 15
secondes.
Réglage de l’angle de la façade
A
B
Remarque
Ne posez rien sur la face interne de la façade.
Insertion du disque dans le
lecteur
1 Appuyez sur Z.
La façade bascul e automatiquement vers le
bas.
2 Insérez le disque (côté imprimé vers le
haut).
La façade se referme automatiquement et la
lecture commence.
ANGLE
1 Appuyez sur la touche (ANGLE) et
maintenez-la enfoncée ; répétez
l’opération jusqu’à obtenir l’angle de
façade voulu.
La façade peut prendr e 3 positions.
Pour remettre la façade dans sa position par
défaut, appuyez pl us i eurs fois sur la touche
(ANGLE) et maintenez-la enfo ncée jusqu’à ce
que la façade reprenne sa position par défaut.
Conseils
• Après avoir basculé vers le base (pour permettre
d’insérer le disque), la façade reprend
automatiquement la position que vous aviez définie.
• L’angle de la façade défini est mémorisé dans
l’appareil. Lorsque vous coupez le contact, la façade
reprend sa position par défaut. Lorsque vous mettez
le contac t, l a f aç ad e re pren d la pos it ion s elon l’ ang le
que vous avez défini.
5
Page 24

Emplacement des commandes et opérations de base
Appareil principal
12 3 4 6578
OFF
MODE
VOL
9
Mini-télécommande
RM-X143A
qh
qd
qa
qj
SCRL
DSPL
REP SHUF
1
4
EQ7 DSO
7
q;
MENU
–
SEEK
qk
SOUND
ql
2
w;
6
PUSH SOUND PUSH ENTER
REP SHUF BBE MP PAUSE
SOURCE DSPL1
2534
6
qaq; qs qd qf qg
Pour plus de détails, reportez-vous aux numéros
de pages indiqués . Le s t o uches correspondantes
de la mini-télécommande pilotent les mêmes
fonctions que celles de l’appareil.
OPEN/CLOSE
2
BBE MP PAUSE
MODE
DISC
SOURCE
DISC
VOL
3
5
6
CAT
LIST
+
SEEK
–
ENTER
ATTOFF
+
–
wa
1
ws
wd
+
wf
6
wg
A Touche MODE 9, 13
Sélection de la ba nde radio (FM/AM )/
sélection de l’appareil*
B Touche OFF
Mise hors tension de l’a ppareil/arrêt de la
source.
C Commande VOL (volume)/touche
SOUND 10
Réglage du volume (tournez) ; sélection des
paramètres du son (appuyez).
D Fenêtre d’affichage
E Fente d’insertion des disqu es 5
Insertion du disque.
F Molette de sélection SEEK/touche
ENTER
Sélection de rubriques (tournez) ; validation
d’un réglage (a ppuyez).
Radio :
Syntonisation de s ta tions : appuyez sur
(ENTER) plusieurs fois pour sélectionner
« SEEK », « MANUAL » ou « PRESET »,
puis tournez la molette SEEK jusqu’à ce que
la station voulue appar aisse.
CD :
Omission de plage s ou de groupes : appuyez
sur (ENTER) plusieurs fois pour
sélectionner ./> ou « GROUP », puis
tournez la molette SEEK jusqu’à ce que la
plage ou le groupe voul u apparaisse.
G Touche MENU
Activation du menu.
ANGLE
+
–
CDX-M7815X
CDX-M7810
1
.
SEEK
MENU
IMAGE
Page 25

H Touche Z (éjection)/ANGLE 5
Ejection du disque/ouverture de la façade
(appuyez) ; réglage de l’angle de la façade
parmi 3 position s (appuyez sur la touche et
mainten ez-la enfo ncée).
I Touche (déverrouillage de la
façade) 4
J Touche SOURCE
Mise sous tension/changement de la source
(radio/CD/MD*
2
/AUX*3).
K Touches numériques
Radio :
Réception des stations enregistrées
(appuyez) ; mémorisation des stations
(appuyez sur la touche et maintenez-la
enfoncée).
CD/MD*
2
:
(1): REP 8
(2): SHUF 8
(5): BBE MP*
4
2
Pour activer la fonction BBE MP, réglez
« BBE MP-on ». Pour la désactiver, réglez
«BBE MP-off».
(6): PAUSE*
4
Pour effectuer une paus e de lecture.
Appuyez de nouveau sur cette touche pour
annuler.
L Touche RESET 4
M Touche DSPL (affich ag e) 8, 11
Changement des rubriques d’affichage.
N Récepteur
Réception des signaux de la minitélécommande et du satellite de commande.
O Touche IMAGE 2
Sélection du motif d’affichage.
Mode Space Producer t Mode Movie
(Film) 1-2 t Mode Spectrum analyzer
(Analyseur de sp ectre) 1-5 t Mode Wall
paper (Papier peint) 1-3 t mode de lecture/
réception normal
Les touches suivantes de la mini-télécommande
correspondent également à des touches/fonctions
différentes de celles de l’appareil.
qh Touche SCRL (défilement) 8
Défilement de la rubrique d’af fichage.
qj Touche EQ7 (égaliseur)
Sélection d’une type d’égaliseur (Xplo d,
Vocal, Club, Jazz, New Age, Rock, Custom
ou désactivé).
qk Touches </, (SEEK –/+)
Radio :
Réglage automatique des stations
(appuyez) ; recherche manuelle d’une station
(appuyez sur la touche et main tenez-la
enfoncée).
CD :
Saut de plages (appuyez) ; saut de plages en
continu (appuyez, puis appuyez dans un
délai d’environ 1 seconde e t mai ntenez la
touche enfoncée) ; avance/retour rapide dans
une plage (appuyez sur la touche et
maintenez-la enfoncée).
ql Touche SOUND 10
Sélection des paramètres de son.
w; Touche VOL (volume) +/–
Réglage du niveau du volume.
wa Touche OPEN/CLO SE
Permet d’ouvr ir ou de fermer la façad e.
ws Touche DSO 2
Sélection du mode DSO (1, 2, 3 ou off). Plus
le chiffre est élevé, plus l’effet est prononcé.
wd Touche LIST/CAT*
5
9, 13
Affichage automatique des titres.
wf Touches M/m (DISC +/–)
Sélection de stat io ns présélectionnées /s aut
de plusieurs groupes (appuyez) ; saut de
plusieurs groupes de suite (appuyez sur la
touche et maintenez-la enfon cée).
wg Tou che ATT (atténuation du son)
Atténuatio n du son . Appuy ez de nouv eau su r
cette touche pour annuler.
*1 Lorsqu’un changeur CD/MD est raccordé.
*2 Lorsqu’un changeur MD en option est raccordé.
*3 Lorsqu’un lecteur appareil portable Sony en option
est raccordé.
*4 Lorsque la lecture est effectuée sur cet appareil.
*5 Lorsqu’un réce pteur XM est raccordé.
Remarque
Si vous éteignez l’appareil et que l’affichage disparaît,
son fonctionnement ne peut pas être commandé avec
la mini-télécommande, sauf si vous appuyez d’abord
sur la touche (SOURCE) de l’appareil ou si vous
insérez d’abord un disque dans le lecteur pour
l’activer.
Conseil
Pour obtenir des informations plus détaillées sur le
remplacement de la pile, reportez-vous à la section
« Remplacement de la pile au lithium de la
télécommande » à la page 16.
7
Page 26

CD
Pour plus de détails sur le raccordement d’un
changeur CD/MD, re por t ez-vous à la page 13.
Rubriques d’affichage
Exemple : lorsque vous sélectionnez le mode de
lecture normal en appuyant plusieurs fois sur
(IMAGE) (p age 7) .
ABC
D
A Source
B Indication MP3/ATRAC3 plus
C Horloge*
1
D Indication BBE
E Numéro de groupe/Num ér o de plage/Temps
de lecture écoulé, Nom du disque/de l’artiste,
Nom du groupe, N om de plage, Informations
textuelles*
*1 Lorsque l’horloge est réglée à « on » (page 12).
*2 Lorsque vous lisez un fichier MP3, l’étiquette ID3
s’affiche et lorsque vous lisez un CD ATRA C, les
informations textuelles de SonicStage, etc.
s’affichent.
2
Pour changer de rubriques d’affichage E,
appuyez sur (DSPL) ; pour faire défiler les
rubriques d’affichage E, appuyez sur (SCRL)
sur la mini-télécommande ou réglez « A.Scroll
on » (page 12).
Conseil
Les rubriques affichées varient selon le type de
disque, le format enregistré et les réglages. Pour plus
de détails à propos des fichiers MP3, reportez-vous à
la page 15 ; à propos des CD ATRAC, reportez-vous à
la page 16.
E
Lecture répétée et lecture aléatoire
1 En cours de lecture, appuyez
plusieurs fois sur (1) (REP) ou (2)
(SHUF) jusqu’à ce que le réglage de
votr e choix apparaisse.
Sélectionnez Pour lire
REP-Track une plage en boucle.
REP-Group* un groupe en b oucle.
SHUF-Group* un groupe dans un ordre
aléatoire.
SHUF-Disc un disque dans un ordre
aléatoire.
* Lors de la lecture d’un fichier MP3/CD ATRAC.
Pour revenir au mode de lecture normal,
sélectionnez « REP-off » ou « SHUF-off ».
8
Page 27

Radio
Mémorisation et réception des
stations
Conseil
Une autre façon de recevoir les stations mémorisées
est d’appuyer plusieurs fois sur (ENTER) jusqu’à ce
que « PRESET » s’affiche, puis de tourner la molette
de sélection SEEK jusqu’à ce que le numéro prédéfini
voulu apparaisse.
Attention
Pour régler des stations pendant que vous
conduisez, utilisez la fo nction de mémorisation
des meilleurs accords (BTM) afin d’éviter tout
accident.
Mémorisation automatique des
stations — BTM
1 Appuyez plusieurs fois sur (SOURCE)
jusqu’à ce que l’indication « TUNER »
apparaisse.
Appuyez plusieur s fois sur (MODE) pour
changer de bande. Vous pouvez sélectionner
FM1, FM2, FM3, AM 1 ou AM2.
2 Appuyez sur (MENU).
3 Tournez la molette de sélection SEEK
jusqu’à ce que « Edit » s’affiche, puis
appuyez sur (ENTER).
4 Tournez la molette de sélection SEEK
jusqu’à ce que « BTM » s’affiche, puis
appuyez sur (ENTER).
L’appareil enregistre les stations sur les
touches numériques dans l’ordre des
fréquences.
Un bip retentit lorsque le réglage est
mémorisé.
Avec la mini-télécommande
Aux étapes 3 et 4 : appuyez sur M ou m au lieu
d’utiliser la molette de sélection SEEK.
Recherche automatique des
fréquences
1 Sélectionnez la bande, appuyez
plusieurs fois sur (ENTER) jusqu’à ce
que « SEEK » apparaisse, puis
tournez la molette de sélection SEEK
pour rechercher la station.
Le balayage s’interrompt lorsque l’appareil
capte une station. R épé tez cette procédure
jusqu’à ce que vous capt iez la station
souhaitée.
Conseil
Si vous connaissez la fréquence de la station à
écouter, appuyez plusieurs fois sur (ENTER) jusqu’à
ce que « MANUAL » s’affiche, puis tournez la molette
de sélection SEEK jusqu’à ce que la fréquence voulue
apparaisse.
Réception d’une station à partir
d’une liste — LIST
Vous pouvez afficher automatiquement la
fréquence ou le nom. Pour savoir comment
attribuer un nom à une station, reportez-vous à la
page 10.
1 Sélectionnez la bande, puis appuye z
sur (MENU).
2 Tournez la molette de sélection SEEK
jusqu’à ce que « List » s’affiche, puis
appuyez sur (ENTER).
La fréquence ou le nom de la station apparaît.
Mémorisation manuelle
1 Lorsque vous captez la station que
vous souhaitez mémoriser, appuyez
sur une touche numérique ((1) à (6))
et maintenez-la enfoncée jusqu’à ce
que l’indication « Memory » s’affiche.
Le numéro de la touche apparaît dans l a
fenêtre d’affichage.
Remarque
Si vous essayez de mémoriser une autre station sur la
même touche numérique, la station mémorisée
précédemment est remplacée.
Réception des stations
mémorisées
1 Sélectionnez la bande, puis appuyez
sur une touche numérique ((1) à (6)).
3 Tournez la molette de sélection SEEK
jusqu’à ce que la station souhaitée
apparaisse.
4 Appuyez sur (ENTER) pour capter la
station.
L’appareil revient au mode de réception
normal.
Avec la mini-télécommande
Sélectionnez la bande, puis appuyez sur (LIST).
Appuyez plusieurs fois sur M ou m jusqu’à ce que la
station souhaitée s’affiche, puis appuyez sur
(ENTER).
9
Page 28

Autres fonctions
Changement des réglages du
son
Réglage des caractéristiques du
son
Vous pouvez régler l’égaliseur, le mode DSO, les
graves, les aigus, la balance gauche/droite,
l’équilibre avant/arrière, ainsi que le volume du
caisson de graves.
1 Sélectionnez une source, puis
appuyez plusieurs fois sur (SOUND)
pour sélectionner la rubrique
souhaitée.
La rubrique change comme suit :
EQ7 t DSO t BAS (graves) t
TRE (aigus) t BAL (gauche-droite) t
FAD (avant-arrière) t
SUB (volume du caisson de graves)*
* « ∞ » est affiché sur le réglage inférieur et peut
être réglé par incréments de 20.
2 Tournez plusieurs fois la commande
VOL pour régler le paramètre
sélectionné.
Après 3 second es , l e réglage est terminé et
l’écran d’affichage revient en mode de
lecture/réception normal.
Remarque
Effectuez ce réglage dans les 3 secondes après avoir
sélectionné le paramètre.
Avec la mini-télécommande
A l’étape 2 : appuyez sur < ou , au lieu d’utiliser la
molette de sélection VOL.
Réglage de la courbe de l’égaliseur
— EQ7 Tune
Vous pouvez régler et mémoris er différentes
plages de tonalité po ur l’ égaliseur.
1 Sélectionnez une source, puis
appuyez sur (MENU).
2 Tournez la molette de sélection SEEK
jusqu’à ce que « Sound » s’affiche,
puis appuyez sur (ENTER).
3 Tournez la molette de sélection SEEK
jusqu’à ce que « EQ7 Tune » s’affiche,
puis appuyez sur (ENTER).
4 Tournez la molette de sélection SEEK
pour sélectionner le type d’égaliseur
souhaité, puis appuyez sur (ENTER).
5 Tournez la molette de sélection SEEK
pour régler le volume.
Le niveau de volume peut être régl é par
incréments de 1 dB, de –10 dB à +10 dB.
6 Appuyez sur (ENTER) pour passer à la
fréquence suivante.
La fréquence change comme suit :
62Hz t 157Hz t 396Hz t 1.0kHz t
2.5kHz t 6.3kHz t 16kHz
Répétez les étapes 5 et 6 pour régler la courbe
de l’égaliseur.
La boîte de dial ogue de conf irmat ion s’ aff ic he
une fois que vous avez réglé « 16kHz » et
appuyé sur (ENTER).
7 Tournez la molette de sélection SEEK
pour sélectionner « YES », puis
appuyez sur (ENTER).
Le réglage est termi né et l’écran d’affichage
revient en mode de lecture/réception nor m al.
Pour restaurer la courbe par déf au t de l’ég aliseu r ,
appuyez sur la touche (ENTER) et maintenez-la
enfoncée à l’étape 5 ou 6, puis tournez la molette
de sélection SEEK po ur sél ectionner « YES ».
Avec la mini-télécommande
Aux étapes 2, 3 et 5 : appuyez sur M ou m au lieu
d’utiliser la molette de sélection SEEK ; aux étapes 4
et 7 : appuyez sur < ou , au lieu d’utiliser la molette
de sélection SEEK ; à l’étape 6 : appuyez sur < ou
, au lieu de (ENTER).
Identification d’une station de
radio/d’un disque
Lorsque vous captez une station ou que vous
lisez un disque d’un cha ngeur CD avec la
fonction CUSTOM FILE, vous pouvez attribuer
un nom personnalisé de 8 caractères maximum
(fonction de mémoire des stations/fonction de
mémo de disque).
Si vous attribuez un nom à une station/un disque,
le nom apparaît dans la liste (page 9 ou 13).
1 Lorsque vous recevez une station ou
que vous lisez un disque auquel vous
souhaitez attribuer un nom, appuyez
sur (MENU).
2 Tournez la molette de sélection SEEK
jusqu’à ce que « Edit » s’affiche, puis
appuyez sur (ENTER).
10
Page 29

3 Tournez la molette de sélection SEEK
jusqu’à ce que « Name Edit » s’affiche,
puis appuyez sur (ENTER).
4 Tournez la molette de sélection SEEK
jusqu’à ce que le cara ct ère souhaité
apparaisse.
Le caractère ch ange comme suit :
A y B y C ... y 0 y 1 y 2 ... y +
y – y ... y (espace) y A
Appuyez sur (ENTER) pour dép l acer
l’indication numérique.
Répétez cette opé ration jusqu’à ce qu e vous
ayez saisi le nom entier.
La boîte de dialogue de confirmation s’affiche
une fois que vous avez entré le caractère à
l’extrême droite et appuyé sur
(ENTER)
.
5 Tournez la molette de sélection SEEK
pour sélectionner « YES », puis
appuyez sur (ENTER).
Le réglage est terminé et l’écran d’affichage
revient en mode de récepti on/lecture normale .
Pour afficher le nom, appuyez sur (DSPL) en
cours de réception/lecture .
Conseils
• Pour corriger ou effacer un caractère, procédez
simplement par réécriture ou saisissez « ».
• Le mémo de disque est toujours affiché en priorité
par rapport à un titre préenregistré.
• Vous pouvez attribuer un nom à un disque sur
l’appareil si un changeur doté de la fonction
CUSTOM FILE est raccordé.
• « REP-Track » et toutes les lectures aléatoires sont
interrompues jusqu’à ce que l’identification du
disque soit terminée.
Avec la mini-télécommande
Aux étapes 2 à 4 : appuyez sur M ou m au lieu
d’utiliser la molette de sélection SEEK ; à l’étape 4 :
appuyez sur < ou , pour déplacer l’indication
numérique ; à l’étape 5 : appuyez sur < ou , au lieu
d’utiliser la molette de sélection SEEK.
4 Tournez la molette de sélection SEEK pour
sélectionner le nom à supprimer.
5 Appuyez sur (ENTER).
La boîte de dialogue de confirmation s’affiche.
6 Tournez la molette de sélection SEEK pour
sélectionner « YES », puis appuyez sur
(ENTER).
Le nom est supprim é ; « Continue » s’affiche
si d’autres noms sont mémorisés. Si vous
souhaitez supprimer d’autres noms, tourn ez la
molette de sélection SEEK pour sélectionner
« YES », pui s répétez les étapes 4 à 6.
7 Appuyez sur (MENU).
L’appareil revient au mode de réception/
lecture normal.
Avec la mini-télécommande
Aux étapes 2 à 4 : appuyez sur M ou m au lieu
d’utiliser la molette de sélection SEEK ; à l’étape 6 :
appuyez sur < ou , au lieu d’utiliser la molette de
sélection SEEK.
Réglage des paramètres du
menu — MENU
1 Appuyez sur (MENU).
2 Tournez la molette de sélection SEEK
jusqu’à ce que le paramètre de menu
souhaité s’affiche, puis appuyez sur
(ENTER).
Les rubriques changent comme suit :
Setup y Display y Receiv e M ode
y Sound y Edit y List
3 Tournez la molette de sélection SEEK
jusqu’à ce que le paramètre de menu
souhaité s’affiche, puis appuyez sur
(ENTER).
L’indication numérique se déplace vers la
droite (sélectio n de réglage).
Suppression du nom personnalisé
1 Sélectionnez la radio ou l’appareil où se trouve
mémorisé le nom personnalisé que vous
souhaitez effacer, puis appuyez sur (MENU).
2 Tournez la molette de sélection SEEK jusqu’à
ce que « Edit » s’affiche, puis appuyez sur
(ENTER).
3 Tournez la molette de sélection SEEK jusqu’à
ce que « Name Delete » s’affich e, puis
appuyez sur (ENTER).
Le nom mémorisé apparaît.
4 Tournez la molette de sélection SEEK
pour sélectionner le réglage, puis
appuyez sur (ENTER).
Le réglage est term iné.
5 Appuyez sur (MENU).
L’appareil revient au mode de lecture/
réception norm al .
Remarque
Les paramètres affichés varient selon la source et le
réglage.
Suite à la page suivante t
11
Page 30

Avec la mini-télécommande
Aux étapes 2 et 3 : appuyez sur M ou m au lieu
d’utiliser la molette de sélection SEEK ; à l’étape 4 :
appuyez sur < ou , au lieu d’utiliser la molette de
sélection SEEK.
Les paramètres suivants peuvent être réglés
(reportez-vous à la page indiquée pour plus d e
détails) :
«
z » indique les réglages par défaut.
Setup (Configuration)
Clock Adjust (Réglage de l’horl oge) (page 4)
Beep (Bip)
Pour régler le bip à « on » (z) ou « off ».
1
AUX-A*
(AUX Audio)
Pour régler l’affichage de la source AUX à « on »
(
z) ou « off » (page 14).
Display (Fenêtre d’affichage)
Clock (Informations relatives à l’h orloge)
Pour afficher simulta n éme nt l’ho rlo g e et les
rubriques/le motif d’af fichage.
–« on » : permet un affichage simultané.
– « off » (
A.IMG (Image automatique)
Le mode Auto Image fait automatiq uement
défiler (toutes les 10 secondes) les motifs
d’affichage.
– « off » (
– « SA » : pour faire défiler de façon répétée les
– « M ovie » : pour faire défiler d e façon répétée
–« All » : pour faire défiler plusieurs fois les
Info (Informations relative s à l’image)
Pour afficher les rubriques (en fonction de la
source, etc.) au milieu de l’écran d’affichage
alors qu’une image est affichée.
– « on » (
– « off » : n’affiche aucune rubrique.
Dimmer
Pour modifier la luminosité de la fenêtre
d’affichage.
– « Aut o » (
–« on » : réduit la luminosité de la fenêtre
– « off » : désactive le régulateur de lum in osité.
Demo*
Pour régler le mode de démonstration à « on »
(
z) ou « off » (page 4).
z) : désactive l’affichage simult ané.
z) : pour ne pas changer
automatiquement d’image.
motifs d’af fi chage du mode Spectr um analy zer
(Analyseur de spectre).
les motifs d’affichage du mode Movie (Film).
images d’affichage de tous les modes
d’affichage.
z) : affi che les rubriques.
z) : réduit la luminosité
automatiquement lorsque vous allume z les
phares.
d’affichage.
1
(Démonstration)
A.Scroll (Défilement automatique)
Pour faire défiler les rubriques longues de façon
automatique lors que vous changez de disque/
groupe/plage.
–« on » : pour faire défiler les rubriques.
–« off» (
z) : pour ne pas fair e défiler les
rubriques.
Receive Mode (Mode de réception)
Local (Mode de r echerche local)
–« on » : pour syntoniser uni quement les
stations dont les signaux sont puissants.
–« off» (
z) : pour syntoniser une réception
normale.
Mono (Mode monaural )
Pour améliorer une réception FM médiocre,
sélectionnez le mode de réception mono.
–« on » : pour écouter les émissions stéréo en
mono.
–« off» (
z) : pour écouter les émissions stéréo
en stéréo.
IF
–« Auto» (
z) : pour restreindre
automatiquement la fréquence de réception
afin de supprimer les parasites.
–«Wide »*
2
: pour toujours écouter en stéréo
les émission s stér éo FM et ét endre la ré cept ion
du signal de la fréq uence.
Sound (Son)
EQ7 Tune (page 10)
HPF (Filtre passe-haut)
Pour sélect ionn er la fr éque nc e de co up ure a v a nt/
arrière : « off » (
z), « 78Hz » ou « 125Hz ».
LPF (Filtre passe-bas)
Pour sélectionner l a f réquence de coupure d u
caisson de graves : « off » (
z), « 125Hz » ou
«78Hz».
Loundness (Intensité sonore)
Pour amplifier les graves et des ai gus, même à
faible volume.
–« on » : pour amplifier les graves et les aigus.
–«off» (
z) : pour ne pas amplifier les graves et
les aigus.
AUX Level (Niveau AUX)
Pour régler le volume de chaque appareil
auxiliaire raccor dé (page 14). Ce réglage év ite
de régler le niveau de volume ent re les sources.
Edit (Édition)
Name Edit (page 10)
Name Delete (page 11)
BTM (page 9)
12
Page 31

*1 Lorsque l’app areil est hors tension.
*2 Dans ce cas, certaines émissions stéréo FM
peuvent passer en réception mono, même si le
mode de réception stéréo est activé.
Avec un équipement en option
Changeur CD/MD
Sélectio n du c han ge u r
1 Appuyez plusieurs fois sur (SOURCE)
jusqu’à ce que « CD » ou « MD » apparaisse.
2 Appuyez plusieurs fois sur (MODE) jusqu’à
ce que le changeu r souhaité apparaisse.
Numéro
d’appareil
La lecture commen ce.
* Lors de la lecture disque MDLP.
Saut de disques
1 En cours de la lecture, ap puyez sur (ENTER)
jusqu’à ce que « DISC » s’affiche.
2 Tournez la molette de sélection SEEK jusqu’à
ce que le disque souhaité apparaisse.
Saut de groupes et de disques à
l’aide de la mini-télécommande
1 En cours de lecture, ap puyez sur M ou m.
Pour sauter Appuyez sur M ou m.
un groupe et relâchez la touche
plusieurs
groupes de
suite
des disques de façon répétée.
plusieurs
disques de suite
Numéro
de disque
Indication
LP2/LP4*
(maintenez-la enfoncée
quelques instants).
et appuyez de nouveau sur la
touche dans les 2 secondes qui
suivent.
puis appuyez de nouveau sur la
touche dans les 2 secondes qui
suivent et maintenez-la
enfoncée.
Lecture répétée et lecture aléatoire
1 En cours de le cture, appuyez s ur (1) (REP) ou
sur (2) (SHUF) de façon répét ée jusqu’à ce
que le réglage de votre choix apparaisse.
Sélectionnez Pour lire
REP-Disc*1un disque en boucle.
SHUF-
Changer*
SHUF-All*
des plages du changeur dans un
1
ordre aléatoire.
2
des plages de tous les appareils
dans un ordre aléatoi re .
*1 Lorsqu’un ou plusieurs changeurs CD/MD sont
raccordés.
*2 Lorsqu’un ou plusieurs changeurs CD ou plusieurs
changeurs MD sont raccordés.
Pour revenir au mode de le ct ure normal,
sélectionnez « REP-off » ou « SHUF-off ».
Conseil
La fonction « SHUF-All » ne passe pas de façon
aléatoire des plages de lecteurs CD aux plages de
changeurs MD.
Recherche d’un disque par son nom
— LIST
Vous pouvez sélectionner un disque à partir de la
liste lorsque vous raccordez un changeur CD
doté de la fonction CUSTOM FILE ou un
changeur MD.
Si vous attribuez un nom à un disque, le nom
apparaît dans la liste . Po ur plus de détails à
propos de l’identification des disq ues, reportezvous à la page 10.
1 En cours de lecture, app uyez sur (MENU).
2 T o ur nez la molet te de sélectio n SEEK jusqu’à
ce que « List » s’affiche, puis appuyez sur
(ENTER).
Le numéro du disqu e ou le n om du disque
apparaît.
3 T o ur nez la molet te de sélectio n SEEK jusqu’à
ce que le disque souhaité apparaiss e.
4 Appuyez sur (ENTER) pour lance r la l ecture
du disque.
L’appareil revient au mode de lecture norma l.
Avec la mini-télécommande
En cours de la lecture, appuyez sur (LIST). Appuyez
plusieurs fois sur M ou m jusqu’à ce que le disque
souhaité s’affiche, puis appuyez sur (ENTER).
Suite à la page suivante t
13
Page 32

Satellite de commande RM-X4S
Apposition de l’étiquette
Apposez l’étiquette comportant les indications,
suivant la position de montage du satellite de
commande.
D
S
D
UN
O
S
E
D
O
M
L
P
S
D
P
L
M
O
D
E
S
O
U
N
D
Emplacement des commandes
Les touches corres pondantes du satellite de
commande pilotent les mêmes fonctions que
celles de l’appareil o u de la mini-télécommande.
SOUND
PRESET/
DISC
SOURCE
VOL
ATT
DSPL
SEEK/AMS
MODE
OFF
Les commandes suivantes du satellite de
commande ont un e fonction différente de celles
de l’appareil.
• Commande PRESET/DISC
Commande de la radio/du CD, identique à la
touche M ou m de la mini-télécommande
(appuyez et tou rn ez).
• Commande VOL (volume)
Identique à la molette de réglage du volume de
l’appareil (tournez).
• Commande SEEK/AMS
Commande de la radio/du CD, identique à la
touche < ou , de la mini-télécommande
(tournez ou tournez et maintenez).
Modification du sens de
fonctionnement
Le sens de fonctionnem ent des commande s es t
réglé par défaut comme indiqué dans
l’illustration ci -dessous.
Pour a ugmenter
Si vous devez monter le satellite de commande
du côté droit de l a colonne de direction, vous
pouvez inverser le sens de fonctionnement.
1 Tout en appuyant sur la commande VOL,
appuyez sur la touche (SOUND) et maintenezla enfoncée.
Raccordement d’appareils audio
auxiliaires
Vous pouvez raccorder un appareil portable Sony
en option à la bo rne BU S A U DIO IN/ A UX IN de
l’appareil. Si aucun changeur ou aucun autre
appareil n’est raccordé à la borne, l’appareil vous
permet d’écouter l’appareil portable par
l’intermédiaire des haut-parleurs de votre
véhicule.
Remarque
OFF
Lorsque vous raccordez un appareil portable, veillez à
ce que BUS CONTROL IN ne soit pas raccordé. Si un
appareil est connecté à BUS CONTROL IN, « AUX»
ne peut pas être sélectionné avec (SOURCE).
Conseil
Si vous raccordez un appareil portable Sony et un
changeur en même temps, utilisez le sélecteur
AUX-IN.
Sélection de l’appareil auxiliaire
1 Appuyez plusie urs fois sur la touche
(SOURCE) jusqu’à ce que l’indication
« AUX » apparaisse.
Commandez l’appareil par l’intermédiaire de
l’appareil portable lui-même.
Pour ajuster le niveau de volume de l’équipement
auxiliaire, reportez-vous à « AUX Level» à la
page 12.
14
Pour diminuer
Page 33

Informations complémentaires
Précautions
• Si votre véhicu le es t r esté stati onn é en plein sole il,
laissez refroidir l’appareil avant de l’utiliser.
• L’antenne électrique se déploie automatiquement
lorsque l’appareil fonctionne.
Condensation
Par temps de pluie ou dans des régions très humides,
de la condensation peut se former à l’intérieur des
lentilles et dans la fenêtre d’affichage de l’appareil.
Si cela se produit, l’appareil ne fonctionne pas
correctement. Dans ce cas, retirez le disque et
attendez environ une heure que l’humidité se soit
évaporée.
Pour conserver un son de haute
qualité
Veillez à ne pas re nverser de jus de fruit ou d’autre s
boissons sucrées sur l’appareil ou sur les disques.
Remarques sur les disques
• Pour qu’un disque reste propre, ne touchez pas sa
surface. Saisissez-le par les bords.
• Rangez vos disques dans leur boîtier ou dans un
chargeur lorsque vous ne vous en servez pas.
• N’exposez pas les disques à des tempé ra tu res
élevées. Évitez de les laisser dans un véhicule en
stationneme nt o u sur l e ta blea u de bo rd ou la pl age
arrière.
• Ne collez pas d’étiqu ettes sur les disques et
n’utilisez pas de disques rendus coll ants par de
l’encre ou des résidus. De tels disques peuvent
s’arrêter de tourner en cours de lecture et
provoquer des problèmes de fonctionnement ou
être endommagés.
• N’utilisez pas de disques sur lesquel s sont collé s
des étiquettes ou des autocolla nt s.
L’utilisation de tels disques peut entraîner les
problèmes de fonctionnement suivants :
– impossibilité d’éject er un disque parce que
l’étiquette ou l’autocollant se décolle et bloque
le mécanisme d’éjection ;
– erreurs de lecture des données a udio (par ex.,
sauts de lecture ou aucune lect ure ) provoquée s
par une déformation du disq ue suit e au
rétrécissement de l’étiquette ou de l’autocollant
sous l’effet de la chale u r.
• Les disques de forme non standard (ex. : en forme
de cœur, de carré ou d’étoile) ne peuvent pas être
lus avec cet appareil. Vous risquez d’endommager
votre appareil si vous essayez de le faire.
N’utilisez pas de tels disques.
• Ce lecteur ne permet pas la lecture des CD de 8 cm
1
/4 po).
(3
• Avant la lecture, nettoyez les
disques avec un chiffon de
nettoyage disponible dans le
commerce. Essu yez chaque
disque en partant du centre vers
l’extérieur. N’utilis ez pas de
solvants, tels q ue de l’essen ce,
du diluant, des produits de
nettoyage vendus dans le
commerce ou des vaporisateurs antistatique s
destinés aux disques analogiques.
Remarques sur les disques CD-R et
CD-RW
• En fonction de l’appareil utilisé pour
l’enregistrement ou de l’état du di sq ue, il est
possible que ce lecteur ne puisse pas lire cert a ins
disques CD-R ou CD-RW.
• Cet appareil ne permet pas la lecture des CD-R ou
CD-RW non finalisés.
Disques de musique encodés avec
une technologie de protection des
droits d’auteur
Cet appareil est conçu pour la lecture des disques
conformes à la norme Compact Disc (CD).
Dernièrement, certaines maisons de disques ont
lancé sur le marché divers types de disques de
musique encodés avec des technologies de protection
des droits d’auteur. Notez que parmi ces types de
disques, certains ne sont pas conformes à la norme
CD et ne peuvent pas être lus avec cet appareil.
À propos des fichiers MP3
MP3, qui signifie MPEG-1 couche audio 3, est une
norme de format de compression des fichiers audio.
Il permet la compression des fichiers audio à
environ 1/10 de leur taille d’origine.
• Ce lecteur est compatible avec le format ISO 9660
niveau 1/niveau 2, le format d’extension Joliet/
Romeo, les étiquettes ID3 version 1.0, 1.1, 2.2, 2.3
et 2.4, et les disques enregistrés en multisession.
• Nombre maxim al de :
– dossiers (groupes) : 150 (y compris le répertoire
de base et les dossiers vides).
– fichiers et dossiers MP3 (plages) contenus sur un
disque : 300 (lorsqu’un nom de fichier ou de
dossier contient un grand nombre de caractères,
ce nombre peut être inférieur à 300).
– caractères affichables pour un nom de dossier/
fichier : 32 (Joliet) ou 32/64 (Romeo) ; pour les
étiquettes ID3 : 15/30 cara ctères (versions 1.0,
1.1, 2.2 et 2.3) ou 63/126 caractères (version
2.4).
Suite à la page suivante t
15
Page 34

Ordre de lecture des fichiers MP3
MP3
Remarques
• Veillez à finaliser le disque avant de l’utiliser sur
l’appareil.
• Lors de l’identification d’un fichier MP3, veillez à
ajouter l’extension « .mp3 » au nom de chaque
fichier.
• Si vous lisez un fichier MP3 d’un débit binaire de
320 kbit/s par exemple, le son risque d’être
intermittent.
• Pendant la lecture d’un fichier MP3 VBR (débit
binaire variable) ou pendant l’avance/le retour
rapide, le temps de lecture écoulé affiché peut ne
pas être correct.
• Lorsque le disque est enregistré en multisession,
seule la première plage du format de la première
session est identifiée et lue (tous les autres formats
sont ignorés). La priorité du format est la suivante :
CD-DA, CD ATRAC et MP3.
– Lorsque la première plage est un CD-DA, seul le
CD-DA de la première session est lu.
– Lorsque la première plage n’est pas un CD-DA,
une session CD ATRAC ou MP3 est lue. Si le
disque ne contient aucune donnée dans ces
formats, « NO Music » s’affiche.
Dossier
(groupe)
Fichier MP3
(plage)
À propos des CD ATRAC
Format ATRAC3plus
ATRAC3, qui signifie Adaptive Transform Acoustic
Coding3, est une technologie de compression audio.
Il permet la compression des fichiers audio à
environ 1/10 de leur taille d’origine. ATRAC3plus
est un format étendu de ATRAC3 et permet la
compression des données des C D audio à environ
1/20 de leur taille d’origine. Cet appareil accepte à
la fois le format ATRAC3 et ATRAC3plus.
CD ATRAC
Le format CD ATRAC enr egistre des données de
CD audio compressés au format ATRAC3 ou
ATRAC3plus à l’aide de logiciels autorisés comme
SonicStage version 2.0 ou ultérieu re ou S oni cSt age
Simple Burner.
• Nombre maxim al de :
– dossiers (groupes) : 255
– fichiers (plages) : 999
• Les caractères du nom de dossier/ fichier et les
informations textuelles de SonicS tage sont
affichés.
16
Pour plus de détails sur CD ATRAC, reportez-vous
au manuel SonicStage ou SonicS t ag e Simple
Burner.
Remarque
Veillez à créer le CD ATRAC à l’aide d’un logiciel
autorisé SonicStage version 2.0 ou ultérieure, ou
SonicStage Simple Burner 1.0 ou 1.1, qui sont fournis
avec les produits Sony Network.
Si vous avez des questions ou des problèmes
concernant cet appareil qui ne sont pas abordés dans
ce mode d’emploi, communiquez avec votre
détaillant Sony.
Entretien
Remplacement de la pile au lithium
de la télécommande
Dans des conditions d’utilisation normales, la pile
dure environ 1 an. (En fonction des condition s
d’utilisation, sa durée de vi e peut être plus courte.)
Lorsque la pile est faible, la p ortée de la minitélécommande diminue. Remplacez la pile par une
nouvelle pile au lithium CR2025. L’utilisation de
tout autre type de pile entraîne un risque d’incendie
ou d’explosion.
x
pôle + vers le
haut
Remarques sur la pile au lithium
• Tenez la pile au lithium hors de portée des enfants.
En cas d’ingestion de la pile, consultez
immédiatement un méd ecin .
• Essuyez la pile avec un chiffon sec pour assurer un
bon contact.
• Veillez à respecter la polarité lors de l’installation de
la pile.
• Ne tenez pas l a pile avec des pinces métallique s,
car cela peut entraîner un court-circuit.
ATTENTION
Utilisée de façon incorrecte, la pile peut
exploser. Ne pas la recharger, la démonter ni
la jeter au feu.
Page 35

Remplacement du
fusible
Lorsque vous remplacez le
fusible, veillez à utiliser un
fusible dont la capacité, en
ampères, correspond à la valeur
indiquée sur l’ancien fusible. Si
le fusible fond, vérifiez le
branchement de l’alimentation
et remplacez l e fus i ble. Si le
nouveau fusible fond
également, il est possible qu e l ’appareil soit
défectueux. Dans ce cas, com m uniquez avec votre
détaillant Sony le plus proche.
Fusible (10 A)
Nettoyage des connecteurs
L’appareil peut ne pas fonctionner correctement si
les connecteurs entre l’appareil et la façade sont
encrassés. Pour éviter cette si tua tion, retirez la
façade (page4) et nettoyez les connecteurs avec un
coton-tige imbibé d’a lc ool. N’exercez pas une
pression trop forte, car les connecteurs pourraient
être endomma gés.
Appareil principal Arrière de la façade
Remarques
• Pour plus de sécurité, coupez le moteur avant de
nettoyer les connecteurs et retirez la clé du contact.
• Ne touchez jamais les connecteurs directement
avec les doigts ou avec un objet métallique.
Démontage de l’appareil
1 Retirez le cadre de sû reté.
1 Retirez la façade (page 4).
2 Insérez les clés de déblocage
simultanément dans le cadre de sûreté.
Orientez les clés de
déblocage comme illustré.
3 Tirez sur les clés de déblocage pour retirer
le cadre de sûreté.
2 Retirez l’appareil.
1 Insérez simultanément les deux clés de
déblocage j usqu’au déclic.
Crochet
tourné vers
l’intérieur.
2 Tirez sur les clés de d éblocage pour
dégager l’apparei l.
3 Faites glisser l’appareil en dehors de son
support.
Caractéristiques techniques
Lecteur CD
Rapport signal/bruit : 120 dB
Réponse en fréquence : 10 à 20 000 Hz
Pleurage et scintillement : en dessous du seuil
mesurable
Radio
FM
Plage de syntonisation : 87,5 à 107,9 MHz
Borne d’antenne : connecteur d’antenne externe
Fréquence intermédiaire : 10, 7 MHz/450 kHz
Sensibilité utile : 9 dBf
Sélectivité : 75 dB à 400 kHz
Rapport signal/bruit : 67 dB (stéréo), 69 dB (mono)
Distorsion harmonique à 1 kHz : 0,5 % (stéréo),
0,3 % (mono)
Séparation : 35 dB à 1 kHz
Réponse en fréquence : 30 à 15 000 Hz
AM
Plage de syntonisation : 530 à 1 710 kHz
Borne d’antenne : connecteur d’antenne externe
Fréquence intermédiaire : 10, 7 MHz/450 kHz
Sensibilité : 30 µV
Suite à la page suivante t
17
Page 36

Amplificateur de puissance
y
Sorties : sorties de haut-parleur s (c onnecteurs de
sécurité)
Impédance des haut-parleurs : 4 à 8 ohms
Puissance de sortie maximale : 52 W × 4 (à 4 ohms)
Généralités
Sorties :
Borne de sorties audio (avant/arrière)
Borne de sortie de caisson de graves (mono)
Borne de commande de relais d’antenne électrique
Borne de commande d’amplificate ur de pui ssa nc e
Entrées :
Borne de commande ATT téléphone
Fil de commande de l’ éclairage
Borne d’entrée de commande BUS
Borne d’entrée audio BUS/AUX IN
Borne d’entrée de télécommande
Borne d’entrée de l’antenne
Commandes de tonalité :
Graves : ± 10 dB à 62 Hz
Aigus : ± 10 dB à 16 kHz
Intensité sonore :
+ 8 dB à 100 Hz
+ 2 dB à 10 kHz
Alimentation requise : batterie de véhicule 12 V CC
(masse négative)
Dimensions : environ 178 × 50 × 188 mm (7
1
7
/2 po) (l/h/p)
Dimensions du support : environ 182 × 53 × 162 mm
1
(7
/4 × 21/8 × 61/2 po) (l/h/p)
Poids : environ 1,6 kg (3 lb 9 oz)
Accessoires fournis :
Mini-télécommande : RM-X 143A
Composants destinés à l’installation et aux
raccordements (1 jeu)
Étui pour la façade (1)
Accessoires de commande/équipement en option :
Satellite de commande : RM-X6S
Câble BUS (fourni avec un câble à broche RCA) :
RC-61 (1 m), RC-62 (2 m)
Changeur CD (10 disques) : CDX-757MX
Changeur CD (6 disques) : CDX-T69
Changeur MD (6 disques) : MDX-66XLP
Sélecteur de source : XA-C30
Sélecteur AUX-IN : XA-300
1
/8 × 2 ×
Brevets américains et internationaux sous licence
de Dolb
Remarque
Cet appareil ne doit pas être branché à un
préamplificateur numérique ni à un égaliseur
compatible avec le système Sony BUS.
La conception et les caractéristiques techniques sont
sujettes à modification sans préavis.
Laboratories.
• De la soudure sans plomb est utilisée pour le
soudage de certaines pièces. (plus de 80 %)
• Aucun retardateur de flamme halogéné n’est
utilisé dans certaines cartes à circuits imprimés.
• Aucun retardateur de flamme halogéné n’est
utilisé dans la composition des coques.
• Imprimée avec de l’encre à base d’huile végétale
sans COV (composés organiques volatils).
• Du polystyrène expansé pour cales d’emballage
n’est pas utilisé dans l’emballage.
Dépannage
La liste de c ont rôl es suivante vous aide ra à r emé di er
aux problèmes que vous pourriez rencontrer avec cet
appareil.
Avant de passer en revue la liste de contrôles cidessous, vérifiez les procédures de racc ordement et
d’utilisation.
Généralités
L’appareil n’est pas alimenté.
• Vérifiez le raccorde ment. Si t out est en ordre, vérif iez
le fusible.
• Si l’appareil est mi s hor s tension et que l’affichage
disparaît, il est alors imposs ibl e de com mander
l’appareil avec la télé commande.
t Mettez l’appa reil sous tension.
L’antenne électrique ne se déploie pas.
L’antenne électrique ne dispose pas d’ un boî tie r de
relais.
Aucun son n’est émis.
• Le volume est trop faible.
• La fonction ATT est activée ou la fonction ATT
téléphone (lorsque le câble d’interface d’un
téléphone de voiture est raccordé au fil ATT) est
activée.
• La position de la commande de balance avant-arrière
(FAD) n’est pas réglée pour un système à 2 hautparleurs.
• Le changeur CD n’est pas compatible avec le format
de disque (MP3/CD ATRAC).
t Lecture avec un changeur CD compatible MP3 de
Sony ou cet appareil.
Aucun bip n’est émis.
• Le bip est désactivé (page 12).
• Un amplificateur de pu iss an ce en o ption est raccordé
et vous n’utilisez pas l’amplificateur int ég r é.
Le contenu de la mémoire a été effacé.
• La touche RESET a été enfoncée.
t Recommencez la procédure d’enregistrement
dans la mémoire.
• Le câble d’alimentation ou la bat te r ie a été
déconnecté.
• Le câble d’alimentation n’est pas raccordé
correctement.
18
Page 37

Les stations mémorisées sont effacées et
l’heure est remise à zér o.
Le fusible a fondu.
Émission de bruits lorsque la position de la clé
de contact est modifiée.
Les câbles ne sont pas raccordés correct em en t au
connecteur d’alimenta tion du véhicule destiné aux
accessoires.
L’affichage disparaît de la fenêtre d’affichage
ou il n’apparaît pas.
• Le régulateur de luminosité est réglé à « Dimmer
on » (page 12) .
• L’angle de la façade est incorrect.
t Réglez l’angle de la façade en appuyant sur
(ANGLE) et en maintenant la touche enfoncée
(page 7).
• L’affichage disparaît si vous maintenez la touche
(OFF) enfoncée.
t Maintenez de nouveau la touche (OFF) enfoncée
jusqu’à ce que l’affichage apparaisse.
• Les connecteurs sont encrassés (page 17).
La fonction DSO est inopérante.
Selon l’intérieur de la voiture ou le type de musique, la
fonction DSO peut avoir un effet indésirable.
Les images changent automatiquement.
En mode Auto Image, l’image sélectionnée ne peut pas
être affichée.
tPour afficher uniquement l’image sélectionnée,
réglez « A.IMG off » (page 12).
Aucune rubrique d’affichage n’apparaît.
tRéglez « Info on » (page 12).
Lecture de CD et de MD
Impossible d’introduire le disque.
• Un autre disque est déjà en place.
• Le disque a été introduit de force à l’envers ou dans le
mauvais sens.
La lecture du disque ne commen ce pas.
• Le disque est défectueux ou sale .
• Les CD-R ou CD-RW ne sont pas destinés à un usage
audio (page 15).
Impossible de lire des fichiers MP3.
Le disque n’est pas compatible avec le format et la
version MP3 (page 15) .
Certains fichiers MP3 exigent un délai plus
long que d’autres avant le début de la lecture.
La lecture des types de disques suivants exige un délai
de démarrage plus long :
– disques compo rt an t une hié rar c hie de dossiers
complexe ;
– disques enregistré s e n mult isession ;
– disques auxquels il est possible d’ajouter des
données.
Impossible de lire le CD ATRAC.
• Le disque n’a pas été créé à l’aide d ’un lo g iciel
autorisé tel que SonicStage ou So nic S tage Simple
Burner.
• Les plages qui ne font pas partie du groupe ne
peuvent pas être lues.
Les rubriques d’affichage ne défilent pas.
• Pour certains disques conte na nt un gr a nd nombre de
caractères, la fonction de défilement peut être
inopérante.
• La fonction « A. Scroll » est désactivée.
t Réglez « A.Scroll on » (page 12) ou appuyez sur
(SCRL) sur la mini-télécomma nde .
Le son saute.
• L’ appareil est mal installé.
t Installez l’a ppa r e il suivant un angle de moins de
45° dans un endroit stable du véhicule.
• Le disque est défectueux ou sa le .
Les touches de commande ne fonctionnent
pas.
Impossible d’éjecter le disque.
Appuyez sur la touche RESET (page 4).
« MS » ou « MD » n’apparaît pas sur l’affichage
de la source lorsque vous raccordez en même
temps l’appareil MGS-X1 et le changeur MD en
option.
Cet appareil recon na ît le MGS-X1 comme éta n t un
lecteur MD.
t Appuyez sur (SOURCE) jusqu’à ce que « MS » ou
« MD » apparaisse, puis appuyez plusieurs fois sur
(MODE).
Réception radio
Impossible de capter des stations.
Le son est parasité.
• Raccordez un fil d e commande d’antenne électrique
(bleu) ou un fil d’alimentation d’a cce ssoire (rouge)
au câble d’alimentation de l’ampl ificateur d’antenne
du véhicule (uniquem e nt si votre véhicule est équipé
d’une antenne FM/AM intégrée dans la fenêtre
arrière ou latéra le ).
• Vérifiez le raccordement de l’antenne du véhicule.
• L’antenne automatique ne se déploie pas.
t Vérifiez le raccordement du fil de com mande de
l’antenne électrique.
• Vérifiez la fréquence.
• Lorsque le mode DSO est activé, le son peut pa r fo is
être parasité.
t Réglez le mode DSO à « off » (page 7).
Impossible de capter une présélection.
• Enregistrez la fréquence correcte d ans la mémoire.
• Le signal capt é e s t tr op faible.
Le réglage automatique des stations est
impossible.
• Le mode de recherche lo cale est réglé à « on ».
t Réglez « Local off » (page 12).
• Le signal capt é e s t tr op faible.
t Réglez la fréquenc e manuellement.
En cours de réception FM, l’indication « ST »
clignote.
• Réglez la fréquence correctement.
• Le signal capt é e s t tr op faible.
t Réglez « Mono on » (page 12).
Suite à la page suivante t
19
Page 38

Une émission FM en stéréo est ente ndue en
mode mono.
L’appareil est en mode de réception mono.
t Réglez « Mono off » (page 12).
Des interférences se produisent en cours de
réception FM.
Réglez le mode IF à « Wide ».
t Réglez à « IF Auto » (page 12).
Affichage des erreurs et messages
1
Blank*
Aucune plage n’a été enregistrée sur un MD.*
t Insérez un MD contenant d es pla ges enregistr é es.
1
Error*
• Le disque est sale ou inséré à l’envers.*
tNettoyez le disque ou insérez-le correctement.
• Le disque ne peut pas être lu en raison de certains
problèmes.
tInsérez un autre disq ue .
Failure (Reste allumé jusqu’ à ce que vous appuyi ez
sur une touche.)
Le raccordement des haut-parleurs ou des
amplificateurs est incorrect.
t Reportez-vous au guide d’installation de cet
appareil et vérifiez le raccordement.
FAILURE (Reste allumé pendant 1 seconde environ.)
Quand un récepteur XM est raccordé, échec de
mémorisation d’une station radio XM sur un numéro
présélectionné.
t Vérifiez que vous recevez la station radio que vous
souhaitez mémoriser, puis essayez de nouveau.
Load
Le changeur charge le disque.
t Attendez que le cha rgement soit terminé.
Local Seek +/–
Le mode de recherche locale est activé en cours de
recherche automatique des fréquences.
NO Data
Tous les noms personnalisés ont été supprimés ou
aucun nom n’est enregistré.
NO Disc
Le disque n’a pas été inséré dans le changeur CD/MD.
t Insérez un disque dan s le change ur.
NO Disc Name
Aucun nom de disque n’est écrit dans la pla ge .
NO Group Name
Aucun nom de groupe n’est écrit dans la plage.
NO ID3 Tag
Aucune information ID3 Tag n’est écrite dans le
fichier MP3.
NO Info
Aucune information textuelle n’est écrite dans le
fichier ATRAC3/ATRAC3plus.
NO Magazine
Le chargeur n’a pas été inséré dans le changeur CD.
t Insérez le chargeur dans le changeur.
2
2
NO Music
Le disque inséré n’est pas un fichier audio.
t Insérez un CD audio dans cet appareil ou dans le
changeur compatible MP3.
NO Track Name
Aucun nom de plage n’est écrit dans la plage.
Not Read
Les informations du disque n’ont pas encore été lues
par l’appareil.
t Chargez le disque, puis sélectionnez-le dans la liste.
Not Ready
Le couvercle du ch angeu r MD es t o uver t ou l es M D ne
sont pas insérés correcte ment.
t Fermez le couvercle ou insérez correctem en t les
MD.
Offset
Il se peut que l’appareil soit défectueux.
t Vérifiez le raccordement. Si le me ssage d’err eu r ne
disparaît pas de l’affichage, communiquez avec
votre détaillant Sony le plus proche.
Read
L’appareil lit toutes les informations relatives aux
plages et aux groupes du disque.
t Attendez qu’il ait terminé et la lecture commence
automatiquement. Selon la structure du disque, cela
peut prendre plus d’une minute .
Push Reset
Le lecteur CD et le changeur CD/MD ne peuvent pas
fonctionner en raison de problèm es .
t Appuyez sur la touche RESET (page 4).
« » ou « »
En mode d’avance rapide ou de retour, vous avez
atteint le début ou la fin du disque et vous ne pouvez
pas aller plus loin.
« s »
Les caractères ne peuvent pas être affichés sur
l’appareil.
*1 Si une erreur se produit lors de la lecture d’un CD
ou MD, le numéro de disque du CD ou du MD ne
s’affiche pas.
*2 Le numéro du disque qui a provoqué l’erreur
s’affiche à l’écran.
Si ces solutions ne pe rmettent pas d’améliorer la
situation, communique z avec votre détailla nt S ony
le plus proche.
Si vous portez l’appareil à réparer en raison d’un
problème de lecture de CD, apportez le disque
utilisé au moment où le problèm e s’e st produit.
20
Page 39

Page 40

Bienvenido
Gracias por adquir ir este reproductor de dis cos
compactos Sony. Mientras maneja puede
disfrutar de las funciones sig u ien te s:
• Reproducción de CD
Puede reproducir CD-DA (incluidos CD
TEXT*), CD-R/CD-RW (archivos MP3,
incluidos también Multi S es sion (página 15)) y
CD de ATRAC (formato ATRAC3 y
ATRAC3plus (página 16)).
Tipo de discos Etiqueta del disco
* Un disco CD TEXT es un CD-DA que incluye
información como el nombre del disco, del artista y
de la pista.
Advertencia: si el encendido del
automóvil no dispone de una posición
ACC
Tras apagar el motor, mantenga presionado
(OFF) en la unidad hasta que se apague la
pantalla.
Si no lo hace, la pantalla no se desactiva y se
desgasta la batería.
CD-DA
MP3
CD de ATRAC
• Recepción de radio
–Puede almacenar ha st a 6 emisoras de radio
por banda (FM1, FM2, FM3, AM1 y AM2).
–BTM (Memoria de la mejor sintonía): la
unidad selecciona las emisoras que emiten la
señal más intensa y las almacena.
–Puede asignar un nombre a cada emisora de
radio, guardarlo en la memoria y mostrar los
nombres en la lista.
• Ajuste del sonido
–EQ7: puede seleccionar una curva de
ecualizador para 7 tipos de música.
–DSO (Organizador de sonido de baja
frecuencia dinám ic o) : cre a un campo de
sonido más ambiental, utilizando una síntesis
de altavoces virtuales para mejorar el sonido
de los altavoces, incluso si éstos están
instalados en un a posición baja en la pue rt a.
–BBE MP: mejora el sonido comprimido
digitalmente, como en el caso de archivos
MP3. Si desea ob t ener más informac ión,
consulte la explicac ió n si guiente.
• Configuración de imagen
Es posible establec er di st intas imágenes en la
unidad.
– Creador de espacio: crea patrones animados en
pantalla sincronizados con la mú sic a.
• Funcionamiento de una unidad
opcional
Esta unidad, ademá s de la rep roducción,
permite controlar los ca mbiadores de CD/MD
opcionales y los di s positivos portátiles
opcionales de Sony.
El proceso BBE MP mejora
R
el sonido comprimido
digitalmente (por ejemplo,
archivos MP3) mediante la restauración y el
realce de los armónicos más altos perdidos
durante la compresión. BBE MP actúa
generando armónicos nivelados a partir del
material original, recuperando de manera eficaz
la calidez, el detalle y el matiz.
El logotipo “XM Ready” indica que
este producto controlará un módulo de
sintonizador XM (se vende por
separado). Si desea obtener detalles
sobre el módulo de sintonizador XM,
póngase en contacto con el distribuidor
Sony más cercano.
SonicStage y su logotipo son marcas comerciales
de Sony Corporation.
ATRAC, ATRAC3, ATRAC3plus y sus
respectivos logotipos son marcas comerciales de
Sony Corporation.
2
Page 41

Tabla de contenido
Procedimientos iniciales
Restauración de la unidad . . . . . . . . . . . . . . . . . 4
Ajuste del reloj . . . . . . . . . . . . . . . . . . . . . . . . . 4
Modo DEMO. . . . . . . . . . . . . . . . . . . . . . . . . . . 4
Extracción del panel frontal. . . . . . . . . . . . . . . . 4
Instalación del panel frontal . . . . . . . . . . . . . 5
Inserción del disco en la unidad . . . . . . . . . . . . 5
Expulsión del disco . . . . . . . . . . . . . . . . . . . 5
Ajuste del ángulo del panel frontal . . . . . . . . . . 5
Ubicación de los controles y
operaciones básicas
Unidad principal . . . . . . . . . . . . . . . . . . . . . 6
Control remoto de la tarjeta RM-X143A . . . 6
CD
Elementos de la pantalla . . . . . . . . . . . . . . . 8
Reproducción repetida y aleatoria . . . . . . . . 8
Radio
Almacenamiento y recepción de emisoras . . . . 9
Almacenamiento automático — BTM . . . . . 9
Almacenamiento manual . . . . . . . . . . . . . . . 9
Recepción de las emisoras almacenadas . . . 9
Sintonización automática . . . . . . . . . . . . . . . 9
Sintonización de una emisora mediante una
lista — LIST . . . . . . . . . . . . . . . . . . . . . . . . 9
Otras funciones
Cambio de los ajustes de sonido. . . . . . . . . . . 10
Ajuste de las características del so ni do . . . 10
Ajuste de la curva de ecualizador
— EQ7 Tune . . . . . . . . . . . . . . . . . . . . . . . 10
Asignación de un nombre a una
emisora o un disco . . . . . . . . . . . . . . . . . . . . . 10
Ajuste de los elementos de menú
— MENU . . . . . . . . . . . . . . . . . . . . . . . . . . . . 11
Uso del equipo opcional . . . . . . . . . . . . . . . . . 13
Cambiador de CD/MD . . . . . . . . . . . . . . . 13
Mando rotatorio RM-X4S . . . . . . . . . . . . . 13
Equipo auxiliar de audio . . . . . . . . . . . . . . 14
Información complementaria
Precauciones . . . . . . . . . . . . . . . . . . . . . . . . . . 15
Notas sobre los discos . . . . . . . . . . . . . . . . 15
Acerca de los archivos MP3 . . . . . . . . . . . 15
Acerca de CD de ATRAC . . . . . . . . . . . . . 16
Mantenimiento . . . . . . . . . . . . . . . . . . . . . . . . 16
Extracción de la unidad. . . . . . . . . . . . . . . . . . 17
Especificaciones . . . . . . . . . . . . . . . . . . . . . . . 17
Solución de problemas . . . . . . . . . . . . . . . . . . 18
Mensajes/indicaciones de error . . . . . . . . . 20
3
Page 42

Procedimientos iniciales
Modo DEMO
Restauración de la unidad
Antes de utilizar la u nidad por primera vez, o
después de sustituir la b at er í a de l auto móv il o de
cambiar las conexiones, debe restaurarl a.
Extraiga el panel fron t al y presione el botón
RESET con un objeto puntiagudo, como por
ejemplo un bolígrafo.
Nota
Al presionar el botón RESET, se borra el ajuste del
reloj y al gunos contenidos almacenados.
Botón RESET
Ajuste del reloj
El reloj emplea una indicació n digital de 12
horas.
1 Presione (MENU).
2 Gire el sel ect o r de con trol SEEK hasta
que aparezca “Setup” y, a
continuación, presione (ENTER).
3 Gire el sel ect o r de con trol SEEK hasta
que aparezca “Clock Adjust” y, a
continuación, presione (ENTER).
Aparece la pantalla de ajuste del reloj.
4 Gire el selector de control SEEK para
ajustar la hora y los minutos .
Para mover la indicación digital, presione
(ENTER).
5 Luego de ajustar los minutos,
presione (ENTER).
El reloj se pone en func i onamiento.
Para que aparezca el relo j durante la
reproducción o rec epción, defina la opción
“Clock on” (pági na 12).
Con el control remoto de tarjeta
En los pasos 2 a 4: presione M o m y no el selector de
control SEEK; en el paso 4: presione < o , y no
(ENTER).
Cuando la unidad está apagada, primero se
muestra el reloj y, a continuación , e l m odo de
demostración (DEMO) inicia la pantalla
respectiva.
Para cancelar el mo do D EMO, defina la opción
“Demo off” en el menú (página 12) mientras la
unidad está apagada.
Extracción del panel frontal
Puede extraer el pane l f rontal de la unidad para
evitar que la roben.
Alarma de precaución
Si gira la llave de encendido hasta la posición
OFF sin haber extraído el panel frontal, la alarma
de precaución sona rá durante unos segundos .
La alarma sonará úni camente si se utiliza el
amplifi cador incorporado.
1 Presione (OFF).
La unidad se apaga.
2 Presione .
La parte izquierda del panel frontal se suelta.
3 Deslice el panel frontal hacia la
izquierda y tire suavemente de él hacia
usted.
(OFF)
2
1
Notas
• No deje caer ni ejerza excesiva presión sobre el
panel frontal y la pantalla.
• No someta el panel fr ont al al cal or ni a te mper at ur as
altas o excesiva humedad. Evite dejarlo en un
automóvil estacionado o sobre el tablero o la
bandeja trasera.
Sugerencia
Al transportar el panel frontal, utilice el estuche
suministrado.
4
Page 43

Instalación del panel frontal
Coloque el orificio A del panel frontal en el eje
B de la unidad y, a continuación, pre si one
ligeramente el lado izquierdo hacia adentro.
Presione (SOURCE) en la unidad (o i nserte un
CD) para utilizarla.
Expulsión del disco
1 Presione Z.
El panel frontal se desliza hacia abajo
automáticamen te y, a continuación , e l di s co
se expulsa.
2 Presione Z para cerrar el panel
frontal.
Nota
El panel frontal se desliza hacia arriba
automáticamente 15 segundos después deslizarse
hacia abajo.
A
B
Nota
No coloque nada sobre la superficie interior del panel
frontal.
Inserción del disco en la unidad
1 Presione Z.
El panel frontal se desliza hacia abajo
automáticamente.
2 Inserte el disco (con la etiqueta
orientada hacia ar riba).
El panel frontal se desliza hacia arriba
automáticamente y, a continuación, la
reproducción comienza automáticamente.
Ajuste del ángulo del panel
frontal
ANGLE
1 Presione (ANGLE) varias veces hasta
que el ángulo del panel frontal sea el
adecuado.
El panel frontal se pu ede ajustar en 3
posiciones.
Para recuperar l a posición predeter m inada del
panel frontal, presione (ANGLE) varias veces
hasta que el panel frontal regrese a su posición
predeterminada.
Sugerencias
• Tras deslizarse el panel frontal hacia abajo (para
insertar el disco), éste regresa nuevamente a la
posición que estableció automáticamente.
• El ángulo del panel frontal que haya ajustado se
almacenará en la unidad. Cuando se apaga el
interruptor de encendido, el panel frontal regresa a
su posición predeterminada. Cuando se enciende el
interruptor de encendido, el panel frontal se
desplaza hasta el ángulo que haya ajustado.
5
Page 44

Ubicación de los controles y operaciones básicas
Unidad principal
12 3 4 6578
OFF
MODE
VOL
PUSH SOUND PUSH ENTER
REP SHUF BBE MP PAUSE
SOURCE DSPL1
9
Control remoto de la tarjeta
RM-X143A
OPEN/CLOSE
2
BBE MP PAUSE
MODE
DISC
3
5
6
CAT
LIST
+
qh
qd
qa
qj
7
SCRL
DSPL
REP SHUF
1
4
EQ7 DSO
MENU
q;
qk
–
SEEK
SOUND
SOURCE
DISC
+
SEEK
–
ENTER
ql
ATTOFF
+
2
VOL
–
w;
+
–
2534
qaq; qs qd qf qg
6
CDX-M7815X
CDX-M7810
Consulte las página s indicadas para obt ener
información det al la da. Los botones
correspondient es en el control remo t o de tarjeta
controlan las mismas funciones que los de la
unidad.
wa
A Botón MODE 9, 13
Para seleccionar la banda de radio (FM/AM)
o seleccionar l a unidad*
1
.
B Botón OFF
Para apagar o detener l a f uente.
1
C Selector de control VOL (volumen)/
botón SOUND 10
ws
wd
Para ajustar el volumen (girar); para
seleccionar el em entos de sonido (presionar).
D Pantalla
wf
E Ranura del disco 5
Para insertar el disco.
6
wg
F Selector de control SEEK/botón
ENTER
Para seleccionar los elementos (girar); para
definir un ajuste (presionar).
Radio:
Para sintonizar emis oras: presi one (ENTER)
varias veces para seleccionar “SEEK”,
“MANUAL” o “PRESET” y, a continuación,
gire el selector de control SEEK hasta que
aparezca la emisora deseada.
CD:
Para omitir pistas o grupos: presione
(ENTER) varias veces para seleccionar
./> o “GROUP” y, a co ntinuación,
gire el selector de control SEEK hasta que
aparezca la pist a o gr upo deseado.
SEEK
ANGLE
MENU
IMAGE
6
Page 45

G Botón MENU
Para entra r en el menú.
H Botón Z (expulsar)/ANGLE 5
Para ex pulsar el disco/deslizar hacia abajo el
panel frontal (presionar); para ajustar el
ángulo del panel frontal en las 3 posiciones
(mantener pres i onado).
I Botón (extracción del panel
frontal) 4
J Botón SOURCE
Para encender o cambiar la fuente (Radio/
CD/MD*
2
/AUX*3).
K Botones numéricos
Radio:
Para recibir las emisoras almacen a da s
(presionar); para almacenar emisoras
(mantener pres i onado).
CD/MD*
2
:
(1): REP 8
(2): SHUF 8
(5): BBE MP*
4
2
Para activar la función BBE MP, defina
“BBE MP-on”. Para cancelar, defina “BBE
MP-off”.
(6): PAUSE*
4
Para hacer una pausa en la reproducción.
Para cancelar esta función, vuelva a
presionarlo.
L Botón RESET 4
M Botón DSPL (pantalla) 8, 11
Para cambiar los elementos en pantalla.
N Receptor
Para recibir señales del control remoto de
tarjeta o del mando rotativo inalámbrico.
O Botón IMAGE 2
Para seleccionar la imagen de la pantalla.
Modo de Space Producer tModo de
película de 1 a 2 t Modo de analizador de
espectros de 1 a 5 t Modo de papel tapiz de
1 a 3 t Modo de reproducción normal/
recepción
Los botones sigu i ent es del control remot o de
tarjeta también presentan botones y funciones
distintos de los de la unidad.
qh Botón SCR L (desplazamiento) 8
Para desplazar el elemento de la pantalla.
qj Botón EQ7 (ecualizador)
Para seleccionar el tipo de ecualizador
(Xplod, Vocal, Club, Jazz, New Age , R ock,
Custom u Off).
qk Botones </, (SEEK – /+)
Radio:
Para sintonizar emisoras de forma
automática (presionar); para localizar una
emisora de forma manual (man tener
presionado).
CD:
Para omitir pistas (presionar); para omitir
pistas de form a continua (presionar y volver
a presionar dentro de 1 segundo y mantener);
para avanzar o retroceder una pista
rápidamente (ma nt ener presionado).
ql Botón SOUND 10
Para seleccionar elementos de sonido.
w; Botón VOL (volumen) +/–
Para ajustar el volumen.
wa Botón OPEN/CLOSE
Para abrir/cerrar el panel frontal.
ws Botón DSO 2
Para seleccionar el modo DSO (1, 2, 3 u off).
Cuanto más grande sea el número, mejor
será el efecto.
wd Botón LIST/CAT*
5
9, 13
Para mostrar un a lista.
wf Botones M/m (DISC +/–)
Para seleccionar emisoras almacenadas en
memoria/omitir grupos (presionar ); para
omitir grupos de forma continua (mantener
presionado).
wg Botón AT T (atenuación)
Para atenuar el sonido. Para cancelar esta
función, vuelva a presionarlo.
*1 Si se conectó un cambiador de CD/MD.
*2 Si se conectó un cambiador de MD.
*3 Si se conectó un dispositivo portátil Sony opcional.
*4 Si se reproduce en esta unidad.
*5 Si se conectó el sintonizador XM.
Nota
Si la unidad está apagada y desaparece la indicación
de pantalla, no se podrá utilizar con el control remoto
de tarjeta salvo que se presione (SOURCE) en la
unidad o se inserte un disco para activarla en primer
lugar.
Sugerencia
Si desea obtener información ad icional sobre cómo
sustituir la pila, consulte “Sustitución de la pila de litio
del control remoto de tarjeta” en la página 16.
7
Page 46

CD
Si desea conoce r m ás detalles acerca de la
conexión a un ca mbi ador de CD/M D, con sul t e la
página 13.
Elementos de la pantalla
Ejemplo: cuando selecciona el modo normal de
reproducción presionando (IMAGE) varias veces
(página 7).
ABC
Reproducción repetida y aleatoria
1 Durante la reproducción, presione (1)
(REP) o (2) (SHUF) varias veces hasta
que aparezca el ajuste dese ado.
Seleccione Para reproducir
REP-Track pistas de forma repetida.
REP-Group* grupos de forma repe ti da.
SHUF-Group* grupos en orden aleatorio.
SHUF-Disc discos en orde n al eatorio.
* Cuando se reproduce un MP3/CD de ATRAC.
Para volver al modo de reproducción normal,
seleccione “RE P-off” o “SHUF-off”.
D
E
A Fuente
B MP3/ATRAC3 más indica ci ón
C Reloj*
1
D Indicación BBE
E Número de grupo/número de pista/tiempo de
reproducción transcurrido, nombre del disco/
artista, nombre del grupo, nombre d e la pi s ta,
información de texto*
*1 Si se “on” el modo de reloj (página 12).
*2 Cuando se reproduce un MP3, se muestra el
indicador ID3, mientras que, cuando se reproduce
un CD de ATRAC, se muestra la información de
texto grabada con SonicStage, etc.
2
Para cambiar los e lementos de pantalla E,
presione (DSPL); para desplazarl os E, pr esio ne
(SCRL) en el co ntrol remoto de tarj et a o ajuste
“A.Scroll on” (pági na 12).
Sugerencia
Los elementos que se muestran variarán en función
del tipo de disco, el formato de grabación y los
ajustes. Si desea conocer más detalles acerca de
MP3, consulte la página 15; para CD de ATRAC,
consulte la página 16.
8
Page 47

Radio
Almacenamiento y recepción
de emisoras
Sugerencia
Otro método para recibir las emisoras almacenadas
es presionar (ENTER) varias veces hasta que
aparezca “PRESET” y , a contin uación, girar el selector
de control SEEK hasta que el número de
memorización deseado aparezca.
Precaución
Para sintonizar emis oras mientra s maneja , util ice
la función Memoria de la mejor sintonía (BTM)
para evitar accidentes.
Almacenamiento automático
— BTM
1 Presione (SOURCE) varias veces hasta
que aparezca “TUN ER”.
Para cambiar de banda, presione (MODE)
varias veces. Puede seleccionar entre FM1,
FM2, FM3, AM1 y AM 2.
2 Presione (MENU).
3 Gire el selector de control SEEK hasta
que aparezca “Edit” y, a continuación,
presione (ENTER).
4 Gire el selector de control SEEK hasta
que aparezca “BTM” y, a continuación,
presione (ENTER).
La unidad almacena las emisoras en el or den
de frecuencia en l os botones numéric os .
La unidad emite un pitido al almacenar el
ajuste.
Con el control remoto de tarjeta
El los pasos 3 y 4: presione M o m y no el selector de
control SEEK.
Almacenamiento manual
1 Mientras recibe la emisora que desea
almacenar, mantenga presionado un
botón numérico (del (1) al (6)) hasta
que aparezca “Me m or y”.
La indicación de botón numérico aparece en
pantalla.
Nota
Si intenta almacenar otra emisora en el mismo botón
numérico, se reemplazará la que estaba almacenada
previamente.
Recepción de las emisoras
almacenadas
1 Seleccione la banda y , a continuación,
presione un botón numérico (de (1) a
(6)).
Sintonización automática
1 Seleccione la banda, presione
(ENTER) varias veces hasta que
aparezca “SEEK” y, a continuación,
gire el selector de control SEEK para
buscar la emisora.
La búsqueda se detiene cuando la unidad
recibe una emisora. Repita este
procedimiento hasta recibir la emiso ra
deseada.
Sugerencia
Si sabe la frecuencia de la emisora que desea
escuchar, presione (ENTER) varias veces hasta que
aparezca “MANUAL” y, a continuación, gire el selector
de control SEEK hasta que aparezca la frecuencia
deseada.
Sintonización de una emisora
mediante una lista — LIST
Puede generar una lista de frecuen cias o de
nombres. Si dese a conocer más detalles sobre
cómo asignar un nombre a una emisora, consulte
la página 10.
1 Seleccione la banda y, a continuación,
presione (MENU).
2 Gire el selector de control SEEK hasta
que aparezca “List” y, a continuación,
presione (ENTER).
Aparece la frecuencia o el nombre de la
emisora.
3 Gire el selector de control SEEK hasta
que aparezca la emisora deseada.
4 Presione (ENTER) para recibir la
emisora.
La unidad vuelve al modo n or m al de
recepción.
Con el control remoto de tarjeta
Seleccione la banda y, a continuación, presione
(LIST). Presione M o m varias veces hasta que
aparezca la emisora deseada y, a continuación,
presione (ENTER).
9
Page 48

Otras funciones
Cambio de los ajustes de
sonido
El nivel de volumen puede ajustarse en
intervalos de 1 dB entre –10 d B y + 10 dB.
Ajuste de las características del
sonido
Es posible ajustar el ecualizador, el DSO, los
graves, los agudos, el balance, el equilibrio y el
volumen del altavoz potenciador de graves.
1 Presione (SOUND) varias veces para
seleccionar el elemento deseado.
El elemento cambia de la manera siguiente:
EQ7 t DSO t BAS (graves) t
TRE (agudos) t
BAL (izquierda-derecha) t
FAD (frontal-posterior) t
SUB (volumen del altavoz potencia dor de
graves)*
* “ ∞” se muestra en el valor más bajo y se puede
ajustar hasta en 20 intervalos.
2 Gire el selector de control VOL varias
veces para ajustar el el em ento
seleccionado.
Después de 3 segundos, se completa el ajuste
y la pantalla vuelve al modo de reproducción/
recepción normal .
Nota
Realice el ajuste a los 3 segundos de seleccionar el
elemento.
Con el control remoto de tarjeta
En el paso 2: presione < o , y no el selector de
control VOL.
Ajuste de la curva de ecualizador
— EQ7 Tune
Puede definir y almacenar los ajustes d el
ecualizador para distintos rangos de tono.
1 Seleccione una fuente y, a
continuación, presione (MENU).
2 Gire el sel ect o r de con trol SEEK hasta
que aparezca “Sound” y, a
continuación, presione (ENTER).
3 Gire el sel ect o r de con trol SEEK hasta
que aparezca “EQ7 Tune” y, a
continuación, presione (ENTER).
4 Gire el selector de control SEEK para
seleccionar el tipo de ecualizador
deseado y, a continuación, presione
(ENTER).
5 Gire el selector de control SEEK para
ajustar el volumen al nivel deseado.
10
6 Presione (ENTER) para pasar a la
frecuencia siguiente .
La frecuencia cambia del modo siguiente:
62Hz t 157Hz t 396Hz t 1.0kHz t
2.5kHz t 6.3kHz t 16kHz
Repita los pasos 5 y 6 para ajustar la curva de
ecualizador.
El diálogo de confirmación aparece despué s
de ajustar “16kHz” y presionar (ENTER).
7 Gire el selector de control SEEK para
seleccionar “YES” y, a continuación,
presione (ENTER).
El ajuste fi naliz a y la pantal la re gresa al modo
de reproducción/ re cepción normal.
Para restaura r la curv a de ecualiz ador aj ustada de
fábrica, mantenga presionado (ENTER) en el
paso 5 ó 6 y, a continuación, gire el sel ector de
control SEEK para seleccionar “YES”.
Con el control remoto de tarjeta
En los pasos 2, 3 y 5: presione M o m y no el selector
de control SEEK; en los pasos 4 y 7: presione < o
, y no el selector de control SEEK; en el paso 6:
presione < o , y no (ENTER).
Asignación de un nombre a una
emisora o un disco
Cuando sintoniza una emisora o reproduce un
disco en un cambi ador de CD con la funció n
CUSTOM FILE, puede etiq ue ta r cada emisora o
disco con un nombre personalizado de hasta 8
caracteres (Memoran do de emi soras/Me moran do
del disco).
Si asigna un nomb re a una em is ora o un disc o, el
mismo aparece en l a l is ta (página 9 o 13).
1 Mientras recibe una emisora o
reproduce un disco al que desea
asignar un nombre, presione (MENU).
2 Gire el selector de control SEEK hasta
que aparezca “Edit” y, a continuación,
presione (ENTER).
Page 49

3 Gire el selector de control SEEK hasta
que aparezca “Name Edit” y, a
continuación, presione (ENTER).
4 Gire el selector de control SEEK hasta
que aparezca el carácter deseado.
El carácter cam b i a de la manera siguie nt e:
A y B y C ... y 0 y 1 y 2 ... y +
y – y ... y (espacio en blanco)
y A
Para mover la indicación digi ta l, pr es ione
(ENTER).
Repita esta oper ación hasta que se ingrese el
nombre completo.
El diálogo de confirmación aparece después
de ingresar el último carácter de la derecha y
presionar (ENTER).
5 Gire el selector de control SEEK para
seleccionar “YES” y, a continuación,
presione (ENTER).
El ajuste f i nali za y l a pan tall a re gres a al modo
de recepción/reproducción nor m al .
Para mostrar el nombre, presione (DSPL)
durante la recepción/reproducci ón.
Sugerencias
• Para corregir o borrar un carácter, sobrescríbalo o
ingrese “ ”.
• El Memorando del disco siempre prevalece sobre
cualquier título pregrabado.
• Puede asignar un nombre a un disco en la unidad si
se conectó un cambiador con la función CUSTOM
FILE.
• “REP-Track” y todos los modos de reproducción
aleatoria quedan suspendidos hasta que se finaliza
la asignación de nombres.
Con el control remoto de tarjeta
En los pasos 2 a 4: presione M o m y no el selector de
control SEEK; en el paso 4: presione < o , para
mover la indicación digital; en el paso 5: presione <
o , y no el selector de control SEEK.
4 Gire el selector de cont r ol SEEK para
seleccionar el nombre que desea borrar.
5 Presione (ENTER).
Aparece el diálog o de confirmación.
6 Gire el selector de cont r ol SEEK hasta que
aparezca “YES” y, a continuación, presione
(ENTER).
El nombre se elimina y aparece “Continue” si
lo nombres restantes están almacenados. Si
desea borrar otros nombres, gire el selector de
control SEEK para seleccionar “YES” y, a
continuación , repita los pasos 4 a 6 .
7 Presione (MENU).
La unidad vuelve al modo de r ecepción/
reproducción nor m al.
Con el control remoto de tarjeta
En los pasos 2 a 4: presione M o m y no el selector de
control SEEK; en el paso 6: presione < o , y no el
selector de control SEEK.
Ajuste de los elementos de
menú — MENU
1 Presione (MENU).
2 Gire el selector de control SEEK hasta
que aparezca el elemento del m enú
deseado y, a continuación, presione
(ENTER).
Los elementos cambian de la manera
siguiente:
Setup y Display y Receiv e M ode
y Sound y Edit y List
3 Gire el selector de control SEEK hasta
que aparezca el elemento deseado y, a
continuación, presione (ENTER).
La indicación digital se mueve hacia la
derecha (selec ci ón de ajuste).
Eliminación del nombre
personalizado
1 Seleccione la radio o la unidad en la que
almacenó el nom br e personalizado que desea
eliminar y presione (MENU).
2 Gire el selector de control SEEK hasta que
aparezca “Edit” y, a continuació n, presione
(ENTER).
3 Gire el selector de control SEEK hasta que
aparezca “Name D el et e” y, a continuación,
presione (ENTER).
Aparecerá el nombre almacenado.
4 Gire el selector de control SEEK para
seleccionar el ajuste y, a continuación,
presione (ENTER).
El ajuste finalizó.
5 Presione (MENU).
La pantalla vuelve al modo de reproducción/
recepción norm al.
Nota
Los elementos que se muestran en pantalla variarán
en función de la fuente y del ajuste.
continúa en la página siguiente t
11
Page 50

Con el control remoto de tarjeta
En los pasos 2 y 3: presione M o m y no el selector de
control SEEK; en el paso 4: presione < o , y no el
selector de control SEEK.
Se pueden ajustar los elementos siguientes
(consulte la referencia de página para conocer los
detalles):
“
z” indica el ajuste predeterminado.
Setup (Configuración)
Clock Adjust (Ajuste del reloj) (página 4)
Beep (Pitido)
Para ajustar “on” (z) u “off” .
1
AUX-A*
(AUX Audio)
Para ajustar la pantalla de origen AUX en “on”
(
z) u “off” (página 14).
Display (Pantalla)
Clock (Información del relo j)
Para mostrar simultáneamente el reloj y la
imagen o los elementos de la pantalla.
–“on”: para visualizarlo simultáneamente.
– “off” (
z): para no visualizar lo
simultáneamente.
A.IMG (Imagen automática)
Con el modo Auto Image se muestra ca da una
de las imágenes de la pantalla de forma
automática (cada 10 segundos).
– “off” (
z): para no cambiar la imagen
automáticamente.
– “SA”: para pasar repetidamente las imágenes
de la pantalla del analizador de espectros.
–“Movie”: para pasar re pe tid ame nte las
imágenes de la pant a ll a de m odo Movie
(Película).
–“All”: para mostrar repetidamente las
imágenes de la pantalla en todos los mod os de
visualización.
Info (Informaci ón de pantalla)
Para mostrar los elementos (dependiendo de la
fuente, etc.) en el centro de la pantalla mientras
se visualiza una imagen.
– “on” (
z): para mostrar los e lementos.
–“off”: para no mostrar los elementos.
Dimmer (Atenuador)
Para cambiar el brillo de la pantalla.
–“Auto” (
– “on”: para atenuar la p ant alla.
– “off”: para desactivar el dimmer (ate nuador).
Demo*
Para ajustar “on” (z) u “off” (página 4).
A.Scroll (Desplazamiento automático)
Para desplazar au to m áticamente el elem ento de
pantalla cuando se cambia de disco/grupo/pista.
– “on”: para desplazarlo.
– “off” (
12
z): para atenuar la pantalla
automáticamente cuando se encienden las
luces.
1
(Demostració n)
z): para no desplazarlo.
Receive Mode (Modo de recepción)
Local (Modo de búsqueda local)
–“on”: para sintonizar únicamente las emisoras
con una señal más intensa.
–“o ff” (
z): para sintoni zar con una recepción
normal.
Mono (Modo monaural )
Seleccione el modo de recepción monoaural
para mejorar una recepción de FM de mala
calidad.
–“on”: para escuchar emisiones estéreo en
monoaural.
–“o ff” (
z): para escuchar emisiones estéreo en
estéreo.
IF
–“Auto” (
–“Wide”*
z): para reducir automáticamente la
frecuencia de recepción y eliminar el ruido.
2
: para escuchar siempre las
emisiones estér eo de FM en estéreo y co n una
recepción total de l a señal de la frecuenc ia .
Sound (Sonido)
EQ7 Tune (página 10)
HPF (Filtro de paso alto)
Para seleccionar la fr ecuencia de corte del
altavoz fro ntal/trasero: “off” (
z), “78Hz” o
“125Hz”.
LPF (Filtro de paso bajo)
Para seleccionar la fr ecuencia de corte del
altavoz potenciador de graves: “off” (
z),
“125Hz” o “78Hz”.
Loudness (Sonoridad)
Para mejorar los bajos y agudos con el volumen
bajo.
–“on”: para reforz ar bajos y agudos.
–“o ff” (
z): para no reforzar bajos y agud os.
AUX Level (Nivel AUX)
Para ajustar el nivel de volumen de cada eq ui po
auxiliar conectado (página 14). Este ajuste evita
la necesida d de aju star el ni v el de vol umen ent re
fuentes.
Edit (Editar)
Name Edit (Edición de nombres) (página 10)
Name Delete (Eliminación de nombres)
(página 11)
BTM (página 9)
*1 Cuando la unidad está apagada.
*2 En tales casos, es posible que algunas emisiones
de FM en estéreo se reciban en monoaural aunque
se encuentre en el modo de recepción estéreo.
Page 51

Uso del equipo opcional
Cambiador de CD/MD
Selección del cambiador
1 Presione (SOURCE) varias veces hasta que
aparezca “CD” o “MD”.
2 Presione (MODE) varias veces hasta que
aparezca el cambi a dor deseado.
Número de
unidad
Número
de disco
Indicación
LP2/LP4*
Seleccione Para reproducir
REP-Disc*1un disco varias veces.
SHUF-
Changer*
SHUF-All*
las pistas del cambiador en
1
orden aleatorio .
2
las pistas de todas las unidades
en orden aleat orio.
*1 Si se conectaron uno o más cambiadores de CD/
MD.
*2 Si se conectaron uno o más cambiadores de CD, o
dos o más cambiadores de MD.
Para volver al modo de reproducción normal,
seleccione “REP-off” o “SHUF-off”.
Sugerencia
“SHUF-All” no establecerá las pistas en orden
aleatorio entre cambiadores de CD y de MD.
Se inicia la reproducción.
* Cuando se reproduce un disco MDLP.
Omisión de discos
1 Durante la reproducción, presione (ENTER)
hasta que aparezca “DISC”.
2 Gire el selector de control SEEK hasta que
aparezca el disco d es eado.
Omisión de grupos y discos con el
control remoto de tarjeta
1 Durante la reproducción, presione M o m.
Para omitir Presione M o m
grupos y suéltelo (manténgalo
presionado du rante un
momento).
grupos de
forma contin ua
a los 2 segundos de haberlo
soltado por prim er a vez.
discos varias veces.
discos de forma
continua
y, a continuación, vuelva a
presionarlo de nt ro de 2
segundos y manténgalo
presionado.
Reproducción repetida y aleatoria
1 Durante la reproducción, presione (1) (REP)
o (2) (SHUF) varias v eces ha sta qu e apar ezca
el ajuste deseado.
Localización de discos por nombre
— LIST
Puede seleccionar un disco de la lista al conectar
un cambiador de CD con l a f unción CUSTOM
FILE o un cambia dor de MD.
Si asigna un nombre al disco, el nombre aparece
en la lista. Si dese a conocer más deta lles sobre
cómo etiquetar un disco, consulte la página 10.
1 Durante la reproducción, presion e (MENU).
2 Gire el selector de cont r ol SEEK hasta que
aparezca “List” y, a continuación , p resione
(ENTER).
Aparece el número o el nombre del disco .
3 Gire el selector de cont r ol SEEK hasta que
aparezca el disco deseado.
4 Presione (ENTER) para reproducir el disco .
La pantalla vuelve al modo de reproducción
normal.
Con el control remoto de tarjeta
Durante la reproducción, presione (LIST). Presione M
o m varias veces hasta que aparezca el disco
deseado y, a continuación, presione (ENTER).
Mando rotatorio RM-X4S
Colocación de la etiqueta
Coloque la etiqueta de indicación según el modo
en que instale el mando ro tatorio.
D
S
D
N
U
O
S
E
D
O
M
PL
S
D
P
L
M
O
D
E
S
O
U
N
D
continúa en la página siguiente t
13
Page 52

Ubicación de los controles
Los botones correspondientes en el mando
rotatorio controlan las mismas funciones que los
de esta unidad o del co nt rol remoto de tarjeta.
SOUND
PRESET/
DISC
SOURCE
VOL
ATT
DSPL
SEEK/AMS
MODE
OFF
OFF
La operación de los co nt roles siguientes del
mando rotatorio es distinta que en la unidad.
• Control PRESET/DISC
Para controlar la radio o el CD, de la misma
manera que con M o m en el control remoto de
tarjeta (pre si onar y hacer girar).
• Control VOL (volumen)
Funciona de igual manera que el selecto r d e
control de volumen en la unidad (girar).
• Control SEEK/AMS
Para controlar la radio o el CD, de la misma
manera que con < o , en el control remoto
de tarjeta (girar o girar y mantener).
Cambio del sentido de
funcionamiento
El sentido de funcionamiento de los controles
está ajustado de fá br ica como se muestra a
continuación.
Para aumentar
Equipo auxiliar de audio
Es posible conectar di spositivos portátiles
opcionales de Sony al te rminal BUS AUDIO IN/
AUX IN de la unidad. Si el cambiador u otro
dispositivo no está conectado al terminal, la
unidad le permite escuchar el dispositivo portátil
desde los altavoces del automóvil.
Nota
Al conectar un dispositivo portátil, asegúrese de que
BUS CONTROL IN no esté conectado. Si un
dispositivo está conectado a BUS CONTROL IN,
“AUX” no se puede seleccionar con (SOURCE).
Sugerencia
Al conectar un dispositivo portátil y un cambiador,
utilice el selector AUX-IN opcional.
Selección del equipo auxiliar
1 Presione (SOURCE) varias veces hasta que
aparezca “AUX”.
Utilice el pr op i o dispositivo portátil.
Para ajustar el nivel de volumen del equipo
auxiliar, consulte “AUX Level” en la pági na 12.
Para disminuir
Si necesita instalar el mando rotatori o en el lado
derecho de la columna de la dirección, puede
invertir el sentido de funcionamiento.
1 Mientras presiona el control VOL, mantenga
presionado (SOUND).
14
Page 53

Información complementaria
Precauciones
• Si estaciona el automóvil bajo la lu z directa del
sol, deje que la unidad se enfríe an te s de usarla .
• La antena motorizada se extenderá
automáticamente mientras la unidad se encuentra
en funcionamiento.
Condensación de humedad
En días lluviosos o en zonas muy húmedas, es
posible que se condense hume da d en el interior de
las lentes y la pantalla de la unidad. Si esto ocurre, la
unidad no funcionará de forma correcta. En tal caso,
extraiga el disco y espere una hora
aproximadamente ha sta que se haya evaporado la
humedad.
Para mantener una alta calidad de
sonido
Asegúrese de no derramar jugos ni ref resc os sobre
la unidad o los discos.
Notas sobre los discos
• Para mantener los discos limpios, no toque su
superficie. Tómelos por los bordes.
• Guarde los disco s en sus cajas o en los cargadores
de discos cuando no los use.
• No someta los discos al calor ni a altas
temperaturas. Evite dejarlos en un automóvil
estacionado o sob r e el tablero o la bandeja trasera.
• No adhiera etiquetas ni utilice discos con residuos
de pegamento o tinta. Tales discos pueden dejar de
girar durante el uso, lo que provocaría una falla de
funcionamiento o podrían dañarse.
• No use discos con etiquetas o autoa dhe sivos.
Su uso puede producir las siguien tes fall as de
funcionamiento:
– Imposibilidad de expulsar el disco (dado que se
despegó la etiqueta o el autoadhesivo y se
obstruyó el mecanismo de expulsión).
– Imposib ilidad de leer lo s d atos de audio d e
forma correcta (por ejemplo, se interrumpe la
reproducción o simplemente no la hay) debido a
que el calor cont r ae el au t oadh es i v o o la eti q ueta
y hace que el disco se deforme.
• No se pueden reproducir en esta unidad discos con
formas no estandarizada s (p or ej em plo, formas de
corazón, cuadrado o estre lla). Si lo intenta, puede
dañar la unidad. No use este tipo de discos.
• No es posible reproduci r discos compactos de
8cm.
• Antes de reproducir discos,
límpielos con un paño de
limpieza disponibl e en el
mercado. Hágalo desde el
centro hacia los bordes. No
utilice disolventes como
bencina, diluyentes, prod uct os
de limpieza comerciales ni
aerosoles antiestáticos para
discos analógicos.
Notas sobre los discos CD-R/CD-RW
• Según el estado del disc o o el equipo utilizado
para su grabación, es posible que algu nos di scos
CD-R y CD-RW no puedan reproducirse en esta
unidad.
• No es posible reproduc ir un disc o CD-R o un CDRW que no esté finalizado.
Discos de música codificados con
tecnologías de protección de los
derechos de autor
Este producto fue diseñ ad o para reproducir discos
que cumplen con el estándar Compact Disc (CD).
Recientemente, algunas compañías discográficas
comercializan discos de mú sic a codificados con
tecnologías de protección de derechos de autor.
Tenga en cuenta que, entre estos discos, algunos no
cumplen con el estándar CD, por l o que no podrán
reproducirse con este producto.
Acerca de los archivos MP3
MP3, que significa MPEG-1 Audio Layer-3, es un
formato estandari zado que permite comprimir
archivos de música. Comprime los datos de CD de
audio a aproximadamen te 1/10 de su tamaño
original.
• La unidad es compatible con la norma ISO 96 60
de formato de nivel 1 o nivel 2, con la norma
Joliet/Romeo en cuanto al formato de expansión,
con el indicador ID3 versión 1.0, 1.1, 2.2, 2.3 y
2.4, así como con Multi Session.
• Cantidad máxim a de:
– carpetas (grupos): 150 (incluidas la carpeta raíz
y las carpetas vacías).
– archi vos MP3 (pistas) y carpetas conten idas en
un disco: 300 (si un nombre de archivo o carpeta
contiene muchos caracteres, este número puede
ser inferior a 300).
– caracteres qu e se puede n visual izar en el nombr e
de una carpeta o ar ch ivo: 32 (Joliet) o 32/64
(Romeo); el indicador ID3 puede contener 15/30
caracteres (1.0, 1.1, 2.2 y 2.3) o 63/126
caracteres (2.4).
continúa en la página siguiente t
15
Page 54

Orden de reproducción de los
archivos MP3
MP3
Carpeta
(grupo)
Archiv o MP3
(pista)
• Se muestran los caracteres correspondientes al
nombre de una carp eta o archivo y la información
de texto grabada por SonicStage.
Si desea conoce r más detalles acer ca de los CD de
AT RAC, consulte el m anual de SonicStage o
SonicStage Simple Burner.
Nota
Asegúrese de crear el CD de ATRAC con el software
autorizado, como SonicStage 2.0 o posterior, o
SonicStage Simple Burner 1.0 ó 1.1, que son
productos suministrados con Sony Network.
Si desea realizar alguna consulta o solucionar algún
problema relativo a la unidad que no se trate en este
manual, póngase en contac to con el distribuidor
Sony más cercano.
Notas
• Asegúrese de finalizar el disco antes de utilizarlo en
la unidad.
• Al asignar un nombre a un archivo MP3, asegúrese
de añadir la extensión “.mp3” al nombre de archivo.
• Si reproduce un archivo MP3 de alta velocidad de
bits, como 320 kbps, el sonido puede ser
discontinuo.
• Durante la reprodu c ci ón de un ar c hivo MP3 de VBR
(velocidad de bits variable) o al avanzar o retroceder
rápidamente, es posible que el tiempo de
reproducción transcurr i do no se muestr e con
precisión.
• Si el disco se grabó en Multi Session, sólo se
reconoce y reproduce la primera pista del formato
de la primera sesión (cualquier otro formato se
omitirá). La prioridad del formato es CD-DA, CD de
ATRAC y MP3.
– Cuando la primera pista es un CD-DA, sólo se
reproduce el CD-DA de la primera sesión.
– Cuando la primera pista no es un CD-DA, se
reproduce una sesión de CD de ATRAC o MP3. Si
el disco no contiene datos en ninguno de estos
formatos, aparece “NO Music”.
Acerca de CD de ATRAC
Formato ATRAC3plus
ATRAC3, que significa Ada pt ive Transform
Acoustic Coding3, es una tecnología de compresión
de audio. Comprime los datos de CD de audio a
aproximadamente 1/10 de su tama ño original.
ATRAC3plus, un formato extendido de ATRAC3,
comprime los datos de CD de audio a
aproximadamente 1/20 de su tamaño original. La
unidad admite los format os ATRAC3 y
ATRAC3plus.
CD de ATRAC
El CD de A TRAC contiene datos grabados de CD de
audio que se comprimen al formato A TRAC3 o
ATRAC3plus mediante el uso de software
autoriza do , como SonicStage 2.0 o poster ior o
SonicStage Simple Burner.
• Cantidad máxima de:
– carpetas (grupos): 255
– archivos (pistas): 999
16
Mantenimiento
Sustitución de la pila de litio del
control remoto de tarjeta
En condiciones norma l es, la pila dura
aproximadamente 1 año (l a duración puede ser
menor en función de las condiciones de uso).
El alcance del control remoto de tarjeta disminuye a
medida que se agota la pila. Sustitúyala por una pila
de litio CR2025 nueva. El uso de cualquier otra pila
podría provocar un incendio o una explosión .
x
Lado + hacia
arriba
Notas sobre la pila de litio
• Mantenga la pila de litio fuera del alcance de los
niños. Si se ingiriese, póngase en contacto
inmediatamente con un médico.
• Limpie la pila con un paño seco para garantizar un
contacto óptimo.
• Asegúrese de observar la polaridad correcta al
instalarla.
• No agarre la pila con pinzas metálicas, ya que
puede producirse un cortocircuito.
ADVERTENCIA
La pila puede explotar si no se emplea
adecuadamente.
No recargue la pila; tampoco la desmonte ni
la arroje al fuego.
Page 55

Sustitución del fusible
Al sustitui r el fusi ble, ase gúres e
de utilizar uno cuyo amperaje
coincida con el especificado en
el original. Si el fusible se
funde, verifique la conexión de
alimentación y sustitúyalo. Si el
fusible vuelve a fundirse
después de sustituirlo, es
posible que exista alguna falla
de funcionamiento interno. En
tal caso, consulte con el
distribuidor Sony más cercano.
Fusible (10 A)
Limpieza de los conectores
Es posible que la unidad no fu nc ione correctamente
si los conectores entre ésta y el panel frontal están
sucios. Con el fin de evitarlo, extraiga el panel
frontal (página 4) y limpie los conectores con un
bastoncillo de algodón hum edecido en alcohol. No
aplique demasiada fuerza , ya que podría dañar los
conectores.
3 Tire de las lla v es de lib erac ión pa ra e xt raer
el marco de protección.
2 Extraiga la unidad.
1 Inserte las dos llaves de liberación
simultáne amente hasta es cuchar un clic.
El gancho
debe mirar
hacia adentro.
2 Tire de las lla v es de lib erac ión pa ra e xt raer
la unidad.
Unidad principal
Notas
• Por razones de seguridad, apague el motor antes de
limpiar los conectores y extraiga la llave del
interruptor de encendido.
• No toque nunca los conectores directamente con los
dedos ni con ningún dispositivo metálico.
Parte post erior del
panel frontal
Extracción de la unidad
1 Extraiga el marco de protección.
1 Extraiga el panel frontal (página 4).
2 Fije las llaves de libera ción al marco de
protección.
Oriente las llaves de liberación
como se indica en la ilustración.
3 Deslice la unidad para extraerla del marco.
Especificaciones
Sección del reproductor de CD
Relación señal-ruido: 120 dB
Respuesta de frecuencia : de 10 a 20 000 Hz
Fluctuación y trémolo: inferior al límite medible
Sección del sintonizador
FM
Margen de sintonizació n: de 87,5 a 107,9 MHz
Terminal de antena: conector de antena externa
Frecuencia intermedia: 10,7 MHz/450 kHz
Sensibilidad útil: 9 dBf
Selectividad: 75 dB a 400 kHz
Relación señal-ruido: 67 dB (estéreo), 69 dB (mono)
Distorsión armónica a 1 kHz: 0,5 % (estéreo),
0,3 % (mono)
Separación: 35 dB a 1 kHz
Respuesta de frecuencia : de 30 a 15 000 Hz
continúa en la página siguiente t
17
Page 56

AM
y
Margen de sintoniz ac ió n: de 530 a 1 710 kHz
Te rminal de antena: conector de antena externa
Frecuencia intermedia: 10,7 MHz/450 kHz
Sensibilidad: 30 µV
Sección del amplificador de potencia
Salidas: salidas de altavoz (conector e s de sella do
seguro)
Impedancia de altavoces: de 4 a 8 Ω
Salida máxima de potencia: 52 W × 4 (a 4 Ω)
Información general
Salidas:
Terminal de salidas de audio (frontal/posterior)
Terminal de salida del altavoz potenciador de
graves (mono)
Terminal de control del relevador de la antena
motorizada
Terminal de control del amplificador de potencia
Entradas:
Terminal de control ATT de teléfono
Terminal de control de iluminación
Terminal de entrada de control BUS
Entrada de audio BUS/terminal AUX IN
Terminal de entrada del control remoto
Terminal de entrada de la antena
Controles de tono:
Graves: ±10 dB a 62 Hz
Agudos: ±10 dB a 16 kHz
Sonoridad:
+8 dB a 100 Hz
+2 dB a 10 kHz
Requisitos de alimentación: baterí a de automóvil de
cc de 12 V (masa negativa)
Dimensiones: aprox. 178 × 50 × 188 mm (an/al/prf)
Dimensiones del montaje: aprox. 182 × 53 × 162 mm
(an/al/prf)
Peso: aprox. 1,6 kg
Accesorios suministrados:
Control remoto de tarjeta: RM-X143A
Componentes de instalación y conexiones
(1 juego)
Estuche para el panel frontal (1)
Equipo y accesorios opcion ales:
Mando rotatorio: RM-X6S
Cable BUS (suministrado con un cable con
terminales RCA): RC-61 (1 m), RC-62 (2 m)
Cambiador de CD (10 discos): CDX-757MX
Cambiador de CD (6 discos): CDX-T69
Cambiador de MD (6 discos): MDX-66XLP
Selector de fuente: XA- C3 0
Selector AUX-IN: XA-300
Patentes de los EE.UU. y otros países usados con
licencia de Dolb
Nota
Esta unidad no puede conectarse a un
preamplificador digital ni a un ecualizador que sea
compatible con el sistema BUS de Sony.
El diseño y las especificaciones están sujetos a
cambios sin previo aviso.
Laboratories.
• Se ha utilizado soldadura sin plomo para soldar
ciertos componentes. (más del 80 %)
• Ciertas placas del circuito impreso no contienen
retardantes de llama halogenados.
• Las carcasas no contienen retardantes de llama
halogenados.
• Impreso con tinta de aceites vegetales, libre de
COV (Compuestos Orgánicos Volátiles).
• No se ha utilizado goma esponjosa de poliestireno
para el material de relleno y protección.
Solución de problemas
La siguiente lis ta de comprobación le ayudará a
solucionar los problemas que puedan producirse con
la unidad.
Antes de consultarla, revise los procedimient os de
conexión y de funcionamient o.
Generales
La unidad no recibe alimentación.
• Revise la conexión. Si todo está en orden, compruebe
el fusible.
• Si la unidad está apagada y desaparece la indicación
de pantalla, no se puede utilizar con el contr ol
remoto.
t Encienda la unidad.
La antena motorizada no se extiende.
La antena motorizada no dispone de una caja de
relevador.
No se emite el sonido.
• El volumen es demasiado bajo.
• Está activada la función ATT o la funci ón ATT de
teléfono (cuando se conecta el cable de interfaz de un
teléfono par a au to móvil al cable A TT ).
• La posición del control de equilibrio (FAD) no está
ajustada para un sistema de 2 altavoces.
• El cambiador de CD no es compat ibl e con el f ormat o
del disco (MP3/CD de A TRAC).
t Reproduzca con un cambiador de CD de Sony
compatible con MP3 o con esta unidad.
No se escuchan pitidos.
• El sonido de los pitidos está canc e la do ( pá g ina 12).
• Se encuentra conectado u n ampl ificador de potencia
opcional y no está usando el amplificador
incorporado.
El contenido de la memoria se borró.
• Presionó el botón RESET.
t Vuelva a almacenar los datos en la memoria.
• Se desconectó el cable de conexión de alimentación o
la pila.
• El cable de conexión de la alimentación no está
conectado de forma correcta.
18
Page 57

Las emisoras almacenadas y la hora correcta
se borraron.
Se fundió el fusible.
Se escucha ruido cuando se cambia la
posición de la llave de encendido.
Los cables no se conectaron de forma correcta al
conector de alimentación auxilia r de l a u tomóvil.
Las indicaciones desaparecen de la pantalla o
no aparecen en ella.
• El atenuador está ajustado en “Dimmer on”
(página 12).
• El ángulo del panel frontal no es el correcto.
t Ajuste el ángulo del panel f r onta l pre sionando y
manteniendo (ANGLE) (página 7).
• La pantalla se apaga si mant iene presionado (OFF).
t Mantenga presionado (OFF) nuevamente hast a
que se ilumine la pantalla.
• Los conectores están sucios (página 17).
La opción DSO no funciona.
Según el tipo de interior del automóvil o el tipo de
música, DSO puede no producir el efecto deseado.
Las imágen e s ca mbian automát i ca mente.
En modo Auto Image (imagen autom át ica ), no se
puede visualizar la imagen sel eccionada.
tPara visualizar úni came nte la im agen s el eccion ada,
ajuste en “ A.IMG off” (página 12).
No se visualiza ningún elemento de la pantalla.
tAjuste “Info on” (página 12).
Reproducción de CD/MD
No es posible insertar el disco.
• Ya hay un disco insertado.
• El disco se insertó a la fuerza al revés o de forma
incorrecta.
No se inicia la reproducción.
• Disco defectuoso o sucio.
• Los discos CD-R/CD-RW no son para audio
(página 15).
No es posible reproducir archivos MP3.
El disco no es compatible con el form at o y la versió n
de MP3 (página 15) .
Los archivos MP3 demoran más tiempo en
reproducirse que los demás.
El inicio de la reproducción de los siguientes discos
demora algo más de tiempo.
– disco grabado con una estructura de árbol
complicada.
– disco grabado en Multi Session.
– disco al que es posible añadir datos.
No se puede reproducir el CD de ATRAC.
• El disco no se creó con software autorizado co m o
SonicStage o SonicStage Simple Burner.
• No es posible reproducir pistas que no están incluidas
en el grupo.
Los elementos de pantalla n o se desplazan.
• En el caso de dis cos con muchos caracteres, es
posible que éstos no se desplacen.
• “A.Scroll” está desactivado.
t Ajuste “A.Scroll on” (página 12) o pr esione
(SCRL) en el control remoto de tarjeta.
Se producen saltos de sonido.
• La instalación no es co rrecta.
t Instale la unidad en un ángulo inferior a 45° en
una parte firme del automóvil.
• Disco defectuoso o sucio.
Los botones de operación no funcionan.
El disco no se expulsa.
Presione el bo tón RESET (página 4).
“MS” o “MD” no aparecen en la pantalla de
origen cuando se conectan el MGS-X1 y el
cambiador MD opcionales.
Esta unidad reconoce MGS-X1 como una unid ad de
MD.
t Presione (SOURCE) hasta que aparezca “MS” o
“MD” y, a continuación, presione (MODE) vari as
veces.
Recepción de radio
No es posible recibir las emisoras.
Hay ruidos que obstaculizan el sonido.
• Conecte un cable de control de an te na motorizada
(azul) o un cable de fuente de alimentación auxiliar
(rojo) al cable de suministro de al imentación del
amplificador de antena del automóvil (sólo cuando el
automóvil tenga una antena de FM/AM inc or por a da
en el cristal trasero o lateral).
• Compruebe la conexión de la antena del automóvil.
• La antena automátic a no se extie nde.
t Compruebe la conexión del cable de control de
antena motorizada.
• Revise la frecuenci a.
• Cuando el modo DSO está activado, el sonido se
escucha ocasionalmente con ruido.
t Ajuste el modo DSO en “off” (página 7) .
No es posible utilizar la sintonización
programada.
• Almacene la frecuencia correcta en la memoria.
• La señal de emisión es dema sia do dé bil.
No es posible utilizar la sintonización
automática.
• El modo de búsqueda local est á ajus tado en “on”.
t Ajuste “Local off” (página 12).
• La señal de emisión es dema sia do débil.
t Use la sintoniza ci ón ma nual.
Durante la reproducción de FM, la indicación
“ST” parpadea.
• Sintonice la frecuencia con precisión.
• La señal de emisión es dema sia do dé bil.
t Ajuste “Mono on” (pá g ina 12).
Un programa de FM emitido en estéreo se
escucha en monoaural.
La unidad se encuentra en el modo de recepción
monoaural.
t Ajuste “Mono off” (página 12).
Se producen interferencias durante la
recepción de FM.
El modo IF está ajustado en “Wide”.
t Ajuste “IF Auto” (página 12).
continúa en la página siguiente t
19
Page 58

Mensajes/indicaciones de error
1
Blank*
No hay pistas grabadas en el MD.*
t Reproduzca un MD que te nga pistas gr a ba da s.
1
Error*
• El disco está sucio o se insertó al revés. *
tLímpielo o insértelo de forma correcta.
• El disco no se reproduce debido a algún problema.
tInserte otro disco.
Failure (Se ilumina hasta que se presiona algún botón.)
La conexión de los altavoces y amplificadores es
incorrecta.
t Consulte el ma nua l de insta la c ión de este modelo
para revisar la conexión.
FAILURE (Se ilumina durante 1 segundo.)
Con el sintonizador XM conectado, no se pudo
almacenar una emisora de radio XM en una emisora
preestablecida.
t Compruebe que recibe la emisora que desea
almacenar e inténtelo de nuevo.
Load
El cambiador está cargand o el di sc o.
t Espere hasta qu e finalice.
Local Seek +/–
El modo de búsqueda local está activado durante la
sintonización automática.
NO Data
Se eliminaron todos los nombres personalizados o no
se guardó ninguno.
NO Disc
El disco no está insertado en el cambiador de CD /MD.
t Inserte los discos en el cambiador.
NO Disc Name
No se escribió ningún nombre de disco en la pista.
NO Group Name
No se escribió ningún nombre de grupo en la pist a.
NO ID3 Tag
No se grabó la información del indica dor ID3 e n el
archi vo MP3.
NO Info
No se grabó información de texto en el archivo
ATRAC3/ATRAC3plus.
NO Magazine
El cargador de discos no está insertado en el cambiador
de CD.
t Inserte el cargador en el cambiador.
NO Music
El disco no es un archivo de música.
t Inserte un CD de música en esta unidad o en un
cambiador con capacidad para reproducir MP 3.
NO Track Name
No se escribió ningún nombre de pista en la pis ta .
Not Read
La unidad no puede leer la informa ción de l disc o.
t Cargue el disco y, a continuación, selecciónelo en
la lista.
2
2
Not Ready
La tapa del c amb iad or de M D es tá abie rta o lo s MD no
están inserta d os correctam e n te.
t Cierre la tapa o inserte los MD correctamente.
Offset
Es posible que se haya producido una falla interna.
t Revise la conexión. Si el indicador de error
permanece en pantalla, póngase en contacto con el
distribuidor Sony más cercano.
Read
La unidad está leyendo toda la información de pistas y
de grupos del disco.
t Espere hasta que finalice la lectura y se inicie la
reproducción automáticamente. Es posible que
demore más de un minuto en función de la
estructura del disco.
Push Reset
La unidad de CD y el cambiador de CD/MD no pueden
utilizarse debido a algún problema.
t Presione el bot ón RESET ( pá gina 4).
“” o “”
Durante la operación de avance o retroceso rápido,
llegó al principio o al final del disco, por lo que no es
posible continuar.
“s”
No se puede mostrar el carácter con la unidad.
*1 Si se produce un error durante la reproducción de
un CD o MD, el número de disco del CD o MD no
aparece en pantalla.
*2 La pantalla muestra el número del disco que causa
el error.
Si estas soluciones no ayudan a mej orar la s itua ción,
póngase en contacto con el dist ribuidor Sony má s
cercano.
Si entrega la unidad para su repar ac ión a causa de
problemas en la reproducción de CD, lleve el disco
que se utilizó cuando se prod ujo el pr obl ema.
20
Page 59

Page 60

Sony Corporation Printed in Korea
 Loading...