

Page 1

FM/MW/LW
3-047-694-12 (1)
FM/MW/LW Compact Disc Player
CDX-M700R/CDX-M600R
Compact Disc
Player
Operating Instructions
Manual de instrucciones
Bruksanvisning
Manual de instruções
Инструкция по эксплуатации
For installation and connections, see the supplied installation/connections
manual.
Para obtener información sobre la instalación y las conexiones, consulte el manual
de instalación/conexiones suministrado.
Vi hänvisar till det medföljande häftet angående montering/anslutningar.
Para a instalação e as ligações, consulte o manual de instalação/ligações
fornecido.
Перед установкой и подсоединениями прочитайте прилагаемую
инструкцию по установке и подсоединению.
GB
ES
SE
PT
RU
CDX-M700R
CDX-M600R
© 2000 Sony Corporation
Page 2

Welcome !
Thank you for purchasing the Sony Compact
Disc Player. This unit lets you enjoy a variety
of features using the following controller
accessories:
Supplied accessory
Card remote commander
RM-X95 (for the CDX-M700R)
RM-X96 (for the CDX-M600R)
Optional accessory
Rotary commander RM-X4S
In addition to the CD playback and radio
operations, you can expand your system by
connecting optional CD/MD units*1.
When you operate this unit or a connected
optional CD unit with the CD TEXT function,
the CD TEXT information will appear in the
display when you playback a CD TEXT disc*2.
*1You can connect CD changers, MD changers, CD
players, or MD players.
*2A CD TEXT disc is an audio CD that includes
information such as the disc name, artist name
and track names.
This information is recorded on the disc.
Precautions
CLASS
This label is located on the bottom of the
chassis.
CAUTION INVISIBLE
VIEW DIRECTLY WITH OPTICAL INSTRUMENTS
This label is located on the drive unit’s internal
chassis.
• If your car was parked in direct sunlight
resulting in a considerable rise in
temperature inside the car, allow the unit to
cool off before operating it.
• If no power is being supplied to the unit,
check the connections first. If everything is in
order, check the fuse.
•If your car is equipped with a power aerial, it
will extend automatically while the unit is
operating.
If you have any questions or problems
concerning your unit that are not covered in
this manual, please consult your nearest Sony
dealer.
1
PRODUCTLASER
LASER RADIATIONWHEN OPEN
DO NOT STARE INTO BEAM OR
Moisture Condensation
On a rainy day or in a very damp area,
moisture may condense on the lenses inside
the unit. Should this occur, the unit will not
operate properly. In such a case, remove the
disc and wait for about an hour until the
moisture has evaporated.
2
Page 3

Notes on CDs
A dirty or defective disc may cause sound
dropouts while playing. To enjoy optimum
sound, handle the disc as follows.
Handle the disc by its edge. To keep the disc
clean, do not touch the surface.
Notes on discs
If you use the discs explained below, the sticky
residue can cause the CD to stop spinning and
may cause malfunction or ruin your discs.
Do not use second-hand or rental CDs that
have a sticky residue on the surface (for
example, from peeled-off stickers or from ink,
or glue leaking from under the stickers).
There are paste residue.
Ink is sticky.
Do not stick paper or tape on the disc.
Do not expose the discs to direct sunlight or
heat sources such as hot air-ducts, or leave
them in a car parked in direct sunlight where
there can be a considerable rise in temperature
inside the car.
Before playing, clean the discs with an optional
cleaning cloth. Wipe each disc from the centre
out.
Do not use rental CDs with old labels that are
beginning to peel off.
Stickers that are beginning
to peel away, leaving a
sticky residue.
Do not use your CDs with labels or stickers
attached.
Labels are attached.
When you play 8 cm CDs
Use the optional Sony compact disc single
adapter (CSA-8) to protect the CD player from
being damaged.
Notes on CD-R discs
•You can play CD-Rs (recordable CDs) on this
unit. However depending on the conditions
of the recording equipment or the CD-R disc
itself, some CD-Rs cannot be played on this
unit.
•You cannot play a CD-R that is not finalized
(Finalization is necessary for a recorded CDR disc to be played on the audio CD player).
•You cannot play CD-RWs (rewritable CDs)
on this player.
Do not use solvents such as benzine, thinner,
commercially available cleaners, or antistatic
spray intended for analog discs.
3
Page 4

Table of Contents
Location of controls ................................................. 6
Getting Started
Resetting the unit ................................................ 8
Security release settings ..................................... 8
Turning the unit on/off ..................................... 8
How to use the menu ......................................... 9
Setting the clock .................................................. 9
CD Player
CD/MD Unit (optional)
Listening to a CD
(with this unit only) ..................................... 10
Playing tracks repeatedly
— Repeat Play .............................................. 12
Playing tracks in random order
— Shuffle Play .............................................. 12
Labelling a CD
— Disc Memo (For a CD unit with the
custom file function).................................... 13
Locating a disc by name
— List-up (For a CD unit with the custom
file function or an MD unit) ....................... 14
Selecting specific tracks for playback
— Bank (For a CD unit with the custom file
function) ........................................................ 15
Radio
Memorising stations automatically
— Best Tuning Memory (BTM) ................. 16
Memorising only the desired stations ............ 16
Receiving the memorised stations .................. 17
RDS
Overview of the RDS function ........................ 18
Displaying the station name ............................ 18
Retuning the same programme automatically
— Alternative Frequencies (AF) ................ 18
Listening to traffic announcements ................ 20
Presetting the RDS stations with the AF and
TA data .......................................................... 21
Locating a station by programme type .......... 22
Setting the clock automatically ....................... 23
DAB
Overview of DAB .............................................. 23
Basic operations of DAB .................................. 24
Presetting DAB services automatically
— BTM .......................................................... 25
Presetting DAB services manually
— Manual Preset Memory ......................... 25
Listening to a DAB programme ...................... 26
Settings on the audio reception ....................... 27
Locating a DAB service by programme type
(PTY) .............................................................. 27
DSP (CDX-M700R only)
Setting the equalizer ......................................... 28
Selecting the listening position ....................... 29
Selecting a soundstage menu
— Dynamic Soundstage Organizer
(DSO) ............................................................. 29
Adjusting the balance (BAL) ........................... 30
Adjusting the front and rear fader ................. 30
Adjusting the volume of the subwoofer(s).... 31
Listening to each programme source in its
registered DSO
— Source Sound Memory (SSM) ............... 31
Other Functions
Labelling the rotary commander .................... 32
Using the rotary commander .......................... 32
Adjusting the sound characteristics
(CDX-M600R only) ...................................... 34
Attenuating the sound ..................................... 34
Changing the sound and display settings ..... 35
Boosting the bass sound
— D-bass (CDX-M600R only) .................... 36
Selecting the spectrum analyser ..................... 36
Adjusting the sound and frequency of the
equalizer preamplifier
(CDX-M600R only) ...................................... 37
Additional Information
Maintenance ....................................................... 37
Dismounting the unit ....................................... 38
Specifications ..................................................... 40
Troubleshooting guide ..................................... 41
4
Page 5

Location of controls
Card remote
commander
OFF
MENU LIST
SEEK
SOUND
PTY
DSPL AF/TA MODE
Refer to the pages listed for details.
1 OFF button 8, 10
2 MENU button 9, 11, 12, 13, 14, 15, 16,
17, 19, 21, 23, 25, 27, 28, 30, 31, 35, 36
3 SOURCE (TUNER/CD/MD) button
8, 10, 11, 14, 16, 17, 24, 28, 29, 30, 31, 36
4 </, (SEEK/AMS –/+) buttons
9, 11, 12, 13, 15, 17, 19, 21, 23, 24, 25,
27, 28, 29, 30, 31, 34, 35, 36
Automatic Music Sensor (./>) 11
Manual Search (m/M) 11
Seek 17
5 SOUND button 28, 29, 30, 31, 34
6 DSPL/PTY (display mode change/
programme type) button
10, 11, 13, 22, 27
7 ATT (attenuate) button 34
8 CDX-M700R:
DSO (Dynamic Soundstage Organaizer)
button 29
CDX-M600R:
D-BASS button 36
9 OPEN/CLOSE button 10
q; LIST button 13, 14, 26
OPEN/CLOSE
DSO
DISC
SEEK
SOURCE
DISC
ENTER
VOLATT
qa M/m (PRST/DISC +/–) buttons
9, 11, 12, 13, 14, 15, 16, 17, 19, 21, 22,
23, 24, 25, 26, 27, 28, 30, 31, 35, 36
During CD/MD playback:
Disc change 11
During radio reception:
Preset stations select 17
qs ENTER button
9, 13, 14, 15, 16, 17, 19, 21, 22, 23, 25,
26, 27, 28, 30, 31, 35, 36
qd AF/TA button 18, 19, 20, 21
qf MODE button 10, 14, 16, 17, 24
During CD/MD playback:
CD/MD unit select 10, 14
During radio reception:
BAND select 16, 17
qg VOL (Volume adjust) buttons 20, 31
A unit turned off by pressing (OFF) for two
seconds cannot be operated with the card
remote commander unless (SOURCE) on the
unit is pressed or a CD is inserted to activate
the unit first.
5
Page 6

Location of controls
Security side
Operation side
T
Y
P
P
S
L
OFF
D
SOURCE
M
E
O
D
REP SHUF
123456
MENU
SOUND
TAAF
DISC
DSO
DISC
LIST
ENTER
CLOSE
CDX-M700R/M600R
6
Page 7

The corresponding buttons of the unit
control the same functions as those on the
card remote commander.
17 Reset button 8
2 Main display window
3 OPEN button 38
4qf Receptor for the card remote
commander
5 Volume adjust buttons
6
Z (eject) button 10
8 DSPL/PTY (display mode change/
programme type) button
9 Sub display window
q; MENU button
qa DISC/PRST +/– (cursor up/down) buttons
SEEK/AMS –/+ (cursor left/right) buttons
16
qs CDX-M700R:
DSO button
CDX-M600R:
D-BASS button
qd LIST button
qg OFF button*
qh MODE button
qj SOURCE (TUNER/CD/MD) button
qk AF button 18, 19, 21
ql Number buttons
During radio reception:
Preset number select
16, 17, 19, 21, 26
During CD/MD playback:
(1) REP 12
(2) SHUF 12
w; TA button 19, 20, 21
wa SOUND button
ws ENTER button
wd CLOSE button
* Warning when installing in a car
without ACC (accessory) position on
the ignition key switch
Be sure to press (OFF) on the unit for two
seconds to turn off the clock display after
turning off the engine.
When you press (OFF) only momentarily,
the clock display does not turn off and this
causes battery wear.
7
Page 8

Getting Started
Resetting the unit
Before operating the unit for the first time or
after replacing the car battery, you must reset
the unit.
Press the reset button with a pointed object,
such as a ballpoint pen.
Reset button
Note
Pressing the reset button will erase the clock
setting and some memorised functions.
Security release settings
Do the following initial settings before you
operate the unit for the first time, after
replacing the car battery, or after resetting the
unit.
Be sure to make these settings, otherwise the
front panel remains disabled and you will be
unable to operate the unit.
Turning the unit on/off
Turning on the unit
Press (SOURCE) or insert a CD in the unit. For
details on operation, refer to page 10 (CD/MD)
and page 16 (radio).
Turning off the unit
Press (OFF) to stop CD/MD playback or radio
MW/LW reception (the key illumination and
display remains on.)
Press (OFF) for two seconds to completely
turn off the unit.
Note
If your car has no ACC position on the ignition key
switch, be sure to turn the unit off by pressing
(OFF) for two seconds to avoid car battery wear.
1 Press the reset button.
“Code in” appears.
2 Press the buttons on the card remote
commander, and send the security code.
Please refer to the supplied insert for details
on the security code buttons.
When the code has been confirmed, the
display changes to clock, and you can
operate the unit normally.
Notes
• When you leave the car, take the card remote
control with you.
• If you forget the security code, consult your Sony
Service Center. Be sure to bring the card remote
control with you.
8
Page 9

How to use the menu
This unit is operated by selecting items from a
menu.
To select, first enter the menu mode and
choose M/m (up/down), or choose </,
(left/right).
M/m
DISC
SEEK SEEK
SOURCE
DISC
M: to select upwards
m: to select downwards
</,
DISC
<:
to select
leftwards
SEEK SEEK
SOURCE
DISC
,:
to select
rightwards
Setting the clock
The clock uses a 24-hour digital indication.
3 Press ,.
The minute indication flashes.
4 Press M or m to set the minute.
2 Press (ENTER).
The clock starts.
Tip
You can set the clock automatically with the RDS
feature (page 22).
Note
In the initial setting, the clock indication appears
while the unit is turned off.
When the D.Info mode is set to “on,” the time is
always displayed (except for some functions of SA
mode) (page 35).
Example: To set the clock to 10:08
1 Press (MENU), then press M or m
repeatedly until “Clock” appears.
1 Press (ENTER).
The hour indication flashes.
2 Press M or m to set the hour.
9
Page 10

CD Player
CD/MD Unit (optional)
In addition to playing a CD with this unit
alone, you can also control external CD/MD
units.
If you connect an optional CD unit with the
CD TEXT function, the CD TEXT information
will appear in the display when you play a CD
TEXT disc.
Listening to a CD
(with this unit only)
1 Press (OPEN/CLOSE) of the card remote
commander and insert the CD.
Playback starts automatically.
Labelled side up
When the last track on the CD is
over
The track number indication returns to “1,”
and playback restarts from the first track of the
CD.
To Press
Stop playback (OFF)
Eject the CD (OPEN/CLOSE) then Z
Playing a CD or MD
(with optional CD/MD unit)
1 Press (SOURCE) repeatedly to select
“CD“ or “MD.“
2 Press (MODE) until the desired unit
appears.
CD/MD playback starts.
All the discs in the current CD/MD unit is
played from the top.
Changing the display item
Each time you press (DSPL/PTY) during CD,
CD TEXT disc, or MD playback, the item
changes as follows:
2 Press (OPEN/CLOSE) of the card remote
commander to close the front panel.
If a CD is already inserted, press (SOURCE)
repeatedly until “CD” appears to start
playback.
CD indication
Elapsed playing timeTrack number
Note
To play back an 8 cm CD, use the optional Sony
compact disc single adapter (CSA-8).
10
Disc number*1/Track number/
Elapsed playing time
Disc name*
*1While an optional CD/MD unit is connected.
2
If you have not labelled the CD or CD TEXT disc
*
(“Labelling a CD” page 13), or if there is no disc
name prerecorded on the MD, “NO D.Name”
appear in the display.
3
If you play a CD TEXT disc, the artist name
*
appears in the display after the disc name. (Only
for CD TEXT discs with the artist name.)
4
If the track name of a CD TEXT disc or MD is not
*
prerecorded, “NO T.Name” appear in the
display.
5
While the AF/TA function is activated.
*
V
V
2
/Artist name*
V
Track name*
V
FM1 frequency*
3
4
5
Page 11

After you select the desired item, the display
will automatically change to the Motion
Display mode after a few seconds.
In the Motion Display mode, all the items are
scrolled in the display one by one in order.
Note
If you use personalised labels, they will always
take priority over the original CD TEXT
information when such information is
displayed.
Tip
The Motion Display mode can be turned off. (See
“Changing the sound and display settings” on
page 35).
Automatically scrolling a disc name
— Auto Scroll
If the disc name, artist name, or track name on
an MD or a CD TEXT disc exceeds 10
characters and the Auto Scroll function is on,
information automatically scrolls across the
display as follows:
• The disc name appears when the disc has
changed (if the disc name is selected as the
display item).
• The track name appears when the track has
changed (if the track name is selected as the
display item).
• The disc or track name appears depending on
the setting when you press (SOURCE) to select
an MD or CD TEXT disc.
If you press (DSPL/PTY) to change the display
item, the disc or track name of the CD TEXT
disc or MD is scrolled automatically whether
you set the function on or off.
1 During playback, press (MENU).
2 Press M or m repeatedly until “A.Scrl”
appears.
3 Press , to select “A.Scrl on.”
4 Press (ENTER).
Locating a specific track
— Automatic Music Sensor (AMS)
During playback, press < or ,
momentarily for each track you want to
skip.
< (.) :
To locate
preceding tracks
DISC
SEEK SEEK
SOURCE
DISC
, (>) :
To locate
succeeding
tracks
Locating a specific point in a track
— Manual Search
During playback, press and hold < or
,. Release when you have found the
desired point.
< (m) :
To search
backward
Note
If “
display, you have reached the beginning or the
end of the disc and you cannot go any further.
” or “ ” appears in the
DISC
SEEK SEEK
SOURCE
DISC
, (M) :
To search
forward
Locating a disc
— Disc Selection
When an optional CD/MD unit is
connected, press M or m to select the
desired disc.
M (DISC +) : For succeeding discs
DISC
SEEK SEEK
SOURCE
DISC
m (DISC –) : For preceding discs
The desired disc in the current optional
CD/MD unit begins playback.
To cancel Auto Scroll, select “A.Scrl off” in
step 3.
Note
For some CD TEXT discs with very many characters,
the following cases may happen:
— Some of the characters are not displayed.
— Auto Scroll does not work.
11
Page 12

Playing tracks repeatedly
— Repeat Play
The CD in the main unit will automatically
repeat itself when it reaches the end. For repeat
play, you can select:
•Repeat 1 — to repeat a track.
•Repeat 2 — to repeat a disc in the optional
CD/MD unit.
1 During playback, press (MENU).
2 Press M or m repeatedly until “Repeat”
appears.
3 Press , repeatedly until the desired
setting appears in the display.
B Repeat 1 B Repeat 2*
Repeat off b
* “Repeat 2” is only available when you
connect one or more optional CD units, or
when you connect the optional MD units.
Repeat Play starts.
Playing tracks in random
order — Shuffle Play
You can select:
•Shuf 1 — to play the tracks on the current
disc in random order.
•Shuf 2 — to play the tracks in the current
optional CD/MD unit in random order.
•Shuf All — to play all the tracks in all the
optional CD/MD units in random order.
1 During playback, press (MENU).
2 Press M or m repeatedly until “Shuf”
appears.
3 Press , repeatedly until the desired
setting appears in the display.
B Shuf 1 B Shuf 2* B Shuf All*
Shuf off b
* “Shuf 2” and “Shuf All” are only available
when you connect one or more optional CD
units, or when you connect the optional MD
units.
To return to normal play mode, select “Repeat
off” in step 3.
Tip
If you select the mode using the buttons on the
unit, press (1) (REP) repeatedly until the desired
mode appears.
12
Shuffle Play starts.
To return to normal play mode, select “Shuf
off” in step 3.
Tip
If you select the mode using the buttons on the
unit, press (2) (SHUF) repeatedly until the desired
mode appears.
Page 13

Labelling a CD — Disc Memo
(For a CD unit with the custom file function)
You can label each disc with a personalised
name. You can enter up to eight characters for
a disc. If you label a CD, you can locate the
disc by name (page 14) and select the specific
tracks for playback (page 15).
1 Start playing the disc you want to label.
2 Press (MENU), then press M or m
repeatedly until ”Name Edit” appears.
Tips
• To erase or correct a name, enter “
bar) for each character.
• There is another way to start labelling a CD. Press
(LIST) for two seconds instead of steps 2 and 3.
You can also complete the operation by pressing
(LIST) for two seconds instead of step 5.
” (under-
Displaying the disc memo
Press (DSPL/PTY) during CD or CD TEXT
disc playback.
3 Press (ENTER).
Name edit mode
4 Enter the characters.
1 Press M repeatedly to select the
desired characters.
(A t B t C t ··· Z t 0 t 1 t 2 t
··· 9 t + t – t * t / t \ t > t <
t . t )
If you press m repeatedly, the characters
will appear in reverse order.
If you want to put a blank space
between characters, select “ .”
2 Press , after locating the desired
character.
The next character flashes.
Each time you press (DSPL/PTY) during CD
or CD TEXT disc playback, the item
changes as follows:
V
1
Disc number*
Elapsed playback time
*1While an optional CD unit is connected.
2
If you connect an optional CD unit with the
*
CD TEXT function, the CD TEXT information
will appear in the display when you play a
CD TEXT disc.
3
While the AF/TA function is activated.
*
/Track number/
V
Disc memo name
V
Track name*
FM1 frequency*
2
V
3
If you press < , the previous character
flashes.
3 Repeat steps 1 and 2 to enter the
entire name.
5 To return to normal CD play mode, press
(ENTER).
13
Page 14

Erasing the disc memo
1 Press (SOURCE) repeatedly to select
“CD.”
2 Press (MODE) repeatedly to select the CD
unit with the custom file function.
3 Press (MENU), then press M or m
repeatedly until “Name Del” appears.
4 Press (ENTER).
5 Press M or m repeatedly to select the disc
name you want to erase.
6 Press (ENTER) for two seconds.
The name is erased.
Repeat steps 5 and 6 if you want to erase
other names.
Locating a disc by name
— List-up (For a CD unit with the custom
file function or an MD unit)
You can use this function for discs that have
been assigned a custom name. For more
information on disc memo names, refer to
“Labelling a CD” (page 13).
1 Press (LIST).
The name assigned to the current disc
appears in the display.
When you assign a disc memo name to a
CD TEXT disc, it takes priority over the
original CD TEXT information.
7 Press (MENU) twice.
The unit returns to normal CD play mode.
Note
When a personalised label is erased, the original
CD TEXT information will appear in the display.
2 Press M (DISC +) or m (DISC –) repeatedly
until you find the desired disc.
3 Press (ENTER) to play the disc.
Notes
• The track names are not displayed during CD
TEXT disc or MD playback.
• If there are no discs in the magazine, “NO Disc”
appears in the display.
• If a disc has not been assigned a custom file,
“********” appears in the display.
• Some letters cannot be displayed during CD TEXT
disc or MD playback.
14
Page 15

Selecting specific tracks
for playback
— Bank
(For a CD unit with the custom file function)
If you label the disc, you can set the unit to
skip or play the tracks of your choice.
1 Start playing the disc you want to label.
2 Press (MENU), then press M or m
repeatedly until “Bank Sel” appears.
3 Press (ENTER).
Bank edit mode
Playing specific tracks only
You can select:
•“Bank on” — to play the tracks with the
“Play” setting.
•“Bank inv” (Inverse) — to play the tracks
with the “Skip” setting.
1 During playback, press (MENU), then
press M or m repeatedly until “Bank”
appears.
2 Press , repeatedly until the desired
setting appears.
B Bank on B Bank inv
Bank off b
4 Label the tracks.
1 Press < or , repeatedly to select the
track you want to label.
2 Press (ENTER) repeatedly to select
“Play.”
5 Repeat step 4 to set “Play” or “Skip” for
all the tracks.
6 Press (MENU) twice.
The unit returns to normal CD play mode.
Notes
• You can set “Play” and “Skip” for up to 24
tracks.
• You cannot set “Skip” for all the tracks on a CD.
3 Press (ENTER).
Playback starts from the track following the
current one.
To return to normal play mode, select
“Bank off” in step 2.
15
Page 16

Radio
Memorising stations
automatically
— Best Tuning Memory (BTM)
The unit selects the stations with the strongest
signals and memorises them in the order of
their frequencies. You can store up to six
stations on each band (FM1, FM2, FM3, MW,
and LW).
Caution
When tuning in stations while driving, use
Best Tuning Memory to prevent accidents.
1 Press (SOURCE) repeatedly to select the
tuner.
Each time you press (SOURCE), the source
changes as follows:
B Tuner B CD B MD*
* If the corresponding optional equipment is
not connected, this item will not appear.
2 Press (MODE) repeatedly to select the
band.
Each time you press (MODE), the band
changes as follows:
B FM1 B FM2 B FM3
LW b MW b
Memorising only the
desired stations
You can preset up to 18 FM stations (six each
for FM1, FM2, and FM3), up to 6 MW stations,
and up to 6 LW stations in the order of your
choice.
1 Press (SOURCE) repeatedly to select the
tuner.
2 Press (MODE) repeatedly to select the
band.
3 Press . or > of the unit to tune in
the station that you want to store on the
number button.
4 Press the desired number button ((1) to
(6)) of the unit until “MEM” appears.
The number button indication appears in
the display.
Note
If you try to store another station on the same
number button, the previously stored station will
be erased.
3 Press (MENU), then press M or m
repeatedly until “BTM” appears.
4 Press (ENTER).
The unit stores stations in the order of their
frequencies on the number buttons.
A beep sounds when the setting is stored.
Notes
• The unit does not store stations with weak
signals. If only a few stations can be received,
some number buttons will retain their former
setting.
• When a number is indicated in the display, the
unit starts storing stations from the one currently
displayed.
• If a CD is not in the unit, only the tuner band
appears even if you press (SOURCE).
16
Page 17

Receiving the memorised
stations
1 Press (SOURCE) repeatedly to select the
tuner.
2 Press (MODE) repeatedly to select the
band.
If FM stereo reception is poor
— Monaural Mode
1 During radio reception, press (MENU),
then press M or m repeatedly until
“Mono” appears.
2 Press , until “Mono on“ appears.
The sound improves, but becomes
monaural (“ST” disappears).
3 Press M (preset up) or m (preset down)
repeatedly to receive the stations in the
order they are stored in the memory.
Tip
If you select memorising the station using the
buttons of the unit, press the number button ((1)
to (6)) on which the desired station is stored.
If you cannot tune in a preset
station
Press < or , to search for the station
(automatic tuning).
Scanning stops when the unit receives a
station. Press < or , repeatedly until the
desired station is received.
Note
If the automatic tuning stops too frequently, press
(MENU), then press M or m repeatedly until
“Local” (local seek mode) is displayed. Then press
, to select “Local on.” Press (ENTER).
Only the stations with relatively strong signals will
be tuned in.
Tips
• When you select the “Local on” setting,
“LCL Seek” appears while the unit is searching
for a station.
• If you know the frequency of the station you
want to listen to, press and hold < or , until
the desired frequency appears (manual tuning).
3 Press (ENTER).
To return to normal mode, select
“Mono off” in step 2.
17
Page 18

RDS
Tip
The Motion Display mode can be turned off. (See
“Changing the sound and display settings” on
page 35.)
Overview of the RDS
function
Radio Data System (RDS) is a broadcasting
service that allows FM stations to send
additional digital information along with the
regular radio programme signal. Your car
stereo offers you a variety of services. Here are
just a few: retuning the same programme
automatically, listening to traffic
announcements, and locating a station by
programme type.
Notes
• Depending on the country or region, not all of
the RDS functions are available.
• RDS may not work properly if the signal strength
is weak or if the station you are tuned to is not
transmitting RDS data.
Displaying the station
name
The name of the current station lights up in the
display.
Select an FM station (page 16).
When you tune in an FM station that
transmits RDS data, the station name
appears in the display.
Retuning the same
programme automatically
— Alternative Frequencies (AF)
The Alternative Frequencies (AF) function
automatically selects and retunes the station
with the strongest signal in a network. By
using this function, you can continuously
listen to the same programme during a longdistance drive without having to retune the
station manually.
Frequencies change automatically.
98.5MHz
Station
1 Select an FM station (page 16).
2 Press (AF/TA) repeatedly until “AF on”
appears.
The unit starts searching for an alternative
station with a stronger signal in the same
network.
Tip
If you select the mode using the buttons on the
unit, press (AF) until “AF on” appears.
96.0MHz
102.5MHz
Note
The “*” indication means that an RDS station is
being received.
After you select the desired item, the display
will automatically change to the Motion
Display mode after a few seconds.
In the motion display mode, all the items are
scrolled in the display one by one in order.
18
Page 19

Changing the display item
Each time you press (AF/TA), the item changes
as follows:
B AF on B TA on B AF TA on*
* Select this to turn on both the AF and TA
functions.
Tips
• Each time you press (AF) on the unit, the item
changes as follows:
AF on y AF off
• Each time you press (TA) on the unit, the item
changes as follows:
TA on y TA off
AF TA off b
Listening to a regional programme
The “REG on” (regional on) function lets you
stay tuned to a regional programme without
being switched to another regional station.
(Note that you must turn the AF function on.)
The unit is factory preset to “REG on,” but if
you want to turn off the function, do the
following.
1 During radio reception, press (MENU),
then press M or m repeatedly until “REG”
appears.
2 Press , until “REG off” appears.
Notes
• When there is no alternative station in the area
and you do not need to search for an alternative
station, turn the AF function off by pressing
(AF/TA) repeatedly until “AF TA off” appears.
• When “NO AF” and the station name flash
alternately, it means that the unit cannot find an
alternative station in the network.
• If the station name starts flashing after selecting
a station with the AF function on, this indicates
that no alternative frequency is available. Press
< or , while the station name is flashing
(within eight seconds). The unit starts searching
for another frequency with the same PI
(Programme Identification) data (“PI Seek”
appears and no sound is heard). If the unit
cannot find another frequency, “NO PI” appears,
and the unit returns to the previously selected
frequency.
3 Press (ENTER).
Note that selecting “REG off” might cause
the unit to switch to another regional
station within the same network.
To return to regional on, select “REG on” in
step 2.
Note
This function does not work in the United
Kingdom and in some other areas.
Local link function
(United Kingdom only)
The Local Link function lets you select other
local stations in the area, even if they are not
stored on your number buttons.
1 Press a number button of the unit that
has a local station stored on it.
2 Within five seconds, press the number
button of the local station again.
3 Repeat this procedure until the desired
local station is received.
19
Page 20

Listening to traffic
announcements
The Traffic Announcement (TA) and Traffic
Programme (TP) data lets you automatically
tune in an FM station that is broadcasting
traffic announcements even if you are listening
to other programme sources.
Presetting the volume of traffic
announcements
You can preset the volume level of the traffic
announcements beforehand so you won’t miss
the announcement. When a traffic
announcement starts, the volume will be
automatically adjusted to the preset level.
1 Select the desired volume level.
Press (AF/TA) repeatedly until “TA on” or
“AF TA on” appears.
The unit starts searching for traffic
information stations. “TP” appears in the
display when the unit finds a station
broadcasting traffic announcements.
When the traffic announcement starts,
“TA” flashes. The flashing stops when the
traffic announcement is over.
Tips
• If the traffic announcement starts while you are
listening to another programme source, the unit
automatically switches to the announcement and
goes back to the original source when the
announcement is over.
• If you select the mode using the buttons on the
unit, press (TA) until “TA on” appears.
Note
“NO TP” flashes for five seconds if the received
station does not broadcast traffic announcements.
Then, the unit starts searching for a station that
broadcasts it.
To cancel the current traffic
announcement
Press (AF/TA).
To cancel all traffic announcements, turn off
the function by pressing (AF/TA) until “AF
TA off” appears.
2 Press (AF/TA) for two seconds.
“TA” appears and the setting is stored.
Receiving emergency
announcements
If an emergency announcement comes in while
you are listening to the radio, the programme
will be automatically switched to it. If you are
listening to a source other than the radio, the
emergency announcements will be heard if
you set AF or TA to on. The unit will then
automatically switch to these announcements
no matter which source you are listening to at
the time.
20
Page 21

Presetting the RDS
stations with the AF and
TA data
When you preset RDS stations, the unit stores
each station’s data as well as its frequency, so
you don’t have to turn on the AF or TA
function every time you tune in the preset
station. You can select a different setting (AF,
TA, or both) for individual preset stations, or
the same setting for all preset stations.
Presetting the same setting for all
preset stations
1 Select an FM band (page 16).
2 Press (AF/TA) repeatedly to select either
“AF on,” “TA on” or “AF TA on” (for both
AF and TA functions).
Note that selecting “AF TA off” stores not
only RDS stations, but also non-RDS
stations.
Tip
If you select the mode using the buttons on the
unit, press (AF) and/or (TA) to select “AF on” and/
or “TA on.” Note that selecting “AF off” or “TA
off” stores not only RDS stations, but also
non-RDS stations.
Presetting different settings for
each preset station
1 Select an FM band, and tune in the
desired station (page 16).
2 Press (AF/TA) repeatedly to select either
“AF on,” “TA on” or “AF TA on” (for both
AF and TA functions).
Tip
If you select the mode using the buttons on the
unit, press (AF) and/or (TA) to select “AF on” and/
or “TA on.”
3 Press the desired number button of the
unit until “MEM” appears.
Repeat from step 1 to preset other stations.
Tip
If you want to change the preset AF and/or TA
setting after you tune in the preset station, you
can do so by turning the AF or TA function on or
off.
3 Press (MENU), then press M or m
repeatedly until “BTM” appears.
4 Press , until “BTM” flashes.
5 Press (ENTER).
21
Page 22

Locating a station by
programme type
You can locate the station you want by
selecting one of the programme types shown
below.
Programme types Display
News News
Current Affairs Affairs
Information Info
Sports Sport
Education Educate
Drama Drama
Culture Culture
Science Science
Varied Varied
Popular Music Pop M
Rock Music Rock M
Easy Listening Easy M
Light Classical Light M
Classical Classics
Other Music Type Other M
Weather Weather
Finance Finance
Children’s Programmes Children
Social Affairs Social A
Religion Religion
Phone In Phone IN
Travel Travel
Leisure Leisure
Jazz Music Jazz
Country Music Country
National Music Nation M
Oldies Music Oldies
Folk Music Folk M
Documentary Document
Not specified None
1 Press (DSPL/PTY) during FM reception
until “PTY” appears.
The current programme type name appears
if the station is transmitting the PTY data.
“- - - - -” appears if the received station is
not an RDS station, or if the RDS data has
not been received.
2 Press M or m repeatedly until the desired
programme type appears.
The programme types appear in the order
shown in the table. Note that you cannot
select “None” (Not specified) for searching.
3 Press (ENTER).
The unit starts searching for a station
broadcasting the selected programme type.
Note
You cannot use this function in some countries
where no PTY (Programme Type selection) data is
available.
22
Page 23

Setting the clock
automatically
The CT (Clock Time) data from the RDS
transmission sets the clock automatically.
1 During radio reception, press (MENU),
then press M or m repeatedly until “CT”
appears.
2 Press , repeatedly until “CT on”
appears.
The clock is set.
3 Press (ENTER) to return to the normal
display.
To cancel the CT function
Select “CT off” in step 2.
Notes
• The CT function may not work even though an
RDS station is being received.
• There might be a difference between the time
set by the CT function and the actual time.
With Optional Equipment
DAB
Overview of DAB
DAB (Digital Audio Broadcasting) is a new
multimedia broadcasting system that transmits
audio programmes with a quality comparable
to that of CDs. This is made possible by the use
of a microcomputer in the DAB tuner which
uses the radio signals sent from multiple
aerials and multi-path signals (reflected radio
waves) to boost the strength of the main signal.
This makes DAB almost immune to radio
interference even in a moving object such as a
car.
Each DAB station bundles radio programmes
(services) into an ensemble which it then
broadcasts. Each service contains one or more
components. All ensembles, services, and
components are identified by name, so you can
access any of them without having to know
their frequencies.
DAB programme
Ensemble
Service
Service
Service
Component
Component
Component
Notes
• The DAB system is actually in a testing phase.
This means some services have not been
sufficiently defined or are presently being tested.
At present, such services are not supported by
the optional DAB tuner unit XT-100DAB.
• DAB programmes are broadcast in Band-III (174
to 240 MHz) and L-Band (1,452 to 1,492 MHz),
with each band divided into channels (41 in
Band-III and 23 in L-Band). One ensemble is
broadcast per channel by each DAB station.
• When you change the mode from FM3 to DAB,
all the AF TA modes stay active.
• When you change any of the AF TA modes in
DAB, that mode stays active in FM1.
23
Page 24

Basic operations of DAB
Searching for the Ensemble and
Service
— Automatic Tuning
1 Press (SOURCE) repeatedly to select the
tuner.
2 Press (MODE) repeatedly to select
“DAB.”
3 Press and hold < or , until “Seek +” or
“Seek –” appears.
4 Press < or , to search the desired
service.
Note
The “
” indication flashes while the unit is
searching for the Ensemble.
Selecting the Ensemble
— Manual Tuning
If you know the channel number of Ensemble,
follow the procedure below to tune in.
1 Press (SOURCE) repeatedly to select the
tuner.
2 Press (MODE) repeatedly to select
“DAB.”
3 Press M or m until “Ch. XXX” appears.
Receiving the memorised services
Following procedure is available after
presetting the service. For details on presetting
the services, refer to “Presetting DAB services
automatically,” (page 25) and “Presetting DAB
services manually” (page 25).
1 Press (SOURCE) repeatedly to select the
tuner.
2 Press (MODE) repeatedly to select
“DAB.”
3 Press M or m repeatedly to select the
preset service.
Tip
There is another way to receive the preset service.
Press the number buttons ((1) to (6)) of the unit
on which the desired service is stored.
The receiving mode of the DAB tuner is
displayed according to the chart below:
Indication Level Receive mode
(flash) 0 cannot receive
1 poor reception
2 so-so
3 moderate
4 good reception
4 Press M or m repeatedly until the desired
channel number appears.
Tips
• More than one channel may broadcast the same
Ensemble.
• If you select the Ensemble service but cannot
receive it, the “
” indication flashes.
24
Page 25

Presetting DAB services
automatically — BTM
The BTM (Best Tuning Memory) function picks
out DAB ensembles and automatically assigns
the services within the ensembles to preset
service numbers. The unit can preset up to 40
services. If services have been previously set,
the BTM function operates under the following
conditions:
•If you activate the BTM function while
listening to a preset service, the unit will
store detected services (by overwriting) only
to preset numbers higher than that of the
current present service.
•If you activate the function while listening to
a service that is not preset, the unit will
replace the contents of all preset numbers.
•In both cases above, if the unit detects a
service that is identical to one already preset,
the previously stored service remains
unchanged and the newly detected service is
not preset.
1 While listening to a DAB programme,
press (MENU).
2 Press M or m repeatedly until “BTM”
appears.
3 Press (ENTER).
A beep sounds when the service is stored.
After activating the BTM function, the unit
tunes the service assigned in the preset
memory 1 automatically.
Note
If the unit can only tune in a few services, the BTM
function may not assign services to all the preset
service numbers.
Presetting DAB services
manually
You can also preset DAB services manually or
delete a service which is already preset. Note
that up to 40 services (preset either by the BTM
function or manually) can be preset to the
unit’s memory.
1 While listening to a DAB programme,
press (MENU).
2 Press M or m repeatedly until
“PresetEdit” appears, then press
(ENTER).
3 Select the service and the preset number
you want to preset.
1 Press < or , to select the service.
2 Press M or m to select the preset
number.
3 Press (ENTER).
4 Press M or m to select “Over Wrt.”
Each time you press m, the edit command
changes as follows:
B Over Wrt B Insert* B Delete
* “Insert” does not appear if the maximum
number of services (40) is already preset in
memory.
— Manual Preset Memory
To preset other services, repeat steps 3 and
4.
5 Press (ENTER).
25
Page 26

Replacing the services in preset
memories
Press M or m to select “Over Wrt” in step 4,
then press (ENTER).
Tip
To check the name of the current component,
ensemble or service, press (LIST) repeatedly until
the respective list appears in the display. The name
of the currently selected item flashes.
Adding the services in preset
memories
Press M or m to select “Insert” in step 4, then
press (ENTER).
Erasing the services in preset
memories
Press M or m to select “Delete” in step 4, then
press (ENTER).
Tip
There is another way to preset the service.
After receiving the service, press the number
buttons ((1) to (6)) of the unit until a beep
sounds.
Listening to a DAB
programme
Follow the procedure below to tune in a DAB
programme manually.
You can also store DAB services in the unit’s
memory for instant tuning (see “Presetting
DAB services automatically (BTM)” on page
25).
1 While listening to a DAB programme,
press (LIST) repeatedly until the
Ensemble List appears.
2 Press M or m until the desired ensemble
appears, then press (ENTER).
Changing the display item
When you press (LIST) once, the list selected
last time appears.
Each time you press (LIST), the list changes as
follows:
V
ENS (Ensemble list)
V
SRV (Service list)
CMP (Component list)
V
V
PRS (Preset list)
V
DAB (Cancel)
Automatic updating of the
ensemble list
When you perform the BTM function for the
first time, all the ensembles available in your
area are automatically stored. When you
perform the BTM function again, the contents
of these lists are updated in accordance with
the conditions described on page 25.
An ensemble is added to the respective list
when it is received during Automatic Tuning
or Manual Tuning but is unlisted.
An unlisted ensemble is also deleted from the
respective list when:
•you select an ensemble from the list, but it
cannot be received.
•you perform Automatic Tuning or Manual
Tuning to receive a listed ensemble, service,
or the component, but it cannot be received.
3 Press (LIST) repeatedly to until the
Service List appears.
4 Press M or m repeatedly until the desired
service appears, then press (ENTER).
5 Press (LIST) repeatedly until the
Component List appears.
6 Press M or m until the desired component
appears, then press (ENTER).
26
Page 27

Settings on the audio
reception
DAB can contain multi-channel audio. You can
select main or sub-channel for reception. Also,
if you turn on the DRC (Dynamic Range
Control) function, the dynamic range on the
service which supports DRC can automatically
be extended.
The following items can be set:
•Main/Sub — to selects chennel between
“Main”(main-cannel) and “Sub”(sub-cannel).
•DRC — to turn on or off the function.
1 While listening to a DAB programme,
press (MENU).
Locating a DAB service by
programme type (PTY)
You can use the PTY (Programme type
selection) function to tune in the programme
you want.
1 While listening to a DAB programme,
press (DSPL/PTY).
2 Press M or m repeatedly to select the
programme type.
2 Press M or m repeatedly until “DRC” or
“Main (or Sub)” appears.
3 Press < or , to select the desired
setting (Example: “on” or “off” ).
4 Press (ENTER).
Note
“Main (or Sub)” appears in the menu only when
the unit is receiving a multi-channel programme.
The programme types appear in the order
shown on the page 22.
3 Press (ENTER).
27
Page 28

DSP (CDX-M700R only)
Adjusting the equalizer curve
1 Press (MENU).
2 Press M or m repeatedly until “EQ Tune”
appears.
Setting the equalizer
You can select an equalizer curve for five
music types (Rock, Vocal, Groove, Techno, and
Custom).
You can store and adjust the equalizer settings
for frequency and level.
Selecting the equalizer curve
1 Press (SOURCE) to select a source (tuner,
CD, or MD).
2 Press (SOUND) repeatedly until “EQ”
appears.
3 Press < or , to select the desired
equalizer curve.
Rock y Vocal y Groove y Techno y
Custom y off
To cancel the equalizing effect, select “off.”
After three seconds, the display returns to
the normal playback mode.
3 Press (ENTER).
4 Press < or , to select the desired
equalizer curve.
Rock y Vocal y Groove y Techno y
Custom y off
5 Press (ENTER).
6 Press < or , to select the desired
frequency.
62 Hz y 157 Hz y 396 Hz y 1.0 kHz y
2.5 kHz y 6.3 kHz y 16.0 kHz
7 Press M or m to select the desired level.
The volume is adjustable by 1 dB steps
from –12 dB to +12 dB.
To restore the factory-set equalizer curve,
press (ENTER) for two seconds.
8 Press (MENU) twice.
When the effect setting is complete, the
normal playback mode appears.
28
Page 29

Selecting the listening
position
You can set a delayed time for the sound to
reach the listeners from the speakers.
In this way, the unit can simulate a natural
sound field so that you feel as if you are in the
centre of the sound field no matter where you
sit in the car.
Display
window
POS
1
2
3
All
POS
Front
POS
Front-R
POS
Front-L
POS
Rear
POS
off
1 Press (SOURCE) to select a source (tuner,
CD, or MD).
2 Press (SOUND) momentarily until “POS”
appears.
Centre of sound
field
Normal setting
(1 + 2 + 3)
Front part
(1 + 2)
Right front (2)
Left front (1)
Rear part (3)
Cancel
Selecting a soundstage
menu
— Dynamic Soundstage Organizer (DSO)
If your speakers are installed into the lower
part of the doors, the sound will come from
below and may not be clear.
The DSO (Dynamic Soundstage Organizer)
function creates a more ambient sound as if
there were speakers in the dashboard (virtual
speakers).
Soundstage menu
Memory presets Meaning
DSO1 – 3 Virtual speakers (Standard)
DSO Wide Virtual speakers (Wide)
DSO off Cancel
Image of virtual speakers
2
*
3
*
*1Standard
2
Wide
*
3
Acutual speakers position (lower part of the
*
front doors).
1
*
1
*
2
*
3
*
3 Press < or , to select the desired
listening position.
All y Front y Front-R y Front-L y Rear y
off
The listening positions appear in the order
shown above.
To cancel the POS mode, select “off.”
After three seconds, the display returns to
the normal playback mode.
Selecting the DSO
1 Press (SOURCE) to select a source (tuner,
CD, or MD).
2 Press (DSO) repeatedly to select the
desired DSO mode.
B 1 B 2 B 3 B Wide
bb
off
b
bb
To cancel the DSO mode, select “off.”
After three seconds, the display returns to
the normal playback mode.
29
Page 30

Adjusting the balance
(BAL)
You can adjust the sound balance from the left
and right speakers.
1 Press (SOURCE) to select a source (tuner,
CD, or MD).
2 Press (SOUND) repeatedly until “BAL”
appears.
Adjusting the cut-off frequency
and the output volume level for
the front/rear speakers
To match the characteristics of the installed
speaker system, you can adjust the output
volume level and select the cut-off frequency
of the speakers.
Cut-off frequency
Level
Frequency (Hz)
3 Press < or , to adjust the balance.
After three seconds, the display returns to
the normal playback mode.
Adjusting the front and
rear fader
1 Press (SOURCE) to select a source (tuner,
CD, or MD).
2 Press (SOUND) repeatedly to select the
“F” for the front speakers or “R” for the
rear speakers.
3 Press < or , to adjust the volume of
front/rear speakers.
After three seconds, the display returns to
the normal playback mode.
1 Press (MENU).
2 Press M or m repeatedly to select “Front
HPF” or “Rear HPF”
3 Press (ENTER).
4 Press < or , to select the cut-off
frequency.
off y 78 Hz y 99 Hz y 125 Hz y 157 Hz y
198 Hz
5 Press M or m to adjust the volume level.
The volume is adjustable by 1 dB steps
from –12 dB to +12 dB.
Tip
When you lower the volume all the way down,
“ATT” appears and the cut-off frequency is
disabled.
6 Press (MENU) twice.
When the effect setting is complete, the
normal playback mode appears.
30
Page 31

Adjusting the volume of
the subwoofer(s)
1 Press (SOURCE) to select a source (tuner,
CD, or MD).
4 Press < or , to select the desired cut-
off frequency.
The cut-off frequency in the display
changes as follows:
62 y 78 y 99 y 125 y 157 y off
5 Press M or m to adjust the volume.
2 Press (SOUND) repeatedly until “SUB”
appears.
3 Press < or , to adjust the volume.
After three seconds, the display returns to
the normal playback mode.
Tip
When you press (VOL) repeatedly to adjust the
volume all the way down, “Sub ATT” appears and
the cutout frequency of the subwoofer is disabled.
Adjusting the frequency of the
subwoofer(s)
To match the characteristics of the connected
subwoofer(s), you can cut out the unwanted
high and middle frequency signals entering
the subwoofer(s). By setting the cut-off
frequency (see the diagram below), the
subwoofer(s) will output only low frequency
signals so you can get a clearer sound image.
Cut-off frequency
Level
6 Press (MENU) twice.
After the frequency setting is complete, the
display returns to the normal playback
mode.
Listening to each
programme source in its
registered DSO
— Source Sound Memory (SSM)
Each time you return to the same source, you
can hear the same DSO menu and equalizer
curve registered for that source, even after
changing the programme source or turning the
unit off and then on again.
Frequency (Hz)
1 Press (MENU).
2 Press (MENU) repeatedly until “SUB LPF”
appears.
3 Press (ENTER).
31
Page 32

Other Functions
Using the rotary
commander
You can also control the unit with a rotary
commander (optional).
Labelling the rotary
commander
Depending on how you mount the rotary
commander, attach the appropriate label as
shown in the illustration below.
SOUND
MODE
DSPL
DSPL
MODE
SOUND
The rotary commander works by pressing
buttons and/or rotating controls.
You can also control an optional CD/MD unit
with the rotary commander.
By pressing buttons
(the SOURCE and MODE buttons)
(SOURCE)
(MODE)
Each time you press (SOURCE), the
source changes as follows:
Tuner t CD t MD*
* If the corresponding optional equipment is
not connected, this item will not appear.
Pressing (MODE) changes the operation
in the following ways:
• Tuner: FM1 t FM2 t FM3 t MW t LW
• CD unit: CD1 t CD2 t …
• MD unit*: MD1 t MD2 t …
* If the corresponding optional equipment is
not connected, the item will not appear.
32
Page 33

By rotating the control
(the SEEK/AMS control)
Other operations
Rotate the VOL control to
adjust the volume.
Press (ATT) to
attenuate the
sound.
OFF
Press (OFF) to
turn off the unit.
Rotate the control momentarily and
release it to:
•Locate a specific track on a disc. Rotate
and hold the control until you locate the
specific point in a track, then release it to
start playback.
•Tune in stations automatically. Rotate and
hold the control to find a specific station.
By pushing in and rotating the
control (the PRESET/DISC control)
Push in and rotate the control to:
•Receive the stations memorised on the
number buttons.
•Change the disc.
Press (SOUND) to
adjust sound menu.
Press (DSPL) to display
the memorised names.
Tip
If your car has no ACC (accessory) position on the
ignition key switch, be sure to press (OFF) for two
seconds to turn off the clock indication after
turning off the engine.
33
Page 34

Changing the operative direction
The operative direction of controls is factoryset as shown below.
To increase
Adjusting the sound
characteristics (CDX-M600R only)
You can adjust the bass, treble, balance, and
fader.
You can store the bass and treble levels
independently for each source.
To decrease
If you need to mount the rotary commander
on the right hand side of the steering column,
you can reverse the operative direction.
Press (SOUND) for two seconds while
pushing the VOL control.
Tip
You can also change the operative direction of
these controls with the unit (see “Changing the
sound and display settings” on page 35).
1 Select the item you want to adjust by
pressing (SOUND) repeatedly.
Each time you press (SOUND), the item
changes as follows:
BAS (bass) t TRE (treble) t BAL (left-right)
t FAD (front-rear)
2 Adjust the selected item by pressing <
or ,.
When adjusting with the rotary
commander, press (SOUND) and rotate the
VOL control.
Note
Adjust within three seconds after selecting the
item.
Attenuating the sound
Press (ATT) on card remote commander
or the rotary commander.
“ATT on” appears momentarily.
To restore the previous volume level, press
(ATT) again.
Tip
When the interface cable of a car telephone is
connected to the ATT lead, the unit decreases the
volume automatically when a telephone call comes
in (Telephone ATT function).
34
Page 35

Changing the sound and
display settings
The following items can be set:
Set (setting)
•Clock (page 9)
•CT (Clock Time) (page 23)
•Beep — to turn the beeps on or off.
•RM (Rotary Commander) — to change the
operative direction of the controls of the
rotary commander.
— Select “norm” to use the rotary
commamder as the factory-set position.
— Select “rev” when you mount the rotary
commander on the right side of the
steering column.
•English/Spanish/Portuguese/Swedish — to
change the display language to English,
Spanish, Portuguese or Swedish.
Dis (Display)
•Dimmer — to change the brightness of the
display.
— Select “Auto” to dim the display only
when you turn the lights on.
— Select “on” to dim the display.
— Select “off” to deactivate Dimmer.
•Contrast — to adjust the contrast if the
indications in the display are not
recognisable because of the unit’s installed
position.
•D.Info (Dual Information) — to display the
clock and the play mode at the same time (on)
or to display the information alternately (off).
•M.Dspl (Motion Display) — to turn the
motion display on or off.
•A.Scrl (Auto Scroll)*1 (page 11)
Snd (Sound)
•EQ Tune*2 (Equalizer tuning) — to adjust the
frquency and volume level of equalizer
curve.
•Front HPF*2 (High pass filter for the front
pre-output) — to select the cut-off frequency
of the front pre-output.
•Rear HPF*2 (High pass filter for the rear preoutput) — to select the cut-off frequency of
the rear pre-output.
•SUB LPF (Low pass filter for the subwoofer
output)*2 — to select the roll off frequency of
the subwoofer output.
1 Press (MENU).
2 Press M or m repeatedly until the desired
item appears.
Each time you press m, the item changes as
follows:
Example
Clock t CT t Beep t RM t English/
Spanish/Portuguese/Swedish t D.Info t SA
t Dimmer t Contrast t M.Dspl t A.Scrl*
t EQ tune*2 t Front HPF*2 t Rear HPF*2 t
2
SUB LPF*
*1When no CD or MD is playing, this item will
not appear.
*2CDX-M700R only
Note
The displayed item will differ depending on
the source.
Tip
You can easily switch among categories (“Set,“
“Snd,“ “P/M“ (Play Mode) and “Dis“) by
pressing M or m for two seconds.
1
3 Press , to select the desired setting
(Example: on or off) or press < or ,
repeatedly to select the frequency
(Example: off, 78 Hz or 125 Hz).
For the “Contrast” setting, pressing ,
makes the contrast higher, and pressing <
makes the contrast lower.
4 Press (ENTER).
After the mode setting is completed, the
display returns to normal play mode.
35
Page 36

Boosting the bass sound
— D-bass (CDX-M600R only)
Selecting the spectrum
analyser
You can enjoy a clear and powerful bass
sound.
The D-bass function boosts the low and high
frequency signal with a sharper curve than
conventional bass boost.
You can hear the bass line more clearly even
while the vocal volume remains the same. You
can emphasize and adjust the bass sound
easily with the D-BASS button.
D-BASS 3
Level
0dB
D-BASS 2
D-BASS 1
Frequency (Hz)
D-BASS 3
D-BASS 2
D-BASS 1
Adjusting the bass curve
Press (D-BASS) repeatedly to select the
desired bass curve.
As the D-BASS number increases so does
the effect.
D-BASS 1 t D-BASS 2 t D-BASS 3 t D-BASS off
Note
The bass sound may distort at same volume. If the
bass sound distorts, select less effective bass curve.
The sound signal level is displayed on a
spectrum analyser. You can select a display
pattern from 1 to 6, or the automatic display
mode.
1 Press (SOURCE) to select a source (tuner,
CD, or MD).
2 Press (MENU).
3 Press M or m repeatedly until “SA” appears.
4 Press < or , repeatedly to select the
desired setting.
B SA 1 bB … SA 6 b
B SA Auto* bB SA off b
* All of these display patterns appear one by
one automatically.
5 Press (ENTER).
36
Page 37

Adjusting the sound and
frequency of the equalizer
preamplifier
This unit can also control an optional equalizer
preamplifier.
This lets you add some effects to the sound
field of the currently selected source.
For details, refer to the instructions manual
supplied with the equalizer preamplifier.
(CDX-M600R only)
Additional
Information
Maintenance
Fuse replacement
When replacing the fuse, be sure to use one
matching the amperage rating stated on the
original fuse. If the fuse blows, check the
power connection and replace the fuse. If the
fuse blows again after replacement, there may
be an internal malfunction. In such a case,
consult your nearest Sony dealer.
Fuse (10 A)
Warning
Never use a fuse with an amperage rating
exceeding the one supplied with the unit as
this could damage the unit.
37
Page 38

Replacing the lithium battery
When the battery becomes weak, the range of
the card remote commander becomes shorter.
Replace the battery with a new CR2025 lithium
battery.
Dismounting the unit
With the front panel open
1 Press (OPEN) of the unit, then press the
clip inside the front cover with a thin
screwdriver, and gently pry the front
cover free.
x
+ side up
Notes on lithium battery
•Keep the lithium battery out of the reach of
children. Should the battery be swallowed,
immediately consult a doctor.
•Wipe the battery with a dry cloth to assure a
good contact.
•Be sure to observe the correct polarity when
installing the battery.
•Do not hold the battery with metallic
tweezers, otherwise a short-circuit may
occur.
WARNING
Battery may explode if mistreated.
Do not recharge, disassemble, or dispose of
in fire.
2 Repeat step 1 on the left side.
The front cover is removed.
3 Use a thin screwdriver to push in the clip
on the left side of the unit, then pull out
the left side of the unit until the catch
clears the mounting.
4 Repeat step 3 on the right side.
38
5 Slide the unit out of the mounting.
Page 39

If the front panel does not open
because of a blown fuse
1 Press the clip inside the front cover with
a release key (supplied), and pry the
front cover free.
Release key (supplied)
2 Repeat step 1 on the left side.
The front cover is removed.
3 Use a release key to push in the clip on
the left side of the unit, then pull out the
left side of the unit until the catch clears
the mounting.
4 Repeat step 3 on the right side.
5 Slide the unit out of the mounting.
39
Page 40

Specifications
MD player section
Signal-to-noise ratio 90 dB
Frequency response 10 – 20,000 Hz
Wow and flutter Below measurable limit
Tuner section
FM
Tuning range 87.5 – 108.0 MHz
Aerial terminal External aerial connector
Intermediate frequency 10.7 MHz/450 kHz
Usable sensitivity 8 dBf
Selectivity 75 dB at 400 kHz
Signal-to-noise ratio 66 dB (stereo),
Harmonic distortion at 1 kHz
Separation 35 dB at 1 kHz
Frequency response 30 – 15,000 Hz
72 dB (mono)
0.6 % (stereo),
0.3 % (mono)
MW/LW
Tuning range MW: 531 – 1,602 kHz
Aerial terminal External aerial connector
Intermediate frequency 10.7 MHz/450 kHz
Sensitivity MW: 30 µV
LW: 153 – 279 kHz
LW: 40 µV
Power amplifier section
Outputs Speaker outputs
Speaker impedance 4 – 8 ohms
Maximum power output 50 W × 4 (at 4 ohms)
General
Outputs Audio outputs*
Inputs Telephone ATT control lead
Tone controls (CDX-M600R only)
Power requirements 12 V DC car battery
Dimensions Approx. 178 × 50 × 182 mm
Mounting dimensions Approx. 182 × 53 × 163 mm
Mass Approx. 1.5 kg
Supplied accessories Card remote commander
Optional accessories Rotary commander
Optional equipment CD changer (10 discs)
*1Equipped with front, rear and sub outputs:
CDX-M700R only
Equipped with front and rear outputs:
CDX-M600R only
2
CDX-M600R only
*
Design and specifications are subject to change
without notice.
Power aerial relay control
lead
Power amplifier control
lead
Illumination control lead
Bass ±9 dB at 100 Hz
Treble ±9 dB at 10 kHz
(negative ground)
(w/h/d)
(w/h/d)
RM-X95 (CDX-M700R only)
RM-X96 (CDX-M600R only)
Parts for installation and
connections (1 set)
RM-X4S
BUS cable (supplied with an
RCA pin cord)
RC-61 (1 m), RC-62 (2 m)
Compact disc single
adaptor CSA-8
CDX-828, CDX-737
MD changer (6 discs)
MDX-65
Other CD/MD units with
the Sony-BUS system
Source selector
XA-C30
DAB tuner unit
XT-100DAB
Digital equalizer
preamplifier*
XDP-210EQ, XDP-4000X
1
2
40
Page 41

Troubleshooting guide
The following checklist will help you remedy the problems you may encounter with your unit.
Before going through the checklist below, check the connection and operating procedures.
General
Problem
No sound.
The contents of the memory
have been erased.
No beep sound.
The sound is noisy.
CD/MD playback
Problem
A disc cannot be loaded.
Playback does not begin.
A disc is automatically ejected.
CD will not be ejected.
The operation buttons do not
function.
The sound skips due to
vibration.
The sound skips.
Cannot turn off the “--------”
indication.
Cause/Solution
•Cancel the ATT function.
•Set the fader control to the centre position for two-speaker
system.
•Press (+) of the VOL button to adjust the volume.
•The power cord or battery has been disconnected.
•The reset button has been pressed.
t Store again into the memory.
The beep sound is cancelled (page 35).
You are using a mobile phone.
Cause/Solution
•Another CD is already loaded.
•The CD is forcibly inserted upside down or in the wrong
way.
Defective MD or dirty CD.
The ambient temperature exceeds 50°C.
You have closed the front panel or pushed the disc forcibly
into the unit while the unit was ejecting the disc after you
pressed Z.
t Press the reset button.
Press the reset button.
•The unit is installed at an angle of more than 60°.
•The unit is not installed in a sturdy part of the car.
A dirty or defective disc.
You cannot label CDs unless you connect a CD unit with the
custom file function.
t Press (LIST) for two seconds.
41
Page 42

Radio reception
Problem
Preset tuning is not possible.
The stations cannot be received.
The sound is hampered by
noises.
Automatic tuning is not
possible.
The “ST” indication flashes.
RDS
Problem
The SEEK starts after a few
seconds of listening.
No traffic announcements.
PTY displays “None.”
DSP functions
Problem
No sound, or sound is too low.
Cause/Solution
•Store the correct frequency in the memory.
•The broadcast signal is too weak.
Connect a power aerial control lead (blue) or accessory power
supply lead (red) to the power supply lead of a car’s aerial
booster. (Only when your car has built-in FM/MW/LW aerial
in the rear/side glass.)
The broadcast signal is too weak.
t Use manual tuning.
•Tune in the frequency accurately.
•The broadcast signal is too weak.
t Set to the Mono mode (page 17).
Cause/Solution
The station is non-TP or has weak signal.
t Press (AF/TA) to select “AF TA off.”
•Activate “TA.”
•The station does not broadcast any traffic announcements
despite being TP. t Tune to another station.
The station does not specify the programme type.
Cause/Solution
The volume of the speakers may have been automatically
lowered in order to maximize the effect of the listening
position adjustment.
t Press < or , to adjust the balance.
The speaker balance can be set separately for DSP on mode
and DSP off mode (page 29).
42
Page 43

Error displays (when an optional CD/MD unit is connected)
The following indications will flash for about five seconds, and an alarm sound will be heard.
Display
NO Mag
NO Disc
NG Discs
Error
Blank
PushReset
Not Ready
High Temp
*1 When an error occurs during playback of an CD or MD, the disc number of the CD or MD does not
appear in the display.
*2 The disc number of the disc causing the error appears in the display.
Cause
The disc magazine is not inserted in
the CD/MD unit.
No disc is inserted in the CD/MD
unit.
A CD/MD cannot play because of
some problem (dirty CD, defective
MD etc.).
A CD is dirty or inserted upside
1
*
1
*
2
down.*
An MD does not playback because of
some problem.*
No tracks have been recorded on an
2
MD.*
The CD/MD unit cannot be operated
because of some problem.
The lid of the MD unit is open or the
MDs are not inserted properly.
The ambient temperature is more than
50°C.
2
Solution
Insert the magazine in the CD/MD
unit.
Insert discs in the CD/MD unit.
Insert another CD/MD.
Clean or insert the CD correctly.
Insert another MD.
Play an MD with recorded tracks
on it.
Press the reset button on the unit.
Close the lid or insert the MDs
properly.
Wait until the temperature goes
down below 50°C.
If the above-mentioned solutions do not help improve the situation, consult your nearest Sony
dealer.
43
Page 44

¡Bienvenido!
Gracias por adquirir el reproductor de discos
compactos Sony. Esta unidad permite disfrutar
de varias funciones mediante el uso de los
siguientes accesorios de control:
Accesorios suministrados
Mando a distancia de tarjeta
RM-X95 (para el CDX-M700R)
RM-X96 (para el CDX-M600R)
Accesorios opcionales
Mando rotativo RM-X4S
Además de las operaciones de reproducción de
CD y radio, puede ampliar el sistema mediante
la conexión de unidades opcionales de CD/
MD*1.
Cuando utilice esta unidad o una opcional de
CD conectada con función CD TEXT, la
información de CD TEXT aparecerá en el visor
al reproducir discos CD TEXT*2.
*1Es posible conectar cambiadores o
reproductores de CD o MD.
2
Un disco CD TEXT es un CD de audio que incluye
*
información, como el nombre del disco, el
nombre del artista y los nombres de los temas.
Esta información está grabada en el disco.
Precauciones
CLASS
Esta etiqueta está situada en la parte inferior
del chasis.
CAUTION INVISIBLE
VIEW DIRECTLY WITH OPTICAL INSTRUMENTS
Esta etiqueta está situada en el chasis interno
de la unidad de activación.
•Si aparca el automóvil bajo la luz solar
directa y se produce un considerable
aumento de temperatura en su interior, deje
que la unidad se enfríe antes de utilizarla.
•Si la unidad no recibe alimentación,
compruebe las conexiones en primer lugar. Si
todo está en orden, examine el fusible.
•Si el automóvil dispone de antena
motorizada, ésta se extenderá
automáticamente durante el funcionamiento
de la unidad.
1
PRODUCTLASER
LASER RADIATIONWHEN OPEN
DO NOT STARE INTO BEAM OR
Si desea realizar alguna consulta o solucionar
algún problema referentes a la unidad que no
aparezcan en este manual, póngase en contacto
con el proveedor Sony más próximo.
Condensación de humedad
En días lluviosos o en zonas muy húmedas, es
posible que se condense humedad en las lentes
del interior de la unidad. Si esto ocurre, ésta no
funcionará correctamente. En este caso,
extraiga el disco y espere una hora
aproximadamente hasta que se haya
evaporado la humedad.
2
Page 45

Notas sobre los discos
compactos
Un disco sucio o defectuoso puede causar
pérdidas de sonido durante la reproducción de
CD. Para obtener un sonido óptimo, coja el
disco de la siguiente forma.
Coja el disco por los bordes y no toque la
superficie sin etiqueta.
Notas sobre los discos
Si emplea los discos descritos a continuación,
el residuo adherente puede causar que el CD
deje de girar y producir fallos de
funcionamiento o dañar los discos.
No utilice discos compactos de segunda mano
o de alquiler que tengan residuos adherentes
en la superficie (por ejemplo, de adhesivos
despegados o tinta, o de restos de pegamento
de los adhesivos).
Residuos adherentes.
Tinta adherente.
No adhiera papel ni cinta en los discos.
No exponga los discos a la luz solar directa ni
a fuentes térmicas, como conductos de aire
caliente. No deje los discos en un automóvil
aparcado bajo la luz solar directa, en cuyo
interior pueda producirse un considerable
aumento de temperatura.
Antes de reproducir un disco, frótelo con un
paño limpiador opcional. Hágalo en la
dirección de las flechas de la ilustración.
No utilice disolventes tales como bencina,
diluyentes, limpiadores disponibles en las
tiendas del ramo ni aerosoles destinados a
discos analógicos.
No utilice discos compactos de alquiler con
etiquetas viejas que estén comenzando a
despegarse.
Adhesivos que empiezan a
despegarse y dejan un
residuo adherente.
No emplee discos compactos con etiquetas o
adhesivos fijados.
Etiquetas adheridas.
Reproducción de discos compactos
de 8 cm
Utilice el adaptador opcional para discos
compactos sencillos de Sony (CSA-8) para
proteger el reproductor de CD contra daños.
Notas sobre discos CD-R
•Es posible reproducir discos CD-R (discos
compactos grabables) en esta unidad. No
obstante, algunos discos CD-R no podrán
reproducirse en esta unidad en función de las
condiciones del equipo de grabación o del
propio disco CD-R.
•No es posible reproducir discos CD-R no
finalizados (Es preciso que los discos CD-R
grabados estén finalizados para poder
reproducirse en el reproductor de CD de
audio).
•No es posible reproducir discos CD-RW
(discos compactos reescribibles) en este
reproductor.
3
Page 46

Indice
Localización de los controles ................................. 6
Procedimientos iniciales
Restauración de la unidad ................................. 8
Ajustes de cancelación de la seguridad ........... 8
Activación/desactivación de la unidad ........... 8
Utilización del menú .......................................... 9
Ajuste del reloj ..................................................... 9
Reproductor de CD
Unidad de CD/MD (opcional)
Reproducción de un CD
(sólo con esta unidad) ................................. 10
Reproducción repetida de temas
— Reproducción repetida........................... 12
Reproducción de temas en orden aleatorio
— Reproducción aleatoria .......................... 12
Asignación de títulos a los discos compactos
— Memorando de discos
(unidad de CD con función de archivo
personalizado) .............................................. 13
Localización de discos mediante el título
— Función de listado (unidad de CD con
función de archivo personalizado o unidad
de MD)........................................................... 14
Selección de temas específicos para su
reproducción
— Función de banco
(unidad de CD con función de archivo
personalizado) .............................................. 15
Radio
Memorización automática de emisoras
— Memorización de la mejor sintonía
(BTM) ............................................................. 16
Memorización de las emisoras deseadas ....... 16
Recepción de emisoras memorizadas ............ 17
RDS
Descripción general de la función RDS ......... 18
Visualización del nombre de la emisora ........ 18
Resintonización automática del mismo
programa
— Frecuencias alternativas (AF) ................ 18
Recepción de anuncios de tráfico ................... 20
Programación de emisoras RDS con los datos
AF y TA ......................................................... 21
Localización de emisoras mediante el tipo de
programa ....................................................... 22
Ajuste automático del reloj .............................. 23
DAB
Descripción general de la función DAB......... 23
Operaciones básicas de DAB ........................... 24
Memorización automática de servicios DAB
— BTM .......................................................... 25
Memorización manual de servicios DAB
— Memorización manual ........................... 25
Recepción de programas DAB ........................ 26
Ajustes de recepción de audio ........................ 27
Localización de un servicio DAB por tipo de
programa (PTY) ........................................... 27
DSP (sólo CDX-M700R)
Ajuste del ecualizador ...................................... 28
Selección de la posición de audición .............. 29
Selección de un menú de sonido de baja
frecuencia
— Organizador de sonido de baja
frecuencia dinámico (DSO) ........................ 29
Ajuste del balance (BAL) ................................. 30
Ajuste del equilibrio frontal y posterior ........ 30
Ajuste del volumen de los altavoces
potenciadores de graves ............................. 31
Audición de cada fuente de programa con su
DSO registrado
— Memoria de sonido fuente (SSM) ......... 31
Otras funciones
Etiquetado del mando rotativo ....................... 32
Uso del mando rotativo ................................... 32
Ajuste de las características de sonido
(Sólo CDX-M600R) ...................................... 34
Atenuación del sonido ..................................... 34
Cambio de los ajustes de sonido y
visualización ................................................. 35
Refuerzo de los graves
— D-bass (Sólo CDX-M600R) .................... 36
Selección del analizador de espectros ............ 36
Ajuste del sonido y la frecuencia del
preamplificador ecualizador
(Sólo CDX-M600R) ...................................... 37
Información complementaria
Mantenimiento .................................................. 37
Desmontaje de la unidad ................................. 38
Especificaciones ................................................. 40
Guía de solución de problemas ...................... 41
4
Page 47

Localización de los controles
Mando a
distancia
OFF
inalámbrico
MENU LIST
SEEK
SOUND
PTY
DSPL AF/TA MODE
Para obtener más información, consulte las
páginas enumeradas.
1 Botón OFF 8, 10
2 Botón MENU 9, 11, 12, 13, 14, 15, 16, 17,
19, 21, 23, 25, 27, 28, 30, 31, 35, 36
3 Botón SOURCE (TUNER/CD/MD)
8, 10, 11, 14, 16, 17, 24, 28, 29, 30, 31, 36
4 Botones </, (SEEK/AMS –/+)
9, 11, 12, 13, 15, 17, 19, 21, 23, 24, 25,
27, 28, 29, 30, 31, 34, 35, 36
Sensor de música automático
(./>) 11
Búsqueda manual (m/M) 11
Búsqueda 17
5 Botón SOUND 28, 29, 30, 31, 34
6 Botón DSPL/PTY (cambio del modo de
indicación/tipo de programa) 10, 11, 13,
22, 27
7 Botón ATT (atenuar) 34
8 CDX-M700R:
Botón DSO (Organizador dinámico de
sonido de baja frecuencia) 29
CDX-M600R:
Botón D-BASS 36
9 Botón OPEN/CLOSE 10
q; Botón LIST 13, 14, 26
OPEN/CLOSE
DSO
DISC
SEEK
SOURCE
DISC
ENTER
VOLATT
qa Botones M/m (PRST/DISC –/+)
9, 11, 12, 13, 14, 15, 16, 17, 19, 21, 22,
23, 24, 25, 26, 27, 28, 30, 31, 35, 36
Durante la reproducción de CD/MD:
Cambio de discos 11
Durante la recepción de la radio:
Selección de emisoras
memorizadas 17
qs Botón ENTER 9, 13, 14, 15, 16, 17, 19,
21, 22, 23, 25, 26, 27, 28, 30, 31, 35, 36
qd Botón AF/TA 18, 19, 20, 21
qf Botón MODE 10, 14, 16, 17, 24
Durante la reproducción de CD/MD:
Selección de unidad de CD/MD 10, 14
Durante la recepción de la radio:
Selección de banda (BAND) 16, 17
qg Botones VOL (ajuste de volumen) 20, 31
No es posible utilizar con el mando a distancia
de tarjeta una unidad que se haya apagado
pulsando (OFF) durante dos segundos, a
menos que pulse (SOURCE) en la unidad o
que inserte un CD para que ésta se active
primero.
5
Page 48

Localización de los controles
Cara de seguridad
Cara de operaciones
T
Y
P
P
S
L
OFF
D
SOURCE
M
E
O
D
REP SHUF
123456
MENU
SOUND
TAAF
DISC
DSO
DISC
LIST
ENTER
CLOSE
CDX-M700R/M600R
6
Page 49

Los botones correspondientes del mando a
distancia inalámbrico controlan las mismas
funciones que los de esta unidad.
17 Botón de restauración 8
2 Visor principal
3 Botón OPEN 38
4qf Receptor para el mando a distancia
de tarjeta
5 Botones de ajuste de volumen
6 Botón Z (expulsión) 10
8 Botón DSPL/PTY (cambio del modo de
indicación/tipo de programa)
9 Visor secundario
q; Botón MENU
qa Botones DISC/PRST +/– (cursor arriba/
abajo)
Botones SEEK/AMS –/+ (cursor
izquierda/derecha) 16
qs CDX-M700R:
Botón DSO
CDX-M600R:
Botón D-BASS
qd Botón LIST
qg Botón OFF*
qh Botón MODE
qj Botón SOURCE (TUNER/CD/MD)
qk Botón AF 18, 19, 21
ql Botones numéricos
Durante la recepción de la radio:
Selección de número de memorización
16, 17, 19, 21, 26
Durante la reproducción de CD/MD:
(1) REP 12
(2) SHUF 12
w; Botón TA 19, 20, 21
wa Botón SOUND
ws Botón ENTER
wd Botón CLOSE
* Advertencia sobre la instalación en
un automóvil que no disponga de
posición ACC (accesorios) en el
interruptor de la llave de encendido
Asegúrese de pulsar (OFF) en la unidad
durante dos segundos para desactivar la
indicación del reloj después de apagar el
motor.
Si pulsa (OFF) sólo momentáneamente, la
indicación del reloj no se desactivará y esto
causará el desgaste de la batería.
7
Page 50

Procedimientos
iniciales
Restauración de la unidad
Antes de utilizar la unidad por primera vez o
después de sustituir la batería del automóvil,
es necesario restaurar dicha unidad.
Pulse el botón de restauración con un objeto
puntiagudo, como un bolígrafo.
Botón de restauración
Nota
Al pulsar el botón de restauración se borrarán los
ajustes del reloj y algunas funciones memorizadas.
Ajustes de cancelación de
la seguridad
Realice los siguientes ajustes iniciales antes de
utilizar la unidad por primera vez, tras
sustituir la batería del automóvil o después de
restaurar la unidad.
Asegúrese de realizar estos ajustes, ya que en
caso contrario el panel frontal permanecerá
desactivado y no podrá utilizar la unidad.
Activación/desactivación
de la unidad
Activación de la unidad
Pulse (SOURCE) o inserte un CD en la unidad.
Para obtener información detallada sobre el
funcionamiento, consulte las páginas 10 (CD/
MD) y 16 (radio).
Desactivación de la unidad
Pulse (OFF) para detener la reproducción de
CD/MD o la recepción de la radio (las teclas
permanecerán iluminadas y el visor
encendido).
Pulse (OFF) durante dos segundos para
apagar completamente la unidad.
Nota
Si el automóvil no dispone de posición ACC en la
llave del interruptor de encendido, asegúrese de
desactivar la unidad pulsando (OFF) durante dos
segundos para evitar el desgaste de la batería del
vehículo.
1 Pulse el botón de restauración.
Aparecerá “Code in”.
2 Pulse los botones del mando a distancia
de tarjeta y envíe el código de seguridad.
Consulte la documentación suministrada
para obtener información detallada sobre
los botones del código de seguridad.
Una vez confirmado el código, el visor
mostrará el reloj y podrá utilizar la unidad
con normalidad.
Notas
• Lleve consigo el mando a distancia de tarjeta
cuando se ausente del automóvil.
• Si olvida el código de seguridad, consulte con un
centro de servicio técnico Sony. Asegúrese de
llevar consigo el mando a distancia de tarjeta.
8
Page 51

Utilización del menú
Esta unidad se utiliza mediante la selección de
elementos en un menú.
Para realizar una selección, entre en el modo
de menús y elija M/m (arriba/abajo) o </,
(izquierda/derecha).
M/m
M: para seleccionar hacia
DISC
SEEK SEEK
SOURCE
DISC
</,
arriba
m: para seleccionar hacia
abajo
2 Pulse M o m para ajustar la hora.
3 Pulse ,.
Los dígitos de los minutos parpadean.
4 Pulse M o m para ajustar los minutos.
<:
para
seleccionar
hacia la
izquierda
SEEK SEEK
DISC
SOURCE
DISC
,:
para
seleccionar
hacia la
derecha
Ajuste del reloj
El reloj dispone de una indicación digital de 24
horas.
Ejemplo: Para ajustar el reloj en 10:08
1 Pulse (MENU) y, a continuación, pulse
M o m varias veces hasta que aparezca
“Clock”.
1 Pulse (ENTER).
2 Pulse (ENTER).
El reloj se pone en funcionamiento.
Consejo
Es posible ajustar el reloj automáticamente con la
función RDS (página 22).
Nota
Con el ajuste inicial, la indicación del reloj aparece
mientras la unidad está apagada.
Si el modo D.Info está ajustado en “on”, la hora
siempre se mostrará (excepto para algunas
funciones del modo SA) (página 35).
Los dígitos de la hora parpadean.
9
Page 52

Reproductor de CD
Unidad de CD/MD
(opcional)
Cuando finalice el último tema del
CD
La indicación del número de tema volverá a
mostrar el valor “1”, y la reproducción volverá
a iniciarse desde el primer tema del CD.
Además de reproducir el CD con esta unidad,
también puede controlar las unidades externas
de CD/MD.
Si conecta una unidad de CD con función CD
TEXT, la información CD TEXT aparecerá en el
visor al reproducir discos CD TEXT.
Reproducción de un CD
(sólo con esta unidad)
1 Pulse (OPEN/CLOSE) en el mando a
distancia de tarjeta e inserte el CD.
La reproducción se iniciará de forma
automática.
Cara con la etiqueta hacia arriba
2 Pulse (OPEN/CLOSE) en el mando a
distancia de tarjeta para cerrar el panel
frontal.
Si ya se ha insertado un CD, pulse (SOURCE)
varias veces hasta que aparezca “CD” para
iniciar la reproducción.
Indicación de CD
Para Pulse
Detener la (OFF)
reproducción
Expulsar el CD (OPEN/CLOSE) y
después Z
Reproducción de discos compactos
(CD) o de minidiscos (MD)
(con una unidad opcional de CD/
MD)
1 Pulse (SOURCE) varias veces para
seleccionar “CD” o “MD”.
2 Pulse (MODE) hasta que aparezca la
unidad que desee.
Se inicia la reproducción de CD/MD.
Todos los discos de la unidad actual de CD/
MD se reproducen desde el principio.
Cambio de los elementos del visor
Cada vez que pulse (DSPL/PTY) durante la
reproducción de CD, discos CD TEXT o MD, el
elemento cambiará de la siguiente forma:
V
1
Número de disco*
Tiempo de reproducción transcurrido
Título del disco*
Frecuencia o nombre de
la emisora de FM1*
/Número de tema/
V
2
/Nombre del cantante*
V
Título del tema*
V
3
4
5
Número de tema
Nota
Si desea reproducir un CD de 8 cm, utilice el
adaptador opcional para discos compactos sencillos
Sony (CSA-8).
Tiempo de reproducción
transcurrido
10
*1Con una unidad opcional de CD/MD conectada.
2
Si no ha asignado título al disco CD o CD TEXT
*
(“Asignación de títulos a los discos compactos”
en la página 13) o si no hay ningún título de
disco registrado en el MD, el visor mostrará
“NO D.Name”.
3
Si reproduce un disco CD TEXT, el nombre del
*
artista aparecerá en el visor después del título
del disco. (Sólo para discos CD TEXT con nombre
del artista.)
4
Si el título del tema de un disco CD TEXT o MD
*
no está previamente registrado, el visor
mostrará “NO T.Name”.
5
Con la función AF/TA activada.
*
Page 53

Una vez seleccionado el elemento deseado, el
visor cambiará automáticamente al modo de
desplazamiento de indicaciones después de
unos segundos.
En el modo de desplazamiento de
indicaciones, todos los elementos anteriores se
desplazan por el visor de uno en uno por
orden.
Nota
Si utiliza etiquetas personalizadas, siempre
tendrán prioridad sobre la información CD
TEXT original al mostrarse dicha información.
Consejo
Es posible desactivar el modo de desplazamiento
de indicaciones. (Consulte “Cambio de los ajustes
de sonido y visualización” en la página 35).
Desplazamiento automático del
título de un disco
— Desplazamiento automático
Si el título del disco, el nombre del artista o el
título del tema de un disco CD TEXT o MD
supera los 10 caracteres y la función de
desplazamiento automático está activada, la
información se desplazará automáticamente
por el visor de la siguiente forma:
• El título del disco aparece al cambiar el disco (si
el título del disco se selecciona como elemento
de visualización).
• El título del tema aparece al cambiar el tema (si
el título del tema se selecciona como elemento
de visualización).
• El título del disco o del tema aparece en función
del ajuste al pulsar (SOURCE) para seleccionar un
MD o un disco CD TEXT.
Si pulsa (DSPL/PTY) para cambiar el elemento
mostrado, el título del disco o del tema del
disco CD TEXT o del MD se desplaza
automáticamente tanto si activa como si
desactiva la función.
1 Durante la reproducción, pulse (MENU).
2 Pulse M o m varias veces hasta que
aparezca “A.Scrl”.
3 Pulse , para seleccionar “A.Scrl on”.
4 Pulse (ENTER).
Para cancelar la función de desplazamiento
automático, seleccione “A.Scrl off” en el paso 3.
Nota
Con algunos discos CD TEXT con un gran número
de caracteres, pueden producirse las siguientes
situaciones:
— Algunos de los caracteres no se muestran.
— La función de desplazamiento automático no
funciona.
Localización de un tema específico
— Sensor de música automático (AMS)
Durante la reproducción, pulse < o ,
momentáneamente para cada tema que
desee omitir.
< (.) :
Para localizar
temas
anteriores
DISC
SEEK SEEK
SOURCE
DISC
, (>) :
Para localizar
temas
posteriores
Localización de un punto específico
de un tema — Búsqueda manual
Durante la reproducción, pulse y
mantenga pulsado < o ,. Deje de
pulsarlo cuando encuentre el punto que
desee.
< (m) :
Para buscar
hacia atrás
Nota
Si “
significa que ha llegado al principio o al final del
disco, por lo que no podrá continuar.
” o “ ” aparece en el visor,
DISC
SEEK SEEK
SOURCE
DISC
, (M) :
Para buscar
hacia delante
Localización de discos
— Selección de discos
Si hay una unidad opcional de CD/MD
conectada, pulse M o m para seleccionar
el disco deseado.
M (DISC +) : Para los discos sucesivos
DISC
SEEK SEEK
SOURCE
DISC
m (DISC –) : Para los discos anteriores
El disco deseado de la unidad actual de
CD/MD opcional comenzará a
reproducirse.
11
Page 54

Reproducción repetida de
temas — Reproducción repetida
El CD de la unidad principal se repetirá
automáticamente al llegar al final. Para la
reproducción repetida, es posible seleccionar:
•Repeat 1 — para repetir un tema.
•Repeat 2 — para repetir el disco que se
encuentre en la unidad opcional de CD/MD.
1 Durante la reproducción, pulse (MENU).
2 Pulse M o m varias veces hasta que
aparezca “Repeat”.
Reproducción de temas en
orden aleatorio — Reproducción
aleatoria
Es posible seleccionar:
•Shuf 1 — para reproducir los temas del disco
actual en orden aleatorio.
•Shuf 2 — para reproducir los temas de la
unidad actual de CD/MD en orden aleatorio.
•Shuf All — para reproducir todos los temas
de todas las unidades opcionales de CD/MD
en orden aleatorio.
1 Durante la reproducción, pulse (MENU).
3 Pulse , varias veces hasta que el ajuste
deseado aparezca en el visor.
B Repeat 1 B Repeat 2*
Repeat off b
* “Repeat 2” sólo se encuentra disponible
cuando se conectan una o más unidades
opcionales de CD, o las unidades opcionales
de MD.
Se inicia la reproducción repetida.
Para volver al modo de reproducción normal,
seleccione “Repeat off” en el paso 3.
Consejo
Si selecciona el modo con los botones de la unidad,
pulse (1) (REP) varias veces hasta que aparezca el
modo deseado.
2 Pulse M o m varias veces hasta que
aparezca “Shuf”.
3 Pulse , varias veces hasta que el ajuste
deseado aparezca en el visor.
B Shuf 1 B Shuf 2* B Shuf All*
Shuf off b
* “Shuf 2” y “Shuf All” sólo se encuentran
disponibles cuando se conectan una o más
unidades opcionales de CD, o las unidades
opcionales de MD.
Se inicia la reproducción en orden aleatorio.
Para volver al modo de reproducción normal,
seleccione “Shuf off” en el paso 3.
Consejo
Si selecciona el modo con los botones de la unidad,
pulse (2) (SHUF) varias veces hasta que aparezca el
modo deseado.
12
Page 55

Asignación de títulos a los
discos compactos
— Memorando de discos
(unidad de CD con función de archivo
personalizado)
Es posible asignar un título personalizado a
cada disco, utilizando un máximo de ocho
caracteres para cada uno. La asignación de
títulos permitirá localizar discos mediante el
título (página 14) y seleccionar temas
específicos para su reproducción (página 15).
1 Inicie la reproducción del disco que desee
etiquetar.
2 Pulse (MENU) y, a continuación, M o m
varias veces hasta que aparezca “Name
Edit”.
3 Pulse (ENTER).
Modo de edición de títulos
4 Introduzca los caracteres.
1 Pulse M varias veces para seleccionar
los caracteres que desee.
(A t B t C t ··· Z t 0 t 1 t 2 t
··· 9 t + t – t * t / t \ t > t <
t . t )
Si pulsa m varias veces, los caracteres
aparecerán en orden inverso.
Si desea introducir un espacio en blanco
entre caracteres, seleccione “ ”.
2 Pulse , después de localizar el
carácter deseado.
El siguiente carácter parpadeará.
3 Repita los pasos 1 y 2 para
introducir el título completo.
5 Para volver al modo normal de
reproducción de CD, pulse (ENTER).
Consejos
• Para borrar o corregir un nombre, introduzca
” (barra inferior) por cada carácter.
“
• Existe otro método para comenzar a asignar
título al CD. Pulse (LIST) durante dos segundos
en lugar de realizar los pasos 2 y 3. También
puede completar la operación manteniendo
pulsado (LIST) durante dos segundos en lugar de
realizar el paso 5.
Visualización del memorando de
discos
Pulse (DSPL/PTY) durante la
reproducción de un CD o de un disco CD
TEXT.
Cada vez que pulse (DSPL/PTY) durante la
reproducción de un CD o de un disco CD
TEXT, los elementos cambiarán de la
siguiente forma:
V
1
Número del disco*
Tiempo de reproducción transcurrido
Nombre del memorando de discos
Frecuencia o nombre de la
*1Con una unidad opcional de CD conectada.
2
Si conecta una unidad opcional de CD con la
*
función CD TEXT, el visor mostrará la
información CD TEXT al reproducir discos CD
TEXT.
*3Con la función AF/TA activada.
/Número del tema/
V
V
Título del tema*
V
emisora de FM1*
2
3
Si pulsa <, el carácter anterior
parpadeará.
13
Page 56

Borrado del memorando de discos
1 Pulse (SOURCE) varias veces para
seleccionar “CD”.
2 Pulse (MODE) varias veces para
seleccionar la unidad de CD con función
de archivo personalizado.
3 Pulse (MENU) y, a continuación, pulse
M o m varias veces hasta que aparezca
“Name Del”.
Localización de discos
mediante el título — Función de
listado (unidad de CD con función de
archivo personalizado o unidad de MD)
Esta función puede utilizarse con discos a los
que se ha asignado un título personalizado.
Para obtener más información sobre los
nombres de memorando de disco, consulte
“Asignación de títulos a los discos compactos”
(página 13).
4 Pulse (ENTER).
5 Pulse M o m varias veces para seleccionar
el nombre de disco que desee borrar.
6 Pulse (ENTER) durante dos segundos.
El nombre se borrará.
Repita los pasos 5 y 6 para borrar otros
nombres.
7 Pulse (MENU) dos veces.
La unidad vuelve al modo normal de
reproducción de CD.
Nota
Si se borra el nombre personalizado, el visor
mostrará la información CD TEXT original.
1 Pulse (LIST).
El título asignado al disco actual aparece en
el visor.
Al asignar un nombre de memorando a un
disco CD TEXT, dicho nombre tendrá
prioridad sobre la información original de
CD TEXT.
2 Pulse M (DISC +) o m (DISC –) varias veces
hasta que encuentre el disco deseado.
3 Pulse (ENTER) para reproducir el disco.
Notas
• Los títulos de tema no aparecen durante la
reproducción de un disco CD TEXT o de un MD.
• Si no hay discos en el cargador, el visor mostrará
“NO Disc”.
• Si no se ha asignado ningún archivo
personalizado a un disco, el visor mostrará
“********”.
• No es posible mostrar ciertas letras durante la
reproducción de un disco CD TEXT o MD.
14
Page 57

Selección de temas
específicos para su
reproducción
(unidad de CD con función de archivo
personalizado)
Si asigna una etiqueta al disco, puede
programar la unidad para omitir o reproducir
los temas que desee.
— Función de banco
Reproducción sólo de temas
específicos
Es posible seleccionar:
•“Bank on” — para reproducir los temas con
el ajuste “Play”.
•“Bank inv” (inverso) — para reproducir los
temas con el ajuste “Skip”.
1 Durante la reproducción, pulse (MENU) y,
a continuación, M o m varias veces hasta
que aparezca “Bank”.
1 Comience a reproducir el disco al que
desee asignar título.
2 Pulse (MENU) y, a continuación, pulse
M o m varias veces hasta que aparezca
“Bank Sel”.
3 Pulse (ENTER).
Modo de edición de banco
4 Asigne título a los temas.
1 Pulse < o , varias veces para
seleccionar el tema que desee etiquetar.
2 Pulse (ENTER) varias veces para
seleccionar “Play”.
5 Repita el paso 4 para definir “Play”
(reproducción) o “Skip” (omisión) para
todos los temas.
6 Pulse (MENU) dos veces.
La unidad vuelve al modo normal de
reproducción de CD.
Notas
• Es posible definir el modo “Play” y “Skip” para
un máximo de 24 temas.
• No es posible definir el modo “Skip” para todos
los temas de un CD.
2 Pulse , varias veces hasta que aparezca
el ajuste deseado.
B Bank on B Bank inv
Bank off b
3 Pulse (ENTER).
La reproducción se inicia a partir del tema
siguiente.
Para recuperar el modo de reproducción
normal, seleccione “Bank off” en el paso 2.
15
Page 58

Radio
Memorización automática
de emisoras
— Memorización de la mejor sintonía (BTM)
Esta unidad selecciona las emisoras de señal
más intensa y las memoriza por orden de
frecuencia. Es posible almacenar hasta 6
emisoras en casa banda (FM1, FM2, FM3, MW
y LW).
Precaución
Para sintonizar emisoras durante la
conducción, utilice la función de
memorización de la mejor sintonía para evitar
accidentes.
1 Pulse (SOURCE) varias veces para
seleccionar el sintonizador.
Cada vez que pulse (SOURCE), la fuente
cambia de la siguiente forma:
B Tuner B CD B MD*
* Si el equipo opcional correspondiente no está
conectado, el elemento no aparecerá.
2 Pulse (MODE) varias veces para
seleccionar la banda.
Cada vez que pulse (MODE), la banda
cambia de la siguiente forma:
B FM1 B FM2 B FM3
LW b MW b
3 Pulse (MENU) y, a continuación, pulse
M o m varias veces hasta que aparezca
“BTM”.
Notas
• La unidad no almacena emisoras de señales
débiles. Si sólo pueden recibirse unas pocas
emisoras, algunos botones numéricos
conservarán sus ajustes anteriores.
• Si el visor muestra algún número, la unidad
almacenará las emisoras a partir del mostrado en
el visor.
• Si no hay ningún CD en la unidad, sólo aparecerá
la banda del sintonizador incluso si pulsa
(SOURCE).
Memorización de las
emisoras deseadas
Es posible memorizar hasta 18 emisoras de FM
(6 para FM1, 6 para FM2 y 6 para FM3), hasta 6
emisoras de MW y hasta seis emisoras de LW
en el orden que desee.
1 Pulse (SOURCE) varias veces para
seleccionar el sintonizador.
2 Pulse (MODE) varias veces para
seleccionar la banda.
3 Pulse . o > en la unidad para
sintonizar la emisora que desee
almacenar en el botón numérico.
4 Pulse el botón numérico que desee ((1) a
(6)) en la unidad hasta que aparezca
“MEM”.
En el visor aparecerá la indicación del
botón numérico.
Nota
Si almacena otra emisora en el mismo botón
numérico, la emisora previamente almacenada se
borrará.
4 Pulse (ENTER).
La unidad almacena en los botones
numéricos las emisoras por orden de
frecuencia.
La unidad emite un pitido al almacenar el
ajuste.
16
Page 59

Recepción de emisoras
memorizadas
1 Pulse (SOURCE) varias veces para
seleccionar el sintonizador.
Si la recepción de FM en estéreo es
de mala calidad
— Modo monofónico
1 Durante la recepción de radio, pulse
(MENU) y, a continuación, pulse M o m
varias veces hasta que aparezca “Mono”.
2 Pulse (MODE) varias veces para
seleccionar la banda.
3 Pulse M (memorizar arriba) o
m (memorizar abajo) varias veces para
recibir las emisoras en el orden en el que
se almacenaron en la memoria.
Consejo
Si opta por memorizar la emisora con los botones
de la unidad, pulse el botón numérico ((1) a (6))
donde se haya almacenado la emisora deseada.
Si no puede sintonizar una emisora
programada
Pulse < o , para buscar la emisora
(sintonización automática).
La exploración se detiene cuando la unidad
recibe una emisora. Pulse < o , varias
veces hasta que se reciba la emisora
deseada.
Nota
Si la sintonización automática se detiene con
demasiada frecuencia, presione (MENU) y, a
continuación, M o m varias veces hasta que
aparezca “Local” (modo de búsqueda local). A
continuación, pulse , para seleccionar “Local
on”. Pulse (ENTER).
Sólo se sintonizarán las emisoras de señal
relativamente intensa.
2 Pulse , hasta que aparezca “Mono on”.
El sonido mejorará, aunque será
monofónico (la indicación “ST”
desaparecerá).
3 Pulse (ENTER).
Para recuperar el modo de reproducción
normal, seleccione “Mono off” en el paso 2.
Consejos
• Si selecciona el ajuste “Local on”, aparecerá
“LCL Seek” mientras la unidad busca las
emisoras.
• Si sabe cuál es la frecuencia de la emisora que
desea escuchar, pulse y mantenga pulsado
< o , hasta que aparezca la frecuencia
deseada (sintonización manual).
17
Page 60

RDS
Consejo
Es posible desactivar el modo de desplazamiento
de indicaciones. (Consulte “Cambio de los ajustes
de sonido y visualización” en la página 35).
Descripción general de la
función RDS
El sistema de datos de radio (RDS) es un
servicio de radiodifusión que permite a las
emisoras de FM transmitir información digital
complementaria junto con las señales normales
de programas de radio. Este sistema estéreo
para automóvil ofrece, entre otros, los
siguientes servicios: resintonización
automática del mismo programa, recepción de
anuncios de tráfico y localización de emisoras
mediante el tipo de programa.
Notas
• La disponibilidad de todas las funciones RDS está
determinada por el país o la región.
• La función RDS puede no activarse
correctamente si la señal es débil o si la emisora
sintonizada no transmite datos RDS.
Visualización del nombre
de la emisora
El nombre de la emisora actual se ilumina en el
visor.
Seleccione una emisora de FM
(página 16).
Al sintonizar una emisora de FM que
transmita datos RDS, el nombre de la
misma se ilumina en el visor.
Resintonización
automática del mismo
programa
— Frecuencias alternativas (AF)
La función de frecuencias alternativas (AF)
selecciona y resintoniza automáticamente la
emisora de señal más intensa dentro de una
red. Mediante el uso de esta función, es posible
escuchar continuamente el mismo programa
durante un largo viaje sin necesidad de volver
a sintonizar la emisora manualmente.
Las frecuencias cambian automáticamente.
98.5MHz
Station
1 Seleccione una emisora de FM
(página 16).
2 Pulse (AF/TA) varias veces hasta que
aparezca “AF on”.
La unidad comienza a buscar una emisora
alternativa de señal más intensa dentro de
la misma red.
96.0MHz
102.5MHz
Nota
La indicación “*” significa que se recibe una
emisora RDS.
Después de seleccionar el elemento que desee,
el visor cambiará automáticamente al modo de
desplazamiento de indicaciones pasados unos
segundos.
En dicho modo, todos los elementos se
desplazan por el visor de uno en uno por orden.
18
Consejo
Si selecciona el modo con los botones de la unidad,
pulse (AF) hasta que aparezca “AF on”.
Page 61

Cambio de los elementos del visor
Cada vez que pulse (AF/TA), los elementos
visualizados cambian de la siguiente forma:
B AF on B TA on B AF TA on*
* Seleccione este elemento para activar las
funciones AF y TA.
Consejos
• Cada vez que pulse (AF) en la unidad, el
elemento cambiará de la siguiente forma:
AF on y AF off
• Cada vez que pulse (TA) en la unidad, el
elemento cambiará de la siguiente forma:
TA on y TA off
Notas
• Si no existe ninguna emisora alternativa en la
zona y no es necesario buscarla, desactive la
función AF pulsando (AF/TA) varias veces hasta
que “AF TA off” se ilumine.
• Cuando “NO AF” y el nombre de la emisora
parpadean alternativamente, ello indica que la
unidad no encuentra una emisora alternativa en
la red.
• Si el nombre de la emisora comienza a parpadear
después de seleccionar una emisora con la
función AF activada, esto indica que no hay
ninguna frecuencia alternativa disponible. Pulse
< o , mientras parpadea el nombre de
emisora (en un intervalo de ocho segundos). La
unidad comenzará a buscar otra frecuencia con
los mismos datos PI (Identificación de programa)
(“PI Seek” aparecerá y no se oirá el sonido). Si la
unidad no encuentra otra frecuencia, mostrará
“NO PI” y volverá a la frecuencia anteriormente
seleccionada.
AF TA off b
Recepción de programas regionales
La función de activación regional (“REG on”)
de esta unidad permite permanecer en la
sintonía de un programa regional sin cambiar
a otra emisora. (Observe que es necesario
activar la función AF.) El ajuste de fábrica de la
unidad es “REG on”. No obstante, si desea
desactivar la función, realice lo siguiente:
1 Durante la recepción de radio, pulse
(MENU) y, a continuación, pulse M o m
varias veces hasta que aparezca “REG”.
2 Pulse , hasta que aparezca “REG off”.
3 Pulse (ENTER).
Observe que la selección de “REG off”
podría causar que la unidad cambie a otra
emisora regional de la misma red.
Para volver a la activación regional, seleccione
“REG on” en el paso 2.
Nota
Esta función no se activa en el Reino Unido ni en
determinadas zonas.
Función de enlace local (sólo Reino
Unido)
La función de enlace local permite seleccionar
otras emisoras locales de la zona, incluso si no
están almacenadas en los botones numéricos.
1 Pulse un botón numérico de la unidad en
el que haya almacenado una emisora
local.
2 En un intervalo de cinco segundos,
vuelva a pulsar el botón numérico de la
emisora local.
3 Repita este procedimiento hasta recibir
la emisora local que desee.
19
Page 62

Recepción de anuncios de
tráfico
Los datos de anuncios de tráfico (TA) y
programas de tráfico (TP) permiten sintonizar
automáticamente una emisora de FM que
emita anuncios de tráfico, incluso si está
escuchando otras fuentes de programa.
Pulse (AF/TA) varias veces hasta que “TA
on” o “AF TA on” se ilumine en el visor.
La unidad comienza a buscar emisoras que
emitan información sobre tráfico. “TP” se
ilumina en el visor al encontrar una emisora
que emita anuncios de tráfico.
Al iniciarse el anuncio de tráfico, “TA”
parpadea. Esta indicación deja de
parpadear cuando el anuncio finaliza.
Consejos
• Si el anuncio de tráfico comienza mientras
escucha otra fuente de programa, la unidad
cambia automáticamente al anuncio y vuelve a la
fuente original al finalizar éste.
• Si selecciona el modo con los botones de la
unidad, pulse (TA) hasta que aparezca “TA on”.
Nota
“NO TP” parpadea durante cinco segundos si la
emisora recibida no emite anuncios de tráfico. A
continuación, la unidad comienza a buscar una
emisora que los emita.
Programación del volumen de los
anuncios de tráfico
Es posible programar previamente el nivel de
volumen de los anuncios de tráfico, de forma
que éstos no pasen inadvertidos. Al comenzar
un anuncio, el volumen se ajustará
automáticamente al nivel programado.
1 Seleccione el nivel de volumen que
desee.
2 Pulse (AF/TA) durante dos segundos.
Se muestra “TA” y se almacena el ajuste.
Recepción de anuncios de urgencia
Si se emite un anuncio de urgencia mientras
escucha la radio, la programación cambiará
automáticamente a él. Si escucha otra fuente
que no sea la radio, es posible recibir los
anuncios de urgencia si activa la función AF o
TA. Posteriormente, la unidad cambiará a estos
anuncios independientemente de la fuente que
esté escuchando en ese momento.
Para cancelar el anuncio de tráfico
actual
Pulse (AF/TA).
Para cancelar todos los anuncios de tráfico,
desactive la función pulsando (AF/TA)
hasta que “AF TA off” se ilumine.
20
Page 63

Programación de emisoras
RDS con los datos AF y TA
Al programar las emisoras RDS, la unidad
almacena los datos de cada emisora, así como
su frecuencia, de forma que no sea necesario
activar la función AF o TA cada vez que
sintonice la emisora programada. Es posible
seleccionar un ajuste diferente (AF, TA o
ambos) para cada emisora programada, o bien
el mismo para todas.
Programación del mismo ajuste
para todas las emisoras
programadas
1 Seleccione una banda de FM (página 16).
2 Pulse (AF/TA) varias veces para
seleccionar “AF on”, “TA on” o “AF TA
on” (tanto para la función AF como para
la TA).
Observe que si selecciona “AF TA off” se
almacenarán tanto las emisoras RDS como
las que no lo son.
Consejo
Si selecciona el modo con los botones de la unidad,
pulse (AF) y/o (TA) para seleccionar “AF on” y/o
“TA on”. Tenga presente que al seleccionar “AF
off” o “TA off”, se almacenarán no sólo las
emisoras RDS, sino también las que no lo son.
Programación de ajustes diferentes
para cada emisora programada
1 Seleccione una banda de FM y sintonice
la emisora que desee (página 16).
2 Pulse (AF/TA) varias veces para
seleccionar “AF on”, “TA on” o “AF TA
on” (tanto para la función AF como para
la TA).
Consejo
Si selecciona el modo con los botones de la unidad,
pulse (AF) y/o (TA) para seleccionar “AF on” y/o
“TA on”.
3 Pulse el botón numérico deseado hasta
que aparezca “MEM”.
Repita el procedimiento a partir del paso 1
para programar otras emisoras.
Consejo
Si desea cambiar el ajuste AF y/o TA predefinido
después de sintonizar la emisora memorizada,
active o desactive la función AF o TA.
3 Pulse (MENU) y, a continuación, pulse
M o m varias veces hasta que aparezca
“BTM”.
4 Pulse , hasta que parpadee “BTM”.
5 Pulse (ENTER).
21
Page 64
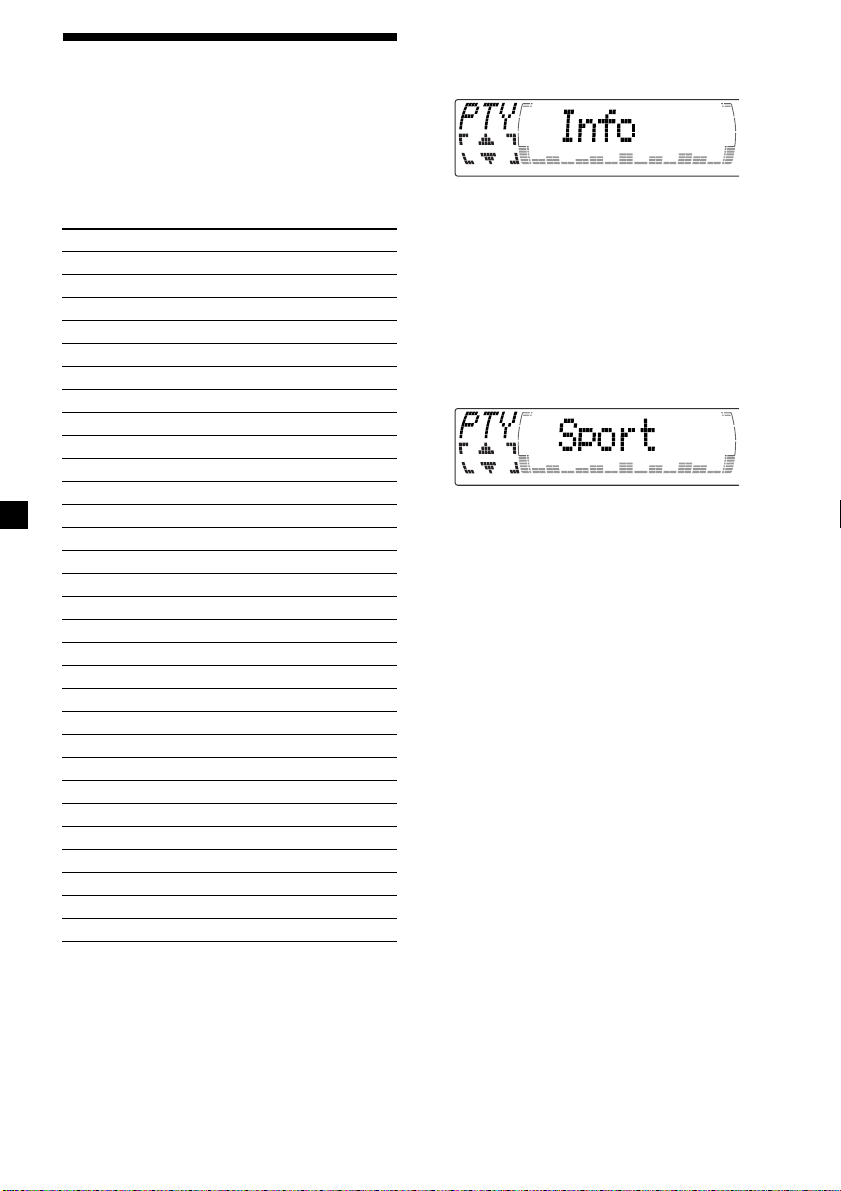
Localización de emisoras
mediante el tipo de
programa
Es posible localizar la emisora que desee
mediante la selección de uno de los tipos de
programa que aparecen a continuación.
Tipos de programa Indicación
Noticias News
Temas de actualidad Affairs
Informativos Info
Deportes Sport
Educación Educate
Drama Drama
Cultura Culture
Ciencia Science
Variedades Varied
Música popular Pop M
Música rock Rock M
Fácil de escuchar Easy M
Música clásica ligera Light M
Música clásica Classics
Otros tipos de música Other M
Meteorología Weather
Economía Finance
Programas infantiles Children
Temas sociales Social A
Religión Religion
Conversación telefónica Phone In
Viajes Travel
Ocio Leisure
Música jazz Jazz
Música country Country
Música nacional Nation M
Melodías de ayer Oldies
Música folklórica Folk M
Documentales Document
Sin especificar None
1 Pulse (DSPL/PTY) durante la recepción de
FM hasta que “PTY” se ilumine en el
visor.
El nombre del tipo de programa actual
aparece si la emisora transmite datos PTY.
Aparece “- - - - -” si la emisora recibida no
es RDS o si no se reciben los datos RDS.
2 Pulse M o m varias veces hasta que
aparezca el tipo de programa que desee.
Los tipos de programa aparecen en el orden
mostrado en la tabla. Observe que no es
posible seleccionar “None” (sin especificar)
para realizar la búsqueda.
3 Pulse (ENTER).
La unidad comienza a buscar una emisora
que transmita el tipo de programa
seleccionado.
Nota
No es posible utilizar esta función en los países en
los que no se disponga de datos PTY (selección de
tipo de programa).
22
Page 65

Ajuste automático del
reloj
Los datos de hora (CT) de las transmisiones
RDS ajustan el reloj automáticamente.
1 Durante la recepción de radio, pulse
(MENU) y, a continuación, pulse M o m
varias veces hasta que aparezca “CT”.
2 Pulse , varias veces hasta que aparezca
“CT on”.
El reloj se ajusta.
3 Pulse (ENTER) para volver a la indicación
normal.
Para cancelar la función CT
Seleccione “CT off” en el paso 2.
Notas
• La función CT puede no activarse aunque se
reciba una emisora RDS.
• Es posible que la hora real y la ajustada mediante
la función CT no coincidan.
Equipo opcional
DAB
Descripción general de la
función DAB
DAB (emisión de audio digital) es un nuevo
sistema de emisión multimedia que transmite
programas de audio con una calidad
comparable a la de los CDs. Ello es posible
gracias al uso de un microordenador en el
sintonizador DAB que utiliza las señales de
radio enviadas desde múltiples antenas y
señales multiruta (ondas de radio reflejadas)
para amplificar la intensidad de la señal
principal. Así, DAB prácticamente no sufre los
efectos de las interferencias de radio, incluso
en un automóvil en movimiento.
Cada emisora DAB junta los programas de
radio (servicios) para formar un conjunto que
luego se emite. Cada servicio contiene uno o
más componentes. Todos los conjuntos,
servicios y componentes se identifican con un
nombre, de forma que es posible acceder a
cualquiera de ellos sin necesidad de conocer
las frecuencias.
Programa DAB
Conjunto
Servicio
Servicio
Servicio
Componente
Componente
Componente
Notas
• El sistema DAB aún se encuentra en fase de
pruebas, lo cual implica que algunos servicios no
se han definido lo suficiente o se están probando
actualmente. En estos momentos, el sintonizador
XT-100DAB opcional no soporta estos servicios.
• Los programas DAB se emiten en la banda III (174
a 240 MHz) y en la banda L (1.452 a 1.492 MHz),
con cada banda dividida en canales (41 en la
banda III y 23 en banda L). Cada emisora DAB
emite un conjunto por canal.
• Cuando cambie el modo de FM3 a DAB, todos los
modos AF TA permanecerán activos.
• Si cambia alguno de los modos AF TA en DAB,
ese modo permanecerá activo en FM1.
23
Page 66

Operaciones básicas de
DAB
Búsqueda del conjunto y del
servicio
— Sintonización automática
1 Pulse (SOURCE) varias veces para
seleccionar el sintonizador.
2 Pulse (MODE) varias veces para
seleccionar “DAB”.
3 Pulse y mantenga pulsado < o , hasta
que aparezca “Seek +” o “Seek –”.
4 Pulse < o , para buscar el servicio
deseado.
Nota
La indicación “
busca el conjunto.
Selección del conjunto
— Sintonización manual
Si sabe cuál es el número de canal del
conjunto, realice el siguiente procedimiento
para realizar la sintonización.
” parpadea mientras la unidad
Recepción de los servicios
memorizados
El siguiente procedimiento estará disponible
tras memorizar el servicio. Para obtener
información detallada sobre la memorización
de los servicios, consulte “Memorización
automática de los servicios DAB” (página 25) y
“Memorización manual de los servicios DAB”
(página 25).
1 Pulse (SOURCE) varias veces para
seleccionar el sintonizador.
2 Pulse (MODE) varias veces para
seleccionar “DAB”.
3 Pulse M o m varias veces para seleccionar
el servicio memorizado.
Consejo
Hay otro método para recibir el servicio
memorizado.
Pulse el botón numérico ((1) a (6)) de la unidad
en el que esté almacenado el servicio deseado.
El modo de recepción del sintonizador DAB
aparece en función de la siguiente tabla:
Indicación Nivel Modo de recepción
(parpadeo) 0 recepción imposible
1 mala recepción
1 Pulse (SOURCE) varias veces para
seleccionar el sintonizador.
2 Pulse (MODE) varias veces para
seleccionar “DAB”.
3 Pulse M o m hasta que aparezca “Ch.
XXX”.
4 Pulse M o m varias veces hasta que
aparezca el número de canal deseado.
Consejos
• Es posible que más de un canal emita el mismo
conjunto.
• Si selecciona el servicio de conjuntos pero no
puede recibirlo, la indicación “
” parpadeará.
24
2 regular
3 moderado
4 buena recepción
Page 67

Memorización automática
de servicios DAB — BTM
La función BTM (memoria de la mejor
sintonía) detecta los conjuntos DAB y asigna
los servicios a los números de memorización
automáticamente dentro de los conjuntos. La
unidad puede memorizar hasta 40 servicios. Si
los servicios se han memorizado
anteriormente, la función BTM funciona bajo
las siguientes condiciones:
•Si activa la función BTM mientras escucha un
servicio memorizado, la unidad sólo
almacenará los servicios detectados
(mediante la sobrescritura) a los números de
memorización superiores al número del
servicio actual.
•Si activa la función mientras escucha un
servicio no memorizado, la unidad sustituirá
el contenido de todos los números de
memorización.
•En los dos casos anteriores, si la unidad
detecta un servicio idéntico a uno ya
memorizado, el servicio almacenado
anteriormente no se modifica y el recién
detectado no se memoriza.
1 Mientras escucha un programa DAB,
pulse (MENU).
2 Pulse M o m varias veces hasta que
aparezca “BTM”.
Memorización manual de
servicios DAB
— Memorización manual
También es posible memorizar los servicios
DAB manualmente o eliminar un servicio ya
memorizado. Recuerde que puede memorizar
hasta 40 servicios (mediante la función BTM o
bien de forma manual) en la memoria de la
unidad.
1 Mientras escucha un programa DAB,
pulse (MENU).
2 Pulse M o m varias veces hasta que
aparezca “PresetEdit” y, a continuación,
pulse (ENTER).
3 Seleccione el servicio y el número de
memorización que desee predefinir.
1 Pulse < o , para seleccionar el
servicio.
2 Pulse M o m para seleccionar el
número de memorización.
3 Pulse (ENTER).
Al almacenarse el servicio, suena un pitido.
Una vez activada la función BTM, la unidad
sintonizará el servicio asignado en la
memoria predefinida 1 automáticamente.
Nota
Si la unidad sólo puede sintonizar unos pocos
servicios, es posible que la función BTM no asigne
servicios a todos los números de memorización de
servicios.
3 Pulse (ENTER).
4 Pulse M o m para seleccionar “Over Wrt”.
Cada vez que pulse m, el comando de
edición cambiará de la siguiente forma:
B Over Wrt B Insert* B Delete
* “Insert” no aparecerá si el número máximo
de servicios (40) ya está almacenado en la
memoria.
Para memorizar otros servicios, repita los
pasos 3 y 4.
5 Pulse (ENTER).
25
Page 68

Sustitución de los servicios de las
memorias predefinidas
Pulse M o m para seleccionar “Over Wrt” en el
paso 4, y pulse (ENTER).
Adición de los servicios de las
memorias predefinidas
Pulse M o m para seleccionar “Insert” en el
paso 4, y pulse (ENTER).
Borrado de los servicios de las
memorias predefinidas
Pulse M o m para seleccionar “Delete” en el
paso 4, y pulse (ENTER).
Consejo
Hay otro método para memorizar el servicio.
Tras recibir el servicio, pulse el botón numérico
((1) a (6)) de la unidad hasta que oiga un pitido.
Consejo
Para comprobar el nombre del componente,
conjunto o servicio actual, pulse (LIST) varias veces
hasta que la lista respectiva aparezca en el visor. El
nombre del elemento actualmente seleccionado
parpadeará.
Cambio de los elementos del visor
Al pulsar (LIST) una vez, aparece la última
lista seleccionada.
Cada vez que pulse (LIST), la lista cambiará de
la siguiente forma:
ENS (Lista de conjuntos)
SRV (Lista de servicios)
CMP (Lista de componentes)
PRS (Lista predefinida)
V
V
V
V
V
DAB (Cancelación)
Recepción de programas
DAB
Siga este procedimiento para sintonizar un
programa DAB manualmente.
También puede almacenar servicios DAB en la
memoria de la unidad para su sintonización
instantánea (consulte “Memorización
automática de servicios DAB (BTM)” en la
página 25).
1 Mientras escucha un programa DAB,
pulse (LIST) varias veces hasta que
aparezca la lista de conjuntos.
2 Pulse M o m hasta que aparezca el
conjunto deseado y, a continuación,
pulse (ENTER).
3 Pulse (LIST) varias veces hasta que
aparezca la lista de servicios.
4 Pulse M o m varias veces hasta que
aparezca el servicio deseado y, a
continuación, pulse (ENTER).
5 Pulse (LIST) varias veces hasta que
aparezca la lista de componentes.
Actualización automática de las
lista de conjuntos
Al utilizar la función BTM por primera vez,
todos los conjuntos disponibles en la zona se
almacenan de forma automática. Al volver a
emplear dicha función, el contenido de estas
listas se actualiza de acuerdo con las
condiciones descritas en la página 25.
Un conjunto se añade a la lista correspondiente
si se recibe durante la sintonización automática
o manual pero no está incluido en la lista.
Un conjunto también se elimina de la lista
correspondiente cuando:
•se selecciona en la lista un conjunto que no
puede recibirse.
•se realiza una sintonización automática o
manual para recibir un conjunto, servicio o
componente que está incluido en la lista pero
no puede recibirse.
6 Pulse M o m hasta que aparezca el
componente deseado y, a continuación,
pulse (ENTER).
26
Page 69

Ajustes de recepción de
audio
DAB puede contener audio multicanal. Es
posible seleccionar el canal principal o un
subcanal para la recepción. Además, si activa
la función DRC (control de rango dinámico), el
rango dinámico de un servicio que soporta
DRC puede ampliarse de forma automática.
Es posible definir los siguientes elementos:
•Main/Sub — que permite seleccionar
chanales entre “Main” (chanal principal) y
“Sub” (subchanal).
•DRC — que permite activar o desactivar la
función.
1 Mientras escucha un programa DAB,
pulse (MENU).
Localización de un servicio
DAB por tipo de programa
(PTY)
Puede utilizar la función PTY (selección de
tipo de programa) para sintonizar el programa
que desee.
1 Mientras escucha un programa DAB,
pulse (DSPL/PTY).
2 Pulse M o m varias veces para seleccionar
el tipo de programa.
2 Pulse M o m varias veces hasta que
aparezca “DRC” o “Main (o Sub)”.
3 Pulse < o , para seleccionar el ajuste
deseado (ejemplo: “on” u “off”).
4 Pulse (ENTER).
Nota
“Main (o Sub)” sólo aparece en el menú cuando la
unidad recibe un programa multicanal.
Los tipos de programa aparecen en el orden
que se muestra en la página 22.
3 Pulse (ENTER).
27
Page 70

DSP (sólo CDX-M700R)
Ajuste de la curva de ecualizador
1 Pulse (MENU).
2 Pulse M o m varias veces hasta que
aparezca “EQ Tune”.
Ajuste del ecualizador
Es posible seleccionar una curva de
ecualizador para cinco tipos de música (Rock,
Vocal, Groove, Techno y Custom).
Puede almacenar y definir los ajustes del
ecualizador de frecuencia y nivel.
Selección de la curva de
ecualizador
1 Pulse (SOURCE) para seleccionar una
fuente (sintonizador, CD o MD).
2 Pulse (SOUND) varias veces hasta que
aparezca “EQ”.
3 Pulse < o , para seleccionar la curva
de ecualizador deseada.
Rock y Vocal y Groove y Techno y
Custom y off
Para cancelar el efecto de ecualización,
seleccione “off”. Después de tres segundos,
el visor volverá al modo de reproducción
normal.
3 Pulse (ENTER).
4 Pulse < o , para seleccionar la curva
de ecualizador deseada.
Rock y Vocal y Groove y Techno y
Custom y off
5 Pulse (ENTER).
6 Pulse < o , para seleccionar la
frecuencia deseada.
62 Hz y 157 Hz y 396 Hz y 1.0 kHz y
2.5 kHz y 6.3 kHz y 16.0 kHz
7 Pulse M o m para seleccionar el nivel
deseado.
El volumen puede ajustarse en intervalos
de 1 dB de –12 dB a +12 dB.
Para restaurar la curva de ecualizador
ajustada en fábrica, pulse (ENTER) durante
dos segundos.
8 Pulse (MENU) dos veces.
Una vez completado el ajuste de efecto,
aparece el modo de reproducción normal.
28
Page 71

Selección de la posición
de audición
Es posible ajustar un tiempo de demora para
que el sonido de los altavoces llegue al oyente.
De esta manera, la unidad puede simular un
campo de sonido natural, de forma que el
oyente obtenga la sensación de encontrarse en
el centro del campo de sonido
independientemente del lugar en el que se
encuentre dentro del automóvil.
Visor
POS
1
2
3
All
POS
Front
POS
Front-R
POS
Front-L
POS
Rear
POS
off
1 Pulse (SOURCE) para seleccionar una
fuente (sintonizador, CD o MD).
Centro del campo
de sonido
Ajuste normal
(1 + 2 + 3)
Parte frontal
(1 + 2)
Parte frontal
derecha (2)
Parte frontal
izquierda (1)
Parte posterior
(3)
Cancelación
Selección de un menú de
sonido de baja frecuencia
— Organizador de sonido de baja
frecuencia dinámico (DSO)
Si los altavoces están instalados en la parte
inferior de las puertas, el sonido se recibirá
desde abajo y puede no ser nítido.
La función DSO (Organizador de sonido de
baja frecuencia dinámico) crea un sonido más
ambiental como si hubiera altavoces en el
salpicadero (altavoces virtuales).
Menú de sonido de baja frecuencia
Predefiniciones Significado
de la memoria
DSO1 – 3 Altavoces virtuales
DSO Wide Altavoces virtuales (grandes)
DSO off Cancelación
Imagen de altavoces virtuales
2
*
1
*
(estándar)
1
*
2
*
3
*
2 Pulse (SOUND) momentáneamente hasta
que aparezca “POS”.
3 Pulse < o , para seleccionar la
posición de audición deseada.
All y Front y Front-R y Front-L y Rear y
off
Las posiciones de audición aparecen en el
orden mostrado anteriormente.
Para cancelar el modo POS, seleccione
“off”.
Transcurridos tres segundos, el visor
volverá al modo de reproducción normal.
3
*
*1Estándar
2
*
Grandes
3
Posición de los altavoces reales (parte inferior de
*
las puertas delanteras).
Selección del DSO
1 Pulse (SOURCE) para seleccionar una
fuente (sintonizador, CD o MD).
2 Pulse (DSO) varias veces para seleccionar
el modo DSO que desee.
B 1 B 2 B 3 B Wide
bb
off
b
bb
Para cancelar el modo DSO, seleccione
“off”.
Transcurridos tres segundos, el visor
volverá al modo de reproducción normal.
29
Page 72

Ajuste del balance (BAL)
Es posible ajustar el balance de sonido entre
los altavoces izquierdos y derechos.
1 Pulse (SOURCE) para seleccionar una
fuente (sintonizador, CD o MD).
2 Pulse (SOUND) varias veces hasta que
aparezca “BAL”.
Ajuste de la frecuencia de corte y
del nivel de volumen de salida de
los altavoces frontales/posteriores
Es posible ajustar el nivel de volumen de
salida y seleccionar la frecuencia de corte de
los altavoces para adaptarlos a las
características del sistema de altavoces
instalado.
Frecuencia de corte
Nivel
3 Pulse < o , para ajustar el balance.
Transcurridos tres segundos, el visor
volverá al modo de reproducción normal.
Ajuste del equilibrio
frontal y posterior
1 Pulse (SOURCE) para seleccionar una
fuente (sintonizador, CD o MD).
2 Pulse (SOUND) varias veces con el fin de
seleccionar “F” para los altavoces
frontales o “R” para los posteriores.
3 Pulse < o , para ajustar el volumen de
los altavoces frontales/posteriores.
Transcurridos tres segundos, el visor
volverá al modo de reproducción normal.
Frecuencia (Hz)
1 Pulse (MENU).
2 Pulse M o m varias veces para seleccionar
“Front HPF” o “Rear HPF”
3 Pulse (ENTER).
4 Pulse < o , para seleccionar la
frecuencia de corte.
off y 78 Hz y 99 Hz y 125 Hz y 157 Hz y
198 Hz
5 Pulse M o m para ajustar el nivel de
volumen.
El volumen puede ajustarse en intervalos
de 1 dB de –12 dB a +12 dB.
Consejo
Al reducir el volumen al mínimo, aparecerá la
indicación “ATT” y se desactivará la frecuencia
de corte.
6 Pulse (MENU) dos veces.
Una vez completado el ajuste de efecto,
aparece el modo de reproducción normal.
30
Page 73

Ajuste del volumen de los
altavoces potenciadores
de graves
3 Pulse (ENTER).
1 Pulse (SOURCE) para seleccionar una
fuente (sintonizador, CD o MD).
2 Pulse (SOUND) varias veces hasta que
aparezca “SUB”.
3 Pulse < o , para ajustar el volumen.
Transcurridos tres segundos, el visor
volverá al modo de reproducción normal.
Consejo
Si pulsa (VOL) varias veces para ajustar el volumen
al mínimo, aparecerá “Sub ATT” y la frecuencia de
corte del altavoz potenciador de graves se
desactivará.
Ajuste de la frecuencia de los
altavoces potenciadores de graves
Con el fin de adaptarse a las características del
altavoz o altavoces potenciadores de graves
conectados, puede eliminar las señales de
frecuencia alta y media que no desee que
reciben dichos altavoces. Al ajustar la
frecuencia de corte (consulte el diagrama que
aparece a continuación), el altavoz o altavoces
potenciadores de graves sólo emitirán señales
de baja frecuencia de forma que pueda
obtenerse una imagen de sonido más nítida.
Frecuencia de corte
Nivel
4 Pulse < o , para seleccionar la
frecuencia de corte que desee.
La frecuencia de corte cambiará de la
siguiente forma en el visor:
62 y 78 y 99 y 125 y 157 y off
5 Pulse M o m para ajustar el volumen.
6 Pulse (MENU) dos veces.
Una vez completado el ajuste de frecuencia,
el visor vuelve a mostrar el modo de
reproducción normal.
Audición de cada fuente
de programa con su DSO
registrado
— Memoria de sonido fuente (SSM)
Cada vez que recupere la misma fuente, podrá
escuchar el mismo menú DSO y curva del
ecualizador registrados para esa fuente,
incluso después de cambiar la fuente de
programa o de apagar la unidad y encenderla
de nuevo.
Frecuencia (Hz)
1 Pulse (MENU).
2 Pulse (MENU) varias veces hasta que
aparezca “SUB LPF”.
31
Page 74

Otras funciones
La unidad también puede controlarse con un
mando rotativo (opcional).
Etiquetado del mando
rotativo
En función de cómo monte el mando rotativo,
adhiera la etiqueta adecuada como se muestra
en la siguiente ilustración.
Uso del mando rotativo
El mando rotativo funciona pulsando los
botones y/o girando los controles.
También es posible controlar una unidad
opcional de CD/MD con el mando rotativo.
Mediante la pulsación de los
botones SOURCE y MODE
(SOURCE)
(MODE)
MODE
SOUND
DSPL
SOUND
MODE
DSPL
Cada vez que pulse (SOURCE), la fuente
cambiará de la siguiente forma:
Sintonizador t CD t MD*
* Si el equipo opcional correspondiente no está
conectado, el elemento no aparecerá.
Al pulsar (MODE), el funcionamiento
cambiará de la siguiente forma:
• Sintonizador: FM1 t FM2 t FM3 t MW t
LW
• Unidad de CD: CD1 t CD2 t …
• Unidad de MD*: MD1 t MD2 t …
* Si el equipo opcional correspondiente no está
conectado, el elemento no aparecerá.
32
Page 75

Mediante el giro del control
SEEK/AMS
Otras operaciones
Gire el control VOL para
ajustar el volumen.
Pulse (ATT) para
atenuar el sonido.
OFF
Pulse (OFF) para
desactivar la
unidad.
Gire el control momentáneamente y
suéltelo para:
•Localizar un tema específico de un disco.
Gire y mantenga girado el control hasta
localizar el punto específico de un tema y,
a continuación, suéltelo para iniciar la
reproducción.
•Sintonizar emisoras automáticamente.
Gire el control y manténgalo así para
buscar una emisora específica.
Mediante la presión y giro del
control PRESET/DISC
Presione y gire el control para:
•Recibir emisoras memorizadas en los
botones numéricos.
•Cambiar el disco.
Pulse (SOUND) para
ajustar el menú de
sonido.
Pulse (DSPL) para mostrar los
nombres memorizados.
Consejo
Si el automóvil no dispone de posición ACC
(auxiliar) en el interruptor de la llave de
encendido, asegúrese de pulsar (OFF) durante dos
segundos para desactivar la indicación del reloj
después de apagar el motor.
33
Page 76

Cambio de la dirección de
funcionamiento
La dirección de funcionamiento de los
controles está ajustada de fábrica como se
muestra a continuación.
Para aumentar
Ajuste de las
características de sonido
(Sólo CDX-M600R)
Es posible ajustar los graves, los agudos, el
balance y el equilibrio entre altavoces.
Es posible almacenar los niveles de graves y
agudos de forma independiente para cada
fuente.
Para disminuir
Si es preciso instalar el mando rotativo en el
lado derecho de la columna de dirección,
puede invertir la dirección de funcionamiento.
Pulse (SOUND) durante dos segundos al
tiempo que presiona el control VOL.
Consejo
También es posible cambiar la dirección de
funcionamiento de estos controles con la unidad
(consulte “Cambio de los ajustes de sonido y
visualización” en la página 35).
1 Pulse (SOUND) varias veces para
seleccionar el elemento que desee
ajustar.
Cada vez que pulse (SOUND), los
elementos cambian de la siguiente forma:
BAS (graves) t TRE (agudos) t BAL
(izquierdo-derecho) t FAD (delantero-trasero)
2 Ajuste el elemento seleccionado con
< o ,.
Al realizar el ajuste con el mando rotativo,
pulse (SOUND) y gire el control VOL.
Nota
Realice el ajuste antes de tres segundos después de
seleccionar los elementos.
Atenuación del sonido
Pulse (ATT) en el mando a distancia de
tarjeta o en el mando rotativo.
“ATT on” aparece momentáneamente.
Para restaurar el nivel de volumen anterior,
vuelva a pulsar (ATT).
Consejo
Si el cable de interfaz de un teléfono para
automóvil está conectado al cable ATT, la unidad
disminuirá el volumen automáticamente cuando se
reciba una llamada telefónica (Función ATT de
teléfono).
34
Page 77

Cambio de los ajustes de
sonido y visualización
Es posible ajustar los siguientes elementos:
Set (Ajuste)
•Clock (Reloj) (página 9)
•CT (Hora del reloj) (página 23)
•Beep — que permite activar o desactivar los
pitidos.
•RM (Mando rotativo) — que permite cambiar
la dirección de funcionamiento de los
controles del mando rotativo.
— Seleccione “norm” para utilizar el mando
rotativo en la posición ajustada de
fábrica.
— Seleccione “rev” si monta el mando
rotativo en el lado derecho de la columna
de dirección.
•English/Spanish/Portuguese/Swedish —
que permite cambiar el idioma de las
indicaciones del visor a inglés, español,
portugués o sueco.
Dis (Visor)
•Dimmer (Atenuador) — que permite cambiar
el brillo del visor.
— Seleccione “Auto” para atenuar el brillo
del visor sólo al encender las luces.
— Seleccione “on” para atenuar el brillo del
visor.
— Seleccione “off” para desactivar el
Atenuador.
•Contrast — que permite ajustar el contraste si
las indicaciones del visor no son visibles
debido a la posición de instalación de la
unidad.
•D.Info (Información dual) – que permite
mostrar simultáneamente el reloj y el modo
de reproducción (on) o la información de
forma alternativa (off).
•M.Dspl (Desplazamiento de indicaciones) —
para activar o desactivar el modo de
desplazamiento de indicaciones por el visor.
•A.Scrl (Desplazamiento automático)*
(página 11)
1
Snd (Sonido)
•EQ Tune*2 (sintonización de ecualizador) —
que permite ajustar la frecuencia y el nivel de
volumen de la curva del ecualizador.
•Front HPF*2 (filtro de paso alto para la
presalida frontal) — que permite seleccionar
la frecuencia de corte de la presalida frontal.
•Rear HPF*2 (filtro de paso alto para la
presalida posterior) — que permite
seleccionar la frecuencia de corte de la
presalida posterior.
•SUB LPF (Filtro de paso bajo para la salida de
potenciación de graves)*2 — que permite
seleccionar la frecuencia de eliminación de
ruido de la salida de potenciación de graves.
1 Pulse (MENU).
2 Pulse M o m varias veces hasta que aparezca
el elemento que desee.
Cada vez que presione m, el elemento
cambiará de la siguiente forma:
Ejemplo
Clock t CT t Beep t RM t English/
Spanish/Portuguese/Swedish t D.Info t SA
t Dimmer t Contrast t M.Dspl t A.Scrl*
t EQ tune*2 t Front HPF*2 t Rear HPF*2 t
2
SUB LPF*
*1Este elemento no aparecerá cuando no haya
ningún CD o MD en reproducción.
*2Sólo CDX-M700R
Nota
El elemento mostrado variará en función de la
fuente.
Consejo
Es posible cambiar fácilmente las categorías
(“Set”, “Snd”, “P/M” (modo de reproducción) y
“Dis”) pulsando M o m durante dos segundos.
1
3 Pulse , para seleccionar el elemento
que desee (Ejemplo: on u off) o pulse
< o , varias veces para seleccionar la
frecuencia (Ejemplo: off, 78 Hz o 125 Hz).
Con respecto al ajuste “Contrast”, al pulsar
, el contraste aumenta, mientras que al
pulsar < disminuye.
4 Pulse (ENTER).
Una vez finalizado el ajuste de modo, el
visor vuelve al modo de reproducción
normal.
35
Page 78

Refuerzo de los graves
— D-bass (Sólo CDX-M600R)
Selección del analizador
de espectros
Es posible disfrutar de graves intensos y
nítidos.
La función D-bass refuerza las señales de baja
y alta frecuencia con una curva más marcada
que la del refuerzo de graves convencional.
Es posible escuchar la línea de graves con
mayor nitidez mientras el volumen del sonido
vocal se mantiene al mismo nivel. Puede
potenciar y ajustar los graves fácilmente con el
botón D-BASS.
D-BASS 3
Nivel
0dB
D-BASS 2
D-BASS 1
Frecuencia (Hz)
D-BASS 3
D-BASS 2
D-BASS 1
Ajuste de la curva de graves
Pulse (D-BASS) varias veces para
seleccionar la curva de graves deseada.
Al aumentar el número D-BASS, también lo
hará el efecto.
D-BASS 1 t D-BASS 2 t D-BASS 3 t D-BASS off
Nota
Los graves pueden distorsionarse con el mismo
volumen. Si esto ocurre, seleccione una curva de
graves menos efectiva.
El nivel de señal de sonido se visualiza en un
analizador de espectros. Es posible seleccionar
un patrón de visualización, de 1 a 6, o el modo
de visualización automático.
1 Pulse (SOURCE) para seleccionar una
fuente (sintonizador, CD o MD).
2 Pulse (MENU).
3 Pulse M o m varias veces hasta que
aparezca “SA”.
4 Pulse < o , varias veces para
seleccionar el ajuste deseado.
B SA 1bB … SA 6 b
B SA Auto* bB SA off b
* Todos estos patrones de visualización
aparecerán uno por uno automáticamente.
5 Pulse (ENTER).
36
Page 79

Ajuste del sonido y la
frecuencia del
preamplificador
ecualizador
(Sólo CDX-M600R)
Esta unidad también puede controlar un
preamplificador ecualizador opcional.
De esta forma, podrá añadir ciertos efectos al
campo de sonido de la fuente actualmente
seleccionada.
Para más información, consulte el manual de
instrucciones suministrado con el
preamplificador ecualizador.
Información
complementaria
Mantenimiento
Sustitución del fusible
Al sustituir el fusible, asegúrese de utilizar uno
con el mismo amperaje que el original. Si éste
se funde, compruebe la conexión de
alimentación y sustitúyalo. Si una vez
sustituido vuelve a fundirse, es posible que
exista un funcionamiento defectuoso interno.
En este caso, póngase en contacto con el
proveedor Sony más próximo.
Fuse (10 A)
Advertencia
No utilice nunca un fusible de amperaje
superior al del suministrado con la unidad, ya
que ésta podría dañarse.
37
Page 80

Sustitución de la pila de litio
Cuando la pila dispone de poca energía, el
alcance del mando a distancia inalámbrico se
reduce. Sustituya la pila por una nueva de litio
CR2025.
x
Lado + hacia arriba
Desmontaje de la unidad
Con el panel frontal abierto
1 Pulse (OPEN) en la unidad y, a
continuación, presione el clip del interior
de la cubierta frontal con un
destornillador fino, y haga palanca
cuidadosamente para liberar dicha
cubierta.
2 Repita el paso 1 en el lado izquierdo.
La cubierta frontal podrá extraerse.
Notas sobre la pila de litio
•Mantenga la pila de litio fuera del alcance de
los niños. Si la pila se ingiere, póngase en
contacto inmediatamente con un médico.
•Limpie la pila con un paño seco para
garantizar un contacto óptimo.
•Asegúrese de observar la polaridad correcta
cuando instale la pila.
•No agarre la pila con pinzas metálicas, ya
que si lo hace puede producirse un
cortocircuito.
ADVERTENCIA
La pila puede explotar si no se emplea
adecuadamente.
No recargue la pila; tampoco la desmonte ni
la arroje al fuego.
38
3 Emplee un destornillador fino para
ejercer presión sobre el clip de la parte
izquierda de la unidad; a continuación,
tire del lado izquierdo de la unidad hasta
que el enganche salga del marco.
4 Repita el paso 3 en el lado derecho.
5 Saque la unidad del marco.
Page 81

Si el panel frontal no se abre
debido a que el fusible se ha
fundido
1 Presione el clip del interior de la cubierta
frontal con la llave de liberación
(suministrada), y libere dicha cubierta.
Llave de liberación
(suministrada)
2 Repita el paso 1 en el lado izquierdo.
La cubierta frontal podrá extraerse.
3 Utilice la llave de liberación para ejercer
presión sobre el clip del lado izquierdo
de la unidad, y después tire de dicho
lado hasta que el retén libere la fijación.
4 Repita el paso 3 en el lado derecho.
5 Saque la unidad del marco.
39
Page 82

Especificaciones
Sección del reproductor de CD
Relación señal-ruido 90 dB
Respuesta de frecuencia 10 – 20.000 Hz
Fluctuación y trémolo Inferior al límite medible
Sección del sintonizador
FM
Gama de sintonización 87,5 – 108,0 MHz
Terminal de antena Conector de antena externa
Frecuencia intermedia 10,7 MHz/450 kHz
Sensibilidad utilizable 8 dBf
Selectividad 75 dB a 400 kHz
Relación señal-ruido 66 dB (estéreo),
Distorsión armónica a 1 kHz
Separación 35 dB a 1 kHz
Respuesta de frecuencia 30 – 15.000 Hz
72 dB (mono)
0,6 % (estéreo),
0,3 % (mono)
MW/LW
Gama de sintonización MW: 531 – 1.602 kHz
Terminal de antena Conector de antena externa
Frecuencia intermedia 10,7 MHz/450 kHz
Sensibilidad MW: 30 µV
LW: 153 – 279 kHz
LW: 40 µV
Sección del amplificador de
potencia
Salidas Salidas de altavoz
Impedancia de altavoz 4 – 8 ohmios
Salida máxima de potencia
50 W × 4 (a 4 ohmios)
General
Salidas Salidas de audio*
Entradas Cable de control de
Controles de tono Graves ±9 dB a 100 Hz
(Sólo CDX-M600R) Agudos ±9 dB a 10 kHz
Requisitos de alimentación
Dimensiones Aprox. 178 × 50 × 182 mm
Dimensiones de montaje Aprox. 182 × 53 × 163 mm
Masa Aprox. 1,5 kg
Accesorios suministrados
Accesorios opcionales Mando rotativo RM-X4S
Equipo opcional Cambiador de CD
*1Equipado con salidas frontal, posterior y
secundaria:
Sólo CDX-M700R
Equipado con salidas frontal y posterior:
Sólo CDX-M600R
2
Sólo CDX-M600R
*
Cable de control de relé de
antena motorizada
Cable de control de
amplificador de potencia
atenuación para teléfono
Cable de control de
iluminación
Batería de automóvil de
12 V CC (toma a tierra
negativa)
(an/al/prf)
(an/al/prf)
Mando a distancia
inalámbrico
RM-X95 (Sólo
CDX-M700R)
RM-X96 (Sólo
CDX-M600R)
Componentes para
instalación y conexiones
(1 juego)
Cable BUS (suministrado
con un cable de pines RCA)
RC-61 (1 m), RC-62 (2 m)
Adaptador para discos
compactos “single” CSA-8
(10 discos)
CDX-828, CDX-737
Cambiador de MD
(6 discos)
MDX-65
Otras unidades de CD/MD
con el sistema BUS de Sony
Selector de fuente
XA-C30
Sintonizador DAB
XT-100DAB
Preamplificador
ecualizador digital*
XDP-210EQ, DXP-4000X
1
2
40
Diseño y especificaciones sujetos a cambios sin
previo aviso.
Page 83

Guía de solución de problemas
La siguiente lista de comprobaciones resulta útil para solucionar los problemas que puedan
producirse al utilizar la unidad.
Antes de consultar la lista que aparece a continuación, compruebe los procedimientos de conexión
y funcionamiento.
Generales
Problema
Ausencia de sonido.
Se ha borrado el contenido de
la memoria.
Ausencia de pitidos.
El sonido se oye con ruido.
Reproducción de CD/MD
Problema
No es posible insertar un disco.
La reproducción no se inicia.
El disco se expulsa
automáticamente.
El CD no se expulsa.
Los botones de funcionamiento
no se activan.
El sonido se omite debido a
vibraciones.
Se producen saltos de sonido.
No es posible desactivar la
indicación “--------”.
Causa/Solución
•Cancele la función ATT.
•Ajuste el control de equilibrio en la posición central para
sistema de dos altavoces.
•Pulse (+) de los botones VOL para ajustar el volumen.
•Ha desconectado el cable de alimentación o la batería.
•Ha pulsado el botón de restauración.
t Vuelva a realizar el almacenamiento en la memoria.
Se han desactivado los pitidos (página 35).
Está utilizando un teléfono móvil.
Causa/Solución
•Ya hay un CD insertado.
•Ha insertado el CD a la fuerza o al revés en el sentido
incorrecto.
MD defectuoso o CD sucio.
La temperatura ambiental es superior a 50°C.
Ha cerrado el panel frontal o introducido el disco en la unidad
a la fuerza mientras ésta lo expulsaba después de pulsar Z.
t Pulse el botón de restauración.
Pulse el botón de restauración.
•Ha instalado la unidad en un ángulo superior a los 60°.
•No ha instalado la unidad en una parte segura del automóvil.
Un disco está sucio o es defectuoso.
No es posible asignar títulos a los discos compactos, a menos
que conecte una unidad de CD con función de archivo
personalizado.
t Pulse (LIST) durante dos segundos.
41
Page 84

Recepción de radio
Problema
No es posible realizar la
sintonización de programación.
No es posible recibir las
emisoras.
Los ruidos obstaculizan el
sonido.
No es posible realizar la
sintonización automática.
La indicación “ST” parpadea.
Funciones RDS
Problema
La búsqueda se inicia después
de unos segundos de escucha.
Ausencia de anuncios de tráfico.
PTY muestra “None”.
Funciones DSP
Problema
No se oye el sonido, o éste es
demasiado bajo.
Causa/Solución
•Almacene la frecuencia correcta en la memoria.
•La emisión es demasiado débil.
Conecte un cable de control de antena motorizada (azul) o un
cable de fuente de alimentación auxiliar (rojo) al cable de
fuente de alimentación del amplificador de antena del
automóvil. (Sólo si el automóvil incorpora una antena de
recepción de FM/MW/LW en el cristal posterior/lateral.)
La emisión es demasiado débil.
t Utilice la sintonización manual.
•Sintonice la frecuencia con precisión.
•La emisión es demasiado débil.
t Realice el ajuste en el modo monofónico Mono
(página 17).
Causa/Solución
La emisora no es TP o se trata de una señal débil.
t Pulse (AF/TA) para seleccionar “AF TA off”.
•Active “TA”.
•La emisora no emite anuncios de tráfico a pesar de ser TP.
t Sintonice otra emisora.
La emisora no especifica el tipo de programa.
Causa/Solución
El volumen de los altavoces puede haberse reducido
automáticamente con el fin de potenciar el efecto del ajuste de
posición de audición.
t Pulse < o , para ajustar el balance.
El balance de los altavoces puede ajustarse por separado
para los modos DSP activado y desactivado (página 29).
42
Page 85

Indicaciones de error (cuando se ha conectado una unidad de CD/MD opcional)
Las siguientes indicaciones parpadearán durante cinco segundos aproximadamente y se oirá una
alarma.
Indicación
NO Mag
NO Disc
NG Discs
Error
Blank
PushReset
Not Ready
High Temp
*1Si se produce un error durante la reproducción de un CD o de un MD, el número del CD o del MD no
aparecerá en el visor.
*2 El visor mostrará el número del disco que causa el error.
Causa
No ha insertado el cargador de discos
en la unidad de CD/MD.
No ha insertado ningún disco en la
unidad de CD/MD.
Un CD/MD no puede reproducirse
debido a algún problema (CD sucio,
MD defectuoso, etc.).
Un CD está sucio o insertado al
2
revés.*
1
*
Un MD no se reproduce debido a
algún problema.*
1
No ha grabado ningún tema en el
*
2
MD.*
No es posible emplear la unidad de
CD/MD debido a algún problema.
La tapa de la unidad de MD está
abierta o los minidiscos no están
insertados correctamente.
La temperatura ambiente es superior a
50°C.
2
Solución
Inserte el cargador en la unidad de
CD/MD.
Inserte discos en la unidad de CD/
MD.
Inserte otro CD/MD.
Limpie el CD o insértelo
correctamente.
Inserte otro MD.
Reproduzca un MD con temas
grabados.
Pulse el botón de restauración de la
unidad.
Cierre la tapa o inserte los MD
correctamente.
Espera hasta que la temperatura
descienda por debajo de 50°C.
Si el problema no se soluciona con las sugerencias anteriormente enumeradas, póngase en contacto
con el proveedor Sony más próximo.
43
Page 86

Välkommen !
Tack för att du visade oss förtroendet att köpa
denna CD-spelare från Sony. Med den här
enheten får du tillgång till ett flertal funktioner
med följande tillbehör:
Medföljande tillbehör
Kortfjärrkontroll
RM-X95 (för CDX-M700R)
RM-X96 (för CDX-M600R)
Tillval
Vridkontroll RM-X4S
Förutom att spela upp CD-skivor och lyssna på
radio kan du bygga ut systemet genom att
ansluta ytterligare CD/MD-enheter*1.
När du använder den här enheten, eller ett
anslutet tillbehör som t.ex. en CD-enhet som
har funktioner för CD TEXT, visas CD TEXTinformationen i teckenfönstret när du spelar
upp en CD TEXT-skiva*2.
*1Du kan ansluta CD-växlare, MD-växlare, CD-
spelare eller MD-spelare.
*2CD TEXT-skivor är ljud-CD-skivor som innehåller
information om t.ex. skivans och/eller artistens
namn och namn på spåren.
Den här informationen finns inspelad på skivan.
Säkerhetsföreskrifter
CLASS
Den här etiketten finner du på undersidan av
enhetens chassi.
CAUTION INVISIBLE
VIEW DIRECTLY WITH OPTICAL INSTRUMENTS
Den här etiketten finner du på enhetens
interna chassi.
•Om du har parkerat bilen i direkt solljus så
att temperaturen i bilen har stigit markant,
bör du låta CD-spelaren svalna innan du
använder den.
•Kontrollera anslutningarna först om ingen
ström tillförs enheten. Kontrollera säkringen
om allt i övrigt är i sin ordning.
•Om bilen har en motorantenn, fälls den
automatiskt ut när enheten är påslagen.
Om du har några frågor eller problem som rör
CD-spelaren och som inte tas upp i
bruksanvisningen, tar du kontakt med din
närmaste Sony-återförsäljare.
1
PRODUCTLASER
LASER RADIATIONWHEN OPEN
DO NOT STARE INTO BEAM OR
Fuktbildning
Regniga dagar, eller i fuktiga miljöer, kan det
hända att det bildas kondens på linserna inne i
spelaren. Då fungerar inte enheten på rätt sätt.
Ta i så fall ut skivan och vänta någon timme så
att fukten hinner avdunsta.
2
Page 87

Hantera CD-skivor
Om en skiva är smutsig eller skadad kan det
leda till avbrott i ljudet under uppspelningen.
För att du ska få ut så mycket som möjligt av
skivorna rekommenderas du att följa
nedanstående råd.
Håll CD-skivan i kanterna och undvik att
vidröra själva skivytan.
Fäst inte etiketter eller tejp på skivorna.
Om diskar
Om du använder diskar av det slag som
beskrivs nedan, kan limresterna göra så att
CD-skivan slutar rotera och du kan få
driftstörningar och skivorna förstörda.
Använd aldrig CD-skivor som du köpt eller
hyrt begagnade om de har limrester på ytan
(t.ex. från klistermärken eller etiketter) eller
rester av bläck eller lim som krypt fram längs
etikettkanterna.
Limrester.
Bläck som kan kladda
av sig.
Använd aldrig hyrda CD-skivor med gamla
etiketter som är på väg att lossna.
Etiketter som är på väg att
lossna och efterlämnar
kladdiga rester.
Utsätt inte CD-skivor för direkt solljus eller
värmekällor, t ex varmluftsutblås. Lämna dem
inte heller i en bil som står parkerad i solen,
eftersom temperaturen inne i bilen kan bli
mycket hög.
Rengör skivan med en mjuk rengöringsduk
(tillval) innan du spelar den första gången.
Torka skivan från mitten och ut.
Använd inte rengöringsmedel, t ex bensin,
thinner eller andra lösningsmedel, eller
antistatspray som är avsedd för LP-skivor.
Använd inte CD-skivor med klistermärken
eller etiketter.
Etiketter som fästs på
skivan.
När du spelar en 8 cm CD
Använd Sonys CD-singel-adapter CSA-8 (finns
som extra tillbehör) för att skydda CDspelaren.
Om CD-R-skivor
•Du kan i princip spela CD-R-skivor
(inspelningsbara CD-skivor) på den här
spelaren, men ibland lyckas det inte,
beroende på hur CD-R-skivan spelats in och i
vilket skick den befinner sig.
•Du kan inte spela upp CD-R-skivor som inte
är stängda, dvs. där
inspelningsmöjligheterna fortfarande är
öppna. (Skivorna måste vara stängda med
hjälp av inspelningsprogrammet innan de
kan spelas upp på en spelare för CDljudskivor).
•Du kan inte spela upp CD-RW-skivor
(återskrivbara CD-skivor) på den här
spelaren.
3
Page 88

Innehållsförteckning
Reglagens placering ................................................ 6
Komma igång
Återställa enheten ............................................... 8
Frigöra säkerhetsspärren ................................... 8
Slå på/stänga av enheten .................................. 8
Använda menyn .................................................. 9
Ställa klockan ....................................................... 9
CD-spelare
CD/MD-enhet (tillval)
Lyssna på en CD-skiva
(endast med den här enheten) ................... 10
Spela upp spår flera gånger
— Upprepad uppspelning ......................... 12
Spela upp spår i slumpmässig ordning
— Slumpmässig uppspelning .................... 12
Namnge en CD-skiva
— Skivminne (CD-spelare med funktion
för anpassad fil) ........................................... 13
Hitta en CD-skiva efter namn
— Lista namn (CD-spelare med funktion
för anpassad fil eller MD-spelare) ............. 14
Välja spår för uppspelning
— Bank (CD-spelare med funktion för
anpassad fil).................................................. 15
Radio
Lagra kanaler automatiskt
— BTM-funktionen...................................... 16
Lagra endast de önskade kanalerna ............... 16
Motta de lagrade kanalerna ............................. 17
RDS
Översikt av RDS-funktionen ........................... 18
Visa kanalnamnet.............................................. 18
Ställa in samma program automatiskt
— Alternativa frekvenser (AF) .................. 18
Lyssna på trafikmeddelanden ......................... 20
Förinställa RDS-kanalerna med
AF och TA data ............................................ 21
Söka en kanal efter programtyp ..................... 22
Ställa klockan automatiskt ............................... 23
DAB
DAB - Översikt .................................................. 23
Grundläggande DAB-funktioner .................... 24
Förinställa DAB-tjänster automatiskt
— BTM .......................................................... 25
Förinställa DAB-tjänster manuellt
— Manual Preset Memory -
manuellt förinställningsminne .................. 25
Lyssna på ett DAB-program ............................ 26
Inställningar för ljudmottagning .................... 27
Söka efter en DAB-tjänst med hjälp av
programtypen (PTY) ................................... 27
DSP (Endast CDX-M700R)
Ställa in equalizern ........................................... 28
Välja lyssningsposition .................................... 29
Välja ljudbildsmeny
— DSO (Dynamic Soundstage
Organizer) ..................................................... 29
Ställa in balansen (BAL) ................................... 30
Ställa in balansen mellan främre och bakre
högtalare ....................................................... 30
Ställa in volymen för subwoofern/
subwoofrarna ............................................... 31
Lyssna på de olika programmen i det valda
DSO-läget
— SSM (Source Sound Memory) ............... 31
Övriga funktioner
Fästa etiketten på vridkontrollen .................... 32
Använda vridkontrollen .................................. 32
Ljudjustering (Endast CDX-M600R) .............. 34
Snabbdämpa ljudet ........................................... 34
Ändra ljud- och
teckenfönsterinställningar .......................... 35
Höja basljudet
— D-bass (Endast CDX-M600R) ................ 36
Välja spektrumanalysator ................................ 36
Justera ljudet och frekvensen på
equaliserförförstärkaren
(Endast CDX-M600R) .................................. 37
Ytterligare information
Underhåll ........................................................... 37
Demontera enheten........................................... 38
Tekniska data ..................................................... 40
Felsökning .......................................................... 41
4
Page 89

Reglagens placering
Kortfjärrkontroll
OFF
MENU LIST
SEEK
SOUND
PTY
DSPL AF/TA MODE
Mer information finns på de angivna sidorna.
1 OFF-knapp 8, 10
2 MENU-knapp 9, 11, 12, 13, 14, 15, 16,
17, 19, 21, 23, 25, 27, 28, 30, 31, 35, 36
3 SOURCE-knapp (TUNER/CD/MD) (knapp
för val av ljudkälla)
8, 10, 11, 14, 16, 17, 24, 28, 29, 30, 31, 36
4 </, SEEK/AMS –/+ knappar
9, 11, 12, 13, 15, 17, 19, 21, 23, 24, 25,
27, 28, 29, 30, 31, 34, 35, 36
Automatisk musiksökning (AMS)
(./>) 11
Manuell sökning (m/M) 11
Söka 17
5 SOUND-knapp 28, 29, 30, 31, 34
6 DSPL/PTY-knapp (ändring av
visningsläge/programtyp)
10, 11, 13, 22, 27
7 ATT (dämpning) knapp 34
8 CDX-M700R:
DSO (Dynamic Soundstage Organaizer)
knapp 29
CDX-M600R:
D-BASS-knapp 36
9 OPEN/CLOSE-knapp 10
q; LIST-knapp 13, 14, 26
OPEN/CLOSE
DSO
DISC
SEEK
SOURCE
DISC
ENTER
VOLATT
qa M/m (PRST/DISC –/+) knappar
9, 11, 12, 13, 14, 15, 16, 17, 19, 21, 22,
23, 24, 25, 26, 27, 28, 30, 31, 35, 36
Under uppspelning av CD/MD:
Skivbyte 11
Under radiomottagning :
Val av förinställda kanaler 17
qs ENTER-knapp 9, 13, 14, 15, 16, 17, 19,
21, 22, 23, 25, 26, 27, 28, 30, 31, 35, 36
qd AF/TA-knapp 18, 19, 20, 21
qf MODE-knapp 10, 14, 16, 17, 24
Under uppspelning av CD/MD:
Val av CD-/MD-enhet 10, 14
Under radiomottagning:
BAND-val 16, 17
qg VOL (volyminställning) knappar 20, 31
Om du har stängt av enheten genom att trycka
på (OFF) under två sekunder, kan du inte
längre manövrera den med hjälp av
kortfjärrkontrollen, om du inte först har tryck
på (SOURCE) på enheten eller aktiverat den
genom att sätta in en CD-skiva i den.
5
Page 90

Reglagens placering
Frontpanel
Reglagepanel
T
Y
P
P
S
L
OFF
D
SOURCE
M
E
O
D
REP SHUF
123456
MENU
SOUND
TAAF
DISC
DSO
DISC
LIST
ENTER
CLOSE
CDX-M700R/M600R
6
Page 91

Knapparna på fjärrkontrollen har samma
funktion som motsvarande knappar på
enheten.
17 Återställningsknapp 8
2 Huvudteckenfönster
3 OPEN-knapp 38
4qf Sensor för kortfjärrkontrollen
5 Volymknappar
6Z (utmatning) knapp 10
8 DSPL/PTY-knapp (ändring av
visningsläge/programtyp)
9 Sidoteckenfönster
q; MENU-knapp
qa DISC/PRST +/– (markör upp/ned)
knappar
SEEK/AMS –/+ (markör vänster/höger)
knappar 16
qs CDX-M700R:
DSO-knapp
CDX-M600R:
D-BASS-knapp
qd LIST-knapp
qg OFF-knapp*
qh MODE-knapp
qj SOURCE-knapp (TUNER/CD/MD) (knapp
för val av ljudkälla)
qk AF-knapp 18, 19, 21
ql Sifferknappar
Under radiomottagning:
Välja förinställningsnummer
16, 17, 19, 21, 26
Under CD/MD-uppspelning:
(1) REP 12
(2) SHUF 12
w; TA-knapp 19, 20, 21
wa SOUND-knapp
ws ENTER-knapp
wd CLOSE-knapp
* Var försiktig när du gör installationen
i en bil där tändningslåset saknar
tillbehörsläge (ACC)
Glöm inte att stänga av klockvisningen
när du har stängt av motorn. Du stänger
av den genom att trycka på (OFF) på
enheten under två sekunder.
Om du bara trycker på (OFF) ett kort
ögonblick slocknar inte klockans
teckenfönster, vilket leder till att batteriet
laddas ur.
7
Page 92

Komma igång
Återställa enheten
Innan du använder enheten för första gången
eller när du har bytt bilbatteri, måste du
återställa enheten.
Tryck på återställningsknappen med ett
spetsigt föremål, t.ex. en kulspetspenna.
Återställningsknapp
Observera
Genom att trycka på återställningsknappen
raderar du inställningarna för klockan samt vissa
funktioner som lagras i minnet.
Frigöra säkerhetsspärren
Om du har bytt batteri på bilen eller återställt
enheten av något annat skäl, måste du utföra
följande procedur innan du kan manövrera
den igen.
Om du inte gör dessa inställningar kommer
frontpanelen att förbli avaktiverad och du kan
inte manövrera enheten.
Slå på/stänga av enheten
Slå på enheten
Tryck på (SOURCE) eller sätt in en CD-skiva i
enheten. Mer information om hur du hanterar
enheten finns på sidan 10 (CD/MD) och sidan
16 (radio).
Stänga av enheten
Tryck på (OFF) när du vill stoppa CD- eller
MD-uppspelningen eller radiomottagningen
(tangentbelysningen och teckenfönstret stängs
inte av).
Tryck på (OFF) under två sekunder för att helt
stänga av enheten.
Observera
Om din bils tändningslås saknar tillbehörsläge
(ACC) bör du se till att du stänger av enheten
genom att tryck på (OFF) och hålla den intryckt
under två sekunder, så undviker du att bilbatteriet
laddas ur.
1 Tryck på återställningsknappen.
“Code in” visas.
2 Tryck på knapparna på
kortfjärrkontrollen och ange
säkerhetskoden.
Se bifogad information för mer information
om knapparna till säkerhetskoden.
När koden har bekräftats visas klockan i
teckenfönstret och du kan manövrera
enheten som normalt.
Observera
• Ta med dig kortfjärrkontrollen när du lämnar
bilen.
• Om du glömmer bort säkerhetskoden kontaktar
du närmaste Sony-service. Ta med dig
kortfjärrkontrollen.
8
Page 93

Använda menyn
Du kontrollerar den här enheten med hjälp av
alternativ som du väljer från en meny.
Den här spelaren kontrollerar du genom att
välja alternativ från olika menyer.
För att göra en inställning eller ett val växlar
du först över till menyläget och väljer
alternativ med hjälp av M/m (uppåt/nedåt)
eller </, (vänster/höger).
M/m
DISC
SEEK SEEK
SOURCE
M: flytta uppåt
2 Ställ in timmarna genom att trycka på
M eller m.
3 Tryck på ,.
Siffrorna för minuter blinkar.
4 Ställ in minuterna genom att trycka
på M eller m.
DISC
m: flytta nedåt
</,
DISC
<:
flytta åt
vänster
SEEK SEEK
SOURCE
DISC
,:
flytta åt
höger
Ställa klockan
Klockan visar en 24-timmars digital
tidsangivelse.
Exempel: Ställ klockan på 10:08
1 Tryck på (MENU) och sedan på M eller m
flera gånger tills “Clock” visas.
1 Tryck på (ENTER).
2 Tryck på (ENTER).
Klockan aktiveras.
Tips!
Du kan ställa klockan automatiskt med RDSfunktionen (sidan 22).
Observera
Som standardinställning gäller att klockindikatorn
visas medan enheten är avstängd.
När D.Info-läget är ställt på “on”, visas alltid tiden
(utom för vissa funktioner i SA-läge) (sidan 35).
Siffrorna för timmar blinkar.
9
Page 94

CD-spelare
CD/MD-enhet (tillval)
Förutom att spela upp CD-skivor på enbart
den här enheten, kan du kontrollera extra
anslutna CD/MD-enheter.
Om du ansluter en CD-enhet med CD TEXTfunktioner visas CD TEXT-informationen i
teckenfönstret när du spelar upp CD TEXTskivor.
Lyssna på en CD-skiva
(endast med den här enheten)
Efter det att det sista spåret på CDskivan spelats upp
Spårnumret i teckenfönstret återgår till ”1“,
varefter skivspelningen fortsätter från CDskivans första spår.
För att Tryck på
Avbryta uppspelningen (OFF)
Ta ur CD-skivan (OPEN/CLOSE)
sedan Z
Spela en CD eller MD
(med valfri CD-/MD-enhet)
1 Tryck på (SOURCE) flera gånger för att
välja “CD” eller “MD”.
1 Tryck på (OPEN/CLOSE) på
kortfjärrkontrollen och sätt in CD-skivan.
Uppspelningen startas automatiskt.
Sidan med etiketten vänd uppåt
2 Stäng frontpanelen genom att trycka på
(OPEN/CLOSE) på kortfjärrkontrollen.
Om du redan satt i en CD-skiva startar du
uppspelningen genom att trycka på (SOURCE)
flera gånger tills “CD” visas.
CD-indikatorn
Förfluten speltidSpårnummer
Observera
Om du vill spela upp en 8 cm CD-skiva, använder
du Sony CD-adaptern (CSA-8) (medföljer inte).
2 Tryck på (MODE) tills önskad spelare
visas.
CD-/MD-uppspelningen börjar.
Alla skivor i den aktuella CD-/MD-enheten
spelas upp från den översta.
Ändra de visade alternativen
Varje gång du trycker på (DSPL/PTY) under
uppspelning av CD-, CD TEXT skivor- eller
MD, ändras alternativet enligt:
Skivnummer*1/Spårnummer/
Förfluten uppspelningstid
Skivnamn*
*1När en valfri CD-/MD-enhet är ansluten.
2
Om du inte har gett CD- eller CD TEXT-skivan ett
*
namn (se “Namnge en CD-skiva”, på sidan 13),
eller om det inte finns något förinspelat namn
på MD-skivan, visas “NO D.Name” i
teckenfönstret.
3
När du spelar upp en CD TEXT-skiva visas
*
artistens namn i textfönstret efter namnet på
skivan. (Gäller bara CD TEXT-skivor där
artistnamnet finns inspelat.)
4
Om spårnamnet på en CD TEXT-skiva eller MD-
*
skiva inte är förinspelat visas “NO T.Name” i
teckenfönstret.
5
När funktionen AF/TA är aktiverad.
*
V
V
2
/Artistnamn*
V
Spårnamn*
V
FM1 Frekvens*
3
4
5
10
Page 95

Efter att du valt det önskade alternativet
kommer teckenfönstret att automatiskt ändras
till Motion Display-läget efter några sekunder.
I det rörliga visningsläget (Motion Display)
rullas alla ovan nämnda val ett efter ett fram i
teckenfönstret.
Observera
Om du har angett egna etiketter har de högre
prioritet än den ursprungliga CD TEXTinformationen, när sådan information visas.
Tips!
Du kan avaktivera Motion Display-funktionen. (Se
“Ändra ljud- och teckeninställningarna” på sidan
35.)
Visa hela skivnamnet automatiskt
— Automatisk bläddring
Om namnen på artisten, skivan eller spåret på
en MD- eller CD TEXT-skiva är längre än 10
tecken, och den automatiska
rullningsfunktionen (Auto Scroll) är aktiverad,
rullas informationen förbi i teckenfönstret
enligt följande:
• Skivnamnet visas när du har bytt skiva (om du
har valt att skivnamn ska visas).
• Spårnamnet visas när du har bytt spår (om du
valt att det är spårnamnet som ska visas).
• När du trycker på (SOURCE) för att välja en MD-
eller CD TEXT-skiva visas skiv- eller spårnamnet
beroende på inställningen.
Om du trycker på (DSPL/PTY) för att ändra
visningen, rullas CD TEXT- eller MD-skivans
skiv-eller spårnamn automatiskt oavsett om
funktionen är aktiv eller inte.
1 Tryck på (MENU) under uppspelning.
Hitta ett visst spår
— AMS-funktionen
Under uppspelning trycker du ett kort
ögonblick på < eller , för varje spår
som du vill hoppa förbi.
< (.) :
Hitta
föregående
spår
DISC
SEEK SEEK
SOURCE
DISC
, (>) :
Hitta
efterföljande
spår
Söka en viss del av ett spår
— Manuell sökning
UNder uppspelning trycker du ned
< eller , och håller den nedtryckt.
Släpp den när du funnit önskad punkt.
< (m) :
Söka
bakåt
Observera
Om “
teckenfönstret har du nått början eller slutet på
skivan och kan inte komma längre.
DISC
SEEK SEEK
SOURCE
DISC
” eller “ ” visas i
, (M) :
framåt
Söka
Hitta en skiva
— Val av skiva
När du har anslutit en extra CD/MDenhet trycker du på M eller m för av välja
skiva.
M (DISC +) : För efterföljande skivor
2 Tryck på M eller m flera gånger tills
“A.Scrl” visas.
3 Välj “A.Scrl on” genom att trycka på ,.
4 Tryck på (ENTER).
Om du vill avbryta den automatiska
rullningen väljer du “A.Scrl off” i steg 3.
Observera
För vissa CD TEXT-skivor med extremt många
tecken kan följande inträffa:
— Alla tecken visas inte.
— Den automatiska bläddringsfunktionen
fungerar inte.
DISC
SEEK SEEK
SOURCE
DISC
m (DISC –) : För föregående skivor
Uppspelningen börjar med önskad skiva i
den extra CD-/MD-enheten.
11
Page 96

Spela upp spår flera
gånger — Upprepad uppspelning
CD-skivan i huvudenheten kommer
automatiskt att spelas upp igen sedan den har
nått slutet. För upprepad uppspelning kan du
välja:
•Repeat 1 — när du vill upprepa spåret.
•Repeat 2 — för att upprepa en skiva i den
extra CD-/MD-enheten.
1 Tryck på (MENU) under uppspelning.
2 Tryck på M eller m flera gånger tills
“Repeat” visas.
3 Tryck på , flera gånger tills önskad
inställning visas i teckenfönstret.
B Repeat 1 B Repeat 2*
Repeat off b
* “Repeat 2” är bara tillgängligt när du har
anslutit en eller flera extra CD-enheter eller
om du har anslutit extra MD-enheter.
Upprepad spelning startar.
Spela upp spår i
slumpmässig ordning
— Slumpmässig uppspelning
Du kan välja:
•Shuf 1 — när du vill spela upp spåren på
aktuell skiva i slumpmässig ordning.
•Shuf 2 — spelar upp alla spår i den aktuella
CD-/MD-enheten i slumpvis ordning.
•Shuf All — spelar upp alla spår i den extra
CD-/MD-enheten i slumpvis ordning.
1 Tryck på (MENU) under uppspelning.
2 Tryck på M eller m flera gånger tills
“Shuf” visas.
3 Tryck på , flera gånger tills önskad
inställning visas i teckenfönstret.
B Shuf 1 B Shuf 2* B Shuf All*
Shuf off b
* “Shuf 2” och “Shuf All” är bara tillgängligt
när du har anslutit en eller flera extra CDenheter eller om du har anslutit extra MDenheter.
När du vill återgå till normalt
uppspelningsläge trycker du på “Repeat off” i
steg 3.
Tips!
Om du väljer läge med hjälp av knapparna på
enheten trycker du på (1) (REP) flera gånger tills
önskat läge visas.
12
Slumpmässig uppspelning startar.
När du vill återgå till normalt
uppspelningsläge trycker du på “Shuf off” i
steg 3.
Tips!
Om du väljer läge med hjälp av knapparna på
enheten trycker du på (2) (SHUF) flera gånger tills
önskat läge visas.
Page 97

Namnge en CD-skiva
— Skivminne
(CD-spelare med funktion för anpassad fil)
Du kan namnge en CD-skiva med ett
personligt namn. Du kan använda upp till 8
tecken per skiva. Om du namnger en CDskiva, kan du söka en skiva efter namn (sidan
14) och välja spår för uppspelning (sidan 15).
1 Starta uppspelningen av den skiva som
du vill namnge.
2 Tryck på (MENU) och sedan på M eller m
flera gånger tills “Name Edit” visas.
Tips!
• Du kan radera eller ändra ett namn genom att
mata in ett “ ” (understreck) för varje tecken.
• Det finns ytterligare ett sätt att starta
namngivningen av en CD-skiva. Tryck på (LIST)
under två sekunder i stället för att utföra steg 2
och 3. Du kan också slutföra operationen genom
att trycka på (LIST) under två sekunder i stället
för att utföra steg 5.
Visa skivminne
Tryck på (DSPL/PTY) under CD eller CD
TEXT uppspelningen.
3 Tryck på (ENTER).
Namnredigeringsläge
4 Mata in tecknen.
1 Välj tecken genom att trycka på M
flera gånger.
(A t B t C t ··· Z t 0 t 1 t 2 t
··· 9 t + t – t * t / t \ t > t <
t . t )
Om du trycker på m flera gånger visas
tecknen i omvänd ordning.
Om du vill göra mellanslag efter ett
tecken, väljer du “ ”
2 Tryck på , sedan du har hittat
önskat tecken.
Nästa tecken blinkar.
Varje gång du trycker på (DSPL/PTY) under
CD eller CD TEXT uppspelning ändras
informationen i teckenfönstret på följande
sätt:
V
1
Skivnummer*
Förfluten uppspelningstid
*1När en extra CD-enhet är ansluten.
2
*
Om du ansluter en valfri CD- spelare med CD
TEXT-funktionen visas CD TEXTinformationen i teckenfönstret när du spelar
upp en CD TEXT-skiva.
3
När funktionen AF/TA är aktiverad.
*
/Spårnummer/
V
Skivminne
V
Spårnamn*
V
FM1 Frekvens*
2
3
Föregående tecken blinkar om du
trycker på <.
3 Upprepa steg 1 och 2 när du anger
namnet.
5 Om du vill återgå till normal CD-
uppspelning trycker du på (ENTER).
13
Page 98

Radera skivminne
1 Tryck på (SOURCE) flera gånger för att
välja “CD”.
2 Välj CD-enheten med funktionen för
anpassad fil genom att trycka flera
gånger på (MODE).
3 Tryck på (MENU) och sedan på M eller m
flera gånger tills “Name Del” visas.
4 Tryck på (ENTER).
5 Tryck på M eller m flera gånger för att
markera namnet på den skiva vars namn
du tänker radera.
Hitta en CD-skiva efter
namn — Lista namn (CD-spelare med
funktion för anpassad fil eller MD-spelare)
Den här funktionen kan utföras när skivorna
har fått ett anpassat namn. Mer information
om hur du anger skivminnen finns i “Namnge
en CD-skiva” (sidan 13).
1 Tryck på (LIST).
Namnet på den skivan som spelas upp
visas i teckenfönstret.
6 Tryck på (ENTER) i två sekunder.
Namnet raderas.
Upprepa steg 5 och 6 om så behövs.
7 Tryck på (MENU) två gånger.
Enheten återgår till normalt CDuppspelningsläge.
Observera
När skivnamnet raderas visas den ursprungliga CD
TEXT-informationen i teckenfönstret.
När du själv har namngett en CD TEXTskiva får namnet som du har angett högre
prioritet än den ursprungliga CD TEXTinformationen.
2 Tryck på M (DISC +) eller m (DISC –) flera
gånger tills du hittat skivan.
3 Tryck på (ENTER) för att spela skivan.
Observera
• Spårnamnen kan inte visas under uppspelning av
CD TEXT-eller MD-skivor.
• Om det inte finns några skivor i magasinet visas
“NO Disc” i teckenfönstret.
• Om en skiva inte har getts ett anpassat namn
visas “********” i teckenfönstret.
• Vissa bokstäver kan inte visas under uppspelning
av CD TEXT- eller MD-skivor.
14
Page 99

Välja spår för uppspelning
— Bank
(CD-spelare med funktion för anpassad fil)
Om du gett skivan ett namn kan du ställa in
enheten så att den hoppar över eller spelar upp
de spår du vill.
1 Börja spela upp den skiva du vill
namnge.
2 Tryck på (MENU) och sedan på M eller m
flera gånger tills “Bank Sel” visas.
3 Tryck på (ENTER).
Bankredigeringsläge
4 Namnge spår
1 Markera spåret som du tänker namnge
genom att trycka på < eller , flera
gånger.
2 Tryck på (ENTER) flera gånger för att
välja “Play”.
Spela endast vissa spår
Du kan välja:
•“Bank on” — för att spela upp de spår som är
märkta med “Play”.
•“Bank inv” (inverterat) — för att spela upp
de spår som är märkta med “Skip”.
1 Under uppspelning trycker du på (MENU)
och sedan flera gånger på M eller m tills
“Bank” visas.
2 Tryck på , flera gånger tills önskad
inställning visas.
B Bank on B Bank inv
Bank off b
3 Tryck på (ENTER).
Uppspelningen startar från nästföljande
spår.
Om du vill återgå till normalt
uppspelningsläge väljer du “Bank off” i steg 2.
5 Upprepa steg 4 för att ställa “Play” eller
“Skip” för alla spår.
6 Tryck på (MENU) två gånger.
Enheten återgår till normalt
CD-uppspelningsläge.
Observera
• Du kan välja läget “Play” eller “Skip” för upp till
24 spår.
• Du kan inte välja “Skip” för alla spår på en
CD-skiva.
15
Page 100

Radio
Lagra kanaler automatiskt
— BTM-funktionen
Enheten väljer ut kanalerna med de starkaste
signalerna och lagrar dem efter frekvens. Du
kan lagra upp till 6 stationer på vardera bandet
(FM1, FM2, FM3, MW och LW).
Varning
För att undvika olyckor bör du använda BTMfunktionen om du tar in en kanal under
körning.
Lagra endast de önskade
kanalerna
Du kan förinställa upp till 18 FM-stationer (6
för vardera FM1, FM2 och FM3), upp till 6
MW-stationer och 6 LW-stationer i den
ordning som du själv vill ha dem.
1 Tryck på (SOURCE) flera gånger för att
välja kanalväljaren.
2 Tryck på (MODE) flera gånger för att
välja band.
3 Ställ in den station som du vill lagra på
sifferknappen genom att trycka på
. eller > på enheten.
1 Tryck på (SOURCE) flera gånger för att
välja kanalväljaren.
Varje gång du trycker på (SOURCE) växlas
källorna på följande sätt:
B Tuner B CD B MD*
* Om den motsvarande extrautrustningen inte
är ansluten visas inte alternativet.
2 Tryck på (MODE) flera gånger för att
välja band.
Varje gång du trycker på (MODE) växlas
banden på följande sätt:
B FM1 B FM2 B FM3
LW b MW b
3 Tryck på (MENU) och sedan på M eller m
flera gånger tills “BTM” visas.
4 Tryck på (ENTER).
Kanalerna lagras i enheten efter frekvens på
sifferknapparna.
En ljudsignal hörs när inställningen lagras.
Observera
• Enheten lagrar inte kanaler med svaga signaler.
Om endast ett fåtal kanaler kan tas emot
behåller vissa nummerknappar sina tidigare
inställningar.
• När ett nummer visas i teckenfönstret lagras
kanalerna från och med detta nummer.
• Om en CD-skiva inte finns i enheten visas endast
radiobandet även om du trycker på (SOURCE).
4 Tryck på önskad sifferknapp ((1) till (6))
på enheten tills “MEM” visas.
Snabbvalsknappens nummer visas i
teckenfönstret.
Observera
Om du försöker lagra en annan kanal på samma
förinställda nummerknapp raderas den tidigare
lagrade kanalen.
16
 Loading...