

Page 1

3-798-021-11 (1)
Compact Disc
Changer System
Operating Instructions
Manual de instrucciones
For installation and connections, see the supplied installation/connections
manual.
Con respecto a la instalación y las conexiones, consulte el manual de Instalación/
conexiones suministrad.
• ti## aíw# »
COMPACT
DIGITAL AUDIO
CDX-71RF
1995 by Sony Corporation
Page 2

Features
The CDXrZlRF is a compact disc changer
system comprised of the display unit, the
hideaway (modulator) unit and the CD
changer unit. The hideaway unit modulates
the audio signal from the CD changer unit into
the RF (Radio Frequency) signal at 88.3 MFIz,
88.7 MHz, 89.7 MHz or 89.9 MHz so that it can
be received by the existing FM tuner of your
car audio. Therefore you will be able to enjoy
CD play with your car audio even if it has no
input terminals for a compact disc player.
Custom file function for putting and
displaying the title of each disc (page 12).
Program memory function for preselecting
your favorite tracks from the discs in all the
changer*, and playing them back in the order
you want to hear them (page 9).
Works only with CD changers with programme memory
function.
You can assign an output level for each disc.
List up function for directory searching of
discs by their customized titles (page 14).
Compact and space saving CD changer unit
for vertical, horizontal, suspended or
inclined installation in your car.
Supplied remote commander enables you to
control the CD changer unit installed in the
trunk room of your car.
Several optional CD changers can be
connected and controlled by the use of the
Sony source selector (not supplied).
Shuffle play function for playing tracks in
random order (page 8).
Repeat play function for playing a track, a
disc or a changer repeatedly (page 8).
Switchable two color illumination (amber
and green).
Provided with a digital 12-hour clock.
Supplied rotary commander (RM-X3S)
which can be operated, like the wiper or
headlight switch of your car, while driving.
Page 3

Table of Contents
Precauhons
Preparations
Setting the Clock
Changing the Transmitting Frequency
............................................
..........................................
...................................
CD Changer Operation
Listening to the CD Playback
Stopping CD Playback
Listening to the Radio
Tape Playback
Playing the Discs Randomly
— Shuffle Play Functions .
Playing a Disc Repeatedly
— Repeat Play Functions ..
........................
..........
...........
Program Memory Function
Configuring a Program
(With tracks you want to hear)
Playing an Arranged Program ....
Cancelling the Program Mode
Erasing Input Tracks
Inserting Tracks into a Program ..
Erasing a Program Completely ...
...................
....
...9
...9
.10
.10
.11
.11
.4
.5
.6
.6
.7
.7
.7
.7
Custom File Function
Putting Your Personalized Titles onto the Discs
— Disc Memo Function .................................12
Changing a Registered Title
— Disc Memo Function
Erasing a Registered Title
— Disc Memo Function
Displaying the Registered Titles ........................13
Changing the Output Level
Searching for =» ?d Discs by Title
— List up Function
Location of Controls............................................15
Maintenance ........................................................17
Specifications
Troubleshooting Guide
.......................................................
.................................
.................................
...............................
........................................
.......................................
13
13
14
14
18
19
Page 4
Precautions
• This system cannot be used with a car audio
without the facility to receive FM.
• Before operating the unit for the first time or
after replacing the car battery^ press the reset
button on the display unit with a ball-point
pen etc., and then start operating the system.
Reset button
• If your car was parked in direct sunlight
resulting in a considerable rise in
temperature inside the car, allow the system
to cool down before operating it.
• If no power is being supplied to the system,
check the connections first. If everything is in
order, check the fuse.
• Avoid installing the system in places:
— subject to temperatures exceeding 55 °C
— subject to direct sunlight.
— near heat sources (such as heaters).
— exposed to rain or moisture.
— exposed to excessive dust or dirt.
— subject to excessive vibration.
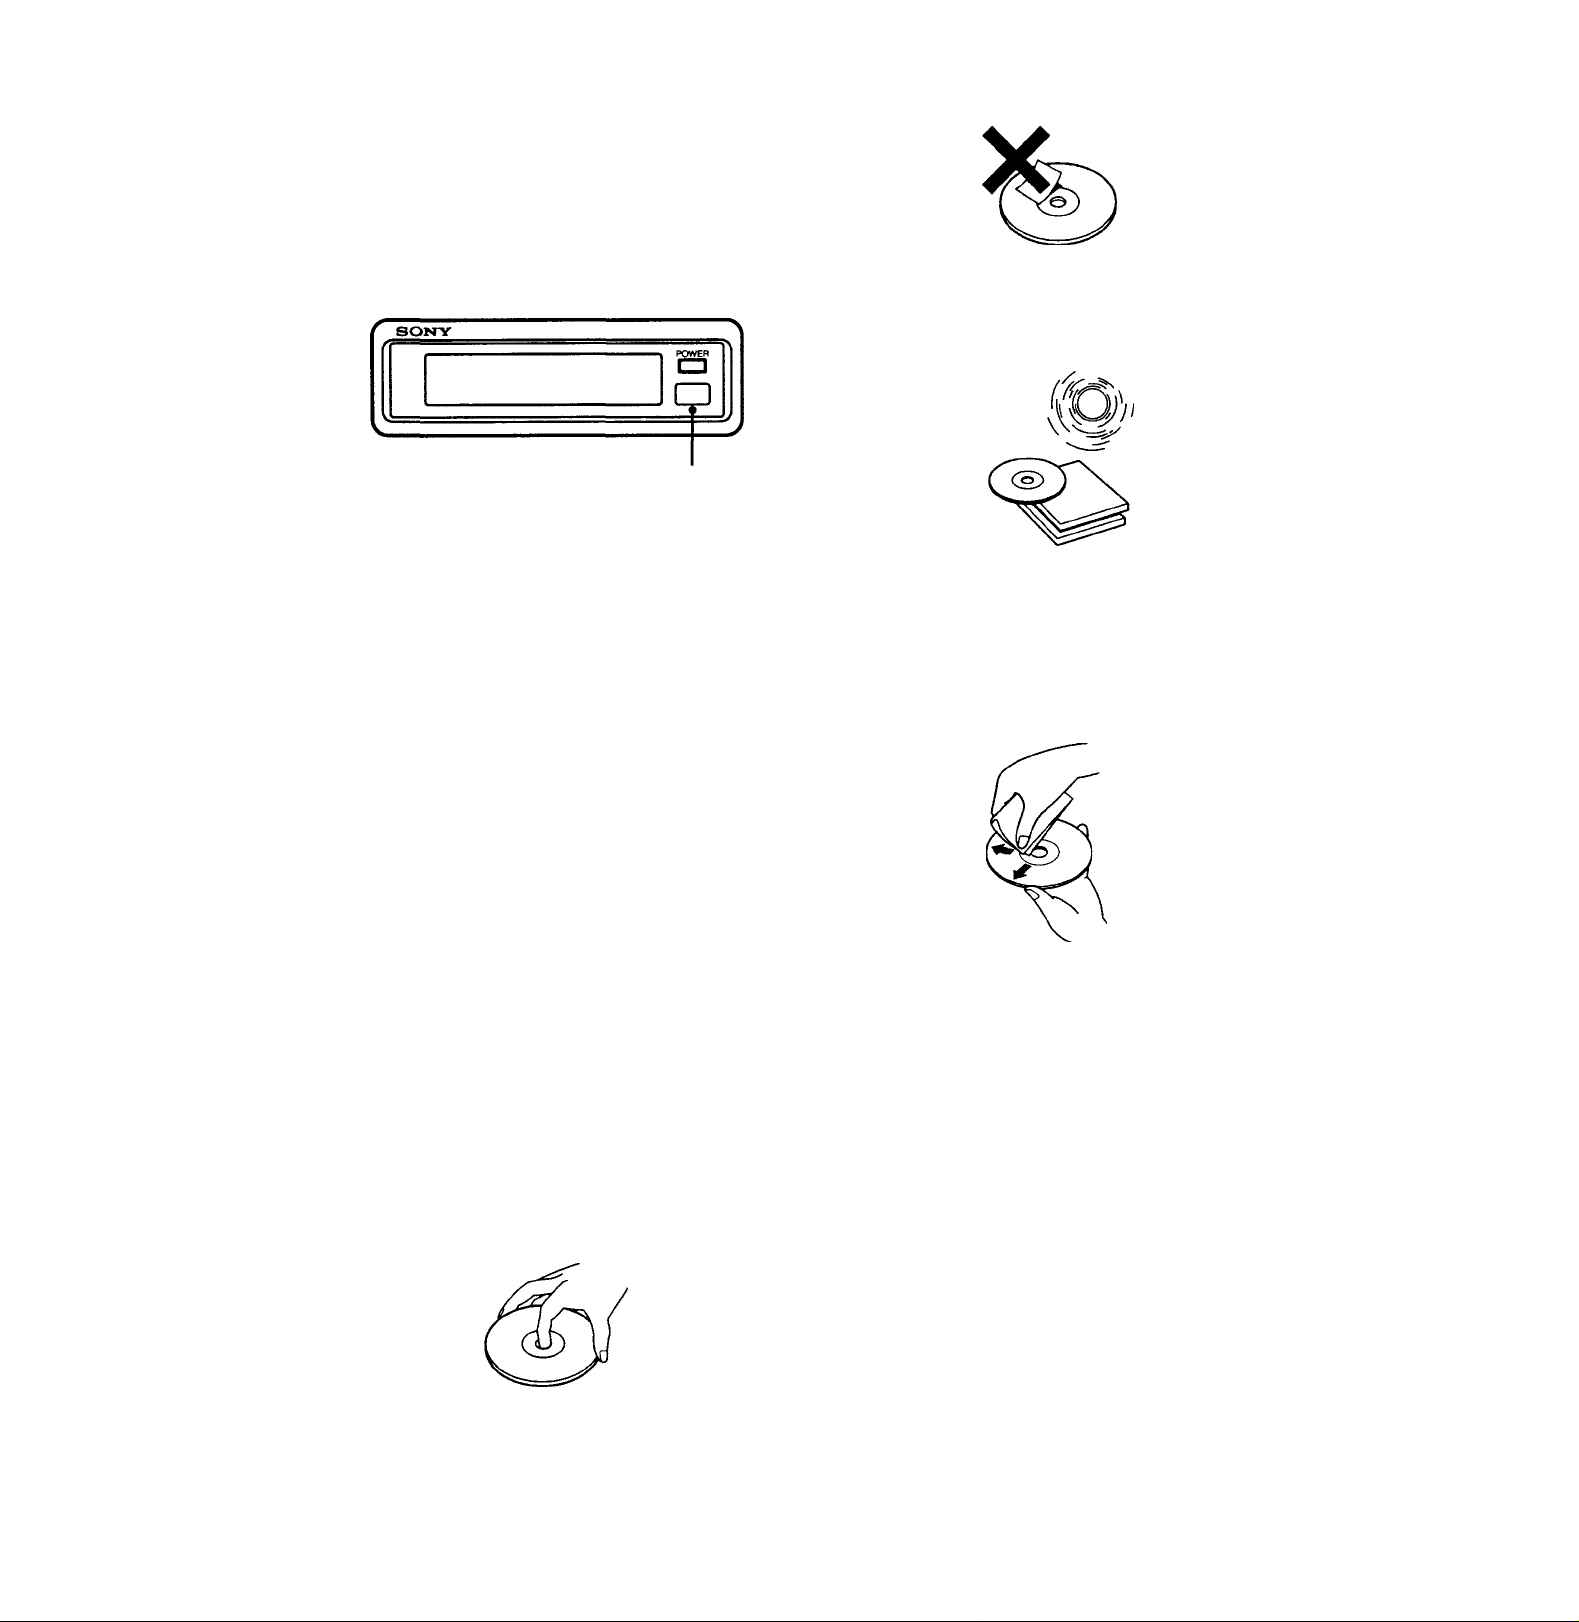
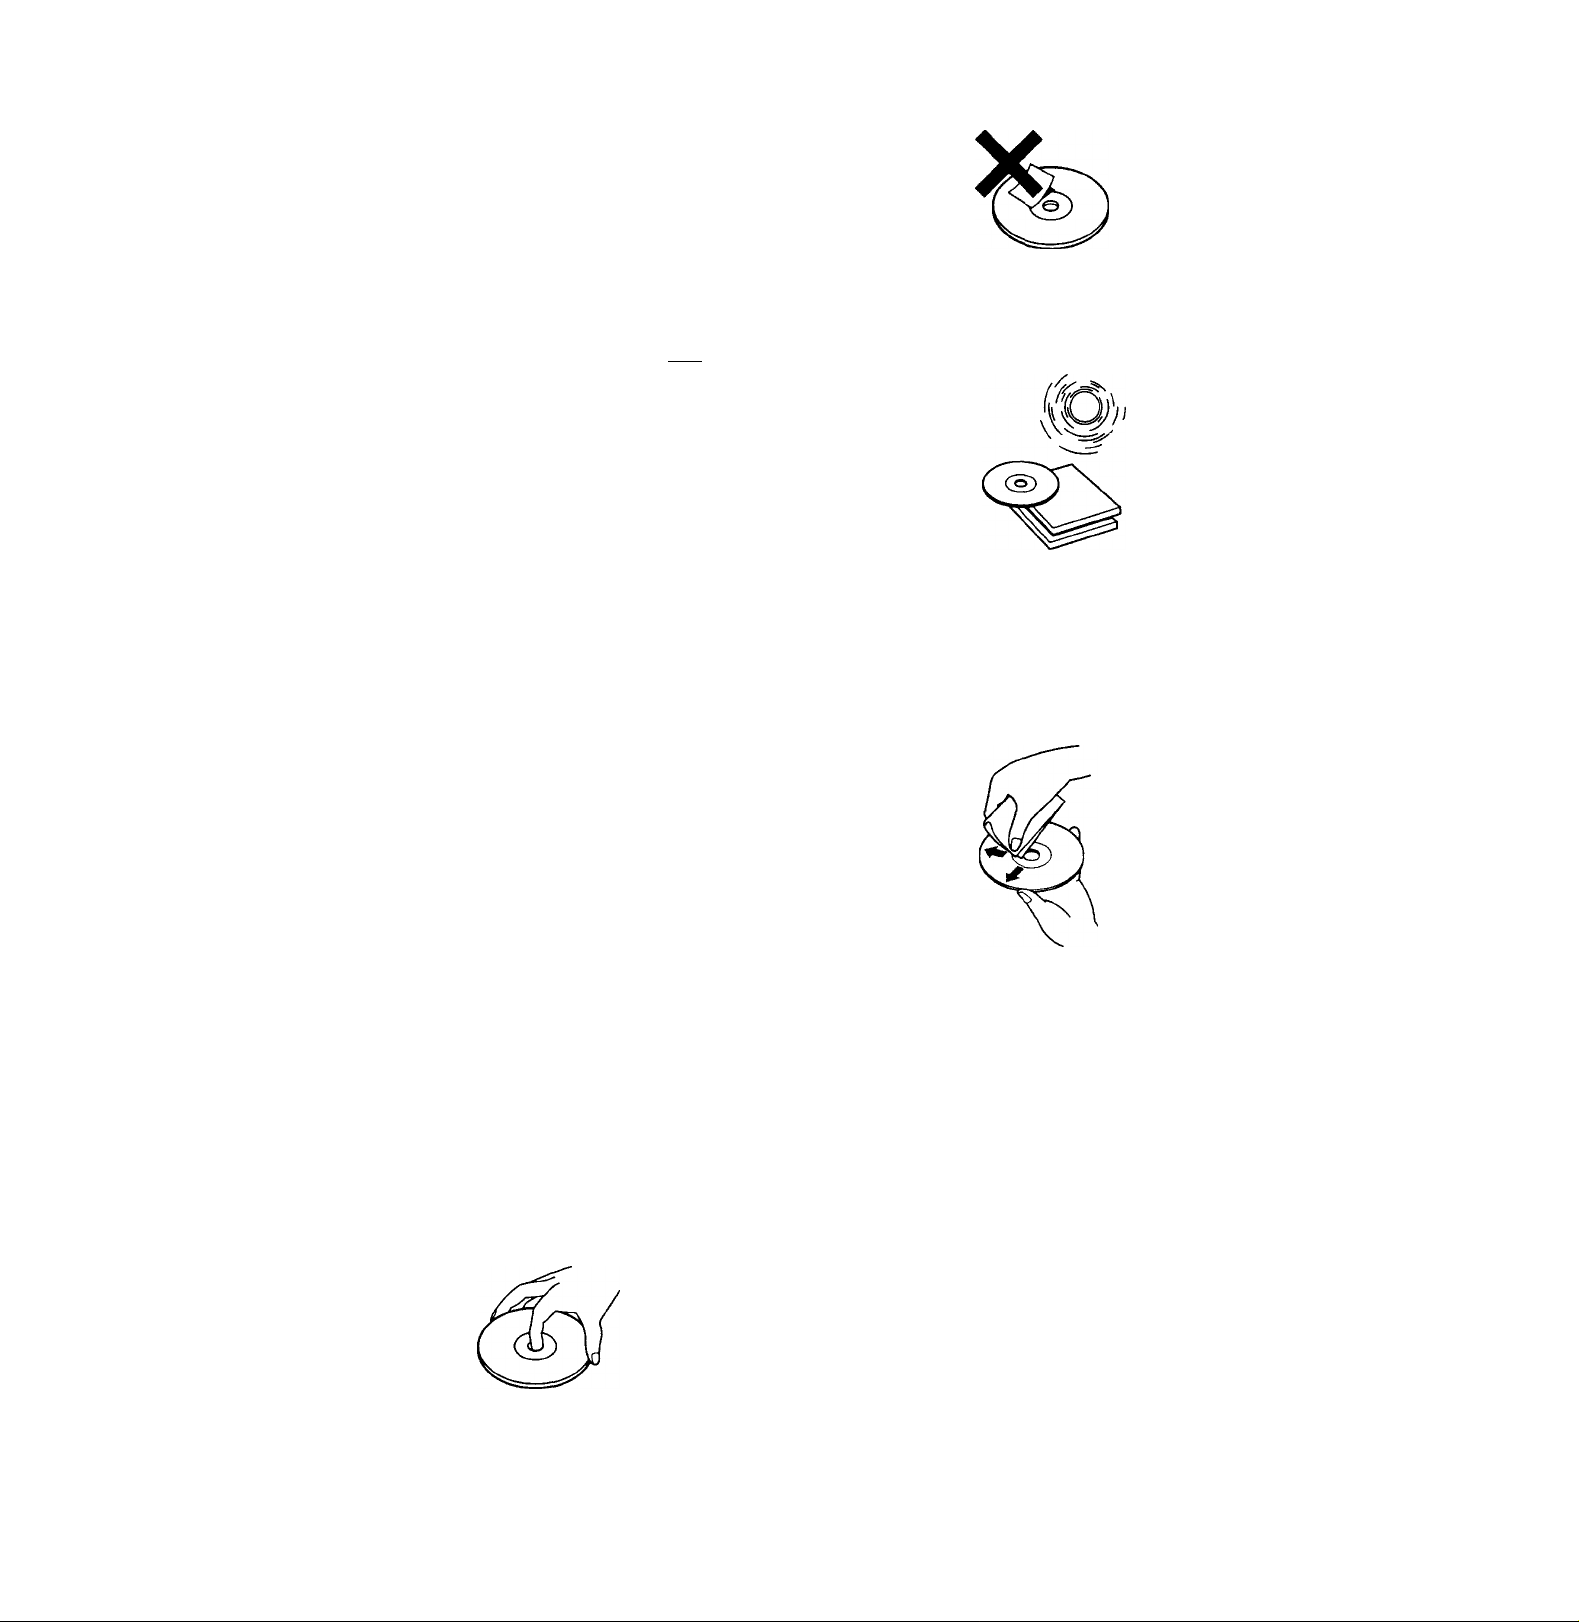
Not this way
Do not stick paper or tape on the labeled
surface.
Not this way
X
Do not expose discs to direct sunlight or heat
sources such as hot air-ducts, or do not leave
them in a car parked in direct sunlight where
there can be a considerable rise in the
temperature inside the car.
This way
Moisture condensation
On a rainy day or in a very damp area,
moisture may condense on the lenses inside
the CD changer urrit. Should this occur, the
unit will not operate properly. In this case,
remove the disc and wait for about an hour
until the moisture has evaporated.
If you have any questions or problems
concerning your system that are not covered in
this manual, please consult your nearest Sony
dealer.
Notes on Compact Discs
This way
A dirty or defective disc may cause soimd
drop-outs during playing. To enjoy optimum
sound, handle the disc as follows.
Before playing, clean the discs with an
optional cleaning cloth. Wipe each disc from
the center of the disc outward.
Do not use solvents such as benzine, thinner,
commercially available cleaners or antistatic
spray intended for analog discs.
Notes on the Disc Magazine
• Do not leave the disc magazine in locations
with high-temperatures and high-humidity,
such as on a dashboard or by the rear
window where the disc magazine will be
subjected to direct sunlight.
• Do not insert more than one disc at a time
into a slot, otherwise the changer and the
discs may be damaged.
• Do not drop the disc magazine or subject it to
a violent shock.
Handle the disc by its edge, and to keep the
disc clean, do not touch its surface.
Page 5

Table of Contents
Precautions
?*reparations
Setting the Clock ...................................
Zhanging the Transmitting Frequency
.........................»,...............
........................................
CD Changer Operation
Listening to the CD Playback
Stopping CD Playback
Listening to the Radio
Tape Playback
Playing the Discs Randomly
— Shuffle Play Functions .
^’laying a Disc Repeatedly
— Repeat Play Functions ..
.......................
..........
...........
Program Memory Function
Zonfiguring a Program
(With tracks you want to hear)
^laying an Arranged Program ............................9
Zancelling the Program Mode
Srasing Input Tracks
inserting Tracks into a Program
Erasing a Program Completely
..........................................
........................
...........................
.......................
.........................
10
10
11
11
Custom File Function
Putting Your Personalized Titles onto the Discs
— Disc Memo Function
Changing a Registered Title
— Disc Memo Function
Erasing a Registered Title
— Disc Memo Function
.7
.7
.7
.7
9
Displaying the Registered Titles
Changing the Output Level
Searching for a Desired Discs by Title
— List up Function
Location of Controls............................................15
Maintenance ........................................................17
Specifications........................................................18
Troubleshooting Guide
.................................
.................................
.................................
........................
...............................
........................................
.......................................
12
13
13
13
14
14
19
Page 6
Precautions
• This systwn cannot be used with a car audio
without the facility to receive FM.
• Before operating the unit for the first time or
after replacing the car battery, press the reset
button on the display unit with a bail-point
pen etc., and then start operating the system.
soi>nr
POWER
CD
□
Reset button
• If your car was parked in direct sunlight
resulting in a considerable rise in
temperature inside the car, allow the system
to cool down before operating it.
• If no power is being supplied to the system,
check the connections first. If everything is in
order, check the fuse.
• Avoid installing the system in places;
— subject to temperatures exceeding 55 °C
— subject to direct sunlight.
— near heat sources (such as heaters).
— exposed to rain or moisture.
— exposed to excessive dust or dirt.
— subject to excessive vibration.
Not this way
Do not stick paper or tape on the labeled
surface.
Not this way
X
Do not expose discs to direct sunlight or heat
sources such as hot air-ducts, or do not leave
them in a car parked in direct sunlight where
there can be a considerable rise in the
temperature inside the car.
This way
Moisture condensation
On a rainy day or in a very damp area,
moisture may condense on the lenses inside
the CD changer urut. Should this occur, the
unit will not operate properly. In this case,
remove the disc and wait for about an hour
until the moisture has evaporated.
If you have any questions or problems
concerning your system that are not covered in
this manual, please consult your nearest Sony
dealer.
Notes on Compact Discs
This way
A dirty or defective disc may cause sound
drop-outs during playing. To enjoy optimum
sound, handle the disc as follows.
Before playing, clean the discs with an
opHonal cleaning cloth. Wipe each disc from
the center of the disc outward.
Do not use solvents such as benzine, thinner,
commercially available cleaners or antistatic
spray intended for analog discs.
Notes on the Disc Magazine
• Do not leave the disc magazine in locations
with high-temperatures and high-humidity,
such as on a dashboard or by the rear
window where the disc magazine will be
subjected to direct sunlight.
• Do not insert more than one disc at a time
into a slot, otherwise the changer and the
discs may be damaged.
• Do not drop the disc magazine or subject it to
a violent shock.
Handle the disc by its edge, and to keep the
disc clean, do not touch its surface.
Page 7
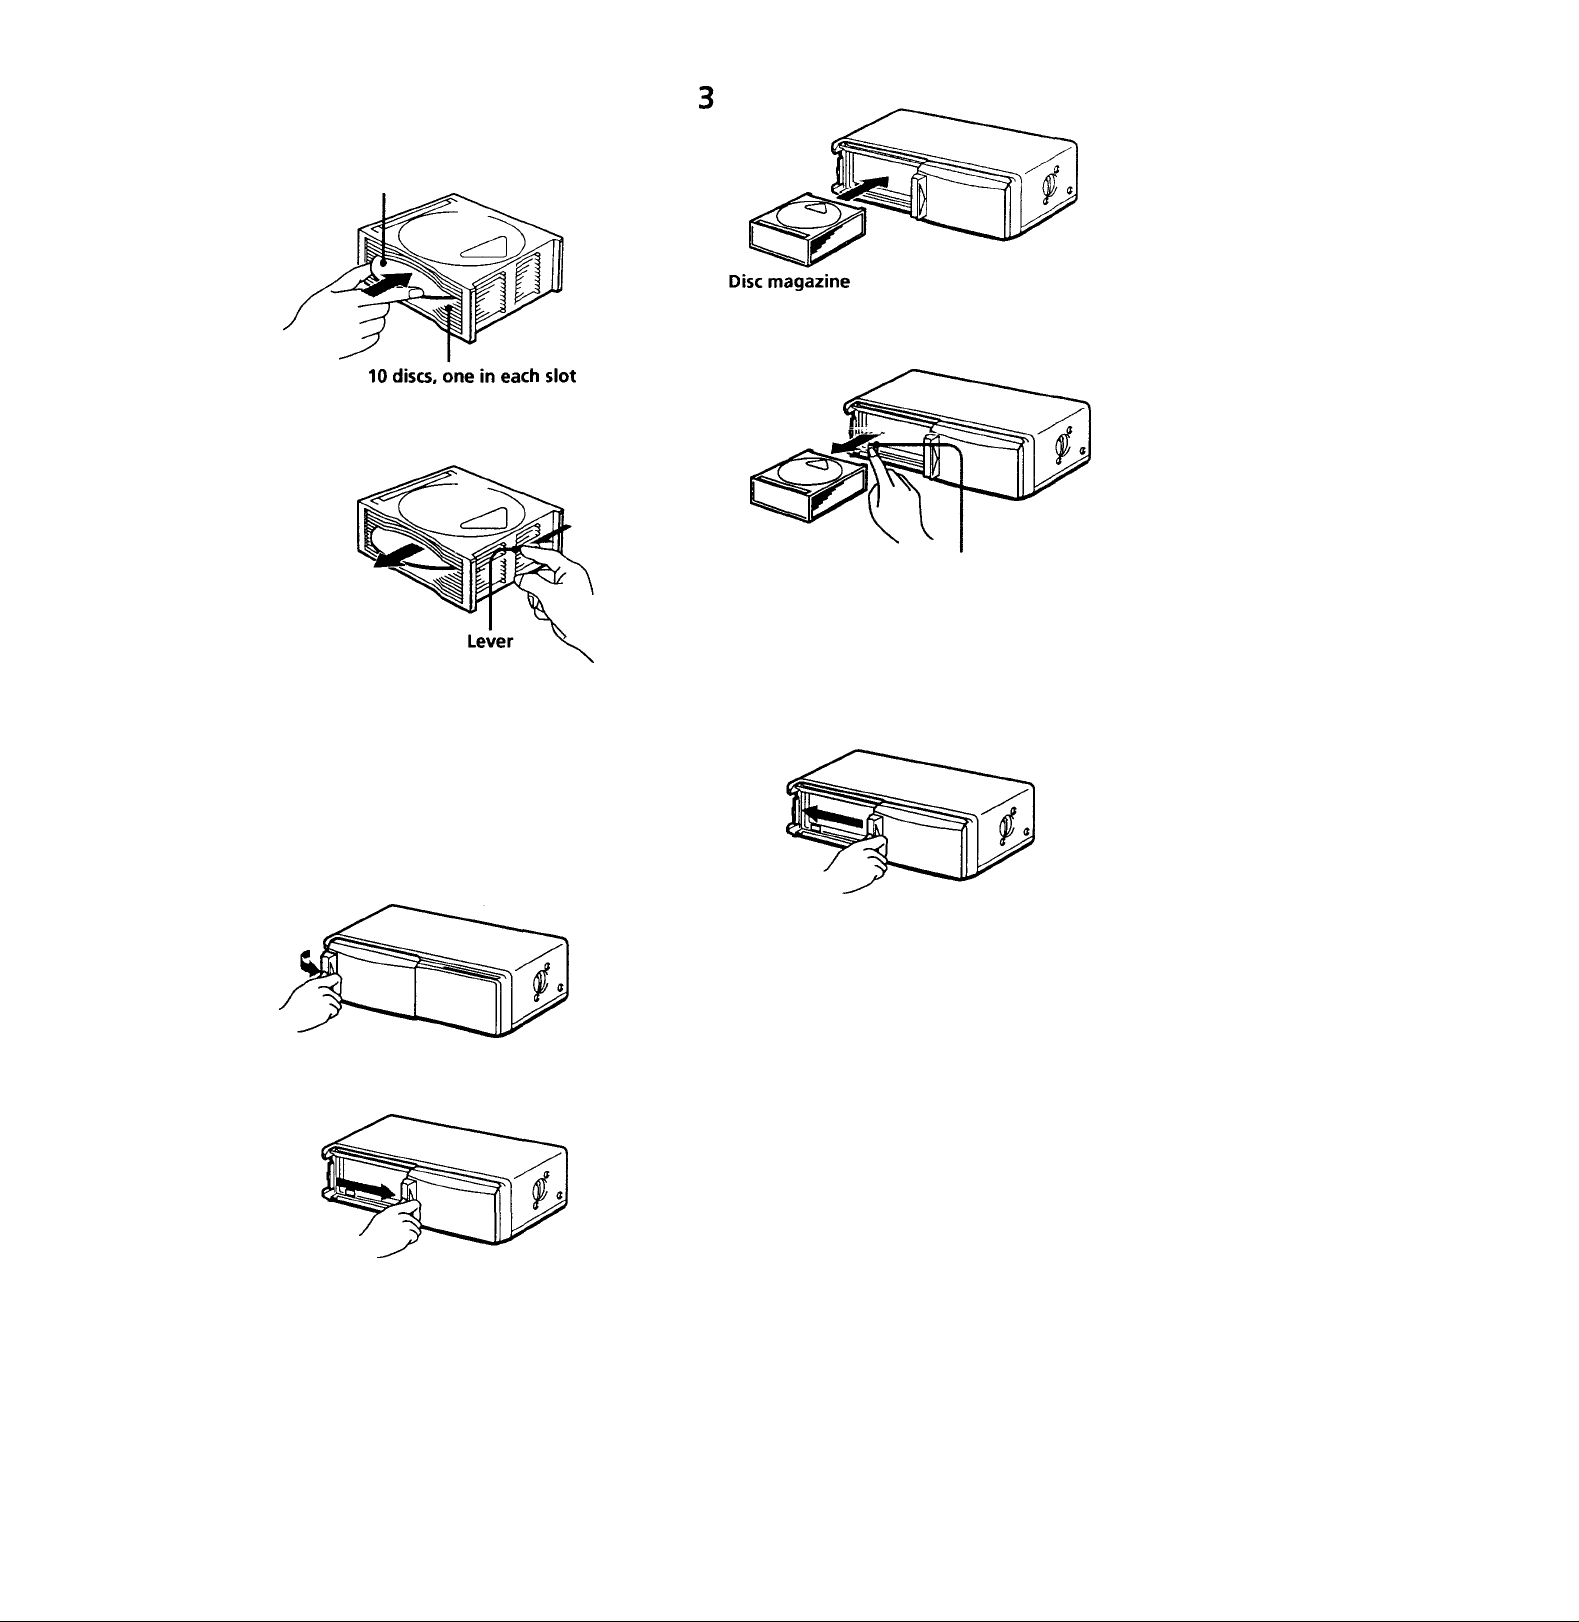
Preparations
Labeled surface*^
To remove
Note
To listen to an 8 cm CD, use the separately sold Sony CD
adaptor CSA-8. Be sure to always use the specified adaptor,
as failing to do so may cause a malfunction of the unit.
If you use any other adaptor, the unit may not operate
properly.
When using the Sony CD adaptor, nmke sure that three
catches on the adaptor are firmly latched onto the 8 cm CD.
To remove
EJECT
Note
If the disc magazine is not locked into place properly inside
the CD changer unit, remove the magazine. Press the
EJECT button first, then insert the magazine into the CD
changer unit again.
Note
When a disc magazine is inserted into the CD changer or
the reset button of the connected car audio is pressed, the
system will be automatically activated and read the
information of the CDs. When the information of all the
CDs in the disc magazine has been read, the unit will
autorrmtically stop the operation.
Use the unit with the door closed
Otherwise, foreign matter may enter the unit,
and contaminate the lenses inside the changer.
Page 8
Setting the Clock
Changing the Transmitting
The clock has a 12-hour digital indication.
For example, set it to 10:08.
1 Turn the ignition key to the ON position.
2 Press the DSPL7CLOCK SET button for
more than two seconds.
V \ |_l # / /
/ / f I I % \
The indication starts flashing.
3 Press the | [ J to set the hour
digits.
(to go back) (to go forward)
Press the i ■** »» 1 to set the minute
digits.
Frequency
You can select the frequency of the modulated
RF signal being transmitted from the hideaway
unit according to the level of interference
noise.
ENTER
-/+
1 Press the ENTER/DELETE button for more
than two seconds.
The system will enter the frequency
selecting mode. The initial setting is
88.3 MHz.
(to go back) (to go forward)
\ \ \ t i I / / /
n.n O'
J u.u a:
/ / /1111 \ \
4 Press the DSPL7CLOCK SET button.
![]:!JB
The clock is activated.
Note
When the POWER SELECT switch on the hideaway unit
is set to the "OFF" position, the clock display will not come
on the display unit even if the ignition of your car is
turned on. In such a case, press the POWER switch of the
display unit and play a disc. Then follow steps 2 to 4.
2 Press either the Q or Q to select the
frequency.
At each pressing, the buttons wiU change
the frequency as follows:
3 : 88.3 MHz -> 89.9 MHz -► 89.7 MHz
88.7 MHz -♦ 88.3 MHz
3 : 88.3 MHz-* 88.7 MHz-► 89.7 MFlz-♦
89.9 MHz -*• 88.3 MHz
3 Press the ENTER/DELETE button again for
more than two seconds.
Note
Be sure to set the frequency of your FM tuner to that of the
newly selected frequency.
Page 9

CD Changer Operation
Listening to the CD
Playback
Turn on the FM tuner of your car audio
and select the frequency from 88.3 MHz,
88.7 MHz. 89.7 MHz or 89.9 MHz
whichever has been selected by the
procedure described in "Changing the
Transmitting Frequency" (page 6).
See the operation manual of your car
audio about the FM tuning as well.
I
Listening to the Radio
Press the POWER switch on the display
unit or the OFF button on the remote
commander to stop CD playback before
tuning in a radio station.
Be sure to stop CD playback before you start
listening to the radio.
Otherwise there may be some mterference in
the radio reception.
To restart CD playback, set the frequency of
the FM tuner to the frequency previously
selected in "Changing the Transmitting
Frequency" (page 6) and press the POWER
switch on the display unit, the CD button on
the remote commander.
Press either the POWER switch on the
display unit or the CD button* on the
remote commander. The CD playback
will start.
* If the POWER SELECT switch on the hideaway unit
is set to the OFF position and the display on the
display unit is turned off, you will not be able to
start CD playback with the remote commander. In
this case, press the POWER switch on the display
unit.
3 Adjust the volume with the volume
control on the car audio.
If the system is in the normal playing mode, after the end of
a disc, the disc with the next number shown on the display
played. If two or more CD changers are connected, after the
end of the last disc in the first changer, the first disc in the
CD changer with the next number shown will be played.
The order of disc play can be rearranged by changing the
playing modes (page 8).
Note
When this system is used with your car audio, the
reception of the tuner may become slightly worse than
usual.
Tape Playback
Press the POWER switch on the display
unit or the OFF button on the remote
commander to stop CD playback before
starting tape playback.
To restart CD playback, turn on the FM tuner
and set the FM frequency to the one previously
selected in "Changing the Transmitting
Frequency" (page 6) and press the POWER
switch on the display unit, the CD button on
the remote commander.
iQ
T3
n
o
n
O)
(D
O
fO
O)
o
Stopping CD Playback
Press either the POWER switch on the
display unit or the OFF button on the
remote commander.
To resume CD playback, press the
POWER switch on the display unit or
the CD button on the remote
commander.
Notes
• When CD playback is stopped, you may hear some noise
from the speakers. To prevent this from Imppening, turn
the volume down before stopping CD playback.
• If you turn off the ignition of your car without stopping
CD playback, it will automatically resume CD playback
from where it ums stopped the next time you turn on the
ignition.
Page 10
Playing the Discs
Randomly — Shuffle Play Functions
Playing a Disc Repeatedly
— Repeat Play Functions
Playing the tracks on the currently
selected disc randomly
— Disc shuffle play
Press the SHUF button to get the "SHUF
1" indication during CD playback.
When all the tracks on a disc have been
played, the shuffle play will move on to the
next disc.
Playing every track on every disc in
the currently selected CD changer
randomly — CD changer shuffle play
Press the SHUF button to get the "SHUF
2" indication during CD playback.
Playing every track on every disc in
all the CD changers connected
randomly
— All shuffle play (when two or more CD
changers are connected)
Press the SHUF button to get the "SHUF
3" indication during CD playback.
The function of the SHUF button changes cyclically
as follows:
SHUF1
(Disc shuffle)
____
^ SHUF2
(CD changer shuffle)
t
Cancel (Normal CD playback mode)
* All-shuffle play (SHUF 3) mode functions only when
two or more changers are connected to the system.
When only one changer is connected, the “SHUF 3"
indication will not be displayed. In this case, if you press
the SHUF button again while the “SHUF 2" indication
is being displayed, the shuffle play will be canceled.
SHUF 3*
(All shuffle)
Playing the currently selected track
repeatedly — Track repeat
Press the REPEAT button to get the
"REP 1" indication during CD playback.
When the track is over, CD playback will be
repeated from the beginning of that track.
Playing the currently selected disc
repeatedly — Disc repeat
Press the REPEAT button to get the
"REP 2" indication during CD playback.
When the last track of the currently selected
disc is over, CD playback will be repeated
from the beginning of that disc.
Playing the discs in the currently
selected CD changer repeatedly
— CD changer repeat (when two or more
CD changers are connected)
Press the REPEAT button to get the
"REP 3" indication during CD playback.
When the last disc of the currently selected CD
changer is over, CD playback will be repeated
from the first disc in the currently selected CD
changer.
The function of the REPEAT button changes
cyclically as follows:
REP 1
(Track repeat)
Cancel (Normal CD playback mode)
* CD changer repeat (REP 3) mode functions only when
two or more changers are connected to the unit. When
only one changer is connected, the “REP 3" indication
will not be displayed. In this case, if you press the
REPEAT button again while the “REP 2" indication is
being displayed, the repeat play will be canceled.
t
____
REP 2
(Disc repeat)
REP 3*
(CD changer repeat)
8
Page 11

I
Program Memory
Function
You can preselect the tracks you want to hear
and the order in which you want them to be
played back (from the discs in the changer
connected to the unit). This function is divided
into Programl and Program2, each allowing
you to preselect up to 12 tracks. Furthermore,
once a program is registered, the track order is
preserved. Changing the disc order in the
changer will not affect the order in which the
tracks have been set for playback.
Notes
• This function works only when CD changers with
program memory function are connected.
• When a CD changer without program memory function
is connected, pressing the PCM/EDTr button for at least
two seconds will not cause the system to enter the
program edit mode. Instead, "SORRY" will appear in
the display.
• If you press the DSPL/CLOCK SET button momentarily
when the program edit mode is engaged, the disc number,
track number, and elapsed playing time of the currently
played track will be displayed for two seconds.
< If you press the ( CD ), ( - disc + ), and AMS
buttons when the program edit mode is engaged, the
selected disc number and track number, and the elapsed
playing time will be displayed for 1.5 seconds.
Pressing the reset button or disconnecting the back-up
line will erase the memorized program.
r 71 t
L JJ 1
PGM EDIT DISC TRACK
5 3
Current Program Initial Programl Indicator
PGM/EDIT
--------
Í - cmscVm^^L
□ G
G3 AMS
ENTER/DELETE
■ -/+
Configuring a Program
(With tracks you want to hear)
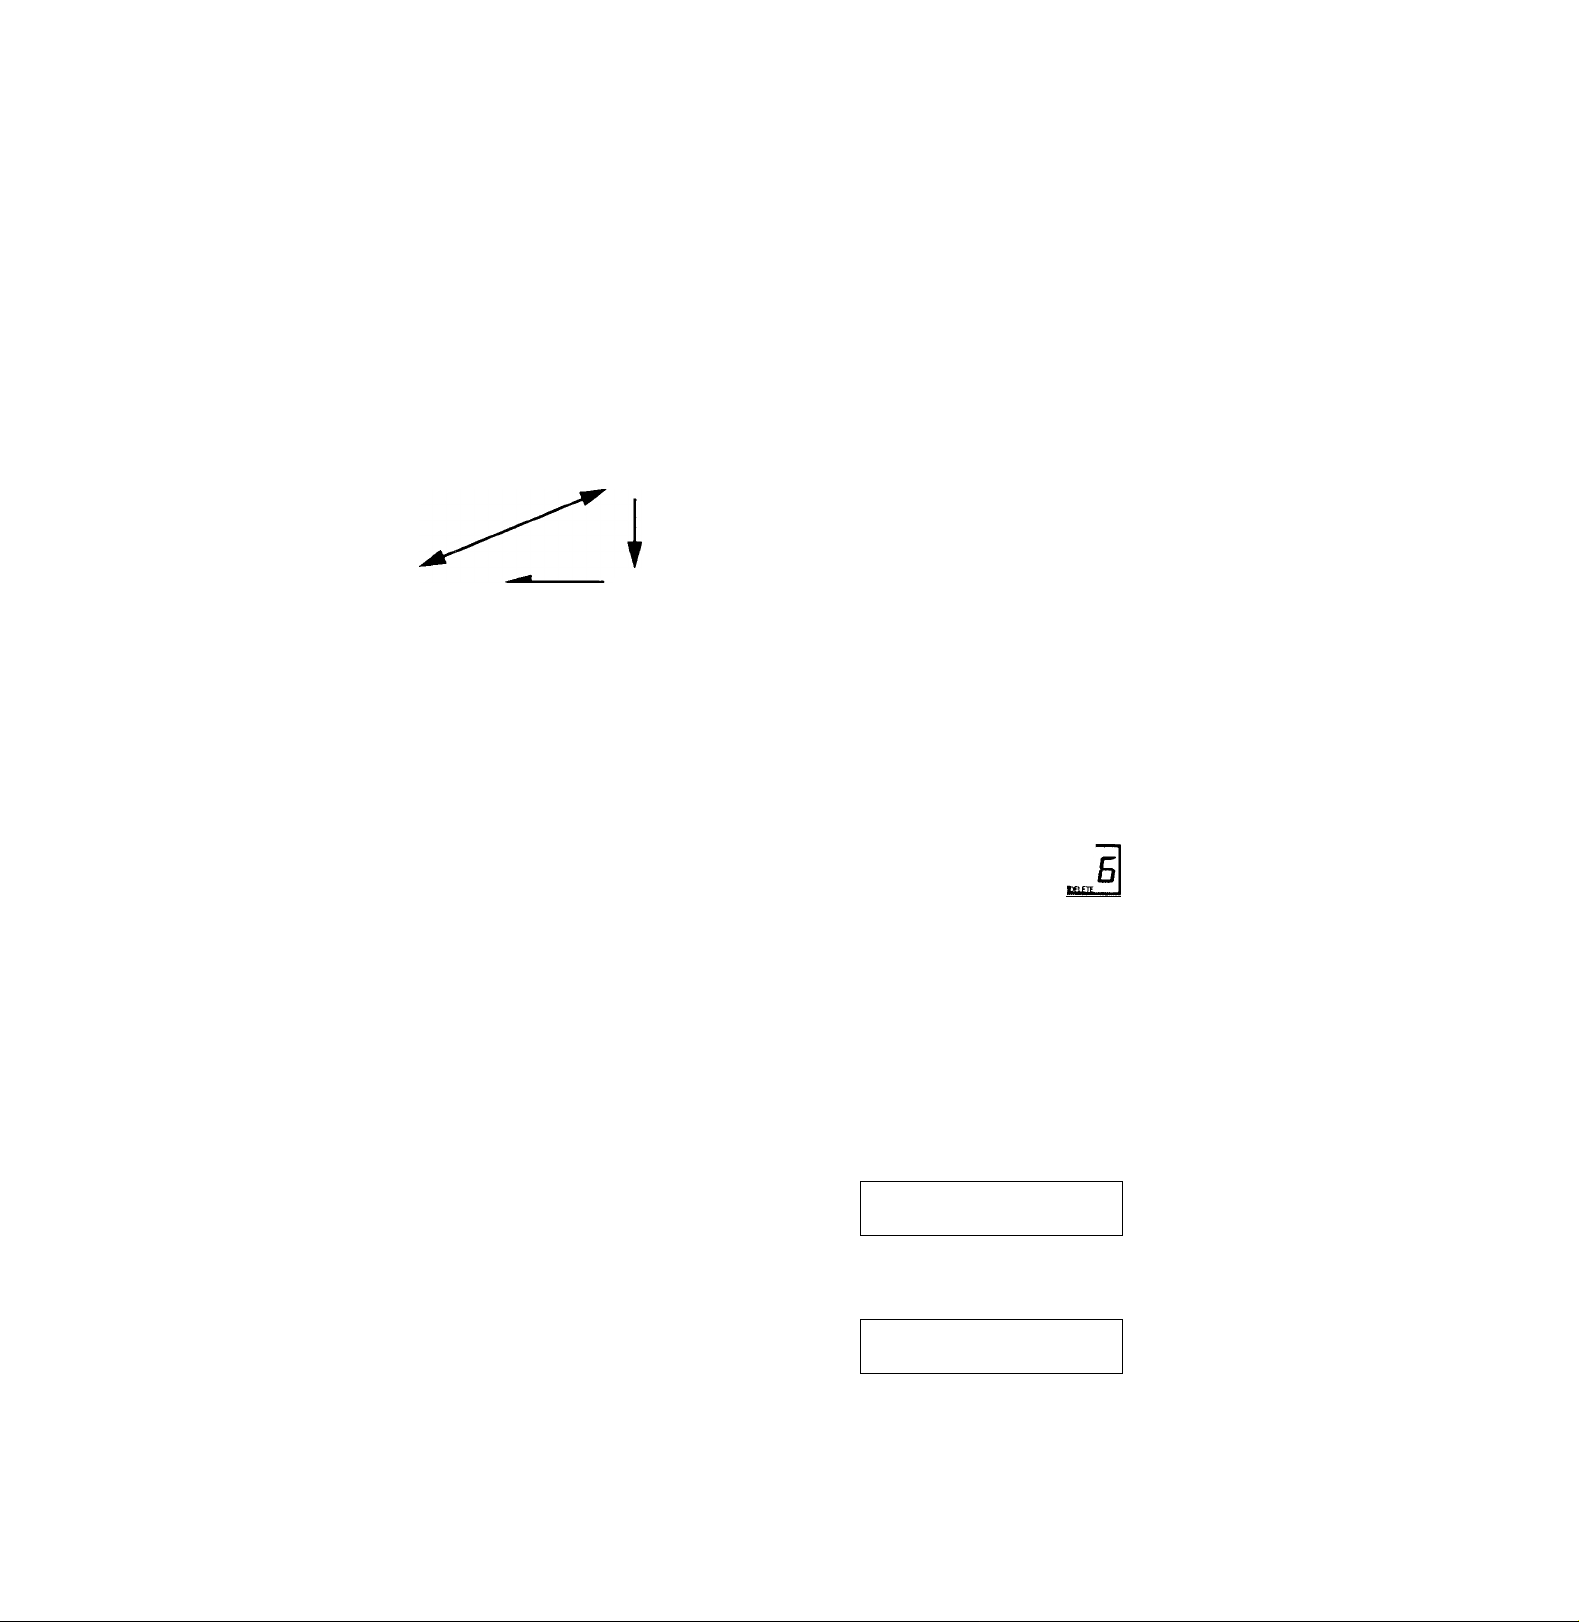
1 Press the PGM/EDIT button for more
than two seconds.
The system will enter the program edit
mode.
ENTER ^
m 1 ^
PGM EDrr 06C
1 n 1-
3 ->
nucx /// 1r I 1tl\\
i.u ;;
Programl
Indicator
To configure Programl, press the PGM/
EDIT button once, quickly.
2 Play the track you want to enter into
memory.
3 Press the ENTER/DELETE button once,
quickly.
P /
iEtJTERi
ENttn «
3 E IP I.D E i
<*GU EOrr OGC
4 0 To continue entering tracks, repeat
steps 2 and 3.
® To finish arranging a program, press
the PGM/EDIT button for more than
two seconds.
When configuration is completed, the unit
returns to normal playback mode.
Notes
• Configuration has been completed but the program will
not play.
• "**WArr**“ appears on the display when the input
tracks data has not yet been read into the memory, or
when a disc has not been put into the unit.
• "**FULL**" appears on the display when you try to
input more than 12 tracks into a program at one time.
///IfItlXW
Playing an Arranged
n
o
n
zr
Q>
3
IQ
ro
o
T3
fi
o
o
(Q
O)
3
m
3
o
c
D
n
O
D
Program
By pressing the PGM/EDIT button
quickly you can designate the
program(s) you wish to play.
The program will begin playing two seconds
later.
If you press the [ ~ ) button during
program memory play, program memory play
will be interrupted, and playback of the
selected disc starts.
continue to next page
Page 12
Programi Playback
I r M
O 11
Program2 Playback
PBn E
Programi and 2 Playback
PGri HE
The function of the PGM/EDIT button changes
cyclically as follows:
PGM 1
----------------------
^ PGM 2
t
PGM OFF
* Only when tracks are programmed into both PGMl and
PGM2, "PGMl + 2" will be displayed.
Note
If a program has not been configured, it will not appear on
the display.
pon
unrn
Furthermore, if neither Programi nor
Program2 have been input in memory, "NO
DATA" will appear on the display.
PGM 1+2*
Erasing Input Tracks
1 Press the PGM/EDIT button for more
than two seconds.
The unit will enter the program edit mode.
U /
5 B IP ¡.DBl
FGW EOT oec
/// I r I I I\\\
To erase tracks in Program2, press the
PGM/EDIT button quickly to prompt the
Program! Configuration Indicator.
Nott>^
• When entering program edit mode from program
memory playback mode, the slot number of the track
currently playing will appear on the display.
• Entering Program Edit Mode from Normal Playback
Mode:
— When all 12 tracks slots are filled in the program, the
number 12 appears on the display.
— When less than 12 tracks have been filled, the number
of the first available slot appears on the display. For
example, if only 7 tracks have been input, the number
8 will appear on the display.
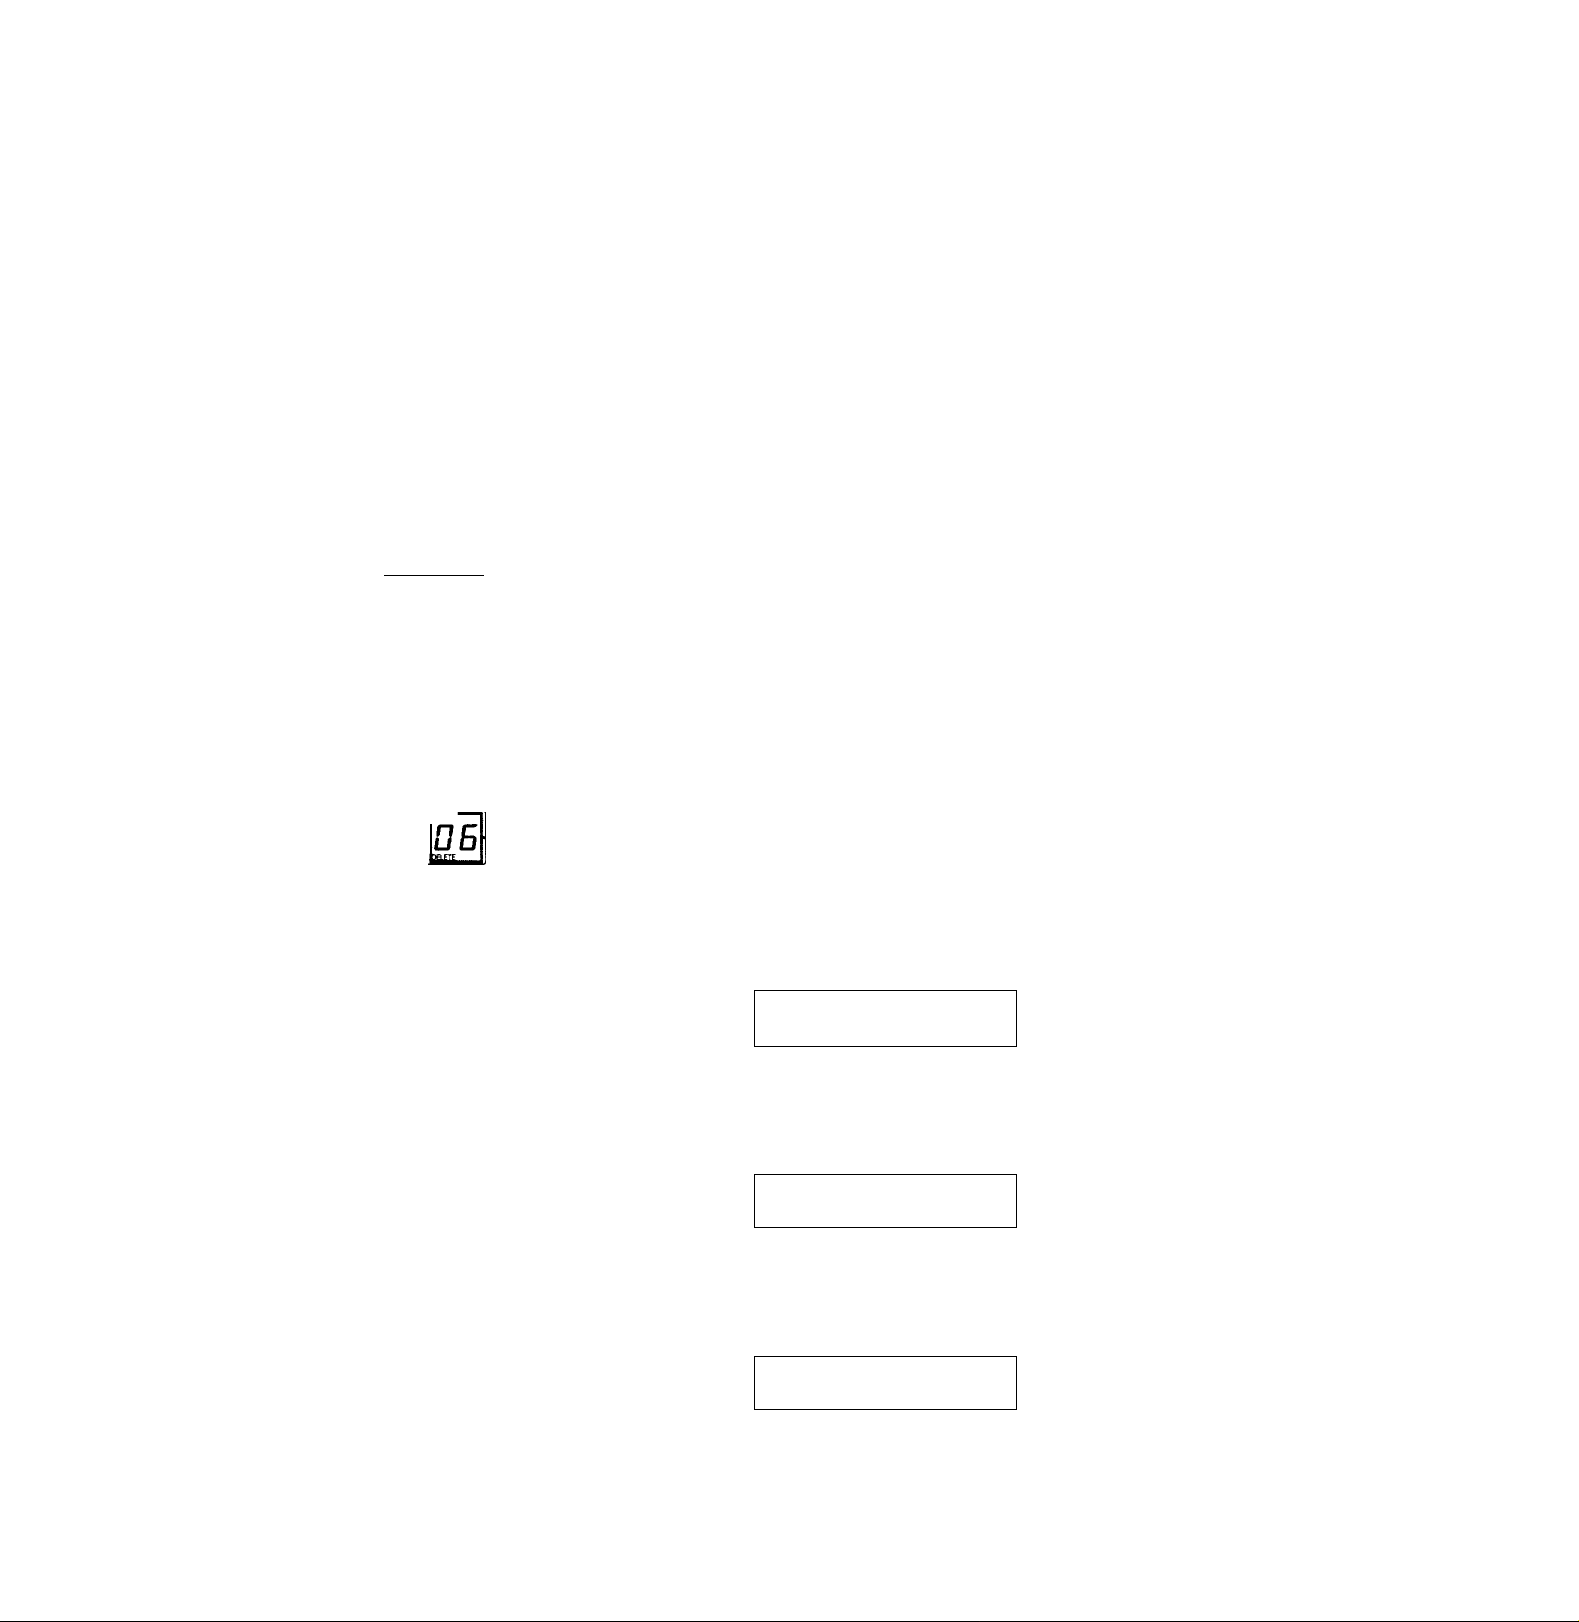
2 Press the Q. Q fo designate which
track you wish to erase (shown on the
display).
The track currently registered in the 6 slot of
Programi.
raw
EBP
Programi
Configuration
Indicator
The track slot
' number.
10
Notes
• If a track stored into program memory is not contained
in the disc magazine, this track will be skipped and the
next track will be played.
• If the information about a track stored into program
memory has not been loaded yet, this track will not be
played.
• When the disc magazine in the CD changer contains not
a single track stored into program memory, or when
information about program memory-stored tracks has
not been loaded yet, "NO READY" will be displayed.
Cancelling the Program
Mode
Press the PGM/EDIT button once,
quickly during program mode playback.
"PGM OFF" appears on the display.
Once the program mode has been canceled, the
unit returns to normal playback mode.
p n.
on U
^FF
When the order of the discs is imclear - for
instance, when the disc information has not
yet been completely read, or when a track
you intend to delete is not contained in the
disc magazine -, will be displayed
instead of the changer number and disc
number.
Once designated, press the ENTER/
DELETE button for more than two
seconds. The track will be erased.
HEL
-
—
P IBB
New track in slot 6
CJ} 1
PCy EDTT
H
oec
TRACK
1
P IBB
EMTER
DELETE
Once the track in the 6 slot has been erased,
tracks in the 7-12 slots will move up one slot.
Note
In the case where all 12 track slots are filled in a program,
erasing one track causes the 12 slot to become empty (For
every erased track, another slot becomes vacant).
Page 13
4 (a) To continue erasing tracks, repeat
steps 2 and 3.
I
Erasing a Program
(D To finish erasing tracks, press the
PGM/EDIT button fbr more than two
seconds.
Inserting Tracks into a
Program
1 Press the PGM/EDIT button for more
than two seconds.
The system will enter the program edit
mode.
r~ ~ in ' I'hn 'rni Programl
CJ} I
5 J IP I.U a: Configuration
PGW ЕПТ CKSC TfVOt
If you wish to insert tracks into Program2,
prompt the Program! Configuration
Indicator by pressing the PGM/EDIT
button quickly.
2 Press the Q, Q designate to which
track slot number you wish to insert a
track.
CJ3 I
5 Б P I
PtM ЕШ Dec ™cx
///Iiimvq Indicator
ПИВГ
The track slot
number
Completely
For example, delete Programl.
1 Press the PGM/EDIT for more than two
seconds.
The system will enter the program edit mode.
r -n / „ Z ''Z.' ’' '‘ISi'JA Programl
5 3 ^P I.U 9^ Configuration
PQU EOT DGC телек ///fflittw
To delete Program!, press the PGM/EDIT
button once, quickly.
2 Press the Q to get following indication.
JIEL
--P
If no track is stored into PGMl, this
indication will not appear.
3 Press the ENTER/DELETE button for more
than two seconds, program 1 will be
deleted.
HI П Tt a T n
PI H n 7t
MU jj П I n
One second after "NO DATA" appeared on
the display, the program edit mode for
PROGRAM 1 will be displayed.
fZ Hi i _
DM I
l] Indicator
oam
(O
о
0)
3
П)
3
о
3 Play the track you wish to insert.
4 Press the ENTER/DELETE button once,
quickly to enter the track.
P I
iEtJTEPi
C]} I
5 Б P 1.0
И5Ы EUrr OeC ТЦАСХ
The newly entered track will fill the 6 track
slot, and tracks 7 and up will move down
one slot.
Note
Once all 12 slots have been filled, "**FULL**" will appear
on the display and it will not be possible to insert more
tracks.
5 0 To continue inserting tracks into the
program, repeat steps 2 through 4.
® To finish inserting tracks, press the
PGM/EDIT button for more than two
seconds.
The function of the buttons changes cyclically as
follows:
Program 1 group
I
------------------------
Cl 1 ^
PGW QXr use
В
Г 71 »
L J/ / T
PGM 0ЭТ C*SC
a
UEL
PGM ECKT
Press the PGM/EDIT button when any of above
indications is dispiayed; the display will change to
PROGRAM 2.
--
Б IP \.0B\
•
•
•
•
•
•
г p
телех
1
mo. / f 11 t Ч \ \\\
•
Ф
•
•
•
•
I П 1
I.U 1
t
a
i
- P r~ НЛ
run
continue to next page
1
1 _ _
1
ЕКТЕЯ
DELETE
OtUTE
c
n
О
D
11
Page 14

Program 2 group
I
ENTEfl
PGM EDIT OGC
0
rjj / n
PGM EDIT CXSC
a
i
HEL
PGM SXT
Press the PGM/EDIT button when any of above
indications is displayed, the display will change to
PROGRAM 1.
Note
If a program has not been configured, it will not appear on
the display.
5 P E. DH
tHA»
•
•
•
•
»
1
E PE .D 1
TRACK oam
1
-POFIE--
1
•
a
•
•
•
•
•
t
a
EVTER
oafTt
Custom File Function
You can register customized titles to a
maximum of 110 discs* per CD changer
(custom file function). These settings will be
stored in the memory of the CD changer.
Therefore, even if you take a custom-filed disc
out of the CD changer, you can still use the
same custom file function the next time you
play that disc in the same CD changer.
Furthermore, if your system has several CD
changers connected, you can play that disc in
another CD changer and still use the same
custom file function, provided that the CD
changers are inter-connected with BUS cables.
* If you try to register more than 110 discs, the display
unit will display the "FULL" indication and will not
accept the command for custom-filing. In this case, you
will have to erase the memory of some other discs before
you enter any new ones.
Note
The registered titles of the discs may not come on the
display window immediately while it is being loaded inside
the CD changer.
4 To finish erasing programs, press the
PGM/EDIT button for more than two
seconds.
Putting Your Personalized
Titles onto the Discs
— Disc Memo Function
1 Play the disc that you wish to title. See
page 7 for details.
2 Press the NAME LIST/NAME EDIT button
for more than two seconds.
The system will enter the name edit mode.
CH I
" I
3 Press either the Q or Q select the
desired characters.
CJI /-'f'
ZJZ.
/ I X
Each time you press the Q or Q,
characters will come on in the following
order:
12
\ f ♦ -
If you keep the button pressed, the
characters will change rapidly.
Page 15

You can put a title of your own choosing onto a
disc (one title per disc). The title can be displayed
on the display window while the disc is being
loaded and played. A maximum of eight letters
can be used per title.
4 Press the ENTER/DELETE button after
locating a desired character.
EH I r
Jb±'.__________________
/ I N
Erasing a Registered Title
— Disc Memo Function
1 Select the CD changer and play any disc.
2 Press the NAME LIST/NAME EDIT button
for more than two seconds.
The system will enter the name edit mode.
The flashing part will move to the next
space on the right. Repeat steps 3 and 4 to
enter the entire titles. Up to eight characters
can be used per disc.
Notes
• If you press the ENTER button when the eighth
character (farthest right character) is flashing, the
flashing part goes back to the first character (farthest left
character).
• If you wish to put a blank space after a character, select
(under-bar).
5 ® To continue putting titles onto the
discs,
— Press the [ - disc +).
® To return to the normal CD playback
mode,
— Press the NAME LIST/NAME EDIT
button for more than two seconds.
If you press the CD button, the next CD changer will be
selected and the system will reenter the normal CD
playback mode (When two or more CD changers are
connected).
3 Press the DSPL/CLOCK SET button for
more than two seconds.
4 Press either the Q o'" Q select the
title that you wish to erase.
5 Press the ENTER/DELETE button for more
than two seconds.
Now the title is erased.
Repeat step 4 and 5 if necessary.
6 Press the NAME LIST/NAME EDIT button
for more than two seconds.
The system returns to the normal CD
playback mode.
When you erase the title, the level settings of output will be
erased as well.
The alternative method to erase a title
You can erase a title by selecting eight (under-bars) as
described in step 3 of "Putting Your Personalized Titles
onto the Discs" (Page 12).
Displaying the Registered
lO
o
0)
3
ft>
3
o
c
3
n
r+
o*
3
n
c
o
3
Changing a Registered
Title — Disc Memo Function
Play the disc whose title you wish to
change and repeat steps 2 to 5.
When you change the title, the level settings of output will
not be erased.
Titles
Press the DSPL/CLOCK SET button.
H I
5CHUBERT
Each time you press the DSPL/CLOCK SET
button during CD playback, the display on the
display window changes as follows:
Elapsed playback time
i
Disc title
I
Clock
continue to next page 13
a>
“n
C
3
n
o'
D
Page 16
Title display modes
While loading the discs, whatever display mode the system
is in, the indication on the display unit automatically
changes as follows:
The title of the disc
4
Disc and track number
I
Currently selected display mode
Changing the Output
Level
Level File Function
You can select the output level for the disc.
If the disc has not been appointed a name, you
cannot select its output level. For instructions
on "Putting Your Personalized Titles onto the
Discs" (page 12).
Note
This function may not work when a changer without level
file feature is connected.
ENTER
4 ® To continue selecting the output
level.
— press the (~
(g) To finish selecting the output level,
— press the NAME LIST/NAME EDIT
button for more than two seconds.
J-
Searching for a Desired
Disc by Title — List up Function
This function can be performed after discs
have been assigned a custom title. For more
information on disc titles, please refer to page
12.
1 Press the NAME LIST/NAME EDIT button
once, quickly.
L3 ^
iBEHUBEET:
The name assigned to the disc currently
playing will appear on the display.
Note
This function may not work when a changer without list
up feature is connected.
14
-/+
Playback the disc for which you wish to
change the output level.
1 Press the NAME LIST/NAME EDIT button
for more than two seconds.
The system will enter the name edit mode.
2 Press the NAME LIST/NAME EDIT button
once, quickly.
The system will enter the output level
selecting mode.
CH I
5 LEy. B
3 Press the Q' Q select the output
level.
You can choose between an output level
range of 1 - 4.
Initial setting
2 By pushing the Q ' (3' s^^n
the list of disc names:
Q : lets you see the previous disc
names
Q : lets you see the following disc
names
Once a disc name has been displayed for
over five seconds, the screen returns to its
normal display.
Notes
• If there are no discs in the magazine, “NO DISC" will
appear on the display.
• If a disc has not been assigned a custom name, "******"
will appear on the display.
• If the disc information has not been read in by the unit,
“NOT READ" will appear on the display. If the disc
information has not been loaded into the unit, “NOT
READ" will appear on the display. To execute loading,
first push the DISC button, then choose the disc that has
not been loaded.
3 When you have found the desired disc,
press the ENTER/DELETE button to
playback the disc (Direct Search
Function).
Note
You can still execute the Direct Search Function even if the
"***♦**" message appears on the display (unnamed disc).
Page 17
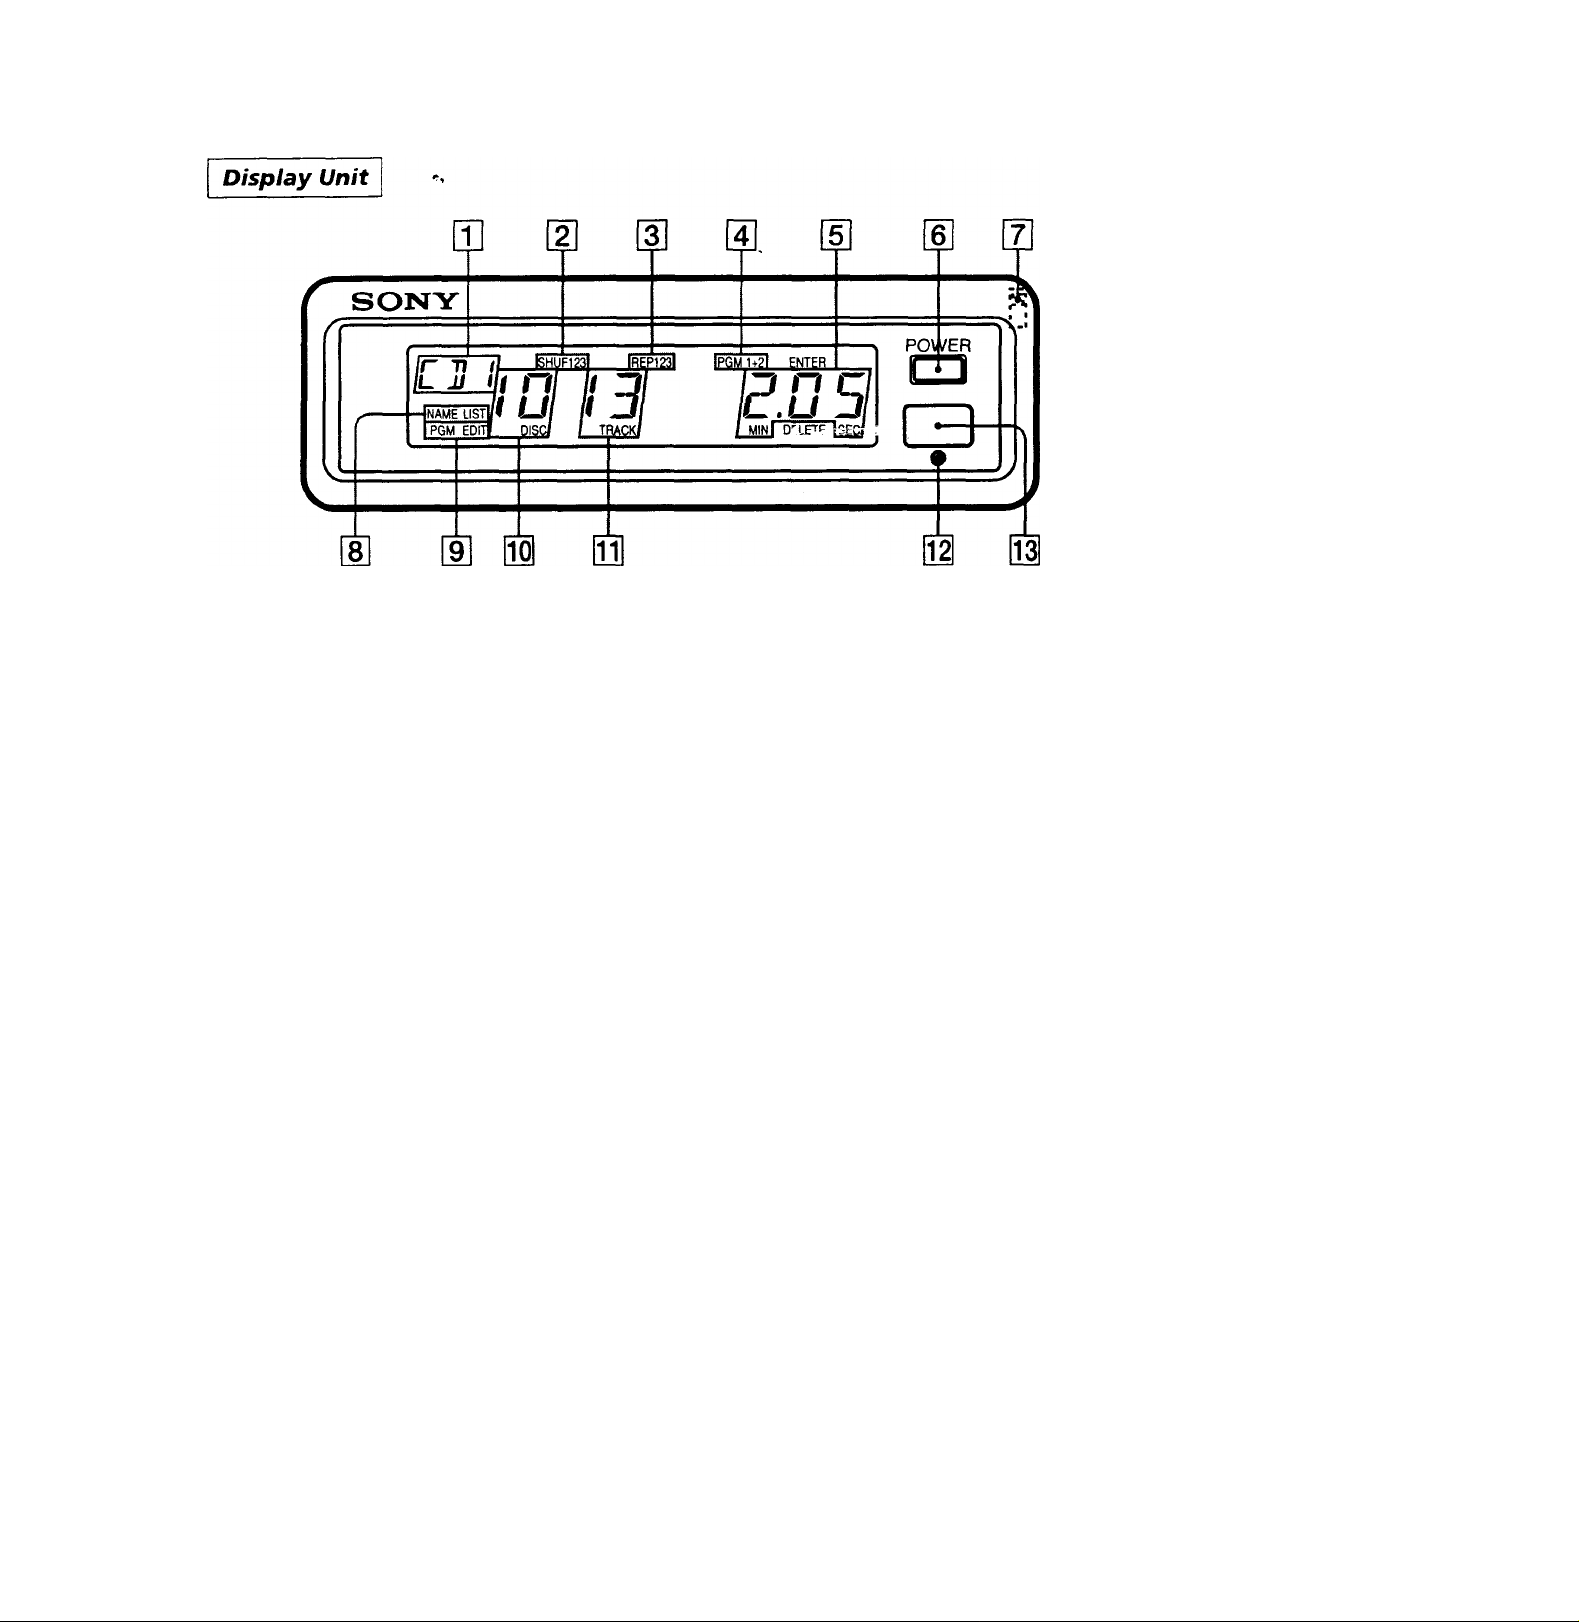
Location of Controls
I
Refer to the pages in # for details.
CD (CD Changer number) indication
m
SHUF (shuffle play) indication O
REP (repeat play) indication O
PGM (program memory function)
indication O(|D(D0
Elapsed playing time indication
POWER switch OO
Press to turn on and off the system.
Illumination color select switch (rear)
m
To change the illumination color, change
the position of the switch on the backside
of the display.
(amber) 10Z12 (green)
NAME LIST (list up function)
indication <D
PGM EDIT (program edit mode)
indication O000
DISC (disc number) indication
Ql] TRACK (track number) indication
m Reset button O
Press this button with a ball-point pen etc.
when the operation buttons fail to
function.
Infrared receptor for the remote
commander
n
c
o
3
(D
c
n
o
3
15
Page 18
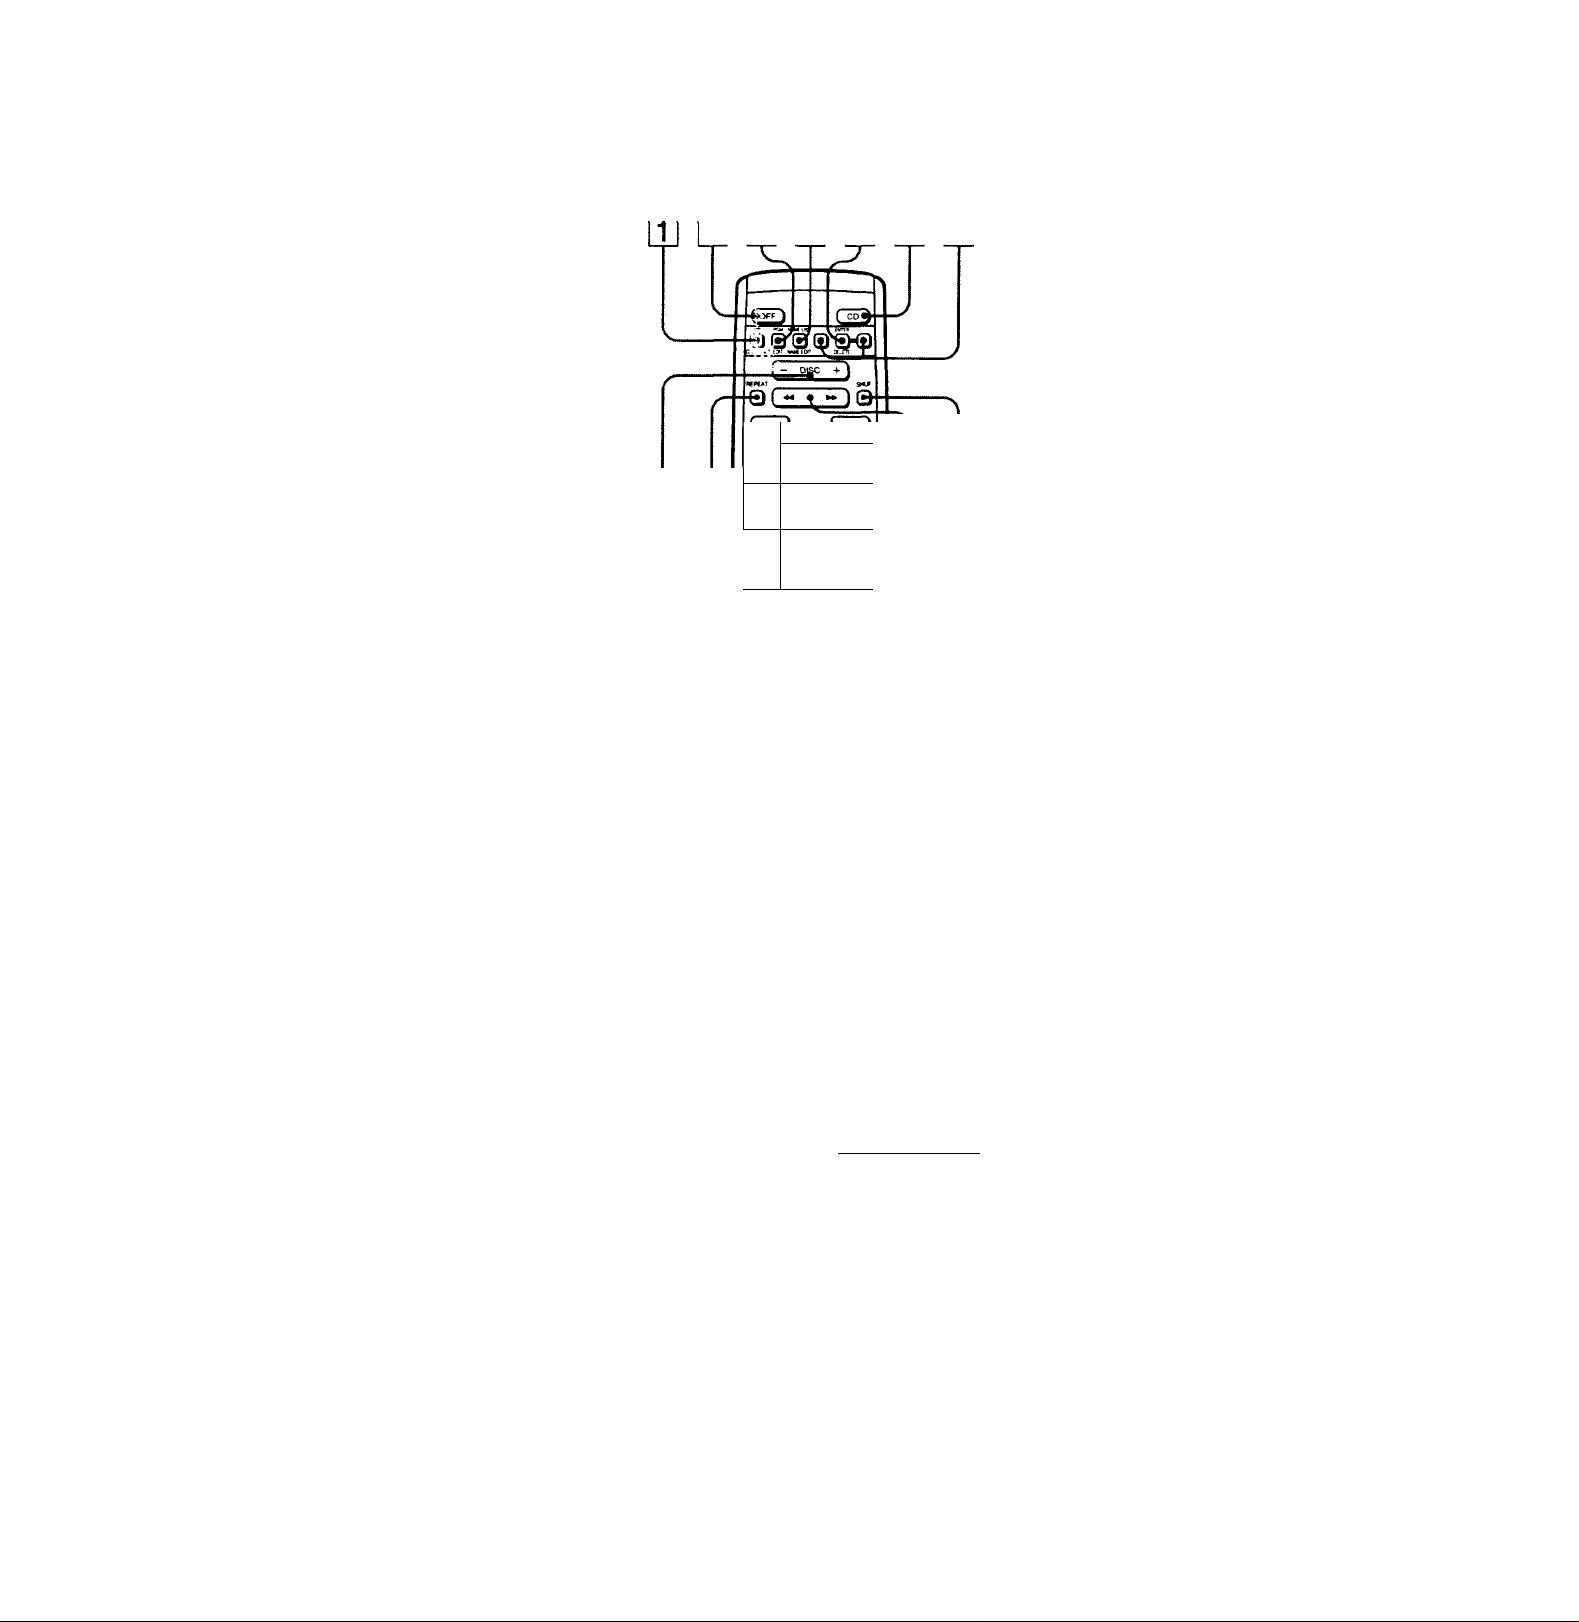
Location of Controls
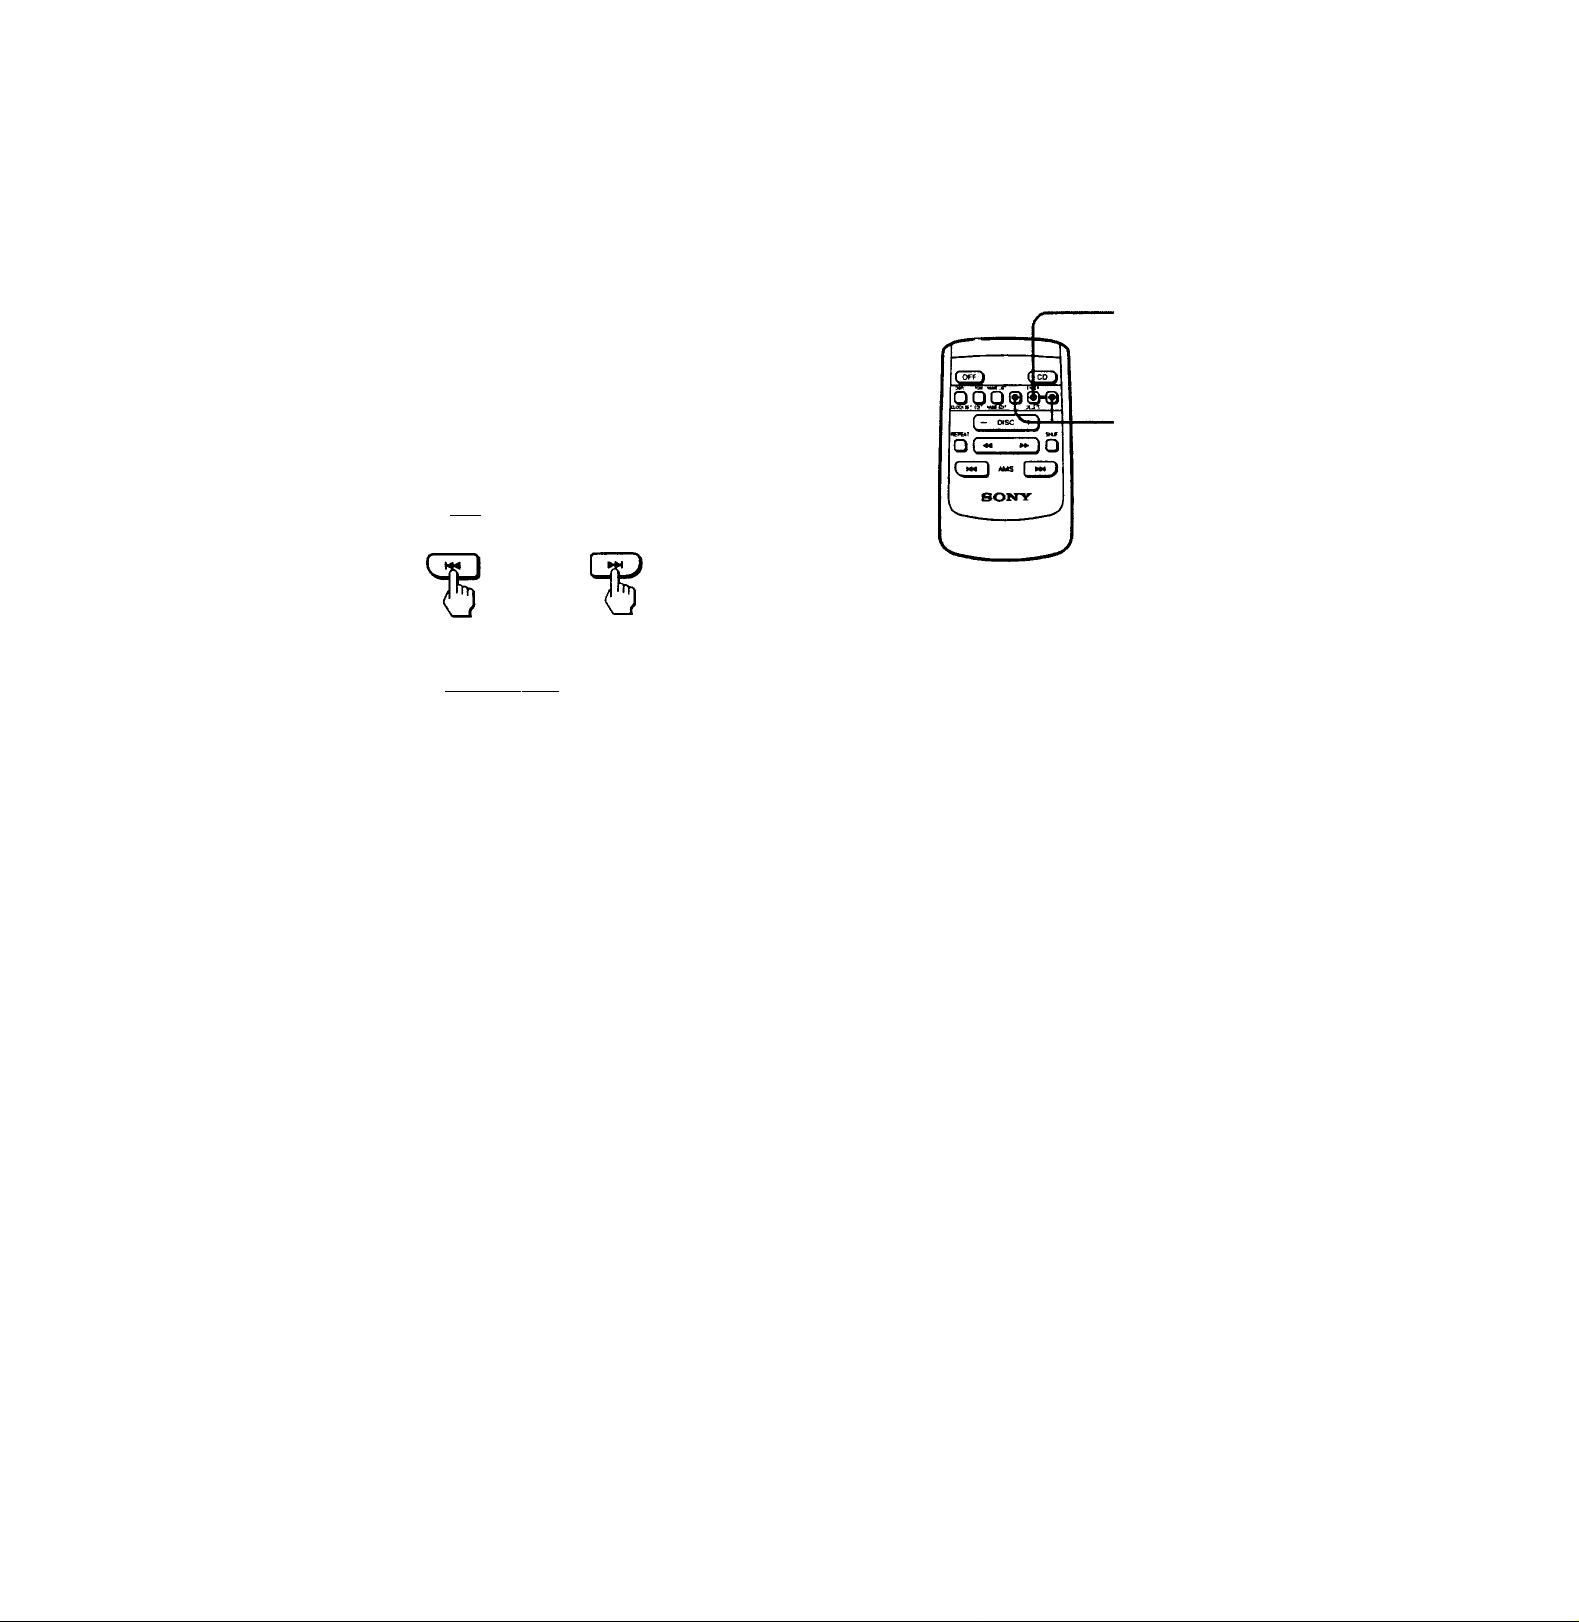
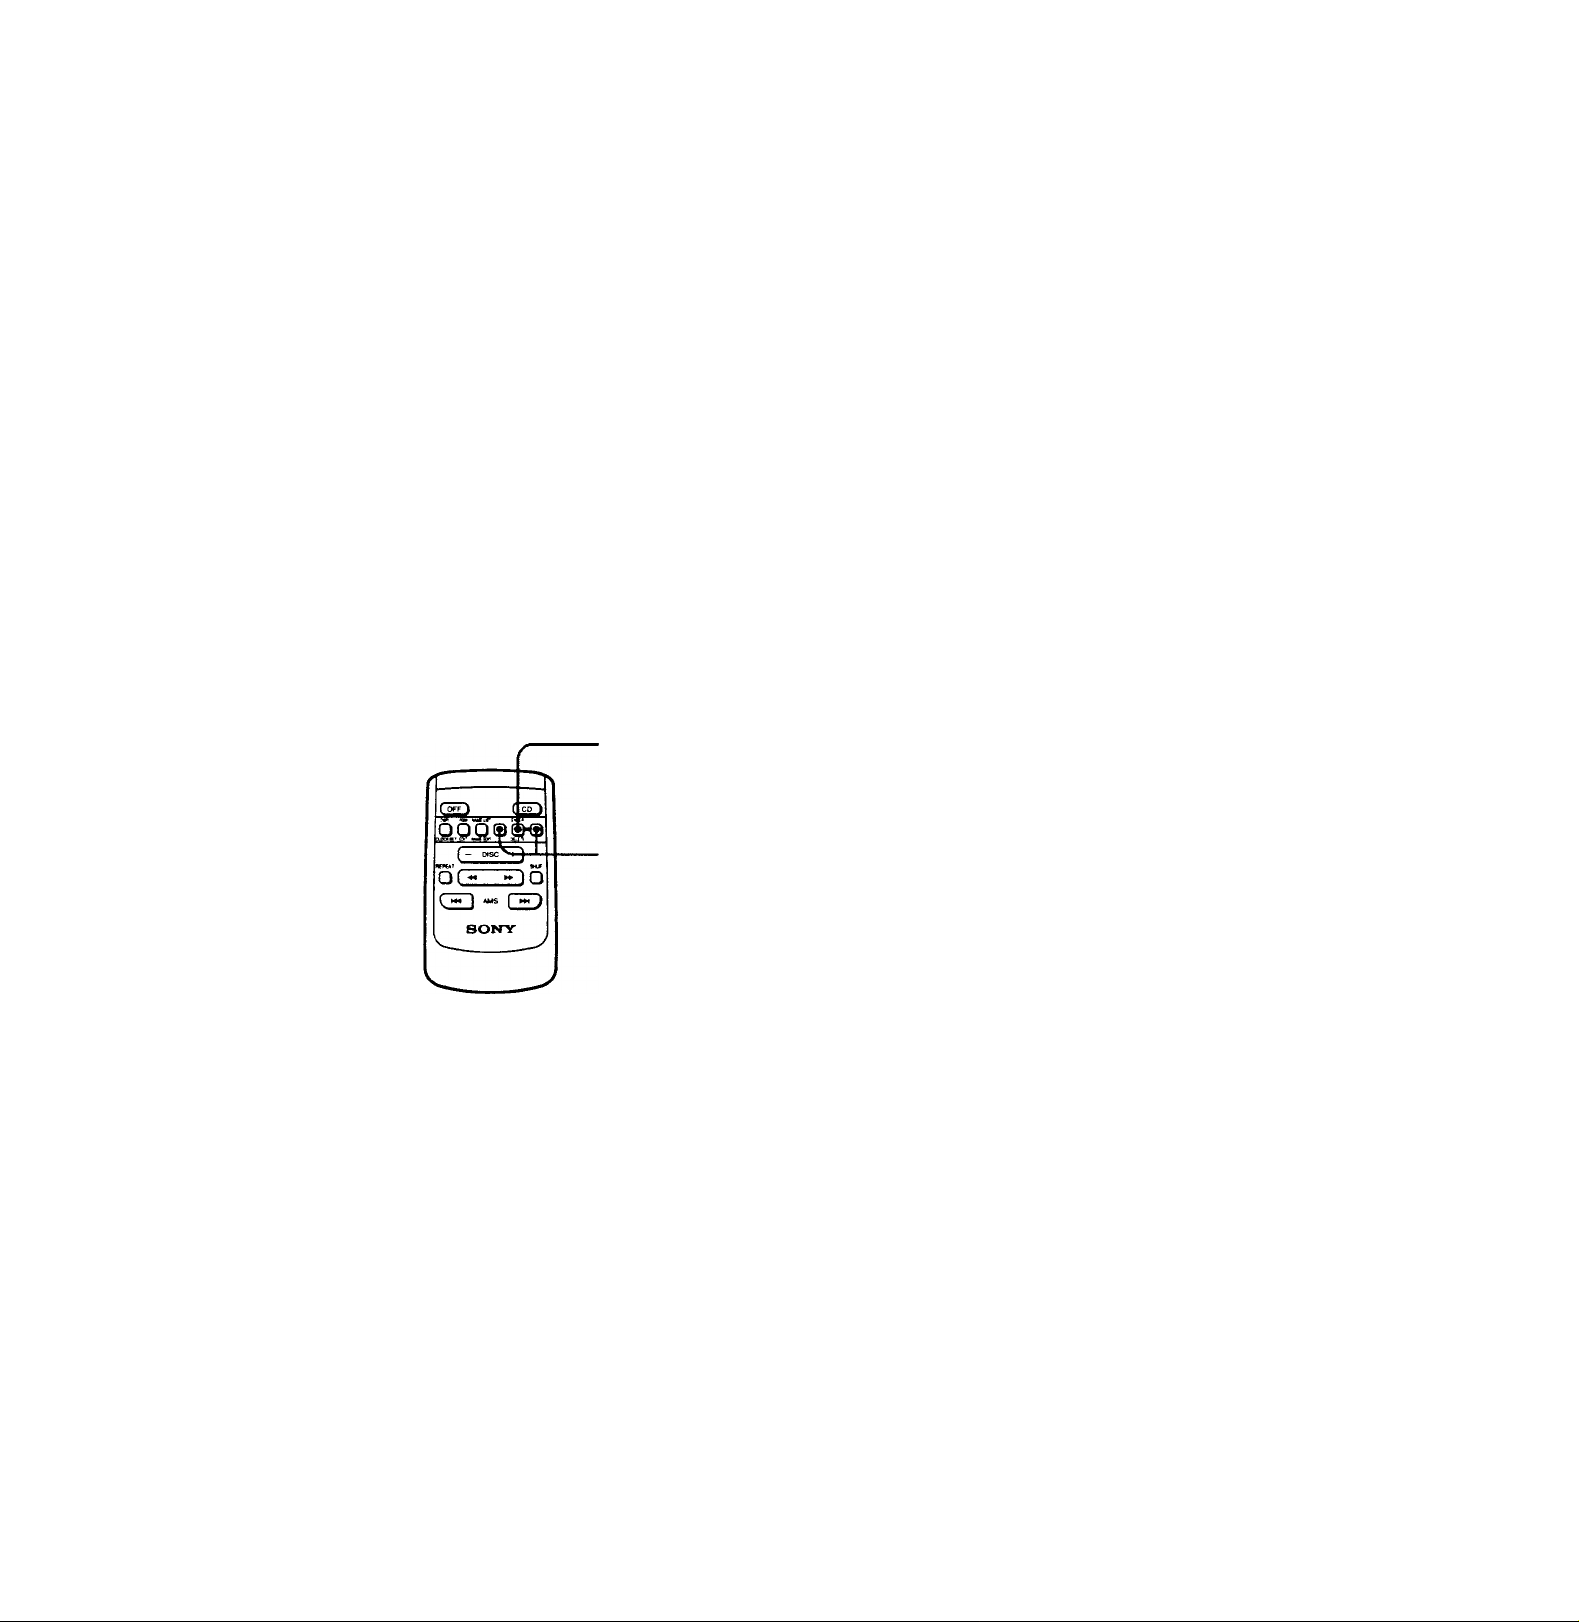
Remote Commander
2 3 4 5 6 7
B AMS1
V ***
SONY
1
0 11 12
If you press the function buttons on the
remote quickly, the function described
above the button will be executed.
If you press the function buttons for at
least two seconds, the functions
described below the button will be
executed.
DSPL PGM NAME LIST
□ □□ □
CLOCK SET EDIT NAME EDIT
Refer to the pages in # for details.
[T] DSPL (display mode change)/CLOCK SET
(time set) button 00®
[Z] OFF button O
PGM (program memory play)/EDIT
(program edit mode) button O0®0
[4] NAME LIST (list up function)/NAME EDIT
(name edit mode) button
[5] ENTER/DELETE button 000000
[U CD (CD play/CD changer select)
button OO®
When two or more CD changers are
connected, press this button to select a
desired CD changer. Every time you press
the button, the CD changer number on the
display unit will change.
ENTER
DELETE
DISC (disc select) button O®®
REPEAT (repeat play) button O
AMS (automatic music sensor) buttons
Press either side of the button once during
CD playback to search the beginning of a
track (AMS function).
side: To locate the beginning of the
next track
side: To locate the beginning of the
currently playing track
If you keep the button pressed, the
beginnings of either the succeeding or the
previous tracks will be located. However,
if the beginning or the end of the disc is
reached, you will not be able to go any
further.
If you press the AMS button during
program memory play, the tracks stored
into program memory will be scanned in
their order.
Ill] ( ♦« ) (manual search) button
Press and hold either side of the button
during CD playback to search a desired
point of a track.
side: To fast forward
side: To fast reverse
The elapsed playing time of the track will
be displayed on the display unit during
the manual search.
SHUF (shuffle play) button O
16
[7] Q Q (character select/list-up select/
program select) button O®®®®®
Page 19

I
Installing the Batteries
Battery life
When the batteries become weak, you will not
be able to operate the unit with the remote
commander. Battery life is approx, six months
although it depends on the way of use.
Notes on batteries
To avoid damage from battery leakage and
subsequent corrosion:
— insert the batteries by matching the "+" and
on the batteries to the "+" and in
the battery compartment
— do not use an old battery with a new one,
or different types of batteries together
— remove the batteries when you do not use
the unit for a long period of time
— do not charge the batteries.
Maintenance
Fuse Replacement
If the fuse blows, check the power connection
and replace the fuse. If the fuse blows again
after replacement, there may be an internal
malfimction. In this case, consult your nearest
Sony dealer.
Warning
Use the specified amperage fuse.
Use of a higher amperage fuse may cause
serious damaee.
If any battery leakage occurs, replace the
batteries witir new ones after cleaning the
battery compartment.
Installing the Remote
Commander
to the place you
wish to install to
Install the remote commander with velcro tape in
a desired place.
Notes
• Do not install or leave the remote commander in a location
near any heat sources, or in a place subject to direct
sunlight (especially on the dashboard in summer etc.).
• When you park your car in direct sunlight, detach the
remote commander and place it in a location such as the
glove-box, where it will not be subjected to direct sunlight.
• Before installing the remote commander, be sure to check
whether you can remote-control the system from the place
where you intend to install the remote commander.
• Clean the surface before attaching the velcro tape.
17
Page 20

Specifications
I
CD change unit
System
Frequency response
Wow and flutter
Signal-to-noise ratio
Output terminals
Current drain
Operational temperature
Dimensions
Mass
Compact disc digital audio
system
5-20,000 Hz
Less than measurable limit
More than 92 dB
BUS control output
terminal (8 pin)
Analog audio output
terminal (RCA pin)
800 mA (at playback)
800 mA (at disc loading/
ejecting)
-10 °C to +55 °C
Approx. 305 X 90 X 180 nfvm
(w/h/d)
Approx. 2.2 kg
Hideaway unit/Remote commander/ Display unit
Frequency
Dimensions
Mass
88.3 MHz/88.7 MHz/
89.7 MHz/89.9 MHz
(switchable)
Hideaway unit:
Approx.
125.2 X 31.6 X 128.2 mm
(w/h/d)
Remote commander
Approx. 66 X 108 X 20 mm
(w/h/d)
Display unit:
Approx. 120 X 37 X 18.5 mm
(wÂ/d)
Hideaway unit:
Approx. 450 g
Remote commander:
Approx. 55 g not ind.
batteries
Display unit:
Approx. 115 g
Supplied accessories
Disc magazine (1)
Rotary commander RM-X3S
BUS cable (1)
RCA pin cord (1)
Mounting hardware (1 set)
Optional accessories
CD cleaning kit CDM-21BK
CD single adaptor CSA-8
Disc magazine XA-lOB
Source i-iector XA-U20, XA-U40
BUS cable (supplied with tin RCA pin cord)
RC-61 (1 m), RC-62 (2 m)
RCA pin cord
RC-63 (1 m), RC-64 (2 m)
Design and specifications are subject to change without
notice.
18
Page 21

Troubleshooting Guide
The following check^ill assist in the correction of most problems which you may encounter with
your unit.
Before going through the check list below, refer back to the connection and operating procedures.
General
Problem
The operation buttons do not
function.
The sound skips due to
vibration.
Cause/Solution
• The built-in micro computer has malfimctioned.
—» Press the reset button on the display unit.
• The connecting cords are not connected properly.
• The batteries in the remote commander are weak.
• The distance between the remote commander and the display
unit is too far.
• The CD changer unit is installed in an unstable location.
—Re-install it in a stable location.
• Dirty or defective disc(s)
—► Clean or replace it/them.
Error displays
The following indication will flash for about five seconds and an alarm sound will be heard.
Display
MO ^<<o/т
MU MflU
MH 77 T rr
mj JJIJL
ERROR
Cause
The disc magazine is not inserted in
the CD changer.
No disc is inserted in the disc
magazine.
The disc is dirty.
The disc is inserted upside down.
Solution
Insert the disc magazine with discs into
the CD changer.
Take out the magazine and insert the
discs.
Clean the disc.
Insert the disc correctly.
The CD changer cannot be operated
RESET
If the above mentioned solutions do not help to improve the situation, consult your nearest Sony
dealer.
because of some problem.
Press the reset button of the display
unit.
19
Page 22

Particularidades
El CDX-71RE es un sistema cambiador de
discos compactos compuesto por una unidad
visualizadora, una unidad oculta (modulador),
y un cambiador de discos compactos. La
unidad oculta modula la señal de audio
procedente del cambiador de discos compactos
en una señal de radiofrecuencia (RF) de 88,3,
88,7, 89,7, u 89,9 MHz a fin de que pueda
recibirse mediante el sintonizador de FM
existente en el sistema de audio de su
automóvil. Por lo tanto, usted podrá disfrutar
de la reproducción de discos compactos con el
sistema estéreo de su automóvil incluso
aunque no posea terminales de entrada para
reproductor de discos compactos.
• Función de archivo de usuario para asignar
y visualizar el título de cada disco
(página 13).
• Función de memoria de programa para
preseleccionar sus canciones favoritas de los
discos en todo el cambiador*, y reproducirlos
en el orden que desee escucharlos (página 9).
• Funciona solamente con cambiadores de discos compactos
con función de memoria de programa.
• Podrá seleccionar el rúvel de salida para cada
disco.
• Función de listado de títulos para buscar el
directorio de discos mediante los títulos
personales (página 15).
• Cambiador de discos compactos de tamaño
reducido para ahorrar espacio, que puede
instalarse en posición vertical, horizontal o
inclinada en su automóvil.
• Telemando sumirüstrado que le permitirá
controlar el cambiador de discos compactos
instalado en el portaequipajes de su
automóvil.
• Podrá conectar y controlar varios
cambiadores de discos compactos
opcionales empleando un selector de fuente
Sony (no suministrado).
• Función de reproducción aleatoria que
reproduce las canciones en orden arbitrario,
(página 8).
• Función de repetición de la reproducción
para reproducir repetidamente una canción,
un disco, o todos los discos de un cambiador
(página 8).
• Iluminación bicolor conmutable (ámbar y
verde).
• Reloj digital de 12 horas incorporado.
• Controlador giratorio suministrado
(RM-X3S) que podrá emplear como el
interruptor del limpiaparabrisas o de los
faros de su automóvil mientras conduce.
Page 23

Indice
Precauciones.......................................................... 4
Preparativos
Puesta en hora del reloj.........................................6
Cambio de la frecuencia de transmisión..............6
...........................................................
Operación del cambiador de
discos compactos
Escucha de la reproducción de discos
compactos
Parada de la reproducción de un disco
compacto.............................................................7
Escucha de la radio
Reproducción de cintas
Reproducción de discos en orden arbitrario
— Fimciones de reproducción aleatoria
Reproducción de discos repetidamente
— Fimciones de reproducción repetida
..........................................................
................................................
.........................................
.........
..........
Función de memoria de
programa
5
1
7
8
8
8
Función de archivo de usuario
Asignación de títulos personales a los discos
— Función de memorando de disco
Cambio de un título registrado
— Función de memorando de disco
Borrado de un titulo registrado
— Función de memorando de disco
Visualización del título registrado
Cambio del nivel de salida
Búsqueda del disco ^oseado mediante el titulo
— Función de listado de títulos
Ubicación de los controles
Mantenimiento
Especificaciones....................................................20
Guía para la solución de problemas...................21
.....................................................
....................................
...................................
................
................
................
.......................
.......................
17
19
13
14
14
15
15
15
Configuración de un programa
(Con las canciones que desee escuchar)...
Reproducción de un programa organizado.
Cancelación del modo de programa
Borrado de canciones de entrada
Inserción de canciones en un programa
Borrado de un programa por completo
.............
.................
.......
.......
.10
.10
.11
.11
.11
.12
Page 24

Precauciones
• Este sistemajio podrá utilizarse con un
sistema de audio para automóvil que no
pueda recibir FM.
• Antes de utilizar el sistema por primera vez,
o después de haber reemplazado la batería
del automóvil, presione el botón de
reposición del panel frontal con un bolígrafo,
etc. y, a continuación, active el sistema.
Un disco sucio o defectuoso puede causar
pérdidas de sonido durante la reproducción.
Para obtener el óptimo sonido, tome los discos
como se indica a continuación.
Tome los discos por sus bordes y, para
mantenerlos limpios, no toque la superficie.
Así no
No pegue papeles ni cintas sobre la superficie
de la etiqueta.
Botón de reposición
• Si dejó el automóvil aparcado al sol y
aumentó considerable la temperatura interior
del mismo, antes de utilizar el sistema, deje
que se enfríe.
• Si el sistema no recibe alimentación,
compruebe en primer lugar las conexiones. Si
todo está en orden, compruebe el fusible.
• Evite instalar el sistema en un lugar:
— sometido a temperaturas superiores a
55°C.
— sometido a la luz solar directa.
— cercano a fuentes térmicas (como aparatos
de calefacción).
— expuesto a la lluvia o a la humedad.
— expuesto a polvo o suciedad excesivos.
— sometido a vibraciones excesivas.
Condensación de humedad
En un día lluvioso, o en un lugar muy
húmedo, es posible que se condense humedad
en las lentes del interior del cambiador de
discos compactos. Cuando suceda esto, la
unidad no funcionará adecuadamente. En tal
caso, extraiga el disco y espere
aproximadamente una hora hasta que la
humedad se haya evaporado.
Si tiene algrma pregunta o problema en
relación con el sistema que este manual no
pueda resolver, consulte a su proveedor Sony.
Notas sobre los discos compactos
Así no
X
No exponga tos discos a la luz solar directa ni
a fuentes térmicas tales como conductos de
aire cálido, ni los deje en un automóvil
aparcado al sol donde la temperatura de su
interior puede aumentar considerablemente.
Así
Antes de reoroducir un disco, limpíelo con un
paño limpiador opcional. Hágalo del centro
hacia la periferia.
No utilice disolventes tales como bencina,
diluidor de pintura, ni limpiadores ni
aerosoles destinados a discos analógicos.
Así
Notas sobre el cargador de discos
• No deje el cargador de discos en lugares
sometidos a altas temperaturas y muy
húmedos, como en el salpicadero o en la
bandeja trasera del automóvil, donde podría
incidir la luz solar directa.
Page 25

• No inserte más de un disco a la vez en cada
ranura, ya que podría dañar el cambiador y
los discos.
• No deje caer el cargadoi;de discos ni lo
someta a golpes violentos.
Preparativos
1 Superficie con etiqueta
10 discos, uno en cada ranura
Para extraer
I
Para extraer
Si el cargador de discos no está adeuadamente bloqueado en
su lugar dentro de la unidad del cargador de discos
compactos, extráigalo. Presione en primer lugar la tecla
EJECT, y después vuelva a insertar el cargador en la
unidad del cambiador de discos compactos.
Nota
Para reproducir un disco compacto de 8 cm, utilice un
idaptador para discos compactos CSA-8 Sony vendido
rparte. Cerciórese de utilizar siempre el adaptador
’spicificado, ya que de lo contrario la unidad podría
‘uncionar mal. Si utilizase otro adaptador, es posible que la
unidad no funcionase adecuandamente.
Zuando utilice el adaptador para discos compactos Sony,
:erciórese de que las tres unas del mismo hayan quedado
urmemente enganchadas en el disco compacto de 8 cm.
Nota
Cuando inserle un cargador de discos en la unidad del
cambiador de discos, o después de presionar el botón de
reposición del sistema estéreo del automóvil, el sistema se
activará automáticamente y leerá la información de los
discos compactos. Cuando la información de todos los
discos compactos del cargador se haya leido, el sistema
cesará automáticamente la operación.
Utilice el cambiador de discos compactos
con la puerta cerrada
De lo contrario, podrían introducirse objetos
extraños en el mismo y contaminar el objetivo
de su interior.
Page 26

I
Puesta en hora del reloj
El reloj posee una indicación digital de 12 horas.
Por ejemplo, para ajustar 10:08.
1 Ponga la llave de encendido en ON.
2 Mantenga presionada la tecla DSPL/
CLOCK SET durante más de dos
segundos.
\\\ 11í/
n nz
ZI.U uz
/ / I I \ \\
La indicación comenzará a parpadear.
3 Presione la tecla ^ *** 1 ( *** J para
ajustar los dígitos de la hora.
(para retroceder) (para avanzar)
Presione la tecla ( ♦« >» ) para ajustar
los dígitos de ios minutos.
Cambio de la frecuencia
de transmisión
Usted podrá seleccionar la frecuencia de la
señal de RF modulada transmitida desde la
unidad oculta de acuerdo con el nivel del
ruido de interferencia.
ENTER
-/+
Mantenga presionada la tecla ENTER/
DELETE durante unos 2 segundos.
El sistema entrará en el modo de selección
de frecuencia. El ajuste inicial es de
88,3 MHz.
(para retroceder) (para avanzar)
\ \ t I I I / / /
n^n O'
ZI u.u az
/ / ; I I I t \ v
4 Presione la tecla DSPL/CLOCK SET.
I nn D
I u.u a
El reloj se pondrá en fimcionamiento.
Nota
Cuando el selector POWER SELECT de la unidad oculta
esté en la posición "OFF", la indicación del reloj no
aparecerá en la unidad visualizadora aunque ponga en ON
la llave de encendido del automóvil. En tal caso, presione el
interruptor POWER de la unidad visualizadora y ponga
en reproducción un disco. Después realice los pasos de 2 a
4.
Presione la tecla Q o Q para
seleccionar la frecuencia.
Cada vez que presione las teclas, la
frecuencia cambiará de la forma siguiente:
0 : 88,3 MHz-
88,7 MHz -
0
:88,3 MHz-
89,9 MHz-
Vuelva a mantener presionada la teda
ENTER/DELETE durante unos 2 segundos.
Nota
Cerciórese de ajustar la frecuendia de su sintonizador de
FM a la nuevamente seleccionada.
•89,9 MHz► 88,3 MHz
■88,7 MHz► 88,3 MHz
■ 89,7 MHz-
89,7 MHz-
Page 27

1
Operación del
cambiador de discos
compactos
Escucha de la
reproducción de discos
compactos
1 Conecte la alimentación del sintonizador
de FM del sistema de audio del
automóvil y seleccione la frecuencia de
88,3. 88,7, 89,7, u 89,9 MHz que haya
elegido con el procedimiento descrito en
"Cambio de la frecuencia de transmisión"
(página 6). Con respecto a la sintonía de
FM, consulte también el manual de
instrucciones del sistema de audio de su
automóvil.
Parada de la reproducción
de un disco compacto
Presione el interruptor POWER de la
unidad visualizadora o la tecla OFF del
telemando.
Para reiniciar la reproducción del disco
compacto, presione el interruptor
POWER de la unidad visuali^dora o la
tecla CD del telemando.
Notas
• Cuando pare la reproducción de un disco compacto, es
posible que oiga cierto ruido a través de los altavoces.
Para evitar que suceda esto, reduzca el volumen antes de
parar la reproducción del disco compacto.
• Si pone en OFF la llave de encendido de su automóvil sin
parar la reproducción del disco compacto, la próxima vez
que la ponga en ON, se reiniciará automáticamente la
reproducción del disco desde el punto en el que cesó.
Escucha de la radio
Z Presione el interraptor POWER de la
unidad visualizadora o la tecla CD=^ del
telemando. Se iniciará la reproducción
del disco compacto.
* Cuando el selector POWER SELECT de la unidad
oculta esté en la posición "OFF", y las indicaciones
de la unidad visualizadora no estén presentes, no
podrá iniciar la reproducción de un disco compacto
con el telemando. En tal caso, presione el interruptor
POWER de la unidad visualizadora.
i Ajuste el volumen con el control de
volumen del sistema de audio del
automóvil.
á el sistema está en el modo de reproducción normal,
espués de haber finalizado un disco, se reproducirá el
isco de número siguiente mostrado en la unidad
isualizadora. Si ha conectado dos o más cambiadores de
iscos compactos, se reproducirá el primer disco del
amblador de discos compactos con el número siguiente
lostrado en el visualizador. El orden de reproducción de
is discos podrá redisponerse cambiando los modos de
^producción. Con respecto a los detalles, consulte
Reproducción en otros modos", (página 8).
Presione el interruptor POWER de la
unidad visualizadora o la tecla OFF del
telemando para parar la reproducción
del disco compacto antes de sintonizar
una emisora de radiodifusión.
Cerciórese de parar la reproducción del disco
compacto antes de iniciar la escucha de una
emisora de radio.
De lo contrario, es posible que se produzca
cierta interferencia en la radiorrecepción.
Para reiniciar la reproducción de un disco
compacto, ajuste la frecuencia del sintonizador
de FM a la previamente seleccionada en
"Cambio de la frecuencia de transmisión"
(página 6), y presione el interruptor POWER
de la unidad visualizadora o la tecla CD del
telemando.
Nota
Cuando utilice este sistema con el sisterrm de audio del
automóvil, la recepción del sintonizador puede ser inferior
a la usual.
O
■a
n>
Q>
Q
o’
D
Q_
5L
r»
Q>
3
O"
Q)'
QO
Q.
ÍD
Q.
n
O
r»
o
T3
0>
r>
Page 28

Reproducción de cintas
Presione el interruptor POWER de la
unidad visualizadora o la tecla OFF del
telemando para parar la reproducción
del disco compacto antes de iniciar la
reproducción.
Para reiniciar la reproducción de un disco
compacto, ajuste la frecuencia del sintonizador
de FM a la previamente seleccionada en
"Cambio de la frecuencia de transmisión"
(página 6), y presione el interruptor POWER
de la unidad visualizadora o la tecla CD del
telemando.
Reproducción de discos en
La función de la tecla SHUF cambiará cíclicamente
de la forma siguiente:
SHUF 1
(Reproducción
aleatoria de disco)
Cancelación
(Reproducción normal
de discos compactos)
^ El modo de reproducción aleatoria total (SHUF 3)
solamente funcionará cuando haya dos o más
cambiadores conectados al sistema.
Cuando solamente haya un cambiador conectado
conectado, la indicación "SHUF 3" no aparecerá. En este
caso, si vuelve a presionar la tecla SHUF mientras esté
visualizándose la indicación "SHUF 2", la reproducción
aleatoria se cancelará.
------
SHUF 2
(Reproducción
aleatoria de
cambiador)
SHUF 3*
(Reproducción
afeatoria total)
I
orden arbitrario
— Funciones de reproducción aleatoria
Reproducción en orden arbitrario
de las canciones del disco
actualmente seleccionado
— Reproducción aleatoria del disco
Presione la tecla SHUF de forma que
aparezca la indicación "SHUF 1" durante
la reproducción de un disco compacto.
Cuando se hayan reproducido todas las
canciones de un disco, la reproducción
aleatoria pasará al disco siguiente.
Reproducción en orden arbitrario
de todas las canciones de todos ios
discos del cambiador actualmente
seleccionado
— Reproducción aleatoria del cambiador de
discos compactos
Presione la tecla SHUF de forma que
aparezca la indicación "SHUF 2" durante
la reproducción de un disco compacto.
Reproducción de discos
repetidamente
— Funciones de reproducción repetida
Reproducción repetida de la
canción actualmente seleccionada
— Repetición de canción
Presione la tecla REPEAT de forma que
aparezca la indicación "REP 1" durante
la reproducción de un disco compacto.
Cuando finalice la canción, se reiniciará su
reproducción.
Reproducción repetida del disco
actualmente seleccionado
— Repetición de disco
Presione la tecla REPEAT de forma que
aparezca la indicación "REP 2" durante
la reproducción de un disco compacto.
Cuando finalice la última canción del disco
actual, se reiniciará la reproducción de tal
disco.
8
Reproducción en orden arbitrario
de las canciones de todos los discos
de todos los cambiadores
— Reproduccción aleatoria total (cuando
haya conectado dos o más cambiadores de
discos compactos)
Presione la tecla SHUF de forma que
aparezca la indicación "SHUF 3" durante
la reproducción de un disco compacto.
Reproducción repetida de los
discos del cambiador actualmente
seleccionado
— Repetición del cambiador de discos
compactos (cuando haya conectado dos o
más cambiadores de discos compactos)
Presione la tecla REPEAT de forma que
aparezca la indicación "REP 3" durante
la reproducción de un disco compacto.
Page 29

Cuando finalice el último disco del cambiador
jctualmente seleccionado, se reiniciará la
'eproducción desde el primer disco del
rambiador actualmente selfeccionado.
Función de memoria
de programa
La fundón de la teda REPEAT cambiará
-.¡cucamente de la forma siguiente:
tEP 1
Repetición de canción)
_________________________
REP2
(Repetición de disco)
f
Cancelación
Reproducción (Repetición de
lormal de disco cambiador)
:ompacto)
' El modo de repelidórt del cambiador de discos compactos
(REP 3) solamente funcionará cuando haya dos o más
cambiadores conectados al sistema. Cuando solamente
haya un cambiador conectado, la indicación "REP 3" no
aparecerá. En este caso, si vuelve a presionar la tecla
REPEAT mientras esté visualizándose la indicación
"REP 2". la repetición de la reproducción se cancelará.
----------
REP 3*
Podrá preseleccionar el orden de reproducción
y las canciones que desee escuchar (de los
discos del cambiador conectado a la unidad).
Esta hmción se divide en Programa 1 y
ProgramaZ, permitiendo cada ui la
preseleccionar hasta 12 canciones. Además,
una vez registrado el programa, el orden de las
canciones se conserva. El cambio del orden de
discos del cambiador no afectará al orden en el
que se han programado las canciones para su
reproducción.
Notas
• Esta función se activa solamente si se conectan
cambiadores de discos compactos con función de memoria
de programa.
• Si se conecta un cambiador de discos compactos sin
función de memoria de programa, presionando la tecla
PGM/EDIT durante más de dos segundos no causará
que el sistema introduzca el modo de edición de
programa, sino que aparecerá "SORRY" en el
visualizador.
• Si presiona la tecla DSPL/CLOCK SET
momentáneamente cuando el modo de edición de
programa está activado, el número de disco, el número de
canción y el tiempo de reproducción transcurrido de la
canción actualmente en reproducción aparecerá en el
visualizador durante dos segundos.
• Si presiona la tecla G D-C - Pise +) yAMS
cuando el modo de edición de programa está activado, el
número de disco seleccionado y de canción junto con el
tiempo de reproducción transcurrido aparecerán en el
visualizador durante 1,5 segundos.
• Si presiona el botón de reposición o desconecta la
alimentación, se borrará el programa memorizado.
r lì I
U JJ 1
PGM eo(T
5 3
DISC "mACK
__________
EntÉR
I n
UJ I
(D
*D
o
3
cu
O
■D
fD
ü>
Q
O'
D
CL
ÍL
n
Ù)
3
g;
a>*
Q.
o
Q.
r\
o
r»
O
3
Q>
n
C
3
n
O'
3
Q_
3
o
3
o
o.
(l
Programa actual Indicador inicial de
PGM/EDIT
programal
ENTER/DELETE
-/+
Page 30

Configuración de un
programa
(Con las canciones que desee escuchar)
I
El programa comenzará la reproducción dos
segundos después.
Si presiona la tecla ( - disc + ) durante la
reproducción de memoria de programa, ésta se
interrumpirá y la reproducción del disco
seleccionado se iniciará.
1 Presione la tecla PGM/EDIT durante más
de dos segundos.
El sistema entrará en el modo de edición de
programa.
Л I
5 3 \P I.U /i configuración
i'GMEnT msc ni«ci> ////tiim»! del programa 1
* entÉr^ ^ Indicador de
Para configurar el programa2, presione
rápidamente la tecla PGM/EDIT una vez.
2 Reproduzca la canción que desee
introducir en la memoria.
3 Presione rápidamente la tecla ENTER/
DELETE una vez.
P I
i E T E R i"
C3 I
3 E IR I.D E Ì
РСЫвП D6C ТЯАСК ///IIMt\\4
Reproducción de programa 1
РГ"LI 11
Reproducción de programa!
»4
REI.
Reproducción de programat у 2
/ (
PG”
La función de la teda PGM/EDIT cambia
ciclicamente de la forma siguiente:
PGM 1
-------------------------
I
PGM OFF PGM 1+2*
* Aparecerá "PGMl + 2" en el visualizador solamente si
las canciones se programan en PGMl у PGM2.
H E
^ PGM 2
4 ® Para continuar introduciendo
canciones, repita los pasos 2 y 3.
(§) Para terminar de organizar un
programa, presione la tecla PGM/EDIT
durante más de dos segundos.
Una vez finalizada la configuración, la
unidad vuelve al modo de reproducción
normal.
Notas
• La configuración ha finalizado pero el programa no se
reproducirá.
• Aparece "**WAIT**" en el visualizador si no se han
leído aún los datos de entrada de canciones en la
memoria, o si no se ha introducido un disco en la unidad.
• Aparece “**FULL**" en el visualizador si intenta
introducir más de 12 canciones en un programa al
mismo tiempo.
Reproducción de un
programa organizado
Nota
Si no se ha configurado ningún programa, no aparecerá en
el visualizador.
POn
0)1 un TI o T n
MU JJ n I П
Además, aparecerá "NO DATA" en el
visualizador si no se han introducido en la
memoria ni el programal ni el 2.
Notas
• Si en el cargador de discos no se incluye una canción
almacenada en la memoria de programa, dicha canción se
saltará y se reproducirá la canción siguiente.
• Si no se ha cargado aún la información sobre una canción
almacenada en la memoria de programa, dicha canción
no se reproducirá.
• Aparecerá "NO READY" en el visualizador si en el
cargador de discos del cambiador de discos compactos no
se incluye ninguna canción almacenada en la memoria de
programa, o si la información sobre las canciones
almacenadas en la memoria de programa no se ha
cargado aún.
10
Podrá designar el programa o
programas que desee reproducir
presionando rápidamente la tecla PGM/
EDIT.
Page 31

Cancelación del modo de
programa
Presione rápidamente la teda PGM/EDIT
una vez durante la reproducción de
modo de programa. Aparece "PGM
OFF" en el visualizador.
Cuando se ha cancelado el modo de programa,
la unidad vuelve al modo de reproducción
normal.
ГГ M
Р
Ü I I
O FF
I
Si el orden de los discos no está claro, por
ejemplo, si la información del disco no se ha
leído aún por completo, o si en el cargador
de discos no está incluida una pista que
desea suprimir, aparecerá en el
visualizador en lugar del número de
cambiador y de disco.
Una vez designado, presione la tecla
ENTER/DELETE durante más de dos
segundos y la canción se borrará.
HEL
- - - P I.O B
Nueva canción en la posición 6
Borrado de canciones de
entrada
1 Presione la tecla PGM/EDIT durante más
de dos segundos.
La unidad introducirá el modo de edición
de programa.
CJ} I
5 3 IP I .D Bl configuración
PGM EDT nsc
///If 1 I \ WV
Para borrar canciones del programa!,
presione rápidamente la tecla PGM/EDIT
para que el indicador de configuración del
programa! se active.
Iotas
Al introducir el modo de edición de programa desde el
modo de reproducción de memoria de programa,
aparecerá en el visualizador el número de posición de la
canción actualmente en reproducción.
Introducción del modo de edición de programa desde el
modo de reproducción normal:
— Cuando todas las posiciones de las 12 canciones están
incluidas en el programa, el número 12 aparece en el
visualizador.
— Si se han incluido menos de 12 canciones, el número
de la primera posición disponible aparece en el
visualizador. Por ejemplo, si se han introducido
solamente 7 canciones, aparecerá el número 8 en el
visualizador.
Presione la tecla Q o Q para designar
la canción que desea borrar (mostrada en
el visualizador).
La canción actualmente registrada en la
posición 6 del programal.
r TI
L M t П
PGM EOT . ase TRACK
В
rm—
1
P
1
D B
XiCL .. ..
Indicador de
del programa 1
Número de
posición de
canción.
ЕЛ I
PGM EDIT ose T7UCK
1
I i
P 1. 0 В
Una vez borrada la canción de la posición 6,
las canciones comprendidas entre las
posiciones 7 a 1! ascenderán una posición.
Nota
Si las 12 posiciones de programa están ocupadas, la
posición 12 quedará libre cuando borre una canción. (Por
cada canción que borre, quedará libre una posición).
4 ® Para continuar borrando canciones,
repita los pasos 2 y 3.
® Para terminar de borrar canciones,
presione la tecla PGM/EDIT durante
más de dos segundos.
Inserción de canciones en
un programa
1 Presione la tecla PGM/EDIT durante más
de dos segundos.
El sistema entrará en el modo de edición de
programa.
^ Indicador de
5 3 "P !.u Bl configuración
TCM ЕПТ nsc TMc // / ni (m\ I (jei programal
Si desea insertar canciones en el programa!,
active el indicador de configuración del
programa! presionando rápidamente la
tecla PGM/EDIT.
continúa en la página siguiente —»
Ю
c
D
n
OÍ
O
O.
Ф
3
Ф
3
o
ш’
Q.
Л)
O
Ù)
3
Ш
11
Page 32

I
2 Presione la tecla Q o Q para designar
el número de posición de canción en el
que desea insertar una canción.
ES 1
в
5
Otsc ПАСХ
PGM EDiT
3 Reproduzca la canción que desea
insertar.
4 Presione rápidamente la tecla ENTER/
DELETE una vez para insertar la canción.
P I
iEtlTER-t
^^'5 3 P 1. 01
reu вуг D6C
La canción recién insertada ocupará la
posición de canción 6, y las canciones de 7
en adelante descenderán una posición.
Nota
Una vez que las 12 posiciones se han ocupado, aparecerá
"**FULL** " en el visualizador y no será posible insertar
más canciones.
rm—
1
1
P
П Б
ЖШ1 canción
Número de
2 Presione la tecla Q para obtener la
indicación siguiente.
Jfí-
_______
Si no hay ninguna canción almacenada en
PGMl, esta indicación no aparecerá.
3 Presione la tecla ENTER/DELETE durante
más de dos segundos y el programal se
suprimirá.
1^1 tu
Un segrmdo después de la aparición de
"NO DATA" en el visualizador, el modo de
edición de programa de PROGRAMl
aparecerá en el visualizador.
La función de las tedas cambia ciclicamente de la
forma siguiente:
_________________
11 (
tu n
n
ни JJ n I П
Ti n T
Ti
p
Grupo de programal
I
-------------------------------
СЛ I
5 В IP I. ÜB l
PGM ED(T 06C TÁ«0(
•
•
•
•
•
-vvM
•
5 ® Para continuar insertando canciones
en el programa, repita los pasos de 2
a 4.
(b) Para terminar de insertar canciones,
presione la tecla PGM/EDIT durante
más de dos segundos.
Borrado de un programa
por completo
Por ejemplo, suprima el programal.
1 Presione la tecla PGM/EDIT durante más
de dos segundos.
El sistema entrará en el modo de edición de
programa.
Л I
КУ ШТ DiSC
Para suprimir el programa2, presione
rápidamente la tecla PGM/EDIT una vez.
Б 3 IP l.u B j configuración
Indicador de
del programal
0
•
•
i
В E P I .D I
РШ евп ose ТПМХ
I
0
i
SEL
©
•
•
•
•
•
t
0
I
--РБП I--
Presione la tecla PGM/EDIT si cualquiera de las
indicaciones anteriores aparece en el visualizador
y éste cambiará a PROGRAM2.
12
Page 33

I
Grupo de programa2
r 71 f EHTtn
PGM SVT OiSC nvO(
b G
»
»
TI I CKTEn
r
^ ' E P E r -I C r C.u I
PGM EDfT ose TM» DaETI
I
0
i
JIEL
______
------
Presione la teda PGM/EDIT si cualquiera de las
ndicadones anteriores aparece en el visuaUzador
f éste cambiará a PR0GRAM1.
'Jota
n no se ha configurado ningún programa, no aparecerá en
i visuaUzador.
% Para terminar de borrar programas,
presione la tecla PGM/EDIT durante más
de dos segundos.
5 Pí,04
p r m p
r O 11 c
i
»
»
B
í
©
________
------------
Función de archivo de usuario
Usted podrá registrar los títulos personales y
los ajustes de reproducción/salto de 110
discos* como máximo por cambiador de discos
compactos (función de archivo de usuario).
Estos ajustes se almacenarán en U memoria del
cambiador de discos compactos. Por lo tanto,
aunque extraiga im disco con ajustes asigados
del cambiador de discos compactos, podrá
seguir utilizando la núsma función de archivo
de usuario la próxima vez que reproduzca tal
disco en el mismo cambiador de discos
compactos. Además, si su sistema tiene varios
cambiadores de discos compactos conectados,
podrá reproducir dicho disco en otro
cambiador de discos compactos y utilizar la
misma función de archivo de usuario, siempre
y cuando los cambiadores de discos compactos
estén interconectados con cables BUS.
♦ Si intenta registrar más de 110 discos, en el visuaUzador
aparecerá la indicación "FULL", y no se aceptará el
mandato de registro en el archivo de usuario. En este
caso, tendrá que borrar de la memoria algunos discos a
fin de poder introducir otros nuevos.
Nota
Es posible que los títulos registrados de los discos no se
visualicen inmediatamente cuando estén cargándose en el
cambiador de discos compactos.
c
D
n
O3
O.
fO
3
ro
3
o
Asignación de títulos
personales a los discos
— Función de memorando de disco
1
Ponga en reproducción el disco al que
desee asignar un titulo. Con respecto a
los detalles, consulte la página 7.
Presione la tecla ÑAME LIST/NAME EDIT
durante más de dos segundos.
El sistema introducirá el modo de edición
de títulos.
LH I
7 I \
continúa en la página siguiente
Q.
(1)
O
ü)
3
cu
c
D
n
o-
3
ca.
fO
cu
n
3"
<
o
Q.
m
c
c
cu
13
Page 34

3 Presione la tecla O o Q para
seleccionar los caracteres deseados.
I
Cambio de un título
CU 1^-^
ZJZ .
f I N
Cada vez que presione la teda Q o Q,
los caracteres cambiarán en el orden
siguiente;
Q ->_фАфВфС4.
(2 f ♦ - ♦ + ♦Эф
Si mantiene presionada la teda, los
caracteres cambiarán rápidamente.
Usted podrá asignar un titulo a cada disco (un
titulo por disco). El titulo podrá indicarse en el
visualizador mientras el disco esté cargándose o
reproduciéndose. Podrá utilizar un máximo de
ocho caracteres por titulo.
Presione la tecla ENTER/DELETE después
de haber localizado el caráaer deseado.
CU I г
Jbií.
________________
/ I Ч
La parte parpadeante se moverá al espacio
siguiente de la derecha. Repita los pasos 3 y
4 a fin de introducir el título completo.
Usted podrá emplear ocho caracteres por
disco.
registrado
— Función de memorando de disco
Ponga en reproducción el disco cuyo título
desee cambiar y repita los pasos de 2 a 5.
Cuando cambie el título, los ajustes de nivel de salida no se
borrarán.
Borrado de un título
registrado
— Función de memorando de disco
Seleccione el cambiador de discos
compactos y ponga en reproducción
cualquier disco.
Presione la tecla ÑAME LIST/NAME EDIT
durante más de dos segundos.
El sistema introducirá el modo de edición
de títulos.
3 Presione la tecla DSPL/CLOCK SET
durante más de dos segundos.
Ilotas
• Si presiona ta tecle ENTER cuando esté parpadeando el
octavo carácter (el del extremo derecho), la parte
parpadeante volverá al primer carácter (el del extremo
izquierdo).
• Si desea dejar un espacio en blanco después de un
carácter, seleccione (subrayado).
® Para continuar asignando títulos a los
discos.
Presione la tecla
d) Para volver al modo de reproducción
normal de discos compactos,
— Presione la tecla NAME LIST/NAME
EDIT durante más de dos segundos.
Si presiona la tecla CD, se seleccionará el siguiente
cambiador de discos compactos y el sistema entrará en el
modo de reproducción normal de discos compactos.
(Cuando haya dos o más cambiadores de discos compactos
conectados).
D-
4 Presione la tecla Q ° Q P^ra
seleccionar el título que desee borrar.
Presione la tecla ENTER/DELETE durante
más de dos segundos.
De esta forma se habrá borrado el título.
Si es necesario, repita los pasos 4 y 5.
Presione la tecla NAME LIST/NAME EDIT
durante más de dos segundos.
El sistema volverá al modo de reproducción
normal de discos compactos.
De esta forma, se habrá borrado el título y los ajustes de
nivel de salida.
Método altarnativo para borrar un titulo
Usted podrá borrar un título seleccionando ocho
(subrayados) como se describe en el paso 3 de "Asignación
de títulos personales a los discos" de la página 13.
14
Page 35

Visualización del título
Reproduzca el disco al que desea
cambiarle el nivel de salida.
registrado
Presione la tecla DSPL/CLOCK SET.
H I
5! IH U :3E R T
Cada vez que presione la tecla DSPL/CLOCK
5ET durante la reproducción de un disco
;ompacto, el visualizador cambiará de la
r'orma siguiente:
1
Tiempo de reproducción transcurrido
i
Título del disco
i
Reloj
VIodos de visualización de títulos
Jurante la carga de discos, independientemente del modo
le visualización en el que se encuentre el sistema, la
ndicación del visualizador cambiará automáticamente de
a forma siguiente:
Título del disco
I
Números de disco y de canción
i
Modo de visualización actualmente seleccionado
1 Presione la tecla ÑAME LiST/NAME EDIT
durante más de dos segundos.
El sistema introducirá en el modo de
edición de títulos.
2 Presione rápidamente la tecla ÑAME
LIST/NAME EDIT una vez.
El sistema introducirá en el modo de
selección de nivel de salida.
OH I
5 LE y. d
3 Presione la tecla Q ° Q
seleccionar el nivel de salida.
Podrá elegir el nivel de salida dentro de un
margen de 1 a 4.
4 (a) Para continuar seleccionando el nivel
de salida,
— presione la tecla [ - pise + ).
d) Para terminar de seleccionar el nivel
de salida,
— presione la tecla ÑAME LIST/NAME
EDIT durante más de dos
segundos.
Ajuste inicial
Búsqueda del disco
c
3
n
O'
3
Q.
O
n
3"
<*
O
Û.
(T)
Cambio del nivel de salida
Función de nivel de salida de archivo
^odrá seleccionar el nivel de salida de discos.
Mo podrá seleccionar el nivel de salida si no ha
isignado título a los discos. Con respecto a los
ietalles, consulte "Asignación de títulos
personales a los discos" (página 13).
Vota
Es posible que esta función no se active si se conecta un
:ambiador sin función de nivel de salida de archivo.
ENTER
-/+
deseado mediante el
título — Función de listado de títulos
Podrá emplear esta función después de haber
asignado títulos personales a los discos. Con
respecto a los detalles sobre títulos de discos,
consulte la página 13.
1 Presione rápidamente la tecla ÑAME
LIST/NAME EDIT una vez.
HUBER T
Aparecerá en el visualizador el título
asignado al disco actualmente en
reproducción.
Nota
Es posible que esta función no sea operativa si se ha
conectado un cambiador sin función de listado.
continúa en la página siguiente
c
0>
15
Page 36

2 Podrá explorar la lista de títulos de los
discos presionando la tecla o {^;
: iSermite ver los títulos de los
discos anteriores
Q : permite ver los títulos de los
discos posteriores
Cuando el título del disco haya aparecido
en el visualizador durante más de cinco
segtmdos, el visualizador volverá a su
estado normal.
Notas
• Si no hay discos en el cargador, aparecerá “NO DISC"
en el visualizador.
• Si no ha asignado un título personal al disco, aparecerá
''******" en el xñsualizador.
• Si la unidad no ha leído la información del disco,
aparecerá "NOT READ" en el visualizador. Si la
información del disco no se ha cargado en la unidad,
aparecerá "NOT READ" en el visualizador. Para
ejecutar la carga, presione primero la tecla DISC, y
después elija el disco que no se ha cargado.
3 Cuando haya localizado el disco que
desee, presione la tecla ENTER/DELETE
para reproducirlo (Función de búsqueda
directa).
Nota
Podrá ejecutar la Función de búsqueda directa incluso si
aparece el mensaje "******'' en el visualizador (disco sin
título).
16
Page 37

Ubicación de los controles
Con respecto a los detalles, consulte las páginas de <
U] Indicación de número de cambiador (CD)
[2] Indicación de reproducción aleatoria
(SHUF) O
Indicación de reproducción repetida
(REP) ©
Indicación de función de memoria de
programa (PGM) ©©ффф
[5] Indicación de tiempo de reproducción
transcurrido
[6] Interruptor de alimentación
(POWER) ©O©
Presiónelo para conectar y desconectar la
alimentación del sistema.
0 Selector de color de iluminación (parte
posterior)
Para cambiar el color de üuminación,
cambie la posición del interruptor situado
en la parte trasera del visualizador.
(ámbar) 1ЕП2 (verde)
[8] Indicación de función de listado de
títulos (NAME LIST) ©
[9] Indicación de modo de edición de
programa (PGM EDIT) ©©©©©
m Indicación de número de disco (DISC)
[TT] Indicación de número de canción
(TRACK)
m Botón de reposición O
Presiónelo con im bolígrafo, etc. cuando no
funcionen las teclas de operación.
01 Receptor de rayos infrarrojos para el
telemando
c
Э
n
o>
3
Q.
Ф
<
O
Q.
rt)
c
LT»
c
Ш
17
Page 38

Ubicación de los controles
Telemando
I
18
Si presiona rápidamente las teclas de
operación del telemando, se ejecutará
la función descrita encima de la tecla.
Sí presiona las teclas de operación
durante más de dos segundos, se
ejecutarán las funciones descritas
debajo de la tecla.
DSPL PGM NAME LIST
□ □□ □
CLOCK SET EDIT NAME EDIT DELETE
Con respecto a los detalles, consulte las
páginas de •.
Teda de cambio de modo de
E
visualización/ajuste de la hora (DSPiy
CLOCK SET) O<EI0
[2] Teda de desactivación (OFF) OO
[3] Tecla de reproducción de memoria de
programa/modo de edición de
programa (PGM/EDIT)
[4] Tecla de función de listado de títulos/
modo de edición de título (NAME LIST/
NAME EDIT)
Tecla de introducción/supresión de
canciones (ENTER/DELETE)
Tecla de reproducción/selectora de
cambiador de discos compactos (CD)
ENTER
OOO0
Cuando haya conectado dos o más
cambiadores de discos compactos,
presione esta tecla a fin de seleccionar el
cambiador deseado. Cada vez que
presione la tecla, se modificará el número
de cambiador de discos compactos en la
unidad visualizadora.
Tecla selectora de carácter/listado de
titulos/de programa fZ) ZT)
Tecla selectora de disco (DISC) 000®
Tecla de reproducción repetida (REPEAT)
0O
Teclas del sensor de música automático
(AMS)
Presione una vez cualquier lado de la tecla
durante la reproducción de un disco
compacto para buscar el comienzo de una
canción (función del AMS).
Lado Para localizar el comienzo de la
canción siguiente
Lado : Para localizar el comienzo de
la canción actualmente en
reproducción
Si mantiene presionada la tecla, se
localizará el comienzo de canciones
siguientes o anteriores. Sin embargo,
cuando se alcance el comienzo o el final
del disco, no podrá seguir.
Si presiona la tecla AMS durante la
reproducción de memoria de programa, se
explorarán las canciones almacenadas en la
memoria de programa siguiendo su orden.
Tecla de búsqueda manual ( ♦« )
0
Mantenga presionado cualquier lado de la
tecla durante la reproducción de un disco
compacto para buscar el punto deseado de
una canción.
Lado ►► ; Para avanzar rápidamente
Lado : Para retroceder rápidamente
El tiempo de reproducción transcurrido de
la canción se indicará en el visualizador
durante la búsqueda manual.
Tecla de reproducción aleatoria (SHUF)
Page 39

I
iolocadón de las pilas
uración de las pilas
uando las pilas se debiliten, no podrá
introlar la unidad con el telemando. La
rración de las pilas es de unos seis meses,
mque depende de la forma de utilización.
Otas sobre las pilas
ira evitar el daño que podría causar el
ectrólito de las pilas:
- Inserte las pilas haciendo coincidir sus
polos "+" y con las marcas "+" y
del compartimiento de las mismas
- No utilice una pila vieja con otra nueva, ni
dos de tipo diferente
Cuando no vaya a utilizar el telemando
durante mucho tiempo, extráigale las pilas
- No cargue las pilas
Mantenimiento
Reemplazo del fusible
Si el fusible se quema, compruebe la conexión
de alimentación y reemplácelo. Si vuelve a
quemarse, es posible que exista un mal
funcionamiento interno. En este caso, consulte
a su proveedor Sony.
Advertencia
Utilice un fusible del amperaje especificado.
Si utilizase un fusible de mayor amperaje,
podría dañar senamente el sistema.
se producen fugas del electrólito de las pilas,
emplácelas por otras nuevas después de
iber limpiado el compartimiento.
istalación del telemando
Cintas velero
'.tale el telemando con la cinta velero en el lugar
seado.
ttas
'Jo instale ni deje el telemando en lugares sometidos a
uentes térmicas ni a la luz solar directa (especialmente
m el salpicadero del automóvil durante el verano, etc.).
Zuando tenga que aparcar su automóvil al sol, extraiga
7 telemando y guárdelo en un lugar no expuesto a la luz
■olar directa, como la guantera.
Antes de instalar el telemando, cerciórese de que pueda
'ontrolar el sistema desde el lugar de instalación.
Antes de pegar la cinta velero, limpie la superficie.
Lugar en el que
desee instalarlo
19
Page 40

Especificaciones
Cambiador de discos compactos
Sistema Sistema audiodigital de
discos compactos
Respuesta de frecuencia
Fluctuación y trémolo
Relación señal/ruido
Terminales de salida
Consumo de corriente
Temperatura de funcionamiento
Dimensiones Aprox. 305 x 90 x 180 mm
Masa Aprox. 2,2 kg
5-20.000 Hz
Inferiores al límite
mensurable
Más de 92 dB
Conector de salida de
control BUS (8 terminales)
Toma de salida de audio
analógico (clavija RCA)
800 mA (en reproducción)
800 mA (en la carga/
extracción de un disco)
-10 a +55°C
(an/al/pf)
Unidad ocuita/telemando/unidad visuaiizadora
Frecuencia
Dimensiones
Masa
88,3/88,7/89,7/89,9 MHz
(conmutable)
Unidad oculta;
Aprox.
125,2 X 31,6 X 128,2 mm
(an/al/pÓ
Telemando;
Aprox. 66 X 108 X 20 mm
(an/al/pf)
Urüdad visuaiizadora;
Aprox. 120 X 37 X 18,5 mm
(am/al/pf)
Unidad oculta;
Aprox. 450 g
Telemando;
Aprox. 55g, excl. las pilas
Unidad visuaiizadora;
Aprox. 115g
Accesorios suministrados
Cargador de discos (1)
Controlador giratorio RM-X3S
Cable BUS (1)
Cable con clavija RCA (1)
Ferretería de montaje (1 juego)
Accesorios oocionales
Juego de limpieza de discos compactos CDM-21BK
Adaptador sencillo de discos compactos CSA-8
Cargador de discos XA-IOB
Solee or de fuente XA-U20, XA-U40
Cable BUS (suministrado con una clavija RCA)
RC-61 (1 m), RC-62 (2 m)
Cable con clavija RCA
RC-63 (1 m), RC-64 (2 m)
Diseño y especificaciones sujetos a cambio sin previo aviso.
20
Page 41

Guía para la solución de problemas
La lista de comprobaciones siguiente le ayudará a solucionar la mayoría de los problemas que pueda
encontrar con su unidad.
Antes de pasar a la lista de comprobaciones siguiente, repase las conexiones y los procedimientos de
operación.
Generales
I
Problema
Las teclas de operación no
funcionan.
El sonido salta debido a
vibraciones.
Cause/Solution
• El microprocesador incorporado funciona mal.
—» Presione el botón de reposición de la unidad
visualizadora.
• Los cables conectores no están correctamente conectados.
• Las pilas del telemando están agotadas.
• La distancia entre el telemando y la unidad visualizadora es
demasiado grande._______________________________________
• La unidad del cambiador de discos compactos está instalada
en un lugar inestable.
—*■ Reinstálelo en un lugar estable.
• Disco o discos sucios o defectuosos.
—*■ Limpíelos o cámbielos.
Indicaciones de error
Las indicaciones siguientes parpadearán durante irnos cinco segundos y se oirá un sonido de alarma.
Indicación Causa
mn Mor
mj lino
El cargador de discos no está
insertado en el cambiador de discos
compactos.
Solución
Inserte el cargador con discos en el
cambiador de discos compactos.
nn liT rr
nu JÍAJL
EPPDR
PE5ET
Si con las medidas indicadas arriba no logra solucionar el problema, consulte a su proveedor Sony.
No hay discos insertados en el
cargador.
El disco está sucio. Límpielo.
El disco está insertado al revés. Insértelo correctamente.
El cambiador de discos compactos no
funcionan debido a algún problema.
Extráigalo e insértele discos.
Presione el botón de reposición de la
unidad visualizadora.
21
Page 42

ш
I
CDX-7ÌRF
ЙШ^^п1Й88.3 MHz ' 88.7 MHz ' 89.7 MHz
^89.9 MHz й ’
п Ш Ш Ш
'
{йшттш RF (Ш) iâ¥u >
±1Жт ш о ЙШ:, вр
’ Й:>ЗГ'
• Ёштшш ’ р1йв^^?1р1>|-*рлшм -
M¿®/T^ÍÜ3|5 (Ш12Ж) «
• ;^]?ёш»й1в«йй1 ’ ^тшттт
ш^*шб^штяштшшшш№ > мш
BMÊ^mmiXif4ïm (Шэж) »
• ятшй-^к)¥ёштшшб<11>мм-тш - ^
шшшт »
• «s-iiaii5^Níí)tg’4®^íbé^^M’ \^À
жштжшт&^т>^ т^ж)
штж '
тк^ ' о
• 1^1шщиттш - ш'^тшш^пжп
• ’ ш^л
Зопу^ЩШР^ ■>
■>
ж ( Ш 8 Ж )
• - -#Pi
->
(Ш8Ю »
• 2шшттш^ тшшш)
• Ш[^^^12Фв|шщ05«щ^в#а »
• (RM-X3S) ш ’ тжт
Page 43

в ш
...............................................
Щ Ш 9 Ш
^тшышт
«miíPi^t.................................................................
...............................................................
........................................................
................................................................
.............................
........................................................
........................................................
..............
..............
..............
.
..............
...............
...............
...............
4
6
6
7
7
7
7
йРЩ>т-ЙРАШ^ШШ
.............
$РМаЖВ®1пЙШ®
-р|>|1ештлш............................
ЙЯЩгй'В§|£МШ®
— т}1тшяш...........................
................
.....
12
13
13
13
14
14
........................................
— &шш^хлт
......................................................
шйшшшвтш
{ЯШШШШШШШ)
ттшшйшш
ШШШШШШAШÿi
........................................
............
..................
......................
..................
...............
..............
8
8
. 9
. 9
10
10
11
11
giijfiföj
тш ш .
Mfô
.........
шш ш ш .
15
17
18
19
Page 44

ш
m
S
Ш
ШШ
Ш
ж
K
WF
■W ùi!
M ^
МШ
0 m
4Ш
B
il ^
rif ^
N'
¡^ ^ Çii
Ш
m
|S^
«
iïSË
»Síá
Î^M
3 “—J
a NJ
mm
° 2^
Э?^2 S
gSII^
Œd „ mdh> Лп1_
m
IXâf fi’i a
ЕЕ = ^
1ш 1 ш:|1
:iF 1ш ^
îflf â-щш
Ш ^ a
H:
iâÎtigiÆ
üü^^í:^n°£S®SS
'^^тн -
■■ ° щшт
§§ - m
(4^5«F ^
fiif^^pif Ë
Ùtt^rë
1 °
g
. "
®^
5#
^ m 1
\ я ^ a
5^ Ш ?si ^ ,
a Й )5Î
S
f$
-^MN- il
S _
° ^ ' 3f Ш1
mu ^
Ш fit- int+
ш)«1 m
^ïf
5ЙЧ w
?if Ht
tç- 4ш1 -i>J
S' Tînt ^
nni>
CTCV
?8F ^
ШШ a ШШ ^ K ШШ
^áS2^^N8 iUllf
mm
Ш^Ш
îS№>
- Й®
"'Ж M i
Ä ^ ^
h"
S
ШШ
11^ ж
bfgi
ЩН
mu
FiP
ПМ M;
Э
il
¿ $ÍF
mm
ШШ
fa
iS '
>n 0Ш
^ ŒC?
SS
тш
ita
шт
4l§âS
41$-Hi
о ш
ш
а
Wffl-
■® m|í
I Œt
Mîi
Ш
m
m
ш\т
ШШ
4ffl “ là-
an! òtt ^
- ж ШШ
a^Frp
<Hl^fi4-
t ^ ^
fí+W-И
2 “ a
O Hiis
2^
^41$
:Fti
■A
:Ti
ffl-
Page 45

mttí
I
mití
Ш^Ш8 стШШ"МЯ^ > ШЯШ Sony CSA-SMÊt
\шшш “
шзопуб^шштжв&ш^ > тшт&штш'ш
ЖШ~Ра.8 стШШ^ЩЖ °
шшттм-жшттмлрмяшш > mmta
ттЕ]ЕсттшшштжшжшшАШш ■>
шшжштшш > шттшшшж »
жттм-шмлтяшш ’ шттшшш
- тшйё№яш№ - ш#
шшшш » шшшжтяжшшшш > "i«
ёш ш ж "
ФМУ >
SISSlJt5« »
Page 46

1 ffiH^?isEste:^siibs^ “ON” m
2 Sli DSPL/CLOCK SET il^2#aU± »
\ \ I I / / /
^ i n ni
"i,u u:
/ /111 \ \
3 An^r^r^a - WssS'J'B#«?
I
> mmi
ENTER
1 gcfi ENTER/DELETE ”
'5
\ \ \ \ i f 11 /
2! n»n PI
Zi U.U OZ
/ /11111 \ \
4 S® DSPL/CLOCK SET
^^ :0BI u.
e
POWER SELECT
"OFF” ’
88.3 MHz “
2 g?E AMS °
^ :
0 : 88.3 MHz -♦ 89.9 MHz —*• 89.7 MHz ■
88.7 MHz —*• 88.3 MHz
0 : 88.3 MHz -► 88.7 MHz -» 89.7 MHz
89.9 MHz -♦ 88.3 MHz
3 fi?K ENTER/DELETE
a
POWER
Page 47

FM mmis - mm
m" (^6M)
8.3 MHz - 88.7 MHz - 89.7 MHz R 89.9 MHz
» №M FM ^
ifiSi/TglM POWER I8S5
I* ° ■>
POWER SELECT
“OFF" ’ > m
»m >
POWER ■>
POWER MKa!6^®^65 OFF m ’ li^^±lli>V
m^zm^o
SPJjifeW«ltpS#^syT^»
^mm>\kmm>^zim^
mmnmz^
power pi
’ ie fm
mm^
CD m.»
nkmttwmiws^M»
I
- ^5fe^ffiliTs§§65
MW ( M8M) “
SeKIS/TlS 65 POWER OFF
^ IS 01^65^
S2J tn§S65
VER 5IS5lKjie§g65 CD
m ’ «)««»# °
POWER MH^^glS65 OFF m ■
»Si»
ig > iE FM
POWER CD n»
- ^5fegгffiSiт^S69
>
mm.
fm
mmmm
_q
mm
s
№
Page 48

“SHUF1” ii/T'tUm»
ft @ 4> Bi>!r«
^gSS65§35ng>^;^§miRft -
^ g«0iniii#'t’S?E SHUF
“SHUF2” mTsiUm. °
I
w?Rft-®:ftsmi/]^
REPEAT mM
“REP1” mT^iUM-
SHUF g?illi(^
y^m
Sg«Di>^Si^4’SE REPEAT
“REP 2” Mmtam-
TU
«t* fi5n|>!r«glgs® a^^ir#
ni)^
m^mm)
iE»i»ii>^i^ - ^ESHUFME/TsStlii^
"SHUF3" »
SHUF mmi.m^Tmmif№mmit ;
SHUF1
SHUF 2
(»i>tll»ISft*Sii«)
f
SHUF 3*
(«aswninsts)««)
m ( SH U F 3 ) - mm
±№P^tbm “SHUF3” ■’Jtt^ ’ miHM ‘‘SHUF2"
im > RmmsHUFmms > °
■ mm REPEAT
stum “REP3” ■>
s»
REPEAT
REP 1
t
(WtiiSRS)
m(REP3)
2Fiam “REP 3" »lit^ > ¡^tam “rep 2“ (nmR
ism REPEAT M6<jss > »
8
Page 49

1 ^ii PGM/EDIT o
I- M
S B IP l.u i:
PGU EO' DISC TTVO( ///MtllXW
fmmnmmm»
fi
’ MiJSPii^t^m PGM/EDIT^2H-'MlU± ’ iilM
mm “SORRY” -
• ’ &m)^n dspl/
CLOCK SET ® > .m^WMMmm2ii-'mp^iSMm9^
azoMKum • msmm • pj.s.mm№z»mm^
i- DISC ->-)# ■ Lxs. AVis M > mTR'smmmmi.s
R№*pi>^?Rai
^wmTW.2U^mm^m2.mm > m
PGM/EDIT H »
2
3 g?-;A: ENTER/DELETE m - ¿e^^^ScSP
Sil °
p /
+ENTEP+
---------------------------
r 7» I >
t>GU EDTT 06C TIWO( ///IMItXW
4 ® • Km
^Si2R3^mi¥ <■
® PGM/
EDIT mm'j>2^mi^x± <>
si
X I I >J » <
3 E IP lOEi
if
inm
PGM/EDIT
ENTER/DELETE
' +
mmAH^A ’ m^w±}»mm “**wait**” -
• ^wiEimmmsp^m-iXin&mmi2tPA±&^9:№
0f > m^s±mm “**full**” ■>
-;i: PGM/EDIT @»
^ it 2 # @ ^ M iE W fi
L
ffi »
mTw-
iff
\
ffil-
Tn>
M
m\'
CU
z=^
OTT
Page 50

PB Г, I
1 fôtt PGM/EDiT mM'j''‘2ÿtmi^À± °
Фм шл г^ /тй ш тб °
РВП Р
РВП ИЕ
шш-ж PGM/EDirm ■ штшшятт ■■
PGM 1
(SSÎÏ1)
t
PGM OFF
“PGM 1+2” »
шшшшт ’ ёй$^Ш2РЁ-лшШ'Ш
P Б ti
ND ЛПТП
PGM 2
(se^2)
PGM 1+2*
(SP 5-1+2)
CJ} I
5 3 IP I.DB^
oec тм» Ì f t t I Ì i \ \\\
miSP5Ô5»SÎ
T PGM/EDI'x' ü > “PI.”
■ШЖ “P2.”
ß
^. тшшФб<1Ф:№гштштш^тш °
шштшшштш№^:ррЁШш ' Mij •■
-шшше^¥Ш12ша > т^^шшшттш
ШШ “I2” “
-ШШ12ШЁ ’ йт^ши1штж^1ишт
тшш1ггй^ » Шр^я^Ауша - ßm
“s” ”
2 ЙшЭяйЭш • eiíÍ$^lX)lMíRÉ (ÏR
i?6ät±°
г J/ /
г e P /рБ|Ь
»sc ЖЮ<
шттш
“NO DATA” »
ШАб^шштшшш2РШ&^м-вштп •
шшш-шшёшшт - штштшштш№ »
ШАптшштшшшгштшштт ■ шш
шшшш »
шжтшшштшжшшшш >
^Ащштт ’ шштшшы^шштыт
Ш ’ Ш^ШВ1ЬШ “NO READY” -
ílüштäшâmmшш
ЙМЙ^Ф ■ «g?-;^PGM/EDITÍI ’ -бЁИ/тШ
ЖЩ “PGM OFF" gpw °
шйшштшж^шжт^хш > ф«1м
РВП DPP
т^шштштпжшш ’ шшштт
3 - mií ENTER/
DELETE■>
7 »
]}Ei
- - - P I.DB
i «б%ЩбШ0^$т0^Ф; й ¿й»
PGW EDTT CMSC TTUCK
е
^-{шшшшшш12шш > пштгтв-
шт ’ ш12шж№ёшштшштш ттш
1Ш№ ’ Ж!¥ёШштштаЕШштА) »
Ч 1 Р I.DB
’ 7-12Ш
10
Page 51

4 ® тштшштшш -
® - fêÆPGMÆDIT
1 ëctt PGM/EDIT ШШ'Х>2^Ш^Х1. »
«ff йШаШ о
ЕЛ I ^
PGM ЕШ Обе
fô—Т PGM/EDIT Ш ’ 1^Л^Ш7кШММ
“Р1.” “Р2.” »
2 gcK0lgQiii'AfêÆMAWifJ?iii!S
ЕЛ I
PGU ЕОП asc ^wx
ТЯАСХ
с 17 P / п с _ ^Я}нЙ^Й1Л05
Ъ d h' 1\иЬ\гшшя^щ
X ENTER «•
IP I.DBi
3
/// # f 1 м\\ч
3 ffiféÌSMSA^ifttì о
4 ЙШ-Т ENTER/DELETE
Si#A^S^îSfô«fÈ7 »
р /
iEtJTERi
ш > im«ftfi
1ЙТ
1 Scfï PGM/EDIT mm'A2fpmix± °
ЕЛ I
5 3 IP l.uB': 'А№№ШШ^
л caí asc тяАСх / f / t t t t \ %\\
T PGM/EDIT II »
2 ёгш0®1А«&ш.тШЩтт5У«[Ш‘>
ЛЕ1
--РЕП I--
^PGMi (Ш1Ш) ШШШШИЩШ
Й ’ ®лчШЛ^ЖЩ±5ЁШ °
3 fôfï ENTER/DELETE ШШ'М^ШЖ± - Ш\
^1SPÎ9-MÛ5ÏRÔM)1I^7 о
’’’ «о зпгп
®7К®ЖЩ “NO DATA” ФШЖШ >
PGMMiii^^) шшшпшжштт
7KÍft®^N® °
®s-/:i:0i?0Ä - шт^тштттт
№дИШ--
тггь
‘^^'5 3 Р I.Ü 1
PGM ЕШ CKSC TRA(X
ifШ АМ ^ ffifit®tä'ltstÎ^:;? ê ш^
s
^В^Ш12Х:9:й ’ т?1^штш “**FLfLL**" ’ Mú
тшшшттшАжшшт ^
5 ® ^^aaaiMAMftte^tì - КШШ2Ш4^:
® ■ fêfËPGlWEDIT
Í'J>2ШIX± о
I----------------------------------------------------------1
ЕЛ I
5 3 IP in Bl
PGW ЕОП Oise TRACK ///ftìllWX
f
0
ЕЛ I
3 г p in I
PGW Е0ГТ CKSC TRACK
è
I Î
0 0
i I
ЛЕ1
--РЕП / - -
^й±шиптт^штштшт pgm/edit
m - pgm 2 (Ш2ШЯ) й^тшня
M
*тя-
пп>
елг
11
Page 52

I
-----------------------
‘^1‘B
PGM EOT asc
nUCK
5
EKTW
PE.UH
f
•
$
I
PLAY/SKIP
1
E]} 1 rj
PGM EDIT disc
1
B
ir
3EL
PGM EOrr
-PBtlE--
TTUCX
EffrW
PE.Q 1
DE1FTE
t
Q
1
DCLfTE
pgm/edit
Mijm'T^^^sE^PGM 1 (mu^)
X‘
s
4 - Sti PGM/EDIT
HittBP ii * P^it S
^S^Pi^i- - Ti^MIslPi/t^AW^^ffii^ > iJ5
BUS
IS)
* ^wimBmaomiu±6<jmM-^{i^ > m^mmtam
"FULL" ’
e
> mzsWAzmzmmzstamunm
1 »M^inA«afi5Pi>^ “ pifflm##^7H
2 NAME LIST/NAME EDIT Sl2ii>aiii
EI I
/ I \
3 fi?0l!c© il ■
EU /:'f'
^J3
/ I X
ilS-iAO^QH ’
)li/T^iiiilil :
Q ■» ♦A^B^C^. ♦X^Y^Z^0^1*2*3^
[0 •♦_♦ \ ♦/♦(♦)♦/♦ f ♦ - ♦ +
12
Page 53

I
m) ■> ■ mamtam
^mms±»smmas^^mmm^n»
4 ENTER/DELETE
LH I r
Jb±c.
/ I \
e
• ’ sm ENTER m
ms > (m^w z& °
• > mm “-” fisn) °
5 ®
m& (Z
— I^a. NAME LIST/NAME EDIT m^'J>2
^m^x± °
CD m' >
rnmmi^mmmMA-mmB» (Rmstmmmiu
±6<]mmmm}
Di
iP№)SBSES^«S-Di>^
IBitiAIg
1
2 NAME LIST/NAME EDIT
± °
3 Scfi DSPL/CLOCK SET
4 LX0iia!c©iii^tti^}^i^&5«ja
5 ScK ENTER/DELETE »
6 SE NAME LIST/NAME EDIT li2i3MlL:i± •
m
m “-” //SIS) t^mmmm > r*
mRMA&mwM] mi2W) »
2S>J5W^'№ “
mscmm > ■
iDffi7TN^IH#S5SM
SB DSPL/CLOCK SET
5CHU2ERT
CLOCK SETH ’
i
oin«i)a
/A DSPL/
aiTM-
nn*
IS
m
Si
HD *
n
m
m
iit
m
13
Page 54

^umf^pMTnmifAm ■■
r, DijtS®
4 ® ^^i&mmmwiiiim^ ■
- DISC +
P
I
— NAME LIST/NAME EDIT mM'J>2
I
pE.H-iT§eiinA^Miii^ > mm'iilitmijj
mzmr^ “ ’ wmmmmi2n»
imvA s Bjg^ni>twi^it)m^ °
nmmm r4PiK-inAs.^^Mj m\2M) »
----------
ENTER
iF=^
i( <yp ) ( CO^I
-/+
□(z;
CZJ CEJ
JO
SONY
1 fic-ii NAME LIST/NAME EDIT
± °
2 NAME LIST/NAME EDIT @ »
CJI I
5 LEl\ 3
3 SE0mQ@li(SMIS$S5lBitil«¥ «
1-4^ r^ifi 5g-f®i^di
1 SSc-;^ NAME LIST/NAME EDIT H »
LUiCHUi'E^'t
tt
mTs\ai^ “
0s :
011 :
a
• > m^Mtam “nodisc" °
ifC ijc ifc >fC o
• > m^^wigium “not
READ" «
“NOTREAD" - Wi$4^mifAmmM-^W ’
mmm DISC m > »
3 - SMENTER/DELETE
(itkiT'S^ags
m^ m ) °
fi
BmmyTStum “h^***^*" (^sprs^^m
MPpmM-)
14
Page 55

mumiii:
[U CD (Slili>ir»^gS^5i) iiTN®
m SHUF (ffBSfll) igт^*©
m REP íi/т^«©
a PGM ii.Tis©©
0©
a POWER («;!) ffiH9©0
m M^S3feMfeS»MM
(3ftafe) In—IP (»fe)
a NAMELIST
©
[9] PGM EDIT Jg/^
IS©©©©
H DISC ig/TN®
[0] TRACK (®:ttlS5S) ig/TN®
Si mmmo
31 jssig&5isa:i^iggi|jiis
in>
m
m
m
Tit
15
Page 56

mmiti:
I
T:^m)im °
DSPL PGM NAME LIST
□ □□ □
CLOCK SET EDIT NAME EDIT
ENTER
DELETE
3
S.
z---qGZsZE)Q
nJ^
10
J
M.-9
SONY
5
6 7
i ” 1
11 12
DISC (Pi>tS») igl©©0
REPEAT (J5M8I) HO
AMS (gii^i^@.i9]) m
m
DSPL (!ig^x;^^3i») /CLOCKSET (^FbI
HOO®
OFF («}it;jBir) mo
PGM /EDIT
NAME LIST /name
[U
EDIT
EfTTER/DELETE iWnXMM) MQOOO
00
CD (nsiPi>tfiiM/iii>irS^iss») m
OO0
00
m
HO00000
mmtmmmwLmmziM^mmiitm ’ m
’ imms.
ED [ *■ ►>) (¥ii^tt) m
m ■ ‘\kW.i^m^W}
m ■■
SHUF (ffiEMfll) HO
16
Page 57

тши^
шш ш т т т ^ > ш ш ш ш ш лш z i
Т ' ’ рнЙ^ЙЛёжУгМSony;
/±-5
шш » > шшшхш
а
j^TE&iiimftfeíáe ’ шми ’ ttrìET
птт :
- - “+” ■ “-”
Ш№Ш7Г^^ “ + ” ' “-” iÈSZkZb’>
о
- > мщжт-ш ■>
— »
ёт-шшш ’ шж^ашш - шшшш
ж > ШШШАШ'Ш “
шшт^ш
штттщ
шш
ЖNШШШйШiSííf¡¡lШZЙ ’ Ш^^№±
MîsmMô^mz {шшштшш±) »
шпшш^±±т1&те^ > шттт&ш ■
■sm-zmuämz > ^тшштшбт^шщй »
шшшаш ■ m9Liññmmmmf °
17
Page 58

I
ш
Ш
Ш4$
Ri-
5 - 20,000 Hz
iÊfôR®i®æ
-кШш dB
BusSfÄ*^i (s:^)
(RCAitSiSIl)
800 mA
800 mA (PiR^A/:^idl
BÍ)
-lO’C -+55t
-^305 X 90 X 180 mm
(Ä/Ä/Ä)
.^2.2kg
88.3 MHz/88.7 MHz/
89.7 MHz/89.9 MHz
(й1ЙШ)
.^125.2 X 31.6 X 128.2 mm
(-Щ/Й/Ж)
:
.^66 X 108X20 mm
(й/Ж/Ж)
ш®#
"iRIl (1)
SlWSiSS?! RM-X3S
визш.^ (1)
RCAltSÄSillig^ П)
(li)
ЙШ®#
WlifiRrtilfflÄ CDM-21BK
CSA-8
íp .RS XV10В
XA-U20, XA-U40
BUS ШШШ (ШЖ RCA аШШШШШ) RC-61 (1 т),
RC-62 (2 т)
RCAH-тштшш
RC-63 (1 т), RC-64 (2 т)
.^120X37X 18.5 mm
(Ш/Щ/Ж.)
,^450 g
:
.^55 g ’ A-feísmífe
Щ/к^ :
.^115 g
18
Page 59

ш
й
ж
zi
îge
»т
ЙШ
МН ■№!
SS^
fr
т ^
s^^
тт
■fr fr
^жт
ш
Oí
ш
fr
шр
ibtn
ГЩШ
fr
La
cc
ca
шр
fr
Ш
=ti
liJ
fr
IP
93
&
fr
ip
m
fr
in
fr
шш
Lj
Ln
lh
РП
ca
fr
mp
l§
m
m
!|C
fr
ш
1й
fr
т
ш
ж
SI
т
It
шр
S
fr
шр
т »
^fr
fr
ti
т
e
fr
шр
íbro
i^m
Ш
fr
liJ
fr
шр
ь
»
т
ш
к-
íW
in о iç
тШщш
Sïï'^'^S
e^ls? W
IP ^ ||п да
^ Ч®1 fr №
li I ™ I
Цш
ш
о
Üni
fr
т
ш
93
fr
ш
ш
lO
» g iië т
ш ^ mf^
ЖН - rase
fr:
ж
sôisisfëgfê
fr I ЭЙ«ИЙ!
Вй
it fr
itfgfê
ItfSßlSÜli?®
^*SSStó$
^gs^sílzi
¥
Í3?
ж
lim ^
$Щ fr
°л
SI
Е
fr
аг
т
щ
ш
th
Ш
К-
ш
ш
fé
fr
ж
I
fr
-N
т
fé
ct
ca
Dt
Dt
LU
fr
m
ь
fr
Ш
fr
Ш
ig
gl
t]mi{
Ptl
S
Щ
Ж
fr
E
Ш
да
Ш
ж
»
fr
IP
h-
LU
Ln
Uj
Dt
Ш
Ш
m
сЯ
s
m
sä'
щ\
SS
Ш
fé
íá
fr
ж
ж
s
да
-Ч
Ш
>-
c
 Loading...