

Page 1

SONY
3-754-170-21 (1)
Compact IXsc Player
Operating Instructions
ncoi
[Iqc
DIGITAL AUDIO
® 1992 by Sony Corporation
Page 2

Warning
To prevent fire or shock hazard, do not expose the unit to rain or moisture.
To avoid electrical shock, do not open the cabinet. Refer servicing to qualified personnel only.
CAUTION
RISK OF ELECTRIC SHOCK
DO NOT OPEN
CAUTION : TO REDUCE THE RISK OF ELECTRIC SHOCK,
DO NOT REMOVE COVER (OR BACK).
NO USER-SERVICEABLE PARTS INSIDE,
REFER SERVICING TO QUALIFIED SERVICE PERSONNEL.
This symbol is intended to alert the user to
the presence of uninsulated
“dangerous voltage” within the product’s
enclosure that may be of sufficient
magnitude to constitute a risk of electric
shock to persons.
This symbol is intended to alert the user to
the presence of important operating and
maintenance (servicing) instructions in the
literature accompanying the appliance.
INFORMATION
This equipment has been tested and found to comply with
the iimits for a Class B digitai device, pursuant to Part 15 of
the FCC Rules. These limits are designed to provide
reasonable protection against harmfui interference in a
residentiai installation. This equipment generates, uses, and
can radiate radio frequency energy and, if not installed and
used in accordance with the instructions, may cause
harmfui interference to radio communications. However,
there is no guarantee that interference will not occur in a
particuiar installation. If this equipment does cause harmfui
interference to radio or teievision reception, which can be
determined by turning the equipment off and on, the user is
encouraged to try to correct the interference by one or more
of the following measures:
- Reorient or reiocate the receiving antenna.
- Increase the separation between the equipment and
receiver.
- Connect the equipment into an outlet on a circuit different
from that to which the receiver is connected.
- Consult the dealer or an experienced radio/TV technician
for help.
You are cautioned that any changes or modifications not
expressly approved in this manual could void your authority
to operate this equipment.
Owner’s Record
The model and serial numbers are located at the rear.
Record these numbers in the spaces provided below. Refer
to these numbers whenever you call upon your Sony
dealer regarding this product.
Model No. CDP-997 Serial No.
Page 3

Table of Contents
Chapter 1 Introduction
Overview
...............................................................................
Precautions ........................................................................... 5
Chapter 2 Getting Started
Unpacking
Hooking up the system ......................................................... 7
Identifying the parts ............................................................... 8
Chapter 3 Basic Operation
Playing a disc-Continuous play............................................ 10
Enhanced Surround Effects-Digital Signal Processor
Playing in a randam order-Shuffle play ............................... 16
Playing only the desired selections-Delete play
Playing the beginning of each selection-Music scan
play ...................................................................................... 18
Playing repeatedly-Repeat play
Playing in a desired order-Program play...............................20
Fading in and fading out play-Fade in/fade out
Chapter 4 Advanced Operation
Custom edit.......................................................................... 23
Recording programmed selections on a tape
Designating the playing order of up to 6 discs
-Multi-disc program............................................................... 26
Designating the total playing time
-Time edit/Just edit............................................................... 28
Fading out at the desired time-Time fade
Locating the loudest portion of the disc
-Peak search ........................................................................31
inserting a blank space between selections
-Auto space...........................................................................31
Custom files
Storing an optimum playback level for each disc
-Level file ..............................................................................33
Assigning names to a disc-Disc memo
Indexing a disc-Custom index...............................................36
Keeping the program in memory-Program bank
Keeping your undesired selections in memory
-Delete bank .........................................................................39
Memorizing a DSP mode
Timer activated playing ....................................................... 41
Chapter 5 Additional Information
Maintenance .........................................................................42
Specifications .......................................................................42
Troubleshooting guide ......................................................... 43
.............................................................................
..........
...............
...........................................
...............
......................
...................
........................................................................
...............................
...............
....................................................
17
19
22
24
30
32
34
38
40
4
6
14
Page 4

Overview
Enjoy listening in various playing modes
You can select playing modes among the following:
Continuous play (page 10) - The entire disc is played once.
Shuffle play (page 16)
Delete play (page 17)
Repeat play (page 19)
Program play (page 20)
Editing your own tapes
• You can start to play from the immediate beginning of a
selection. - Auto Cue (page 13)
• You can fade in or out the play when making your own
tape recording. - Fade in/Fade out (page 22)
• CUSTOM EDIT function
-You can program a pause separately on side A and
B. - Pause program (page 24)
-You can confirm the total playing time while choosing
the selections to be programmed. - Program edit (page
24)
-You can designate the playing order of up to 6 discs.
- Multi-disc program (page 26)
-The player can program selections automatically to fit in
a desired duration. - Time edit/Just edit (page 28)
-You can stop the play, fading out at the time desired.
- Time fade (page 30)
-The loudest portion of the disc will be determined and
played repeatedly. - Peak search (page 31)
Enjoy listening in various acoustic atmospheres
The DIGITAL SIGNAL PROCESSOR (DSP) lets you listen
to selections according to various acoustic atmospheres,
(page 14)
You can play a beginning of each selection
You can check the selections by scanning the beginning of
each selection in the disc. - Music scan play (page 18)
Making your disc custom-made - CUSTOM FILE
function
• You can store the optimum playback level of each disc in
the player’s memory. - Level file (page 33)
• You can assign a name to a disc, such as the title of the
disc or the date of purchase. - Disc memo (page 34)
• You can assign your own index point to any desired
position on a disc. - Custom index (page 36)
• You can store the programmed playing order for a disc.
- Program bank (page 38)
• You can keep your undesired selections in memory
- Delete bank (page 39)
• You can select and store specific acoustic surround
effects for an individual disc. - DSP file (page 40)
- Selections are played in a
random order.
- Selections of your choice are
played in the order you desire.
- Selections or portions are
played repeatedly.
- Selections are played in your
desired order.
You can make 3-second blanks between selections
The blank space enables you to locate selections when
using a tape deck with the automatic selection search
function. - Auto space (page 31)
Easy-to-see display
The selection number, the playing time, the remaining time
are displayed by pressing the TIME/MEMO button.
In addition, you can change the desired display information
by selecting three patterns. Adjusting the brightness of the
display by selecting three patterns, (page 11)
Page 5

Precautions
On safety
• Operate the player only on 120 V AC, 60 Hz,
• Should any solid or liquid object enter the cabinet, unplug
the player and have it checked by qualified personnel
before operating it any further.
• Unplug the player from the wall outlet if it is not to be
used for an extended period of time.
To disconnect a cord, pull it out by the plug. Never pull
the cord itself.
• Do not disassemble the cabinet. The laser beam used in
this player is harmful to the eyes when uncovered. Refer
servicing to qualified personnel only.
On operation
• When turning off the power, wait until “NO DISC”
message appears after a disc has been removed and the
tray has been closed. Especially, this must be practiced
when the player is to be transported.
• Remove the disc from the tray after playing it, if the
player will not be used for any length of time. Do not
transport the player with a disc in place.
• When the disc tray is in the open position, do not press
down on it strongly, or place heavy objects on it.
• Do not turn up the volume while listening to a portion with
very low level inputs or no audio signals. If you do, the
speakers may be damaged when a peak level portion is
played.
On disc tray
• If the disc tray does not close properly and slides out
again, reinsert the disc.
• Be careful not to pinch your fingers between the tray and
the player.
• Always keep the tray closed when not using the player to
keep dust or dirt from entering the optical system of the
player.
• If the player does not operate, press the £ OPEN/
CLOSE button and reinsert the disc.
• Insert only one disc at a time.
• Make sure the disc is placed properly in the tray.
Incorrect positioning may result in permanent damage to
the disc.
On moisture condensation
If the player is brought directly from a cold to a warm
location, or is placed in a very damp room, moisture may
condense on the lens inside the player. Should this occur,
the player will not operate. In this case, remove the disc
and leave the player turned on for about an hour until the
moisture evaporates.
Notes on handling discs
• To keep the disc clean, handle the disc by its edge. Do
not touch the surface.
■ Do not stick paper or tape on the disc.
• Do not expose the disc to direct sulight or heat sources
such as hot air ducts, or leave it in a car parked in direct
sunlight as there can be a considerable rise in the
temperature.
• After playing, store the disc in its case.
If you have any questions or problems concerning your
player, please contact your nearest Sony dealer.
Customer for the U.S.A.
For detailed safety precautions, see the leaflet
“IMPORTANT SAFEGUARDS”.
Page 6

Unpacking
Choosing a Good Location
• Place the player in a location with adequate air circulation
to prevent internal heat build up in the player.
• Do not place the player on a soft surface, such as a rug
that would block the ventilation holes on the bottom.
• Do not Install the player:
- near heat sources such as radiators or air ducts.
-in a place subject to direct sunlight, excessive dust,
mechanical vibration or shock.
Checking the Supplied Accessories
Make sure that all supplied accessories are included with
your player. This manual and the following items are
included with your CDP-997.
• Audio connecting cords (1)
• Wireless remote commander RM-D997 (1)
• Sony SUM-3(NS) batteries (2)
Note on Protective Sheet
The tape on the table should be removed after loading the
compartment.
Inserting the Batteries into the Remote Commander
1 Open the cover.
2 Insert two size AA(R6)
batteries with
correct polarity.
Battery life
• About half a year of normal operation can be expected
when using the Sony SUM-3(NS) batteries.
• When the batteries are run down, the remote commander
will not operate the player. In this case, replace both
batteries with new ones.
Notes on the remote control operation
• Avoid exposing the remote sensor to direct sunlight or
lighting apparatus. Such exposure can cause a
malfunction.
• To avoid damage caused by battery leakage and
corrosion, remove the batteries when the commander will
not be used for a long time.
Conventions
This symbol shown in the manual headings indicates
a function operated only from the remote
commander.
This symbol shown in the manual headings indicated
a function operated only on the main player.
Page 7

Hooking Up the System
You can connect the player with analog or digital signal depending on your
amplifier or D/A converter.
Before you begin, remember the following;
• Turn off the power of each unit before making connections.
• Connect the AC power cord last.
• Be sure to insert the plugs firmly into the jacks. Loose connection may cause hum and noise.
• Leave a little slack in the connecting cord to allow for inadvertent shock or vibration.
• Cord plugs and jacks are color coded: Red plugs and jacks are for the right channel (R) and white ones for the left
channel (L).
Note on DIGITAL OUT (OPTICAL)
When connecting with DIGITAL OUT (OPTICAL), use the
POC-15 audio optical connecting cord (not supplied).
Please note that when the digital out is connected, fade
out, fade in, time fade, level file and DSP file functions
cannot be used.
Note on LINE OUT
FIXED: The output level is fixed.
VARIABLE: The output level can be adjusted with the LINE
OUT/PHONE LEVEL or LINE OUT LEVEL on the
remote commander.
• Connect your system to the VARIABLE output when
using level file.
• If the LINE OUT/PHONE LEVEL is adjusted while
recording, the recording level be changed even when
it is preset on the tape deck.
Page 8

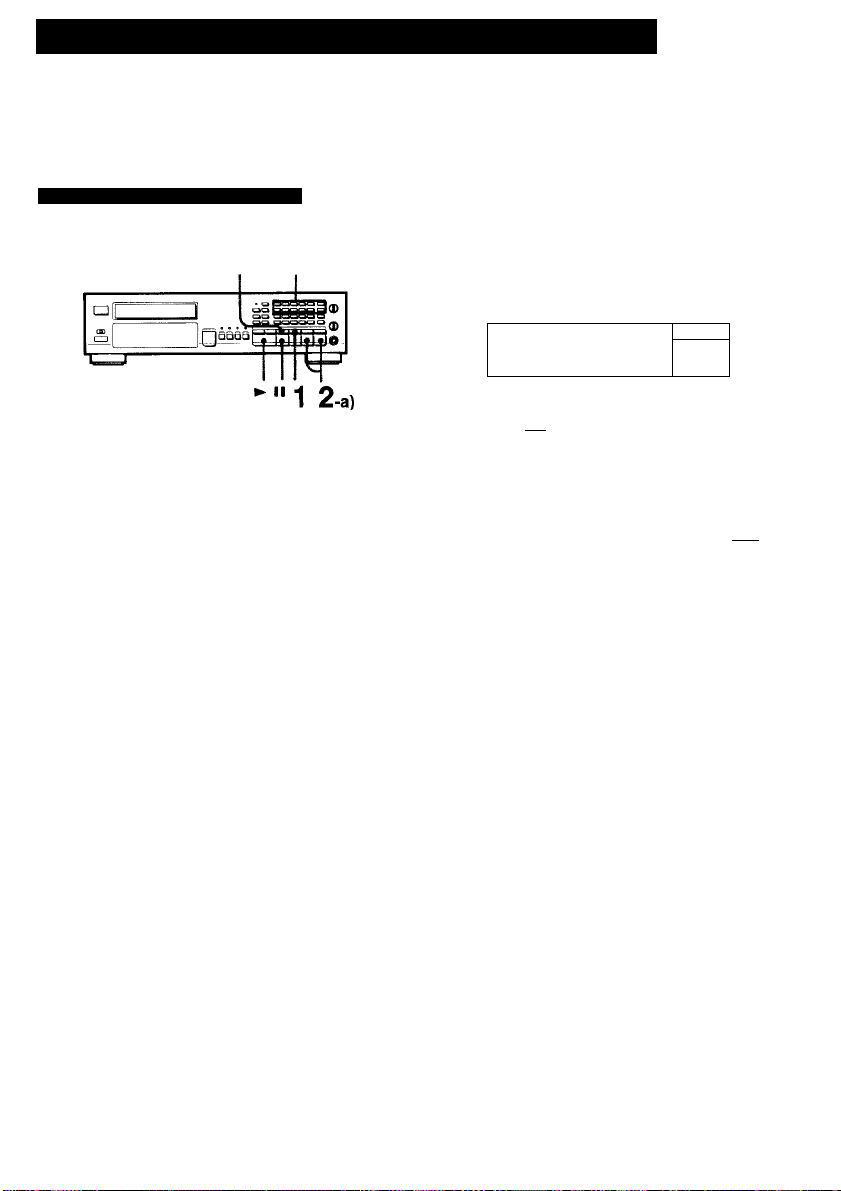
Identifying the Parts
Front Panel
Refer to the pages indicated in ( ) for detaiis.
POWER switch (page 10)
E
Disc tray
£i OPEN/CLOSE button (page 10)
a
PLAY MODE buttons
a
CONTINUE button and indicator (page 10)
SHUFFLE button and indicator (pages 16 and 17)
PROGRAM button and indicator (pages 20 and 24)
C. (custom) INDEX button and indicator (page 36)
PEAK SEARCH button (page 31)
a
ERASE (memory erase) button (page 32)
a
FILE (custom file) button (page 32)
a
DSP/1-20 button and indicator (pages 14 and 40)
a
FILE RECALL button (page 34)
a
A.SPACE/A.CUE button (pages 13 and 31)
[m
Numeric buttons/DSP SELECT button (pages 12, 14
33
and 40)
>20 (over 20)/FLAT button (pages 12, 14 and 40)
CHECK (program check) button (pages 20 and 25)
0
EFFECT level (page 15)
31
CLEAR (program clear) button (pages 17 and 20)
51
36 LINE OUT/PHONE LEVEL control (pages 7 and 10)
3t| phones jack
51 LEVEL FILE button (page 33)
31 AMS* buttons (pages 12, 24 and 34)
H ►► (manual search) DISC MEMO buttons (pages
12 and 34)
^ ■ (stop) button (page 10)
n EDIT/TIME FADE button (page 26 and 28)
M ■> (pause) button and indicator (page 10)
^ FADER (fade in/fade out) button (page 22)
H REPEAT button (pages 11 and 19)
H ► (play) button and indicator (page 10)
H TIME/MEMO button (page 11)
g MUSIC SCAN button (page 16)
g Display window (page 11)
g Remote sensor
53 TIMER switch (page 41)
* AMS is the abbreviation of Automatic Music Sensor.
Page 9

Remote Commander
Refer to the pages indicated in ( ) for detaiis.
[0 — OPEN/CLOSE button (page 10)
[|] FiLE RECALL button (page 34)
[U DISPLAY MODE button (page 11)
g] MUSiC SCAN button (page 18)
[5] Numeric buttons (page 12)
[|] MEMO iNPUT button (page 34)
in FILE (custom file) button (page 32)
ERASE button (page 32)
H] DSP SELECT button (page 14)
DSP FLAT button (page 14)
[9] LEVEL FILE button (page 33)
[i§ FADER (fade in/fade out) button (page 22)
[m| ◄◄ ►► (manual search) button (pages 12 and 34)
1^ LINE OUT LEVEL (line out/headphone level) buttons
(pages 7 and 10)
m ■« ►► SLOW (low speed manual search) buttons
(page 12)
0
----------
k. index buttons (pages 11 and 37)
5H ►W AMS buttons (pages 12, 24 and 34)
@ ■ (stop) button (page 10)
II (pause) button (page 10)
► (play) button (page 10)
0 A. SPACE (auto space)/A. CUE (auto cue) button
(pages 13 and 31)
53 REPEAT button (repeat/A <-► B repeat clear) button
(page 19)
59] TIME button (page 11)
13 >20 (over 20) button (page 12)
Q CLEAR button (pages 17 and 20)
CHECK button (pages 20 and 25)
13 PLAY MODE buttons
CONTINUE button (page 10)
SHUFFLE button (pages 16 and 17)
PROGRAM button (pages 20 and 24)
C (custom). INDEX button (page 36)
Buttons with orange letters (A, B, C,
...........
) are for entering
a disc memo (page 26).
Page 10

Chapter 3 Basic Operation
r
Playing a Disc - Continuous Play
In the continuous play mode, you can play the first selection or desired selection
on your disc.
Before playing a disc, turn on the amplifier and set the input selector to the CD
player position.
Playing the First Selection
To stop piay
To stop for a moment during play, press II.
Press II or ► to resume play.
To stop play, press ■.
To stop play and open the tray, press â.
To control the volume
When you use VARIABLE, adjust the volume with LINE
OUT/PHONE LEVEL of the player or LINE OUT LEVEL of
the remote commander. Press + of the remote
commander to turn up the volume and press — to turn
down the volume. When you press + or —, LINE OUT/
PHONE LEVEL of the player rotates automatically.
When listening with headphones
Connect the headphones and adjust the volume with LINE
OUT/PHONE LEVEL or LINE OUT LEVEL of the remote
commander.
To play a 8 cm (3-Inch) CD
Place it on the inner circle of fhe tray. If the disc is
provided with an adaptor, first remove it. Do not put a
normal CD (12 cm/5-inch) on to of a 8 cm CD.
Note on the TIMER switch
Leave the TIMER switch off when you are not using timer activated play. (For
further details, refer to page 41.)
What is this inilication?
This indication appears when the tray is empty. The indication can be
changed to a customized indication, (page 34).
10
Page 11

Information Display
Checking the totai number of selections and totai piay time
There are two ways.
a) Place your disc on the tray and then either press £ to
automatically close the tray or manually close it.
b) Press TIME/MEMO (or TIME on the remote
commander) during stop.
If disc contains more than 20 selections
► appears in the display window behind 20 on the music calendar.
Checking the remaining piaying time
Each time you press TIME/MEMO (or TIME on the remote
commander) during play, the display changes to give you
the following information.
Selection number
Index number
Rem aining time
in a selection
lapsed p laying time
TINC/MEMO
To change the parts of information display LU
Each time you press DISPLAY MODE on the remote
commander during play, the display changes to give you
the following information.
Entire display appears. ^
---------
i
Track number, Index number
and playing time appear.
i
Entire display disappears. —
To adjust the brightness of the display
-DIMMER function \A]
Press REPEAT while holding down on TIME/MEMO. The
brightness adjustment has three tones. The tone you select
will be stored in memory so that you do not have to adjust
it again after turning the power off.
Note
The time display mode selected with the TIME/MEMO button will not change
until the power is turned off.
If you have stored a disc memo
The stored disc memo will be displayed, following the display of the
remaining, lime of the disc.
If the current selection number is over 24,
is displayed. ^
*lf “
-----------
time
- You have played a disc containing more than 24
” is displayed instead of the remaining
selections in the shuffle or delete play mode.
-You have programming more than 24.
11
Page 12

Playing a Disc - Continuous Play
Locating a Particular Selection
A.SPAC E/ Numeric
A.CUE buttons >20
"Numeric
buttons
-II
(SLO\W)
You can locate the beginning of a desired selection during
play or pause. There are two ways.
a) To locate sequentially
To locate the beginning of the current or preceding
selection
• Press as many times as required.
• Keep K4 pressed to skip selections.
To locate the beginning of the succeeding selection
• Press as many times as required.
• Keep PW pressed to skip selections.
b) To locate directly
Press one of the numeric buttons ([T] to [20]) to enter
the desired selection number.
If a selection number is greater than 20, use the
and [1] to QO] buttons. [TO] functions as the figure 0.
e.g. To play from selection No. 22, press I > 201 [2] [2].
To play from selection No. 30, press I > 201 [3] pfO].
Locating a Particular Point in a Selection
There are two ways to locate a particular point you want.
a) To search quickly while monitoring the sound
Keep ◄◄ or ►► pressed during play and release at
the desired point.
b) To search using an index [T]
You can use this function only with a disc on which
index numbers are recorded.
Press -a— or —A. on the remote commander to locate
the desired index number.
The selected index number appears in the display
window.
To search quickly by observing the display
Press II, then keep ◄◄ or ►► pressed. The search
speed will increase, but there will be no sound. Find the
desired point by observing the display.
Press II or ^ again at the desired point.
To search slowly while monitoring the sound [U
Press SLOW during play and release at the
desired point.
1
>20
12
Page 13

“-OVER-” is dispisyed
If you continuously press ►► at the end of the disc. OVER appears in
the window. Press ◄◄ or to turn the normal indication.
If you continuously press at the beginning of the disc, play begins
automatically from the first selection.
When you press KM during play
The player locates the beginning of the selection.
What is an index?
This is a number assigned to a section of a selection (for example, to a
movement in a symphony) to allow that section to be located easily.
To Play a Selection Immediately from the
Beginning - Auto Cue
Auto cue lets you play right from the beginning of a given
selection without having to listen to the blank lead-in.
To use auto cue function
Press A. SPACE/A. CUE twice.
ASPACE.'ACUE
“A.CUE” will appear in the window.
Press 11 and then make your selection by
pressing the numeric button.
a
The time display will go out while the player is
searching for the beginning of your selection. When
the selection has been cued, the time display will
come back on. (Some selections may take longer to
find.)
Press or IL
i-
______
The selection will start immediately.
To cancel auto cue function
Press the A. SPACE/A. CUE again.
“A. CUE” will disappear in the window.
Note on auto cue
Selections that fade in slowly or have noise in the lead-in may not be picked
up successfully by the auto cue function.
13
Page 14

Enhanced Surround Effects-Digitai signai Proccesor
The Digital Signal Processor (DSP) lets you listen to selections according to seven
acoustic atmospheres.
These atmospheres are produced by a digital processing technique that involves
simulating reflected and reverberated sound effects and digitally compensated
frequency response. DSP modes can be stored in the memory of the player as a
custom file. (See page 40)
To Choose the Desired DSP Mode
3 Press DSP/1-20 once more.
□
The DSP indicator disappears.
DSP mode setting is completed.
Without operating step 3, the DSP indicator «411
disappear after about 30 seconds. The function
of the buttons which you used for selecting
DSP modes return back to the normal numeric
function.
You can choose from the following processing mode.
DSP mode
HALL
CHURCH Reproduces the acoustics of a church
JAZZ CLUB
STADIUM
DISCO
LIVE ROOM
BGM
Reproduces the acoustics of a 2,000
seat capacity concert hall.
with solid walls, stained glass interior,
and high roof.
Reproduces the acoustics of a modern
jazz club.
Reproduces the acoustics of a 30,000
seat capacity out door stadium.
Reproduces the acoustics of a
discotheque and features strong
reverberation with a dynamic bass.
Expands the sound for ideal listening
acoustics in small rooms or when using
headphones.
Softens the sound for a background
music effect similar to the acoustics of
a hotel lobby.
Characteristic
14
To check DSP mode ^
Press DSP/1-20 on the player. The DSP indicator will light
up and the current selected DSP mode appears in the
window. After checking the DSP mode, press DSP/1-20
again. The DSP indicator will go out.
Page 15

Adjusting the EFFECT level About Surround Sound
The EFFECT level control adjusts the surround level and
frequency response of the surround effect. Turning this
knob toward MAX increases the level and extends the
frequency response, while turning it toward MIN reduces
these effects.
The effect level cannot be adjusted while FLAT is enabled.
Clearing the DSP Mode
There are two ways.
a) On the remote commander
Press DSP FLAT.
FLAT is displayed and “
DSP mode is cleared.
b) On the player
I DSP I ” disappears. The
1 Press DSP/1-20.
The DSP indicator lights up.
2 Press >20/FLAT.
FLAT-” is displayed and '
The DSP mode is cleared.
I DSP I ” disappears.
3 Press DSP/1-20.
The DSP indicator goes off.
Surround Effects Demonstration - DSP DEMO mode
Keep pressing ► and then press DSP/1-20 to set to the
DSP DEMO mode.
The selection in each DSP mode (including FLAT) is
played repeatedly for about 5 seconds each.
During this, the DSP/1-20 indicator is blinking.
When you hear your desired DSP mode, press ► to set it.
The DSP DEMO mode is cleared and the DSP/1-20
Indicator goes out.
During the DSP DEMO mode is setting, the >20/FLAT
button works as the >20 button.
There are three basic sound effects that produce the
acoustics of concert halls and movie theater. Direct sound,
early reflection, and reverberation. The acoustic quality of a
room depends on how that room reproduces these three
sounds.
» The DSP mode remains while the power is turned off.
» Noise may occur when switching the DSP modes and Effect levels.
» When using the DSP mode, large outputs from the player may cause
distortion from your amplifier.
In this case, change the LINE OUT connections from FIXED to VARIABLE so
that you can adjust the output level with the PHONE LEVEL/LINE OUT
LEVEL control.
» When connecting with DIGITAL OUT, you cannot use the DSP mode
function.
15
Page 16

Playing in a Random Order - shuttle piay
Shuffle play: Allows you to play all (up to 99) selections on your disc
Delete shuffle play: Allows you to delete all undesired selections on your disc
Shuffle Play
all 1
sj Lpi
1
___
Press SHUFFLE.
once each in a random order.
and play only desired ones.
CONTINUE
1 ..............
.
SHUFFLE
□âg
\ 1 1 T Ti e
à
1
□
Press I
Shuffle play starts.
To cancel the shuffle play
Press CONTINUE and return to the continuous playing
mode.
To check the remaining time
Press TIME/MEMO (or TIME on the remote commander) once to see the
remaining time of the selection being played; twice to see the total remaining
time; once more to return to the initial display.
If you press SHUFFLE during play
Shuffle play begins from the current selection.
What is this indication?
This indication appears while the player is "shuffling" the
selections.
16
To put back all selections which you have deleted
Press ■ during stop.
To delete a selection during play
Press the numeric button for that selection.
“DELETE” will appear in the display. You can also delete a
selection being played by pressing the CLEAR button.
Delete bank function
You can keep the desired selections in memory for each disc by using the
delete bank function, (page 39)
Page 17

Playing Only the Desired Selections - Delete Play
Delete play allows you to delete all undesired selections on your disc and play
only desired ones. The player will skip the undesired selections and play the
desired ones in the ascending order of their selection number. In the delete play
mode, therefore, you can play only the desired selections continuously.
To Delete the Undesired Selection Before Playing
Press SHUFFLE.
bMUI-hLt
□
Press the numeric button(s) of undesired selection number (to be deleted).
The number disappears.
To put back a selection which you have deleted,
press the numeric button for that selection.
“SELECT” will be displayed in the window.
Press CONTINUE.
□
Press I
Delete play starts.
To Delete a Selection During Play
When play ends
Selections except deleted ones will be restored.
To play again
Press ►. Delete play starts.
To put back a selection which you have deleted,
press the numeric button for that selection. “SELECT” will
be displayed in the window.
To put back all selections which you have deleted,
press ■ during stop.
If you press SHUFFLE during delete play, your selections will be played in
the delete shuffle play mode.
For a disc with selections more than 24
The remaining time of the disc as a whole appear as "-------------------",
Delete bank function.
You can keep the desired selections in memory for each disc by using the
delete bank function, (page 39).
17
Page 18

Playing the Beginning of Each Selection
- Music Scan Play
Music scan: Allows you to play the beginning of each selection in any play mode.
Music scan delete play: Allows you to play the beginning of undesired selections
Music Scan Play
Press MUSIC SCAN during stop.
Each time you press MUSIC SCAN, the display will
be as follows:
As such, it is useful for checking the contents of your disc or program.
In the music scan mode, you can set playing time to 10, 20, or 30 seconds.
to delete them and play only desired ones.
When you delete the undesired selections, the unit plays
just the selections you prefer in shuffle play mode.
Music Scan Delete Play
MUSIC SCAN
MUSIC SCAN
a
1
\
Press MUSIC SCAN |
in the stop mode.
The indicator on the ► button blinks.
When playing the beginning of an undesired selection, press CLEAR.
T
-----
The indicator on the ► button blinks and beginning
of each selection is played for 10, 20 or 30 seconds
as designated.
If you press MUSIC SCAN during play of the beginning of a particular selection:
You can extend the current playing time by specified
seconds.
To start play immediately
Press ►. The indicator on the ► button lights up, normal
playback will start from the selection being played. If you
press ◄◄/►►, music scan play will be overridden by
continuous play.
To stop the music scan play during scanning
Press■.
18
The next selection will be played.
When the all selections have been played,
player stops.
Press the ^ button to play the remaining
selections after all the selections have been
scanned. ,
When music scan delete play ends
Selections except deleted ones will be restored.
To put back a selection which you have deleted
Press the numeric button for that selection. “SELECT” will
be displayed in the window.
To put back all selections which you have deleted,
Press ■ during stop.
Page 19

Playing Repeatedly - Repeat Play
Repeat play; Allows you to repeatedly play all selections or one particular
A - B repeat play: Allows you to repeatedly play a particular portion (starting with
Repeating Selections
selection on your disc in any play mode.
point A and ending with point B) on your disc. Useful for
learning foreign languages or lyric lines.
Repeating a Particular Portion
- A - B Repeat
aC
J-Qs
Press REPEAT before or during play.
Press A<^B at the starting point (point A) of the portion to be repeatedly played.
“A SET” is displayed and “A-” blinks.
Lights up.
The player repeats the current playing mode.
Playing mode Selections to be repeated
Continuous play All the selections or a single
Delete play
Shuffle play
Delete shuffle play
Program play All the selections programmed
Custom index play Between the specific custom
To repeat a single selection
Press REPEAT again during repeat play of the continuous
or delete playing mode. “REPEAT 1 ” appears.
To cancel repeat play
Press REPEAT again. “REPEAT" disappears. To cancel
repeat play of the continuous play, press “REPEAT” until
“REPEAT” disappears.
Note
Repeat play cannot be conducted on muiti-disc programs.
selection
Repeat playing selections
except deleted ones
Selections that the player
reshuffles
in the same order
indexes
Either continue playing the portion or press
the portion and then press A^B again.
“REPEAT A-B” appears.
The player memorizes the ending point (point B)
and repeat play the specified portion starts.
To set a new starting point
Press A<->.B repeat during play In the A-B repeat mode.
The ending point (B) becomes the new starting point (A)
and play is continued.
To designate the new ending point (B), press A<^B repeat
again at your desired place.
The new A-B repeat portion is set.
You can advance the portion by repeating the above
operation.
To cancel A-B repeat
Press REPEAT.
Going back to the same point (A) from any point on
the disc
Press A<-»-B to designate the desired point (A). (Point B
need not be designated.)
You can go back to point A from any point on the disc by
simply pressing ►.
Note
You cannot designate point A and B in two different selections.
A— B
to reach the ending point (point B) of
□
19
Page 20

Playing in a Desired Order-Program piay
Program play allows you to play up to 24 programmed selections in the order in
which they are programmed. This section shows the basic method of programming
selections. For the method of programming selections to be recorded on your
tape, see page 24.
To stop playing
Press ■.
You can play the same program repeatedly as long as you
do not cancel program play or erase the program.
To cancel program play
Press CONTINUE and return to the continuous playing
mode.
The program will be erased.
To check your program
Press CHECK and the first selection in the program will be
displayed.
Each time you press CHECK, the next selection in the
program will be displayed. When CHECK is pressed after
the last selection, END appears and then the display
returns to the initial display.
20
To Change Your Program
To erase the last selection, press CLEAR.
Each time you press CLEAR, the last selection in the
program will be erased.
To add a selection to the end of the program, just
press the numeric button for that selection. You can also
add selections during play or stop.
To delete a selection, press CHECK repeatedly until the
undesired selection is displayed. Then press CLEAR.
To change the order, press ■ during stop to erase the
program. Then repeat the programming procedure from the
beginning.
Page 21

When you use the auto space function
All the blank spaces between selections, whether short or
long, will automatically be set uniformly to 3 seconds.
Therefore, playing time displayed for each selection will
include additional 3 seconds, (page 31)
When the power Is turned off while playing a program selection
The program is erased.
When pressing PROGRAM during playing
The current playing selection will be the first one.
You can program while playing.
If “
-------------
” is displayed instead of the actual time
- You have programmed a selection number over 24.
-The total time is exceeded 100 minutes.
To check the remaining time in the program play
Press TIME/MEMO once (o see the remaining time of the selection being
played; twice to see the total remaining time; once more to return to the
initial display.
If you have inserted a pause, the display shows the total remaining time until
the pause.
Program bank function
You can have the player memorize programmed selections for each disc,
(page 38)
21
Page 22

Fading in And Fading out Piay - Fade-in/Fade-out
Fade-in and fade-out allow you to record selections on your tape in such a manner
that their play may not start and stop suddenly. You can have the play fade out
between 2-10 seconds. When no time is specified, the play will fade in and fade
out for 5 seconds. This function cannot be operated when the DIGITAL OUT
(OPTICAL) is used for connections.
Fading in/Fading out To Set the Fade Time
To end the play fading out
Press FADER when you want to start fading out.
blinks in the window, and play fades out and enters
the pause mode.
To restart the play fading in
Press FADER in the pause mode.
-■•«I blinks in the window, and play fades in.
Using custom file function
The last designated fade time also remains for the discs with custom files.
Press FADER during stop.
Press to select fade time between
2-10 seconds.
- I I
Press FADER.
22
Page 23

Chapter 4 Advanced Operation
r
Custom Edit
Custom edit is a useful function for editing selections on a disc on your tape. The
following types of custom edit are available with the player.
Editing Desired Selections in a Desired Order
Fade-out at Desired Time - Time Fade
Program play
Program play is a basic type of custom edit that allows you
to edit up to 24 selections as you want. It also allows you
to edit selections on side A separately from those on side
B and check the total playing time during editing.
• Pause program
Allows you to program a pause and edit selections on
side A separately from those on side B (see page 24).
• Program edit
Allows you to check the total playing time during editing
by pressing ►>! AMS and PROGRAM (page 24).
Multi-disc program
Multi-disc program allows you to edit up to 24 desired
selections on up to six discs in the program mode. If you
choose desired selections on the first disc and then open
the disc tray, the player will enter the multi-disc program
mode (page 26).
Editing Selections Automatically According to the Length of Your Tape
Editing navigation
After each step, you can see the proper operation guide of
what you should do next.
Time edit
Time edit automatically edits selections on sides A and B
according to the length of one side of your tape, thus
improving an editing efficiency. It also edits programmed
selections in preference to the others.
It automatically edits selections without changing their
original order on your disc (page 28).
Just edit
Just edit is an improvement of time edit. Like time edit, it
edits programmed selections in preference to the others.
Unlike time edit, however, it automatically edits selections
according to the length of one side of your tape by
changing their original order on your disc (page 28).
Link edit
When either one side of your tape is not fully occupied by
selections edited by time edit or just edit, “LINK” will blink
together with the selection numbers in the music calendar
for those selections fitting the remaining tape length. Link
edit links the fitting selections to edited ones whether the
former is on the current disc or a new disc (page 29).
Time fade automatically causes selections to fade out at
specified time. This function is useful for replacing multiple
discs or editing multiple 8-cm (3-inch) CDs because the
player will retain the remaining playing time when it is
stopped or the disc tray is opened during play.
Time fade is available in the continuous play, program play,
shuffle play, and repeat play modes. It operates twice for
both sides (see page 30).
Inserting a Blank Space Between Selections
- Auto Space
Auto space automatically creates a 3-second blank space
between selections during play to arrange them at an equal
intenral (page 31).
Locating Highest-level Portion of Disc
- Peak Search
When editing selections on your tape, you need to adjust a
recording level. An excessively high recording level results
in distorted sound while an excessively low recording level
causes great noise.
Peak search repeatedly plays the highest-level portion of
selections on your disc or programmed selections for four
seconds. As such, peak search allows you to optimize a
recording level (page 31).
23
Page 24

Recording Programed Selections on a Tape
You can program up to 24 selections in a desired order according to the length of your
tape on which they are to be recorded. You can also program selections to be recorded
on side A simultaneously with those to be recorded on side B on your tape.
b) To program selections while checking the
total playing time (Program Edit):
1 Press Instead of the numeric buttons
to choose selections to be programed.
Current
selection
Order Total playing time
Press repeatedly to choose an
appropriate selection.
2 After choosing the selections to be
programmed, press PROGRAM.
ll'
PROGRAM
□
Blinks
24
If you program selections on side B, press II
to program a pause.
Order Total playing time will return to "0.00”
Pause "B” lights up.
The pause is programmed as the fifth selection.
Note that the player counts pauses as
selections to be programmed.
Page 25

Program the selections for side B.
Repeat step 2.
Press I
To play the selections for side B
When the selections for side A are piayed, the player will
pause. Set the tape to the beginning of side B (“B” lights
up.), then press ^ or II.
When the program being played is on side A, [*¿^1 appears.
When it is on side B, [¿3 appears.
To stop playing
Press ■.
You can play the same program repeatedly as long as you
do not cancel program play or erase the program.
To cancel program play
Press CONTINUE and return to the continuous playing
mode.
The program will be erased.
To erase the entire program
Press ■ once during stop; twice during play.
The program is also erased when you turn off the player.
To check your program
Press CHECK the first selection in the program will be
displayed.
Each time you press CHECK, the next selection in the
program will be displayed. When CHECK is pressed after
the last selection, END appears for 1 second and
then the display returns to the initial display.
To Change Your Program
For operation, see page 20.
When you use the auto space function
All the blank spaces between selections, whether short or
long, will automatically be set uniformly to 3 seconds.
Therefore, playing time displayed for each selection will
include additional 3 seconds, (page 31)
If “
-------------
” is displayed instead of the actuai time
- You have programmed a selection number over 24.
-The total time Is exceeded 100 minutes.
To check the remaining time
Press
TIME/MEMO
played; twice to see the total remaining time; once more to return to the
initial display.
If you have inserted a pause, the display shows the total remaining time until
the pause.
Your program is erased when:
• You change the continuous play mode.
• You turn oft the power during program play.
once to see the remaining time of the seleciion being
25
Page 26

Designating the Piaying Order of Up To 6 Discs
- Multi-disc Program
Multi-disc program allows you to program selections on one disc after another. You
can choose up to 24 selections from up to six discs for playing in any desired order.
Programming
2 3
Replace the first disc with the second one.
□ll «
oo (3)
oa 3Qooaa
. o« Baaaâam
bq|—U__UJe_
1,4 "
Insert the first disc in the player.
Press PROGRAM.
\ ^ /
— • —
PROGRAM
□
Program desired seiections on the first disc.
Press the appropriate numeric buttons or press
For detaiis, see page 24.
and PROGRAM.
Chosen
selection Order
Current selections
Lights up.
Remove the disc, “MULTI PGM" is displayed
and “MULTI” lights up in the window. Insert the
second disc, “TFDISC-2*” is displayed.
Repeat steps 3 and 4 to program additional selections.
Up to 24 selections from up to 6 discs can be
programed. The total playing time from the first
disc is displayed for the time display.
To proceed to program selections to be recorded on side B
Press 11 to put a pause and then program selections to be
recorded on side B.
If you press ► by mistake when inserting the second disc:
The multi-disc program will be overriden by the continuous
play mode. Note that the programmed selections on the
first disc will be cancelled at this time.
To check the current disc number
Press TIME/MEMO (or TIME on the remote commander)
during stop. The disc number will be displayed.
To program selections on the same disc
You can program selections on the same disc again
The following functions cannot be conducted on Multi-disc programs.
• Repeat play
* Program bank
If you set the auto space function
The auto space cannot be set during multi-disc programming. Be sure to set
the auto space before programming.
26
Page 27

Playing the Program
To play the selections for side B
When the selections for side A are played, the player will
pause. Set the tape to the beginning of side B (“B" lights
up.), then press ^ or II.
To stop playing
Press ■.
To cancel multi-disc program
Press CONTINUE and return to the continuous playing
mode. The program will be erased.
To check your program
Press CHECK. Each time you press CHECK, the selection
in the program will be displayed along with its selection,
order and disc number.
When CHECK is pressed after the last selection “-END-"
appears and then the display returns to the initial display.
To Change Your Program
You can make the following changes before starting play.
To erase the last selection
Insert the last disc programmed and press CLEAR. Each
time you press CLEAR, the last selection in the program
will be erased. To continue erasing selections, replace the
disc accordingly and repeat the procedure.
If a pause has been programmed, the selections
programmed before the pause cannot be cleared.
To add a selection to the end of the program
Insert a disc and press the numeric button for that
selection.
You can add a selection during stop.
To erase the entire program
Press ■ once during stop; twice during play. The program
will be erased.
If you make a mistake in the disc order
Even if a disc is inserted in an incorrect order, the selections chosen from
that disc will be played. However, when a disc which has already been
played is inserted, program play will not proceed. In addition, when a seventh
disc is incorrectly inserted, “DISC FULL" will be displayed.
To check the remaining time In multi-disc program play
Press TIME/MEMO (or TIME on the remote commander) once to see the
remaining time of the selection being played; twice to see the remaining time
of the disc being played. The remaining time of the program cannot be
displayed tor multi-disc programs.
27
Page 28

Designating the Total Playing Time
- Time Edit/Just Edit
If you specify the total length of your tape, the player will accordingly program selections
to be recorded on sides A and B of your tape.
Time edit: Edits selections on your tape without changing their original order on your
If you use the auto space function, you can automatically insert a 3-second blank
space between selections. Therefore, playing time of each selection includes additional 3 seconds.
disc, choosing the last few selections that fit the remaining length of your tape.
Just edit: Edits selections on your tape by changing their original order on your disc,
choosing those selections which fit the specified tofal length of your tape.
Programming
Example: a 54 minute tape
About the HALF DISC edit
Time edit — Editing starts at the first
If you want to edit particular selections on your tape
in preference to the others, program those selections
beforehand (page 18).
Just edit — Changing the order to fit the
If selections are programmed beforehand, the HALF
DISC mode will not work with Time Edit.
1 Choose either time edit or just edit during
stop, press EDIT/TIME FADE.
EDIT/TIME FADE I
Specify a desired recording time.
a) When you specify a commercially
available tape length:
Each time you press ►►!, the display
changes to give you the following duration:
. HA LF DISC - • C -46
• Time edit — Press once,
"TIME EDIT” is displayed.
• Just edit — Press twice
"JUST EDIT" is displayed.
<23.00 min.)
- C-90
(45.00 min.)
. C-54
(27.00 min.)
C-74 .
(37.00 min.)
C-60
(30.00 min.)
b) When you specify a free tape length:
Use numeric buttons ( Q] - [to]).
Press 1101 for “0”.
You need not press keys for seconds, unless
required.
Example: a 46 minute tape (23 minutes per
.........
selections on the disc. At about half
point, selections are distributed to side A
and B.
playing time to a half of playing time as
close as possible, selections are
distributed to side A and B. Note
however, that more selections may be
allocated to side A than side B.
side)
'
I:.'
After 1 second.
:[f
By pressing t<^, you can reverse the above
cycle.
HALF DISC cannot be set on the disc with
selections more than 24.
28
Page 29

After specifying the desired recording time, press EDIT/TIME FADE once.
EDIT/TIME FADE I
The program for side A is compieted.
If "LINK" blinks, see “Adding Selection(s)”.
• When you choose time edit
The player will program selections on your disc in
the ascending order of their selection number,
choosing the last selections that fit the remaining
length of your tape.
"EDIT” and “A-” lights up. “B” blinks.
• When you choose just edit
The player will program selections on your disc in
a random order, choosing those selections which
fit the specified total length of your tape.
“EDIT” and “A-” lights up. “B” blinks.
Press EDIT/TIME FADE once more, to make a program for the other side of your tape.
If “LINK” blinks, see “Adding Selection(s)”.
Editing Navigation
After each step, you can see the proper operation guide of
what you should do next.
Adding Selection(s) — Link Edit —
After all selections on the disc have been programed, if
there is a selection(s) shorter than the remaining time,
“LINK” and the selection numbers will blink.
----------
--------------
----------
-xvS I / ^ I
•f> Li-/
Playing the Program
Press ►.
The selections for side A will be played and then the unit
will pause. “B” lights up in the tape side indicator. Set the
tape to the beginning of side B, then press ^ or
To stop playing
Press ■.
You can play the same program repeatedly as long as you
do not cancel time edit or erase the program.
To cancel time edit/just edit
Press CONTINUE and return to the continuous playing
mode.
The program will be erased.
To erase the entire program
Press ■ once during stop; twice during play.
The program is also erased, when you turn off the player.
If your disc has more than 24 selections
Selections over 24 cannot be programmed automatically program desired
selections before using the time edit function. See page 20 for details.
You cannot edit selections in the following cases
* If you have programmed up to 24 steps (i.e. selections plus pauses).
* If you have programmed selections whose playing time exceeds one hour.
Note
Playback can be performed when “EDIT” is displayed.
After programmed selections are played
Time edit or just edit will be cancelled.
When JUST EDIT programming takes too long
The JUST EDIT programming feature may lake a long time if the disc has a
lot of selections on it. In this case, you can stop the programming by
pressing ■. Selections that best fit the playing time at that point will be
programmed.
To designate a different time for each side
Execute steps 1 to 3 and press II Then repeat steps 1 through 3. Do not
execute step 4.
II.
To add selection, press the numeric button for the
selection number or press EDIT/TIME FADE again.
When pressing EDIT/TIME FADE, a program will be made
automatically to fit the playing time as close as possible to
the remaining time.
If the remaining time can contain other selection(s), “LINK”
and the selection number keep blinking. When “LINK”
blinks, if the disc is replaced by another disc, the new
selection number(s) on the new disc that fit in the
remaining time will blink.
“EDIT” disappears when the rest of the playing time is less
than 1 minute. Whether “LINK” is blinking or not, you can
replace the disc by another disc and choose selection(s) to
fit the remaining time.
To clear “EDIT” from the window, press ■.
29
Page 30
Fading Out at the Desired Time — Time Fade
You can have the play fade out at the end by designating the play duration. Once
time fade is set, it functions twice for editing both sides of the tape. You can
change discs without canceiing this function.
This function cannot be conducted on muiti-disc program or when the DIGITAL
OUT (OPTICAL) is being used for connections.
Setting the Time Fade and Piaying
Example: a 54 minute tape
FAD ER 2-b)
1 Press EDiT/TiME FADE three times during
stop or once in the pause mode.
EOIT/TIME FADE I
and
Avoid pressing ■ (Stop) while programmed selections are not
played. Otherwise, they will be erased.
are displayed in the window.
Specify desired fade time.
a) When you specify a commercially
available tape length:
Each time you press the display
changes to give you the following duration.
E HALF DIS C ^ C-46 ^ C-54 C-60
--------------------
(23.00 min.) (27.00 min.) (30,00 min.)
^ C-90 ^ C-74 «
(45.00 min.) (37.00 min.)
By pressing you can reverse the above
cycle.
With HALF DISC, the playing time is set to
half of the total playing time.
30
------------------------
tri“ ;
After 1 second
r«c XI Wrg SEC
i ; i i
îlijTÂ^'ri
±3 ; H
b) When you specify a free tape length:
Use numeric buttons ([T] - [To]).
Press |10| for “0”.
You need not press keys for seconds, unless
required.
Example: a 46 minute tape (23 minutes per
side)
M° >
Time
To start play, press I
i\
After the designated time, piay fades out and
pauses. Tape side B iights up.
Press ► or II to resume piaying for other side
of the tape.
If you press FADER, fade in will start. When the
play fades out for the second time, the player
pauses and the time fade function is canceled.
When playback of a disc ended before the designated playing time
The time fade function will remain effective even for a new
disc(s) added' for the remaining playing time originally
designated, and the fade out starts in accordance with the
initially set fade time.
To cancel time fade
Time fade will be canceled when
- EDIT/TIME FADE is pressed once again.
- is pressed during play.
To display the time remaining until the time set
Press TIME/MEMO (or TIME on the remote commander) twice.
Page 31

Locating the Loudest Portion
of the Disc
-Peak Search O
inserting a Blank Space Between
Selections
-Auto Space
The player will search the loudest portion (peak level) of
the disc, and then play it repeatedly. This function will
make it easier for you to adjust to the optimum level when
recording on tape.
Press PEAK SEARCH in the stop mode.
PEAK SEARCH
□
“PEAK” blinks in the window. The loudest portion
will be playing repeatedly for 4 seconds.
At this time, adiust the recording level.
Notes
• In the delete play, delete shuffle play, or program
play mode, when a single disc is inserted in the
player, selections chosen from that disc will be
searched for a peak.
• In the multi-disc program mode, when multiple
discs are inserted, peak search will apply to
selections chosen from the currently inserted disc.
To stop peak search
Press ■. Press II to pause at the first selection.
“PEAK” will disappear in the display window.
To start play immediately
Press ►.
Note on peak search function
The player determines the loudest portion (peak level) of a disc by searching
it at fixed intervals. As a result, the portion searched may differ from the
actual peak level. In addition, this function may determine different portions
as the peak level for the same disc. However, the difference between the
portion searched and the actual peak level is insignificant and will not
present any problem in adjusting the recording level.
You can insert a 3-second blank space between each
selection. The blank space enables you to locate
selections when using a tape deck with the automatic
selection search function.
Before starting play, press A.SPACE/A.CUE once.
□
“AUTO SPACE” appears in the window.
A blank space of approximately 3 seconds will be
inserted between each selection.
To cancel the auto space function
Press A.SPACE/A.CUE twice.
“AUTO SPACE” disappears.
Note on auto space function
When selections consist of several chapters following one after another
successively like symphonies, the auto space function may create breaks
between each selection.
31
Page 32

Custom Files
The CD player incorporates a memory in which you can store six types of
informations called “custom files”.
Six Custom Files
Level file
You can assign a playback level to each
individual disc, so that the disc can be
played automatically on a fixed playback
level, (page 33)
Disc memo
Custom Index
Program bank
You can assign a title within 10 letters to
each individual disc, (page 34)
You can assign up to 10 index points on
anywhere you want on a disc, (page 36)
A programed piaying order you store in
memory for a disc, so that the disc can
be played always in the fixed order,
(page 38)
Delete bank
You can store certain selections in
memory so that the player will always
play only desired selections, (page 39)
DSP file
To store an acoustic atmosphere for an
individual disc, (page 40)
What is this indication?
-Lights when Disc M emo is memorized.
- Lights when Custom index is memorized
;USTC M FILE DSP-
MEMOliNDEXiBANKLEVEL
- Lights when DSP file is memorized.
-Lights when Level file Is memorized.
- Lights wheh Program Bank or Delete
Bank is memorized.
Custom File Last Mode Memory
The last play mode (continuous play mode, and fade time)
of a disc containing custom fiie will be retained in the
player’s memory when the disc is removed from the player.
When the disc is inserted again, the last play mode will be
recalled. However, if you press ► while the disc tray is
open, the current piay mode will take priority over the last
play mode memorized.
Where are custom files memorized?
Custom files are memorized not in the disc but ih the
player’s memory. So you can’t enjoy custom files with the
other players without memorizing custom files again.
Custom files are retained for approximately 1 month
without AC power supply.
To check the items of the custom files
Press FILE RECALL without the disc inserted (while
“-NO DISC-” is displayed). Each time you press FILE
RECALL, the items of the custom files and items of the
each column of about the disc are displayed. If
you press FILE RECALL when the last disc’s information is
displayed, “-END-” is displayed and returns to “-NO DISC-”
after a few seconds.
To clear all custom files of a disc at once
Each time you press FILE RECALL, the contents of disc
memos and the items of custom files are displayed in the
window. When the disc memo is assigned in a disc, you
can see these displays even if a disc is not inserted in the
player.
When the display which you want to clear appears, press
ERASE. All the custom files of a disc are cleared and
“FILE ERASE” will appear in the window.
How many discs can be assigned to custom files?
You can give custom files to up to 185 discs.
But it takes two discs’ memory in the following cases:
• When disc memo, custom index, program bank and
delete bank are memorized for one disc at the same
time.
• When more than 9 custom indexes and disc memo are
memorized for one disc at the same time.
• When custom index, program bank and delete bank are
memorized for one disc at the same time.
When the memory becomes full of custom files.
"FILE FULL” indication appears when FILE is pressed
while no custom file can be memorized for the disc
currently put in the player. To make a custom file for the
disc, clear the custom file of another disc.
To clear custom files or to reset memory of all discs at once
When the disc tray is empty, press POWER to turn on the
player while keeping ERASE and FILE pressed.
“ALL ERASE” is displayed in the window.
Note on program bank
A single disc cannot be assigned with both a program bank and a delete
bank. Multi-disc programs cannot be stored in memory.
32
Page 33

storing an Optimum Playback Level for Each Disc
- Level File
You can have the player memorize an optimum playback level for each individual disc.
Each time you play a disc, the volume will be set to the level memorized for that disc.
This function can be used when the amplifier is connected to the VARIABLE LINE
OUT terminals or when headphones are used.
Clearing the Level File
1 Insert the disc whose level file Is to be cleared In
the tray.
2 Press LEVEL FILE. 3 Press ERASE.
J. L... I:
When “FILE ERASE” is displayed and "LEVEL”
disappears, the level file is cleared.
Note
This function cannot be operated when the DIGITAL OUT (OPTICAL) is used
for connections.
3 -^5
PTTTl :-r
10
To play the disc using the level file
Each time disc is inserted into the player, the LINE
OUT/PHONE LEVEL will be automatically turn to the
designated playback level.
When the playback level is changed
Press FILE RECALL during stop. The LINE OUT/PHONE
LEVEL will be automatically reset to the memorized
playback level.
33
Page 34

Assigning Names to a Disc - Disc Memo
Using the disc memo function, you can assign a name within 10 letters for each disc.
The memo appears in the window every time you put the disc in the player. One name
can be assigned for one disc. For the disc memo function, 78 letters (including a space,
characters, and symbols) are available. You can use these letters to assign a title,
musician name, genre, date of purchase, and other disc memos to your disc.
“-NO DISC-” can be changed to a desired indication.
Assigning a Disc Memo to Your Disc
ZDcziEziaa
□ aaoo
!
CZIOlIDCDa
□ aczioczi
□ gaga
gggc 3
ggg
gggc 3
ggcog
Insert the disc to which you want to assign a
disc memo.
Make sure that the total number of selections
and the total playing time is displayed.
Input a desired disc memo.
The letters available as a disc memo are shown
on the right page.
You can input a disc memo more quickly by
using the remote commander.
You can also input a disc memo during play.
a) When you input alphanumeric characters
as a disc memo
1 Choose the desired capital letters, small
letters, or numbers.
CD
-«3C 3
—P....
„ll2
Move the cursor to select
To change to small letters or numbers, return to the
step 1.
the next letter.
1 1
b) When you input non-alphanumeric
' 1 ! 2
3 i
characters as a disc memo
To input them during play, press MEMO
INPUT on the remote commander.
Use the DISC MEMO buttons.
1 Press ◄◄ or ►► until
the desired symbol or
letter appears.
r~ I - I
2 When the desired letter
appears, press
S! ^
Move the cursor to select the next sym bol/lette r
Lights up.
Repeat step 2 to input the disc memo.
You can write up to 10 letters.
2 sT 4 5 J
7 8 9 101
11
12
Press FILE.
■ «
After about 1 se cond.
Each time you press MEMO INPUT, the
display changes as shown above.
2 Press the applicable letter button.
I 1 I I 16 I ^ I 14 I
34
Each time the disc is inserted in the tray, the
memo will be displayed.
Page 35

Clearing the Disc Memo
1 Insert the disc whose memo you want to clear
in the tray.
2 Press MEMO INPUT or
The first letter in the disc memo blinks.
Usable letters and symbols
For the disc memo, 78 letters and symbols and space can be used. When
the button is pressed for the first time, the space appears. Each
time ►► is pressed, letters and symbols will appear in the following order.
(Space) ABCDEFGHIJKLMNOPQR
STUVWXYZ&abcdefghijkImno
pqrstuvwxyz,~=[]< >!?*/ +
:. 9876543210-
3 Press ERASE.
When “FILE ERASE” is displayed and “MEMO”
disappears, the disc memo is cleared.
To rewrite letters or symbols before pressing FILE
Move the cursor under the letter/symbol to be changed,
and then select the desired letter/symbol using
DISC MEMO. To erase the letter and make space, locate
the desired place with and press CLEAR.
Use to call up a previous character.
Note
• Symbols cannot be entered with the letter buttons. To enter symbols, use
the -♦</►► DISC MEMO buttons.
• The only characters that can be entered directly for your disc memo have
the orange letter on the remote commander.
35
Page 36

Indexing a Disc - Custom Index
A custom index is a special index that can be assigned to any position you want
on the disc. If you assign custom indexes to the positions on a disc, you can
easily locate the positions during play, or enjoy repeat play between two adjacent
custom indexes.
Press FILE to store the custom index. The
custom index is assigned to the repeat start
point.
You can assign custom indexes up to 10 positions by repeating steps from 2 to 4.
To reiease rehearsal play
Press CLEAR, to resume normal play.
If a new custom index is assigned to a position preceding another index.
Previously existing Indexes will be shifted as follows.
Example: If you assign a new index between 2 and 3.
Lights up.
Lights up.
36
A new index
During custom index play
You cannot use the normal index search, however, search of custom index
function is possible.
If you press FILE in the pause mode
The rehearsal play is not made and the custom index is assigned
immediately at the position where FILE is pressed.
If you press the MUSIC SCAN in the C.INDEX mode, the beginning of each
custom index is played.
The old index 3 becomes 4
Page 37

Playing from the Desired Custom Index
Clearing Custom Indexes
There are three ways to play from a desired custom index.
a) To play from an index to the end of the disc
1 Press C.INDEX.
2 Select the desired custom index by pressing the
corresponding numeric button 1 through 10.
b) To play from one index to the next
1 Press C.INDEX twice so that “C.INDEX 1” and
“SINGLE” are displayed.
2 Select the desired custom index by pressing the
corresponding numeric button 1 through 10.
To play repeatedly between adjacent indexes
Press REPEAT between steps 1 and 2 above. To cancel repeat play,
press REPEAT again.
c) To access an index during play IX
1 Press C.INDEX
2 Press -a—/—s. on the remote commander.
—Accesses the next index.
■a—: Returns to the preceding index.
(to go further back, use the numeric button.)
To release play using custom indexes
Press one of the PLAY MODE buttons (PROGRAM,
SHUFFLE or CONTINUE). The music calendar appears.
Recommended application of custom indexes
When the selections on your disc are symphonies or
concertos, their selection number is not useful for locafing
their chapters. In this case, you are recommended to
assign a custom index to each chapter so that you can
locate it easily. When you want to play only one chapter,
you are recommended to choose Custom Index 1 (Single).
1 Press C.INDEX.
C.INDEX appears.
2 Press CHECK.
Each time you press CHECK, index number blinks.
Select the index number you want to delete.
3 Press ERASE while Index number blinks.
The specified index will be erased and the
succeeding index numbers will move up one.
37
Page 38

Keeping the Program in Memory - Program Bank
After programming selections, you can keep the program memorized, so that the
disc is played always in the fixed order. The memorized program is called
“program bank”. One program bank can be made for a disc.
Memorizing Program
Piaying the Disc Using the Program Bank
Before inserting a disc
1 Press PROGRAM.
The indicator above the PROGRAM button lights up.
2 Insert the disc in the tray. 3 Press ►.
When the disc is in the tray
1 Press FILE RECALL during stop.
Program play mode indicator tights up and the
memorized program will be recalled.
2 Press ►.
To play the selections in another program without clearing the program
bank
Insert the disc in the tray, press PROGRAM to program the selections as you
want, and press
The memorized program bank won’t be cleared. (Press FILE RECALL to check
the program bank.)
To play a disc having a program bank in other modes
Insert the disc in the tray, set the player in the desired play mode and press
>■.
The disc will be played in the newly programmed order.
Clearing the Program Bank
1 Insert the disc whose program bank is to be
cleared In the tray.
To change the program bank
Program the selections again and press FILE.
Note
You cannot keep the multi-disc program in memory.
Where is the program bank memorized?
The program bank is memorized in the player’s memory, Therefore, if a disc
for which you made a program bank is used with another player, play using
the program bank is not possible.
38
2 Press FILE RECALL. 3 Press ERASE.
When “FILE ERASE” is displayed and “BANK”
disappears, the program bank is cleared.
Page 39

Keeping Your Undesired Selections in Memory
- Delete Bank
After choosing desired selections, you can keep them in the memory. These
memorized desired selections are called “Delete Bank”.
One delete bank can be made for each disc. Note that both program bank and
delete banks cannot be made for one disc.
Memorizing Desired Selection
1
Select the undesired selections, (see page
17.)
2 Press FILE during stop.
FILE
CD
Lights up.
When “BANK” lights, the undesired selections is
memorized for the delete bank.
Playing the Disc Using the Delete Bank
Before inserting a disc
1 Press CONTINUE or SHUFFLE. 2 Insert the disc In the tray. 3 Press
When the disc is in the tray
1 Press CONTINUE or SHUFFLE. 2 Press FILE RECALL during stop. 3 Press ►.
To play the selections in another desired selections without clearing the
delete bank
Insert the disc in the tray, press ■. Select the undesired selections again,
and press The disc will be played in the order newly chosen. The
memorized delete bank won’t be cleared. (Press FILE RECALL to check the
delete bank.)
To play a disc having a delete bank in other modes
Insert the disc in the tray, set the player in the desired play mode and press
Clearing the Delete Bank
1 Insert the disc whose delete bank Is to be
cleared In the tray.
2 Press FILE RECALL.
To change the delete bank
Select the desired selections again, and press FILE.
Note on delete banks
• Up to 99 selections can be specified in the delete bank.
However, a delete bank will not register if no selections are deleted at all.
* You cannot store a delete bank along with a program bank for a single
disc.
Where is the delete bank memorized?
The delete bank is memorized in the player’s memory.
Therefore, if a disc for which you made a delete bank is used with another
player, play using the delete bank is not possible.
3 Press ERASE.
When “FILE ERASE” is displayed and “BANK”
disappears, the delete bank is cleared.
39
Page 40

Memorizing a DSP (Digital Signal Processor) Mode
The DSP modes, can be stored in memory to correspond with a certain disc. By
making a DSP file, you can insert of select a disc and have it played to a
pre-selected acoustic atmosphere.
Making a DSP File
Seiect the desired DSP mode, (see page 14)
Press FILE during the DSP indicator is lighting.
FLAT also can be memorized.
CD
Light up except for FLAT.
^...
...........
Clearing a DSP Fiie
insert the disc whose DSP mode to be cleared in the tray.
2 Press DSP/1-20 (or SELECT on the remote
commander).
The DSP indicator lights up.
Press ERASE during the DSP Indicator is lighting.
When “FILE ERASE” is displayed and “DSP”
disappears, the DSP file is cleared. The DSP mode
is also cleared automatically.
Note
Ttie effect level setting cannot be stored.
Ligh s up
Playing the disc using the DSP file
Each time a disc is inserted into the player, the designated
DSP mode will automatically set to play.
To change DSP mode without erasing the DSP file.
Change the DSP mode as you want and play, press FILE
RECALL.
The preceding DSP mode will be set.
To change DSP files.
Select a new DSP mode. Press FILE during the DSP
indicator is lighting. The new DSP mode will be stored in
the DSP file.
40
Page 41

Timer Activated Playing
By connecting a commercially available timer, disc play of the desired play mode
can be started at any desired time.
Connection and Operation
Set the timer to a desired play start time.
Set TIMER to PLAY position.
TIMER
OFF PLAY
JU
jQaa
Connecting
AC power cord
To the switched outlet
_Z_
Amplifier
Connecting
AC power cord
Audio timer
1,4
Connect the timer to the piayer and power on the timer.
Power on the player and insert a disc in the player.
Set a desired play mode.
(e.g. continuous play, program play, shuffle play,
repeat play, etc.)
(Keep th e power on)
-to a n wall outlet
Play will start at the registered time.
Keep the POWER switch depressed on the player
When the timer is set, the power of the piayer wili be cut
off.
However, be sure to leave the POWER switch on.
When the timer-activated play ends
Be sure to set TIMER to OFF. If the TIMER switch is left
at PLAY, the player wili automatically start playing the next
time the power is turned on.
To play in the program play mode
Make a program bank (page 36) and then prepare for timer
activated playing.
If you select the custom index play mode
Play begins from custom index 1.
41
Page 42

r
Chapter 5 Additional Information
Maintenance Specifications
Cleaning Your Player
Clean the cabinet, panel and controls with a soft cloth
lightly moistened with a mild detergent solution. Do not use
any type of abrasive pad, scouring powder or solvent such
as alcohol or benzine.
Cleaning Discs
When a disc becomes dirty, clean it with a cleaning cloth.
Wipe the disc from the center out.
Do not use soivents such as benzine, thinner, commercialiy
availabie cleaners or anti-static spray intended for anaiog
discs.
Compact disc player
Frequency response
Signal to noise ratio
Dynamic range
Harmonic distortion
Channel separation
Outputs
LINE OUT (FIXED)
(phone jacks)
LINE OUT (VARIABLE)
(phone jacks)
DIGITAL OUTPUT
(OPTICAL)
(optical output
connector)
HEADPHONES
(stereo phone jack)
General
Power requirements
Power consumption
Dimensions
Weight
Remote commander (RM-D997)
Remote control system
Power requirements
Dimensions
Weight
Supplied accessories
Connecting cord (1)
(2 phono plugs <-> 2 phono plugs)
Remote commander (1)
Sony SUM-3(NS) batteries (2)
Optional accessory
Audio optical connecting cord POC-15
Design and specifications are subject to change without
notice.
2 Hz-20 kHz ±0.3 dB
More than 115 dB
More than 100 dB
Less than 0.0025%
More than 110 dB
Output level 2 V (at 50 kilohms,
non DSP mode)
Load impedance over 10 kilohms
Output level max. 2 V
(at 50 kilohms, non DSP mode)
Load impedance over 50 kilohms
Wave length 660 nm
Output level -18 dBm
Output level max. 28 mW
Load impedance 32 ohms
120 V AC, 60 Hz
17 W
Approx. 430x110x355 mm
(w/h/d)
(17x43/sXl4 inches)
Including projecting parts and
controls
Approx. 4.6 kg (9 lbs 15 oz), net
Infrared control
3 V DC with two batteries size
AA (I EC designation R6)
Approx. 62X18X175 mm
(w/h/d)
(21/2X23/32 X7 inches)
135 g (4.6 oz)
Including batteries
42
Page 43

Trâubleshooting Guide
Before going through the check list below, first refer back to the connections and operating procedures.
Should any problem persist after you have made these checks, consult your nearest Sony service facility.
Symptom Cause Remedy
The disc tray does not close.
Play does not start.
‘‘-NO DISC-” is dispiayed.
Play begins only by turning on the
power.
Dispiay window does not iiiuminate
even when the power is turned on.
Sound is not heard.
Piay does not begin from the first
selection.
“-OVER-” is displayed.
The remote commander does not
operate the player.
Any operation is not possibie.
The disc is not placed correctly.
Dirty disc.
The disc is inserted upside down.
The player is in the pause mode.
Moisture condensation.
There is no disc in the player.
The TIMER switch is set to PLAY.
DISPLAY MODE was pressed.
Loose connection.
Connection is incorrect.
The LINE OUT/PHONE LEVEL
control is set to the minimum.
The player is in the PROGRAM,
SHUFFLE or C.INDEX mode.
►► was continuously pressed at the
end of the disc.
The batteries are run down.
The remote commander is not
pointed at the remote sensor.
There is an obstacle between the
remote commander and the player.
The remote commander is too far
from the player.
The internal control program may not
run.
Place the disc correctly on the disc
tray.
Clean the disc.
Insert the disc with the printed side
up.
Press II or ► to release pause.
Leave the player turned on for
approximately one hour.
Insert a disc.
Set the TIMER switch to OFF.
Press the button again.
Insert the plug firmly.
Check the connection refering to
“Connecting an Amplifier Direct”.
Turn the control clockwise.
Press CONTINUE.
Press or to return to normal
indication.
Replace both batteries.
Point the remote commander at the
sensor.
Remove the obstacle.
Move closer.
Turn off the power and turn it on
again.
43
 Loading...