

Page 1
Email Security Virtual Appliance 7.2 Getting Started Guide
PROTECTION ATTHE SPEED OF BUSINESS
™
Page 2

SonicWALL Email Security Virtual Appliance 7.2
Getting Started Guide
This Getting Started Guide contains installation procedures and configuration guidelines
for deploying the SonicWALL Email Security Virtual Appliance on a server on your
network. The SonicWALL Email Security Virtual Appliance includes a software appliance,
which has been pre-installed and pre-configured for VMware environments, and allows
for the secure and easy deployment of SonicWALL Email Security solution within a
virtual environment.
The SonicWALL Email Security Virtual Appliance provides the following benefits:
• Scalability and Redundancy:
• Multiple virtual machines can be deployed as a single system, enabling
specialization, scalability, and redundancy.
• Operational Ease:
• Users can virtualize their entire environment and deploy multiple machines
within a single server or across multiple servers.
• Product Versatility:
• SonicWALL Email Security Virtual Appliance is compatible with other
SonicWALL Email Security platforms (Windows/Linux) as a stand-alone (AllIn-One), control center, or remote analyzer.
• Security:
• SonicWALL Email Security Virtual Appliance provides an optimized, nontamperable software and hardware architecture.
Note: For SonicWALL Email Security documentation, refer to the SonicWALL Email
Security 7.2 Administrator’s Guide. This and other documentation are
available at:
http://www.sonicwall.com/us/Support.html
SonicWALL Email Security Virtual Appliance 7.2 Getting Started Guide Page 1
Page 3

Contents
1
2
3
4
5
This document contains the following sections:
“Before You Begin” on page 3
“Installing SonicWALL Email Security Virtual Appliance” on page 5
“Registration Process” on page 19
• “Supported Platforms” on page 3
• “Hardware Resource Requirements” on page 3
• “Files for Installation” on page 4
• “About Thick Provisioning” on page 6
• “Installing with vSphere” on page 6
“Performing Basic Tasks and Host Configuration” on page 11
• “Powering the Virtual Appliance On or Off” on page 14
• “Configuring Host Settings on the Console” on page 14
• “Configuring Settings on the Appliance Web Interface” on page 16
• “Creating a MySonicWALL Account” on page 19
• “Registering Your SonicWALL Email Security Virtual Appliance” on page 20
“Updating the SonicWALL Email Security Virtual Appliance” on page 22
Page 2
Page 4

Before You Begin
1
This section contains the following subsections:
• “Supported Platforms” on page 3
• “Hardware Resource Requirements” on page 3
• “Files for Installation” on page 4
Supported Platforms
The elements of basic VMware structure must be implemented prior to deploying the
SonicWALL Email Security Virtual Appliance. SonicWALL Email Security Virtual
Appliance runs on the following VMware platforms:
• ESXi 4.0 Update 1 (Build 208167 and newer)
• ESX 4.0 Update 1 (Build 208167 and newer)
You can use the following client applications to import the image and configure the virtual
settings:
• VMware vSphere – Provides infrastructure and application services in a
graphical user interface for ESX/ESXi, included with ESX/ESXi. Provides Thick
provisioning when deploying SonicWALL Email Security Virtual Appliance.
• VMware vCenter Server – Centrally manages multiple VMware ESX/ESXi
environments. Provides Thick provisioning when deploying SonicWALL Email
Security Virtual Appliance.
Hardware Resource Requirements
The following hardware resources are the minimum requirements for the
SonicWALL Email Security Virtual Appliance:
• 80 GB Thick provisioned hard disk space
Note that the OVA image for the SonicWALL Email Security Virtual Appliance
specifically allocates 80 GB on the virtual disk and cannot be altered.
•2 GB RAM
• 1 CPU
SonicWALL Email Security Virtual Appliance 7.2 Getting Started Guide Page 3
Page 5

Files for Installation
You will use different files for a fresh installation than when updating to a newer version.
New Deployment Files
SonicWALL Email Security Virtual Appliance is available for download from <http://
www.mysonicwall.com>. For a fresh install, the Open Virtual Appliance (OVA) file with
the following file name format is available for import and deployment to your ESX/ESXi
server:
• es_vm_x.x.x.xxxx.ova
Note: Do not rename the OVA files.
Updater File
For a software update, a file with the following file name format is available from
MySonicWALL:
• es-vmware-updater-x.x.x.xxxx-3440i-der-signed.sh
Note: Do not rename the updater file.
The es-vmware-updater-x.x.x.xxxx-3440i-der-signed.sh file is uploaded to the
Miscellaneous Setting/Upload Patch section of the System >Advanced page on the
appliance management interface of your existing SonicWALL Email Security
deployment.
Page 4
Users already running SonicWALL Email Security 200 to 8000 appliances will need to
use the Updater File.
Page 6
Installing SonicWALL Email Security Virtual Appliance
2
SonicWALL Email Security Virtual Appliance is installed by deploying an OVA file to your
ESX/ESXi server. Each OVA file contains all software components related to
SonicWALL Email Security .
You can deploy the OVA files as needed for your SonicWALL Email Security
environment. SonicWALL Email Security can be configured for a single server or in a
distributed environment on multiple servers.
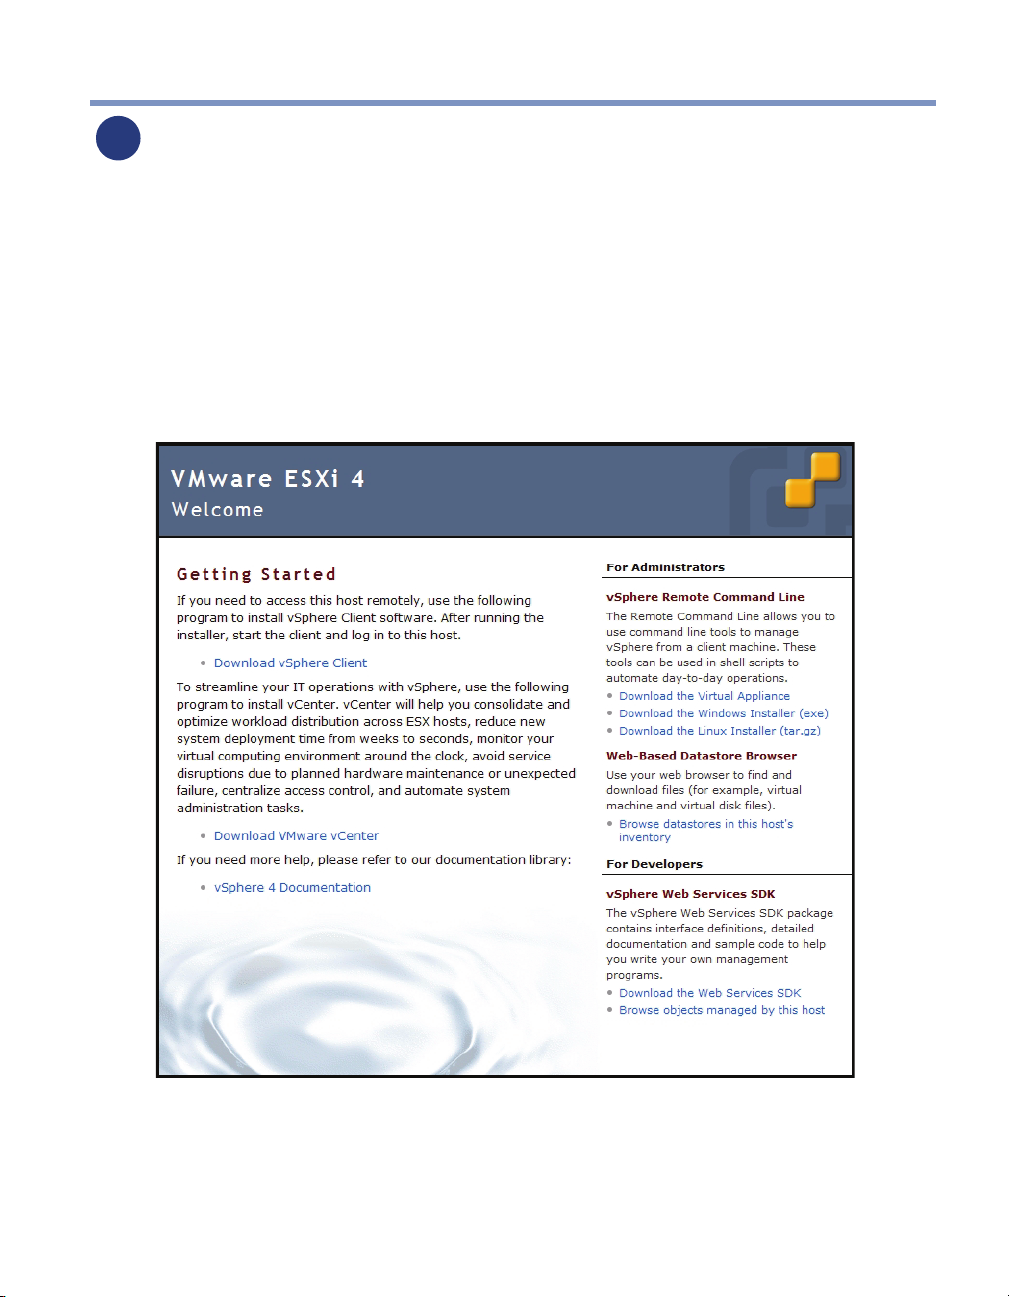
You can deploy an OVA file by using the vSphere or vCenter client, which comes with
ESX/ESXi. For vSphere, point a browser to your ESX/ESXi server, and click on
Download vSphere Client.
See the following sections:
• “About Thick Provisioning” on page 6
• “Installing with vSphere” on page 6
SonicWALL Email Security Virtual Appliance 7.2 Getting Started Guide Page 5
Page 7
About Thick Provisioning
Thick provisioning occurs when an OVA file is deployed on your ESX/ESXi server. This
type of provisioning pre-allocates all the hard disk space for the virtual appliance.
Installing with vSphere
To perform a fresh install of the SonicWALL Email Security Virtual Appliance using the
vSphere client, perform the following steps:
1. Download the es_vm_7.2.x.xxxx.ova file from MySonicWALL to a system that is
accessible to your ESX/ESXi server.
Note: Do not rename the OVA files.
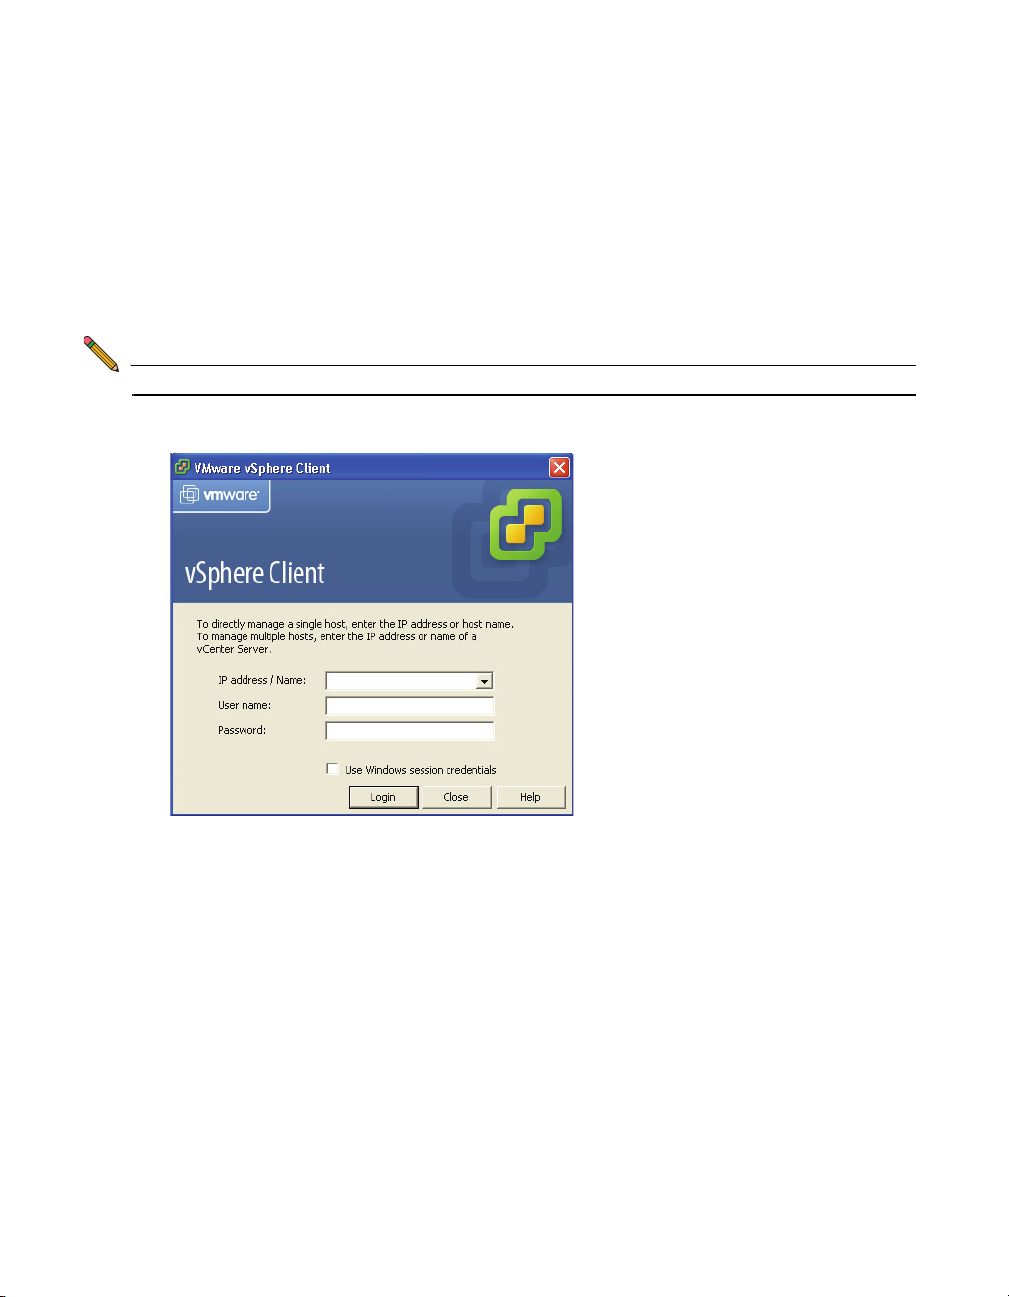
2. Launch vSphere and use it to log on to your ESX/ESXi server.
Page 6
Page 8
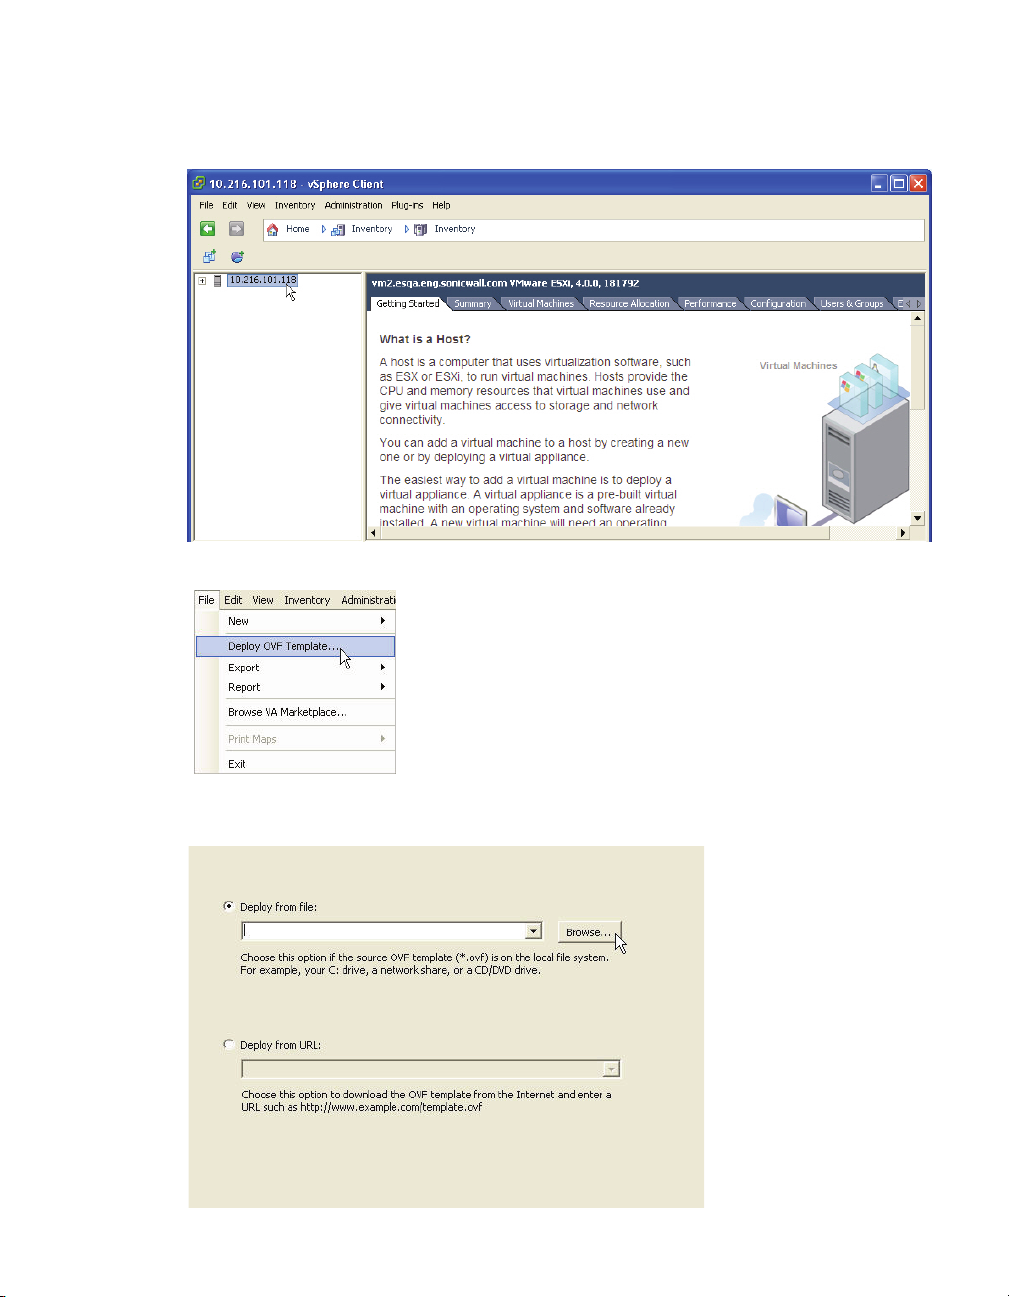
3. From the Home screen, click the Inventory icon to display the virtual appliances
running on your ESX/ESXi server. Click on the SonicWALL Email Security appliance
you wish to deploy.
4. To begin the import process, click File and select Deploy OVF Template.
5. In the Source screen of the Deploy OVF Template window, select Deploy from file,
then click Browse.
SonicWALL Email Security Virtual Appliance 7.2 Getting Started Guide Page 7
Page 9
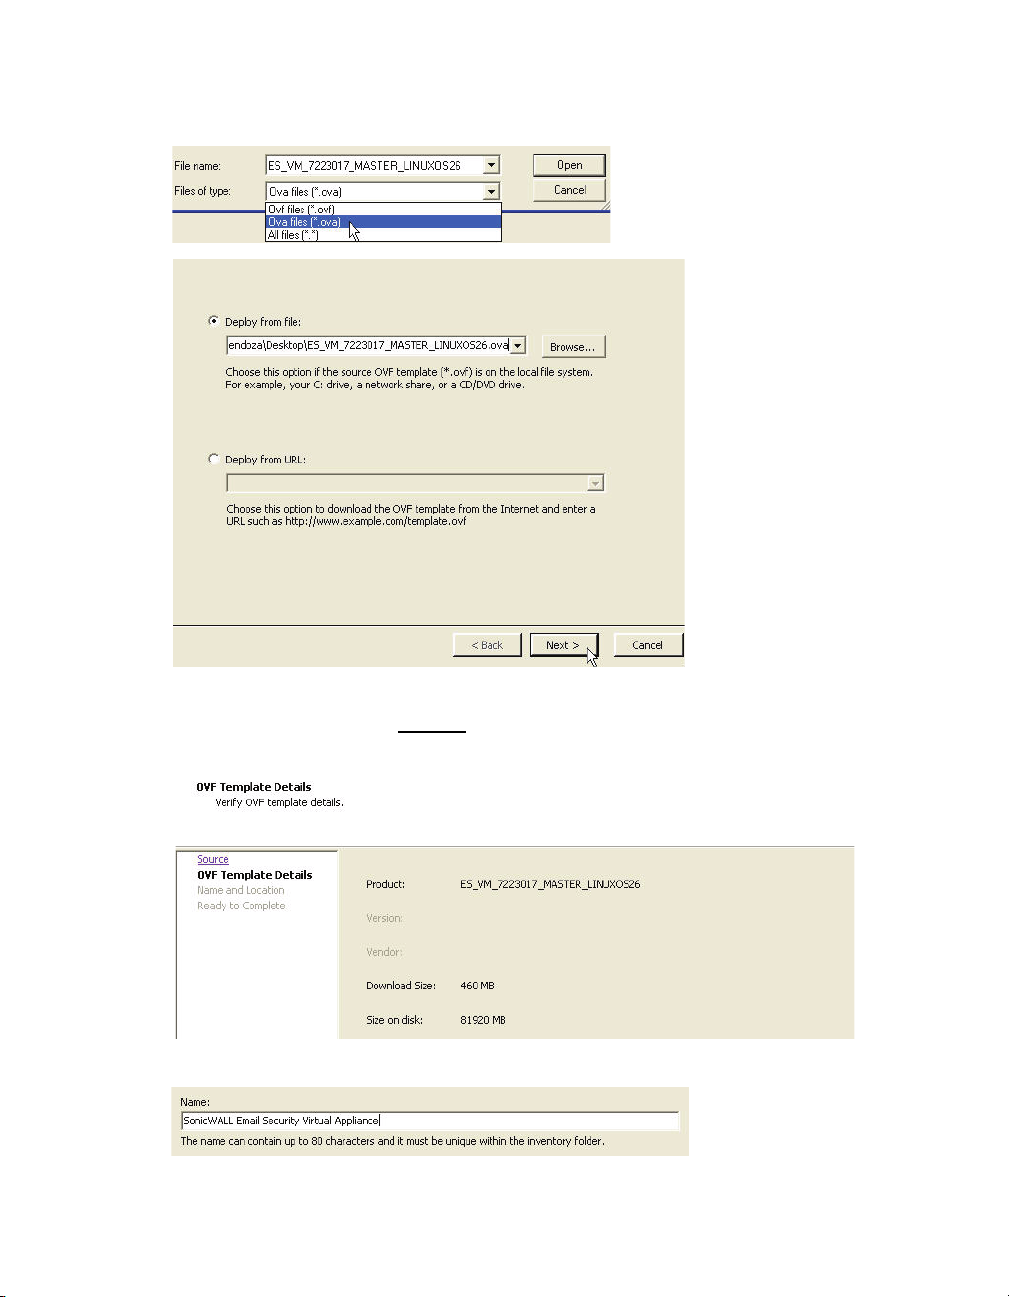
6. Set the Files of type to Ova files (*.ova). Select the OVA file to import. Then, click
Open. When the selected OVA file appears in the Deploy from file field, click Next.
Page 8
7. In the OVF Template Details screen, verify the information about the selected file. To
make a change, click the Source
link to return to the Source screen and select a
different file. To continue, click Next.
8. Enter a description name for the virtual appliance in the Name field. Click Next.
Page 10

9. In the Ready to Complete screen, review and verify the displayed information. To
begin the deployment with these settings, click Finish. Otherwise, click Back to
navigate back through the screens to make a change.
The Deploying box displays the progress.
10. In the Deployment Completed Successfully dialog box, click Close.
SonicWALL Email Security Virtual Appliance 7.2 Getting Started Guide Page 9
Page 11

The name of the new SonicWALL Email Security Virtual Appliance appears in the left
pane of the vSphere window.
• To power on the virtual appliance and perform required host configuration, see
“Performing Basic Tasks and Host Configuration” on page 11.
• To register the SonicWALL Email Security appliance, see “Registration Process” on
page 19.
Page 10
Page 12

Performing Basic Tasks and Host Configuration
3
This section describes how to power on and configure basic settings on the
SonicWALL Email Security Virtual Appliance, including virtual hardware settings and
networking settings.
The following tasks are required to configure your SonicWALL Email Security Virtual
Appliance before registering it:
1. Power on the virtual appliance.
See “Powering the Virtual Appliance On or Off” on page 14.
2. Open the virtual appliance console and configure the following host settings:
• IP address
• Default route
See “Configuring Host Settings on the Console” on page 14.
3. Log in to the appliance system interface and configure the following:
• Host name
• Network settings
• Time settings
See “Configuring Settings on the Appliance Web Interface” on page 16.
The following sections are not part of the task flow, but describe how to view and edit
settings on the virtual appliance:
• “Viewing Settings Summary” on page 12
• “Editing Virtual Machine Settings” on page 13
SonicWALL Email Security Virtual Appliance 7.2 Getting Started Guide Page 11
Page 13

Viewing Settings Summary
When the SonicWALL Email Security Virtual Appliance is selected in the left pane, the
Summary tab of the vSphere interface displays pertinent information such as memory,
powered on/off state, hard disk storage usage, network subnet settings, and other
settings.
Note: This page might incorrectly indicate that VMware Tools are not installed.
A short list of commands is also provided on this page, including Power On and Edit
Settings.
When using vSphere with vCenter Server, the Migrate and Clone commands are also
available.
Page 12
Page 14

Editing Virtual Machine Settings
You can use the vSphere client to edit settings for the SonicWALL Email Security Virtual
Appliance, including memory, CPUs, descriptive name, datastore, and resource
allocation.
To edit virtual machine settings:
1. In the vSphere client, right-click the SonicWALL Email Security Virtual Appliance in
the left navigation pane and select Edit Settings from the right-click menu.
2. In the Virtual Machine Properties window, the Hardware tab displays the settings for
memory, CPU, hard disk, and other hardware. Click on the row in the table to access
the editable settings in the right pane.
3. Click the Options tab to view and edit the SonicWALL Email Security Virtual
Appliance name, guest operating system, and other settings.
4. Click the Resources tab to view and edit the resource allocation settings.
5. When finished, click OK.
SonicWALL Email Security Virtual Appliance 7.2 Getting Started Guide Page 13
Page 15

Powering the Virtual Appliance On or Off
There are multiple ways to power the SonicWALL Email Security Virtual Appliance on or
off.
To power the virtual appliance on (or off):
1. Do one of the following:
• Right-click the SonicWALL Email Security Virtual Appliance in the left pane and
navigate to Power > Power On (or Power > Power Off) in the right-click menu.
• Select the SonicWALL Email Security Virtual Appliance in the left pane and then
click Power on the virtual machine (or Shut down the virtual machine) on
the Getting Started tab in the right pane.
• Select the SonicWALL Email Security Virtual Appliance in the left pane and then
click Power On (or Shut down guest) on the Summary tab in the right pane.
Configuring Host Settings on the Console
After powering on the SonicWALL Email Security Virtual Appliance, perform the following
steps to open the console and configure the IP address and default route settings:
1. In vSphere, right-click the SonicWALL Email Security Virtual Appliance in the left
pane and select Open Console in the right-click menu.
Page 14
Page 16

2. When the console window opens, click inside the window, type admin at the Login:
prompt and press Enter, and then type password at the Password: prompt and
press Enter. The SNWLCLI> prompt is displayed.
Note: The mouse pointer disappears when you click in the console window. To release
it, press Ctrl+Alt.
3. Configure the local IP address for the virtual appliance with the command:
interface eth0 <IP Address> <Subnet Mask>
4. Configure the DNS with the command:
dns --nameserver <DNS IP>
5. Configure the default route for the virtual appliance with the command:
route --add default --destination <gateway IP>
You can test connectivity by pinging another server or your main gateway, for
example:
ping <gateway IP>
Press Ctrl+c to stop pinging.
6. Type exit to exit the CLI. Close the console window by clicking the X.
SonicWALL Email Security Virtual Appliance 7.2 Getting Started Guide Page 15
Page 17

Configuring Settings on the Appliance Web Interface
After configuring the IP address and default route settings on the SonicWALL Email
Security Virtual Appliance console, the next steps are to configure host name, network,
and time settings in the appliance management interface.
Perform the following steps to complete host configuration for the virtual appliance:
1. Launch a browser and enter the URL of the virtual appliance.
2. On the appliance interface login page, type in the default credentials and then click
Login.
The default credentials are:
User – admin
Password – password
Page 16
3. If this is the first time you have logged into a SonicWALL Email Security appliance,
you must enter the following system configuration information before you can
continue:
• Monitoring—The email address of the mail server administrator who receives
emergency alerts, the email of the MTA postmaster who will receive emergency
alerts, and the name or IP address of the SMTP servers.
• Hostname—A descriptive hostname for this SonicWALL Email Security
appliance.
• Networking— The static IP address for this computer, including the Primary and
Fallback DNS server IP addresses.
• Date and Time—The system date and time, current time zone, and an option for
automatically adjusting for Daylight Savings Time.
Page 18

When you have finished configuring these system settings, click Apply Changes to
continue.
SonicWALL Email Security Virtual Appliance 7.2 Getting Started Guide Page 17
Page 19

4. A dialog box warns you that the virtual appliance will reboot. Click OK.
Note: If you modified the DNS settings, the services on the appliance will restart when
the changes are applied, causing a momentary connectivity loss to the Web
server. Your browser will be redirected to the appliance management interface
login page.
If you modified the Time settings, the virtual appliance will reboot. Use your
browser to reconnect to the appliance management interface.
Page 18
Page 20

Registration Process
4
The SonicWALL Email Security Virtual Appliance must be registered before use.
This section contains the following subsections:
• “Creating a MySonicWALL Account” on page 19
• “Registering Your SonicWALL Email Security Virtual Appliance” on page 20
Creating a MySonicWALL Account
A MySonicWALL account is required for product registration. If you already have an
account, continue to the Registering Your SonicWALL Email Security Virtual Appliance
section. Perform the following steps to create a MySonicWALL account:
1. In your browser, navigate to http://www.mysonicwall.com.
2. In the login screen, click the Not a registered user?
link.
3. Complete the Registration form, then click Register.
4. Verify that the information is correct and click Submit.
5. In the screen confirming that your account was created, click Continue.
Note: MySonicWALL registration information is not sold or shared with any other
company.
SonicWALL Email Security Virtual Appliance 7.2 Getting Started Guide Page 19
Page 21

Registering Your SonicWALL Email Security Virtual Appliance
You must register your SonicWALL Email Security Virtual Appliance before first use.
Registration is performed using the appliance management interface. When registration
is completed, SonicWALL Email Security will be licensed on your virtual appliance.
To register your SonicWALL Email Security Virtual Appliance, perform the following
steps:
1. Log in to your SonicWALL Email Security Virtual Appliance. The System > License
Management page displays.
2. Enter your mySonicWALL.com account Username and Password in the
appropriate fields. Click Submit.
Page 20
Page 22

3. The Administration section displays. Enter the Serial Number, Authentication
Code, and Friendly Name for your SonicWALL appliance. Click Submit to finish the
registration process.
4. You have successfully registered your SonicWALL Email Security Virtual Appliance.
Click Continue to view the Manage Licenses screen or continue configuring other
settings within the appliance.
SonicWALL Email Security Virtual Appliance 7.2 Getting Started Guide Page 21
Page 23

Updating the SonicWALL Email Security Virtual Appliance
5
The System > Advanced page of the appliance interface is used to update the
SonicWALL Email Security Virtual Appliance to a newer build or version.
To update the SonicWALL Email Security Virtual Appliance, perform the following steps:
1. Download the updater file from MySonicWALL. The file name is in the format:
es-vmware-updater-x.x.x.xxxx-3440i-der-signed.sh
Note: Do not rename the updater file.
2. Log on to the appliance interface of the SonicWALL Email Security Virtual Appliance
and navigate to the System > Advanced page.
3. Scroll down to the Miscellaneous Settings section. Click Browse and select the es-
vmware-updater-x.x.x.xxxx-3440i-der-signed.sh file on your local system.
4. Click Apply to update your virtual appliance with the new software.
Backup and Restore
Note that all configuration data resides on the Central Console (CC). Because there is
really no stored or persistent data on the Remote Agent (RA), taking a snapshot of an RA
and restoring it at a later time will not cause issues with other RAs. Any time a new RA is
brought online and associated with a CC, the settings are replicated out to the RA.
Page 22
Page 24

Copyright Notice
© 2010 SonicWALL, Inc.
All rights reserved.
Under the copyright laws, this manual or the software described within, cannot be copied,
in whole or part, without the written consent of the manufacturer, except in the normal
use of the software to make a backup copy. The same proprietary and copyright notices
must be affixed to any permitted copies as were affixed to the original. This exception
does not allow copies to be made for others, whether or not sold, but all of the material
purchased (with all backup copies) can be sold, given, or loaned to another person.
Under the law, copying includes translating into another language or format.
Specifications and descriptions subject to change without notice.
Trademarks
SonicWALL is a registered trademark of SonicWALL, Inc.
Microsoft Windows 7, Windows Vista, Windows XP, Windows Server 2003, Windows
Server 2008, Internet Explorer, and Active Directory are trademarks or registered
trademarks of Microsoft Corporation.
Adobe, Acrobat, and Acrobat Reader are either registered trademarks or trademarks of
Adobe Systems Incorporated in the U.S. and/or other countries.
VMware, ESX, ESXi, vSphere, VMware vCenter Server, and vCenter Converter
Standalone are trademarks or registered trademarks of VMware, Inc.
Firefox is a trademark of the Mozilla Foundation.
Other product and company names mentioned herein may be trademarks and/or
registered trademarks of their respective companies and are the sole property of their
respective manufacturers.
SonicWALL Email Security Virtual Appliance 7.2 Getting Started Guide Page 23
Page 25

Customer Support
For answers to all your support questions, visit the SonicWALL Support Web site at:
<http://www.sonicwall.com/us/Support.html> where you’ll find featured support topics,
tutorials, and more. If you need further assistance, SonicWALL offers telephone, email,
and Web-based support to customers with valid Warranty Support or a purchased
support contract. Please review our Warranty Support Policy for product coverage.
Related Documentation
The SonicWALL Email Security 7.2 documentation set includes the following user
guides:
• SonicWALL Email Security 7.2 Appliance Administrator’s Guide
• SonicWALL Email Security 7.2 Software Administrator’s Guide
• SonicWALL Email Security 7.2 User’s Guide
• SonicWALL Email Security 7.2 Software Getting Started Guide
• SonicWALL Email Security 7.2 Release Notes
• SonicWALL Anti-Spam Desktop 6.2 User’s Guide
• SonicWALL Anti-Spam Desktop Quick Start Guide
For basic and advanced deployment examples, refer to SonicWALL Email Security user
guides and deployment technotes.
Page 24
Page 26

SonicWALL Live Product Demos
Get the most out of your SonicWALL Email Security with the complete line of SonicWALL
products. The SonicWALL Live Demo Site provides free test drives of SonicWALL
security products and services through interactive live product installations:
• Unified Threat Management Platform
• Secure Cellular Wireless
• Continuous Data Protection
• SSL VPN Secure Remote Access
• Content Filtering
• Secure Wireless Solutions
• Email Security
• GMS and ViewPoint
For further information, visit:
<http://livedemo.sonicwall.com/>
SonicWALL Email Security Virtual Appliance 7.2 Getting Started Guide Page 25
Page 27

Notes
Page 26
Page 28

Son icWALL, Inc.
2001 Logic Drive T +1 408. 74 5.9600 ww w.soni cwall.com
San Jose CA 95124-3452 F +1 4 08.745. 9300
PN: 232-001855-00 Rev A 3/2010
descriptions subject to change without notice. 07/07 SW 145
2010
PROTECTION AT THE SPEED OF BUSINESS™
 Loading...