

Page 1
Installation and setup for the HA360DB
HomeAware™ Doorbell Signaler
The HA360DB Doorbell Signaler will alert you when someone comes to visit. The HA360DB
requires no wires and can be installed in seconds.
The HA360DB will alert you to someone at the door via the HA360M master unit. The master
unit receives a wireless signal from the Doorbell signaler and will flash a strobe, make a loud
sound and vibrate a bed shaker. Once the master unit receives the signal from the doorbell it
will also send a signal to all HomeAware remote receivers. In addition to the HomeAware
receivers, if using our optional bridge unit you will also be alerted to the HA360DB doorbell
signaler using your original Sonic Alert receivers (SA102, SA201, BL300, and SB1000).
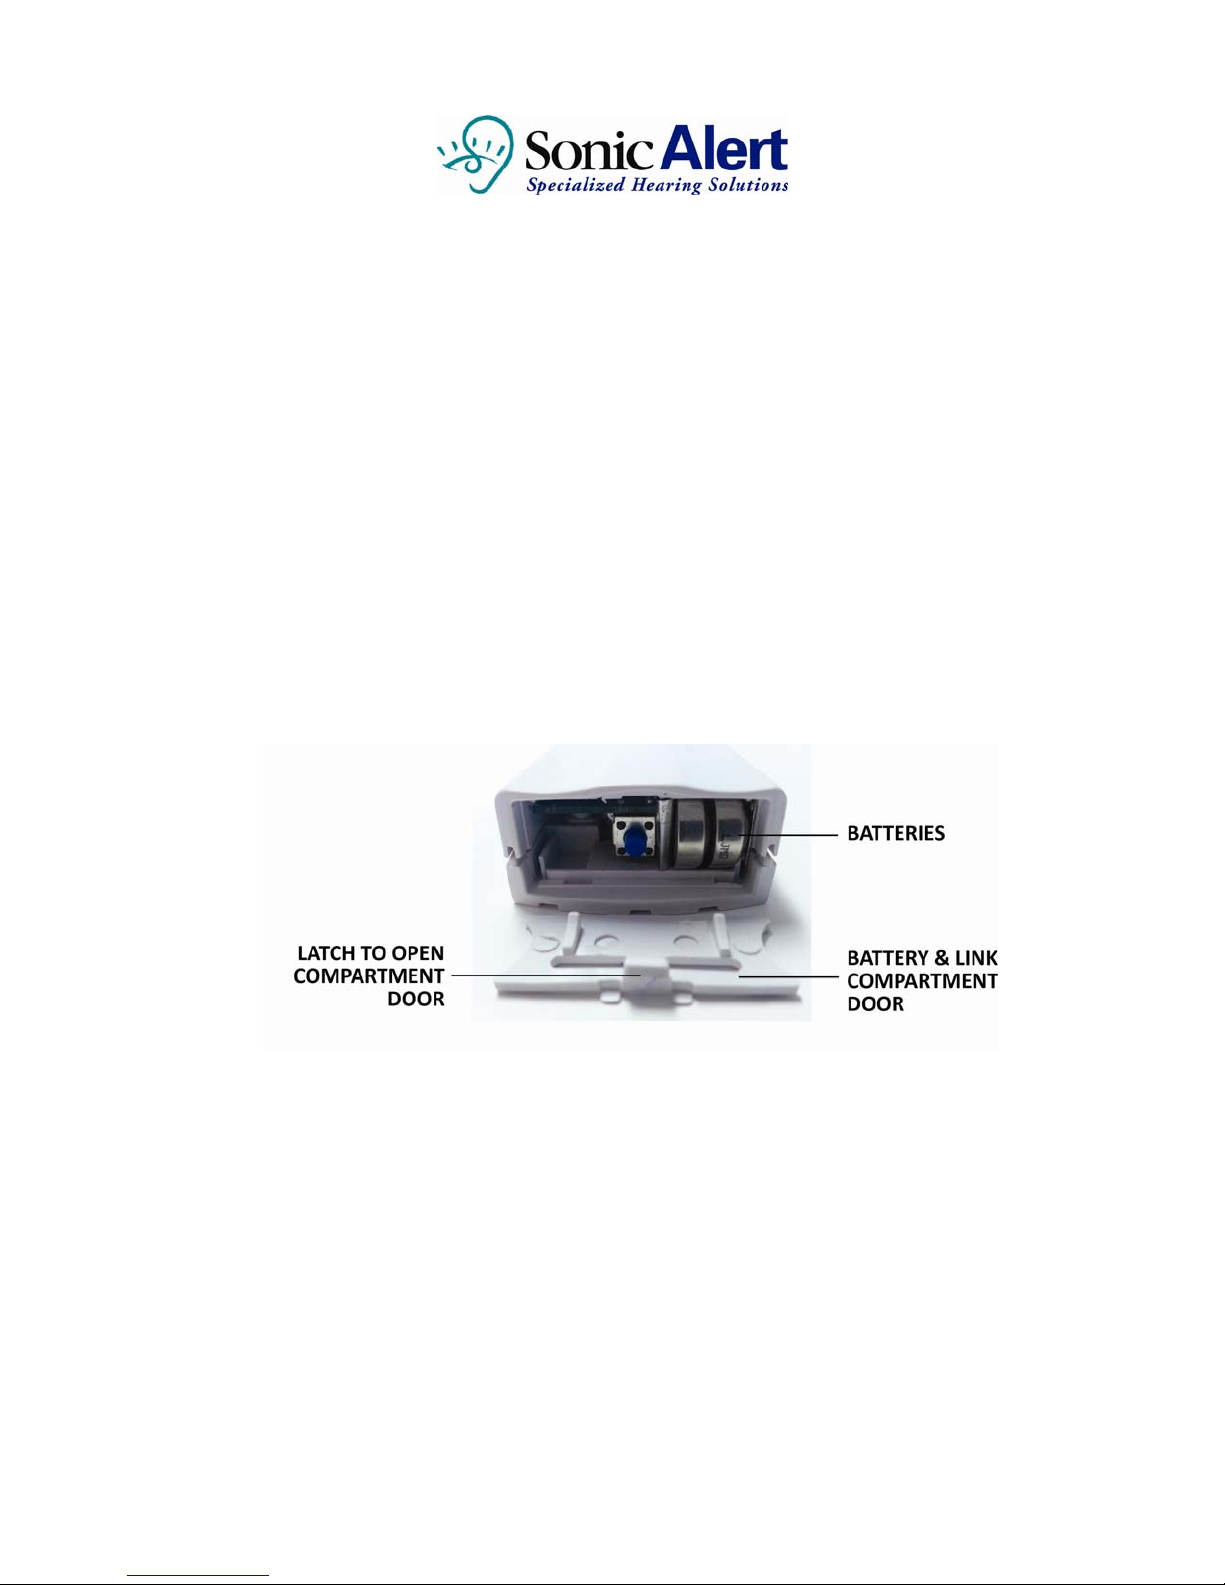
Step #1) Install Battery
The HA360DB comes with two #357 silver oxide long lasting batteries that need to be
installed into the bottom of the unit. See photo for Battery installation. Once installed the red
light should light when the button is pushed. If the light does not show, you may have the
batteries in backwards.
Step #2) Installation of button outside
There are two methods for installing the doorbell button, see #3 if you have an existing
doorbell chime box.
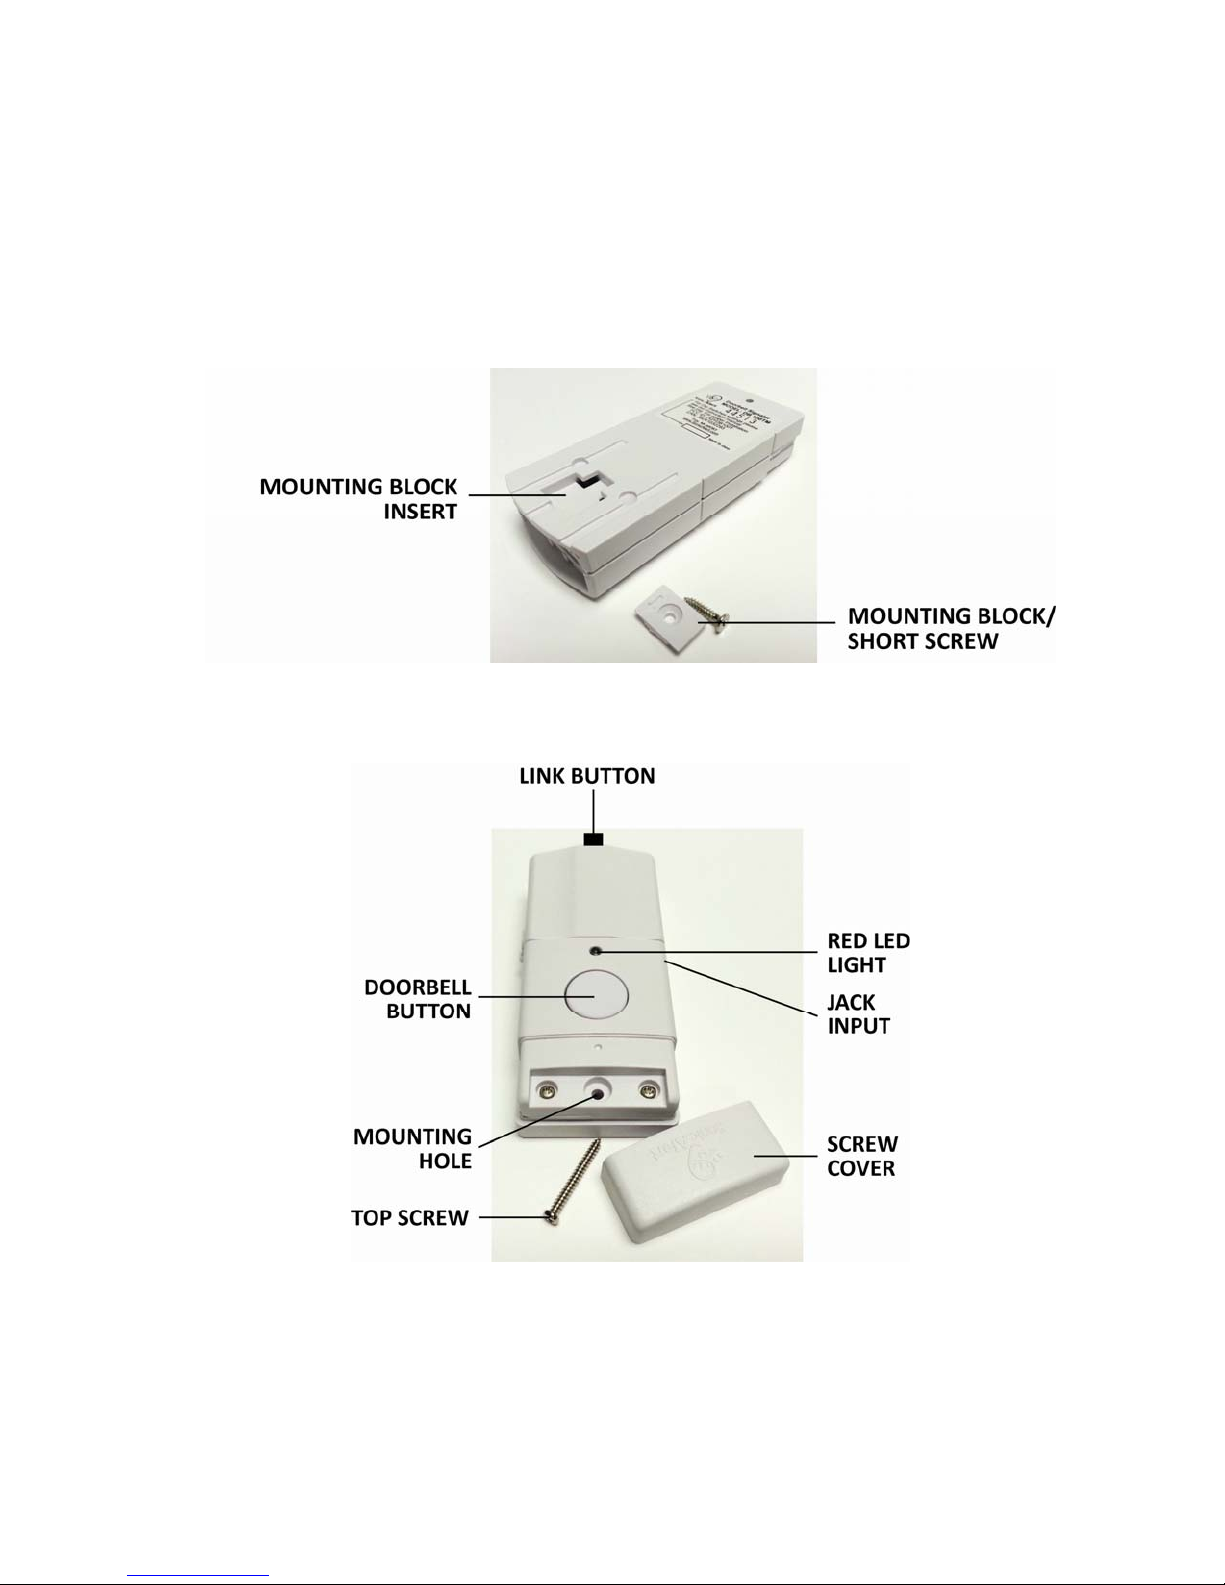
For this method you will need the provided hardware to install. We provide screws, and a
mounting block see diagram for button install below, also step by step instructions.
To install to a hard surface using the provided hardware follow these steps:
1) Install mounting block using provided short screw. Install the small side to the surface
(side without arrow). This will provide a space for the unit to slide over in order to attach
to the mounting block.
2) Remove the screw cover at the top of the doorbell unit; this will slide up to remove. Once
removed, you’ll see the top screw mounting hole.
Page 2
3) Once the mounting block is in place, and you’ve removed the top screw cover, position
the back of the doorbell unit over the mounting block. There is a square opening that the
block will fit into position that opening over the mounting block. Next slide the doorbell
unit down on the block about 1/8 inch, the doorbell unit should stay on by itself if
installed correctly.
4) Now that the doorbell unit is installed over the mounting block and in place, you now can
install the long screw in the top hole, and replace the screw cover.
Page 3

Step #3) Installation to existing door chime inside
With this method you can install the HA360DB to your existing AC powered doorbell chime.
This method allows you to use the existing doorbell button so there aren’t two buttons
outside.
Use the provided wire to connect the Doorbell Signaler to your existing AC powered chime
box. Remove chime box cover and connect the red and white wires to the existing terminal
screws (common and front) if connecting to the front door. Otherwise connect the red and
white wires to the (common and rear) screws for the rear door.
Next, plug the jack at the opposite end of the wire into the input on the side of the Doorbell
Signaler. To test press the doorbell button on the front, if the red LED lights up the
installation was successful. If the red light does not light up check the wiring again, also
check that the batteries are in correctly, check if chime box has power, also was it working
before you installed the wire?
Use the provided Velcro to attach the signaler next to or under the chime box cover if
enough room. See diagram for Door Chime installation below.
Step #4) Link button setup
This procedure will link your HA360DB to your HomeAware Master unit. The Master unit will
also provide an alert to all HomeAware remote receivers. When using the Sonic Alert bridge
unit HA360BU all original Sonic Alert receivers (SA101, SA201, BL300, and SB1000) will
also alert you.
Its best to do the LINK procedure in the same room with the HomeAware Master unit, make
sure this unit is plugged in.
To link the HA360DB to your Sonic Alert HomeAware Master unit follow the steps below.
1) On the Master unit press the
Set Up button. Now you will see the work CLOCK on the
display.
2) Next, on the Master unit you’ll need to scroll through the options until you see the word
LINK. Scroll up or down using the
button and down with the MINUTE button until you see the word
TONE & MINUTE buttons. Scroll up with the TONE
LINK then press
ENTER.
Page 4

3) The word LINK will begin flashing for up to 1 minute until this part of the setup is
finished.
4) At anytime if you need to exit out simply press the back button to exit.
5) Next Press the
link button on the back of the HA360DB signaler. On the Master unit
display the word FT DOOR will begin flashing. At this point you have these three options
to select from (FT DOOR, RE DOOR, DOOR 3, DOOR 4). To select one of these four
options you need to scroll through the display using the
TONE & MINUTE buttons. Scroll
up with the TONE button and down with the MINUTE button. When the display shows
the option you want press the ENTER button. The red LED light on the front of the
doorbell unit will blink several times during the link process. When done blinking the link
setup is complete, the units are now linked together and ready to use.
Step #5) Placement of the HA360DB doorbell transmitter
Proper placement of the HomeAware doorbell signaler is important because it uses Digital
RF frequencies to send its signal. It’s important to not place or install it on anything made of
metal because RF signals cannot go through metal. The HomeAware doorbell comes with
mounting hardware and is simple to install see Steps 2 & 3 above.
Page 5

Sonic Alert’s Limited Warranty
The HA360DB Doorbell Signaler is warranted against manufacturing defects in material or
workmanship for 1 year from the date of purchase. Within this period of time Sonic Alert will
repair or replace at our option the HA360ss without charge for parts or labor.
FCC Requirements
This device complies with part 15 of the FCC rules, and with RSS-210 of Industry Canada.
Operation is subject to the following two conditions; (1) This device might not cause harmful
interference, and (2) this device must accept any interference received, including interference
that may cause undesired operation.
Note: This equipment has been tested and found to comply with the limits for a Class B digital
device, pursuant to part 15 of the FCC rules. These limits are designed to provide responsible
protect against harmful interference in a residential installation. This equipment generates,
uses, and can radiate radio frequency energy and, if jot installed and used in accordance with
the instructions manual, may cause harmful interference to radio communications. However,
there is no guarantee that interference will not interfere in a particular installation. If this
equipment does cause harmful interference to radio or television reception, which can be
determined by turning the equipment on and off, the user is encouraged to thy to correct the
interference by one or more of the following measures:
i. Reorient or relocate the receiving antenna.
ii. Increase the separation between the equipment and receiver.
iii. Connect the equipment into an outlet on a circuit different from that to which the receiver
is connected.
iv. Consult the dealer or and experienced radio /TV technician for help
Modification not expressly approved by the manufacturer could void the user’s authority to
operate the equipment under FCC rules.
Customer Service & Warranty Questions
Call 1-888-864-2446 to receive an RMA for warranty instructions or e-mail to
RMA@sonicalert.info
Sonic Alert
Troy, MI 48083
www.sonicalert.com
REV:3 8/28 Ed
 Loading...