

Page 1
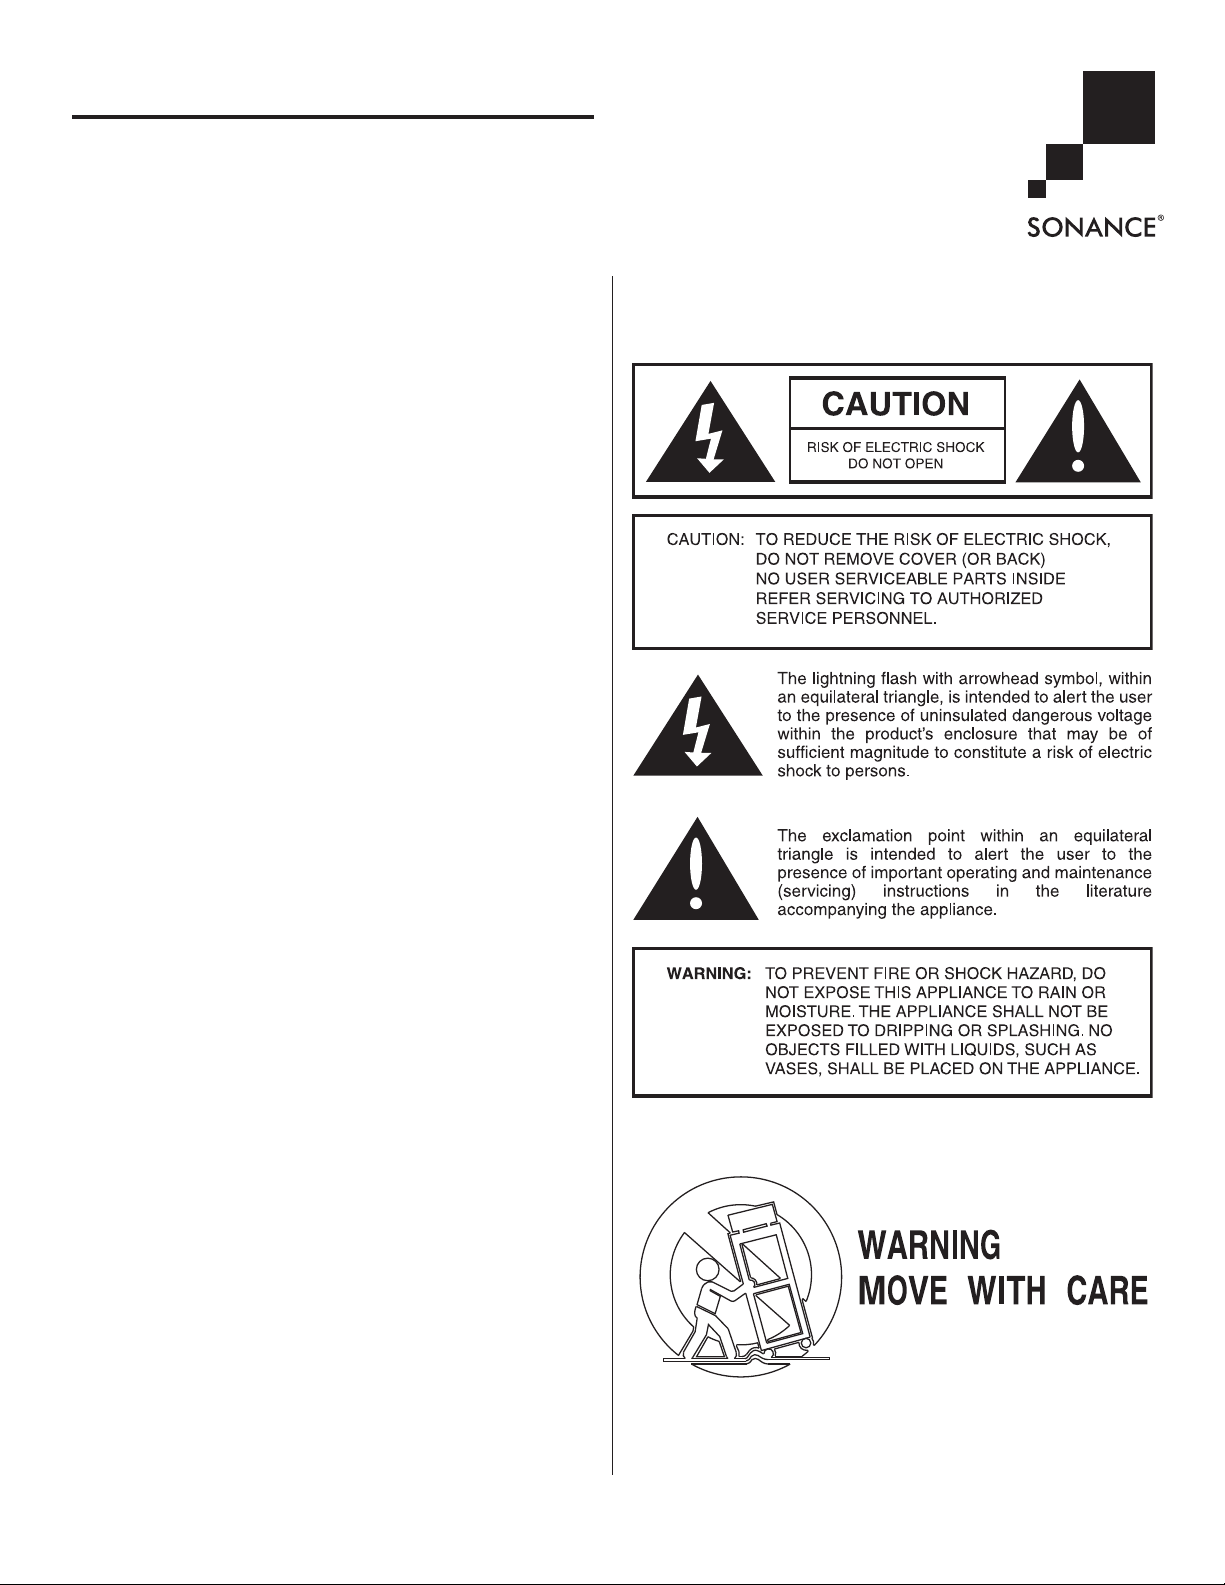
IMPORTANT SAFETY INSTRUCTIONS
CAUTION: Read all of these instructions before you operate and save
instructions for later use.
1. Read Instructions — All these safety and operating instructions should be
read before the amplifier is operated.
2. Retain Instructions — These safety and operating instructions should be
retained for future reference.
3. Heed Warnings — All warnings on the amplifier and in the operating
instructions should be adhered to.
4. Follow Instructions — All operating and use instructions should be
followed.
5. Water and Moisture — The amplifier should not be used near water — for
example, near a bathtub, washbowl, kitchen sink, laundry tub, in a wet
basement, or near a swimming pool, and the like.
6. Carts and Stands — The amplifier should be used only with a cart or stand
that is recommended by the manufacturer.
• An amplifier and cart combination should be moved with care. Quick
stops, excessive force, and uneven surfaces may cause the amplifier and
cart combination to overturn.
7. Caution: To prevent electric shock, do not use the amplifier’s polarized
plug with an extension cord, receptacle, or other outlets unless the
blades can be fully inserted to prevent blade exposure.
8. Ventilation — The amplifier should be situated so that its location or
position does not interfere with its proper ventilation. For example, the
amplifier should not be situated on a bed, sofa, rug, or similar surface that
may block the ventilation openings; or be placed in a built-in installation,
such as a bookcase or cabinet, that may impede the flow of air through the
ventilation openings.
9. Heat — The amplifier should be situated away from heat sources such
as radiators, heat registers, stoves, or other appliances (including other
amplifiers) that produce heat.
10. Power Sources — The amplifier should be connected to a power supply
only of the type described in the operating instructions or as marked on
the amplifier.
11. Grounding or Polarization — Precautions should be taken so that the
grounding or polarization means of the amplifier is not defeated.
12. Power-Cord Protection — Power supply cords should be routed so that
they are not likely to be walked on or pinched by items placed upon or
against them, paying particular attention to cords at plugs, convenience
receptacles, and the point where they exit from the amplifier.
13. Cleaning — The amplifier should be cleaned only as recommended by the
manufacturer.
14. Non-Use Periods — The power cord of the amplifier should be unplugged
from the outlet when left unused for a long period of time.
15. Object and Liquid Entry — Care should be taken so that objects do not fall
and liquids are not spilled into the enclosure through openings.
16. Damage Requiring Service — The amplifier should be serviced by
qualified service personnel when:
a. The power-supply cord or the plug has been damaged; or
b. Objects have fallen or liquid has been spilled into the amplifier; or
c. The amplifier has been exposed to rain; or
d. The amplifier does not appear to operate normally or exhibits a marked
change in performance; or
e. The amplifier has been dropped or the enclosure damaged.
17. Servicing — The user should not attempt to service the amplifier beyond
that described in the operating instructions. All other servicing should be
referred to qualified service personnel.
1
INSTRUCTION MANUAL
SONAMP®275 SE / 275X3 SE
STEREO POWER AMPLIFIER
Page 2

INTRODUCTION
Thank you for purchasing the Sonamp® 275 SE/275X3 SE. These amps
incorporate Sonance’s exclusive SAT™ (Smart Amp Technology) module that
allows you to customize the amplifier to the installation by simply removing
two screws on the back panel and inserting the desired module.
The 275 SE/275X3 SE (Sound Enhancement) amplifiers include a factoryinstalled BBE® Sound Enhancement SAT module. The BBE process improves
presence and detail of speakers, especially at lower listening volumes. This
makes it particularly effective at improving the sound quality of distributed
audio systems playing background music. BBE restores clarity and definition
(or focus) to spoken voices,making paging systems easier to understand without having to run them at high volumes. The BBE process is so effective that
it can even compensate for inferior sound from poor-quality source material
or compressed sources like MP3, etc. In addition to manual control, the BBE
effect can also be triggered on/off and the effect amount changed
(+6dB or +9dB) by an external control voltage.
The 275 SE/275X3 SE also includes these important features:
• Recessed power switch that prevents accidental turn-off
• Tamper-resistant, recessed input level and auto-on sensitivity controls
• Auto-on dip switch for turn-on delay (2, 4, 6, 8, 12 seconds)
• Defeatable high-pass filter to protect in-wall volume controls
• Bridge/mono switch (not available on 275X3 SE)
• Ground lift switch
• High-current amplifier topology that can operate at 2.66 ohms
• Defeatable auto-on signal sensing
• Active current limit, short-circuit and speaker protection
• Signal preset LEDs
• Protect/Clipping LEDs for easy level setup
• Auto-resetting thermal protection shutoff
• Inrush current-limiting circuit
This manual applies to the 275 SE, 273X3 SE and their rack-mount versions.
Except where noted, the installation, connection and use instructions are
identical for all models.
BOX CONTENTS
Your Sonamp 275 SE/275X3 SE box should contain the following items:
(1) Sonamp 275 SE or 275X3 SE amplifier
(1) IEC Power cord (Note: A power cord is not included with 230V models)
(1) Rack-mount hardware package (RMF versions only)
(1) Speaker zone label sheet (275X3 SE only)
UNPACKING
Save the carton and the styrofoam inserts for future safe transport in case you
move or the amplifier ever requires shipping for repair. Note, it is best if you
place it into an additional outer "overcarton" before shipment to minimize a
chance of theft in shipment.
Before you proceed, find the serial number which is located on the rear panel
of the amplifier and note it here for future reference:
S/N __________________________________________
PLACING THE AMPLIFIER
• Keep the amplifier out of direct sunlight and away from windows that could
let in rain.
• The amplifier should be placed away from heat sources such as hot air ducts
or radiators.
• Do not place the amplifier directly on carpet that could interfere with airflow
into its bottom vent openings.
• If you place your amplifier on the floor near your speakers, elevate it up off
the carpet.
• If you stack your components, it is better to place the amplifier above or
alongside your other components. When driven hard, the amplifier creates
significant heat and can affect components stacked on top of it.
• If you place the amplifier inside a cabinet, allow ample ventilation and at
least 2" clearance on top and both sides.
• Very sensitive low-level sources might pick up some hum radiated from the
amplifier’s power supply.
POWERING THE AMPLIFIER
AC Line Cord
The Sonamp 275 SE/275X3 SE feature a removable IEC power cord to allow
for easy installation. Plug the female end of the power cord into the connector
on the rear panel (Figure 1, #23) and plug the male end into a grounded wall
socket. DO NOT plug the power cord into an AC outlet on your preamplifier/
receiver.
CAUTION: TO PREVENT ELECTRIC SHOCK, DO NOT DEFEAT THE
THIRD PRONG OF THE POWER CORD PLUG.
ATTENTION: AFIN D’EVITER TOUT RISQUE D’ELECTROCUTION,
NEPAS ENLEVER LA 3EME FICHE DE LA PRISEELECTRIQUE.
Use only a heavy-duty extension cord, if required, to avoid starving the
amplifier of all the current necessary for full-power operation.
A.C. On
LED (
Figure 1
, #3)
This LED indicates that the AC power line cord is plugged into a live AC outlet. If the main AC line fuse ever opens,this LED will go out. To use the AutoOn feature, this LED must remain on at all times. The Power switch has no
effect on this LED.
AC Fuse (
Figure 1
, #22)
This will blow to protect the unit from possible internal parts failure.
NEVER replace the fuse with any size other than that indicated on the rear
panel to avoid more serious damage. Substitution of a larger fuse may create
serious damage to internal parts and will void your Sonance warranty.
CAUTION: For continued protection against fire, replace the fuse with
only the same type and rating.
Ground Lift Switch (
Figure 1
, #20)
The Sonamp 275 SE/275X3 SE feature a ground lift switch to eliminate hum
caused by ground loops. This is often set up by the chassis making contact
in a rack system. This eliminates the need to insulate the rack mount
faceplates with nylon washers.
MAKING CONNECTIONS
Before making any signal or speaker connections, make sure the amplifier’s
power is turned OFF and its power cord is unplugged.
When making connections, make sure there is no strain or tension on input
leads or speaker wires that could cause them to pull loose later on.
2
INSTRUCTION MANUAL
SONAMP®275 SE / 275X3 SE
STEREO POWER AMPLIFIER
Page 3

3
275X3 SE F
RONT
275 SE F
RONT
275 SE R
EAR
275X3 SE R
EAR
10 11
9
787
5566
12
16 17 18 20 221312 1514
19 21 23
3
10 11
787
5566
12
4
16 17 18 20 221312 1514
19 21 23
3
1. POWER SWITCH
2.
ACTIVE
L.E.D.
3.
AC ON
L.E.D.
4. SPEAKER SELECTORS
(275 X3 SE ONLY)
5.
SIGNAL
L.E.D.s
6.
CLIPPING
L.E.D.s
7. INPUT LEVEL CONTROLS
8. AUTO-ON SENSITIVITY ADJUSTMENT
9. AMPLIFIER BRIDGE SWITCH
(275 SE ONLY)
10. RCA INPUT/OUTPUT JACKS
11. BBE STATUS LEDs
12. BBE ON/OFF SWITCH
13. BBE ON/OFF EXTERNAL
CONTROL CONNECTION
14. BBE EFFECT LEVEL SWITCH
15. BBE EFFECT LEVEL EXTERNAL
CONTROL CONNECTION
16. SPEAKER CONNECTORS
17. AUTO-ON TIMING DELAY
DIP SWITCHES
18. AUTO-ON SWITCH
19. AUTO-ON CONTROL VOLTAGE
INPUT CONNECTION
20. GROUND LIFT SWITCH
21. CONTROL VOLTAGE OUTPUT
CONNECTION
22. FUSE
23. POWER CORD CONNECTION
Figure 1:
Front and
Rear Panels
INSTRUCTION MANUAL
SONAMP®275 SE / 275X3 SE
STEREO POWER AMPLIFIER
Page 4
4
Input Connections (
Figure 1
, #10)
Input signal is connected via the R and L RCA Input jacks. Make sure these are
consistent with the R and L outputs from your preamplifier or source device.
Output Connections (
Figure 1
, #10)
The BBE SAT module included with the 275 SE/ 275X3 SE includes buffered
R and L RCA output jacks. These can link additional power amplifiers to a
single source component without using messy Y-cord adaptors.
Note: The buffered output signal is not BBE-processed.
Speaker Connectors (
Figure 1
, #16)
The speaker connectors on the Sonamp 275 SE/275X3 SE are hex style
“5-way” binding posts. They can accept wire terminated in spade lugs, pins,
single and double banana connectors as well as bare wire.
Caution: Do not over-tighten when using a hex nut-driver or socket.
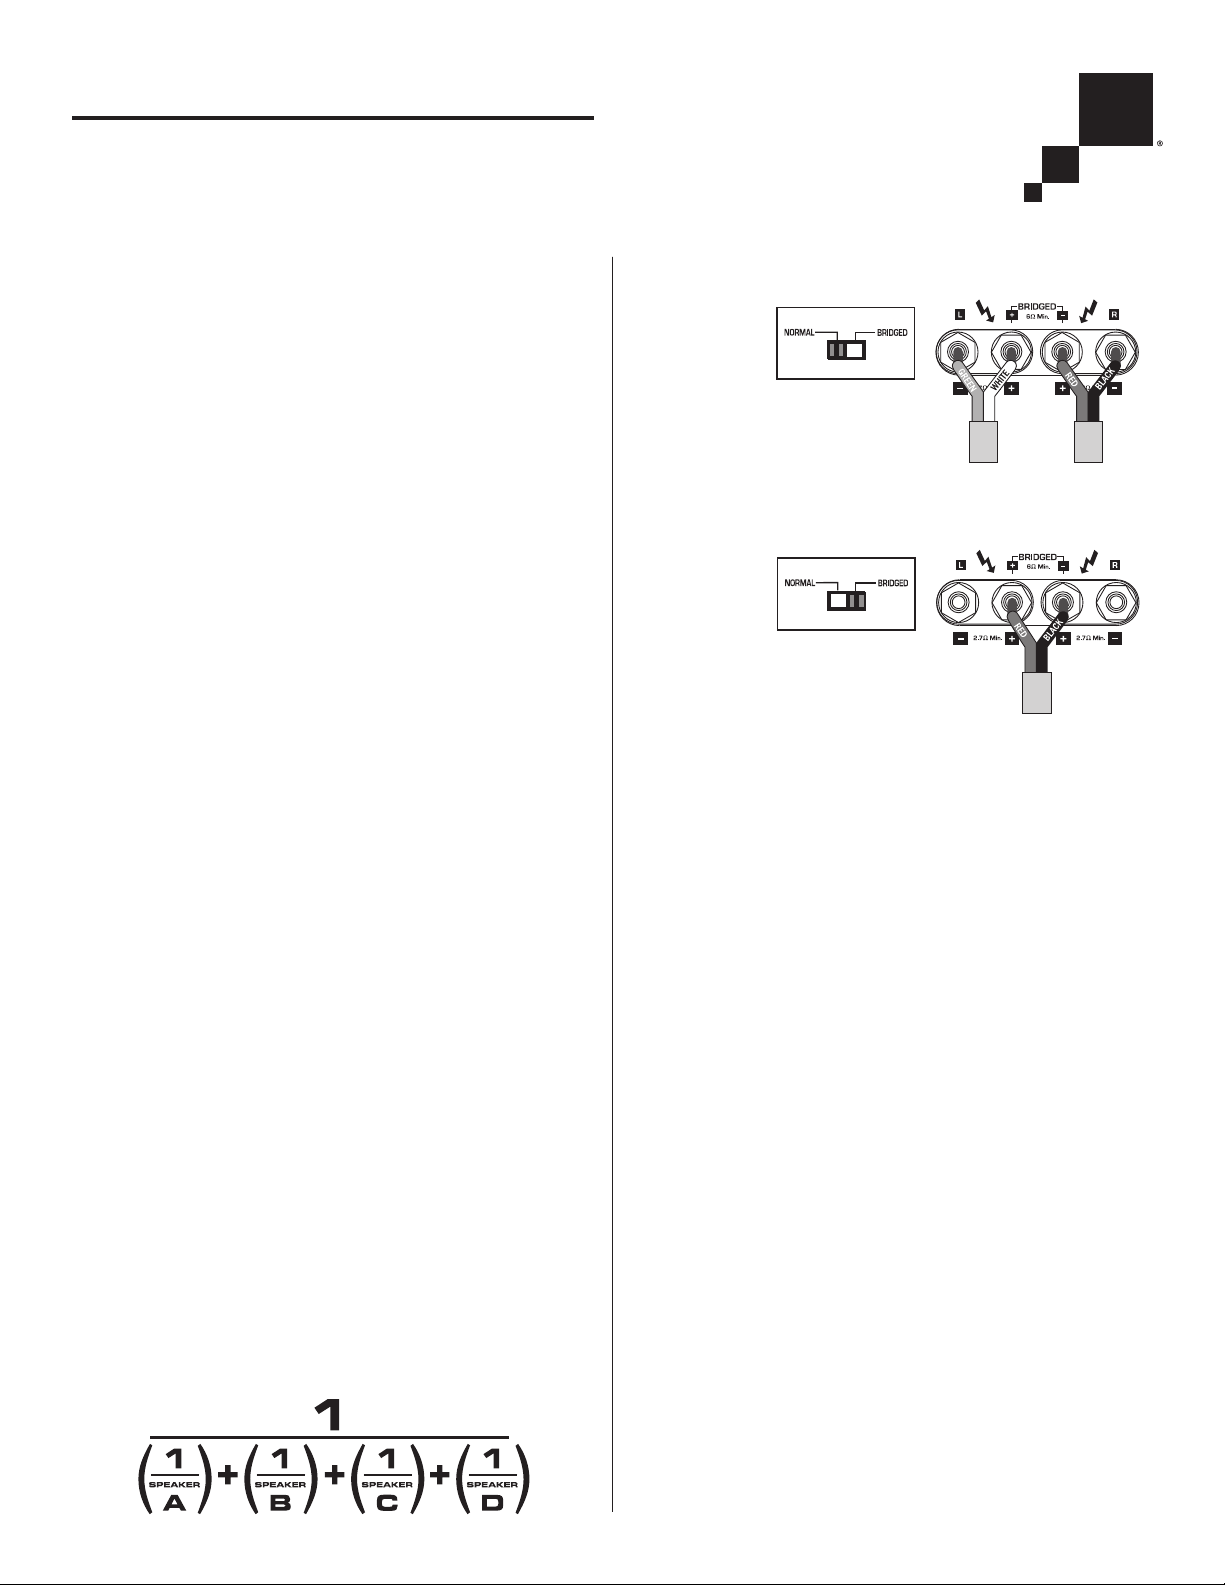
Making Speaker Connections: Stereo Operation (
Figure 2
)
All four connections are required for stereo operation — negative signal paths
can NOT be combined. Minimum total impedance is 2.66 ohms (three pairs
of 8-ohm speakers).
It is important to observe correct speaker polarity when using this amplifier
in the stereo mode. One side of the speaker lead will have some sort of mark,
either printing, a raised ridge on the insulation, or different color of conductor. This permits you to know which wire you had connected to the + and
which to the – speaker terminal so you can do exactly the same at the power
amplifier terminals. If polarity of one speaker is reversed, the speakers will be
out of phase from each other, which will severely degrade sound quality.
Sonance recommends that red = “R+”, black = “R-“, white = “L+” and green
= “L-”. Most importantly, adopt a color protocol and stick with it.
Making Speaker Connections: Bridged Operation — 275 SE only
(
Figure 2
)
The 275 SE can operate in single-channel bridged mode, which increases the
amplifier’s power to 250 watts RMS (twice its 4-ohm stereo rating).
Note When operating the amplifier in the bridged mode be sure the speakers are
rated to handle the increased output power.
For bridged operation, use only the two positive (red) speaker connectors and
the right channel input connector. Make sure that the Amplifier Bridge Switch
(Figure 1, #9) is set to the correct position.
IMPORTANT: Minimum impedance for bridged operation is 6 ohms.
Connecting Multiple Speakers
The 275 SE and 275X3 SE are both capable of handling a minimum total
impedance of 2.66 ohms without strain or distortion. This means you can
safely connect up to three pairs of high-quality 8-ohm speakers (we recommend Sonance speakers, of course!). You can connect the three sets of speakers to the same set of speaker connection posts on the 275 SE or connect one
set to each of the three sets of speaker connection posts on the 275X3 SE.
Caution: If any of your speakers have a rated impedance of less than
8 ohms, be sure that the total speaker impedance is not less than 2.66 ohms
per channel. If you are in doubt, consult your Sonance dealer, custom
installer, or Sonance Technical Service. To calculate impedance, use the
following equation:
OPERATING THE 275 SE/275X3 SE
Operating Tip
The Sonamp 275 SE and 275X3 SE have an ingenious and very sophisticated
auto turn on/off circuit. Please read these instructions completely so you do
not get frustrated trying to operate them for the first time.
Power Switch (
Figure 1
, #1)
Press once to the “in”position to turn the amplifier on. Press again to the “out”
position to turn the amp off. Leave the Power Switch in the “in” position when
using either of the the Auto On Modes (see below).
Auto-On Modes
The Auto-On switch located on the rear panel (Figure 1, #18) selects between
"On" (audio trigger mode), "External Volt" (control voltage activation mode),
and "Bypass" (activated only by the Power Switch).
Audio Trigger Mode (Auto-On Switch “ON” Position)
When the Auto On switch is set to the ON (left-hand) position, any audio
signal arriving at the amplifier’s input connectors will trigger the automatic
turn-on circuitry to activate the amplifier for operation. The Active LED on
the front panel (Figure 1, #2) illuminates when the amplifier is operational.
The sensitivity of the Auto-On circuit can be increased or decreased by
adjusting the level control on the front panel (Figure 1, #8).
The amplifier will remain on for approximately 3½ minutes after the audio
signal has ceased. This provides ample time to prevent erratic operation from
pauses between musical passages or while changing sources. The Audio
Trigger feature frees you from having to place the amplifier in a rack with the
other components. Here are a few installation possibilities:
• Local-room system coupled with a multi-CD changer.
• Surround sound rear or side channels.
• Multi-room, multi-source control systems.
• Use the Audio Trigger Mode with the delay settings to control a 16-zone
system with 4 amplifiers. (See
Figure 11,
on page 10.)
• Or even an amplifier-controlled lava lamp! (See
Figure 12,
on page 11).
NORMAL STEREO
LEFT SPEAKER RIGHT SPEAKER
BRIDGED
(275 SE ONLY)
MONO SPEAKER
Figure 2:
Proper
Speaker
Connections
INSTRUCTION MANUAL
SONAMP®275 SE / 275X3 SE
STEREO POWER AMPLIFIER
Page 5

5
External Voltage Mode (Auto-On Switch"External Volt" Position)
The 275 SE/275X3 SE also feature a removable voltage input connector to
connect other electronics with voltage control outputs. When the Auto-On
switch is set to the “Voltage Trigger “(center) position,the voltage trigger monitors the voltage input connector (Figure 1, #19) and turns the amplifier ON
when a voltage (either AC or DC) between 5V and 24V is detected.
Bypass Mode (Auto-On Switch "Bypass" position)
When the auto On switch is set to the BYPASS (right-hand) position, the
Auto-On circuit is bypassed. In this mode, the amplifier is active any time the
front-panel Power switch is in the "in" position.
Auto-On Delay Time Switches (
Figure 1
, #17)
The Auto-On Delay Time Switches allow you to set Auto-On turn-on delay
times ranging from less than 1 second up to 12 seconds (see the table to the
right as well as Figure 3 and Figure 11). When more than one Sonamp is being
used, the Delay Time settings
can be staggered to allow the
amps to turn on at
different times. This avoids
taxing AC power lines beyond
the capability of the circuit
breaker(s).
Voltage Output
Connector
(
Figure 1,
#21)
The 275 SE and 275X3 SE feature a removable Voltage Output connector that provides 12V DC to control
other devices such as Sonance A/V Automation Products, 12V relays, or other
Sonamps (See Figure 4). The current draw on the connection should not
exceed 200mA.
Active
LED (
Figure 1
, #2)
This LED shows the amplifier’s operational activity. The first time AC power
is applied to the amplifier the Active LED will illuminate for about 1.75
minutes and then extinguish. This is a normal reaction of the Auto-On
circuitry the very first time it receives power.
Thereafter, the 275 SE/275X3 SE are ready for automatic operation. In the
Auto-On mode, the Active LED illuminates at the presence of an audio signal
to the input jacks. When the Auto-On feature is defeated the Active LED
functions as a normal on/off power indicator.
Note: Whenever AC power to the 275 SE/275X3 SE has been interrupted, the
Active
LED will illuminate for about 1.75 minutes when the power is first
restored.
AC On
LED (
Figure 1
, #3)
This LED indicates that the AC power cord is plugged-into a live AC outlet. If
the amplifier’s main AC fuse ever opens, this LED will extinguish. This LED
must remain ON at all times for the amplifier’s Auto-On features to operate.
The amplifier’s Power switch (Figure 1, #1) has no effect on the AC On LED.
Speaker Switch — 275X3 SE only (
Figure 1
, #4)
The Sonamp 275X3 SE has three pairs of speaker outputs. Each pair may be
selected individually by one of the three front-panel push-button switches.
The low impedance capability of the 275X3 SE allows connection of up to 3
pairs of 8-ohm speakers directly to the amplifier’s output stage. The amplifier
does not depend on an acoustically-inferior series connection for safe
operation. This eliminates any interactions between speaker systems, in-wall
volume controls, etc.
Input Level Controls
(
Figure 1
, #7)
The front-panel Input Level controls are recessed for adjustment by screwdriver only. This prevents accidental tampering with levels. The Level controls
are factory-set to a nominal level safe for connecting a CD player output
directly to the amplifier’s line inputs. This would be the case in a receiver Tap e
Out/multiple autoformer-type volume control installation (Plug and Play).
For systems that incorporate in-wall volume controls: Use the Input Level
controls to achieve the maximum desired listening level. Use the amplifier’s
Overload LEDs (FIgure 1, #6) to assist when adjusting levels to the desired
maximum. Set the input level controls to just below the LED’s flash point. This
practice helps to prevent autoformer saturation, distortion, or burnout of
the in-wall volume control while also improving audio resolution.
For systems that do not incorporate in-wall volume controls: Use the Input
Level controls to limit maximum safe gain to protect speakers or to optimize
the signal-to-noise ratios between the source components and amplifier.
Many output level controls on source components are overly-sensitive near
their minimum position; by reducing the amplifier’s Input Level control settings, you “compel” the source component’s volume control to operate in its
more uniform adjustment range. You can also use the amplifier’s Input Level
controls to adjust left/right channel balance for off-center listening positions.
Auto-On Sensitivity Adjustment (
Figure 1,
#8)
This control is conveniently placed on the front panel between the left and
right Input Level controls. It is pre-set at its mid rotation setting, which works
for most applications. If the source equipment’s output level is low,rotate the
Auto-On Sensitivity control clockwise so the Auto-On circuitry will respond at
the lower level. If the source equipment’s output has some low residual noise,
rotating the Auto-On Sensitivity control counterclockwise will raise the AutoOn trigger level above the noise level, so it responds only to the signal level.
Clipping
LEDs (
Figure 1
, #6) and Protection Circuits
The 275 SE/275X3 SE have independent L and R Clipping LEDs that alert you
when the amplifier’s normal operation has been exceeded. If the Clipping
LEDs are constantly illuminated, a short circuit is most likely present.
The speaker relay will disconnect when a DC offset condition is detected, thus
preventing damaged voice coils.
The 275 SE/273X3 SE employ active-limiting protection circuits. When an
over-current condition is realized, the amplifier will actively limit the amount
of power delivered to the speaker connectors. No longer will annoying relay
clicking get in the way of listening to an audio program.
Note: It is always a good idea to turn off the power switch while you
are trouble-shooting for shorted connections or faults with source
components.
INSTRUCTION MANUAL
SONAMP®275 SE / 275X3 SE
STEREO POWER AMPLIFIER
Page 6

BBE®CONNECTIONS AND OPERATION
1. Status LEDs: Illuminate to show if the BBE process is ON, and how much
processing (+6dB or +9dB) is being applied.
2. BBE ON/OFF switch: In the OFF
EXT. position, BBE processing is bypassed;
in the ON position BBE processing is applied.
• When this switch is in the OFF
EXT. position BBE processing can be
automatically activated when an external control voltage is applied to the
BBE ON/OFF EXT. CTRL. connector.
3. BBE ON/OFF EXT. CTRL. connector: When a control voltage appears at this
connection and the BBE ON/OFF switch is in the OFF
EXT. position, BBE
processing is automatically activated.
• The connection accepts AC or DC control voltages between 5V and 24V.
4. BOOST LEVEL +6dB
EXT
./+9dB switch: Sets the amount of BBE processing
being applied to either +6dB or +9dB.
• When this switch is in the +6dB EXT. position the amount of BBE processing being applied can be automatically changed to +9dB when an
external control voltage is applied to the BOOST LEVEL EXT. CTRL. con-
nector.
5. BOOST LEVEL EXT. CTRL. connector: When a control voltage appears at this
connection, and the BOOST LEVEL switch is in the +6dB
EXT
. position, the
amount of BBE processing being applied is automatically changed to +9dB.
• The connection accepts AC or DC control voltages between 5V and 24V.
High-Pass Filter Settings (
Figure 4
)
The 275 SE and 275X3 SE have high-pass filters located on the BBE SAT
Module circuit board. The filter settings are determined by the positions of a
pair of shorting sleeves on jumper pins.
IMPORTANT: The high-pass filter jumpers are set at the factory in the
high-pass filter
ON
position. Sonance
HIGHLY RECOMMENDS
that these
jumpers remain in the
ON
position if the amplifier will be used in a system
that includes in-wall volume controls for the speakers. The amplifier’s
high-pass filters reduce infrasonic energy and help protect autoformerbased volume controls from saturation and overload.
To bypass the high-pass filters, set the jumpers to the OFF position:
1. The jumper pins are located in the marked area of the BBE SAT module
circuit board, as shown in the upper portion of Figure 4.
2. As shown in the lower portion of Figure 4, remove the shorting sleeves from
their factory-set (ON) position on the jumper pins and replace them in the
OFF positions. Make sure you insert the shorting sleeves all the way onto
the jumper pins.
BBE SAT Module Connections
Systems With No External Control Capability (
Figure 5
)
1. Connect the BBE module’s Input jacks to the stereo line-level source.
• If you’re operating the 275 SE in the bridged mode, use the R input only.
2. Connect the amplifier’s speaker outputs to the speakers.
3. If you wish to feed the source’s signal to additional amplifiers, connect them
to the BBE module’s Output jacks.
Note: The signal sent through the module’s Output jacks is
not
BBE processed.
Systems With External Control Capability (
Figure 6
)
The BBE sound enhancement process can be activated and the amount of
BBE processing changed by an external control voltage. This allows an audio
system with two different sources to employ BBE processing for only one
source, or to employ different amounts of BBE processing for the different
sources.
Figure 6 shows a system with two sources (such as would be used in a doctor’s
office): a CD player playing uncompressed audio that doesn’t require BBE
processing, and an iPort™ with an iPod® playing compressed audio files that
could benefit from BBE enhancement. Both sources are connected to a
Sonance AL1 Line-Level Switcher that automatically switches to the iPod connections whenever it senses an audio signal from the iPod. Whenever AL1
selects the iPod input it also sends a +12V control voltage to the BBE module’s
BBE ON/OFF EXT. CTRL. connector, which activates the BBE processing.
6
12345
Figure 3: BBE SAT Module Controls and Indicators
TOWARDS
RIBBON
CONNECTOR
TOWARDS
INPUT/OUTPUT
CONNECTORS
AREA
DETAILED
BELOW
BBE SAT MODULE CIRCUIT BOARD
HI-PASS FILTER ON
(FACTORY DEFAULT)
HI-PASS FILTER OFF
Jumper
Sleeve
Jumper
Sleeve
Figure 4: BBE SAT Module High-Pass Filter Jumpers
INSTRUCTION MANUAL
SONAMP®275 SE / 275X3 SE
STEREO POWER AMPLIFIER
Page 7

7
B
R
I
D
G
E
D
I
N
/
O
U
T
Sonamp with
BBE SAT Module
Line-Level Stereo Source Component
(CD player, satellite radio tuner, etc.)
LINE OUT
L
R
Optional Second Zone
Amplifier and Speakers
* Buffered output signal is not BBE-processed
Sonamp with
BBE SAT Module
AL1
Automatic
Source
Selector
iPort
Wallplate
CD Player
LINE OUT
L
R
Cat5 Wire
*A trigger voltage can also be generated
by a control system such as a Crestron
or AMX
AL1
12VDC
Control
Output*
iPort
with
iPod
Figure 5: BBE Module Connections in a System with No External Control Capability
Figure 6: BBE Module Connections in a System with External Control Capability
(When the iPod is played the BBE processing will automatically
be engaged by the AL1 control voltage trigger.)
INSTRUCTION MANUAL
SONAMP®275 SE / 275X3 SE
STEREO POWER AMPLIFIER
Page 8

8
When the AL1 no longer detects an audio signal from the iPod it automatically
switches to the CD player input and removes the +12V control voltage.
When the control voltage is removed the BBE module switches the BBE
processing off.
The BBE module has a second control voltage input (the BOOST LEVEL EXT.
CTRL. connector) that operates in the same way, but changes the amount of
BBE processing from +6dB to +9dB. This connector can be employed when
different amounts of BBE processing are desired for two different sources.
Note: The BBE module’s
External Control
inputs can also be triggered by
voltage from a Crestron or similar control system.
1. Connect the BBE module’s Input jacks to the AL1 switcher’s Outputs.
• If you’re operating the Sonamp in the bridged mode, use the R input only.
2. Connect the outputs of the two sources to the AL1’s A and B inputs.
• Connect the source that you want BBE processed to the B inputs.
3. Connect the AL1’s Control Output to the BBE module’s BBE ON/OFF
EXT. CTRL. input.
• Make sure that the module’s BBE ON/OFF switch is in the OFF
EXT
. position.
4. Connect the Sonamp’s speaker outputs to the speakers.
5. If you wish to feed the AL1’s signal to additional amplifiers, connect them
to the BBE module’s Output jacks. (The signal through the jacks is not BBE
processed).
• If the additional amplifiers are equipped with BBE module, run parallel control voltage connections to the other BBE modules.
REPLACING THE BBE SAT MODULE
(
Figure 7
)
The 275 SE/275X3 SE Smart Amplifier Technology module bay allows future
upgadability, greatly increasing the life span of the amplifier and making it
compatible with new protocols. A new module can be easily swapped for the
included BBE SAT module. Refer to the following steps and Figure 7 for SAT
Module removal and installation.
IMPORTANT: Make sure the amplifier’s
Powe r
switch is
Off
and its power
cord is disconnected before removing the SAT module.
1. Unscrew and save the two screws holding the BBE SAT module in place.
2. Gently pull the module out of the SAT module bay.
3. Flip the tabs on the ends of the ribbon connector socket outward to release
it and disconnect the cable. (Note the alignment of the connector.)
4. Select the desired position of any jumpers on the new SAT module (i.e. high
pass filter).
5. Re-connect the ribbon cable to the ribbon cable connector on the new SAT
module so that it clicks into place. Make sure the connector is aligned properly.
6. Slide the SAT module into the SAT module bay.
7. Replace the two mounting screws.
The following paragraphs explain how each SAT module can be used with the
Sonamp 275 SE/275X3 SE. Currently available SAT modules are the LR1 and
AL1 (sold separately). The BBE SAT module is also available separately, for use
with other Sonamp models that have SAT module bays. Contact your
Sonance-Authorized installer or dealer for more information on these or
other SAT module options.
LR1 Module
(
Figure 8
)
The LR1 — Balanced Line Receiver — module features a circuit that cancels
out noise on long audio runs, (typically greater than thirty feet). This module
has an input impedance of 12k ohms and is perfectly matched with the
Sonance LS1 Balanced Line Sender (sold separately). This increases installation options, allowing the amplifier to be placed some distance from the rest
of the audio system. The LR1 Module provides unbalanced (unity gain) stereo
output jacks to feed signal to other amplifiers or other system components.
Figure 7: SAT Module Removal and Installation
Figure 8: LR1 SAT Module
INSTRUCTION MANUAL
SONAMP®275 SE / 275X3 SE
STEREO POWER AMPLIFIER
Page 9

AL1 Module (
Figures 9 & 10
)
The AL1 — Automatic Line-Level Switcher — module has a default input as
well as a sensing input. When signal is detected at the sensing input, that
signal is fed to the amplifier as well as its output jacks. At the same time a 12V
DC control signal is present on the removable screw connector.
The sensing input has a sensitivity control as well as a delay adjustment which
controls the time the module waits after the signal at the sensing jack subsides
before switching back to the default input.
Figure 10 shows a 275 SE amplifier with the AL1 module in a restaurant
installation. The module’s default input is connected to the house restaurant
audio and the sensing input monitors the paging microphone. The output is
feeding a second 275 SE that has the factory-installed BBE module.
SPECIFICATIONS
Rated Power (20Hz – 20kHz) RMS: 75 Watts per channel @ 8 ohms
125 Watts per channel @ 4 ohms
135 Watts per channel @ 2.7 ohms
Bridged Power (20Hz – 20kHz) RMS: 250 Watts @ 8 ohms (275 SE only)
Midband Power (1kHz, at Clipping) RMS: 114 Watts per channel @ 8 ohms
140 Watts per channel @ 4 ohms
168 Watts per channel @ 2.7 ohms
Bridged Midband Power (1kHz) RMS: 270 Watts @ 8 ohms (275 SE only)
IHF Dynamic Power 120 Watts per channel @ 8 ohms
(20ms 1kHz Tone Burst) 194 Watts per channel @ 4 ohms
per IHF RS-490/3.2: 239 Watts per channel @ 2.7 ohms
IHF Dynamic Headroom +1.75 dB @ 8 ohms
+1.9 dB @ 4 ohms
+2.5 dB @ 2.7 ohms
Total Harmonic Distortion (2-channel mode): 0.05% 20Hz – 20kHz @ 8 ohms
0.08% 20Hz – 20kHz @ 4 ohms
0.15% 20Hz – 20kHz @ 2.7 ohms
Total Harmonic Distortion (Bridged mode): 0.05% 20Hz – 20kHz @ 8 ohms
I.M. Distortion (SMPTE 4:1) @ 8 ohms: 0.008% @ 1 watt
0.015% @ 75 watts
Signal to Noise Ratio: 105dB below rated output
(A-weighted)
Input Sensitivity: 0.7 volts for rated output
(75 watts @8 ohms)
Input Impedance: 47k ohms, Min.
Power Requirement (120V version): 120 VAC, 50/60Hz
Power Requirement (230V version): 230 VAC, 50/60Hz
Power Consumption (all versions): 500 watts (625VA)
Heat Output
(BTU/HR @ 8 ohms): 164 (classical); 232 (rock)
(BTU/HR @ 4 ohms): 294 (classical); 418 (rock)
(BTU/HR @ 2.7 ohms): 382 (classical); 542 (rock)
Dimensions (W x H x D): 16¾" x 3
7
/8
" x 15¼"
(425mm x 98mm x 387mm)
Dimensions w/Rack Ears (W x H x D): 19" x 3½" x 15¼"
(483mm x 89mm x 387mm)
Rack Space Requirement: 2U
Shipping Weight: 24 lbs (10.9 kg)
9
Figure 9: AL1 SAT Module
MICROPHONE PREAMP
RECEIVER
TO SPEAKERS
TO SPEAKERS
Figure10: Restaurant/Bar System Using One Sonamp 275 SE
with an AL1 Module and Another 275 SE with the BBE Module
INSTRUCTION MANUAL
SONAMP®275 SE / 275X3 SE
STEREO POWER AMPLIFIER
Page 10

10
ZONE
1
ZONE
2
ZONE
3
ZONE
4
ZONE
5
ZONE
6
ZONE
7
ZONE
8
ZONE
9
ZONE
10
ZONE
11
ZONE
12
ZONE
13
ZONE
14
ZONE
15
ZONE
16
2 SEC.
DELAY
4 SEC.
DELAY
6 SEC.
DELAY
8 SEC.
DELAY
INPUT SOURCE
Figure 11:
Four 275 SE Amplifiers
Powering Sixteen Zones
(Using Staggered Turn-On)
INSTRUCTION MANUAL
SONAMP®275 SE / 275X3 SE
STEREO POWER AMPLIFIER
Page 11

11
LAVA
LAMP
RIGHT
SPEAKER
LEFT
SPEAKER
2 SEC. DELAY
INPUT SOURCE
12VDC
CONTROLLED
AC OUTLET
Figure 12: Sonamp 275 SE Providing an Output Voltage to Control a Lava Lamp
INSTRUCTION MANUAL
SONAMP®275 SE / 275X3 SE
STEREO POWER AMPLIFIER
Page 12

LIMITED FIVE (5) YEAR WARRANTY
Sonance warrants to the first end-user purchaser that this Sonance-brand product (“Product”), when purchased from an authorized Sonance Dealer/Distributor,
will be free from defective workmanship and materials for the period stated below. Sonance will at its option and expense during the warranty period, either
repair the defect or replace the Product with a new or remanufactured Product or a reasonable equivalent.
EXCLUSIONS
TO THE EXTENT PERMITTED BY LAW, THE WARRANTY SET FORTH ABOVE IS IN LIEU OF, AND EXCLUSIVE OF, ALL OTHER WARRANTIES,
EXPRESS OR IMPLIED, AND IS THE SOLE AND EXCLUSIVE WARRANTY PROVIDED BY SONANCE. ALL OTHER EXPRESS AND IMPLIED
WARRANTIES, INCLUDING THE IMPLIED WARRANTIES OF MERCHANTABILITY, IMPLIED WARRANTY OF FITNESS FOR USE, AND IMPLIED
WARRANTY OF FITNESS FOR A PARTICULAR PURPOSE ARE SPECIFICALLY EXCLUDED. No one is authorized to make or modify any warranties on
behalf of Sonance.
The warranty stated above is the sole and exclusive remedy and Sonance’s performance shall constitute full and final satisfaction of all obligations, liabilities and
claims with respect to the Product. IN ANY EVENT, SONANCE SHALL NOT BE LIABLE FOR CONSEQUENTIAL, INCIDENTAL, ECONOMIC,
PROPERTY, BODILY INJURY, OR PERSONAL INJURY DAMAGES ARISING FROM THE PRODUCT, ANY BREACH OF THIS WARRANTY OR
OTHERWISE.
This warranty statement gives you specific legal rights, and you may have other rights which vary from state to state. Some states do not allow the exclusion of
implied warranties or limitations of remedies, so the above exclusions and limitations may not apply. If your state does not allow disclaimer of implied
warranties, the duration of such implied warranties is limited to period of Sonance’s express warranty.
Your Product Model and Description: 275 SE; 275X3 SE
Warranty Period for this Product: Five (5) years from the date on the original sales receipt or invoice or other satisfactory proof of purchase.
Additional Limitations and Exclusions from Warranty Coverage: The warranty described above is non-transferable, applies only to the initial installation of the
Product, does not include installation of any repaired or replaced Product, does not include damage to allied or associated equipment which may result for any
reason from use with this Product, and does not include labor or parts caused by accident, disaster, negligence, improper installation, misuse (e.g. overdriving
the amplifier or speaker, excessive heat or cold or humidity, outdoor installation), or from service or repair which has not been authorized by Sonance.
Obtaining Authorized Service: To qualify for the warranty, you must contact your authorized Sonance Dealer/Installer or call Sonance Customer Service at
(800) 582-0772 within the warranty period, must obtain a return merchandise number (RMA), and must deliver the Product to Sonance shipping prepaid
during the warranty period, together with the original sales receipt, or invoice or other satisfactory proof of purchase.
Sonance • 212 Avenida Fabricante • San Clemente, CA 92672-7531, USA • (800) 582-7777 or (949) 492-7777 • FAX: (949) 361-5151 • Technical Support: (800) 582-0772
www.sonance.com
33-3852 110608cFinal
©2008 Sonance. All rights reserved.
Sonance, Sonamp, Smart Amplifier Technology and iPort are trademarks or registered trademarks of Dana Innovations, Inc.
“BBE” and its designs are the registered trademarks of BBE Sound, Inc. iPod is a registered trademark of Apple Inc.
 Loading...