


Solis 26
INTERNATIONAL TRACTORS LIMITED
HOSHIARPUR
INDIA
Part No. 10013156AA
OWNERSHIP AND TRACTORS DETAILS
OWNER'S NAME
& ADDRESS
TEL.NO.
Model : |
|
|
Delivery Date : |
|
|
|
|
|
|
|
|
Chassis No. : |
Bill No. / Date : |
|
|||
|
|
|
|
|
|
Engine No. : |
Alternator Make / Sr. No. : |
|
|||
|
|
|
|
||
Battery Make / Sr. No. : |
Starter Motor Make / Sr. No. : |
||||
|
|
|
|
||
FIP Sr. No. : |
Hydraulic Pump Make / Sr. No. : |
||||
|
|
|
|
|
|
|
|
|
|
|
|
Tyre |
|
Make |
Size |
|
Sr. No. |
|
|
|
|
|
|
Front |
(Left) |
|
|
|
|
|
|
|
|
|
|
Front |
(Right) |
|
|
|
|
|
|
|
|
|
|
Rear |
(Left) |
|
|
|
|
|
|
|
|
|
|
Rear |
(Right) |
|
|
|
|
|
|
|
|
|
|
I have understood all the terms & conditions of the maintenance of the tractor, terms of warranty, systems, Scheduled services & understood operation of tractor in the field and other operations.
Received a new defect free tractor Chassis No. ............................................................................................
Engine No. ....................................................................... & fully satisfied with the transaction.
OWNER’S SIGNATURE |
DEALER STAMP & SIGNATURE |
PH. NO. .................................... DATE: .........................
* IMPORTANT INFORMATION TO CUSTOMER: For any assistance with regard to our product,
please contact our authorized dealer or authorized service center.
DEALER COPY
OWNERSHIP AND TRACTORS DETAILS
OWNER'S NAME
& ADDRESS
TEL.NO.
Model : |
|
|
Delivery Date : |
|
|
|
|
|
|
|
|
Chassis No. : |
Bill No. / Date : |
|
|||
|
|
|
|
|
|
Engine No. : |
Alternator Make / Sr. No. : |
|
|||
|
|
|
|
||
Battery Make / Sr. No. : |
Starter Motor Make / Sr. No. : |
||||
|
|
|
|
||
FIP Sr. No. : |
Hydraulic Pump Make / Sr. No. : |
||||
|
|
|
|
|
|
|
|
|
|
|
|
Tyre |
|
Make |
Size |
|
Sr. No. |
|
|
|
|
|
|
Front |
(Left) |
|
|
|
|
|
|
|
|
|
|
Front |
(Right) |
|
|
|
|
|
|
|
|
|
|
Rear |
(Left) |
|
|
|
|
|
|
|
|
|
|
Rear |
(Right) |
|
|
|
|
|
|
|
|
|
|
I have understood all the terms & conditions of the maintenance of the tractor, terms of warranty, systems, Scheduled services & understood operation of tractor in the field and other operations.
Received a new defect free tractor Chassis No. ............................................................................................
Engine No. ....................................................................... & fully satisfied with the transaction.
OWNER’S SIGNATURE |
DEALER STAMP & SIGNATURE |
PH. NO. .................................... DATE: .........................
* IMPORTANT INFORMATION TO CUSTOMER: For any assistance with regard to our product,
please contact our authorized dealer or authorized service center.
CUSTOMER COPY
PREFACE
Dear Customer,
We welcome you with great pleasure for joining ITL family and thanks for faith and trust you have placed in the careful selection of your tractor.
We are sure that our dealer must have taken good care while delivering tractor upto your satisfaction.
Before using tractor, it is recommended to read this manual thoroughly. Any person who uses the tractor should be also advised to read these instructions.
Daily and routine maintenance operations can be easily performed with the use of this manual. To get best and trouble free performance from you tractor. Please ensure for periodic maintenance as per recommended schedule in the owner's manual at authorized dealership.
Use only genuine ITL spare parts from dealer/stockist for reliable and durable performance.
Information provided in this operator manual is accurate at the time of printing. Improvements and modifications are a continuous process at International Tractors Limited (ITL), therefore ITL reserves the right for modification at any time without prior notice.
For any help/support feel free to call our dealership with the tractor details like Engine number and Chassis number.
We wish you prosperity and growth.

YOUR RIGHTS
While taking delivery of new “SOLIS 26” Tractor, kindly ask the dealer to give following items*:
1. Tool kit which includes |
|
Grease Gun |
1 pc |
D-spanner 10X11 |
1 pc |
D-spanner 12X13 |
1 pc |
D-spanner 14X17 |
1 pc |
D-spanner 18X19 |
1 pc |
D-spanner 20X22 |
1 pc |
D-spanner 30X32 |
1 pc |
Ring spanner 24X27 |
1 pc |
Ring spanner 16X17 |
1 pc |
Battery Guarantee Card |
1 pc |
2.Farmer kit which includes
Fuel Filter Cartridge |
3 pc |
Linch Pin |
3 pc |
Tyre Pressure Gauge |
1 pc |
Fuse Set |
1 pc |
Fuel Tank Cap |
1 pc |
Radiator Cap |
1 pc |
Fan Belt |
1 pc |
Air Cleaner Hose |
1 pc |
3.To avail the services.
4.To call dealers any time for any breakdown.
5.Additional Accessories as Standard fitment
Plough Lamp
Rear View Mirror
* Charges applicable as per Invoice.

DESCRIPTION
CHAPTER 1: TRACTOR IDENTIFICATION |
|
Chassis Serial Number ..................................................................................................................................... |
15 |
Engine Serial Number ....................................................................................................................................... |
15 |
Statutory Plate................................................................................................................................................... |
15 |
ROPS Certificate Plate...................................................................................................................................... |
15 |
CHAPTER 2: INTRODUCTION, WARRANTY & SAFETY NOTES |
|
Introduction ....................................................................................................................................................... |
19 |
Warranty Policy ................................................................................................................................................. |
20 |
Safety Notes...................................................................................................................................................... |
22 |
CHAPTER 3: INSTRUMENTS & CONTROLS |
|
Universal Symbols ............................................................................................................................................ |
33 |
Controls............................................................................................................................................................. |
34 |
Instrument Panel ............................................................................................................................................... |
35 |
Fuel Gauge ....................................................................................................................................................... |
36 |
Engine Oil Pressure Gauge .............................................................................................................................. |
36 |
Left Turn Indicator ............................................................................................................................................. |
36 |
Right Turn Indicator........................................................................................................................................... |
37 |
Gear Lever Position Indicator ........................................................................................................................... |
37 |
Temperature Gauge .......................................................................................................................................... |
37 |
Cold Start Indication.......................................................................................................................................... |
38 |
Battery Charge Indication ................................................................................................................................. |
38 |
Engine RPM cum Hour Meter ........................................................................................................................... |
38 |
Air Cleaner Clogging Indicator .......................................................................................................................... |
38 |
High Beam Indicator.......................................................................................................................................... |
38 |
Dashboard Controls .......................................................................................................................................... |
39 |
Hazard Warning Light Switch............................................................................................................................ |
39 |
Combination Switch .......................................................................................................................................... |
39 |
Starting Key (Ignition) Switch ............................................................................................................................ |
40 |
Beacon Light Switch.......................................................................................................................................... |
40 |
Fuse Box ........................................................................................................................................................... |
41 |
Lights................................................................................................................................................................. |
41 |
Plough Lamp ..................................................................................................................................................... |
41 |
Beacon Light ..................................................................................................................................................... |
42 |
Driver’s Seat ..................................................................................................................................................... |
42 |
Registration Plate.............................................................................................................................................. |
43 |
Seven Pin Socket.............................................................................................................................................. |
43 |
Tool Box ............................................................................................................................................................ |
43 |
CHAPTER 4: OPERATION |
|
Boarding & Leaving the Tractor ........................................................................................................................ |
47 |
Engine: Starting the Engine .............................................................................................................................. |
47 |
Engine: Cold Weather Starting.......................................................................................................................... |
47 |
Engine: Running In ........................................................................................................................................... |
48 |

DESCRIPTION
Engine: Turning off the Engine.......................................................................................................................... |
48 |
Under Hood Muffler........................................................................................................................................... |
49 |
Opening the Bonnet .......................................................................................................................................... |
49 |
Accelerator Pedal.............................................................................................................................................. |
49 |
Clutch Pedal...................................................................................................................................................... |
49 |
‘2WD/4WD’ Lever.............................................................................................................................................. |
50 |
Hand Throttle Lever .......................................................................................................................................... |
50 |
Gear Shifter Lever............................................................................................................................................. |
50 |
Power Take Off (PTO) ....................................................................................................................................... |
51 |
Using Implements with PTO Drive Shafts ......................................................................................................... |
52 |
Hydraulic Coupling Devices .............................................................................................................................. |
53 |
Power Steering.................................................................................................................................................. |
53 |
Transport Lock .................................................................................................................................................. |
54 |
Hi-Low Lever ..................................................................................................................................................... |
54 |
Differential Lock Pedal ...................................................................................................................................... |
54 |
DCV Lever......................................................................................................................................................... |
54 |
Service Brakes .................................................................................................................................................. |
55 |
Parking Brake.................................................................................................................................................... |
55 |
Ground Speed Chart ......................................................................................................................................... |
56 |
Wheels and Tyres ............................................................................................................................................. |
57 |
Ballasting of Tyres............................................................................................................................................. |
58 |
Hydraulic ........................................................................................................................................................... |
58 |
Three Point Linkage .......................................................................................................................................... |
59 |
CHAPTER 5: MAINTENANCE |
|
Maintenance Schedule ..................................................................................................................................... |
63 |
Fuel Tank Filling ................................................................................................................................................ |
65 |
Fuel Requisites ................................................................................................................................................. |
65 |
Fueling .............................................................................................................................................................. |
65 |
Fuel Storage...................................................................................................................................................... |
65 |
Checking Engine Oil Level ................................................................................................................................ |
66 |
Replacement of Oil Filter and Engine Oil .......................................................................................................... |
66 |
Replacement of Fuel Filter ................................................................................................................................ |
67 |
Coolant Level in Radiator.................................................................................................................................. |
67 |
Radiator Draining and Flushing ........................................................................................................................ |
68 |
Radiator Fins Cleaning...................................................................................................................................... |
68 |
Radiator Cap ..................................................................................................................................................... |
68 |
Inspection of Hoses........................................................................................................................................... |
68 |
Air Cleaner (Dry Type) ...................................................................................................................................... |
69 |
Clutch Pedal: Free Play Adjustment ................................................................................................................. |
70 |
Foot Brake Pedals: Free Play Adjustment ........................................................................................................ |
70 |
Steering Cylinder Knuckle Joints ...................................................................................................................... |
70 |
Oil Changes in 4WD Front Axle ........................................................................................................................ |
71 |
Oil Changes in Transmission, Rear Final Drives and Power Lift ...................................................................... |
71 |
Recommended Oil Grade & application Range ................................................................................................ |
72 |
Cleaning of Suction Strainer ............................................................................................................................. |
72 |
DESCRIPTION
General Maintenance of Electrical System ....................................................................................................... |
73 |
Battery and its Maintenance ............................................................................................................................. |
73 |
Starter Motor ..................................................................................................................................................... |
75 |
Alternator........................................................................................................................................................... |
75 |
V-belt Checking and Adjustment ....................................................................................................................... |
75 |
Fuses in Fuse Box ............................................................................................................................................ |
76 |
Long Idle Period ................................................................................................................................................ |
76 |
Greasing Points................................................................................................................................................. |
77 |
Jack Up the Tractor - Lifting Points ................................................................................................................... |
78 |
Oil and Lubrication Chart .................................................................................................................................. |
79 |
Electrical Wiring Circuit Diagram....................................................................................................................... |
81 |
CHAPTER 6: TECHNICAL SPECIFICATIONS |
|
Technical Specifications .................................................................................................................................... |
85 |
Implement Specifications .................................................................................................................................. |
86 |
CHAPTER 7: DO’S AND DON'TS |
|
Do’s and Don’ts................................................................................................................................................. |
91 |
CHAPTER 8: TROUBLESHOOTING |
|
Troubleshooting ................................................................................................................................................ |
97 |
CHAPTER 9: INSTALLATION CERTIFICATE & SERVICE RECORD |
|
Installation Certificate........................................................................................................................................ |
101 |
Service Record.................................................................................................................................................. |
103 |

CHAPTER - 1
TRACTOR IDENTIFICATION

TRACTOR IDENTIFICATION
Chassis Serial Number
The chassis and/or engine serial numbers are used to register the vehicles. They are also used to assist your dealer when ordering or referring to special service information. Whenever you have occasion to consult your dealer, remember to identify your vehicle with this number. Chassis number is punched on right hand side of the front axle bracket. Should you find the number difficult to read, you will also find it on the Statutory plate.
Chassis No
Engine Serial Number
The engine serial number is stamped on the upper side of
the fuel injection pump installation part located in the right
side of cylinder block.
For easy and quick reference, engine serial number is
also mentioned on the information sticker which is pasted
on valve cover of the engine as shown in Fig.
Statutory Plate
Chassis number is also engraved on Statutory plate
which is located inside of the bonnet.
Model :
Serial No :
Manufacturing Date :
Application : Variable Speed
MADE IN INDIA
MHIL DIESEL ENGINE PVT. LTD.
MITSUBISHI
DIESEL ENGINE
INTERNATIONAL TRACTORS LTD.
Type: ...............................................................................
EEC number ...................................................................
Identification number: ...............................................................................
Total permissible mass (*) :
Permissible front axle load (*):
Permissible rear axle load (*):
(*) depending on the tyres.
Permissible towable mass:
Unbraked towable mass:
Independently-braked towable mass:
Inertia-braked towable mass:
Towable mass fitted with an assisted braking system : (hydraulic or pneumatic)
INTERNATIONAL TRACTORS LIMITED
HOSHIARPUR, PUNJAB (INDIA)
ROPS Certificate Plate
ROPS certificate plate is riveted on ROPS as shown in
Fig. Information about ROPS serial number and tractor
model is engraved on ROPS plate.
1 |
INTERNATIONAL |
|
TRACTORS LIMITED |
||
SV |
||
e 11 |
TRACTOR TYPE T 2 |
|
ROPS Serial No |
||
3056 |
|
|
Tractor Model |
Solis 26 4WD |
|
15

CHAPTER - 2
INTRODUCTION, WARRANTY & SAFETY
INTRODUCTION
Tractor an Introduction
The word, 'Tractor' has been derived from 'Traction' which means pulling.
A Tractor is required to pull or haul an equipment or implement which are coupled to the Tractor body through suitable linkage. A Tractor can also be used as a prime mover as it has power outlet source which is also called Power Take off or PTO shaft.
In this manual the operating, maintenance and storage instructions for Solis-26 Tractor has been compiled. This material has been prepared in detail to help you in the better understanding of maintenance and efficient operation of the machine.
If you need any information not given in this manual or require the services of a trained mechanics, please get in touch with the ITL Dealer/Distributor in your country, Dealer/Distributors are kept informed of the latest methods of servicing Tractors. They keep stock of genuine spare parts which is supplied by the company.
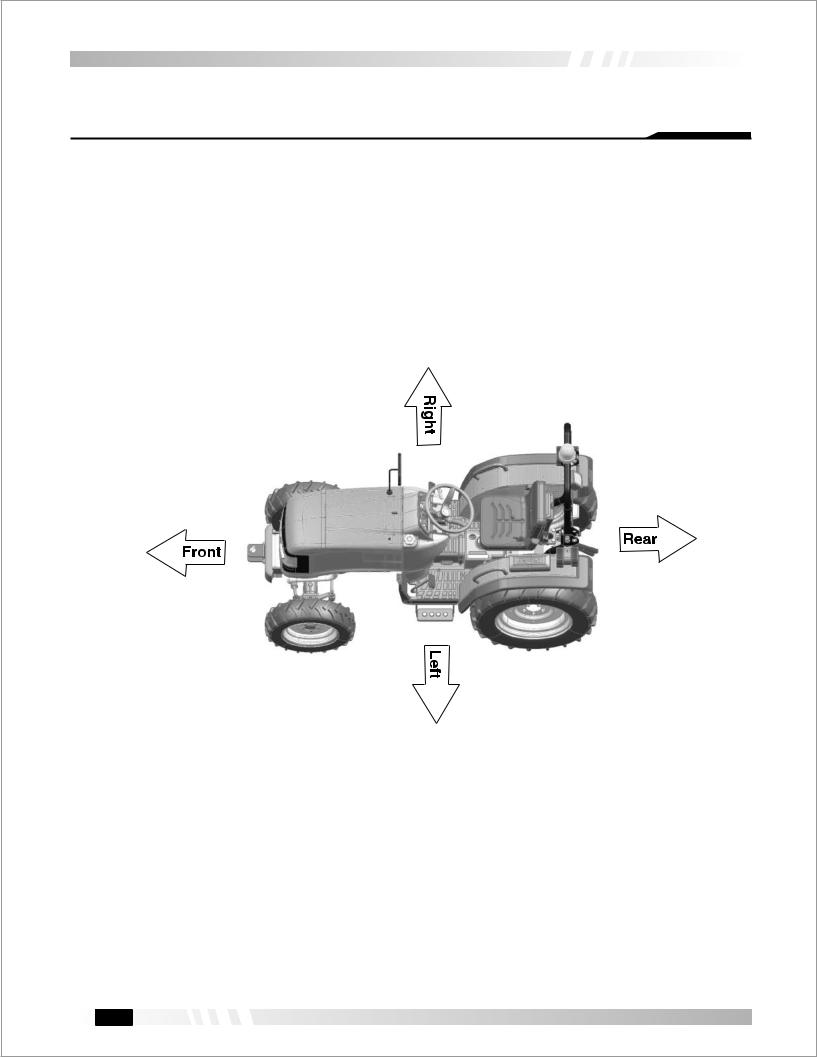
(Front, Rear, Left, Right Portion)
Through this manual. The use of the terms LEFT, RIGHT, FRONT and REAR must be understood, to avoid any confusion when following the introductions. The LEFT and RIGHT means left and right sides of the Tractor when facing forward in the driver's seat, Reference to the FRONT indicates the radiator end of the Tractor, while the REAR, indicates the drawbar end.
Always specify the tractor chassis and engine serial number when ordering spare parts. This will facilitate correct & faster delivery of require parts. For easy reference, we suggest you to write the number in the space provided in the owner's personal data.
19

WARRANTY
Warranty Policy
M/s International Tractors Limited, India warrant, subject as hereinafter provided that all new goods supplied by it are free from defects in material and workmanship. Its liability under such warranty being limited to 24 Months from date of Bill of landing or 18 Months from date of delivery to first original retail purchaser or 1500 Hours which ever is earlier. Warranty for proprietary items will be up to 12 months or 1000 working hours whichever appears earlier from the date of delivery to the first original retail purchaser. Claims will be settled against manufacturing defects by ITL as per their published warranty policy.
(A) - Terms and Condition:
FDuring warranty period the Authorized Distributor will repair the Tractor by replacing the failed parts from their stock which are supplied by ITL against their order and lodge the claim within 60 days from the date of repair of Tractor.
FThe claim will be settled as per ITL warranty policy.
FIf any work is outsourced like welding, machining operation, transportation, labor charges etc will not be covered under warranty.
(B) Exceptions To Warranty:
FElectrical fitment like Bulbs and Glasses do not come under warranty. At the time of delivery the customer should ensure that these things are in proper order because after that, customer himself is responsible.
FPolicy does not include replacement of Oil and Fuel filters, Oil and Lubricants, Nuts & Bolts, Plastic Material.
FWarranty for propriety articles like Fuel Injection Equipments, Self starter, Alternator, Batteries, Tyres & Tube will be up to 12 months or 1000 working hours whichever appears earlier from date of sale to the original retail customer & shall be settled as per terms & conditions of the concerned manufacturer provided the repairable items have not been repaired from any other sources.
FDistributor will deliver the tractor with complete oil level as per standard onwards. In case of any seal leakage, customer will have to bear the cost of oil.
FNormal wear and tear of the components is not covered under warranty; however ITL will decide discuss premature or epidemic on case to case basis.
FParts lost in field are not covered under warranty.
Warranty is not applicable
FIf tractor is being used overloaded or over heated, driver negligence, unauthorized modification, untimely servicing, poor maintenance or tractor met with an accident.
FTractor has crossed the warranty period.
FIn case of late submission of warranty claim. (The claim must be submitted within 60 days from the date of repair).
FIf defective parts not available for inspection. ITL can request parts within 90 days from date of submission of warranty claims.
FOnce a Tractor is purchased / delivered, it will not be returned or replaced. It will be repaired only as per ITL warranty policy.
FWarranty applicable only to first retail purchaser.
FThis policy ceases if the components shows mishandling, modification, neglect of slight defect, overloading, overheating, poor maintenance or use of incorrect grade of oil.
20
WARRANTY
FThe warranty becomes void if the tractor is repaired/ dismantled in an unauthorized workshop and use of replacement parts, not supplied/approved by ITL.
FITL’s responsibility is limited to the terms of the warranty and it shall not be answerable for personal injuries or consequential or resulting liability, damage or loss arising from any defects.
(C) - Warranty Claims Submission: -
Authorized Dealer will submit the warranty claim form by filling all column duly signed & seal by dealer with customer signature, along with following documents:
1.Photograph of failed component with Chassis/Engine number written with paint
2.Copy of Job card duly signed by dealer and customer.
3.Copy of Tractor Installation certificate//Delivery Certificate.
FClaims will not be entertained under warranty if received with incomplete information and without supporting documents.
FAll warranty claims along with supporting documents must reach warranty department under intimation to Exports Department within 60 days from date of repair of Tractor thru courier/ e-mail.
FDistributor must provide the Installation certificate copy with in 30 days from the date the tractor is delivered to customer, for reference of ITL during warranty settlement. The claim of tractor for which installation certificate is not submitted, warranty claim shall not be settled.
(D) - Storage of Defective Parts: -
FAll failed parts pertaining to warranty replacement are property of ITL & must be retained with distributor at least for 90 days from date of submission of warranty claims with proper tagging & packing for further Inspection/investigation by ITL Engineer. These can be called back to ITL works if necessary for investigation at ITL expense.
(E) - Settlement of Warranty Claim: -
FClaim will be settled with in 30 days from date of submission of warranty claim as per ITL warranty policy by our warranty division and reimbursement of parts value as per latest prices (applicable import price at the time of repair of tractor) + 35 % as freight component will be credited in Distributor account within 45 days of submission of warranty claim.
Address for submission of warranty claims: -
To,
Exports Department
INTERNATIONAL TRACTORS LTD,
Village - Chak Gujaran,
P.O.- Piplanwala-146022.
Jalandhar Road,
HOSHIARPUR (Punjab), INDIA.
Tel No: +91-1882-302521
Fax No: +91-1882302523
E- Mail: exports@sonalika.com
21
SAFETY NOTES
Guidelines About Safety Sign
Recognize Safety Information:
Any of the following symbols on your machine or in this manual, alert you to the potential for personal injury. Follow recommended precautions and safe operating practices.
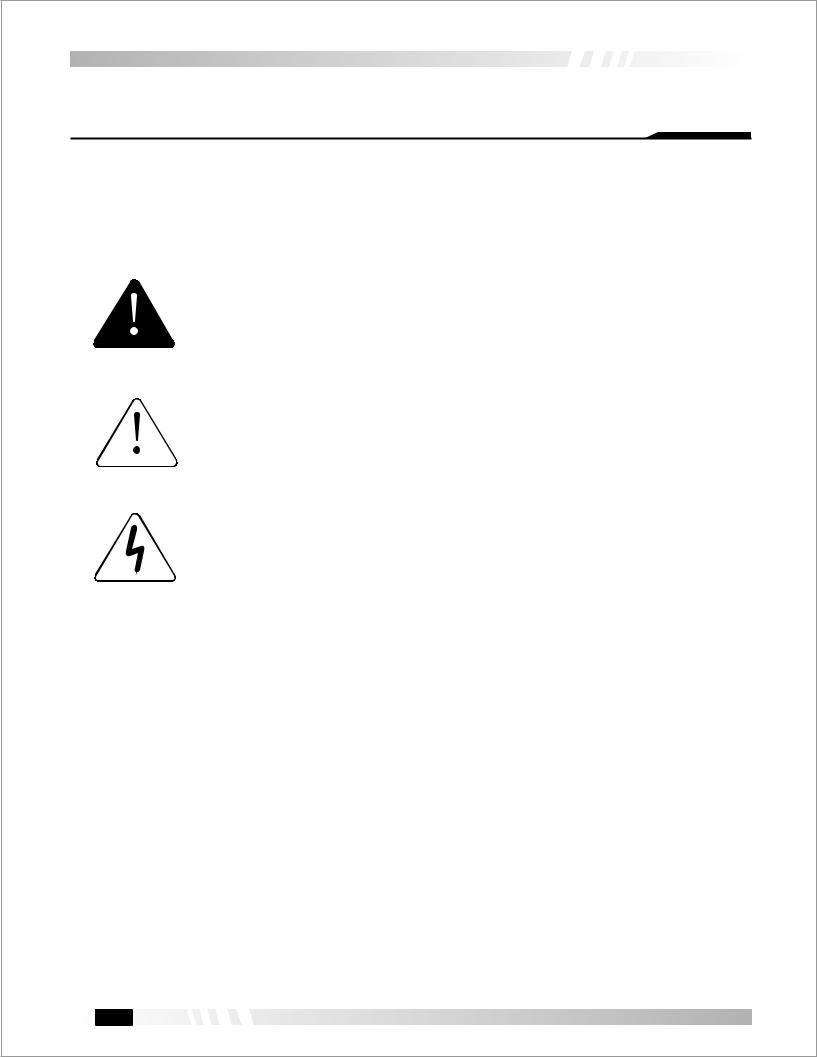
The symbol and the word DANGER indicate an immediate hazardous situation, which if not avoided, will result in DEATH OR VERY SERIOUS INJURY.
DANGER
The symbol and the word WARNING indicate a potentially hazardous situation. If the instructions or procedures are not correctly followed it could result in DEATH OR VERY SERIOUS INJURY.
WARNING
The symbol and the word CAUTION indicate a potentially hazardous situation, which if not avoided, may result in MINOR INJURY.
CAUTION
IMPORTANT :
NOTE :
Indicates that equipment or property damage could result if instructions are not followed.
Indicates important information or information which is useful for tractor operation.
22

SAFETY NOTES
SAFE OPERATION
Careful operation is your best insurance against accident.
Read and understand this manual carefully before operating the tractor.
All operator's no matter how much experience they may have, should read this and other related manuals before operating the tractor or any implement attached to it.
It is the owner's obligation to instruct all operators a safe operation.
BEFORE OPERATING THE TRACTOR
READ SAFETY INSTRUCTION
Carefully read all safety instructions given in this manual for your safety. Tempering with any of the safety devices can cause serious injuries or death. Keep all safety signs in good condition. Replace missing or damaged safety signs.
Keep your tractor in proper condition and do not allow any unauthorized modifications to be carried out on the Tractor, which may impair the function/safety and affect Tractor life.
Strictly follow the instructions outlined in the operator’s manual of the mounted or trailed machinery or trailer, and not to operate the combination tractor — machine or tractor — trailer unless all instructions have been followed.
DRIVING THE TRACTOR
1.Watch where you are going especially at row ends, on roads, around trees and low hanging obstacles.
2.To avoid upsets, drive the tractor with care and at speeds compatible with safety, especially when operating over rough ground, crossing ditches or slopes, and when turning at corners.
3.Lock the tractor brake pedals together when transporting on roads to provide proper wheel braking.
4.Keep the tractor in the same gear when going downhill as used when going uphill. Do not coast or free wheel down hills.
5.Any towed vehicle and/or trailer whose total weight exceeds that of the towing tractor, must be equipped with its own brakes for safe operation.
6.When the tractor is stuck or tyres are frozen to the ground, back out to prevent upset.
7.Always check overhead clearance, especially when transporting the tractor.
23

SAFETY NOTES
STARTING THE TRACTOR
Warn bystanders before starting:
Before starting, Walk all around the tractor and any attached equipment. Make sure that no one is under it, on it, or close to it. Let other workers and bystanders know you are starting up and don't start until everyone is clear of the tractor, implements and towed equipment.
Ensure that all bystanders, particularly children are in a safe position before starting the engine.
Mount and dismount properly:
Always use 'three point contact' with the machine, and face the machine when you mount it. Three point contact means both hands and one foot or one hand and both feet are in contact with the machine at all times during mounting and dismounting.
Clean the soles of your shoes and wipe your hands before climbing on. Use handrails, grip handrails, ladders or steps (as provided) when mounting or dismounting.
NEVER use control levers as a hand hold and NEVER step on foot controls when mounting or dismounting.
NEVER attempt to mount or dismount from a moving tractor. NEVER jump off a tractor in any circumstances.
Adjust the seat, fasten the seat belt (where applicable as outlined in this manual), apply the parking brake and put all controls in neutral before starting up.
Before starting the engine, make sure there is plenty of ventilation. Never operate the engine in a closed building. The exhaust fumes may cause asphyxiation.
KEEP RIDERS OFF TRACTOR
Do not allow riders on the Tractor.
Riders on Tractor are subject to injury such as being stuck by foreign objects and being thrown off the Tractor.
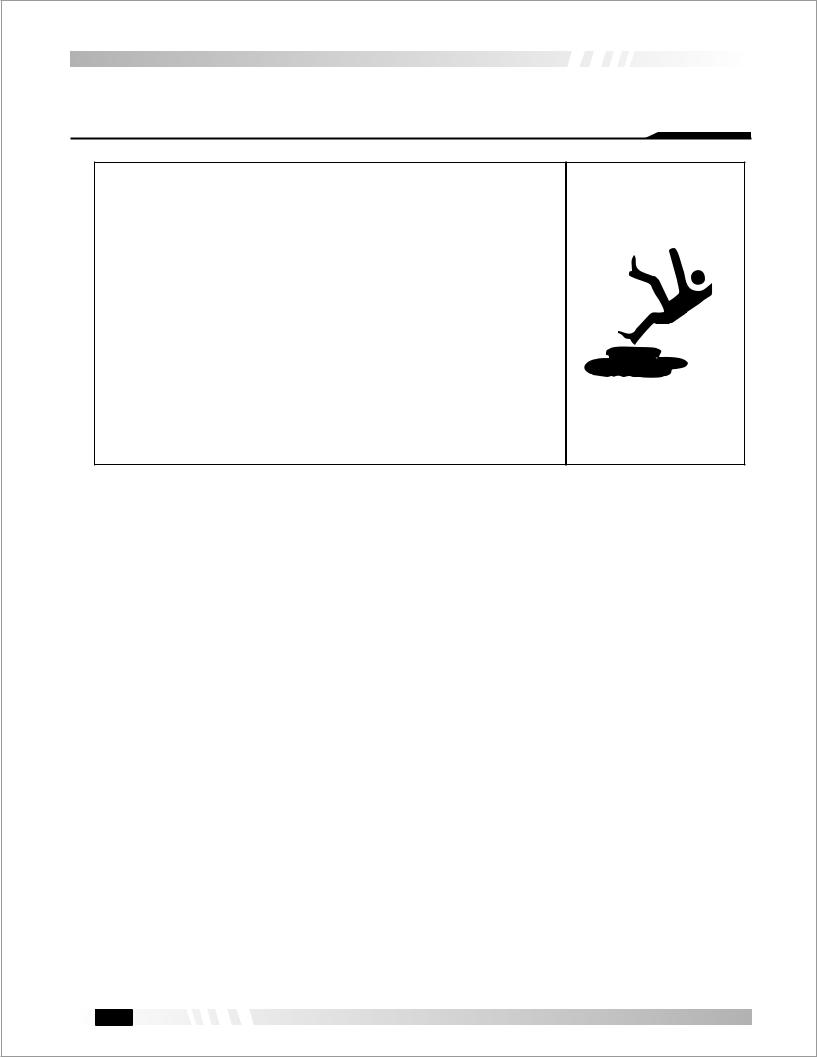
PRECAUTION TO AVOID TIPPING
Do not drive where the Tractor could slip or tip.
Stay alert for holes and rocks in the terrain, and other hidden hazards. Slow down before you make a sharp turn.
Driving forward out of a ditch or mired condition could cause Tractor to tip over backward. Back out these situations if possible.
24

SAFETY NOTES
PROHIBITED USE OF TRACTOR DURING OVERTURNING
Risk of Overturning:
For your safety, tractor is fitted with safety frame and seat belts.
In the event of overturning with a tractor fitted with a safety frame, hold the steering wheel firmly and DO NOT attempt to leave the seat until the tractor has come to rest.
To avoid side overturns:
•Set the wheel track at the widest setting suitable for the job being done.
•Lock the brake pedals together before driving at transport speeds.
•Reduce speed to match operating conditions. If the tractor is equipped with a front end loader, carry the bucket and load as low as possible.
•Make wide slow turns on reduced speed. DON'T let you tractor bounce. You may loose steering control.
•DON’T pull a load too heavy for your tractor. It could run away on the down slope the tractor could jack knife around a towed load.
•DON’T brake suddenly. Apply brakes smoothly and gradually.
•When going down a slope use the throttle to slow the tractor engine and use the same gear you would use to up the slope. Shift into gear before you start downhill.
•Engine four-wheel drive (4WD), if fitted, will give you four wheel braking.
PARK TRACTOR SAFELY
Before working on the Tractor:
Lower all equipments to the ground.
Stop the engine and remove the ignition key.
SAFETY STARTER SWITCH
1.Clutch operated Safety switch is provided which allows the starting system to become operational only when the Clutch pedal is fully pressed.
2.Do not By-pass this Safety switch or work on it. Only Authorized Dealers are recommended to work on Safety starter switch.
TRACTOR RUNAWAY
1.The tractor can start even if the transmission is engaged position causing Tractor to runaway and serious injury to the people standing nearby the tractor.
2.Keep Transmission in neutral position. Foot brake engaged and PTO lever in disengaged position while attending to Safety Starter Switch or any other work on the Tractor.
25

SAFETY NOTES
AVOID HOT EXHAUST
Servicing machine or attachment with engine running can result in serious personal injury. Avoid exposure.
Exhaust parts and streams become very hot during operation. Exhaust gases and components reach temperatures hot enough to burn people, ignite, or melt common materials.
AVOID HIGH-PRESSURE FLUIDS
Escaping fluid under pressure can penetrate the skin causing serious injury.
Keep hands and body away from pinholes and nozzles, which eject fluids under
high pressure. If any fluid is injected into the skin, consult your doctor
immediately.
PREVENT BATTERY EXPLOSIONS
Keep sparks, lighted matches, and open flame away from the top of battery.
Battery gas can explode.
Never check battery charge by placing a metal object across the poles.
ALWAYS USE SAFETY LIGHTS
Use of hazard warning lights and turn signals are recommended when towing equipment on public roads unless prohibited by state or local regulations.
ROAD REGULATIONS
ŸWhen operating your tractor on a public road a number of precautions must be taken.
ŸKnow the route you are going to travel.
ŸUse caution when towing a load at transport speeds especially if the towed equipment is NOT equipped with brakes.
ŸObserve all local or national regulations regarding the road speed of your tractor.
ŸUse extreme caution when transporting on snow-covered or slippery roads.
ŸWait for traffic to clear before entering a public road. Beware of blind intersections. Slow down until you have a clear view.
26

SAFETY NOTES
PREVENT ACID BURNS
Sulfuric acid in battery electrolyte is poisonous. It is strong enough to burn skin, cause holes in clothing and cause blindness. For adequate safety always:
1.Fill batteries in a well-ventilated area.
2.Wear eye protection and acid proof hand gloves.
3.Avoid breathing direct fumes when electrolyte is added.
4.Do not add water to electrolyte as it may splash off causing severe burns.
If you spill acid on yourself, immediately flush your skin with water and flush your eyes for 10-15 minutes. Get medical attention immediately.
HANDLE FUEL SAFELY-AVOID FIRES
Handle fuel with care; it is highly flammable. Do not refuel the Tractor while smoking or near open flame or sparks.
Always stop engine before refueling.
Always keep your tractor clean of accumulated grease and debris.
Always clean up spilled fuel.
SERVICE TRACTOR SAFELY
Do not wear a necktie, scarf or loose clothing when you work near moving parts.
If these items get caught, severe injury could result.
Remove rings and other jewellery to prevent electrical shorts and entanglement
in moving parts.
STAY CLEAR OF ROTATING SHAFTS
Entanglement in rotating shaft can cause serious injury or death.
Keep PTO shield in place at all times.
Wear close fitting clothing. Stop the engine and to sure PTO drive is stopped before making adjustments, connections, or cleaning out PTO driven equipment.
GENERAL OPERATING HAZARDS
ŸThree point hitch and side mounted implements make a much larger arc when turning that towed equipment. Make certain to maintain sufficient clearance for safe turning.
ŸWhen using attachments or implements with the tractor, be sure to thoroughly read the Operator Instruction Book for that attachment or implement and follow its safety instructions.
ŸPull only from the approved drawbar. Towing or attaching to other locations may cause the tractor to overturn.
ŸImproper use of the drawbar, even if correctly positioned, may cause the tractor to overturn to the back.
ŸDO NOT overload an attachment or towed equipment. Use proper counterweights to maintain tractor stability. Hitch loads to the drawbar only.
27
SAFETY NOTES
PRACTICE SAFE MAINTENANCE
ŸUnderstand service procedure before doing work.
ŸKeep the surrounding area of the Tractor clean and dry.
ŸDo not attempt to service Tractor when it is motion.
ŸKeep body and clothing away from rotating shafts.
ŸAlways lower equipment to the ground. Stop the engine.
ŸRemove the key equipment to the ground. Stop the engine.
ŸSecurely support any Tractor elements that must be raised for service work.
ŸKeep all parts in good condition and properly installed.
ŸReplace worn or broken parts. Replace damage/missing decals.
ŸRemove any buildup of grease or oil form the Tractor.
ŸDisconnect battery ground cable (–) before making adjustments on electrical system or welding on Tractor.
SAFETY TIPS DURING MAINTENANCE
1.At least on a daily check all oil levels. Water level in the radiator and electrolyte level in the battery and perform services according to the service schedule.
2.Ensure tyre pressure are even and the correct pressure for the job being done is maintained.
3.Check to ensure that the all controls and preventive mechanisms of the Tractor and implement work correctly and effectively.
4.Ensure that an adequate set of the correct tools is available for maintenance and minor repairs.
5.Ensure that all service work and repairs are carried out on a flat area with a concrete or similar floor.
Do not carry out service work on tractor unitil it is switched off, and the parking brake applied and wheels choked. Where a tractor is stared in a confined area, ensure that the area is well ventilated as exhaust gases are very harmful, and can cause death.
6.Do not work under lifted implements/Implements under operation.
7.When changing wheels or tires ensure that a suitable wheel stand is placed under the axie prior to removing the wheel and the wheels are chocked.
8.Where guards or shields need to be removed to perform a service or repair, ensure that the guard or shield is correctly reinstalled before starting the Tractor.
9.Never refuel near a naked flame or with an overheated engine. Ensure to turn off Engine before refueling.
10.The cooling system operates under pressure, take care when removing the Radiator cap a hot engine to prevent being scalded by steam or hot water. Do not add water in the radiator when then engine is hot. Add water to the radiator only after the engine coals down completely.
11.To prevent fire keep the tractor including the engine clean and free from inflammable material and well away from fuels and other inflammable material.
28

SAFETY NOTES
Safety: Prepare For Safe Operation
Protect yourself: |
|
|
|
Wear all the protective clothing and personal safety devices |
|
|
|
issued to you or called for by job conditions. Don't take risk |
|
|
|
hence you may carry/wear the following (Fig. 2.1) |
|
|
|
(a) |
A hard hat. |
|
|
(b) |
Safety glasses, goggles or face shield. |
(a) |
(b) |
(c)Hearing protection.
(d)Respirator or filter mask.
(e)Inclement weather clothing.
(f)Reflective clothing.
(g)Heavy gloves (neoprene for chemical, leather for rough work).
(h)Safety shoes.
DO NOT wear loose clothing, jewellery or other items |
(c) |
(d) |
and tie up long hair which could catch on controls or |
|
|
other parts of the tractor. |
|
|
Learn where fire extinguishers and first aid or emergency |
|
|
equipment is kept and where to get help in a hurry. |
|
|
Make sure you know how to use this equipment. |
|
|
(e) |
(f) |
Protect The Environment :
|
|
|
|
|
|
|
(g) |
(h) |
It is |
illegal to pollute drains, water courses |
or |
soil. |
|
||||
Use |
authorized |
waste |
disposal |
facilities, |
including |
|
||
civic |
amenity sites and garages |
providing |
facilities |
|
||||
for disposal of used oil. If in doubt, contact your local |
|
|||||||
authority for advice. |
|
|
|
|
|
|||
To get to |
know |
the correct methods to dispose of |
|
|||||
oils, |
filters, |
tyres |
etc. |
contact your Dealer |
or |
the |
|
|
local agency for waste recycling.
29
 Loading...