

Page 1

Deploying the
snom ONE IP Telephone System
Technical Manual
Kevin Moroz and Robyn Wright
Printed by
Puritan Press, Inc.
Hollis, New Hampshire, USA
Version 1.1
Page 2

Copyright © 2011 snom technology, Inc.
All rights reserved.
snom® is a registered trademark of snom technology AG and its aliates in the European Union, USA, Japan, South Africa, Australia, China, and certain other countries
and regions. Unless specied otherwise, all trademarks, in particular product names,
are legally protected trademarks of snom technology AG. Other mentioned trademarks
or registered trademarks are the property of their respective manufacturers or owners.
Product specications are subject to change without notice.
Graphics artist: Milla Kesseli
Cover designer: Milla Kesseli
Library of Congress Cataloging-in-Publication Data
Kevin Moroz and Robyn Wright
Deploying the snom ONE IP Telephone System, Version 1.1
ISBN 978-1-884186-46-2
Puritan Press, Inc.
Hollis, New Hampshire, USA
snom.com
Page 3

Authors
Kevin Moroz has been involved in the communications industries for more than 20
years. Mr. Moroz began his career as a sales engineer with companies like BBN Communications, MediaGate, and Pingtel and later became Director of Engineering at ABP
Technologies. Before coming to snom, Mr. Moroz was COO of pbxnsip. He holds a
B.S. in Management Science from University of Massachusetts and an M.S. in Computer Information Systems from Bentley University.
Robyn Wright has been editing and writing technical documents in the telecommunications industry for more than 20 years. After the high-tech bubble burst in 2003, she
began exploring other genres and writing projects, including advising undergraduates
in technical writing at UMass Lowell’s College of Engineering. Deploying the snom ONE
IP Telephone System was an unexpected and challenging return to the eld of telecommunications. She has a B.A. in English from the University of Massachusetts and is
working toward an M.Ed. in Instructional Design.
Key Contributors
Jonathan Greenwood has created and managed several startups within the telecommunication industry during the past 9 years. Previously a software engineer at Pancredit, he
worked on several major projects within the nancial industry. He transitioned from nancial systems software development to telecommunications while at pbxnsip Europe,
where he was responsible for the entire operations for Europe, Middle East, and Africa.
Jonathan is now Managing Director of snom UK Ltd and is also Product Manager for
snom ONE.
David Kirsopp is a technical support engineer and provided professional support to
pbxnsip before coming to snom. David studied IT at TMC Academy in Singapore and
has expertise in improving the services oered by the telecommunications industry as it
embraces the digital age. David is a Microsoft Certied Professional (MCP) and is also
CompTIA A+ certied.
Pradeep Kumar has more than 15 years of experience in the telecommunication industry working on various VoIP products. He has worked for successful startups, such
as Unisphere Networks, as one of the key members of the media gateway design and development group. He has also worked for Siemens Network Convergence group, leading the SIP-based residential gateway product. He has a B.S. in Electronics & Communications. He is currently leading the PBX software development for snom.
Page 4

Page 5

BRIEF CONTENTS
Part I—Getting Started
1 Getting Started ............................................................................................................ 1
Part II—Administering the System
2 System Settings ......................................................................................................... 29
3 Administering the Domain ........................................................................................83
4 Trunks ....................................................................................................................... 113
5 Dial Plans ................................................................................................................. 147
6 Extensions ................................................................................................................ 161
7 Park Orbits ............................................................................................................... 177
8 Service Flags ........................................................................................................... 181
9 Auto Attendant ........................................................................................................ 193
10 Hunt Groups ............................................................................................................ 215
11 Agent Groups .......................................................................................................... 225
12 Paging ...................................................................................................................... 251
13 Conferencing ........................................................................................................... 259
14 IVR Node .................................................................................................................. 271
15 Calling Card Account ............................................................................................ 283
16 Pre-Pay Feature ...................................................................................................... 289
17 Email ......................................................................................................................... 295
18 Audio and Greetings .............................................................................................. 309
19 Buttons ..................................................................................................................... 327
20 Plug and Play........................................................................................................... 343
21 Music on Hold ......................................................................................................... 375
22 Call Detail Records (CDRs) ................................................................................. 389
Page 6

Deploying the snom ONE IP Telephone System
vi
Part III—The User Interface
23 Web Interface ......................................................................................................... 399
24 Star Codes .............................................................................................................. 425
25 Voicemail .................................................................................................................. 447
26 Cell Phones ............................................................................................................. 459
Appendix A. Working with CSV Files ............................................................ 475
Appendix B. SIP Overview .............................................................................. 499
Appendix C. snom ONE and Exchange ........................................................ 527
Glossary .................................................................................................................. 535
Index .................................................................................................................... 555
Page 7

CONTENTS
Part I—Getting Started
1 Getting Started .......................................................................1
About snom ONE .................................................................... 1
Memory/Hardware Requirements ............................................ 2
USB Device .......................................................................... 4
Warnings ........................................................................ 4
Standards Conformance ...................................................... 4
Disposal ......................................................................... 4
Installing the Software .............................................................. 5
Windows Installations ......................................................... 5
MAC OS Installations ......................................................... 7
Linux Installations ............................................................ 10
Logging In .......................................................................... 14
Login Levels .................................................................. 15
Activating Your License ........................................................... 17
Upgrading the Software .......................................................... 17
Manual Software Upgrades (Windows) ................................... 18
Mac OS Upgrades ........................................................... 19
Linux Upgrades ............................................................... 20
Restarting the System ............................................................. 20
Restarting From Windows (Service Control Manager) .................. 21
Restarting From a Command Line ......................................... 22
Restarting From Mac OS ................................................... 22
Restarting From a Linux Environment ...................................... 22
Manually Starting the Service .............................................. 22
When the System Fails to Restart ......................................... 23
Technical Support ................................................................. 24
Documentation ..................................................................... 26
Part II—Administering the System
2 System Settings .................................................................... 29
Directory Structure ................................................................ 33
Page 8

Deploying the snom ONE IP Telephone System
viii
Directory Tree ................................................................ 33
Global Configuration File ................................................... 34
Folder Overview .............................................................. 35
Folder Details ................................................................. 37
Configuring System Settings ..................................................... 42
General ........................................................................ 42
Administrator Login .......................................................... 44
Appearance ................................................................... 45
Performance .................................................................. 48
SIP Settings .................................................................. 51
Ports ................................................................................. 53
HTTP Ports ................................................................... 53
SIP Ports ...................................................................... 54
RTP Ports ..................................................................... 56
SNMP ......................................................................... 58
TFTP ........................................................................... 59
LDAP .......................................................................... 60
Logging ............................................................................. 60
General Logging ............................................................. 61
Specific Events ............................................................... 62
SIP Logging .................................................................. 63
Configuration ....................................................................... 66
Save/Restore a Backup ..................................................... 66
Request Configuration ...................................................... 67
Reload Configuration Files .................................................. 67
Schedule a Reboot .......................................................... 68
Certificates ......................................................................... 69
Access List ......................................................................... 72
Web Page Control................................................................. 75
Templates ..................................................................... 75
Translation .................................................................... 77
User Page Control ........................................................... 78
3 Administering the Domain ........................................................ 83
Naming the Domain................................................................ 84
Changing the Name of the Domain ........................................ 84
Assigning a Domain Administrator ............................................... 85
Domains—Default and New ...................................................... 89
Default Domain ............................................................... 89
Page 9

Contents
ix
Creating New Domains...................................................... 90
Configuring the Domain ........................................................... 93
Accounts Page Display ....................................................101
Recording Defaults .........................................................104
Email Settings ...............................................................104
Midnight Events .............................................................105
Domain Address Book ...........................................................108
Creating a Domain Address Book .......................................109
Searching for Contacts ....................................................111
4 Trunks ...............................................................................113
Trunk Types .......................................................................114
SIP Registrations ...........................................................114
SIP Gateway .................................................................116
Outbound Proxy .............................................................116
Inbounds Calls ....................................................................117
How the System Identifies a Trunk .......................................117
How the System Routes a Call to the Proper Extension .....................119
Basic Routing ...............................................................119
When Regular Expressions are Involved .................................121
Regular Expressions and Direct Inward Dialing (DID) ..................124
Outbound Calls ...................................................................127
Caller-ID .....................................................................127
Generating the ANI .........................................................128
Representing the Source ..................................................129
Creating Trunks ...................................................................130
Configuring Trunks ...............................................................131
General Settings ............................................................131
Outbound Settings .........................................................139
Inbound Settings ............................................................141
Connecting Branch Offices Together ..........................................142
Using a Gateway Trunk ....................................................142
Using a SIP Registrations Trunk (SIP Tie Line) .........................144
5 Dial Plans ...........................................................................147
Parts of a Dial Plan ...............................................................148
Key Components ............................................................148
Wildcard Patterns ..........................................................151
Regular Expression Matching .............................................152
Page 10

Deploying the snom ONE IP Telephone System
x
Building a Dial Plan ...............................................................153
Creating a Dial Plan ........................................................153
Configuring the Dial Plan ..................................................153
Sample Dial Plans ................................................................155
Typical Dial Plan ............................................................155
A Simplified Dial Plan.......................................................156
Dial Plan with Prefix in Front of the Number .............................156
A North American Dial Plan ................................................156
Sending Star Codes on a Trunk ..........................................157
Forced Matching
............................................................158
Inter-Domain Dialing
..............................................................158
Domains with Non-Overlapping Extensions .............................159
Domains with Overlapping Extensions ...................................159
6 Extensions ..........................................................................161
Preparing the User Account
.....................................................162
Working with Default Extensions
..........................................162
Importing Multiple Extensions (Bulk) .....................................164
Creating a Few New Extensions ..........................................164
Before Registering the Extension ...............................................167
Administrator-Only Settings ...............................................167
Registration Settings .......................................................169
Permission Settings ........................................................173
7 Park Orbits .........................................................................177
Creating a Park Orbit ............................................................178
How the Park Orbit Works ......................................................180
Parking Calls ................................................................180
Retrieving Calls .............................................................180
Using a Park Orbit Button .................................................180
8 Service Flags .......................................................................181
Setting up a Service Flag Account .............................................183
Linking a Service Flag to an Account ..........................................186
Method 1: Night Service ..................................................186
Method 2: Message-Only and Voicemail Options .....................188
Setting/Clearing a Service Flag .................................................190
Setting a Manual Service Flag from the Phone ..........................190
Setting a Manual Service Flag from the Web Interface ................191
Page 11

Contents
xi
Service Flags and Buttons .......................................................191
Using a Button to Activate a Service Flag ...............................191
9 Auto Attendant .....................................................................193
How an Auto Attendant Works .................................................196
Welcome Message .........................................................196
Processing User Input ......................................................196
Ringing an Extension .......................................................197
Blacklisted Callers and Anonymous Calls ...............................198
Multiple Messages—Time-Based Configuration ........................198
Setting up an Auto Attendant ...................................................198
Auto Attendant Behavior ...................................................199
Timeout Handling ...........................................................203
Night Service ................................................................204
Dial-by-Name
................................................................205
Direct Destinations .........................................................205
Nesting Auto Attendants
.........................................................207
Welcome Greetings ..............................................................209
Overview .....................................................................209
Recording the Greeting ....................................................209
Filing System and Naming Conventions .................................211
10 Hunt Groups........................................................................215
How the Hunt Group Works ....................................................216
Setting up a Hunt Group ........................................................218
Identity .......................................................................218
Ring Stages .................................................................219
Behavior ......................................................................220
Night Service ................................................................222
11 Agent Groups ......................................................................225
How the Agent Group Works ...................................................227
The Message-Music Cycle ................................................228
Setting up an Agent Group Account ...........................................229
Identity .......................................................................230
Behavior ......................................................................231
Connecting Caller to Agent ...............................................238
Preventing Lengthy Periods in Ringback or Queue .....................239
Mapping Telephone Keypad Numbers with Extensions ................240
Page 12

Deploying the snom ONE IP Telephone System
xii
Night Service ................................................................242
SOAP Interface .............................................................243
Logging In and Out ...............................................................244
Method 1: Buttons ........................................................244
Method 2: Star Codes ....................................................245
Monitoring Agent Groups ........................................................246
Monitoring from the Web Interface .......................................246
Monitoring Using Buttons on Phone ......................................248
Monitoring from the WAC (Web-Based Console) ......................248
12 Paging ...............................................................................251
Types of Paging ...................................................................251
Unicast Paging ..............................................................251
Multicast Paging ............................................................252
Setting up a Paging Account ....................................................253
Assigning Multicast IP Addresses to IP Phones ........................256
13 Conferencing .......................................................................259
Scheduled Conferences .........................................................261
Creating a Scheduled Conference Account .............................261
Scheduling a New Conference ............................................263
Modifying Scheduled Conferences .......................................265
Moderating Scheduled Conferences .....................................265
Ad Hoc Conferences .............................................................266
Creating an Ad Hoc Conference Account ...............................266
Calling into an Ad Hoc Conference ......................................268
Moderating an Ad Hoc Conference ......................................269
14 IVR Node ............................................................................271
How the IVR Node Works .......................................................272
Setting up an IVR Node Account ...............................................274
Identity .......................................................................275
Settings ......................................................................276
Recording Messages .............................................................277
Record the Message Directly ..............................................277
Upload a WAV File .........................................................278
Linking an External Application Server to an IVR Node ......................279
Sample SOAP Message ...................................................279
Page 13

Contents
xiii
15 Calling Card Account .............................................................283
Setting up a Calling Card Account
.............................................284
Identity
.......................................................................285
Behavior ......................................................................286
16 Pre-Pay Feature ...................................................................289
Setting up the Pre-Pay ...........................................................290
Creating the Rates Table ..................................................290
Assigning a Dollar Amount to an Extension ..............................292
Methods of Access ...............................................................293
Extension .....................................................................293
Personal Virtual Assistant ..................................................293
Calling Card Account (PIN Access) ......................................294
17 Email .................................................................................295
Configuring the SMTP Server ...................................................295
System-Wide SMTP Settings .............................................295
Adding Email Accounts to the System ...................................299
Receiving Email Notifications from the System ...............................303
Types of Email Notifications ...............................................303
CDRs to Email ...............................................................304
CDRs for Trunk Activity ....................................................304
CDRs for Your Extension Only ............................................305
CDRs for All Extensions on Your Domain ................................306
CDRs for All Extensions on All Domains .................................306
Call Recording to Email ..........................................................307
Blacklist Activity to Email ........................................................307
System-Initiated .............................................................307
18 Audio and Greetings ..............................................................309
Greetings ..........................................................................309
Personal Greetings .........................................................309
Auto Attendant Greetings ..................................................311
Agent Group Greetings ....................................................313
Recorded Phone Calls ...........................................................315
User-Initiated Recordings ..................................................316
System-Initiated Recordings ..............................................317
File System ..................................................................317
Notes .........................................................................320
Page 14

Deploying the snom ONE IP Telephone System
xiv
Audio Prompts ....................................................................321
Uploading New Languages ................................................322
Customized Ringtones ...........................................................323
19 Buttons ..............................................................................327
Creating a Button Profile ........................................................331
Point-and-Click Method ....................................................331
CSV Method .................................................................334
Assigning Button Profiles to Users .............................................336
Assigning a Profile to a Single User ......................................336
Massive Update of Profiles
................................................336
Key System Configuration .......................................................338
Setting up a Key System ...................................................338
Multiple Identities and Button Profiles .........................................341
20 Plug and Play
......................................................................343
Finding the snom ONE
...........................................................343
Plug and Play Checklist ..........................................................345
Configuring the Administrator Settings ..................................345
Configuring the Domain Settings
.........................................346
Creating an Authentication Password ....................................348
Setting up the Domain Address Book ....................................349
Configuring the Button Profiles ...........................................349
Creating the Extension(s) .................................................349
Performing Plug and Play ........................................................352
DHCP, Option 66 ...........................................................352
SIP SUBSCRIBE (Multicast) ..............................................353
Mass Deployment ...........................................................354
Manual Method (HTTP) ....................................................355
Resetting the Phone
..............................................................359
Using the Web Interface ...................................................359
Using the Phone
............................................................359
Using the Phone GUI .......................................................359
Registering Numerous Extensions to One Phone ............................360
Overriding Plug and Play Defaults ..............................................362
Changing Default Settings from Admin > Settings > PnP ............362
Changing Default Settings Using a Customized XML File .............364
Troubleshooting ...................................................................372
Page 15

Contents
xv
21 Music on Hold ......................................................................375
Setting up Music on Hold
.......................................................376
Editing MoH Sources
.......................................................378
Creating WAV Files ..............................................................379
Configuring Paging/Music on Hold .............................................381
Download and Installation .................................................381
Setting up Paging ...........................................................382
Configuring Music on Hold ................................................385
XML Configuration File .....................................................387
22 Call Detail Records (CDRs) ......................................................389
CDRs for Third-Party Software Vendors .......................................390
CDR to CSV .................................................................391
CDR to Email ................................................................392
CDR to Simple TCP ........................................................392
CDR to SOAP/XML ........................................................395
Part III—The User Interface
23 Web Interface ......................................................................399
Logging in .........................................................................399
Extension Settings ................................................................401
General Settings ............................................................402
Redirection Settings ........................................................406
Email Settings ...............................................................411
Instant Message .............................................................414
Call Lists ...........................................................................415
Mailbox .......................................................................415
Missed Calls .................................................................415
Call Log ......................................................................416
Contacts ...........................................................................418
Personal Address Book ....................................................418
Domain Address Book .....................................................422
Upload Domain Address Book to Phone .................................423
Extension Status ..................................................................423
24 Star Codes ..........................................................................425
Basic Star Codes .................................................................427
Page 16

Deploying the snom ONE IP Telephone System
xvi
Redial a Number (*66) .....................................................427
Call Return (*69) ............................................................427
Intercom (*90) ...............................................................427
Transferring Calls .................................................................428
Transfer Calls ................................................................428
Transfer a Call Directly to Someone’s Voicemail ........................429
Call Park (*85) and Call Park Retrieve (*86) ............................430
Call Pickup (*87) ............................................................431
Conferencing ......................................................................433
Three-Way Conferences
...................................................433
Conference (*53)
...........................................................433
Anonymous Calls .................................................................434
Block Caller-ID (*67) .......................................................434
Reject Anonymous Calls (*88) ............................................434
Forwarding Calls ..................................................................435
Hot Desking (*70) ...........................................................435
Call Forward All Calls (*71/*72) ..........................................437
Call Forward on Busy (*73/*74)...........................................437
Call Forward on No Answer (*75/*76) ...................................438
Do Not Disturb (*78) .......................................................438
Set Night Mode for Domain Accounts (*80) .............................439
Call Center Features .............................................................440
Agent Log in/Log out (*64/*65) ...........................................441
Call Barge (*81) .............................................................441
Call Teach Mode (*82) .....................................................442
Listen In (*83) ...............................................................442
Miscellaneous .....................................................................442
Show Account Balance (*61) .............................................442
Wakeup Call (*62) ..........................................................443
Request Call Details (*63) .................................................443
Clean up an Extension (*84) ...............................................444
Add to White List (*91) ....................................................444
Add to Black List (*92) .....................................................444
Call Record (*93/*94) ......................................................445
25 Voicemail ...........................................................................447
Setting up the Voicemail Account ..............................................448
Changing the PIN ...........................................................448
Record Your Name .........................................................448
Page 17

Contents
xvii
Record a Personal Welcome Message ..................................449
Accessing the Voicemail System ...............................................449
Forwarding a Message ...........................................................450
Leaving Voicemail Messages ....................................................451
Composing a New Message ....................................................451
Personal Greetings ...............................................................452
Recording/Activating Personal Greetings ...............................452
Hearing Your Personal Greetings .........................................453
Advanced Features ...............................................................453
Send a Voicemail Message Without Ringing Extension(s)
.............453
Transfer a Call Directly to Someone’s Voicemail
........................454
Listen to Voicemail on Cell Phone ........................................454
Voicemail Notification ............................................................454
Via Email .....................................................................454
Via Cell Phone ...............................................................455
Voicemail Feature Codes ........................................................455
Send Voicemail to Email Account (*95/*96) .............................455
Go to Voicemail (*97) ......................................................456
Go to Group Mail (*97) ....................................................456
Clear Message Waiting Indicator (*99) ..................................458
26 Cell Phones.........................................................................459
Cost Savings ......................................................................461
Callback ......................................................................461
Calling Card Account ......................................................462
Configuring the Cell Phone ......................................................463
Add a Cell Phone to Your Account .......................................463
Safeguard Against Loss-of-Signal Events ...............................466
Ring My Cell Phone When Voicemail Arrives ...........................466
Feature Codes ....................................................................468
Retrieve Call From Cell Phone (*51) .....................................468
Move Current Call to Cell Phone (*52) ...................................468
Call Cell Phone of the Extension (*00) ..................................469
Personal Virtual Assistant ........................................................470
Appendix A. Working with CSV Files .............................................. 475
Structural Requirements .........................................................475
Structure .....................................................................476
Page 18

Deploying the snom ONE IP Telephone System
xviii
Parameters ........................................................................477
Extensions ...................................................................477
Agent Groups ...............................................................478
Hunt Groups .................................................................479
Conference Account .......................................................480
Paging ........................................................................480
Service Flags ................................................................481
Converting an Excel File to CSV ................................................482
Changing the Field Separator and Validating the File ..................488
Creating a Domain Address Book ..............................................489
Address Book Parameters .................................................489
Converting the Address Book to CSV ...................................491
Changing the Field Separator and Validating the File ..................493
Importing the CSV File ...........................................................494
Importing a CSV File for the Extension Account ........................494
Importing CSV Files for Domain Address Books........................496
Troubleshooting ...................................................................497
Appendix B. SIP Overview .......................................................... 499
What is SIP? ......................................................................499
SIP Components ..................................................................500
SIP Language .....................................................................503
Describing the SIP Session .....................................................507
SIP Call Process ..................................................................509
snom ONE Settings and SIP Traces ...........................................519
Appendix C. snom ONE and Exchange ........................................... 527
Configuring Exchange for snom ONE ..........................................527
Configuring the snom ONE Server .............................................531
Glossary ................................................................................... 535
Index ..................................................................................... 555
Page 19

Part I
Getting Started
Page 20

Part I—Getting Started
Page 21

Chapter
1
GETTING STARTED
Welcome to snom ONE, your state-of-the-art IP telephone system. Administrating a
VoIP system can be a daunting task for administrators unfamiliar with VoIP. is guide
is designed to help you plan and congure snom ONE Voice over IP (VoIP) deployments ranging in complexity from a small oce using the Internet for SIP trunks to a
large, multi-national conglomerate of snom ONE systems.
snom ONE is the answer to all your IP telephone system needs.
About snom ONE
snom ONE is a SIP-based IP telephone system which is implemented in a back-toback user agent (or B2BUA), so all trac between two endpoints traverses the system
(Figure 1-1). is gives the system complete control of the call state and allows it to
participate in all call requests. It also allows it to perform a number of functions that
are impossible using the SIP proxy model. A few such functions are forking calls to the
cell phone, returning them to the system, if needed, and connecting phones remotely to
the system. e B2BUA also facilitates advanced media features such as call recording,
barge, listen in, and whisper, as well as ensuring two-way audio session is established.
Answering
SIP UA
Originating
SIP UA
Originating
SIP Endpoint
Answering
SIP Endpoint
Figure 1-1. B2BUA Architecture
Page 22
Deploying the snom ONE IP Telephone System
2
e system is easily portable to most operating systems and requires only a small
amount of memory. Due to the need for speed, snom technology does not use a traditional database to store its information. Doing database lookups can be slow in a very
busy system. Having a data structure in memory with the necessary information to
authenticate a phone is much faster.
e snom ONE telephone system is a software-based solution and executes several measures to preserve call quality:
• A high-scheduling priority is used with applications that are real-time critical.
• e snom ONE measures CPU usage and rejects calls if the load becomes too
high.
• When too many calls are coming in during a short period (call bursts), the
system also rejects calls.
While these measures are important, the performance of the software depends largely
on the hardware being used.
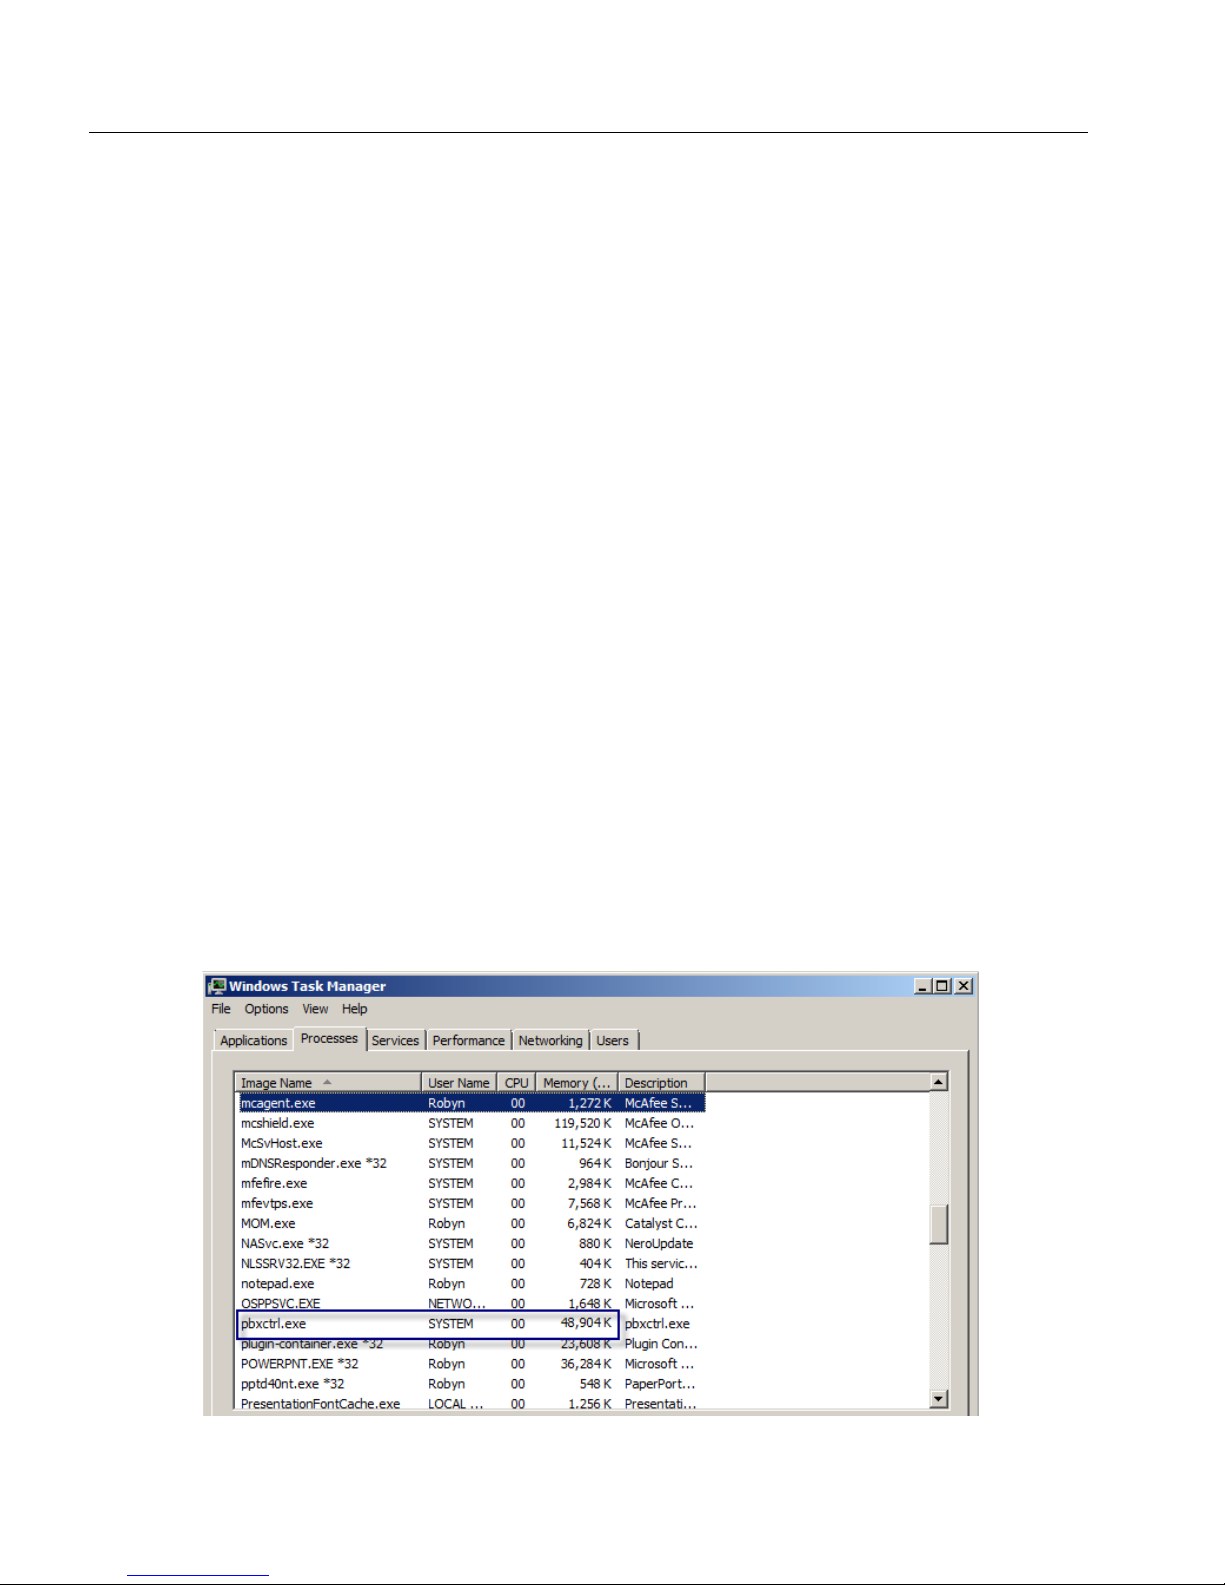
Memory/Hardware Requirements
e snom ONE system consumes only a small amount of memory. In the image shown
below, a snom ONE system uses under 50 MB of RAM, which is not unusual for a
lightly loaded system.
Page 23

Chapter 1: Getting Started
3
For a heavily loaded system, we recommend 2 GB of RAM. However, the system can
run on machines with far less RAM, but this will depend on your operating system.
Factors inuencing memory requirements include the number of voice mails that accumulate, how much logging information is stored on the system, and the number of
CDRs you store. To keep 2weeks’ worth of information on a heavily tracked system,
you will need sucient memory to store that information. e following table reects
our recommended minimums:
10 Extensions 20 Extensions 150 Extensions
Memory*
40 MB 50 MB 150 MB
Hard Disk**
100 MB 100 MB 150 MB
* Memory requirements will increase according to voicemails, CDR duration, etc.
** Hardware requirements are signicantly impacted by recordings, as they consume
large amounts of disk space.
CPU requirements can be a challenge; however, the anity mask can be used to improve the performance of the PBX. e ideal scenario will be to have a dual-core CPU,
wherein the PBX is bound to one of the cores. is setting instructs the operating system to run the PBX on the specied core, eliminating the context switching issues that
can cause problems for time-critical RTP threads.
When determining hardware requirements, you need to factor in the number of parallel
calls, the number of registrations that will be kept alive on the system, and transcoding
issues (i.e., will the CPU need to translate the codecs?). If the CPU only has to pass the
packets through, the CPU performance is practically limited by the I/O-subsystem.
Hard disk space is also dependent on whether or not you’ll be recording calls and the
length of time the recordings will be kept on the system. At minimum, 100 MB is
needed, but call volume and other variables will determine whether 100 MB is really
sucient.
Although the hard disk requirement for the installation is minimal (less than 20 MB),
keeping an eye on the system once it has been in production for a while is essential. Additional languages, recorded calls, and log les can ll the disk quickly.
Page 24

Deploying the snom ONE IP Telephone System
4
USB Device
e snom ONE software has been loaded onto the 1 GB USB drive that was shipped
with this book. is section contains information about the USB drive.
Warnings
e USB drive is for indoor use or storage with a temperature range between +0°C and
+70°C. Not for outdoor use! Do not use or store the product in rooms with high humidity (for example, in bathrooms, laundry rooms, damp basements). Do not immerse
the product in water, and do not spill or pour liquids of any kind onto or into any part
of it. Do not use the product in surroundings at risk for explosions, and do not use
the handset in such surroundings (paint shops, for example). Your device may contain
small parts, so keep them out of the reach of small children.
Standards Conformance
is device is CE and FCC-certied and meets European and U.S. health, safety, and
environmental standards. Unauthorized opening, changing, or modifying the device
will cause the warranty to lapse and may also result in the lapse of the CE and FCC
certications. In case of malfunction, contact authorized service personnel, your reseller,
or snom technology.
Disposal
is device is subject to European Directive 2002/96/EC and may not be disposed of
with general household garbage. e separate collection and proper disposal of electrical and electronic devices serves to protect human health and the environment. It also
provides a vehicle for using and reusing resources prudently and rationally. If you do
not know where you may dispose of the device at the end of its lifespan, contact your
municipality, your local waste management provider, or your seller. Disposal of electrical and electronic products in countries outside the European Union should be done in
line with local regulations. Please contact local authorities for further information.
Page 25
Chapter 1: Getting Started
5
Installing the Software
e snom ONE software has been loaded onto the USB drive that was shipped with
your order. Follow the instructions below to complete the installation.
Note: If you purchased this book without the software, you may download snom ONE
free at http://www.snom.com/products/ip-pbx/snom-one. Click the snom
ONE free link at the top-right corner, ll out the form, then click Submit. Your per-
sonal download link will be sent via email (check your spam folder). Double-click the
setup.exe le inside the email to install the software.
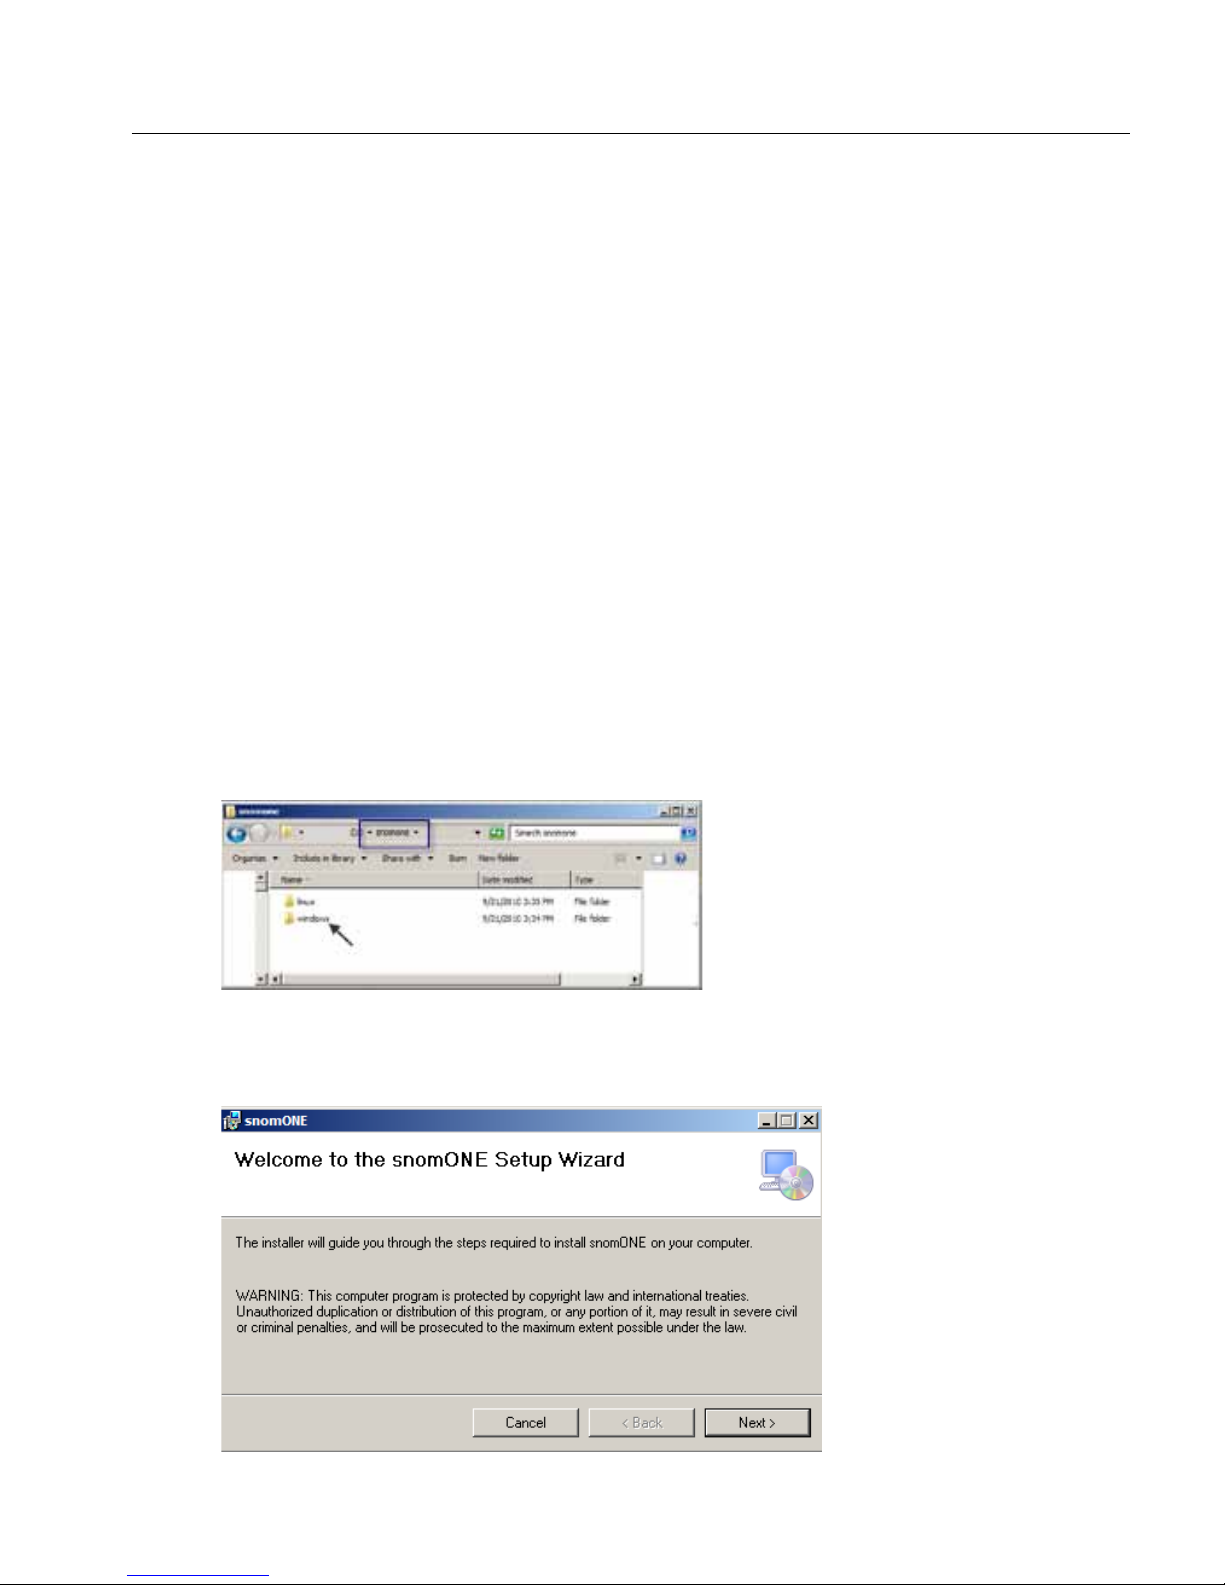
Windows Installations
1. Put the USB drive into your computer. e software will be listed with your
standard disk drives.
2. Double-click the snomone folder.
3. Double-click the windows folder.
4. Double-click setup.exe.
5. Click Next at the welcome wizard.
Page 26
Deploying the snom ONE IP Telephone System
6
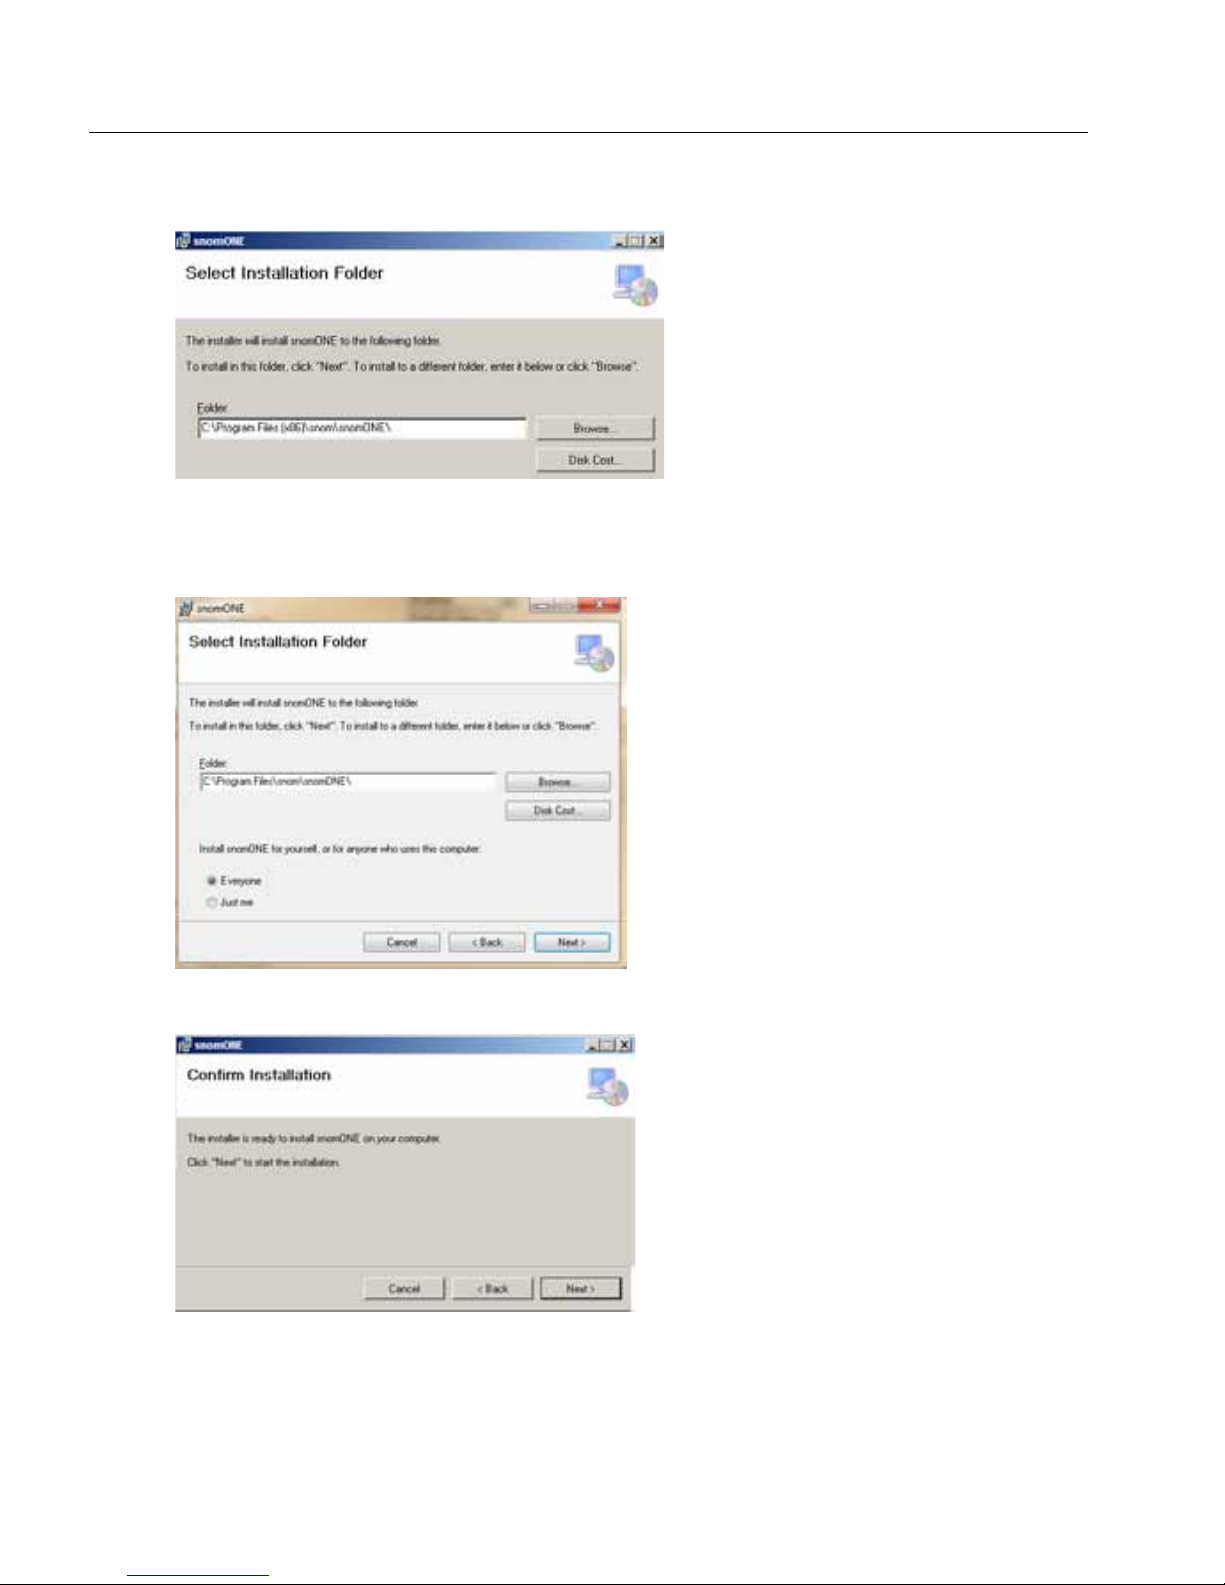
6. Choose an installation location or accept the default, then click Next.
Note: If you are installing the software on a 64-bit system, the default directory
path will be as follows:
7. Click Next to start the installation.
e installation will take a minute to install.
Page 27
Chapter 1: Getting Started
7
8. Click Close when the installation is complete.
MAC OS Installations
is section explains how to install snom ONE for Mac OS (tested on Darwin). Currently, we support only Intel-based hardware.
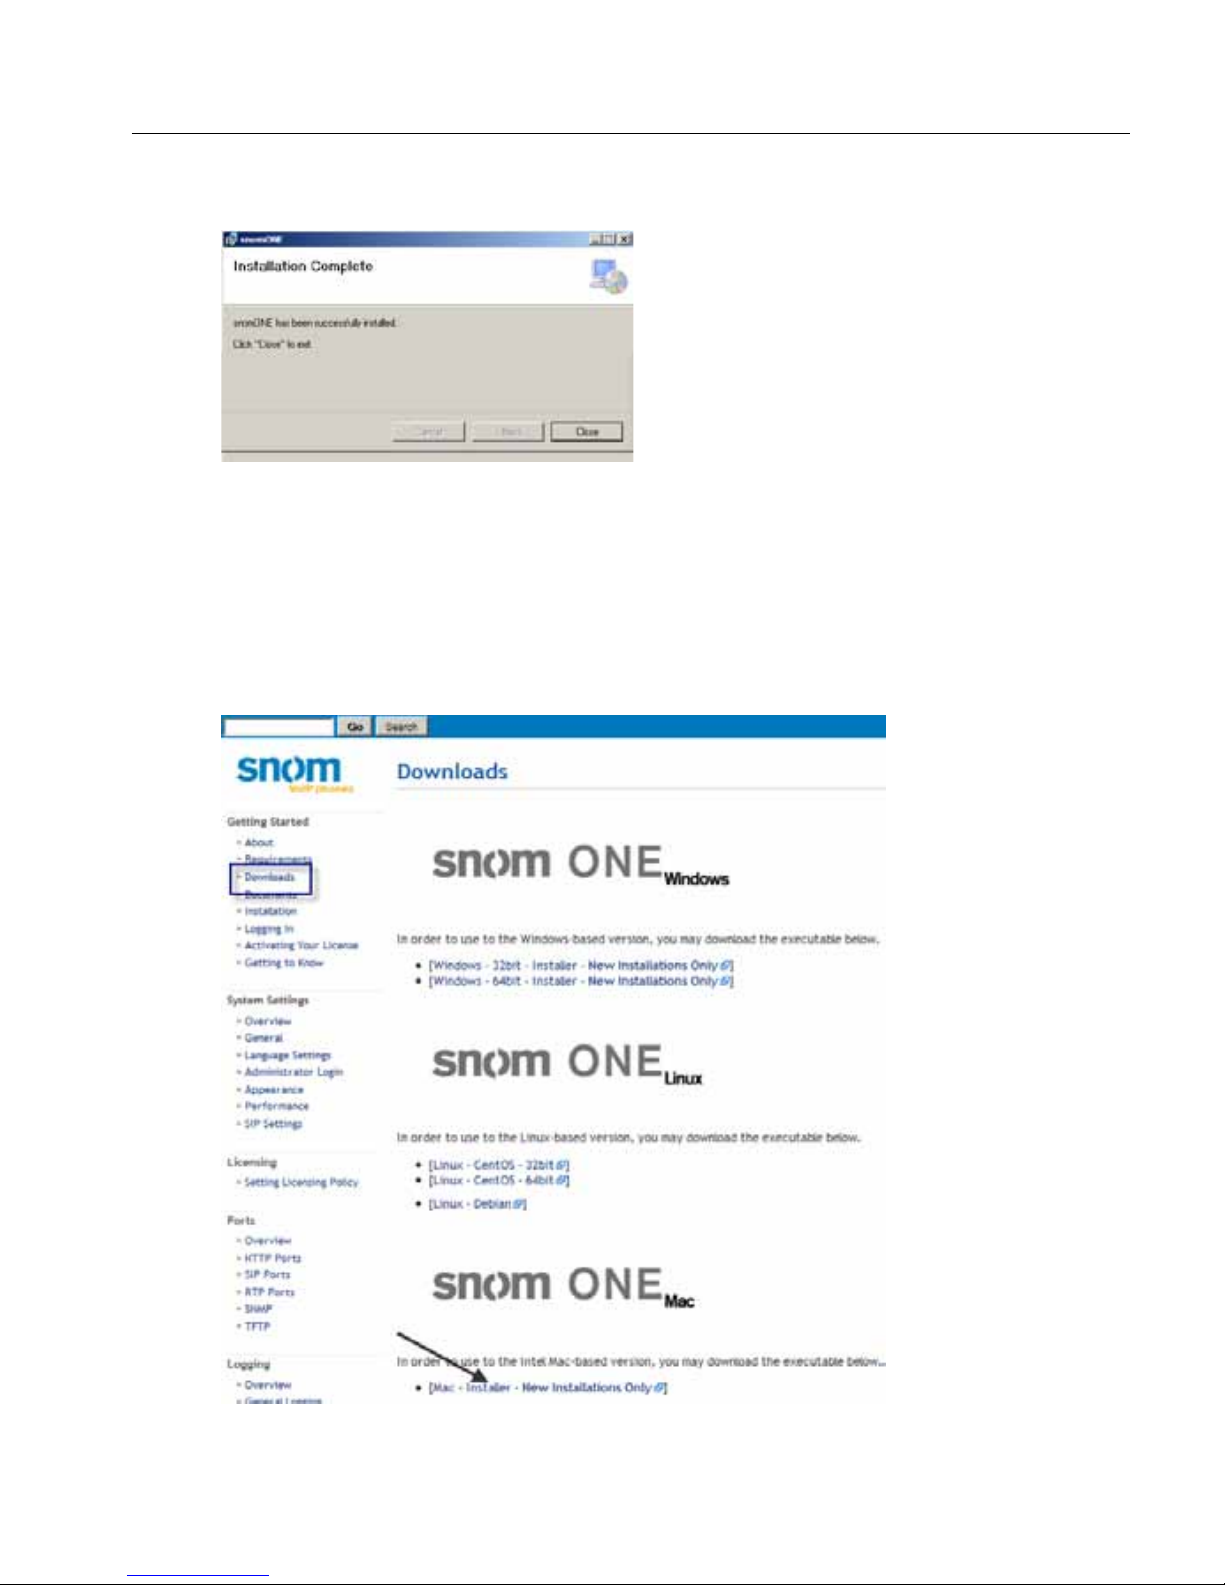
1. Navigate to http://wiki.snomone.com, and click Downloads at the left.
Page 28
Deploying the snom ONE IP Telephone System
8
2. Click Mac - Installer - New Installations Only.
3. Download the installation package.
4. Unzip the zip le by double-clicking it.
5. Execute the installer contained in the zip le.
6. At the Welcome screen, click Continue.
7. At the Important Information page, click Continue.
8. Take a moment to look through the license agreement, then click Continue.
Page 29
Chapter 1: Getting Started
9
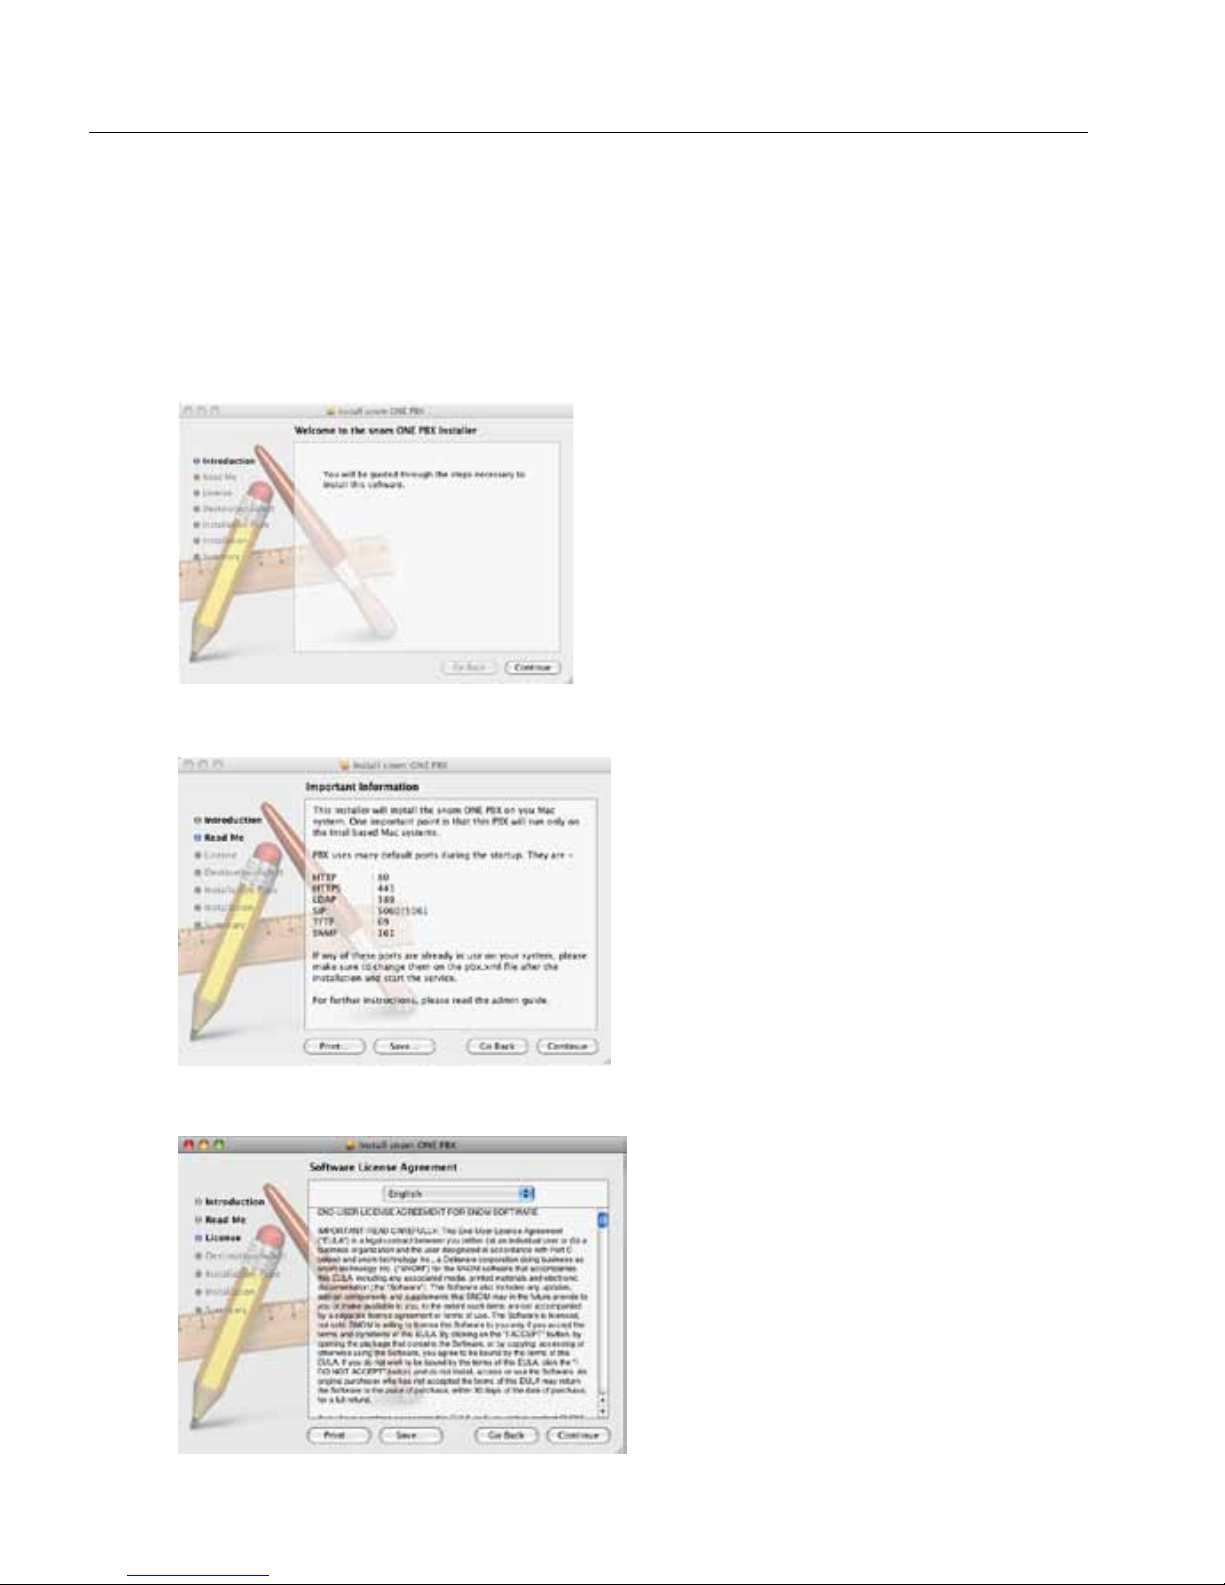
9. To continue the installation, click Agree.
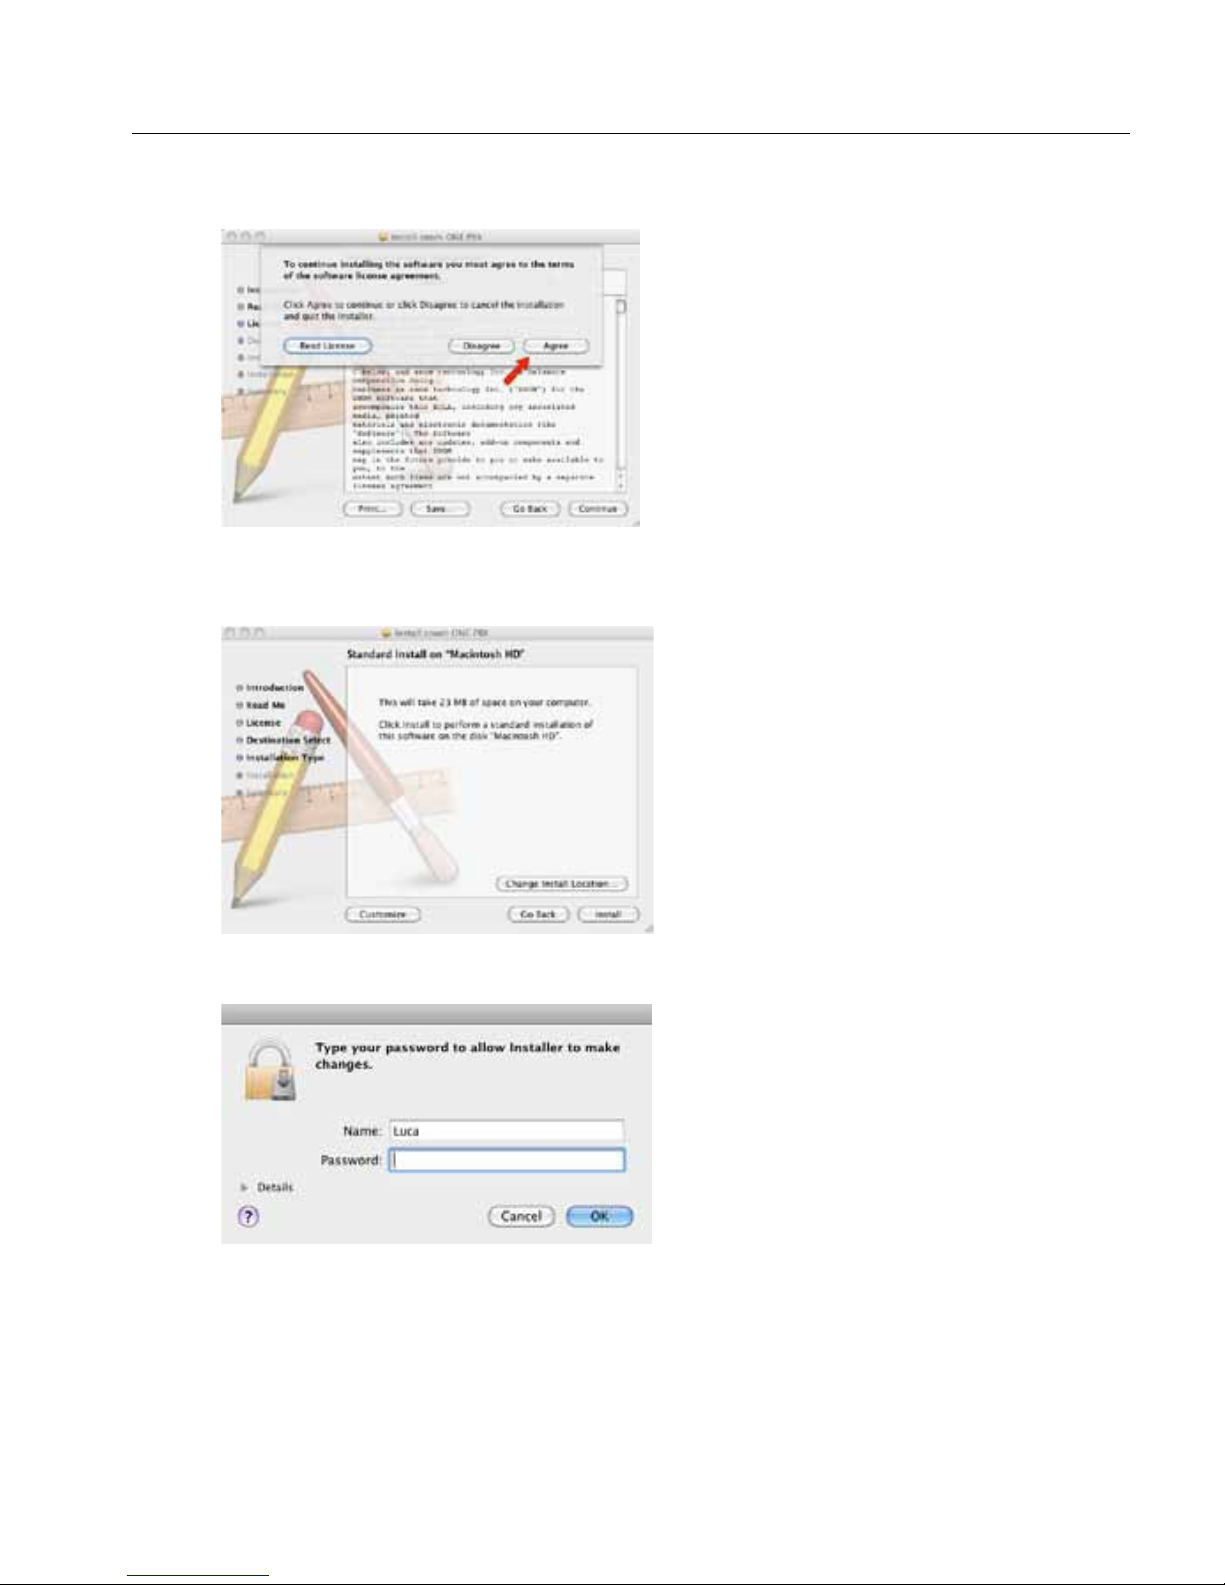
10. To install snom ONE to the default directory, click Install. To install it to a
new location, click Change Install Location and select a location.
11. At the password screen, enter your password and click OK.
Page 30
Deploying the snom ONE IP Telephone System
10
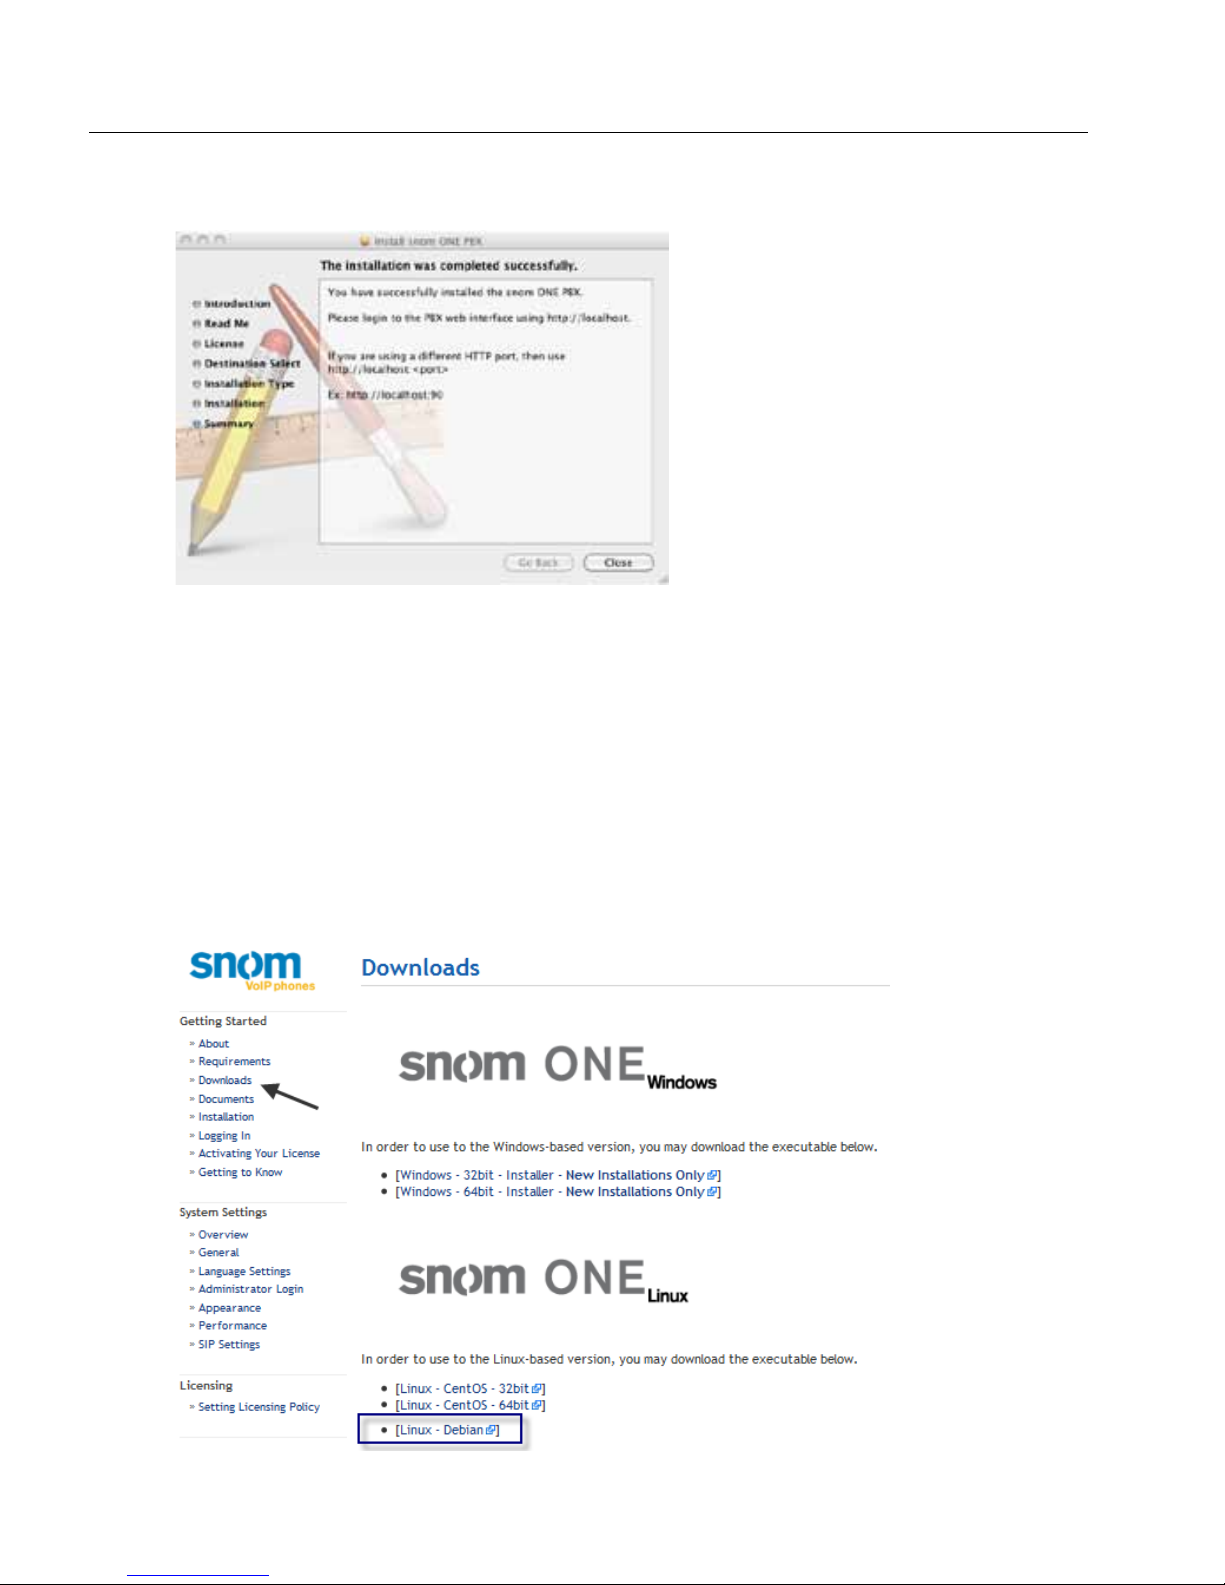
12. Click Close when the installation is complete.
To log into snom ONE, enter http://localhost into a web browser. If
you are using a dierent HTTP port, then enter localhost:<port> (e.g.,
localhost:80).
Linux Installations
Debian
1. Go to www.wiki.snomone.com, and click Downloads at the left.
Page 31

Chapter 1: Getting Started
11
2. Right-click Linux - Debian and copy the link location.
3. Download the le onto your Linux box using the following command:
wget <linklocation><previously saved>
For example:
wget http://downloads.snom.net/snomONE/debian/
snomone-debian4-2011-4.2.0.3958.deb
4. To install the software, execute the following command with root privileges:
dpkg -i snomone-debian4-2011-4.2.0.3958.deb
Page 32

Deploying the snom ONE IP Telephone System
12
e installed les are located in /usr/local/snomONE as shown below:
If you need to uninstall snom ONE, execute the following command:
apt-get remove snomone
Cent OS
1. Go to www.wiki.snomone.com, and click Downloads at the left.
Page 33

Chapter 1: Getting Started
13
2. Right-click Linux - CentOS and copy the link location.
3. Download the le onto your Linux box using the following command:
wget <linklocation><previously saved>
For example::
wget http://downloads.snom.net/snomONE/centos32/
snomone-CentOS5-2011-4.2.0.3958.bin
4. To make the le executable once the download is complete, enter the following
command:
chmod +x snomone-CentOS5-2011-4.2.0.3958.bin
5. To execute it, enter the following command:
./snomone-CentOS5-2011-4.2.0.3958.bin install
Page 34

Deploying the snom ONE IP Telephone System
14
e installed les are located in /usr/local/snomONE as shown below:
To uninstall the software, execute the following command:
./snomone-CentOS5-2011-4.2.0.3958.bin uninstall
Logging In
Once the software has been installed, the snom ONE will run as a service. To access
it, bring up a browser from the machine on which the software has been installed and
enter http://localhost.
Note: If there is a rewall running on the system, be sure that it allows access to HTTP
as well as the other ports of the system (see page 53).
Page 35

Chapter 1: Getting Started
15
e login screen shown below will be displayed:
Figure 1-2. Login Levels
Login Levels
snom ONE includes three main login levels—administrator, domain administrator,
and user— that provide access to dierent web interfaces. e login levels are shown in
Figure 1-2, and the web interfaces for each login type are shown in Figure 1-3:
System
Administrator
Domain
Administrator
User
Figure 1-3. snom ONE Web Interfaces
Page 36

Deploying the snom ONE IP Telephone System
16
e Automatic login type will default to the highest login level of the person logging
in. Administrators and domain administrators who want to log in as a user must enter
their extension number and choose User Login from the dropdown. Instructions for
each login type are detailed below.
Login Types
• For users:
— Account: Extension number (e.g., 509)
— Password: Extension password
— Login Type: Automatic
• For system administrators: If you are logging in as an administrator, use the
following account information to log in:
— Account: admin
— Password: e password eld is blank by default.
— Login Type: Automatic.
Note: When either a system or a domain administrator logs in as a user,
User Login must be selected from the dropdown.
• For domain administrators: If you are logging in as a domain administrator,
use the following account information to log in:
— Account: Extension number (e.g., 555)
— Password: Extension password
— Login Type: Automatic
• To access the WAC:
— Account: Extension number (e.g., 509)
— Password: Extension password
— Login Type: Console Login
Page 37

Chapter 1: Getting Started
17
Activating Your License
Your snom ONE license will need to be activated before you can register extensions
to the system. e activation code is located on the back cover of this book near the
Product key barcode. To activate your license, complete the following steps:
1. Click Admin.
2. Click the Settings tab, then click License as shown below:
3. Enter your activation code into the Code box (the activation code is located on
the back cover of this book near the Product key barcode).
Upgrading the Software
Software upgrades can be downloaded from wiki.snomone.com. To avoid interrupting calls, perform system upgrades during o hours. If you need to upgrade the system
when the system is active, you can send a page announcing the upgrade, or in cases
where only a few people are involved, barge into the call and inform the participants of
Page 38

Deploying the snom ONE IP Telephone System
18
the upgrade. e Maximum Number of Calls setting can also be used see restrict call
activity (see page 49). Congure this setting to 0 so that no new calls can be established on the system. To check the status of the system, navigate to Admin > Status >
Graphs. A busy system will show active calls on the system graphs.
Another way to determine how many active calls are on the system is to check the call
list (from the domain settings, click Status > Calls).
Manual Software Upgrades (Windows)
Manual upgrades can be done by replacing the pbxctrl.exe le. Before the upgrade, you might want to make a backup of the working directory in the event you
want to revert to the former software version.
1. Determine the version number of the current software by going to Admin >
Status.
Page 39

Chapter 1: Getting Started
19
2. Navigate to the working directory and rename the pbxctrl.exe le so that
it corresponds with the old version number (e.g., pbxctrl-2.0.3.1713).
Keep the le in the directory so that you can later determine which software
version is associated with which le. is step can be done while the system is
running.
3. Go to wiki.snom.com and download the new executable (click the Existing
Installations Only link).
4. Place the le into the snomONE working directory.
5. Rename the new le pbxctrl.exe.
6. Restart the system.
Mac OS Upgrades
To upgrade snom ONE on a MAC, navigate to wiki.snomone.com, select Downloads,
and follow the Mac OS installation instructions on page 7 of this manual. If for any
reason you see errors, follow the steps below:
1. Back up the working directory. is is where all the conguration les reside.
e default working directory is /usr/Applications/snom.
2. Manually delete /Library/snomone/*
3. Install the new version.
In some cases, the software may have installed successfully, but still the old version is
running. In such cases, stop the PBX, remove the link, then recreate it. Instructions are
detailed below:
Page 40

Deploying the snom ONE IP Telephone System
20
1. Stop the PBX using the following command:
sudo /Library/StartupItems/PBX/PBX stop
2. Remove the old link to pbxctrl-darwin9.0 by entering the following command:
rm pbxctrl-darwin9.0-<old le>
3. Recreate the link using the following command:
ln -s <new le> pbxctrl-darwin9.0
4. Restart the PBX using the following command:
sudo /Library/StartupItems/PBX/PBX start
Linux Upgrades
All conguration will be kept; however, we recommend you do a full backup of your
/usr/local/snomONE directory before doing the update.
Debian
1. Download the correct installer for your platform.
2. Execute the following command with root privileges:
dpkg -i snomone-debian4-2011-4.2.0.3958.deb
Cent OS
1. Download the correct installer for your platform.
2. Execute the following commands with root privileges:
chmod +x snomone-CentOS5-2011-4.2.0.3958.bin
./snomone-CentOS5-2011-4.2.0.3958.bin update
Restarting the System
Various system congurations require a system restart. You can do this by either restarting the computer or restarting the system. When restarting the system, use one of the
following methods.
Page 41

Chapter 1: Getting Started
21
Restarting From Windows (Service Control Manager)
1. Right-click My Computer.
2. Click Manage.
3. Click Service Applications, then click Services.
4. From the right-hand pane, click snomONE PBX.
5. Click Restart.
Page 42

Deploying the snom ONE IP Telephone System
22
.
Restarting From a Command Line
e system can be stopped and restarted from the command line:
•
net stop snomone
• net start snomone
Restarting From Mac OS
e simplest way to restart snom ONE from a Mac is to restart the Mac, but this may
not be desirable in many cases. In such cases, you can start and stop snom ONE from
the command line:
• /Library/StartupItems/snom/snomone stop
• /Library/StartupItems/snom/snomone start
Restarting From a Linux Environment
• /etc/init.d/snomONE restart
• /etc/init.d/snomONE stop
Manually Starting the Service
To manually start the system with logging:
1. Open a command prompt.
2. Go to the snom ONE working directory.
Page 43

Chapter 1: Getting Started
23
3. On Windows, enter .\pbxctrl.exe --dir . --no-daemon --log 9
4. On Linux, enter ./snomONE-ctrl --dir . --no-daemon --log 9
5. Press Enter.
is will force the service to start at log level 9, which will help you diagnose issues that
stop the service from fully initializing.
When the System Fails to Restart
When the system fails to start, the system attempts to write the error message to the
log le in accordance with the log_lename parameter contained in the pbx.xml
le; however, if the pbx.xml le has not been set up properly or if the system crashed
before the error message was written, the administrator will be unable to determine the
cause of the error.
A way around this issue is to rely on the pbx_startup_err.txt le. is le is located in the snom/snomONE folder and indicates why the system either crashed or did
not come up the last time an attempt was made. Following is a sample error message:
Page 44

Deploying the snom ONE IP Telephone System
24
Setting up the Log File
If you want to log the PBX messages (error or not), the log_lename parameter in
the pbx.xml le may need to be modied so that the value of the log_lename
parameter includes a dollar sign ($); otherwise, your system’s performance will become
unstable. e following sample shows a problematic value in the log_lename eld.
To change the value, open the pbx.xml le using an XML editor. Click in the text
and replace it with
log-$.txt.
Technical Support
Technical support for snom ONE is available through the wiki, the online help system,
and the forum. If you cannot nd an answer to your question through these sources,
you can also open a ticket with snom ONE support. Each support option is detailed
below.
Wiki
e view the knowledge data for snom ONE, go to wiki.snomone.com.
Page 45

Chapter 1: Getting Started
25
Online Help
To access online help, click the Help link at the top of each page.
Forums
To join the forum, go to forum.snom.com.
Submit a Ticket
To submit a ticket or view existing tickets, go to support.snom.com, and log in or register a new account:
Page 46

Deploying the snom ONE IP Telephone System
26
Documentation
e following typographic and usage conventions occur in this book:
Typeface Description Example
Bold Names of tabs, settings,
and buttons
Navigate to Admin > Settings > Log-
ging.
monospace
File and directory names,
examples of program
code, command strings,
and user input.
• e default recording name is
$r/$d/$t-$i-$u-$n.wav
• Place the le into the
recordings directory.
• A typical dial plan would include
the string ([0-9]*)@.*
as pattern and sip:\1@\
r;user=phone
as the
replacement.
monospace
italic
Names of parameters • Modify the cdr_eld_
separator
parameter.
Feedback and comments can be sent to feedback@snom.com.
Page 47

Part II
Administering
the System
Page 48

Part II—Administering the System
Page 49

Chapter
2
SYSTEM SETTINGS
e snom ONE telephone system encompasses three dierent access levels—administrator, domain administrator, and user—each providing a dierent web interface (depicted earlier on page 15). e system administrator has control of the entire system,
while the domain administrator has control of only the domain. is setup enables the
administrator to assign responsibilities related to user accounts and other non-systemrelated settings to another individual without compromising system congurations.
is chapter discusses administrator-level settings only. Congurations that can be
made by the domain administrator are discussed in Chapter 3.
Admin
User
Settings
Admin
Settings
Domain
Settings
User
User
Settings
Domain Admin
User
Settings
Domain
Settings
Figure 2-1. snom ONE Web Interfaces (Admin, Domain Admin, and User)
Page 50

Deploying the snom ONE IP Telephone System
30
To access the administrator settings:
1. Log in as admin. e following screen will be displayed.
.
2. Click Admin. e new screen includes the four tabs shown below. ese tabs
can be seen only by administrators.
Page 51

Chapter 2: System Settings
31
e settings associated with the administrator tabs are briey outlined in Figure 2-2 and
are described in more detail in Table 2-1.
Settings Domains Email Status
• General
• License
• Ports
• Logging
• Configuration
• Certificate
• MoH
• PnP
• Access
• User Page
Control
• General
• Messages
• Texts
• Translation
• pbx.companya.com
• pbx.companyb.com
• pbx.companyc.com
• General
• Graphs
• Logfile
• Call Log
• Calls
Web Page Control
• Templates
• Translation
• User Page
Control
Figure 2-2. Outline of Adminstrator Web Interface
e following table provides an overview of the various topics that are available from
the administrator’s view of the web interface. ese topics are discussed in more detail
throughout this chapter.
Table 2-1. Menu Tree of Administrator Tabs
Tab/Link Name Description
Settings
General
is page allows you to congure global system settings (IVR,
tone, and web languages), including performance, password,
and SIP settings.
License
is is where you activate your license code.
Ports
e ports that are used for the system are specied here.
Logging
e settings on this page are designed to help you debug issues.
Page 52

Deploying the snom ONE IP Telephone System
32
Tab/Link Name Description
Configuration
From this page, you can restore the system’s conguration,
including recordings and customized les in the tftp server
directory. You can also request conguration information
from a service provider, reload conguration les if you want
to change them without restarting the system, or schedule a
system reboot.
Certificate
From this page, you can install a certicate and private key to
ensure secure communication. e certicate will be checked
by clients that need to trust you. e private key will be used
for encrypting messages.
MoH
e settings on this page allow you to specify which music on
hold sources will be available on the system.
PnP
From this page, you can provide parameters to change the generation of plug and play les.
Access
You can control which IP addresses may access the snom ONE
service here.
Domains
From the Domains tab, the administrator can view and edit the
domain.
Email
General
is page allows you to congure the mail client settings that
will be used by the system when sending out emails.
Messages
e settings on this page allow you to specify which events warrant an email notication and who should receive that notication. Examples include call rejection due to CPU load and call
disconnection because of one-way audio.
Web Page Control
Templates
is page allows you to change the look and feel of the PBX
web pages. It also allows you to change the various email templates, phone conguration templates, style sheets, etc.
Translation
is page allows you to change the translation of text that is
used in various places throughout the web interface.
Page 53

Chapter 2: System Settings
33
Tab/Link Name Description
User Page
Control
is page lets you control which settings will be displayed on
the user’s web interface.
Status
General
is page shows you the status of your system (e.g., the release
of software you are running, the type of software, the expiration
date, etc.).
Graphs
is page displays a graphical representation of CPU usage,
current calls and registrations, and the MOS for extension and
trunk calls.
Logfile
is page displays SIP messages, which can be used for troubleshooting.
Call Log
A list of calls that have been made through the system is displayed.
Calls
A list of active calls is displayed.
Directory Structure
Directory Tree
While most of the system settings can be congured from the web interface, the administrator will need to access the le system at times. is section provides a brief overview
of the les that are part of the system and explains why you may need to access them.
All les related to the system are located in C:\Program Files\snom\snomONE,
which is the system’s default working directory. e main program that runs the
software is pbxctrl.exe, and the global conguration le is pbx.xml (Figure 2-3).
e folders within the snomONE directory contain les that hold information about
accounts, trunks, audio prompts, features, and many other parts of the system. e
majority of folders are composed during installation. However, a few folders (e.g.,
cdre, cdri, cdrt) are composed only after the phone communicates with the system
(i.e., once a call is made or a star code is used).
Page 54

Deploying the snom ONE IP Telephone System
34
Figure 2-3. snom ONE Directory Structure
Global Configuration File
Some settings cannot be changed via the web interface. Such settings must be modied
via the global conguration le (Figure 2-3), a standard XML le that is encoded in
UTF-8. Unlike the majority of les that can be modied through the web interface, the
global conguration le contains many hidden settings which cannot be changed this
way. Changes to this le must be made through either the XML le or by handcrafting
a URL that contains the change. With either method, the three important components
are the address of the snom ONE system, the name of the setting, and the value. In the
sample URL shown below, the address is pbx, the setting is setting, and the value is
being changed to 123.
Important: Always make a backup before modifying the le!
http://pbx/reg_status.htm?save=save&setting=123
Once the URL is set, press Enter. is is equivalent to pressing the Save button when
in admin mode in the web interface.
Page 55

Chapter 2: System Settings
35
A typical use case for modifying the global conguration le would be to change the
format of CDRs (applicable only for CDRs that are exported via simple TCP). To
change the CDR format of a system running on a localhost, you would use something
similar to
http://localhost/reg_status.htm?save=save&cdr_format=$w$5d$25
m$2o$20F$20T$20R$20r$15c$20f$15v
where cdr_format is the parameter.
Caution: e above link will change your CDR format if you execute it while the system is running on the localhost!
Note: If you want a specic delimiter between the elds, use a comma (e.g., $w,$5d,$
25m,$2o,$20F,$20T,$20R,$20r,$15c,$20f,$15v
). Be careful when choosing
a delimiter. If the names or URIs contain those characters, there will be a conict.
Folder Overview
Table 2-2 lists the folders that are located in snom/snomONE:
Table 2-2. Folder Details
Folder Name Contents
accesslist
IP addresses that have been blocked from accessing the system
acds
Account information about each agent group
adrbook
Contacts that have been added to the domain address book
attendants
Account information about each auto attendant
audio_en
Audio prompts for auto attendant, IVR, etc., and ring tones
audio_moh
Music on hold and universal tones like ringback
button_lists
Button proles that are on the domain
buttons
Individual buttons that are part of the button proles
callingcards
Account information about each calling card
cdr
CSV CDRs, if any exist
cdre*
CDRs that contain information about the extension
cdri*
CDRs that indicate the role played by the IVR
cdrt*
CDRs that contain information about the trunk
Page 56

Deploying the snom ONE IP Telephone System
36
Folder Name Contents
certificates
Certicates being used by the system.
colines
Central oce lines on the trunk
conferences
Account information about conference accounts
dial_plan
Dial plans that are on the domain
dial_plan_entry
Individual pattern and replacement values for each dial plan
domain_alias
Information about the domain when it is associated with an alias
domains
Information about the current state of the domain
email_templates
Custom email templates
extensions
Information about each extension (name, number, MAC, etc.)
generated**
Files that are generated from templates that exist within the
system binary
hoots
Multicast paging information
html
Customized HTML les
hunts
Account information about hunt group accounts
ivrnodes
Information about each IVR node account
messages
Voicemail messages
mohs
Available music on hold sources
pnp_parms
Conguration les that are involved in plug and play
recordings
Recorded calls and greetings
registrations
Static registrations
schedules
User-created conferences
srvflags
Account information about service ag accounts
tftp
Firmware and/or provisioning les for the phones
trunks
Information about each trunk on the system
user_alias
Information about each account associated with an alias
users
Information about each account (extension, auto attendant, etc.)
wipers
Conference recordings
* e cdre, cdri, and cdrt folders are generated after the phone contacts the system.
** e generated folder is created when the phone contacts the system for its conguration les during plug and play.
Page 57

Chapter 2: System Settings
37
Folder Details
Each folder in the snomONE directory contains a list of XML les similar to the following:
Each XML document reects various XML constructs and concepts:
Each folder in the snomONE directory is detailed below.
• accesslist—e accesslist folder contains IP addresses that have
been blocked from accessing the snom ONE service. IP addresses can be
blocked/unblocked by the administrator in Admin > Settings > Access List.
• acds—e acds folder contains an XML le for each agent group. Each
le includes the possible parameters for the account and any values assigned to
those parameters.
• adrbook—e adrbook folder contains contacts that have been added to
the domain address book. Each contact has a corresponding XML le.
Page 58

Deploying the snom ONE IP Telephone System
38
• attendants—e attendants folder contains an XML le for each auto
attendant. Each le includes the possible parameters for the account and any
values assigned to those parameters.
• audio_*—e audio_* directory contains audio prompts that are used by
the auto attendant and IVR node. ese prompts aect the language settings
that are available from the web interface (see page 43). e les within the
directory contain many types of prompts. Following is a summation of the
main prexes.
Prefix Description
aa-
Auto attendant
bi-
Built-in numbers
co-
Conference
code-
Feature-code related
ex-
Extension-related
mb-
Mailbox
pb-
ACD-related
wk-
Time-related
Note 1: e directory sux corresponds with the language of the prompts
themselves (i.e., English prompts are contained in
audio_en). See page
321 for instructions on installing audio prompts for additional languages.
Note 2: e ringback.wav and busy.wav les are also included in this
directory. ese les inuence the ringback and busy tones that a caller hears
during voicemail prompts and IVR interaction (see page 43 for more on
tone language).
• audio_moh—e audio_moh folder contains DTMF tones and music on
hold sources.
• button_lists—e button_lists folder contains the button proles
that are available on the domain.
• buttons—e buttons folder contains the types of buttons (e.g., private,
speed dial, DND) that have been set in the button proles.
Page 59

Chapter 2: System Settings
39
• callingcards—e callingcard folder contains an XML le for each
calling card account. Each le includes the possible parameters for the account and any values assigned to those parameters.
• cdr—e cdr folder contains the CSV CDRs, if there are any.
• cdre—e cdre folder contains CDRs that hold extension-related informa-
tion. A CDR is generated for each call.
• cdri—e cdri folder contains CDRs that hold IVR-related information.
A CDR is generated for each call.
Page 60

Deploying the snom ONE IP Telephone System
40
• cdrt—e cdrt folder contains CDRs that hold trunk-related information.
A CDR is generated for each call.
• colines—e colines folder contains information about co-lines that are
created on the system.
• conferences—e conferences folder contains an XML le for each
conference account. Each le includes the possible parameters for the account
and any values assigned to those parameters.
• dial_plan—e dial_plan folder contains an XML le for each dial
plan on the system.
• dial_plan_entry—e dial_plan_entry folder contains the pattern
and replacement values for each entry in the dial plan.
• domain_alias—e domain_alias folder contains the alias name of
each domain. Each alias has an XML le.
• domains—e domains folder contains details about the domain, such as
star codes, password, and PIN requirements.
• email_templates—e email_templates folder contains customized
email templates.
Page 61

Chapter 2: System Settings
41
• extensions—e extensions folder contains an XML le for each ex-
tension. Each le includes the possible parameters for the extension and any
values assigned to those parameters.
• hoots—e hoots folder contains an XML le for each paging account.
Each le includes the possible parameters for the paging account and any
values assigned to those parameters.
• html—e html folder is used for customizing conguration les, such as
ringtones.xml and pnp.xml. You can download these les from
wiki.snomone.com and then place them into the html folder. Once the
snom ONE is restarted, the new congurations will take eect.
• hunts—e hunts folder contains an XML le for each hunt group. Each
le includes the possible parameters for the account and any values assigned to
those parameters.
• ivrnodes—e ivrnodes folder contains the details of all IVR node
accounts. Each le includes the possible parameters for the account and any
values assigned to those parameters.
• messages—e messages folder contains voicemail messages.
• mohs—e mohs folder contains a WAV le for the sources of music on hold
that are available on the system.
• pnp_parms—e pnp_parms folder contains all conguration les that are
involved in plug and play.
• recordings—e recordings folder contains a WAV le for all greetings
and recordings, whether created for personal or system use (e.g., auto attendants, agent groups, and hunt groups). See Chapter 18 for more information
on recordings.
• registrations—e registrations folder is needed for the index le.
• schedules—e schedules folder contains conferences that were created
by users.
• srvags—e srvags folder contains an XML le for each service ag
account. Each le includes the possible parameters for the account and any
values assigned to those parameters.
Page 62

Deploying the snom ONE IP Telephone System
42
• tftp—e tftp folder can be used for customizing plug and play. For
example, placing the
snom_320_custom.xml le into the tftp folder will
provide new settings for the phone.
•
trunks—e trunks folder contains an XML les for each trunk. Each
le includes the possible parameters for the trunk and any values assigned to
those parameters.
• user_alias—e user_alias folder contains an XML le for every alias
name that is associated with an account (a DID number is considered an
alias).
•
users—e users folder contains an XML le for every account on the
system (DIDs are not considered a separate account).
•
wipers—e wipers folder contains conference recordings.
Configuring System Settings
is section describes the general administrator settings that are located in Admin >
Settings on the web interface. (You must be logged in as administrator.)
General
• System Name: is eld allows the administrator to set a name for the sys-
tem. e name is used in several places to identify the system. For example,
when the system sends out emails with system performance information, the
system name will be placed into the subject line of the e-mail.
Page 63

Chapter 2: System Settings
43
e next four settings pertain to language and time zone. e settings made here by
the administrator can be overridden by the domain administrator.
• Default IVR Language: is setting represents the language that is used for
voicemail and IVR prompts. Only U.S.-English prompts are included in the
installer, but additional languages can be installed. See “Audio Prompts” in
Chapter 18 for more information on audio prompts and downloading languages.
• Default Tone Language: is setting allows you to control the ringback and
busy tones that a caller hears during voicemail prompts and IVR interaction.
e les that inuence this setting are ringback.wav and busy.wav.
ese les are located in the audio_* directory. e * represents a language
identier code (see Table 18-5 for a list of the languages that are supported
and their corresponding language identier codes).
• Default Web Language: is setting controls the language used on the web
interface. e le that inuences this setting is lang.*.xml, where * represents a language identier code (see Table 18-5 for a list of the languages that
are supported and their corresponding language identier codes).
• Time Zone: e Time Zone setting is used to set the local time zone. It in-
uences the time that appears on a user’s mailbox messages, telephone display,
and voicemail. e system is capable of dealing with several time zones at
once, making it possible for every user to select his or her own time zone.
Page 64

Deploying the snom ONE IP Telephone System
44
Administrator Login
e system administrator’s login must be protected at all times, so it is imperative that a
high-security password be used (see the Password Strength setting on page 45). e
password is stored in a hashed format and cannot be read from the global conguration
le.
• Username: is eld sets the administrator’s user name. By default, the user
name is admin, but it can be changed and we recommend doing so.
• Password: is eld sets the password for the user name from the previous
setting. By default, no password has been set, so be sure to set one. is password can be reset in the event it gets lost (see instructions below).
Resetting the Admin Password if Lost
To reset a lost password, you will need to remove the existing password from the global
conguration le (from the pw_pass parameter) and then enter a new one through
the web interface. is can be done in Notepad. Instructions are provided below:
1. From a text editor, open the root le (pbx.xml). e le path is shown below:
Page 65

Chapter 2: System Settings
45
2. Search for the <pw_pass> element tag.
3. Delete the password. (If no text appears between the element tags, then the
password eld is empty.)
4. Save the le.
5. Restart the system.
6. Set a new password through the web interface (Admin > Settings > General).
Appearance
• Web Session Timeout (s): is eld determines the length of time a web
session will stay active before it times out. e duration is set in seconds, and
the default value is 3600 (1hour). Increase or decrease this setting depending
on whether you want the system to log you o after a certain period of time.
Once timed out, the main login screen will be displayed.
• Password Strength: is eld is used to specify the types of passwords that
are acceptable. e default is “Accept All Passwords,” but it is advisable to
require medium or high-security passwords. Users should be encouraged to
Page 66

Deploying the snom ONE IP Telephone System
46
avoid passwords that are dictionary words and to instead create passwords that
are more challenging. A combination of letters, digits, and symbols is recommended.
— Accept all Passwords: All passwords will be accepted.
— Medium Security: e score must be 120 or higher (see Table 2-3).
— High Security: e score must be 200 or higher (see Table 2-3).
Note: Beginning with Release 1.1, snom ONE replaces weak passwords with
random passwords. e administrator can check the prov_pass parameter
in the domain XML le (e.g., domain/1.xml) to determine which password was assigned during plug and play.
Table 2-3. Password Scoring Method
Character Type Points
Digits 10
Upper/lowercase letters 26
Symbol 28
• Default CDR listing size: A Call Detail Record (CDR) is a record that is
produced by the system and contains the details of calls that have terminated
on the system. CDRs include the date and time the call started, the number
that made the call, the number that received the call, and the call duration.
Use this eld to limit the number of CDRs that will be displayed in the web
interface (CDRs can be memory consuming). e default is 30 CDRs. For
more information on CDRs, see Chapter 22.
• Keep CDR Duration: is setting denes the length of time CDRs are kept
on the le system. CDRs can consume large amounts of disk space, so be careful when setting this eld. If too many CDRs are on a busy system, the system
will not start. e default is 7 days. e duration can be expressed in various
time units:
— Seconds: Enter an
s after the number (e.g., 60s for 60 seconds)
— Minutes: Enter an
m after the number (e.g., 60m for 60 minutes)
— Hours: Enter an h after the number (e.g., 24h for 24 hours)
Page 67

Chapter 2: System Settings
47
— Days: Enter a d after the number (e.g., 7d for 7 days)
• SOAP Trusted IP: SOAP (Simple Object Access Protocol) is an XML
message-based protocol specication that is used to allow computers to talk
to each other over a network such as the Internet, typically as part of a Web
service. SOAP can be used to pass almost any type of data between two
applications. Because it is based on XML, SOAP is language- and platformindependent. e two applications could be written in dierent languages and
could run on dierent operating systems. SOAP is often used to make Remote
Procedure Calls (RPCs). When used to encode RPCs, SOAP is used as the
request/response protocol. See Chapter 14 for a sample SOAP message.
e SOAP Trusted IP eld controls a SOAP request coming from random
addresses and is available only if the license key contains a SOAP ag. Use this
eld to specify the IP address or the host names that are permitted to make
SOAP requests to the system (i.e., management system). If you want to allow
multiple systems to send SOAP requests, use a space to separate the entries.
• CDR URL: e CDR URL eld controls where the CDRs are written. e
system can write CDRs to a SOAP destination and to a CSV le. (e default
separator for the values is a comma; however, it can be changed by modifying
the cdr_eld_separator parameter.) To populate the CDR URL eld,
use the syntax shown in Table 2-4. CDRs can be viewed only after they have
been collected and organized through an external call accounting application.
Table 2-4. Syntax Used in CDR URLs
Format CDR URL Syntax Description of Syntax
ASCII
cdr:192.168.1.2:10000
■ 192.168.1.2 is the IP address
■ 10000 is the TCP port of the
CDR server
CSV
le:disk
Disk can be any name, as it is not
used by the program anyway.
Email
mailto:name@company.com
• Record Location: is eld determines where system-initiated recordings will
be stored on the system. By default, $r/$o/$a/$d-$t-$i-$n.wav is the
Page 68

Deploying the snom ONE IP Telephone System
48
string used in this eld. For more information about recording calls and how
to create a string for the Record Location eld, see page 315294.
• Compress Recording: e system will compress recordings when this setting
is enabled. Otherwise, recordings will be saved as 16 bits/sample.
• Hide aliased rows under domains page: is setting allows you to control
whether the alias account of your domain will be displayed on the Domains
page. When this setting is set to No, the list of domains will include the alias
in addition to the primary domain, which may be confusing since it appears
that more domains are on the system than there actually are. When this setting is set to Yes, only the primary domain(s) will be displayed.
Before (set to No):
After (set to Yes):
Performance
From this section, you can set performance-related settings.
Page 69

Chapter 2: System Settings
49
• Maximum Number of Calls: is setting denes the number of simultane-
ous calls allowed by the system. Because every call requires a certain portion
of the available CPU, allowing too many calls will aect the quality of all
ongoing calls. By limiting the number of calls on the CPU, you can reject calls
that would otherwise potentially degrade overall performance. On modern
PCs, 100 or more calls can run on one computer; however, on an embedded
system, you will probably have much less CPU power and thereby increase the
probability of running out of CPU power if you allow that many calls. If this
eld is left blank, the key in the system will limit the calls, or the CPU limitation, when reached, will limit the calls.
• Processor Anity Mask: is eld allows the administrator to assign a
particular CPU to the pbxctrl system process. When using a multiple-core
CPU, the operating system has to assign processes to processors. By default,
the operating system tries to balance out the load so that the overall system
performance is as fast as possible. However, the disadvantage with this approach is that the whole process gets stuck for some time while moving the
processes from one CPU to another. If during that time the CPU should play
out media, it will come across as stuttering and be perceived as jitter coming
from the system. In order to avoid this problem, bind the pbxctrl to one xed
CPU. Depending on the operating system, you can do this manually or you
can ask the system processes to do this during startup. Changes to this eld
require a system restart.
• Maximum Duration of Call Recording: is setting allows you to establish
an upper limit on call recordings, which is important since large recordings
can cause problems with system performance. To further conserve on disk
space, you can limit the number of messages that can be stored in a user’s
voicemail box (see the Voicemail Size setting on page 98).
• Max. size of a conguration backup le: is setting allows you to establish
the maximum size, in bytes, of the backup le. e default is 1 MB. If your
system has a lot of data to be backed up, increase this value. e backup feature through the web interface is used mostly in the appliances (in embedded
systems where the le access is primitive). On other systems, it is advisable to
use the OS le manager to do the backup.
Page 70

Deploying the snom ONE IP Telephone System
50
• Max. number of concurrent registrations per extension: is setting con-
trols how many user agents (i.e., phones) can be registered against an extension. is feature is useful if you want to restrict the number of phones that
can be registered to an extension. If this eld is left blank, the extension will
have no limit.
• Minimum Registration Time (s): In a SIP environment, the registrar deter-
mines how long a user agent may be registered. Short registration times have
a negative impact on the performance; however, it is critical that user agents
stabilize quickly once they’ve lost their connection to the system. is setting
denes the lower limit for the registration time. e default is 30 seconds.
• Maximum Registration Time (s): is setting is used to dene the upper
limit for the registration time. e default value is 360 seconds. See also Appendix B, “SIP Overview.”
• UDP NAT Refresh (s): If the registering user agent is behind NAT, the
system uses this setting to control the registration. e system registers agents
that use the UDP transport layer only for a short time so that the user agents
will re-register quickly and keep the NAT bindings alive. Typically, the settings
for UDP should be from 15 to 45 seconds since most NAT routers close ports
after 60 seconds of inactivity. e default for this setting is 30 seconds.
• TCP/TLS NAT Refresh (s): is is similar to the UDP NAT refresh setting.
Since TCP/TLS connections do not need to refresh the bindings as often, a
value of a few minutes is okay in most situations. e default is set to 180
seconds (3 minutes).
• Maximum call duration: is setting establishes an upper limit for the call
duration. By default, the setting is 2 hours (7200 seconds), but you can increase this setting if you lean toward longer phone calls. is setting is crucial
for keeping your call list clean; for example, if one mailbox talks to another
mailbox or if a call does not drop properly, the system can automatically clean
this up.
• Maximum ring duration (s): is setting determines the length of time the
system will wait before it disconnects a call.
Page 71

Chapter 2: System Settings
51
SIP Settings
is section denes SIP-related settings.
• Use Short SIP Headers: Some SIP headers have a short form (e.g., the From
header gets shortened to F, the To header becomes T, and Via becomes V).
Short headers have the advantage of saving space in the messages, reducing
overall probability of running into problems with maximum message size in
UDP. Although it is quite simple to support this, some devices do not support short headers. For this reason, the system oers both short and long. To
maximize interoperability, keep the default value (long). If you are running
into UDP packet fragmentation problems (message size above 1492 bytes),
switch to the short header form.
• Listen to sip.mcast.net: SIP has its own multicast group according to
RFC3261. A SIP device usually knows where to send requests, but during
bootup and conguration, a user agent might want to locate the system with
a multicast request. If this setting is turned on and you are using user agents
with the multicast detection feature, you can just plug the devices into the
network and they will get their conguration information automatically from
the system if the system PnP settings have been congured (see Chapter 20).
Changing the Listen to sip.mcast.net setting requires a system restart.
• Allow domain admin to change trunks: In hosted environments, the service
provider might want to set up the trunks and then hide them from domain
administrators. When this feature is set to No, domain administrators will be
unable to edit or view trunks.
Page 72

Deploying the snom ONE IP Telephone System
52
• Allow domain admin to change dial plans: is feature allows the adminis-
trator to hide all dial plans from domain administrators. When this feature is
set to No, domain administrators will be unable to change or view dial plans.
• Allow domain admin to create or change accounts: If this feature is set to
No, domain administrators cannot create, change, or view accounts.
• Allow domain admin to create or change ANI: If this feature is set to No,
domain administrators cannot create or change the ANI (automatic number
identication). e ANI is used when the system sends an outbound call on a
trunk (see page 95 for more information on the default ANI).
• Loopback detection: is setting applies only to multi-domain environ-
ments (for single-domain environments, leave this setting on). When the
system starts a call, that same call may come back to the system and create a
loop. is may happen if the call is made to another caller on the system in
a multi-tenant environment. is is a dangerous situation because it might
repeatedly initiate the same call, ending up in many calls that take a lot of resources. erefore, the system must detect such a loop. In environments where
an external SIP proxy routes the call from one snom ONE domain to another,
a simple loopback detection that is based on the call-ID is too pessimistic.
erefore, in such environments, you might want to allow these calls and turn
the loopback detection o (see the Try Loopback setting on page 155).
• Inband DTMF detection: When a user presses a key on the telephone, the
system must be able to understand the action. In telephony systems, this
mechanism is typically called DTMF. In VoIP, DTMF is usually sent “out of
band” (RFC 2833) because it allows the system to easily detect the tones in a
fail-safe manner. However, not all devices support this method, and when this
is the case, the system must decode and analyze the media stream and perform
this detection. Because this is erroneous and costs additional CPU performance, it is strongly recommended that you not use this feature and instead
replace devices which do not support the out-of-band method with devices
that do. In-band and out-of-band can be compared to a T1 line that uses inband signalling and a PRI line that uses out-of-band signalling.
• Remote SIP management: is setting allows the provider to send com-
mands to the system (for example, for rereading the conguration). It is useful
in environments where the service provider controls the system from a central-
Page 73

Chapter 2: System Settings
53
ized location. By default, this setting is o, but if your network is in such an
environment, this setting needs to be activated.
Ports
e Ports page allows you to control which networking resources the system will
utilize when communicating with the outside IP world. When specifying ports, list
the ports that you may bind to, either specifying a port number or explicitly specifying the IP address and the port, separated by a colon (e.g., 192.168.1.2:8080). If
you are binding to IPv6 addresses, place square brackets around the IP address, e.g.,
[2001:db8::4]:5060. If you are specifying only the port number, the system will
bind to all IPv4 and IPv6 addresses on the system. If you want to bind only to IPv4
sockets, use the form 0.0.0.0:5060. If you want to bind only to IPv6 sockets, you
can use [::]:5060. In general, you may bind to more than one socket; just separate
the addresses by spaces. If you do not want to use the service, leave the eld empty. If
you change a port binding, you will need to restart the snom ONE service. We support
the default SIP port.
* Changes to HTTP and SIP settings require a system restart.
HTTP Ports
e HTTP and HTTPS ports are used to communicate between the built-in web
server and the web browser (snom ONE does not rely on IIS or Apache for its web
Page 74

Deploying the snom ONE IP Telephone System
54
interface). e HTTP port is used for insecure, but lightweight, communication. e
HTTPS port is used for communication that is secure, but a bit more expensive.
If you cannot reach the system on any port, change the ip_http_port and ip_
https_port
parameters in the global conguration le (the defaults are shown
below). If you are running another service on your host or if you want to gain some
additional security, you may change these ports to any other available port. e system
will fail to start if it cannot bind to the port.
• HTTP Port: e default HTTP port is 80.
• HTTPS port: e default HTTPS port is 443.
SIP Ports
In this section, you can provide specic port information for the SIP protocol. SIP can
run on UDP, TCP, or TLS. TCP and UDP send the SIP packets unencrypted and are
therefore considered insecure. TLS is used for secure SIP communication since it encrypts the SIP signalling packets much like HTTPS encrypts HTTP trac. e default
SIP port per RFC 3261 is 5060 for SIP and 5061 for SIPS. e snom ONE software is
listening for and transmitting SIP requests and responses on these ports.
* Changes to HTTP and SIP settings require a system restart.
• SIP UDP Ports: If you are using SIP over UDP, you need to set this eld.
e default port for UDP is
5060, but multiple ports are permitted (e.g.,
5060 5064).
• SIP TCP Ports: If you are using SIP over TCP, you need to set this eld. e
default port for TCP is
5060.
Page 75

Chapter 2: System Settings
55
• SIP TLS Ports: If you are using SIP over TLS (Transport Layer Security - Se-
curity over TCP), you need to set this eld. e default port for TLS is 5061.
• Maximum number of SIP connections per second: is setting species
the number of SIP conversations the system will respond to in 1 second. is
setting is useful for deterring against SIP attacks.
• Maximum number of SIP connections: is setting limits the total number
of SIP connections the system will support. is setting must be congured in
busy environments where resource limitation is an issue.
• SIP IP Replacement List: is setting applies to a system that is used
in a DMZ zone with NAT (e.g., for remote phones that are connected to
a system which is not on a public IP address). In this case, when the system builds the remote SIP packets, it will use the public IP address of the
router. e setting should include a list of local IP addresses and their replacements (e.g., 192.168.1.0/255.255.255.0/192.168.1.1
0.0.0.0/0.0.0.0/75.150.87.9
). Whenever the system nds a local
address in the list, it replaces the local address with the remote address, so the
SIP messages from the system will look as if they were sent from the replaced
IP address. e format of the list is LocalAddress/RemoteAddress [LAdr/
RAdr]. Both the LAdr and the RAdr must be an IPv4 or IPv6 address (e.g.,
192.168.1.2/203.4.5.12). DNS addresses are not resolved here.
75.150.87.9
Internet
DMZ
75.150.87.9:5060, 1000-10999
192.168.1.1
192.168.0.7
Firewall/
router
• IP Routing List: e IP Routing List setting is used to override the operat-
ing system IP routing table and is linked to the routing table (this setting will
Page 76

Deploying the snom ONE IP Telephone System
56
be consulted by the system before consulting/using the operating system).
Whenever the system wants to nd the IP address that is being used when
sending a SIP packet, it steps through the list and looks for a match (using
the netmask mask) to a destination address (DAdr). If a match is found, the
system uses the provided IP address (LAdr). e mask must be in the form of
an IP address, e.g., 255.255.255.0.
RTP Ports
e Real Time Protocol (RTP) ports are used for sending and receiving media. Be sure
to specify a reasonable port range so that you have enough ports for all open calls. A
port range of 100 ports is not unusual.
Most user agents send RTP media data from the same port on which they expect to receive data. is is useful when a user agent sends media from behind NAT. e system
can use this mechanism to establish a two-way media path, even if the user agent is not
able to determine its public IP address for media and is behind NAT.
• Port Range Start: is setting represents the starting RTP port that the sys-
tem will use for media sessions. If the system is behind a rewall, these ports
should be open.
• Port Range End: is setting represents the end RTP port that the system
will use for the media sessions. RTP uses UDP for transport, whereas SIP can
use UDP, TCP, and/or TLS.
Page 77

Chapter 2: System Settings
57
• Follow RTP: Some user agents use dierent ports for sending and receiv-
ing. Although they will not be able to operate behind NAT, they are within
the scope of the IETF standards. With this setting, these devices can be made
compatible. By default, this ag is set to on. If you have trouble with devices
that use dierent ports for sending and receiving, try turning this ag o. (If
this setting is already set to o and you are still having trouble, try turning it
on.) Some troublesome devices also have a ag that can be used to turn the
usage of dierent ports o.
is behavior can also be controlled on a trunk level, so if only a specic trunk
has this problem, use this setting only on the trunk level.
• Codec Preference: e Codec Preference setting allows you to select the
codecs that will be supported on the system. e codecs that are allowed on
the system are shown at the left. If you do not want to use a particular codec,
click the codec, then click Remove. is will move the codec to the right-side
selection box, removing it from use. e system comes with recommended
high-quality codecs like G.711 µ-law (0), G.711 A-law (8), G.722 (9), G.726
(2), or GSM 6.10 FullRate (3). Codecs can be changed without restarting the
service. G.729 is a royalty-based codec and requires a fee (it is not enabled by
default).
• Lock codec during conversation: In certain cases, the system can switch to a
common codec (advertised by both end devices) to avoid the transcoding during the call setup. Even though this is legal from the protocol’s point of view,
many devices still cannot change codecs midstream. To avoid this problem,
you must enable this feature.
Once this is set, the system will not switch the codec during the call setup.
is may introduce transcoding, which is a CPU-intensive job. Default is o.
• Packet length (in ms): is is the ptime parameter in the session descrip-
tion protocol (SDP). e default is 20 ms.
• Multicast IP Addresses: Set this to an IP address if you want the system to
send and receive multicast IP addresses on this network interface. If this is set
to 20 ms, then the system will send out packets every 20 ms, which equals 50
packets per second. If both sides of the call are set to dierent ptimes, then the
system will have to transcode them, which will degrade performance.
Page 78

Deploying the snom ONE IP Telephone System
58
• Bind to specic IP address (IPv4): e system listens to SIP requests that
are sent by the user agent from this IP address only. is is useful if you have a
dual NIC machine and want to listen to SIP requests only on one interface. If
this is left blank, then the system will listen to SIP requests on all interfaces it
sees in the machine.
• Bind to specic IP address (IPv6): e system listens to SIP requests that
are sent by the user agent from this IP address only.
SNMP
Simple Network Monitoring Protocol (SNMP) is used to poll the system for information. Table 2-5 lists the information that can be made available to an SNMP management tool.
• SNMP Port: e SNMP port setting denes the port on which the system
will listen for SNMP requests. By default, the port is 161.
• SNMP trusted addresses: is eld lists the IP addresses that may send
SNMP requests. If this setting is empty, the system will not accept any
SNMP requests. Whenever a request is rejected, the system writes a log message. is eld requires the IP address of the SNMP server.
• SNMP Community: An SNMP community is the group to which devices
and management stations running SNMP belong. If you would like to
change the community, you can do so from the web interface. It does not
require a restart of the service. SNMP default communities are private (write)
and public (read). e system, by default, is set to public.
Table 2-5. Available SMNP Sensors
OID Description Absolute Unit
1.3.6.1.4.1.25060.1.1 Call legs Yes Calls
1.3.6.1.4.1.25060.1.2 Registrations Yes Registrations
Page 79

Chapter 2: System Settings
59
OID Description Absolute Unit
1.3.6.1.4.1.25060.1.3 Messages Yes Minutes
1.3.6.1.4.1.25060.1.4 Call attempts No Calls
1.3.6.1.4.1.25060.1.5 Successful calls No Calls
1.3.6.1.4.1.25060.1.6 Media CPU load Yes Value 0..100
1.3.6.1.4.1.25060.1.7 Successful emails No Emails
1.3.6.1.4.1.25060.1.8 Unsuccessful emails No Emails
1.3.6.1.4.1.25060.1.9 Email alert ag Yes Value 0..1
1.3.6.1.4.1.25060.1.10 SIP received packets No Packets
1.3.6.1.4.1.25060.1.11 SIP sent packets No Packets
1.3.6.1.4.1.25060.1.12 Allocated memory Yes Bytes
1.3.6.1.4.1.25060.1.13 Calls Yes Calls
1.3.6.1.4.1.25060.1.14.x Trunk calls Yes Calls
1.3.6.1.4.1.25060.1.15.x Trunk status Yes SIP response code
1.3.6.1.4.1.25060.1.16 Uptime Yes Seconds
1.3.6.1.4.1.25060.1.17 Disconnects (no media) Yes Calls
1.3.6.1.4.1.25060.1.18 Disconnects (media
timeout)
Yes Calls
TFTP
e TFTP ports are used for provisioning purposes. Many SIP devices use TFTP for
automatic conguration.
• TFTP Port: e TFTP (Trivial File Transfer Protocol) port is on port 69 by
default. If your machine has multiple network interface controllers (NICs),
you may specify the IP address port to bind only to that port.
• Allow TFTP Write: Some devices write log les using TFTP, which can be
enabled with this feature; however, keep in mind that this feature enables users
to write les that aect other devices, and this may introduce system instability and security concerns. Per the example above, you can also bind to a private
IP address, which will make it more secure.
Page 80

Deploying the snom ONE IP Telephone System
60
• NTP Port: e system can act as an NTP (Network Time Protocol) server for
the network. If you want to run the NTP server on the system, use this eld
to provide a port number on which it can run. By default, the NTP Port eld
is blank so that the system doesn’t respond to NTP requests. e default port
is 123, so if you populate it and restart the service, the system will respond to
NTP. e phone gets its time from the NTP, so if the phone cannot reach the
Internet, then a local NTP server is necessary. A popular, publicly available
NTP server is pool.ntp.org.
LDAP
LDAP (Lightweight Directory Access Protocol) is an Internet protocol used to access directory type of information, such as address books. All snom phones support
LDAP, so users can query phone numbers by pressing the directory button of the
phone. LDAP makes it easier for companies to share a common directory.
• LDAP Port: Port 389 is the default port.
Logging
Logging is a powerful mechanism for tracking system activity. Once you have installed
the system, the logging feature allows you to see how it works and how the system interprets the input to the system.
Page 81

Chapter 2: System Settings
61
General Logging
• Log Level (0-9): is eld determines which log messages are included in the
log. e range is between 0 and 9. Level 0 will show you only critical messages, while level 9 will show you every available log messages of the system. Log
level 9 should be used only for troubleshooting, as it creates additional load
for the system and may generate extremely large log les.
• Log Length: is setting determines the length of the internal log message
buer and is used to show the log messages in the web interface.
• Log Filename: To request that the system write log messages to a lename,
specify that lename here. If you enter a dollar sign into the log lename
(highly recommended), the system will replace the dollar sign with the current
day and automatically generate a new le everyday. is will ensure that the
log les do not become too large over time. It is highly recommended that you
not log to a le without using the dollar sign. Also, be sure to delete old log
les from time to time so that your le system does not get overloaded with
too much logging information.
One of the rst log messages that you will see will be in the working directory.
If the Log Filename setting does not contain a path, the system will write the
log le to that directory. You can specify the directory during the installation
process.
Example: e setting log-$.txt will create a log le under the system
working directory with the name log-yyyy-mm-dd.txt, where yyyy is
Page 82

Deploying the snom ONE IP Telephone System
62
the year, mm is the month, and dd is the date. If you have multiple drives, it is
good practice to write the logs there (e.g., D:\logs).
Warning: Please note that using a log le without a dollar sign as part of the
name is a ticking time bomb. While the system may initially run ne, system
instability is likely to occur as disk space becomes consumed.
Warning: Be sure to lower the log level once the system is running, especially
when you write the log messages to a le. Sooner or later, you will get a hard
disk full error, which is a severe situation because the system will not be able
to save runtime data.
Specific Events
You can enable or disable logging on a subsystem level (available subsystems are shown
below):
• Log general events: ese events are of general interest, for example, informa-
tion about the working directory.
• Log SIP events: Events in this module relate to the SIP trac of the system.
• Log media events: e system reports events about media processing, for
example, a one-way audio RTP timeout.
• Log IVR events: is module logs events related to processing user input
(e.g., all DTMF events, including the auto attendant and the mailbox).
• Log email events: If you want to troubleshoot the email server interaction,
turn this module on so that you’ll see SMTP events.
• Log http events: is ag controls whether events in the internal HTTP
server should be logged.
• Log registration events: When a device registers or deregisters, it appears in
this module.
• Log SNMP events: SNMP events occur when an external SNMP agent
requests information from the system (see also page 58).
• Log trunk events: Log events are related to trunks (e.g., when a trunk regis-
ters for the rst time or when an inbound trunk calls).
Page 83

Chapter 2: System Settings
63
• Log SOAP events: is subsystem deals with SOAP input and output.
• Log TFTP and PnP events: is module includes events related to the
built-in TFTP server. It also includes information related to plug and play.
• Log TLS events: is module logs TLS-related messages in the log le.
• Analyze audio levels (CPU intense!): is feature measures the audio levels
on a call leg. e volume is measured in decibels (dB) relative to the maximum volume (0 dB is maximum loudness).
SIP Logging
Logging is important when tracking down problems. e settings on this page are designed to help you troubleshoot.
Page 84

Deploying the snom ONE IP Telephone System
64
When the system receives or sends a SIP packet, it determines whether the packet will
be logged and which log level the event will have.
• Log REGISTER: REGISTER packets deal with the registration of extensions
or trunks, which can generate a lot of trac. If you are not interested in the
registration trac, disable this setting (see Appendix B for more information
on SIP messages).
• Log SUBSCRIBE/NOTIFY: SUBSCRIBE/NOTIFY deals with message
waiting indications (MWIs), the LED state, and other used subscriptions.
• Log OPTIONS: OPTIONS can be used to keep the SIP connection alive.
ey are designed so that a user agent can see which options or methods the
other user agent supplies. OPTIONS allow you to view the full SIP messages
with all the SIP header information (when using log level 7).
• Log Other Messages (e.g., INVITE): All other packets usually belong to an
ongoing call (e.g., INVITE, CANCEL, ACK, BYE).
When you enable the logging for one of the previous categories, the SIP packets will be
logged on log level 7. If your log level is below 7, the packets won’t show up in your log.
• Log Watch List (IP): e watch list lters the SIP packets by IP address. is
feature is useful when you have a specic device that you want to watch in the
system’s log. Enter the IP addresses into this eld.
• Log Watch List: is setting denes the log level for the previous setting—
Log Watch List (IP). e log level for the watch list is independent of the log
level of the packets that are not on the list (and which are on level 7). is
makes is possible to lower the log level and show the SIP packets of a specic
device also on a lower log level.
Example: If you want to log SIP messages from 192.168.1.113 only, congure
the following settings:
— Log Watch List(IP): Set the IP address (e.g., 192.168.1.113).
— Log watch list: 7
— Log Level: 8
— Specic Events: Enable Log SIP events. is lters out all the events,
since they are set at 8 and log watch is set at 7.
Turn o everything under SIP Logging.
Page 85

Chapter 2: System Settings
65
Retrieving SIP logging
e SIP log is the most common logging that is requested. Use the following steps to
turn on SIP logging:
1. Navigate to Admin > Settings > Logging.
2. Set Log Level to 7.
3. Set Log Length to 300.
4. Under “Specic Events,” enable the following settings:
• Log general events
• Log SIP events
• Log trunk events
5. Under “SIP Logging,” enable Log Other Messages (e.g., INVITE).
6. Click Save.
7. Navigate to Admin > Status > Logle, and click Clear. is will clear the page.
8. Make the call.
9. Navigate to Admin > Status > Logle, and click Reload.
Page 86

Deploying the snom ONE IP Telephone System
66
Configuration
is section shows you how to save and restore the system conguration, as well as
load the conguration XML les. is will generate a complete backup of your system,
including all temporary les, recordings, TFTP server les, etc. You can even schedule
this task nightly so that you automatically have a fresh backup for disaster recovery.
Important: e backup from the web interface is designed for smaller systems. If the
working directory of the system is larger than 5 MB, it is best to use TAR or ZIP and
move the backup to another storage place.
Save/Restore a Backup
is backup will make a TAR backup of the whole conguration, including audio
recordings. Because the le might get potentially large, you should perform this action in times when there is not too much going on in the system. is will prevent you
from interfering with the service and will ensure that you get an integer snapshot of the
system state.
1. Use the “click here” link, as shown in the following image.
2. When prompted, save the le on the local computer.
Important: e size of the le is limited by the Max. size of a conguration backup
le setting (see page 49). If the TAR le exceeds the congured size, the backup will
fail and an empty le will be returned. erefore, be sure to check whether the le size
is okay after storing the backup. If there is a problem, consider making the le system
backup manually.
Page 87

Chapter 2: System Settings
67
To restore the backup
To restore a conguration, the le must be loaded through the web interface. As with
saving the conguration, this may be time-intensive, so be sure to do this when no calls
are on the system. e system restoral will rst erase your existing conguration, so
exercise caution with this step.
1. Click Browse to nd the le to be restored (the full path of the le is required).
is le is the one you backed up in the previous section.
2. Click Save to load the selected le. is will load the selected le, and the system will have the new conguration.
Warning: e Factory Reset button will load a default conguration le from the le
system. All data will be erased.
Note: e global parameter (max_tcp_length) can accommodate the large TAR
les. You will need to set this before running the backup/restore. Currently, this value is
in bytes, so you will need to provide a value similar to 384000000 (for 384 MB).
Request Configuration
e system may receive its conguration information from a service provider. Be especially careful when using this feature because it may overwrite your existing conguration without further warning. If you leave the URL empty, the system will use the default URL. Please note that your license key will be sent over the Internet (encrypted).
If you have a web service that generates congurations dynamically, you can request
the pull-down of a conguration from the web server. e system will initiate the web
request on its own. is feature is useful in large-scale installations (many systems running as CPE devices) that involve a central conguration management database.
Reload Configuration Files
Conguration les ringtones.xml and pnp.xml can be customized for your system. ese les can be downloaded from wiki.snomone.com and uploaded through
the Browse option shown below. You can also place the les into the html folder and
restart the system (downloads are available at wiki.snomone.com). See also “Customized Ringtones” on page 323.
Page 88

Deploying the snom ONE IP Telephone System
68
e les are detailed below:
• ringtones.xml: is le is used to describe the available Alert-Info or
Call-Info header that should be sent in the dierent Alert-Info head-
ers. Some phone vendors handle these headers dierently, and this le can be
used to address that.
• pnp.xml: is le is used to describe the les that are available for plug and
play. is le also denes various parameters for dierent phone models and
vendors (see Table 20-3).
Schedule a Reboot
To schedule software updates, you can request that the system reboot the server. (is
applies to non-Windows servers only.) Note that during a reboot, all services will be
shut down. You can schedule a restart on the next occasion, or you can instruct the
system to wait until midnight. In any case, the system will restart only if there is no call
active.
Page 89

Chapter 2: System Settings
69
Certificates
Digital certicates are electronic documents that are used to verify that the system you
are interacting with is legitimate. e PBX uses them in multiple ways:
• For securing the trac between the web browser and the web interface of the
system when HTTPS is used.
• For securing the SIP trac between the phone and the system’s signaling path
when TLS is used.
• For your email server when it requires TLS (e.g., gmail).
e system by default generates a certicate, referred to as a self-signed certicate. A
self-signed certicate is signed by its own creator and is responsible for verifying that
it is legitimate. While this provides a reasonable encryption of the trac, it does not
ensure that the client is really talking to the server, as third-party certicates do (i.e.,
it could also be talking to a person in the middle who is just relaying the trac). is
essentially means that the trac is no longer private, and since most Internet browsers are quite strict regarding certicate verication, the user must explicitly accept the
untrusted certicate. Also, some IP phones accept SIP trac only on connections that
have valid certicates. While the user of a web browser can just click and accept the
certicate, a user of a phone usually does not have that choice and the connection just
fails.
Certicates also allow you to defend your installation against DNS redirection attacks. For example, an attacker might get control over a DNS server (which you do not
operate) and redirect all requests to their server. Although the attacker might be able to
present the same certicate that you have, without the private key that you used when
requesting the certicate from the trusted third party, the attacker will be unable to
establish secure communication. is way, the user agent can determine whether the
host that has been contacted is really the desired host and can then decide to deny the
connection if the public and private keys do not match.
e system supports HTTPS, TLS, and SRTP, protocols which require a digital certicate and private key for secure communication (the private key will be used for encrypting messages). Certicates are usually used for web services; however, the same certicates can also be used for SIP services. e system can support multiple certicates,
which allows you to have a certicate for each domain.
Page 90

Deploying the snom ONE IP Telephone System
70
When using certicates on snom ONE, you can choose from the following four types:
1. Domain certicate chain + private key: While “Server certicate chain + private
key” is the default for the whole server (see below), the PBX can also present
domain-specic certicates that require that the client, at the beginning of the
session setup, tell the server which domains it wants to connect to. With this
type of certicate, the domain name must be in the certicate, as the PBX uses
it during the import process.
2. Server certicate chain + private key: e PBX also needs to present a certicate when it is being connected to. In this case, it must also have a private key
associated with it. e certicate portion may actually consist of a certicate
path so that the caller can verify where it comes from.
3. Trusted Root CA for server authentication: is certicate is used by the snom
ONE built-in web client when assessing whether or not it can trust the server it
is connecting to.
4. Trusted Root CA for client authentication: is certicate is used for client
certicate authentication and is needed essentially when a phone requests provisioning. is way, the PBX can be sure that an actual phone is downloading the
conguration and not a hacker using a web browser.
Getting a Valid Certificate
Buying a Certificate
When you buy a certicate, it must be known that you are really the one who is operating a server. Although the mechanisms for this process dier, all services require that
you pay for the service and that your web browser is already set up to trust the certicate authority. is mechanism is suitable if you are operating a public service where
it is not an option to load root certicates on many clients. You usually also need to
specify which IP addresses are using this certicate for the service.
Making Your Own Certificate
You also have the option to generate your own certicates if you have control over the
clients. For example, you can join the community at http://cacert.org and generate
Page 91

Chapter 2: System Settings
71
them there. You will need to load the root certicate into the clients that should talk to
the snom ONE system.
ere are various other sites available which provide a similar service. You may also
download the openSSL toolkit and compile your own certicate generator and set up
your own trusted network. If you have already done this to secure your other oce
infrastructures (e.g., email or VPN), you can probably reuse those certicates.
Certificate Size and Format
Please use only 512 and 1024 bit certicates. e system currently has trouble handling
certicates with other sizes. e security and the performance on these certicates is still
reasonable.
e format of the certicate must be base64-encoded. You must include the private key
and the certicate in the upload. Please note that uploading the private key this way
might be intercepted by an intruder. You can minimize this risk by using the localhost
address from the local machine.
In order to provide the key, just enter the ASCII string that you received from the
trusted party, copy it into the text eld, and press Save. e system will then present
this certicate to HTTP and SIP connections that require secure communications.
Page 92

Deploying the snom ONE IP Telephone System
72
Access List
If your system is under a denial of service attack, the system will automatically block
the IP address that is attacking the system. You can also add IP addresses to the Access page and place a Block on them so that they will be unable to access the system.
Just enter the IP address, the net mask, and the access type, and click Create. Enter
only as much information as needed by the net mask; for example, if the net mask is
“255.255.0.0,” enter 192.168.0.0. To delete an entry, click the Delete button.
Changing the entry does not require a restart of the system. e changes take eect immediately.
You may specify IP addresses with their netmask and their policy. If no match is found,
packets will be accepted. System administrators might want to dene who has access to
the system for a number of reasons:
• Protection against denial of service attacks: If you are operating the system on
publicly available addresses, there is always the risk that someone will try to
interrupt the service. Although the system has several protections against such
attacks, it might be easier to rule out such attacks from the beginning.
• Limiting the service to authorized addresses: You might also want to limit the
service to specic IP addresses only. For example, while you might allow users
to register their IP phones in the oce, you might allow only selected users
with their associated IP addresses to register their phones from home.
Page 93

Chapter 2: System Settings
73
e motivation for the list is to provide the rewall type of functionality within the
system application and reduce the chance of unauthorized access to the system.
e access control is not limited to SIP only, but it also applies to all other protocols on
the system, including HTTP, TFTP, and SNMP. When the system acts as a client (for
example, when performing DNS requests), the rules do not apply. Using 0.0.0.0 in the
IP eld species that everything will be accepted. In addition, if you are getting a lot of
requests from a particular source, the system will automatically add them to the access
control list and block them.
How the Access List Functions
When a packet reaches the system, the system checks the list of enabled and disabled
addresses for a match. If the request is ignored, the system discards the packet without
answering. When the system checks the list for matches, a match occurs if a “source
address” matches a “check address” with the mask. More specic addresses are checked
rst, making it possible to dene exceptions to the general rule. Also, the system checks
IPv4 and IPv6 addresses separately. If there is a match, the system checks for the type.
If the type is Allow, then the system accepts the packet. If the type is Block, then the
system blocks that request. If there is no match in the list, then the request is accepted.
If the list is empty, the access control is disabled. is is the default behavior after the
installation of the product.
For UDP-based requests, this is relatively easy—the request is just not answered. But
because the UDP port is open, there is no ICMP request sent to the origin, which
means if someone wants to attack the system, it might be possible for the attacker to
gure out that there is an open port. But since the system just discards these messages,
the damage is limited.
For TCP ports, the situation is more complicated. In Linux, there is no way for an
application to determine where a TCP connection is coming from until the connection is accepted. is is why the system rst accepts the connection and then examines
whether the connection was allowed or not. If the connection was not allowed, then it
is turned down immediately. In Windows, there is a special system call that rst checks
where the connection is coming from. If the source is not enabled, then the system does
not accept the connection. However, because the operating system has already answered
the TCP connection request with an acknowledge, in Windows it will be obvious that
an application is running on the ports.
Page 94

Deploying the snom ONE IP Telephone System
74
e behavior of the access list is similar to a rewall. However, especially for TCP, a
rewall will keep the trac completely out. Someone testing the system will not get a
response for a TCP request if the source IP address is not listed.
Example
Table 2-6 shows a scenario in which all users in the LAN are given access, but access
from the public Internet is not allowed, except for two employees working from home
and a trunk that comes from a service provider with a small range of IP addresses.
Table 2-6. Access List Scenario
Address Net Mask Type Description of Result
First
entry
127.0.0.1 255.255.255.255
Allow is entry will ensure
that you can always access the HTTP interface
from the local computer.
Next
entry
192.168.0.0 255.255.0.0
Allow is entry will ensure
that everyone in the
LAN can access the
system.
Next
entry
0.0.0.0 0.0.0.0
Block is entry will disable
all packets by default.
Populate this entry last;
otherwise, you will be
unable to access the
system.
Next
entry
213.1.2.3 255.255.255.255
Allow is entry will give the
remote worker access to
the system. Repeat the
same entry for other IP
addresses.
Next
entry
12.23.34.45 255.255.255.248
Allow is entry is intended
for the IP addresses of
the ITSP.
Page 95

Chapter 2: System Settings
75
Web Page Control
Templates
is page allows you to change the look and feel of the PBX web pages. It also allows
you to change the various email templates, phone conguration templates, style sheets,
etc.
Page 96

Deploying the snom ONE IP Telephone System
76
To customize the templates, a familiarity with HTML is required.
1. Navigate to Admin > Web Page Control > Templates.
2. From the dropdown, make a selection. e HTML will be displayed:
Embedded between the standard HTML tags (e.g., <title></title> and
<body></body>
) is additional code (ssi htmvar password, lng
text4, ssi var link
, etc.) that is used by the system to translate various
parts of the welcome message, e.g., the specic extension that has been created,
the language that has been set for that extension, etc. If these settings are not
important and you prefer to send a static email once an extension has been created, you can create a static message similar to the following:
<?xml version=”1.0” encoding=”UTF-8” ?>
<!DOCTYPE html PUBLIC “-//W3C//DTD XHTML 1.0 Transitional//
EN” “http://www.w3.org/TR/xhtml1/DTD/xhtml1-transitional.
dtd”>
<html xmlns=”http://www.w3.org/1999/xhtml”>
<head>
<title>This email is sent by snom ONE</title>
<style type=”text/css”>
.normalText {
FONT-SIZE: 12px; FONT-FAMILY: Verdana; border-bottom: 10pt
}
Page 97

Chapter 2: System Settings
77
.header2Text {
FONT-WEIGHT: bold; FONT-SIZE: 18px; COLOR: #168099; FONT-
FAMILY: Verdana
}
</style>
</head>
<body bgcolor=”#f0f0f0” leftmargin=”0” topmargin=”0” margin-
height=”0” marginwidth=”0”>
<p class=”normalText>Hello new user. You have been added to
the snom ONE telephone system. This email is sent automatically. Do not reply.
</p>
</body>
</html>
Translation
Although we try to provide good translations, it’s not an easy task for every language.
On this page, you can modify the text for the language you are using.
Page 98

Deploying the snom ONE IP Telephone System
78
User Page Control
e User Page Control tab allows the administrator to control which elds are dis-
played on the user pages. Figure 2-4 shows the general settings that can be hidden from
the user. ese settings are detailed on the next page.
Figure 2-4. Blockable User Settings (Settings > General)
Page 99

Chapter 2: System Settings
79
General Control
e General Control settings allow you to prevent the user from viewing the password
elds and certain monitoring settings.
• SIP password: By preventing the user from seeing the SIP Password setting,
the administrator can ensure that users will be unable to change their SIP
passwords. is can save the administrator time spent in dealing with registration problems that result from changed SIP passwords.
• Web password: By preventing the user from seeing the Web password set-
ting, the administrator can ensure that users will be unable to change their
web passwords. is will prevent the user from forgetting a changed password
and the administrator from having to issue a new one.
• Calls, presence, PAC watch eld: is setting impacts the following user
settings:
— Watch the calls of the following extensions: is setting allows users
to monitor the status of other extensions. Some users will need this setting (e.g., a boss who is monitoring certain employees, a secretary who
needs to monitor the boss’s extension, etc.). Other users, such as those
working in a call center, will not need to monitor other people’s extensions.
— Watch the presence of the following extensions: is setting allows
you to see a person’s presence status (e.g., away, busy, DND) from the
WAC and from some phones.
— Watch the following accounts on PAC: is setting allows users to
monitor extensions on the WAC. Not all users will need access at this
level.
• Phone address book preference: is setting is applicable to the address book
of the snom phone. It allows the user to upload the address book from the
system to the snom phone directory.
Page 100

Deploying the snom ONE IP Telephone System
80
Redirection Control
e Redirection Control settings allow you to prevent the user from viewing certain
redirection settings. Figure 2-5 highlights these settings (details are provided below the
image).
Figure 2-5. Blockable User Settings (Settings > Redirection)
• Incoming anonymous calls: is setting allows users to control the treat-
ment of anonymous callers (reject them, pretend to be busy, ask for name,
etc.). In some situations, administrators may prefer to determine how anonymous callers are handled.
• Call forward on no answer timeout: is setting allows users to specify the
number of seconds that should lapse before the call is directed to voicemail.
In situations where voicemail is not used, such as call centers, this setting is
not necessary.
Mailbox Control
e Mailbox Control settings allow you to prevent the user from viewing various voicemail settings. Figure 2-6 highlights these settings (details are provided below the image).
 Loading...