


Snom IP Phone
Configuration Guides
Version 2.0
Date: September 28, 2015
Yeastar Information Technology Co. Ltd.

Snom IP Phone Configuration Guides
2/14
Contents
1. Introduction .......................................................................................................... 3
2. Register with MyPBX Manually ........................................................................... 4
3. Provisioning for MyPBX ...................................................................................... 7
3.1 Phone Provisioning via PnP Mode ................................................................... 8
3.2 Phone provisioning via DHCP Mode ............................................................... 11

Snom IP Phone Configuration Guides
3/14
1. Introduction
This guide shows you how to manually configure Snom IP phones with MyPBX and
how to provision the Snom IP phones with MyPBX. It has been tested with the latest
firmware version supported by MyPBX firmware version X.19.0.47.
Applicable Models:
370
360
320
300
710
715
720
760
820
821
870
Please note that different firmware revisions may have different web interface formats
and functionality.
Snom IP Phone Configuration Guides
4/14
2. Register with MyPBX Manually
1. Start up the phone and identify its IP Address by pressing the "Help" or "7"
button. For this example we will assume the IP Address of the phone is
192.168.5.126, and IP Address of the MyPBX Phone System machine is
192.168.5.250
2. Point your browser to the web interface of the phone: http://192.168.5.126.
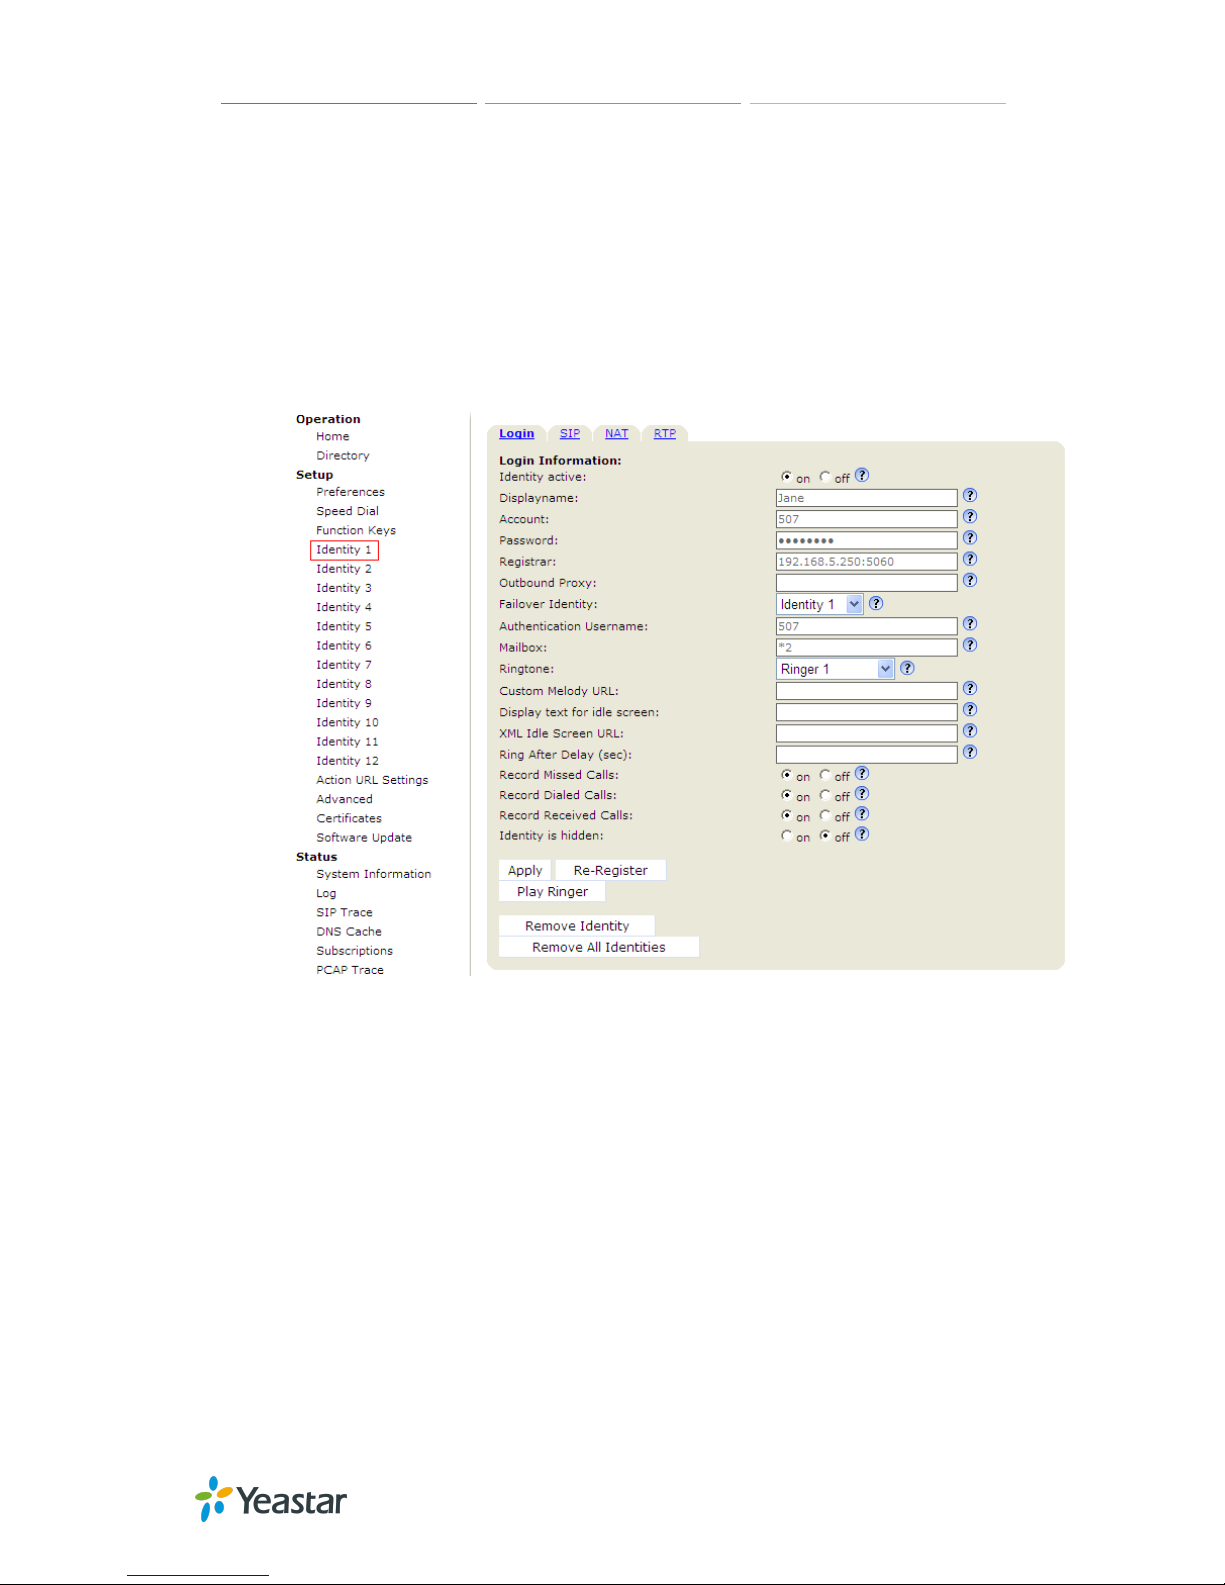
3. We now need to set the phone to register with MyPBX Phone System. Go to
the "Setup -> Identity 1" page, and in the "Login" tab:
1) Set the "Identity Active" field to "on"
2) Set the "Display name" field to the name you want to appear on the Phone
display
3) Set the "Account" field to the extension number you want to associate with
this phone
4) Set the "Password" field to the extension's Authentication Password
5) Set the "Register" field to the IP Address of the MyPBX Phone System – in
this example, 192.168.5.250:5060.
6) Set the "Authentication Name" field to the extension's Authentication ID
7) Set the "Mailbox" field to your system's Special Voice Mail Extension
Number.
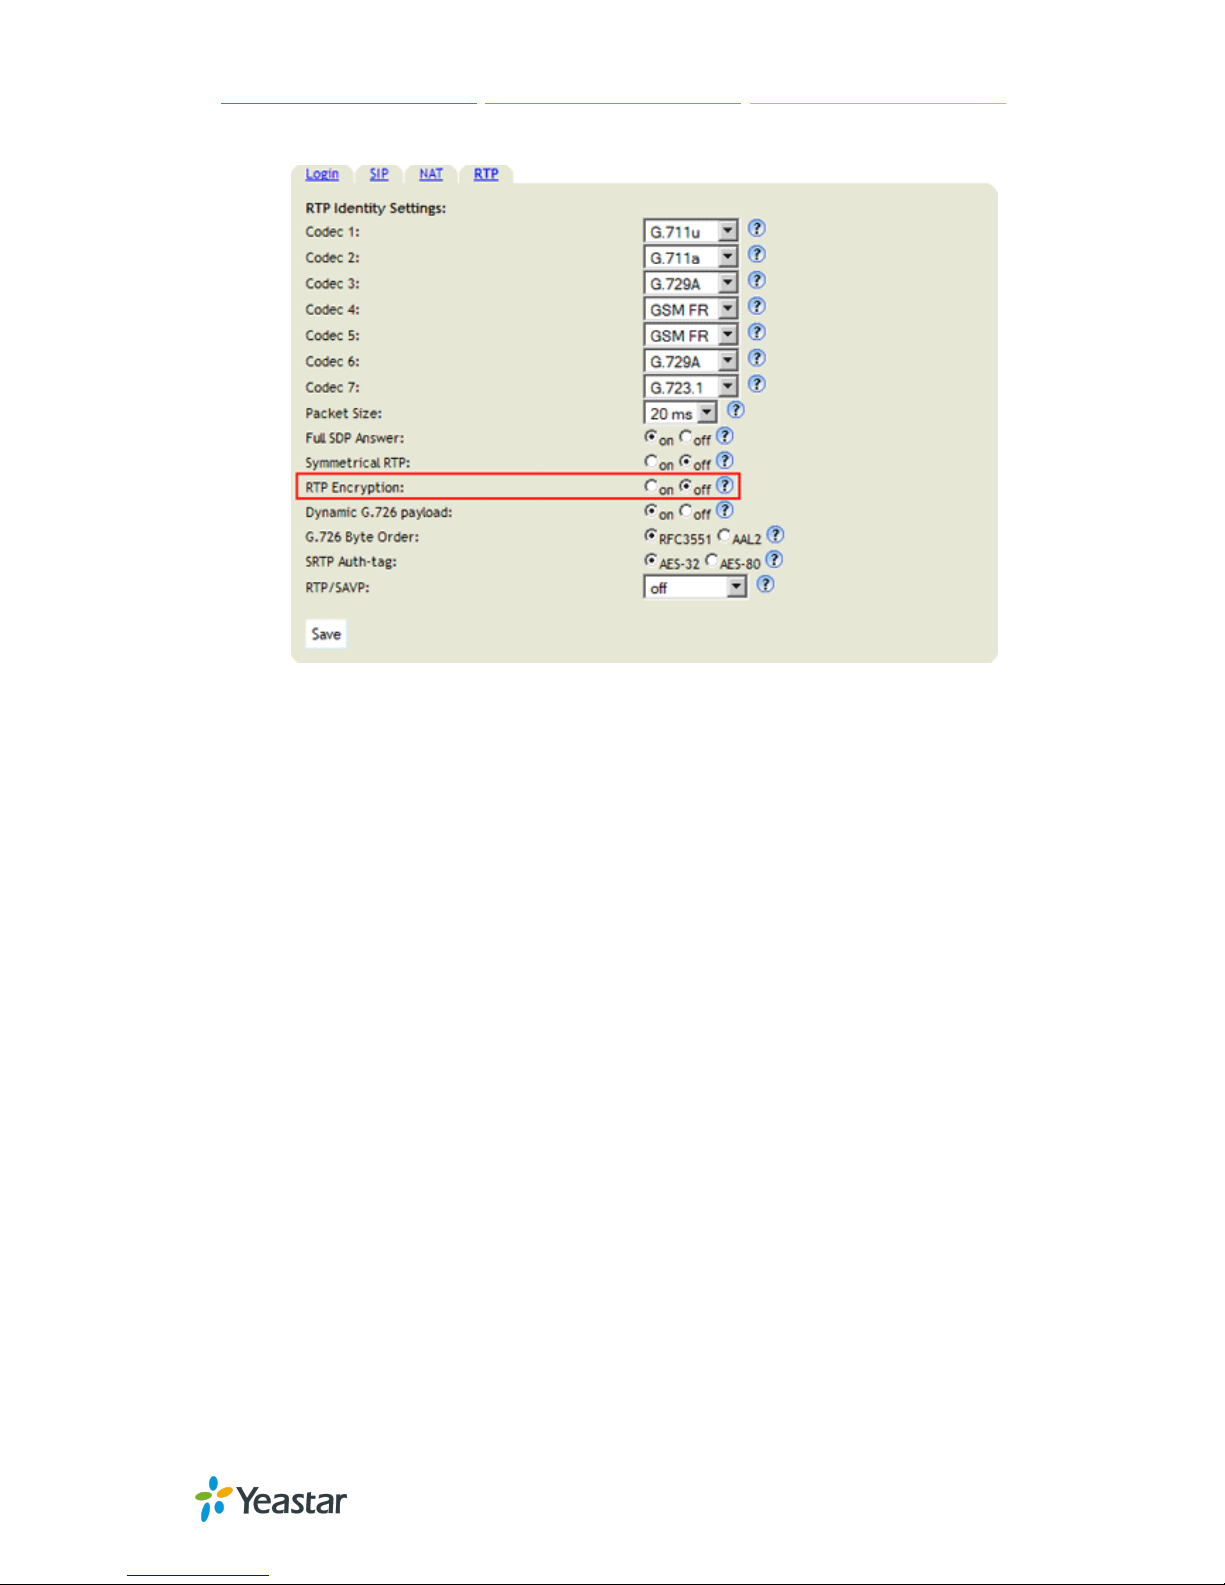
4. Next, we need to adjust the audio parameters. Click on the "RTP" tab and set
the "RTP Encryption" field to "off" if you disable the SRTP in extension settings
Snom IP Phone Configuration Guides
5/14
of MyPBX Management Console
5. Click the "Save" button, and then click the "Reboot" button that appears at the
top of the page. Your phone will restart. After rebooting, the phone will retrieve
its configuration files and register with MyPBX Phone System. This can be
verified via the "Extension Status" page of MyPBX Management Console.

Snom IP Phone Configuration Guides
6/14
6. For some issues about function of intercom, please refer to the following
setting on Snom web interface

Snom IP Phone Configuration Guides
7/14
3. Provisioning for MyPBX
The easiest way to set up a Snom phone for use with MyPBX is to use the built-in plug
and play provisioning functionality inside MyPBX. This will allow the phone to
configure itself by retrieving a generated phone configuration file. Alternatively you
can configure using DHCP and option. For more information, see this configuration
guide.
1. Verify Firmware Installed on your Phone
Verify the firmware version currently installed on the phone as older firmware will not
have the plug and play feature. You can power up the phone and press “Menu >
Status > Firmware” to check. Go to Snom Support Website to download the latest
firmware for your phone.
2. Plug phone into the network
Plug your Snom phone into your LAN. (The Phone must be on the same LAN as that
of MyPBX IP PBX).
3. Approve phone and Assign an Extension
To do provisioning with Snom IP phones, you can choose PnP mode or DHCP mode.
When you phone provisioning via PnP mode, there is no need to set MyPBX working
as the only DHCP server any more.

Snom IP Phone Configuration Guides
8/14
3.1 Phone Provisioning via PnP Mode
Step1. Log in Snom IP phone web user interface, go to “Setup->Advanced->Update ”
to enable PnP feature on your phone.
Step2. Check MAC address of your Snom IP Phone on “Status->System
Information” page.
Step3. Reboot Snom IP phone.

Snom IP Phone Configuration Guides
9/14
Step4. Search MAC address you would like configure in “Phone Provisioning->Not
Configured Phone” page
Fill in the phone detail message on the pop-up windows.
Input Name, Call waiting, Line, Extension, Label, Line active and so on for the phone.

Snom IP Phone Configuration Guides
10/14
Step5. Save the settings and reboot the IP phone. After you save the changes,
system will prompt you to save the changes and reboot to save changes without
rebooting. Click OK to reboot the IP phone and provisioning the phone.
Then IP phone will reboot twice to apply the configurations take effect, when done,
you can find the account 506 is registered in MyPBX’s line status page and Snom IP
phone’s status page.

Snom IP Phone Configuration Guides
11/14
3.2 Phone provisioning via DHCP Mode
Step1. Disable DHCP Server on your local network.
E.g. Disable DHCP Server on Linksys Router.

Snom IP Phone Configuration Guides
12/14
Step2. Enable DHCP Server on MyPBX to make MyPBX as the DHCP server in the
local network.
Log in MyPBX web interface, go to “System ->Network Preferences->DHCP
Server”, enable DHCP server.
Step3. Set your Yealink phone as one DHCP client. Go to “Network->Advanced” to
enable DHCP.
Step4. Go to MyPBX “PBX->Extensions->Phone Provisioning”, select your Snom
phone from “Not configured Phone”.

Snom IP Phone Configuration Guides
13/14
Step5. Assign extensions to the phone, and you can also configure the Memory keys
and Line keys.
Step6. Save the settings and reboot the IP phone. After you save the changes,
system will prompt you to save the changes and reboot to save changes without
rebooting. Click OK to reboot the IP phone and provisioning the phone.

Snom IP Phone Configuration Guides
14/14
<END>
 Loading...