

Page 1

Administrator
Version V1.14
Page 2

This document is supplied by snom technology AG for information purposes only
to licensed users of the snom phone and is supplied on an “AS IS” basis, that is,
without any warranties whatsoever, express or implied.
the law to copy or use this product except as speci cally allowed in the license.
Page 3

telephone!
Telephony is part of our every day life. Over a period of more
than 100 years a communication form has evolved which we feel cannot
VoIP is not only about transporting speech over data networks.
Page 4

• Table of Contents
Page 5

H.323
SIP
DND Mode on/off
Add User
Logoff User
20
Logoff All
20
21
Reboot
21
Administration
Installing DHCP
25
Redirection
31
Base
32
Page 6

• Table of Contents
SIP Lines
34
SIP Stack
35
SIP Authentication
38
H.323
38
Network Base
43
Network Advanced
45
Miscellaneous Pre xes
48
Miscellaneous PBX Codes
49
Miscellaneous Auto Answer
51
Administrator Mode
52
Reset Values
52
Appendix
Page 7

1
the date of the phone is set to a year later or equal to 2002 a clock is
the date and time of the phone are not set properly.
The language is set to English by default. In order to change it,
or
to select this menu entry.
Page 8

• Quickstart
1
Then go to “Language”
to activate your selection.
Page 9

1
http://www.snomag.de/faq_en.php
VoIP has two competing signalling stan dards
to establish and tear down calls. “H.323” is an
Page 10
• Quickstart
1
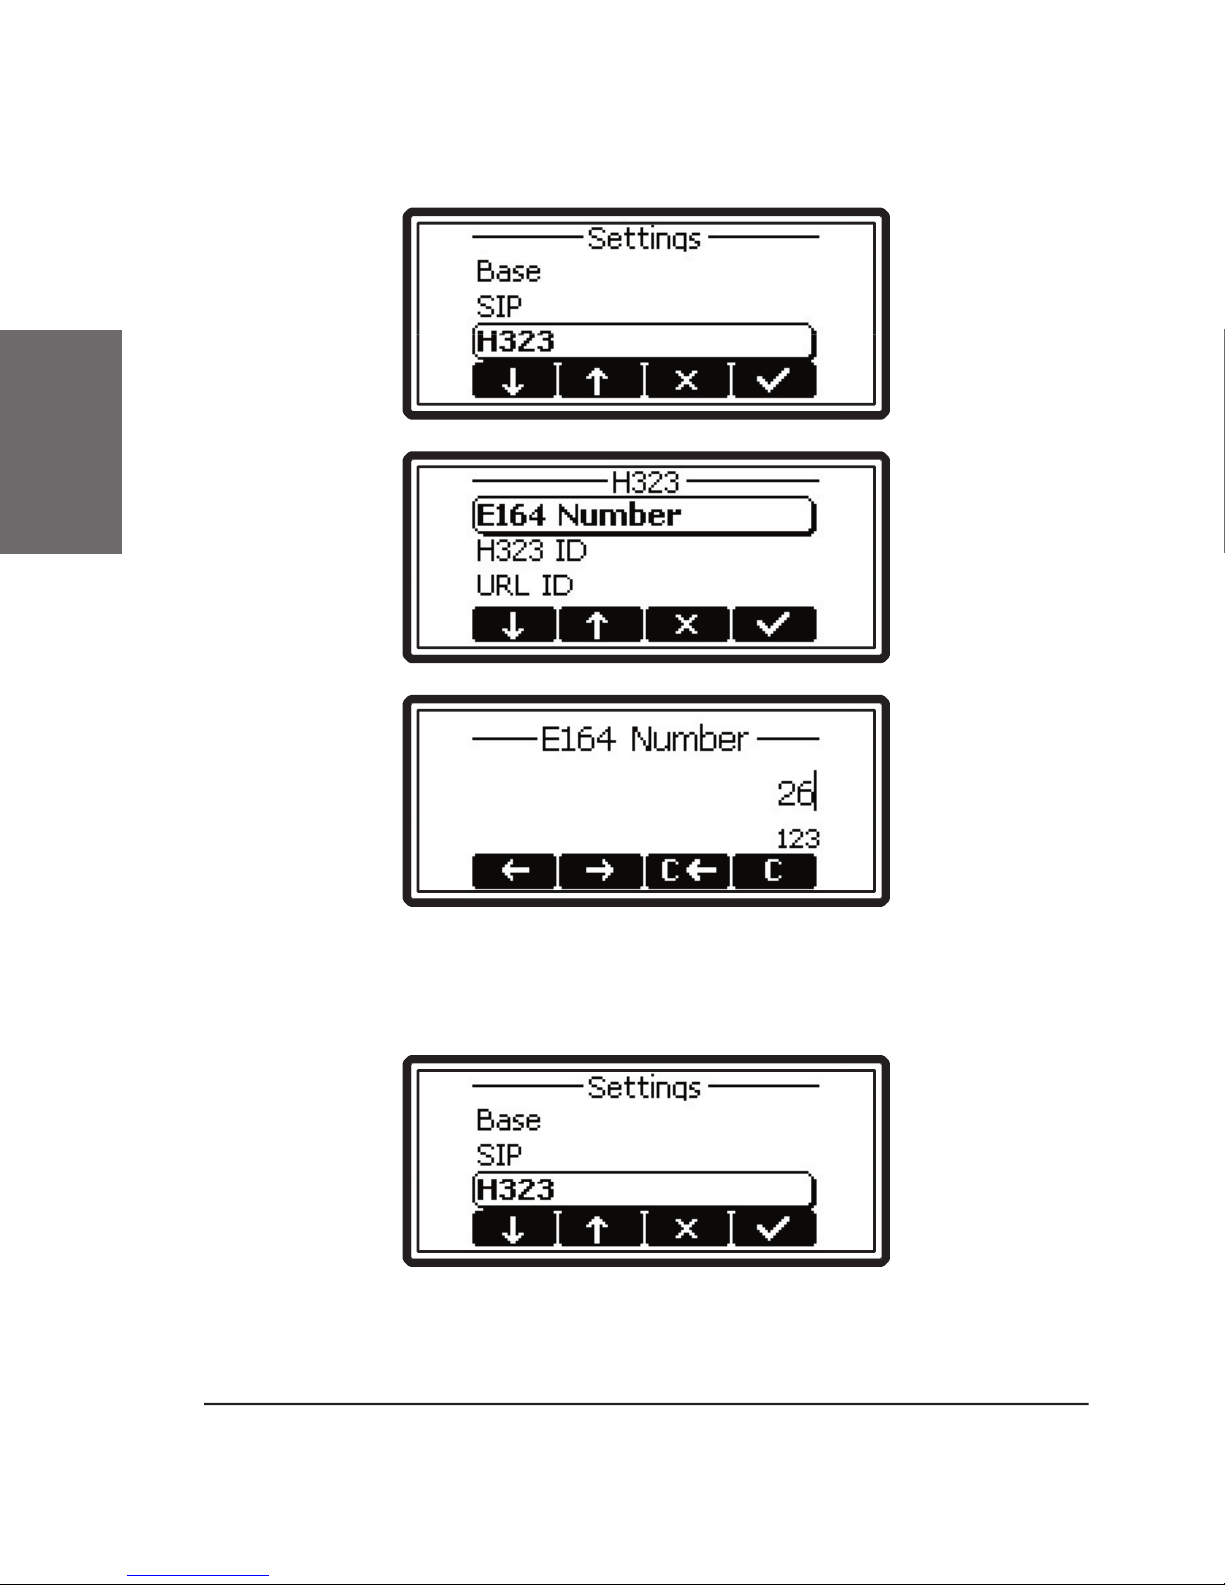
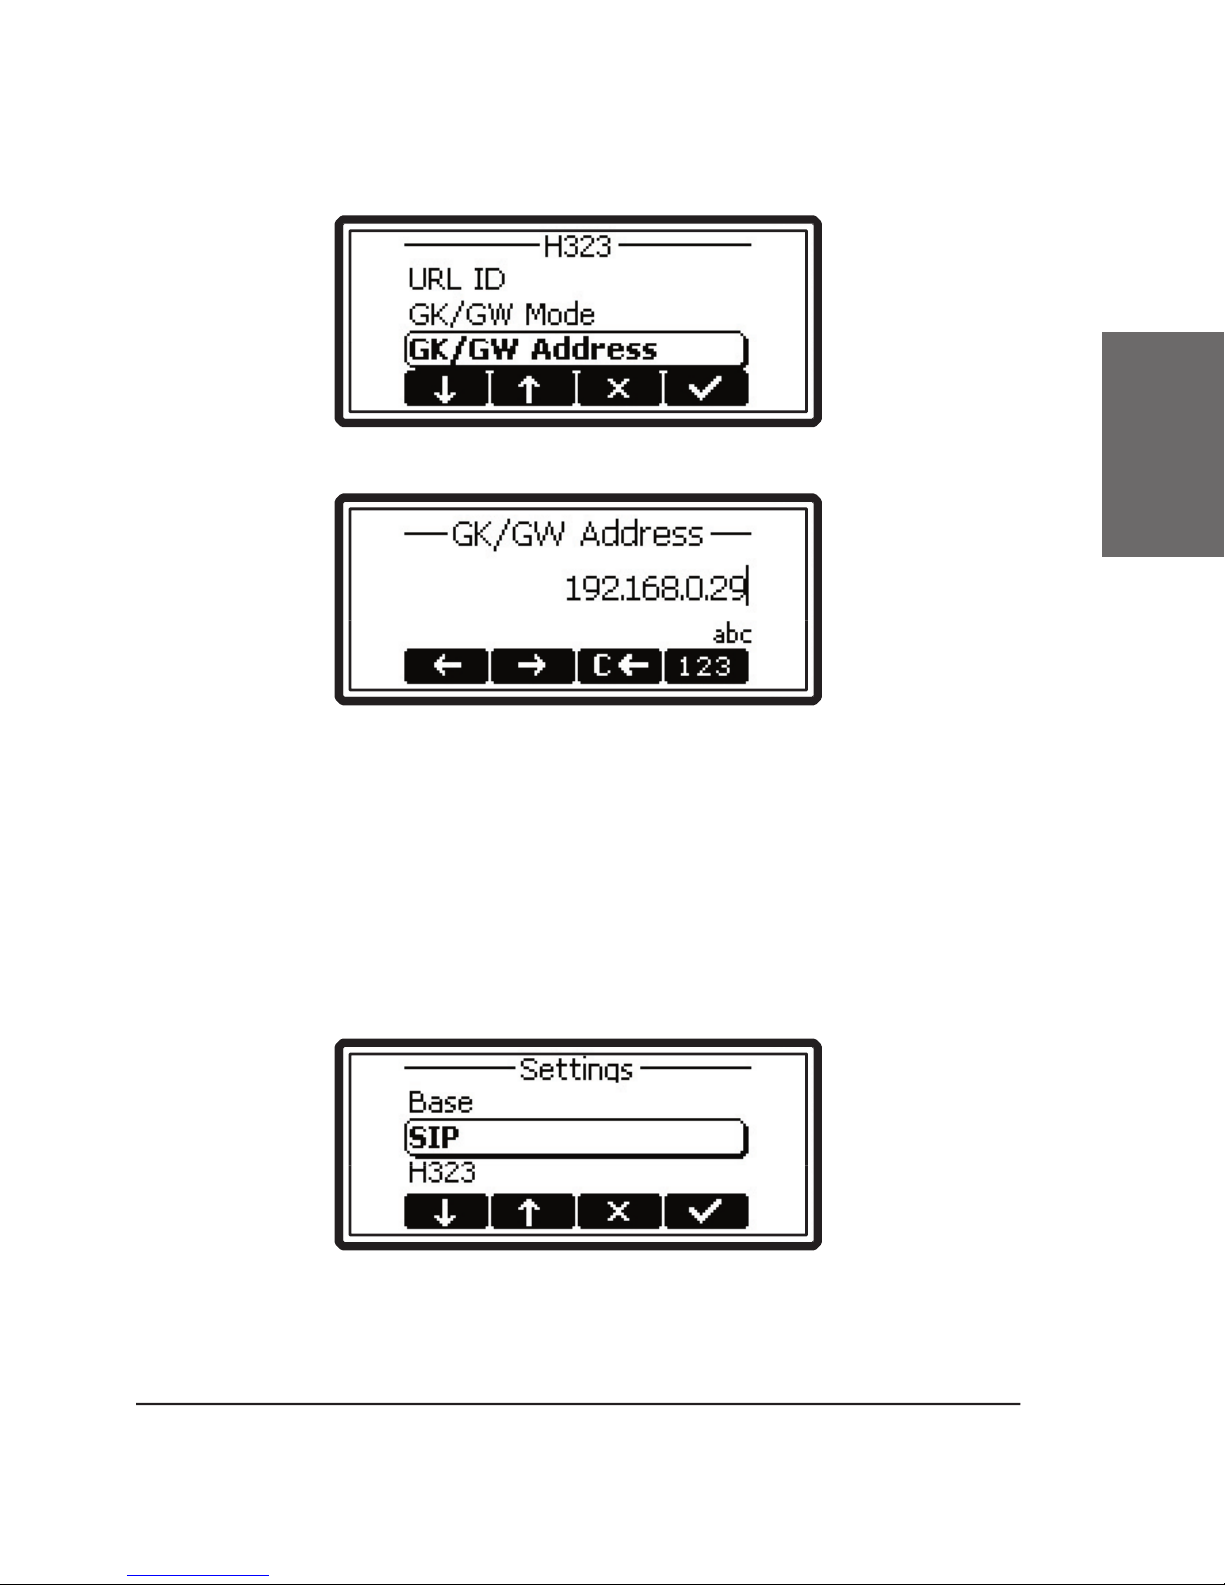
the “Settings” menu (as described above) and then to “H.323”. Select
“GK/GW-Address” and type in the address.
Page 11
1
These two values (gatekeeper and an E.164 number) are
the registrar (e.g. proxy.sipproxy.com).
Page 12

• Quickstart
1
to be reachable. For the rst user of the snom 100 this can be entered in
Page 13

1
These two values (registrar and account) are mandatory for
Page 14

• Quickstart
1
Page 15

2
Page 16

• Logon
2
To ease the effort of assigning in each case the appropriate phone
After pressing a button, you will be prompted to type in your
Page 17

2
After typing in your account name followed by the enter key, the
Type in the requested information and con rm with the enter key.
The phone tries to register your given account name at the given registrar.
The idle screen is shown and the rst SIP line displays your regis tration.
to the value of the setting “Register Post x” if set.
is assigned to the snom menu.
Page 18
• Logon
2
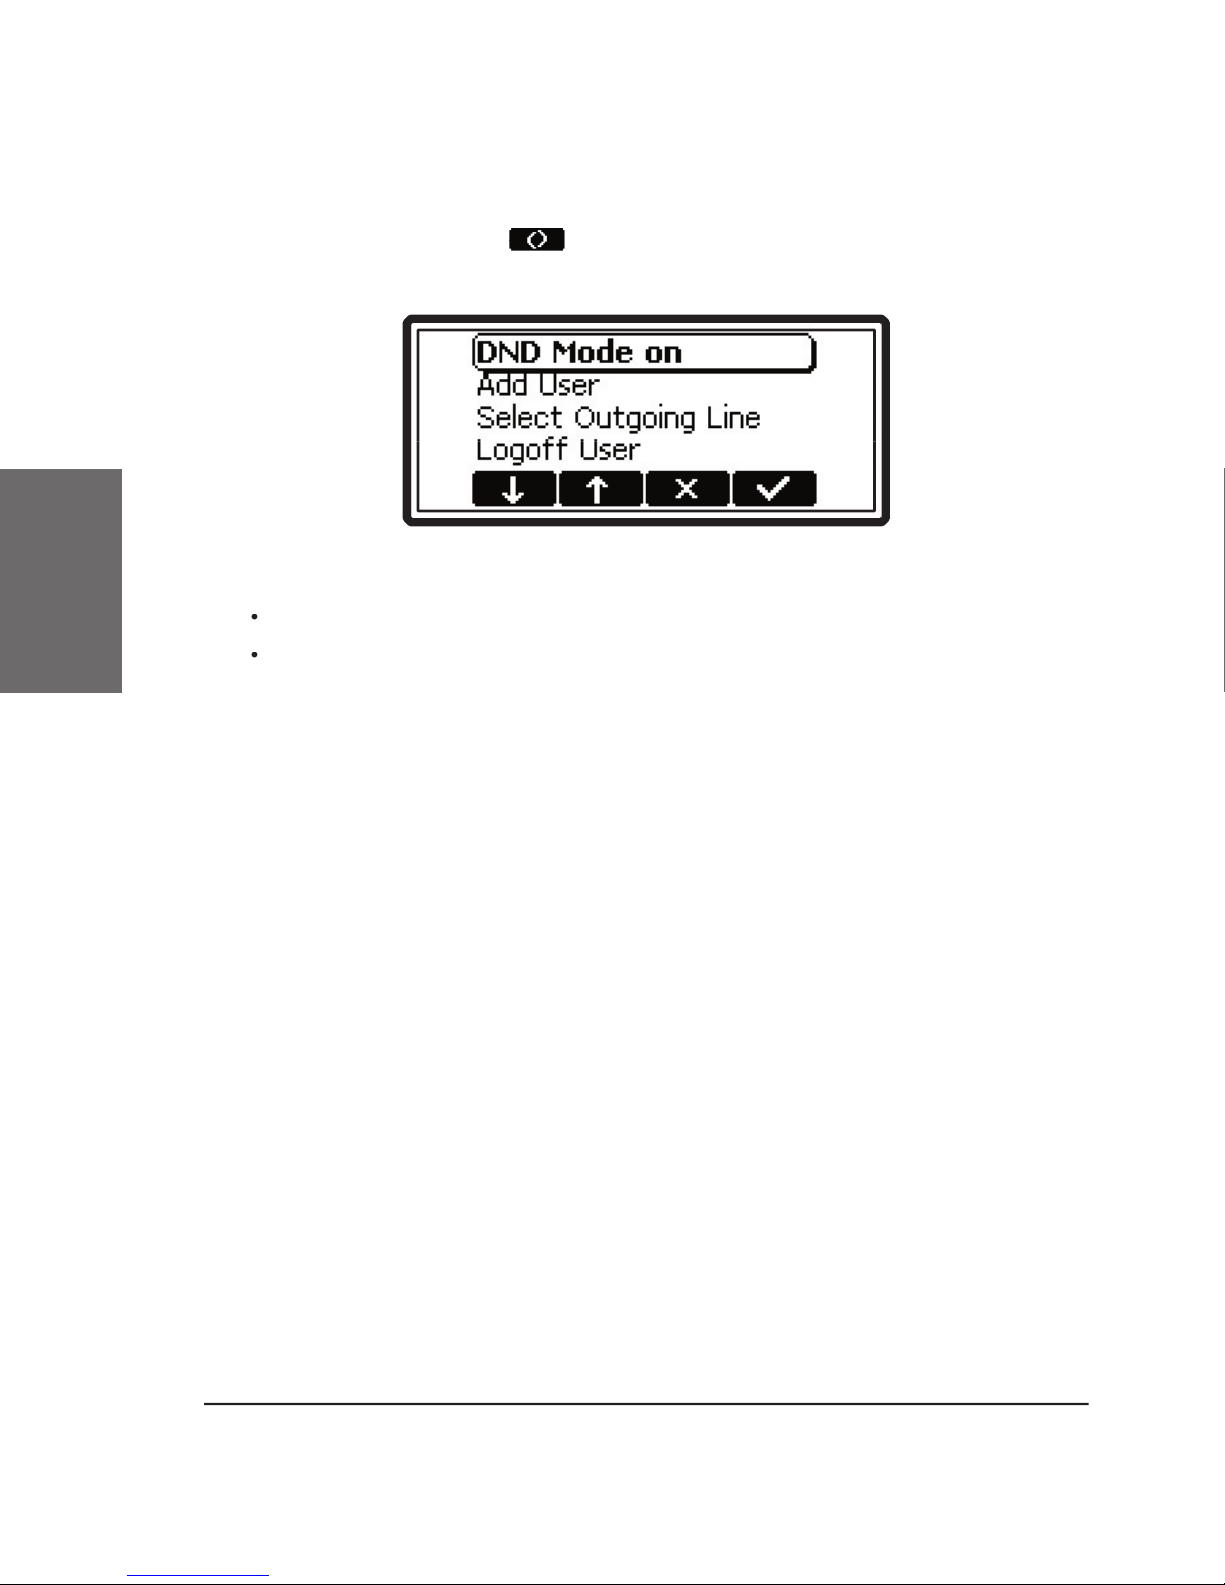
After pressing the
key the phone shows the snom menu, with the
following menu items:
Add User
The appearance of the snom menu can differ. This is the maximum
this mode is activated, you get asked if you really want to activate this
the screen, if the mode is activated.
Page 19

2
Add User
you can register an
The selection of this menu item displays a list of currently
Page 20

• Logon
2
to this line. So different people can initiate calls from the same phone with
their own identity and the called phone only displays this current outgoing
After selecting this menu item and pressing enter you get asked,
you con rm the message and all currently
Page 21

2
Administrator Mode
to user mode. This means that only base settings and settings for
the user from unintentionally miscon guring the phone.
To change back into ‘Administrator Mode’ you have to type in the
Page 22

• Logon
2
Page 23

3
Administration
Page 24

• Administration
3
ash of the phone. They include registration information, dialed numbers,
the phones and wants to avoid that users change settings that affect the
“Con guring the snom100 for Mass Deployment” which you will nd at:
VoIP is a technology that is changing rapidly. Shipping phones
The phone needs to have a network identity to be able to
few other base settings are needed as well to make the con guration of
the phone over the network, easy and comfortable. There are basically
two methods to set up the basic settings:
a server provides the settings and local settings of the phone
are erased.
Page 25

3
pad or webbrowser and stored in the ash.
them. Manual installations should only be used in smaller networks.
Page 26

• Administration
3
Page 27

4
Page 28

• Settings
4
The
via Phone Display
function keys
and
you can navigate up and down in the menu.
You are now in the Settings menu and it has the following
Page 29

4
and
to scroll within the Settings
and
to scroll within the list. By pressing Enter
the value of the setting can be viewed or modi ed.
and
to scroll within the list to set the desired value. The value
the keys and letters can be called up by pressing a key repeatedly. You
Accepts the entry.
Aborts the changes.
Page 30

• Settings
4
via Browser
You may prefer to use a browser to con gure the settings, which
The snom 100 has a built in web server to con gure its settings.
192.168.0.100). If you do not know the
at your phone, press MENU key
and “Settings / Network /
Base / Identity / IP Address”
Page 31

4
settings of this submenu are displayed.
You can now modify and store the values by using the mouse
the changes then do NOT press SAVE.
You can have all incoming calls diverted to a different number.
/ Redirect Event” and you will have the following selections:
This deactivates all call diverts.
Always:
All calls are diverted to the number speci ed in “Phone
Number”.
When Busy:
When a call is in progress, another call would be
that the third caller is diverted to another number or a voice
mailbox.
Calls are diverted after the timeout
speci ed.
Page 32

• Settings
4
“Settings / Redirection / Redirect Number”.
“Settings / Redirection / Redirect Time”.
Your phone is able to display all texts in different languages. Just
for snom100A phones.) Press the menu key in the idle state and select
the submenu “Settings / Base / Display Contrast”.
Time
Page 33

4
Time”.
VoIP protocol (SIP or H.323) is selected that the phone
“Settings / Base / Phone Type”. If the phonetype is not changeable,
This setting determines the look of the idle state. “Registrations”
the submenu “Settings / Base / Number Guessing”.
After typing in the complete number to dial, you have to press
the enter key or hook off the phone (<on>). Setting the value to <off>
The pictures for the internal webinterface are taken from the
the menu key in the idle state and select the submenu “Settings / Base /
Page 34

• Settings
4
/ Line<n> / User Name”.
Account
The account of the nth user. By example “tom” is the account in
“Settings / SIP / Lines / Line<n> / Account”.
“Settings / SIP / Lines / Line<n> / Registrar”.
The likelihood with which the nth user can be found at this phone.
The value has to be between 0.0. and 1.0. This value is used by proxies
to call the phone in the correct sequence (sequential and parallel forking
“Settings / SIP / Lines / Line<n> / Probability”.
Action
“Settings / SIP / Lines / Line<n> / Action”.
Page 35

4
Timespan
The recommended registration time in seconds for user<n>.
“Settings / SIP / Lines / Line<n> / Expires after”.
The sip URL of the mailbox of user<n>, e.g. <sip:
tom@mailbox.rock.com>.
“Settings / SIP / Lines / Line<n> / Mailbox”.
to which the SIP messages are sent, if one is present.
“Settings / SIP / Stack / Outbound Proxy”.
Treat outbound proxy as initial route <on> or for address only
Page 36

• Settings
The time to repeat SIP messages in milliseconds. These should
“Settings / SIP / Stack / Retry [1|2]”.
After the elapse of this standard timeout, there will be an
“Settings / SIP / Stack / Session Timer”.
Tracing
“Settings / SIP / Stack / Tracing”.
“Settings / SIP / Stack / Use Hostname”.
Activates logon wizard and mobility features available in the
“Settings / SIP / Stack / Logon Wizard”.
The maximum number of hops allowed for a SIP request/
4
Page 37

TCP Threshold (web interface only)
4
Page 38

• Settings
Authentication
A tuple needed for authentication by some proxies and registrars.
The realm depends on the used product and user name and password are
“Settings / SIP / Authentication / Line[1-9] / [Realm|User|Pass]”.
“Settings / SIP / Authentication / Line[1-9] / Line”.
This can be used to enter the E.164 number (e.g. 123). This may
“Settings / H323 / E164”.
4
Page 39

This can be used to enter the H.323 ID (e.g. Tom Testa). This
“Settings / H323 / H323 ID”.
This can be used to enter the H.323 URL ID (e.g.
tt@rock.com
to register as a resource. This is helpful for other entities to resolve the
“Settings / H323 / URL ID”.
The VoIP phone can be used with a gatekeeper,
The phone is in
address of the gatekeeper in “Settings / H323 / GK-GW
Address”.
The phone is used without a gatekeeper and without a
gateway.
Auto:
The phone is in gatekeeper mode but it uses a multicast
to automatically detect it.
The phone is in
of the gateway in “Settings / H323 / GK-GW Address”.
“GK-GW Mode”) here the IP address is set.
“Settings / H323 / GK-GW Address”.
4
Page 40

40
• Settings
Time-to-live for
traf c. Very high values result in large intervals of disconnection from the
“Settings / H323 / GK TTL”.
The early start option allows the H245 channel to be setup earlier,
to H225.
“Settings / H323 / Early Start”.
the setup messages and hence eliminates the need for a separate H245
“Settings / H323 / Fast Start”.
“Settings / H323 / H245 Tunneling”.
4
Page 41

The menu item “Settings / H323 / H.450 Services” can be used to
toggle between H.450 (<on>) and facility based (<off>) supplementary
“Settings / H323 / H.450 Services”.
Tracing
“Settings / H323 / Tracing”.
4
Page 42

• Settings
The snom
100 converts speech into data packets. With this setting
the payload size of the packets can be set in terms of milliseconds. 80 (10
“Settings / Codec / Codec / Packet Size”.
The preferred codec your phone should use. Currently U-law, A-
“Settings / Codec / Codec / Codec”.
The <single> option offers only the preferred codec. <full> offers
“Settings / Codec / Codec / Negotiation”.
The options for “in band DTMF”are :
DTMF if the other party is also supporting it.
low rate codecs (G729 and GSM).
“Settings / Codec / DTMF / In Band”.
4
Page 43

The options for “Out of band DTMF” are
band DTMF if the other party is also supporting it.
low rate codecs (G729 and GSM).
“Settings / Codec / DTMF / Out Of Band”.
“Settings / Codec / DTMF / Payload Type”.
This is the identity of the ethernet interface and is unique to each
“Settings / Network / Base / Identity / MAC Adr”.
“Settings / Network / Base / Identity / IP Adr”.
4
Page 44

• Settings
“Settings / Network / Base / Identity / Netmask”.
“Settings / Network / Base / Identity / Hostname”.
This
value is needed to send IP packets to destinations outside
the local ip network. This is not the H.323
/ Gk-GW Address”.
“Settings / Network / Base / Identity / IP Gateway”.
to specify a few elds.
“Settings / Network / Base / Identity / DHCP”.
“Settings / Network / Base / Time / UTC Offset”.
4
Page 45

Time Server
the UTC time (e.g. 192.53.103.103). Corrections for daylight savings and
timezone have to be set in addition. If the SIP proxy is offering the time
“Settings / Network / Base / Identity / Time Server”.
This setting is used to specify when daylight savings is adjusted
The month (
ww
seconds) forward.
And on Sunday (
This eld determines the DNS domain (e.g. company.com).
4
Page 46

46
• Settings
“Settings / Network / Advanced / DNS / DNS Domain”.
“Settings / Network / Advanced / DNS / DNS Server[1|2]”.
The user name and password needed to access the phone via
“Settings / Network / Advanced / HTTP / [HTTP Admin|HTTP Password]”.
“Settings / Network / Advanced / HTTP / HTTP Proxy”.
“Settings / Network / Advanced / HTTP / HTTP Port”.
“Settings / Network / Advanced / LDAP / LDAP Server”.
4
Page 47

“Settings / Network / Advanced / LDAP / LDAP Base”.
“Settings / Network / Advanced / LDAP / LDAP Bind dn”.
“Settings / Network / Advanced / LDAP / LDAP Max. Hits”.
rstnames and <Lastname> sends a “Surname request” and gets back a
the phone uses the local server which does not explicitly have to be set.
The second entry is used as a backup.
“Settings / Network / Advanced / LCServer / LCServer[1|2]”.
4
Page 48

48
• Settings
“How can I update a snom100?” for more information about that topic.
“Settings / Network / Advanced / Remote Con g / Settings Server”.
these.
“Settings / Network / Advanced / PPPOE / [PPPoE User|PPPoE Pass]”.
These settings are used to connect the snom 100 to DSL networks.
from the submenu “Settings / Network / Advanced / PPPOE”.
This is particularly useful for using calling/prepaid cards etc.
“Settings / Miscellaneous / Pre xes / Preselection”.
4
Page 49

This pre x will be replaced by the gateway pre x in a dialed number for
“Settings / Miscellaneous / Pre xes / Ext. Line Pre x”.
“Settings / Miscellaneous / Pre xes / Gateway Pre x”.
or
(language dependent) is pressed on the phone
“Settings / Miscellaneous / PBX Codes / Hold on”.
or
(language dependent) key is pressed on the phone
“Settings / Miscellaneous / PBX Codes / Hold off”.
4
Page 50

• Settings
the transfer key
is pressed on the phone for a blind transfer (e.g.
“Settings / Miscellaneous / PBX Codes / Blind Transfer”.
transfer key
is pressed on the phone for a consultation transfer. The
“Settings / Miscellaneous / PBX Codes / Consult. Transfer”.
“Settings / Miscellaneous / PBX Codes / Divert”.
is pressed on the phone (e.g. *3).
“Settings / Miscellaneous / PBX Codes / Conference on”.
is pressed on the phone (e.g. *30).
“Settings / Miscellaneous / PBX Codes / Conference off”.
4
Page 51

“Settings / Miscellaneous / PBX Codes / Pickup”.
The end symbol which is automatically appended to the above
The end symbol marks the end of a key code sequence.
“Settings / Miscellaneous / PBX Codes / End Symbol”.
Auto Answer
“Settings / Miscellaneous / Auto Answer / Auto Answer”.
“Settings / Miscellaneous / Auto Answer / Use”.
4
Page 52

• Settings
Administrator Mode
Administrator Mode
“Settings / Administrator Mode / Administrator Mode”.
Administrator Mode Password
The password for entering the administrator mode on the snom
“Settings / Administrator Mode / Admin Mode Password”.
“Settings / Reset Values”.
4
Page 53

Appendix
5
Page 54

• Appendix
The snom technology AG assures that the product
Type:
VoIP Phone
Vorstand (MD)
5
Page 55

A
Account
Action
Administrator Mode
Authentication
See also
Pg. 7
Time
Codec
42
42
45
44
45
46
42
42
Out of Band
43
43
Gatekeeper
9
gatekeeper address
gatekeeper mode
gatekeeper registration
40
9
Gateway
gateway mode
Gateway Pre x
49
40
40
Gatekeeper
9
gateway
GK/GW Address
9
Tracing
41
46
6
Page 56

• Index
46
46
46
43
See PBX Keycodes
49
47
47
47
46
43
49
48
AC Name
48
48
48
48
Quickstart
9
Codec
42
42
via Browser
via Phone Display
9
Timespan
VoIP protocol
snom menu
6
Page 57

Page 58

All rights reserved.
ABP International, Inc.
 Loading...