

Page 1

ITM./ART. 642672
THIS MANUAL CONTAINS IMPORTANT INFORMATION REGARDING SAFETY, OPERATION,
MAINTENANCE AND STORAGE OF THIS PRODUCT. BEFORE USE, READ CAREFULLY AND
UNDERSTAND ALL CAUTIONS, WARNINGS, INSTRUCTIONS AND PRODUCT LABELS. FAILURE TO DO SO
COULD RESULT IN SERIOUS PERSONAL INJURY AND/OR PROPERTY DAMAGE.
IF YOU SHOULD HAVE ANY QUESTIONS OR EXPERIENCE A PROBLEM WITH YOUR SNAP-ON
PRODUCT, DO NOT RETURN THIS PRODUCT TO THE STORE. PLEASE CALL OUR CUSTOMER SERVICE
DEPARTMENT AT 1-888-278-8092. BEFORE YOU CALL, HAVE THE FOLLOWING INFORMATION
AVAILABLE: MODEL No., DATE PURCHASED AND STORE LOCATION. AN ALLTRADE
REPRESENTATIVE CAN RESOLVE YOUR PROBLEM OVER THE PHONE.
1650 PSI / 113.8 bar
ELECTRIC
PRESSURE WASHER
INSTRUCTION MANUAL
For consumer questions or comments,
please call 1-888-278-8 092.
Days/Hours of operation:
9am-7pm EST Monday - Friday
10am-6pm EST Saturday - Sunday
English and Spanish Speaking
Customer Service Representatives are
Available.
Page 2

TABLE OF CONTENTS
CONGRATULATIONS! . . . . . . . . . . . . . . . . . . . . . . . . . . . . . . . . . . . . . . . . . 1
INTRODUCTION . . . . . . . . . . . . . . . . . . . . . . . . . . . . . . . . . . . . . . . . . . . . . . 2
GENERAL SAFETY . . . . . . . . . . . . . . . . . . . . . . . . . . . . . . . . . . . . . . . . . 2-4
RECOGNIZE SAFETY SYMBOLS, WORDS AND LABELS . . . . . . . . 2-3
IMPORTANT INFORMATION ABOUT THIS MANUAL . . . . . . . . . . . 4
UNPACKING & INSPECTION . . . . . . . . . . . . . . . . . . . . . . . . . . . . . . . . . 4
SAFETY WARNINGS . . . . . . . . . . . . . . . . . . . . . . . . . . . . . . . . . . . . . . . 5-6
GENERAL SAFETY RULES . . . . . . . . . . . . . . . . . . . . . . . . . . . . . . . 5-6
SAFETY RULES FOR PRESSURE WASHERS . . . . . . . . . . . . . . . . . . . . 6-10
GROUND-FAULT CIRCUIT - INTERRUPTER PROTECTION . . . . . . . 9
GROUNDING INSTRUCTIONS . . . . . . . . . . . . . . . . . . . . . . . . . . . . 9-10
EXTENSION CORD USAGE . . . . . . . . . . . . . . . . . . . . . . . . . . . . . . . 10
FUNCTIONAL DESCRIPTION . . . . . . . . . . . . . . . . . . . . . . . . . . . . . . . . . 11
PRESSURE WASHER TERMINOLOGY . . . . . . . . . . . . . . . . . . . . . . . . . 11
ASSEMBLY & SETUP . . . . . . . . . . . . . . . . . . . . . . . . . . . . . . . . . . . . . . 12-13
OPERATING THE PRESSURE WASHER . . . . . . . . . . . . . . . . . . . . . . . . 14-17
WATER FLOW ADJUSTMENT . . . . . . . . . . . . . . . . . . . . . . . . . . . . . 15
USING SPRAY WAND . . . . . . . . . . . . . . . . . . . . . . . . . . . . . . . . . . . 15-16
SHUTTING DOWN PRESSURE WASHER . . . . . . . . . . . . . . . . . . . . 16
USAGE OF CLEANING DETERGENTS . . . . . . . . . . . . . . . . . . . . . . . 16-17
MAINTENANCE . . . . . . . . . . . . . . . . . . . . . . . . . . . . . . . . . . . . . . . . . . . 17-19
TROUBLESHOOTING GUIDE . . . . . . . . . . . . . . . . . . . . . . . . . . . . . . . . . 19-24
SPECIFICATIONS . . . . . . . . . . . . . . . . . . . . . . . . . . . . . . . . . . . . . . . . . . 24-25
1 YEAR LIMITED WARRANTY . . . . . . . . . . . . . . . . . . . . . . . . . . . . . . . . 25-27
CONGRATULATIONS!
Thank you for choosing this pressure washer. Our aim is to provide you with quality professional products, and we want you to be totally satisfied with your product
and our Customer Service. If any help or advice is needed, please contact us at
1-888-278-8092. When properly cared for, this product will give you many years of
satisfaction.
1
For consumer questions or comments, please call 1-888-278-8 092.
Days/Hours of operation:
9am-7pm EST Monday - Friday
10am-6pm EST Saturday - Sunday
English and Spanish Speaking Customer Service Representatives are Available.
Page 3
INTRODUCTION
This instruction manual is intended for your benefit. Please read and follow the safety, installation, maintenance and troubleshooting steps described within to ensure
your safety and satisfaction. The contents of this instruction manual are based upon
the latest product information available at the time of publication. The manufacturer reserves the right to make product changes at any time without notice.
GENERAL SAFETY
READ AND FOLLOW ALL INSTRUCTIONS.
Failure to follow all instructions in this manual may result in severe
personal injury or death. Keep this manual and refer to it for Safety
Instructions, Operating Procedures, and Warranty.
SAVE THESE INSTRUCTIONS FOR
FUTURE REFERENCE.
RECOGNIZE SAFETY SYMBOLS, WORDS AND LABELS
The safety instructions provided in this manual are not intended to cover all possible
conditions and practices that may occur when operating, maintaining and cleaning
power tools.
Always use common sense and pay particular attention to all the DANGER,
WARNING, CAUTION and NOTE statements in this manual.
This is the safety alert symbol. It is used to alert
you to potential personal injury hazards. Obey all
safety messages that follow this symbol to avoid
possible injury or death.
DANGER indicates an imminently hazardous
situation which, if not avoided, will result in death
or serious injury.
WARNING indicates a potentially hazardous
situation which, if not avoided, could result in
death or serious injury.
2
Page 4
CAUTION indicates a potentially hazardous
situation which, if not avoided, may result in
minor or moderate injury.
CAUTION used without the safety alert symbol
indicates a potentially hazardous situation which,
if not avoided, may result in property damage.
NOTE provides additional information that is useful
for proper use and maintenance of this tool. If a NOTE
is indicated, make sure it is fully understood.
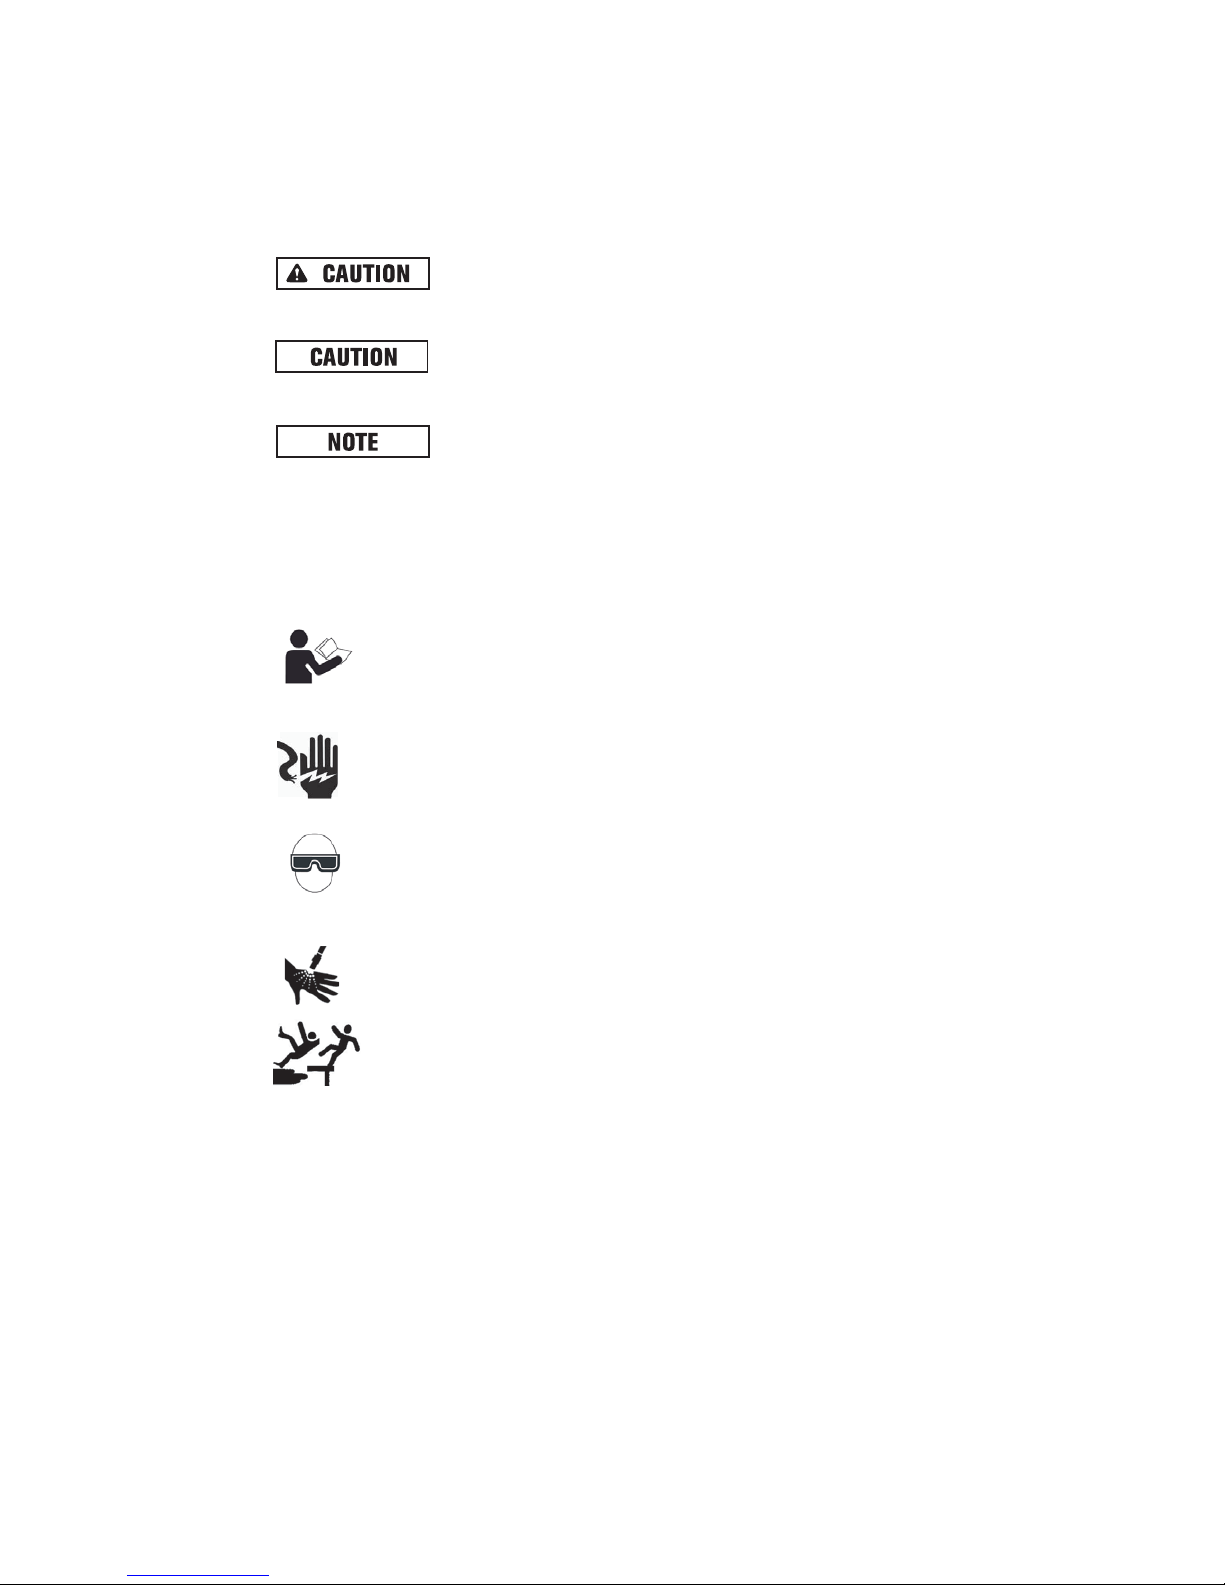
In addition to SAFETY ALERTS listed above, there could also be numerous symbols
alerting the operator that specific safety measures are required to safely operate this
tool. Learn these SAFETY SYMBOLS as well as the SAFETY ALERTS to prevent
injury to the operator and to bystanders.
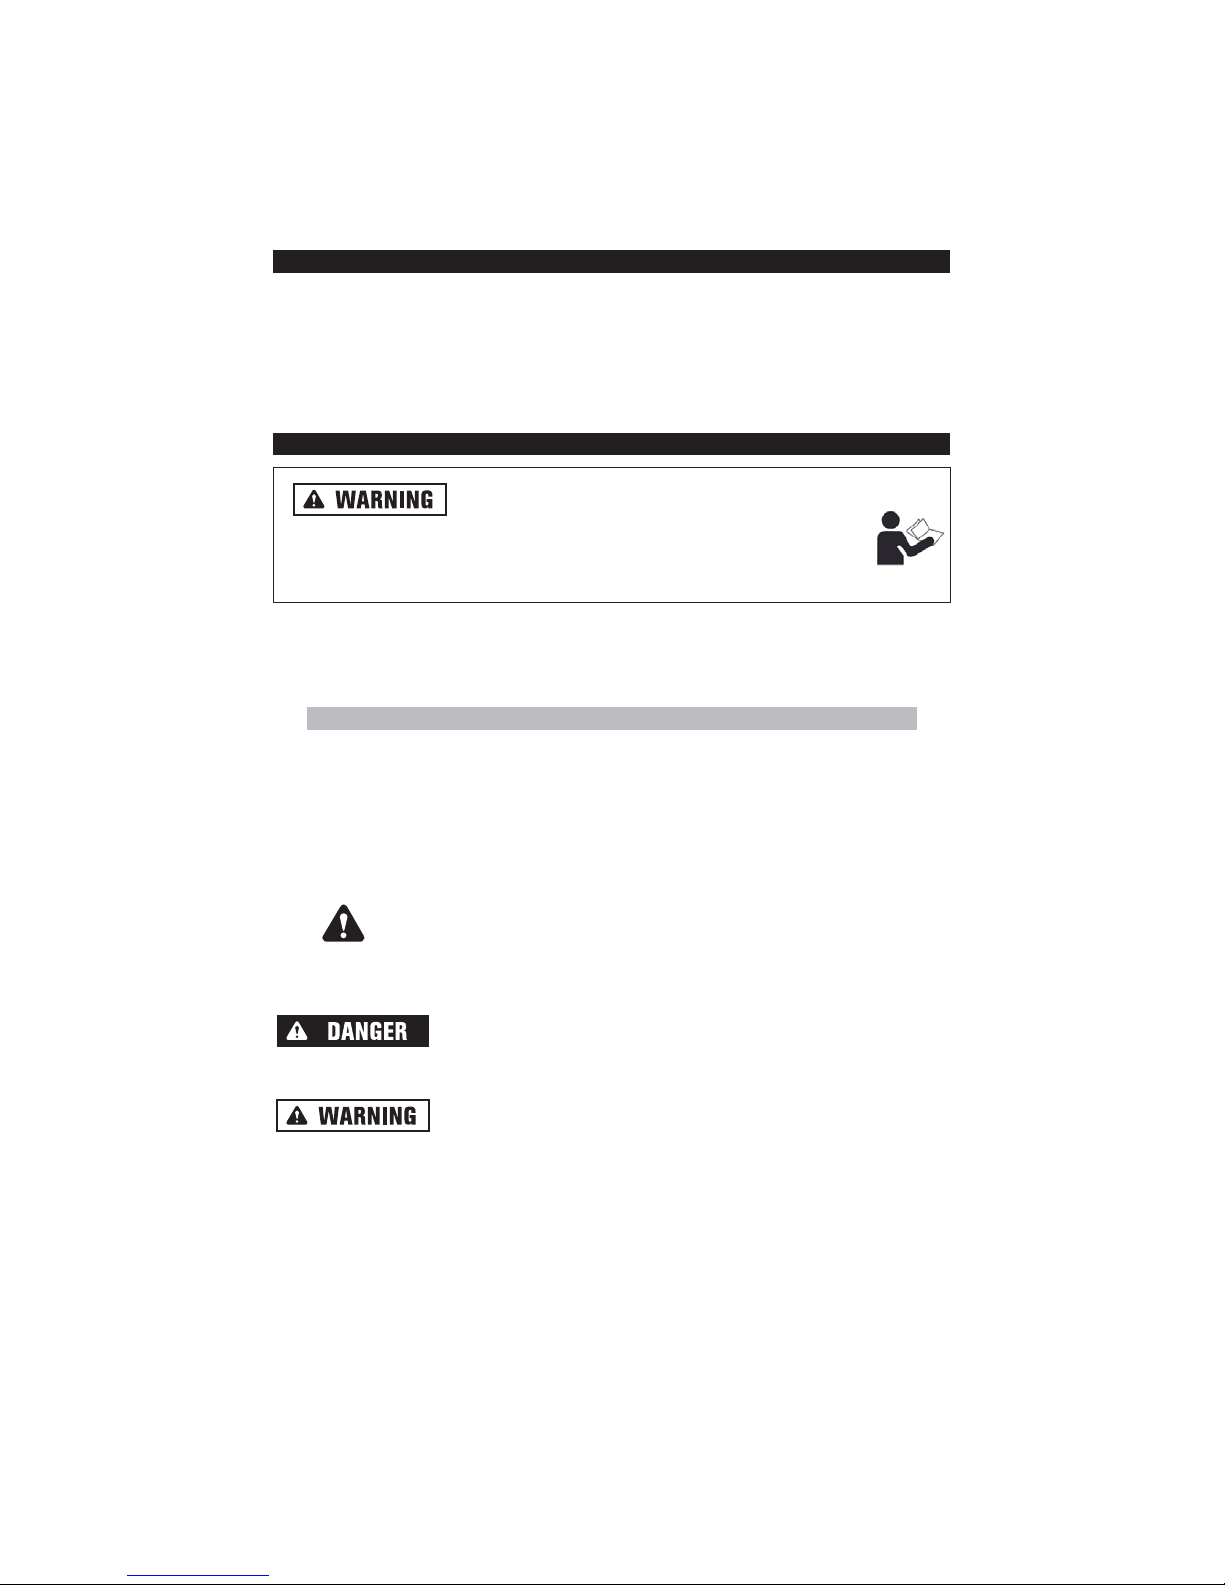
READ OPERATING INSTRUCTIONS: Read and understand tool labels,
safety warnings and precautions in this manual before operating the tool.
Failure to follow WARNINGS could result in serious injury or even death
to the operator or bystanders.
ELECTRICAL SHOCK: This tool produces hazardous electrical voltage.
Read and become familiar with this manual’s WARNINGS and CAUTIONS
so that it is installed and used properly.
WEAR APPROVED EYE PROTECTION: Spray can splash back or propel
objects, including incorrectly attached accessories. Always wear
approved eye protection. Safety glasses must conform to the requirements of American National Standards Institute (ANSI) Z87.1 and provide protection against flying particles from both front and side.
INJECTION HAZARD: Pressure washers can produce fluid streams
severe enough to penetrate animal and human flesh.
SLIPPING and FALLING: Pressure washers produce puddles of slippery
liquid that can result in falls. Kickback from spray wand can result in falls
when using unstable platforms.
3
Page 5
IMPORTANT INFORMATION ABOUT THIS MANUAL
Improper and unsafe use of this Pressure Washer can
result in death, fire and/or bodily injury. This instruction manual contains
important information about product safety. Keep the instruction manual
available for others to read before they use the Pressure Washer.
Improper maintenance and operation are responsible for the majority of accidents
involving Pressure Washers. The largest portion of these could be prevented by recognizing the basic safety rules and precautions. Most accidents can be avoided if
the operator recognizes a potentially hazardous situation before it happens and by
observing appropriate safety rules and procedures as outlined in this manual.
Basic safety precautions are outlined in the SAFETY portion of this manual and
throughout the text in this manual where a potential hazard might occur.
Hazards that MUST be avoided to prevent serious injury follow headers marked DANGER
or WARNING. These same precautions are placed as labels on the tool itself.
NEVER use this Pressure Washer for applications that are NOT specified in this manual.
UNPACKING & INSPECTION
After opening the carton, unpack your new Pressure Washer and related parts &
accessories. Please inspect it carefully for any damage that may have occurred
during transit. If any parts are missing, please contact our Consumer Helpline:
Phone: 1-888-278-8092
Do not operate this Pressure Washer if damaged during
shipment, handling or misuse. Damage may result in bursting, which can
cause serious injury or property damage. All damaged parts must be
repaired or replaced as needed prior to operating this Pressure Washer.
Check to see that all nuts, bolts and fittings are secure before putting this Pressure
Washer into service. If you have any questions, or require assistance with damaged
or missing parts, please contact our Consumer Helpline: Phone: 1-888-278-8092
Please have the serial number, model number, date of purchase, and parts list (with
missing parts identified) available for reference when calling.
MODEL NUMBER:
SERIAL NUMBER:
DATE OF PURCHASE:
4
Page 6
SAFETY WARNINGS
READ ALL SAFETY WARNINGS BEFORE
USING PRESSURE WASHER.
GENERAL SAFETY RULES
People with electronic devices, such as pacemakers, should consult their
physician(s) before using this product. Operation of electrical equipment in close
proximity to a heart pacemaker could cause interference or failure of the pacemaker.
WARNING: This product contains chemicals known to the State of California to
cause cancer and birth defects or other reproductive harm.
Keep work area clean and well lit. Messy areas and cluttered workbenches
invite personal injury and/or property damage. Clear all work areas of unnecessary tools, debris, furniture, etc.
Make sure the work area is well ventilated. Never operate in an enclosed area.
Do not place objects on top or against the tool.
Handle correctly. Always operate according to the instructions provided.
Never allow the tool to be operated by children, individuals unfamiliar with its
operation or unauthorized personnel.
Keep children and visitors away. All children should be kept away from the
work area. DO NOT let children handle the tool. Maintain a safe distance for any
person near the work area.
Childproof the workshop. The use of master switches and padlocks is highly
recommended. Remove starter keys where applicable.
Stay alert, watch what you are doing, and use common sense. Do not stand
on tool. Do not use tool while tired or under the influence of drugs, alcohol
or medication. A moment of inattention while operating the tool may result in
serious personal injury.
Operating any tools or equipment under the influence of drugs, alcohol, or
medication can cause personal injury to yourself and others.
Use the right tool. Use tools properly and for their intended task. Do not force
a small tool to do the job of a heavy-duty tool. Using the right tool to do the
right job will make doing the job safer.
5
Page 7

Always make sure the tool is in the OFF position when making adjustments,
changing parts, or performing any maintenance.
Service must be performed only by qualified repair personnel. Service or
maintenance by unqualified personnel may result in a risk of injury.
Do not use the tool if the power switch does not turn it “ON” or “OFF”. A tool that
cannot be controlled with the switch is dangerous and must be repaired.
Store all maintenance tools away from the immediate area before turning ON
the tool.
Do not overreach. Proper footing and balance is a must at all times while using
tools. Unstable support may lead to personal injury. Do not stand on the tool.
Serious injury could result if the tool tips over or you accidentally contact tool.
When using accessories, consult the owner’s manual provided by the manufacturer. The use of improper accessories may cause risk of injury to yourself and others.
Keep protective guards in place and in proper working condition.
Maintain tools and equipment with care. They will function better and more
safely when kept clean and in good working condition. Keeping the tool clean,
dry, and free of grime will add to its life and performance.
Do not use the tool for applications other than specified.
SAFETY RULES FOR PRESSURE WASHERS
RISK OF INJURY
TO reduce the risk of injury, user must read and understand all
safety instructions and warnings at the beginning of this manual.
Pressure Washer produces fluid pressures and velocities high
enough to penetrate human and animal flesh which could result in
serious injury or amputation.
Ensure all connections are tightened securely. Inspect all hoses to ensure
they are not damaged or kinked. Loose connections or damaged hoses can
result in injection injuries.
Ensure all fittings are properly connected. Pull on connection to ensure fittings are secure. Improperly connected fittings can unexpectedly separate
resulting in injury.
6
Page 8
NEVER place hands in front of nozzle.
NEVER attempt to attach or remove spray wand or hose fittings while Pressure
Washer system is pressurized.
DO NOT treat fluid injection injuries as a simple cut. Seek immediate medical attention.
HIGH VELOCITY fluid spray can cause objects to break, propelling particles
at high speeds.
ALWAYS wear approved safety glasses when using or doing
maintenance on Pressure Washers.
ALWAYS wear protective clothing to prevent accidental spraying.
DO NOT permanently secure spray wand trigger in open position.
DO NOT use spray wand that does not have a trigger lock or trigger guard in
place and in proper working order.
DO NOT use acids, toxic or corrosive chemicals, poisons, insecticides, flammable solvents or bleach with Pressure Washer. Use of these chemicals can result
in damage to equipment or serious injury or death.
RISK OF EXPLOSION - Do not spray flammable liquids.
RISK OF INJECTION OR INJURY to persons. Do not discharge stream at persons.
RISK OF INJECTION - Unit will start spraying when trigger is squeezed, if
“ON/OFF” switch is in “ON” position, point gun in safe direction.
GUN KICKS BACK - Firmly hold with both hands.
NEVER allow children to operate a Pressure Washer. Keep children at a safe
distance when an adult is using a Pressure Washer.
NEVER direct spray at Pressure Washer.
NEVER operate the Pressure Washer after it has tripped the GFCI or the main
circuit breaker unless the cause has been identified and resolved.
IF an extension cord must be used, keep the power cord connection out of
any standing water, and use a heavy duty three-wire properly grounded type.
Keep the connection as far away as possible from the item being washed and
any water runoff.
7
Page 9
NEVER cut or splice the power cord or extension cords.
DO NOT spray electrical apparatus and wiring.
WEAR rubber-soled tennis shoes or other footwear that provides some insula-
tion when operating the Pressure Washer.
COLD water use only.
FOR EITHER INDOOR OR OUTDOOR USE. Store indoors.
DO NOT direct spray toward electrical outlets, switches or products
connected to electrical service. Failure to observe this
warning can
result in electrocution resulting in severe electrical shock or burns
and possibly resulting in death.
NEVER run the pressure pump without the water supply connected and turned
on. Non-repairable damage to the pump will occur.
RISK OF FALLING - Pressure washer can create puddles of slippery
solutions that can become hazardous.
ENSURE you stand on a stable surface while operating Pressure Washe
r. Initial
kickback from engaging spray wand can cause you to lose your balance and fall
resulting in minor to severe injuries.
USE EXTREME CAUTION if you must operate Pressure Washer from a ladder or
scaffolding. Kickback from spray wand can result to loss of balance and result
in a fall that could cause serious injuries.
WHEN cleaning Pressure Washer, ensure there are adequate slopes for drainage so
solutions don’t cr
eate puddles around unit that could result in slipping and falling.
RISK OF ELECTROCUTION:
Connect only to properly grounded outlet. Do not remove ground pin.
Inspect cord before using. DO NOT use if the cord is damaged.
Keep all connections dry and off the ground.
DO NOT touch plug with wet hands.
Connect to individual branch circuit only.
This product is provided with Ground Fault Circuit Interrupter bui
lt into the
power cord plug. If replacement of the plug or cord is needed, use only identical replacement parts.
8
Page 10

GROUND-FAULT CIRCUIT - INTERRUPTER PROTECTION
This Pressure Washer is provided with a Ground-Fault CircuitInterrupter (GFCI) built into the plug of the power supply cord. This
device provides additional protection from the risk of electric
shock. Should replacement of the plug or cord become necessary,
use only identical replacement parts that include GFCI protection.
GROUNDING INSTRUCTIONS
In the event of a malfunction or breakdown, grounding provides a path of least
resistance for electric current to reduce the risk of electric shock. This tool is
equipped with an electric cord having an equipment-grounding conductor and a
grounding plug. The plug must be plugged into a matching outlet that is properly
installed and grounded in accordance with all local codes and ordinances.
Do not modify the plug provided - if it will not fit the outlet, have the proper outlet
installed by a qualified electrician.
Improper connection of the equipment-grounding conductor can result in a risk of
electric shock. The conductor with insulation having an outer surface that is green
with or without yellow stripes is the equipment-grounding conductor. If repair or
replacement of the electric cord or plug is necessary, do not connect the equipmentgrounding conductor to a live terminal.
Check with a qualified electrician or service personnel if the grounding instructions
are not completely understood, or if in doubt as to whether the tool is properly
grounded.
Use only 3-wire extension cords that have 3-prong grounding plugs and 3-pole
receptacles that accept the tool’s plug.
Repair or replace damaged or worn cord immediately.
This tool is intended for use on a circuit that has an outlet that looks like the one
illustrated in Figure 1. The tool has a grounding plug that looks like the plug illustrated in Figure 1. A temporary adapter, which looks like the adapter illustrated in
Figure 1, may be used to connect this plug to a 2-pole receptacle as shown in Figure
1 if a properly grounded outlet is not available. The temporary adapter should be
used only until a properly grounded outlet can be installed by a qualified electrician.
The green-colored rigid ear, lug, and the like, extending from the adapter must be
connected to a permanent ground such as a properly grounded outlet box.
9
Page 11

EXTENSION CORD USAGE
Use only 3-wire extension cords that have 3-prong grounding-type plugs and 3-pole
cord connectors that accept the plug from the product. Use only extension cords that
are intended for outdoor use. These extension cords are identified by a marking
“Acceptable for use with outdoor appliances; store indoors while not in use.” Use only
extension cords having an electrical rating not less than the rating of the product. Do
not use damaged extension cords. Examine extension cord before using and replace if
damaged. Do not abuse extension cord and do not yank on any cord to disconnect.
Keep cord away from heat and sharp edges. Always disconnect the extension cord
from the receptacle before disconnecting the product from the extension cord.
10
UNGROUNDED AC OUTLET
GROUNDED AC OUTLET
GROUNDING ADAPTER
POWER CORD PLUG
POWER CORD PLUG
COVERPLATE
MOUNTING SCREW
GROUNDING PIN
GROUNDING PIN
GROUNDING
RIGID EAR
Figure 1
Page 12

FUNCTIONAL DESCRIPTION
PRESSURE WASHER FEATURES:
1. Gun
2. Adjustable Nozzle
3. Pressure Adjust Collar
4. Wand
5. Trigger
6. Trigger Safety Lock
7. Safety Glasses
8. Nozzle Cleaning Needle
9. Pressure Hose
10. Retractable Handle
11. On/Off Switch
PRESSURE WASHER TERMINOLOGY
Following are common terms associated with the use of Pressure Washers:
PSI: Pounds per square inch – common unit measure used for water pressure, air
pressure, hydraulic pressure and pounds of force.
GPM: Gallons per minute (liters per minute [metric]) – common unit measure used
for flow rate of water.
11
12. Garden Hose Coupling/Water Inlet
13. Detergent Tank Lid
14. Electric Cord Holder
15. Gun Holder (Top)
16. GFCI Power Cord
17. Power Cord Hook
18. Pressure Hose Connector/Water Outlet
1
5
6
2
3
4
7
8
10
13
14
15
16 17
18
11
12
9
Page 13

ASSEMBLY & SETUP
This Pressure Washer requires some assembly. If you have any problems with the
assembly of your Pressure Washer, please call the Pressure Washer helpline at
1-888-278-8092. If calling for assistance, please have the model, revision, and serial number from the data tag available.
1. Using a box cutter, cut open the Pressure Washer carton on top.
2. Carefully remove all items from the box and inspect for completeness (see
Functional Description).
WAND/ GUN CONNECTION
Insert the wand into the gun fitting outlet.
Ensure that the threads are aligned properly
and that the connection is secure. Securely
tighten the nut by hand.
PRESSURE HOSE/GUN CONNECTION
Unpack the pressure hose and connect
the metal fitting to the gun inlet. Ensure
that the threads are aligned properly
and that the connection is secure.
Securely tighten the nut by hand. Place
the gun into the gun holder on the side
of the Pressure Washer.
PRESSURE HOSE / WASHER CONNECTION
1. Remove and discard the protective plastic plug from the Pressure Hose Connector located
on the rear of unit.
2. Connect the pressure hose plastic
fitting to the Pressure Hose
Connector. Ensure that the threads
are aligned properly and that the
connection is secure. Securely
tighten the nut by hand.
GARDEN HOSE / WASHER CONNECTION
DO NOT run the pressure washer without the water supply
connected and turned on. Damage to equipment resulting from failure to follow
this instruction will void warranty.
12
Page 14

1. Before connecting the garden hose to
the Pressure Washer, connect the garden hose to the water source and run
water through the hose to flush out any
debris. Shut off the water at the source.
2. Attach garden hose to the Pressure
Washer coupling inlet at the lower front of the unit. Ensure that the threads are
aligned properly and that the connection is secure. Securely tighten the nut by
hand.
3. Turn on the water source.
For best result, use a short garden hose (30 ft. or less length),
cold water (less than 100 F) and adequate pressure (no less than 50 PSI).
OPERATING THE PRESSURE WASHER
POWER SUPPLY CONNECTION
KEEP all electrical connections dry and off the ground.
NEVER touch the plug with wet hands.
NEVER cut or remove grounding blade (round longer pin) on
GFCI attachment plug.
1. Connect the Pressure Washer GFCI power cord to a
dedicated electrical outlet.
2. Press the RESET button on the GFCI to ensure its
proper operation.
Outlet capacity must be 120V, 60HZ and minimum 15 AMP.
13
2
3
Page 15

OPERATING THE PRESSURE WASHER
ALWAYS wear approved safety glasses when operating Pressure
Washers. Spray can splash back or propel objects, including
incorrectly attached accessories.
The high pressure stream of water that this equipment produces can cut
through skin and its underlying tissues, leading to possible amputation.
Spray gun traps high water pressure, even when the motor
is stopped and water is disconnected, which can cause injury.
Kickback from spray gun can cause you to fall.
1. For your protection, wear the protective safety glasses (provided).
2. Place the Pressure Washer near the working surface.
Make sure that the water source is turned on and all connections
to the Pressure Washer and Spray Gun are secure and without any water leakage.
3. Carefully remove the gun from its holder.
4. Hold th
e gun securely with both hands. Point the gun in a
safe direction. Make sure that the gun safety (the button
above the trigger) is unlocked and squeeze the trigger to
allow any air that is trapped inside the unit and hoses to
escape. Continue to squeeze the trigger until a steady
stream of water comes from the nozzle. Release spray gun trigger.
5. Turn on the ON/Off switch on the front of the Pressure
Washer. NOTE: Motor does not start until trigger is pulled.
6. Point the gun in a safe direction and squeeze the trigger
to start motor and water flow.
Make sure wand is
SECURELY tightened to Gun. If the wand is not
securely locked into place, it could be ejected
under high pressure when operating the gun,
possibly causing injury or damage.
14
Page 16

WATER FLOW ADJUSTMENT
ADJUSTING FOR FAN PATTERN
The angle of spray coming out of the nozzle may be adjusted by rotating the front
of the nozzle (cone). This will vary the spray pattern from approximately a 0°
narrow high impact stream (by turning the nozzle fully to the left) to a 60° wide fan
spray (by turning the nozzle fully to the right).
A narrow stream has high impact force on the cleaning surface and results in maximum deep cleaning in a concentrated area. However, this narrow high impact spray
must be used cautiously, as it may damage some surfaces.
A wide fan pattern will distribute the impact of the water over a larger area, resulting in excellent cleaning action with a reduced risk of surface damage. Large
surface areas can be cleaned more quickly using a wide fan pattern.
ADJUSTING FOR PRESSURE
The Adjustable Pressure Nozzle allows you to vary the pressure of your spray by
turning the end of the nozzle (collar). Turning the collar fully to the right will reduce
the pressure to its minimum. If the Pressure Washer has a detergent tank system
you must use this minimum pressure setting in order to suction detergent.
Turning the collar fully to the left will increase the pressure to its maximum for greatest cleaning efficiency. Turning the collar changes the pressure but not the fan pattern.
Detergent will NOT flow until the Pressure Adjust Collar is
set (turned) to low pressure position.
USING THE SPRAY WAND
To prevent damage to your surface and to select an appropriate working pressure for your application, always start with lowest pressure
setting and continue increasing the pressure until the best work result is
achieved.
USAGE TIPS:
• For most effective cleaning, keep spray nozzle from 8 to 24 inches away from
cleaning surface.
15
LOW
LOW PRESSURE
HIGH PRESSURE
CONE
HIGH
WIDE
WIDE
STREAM STREAM
COLLAR
Page 17

• If you get spray nozzle too close, especially using high pressure mode, you may
damage surface being cleaned.
• DO NOT get closer than 6 inches when cleaning tires.
SHUTTING DOWN THE PRESSURE WASHER
The Pressure Washer motor runs only when the trigger is engaged. To shut off the
Pressure Washer:
1. Release spray gun trigger.
2. Move unit's ON/OFF switch to OFF position.
IMPORTANT: Releasing the trigger will shut off the motor but does not shut off electrical power to the unit.
3. Turn off water supply.
4. ALWAYS point spray gun in a safe direction and squeeze spray gun trigger to
relieve built up pressure in the unit.
Spray gun traps high water pressure, even when motor is
stopped and water is disconnected.
5. Engage trigger lock on spray gun when not in use. Place the gun in its holder on
the side of the unit.
6. Disconnect GFCI plug from outlet and wrap power cord around the Power Cord
Hook at the back of the pressure washer. Store the GFCI plug inside its housing
in the center of cord intake.
7. Disconnect pressure washer from water supply and store the unit (see MAINTENENCE section).
USAGE OF CLEANING DETERGENTS
TO APPLY DETERGENT:
1. Select a detergent/cleanser appropriate for the intended application.
2. Prepare detergent solution as recommended by the manufacturer.
3. Remove the detergent tank lid located at the top of the Pressure Washer.
4. Fill tank with prepared detergent solution. A small funnel may help with this task.
Replace the detergent tank lid.
5. Set (turn) the Pressure Adjust Collar to low pressure position.
Detergent will NOT flow until the Pressure Adjust Collar is
set (turned) to low pressure position.
6. Pull spray gun trigger and apply detergent to a dry surface, starting at lower portion
of area to be washed and work upward, using long, even, overlapping strokes.
16
Page 18

Wetting the surface first is not recommended, as it dilutes
the detergent and reduces its cleaning ability.
7. Allow detergent to "soak in" for 3-5 minutes before washing and rinsing.
Reapply as needed to prevent surface from drying. Do Not allow detergent to
dry on surface (prevents streaking).
TO RINSE:
1. Reset the Pressure Adjust Collar to high pressure, press the trigger and wait for
the detergent to clear.
2. Keep the spray gun a safe distance from the area you plan to spray.
3. Apply a high pressure spray to a small area, and then check the surface for
damage. If no damage is found, it is okay to continue cleaning.
4. Start at the top of the area to be rinsed, working down with same overlapping
strokes as you used for washing and applying detergent.
When you have completed use of the detergent injection system, continue to run in
low pressure position and flush clean water through the detergent tank until it is
thoroughly cleaned.
Failure to clean properly will cause the injection system to
become clogged and inoperable.
Stop the unit by pressing the ON/OFF button.
Disconnect electrical plug.
Turn off water and depressurize unit by squeezing trigger.
CLEANING TIPS:
• Never leave the Pressure Washer unattended while it is plugged into an electrical outlet and while water is supplied to the equipment.
• Never use the Pressure Washer water inlet to siphon detergent or wax.
• If you have the nozzle too far away from the surface being washed, the cleaning
will not be as effective.
IMPORTANT: DO NOT get closer than 6 inches when cleaning.
MAINTENANCE
Regular maintenance will improve performance and extend life of Pressure Washer.
Pressure Washer’s warranty does not cover items that have been subjected to opera-
tor abuse or negligence. Only by maintaining Pressure Washer in accordance with
instructions in this manual will the full value of the warranty be honored.
17
Page 19

Some adjustments will need to be made periodically to properly maintain the Pressure
Washer. All service and adjustments should be made at least one time each season. It
is important that the maintenance chart below be followed.
MOVING AND STORAGE
After each application or winter storage follow these instructions:
1. When finished using the Pressure Washer, you must first drain and rinse the
detergent tank.
2. Run the Pressure Washer in low pressure until all of the soap is drained from
the detergent tank.
3. Pour clear water into the tank and run it through on low pressure as though it
were detergent.
4. Turn the machine OFF and squeeze the trigger to release the trapped pressure
inside of the machine.
5. Remove both the garden hose and pressure hose from the unit.
6. Turn ON the machine and allow it to run for 5 seconds. (This will clear out most
of the water trapped in the pump).
7. Unplug the machine and store in a dry, climate controlled environment.
NOTE: Do not store the machine or accessories in a place where the temperature could
drop below 40°F.
AFTER EXTENDED STORAGE
Scale deposits may form in the pump when it is not used for some time. This causes
the motor to hesitate or not start up at all.
1. Do not plug the unit into electrical outlet or connect the pressure hose to the unit.
2. Connect garden hose to the unit and allow the water to exit from high pressure
outlet for a few seconds to rinse the system.
3. Shut off the water.
4. Connect pressure hose to the gun and then lock hose safety device.
CONNECTIONS
Connections (fittings) on Pressure Washer, pressure hose, gun and spray wand should
be cleaned regularly and lubricated with non-water soluble grease to prevent leakage
and damage to the o-rings.
NOZZLE
The nozzles should be lubricated with non-water soluble grease or light oil regularly.
Clogging of the nozzle causes the pump pressure to build up too high and cleaning is
required.
1. Make sure Pressure Washer On/Off switch is set to Off and spray gun trigger is
locked.
18
Page 20

2. Set the nozzle to high pressure setting to make
the nozzle hole accessible.
3. Clear blockage in nozzle by inserting the nozzle
cleaning needle (provided) through center hole.
4. After cleaning, remove the needle from nozzle
and store for future use.
LUBRICATION
This Pressure Washer does not require any maintenance on the pump or motor.
Both assemblies are pre-lubricated and sealed, requiring no additional lubrication.
A small amount of oil leakage is normal. If oil leakage
persists or became worse, contact our customer service department.
WATER INLET SCREEN (FILTER)
The Pressure Washer is equipped with a water inlet
screen to protect the pump from foreign debris.
CAREFULLY remove debris from the screen using a
nonabrasive and dull object (finger or Q-Tip). Make sure
screen is not torn or broken.
Do not operate Pressure Washer without screen filter in
place. Impurities entering pressure pump can cause internal damage.
COOLING SYSTEM
The air louvers, located in and around the Pressure Washer housing must be kept
clean and free of any obstructions to ensure proper air cooling of the motor and
pump during operation.
TROUBLESHOOTING GUIDE
19
Problem Probable Cause Solution
Unit will not start (when
trigger is depressed)
1. Unit is not turned on.
2. Loose or disconnected
plug.
3. GFCI has tripped.
4. Thermal Switch has
tripped.
1. Press ON/OFF Switch
into ON position.
2. Reconnect Plug.
3. Push reset button on
plug.
4. Allow to cool and
restart unit.
SCREEN
Page 21

TROUBLESHOOTING GUIDE
20
Problem Probable Cause Solution
Unit will not start (when
trigger is depressed)
5. No AC power at the
outlet.
6. Main voltage supply is
too low.
7. Extension cord is too
long or wire size too
small.
8. Defective ON/OFF
Switch.
9. Defective GFCI Plug.
10. Defective Gun.
5. Main circuit breaker is
tripped or outlet is faulty.
6. Make sure main supply
voltage is adequate
(See specifications).
7. Remove extension cord
or use proper extension
cord (See instructions).
8. Call Customer Service:
1-888-278-8092.
9. Call Customer Service:
1-888-278-8092.
10. Turn off the unit.
Remove the Gun and
Hose assembly from
high pressure outlet in
the back of the unit.
Redirect the outlet to a
safe direction and
switch ON the unit. If
the unit starts and
water comes out of the
front, the Gun may
need to be replaced.
Call Customer Service:
1-888-278-8092.
AC outlet circuit breaker
trips
1. Circuit (outlet) overloaded.
2. Extension cord is too
long or wire size too
small.
3. Nozzle partially
blocked causing
excessive pressure.
1. Make sure circuit is
rated at 15 amps or
greater and unit is
plugged into a
dedicated circuit.
2. Use proper extension
cord (see instructions).
3. Clean Nozzle (see
instructions).
Page 22

TROUBLESHOOTING GUIDE
21
Problem Probable Cause Solution
Motor stops suddenly
1. Extension cord is too
long or wire size too
small.
2. Thermal safety switch
has tripped due to
overheating and overwork.
1. Remove extension
cord or use proper
extension cord (See
instructions).
2. Make sure main supply
voltage corresponds to
specifications. Allow to
cool and restart unit.
Unit will not stop when
trigger is released
1. Gun/Hose Assembly is
defective.
1. Remove Wand from
the Gun and squeeze
trigger to ensure that
the water is coming
out of the front of the
Gun at a rate equal to
the Garden Hose. Call
Customer Service:
1-888-278-8092.
Unit begins to smoke
1. Overheated, overloaded or damaged
motor.
1. Turn off unit and Call
Customer Service:
1-888-278-8092.
Trigger will not move
1. Gun Safety Lock in
engaged.
1. Release Safety Lock
(See instructions).
Gun/Hose - Leaking water
1. Loose fitting. 1. Tighten fittings. If persists, Gun/Hose will
need to be replaced.
Call Customer Service:
1-888-278-8092.
Pump is noisy
1. Pump is sucking air. 1. Make sure hoses and
fittings are air tight.
Turn off machine and
purge pump by
squeezing trigger gun
until a steady flow of
water emerges through
the nozzle.
Page 23

TROUBLESHOOTING GUIDE
22
Problem Probable Cause Solution
No water coming out of
Wand
1. Clogged Nozzle.
2. Wand is attached
incorrectly.
3. Clogged filter.
4. Kink in the Garden
Hose or Hose is
wrapped on a storage
wheel.
5. Gun/Hose Assembly is
defective.
1. Clean Nozzle (See
instructions).
2. See instructions.
3. Clean filter (see
instructions)
4. Unwrap the Garden
Hose and lay it out flat
to ensure that there
are no kinks in the
Hose.
5. Remove Wand from
the Gun and squeeze
trigger to ensure that
the water is coming
out of the front of the
Gun at a rate equal to
the Garden Hose. Call
Customer Service:
1-888-278-8092.
Unit does not reach
maximum pressure or
pressure is irregular
1. Diameter of garden
hose is too small.
2. Water supply is
restricted.
3. Not enough inlet water
supply.
4. Garden Hose length is
too long.
1. Replace with a 5/8
inch or larger garden
hose.
2. Make sure garden
hose has no kinks,
leaks and blockage.
3. Open water source
fully.
4. Shorten the length of
the Garden Hose. We
recommend a maximum length of 25 to
50 feet for City water
supply and 30 feet for
Well water supply.
Page 24

TROUBLESHOOTING GUIDE
Problem Probable Cause Solution
Unit does not reach
maximum pressure or
pressure is irregular
5. Water supply is over
I00°F / 37.7˚ C
6. Water inlet filter is
clogged.
7. Water leaking from
either Hose or Unit.
8. Pressure hose is
blocked or leaks.
9. Spray wand is on low
pressure position.
10.Nozzle worn or not
correct size.
11.Gun or Hose failure.
12.Pump sucking air
from hose connections.
13.Pump, Unloader or
Valves are clogged or
worn.
5. Provide cooler water
supply.
6. Clean the Screen filter
(see instructions).
7. Stop water from
leaking before using
the unit or Call
Customer Service:
1-888-278-8092.
8. Clear blocks in pressure hose or replace
hose.
9. Turn spray wand to
high pressure
position.
10.Replace nozzle.
11.Call Customer
Service:
1-888-278-8092.
12.Make sure connection
fittings are properly
tightened.
13.Call Customer
Service:
1-888-278-8092
No detergent
1. Spray wand is in high
pressure position.
2. Detergent is too thick.
3. Damaged or clogged
detergent suction tube.
4. Nozzle is clogged with
debris.
1. Turn Pressure Adjust
Collar to low pressure
position.
2. Dilute detergent.
3. Call Customer Service:
1-888-278-8092.
4. Unclog nozzle using
provided cleaning
needle.
23
Page 25

TROUBLESHOOTING GUIDE
SPECIFICATIONS
24
MAXIMUM PRESSURE 1650 PSI* / 113.8 bar
MAX WATER FLOW 1.2 GPM* / 4.5 LPM
VOLTAGE 120V / 60HZ
CURRENT 12A
DETERGENT TANK 0.62 LITER / 0.16 GAL
ELECTRICAL CORD 35 FT. / 10.6 M
Problem Probable Cause Solution
Detergent Leak from inside
the unit or won’t hold
detergent
1. Disconnected or
Kinked Detergent Pick
up Tube.
2. Chemical Tank Nipple
Broken.
1. Call Customer
Service:
1-888-278-8092.
2. Call Customer
Service:
1-888-278-8092.
Leaking Oil from Pump
1. A small amount of
leakage is normal.
1. If leakage persists, Call
Customer Service:
1-888-278-8092.
Leaking water from
bottom of unit
1. Machine Inlet
connection is
defective.
1. Check the Machine
Inlet at the front of the
unit to ensure that
water is not leaking
from it. If the connection is leaking, it will
have to be replaced.
Call Customer Service:
1-888-278-8092.
Spray wand leaks
1. Spray wand is not
properly attached.
1. See instructions.
Detergent Tank fills up with
water
1. Detergent Suction
Assembly is defective.
1. Call Customer Service:
1-888-278-8092.
Page 26

SPECIFICATIONS
*Meets PWMA-PW101 test requirement.
1 YEAR LIMITED WARRANTY
Express and Exclusive Limited Warranty to Original Retail Buyer
Alltrade Tools LLC (hereinafter "Alltrade") expressly warrants to the original retail
purchaser of the accompanying SNAP-ON™ Pressure Washer and no one else all
parts of the product (except those parts referred to below which are specifically
excluded from such warranty (see Exclusions) to be free from defects in materials
and workmanship for a period of one year from the original date of purchase.
SPECIAL WARRANTY NOTE FOR COMMERCIAL OR RENTAL USE: The above
warranty for this SNAP-ON™ Pressure Washer shall be effective for only 90 days
from the original date of purchase if this tool is used for any COMMERCIAL OR
RENTAL PURPOSE.
The date of purchase shall be the date of shipment to the original purchaser, or the
date the original purchaser took possession, custody, or control of the product,
whichever occurred first. This warranty shall be null and void if the product or any
component thereof is modified or altered. This warranty does not apply to any other
product and/or component thereof manufactured or distributed by Alltrade, and
does not apply to products and/or components thereof designed, manufactured
and/or assembled by others, for which Alltrade makes no warranties whatsoever.
THERE ARE NO WARRANTIES, WHICH EXTEND BEYOND THE DESCRIPTION ON
THE FACE HEREOF.
WARRANTY PERFORMANCE
By purchasing this product, purchaser expressly acknowledges and agrees that
their sole and exclusive remedy under this warranty shall be strictly limited to the
repair or replacement of any covered nonconforming items or parts thereof provided that any such nonconforming item and/or part is promptly returned to an authorized Service Center within the applicable warranty period, with a written request by
purchaser to repair and/or replace the nonconforming item and/or part. We recommend that you keep the original product packaging in the event you need to ship the
unit. We suggest the package be insured against loss or in transit damage. When
sending your product, include your name, address, phone number, e-mail address,
dated proof of purchase (or copy) and a statement about the nature of the problem.
Warranty coverage is conditioned upon purchaser furnishing Alltrade with adequate
written proof that they are the original purchaser and of the original purchase date.
Parts returned, freight prepaid and insured, will be inspected and, at Alltrade's
option, repaired and/or replaced free of charge if it is found to be defective and sub-
25
PRESSURE HOSE 25 FT. / 7.6 m
INLET WATER PRESSURE 40-60 PSI
Page 27

ject to warranty. Alltrade retains the sole discretion to determine whether any item
or part is nonconforming and, if so, whether the item and/or part will be repaired
and/or replaced. If the unit is repaired, new or reconditioned replacement parts may
be used. If Alltrade chooses to replace the product, it may replace it with a new or
reconditioned of the same or comparable design. The repaired or replaced unit will
be warranted under the terms of the remainder of the one year warranty period; covered defective parts not subject to normal wear and tear or other exclusions will be
repaired or replaced, at Alltrade's option. During the warranty period, Alltrade will
be responsible for the return shipping charges. Alltrade's repair and/or replacement
of any nonconforming item and/or part thereof shall constitute fulfillment of all obligations to the purchaser. Alltrade shall not be responsible or liable for any expense,
including freight charges, or repairs made outside Alltrade's facility or an Alltrade
designated service, unless expressly agreed to by Alltrade in writing. Under no circumstances shall Alltrade bear any responsibility for loss of the unit, loss of time or
rental, inconvenience, commercial loss, or consequential damages.
For the location of an Authorized Service Center nearest you, please call customer
service at 1-888-278-8092.
This warranty does not cover parts damaged due to normal wear, abnormal conditions, misapplication, misuse, abuse, accidents, operation, improper storage, or
freight damage. Parts damaged or worn by operation in dusty environments are not
warranted. Failure to follow recommended operating and maintenance procedures
also voids warranty.
DAMAGE TO THE PRODUCT RESULTING FROM TAMPERING, ACCIDENT, ABUSE,
NEGLIGENCE, FAILURE TO FOLLOW INSTRUCTIONS, UNAUTHORIZED REPAIRS
OR ALTERATIONS, DAMAGE WHILE IN TRANSIT TO OUR SERVICE FACILITY, USE
OF UNAPPROVED OR IMPROPER ATTACHMENTS OR ACCESSORIES, OR OTHER
CAUSES UNRELATED TO PROBLEMS WITH MATERIAL OR WORKMANSHIP ARE
NOT COVERED BY THIS WARRANTY.
Alltrade will not be liable for the following: labor charges, loss or damage resulting
from improper operation, maintenance or repairs made by other persons; pre-delivery services such as assembly, oil and lubricants, and adjustment; maintenance
services that are normally required to maintain the product.
The use of other than genuine Snap-On™ Repair Parts will VOID the warranty.
WARRANTY DISCLAIMERS
EXCLUSION AND DISCLAIMER OF ALL OTHER EXPRESS WARRANTIES, GUARANTIES AND/OR REPRESENTATIONS, EXCEPT FOR THE LIMITED WARRANTY
PROVIDED HEREIN, ALL OTHER EXPRESS WARRANTIES, GUARANTIES, AND/OR
REPRESENTATIONS BY ALLTRADE AND OR ITS REPRESENTATIVE(S) REGARDING
THE DESIGN, MANUFACTURE, PURCHASE, USE AND/OR OPERATION OF THE
PRODUCT OR ANY COMPONENT THEREOF SOLD HEREUNDER, REGARDLESS OF
WHETHER ANY SUCH WARRANTY, GUARANTY AND/OR REPRESENTATION,
WRITTEN OR ORAL, ARISES BY OPERATION OF LAW AND/OR EQUITY AND/OR BY
ANY ACT OR OMISSION OF ALLTRADE AND/OR ITS REPRESENTATIVE(S), OR THE
26
Page 28

BUYER, ARE HEREBY EXPRESSLY EXCLUDED AND DISCLAIMED BY ALLTRADE
AND/OR ITS REPRESENTATIVES. PURCHASER KNOWINGLY AND WILLINGLY
WAIVES ANY AND ALL SUCH WARRANTIES AND RIGHTS, CLAIMS AND/OR
CAUSE OF ACTION ARISING THEREFROM OR BASED THEREON. PURCHASER'S
SOLE AND EXCLUSIVE REMEDY IS AS STATED ABOVE.
EXCLUSION AND DISCLAIMER OF ALL IMPLIED WARRANTIES, INCLUDING THE
IMPLIED WARRANTIES OF MERCHANTABILITY AND FITNESS FOR A PARTICULAR
PURPOSE. NO WARRANTY, ORAL OR WRITTEN, OTHER THAN THE WARRANTY
LISTED HEREIN IS MADE WITH REGARD TO THIS PRODUCT. ALL WARRANTIES
AND/OR IMPLIED WARRANTIES, GUARANTIES AND/OR REPRESENTATIONS BY
ALLTRADE AND/OR ITS REPRESENTATIVE(S) REGARDING THE DESIGN, MANUFACTURE, PURCHASE, USE AND/OR OPERATION OF THE PRODUCT OR ANY COMPONENT THEREOF SOLD HEREUNDER, REGARDLESS OF WHETHER ANY SUCH
WARRANTY, GUARANTY AND/OR REPRESENTATION, WRITTEN OR ORAL, ARISES
BY OPERATION OF LAW AND/OR EQUITY AND/OR BY ANY ACT OR OMISSION OF
ALLTRADE AND/OR ITS REPRESENTATIVES. PURCHASER KNOWINGLY AND
WILLINGLY WAIVES ANY AND ALL SUCH WARRANTIES AND RIGHTS, CLAIMS
AND/OR CAUSES OF ACTION ARISING THEREFROM OR BASED THEREON.
PURCHASER'S SOLE AND EXCLUSIVE REMEDY IS AS STATED ON PRECEDING PAGES.
LIMITATIONS OF LIABILITY
IN NO EVENT SHALL ALLTRADE AND/OR ITS REPRESENTATIVE(S) BE LIABLE FOR
INDIRECT, INCIDENTAL, SPECIAL AND/OR CONSEQUENTIAL DAMAGES OF ANY
KIND ARISING OUT OF OR RELATED TO, DIRECTLY OR INDIRECTLY, ANY BREACH
OR PROVISION OF ANY AGREEMENT BETWEEN ALLTRADE AND/OR ITS REPRESENTATIVE(S) AND PURCHASER, AND WARRANTY HEREUNDER, AND/OR THE
EXISTENCE, DESIGN, MANUFACTURE, PURCHASE, USE AND/OR OPERATION OF
ANY ITEM(S) SOLD HEREUNDER EVEN IF ALLTRADE AND/OR ITS REPRESENTATIVE(S) HAS BEEN ADVISED OF THE POSSIBILITY OF ANY SUCH DAMAGES. IN NO
EVENT, WHETHER BECAUSE OF A BREACH OF CONTRACT, WARRANTY, TORT
(INCLUDING NEGLIGENCE) OR OTHERWISE, SHALL ALLTRADE'S AND/OR ITS
REPRESENTATIVE (S) LIABILITY EXCEED THE PRICE OF THE PRODUCT. All LIABILITY CONNECTED WITH THE USE OF THIS PRODUCT SHALL TERMINATE UPON
THE EXPIRATION OF THE WARRANTY PERIODS SPECIFIED ABOVE.
LIMITATIONS ON WARRANTY DISCLAIMERS
Some states do not allow limitations on how long an implied warranty lasts and
some states do not allow the exclusion or limitation of the incidental or consequential damages, so part or all of the above limitations or exclusions may not apply to
you. This warranty gives you specific legal rights, and you may also have other
rights, which vary from state to state.
If your product is not covered by this warranty, please call our Customer Service
Department at 1-888-278-8092 for general repair information, and charges and the
location of your nearest authorized service facility.
27
Page 29

28
 Loading...