

– WD-PRINT9 – Printer for 4190 – EN
1
WD-PRINT9
INSTALLATION INSTRUCTIONS
PRINTER KIT FOR GW4190 - WD4190
READ CAREFULLY
This document relates to Smeg accessory WD-PRINT9.
This accessory is for installation on Smeg devices only. The kit enables the appliance to acquire and print the
washing cycle performed by the appliance, to allow detection of any anomalies and provide process
traceability.
For proper, safe use, this manual must be used together with the manual of the instrument or glassware
washer on which the accessory is installed.
Failure to read, any misunderstanding or incorrect interpretation of the instructions provided in this manual
may lead to misuse of the appliance, put the operator at risk and conside rably reduce the appliance’s
performance.
The manufacturer declines all liability for uses other than those described in this manual.
Installation, maintenance and repairs must be carried out only by SMEG authorized staff.
In the event that the device is used in breach of the instructions provided by SMEG, the
manufacturer, the relative warranty rights could be forfeited.
The information in this manual is provided for guidance only. The contents and the equipment described may be
subject to change without notice.
19561006202
24/05/2016
Ed.
Date
INFORMATION AND AFTER-SALES SERVICE FOR SMEG
INSTRUMENTS DIVISION PRODUCTS
Our Sales Department staff are able to provide you with information about prices and special offers.
Our After-Sales Department will be able to provide you with guidance about keeping your appliance functioning
correctly and put you in touch with your nearest authorised Service Centre.
instruments@smeg.it – service.instruments@smeg.it
Our entire product offering can be viewed at:
www.smeg-instruments.com
International customers, please contact your local SMEG distributor.
– WD-PRINT9 – Printer for 4190 – EN
2
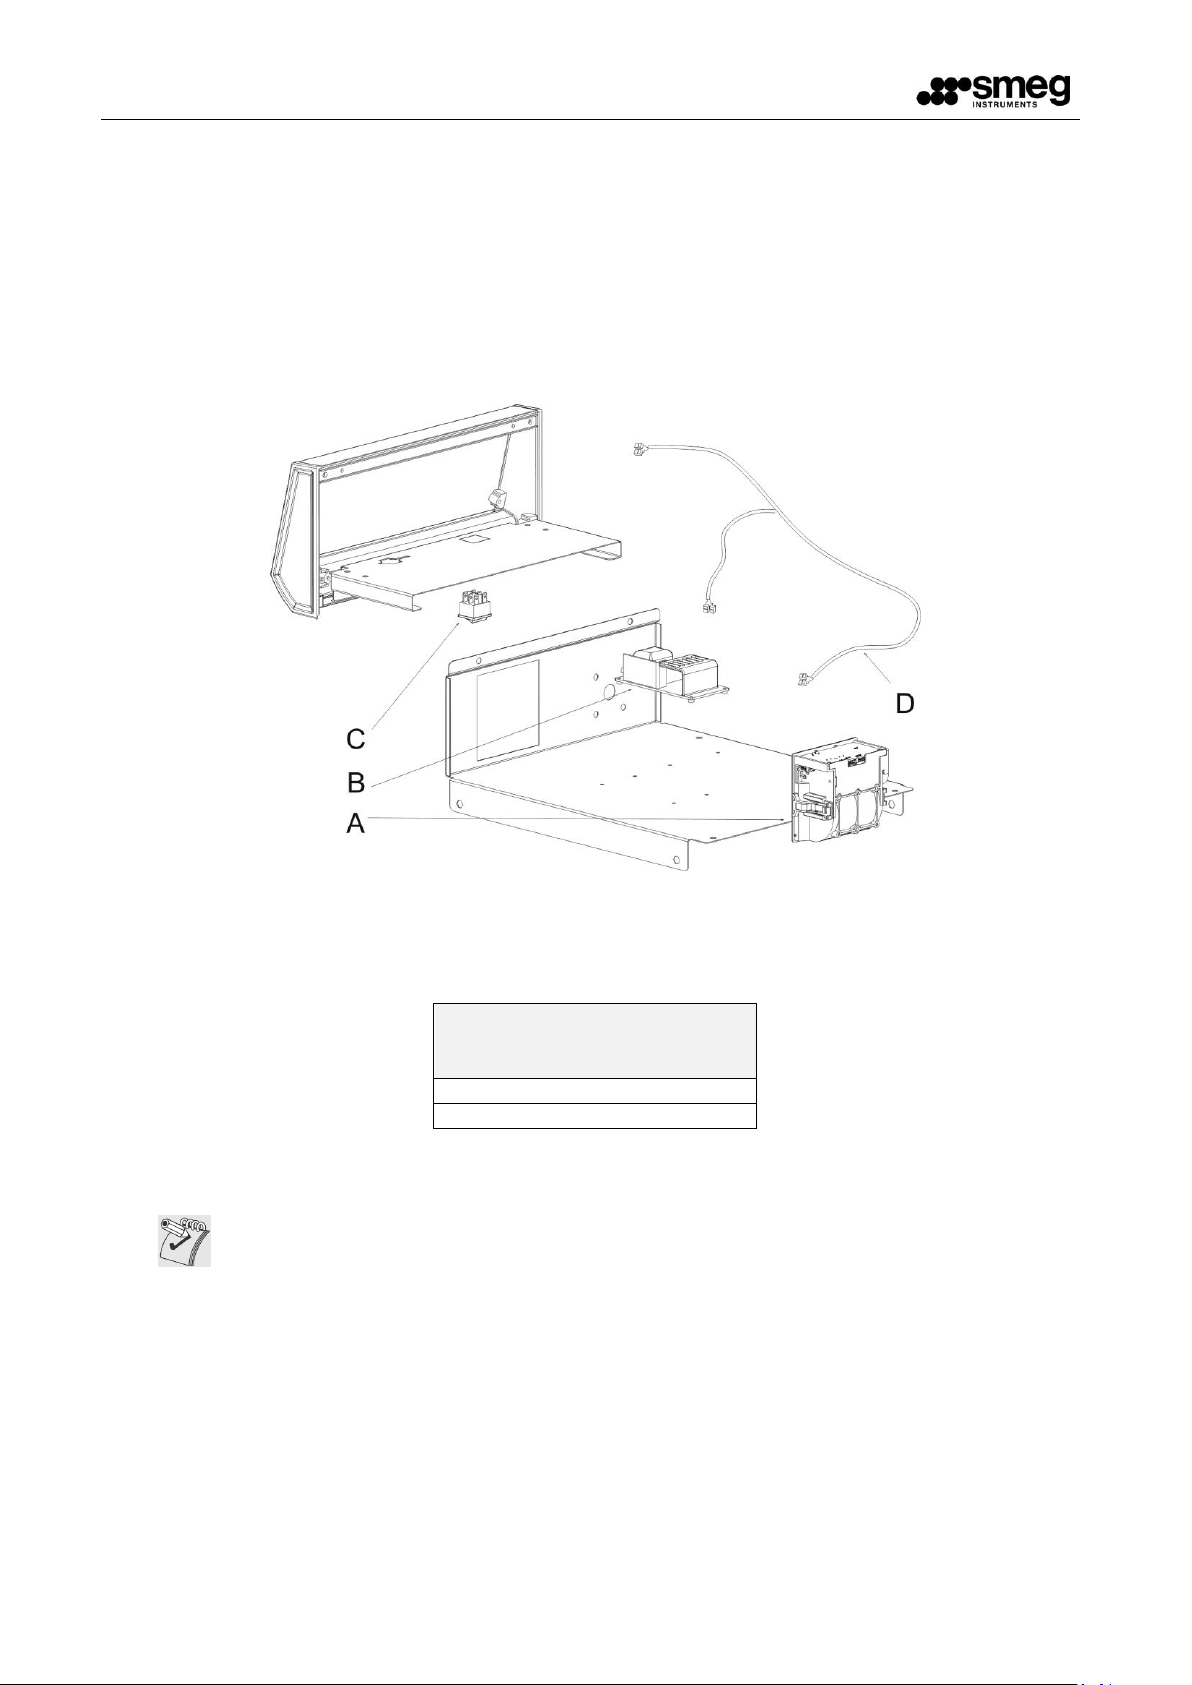
1 KIT COMPOSITION (main items)
A_ PRINTER
B_ POWER TRANSFORMER 24V,2.5A
C_ SWITCH
D_WIRING
Note: The blow-up diagram below does not show the metal fasteners (screws, washers, etc.).
2 WD-PRINT9
The WD-PRINT9 accessory can be installed on the following series of Smeg washing appliances.
WD-PRINT9
Series which can be equipped with
the device
WD4190
GW4190
3 PRECAUTIONS
A_ Perform an appliance reset cycle.
B_ Disconnect the appliance from the electricity supply
C_ Remove the detergent intake nozzles from the cans, and remove the cans from the appliance in
the case of 4190 appliances.
D_ Disconnect the water outlet and inlet connections from the drain and supply systems.

– WD-PRINT9 – Printer for 4190 – EN
3
4 PROCEDURE
To install the kit, it is best to remove the top.
PROCEDURE
ILLUSTRATION
1. Remove the cover plate and fit the printer from
the front, fixing it with the plastic brackets at
the back (fig. 2)
Figure 1
Figure 2
2. Remove the push-out plate and fit the switch C.
Figure 3
– WD-PRINT9 – Printer for 4190 – EN
4
PROCEDURE
ILLUSTRATION
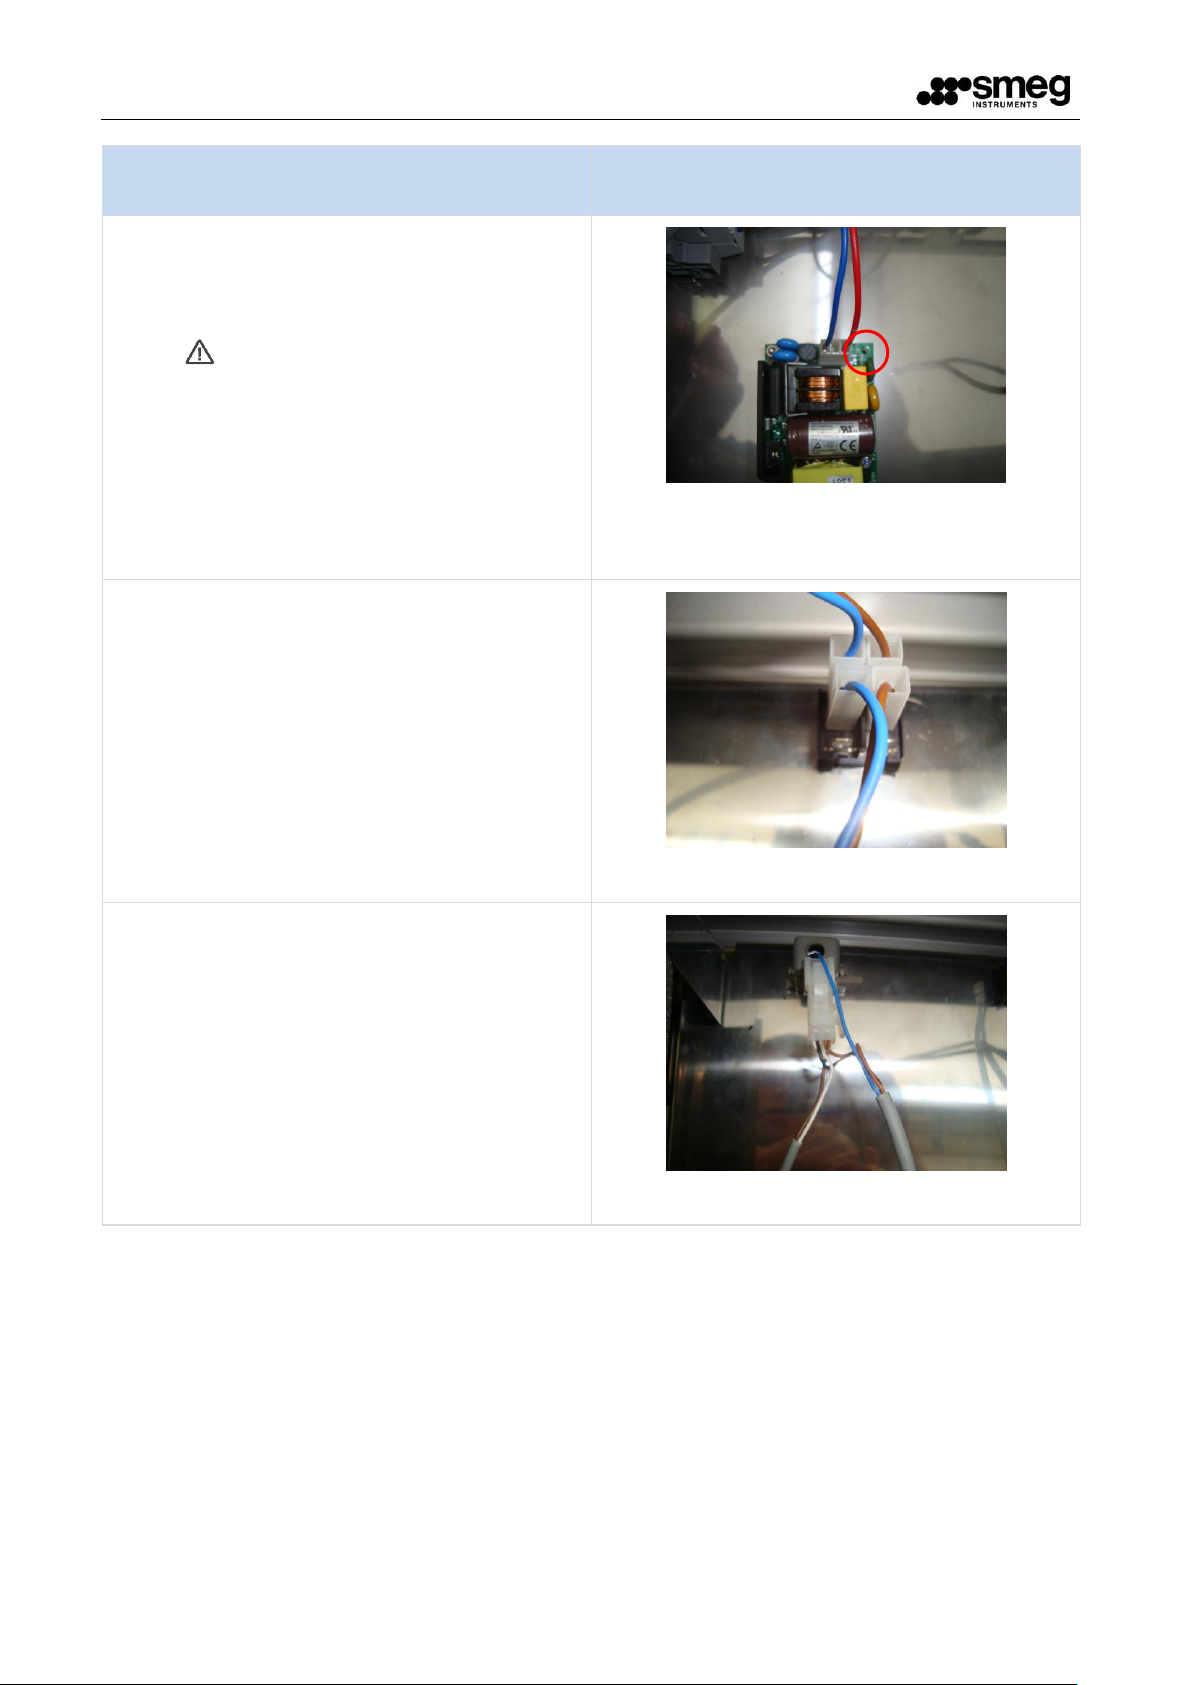
3. Mount the power transformer on the electrical
box using the 3 standoffs; connect the power
supply wiring (in the device-cabinet wiring) to
the power supply input (fig. 4),
take care not to fix the standoffs close to
the power supply wiring.
Figure 4
4. Connect the power transformer output to the
switch.
Connect in this order:
1 1a
2 2a
The switch is marked with the codes.
Figure 5
5. Replace the RS232 extension with the wiring
provided.
Figure 6

– WD-PRINT9 – Printer for 4190 – EN
5
PROCEDURE
ILLUSTRATION
6. Connect the wiring to the printer.
Figure 7
Figure 8

– WD-PRINT9 – Printer for 4190 – EN
6
5 CONFIGURATION OF THE DEVICE
To enable the operation of the device on family 4190, it is necessary to modify the printer SET-UP.
Please follow the procedure below:
1. Press and hold the “FEED” key and start the device;
This way, the saved parameters will be printed out and you will enter the parameter configuration.
2. Press and hold the “FEED” key many times, until the “PRINT MODE” entry.
3. Press the “FEED” key quickly, in order to modify the parameter and switch it from “NORMAL” to “REVERSE”
(the new value will be printed out);
4. Press and hold the “FEED” key to move to the following parameter;
The printout of the SET-UP report indicates the end of the SET-UP.
5. Turn the device off and then back on.
Smeg S.p.A.
Instruments Division
Via Leonardo da Vinci, 4 – 42016 Guastalla (RE) Italy
Tel. +39 0522 8211 – Fax +39 0522 821 592
E-Mail: instruments@smeg.it – service.instruments@smeg.it
www.smeg-instruments.com
 Loading...