Smart Temp Microstat Thermostat User Manual

Smart Temp |
Microstat |
TM |
|
Thermostats |
Operating Instructions |
|
Congratulations on the purchase of your new Electronic Thermostat!
Your new Smart Temp Microstat thermostat has been built using the best components and design philosophy. As a consequence of this, if properly installed your new electronic programmable thermostat will provide you with many years of trouble free and reliable service.
The Smart Temp Microstat has been designed to be attractive, highly reliable and simple to use. Please take the time to read these instruction to familiarise yourself with the function and features offered in this product.
Installation
Note: To be installed by qualified personnel only
Choosing a location for the Microstat.
Choose a mounting location about 1.5 metre above the floor in an area with good air circulation and away from:
P 2:35
M
Tu
 22 c
22 c
.5
PROG
1 2
3 4 MANUAL ECONO
 Smart TempTM
Microstat
AUTO MAN
Operating Modes
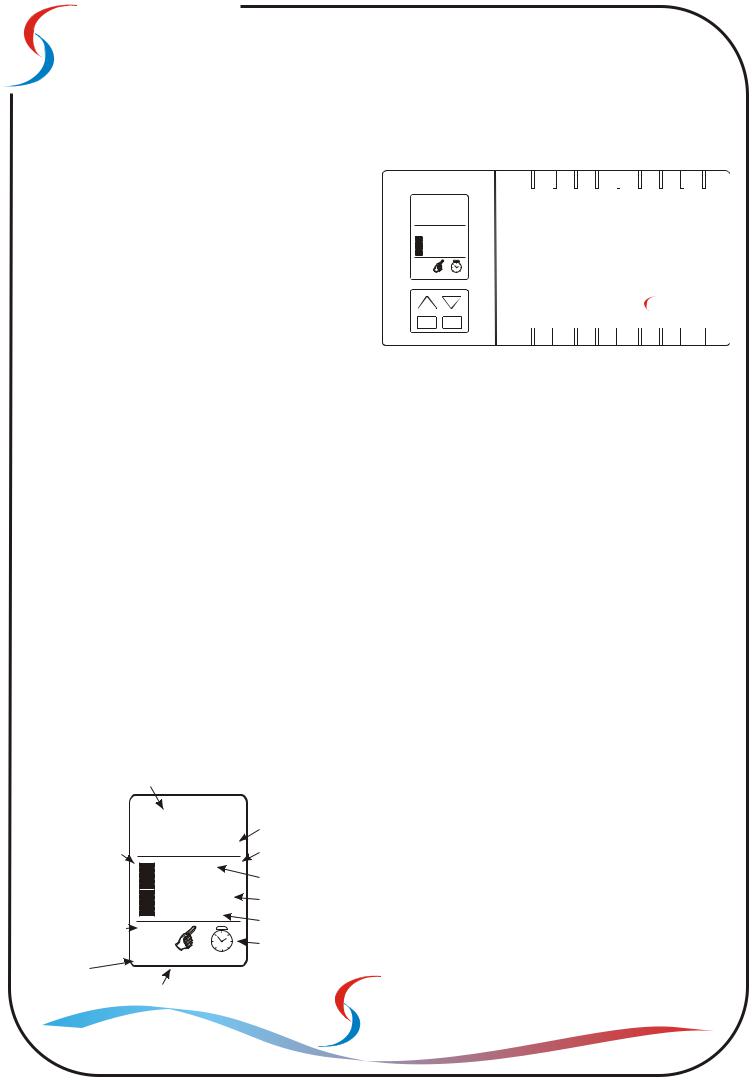
The thermostat has three separate operating modes being : AUTOmatic, MANual and TIMER ECONO.
NOTE: Only one mode can be active at a time.
AUTO
1. |
Drafts and dead air spots. |
The Automatic mode maintains the room temperature |
|
2. |
Radiant heat from the sun or appliances. |
according to the user programs. |
|
3. |
Concealed pipes and chimneys. |
Press the AUTO button. The “PROG” icon and the running |
|
|
|
program will be displayed. |
|
Mounting the thermostat unit onto the wall: |
Momentarily pressing the up or down button displays the |
||
|
|
temperature set point of the running program. |
|
1. |
Remove the slide door of the thermostat completely. |
MAN |
|
2. |
Mark the holes position. |
||
3. |
Drill two holes and insert the plastic anchors carefully into the |
The Manual mode allows the user to bypass the |
|
|
holes. |
programming and operate the thermostat as a simple non |
|
4. |
Fasten the thermostat to the wall with the two (2) screws- |
programmable thermostat. |
|
|
included |
Pressing the MAN button displays a hand symbol indicating |
|
5. |
Install two “AA” size Alkaline batteries into the battery |
Manual mode is active. |
|
|
compartment. |
The set temperature can be adjusted by pressing the |
|
|
|
Temperature Up or Temperature Down button in 0.5 C |
|
Power-up. |
increments. |
||
Your Microstat uses two “AA” size Alkaline batteries to operate. |
TIMER ECONO |
||
When the display shows “BATT”, you should replace the two |
|||
batteries. |
When going on vacation or leaving the home for extended |
||
When power is first applied, the display will show the time and |
periods (up to 7 days) the Microstat provides a useful |
||
day (MO 12:00) as well as the ambient temperature. |
TIMER ECONO function. |
||
Note: For trouble free performance use Alkaline batteries only with the Microstat |
This function provides a means to hold the homes |
||
temperature to a temporary fixed temperature for up to 7 |
|||
|
Current Time Indicator |
||
|
days. At the end of the TIMER ECONO mode the Microstat |
||
|
|
will automatically return to Auto mode as described above. |
|
|
P |
2:35 |
Current Day Indicator |
|
This operating mode allows the user to temporarily override |
|
|
M |
|
||||
|
|
the program to maintain a lower heating temperature |
||||
|
|
|
|
|||
Heating On Indicator |
MO TU WE TH FR SA SU |
Low Battery Indicator |
|
(during vacations etc) thereby providing savings in energy |
||
|
|
SETPOINT |
BATT |
|
|
costs. |
|
|
22 |
c |
Set Temperature Indicator |
To activate the Timer Econo mode : |
|
|
|
.5 |
Temperature Display |
|||
|
|
1 |
Press and hold MAN button for three (3) seconds. |
|||
|
|
|
||||
|
|
FILTER |
Clean Filter Indicator |
2 |
The clock symbol, the return time and the ECONO |
|
Auto Mode Indicator |
|
|
|
|||
PROG |
|
|
|
temperature set point will be displayed. |
||
|
1 2 |
|
Econo Mode Indicator |
3 |
Press DAY, HOUR and MIN keys to specify the return time. |
|
3 4 MANUAL ECONO
Program Number
Manual Mode Indicator
Smart Temp
Australia
Making Life Comfortable
 Loading...