

Page 1
User Manual
Webconnect Systems in SUNNY PORTAL
SPortalWebcon-BA-en-13 | Version 1.3 ENGLISH
Page 2

Legal Provisions SMA Solar Technology AG
Legal Provisions
The information contained in this document is the property of SMA Solar Technology AG. Publishing
its content, either partially or in full, requires the written permission of SMA Solar Technology AG.
Any internal company copying of the document for the purposes of evaluating the product or its
correct implementation is allowed and does not require permission.
Trademarks
All trademarks are recognized, even if not explicitly identified as such. A lack of identification does
not mean that a product or symbol is not trademarked.
The Bluetooth
any use of these marks by SMA Solar Technology AG is under license.
Modbus® is a registered trademark of Schneider Electric and is licensed by the Modbus
Organization, Inc.
QR Code is a registered trademark of DENSO WAVE INCORPORATED.
Phillips
Torx® is a registered trademark of Acument Global Technologies, Inc.
SMA Solar Technology AG
Sonnenallee 1
34266 Niestetal
Germany
Tel. +49 561 9522-0
Fax +49 561 9522-100
www.SMA.de
E-mail: info@SMA.de
© 2004 to 2014 SMA Solar Technology AG. All rights reserved
®
word mark and logos are registered trademarks owned by Bluetooth SIG, Inc. and
®
and Pozidriv® are registered trademarks of Phillips Screw Company.
2 SPortalWebcon-BA-en-13 User Manual
Page 3

SMA Solar Technology AG Table of Contents
Table of Contents
1 Information on this Document. . . . . . . . . . . . . . . . . . . . . . . . . . . 6
2 Sunny Portal . . . . . . . . . . . . . . . . . . . . . . . . . . . . . . . . . . . . . . . . . 8
2.1 Intended Use . . . . . . . . . . . . . . . . . . . . . . . . . . . . . . . . . . . . . . . . . . . . 8
2.2 SMA Webconnect Function. . . . . . . . . . . . . . . . . . . . . . . . . . . . . . . . . 8
2.3 System Requirements. . . . . . . . . . . . . . . . . . . . . . . . . . . . . . . . . . . . . . 8
3 Getting Started . . . . . . . . . . . . . . . . . . . . . . . . . . . . . . . . . . . . . . . 9
3.1 Registering the Inverter in Sunny Portal . . . . . . . . . . . . . . . . . . . . . . . . 9
3.2 Logging In and Out of Sunny Portal . . . . . . . . . . . . . . . . . . . . . . . . . 11
3.3 Setting the Language. . . . . . . . . . . . . . . . . . . . . . . . . . . . . . . . . . . . . 12
4 User Interface . . . . . . . . . . . . . . . . . . . . . . . . . . . . . . . . . . . . . . . 13
4.1 Overview of the User Interface . . . . . . . . . . . . . . . . . . . . . . . . . . . . . 13
4.2 Overview of Menus and Pages. . . . . . . . . . . . . . . . . . . . . . . . . . . . . 14
4.3 "My Webconnect System" > PV System Overview Page. . . . . . . . . . 17
4.3.1 PV System Data Area. . . . . . . . . . . . . . . . . . . . . . . . . . . . . . . . . . . . 17
4.3.2 System Status in the PV System Data Area . . . . . . . . . . . . . . . . . . . 19
4.3.3 Messages for the System Data Area . . . . . . . . . . . . . . . . . . . . . . . . 20
4.4 Energy Balance . . . . . . . . . . . . . . . . . . . . . . . . . . . . . . . . . . . . . . . . . 21
5 Page Settings . . . . . . . . . . . . . . . . . . . . . . . . . . . . . . . . . . . . . . . 26
5.1 Configuring Settings for Diagrams. . . . . . . . . . . . . . . . . . . . . . . . . . . 26
5.1.1 Setting the Display Period . . . . . . . . . . . . . . . . . . . . . . . . . . . . . . . . 26
5.1.2 Saving Diagram Data . . . . . . . . . . . . . . . . . . . . . . . . . . . . . . . . . . . 26
5.1.3 Printing Diagram Data . . . . . . . . . . . . . . . . . . . . . . . . . . . . . . . . . . . 27
5.1.4 Enlarging the View . . . . . . . . . . . . . . . . . . . . . . . . . . . . . . . . . . . . . . 27
5.2 Sorting the System List . . . . . . . . . . . . . . . . . . . . . . . . . . . . . . . . . . . . 27
5.3 Setting Options on the Inverter Page. . . . . . . . . . . . . . . . . . . . . . . . . 27
5.4 Publishing Sunny Portal Pages. . . . . . . . . . . . . . . . . . . . . . . . . . . . . . 28
5.4.1 Pages to Be Published . . . . . . . . . . . . . . . . . . . . . . . . . . . . . . . . . . . 28
5.4.2 Releasing Pages for Viewing in Sunny Portal. . . . . . . . . . . . . . . . . . 28
5.4.3 Presenting Pages on the Internet . . . . . . . . . . . . . . . . . . . . . . . . . . . 28
User Manual SPortalWebcon-BA-en-13 3
Page 4

Table of Contents SMA Solar Technology AG
6 PV System Monitoring . . . . . . . . . . . . . . . . . . . . . . . . . . . . . . . . 29
6.1 PV System Monitoring Options . . . . . . . . . . . . . . . . . . . . . . . . . . . . . 29
6.2 PV System Logbook . . . . . . . . . . . . . . . . . . . . . . . . . . . . . . . . . . . . . . 30
6.2.1 Retrieving and Filtering Messages . . . . . . . . . . . . . . . . . . . . . . . . . . 30
6.2.2 Confirming Messages . . . . . . . . . . . . . . . . . . . . . . . . . . . . . . . . . . . 31
6.3 Reports. . . . . . . . . . . . . . . . . . . . . . . . . . . . . . . . . . . . . . . . . . . . . . . . 32
6.3.1 Report Overview . . . . . . . . . . . . . . . . . . . . . . . . . . . . . . . . . . . . . . . 32
6.3.2 Creating Info Reports. . . . . . . . . . . . . . . . . . . . . . . . . . . . . . . . . . . . 33
6.3.3 Configuring Event Reports . . . . . . . . . . . . . . . . . . . . . . . . . . . . . . . . 33
6.3.4 Retroactively Generating a Report. . . . . . . . . . . . . . . . . . . . . . . . . . 34
6.4 Overview of the System Monitoring Page. . . . . . . . . . . . . . . . . . . . . 35
6.5 Setting Communication Monitoring . . . . . . . . . . . . . . . . . . . . . . . . . . 36
6.6 Setting the Inverter Comparison . . . . . . . . . . . . . . . . . . . . . . . . . . . . 37
7 System Settings. . . . . . . . . . . . . . . . . . . . . . . . . . . . . . . . . . . . . . 38
7.1 Entering String Properties. . . . . . . . . . . . . . . . . . . . . . . . . . . . . . . . . . 38
7.2 Changing System Data . . . . . . . . . . . . . . . . . . . . . . . . . . . . . . . . . . . 39
7.3 Changing the System Name . . . . . . . . . . . . . . . . . . . . . . . . . . . . . . . 40
7.4 Setting the Nominal System Power . . . . . . . . . . . . . . . . . . . . . . . . . . 40
7.4.1 Manual Entry of Nominal System Power . . . . . . . . . . . . . . . . . . . . . 40
7.4.2 Automatic Calculation of Nominal System Power . . . . . . . . . . . . . . 41
7.5 Changing the System Description . . . . . . . . . . . . . . . . . . . . . . . . . . . 41
7.6 Changing Operator Data . . . . . . . . . . . . . . . . . . . . . . . . . . . . . . . . . 42
7.7 Changing/Deleting the System Image . . . . . . . . . . . . . . . . . . . . . . . 42
7.8 Entering the Feed-In Tariff . . . . . . . . . . . . . . . . . . . . . . . . . . . . . . . . . 44
7.9 Entering the Amount of CO
7.10 Automatic Calculation of the Predicted Annual Yield . . . . . . . . . . . . 45
7.11 Setting the Monthly Distribution of the Predicted Annual Yield . . . . . 45
7.12 Editing Data Releases . . . . . . . . . . . . . . . . . . . . . . . . . . . . . . . . . . . . 47
Avoided. . . . . . . . . . . . . . . . . . . . . . . . 44
2
8 Device Settings . . . . . . . . . . . . . . . . . . . . . . . . . . . . . . . . . . . . . . 48
8.1 Calling up the Device Properties . . . . . . . . . . . . . . . . . . . . . . . . . . . . 48
8.2 Calling Up the Device Parameters. . . . . . . . . . . . . . . . . . . . . . . . . . . 48
4 SPortalWebcon-BA-en-13 User Manual
Page 5

SMA Solar Technology AG Table of Contents
8.3 Entering Line Conductors. . . . . . . . . . . . . . . . . . . . . . . . . . . . . . . . . . 48
8.4 Entering the PV Array Power . . . . . . . . . . . . . . . . . . . . . . . . . . . . . . . 49
8.5 Changing the Device Name . . . . . . . . . . . . . . . . . . . . . . . . . . . . . . . 50
8.6 Changing a Device Description. . . . . . . . . . . . . . . . . . . . . . . . . . . . . 50
8.7 Activating/Deactivating Automatic Update for Devices . . . . . . . . . . 51
9 System Management. . . . . . . . . . . . . . . . . . . . . . . . . . . . . . . . . 52
9.1 Adding Inverters . . . . . . . . . . . . . . . . . . . . . . . . . . . . . . . . . . . . . . . . 52
9.2 Replacing an Inverter. . . . . . . . . . . . . . . . . . . . . . . . . . . . . . . . . . . . . 53
9.3 Deactivating/Activating the Inverters. . . . . . . . . . . . . . . . . . . . . . . . . 54
9.4 Deleting Inverters. . . . . . . . . . . . . . . . . . . . . . . . . . . . . . . . . . . . . . . . 54
9.5 Deleting a Sunny Portal System. . . . . . . . . . . . . . . . . . . . . . . . . . . . . 55
10 User Management . . . . . . . . . . . . . . . . . . . . . . . . . . . . . . . . . . . 56
10.1 User Roles and User Rights in Sunny Portal . . . . . . . . . . . . . . . . . . . . 56
10.2 Creating a New User . . . . . . . . . . . . . . . . . . . . . . . . . . . . . . . . . . . . 58
10.3 Deleting a User . . . . . . . . . . . . . . . . . . . . . . . . . . . . . . . . . . . . . . . . . 58
10.4 Changing User Rights . . . . . . . . . . . . . . . . . . . . . . . . . . . . . . . . . . . . 58
10.5 Changing User Information . . . . . . . . . . . . . . . . . . . . . . . . . . . . . . . . 59
11 Passwords. . . . . . . . . . . . . . . . . . . . . . . . . . . . . . . . . . . . . . . . . . 60
11.1 Selecting Secure Passwords . . . . . . . . . . . . . . . . . . . . . . . . . . . . . . . 60
11.2 Required Passwords. . . . . . . . . . . . . . . . . . . . . . . . . . . . . . . . . . . . . . 60
11.2.1 Sunny Portal Password. . . . . . . . . . . . . . . . . . . . . . . . . . . . . . . . . . . 60
11.2.2 System Password . . . . . . . . . . . . . . . . . . . . . . . . . . . . . . . . . . . . . . . 60
11.3 Changing Passwords . . . . . . . . . . . . . . . . . . . . . . . . . . . . . . . . . . . . . 61
11.3.1 Changing the Sunny Portal Password . . . . . . . . . . . . . . . . . . . . . . . 61
11.3.2 Changing the System Password. . . . . . . . . . . . . . . . . . . . . . . . . . . . 61
11.4 Sunny Portal Password Forgotten . . . . . . . . . . . . . . . . . . . . . . . . . . . 62
12 Glossary . . . . . . . . . . . . . . . . . . . . . . . . . . . . . . . . . . . . . . . . . . . 63
13 Contact . . . . . . . . . . . . . . . . . . . . . . . . . . . . . . . . . . . . . . . . . . . . 66
User Manual SPortalWebcon-BA-en-13 5
Page 6
1 Information on this Document SMA Solar Technology AG
1 Information on this Document
Validity
This document applies to systems in Sunny Portal consisting only of inverters with integrated or
retrofitted SMA Webconnect function.
Target Group
This document is intended for end users.
Additional Information
Links to additional information can be found at www.SMA-Solar.com:
Document title Document type
Factor — Factor for calculating the amount
CO
2
of CO2 avoided in power generation
Performance ratio – Quality factor for the PV
plant
Symbols
Symbol Explanation
%"/(&3
8"3/*/(
$"65*0/
/05*$&
☐ Indicates a requirement for meeting a specific goal
☑ Desired result
✖ A problem that might occur
Indicates a hazardous situation which, if not avoided, will result in death
or serious injury
Indicates a hazardous situation which, if not avoided, can result in death
or serious injury
Indicates a hazardous situation which, if not avoided, can result in minor
or moderate injury
Indicates a situation which, if not avoided, can result in property damage
Information that is important for a specific topic or goal, but is not
safety-relevant
Technical Information
Technical Information
6 SPortalWebcon-BA-en-13 User Manual
Page 7
SMA Solar Technology AG 1 Information on this Document
Typographies
Typography Use Example
bold • Display texts
• Elements on a user interface
•Terminals
• Elements to be selected
• Elements to be entered
> • Several elements that are to
• The value can be found in the
field Energy.
• Select Settings.
• Enter the value 10 in the field
Minutes.
• Select Settings > Date.
be selected
[Button/Key] • Button or key to be selected or
• Select [Next].
pressed
Nomenclature
Complete designation Designation in this document
Small wind turbine system System
PV system System
SMA Webconnect function Webconnect function
The designation "My Webconnect system" is used as a placeholder for the name that you have
given your Webconnect system in Sunny Portal.
Abbreviations
Abbreviation Designation Explanation
DHCP Dynamic Host Configuration
Protocol
IP Internet Protocol ‒
PIC Product Identification Code ‒
PV Photovoltaics Identification key for registration in
RID Registration Identifier Registration key for registration in
User Manual SPortalWebcon-BA-en-13 7
Pr otocol for the dyn ami c assig nme nt
of IP configurations
Sunny Portal
Sunny Portal
Page 8

2 Sunny Portal SMA Solar Technology AG
2 Sunny Portal
2.1 Intended Use
Sunny Portal is an Internet portal for the monitoring of systems as well as the visualization and
presentation of system data.
In order to use Sunny Portal, you will need an SMA product that can record your system data and
send it to Sunny Portal (see Section2.3 "System Requirements", page8). Depending on the product
that sends the data, various functions are available in Sunny Portal.
2.2 SMA Webconnect Function
The SMA Webconnect function enables data transmission between Sunny Portal and a maximum of
four inverters. This data transmission takes place via a router with Internet access.
Yo u ca n reg ist er a max imu m of fou r inv ert ers wit h We bco nne ct f unction in a joint Sunny Portal system.
Only one of these inverters is allowed to be of the type Sunny Boy Smart Energy. If you have more
than four inverters or more than one inverter of type Sunny Boy Smart Energy, you can register the
inverters in additional Sunny Portal systems.
2.3 System Requirements
☐ A computer with Internet access must be available.
☐ An Internet browser must be installed on the computer.
☐ JavaScript must be activated in the Internet browser.
Selecting a suitable Internet tariff for small systems
To use the new Webconnect function, you will need a permanent Internet connection.
De pen din g on the qua lit y of the Int ern et c onnecti on, the tra nsm ission volume for one inverter will
be between 150 MB and 550 MB/month. When using the system overview in Sunny Portal
with live data display, there is an additional data volume of 600 kB per hour.
• SMA Solar Technology AG recommends using an Internet flat rate.
• Since there is a constant Internet connection to Sunny Portal time-based billing systems
should be avoided. High costs could be incurred.
Required SMA Products
To use Sunny Portal for Webconnect systems, you will need inverters with integrated or retrofitted
Speedwire/Webconnect interface. Information on whether an inverter has an integrated Speedwire/
Webconnect interface or can be retrofitted with a Speedwire/Webconnect interface can be found in
the download area of the respective inverter at www.SMA-Solar.com.
Supported Internet browsers
You can find a list of supported Internet browsers in the technical data on the Sunny Portal product
page www.sma-america.com/sunny-portal.
Recommended Display Resolution
• Minimum 1,024 pixels x 768 pixels
8 SPortalWebcon-BA-en-13 User Manual
Page 9

SMA Solar Technology AG 3 Getting Started
3 Getting Started
3.1 Registering the Inverter in Sunny Portal
Requirements:
☐ The PV system must be commissioned.
☐ DHCP must be enabled for the router of the PV system.
☐ The router of the PV system must have an Internet connection.
☐ The PI C an d RI D of a ll i nve rte rs m ust be a vai labl e (s ee i nve rte r typ e la bel or s tic ker n ear the typ e
label).
Procedure:
• Start the PV System Setup Assistant in Sunny Portal
•Registering as a New User in Sunny Portal
or
Login as an existing user in Sunny Portal
• Creating a Webconnect System in Sunny Portal
Starting the PV System Setup Assistant in Sunny Portal
The PV System Setup Assistant guides you step-by-step through user registration and the registration
of your PV system in Sunny Portal.
Procedure:
1. Go to www.SunnyPortal.com.
2. Select [PV System Setup Assistant].
☑ The PV System Setup Assistant opens.
3. Select [Next].
☑The page User Registration opens.
User Manual SPortalWebcon-BA-en-13 9
Page 10

3 Getting Started SMA Solar Technology AG
Register as a new user in Sunny Portal
1. Activate the checkbox I am not yet registered and select [Next].
2. Enter the necessary data for registration.
3. Select [Next].
☑ You will receive an e-mail containing a hyperlink and your access data to Sunny Portal
within a few minutes.
✖ You did not receive an e-mail from Sunny Portal?
The e-mail may have been automatically redirected to your spam mail folder.
• Check whether the e-mail is in the spam mail folder.
You may have stated a different e-mail address.
• Check whether the e-mail was sent to the other e-mail address.
• If the other e-mail address is an unknown address, restart the PV System Setup Assistant
and register as a new user again.
4. Follow the hyperlink in the confirmation e-mail within 24 hours.
☑ Sunny Portal opens a separate window and confirms successful registration.
• Select [Next].
☑The page Select PV system opens.
Login as an Existing User in Sunny Portal
In addition to your existing system, another system will be created in Sunny Portal for your
Webconnect system. You can call up the systems via the menu PV System Selection.
Requirement:
☐ You must already be registered in Sunny Portal.
Procedure:
1. Enter the e-mail address and the Sunny Portal password in the fields E-mail Address and
Password.
2. Select [Next].
☑The page Select PV system opens.
Create a Webconnect system in Sunny Portal
1. Select the option Create a new PV system and enter a PV system name
(e.g. My Webconnect system) in the field PV System Name.
2. Enter the system password for the user role "Installer" of your system in the field PV System
Password. If you have not yet changed the system password for the user role "Installer", the
default system password 1111 is set. In such cases, you must now assign a new system
password.
3. Enter the system password again in the field Repeat password.
10 SPortalWebcon-BA-en-13 User Manual
Page 11

SMA Solar Technology AG 3 Getting Started
4. Select [Next].
☑The page Select devices opens.
5. Enter the PIC and RID of an inverter in your system in the PIC and RID fields (for PIC and RID,
see inverter type label or sticker near the type label).
6. Select [Identify].
☑ The P V System Setup Ass istan t establis hes a conne ction to the inverters and then adopts the
data entered without displaying an error message.
✖ Is an error message displayed?
• Rectify the error as stated in the error message.
7. To add up to three more inverters, enter the PIC and RID for each additional inverter and select
[Identify]. A Webconnect system can consist of up to four inverters. To add more inverters,
create another Webconnect system after completion of the registration.
8. Select [Next].
☑The page Extended PV System Properties opens.
9. Enter the system properties.
10. Select [Next].
☑ The PV System Setup Assistant shows a summary of your entered data.
11. Select [Finish].
☑ Sunny Portal configures your Sunny Portal system.
12. To switch to the Sunny Portal system, select [To the PV system]
☑ Your Webconnect system in Sunny Portal opens.
3.2 Logging In and Out of Sunny Portal
Logging into Sunny Portal
Requirement:
☐ You must already be registered in Sunny Portal.
Procedure:
1. Go to www.SunnyPortal.com.
2. In the Login area, enter your e-mail address in the field E-mail.
3. Enter the Sunny Portal password in the field Password.
4. Activate the SSL checkbox to transmit the encrypted login data.
5. Activate the Remain logged in checkbox to stay logged in for your next Sunny Portal visits.
This means that you will remain logged into Sunny Portal until you actively log out.
6. Select [Login].
User Manual SPortalWebcon-BA-en-13 11
Page 12

3 Getting Started SMA Solar Technology AG
Logging Out of Sunny Portal
By logging out of the Sunny Portal user interface, you protect your system against unauthorized
access.
Procedure:
•Select [Logout] in the header.
or
•Select User Info/Logout > Logout in the page and menu selection.
3.3 Setting the Language
1. In the user interface header, move the mouse pointer onto .
☑ A drop-down menu opens.
2. Select the desired language.
12 SPortalWebcon-BA-en-13 User Manual
Page 13
SMA Solar Technology AG 4 User Interface
4 User Interface
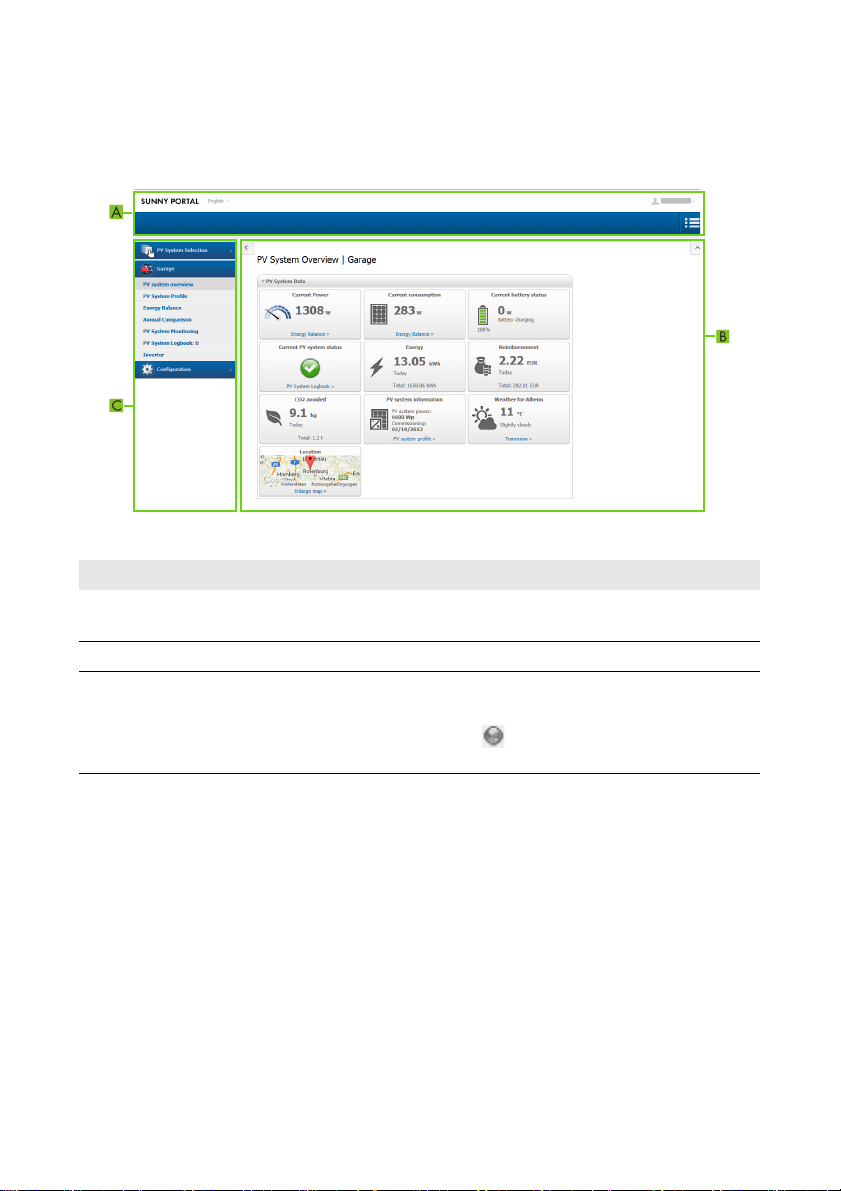
4.1 Overview of the User Interface
Figure1: User interface of Sunny Portal (example)
Position Designation Explanation
A Header Contains the language selection and logout from
Sunny Portal
B Content area Contents of the selected page
C Page and menu
selection
Access to the pages and menu items
Released pages of the menu "My Webc onn ect sys tem " are
marked with the icon (see Section5.4.2 "Releasing Pages
for Viewing in Sunny Portal", page28).
User Manual SPortalWebcon-BA-en-13 13
Page 14

4 User Interface SMA Solar Technology AG
4.2 Overview of Menus and Pages
System Selection Menu
Requirement for displaying the menu:
☐ Your e-mail address must be assigned to more than one system in Sunny Portal.
In this menu you can select the desired system. The name of the currently selected system is adopted
as the name of the second menu item. All other pages always refer to the currently selected system.
Page Explanation
PV System List The page includes an overview of systems that are assigned to
your e-mail address. By default, the system list is sorted in
ascending order according to the specific system yield. You can
also sort the system list by other values and in descending order
(see Section5 "Page Settings", page26).
Menu "My Webconnect System"
This menu contains all pages with information, system data, and visualizations for your system.
Page Explanation
System Overview This page provides you with an overview of the most important
in for mat ion abo ut your syst em. The display and ran ge of fun cti ons
of the page depend on your user role (see Section10.1,
page56).
For information on system data, see Section 4.3.
If the checkbox Display the monthly distribution in the
yearly comparison, as well as energy and power is
activated, the average expected yield will also be displayed in
the diagram in the Year and Total tabs (see Section7.11,
page45).
System Profile Sunny Portal compiles the system profile from information that you
can enter on different Sunny Portal pages (see Section4.3.2,
page19).
Energy Balance This page will only be displayed if there is an inverter of type
Sunny Boy Smart Energy registered in your Sunny Portal system.
The display visualizes the temporal progression of the power or
energy flowing between your PV system, your household, the
utility grid and your battery.
For further information on this page, see Section 4.4.
14 SPortalWebcon-BA-en-13 User Manual
Page 15
SMA Solar Technology AG 4 User Interface
Page Explanation
Annual Comparison This page provides you with a summary of the total yield and the
specific system yield per month in a year overview.
If the checkbox Display the monthly distribution in the
yearly comparison, as well as energy and power is
activated, the average expected yield will also be displayed
(see Section7.11, page45).
PV System Monitoring On this page, the following PV system monitoring functions are
available (see Section 6.4):
• Communication monitoring: monitoring of the
communication between Sunny Portal and the inverters
• Inverter comparison: system monitoring via comparison of
the inverter yields, provided that at least two inverters are
present in the system
If the communication monitoring or the inverter comparison show
an err or o r warnin g, t he icon wil l be dis played i n the pag e an d
menu selection next to the menu PV System Monitoring. The
icon will be displayed until communication is restored or the
inverter comparison error has been eliminated.
PV System Logbook This page shows messages in connection with system status,
e.g. disturbances in your system. The number after the colon
indicates the number of unread messages.
For further information on this page, see Section 6.2.
Inverter On the Day tab on this page, you can view the power values of
all inverters for specific days.
On the Month, Year, Total tab s, yo u ca n vi ew t he e ner gy v alue s
of all inverters.
You can select the display type above the diagram:
• absolute: displays the system yield (kWh)
• specific: displays the specific system yield (kWh/kWp)
For further information on this page, see Section 5.3.
User Manual SPortalWebcon-BA-en-13 15
Page 16

4 User Interface SMA Solar Technology AG
Configuration Menu
This menu contains pages on which you can make configurations. This menu is only displayed if you
have the user role Installer or Administrator.
Page Explanation
System Properties On this page, you can use the various tabs to configure your
Sunny Portal system.
System Presentation On this page you have the following options:
• Send third parties a hyperlink to your released pages
(see Section5.4.2, page28).
• Embed the page PV system profile in other websites.
Device Overview All the devices of your system are listed on this page. You can call
up device properties, parameters, and messages.
Report Configuration On this page you can configure Sunny Portal to inform you by
e-mail of events and other information such as yield
(see Section6.3, page32).
User Management This page displays a list of all users to whom you have granted
access to the system (see Section10.2, page58).
User Info/Logout Menu
Page Explanation
User Information Displays your user information
Logout Ends your session in Sunny Portal
16 SPortalWebcon-BA-en-13 User Manual
Page 17
SMA Solar Technology AG 4 User Interface
4.3 "My Webconnect System" > PV System Overview Page
4.3.1 PV System Data Area
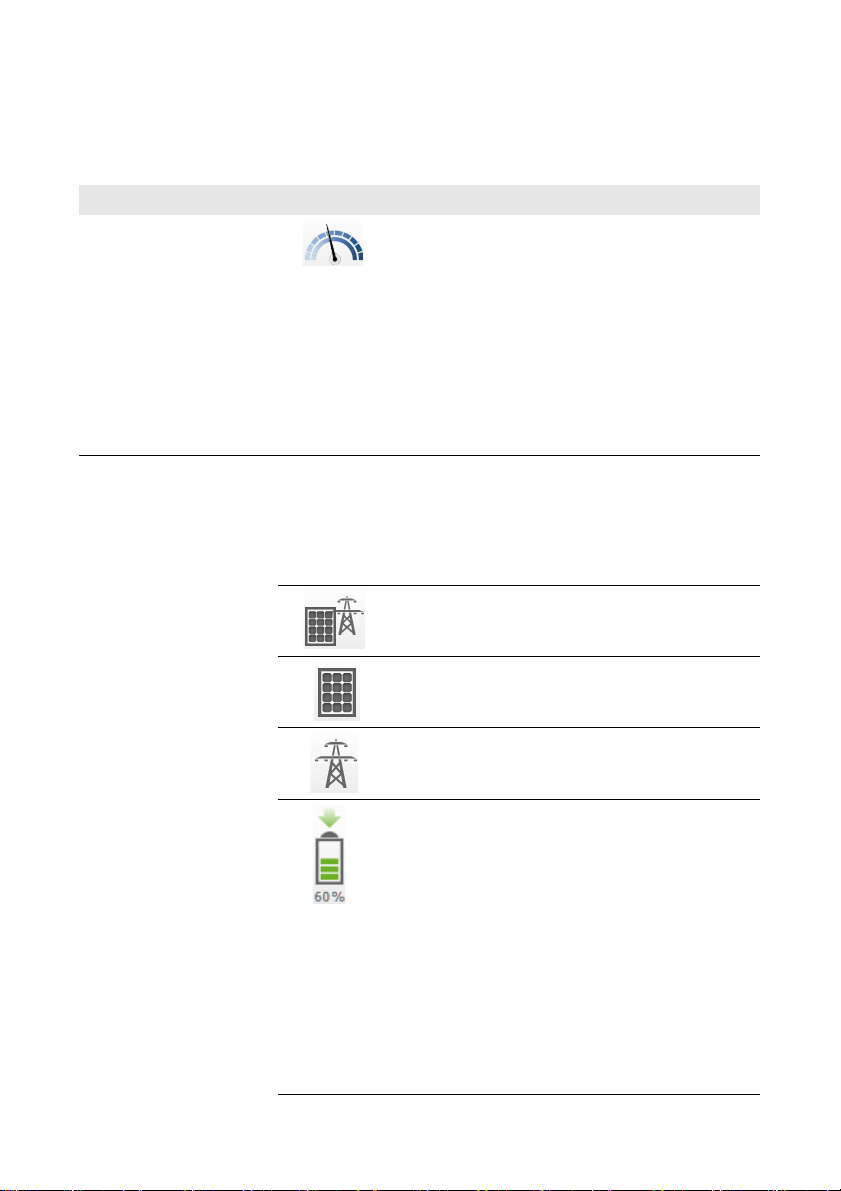
Information Symbol Explanation
Current Power This value indicates the current power. If the value
cannot be currently updated due to a temporary
connection problem with your PV system, the last
known value with corresponding time stamp will be
displayed.
The icon shows how high the current power is
compared to the installed system power
(peak power).
You can access the page Energy Balance using t he
hyperlink Energy Balance.
Current Consumption* Current consumption of your PV system
You can access the page Energy Balance using t he
hyperlink Energy Balance.
The symbols indicate the kind of energy being
consumed:
Your household is currently drawing power from the
PV system and the utility grid.
Your household is currently drawing power from the
PV system.
Your household is currently drawing power from the
utility grid
Current battery status*
(example)
User Manual SPortalWebcon-BA-en-13 17
• The battery is currently being charged with
power from your PV system.
• The number of bars indicates the battery state
of charge.
• Specification in %: battery state of charge
• Specification in W: power currently being
charged to the battery.
Tip: If you move the mouse pointer to the battery
symbol, the battery state of charge and the current
battery capacity compared to nominal battery
capacity are displayed. Battery capacity decreases
with age. This is due to a natural aging process.
Page 18
4 User Interface SMA Solar Technology AG
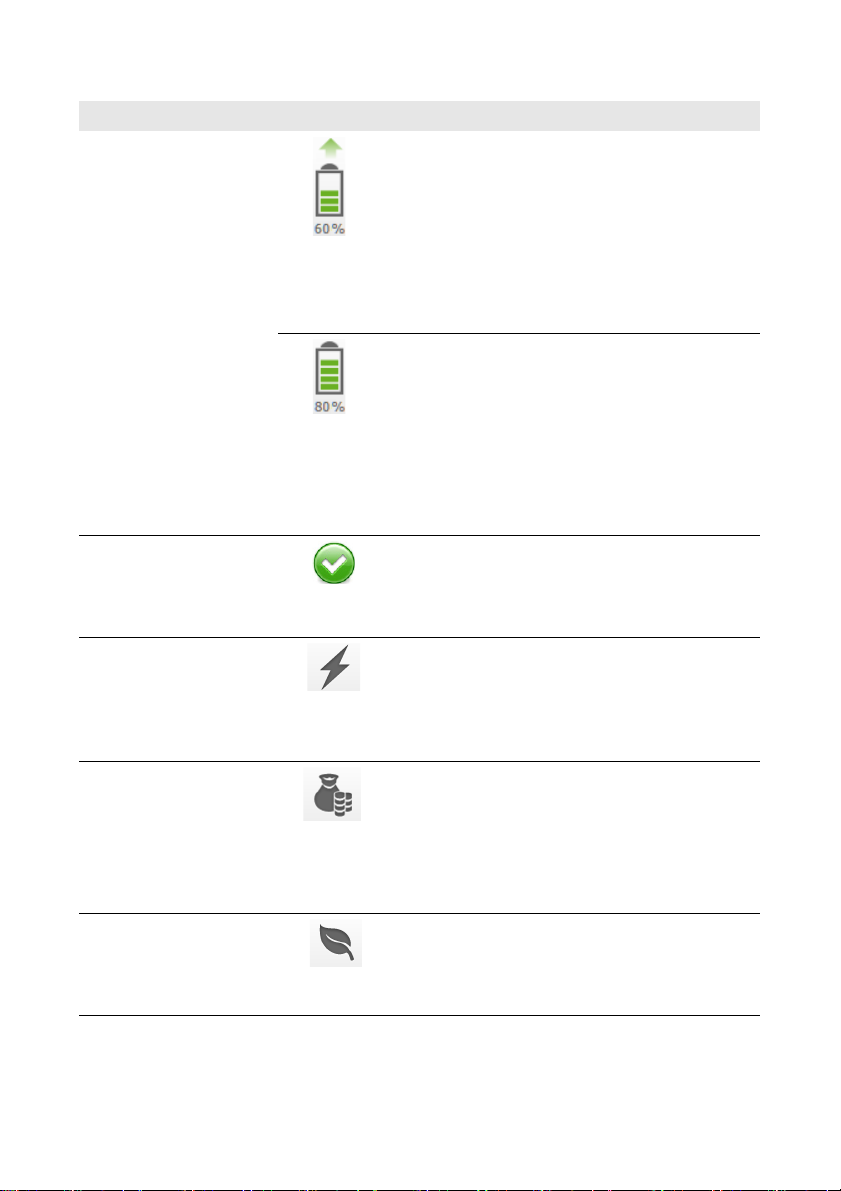
Information Symbol Explanation
• The battery is currently being discharged.
Your household is currently drawing power
from the battery.
• The number of bars indicates the battery state
of charge.
(example)
• Specification in %: battery state of charge
• Specification in W: power currently being
drawn from the battery by the household.
• Currently, the battery is neither being charged
or discharged.
• The number of bars indicates the battery state
of charge.
(example)
• Specification in %: battery state of charge
• Specification in W: since the battery is being
neither charged nor discharged, the power
value is 0.
Current PV system status The icon displays the current system status
(for explanations, refer to Section 4.3.2).
You can activate the page PV System Logbook
using the hyperlink PV System Logbook.
Energy Today: the value states the energy produced so far
by the PV system on the current day.
Total: the value states the total energy produced so
far by the PV system, based on the aggregate meter
readings of the inverters.
Reimbursement** This icon is only displayed if the feed-in tariff has been
set (see Section 7.8).
Today: the value states the reimbursement
calculated so far for the current day.
Total: the value states the total reimbursement
calculated so far.
avoided Today: the value states the CO2 emission avoided
CO
2
by the PV system so far on the current day.
Total: the value states the CO2 emission avoided by
the PV system since it was commissioned.
18 SPortalWebcon-BA-en-13 User Manual
Page 19
SMA Solar Technology AG 4 User Interface
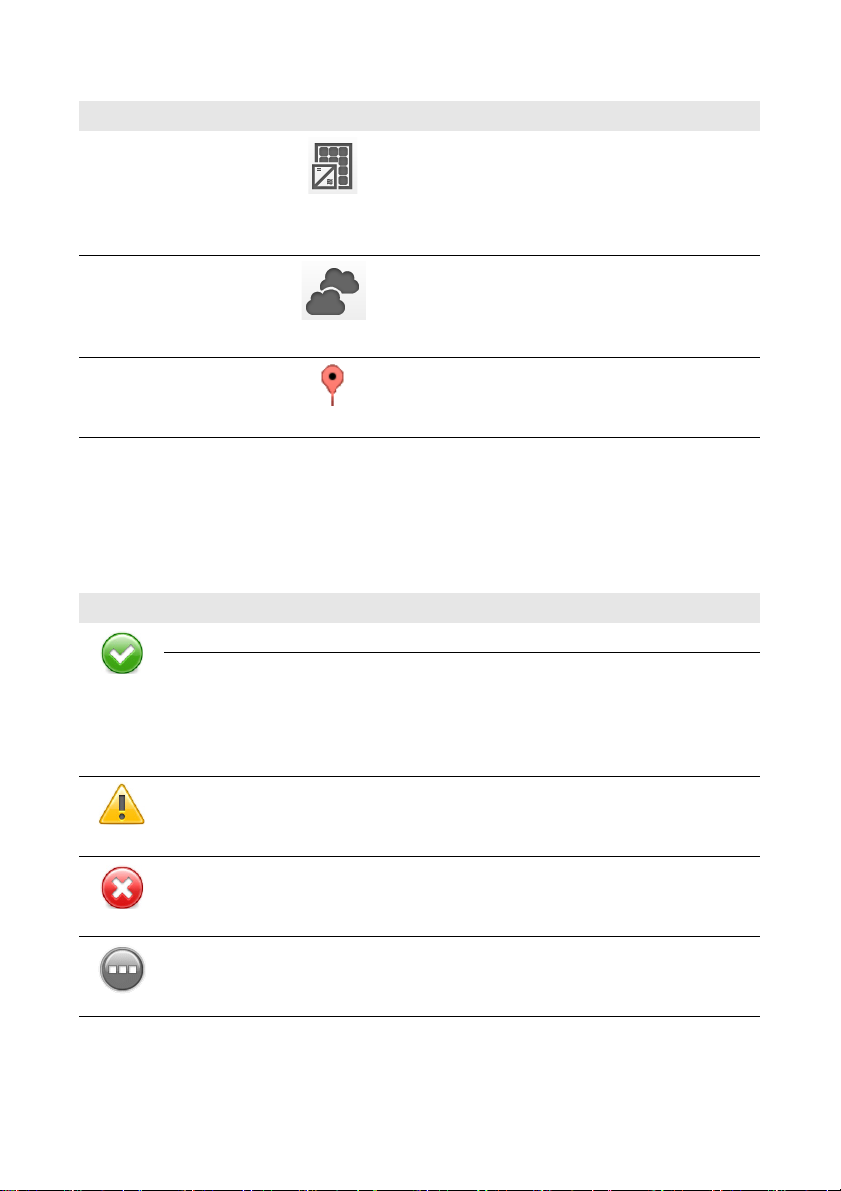
Information Symbol Explanation
System information The value states the installed system power
(peak power) of the PV system. The date is the
commissioning day of the PV system.
You can activate the page PV System Profile using
the hyperlink PV System Profile.
Weather The current weather for the PV system location is
displayed.
You can scroll to the weather forecast for the next
day at noon using the hyperlink Tomorrow.
Location Displays the PV system location on a map extract.
A larger view of the map can be activated via the
hyperlink Enlarge map.
* Only displayed if there is an inverter of type Sunny Boy Smart Energy in your PV system.
** Only displayed if you have entered the feed-in tariff (see Section7.8, page44). The data is not suitable for billing
purposes. The data may deviate from the data supplied by the energy meter.
4.3.2 System Status in the PV System Data Area
The text below the icon is a hyperlink that can be used to activate the PV system logbook.
Information in the System Profile
Symbol Text below the icon Explanation
PV System Logbook All existing status information for the devices is OK.
n device/s cannot be reached All existing status information for the devices is OK;
however, information is not available for all devices.
The text below the icon shows the number of devices
that cannot be reached. The status of these devices
could not be captured.
n device/s with warnings A warning has occurred.
The text below the icon shows the number of devices
that are affected by the warning.
n device/s with errors An error has occurred.
The text below the icon shows the number of devices
that are affected by the error.
PV System Logbook The status of all devices is unknown.
Fu rth er info rma tio n ca n be acc ess ed v ia the h ype rli nk
PV System Logbook below the icon.
User Manual SPortalWebcon-BA-en-13 19
Page 20
4 User Interface SMA Solar Technology AG
Sunny Portal compiles the system profile from information that you can enter on different Sunny Portal
pages. The following table includes the possible information in the system profile and the source for
changing or entering the information.
Information Configuration
Location (see Section7.2 "Changing System Data", page39)
Operator (see Section7.6 "Changing Operator Data", page42)
Commissioning (see Section7.2 "Changing System Data", page39)
Nominal system power (see Section7.4 "Setting the Nominal System Power", page40)
Annual production (see Section7.10 "Automatic Calculation of the Predicted Annual Yield",
page45)
avoided (see Section7.9 "Entering the Amount of CO2 Avoided", page44)
CO
2
Modules (see Section7.1 "Entering String Properties", page38)
Azimuth
Tilt angle
Communication No configuration necessary, this information is automatically detected.
Inverter
Description (see Section7.5 "Changing the System Description", page41)
PV system image (see Section7.7 "Changing/Deleting the System Image", page42)
4.3.3 Messages for the System Data Area
On the page PV system overview, messages are displayed if Sunny Portal cannot retrieve any
current data from the devices. In this case, the data displayed on the page PV System Overview is
not current.
Messages are displayed on the right above the PV System Data area with the symbol .
The number in the icon represents the number of messages. The color of the symbol indicates the
message category.
Symbol Meaning
red = error
*
yellow = warning
blue = information
* The table gives examples of the symbol with three messages.
20 SPortalWebcon-BA-en-13 User Manual
Page 21
SMA Solar Technology AG 4 User Interface
Retrieving Messages
1. Select the symbol .
☑ A window appears containing the message and a possible corrective measure.
2. To close the window, select [OK].
4.4 Energy Balance
Requirements for displaying the page:
☐ There must be one Sunny Boy Smart Energy in the Sunny Portal system.
☐ The SMA Energy Meter must be connected to the Sunny Boy Smart Energy.
Showing and hiding data
• You can show and hide the data indicated in the legend of the diagram. To do this, click on the
respective value in the legend which you wish to show or hide.
• If a battery is present in your PV system, you can choose between the simplified view without
battery data and the detailed view with battery data. To do this, you must activate or deactivate
the checkbox Detailed view.
Scaling values in the diagram up to peak system power
• Use the tabs Current and Day to configure scaling of the values up to peak system power.
To do this, move the mouse pointer to the gearwheel icon on the right underneath the diagram
and select in the drop-down menu.
The page Energy Balance includes the following tabs:
Tab Content
Current Data in the diagram Consumption:
• Current consumption: Power that your household is currently
drawing from your PV system (direct consumption), the utility grid
(purchased electricity) and, if applicable, the battery (battery
discharging).
• Purchased electricity: Power that your household is currently
drawing from the utility grid.
• Internal power supply: Power that your household is drawing
directly from your PV system (direct consumption) and the battery
(battery discharging).
• Battery discharging* : Power that your household is currently
drawing from the battery.
• Direct consumption*: Power that your household is currently
drawing from your PV system, without intermediate storage in the
battery.
User Manual SPortalWebcon-BA-en-13 21
Page 22
4 User Interface SMA Solar Technology AG
Tab Content
Current Data in the diagram Generation:
• Current power: Power that your PV system is currently generating.
• Self-consumption: Power that your household is currently drawing
di rec tly from yo ur P V sy ste m (dire ct c ons ump tio n) and t he p owe r th at
your PV system is currently storing in the battery (battery charging).
• Battery charging*: Power that your PV system is currently storing
in the battery.
• Grid feed-in: Po wer tha t yo ur P V system is c urrent ly f eed ing in t o the
utility grid.
If your PV system is producing more power than your household
needs at the m oment , the su rplus power i s fed in to the util ity grid. For
PV systems including battery, the battery will first be charged and
then the surplus power fed into the utility grid.
Day Data in the diagram Consumption:
• Daily consumption: Energy that your household has drawn from
your PV system (direct consumption), the utility grid (purchased
electricity) and, if applicable, the battery (battery discharging) on
the day selected.
• Purchased electricity: En erg y th at y our hous eho ld h as d raw n fr om
the utility grid on the day selected.
• Internal power supply: Energy that your household has drawn
directly from your PV system (direct consumption) and the battery
(battery discharging) on the day selected.
• Battery discharging*: Energy that your household has drawn from
the battery on the day selected.
• Direct consumption*: Energy that your household has drawn
directly from your PV system on the day selected, without
intermediate storage in the battery.
Data in the diagram Generation:
• Daily yield: Energy that your PV system has generated on the day
selected.
• Self-consumption: Energy that your household has drawn directly
from your PV system on the day selected (direct consumption) and
energ y stored by your PV system i n the batte ry (ba ttery char ging) on
the day selected.
• Battery charging*: Energy that your PV system has stored in the
battery on the day selected.
• Grid feed-in: Energy fed by your PV system into the utility grid on
the day selected.
22 SPortalWebcon-BA-en-13 User Manual
Page 23
SMA Solar Technology AG 4 User Interface
Tab Content
Day Additional data:
• Self-sufficiency quota: Ratio of internal power supply to daily
consumption
• Self-consumption rate: Ratio of self-consumption to daily yield.
• Direct consumption rate*: Ratio of direct consumption to daily
yield.
Month Data in the diagram Consumption:
• Monthly consumption: Energy that your household has drawn
from your PV system (direct consumption), the utility grid (purchased
electricity) and, if applicable, the battery (battery discharging)
during the month selected.
• Purchased electricity: En erg y th at y our hous eho ld h as d raw n fr om
the utility grid during the month selected.
• Internal power supply: Energy that your household has drawn
directly from your PV system (direct consumption) and the battery
(battery discharging) during the month selected.
• Battery discharging*: Energy that your household has drawn from
the battery during the month selected.
• Direct consumption*: Energy that your household has drawn
directly from your PV system during the month selected, without
intermediate storage in the battery.
Data in the diagram Generation:
• Monthly yield: Energy that your PV system has generated during
the month selected.
• Self-consumption: Energy that your household has drawn directly
from your PV system during the month selected (direct consumption)
and the energy that your PV system stored in the battery (battery
charging) during the month selected.
• Battery charging*: Energy that your PV system has stored in the
battery during the month selected.
• Grid feed-in: Energy that your PV system has fed into the utility grid
during the month selected.
Additional data:
• Self-sufficiency quota: Ratio of internal power supply to monthly
consumption
• Self-consumption rate: Ratio of self-consumption to monthly yield
• Direct consumption rate*: Ratio of direct consumption to monthly
yield.
User Manual SPortalWebcon-BA-en-13 23
Page 24

4 User Interface SMA Solar Technology AG
Tab Content
Year Data in the diagram Consumption:
• Yearly consumption: Energy that your household has drawn from
your PV system (direct consumption), the utility grid (purchased
electricity) and, if applicable, the batte ry (batter y discharg ing) in the
year selected.
• Purchased electricity: En erg y th at y our hous eho ld h as d raw n fr om
the utility grid during the year selected.
• Internal power supply: Energy that your household has drawn
directly from your PV system (direct consumption) and the battery
(battery discharging) during the year selected.
• Battery discharging*: Energy that your household has drawn from
the battery during the year selected.
• Direct consumption*: Energy that your household has drawn
directly from your PV system during the year selected, without
intermediate storage in the battery.
Data in the diagram Generation:
• Annual yield: Energy that your PV system has generated during the
year selected.
• Self-consumption: Energy that your household has drawn directly
from your PV system during the year selected (direct consumption)
and the energy that your PV system stored in the battery (battery
charging) during the year selected.
• Battery charging*: Energy that your PV system has stored in the
battery during the year selected.
• Grid feed-in: Energy that your PV system has fed into the utility grid
during the year selected.
Additional data:
• Self-sufficiency quota: Ratio of internal power supply to yearly
consumption.
• Self-consumption rate: Ratio of self-consumption to annual yield.
• Direct consumption rate*: Ratio of direct consumption to annual
yield.
24 SPortalWebcon-BA-en-13 User Manual
Page 25

SMA Solar Technology AG 4 User Interface
Tab Content
Total Data in the diagram Consumption:
• Total consumption: Total amount of energy that your household
has drawn from your PV system (direct consumption), the utility grid
(purchased electricity) and, if applicable, the battery (battery
discharging) so far.
• Purchased electricity: Total amoun t of energy that your h ouseh old
has drawn from the utility grid so far.
• Internal power supply: Total amount of energy that your
household has drawn from your PV system (direct consumption) and
the battery (battery discharging) so far.
• Battery discharging*: Total amount of energy that your household
has drawn from the battery so far.
• Direct consumption*: Total amount of energy that your household
has drawn directly from your PV system so far, without intermediate
storage in the battery.
Data in the diagram Generation:
• Total yield: Total amount of energy that your PV system has
generated so far.
• Self-consumption: Tot al a mou nt o f en erg y th at y our hou seh old has
drawn directly from your PV system so far (direct consumption) and
total amount of energy that your PV system has stored in the battery
(battery charging) so far.
• Battery charging*: Tot al amou nt o f en ergy th at y our PV s yst em h as
stored in the battery so far.
• Grid feed-in: Total amount of energy that your PV system has fed
into the utility grid so far.
Additional data:
• Self-sufficiency quota: Ratio of internal power supply to total
consumption.
• Self-consumption rate: Ratio of self-consumption to total yield.
• Direct consumption rate*: Ratio of direct consumption to total
yield.
* Only displayed for PV systems with battery
User Manual SPortalWebcon-BA-en-13 25
Page 26
5 Page Settings SMA Solar Technology AG
5 Page Settings
5.1 Configuring Settings for Diagrams
5.1.1 Setting the Display Period
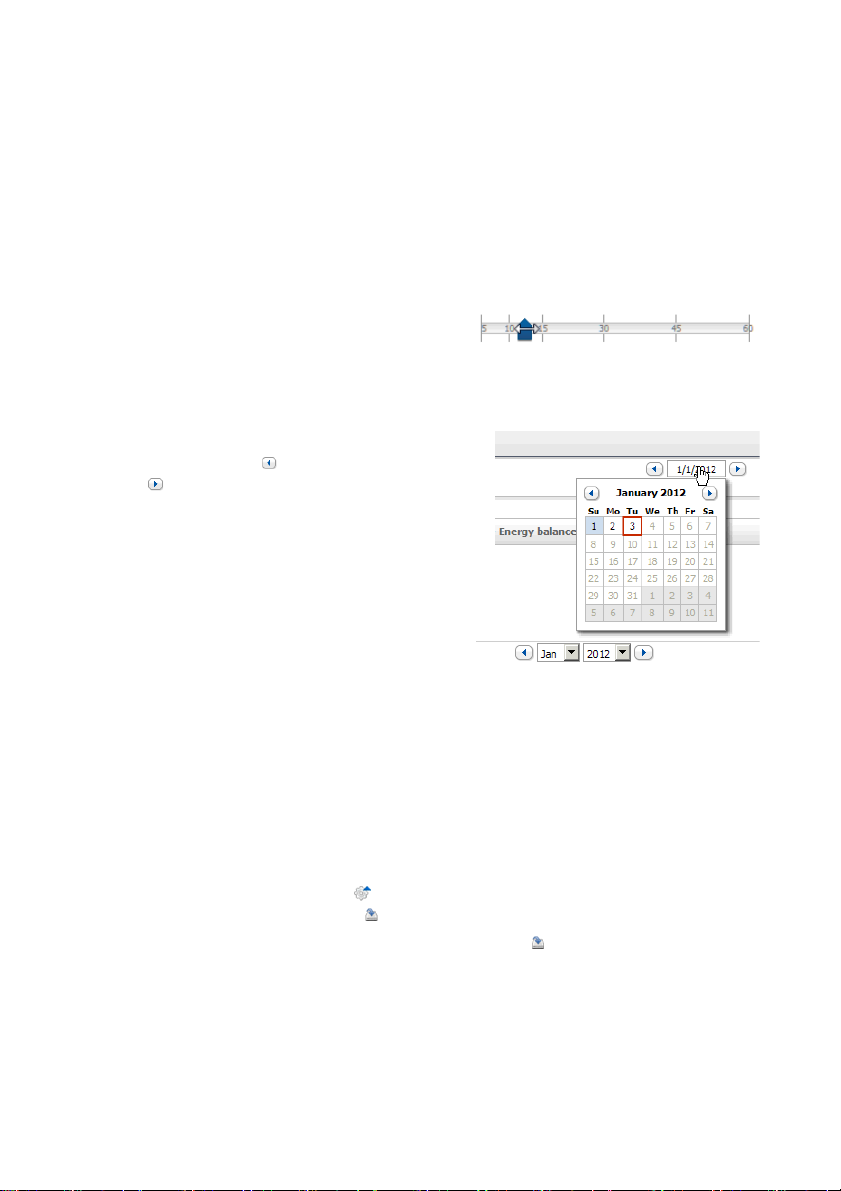
Depending on the diagram, you can set various display periods. The control element for setting the
display period can be found below each diagram.
Procedure:
• If there is a slider below the diagram, click the blue
arrow and keeping the left mouse button pressed,
set the display time period.
• If there is a date and arrow icon below the diagram, set the date using the arrow icons or a
calendar:
– To set the date using the arrow icons, browse
backward using and browse forward using
and select the desired date.
– To set the date using the calendar, click on the
date between the arrow icons and select the
desired date.
• If there are drop-down lists between the arrow
icons , use these to select t he desired display pe riod.
5.1.2 Saving Diagram Data
You can save diagram data as CSV files.
Requirement:
☐ You must have the user role Installer or Administrator (see Section10.1 "User Roles and
User Rights in Sunny Portal", page56).
Procedure:
1. If you can see the gearwheel icon on the right below the diagram, move the mouse pointer
onto the gearwheel icon and select in the drop-down menu.
2. If there are two icons on the right below the diagram, select .
3. Select [Save].
4. Select the target directory.
5. Select [Save].
26 SPortalWebcon-BA-en-13 User Manual
Page 27
SMA Solar Technology AG 5 Page Settings
5.1.3 Printing Diagram Data
1. Move the mouse pointer onto on the right below the diagram.
☑ A drop-down menu opens.
2. Select and then select [Print].
3. Select the desired printer and select [Print].
5.1.4 Enlarging the View
• If is visible on the right below the diagram, move the mouse pointer onto and select .
• If there are two icons on the right below the diagram, select .
5.2 Sorting the System List
By default, the system list is sorted in ascending order according to the specific system yield. You can
also sort the system list by other values and in descending order.
Procedure:
1. Select PV System Selection > PV System List in the page and menu selection.
2. Set the desired sorting criteria:
• To sort the list by another value, click one of the other blue values in the header.
• To sort the list in descending order, click on the blue value in the header again.
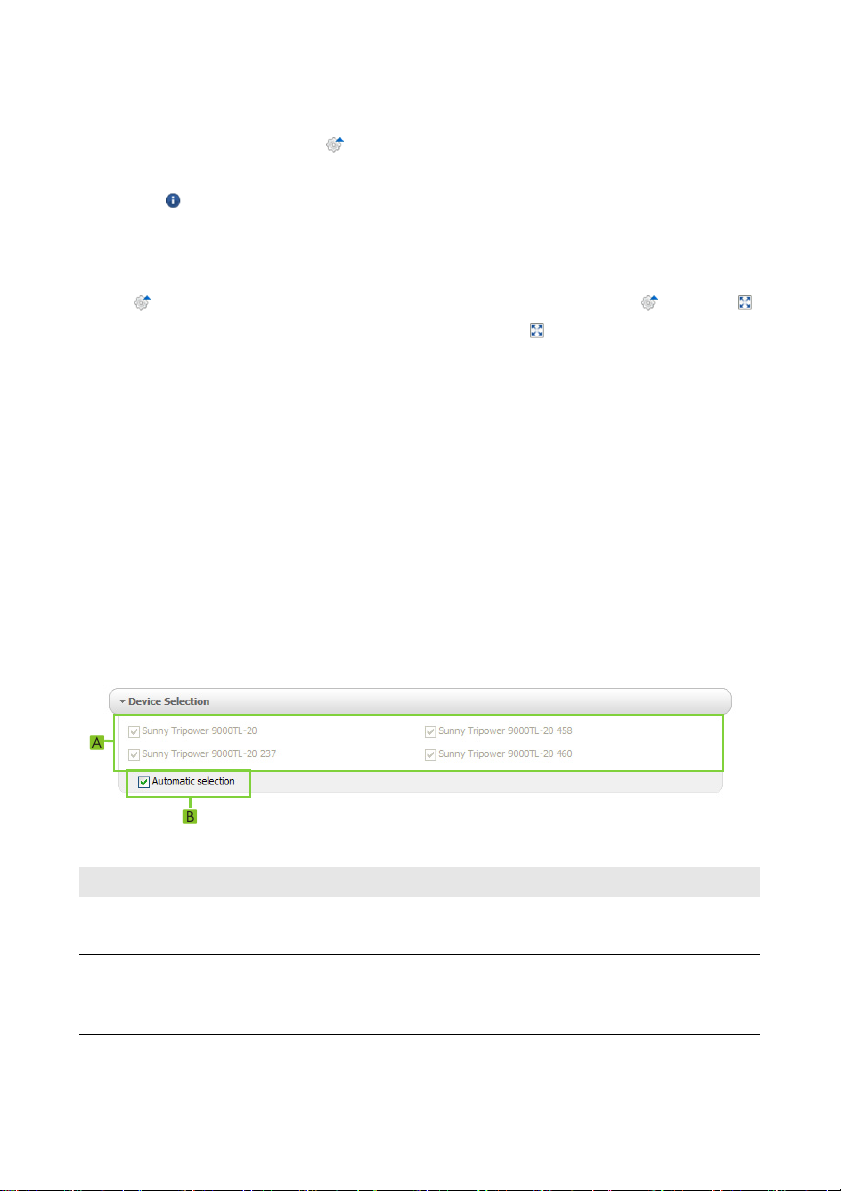
5.3 Setting Options on the Inverter Page
On the page "My Webconnect system" > Inverter > Device Selection, you have the following
setting options:
Figure2: Structure of the settings area on the Inverter page
Position Meaning
A Area for selecting the inverters to be shown
For this purpose, the checkbox Automatic selection must be deactivated.
B Checkbox for automatic selection of all inverters in area (A)
If you activate the checkbox, all inverters in area (A) will be selected automatically
and manual selection will be deactivated.
User Manual SPortalWebcon-BA-en-13 27
Page 28

5 Page Settings SMA Solar Technology AG
5.4 Publishing Sunny Portal Pages
5.4.1 Pages to Be Published
You can publish the following pages of the menu "My Webconnect system":
• System Overview
•System Profile
• Energy and Power
•Annual Comparison
5.4.2 Releasing Pages for Viewing in Sunny Portal
If you release pages for viewing in Sunny Portal, other Sunny Portal users can view these pages.
Requirement:
☐ You must have the user role Installer or Administrator (see Section10.1 "User Roles and
User Rights in Sunny Portal", page56).
Procedure:
1. Select the desired page in the page and menu selection.
2. In the Contents area at the bottom, select [Configuration - "Name of the page"].
3. In the area Approval, activate the checkbox Also release page on
www.sunnyportal.com.
4. To send the page by e-mail, select Send the page by e-mail, enter the e-mail address of the
recipient, select [Send e-mail], and select .
5. Select [Save].
☑ T he icon is display ed in the page an d menu s election n ext to the name of the released page.
5.4.3 Presenting Pages on the Internet
Each of your Sunny Portal pages is assigned a specific URL. You can use these URLs to place a
hyperlink to your Sunny Portal page on other websites.
Requirement:
☐ You must have the user role Installer or Administrator (see Section10.1 "User Roles and
User Rights in Sunny Portal", page56).
Procedure:
1. Select the desired page in the page and menu selection.
2. In the Contents area, select [Configuration - "Name of the page"].
3. To view a preview of the page, select Open page in a new window.
4. Copy the URL from the field URL of the Page onto the clipboard.
5. Copy the URL from the clipboard to a program for creating websites (e.g. Microsoft Office
FrontPage) or integrate it in your own website by means of a so-called inline frame.
28 SPortalWebcon-BA-en-13 User Manual
Page 29
SMA Solar Technology AG 6 PV System Monitoring
6 PV System Monitoring
6.1 PV System Monitoring Options
Monitoring Option in Sunny Portal See
System events PV System Logbook
You can view messages regarding system events.
Report Configuration
You receive e-mails reporting the events of your
system.
Yield, power, and CO
avoided
Inverter yields Inverter Comparison
Communication
between the inverters
and Sunny Portal
Report Configuration
2
You receive e-mails reporting the data of your
system.
You will be notified by e-mail if the specific yield of
one inverter is outside the average specific yield of
all the inverters. To use this function, the system must
include at least two inverters.
Requirement for display of inverter
comparison:
☐ Your Sunny Portal system must contain at least
two inverters.
Communication Monitoring
You will be notified by e-mail if an inverter cannot be
accessed for a period of 24 hours.
Section 6.2
Section 6.3
Section 6.6
Section 6.5
User Manual SPortalWebcon-BA-en-13 29
Page 30

6 PV System Monitoring SMA Solar Technology AG
6.2 PV System Logbook
6.2.1 Retrieving and Filtering Messages
Me ssa ges hel p yo u, f or i nst anc e, to ide nti fy d ist urb anc es i n yo ur s yst em. Dependi ng o n yo ur u ser rol e,
you will only be able to view the messages that are relevant for your user group.
In the PV system logbook messages are entered relating to:
•System
•Inverter
•Communication device
•Sunny Portal
The following types of message are available, in ascending order according to the importance of the
event:
Message type Meaning
Info Displays events serving information purposes
Warning Displays events as warnings if an unusual operating condition is
present.
Disturbance Displays events as disturbances if operation is temporarily
disabled. As soon as the disturbance is remedied, operation is
restarted automatically.
Error Displays events as errors if operation is permanently disabled.
Operation cannot be restarted automatically.
Requirement:
☐ You must have the user role Standard user, Installer, or Administrator (see Section10.1
"User Roles and User Rights in Sunny Portal", page56).
Retrieving Messages
•Select "My Webconnect system" > PV System Logbook in the page and menu selection.
Filtering Messages
You can filter messages in the PV system logbook to restrict retrieval to certain messages only.
Procedure:
1. Select PV System Logbook in the page and menu selection.
2. To filter messages, set one or more of the following filters:
Input field or drop-down list Explanation
Go to • To display messages up to a certain date, enter the
date. Tip: click the calendar icon and select a date in
the calendar.
30 SPortalWebcon-BA-en-13 User Manual
Page 31
SMA Solar Technology AG 6 PV System Monitoring
Input field or drop-down list Explanation
Status The status of a message indicates whether you have already
confirmed the message (see Section 6.2.2).
• To display all unconfirmed messages, select Not
approved.
• To display all confirmed messages, select Approved.
• To display both confirmed and unconfirmed messages,
select All.
System/Devices • To display Sunny Portal, system and device messages,
select All.
• To display Sunny Portal messages, select Portal.
• To display system messages, select PV System.
• To display device-specific messages, select the desired
device.
Number per page • Select the number of messages that you would like to
see.
Type • To display messages of a specific type, activate the
appropriate checkbox Info, Warning, Failure, or
Error.
6.2.2 Confirming Messages
You can confirm messages in order to mark them as read.
Requirement:
☐ You must have the user role Standard user, Installer, or Administrator (see Section10.1
"User Roles and User Rights in Sunny Portal", page56).
Procedure:
1. Select "My Webconnect system" > PV System Logbook in the page and menu selection.
2. To confirm messages individually, select in the message line and the column Confirmed.
3. To confirm several messages, mark the required messages:
• To mark individual messages, activate the relevant checkboxes on the left of the messages.
• To mark all messages, activate the checkbox Select All.
4. Select [Submit].
User Manual SPortalWebcon-BA-en-13 31
Page 32
6 PV System Monitoring SMA Solar Technology AG
6.3 Reports
6.3.1 Report Overview
Reports are documents containing system data or system events. You can configure the content to be
included in the reports and have them sent to you via e-mail from Sunny Portal.
The following report types are available:
• Info reports: Contain system data and are sent to you at regular intervals.
•Event reports: Notify you if certain events occur in the system.
Report Possible content
Daily info report • Daily yield (kWh)
• Reimbursement today
•CO2 avoided today (kg)
•Diagram of the Energy Balance page for the
day*
Monthly info report • Monthly yield (kWh)
•Monthly reimbursement
•Monthly CO
•Diagram of the Energy Balance page for the
month*
Event report • Information
•Warnings
• Error
* Only displayed for systems with Sunny Boy Smart Energy if the report is sent as a PDF.
avoided (kg)
2
32 SPortalWebcon-BA-en-13 User Manual
Page 33

SMA Solar Technology AG 6 PV System Monitoring
6.3.2 Creating Info Reports
You can create three daily info reports and three monthly info reports with different content.
Sunny Portal sends you the daily info reports when it has processed all the data of the previous day.
Monthly info reports are sent as soon as Sunny Portal has processed all the data of the last day of
the month.
Requirements:
☐ You must have the user role Installer or Administrator (see Section10.1 "User Roles and
User Rights in Sunny Portal", page56).
☐ You must have entered the CO
Avoided", page44).
Procedure:
1. Select Configuration > Report Configuration in the page and menu selection.
2. In the drop-down list Report Configuration, select Daily info report or Monthly info
report.
3. Select [Edit].
4. In the area Activate Report, activate the checkbox Active.
5. In the field E-mail Address(es) in the Recipient area, enter the e-mail address(es) of the
recipient(s). Separate multiple e-mail addresses by commas. The number of characters in the
input field is limited. This means that you can enter only a certain number of e-mail addresses.
6. In the field Send Report at in the Interval area, set the time from which the report is to be sent.
7. In the field Select Channel(s) in the Contents area, activate the content that is to be displayed
in the e-mail.
8. In the field Send Report as in the Contents area, select the format in which Sunny Portal is to
send the report.
9. To send a test report to the stated e-mail address, select [Send test report].
10. Select [Save].
avoided factor (see Section7.9 "Entering the Amount of CO2
2
6.3.3 Configuring Event Reports
You can configure three event reports with different content.
Requirement:
☐ You must have the user role Installer or Administrator (see Section10.1 "User Roles and
User Rights in Sunny Portal", page56).
Procedure:
1. Select Configuration > Report Configuration in the page and menu selection.
2. In the drop-down list Report Configuration, select an event report.
3. Select [Edit].
4. In the area Activate Report, activate the checkbox Active.
User Manual SPortalWebcon-BA-en-13 33
Page 34

6 PV System Monitoring SMA Solar Technology AG
5. In the field E-mail Address(es) in the Recipient area, enter the e-mail address(es) of the
recipient(s). Separate multiple e-mail addresses by commas. The number of characters in the
input field is limited. This means that you can enter only a certain number of e-mail addresses.
6. Configure the settings in the area Interval:
• To receive an hourly e-mail with the event report, activate the option Hourly.
• To receive one daily e-mail with the event report, activate the option Daily and, in the
drop-down list, select the time you would like to receive the e-mail.
7. Configure the settings in the area Contents:
• Activate the checkboxes for the required messages. In each case, you can select up to three
event types from Sunny Portal and the system: Information, Warnings, Errors.
•In the area Send Report as, select the format in which Sunny Portal is to send the report.
•In the area Limit messages in one report, use the drop-down list to select the maximum
number of messages to be displayed in the e-mail.
• If you wish to send reports even if there are no new events, activate the checkbox
Send empty reports if no new events are available.
8. To send a test report to the stated e-mail address, select [Send test report].
9. Select [Save].
6.3.4 Retroactively Generating a Report
You can create a report for a specific date in the past.
Requirement:
☐ You must have the user role Installer or Administrator (see Section10.1 "User Roles and
User Rights in Sunny Portal", page56).
Procedure:
1. Select Configuration > Report Configuration in the page and menu selection.
2. Select the desired report in the drop-down list Report Configuration.
3. In the field Report Date in the Regenerate Report Manually area, enter the date for which
you wish to create a report. Tip: click the calendar icon and select a date in the calendar.
4. Select [Generate].
☑ A message that the report has been sent successfully is displayed.
34 SPortalWebcon-BA-en-13 User Manual
Page 35
SMA Solar Technology AG 6 PV System Monitoring
6.4 Overview of the System Monitoring Page
The page "My Webconnect system" > PV system Monitoring is made up of the areas
Communication Monitoring and Inverter comparison.
Communication Monitoring Area
Communication monitoring shows the current communication status between the inverters and
Sunny Portal. If an inverter cannot be accessed, Sunny Portal informs you by e-mail (see Section6.5
"Setting Communication Monitoring", page36).
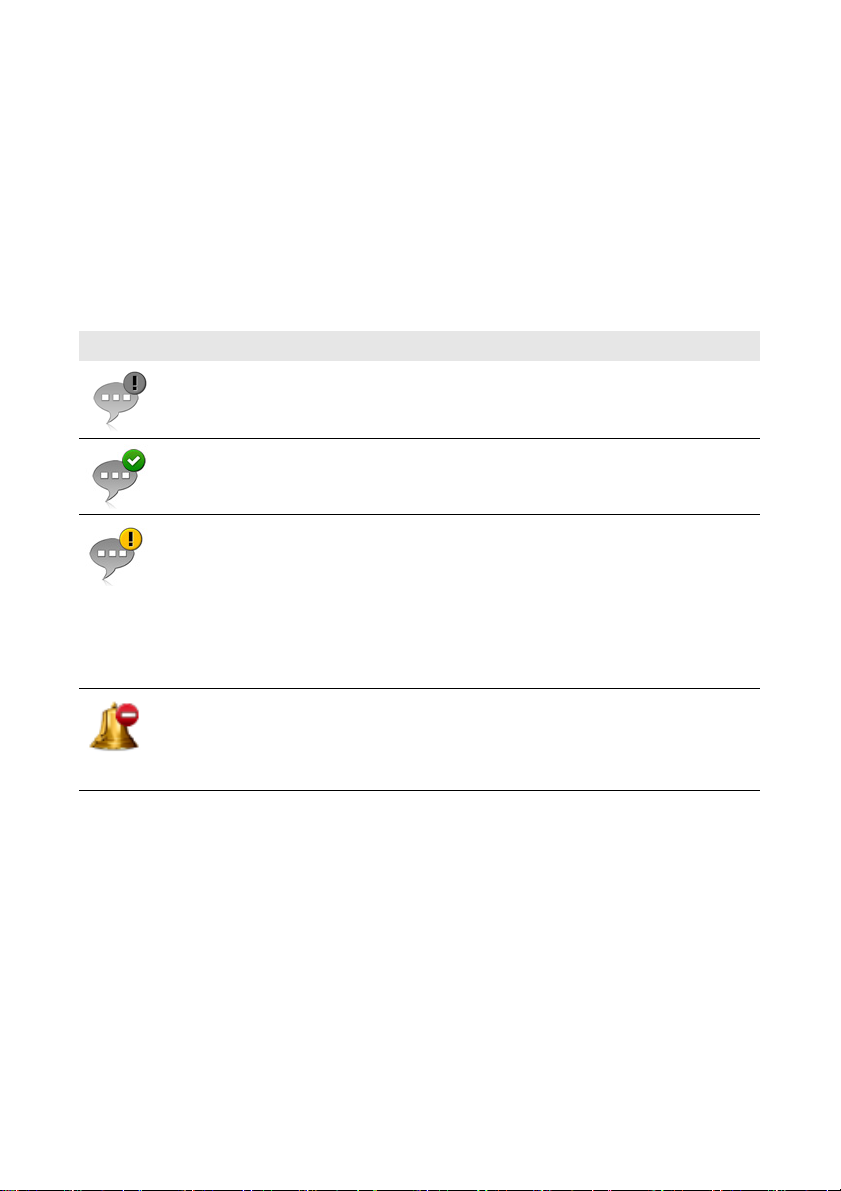
The communication monitoring status is displayed in Sunny Portal with the following icons:
Symbol Status Explanation
Deactivated Communication monitoring is not set (see Section6.5
"Setting Communication Monitoring", page36).
OK Com municatio n with the invert ers is error-free. The time of
last contact is displayed.
Error Communication with the inverters is interrupted. Use the
hyperlink Details to access detailed information on the
time of last contact.
The error will be displayed until it has been cleared.
If the error is n ot corr ect ed, Su nny Porta l wi ll send ano ther
e-mail reminder on up to three days after the first e-mail
was sent.
E-mail reminder is
activated.
Click the bell icon to stop reminder e-mails for the current
error from being sent.
If a new error occurs, the e-mail reminder will
recommence.
User Manual SPortalWebcon-BA-en-13 35
Page 36

6 PV System Monitoring SMA Solar Technology AG
Inverter Comparison Area
Requirement for display of the area:
☐ The system must contain at least two inverters.
Sunny Portal can recognize potential yield losses via the inverter comparison option. If the specific
yield of one inverter differs significantly from the average yield of all the inverters, Sunny Portal can
notify you by e-mail (see Section6.6 "Setting the Inverter Comparison", page37).
Symbol Status Explanation
Deactivated Inverter comparison is not activated (see Section6.6 "Setting
the Inverter Comparison", page37).
OK The specific yield of each inverter is within the average yield
range of all inverters. The total yield of all inverters on the last
day is displayed.
Error For at least one monitored inverter, the specific yield is outsi de
the average yield range of all inverters. Use the hyperlink
Details to access the following information:
• Specific yield of the affected inverters
• Average value of all monitored inverters
6.5 Setting Communication Monitoring
Via communication monitoring, you can be notified by e-mail if an inverter cannot be reached for a
period of 24 hours.
Requirement:
☐ You must have the user role Installer or Administrator (see Section10.1 "User Roles and
User Rights in Sunny Portal", page56).
Procedure:
1. Select "My Webconnect system" > PV System Monitoring in the page and menu selection.
2. In the area Communication Monitoring, select [Settings].
☑The page Configuration communication monitoring opens.
3. To activate communication monitoring, activate the active checkbox and enter the e-mail
address of the recipient(s) in the field Recipient. Separate multiple e-mail addresses by
commas.
4. To deactivate communication monitoring, deactivate the checkbox active.
5. Select [Save].
36 SPortalWebcon-BA-en-13 User Manual
Page 37

SMA Solar Technology AG 6 PV System Monitoring
6.6 Setting the Inverter Comparison
Sunny Portal can recognize potential yield losses via the inverter comparison option. If the specific
yield of an inverter differs significantly from the mean yield of all the inverters, Sunny Portal can notify
you by e-mail. Inverter comparison will only be displayed if there is more than one inverter in your
Sunny Portal system.
Requirements:
☐ Your Sunny Portal system must contain at least two inverters.
☐ The PV array power of the inverters must be configured (see Section8.4 "Entering the PV Array
Power", page49).
☐ You must have the user role Installer or Administrator (see Section10.1 "User Roles and
User Rights in Sunny Portal", page56).
Procedure:
1. Select "My Webconnect system" > PV System Monitoring in the page and menu selection.
2. In the area Inverter comparison, select [Settings].
☑The page Configuration of inverter comparison opens.
3. To activate inverter comparison, activate the active checkbox and enter the e-mail addresses
of the recipient(s) in the field Recipient. Separate multiple e-mail addresses by commas.
4. To deactivate inverter comparison, deactivate the checkbox active.
5. Select [Save].
User Manual SPortalWebcon-BA-en-13 37
Page 38

7 System Settings SMA Solar Technology AG
7 System Settings
7.1 Entering String Properties
A string designates a group of series-connected PV modules. Normally, a system is made up of
multiple strings. Each string has specific properties, such as deviation to south (azimuth) or the roof tilt
angle.
Requirement:
☐ You must have the user role Installer or Administrator (see Section10.1 "User Roles and
User Rights in Sunny Portal", page56).
Procedure:
1. Call up the inverter properties (see Section8.1 "Calling up the Device Properties", page48).
2. Select [Edit].
☑ The menu for setting the device properties opens.
3. To add a new string, select [Add string].
☑ The menu for setting the string opens.
4. To copy a previously set string:
• In the string line and the column Copy, select .
•In the column Edit of the copied string line, select .
☑ The menu for setting the string opens.
5. Enter the string properties:
Input field or
drop-down list
Designation Name of the string, e.g. String 1
Manufacturer PV module manufacturer
Module type Depending on the selected manufacturer, various module types are
Module power These values are entered automatically once you have selected the
Module surface
Efficiency
Number of modules Number of PV modules comprising the string.
38 SPortalWebcon-BA-en-13 User Manual
Explanation
displayed in the drop-down list.
module type. You can change the values using or the arrow keys
on the keyboard.
Page 39

SMA Solar Technology AG 7 System Settings
Input field or
Explanation
drop-down list
Azimuth The azimuth angle indicates by how many degrees the module
surfaces deviate from a southern orientation.
• In the field, enter the deviation of the module surfaces from a
southern orientation in degrees. Enter a negative value (e.g.
−20) for a deviation to the east and a positive value (e.g. 20)
for a deviation to the west.
• If the module surfaces track the sun automatically, activate the
checkbox Tracking.
Tilt angle The tilt angle indicates by how many degrees the module surfaces
deviate from the horizontal. In some systems, the module surfaces
are optimally aligned according to the latitude.
• In the field, enter the deviation of the module surfaces from the
horizontal in degrees.
• If the module surfaces are optimally aligned according to the
latitude, activate the checkbox Optimized.
Description • Enter any comments.
6. Select [Submit].
7. Select [Save].
7.2 Changing System Data
Requirement:
☐ You must have the user role Installer or Administrator (see Section10.1 "User Roles and
User Rights in Sunny Portal", page56).
Procedure:
1. Select Configuration > PV System Properties in the page and menu selection.
2. Select the tab PV System Data.
3. Select [Edit].
☑The menu for setting PV system data opens.
4. Make the desired changes to the system data.
5. Select [Save].
User Manual SPortalWebcon-BA-en-13 39
Page 40

7 System Settings SMA Solar Technology AG
7.3 Changing the System Name
You can change the system name entered during system registration.
Requirement:
☐ You must have the user role Installer or Administrator (see Section10.1 "User Roles and
User Rights in Sunny Portal", page56).
System name requirement:
☐ The system name can have a maximum of 30 characters.
Procedure:
1. Select Configuration > PV System Properties in the page and menu selection.
2. Select the tab PV System Data.
3. Select [Edit].
☑The menu for setting PV system data opens.
4. In the field Name, enter the desired system name.
5. Select [Save].
7.4 Setting the Nominal System Power
7.4.1 Manual Entry of Nominal System Power
Th e PV sys tem pow er i s th e ag gre gat e ma xim um p owe r of all P V mo dul es. You can obt ain the nom ina l
PV system power specifications from your installer.
The nominal PV system power is required in order to display the following data:
• Specific PV system yield
• Average expected yield
Requirement:
☐ You must have the user role Installer or Administrator (see Section10.1 "User Roles and
User Rights in Sunny Portal", page56).
Procedure:
1. Select Configuration > PV System Properties in the page and menu selection.
2. Select the tab PV System Data.
3. Select [Edit].
☑The menu for setting PV system data opens.
4. In the field PV System Power in the Power area, enter the system power.
5. To set the manufacturer of the PV modules, select the manufacturer in the drop-down list
Manufacturer.
6. To set the module types, select the module types in the drop-down list Module Type.
7. Select [Save].
40 SPortalWebcon-BA-en-13 User Manual
Page 41

SMA Solar Technology AG 7 System Settings
7.4.2 Automatic Calculation of Nominal System Power
The nominal system power is the sum of the power of all PV modules. It can be calculated
automatically from the data in the device properties.
The nominal PV system power is required in order to display the following data:
• Specific PV system yield
• Average expected yield
Requirements:
☐ You must have entered the PV array power of all inverters (see Section8.4 "Entering the PV
Array Power", page49).
☐ You must have the user role Installer or Administrator (see Section10.1 "User Roles and
User Rights in Sunny Portal", page56).
Procedure:
1. Select Configuration > PV System Properties in the page and menu selection.
2. Select the tab PV System Data.
3. Select [Edit].
☑The menu for setting PV system data opens.
4. In the area Power, activate the checkbox Calculate PV system performance from device
properties.
☑ The calculated nominal system power is displayed.
5. Select [Save].
7.5 Changing the System Description
You can enter important features of the system in the description. The text is displayed on the
PV system profile page.
The editor supports text only and not typography with HTML tags.
Requirement:
☐ You must have the user role Installer or Administrator (see Section10.1 "User Roles and
User Rights in Sunny Portal", page56).
Procedure:
1. Select Configuration > PV System Properties in the page and menu selection.
2. Select the tab PV System Data.
3. Select [Edit].
☑The menu for setting PV system data opens.
4. Enter a description in the area Description.
5. Select [Save].
User Manual SPortalWebcon-BA-en-13 41
Page 42

7 System Settings SMA Solar Technology AG
7.6 Changing Operator Data
The operator is a private individual or legal entity assuming ownership of energy generating systems,
e.g. for business purposes. The operator can farm out the use of the system without necessarily being
the user himself.
The name of the operator is displayed on the page PV system profile.
Requirement:
☐ You must have the user role Installer or Administrator (see Section10.1 "User Roles and
User Rights in Sunny Portal", page56).
Procedure:
1. Select Configuration > PV System Properties in the page and menu selection.
2. Select the tab Operator.
3. Select [Edit].
☑The menu for setting the operator data opens.
4. Enter the operator data.
5. Select [Save].
7.7 Changing/Deleting the System Image
The system image is the image in the page and menu selection next to the menu item
"My Webconnect system".
Figure3: PV system image
You can replace the standard system image with a user-defined system image. The user-defined
system image will also be displayed at the following locations:
• PV system profile page
• If there are released pages for Sunny Portal, it will be shown on the list of released systems on
the www.SunnyPortal.com homepage.
You can save several images in a gallery in Sunny Portal. This allows you to easily change the system
image and access your images from different computers.
Changing the System Image
Requirement:
☐ You must have the user role Installer or Administrator (see Section10.1 "User Roles and
User Rights in Sunny Portal", page56).
42 SPortalWebcon-BA-en-13 User Manual
Page 43

SMA Solar Technology AG 7 System Settings
System image requirements:
☐ Maximum image size: 500 kB
☐ Possible image formats: JPG, PNG, GIF
Procedure:
1. Select Configuration > PV System Properties in the page and menu selection.
2. Select the tab PV System Data.
3. Select [Edit].
☑The menu for setting PV system data opens.
4. In the PV system image area, select [Load image].
5. Select the desired image from one of your directories.
6. Select [Open].
7. To change the system image size, move the gray squares with the mouse.
8. To modify the image section, click on the image section and move i t whil e holding t he left mou se
button pressed.
9. Select [Save].
10. To save an image in the gallery, upload the image to the gallery as follows:
• Select [Select from the gallery].
• Select [Upload].
• Select [Browse].
• Select the desired image from one of your directories.
• Select [Upload selected file].
• Close the window of the gallery.
☑ The image is saved in the gallery.
11. To upload an image from the gallery as the system image, select [Select from the gallery].
12. Double-click the desired image.
13. Select [Save].
Deleting the User-Defined System Image
If you delete the user-defined system image, Sunny Portal will display the default system image.
Procedure:
1. Select Configuration > PV System Properties in the page and menu selection.
2. Select the tab PV System Data.
3. Select [Edit].
☑The menu for setting PV system data opens.
4. Select [No PV system image] in the area PV system image.
5. Select [Save].
User Manual SPortalWebcon-BA-en-13 43
Page 44

7 System Settings SMA Solar Technology AG
7.8 Entering the Feed-In Tariff
Requirement:
☐ You must have the user role Installer or Administrator (see Section10.1 "User Roles and
User Rights in Sunny Portal", page56).
Procedure:
1. Select Configuration > PV System Properties in the page and menu selection.
2. Select the tab Parameters.
3. Select [Edit].
☑ The menu for setting parameters opens.
4. In the area Reimbursement, enter the feed-in tariff per kWh in the field Reimbursement /
Currency. At the same time, select the desired currency in the accompanying drop-down list.
5. Select [Save].
7.9 Entering the Amount of CO2 Avoided
The CO2 factor indicates how much CO2 is produced during the generation of one kilowatt hour.
The CO
hour of electricity, contact your grid operator.
Sunny Portal uses the CO
generation of your system.
You can view the amount of CO2 avoided on the following pages:
Requirement:
Procedure:
factor can vary depending on the grid operator. To find out the CO2 factor for one kilowatt
2
factor value to calculate how much CO2 has been saved by the power
2
• PV system profile page
• Daily info report or Monthly info report (see Section6.3 "Reports", page32).
☐ You must have the user role Installer or Administrator (see Section10.1 "User Roles and
User Rights in Sunny Portal", page56).
1. Select Configuration > PV System Properties in the page and menu selection.
2. Select the tab Parameters.
3. Select [Edit].
☑ The menu for setting parameters opens.
4. In the appropriate field in the Factor area, enter the CO
factor or click the slide control and
2
hold the left mouse button pressed to set the CO2 factor.
5. Select [Save].
44 SPortalWebcon-BA-en-13 User Manual
Page 45

SMA Solar Technology AG 7 System Settings
7.10 Automatic Calculation of the Predicted Annual Yield
Sunny Portal can display in a table how the predicted annual yield of your system is likely to be
distributed throughout the months of the year.
The predicted annual yield of the system is calculated from the specific annual yield (kWh/kWp) at
the system location multiplied by the system power.
You can obtain the specific annual yield for your system location from irradiation maps. Local
conditions such as the shading or orientation of the PV system are not taken into account by
Sunny Portal.
Requirements:
☐ The system power must be set (see Section 7.4).
☐ You must have the user role Installer or Administrator (see Section10.1 "User Roles and
User Rights in Sunny Portal", page56).
Procedure:
1. Select Configuration > PV System Properties in the page and menu selection.
2. Select the tab Parameters.
3. Select [Edit].
☑ The menu for setting parameters opens.
4. In the Yield Expectations area, enter the specific annual yield in the field Specific Annual
Yield.
☑ The predicted annual yield is displayed in the field Predicted Annual yield.
5. To enable configuration of the average expected yield on the pages Energy and Power and
Annual Comparison, activate the checkbox The monthly distribution can be configured
in the diagrams.
6. Select [Save].
7.11 Setting the Monthly Distribution of the Predicted Annual Yield
The monthly distribution shows how the predicted annual yield is distributed throughout the months of
the year.
You have the following options:
• Letting Sunny Portal Suggest the Monthly Distribution
• Manually Entering the Monthly Distribution
Letting Sunny Portal Suggest the Monthly Distribution
Requirements:
☐ The system location must be entered (see Section (see Section7.2 "Changing System Data",
page39)).
☐ You must have the predicted annual yield calculated (see Section7.10 "Automatic Calculation
of the Predicted Annual Yield", page45).
☐ You must have the user role Installer or Administrator (see Section10.1 "User Roles and
User Rights in Sunny Portal", page56).
User Manual SPortalWebcon-BA-en-13 45
Page 46

7 System Settings SMA Solar Technology AG
Procedure:
1. Select Configuration > PV System Properties in the page and menu selection.
2. Select the tab Parameters.
3. Select [Edit].
☑ The menu for setting parameters opens.
4. In the area Yield expectations, select [Suggest a monthly distribution].
☑ The monthly distribution is displayed in the table with the months.
5. To display the average expected yield and the monthly distribution in the diagrams on the
Annual Comparison and Energy and Power pages, activate the checkbox Display the
monthly distribution in the yearly comparison, as well as energy and power.
6. To ena ble con fig ura tio n of the aver age exp ect ed y iel d on t he pages Annual comparison and
Energy and power, activate the checkbox The monthly distribution can be configured
in the diagrams.
Manually Entering the Monthly Distribution
Requirement:
☐ You must have the user role Installer or Administrator (see Section10.1 "User Roles and
User Rights in Sunny Portal", page56).
Procedure:
1. Select Configuration > PV System Properties in the page and menu selection.
2. Select the tab Parameters.
3. Select [Edit].
☑ The menu for setting parameters opens.
4. In the Yield expectations area, enter values in the fields in % in the table with the months.
5. To display the predicted annual yield and the monthly distribution in the diagrams on the pages
Annual comparison and Energy and power, activate the checkbox Display the monthly
distribution in the yearly comparison, as well as energy and power.
6. To enable configuration of the predicted annual yield on the pages Annual comparison and
Energy and power, activate the checkbox The monthly distribution can be configured
in the diagrams.
7. Select [Save].
46 SPortalWebcon-BA-en-13 User Manual
Page 47

SMA Solar Technology AG 7 System Settings
7.12 Editing Data Releases
You can configure an option for sharing your system data on the PV database "sonnenertrag.eu".
By providing this data, you can contribute to improving this PV database. The more users participate,
the better "sonnenertrag.eu" will be able to indicate the expected yields for the different locations.
Requirement:
☐ You must have the user role Installer or Administrator (see Section10.1 "User Roles and
User Rights in Sunny Portal", page56).
Procedure:
1. Select Configuration > PV System Properties in the page and menu selection.
2. Select the tab Data releases.
3. Select [Edit].
☑ The menu for setting data releases opens.
4. Activate or deactivate the data releases checkbox.
5. Select [Save].
User Manual SPortalWebcon-BA-en-13 47
Page 48
8 Device Settings SMA Solar Technology AG
8 Device Settings
8.1 Calling up the Device Properties
The tab with the device properties displays information on each device. Depending on the device and
the device settings, various device properties can be displayed on this tab.
Requirement:
☐ You must have the user role Installer or Administrator (see Section10.1 "User Roles and
User Rights in Sunny Portal", page56).
Procedure:
1. Select Configuration > Device Overview in the page and menu selection.
2. In the device line and the column Properties, select .
8.2 Calling Up the Device Parameters
The parameters of a device are described in the respective device manual. The device parameters on
this page can only be read but not changed. If you want to change the parameters, use the
Sunny Explorer software (see Sunny Explorer help). You can obtain Sunny Explorer free of charge
fr om t he downl oad are a at www. SMA-Solar.com. Inverters with Webconnect function are compatible
with Sunny Explorer as of software version 1.04.
Requirement:
☐ You must have the user role Installer or Administrator (see Section10.1 "User Roles and
User Rights in Sunny Portal", page56).
Procedure:
1. Select Configuration > Device Overview in the page and menu selection.
2. In the device line and the column Parameters, select .
☑ You can read off the parameters in the parameter list.
3. To display changes to the parameters, select in the column History.
8.3 Entering Line Conductors
In the device properties, Sunny Portal can display the line conductors to which each inverter is
connected. To display the line conductors, they must first be entered.
Requirement:
☐ You must have the user role Installer or Administrator (see Section10.1 "User Roles and
User Rights in Sunny Portal", page56).
48 SPortalWebcon-BA-en-13 User Manual
Page 49

SMA Solar Technology AG 8 Device Settings
Procedure:
1. Call up the inverter properties (see Section8.1 "Calling up the Device Properties", page48).
2. Select [Edit].
☑ The menu for setting the device properties opens.
3. In the area Phase, activate the checkbox of the line conductor to which the inverter is
connected.
4. Select [Save].
8.4 Entering the PV Array Power
The PV array power is the maximum power of the PV modules connected to one inverter.
Procedure:
• Calculate the PV array power via the string properties (see Section7.1 "Entering String
Properties", page38).
or
• Enter the PV array power manually.
SMA Solar Technology AG recommends calculating the PV array power via the string properties.
A string designates a group of series-connected PV modules. Normally, a system is made up of
multiple strings. Each string has specific properties, such as deviation to south (azimuth) or the roof tilt
angle. If you enter the properties of the strings, Sunny Portal can determine the PV array power more
precisely.
Entering the PV Array Power Manually
To find out the connected PV array power present at each inverter, contact your installer. Using the
PV array power, Sunny Portal can calculate the nominal system power of your system
(see Section7.4.2 "Automatic Calculation of Nominal System Power", page41).
Requirement:
☐ You must have the user role Installer or Administrator (see Section10.1 "User Roles and
User Rights in Sunny Portal", page56).
Procedure:
1. Call up the inverter properties (see Section8.1 "Calling up the Device Properties", page48).
2. Select [Edit].
☑ The menu for setting the device properties opens.
3. Enter the PV array power in the Generator capacity area in the field kWp.
4. Select [Save].
User Manual SPortalWebcon-BA-en-13 49
Page 50

8 Device Settings SMA Solar Technology AG
8.5 Changing the Device Name
By default, the device type and the last three numbers of the device serial number are displayed as
the device name.
Requirement:
☐ You must have the user role Installer or Administrator (see Section10.1 "User Roles and
User Rights in Sunny Portal", page56).
Device name requirement:
☐ The device name can have a maximum of 20 characters.
Procedure:
1. Call up the device properties (see Section8.1 "Calling up the Device Properties", page48).
2. Select [Edit].
☑ The menu for setting the device properties opens.
3. Enter a device name in the field Device Name.
4. Select [Save].
8.6 Changing a Device Description
You can enter an arbitrary description for each device. The description of the device is displayed in
Device Properties.
Requirement:
☐ You must have the user role Installer or Administrator (see Section10.1 "User Roles and
User Rights in Sunny Portal", page56).
Procedure:
1. Call up the device properties (see Section8.1 "Calling up the Device Properties", page48).
2. Select [Edit].
☑ The menu for setting the device properties opens.
3. Enter a description in the field Description.
4. Select [Save].
50 SPortalWebcon-BA-en-13 User Manual
Page 51

SMA Solar Technology AG 8 Device Settings
8.7 Activating/Deactivating Automatic Update for Devices
Sunny Portal can carry out an automatic firmware update on the devices of your PV system.
This means that you will benefit from ongoing product enhancements.
You can set the automatic update for individual devices or for all devices. When you change and
save the setting for one device, you will be asked whether the setting should be adopted for all
devices.
1. Call up the device properties (see Section8.1 "Calling up the Device Properties", page48).
2. Select [Edit].
☑ The menu for setting the device properties opens.
3. In the area Automatic updates, activate or deactivate the checkbox Automatically update
device.
4. Select [Save].
☑ A prompt appears.
5. To adopt the setting for all devices, select [Accept].
User Manual SPortalWebcon-BA-en-13 51
Page 52

9 System Management SMA Solar Technology AG
9 System Management
9.1 Adding Inverters
A Webconnect system in Sunny Portal can consist of a maximum of four inverters with Webconnect
function. If your Webconnect system in Sunny Portal already consists of four inverters, you will need
to create a new system in Sunny Portal (see Section3.1 "Registering the Inverter in Sunny Portal",
page9).
Requirements:
☐ The new inverter must have Webconnect function.
☐ The new inverter must be commissioned in your system.
☐ The new inverter must be connected to the router/network switch and the Internet
(see installation manual of the inverter with integrated Webconnect function or the installation
manual of the retrofitted Speedwire/Webconnect interface).
☐ The PI C an d RI D of a ll i nve rte rs m ust be a vai labl e (s ee i nve rte r typ e la bel or s tic ker n ear the typ e
label).
☐ You must have the user role Administrator (see Section10.1 "User Roles and User Rights in
Sunny Portal", page56).
Procedure:
1. Go to www.SunnyPortal.com.
2. Select [PV System Setup Assistant].
☑ The PV System Setup Assistant opens.
3. Select [Next].
☑The page User Registration opens.
4. Enter the e-mail address and the Sunny Portal password in the fields E-mail Address and
Password.
5. Select [Next].
☑The page Select PV system opens.
6. Select the option Add or replace devices.
7. In the system line and the column Option, select and [Next].
☑The page Select devices opens.
8. Enter the PIC and RID of a new inverter in the fields PIC and RID.
9. Select [Identify].
10. To add more inverters, enter the PIC and RID of a further inverter and select [Identify].
11. Select [Next].
☑ A summary is displayed.
12. Select [Finish].
52 SPortalWebcon-BA-en-13 User Manual
Page 53

SMA Solar Technology AG 9 System Management
9.2 Replacing an Inverter
Requirements:
☐ T he new inve rter must be of t he same dev ice type as the inverter to be replaced and be enabled
for Webconnect function.
☐ The new inverter must be commissioned in your system.
☐ The new inverter must be connected to the router/network switch and the Internet
(see installation manual of the inverter with integrated Webconnect function or the installation
manual of the retrofitted Speedwire/Webconnect interface).
☐ The PIC and RID of the new inverter must be available (see inverter type label or sticker near
the type label).
☐ You must have the user role Administrator (see Section10.1 "User Roles and User Rights in
Sunny Portal", page56).
Device replacement: do not delete the old inverter
If the inverter being replaced is deleted from Sunny Portal, all the data of that inverter will be
irretrievably deleted from Sunny Portal.
• To retain the data of the old inverter in Sunny Portal, do not delete the old inverter.
Procedure:
1. Go to www.SunnyPortal.com.
2. Select [PV System Setup Assistant].
☑ The PV System Setup Assistant opens.
3. Select [Next].
☑The page User Registration opens.
4. Enter the e-mail address and the Sunny Portal password in the fields E-mail Address and
Password.
5. Select [Next].
☑The page Select PV system opens.
6. Select the option Add or replace devices.
7. In the system line in which inverters are to be replaced, select and [Next].
☑The page Select devices opens.
8. Enter the PIC and RID of a new inverter or a new Speedwire/Webconnect interface in the fields
PIC and RID.
9. Select [Identify].
10. To add more inverters, enter the PIC and RID of a further inverter and select [Identify].
11. Select [Next].
☑The page Replace devices opens.
12. In the line of the old inverter, select the new inverter in the drop-down list Replace with.
User Manual SPortalWebcon-BA-en-13 53
Page 54

9 System Management SMA Solar Technology AG
13. Select [Next].
☑ A summary is displayed.
14. Select [Finish].
9.3 Deactivating/Activating the Inverters
In the following cases, you must deactivate inverters in Sunny Portal:
• You have removed an inverter with integrated or retrofitted Webconnect function from your
system.
or
• You no longer wish to display an inverter in Sunny Portal.
The data of the deactivated inverter is retained in Sunny Portal.
Requirement:
☐ You must have the user role Installer or Administrator (see Section10.1 "User Roles and
User Rights in Sunny Portal", page56).
Procedure:
1. Call up the inverter properties (see Section8.1 "Calling up the Device Properties", page48).
2. Select [Edit].
☑ The menu for setting the device properties opens.
3. To deactivate the inverter in Sunny Portal, deactivate the checkbox active in the area
Data Collection.
4. To activate the inverter in Sunny Portal, activate the checkbox active in the area
Data Collection.
5. Select [Save].
9.4 Deleting Inverters
Requirement:
☐ You must have the user role Installer or Administrator (see Section10.1 "User Roles and
User Rights in Sunny Portal", page56).
Inverter data is irretrievably deleted
If you delete the inverter, all the data of that inverter will be irretrievably deleted from
Sunny Portal. The data will be retained in the memory of the inverter. The amount of data
depends on the size of the inverter memory.
• Check whether it is sufficient to deactivate the inverter (see Section9.3 "Deactivating/
Activating the Inverters", page54).
54 SPortalWebcon-BA-en-13 User Manual
Page 55

SMA Solar Technology AG 9 System Management
Procedure:
1. Call up the inverter properties (see Section8.1 "Calling up the Device Properties", page48).
2. Select [Edit].
3. Select [Delete].
☑ A window with a security prompt opens.
4. To irretrievably delete the inverter, select [Delete].
9.5 Deleting a Sunny Portal System
If you delete your system, the system and its data will be irretrievably deleted in Sunny Portal.
Requirement:
☐ You must have the user role Installer or Administrator (see Section10.1 "User Roles and
User Rights in Sunny Portal", page56).
Procedure:
1. Select Configuration > PV System Properties in the page menu selection.
2. Select the tab PV System Data.
3. Select [Edit].
4. In the area PV System Data, select [Irretrievably delete PV system].
☑ A security prompt opens.
5. To irretrievably delete the system, select [Yes].
User Manual SPortalWebcon-BA-en-13 55
Page 56
10 User Management SMA Solar Technology AG
10 User Management
10.1 User Roles and User Rights in Sunny Portal
If you hav e th e us er role Administrator, you can create f urt her use rs i n Su nny Por tal so t hat the y have
access to your Sunny Portal system. You must assign every user a user role. The user roles have
different rights in your Sunny Portal system.
The following user roles are possible:
•Guest
• Standard user
• Installer
• System administrator
General Rights
Rights User role
Guest Standard
user
View pages ✓ ✓ ✓ ✓
Release pages for viewing in
Sunny Portal and publish pages
Save diagram data ✖ ✓ ✓ ✓
View/change user information ✓ ✓ ✓ ✓
Change Sunny Portal password ✖ ✓ ✓ ✓
Change system password ✖ ✖ ✓ ✓
View device properties ✖ ✖ ✓ ✓
View/change system properties ✖ ✖ ✓ ✓
Configure PV modules ✖ ✖ ✓ ✓
View/change report
configuration
Change device properties ✖ ✖ ✓ ✓
Replace/delete devices ✖ ✖ ✓ ✓
Delete system ✖ ✖ ✓ ✓
Set communication monitoring ✖ ✖ ✓ ✓
Set inverter comparison ✖ ✖ ✓ ✓
View PV system logbook and
confirm entries
Import data ✖ ✖ ✓ ✓
✖✖✓ ✓
✖✖✓ ✓
✖✓✓ ✓
Installer System
administrator
56 SPortalWebcon-BA-en-13 User Manual
Page 57

SMA Solar Technology AG 10 User Management
Rights User role
Guest Standard
user
Installer System
administrator
View user management ✖ ✖ ✖ ✓
Create/delete users and assign
✖✖✖ ✓
user roles
Rights to the System Overview Page
PV System Data area:
Rights User role
Guest Standard
user
View current inverter status ✖ ✖ ✓ ✓
View status of inverter
✖✖✓ ✓
comparison
View energy yield ✓ ✓ ✓ ✓
View monetary yield ✖ ✓ ✓ ✓
View CO
View the PV system information ✓*
avoided ✓✓✓ ✓
2
✓✓ ✓
View meteorological data ✓ ✓ ✓ ✓
View current PV system power ✖ ✖ ✓ ✓
* Also sees the system image, if available.
Installer System
administrator
Yield Overview area:
Rights User role
Guest Standard
user
Installer System
administrator
View energy and power ✖ ✓ ✓ ✓
User Manual SPortalWebcon-BA-en-13 57
Page 58

10 User Management SMA Solar Technology AG
10.2 Creating a New User
Requirement:
☐ You must have the user role Administrator (see Section10.1 "User Roles and User Rights in
Sunny Portal", page56).
Procedure:
1. Select Configuration > User Management in the page and menu selection.
2. Select [New User].
3. Enter the e-mail address of the new user in the field E-mail Address.
4. Activate the desired user role in the area Roles.
5. Select [Save].
☑ The new user receives an e-mail with the access data.
10.3 Deleting a User
Requirement:
☐ You must have the user role Administrator (see Section10.1 "User Roles and User Rights in
Sunny Portal", page56).
Procedure:
1. Select Configuration > User Management in the page and menu selection.
2. In the user line and the column Delete, select .
3. Confirm the security prompt with [Yes].
10.4 Changing User Rights
Requirement:
☐ You must have the user role Administrator (see Section10.1 "User Roles and User Rights in
Sunny Portal", page56).
Procedure:
1. Select Configuration > User Management in the page and menu selection.
2. In the user line and the column Edit, select .
☑The areas E-mail Address and Roles open.
3. Activate the desired user role in the area Roles.
4. Select [Save].
58 SPortalWebcon-BA-en-13 User Manual
Page 59

SMA Solar Technology AG 10 User Management
10.5 Changing User Information
Every user can enter user information. User information includes, for instance, name and address.
Procedure:
1. Select User Info/Logout > User information in the page and menu selection.
2. Select [Edit].
☑ The menu for setting user information opens.
3. Enter the user information.
4. Select [Save].
User Manual SPortalWebcon-BA-en-13 59
Page 60

11 Passwords SMA Solar Technology AG
11 Passwords
11.1 Selecting Secure Passwords
To enhance the security of your password, note the following:
• Select passwords containing at least eight characters.
• Use combinations of upper-case and lower-case letters, special characters and numbers.
• Do not use names or common words (e.g. "dog", "cat", "house").
• Avoid using words that have any personal relevance to you such as the names of persons or
pets, personnel numbers, identification numbers, or car license plates.
• Do not repeat names or words (e.g. "househouse" or "catcat").
• Do not use number or letter combinations as they appear on the keyboard (e.g. "12345",
"qwerty").
11.2 Required Passwords
11.2.1 Sunny Portal Password
The Sunny Portal password protects your Sunny Portal system from unauthorized access. You can log
into Sunny Portal with the Sunny Portal password. If you register a system in Sunny Portal, you must
create a Sunny Portal password during registration. You can change the Sunny Portal password
(see Section 11.3.1)
11.2.2 System Password
System Password Basics
Th e se cur ity con cept for sys tem s fr om S MA S ola r T ech nol ogy AG g enerally distinguishes the two user
groups User and Installer. The user groups have different rights. The following system passwords
are configured in the devices by default: User = 0000, Installer = 1111. You will only be able to
acces s the devic es of your s ystem via c ommunicat ion produc t (e.g. Sun ny Explor er) provid ing that th e
same system password has been set for all devices. You can find more information on system
passwords and on the user group and security concept in the Sunny Explorer help.
System Password in Sunny Portal
For the registration of your system, Sunny Portal requires the system password for the user group
Installer. You entered the system password when registering your systems in Sunny Portal.
Via Sunny Portal you can change the system password of the user group Installer for all devices
registered in your Sunny Portal system (see Section 11.3.2). The system password for the user group
User cannot be changed in Sunny Portal. To change the system password for the user group User,
use e.g. Sunny Explorer (see Sunny Explorer help).
Changing default system passwords
Change the default system passwords for both user groups (user/installer) promptly in order
to prevent unauthorized access to your system.
60 SPortalWebcon-BA-en-13 User Manual
Page 61

SMA Solar Technology AG 11 Passwords
11.3 Changing Passwords
11.3.1 Changing the Sunny Portal Password
Sunny Portal password requirements:
☐ The Sunny Portal password can consist of a maximum of eight characters.
☐ You must have the user role Standard user, Installer, or Administrator (see Section10.1
"User Roles and User Rights in Sunny Portal", page56).
The following special characters are permitted:
• ! $ % & / ( ) = ? + − . ; : _ < > #
•Space
Procedure:
1. Select User Info/Logout > User information in the page and menu selection.
2. On the tab User Information, select the hyperlink If you want to change your password,
please click here.
3. Enter the old and the new Sunny Portal password in the fields provided.
4. Select [Save].
11.3.2 Changing the System Password
Via Sunny Portal you can change the system password of the Installer user group for all devices
registered in your Sunny Portal system. If you change the system password in Sunny Portal, the system
password of the inverters registered in Sunny Portal will also be changed.
Requirement:
☐ You must have the user role Installer or Administrator (see Section10.1 "User Roles and
User Rights in Sunny Portal", page56).
System password requirement:
☐ The system password can be a maximum of twelve characters.
The following special characters are permitted:
• ? _ ! -
Procedure:
1. Select Configuration > PV system properties.
2. Select the tab PV System Data.
3. Select [Edit].
4. In the area PV System Data, enter the old password in the field Old PV system password.
5. In the area PV System Data, enter a new password in the field New PV system password.
6. In the area PV System Data, enter the new password again in the field Repeat password.
User Manual SPortalWebcon-BA-en-13 61
Page 62

11 Passwords SMA Solar Technology AG
7. Select [Save].
☑ A message is displayed confirming that the password change was successful.
✖ You get a message stating that the password change was not successful?
It is possible that a device cannot be accessed right now.
• Try to change the system password again later.
• If the problem persists, change the system password of the devices via Sunny Explorer
(see Sunny Explorer help) and then enter the new password in Sunny Portal.
Otherwise, Sunny Portal will not be able to display any new data from the devices.
11.4 Sunny Portal Password Forgotten
1. Go to www.SunnyPortal.com.
2. In the Login area, select the hyperlink Forgotten password?.
3. In the field E-mail, enter the e-mail address used for registering in Sunny Portal.
4. Select [Generate New Password].
☑ You will receive an e-mail with a new password.
5. Change the assigned password (see Section11.3.1 "Changing the Sunny Portal Password",
page61).
62 SPortalWebcon-BA-en-13 User Manual
Page 63

SMA Solar Technology AG 12 Glossary
12 Glossary
Azimuth angle
In the Northern hemisphere, the azimuth angle indicates by how many degrees the module surface
deviates from the compass point South. In the southern hemisphere, it indicates the deviation from the
compass point North. The azimuth angle is counted from south (0°) via west (+90°) with positive
values and from south (0°) via east (-90°) with negative values.
DHCP
DHCP is short for "Dynamic Host Configuration Protocol" and is a server service with which devices
are automatically integrated into a network. If DHCP is not activated in the network (e.g., at the
router), devices will need to be integrated in the network manually. An IP address and subnet mask
suitable for the network must be manually configured in the device to be integrated.
kWp
See peak power
Log file
A log file is an automatically logged protocol of events on a computer system. A log file contains
errors that occurred during operation of the computer system, for example.
Nominal power (kWp)
See peak power
Nominal PV system power in kWp
The nominal PV system power in kWp (kilowatt peak) is the maximum possible PV system power.
The nominal PV system power in kWp is also known as the nominal power of the PV system.
The peak power of a PV system is the aggregate peak power of all PV modules installed (see peak
power of a PV module). The peak power of a PV system can, for instance, be used to compare the
system yield and system costs with other PV systems. The peak power of a PV system is often referred
to as "system power (kWp)".
An installed system can rarely achieve peak power because it is not installed in laboratory conditions.
Peak power (kWp)
The peak power is the maximum power output calculated for a PV module under STC (Standard Test
Conditions).
The peak power is measured in watt peak (Wp), kilowatt-peak (kWp), or megawatt-peak (MWp).
Peak power is also called nominal power.
STC (Standard Test Conditions): Standardized test conditions in the laboratory, under which the
electrical characteristics of PV modules are measured. This enables the comparison of different
PV modules. The PV modules are subjected to a vertical irradiation of 1,000 W/m
temperature of 25°C and a wind speed of 1 m/s. The electrical characteristics are then measured.
The test conditions are designed to correspond to the ideal ambient conditions for operation of an
installed PV module.
2
, an ambient
User Manual SPortalWebcon-BA-en-13 63
Page 64

12 Glossary SMA Solar Technology AG
PIC
See abbreviations (see Section1 "Information on this Document", page6).
Predicted annual yield (kWh)
The predicted annual yield of a system is calculated from the specific annual yield (kWh/kWp) at the
system location and the system power in kWp (also known as nominal power).
You can obtain the specific annual yield for the location of your PV system from irradiation maps.
Specific annual yield (kWh/kWp) x nominal power (kWp) = predicted annual yield (kWh)
Example: Calculation of the predicted annual yield
The specific annual yield at a PV system location is approximately 900 kWh/kWp. The nominal
power of the PV system is 4.8 kWp.
Predicted annual yield = 900 kWh/kWp x 4.8 kWp = 4,320 kWh
PV array
Technical device for the conversion of solar energy into electrical energy. All series (= in series) and
parallel installed and connected PV modules of a PV system are referred to as a PV array.
For PV systems with micro inverters, a PV array consists of one PV module, as only one PV module can
be connected to a micro inverter.
PV array power
The PV array power is the maximum power of the PV modules connected to one inverter.
PV module
Electrical circuitry of several PV cells encapsulated in an enclosure to protect the sensitive cells from
mechanical stress and environmental influences.
PV System Setup Assistant
The PV System Setup Assistant is an application in Sunny Portal that helps you register your system in
Sunny Portal.
RID
See abbreviations (see Section1 "Information on this Document", page6).
SMA Connection Assist
SMA Connection Assist helps you configure the devices for your network if they do not automatically
integrate into your network and connect to Sunny Portal.
Specific annual yield (kWh/kWp)
The specific annual yield is a calculated average value of specific system yield values of different
PV systems for a particular location. You can obtain the specific annual yield for the location of your
PV system from irradiation maps. You can assess the efficiency of your PV system by comparing the
specific system yield of your PV system with the specific annual yield for the PV system location.
64 SPortalWebcon-BA-en-13 User Manual
Page 65

SMA Solar Technology AG 12 Glossary
Specific system yield (kWh/kWp)
The specific system yield is a key figure that describes the efficiency of a PV system, regardless of its
size. The specific system yield is dependent on the irradiation at the location, the ambient temperature,
shading, tilt and azimuth angle of the PV modules, and the module and inverter power.
You can assess the efficiency of your PV system by comparing the specific system yield of your
PV system with the specific annual yield for the PV system location.
The specific system yield is calculated from the actual measured energy yield (kWh) of a PV system
for a specific period (e.g. one year or one month) divided by the peak power (kWp) of the PV system.
Example: calculation of the specific system yield for one year
Your PV system consists of 40 PV modules, each with a peak power of 120 Wp (watt peak) as per
manufacturer specification. Hence, your PV system has a peak power of
40 x 120 Wp = 4,800 Wp = 4.8 kWp.
To calculate the specific system yield of your PV system for the year 2011, for example, you will
need the actual (measured) energy yield of your PV system for 2011, e.g. 3,200 kWh. You can
now calculate the specific system yield of your PV system for the year 2011: 3,200 kWh divided
by 4.8 kWp = 666 kWh/kWp in 2011.
Tilt angle
The tilt angle indicates by how many degrees the tilt of the module surface deviates from the
horizontal.
User Manual SPortalWebcon-BA-en-13 65
Page 66

13 Contact SMA Solar Technology AG
13 Contact
If you have technical problems concerning our products, contact the SMA Service Line.
We require the following information in order to provide you with the necessary assistance:
• For inverters with integrated Webconnect function:
– Inverter type and serial number of the inverter (see type label of the inverter)
– If possible: firmware version of the inverter (see Sunny Explorer)
• For inverters with retrofitted Webconnect function:
– PIC of the Speedwire/Webconnect interface (see inverter type label o r st ick er n ear the typ e
label)
– Inverter type and serial number of the inverter (see type label of the inverter)
– If possible: firmware version of the inverter (see Sunny Explorer)
• Quantity and type of all inverters
• Error description
Australia SMA Australia Pty Ltd.
Sydney
Belgien/
Belgique/
België
Brasil Vide España (Espanha)
Česko SMA Central & Eastern Europe
Chile Ver España
Danmark Se Deutschland (Tyskland)
SMA Benelux BVBA/SPRL
Mechelen
s.r.o.
Praha
Toll free for
Australia:
International: +61 2 9491 4200
+32 15 286 730
+420 235 010 417
1800 SMA AUS
(1800 762 287)
66 SPortalWebcon-BA-en-13 User Manual
Page 67
SMA Solar Technology AG 13 Contact
Deutschland SMA Solar Technology AG
Niestetal
España SMA Ibérica Tecnología Solar,
S.L.U.
Barcelona
France SMA France S.A.S.
Lyon
India SMA Solar India Pvt. Ltd.
Mumbai
Italia SMA Italia S.r.l.
Milano
Κύπρος/
Kıbrıs
Luxemburg/
Luxembourg
Βλέπε Ελλάδα/
Bkz. Ελλάδα (Yunanistan)
Siehe Belgien
Voir Belgique
Magyarország lásd Česko (Csehország)
Nederland zie Belgien (België)
Österreich Siehe Deutschland
Perú Ver España
Polska Patrz Česko (Czechy)
Medium Power Solutions
Wechselrichter:
Kommunikation:
+49 561 9522-1499
+49 561 9522-2499
SMA Online Service Center:
www.SMA.de/Service
Hybrid Energy Solutions
Sunny Island: +49 561 9522-399
PV-Diesel
+49 561 9522-3199
Hybridsysteme:
Power Plant Solutions
Sunny Central: +49 561 9522-299
Llamada gratuita en
900 14 22 22
España:
Internacional: +34 902 14 24 24
Medium Power Solutions
Onduleurs :
Communication :
+33 472 09 04 40
+33 472 09 04 41
Hybrid Energy Solutions
Sunny Island : +33 472 09 04 42
Power Plant Solutions
Sunny Central : +33 472 09 04 43
+91 22 61713888
+39 02 8934-7299
User Manual SPortalWebcon-BA-en-13 67
Page 68
13 Contact SMA Solar Technology AG
Portugal SMA Solar Technology Portugal,
Unipessoal Lda
Lisboa
România Vezi Česko (Cehia)
Schweiz Siehe Deutschland
Slovensko pozri Česko (Česká republika)
South Africa SMA Solar Technology
South Africa Pty Ltd.
Centurion (Pretoria)
United
Kingdom
Ελλάδα SMA Hellas AE
България Вижте Ελλάδα (Гърция)
대한민국 SMA Technology Korea Co., Ltd.서울+82 2 508-8599
中国 SMA Beijing Commercial
SMA Solar UK Ltd.
Milton Keynes
Αθήνα
SMA Solar (Thailand) Co., Ltd. +66 2 670 6999
Company Ltd.
北京
Isento de taxas em
Portugal:
Internacional: +351 2 12 37 78 60
08600 SUNNY
(08600 78669)
International: +27 (12) 643 1785
+44 1908 304899
801 222 9 222
International: +30 212 222 9 222
+86 10 5670 1350
800 20 89 87
+971 2 234-6177 SMA Middle East LLC
!
Other
countries
68 SPortalWebcon-BA-en-13 User Manual
International SMA Service Line
Niestetal
Toll free worldwide: 00800 SMA SERVICE
(+800 762 7378423)
Page 69

SMA Solar Technology
www.SMA-Solar.com
 Loading...