

Slendertone ABS8 User Manual
Instruction Manual
www.slendertone.com
WELCOME
Congratulations on purchasing
read the user manual that was supplied with your product carefully before using this product.
SLENDERTONE ABS
8
to begin your journey to getting firmer and flatter abs. Please
If you have any difficulty setting up your product or have any other questions or concerns, please send us an
email or call the
SLENDERTONE Careline on:
• UK: 0800 169 3919
• Ireland: 1800 719 833
• USA: 1-800-551-2443
• International: +353 94 902 9936
• Email: info@slendertone.com
INTRODUCING YOUR SLENDERTONE ABS8
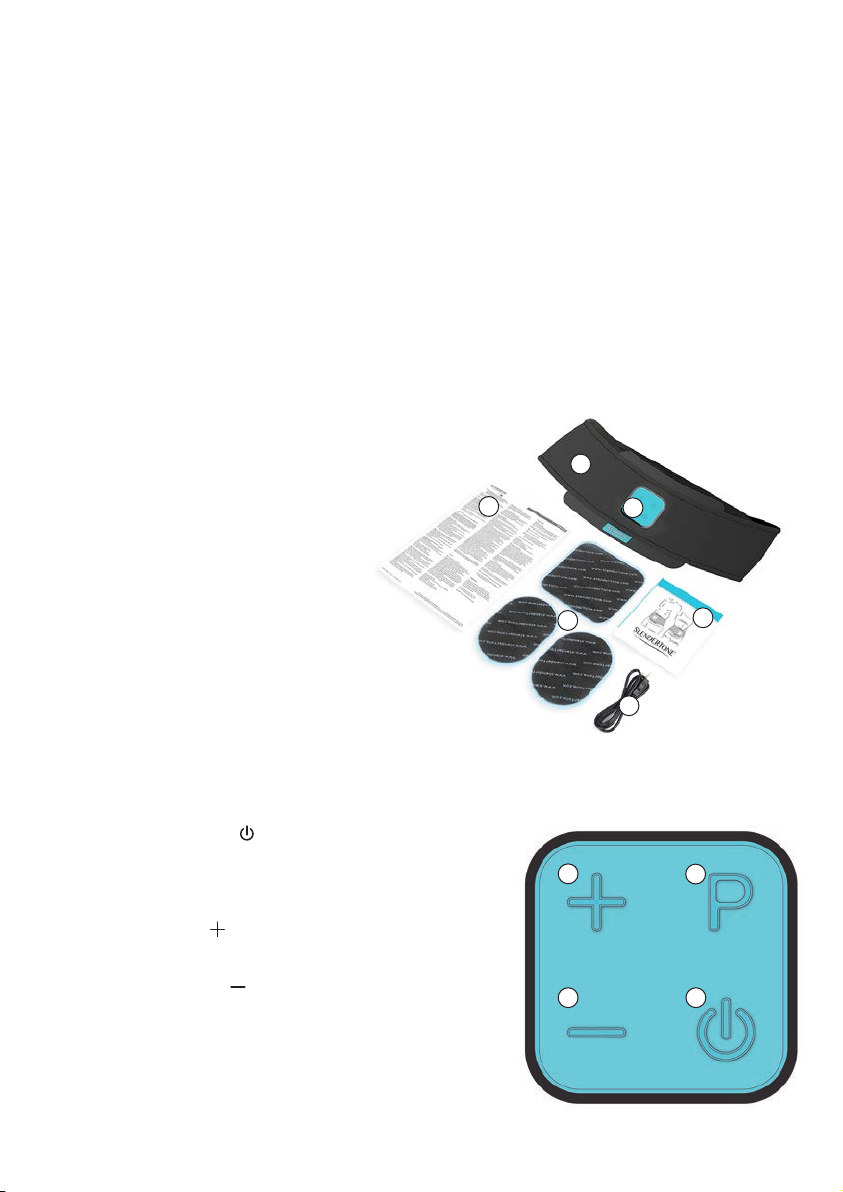
ACK CONTENTS
P
1. Controller
2. Belt: Fits waist sizes 24"- 42"/61-107cm
3. Pack of three adhesive gel pads
4. USB Charging Cable
5. Instruction Literature
5
2
1
3
4
5
HOW THE CONTROLLER WORKS
1. On / Off / Pause Button ( )
Press this button to turn your controller on or off. You may also
pause the exercise by briefly pressing this button during a toning
session.
2. Intensity Up Button ( )
Press this button to increase the intensity of the exercise.
3. Intensity Down Button ( )
Press this button to decrease the intensity of the exercise.
NOTE: To increase or decrease intensity quicker, press and hold
either intensity up/down button.
4. Program Button ( P )
Press this button to select the toning program you wish to use. There
are 10 programs in total, which are explained later in this manual (page 7).
2
2
3
4
1
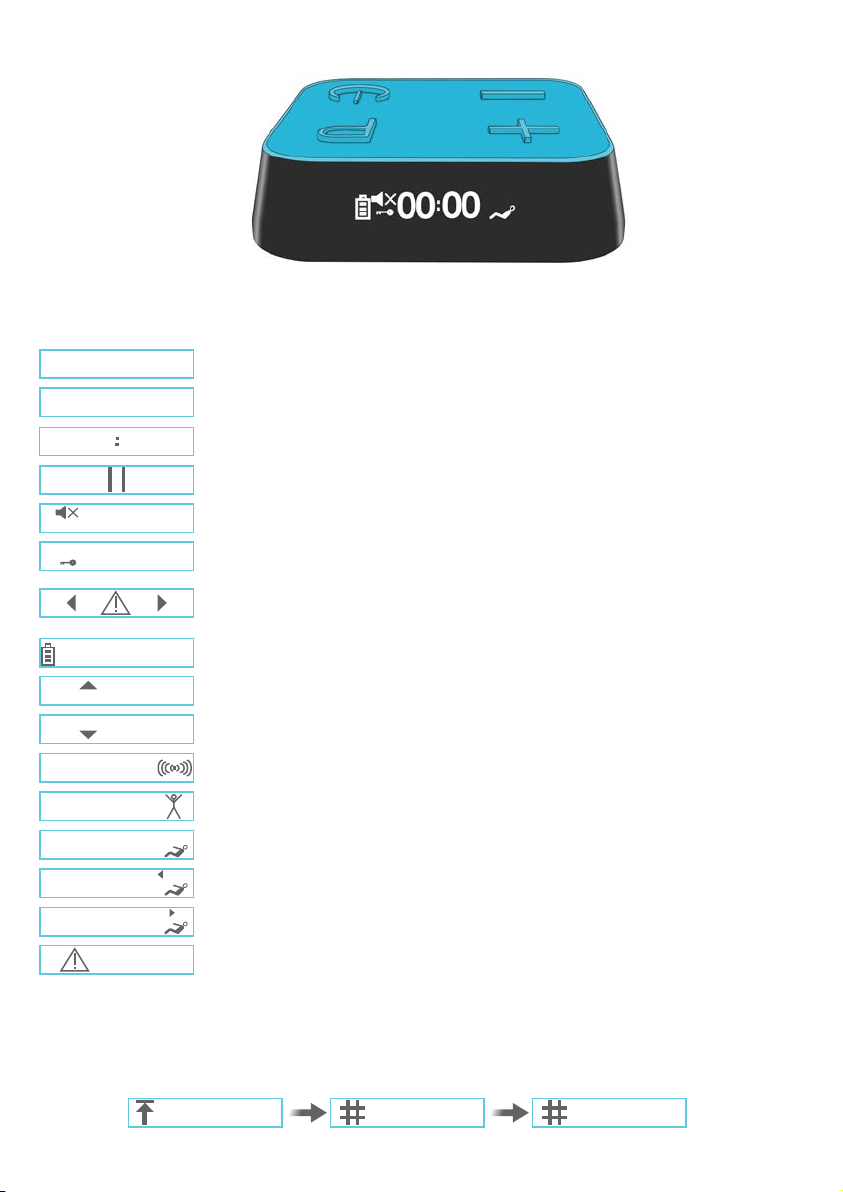
CONTROLLER DISPLAY (ICONS)
The following are the icons which may appear on the screen during the treatment session.
P
23
01
49
49
67
32
56
49
64
53
57
01 0
Programme number
Toning intensity level
Countdown timer
Session is paused
Sound is muted
Keylock is activated. You cannot change intensity levels or program whilst enabled.
Load Sense Warning. Indicates a poor contact between the controller and belt or
between the gel pads and skin
Battery charging level
Intensity increasing
Intensity decreasing
This indicates each contraction/relaxation phase - Programmes 1-7
Activity indicator for cardio activity - Programme 8
Activity indicator for active abdominal crunches - Programme 9
Activity arrow for the left side abdominal crunches - Programme 10
Activity arrow for the right side abdominal crunches - Programme 10
Error message. Please see troubleshooting (page 10).
When you switch on your controller, the screen will cycle though the following start-up screens. These indicate
1. Highest intensity reached in the previous session; 2. Number of sessions completed in current programme;
3. Total number of sessions completed. You may skip these by pressing the Programme button.
63
2503
50
3
SETTING UP YOUR SLENDERTONE ABS8
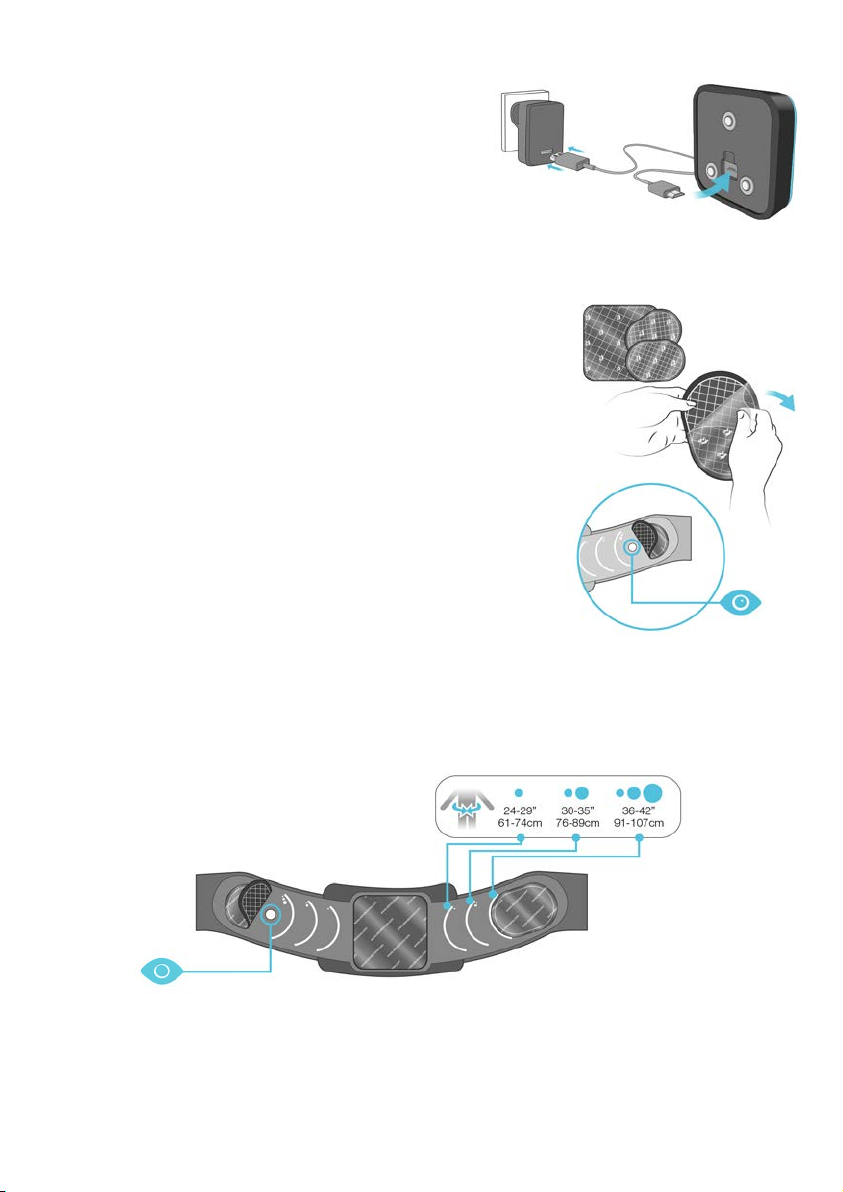
Step 1 - Charge the battery.
Insert a suitably approved USB charger into a charging socket
and then connect it to your controller using the USB charging
cable provided (Fig. a). It’ll take up to three hours to fully
charge the battery. Your controller is fully charged when you hear
a beep and the battery icon on the display is flashing with all
three bars full.
OTE: Do not leave your controller connected to the charger when the battery is fully charged.
N
Step 2 – Place the gel pads on the belt.
i) Remove the three adhesive gel pads from their pack. There is a large, square
gel pad and two smaller oval gel pads. One side of each gel pad has a grid
pattern while the other side is black.
ii) Position the belt on a flat surface with the three metal studs facing upwards.
Remove the plastic cover from the grid pattern side of the square gel pad
and place the gel pad grid pattern side down within the blue square to
cover the central metal stud. Press the edges of the gel pad firmly onto the belt.
(iii) Then remove the plastic covers from the grid pattern side of the two oval
gel pads and place them grid pattern side down either side of the square
gel pad (Fig. b) in the positions best suited to your waist size. Press the
edges of both gel pads firmly onto the belt.
Fig. a
Fig. b
N
OTE: The location of the two smaller gel pads depends on your waist size. In the example below (Fig.c) we
show the smaller gel pads placed farthest from the large, square gel pad. This signifies the position of those
who have a larger waist (36"-42" / 91-107cm). Use the sizing guidelines below to help you choose which is
suitable for you.
Fig. c
I
MPORTANT: Ensure each gel pad is placed
grid
pattern side down and completely covering the metal studs. Press
the edges of all three gel pads firmly onto the belt before use.
OTE: The gel pads should be replaced every 25-30 sessions.
N
4
 Loading...