


WL-340
WL-340/WL-341v3
Wireless Broadband router
(802.11bgn draft 2.0)

User Manual
Revision: 1
T
ABLE OF CONTENTS
1 KEY FEATURES.................................................................................. 4
2 PACKAGE CONTENTS......................................................................... 5
3 PRODUCT LAYOUT ............................................................................ 6
4 NETWORK + SYSTEM REQUIREMENTS .............................................. 9
5 WL-340/WL-341 PLACEMENT ........................................................... 9
6 SETUP LAN, WAN ............................................................................ 10
7 PC NETWORK ADAPTER SETUP (WINDOWS XP) ............................. 11
8 BRINGING UP THE WL-340/WL-341............................................... 13
9 INITIAL SETUP WL-340/WL-341 .................................................... 13
10 CONFIGURATION WIZARD.............................................................. 20
11 WIRELESS SETTINGS...................................................................... 22
12 FIREWALL SETTINGS ...................................................................... 33
13 ADVANCED SETTINGS..................................................................... 39
14 TOOLBOX SETTINGS ....................................................................... 45
2

Introduction
Congratulations on your purchase of the WL-340/WL-341 Wireless Network
Broadband Router. The WL-340/WL-341 is compliant with draft 802.11n v2.0
and up to 6 times faster than standard 802.11g based routers while still being
compatible with 802.11g & 802.11b gadgets. The WL-340/WL-341 is not only a
Wireless Access Point, but also doubles as a 4-port full-duplex Switch that
connects your wired-Ethernet devices together.
At 300 Mbps wireless transmission rate, the Access Point built into the Router
uses advanced MIMO (Multi-Input, Multi-Output) technology to transmit
multiple streams of data in a single wireless channel, giving you seamless
access to multimedia content. Robust RF signals travel farther, eliminating dead
spots and extending network range. For data protection and privacy, the WL-
340/WL-341 encodes all wireless transmissions with WEP, WPA, or WPA2
encryption.
With an inbuilt DHCP Server & powerful SPI firewall the WL-340/WL-341
protects your computers against intruders and most known Internet attacks but
provides safe VPN pass-through. With the incredible speed and the QoS
function of 802.11n(draft2.0), the WL-340/WL-341 is ideal for media-centric
applications like streaming video, gaming, and VoIP telephony to run multiple
media-intense data streams through the network at the same time, with no
degradation in performance.
3

1 Key Features
Features Advantages
Incredible Data Rate up to
300Mbps*
IEEE 802.11n draft 2.0 Compliant
and backward compatible with
802.11b/g
Four 10/100 Mbps Fast Switch Ports
(Auto-Crossover)
Firewall supports Virtual Server
Mapping, DMZ, IP Filter, ICMP
Blocking, SPI.
Support 802.1x authenticator,
802.11i (WPA/WPA2, AES), VPN
pass-through
WDS (Wireless Distribution System) Make wireless AP and Bridge mode
Heavy data payloads such as
MPEG video streaming
Fully Interoperable with IEEE
802.11b / IEEE802.11g compliant
devices with legacy protection
Scalability, extend your network.
Avoids the attacks of Hackers from
Internet.
Provide mutual authentication
(Client and dynamic encryption
keys to enhance security)
simultaneously as a wireless
repeater.
* Theoretical wireless signal rate based on IEEE standard of 802.11a, b, g, n chipset used.
Actual throughput may vary. Network conditions and environmental factors lower actual
throughput rate. All specifications are subject to change without notice.
4

2 Package Contents
Open the package carefully, and make sure that none of the items listed below
are missing. Do not discard the packing materials, in case of return; the unit
must be shipped back in its original package.
1. WL-340/WL-341 Router
2. 220V~240V Power Adapter
3. Quick Install Guide
4. CD (User’s Manual)
5. Warranty card
6. UTP cable
5

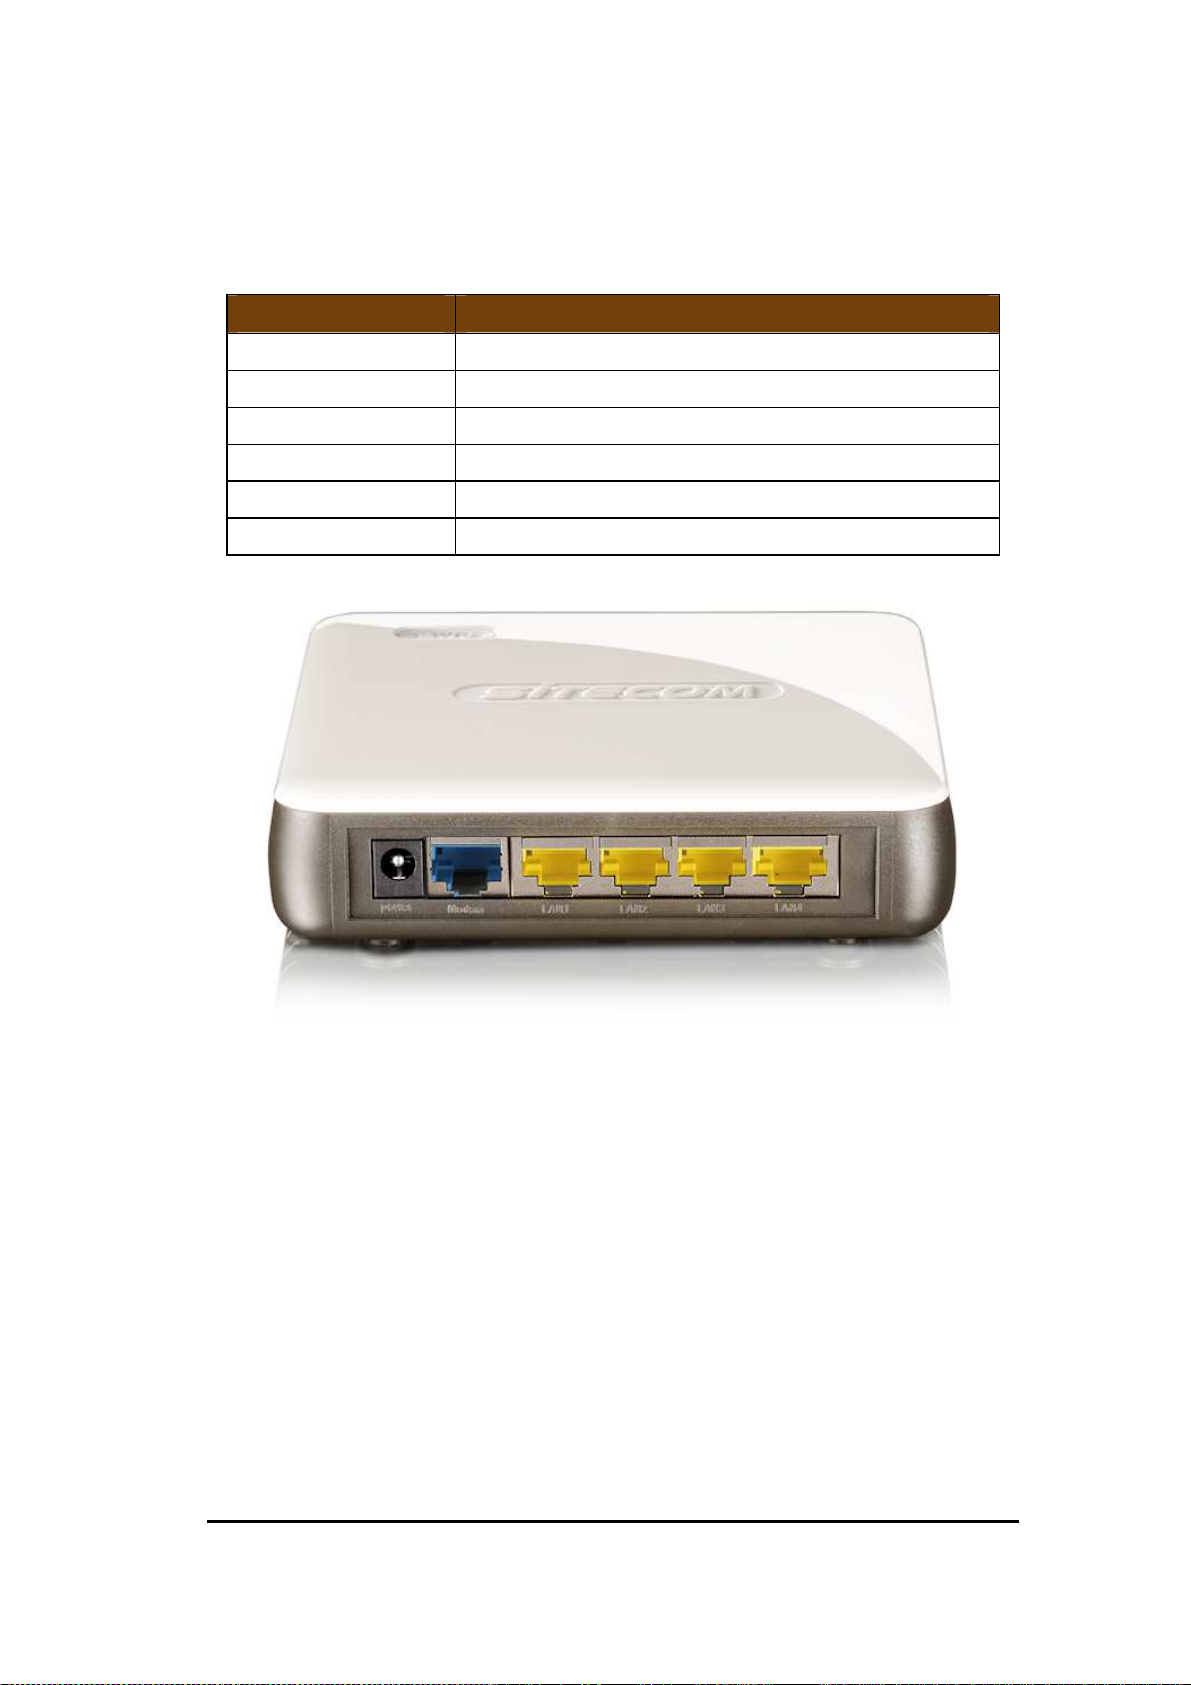
3 Product Layout
Port Description
Power connector Blinks on traffic for specific LAN PORT
WAN[Blue]
LAN[Yellow]
Connect the cable from you ADSL/Cable modem
to this port
Connect the cable from your PC’s or network
devices to this port
6

Back label
The back label describes the corresponding LED indications and port
functionality.
LED Description
Lights up in yellow when WLAN is enabled, blinks
WLAN
LINK/ACTIVY Blinks on traffic for specific LAN PORT
WAN
WPS BUTTON
yellow when WPS is set and lights up blue when
WLAN is connected.
Lights up in yellow when WAN port is connected,
lights up in blue when internet connection is
established.
Press 2 seconds for WPS mode
Press 10 seconds to reset the router
Press 15 Seconds to reset the router to factory
defaults.
7
LED Definition
From left to right.
Port Description
WAN (Blue) Shows the cable is connected.
LAN (Blue) Shows the cable is connected.
LAN (Blue) Shows the cable is connected.
LAN (Blue) Shows the cable is connected.
LAN (Blue) Shows the cable is connected.
Power (Red) Shows the device is turned on.
8

4 Network + System Requirements
To begin using the WL-340/WL-341, make sure you meet the following as minimum
requirements:
• PC/Notebook.
• Operating System – Microsoft Windows XP/2000/VISTA.
• 1 Free Ethernet port.
• WiFi card/USB dongle (802.11 b/g/n) – optional.
• External xDSL (ADSL) or Cable modem with an Ethernet port (RJ-45).
• PC with a Web-Browser (Internet Explorer, Safari, Firefox, Opera).
• Ethernet compatible CAT5 cables.
5 WL-340/WL-341 Placement
You can place the WL-340/WL-341 on a desk or other flat surface, or you can
mount it on a wall. For optimal performance, place your Wireless Broadband
Router in the center of your home (or your office) in a location that is away from
any potential source of interference, such as a metal wall or microwave oven. This
location must be close to a power connection and your ADSL/Cable modem.
9
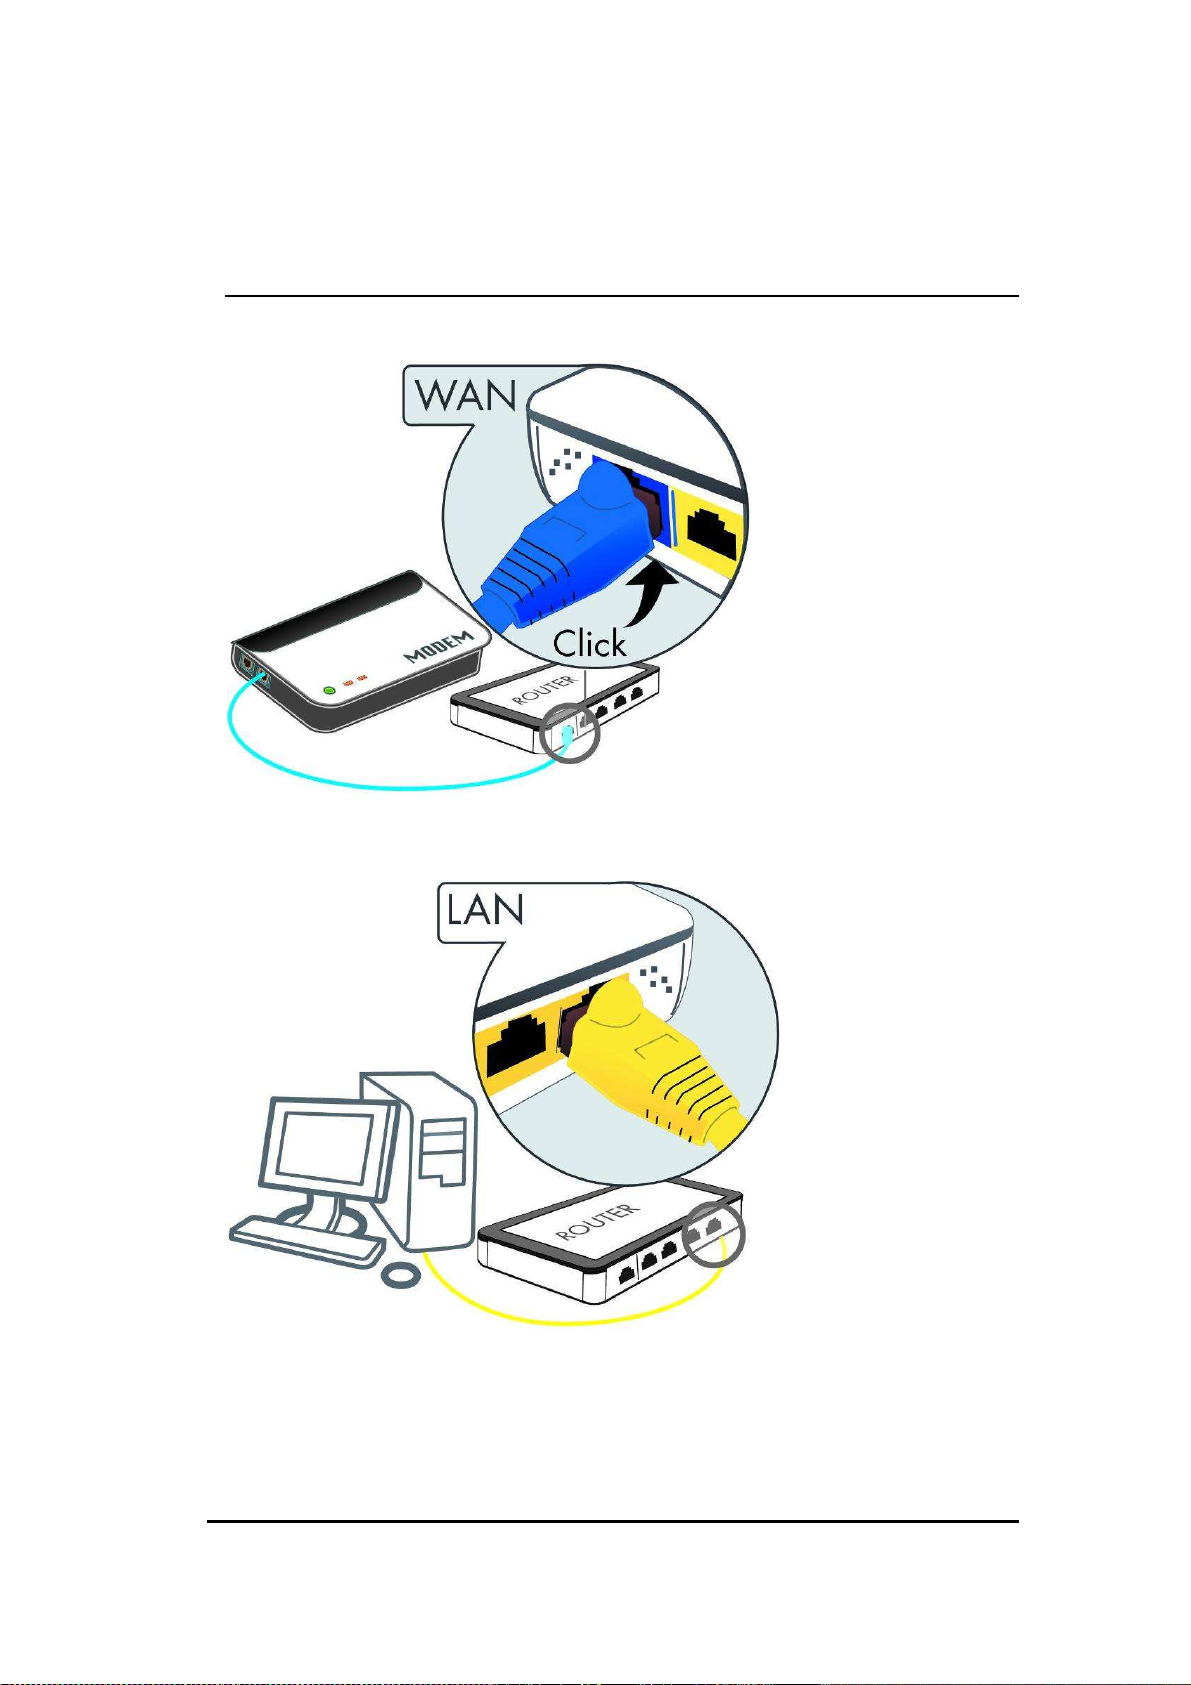
6 Setup LAN, WAN
WAN connection:
LAN connection:
10
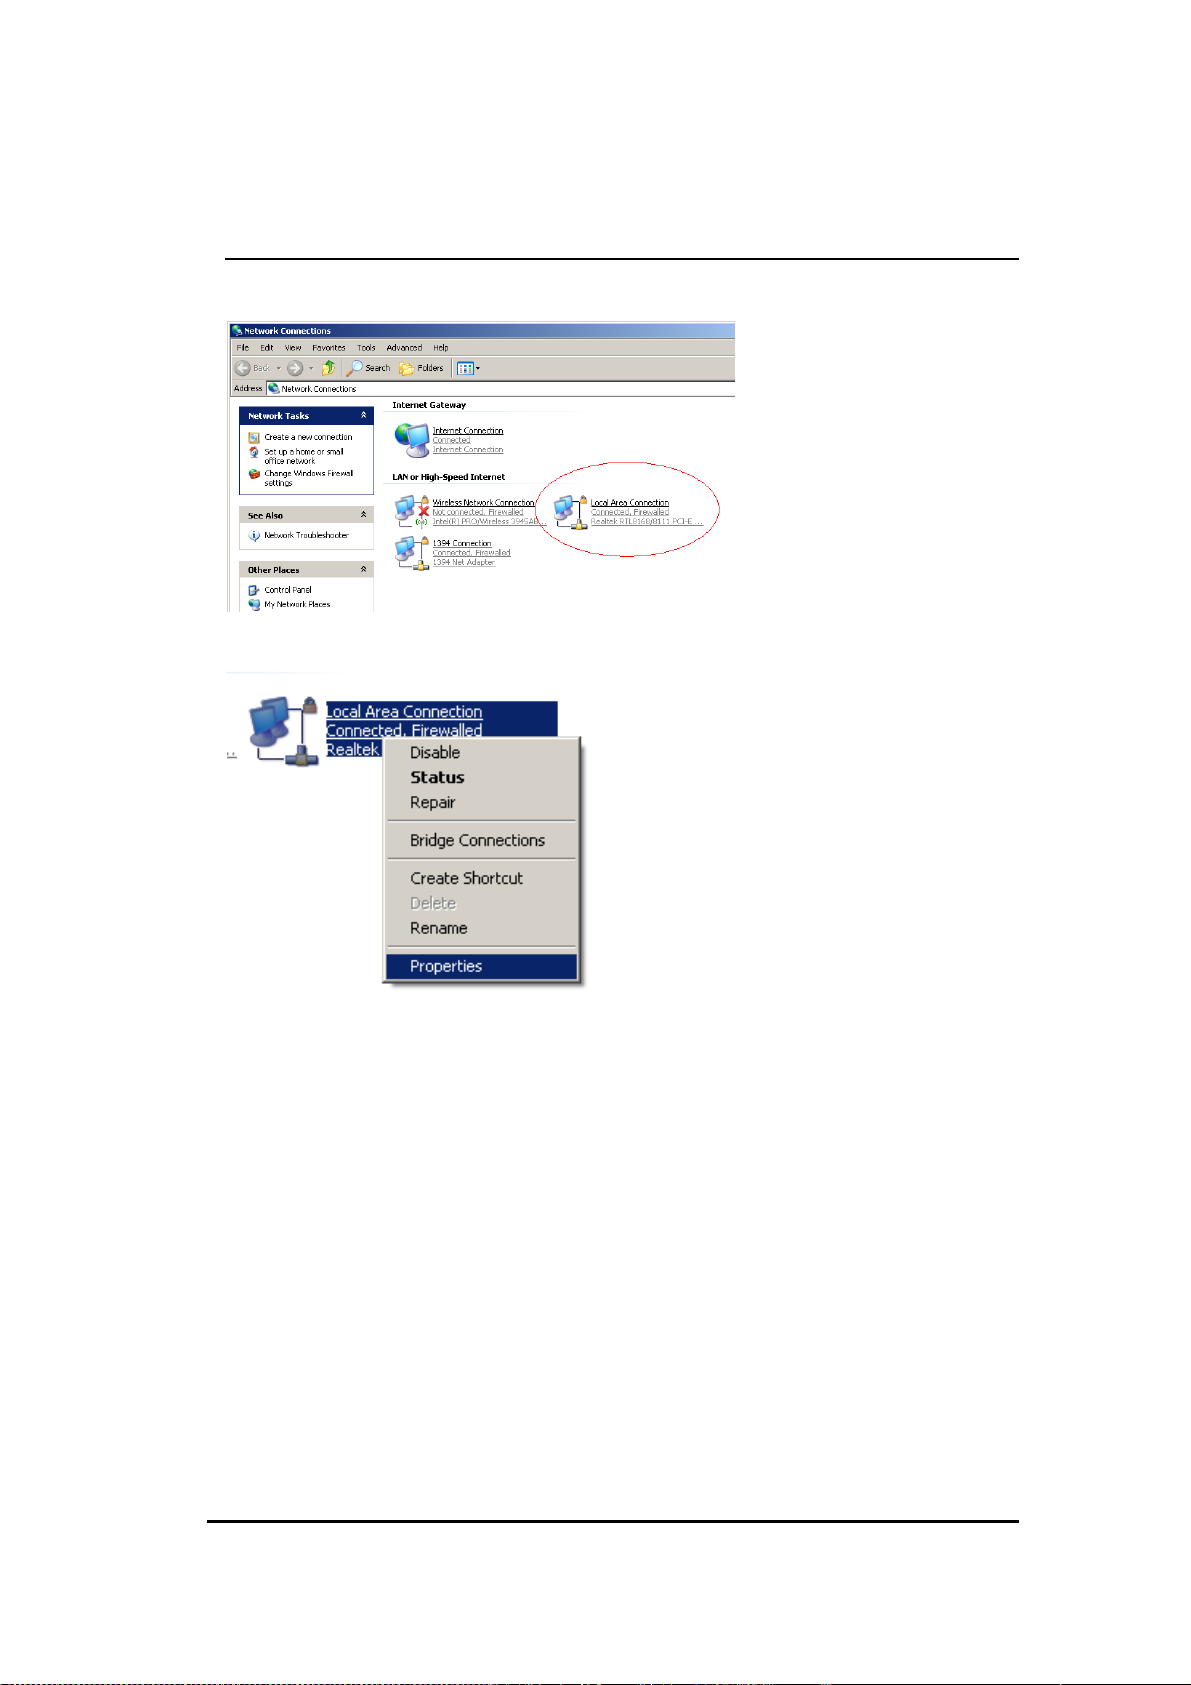
7 PC Network Adapter setup (
• Enter [Start Menu] select [Control panel] select [Network].
• Select [Local Area Connection]) icon=>select [properties]
Windows XP
)
11
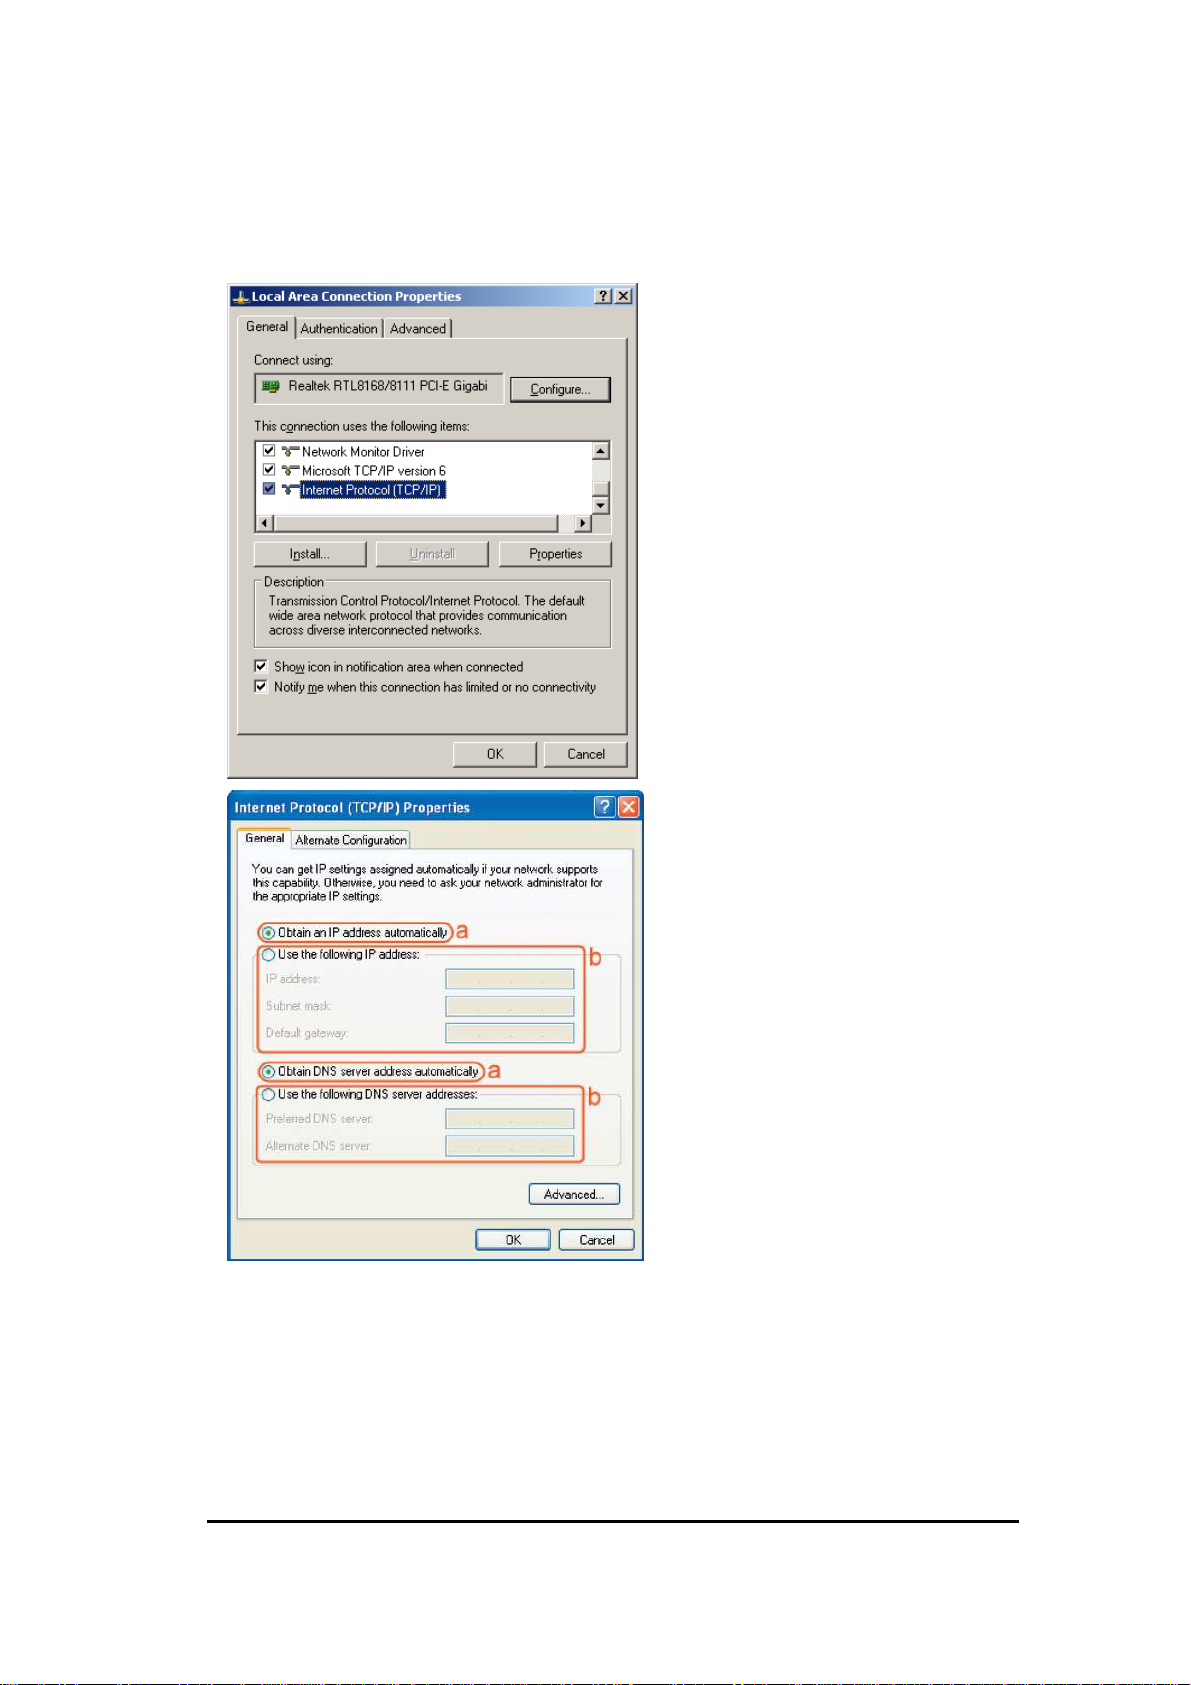
• Select [Internet Protocol (TCP/IP)] =>Click [Properties].
• Select the [General] tab.
a. WL-340/WL-341 supports [DHCP] function, please select both [Obtain an IP
address automatically] and [Obtain DNS server address automatically].
12
8 Bringing up the WL-340/WL-341
Connect the supplied power-adapter to the power inlet port and connect it to a
wall outlet. The WL-340/WL-341 automatically enters the self-test phase.
During self-test phase, the Power LED will be lit continuously to indicate that
this product is in normal operation.
9 Initial Setup WL-340/WL-341
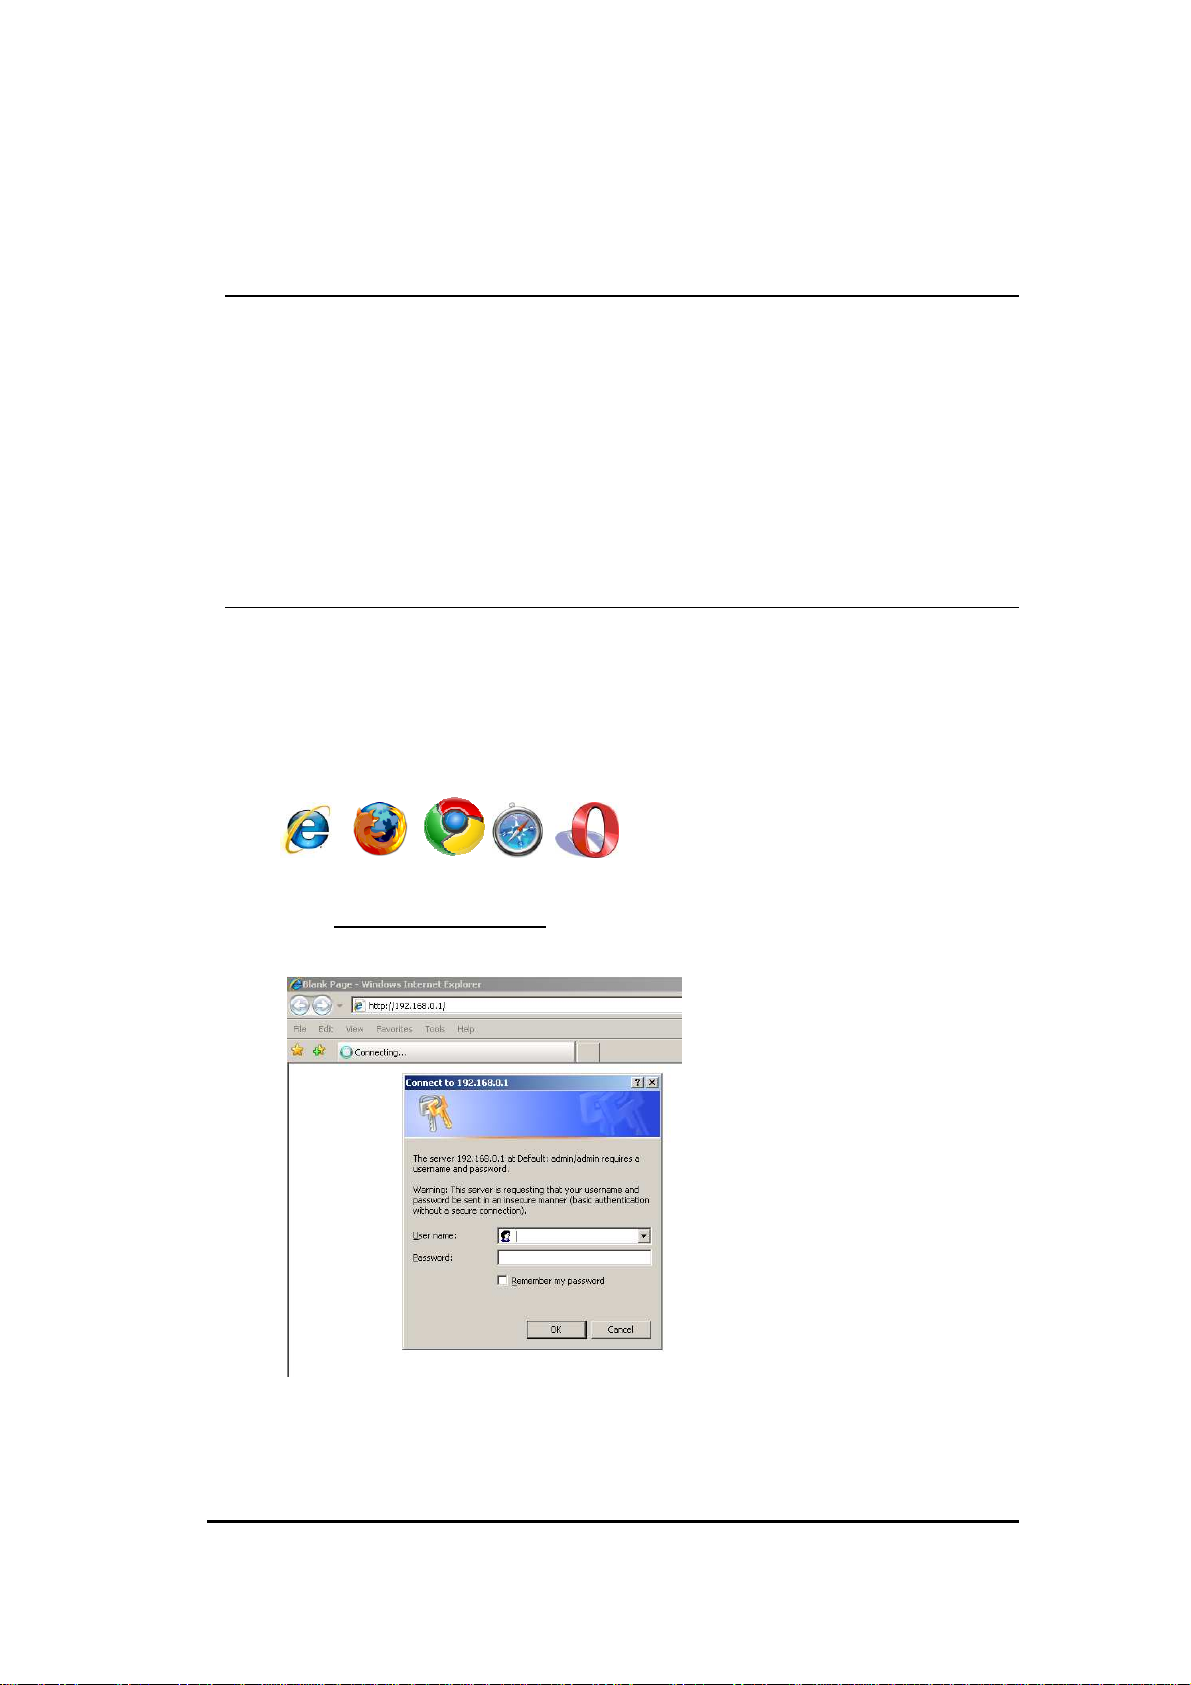
LOGIN procedure
1. Click to OPEN your browser (e.g. Internet Explorer).
2. Type http://192.168.0.1 in the address bar and press [Enter].
13
3. Type user name and password (default is admin/admin).
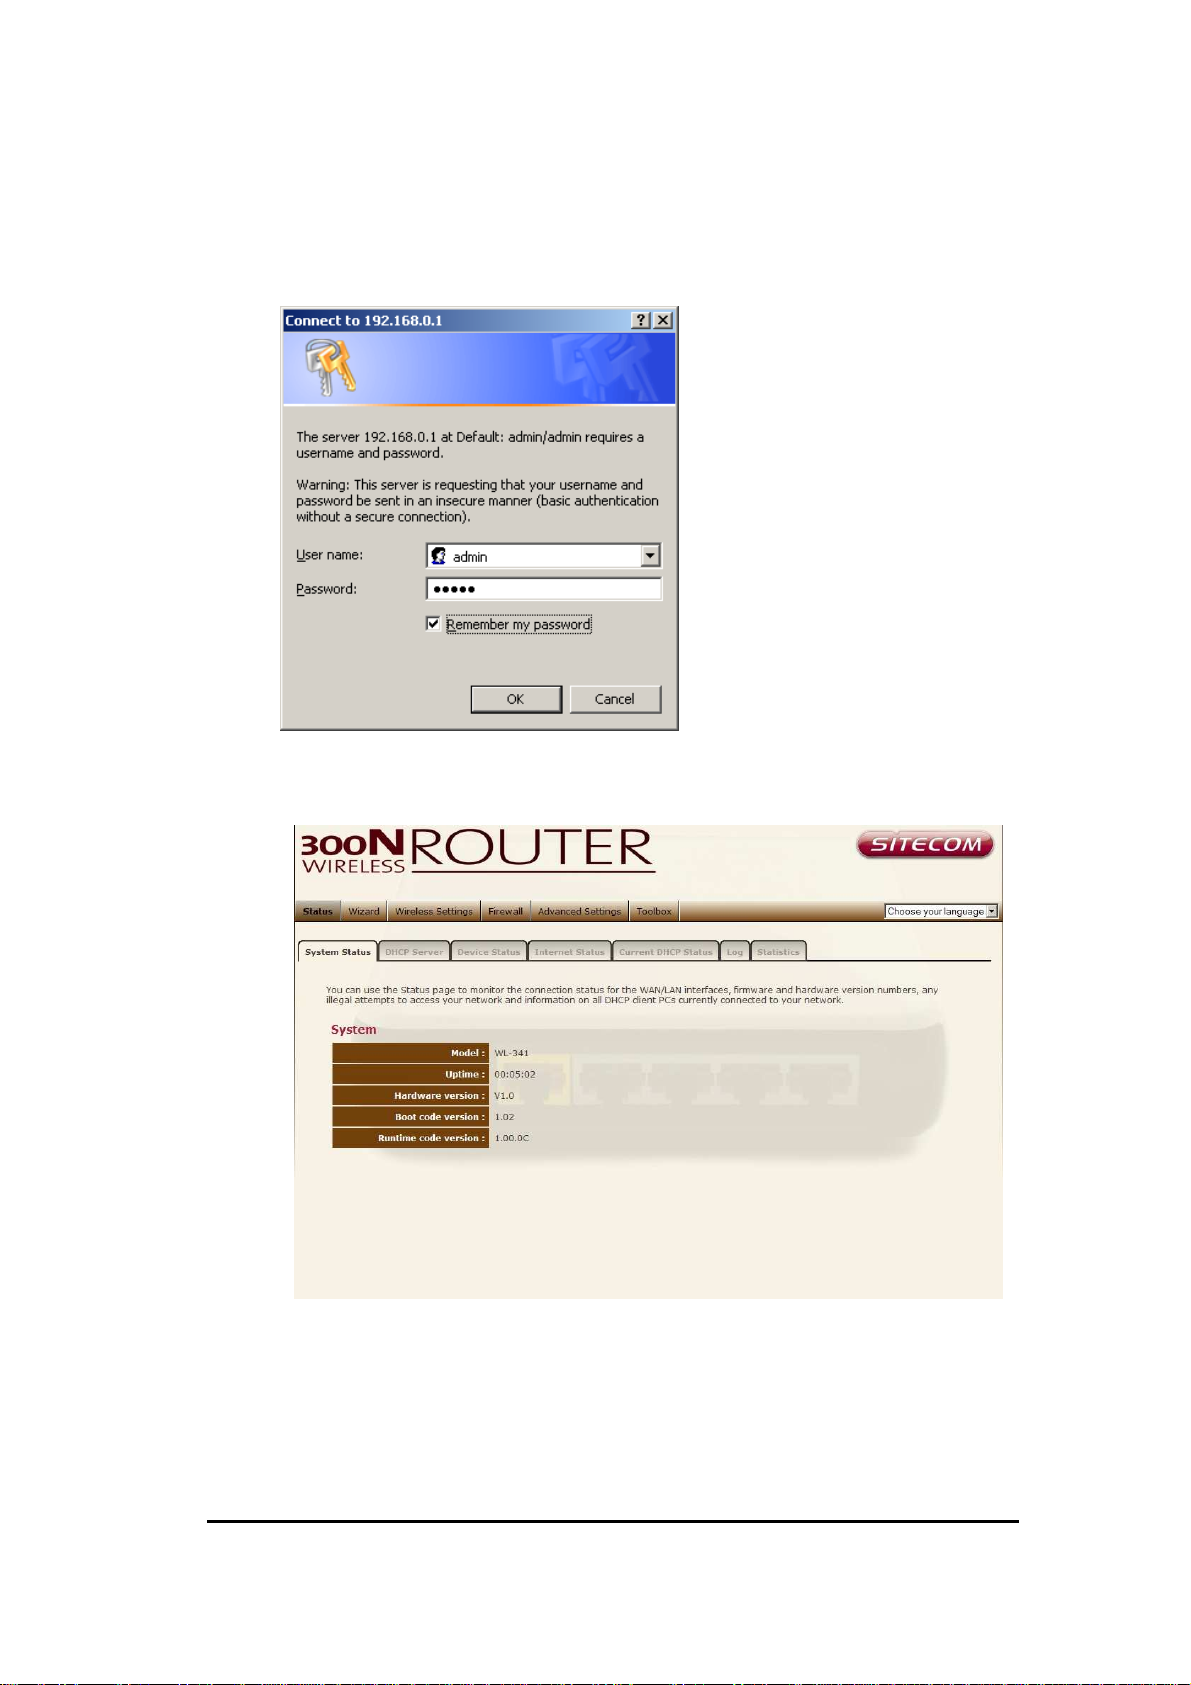
4. Click OK.
5. You will see the home page of the WL-340/WL-341.
The System status section allows you to monitor the current status of
your router.
The UP time, hardware information, serial number as well as firmware
version information is displayed here.
14
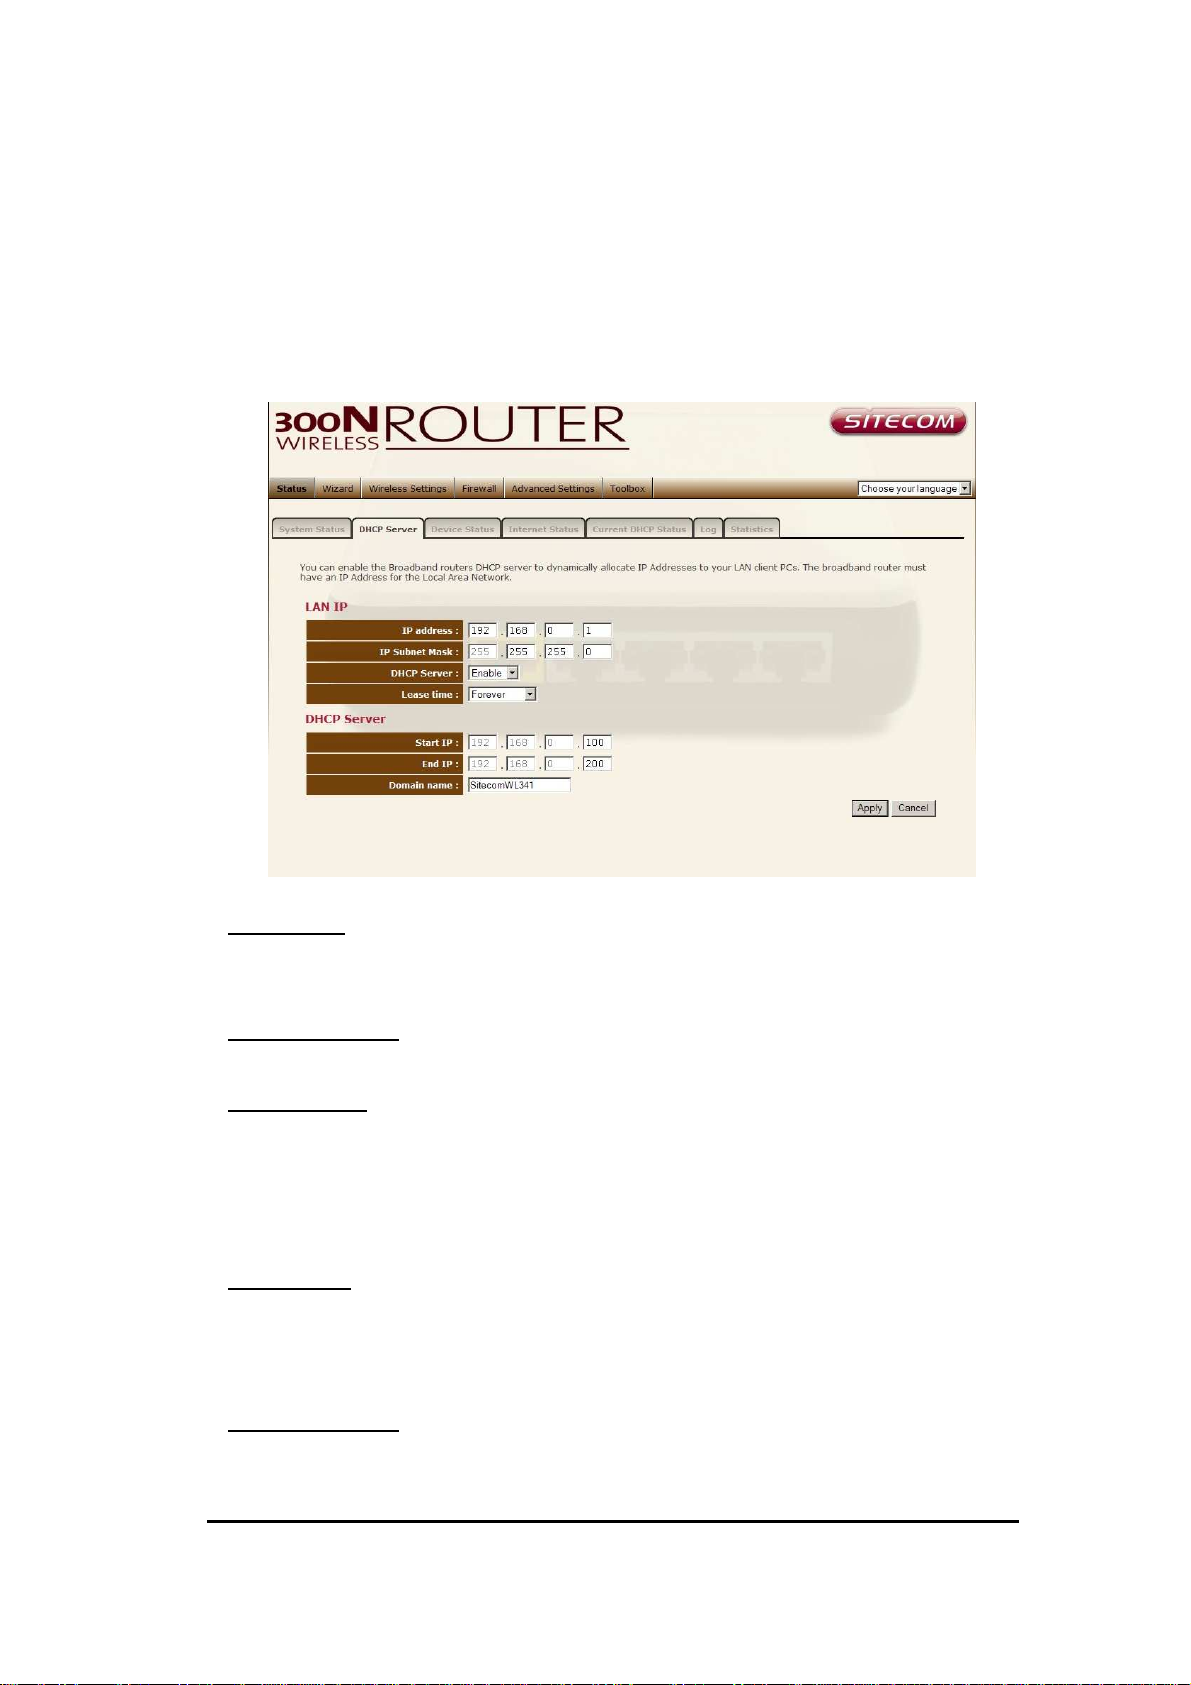
DHCP Server
The DHCP server tab gives you the opportunity to change the IP settings of the
WL-340/WL-341.
IP address 192.168.0.1. It is the router’s LAN IP address (Your LAN clients
default gateway IP address).
IP Subnet Mask 255.255.255.0 Specify a Subnet Mask for your LAN segment.
DHCP Server Enabled by default. You can enable or disable the DHCP server.
When DHCP is disabled no ip-addresses are assigned to clients and you have to
use static ip-addresses. When DHCP server is enabled your computers will be
assigned an ip-address automatically until the lease time expires.
Lease Time Forever. In the Lease Time setting you can specify the time period
that the DHCP lends an IP address to your LAN clients. The DHCP will change
your LAN client’s IP address when this time threshold period is reached.
Start IP/End IP You can select a particular IP address range for your DHCP
server to issue IP addresses to your LAN Clients.
15
Note: default IP range 192.168.0.100 192.168.0.199. If you want
your PC(s) to have a static/fixed IP address, then you’ll have to choose
an IP address outside this IP address Pool
Domain Name You can specify a Domain Name for your LAN. Or just keep the
default (Sitecom).
Click <Apply> at the bottom of this screen to save any changes.
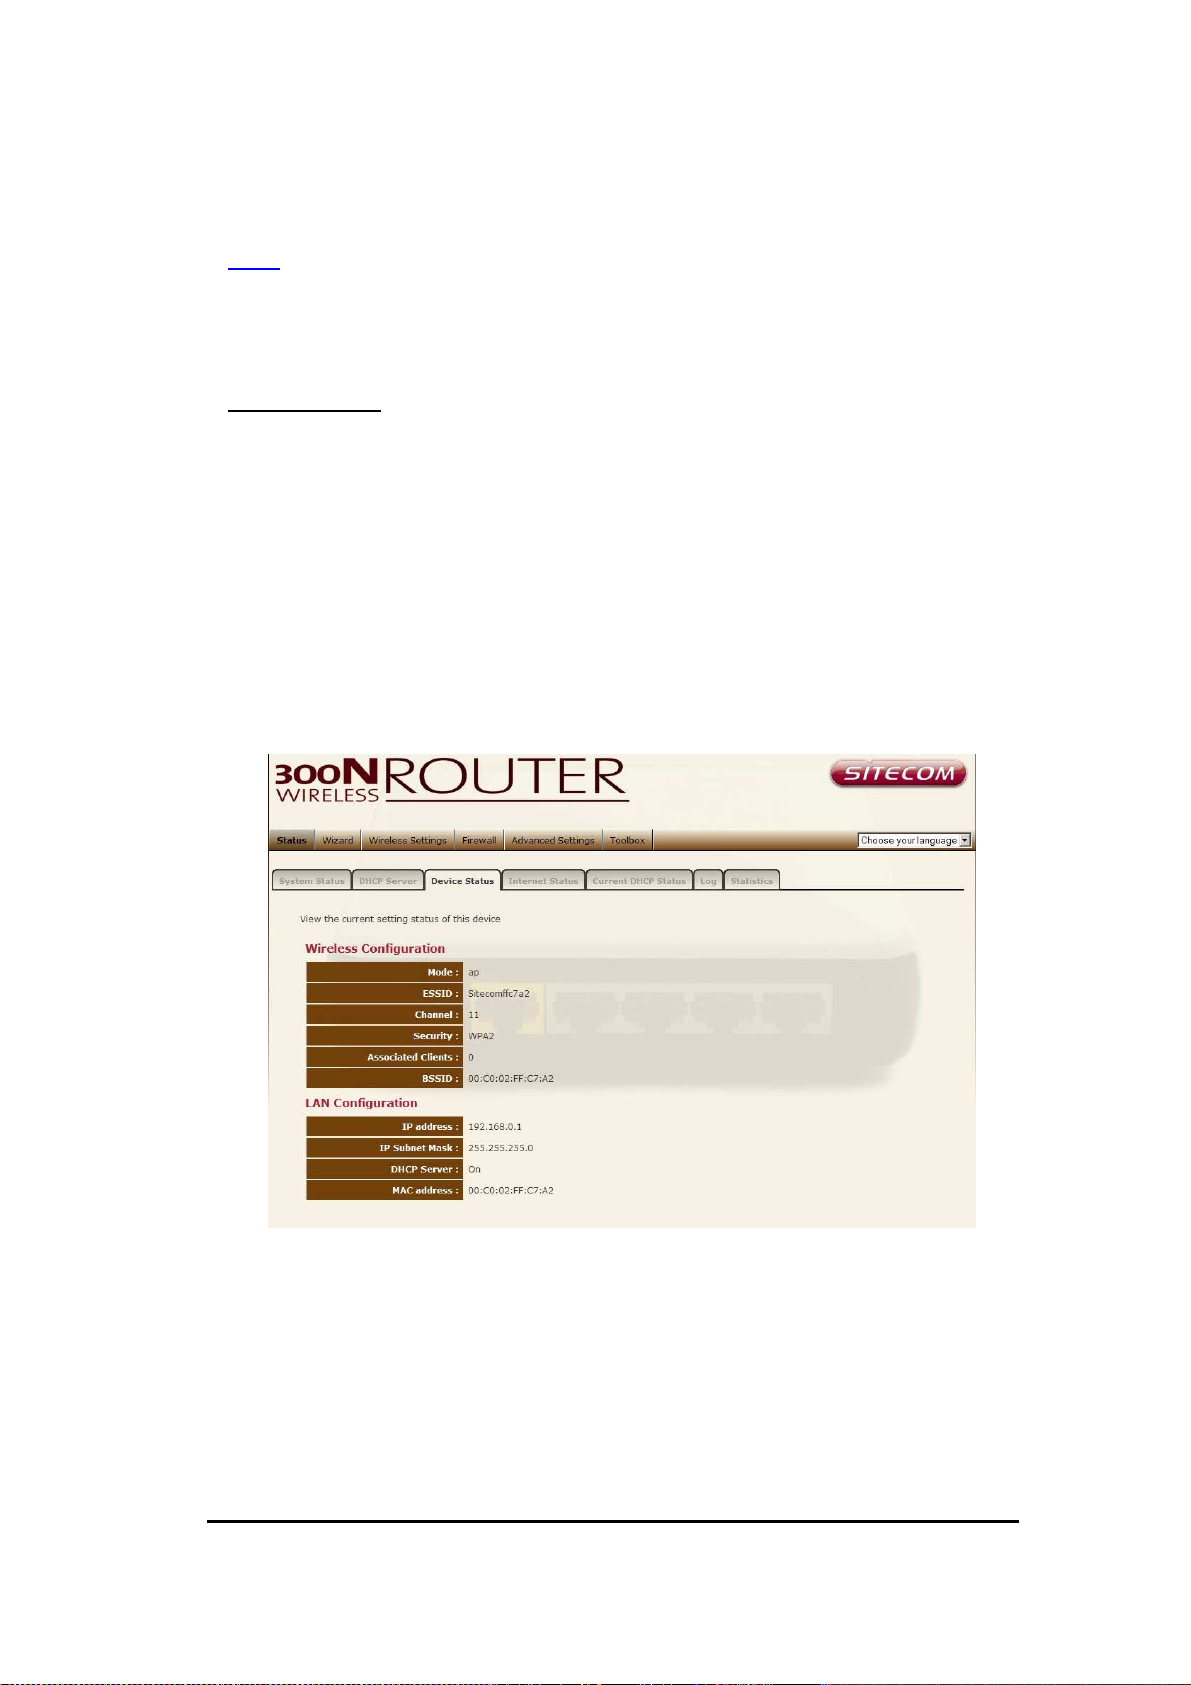
Device Status
View the Broadband router’s current configuration settings. Device Status
displays the configuration settings you’ve configured in the Wizard / Basic
Settings / Wireless Settings section.
16
 Loading...