

Page 1

Page 2
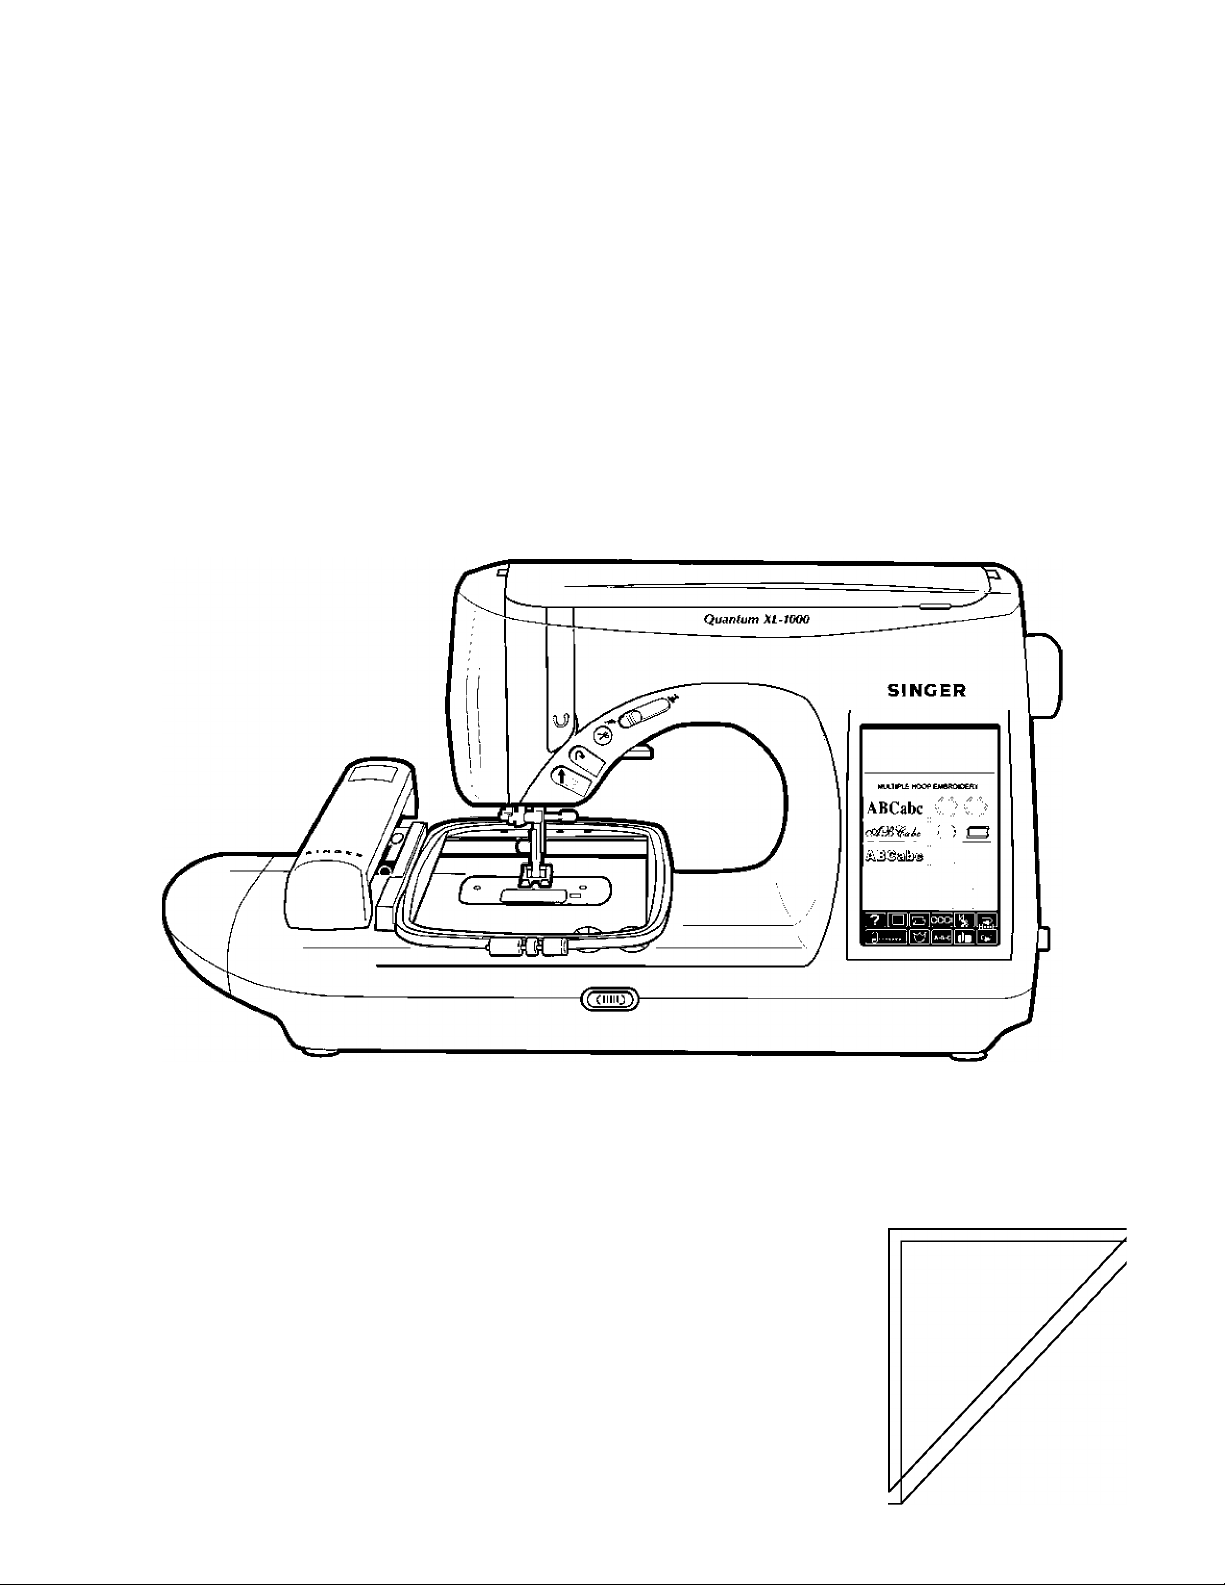
SINGER'
Quantum XL-1000
Training Guide
SINGER® and Quantum® are registered trademarks of the Singer
Company Limited.
Part #505257-XL1000
Page 3

Quantum® XL-1000
Part I - Getting Started
1. Memory and Pattern Category Buttons
Part II - Help Screens
Part III - Standard Machine Operation
1. Utility Stitches
■ Running Quilt Stitch
■ Eight Different Top Stitches
2. Buttonholes
■ Bartack Buttonhole
■ Stretch Buttonhole
Part IV - Category Selection Screen
1. Large Motifs
■ Three Sizes
■ Mirror Image a Pattern
■ Two Color Motif
■ Pattern Positioning
■ Repeat a Pattern
■ Balancing a Pattern
2. Fun Faces
3. Fun Flowers
4. Animated Animals
5. Decorative Stitches
■ Elongate
■ Two Color Continuous Sewing
■ Turn a Pattern Over
6. Cross Stitches and Heirloom
■ Pin Stitch
■ Entredeux
■ Blanket Binding Stitch
Table of Contents
Part V - Built-in Continuous Alphabet
Part VI - Combination Embroidery and Memory
1. Combine Embroidery Designs
2. Place Design Into Permanent Memory
Part VII - Advancing or Repeating Colors in Embroidery
Part VIII - Multiple Hoop Embroidery
Part IX - Memories
1.Standard Machine (Working and Permanent)
2.Embroidery (Working and Permanent)
Page 4
1. Memory and pattern category buttons
Part I
Getting Started
Help key - Opens a screen that will give detail instructions and sewing
advice
&
’IN"- file folder key - to place elements into permanent memory
A
"OUT- file folder key - to take an element out of permanent
memory
-1-
Page 5
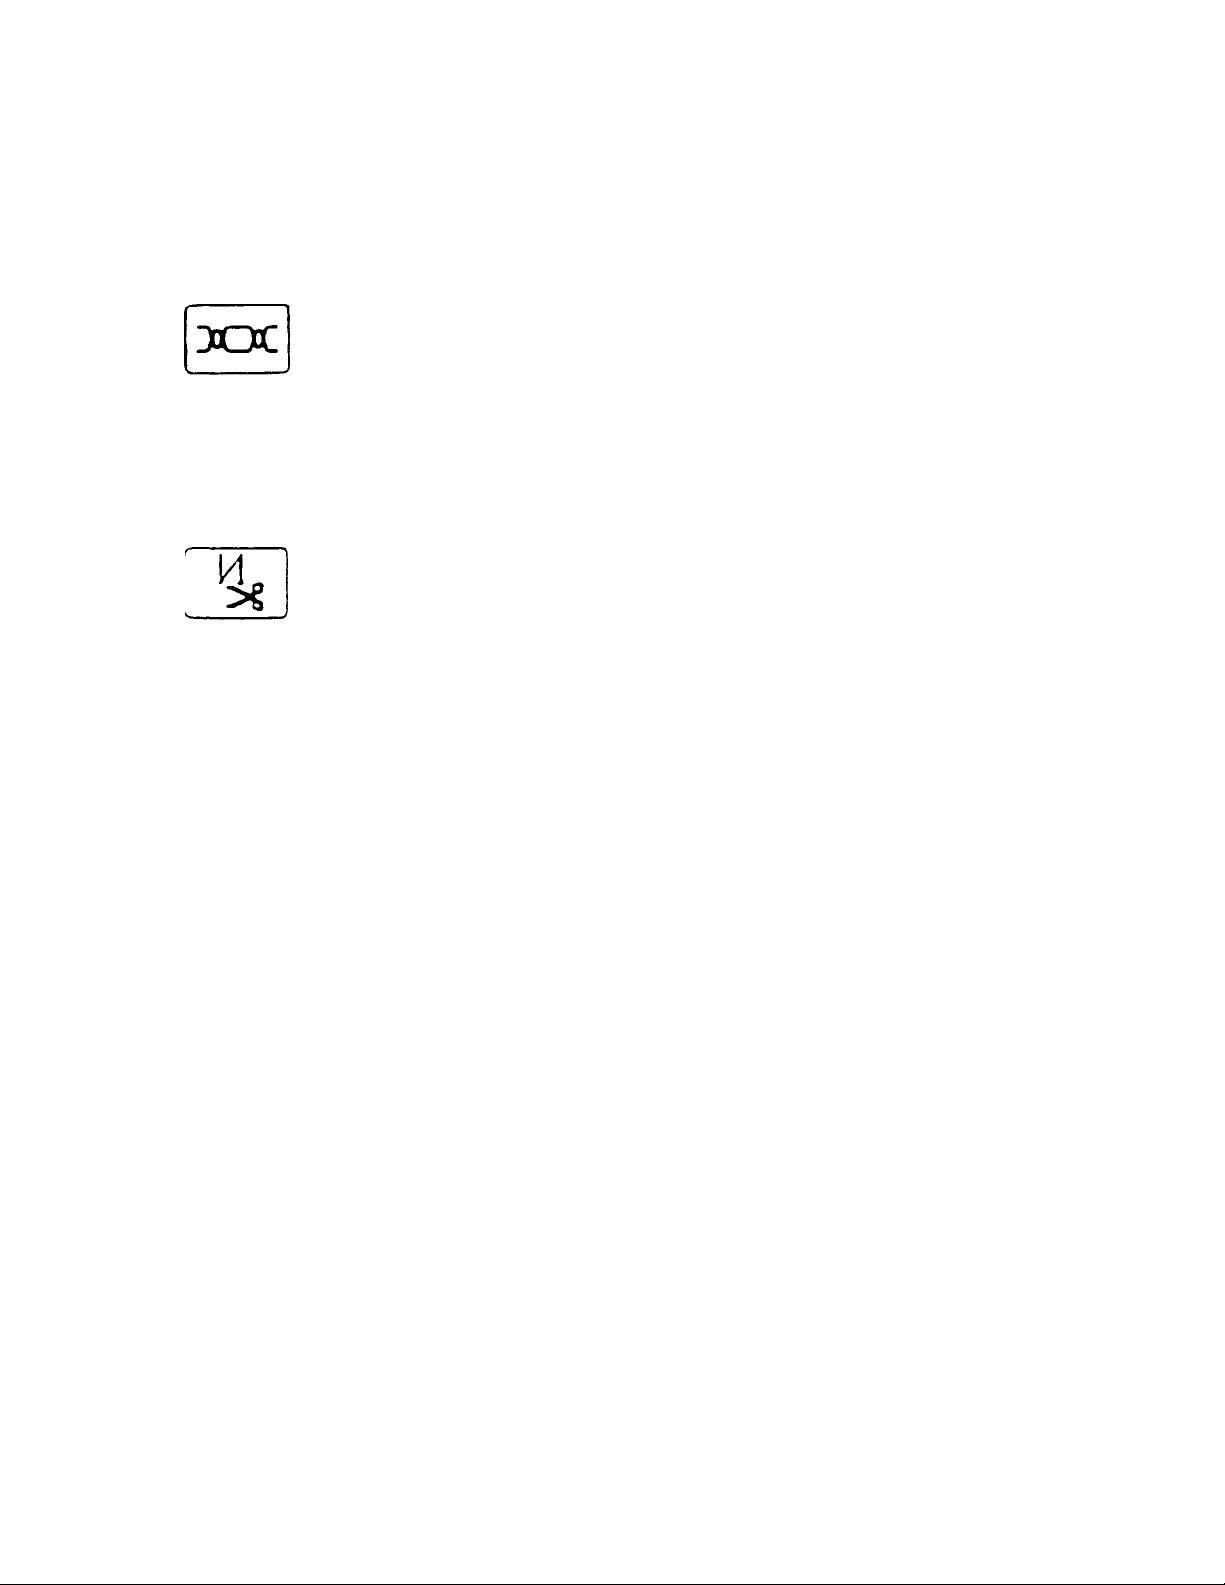
Tension key - Use to override the tension
Automatic back tack button and thread cutter key - Automatically
back tacks at the start of a stitch/ pattern and automatically back tacks and
cuts threads at the end of a stitch/pattern. When this key is activated an icon
appear on the left corner of the LCD screen.
■9
U
Utility key - Opens the screen to the basic utility stitches
w
Crown key - Opens the screen to the pattern selection screen; this is
where the large motif, fun faces and flowers, animated animals, decorative
and heirloom stitches are found
-2-
Page 6
A-B-C
A-B-C key - Opens the screen to the built-in continuous sewing alphabet
(block, large satin script, and small script)
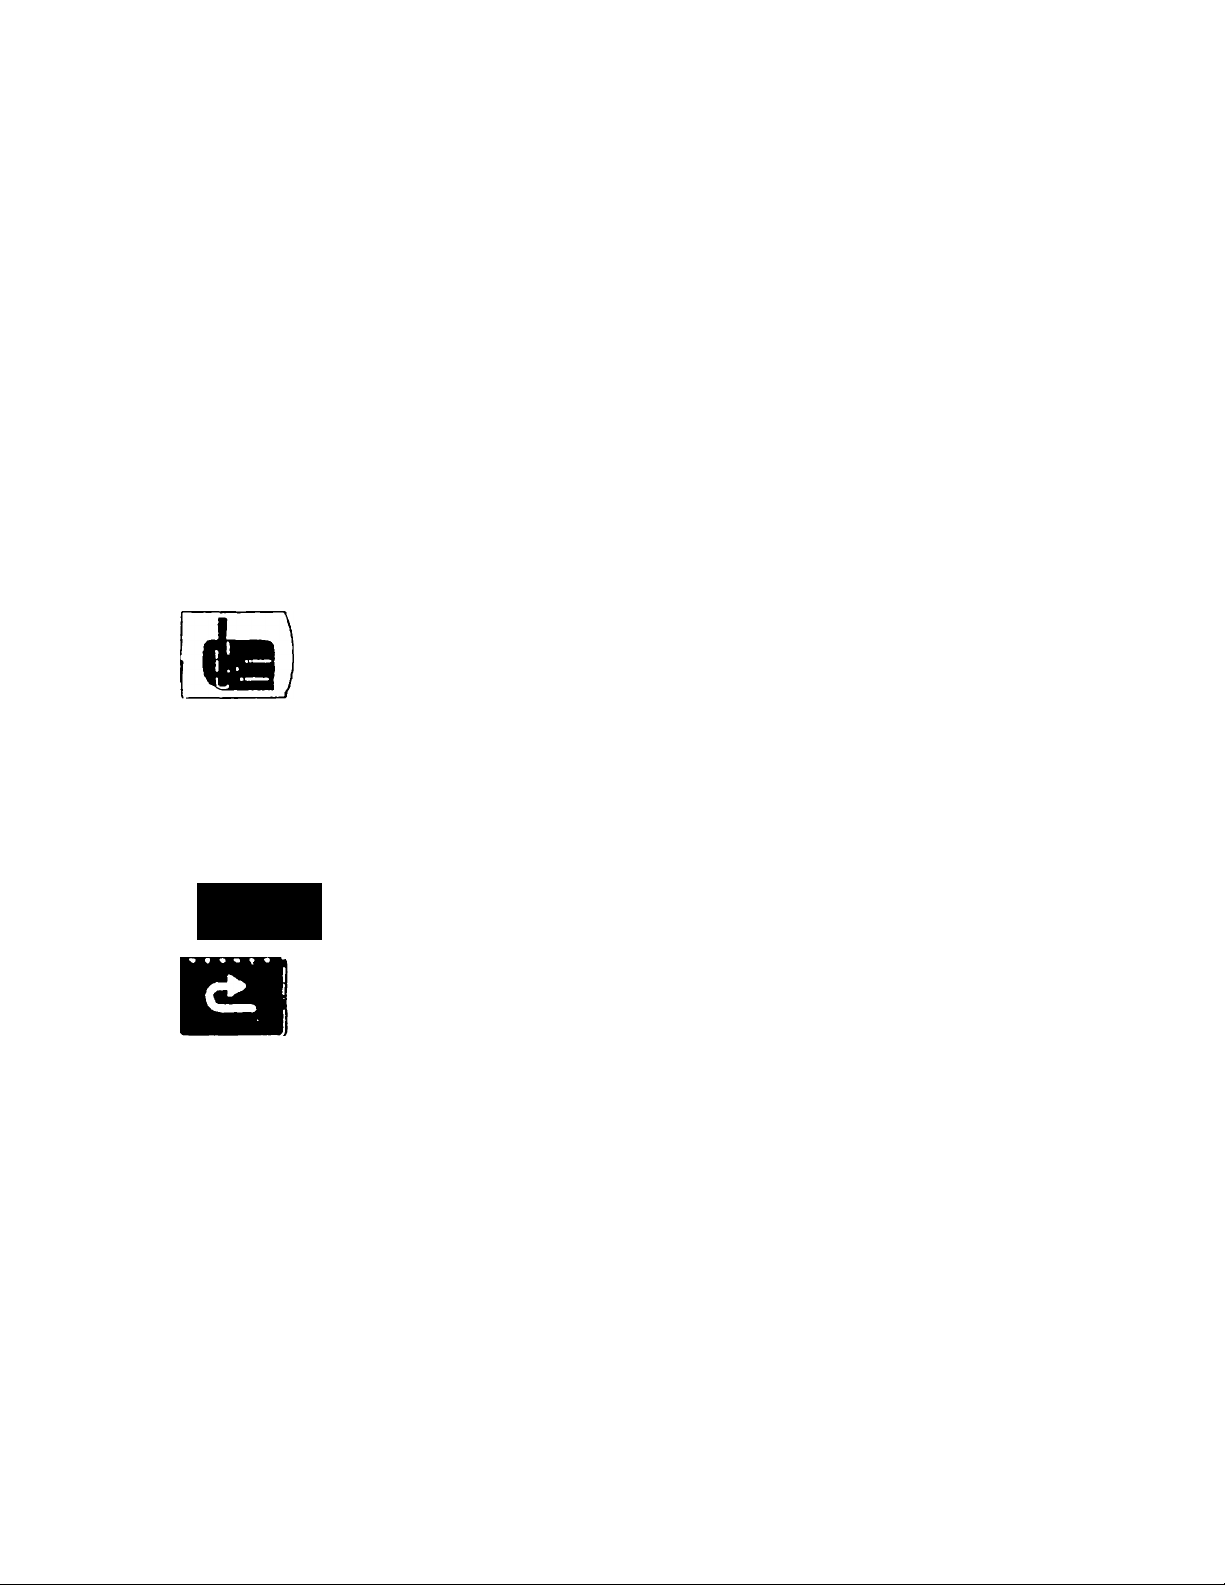
Embroidery key - Opens the screen to the embroidery capabilities
■p
Page turning keys - Return to previous page or next page within a
section. An icon at the top of the LCD screen will appear and inform you how
many pages exist in the present section.
For example:
1. Large motifs have 5 pages
2. Fun faces have 1 page
3. Fun flowers have 1 page
4. Decorative stitches have 4 pages
5. Heirloom/cross stitches have 6 pages
-3-
Page 7
Keys above the needle area
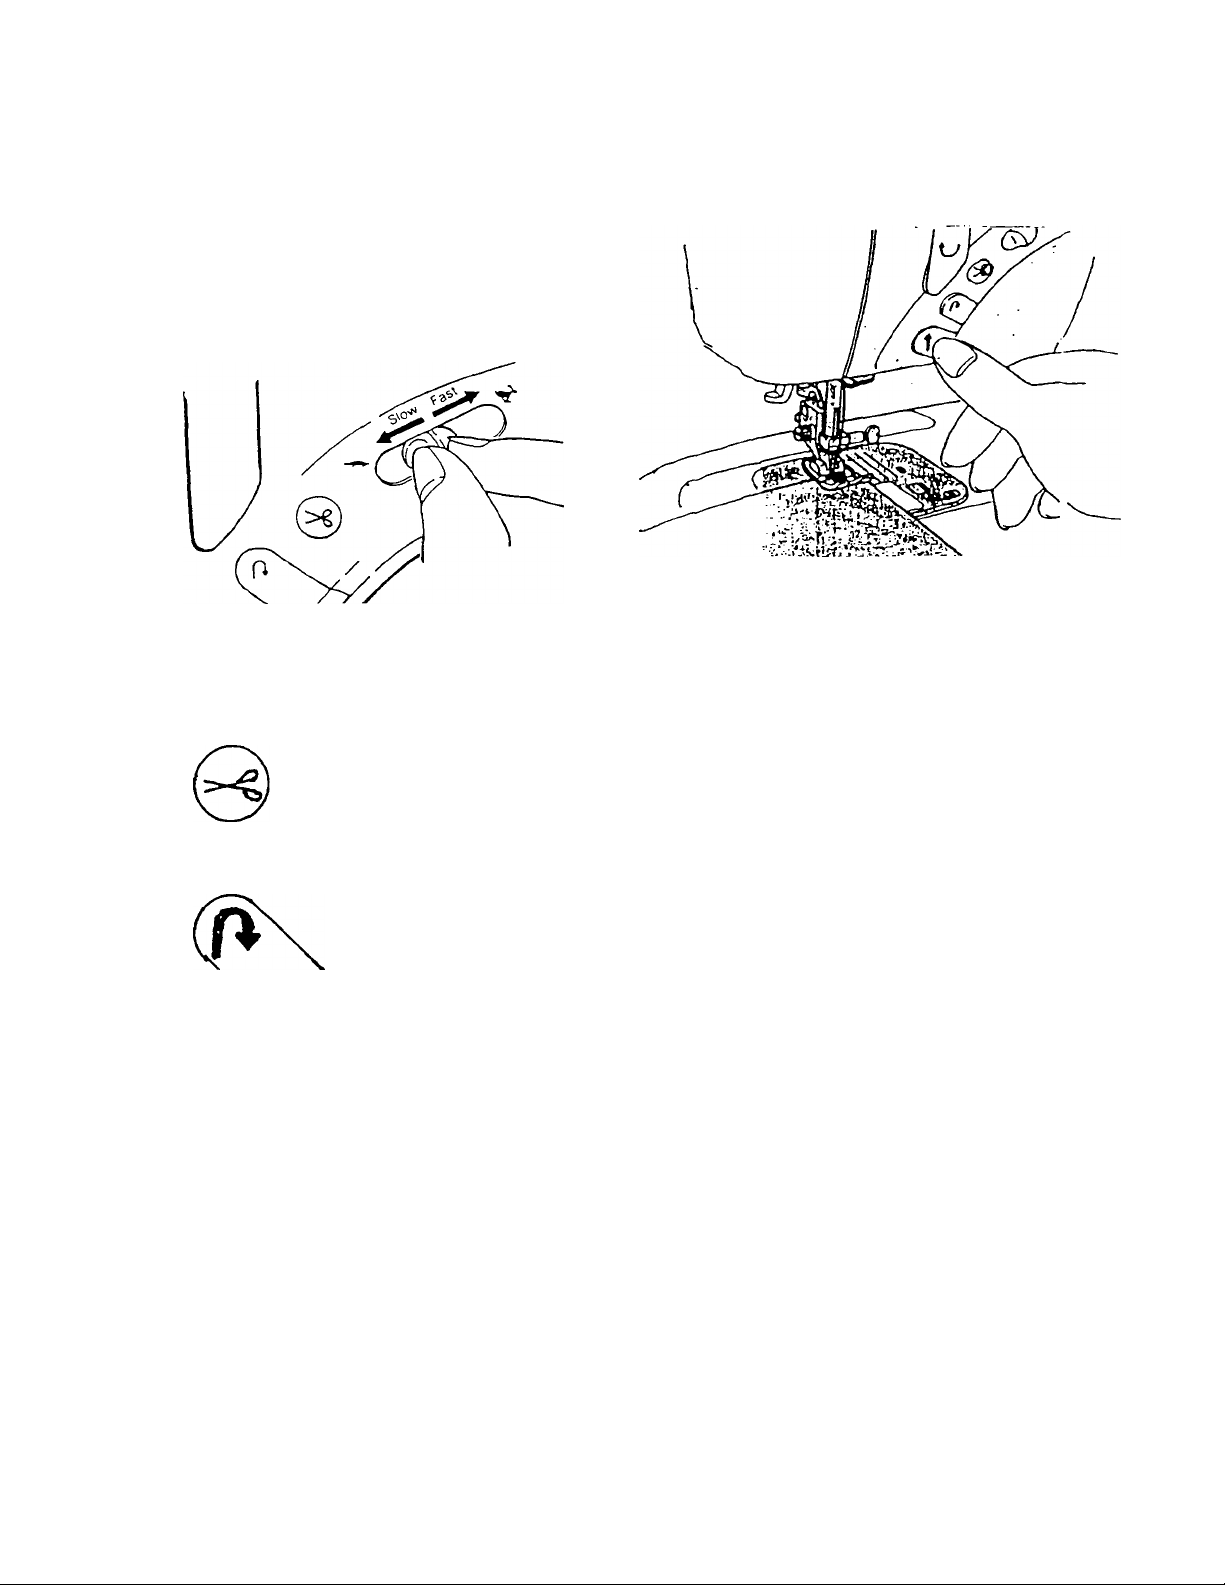
Sewing speed limiter- Limits the speed during embroidery (450,600 or
750 stitches per minute) or limits the speed during regular sewing with the
foot control giving infinite settings
Thread trimmer - Trims the needle and bobbin thread
Back tack key - Use to secure the beginning and end of seams or when
wishing to sew in reverse for a few stitches
(f\
Start/stop sewing key - Use to start or stop sewing.
Explanation of color arrow mark on start/stop button
■ Green: Conditions are correct for sewing
■ Red: Conditions are not correct for sewing
■ Orange: Welcome screen is illuminated or bobbin winding shaft is in
winding position
Note: When foot speed controller is plugged in..
■ start/stop button can only be used to stop machine
■ lever serves as a top speed limiter
■ green arrow will only glow when controller is depressed
-4-
Page 8
____________________________Part II
Help Screens
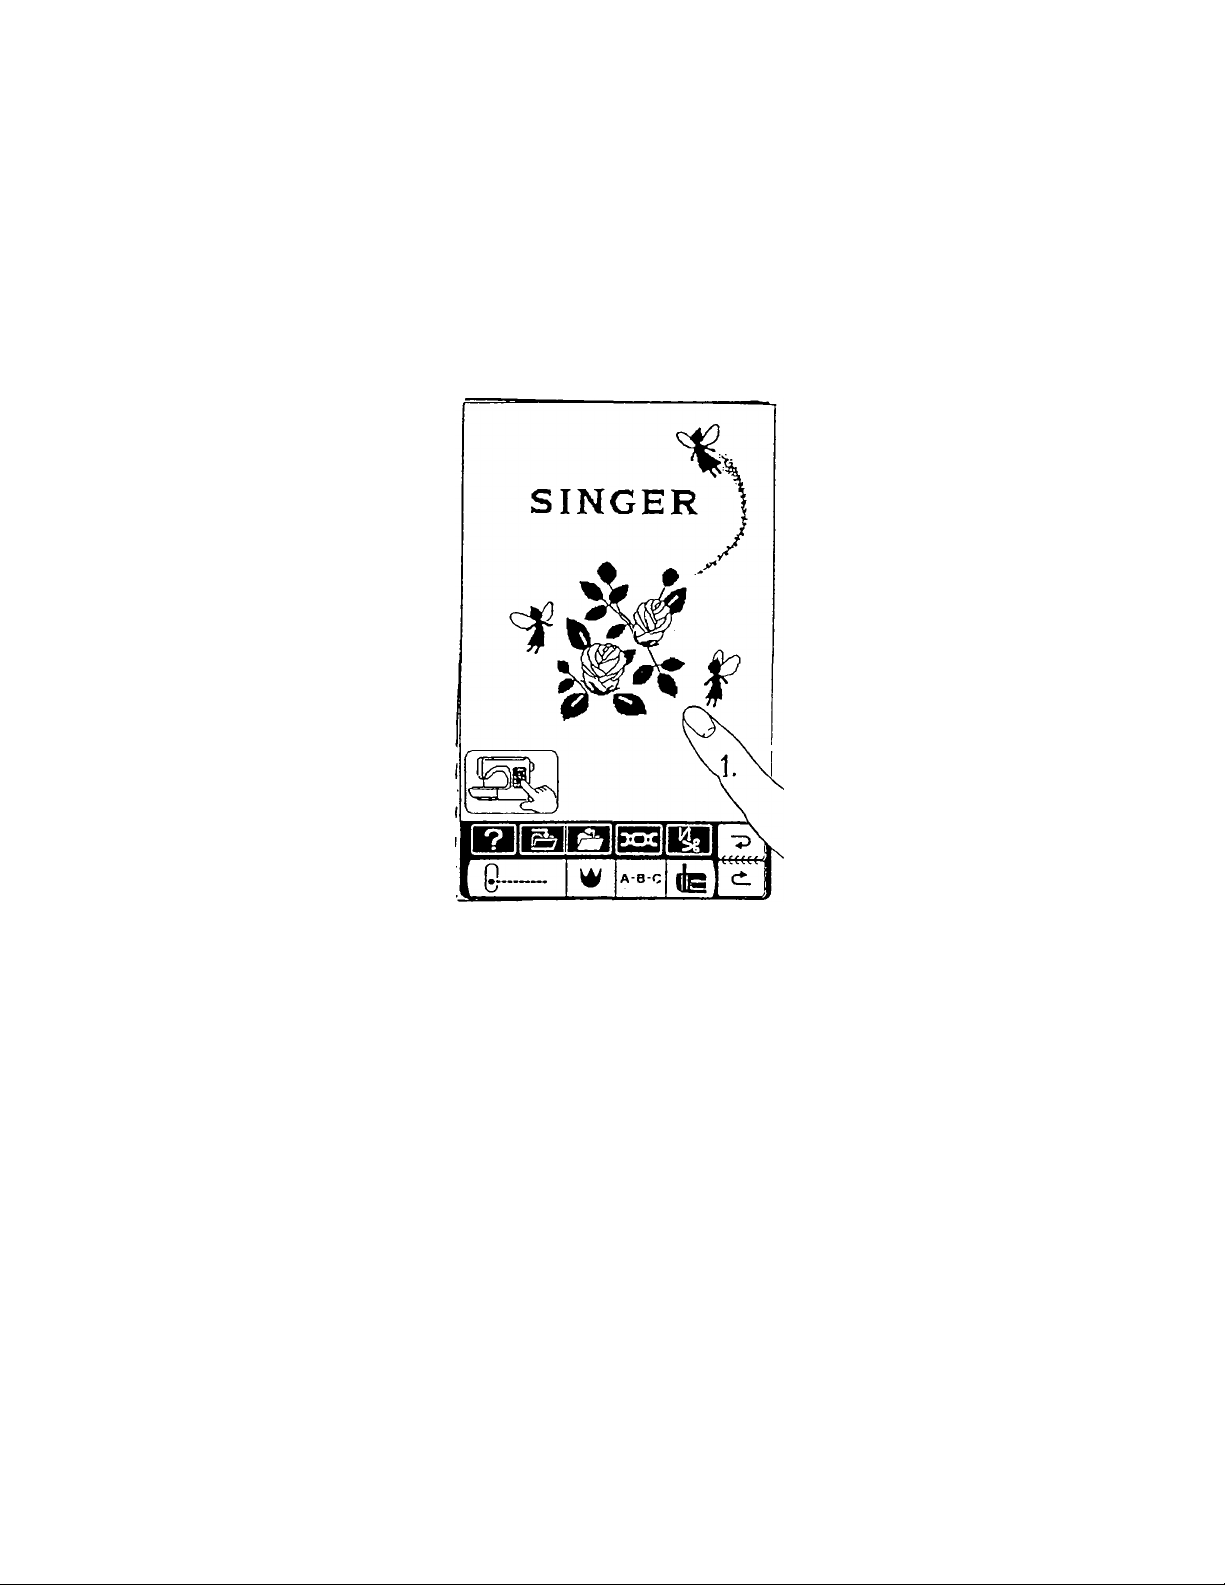
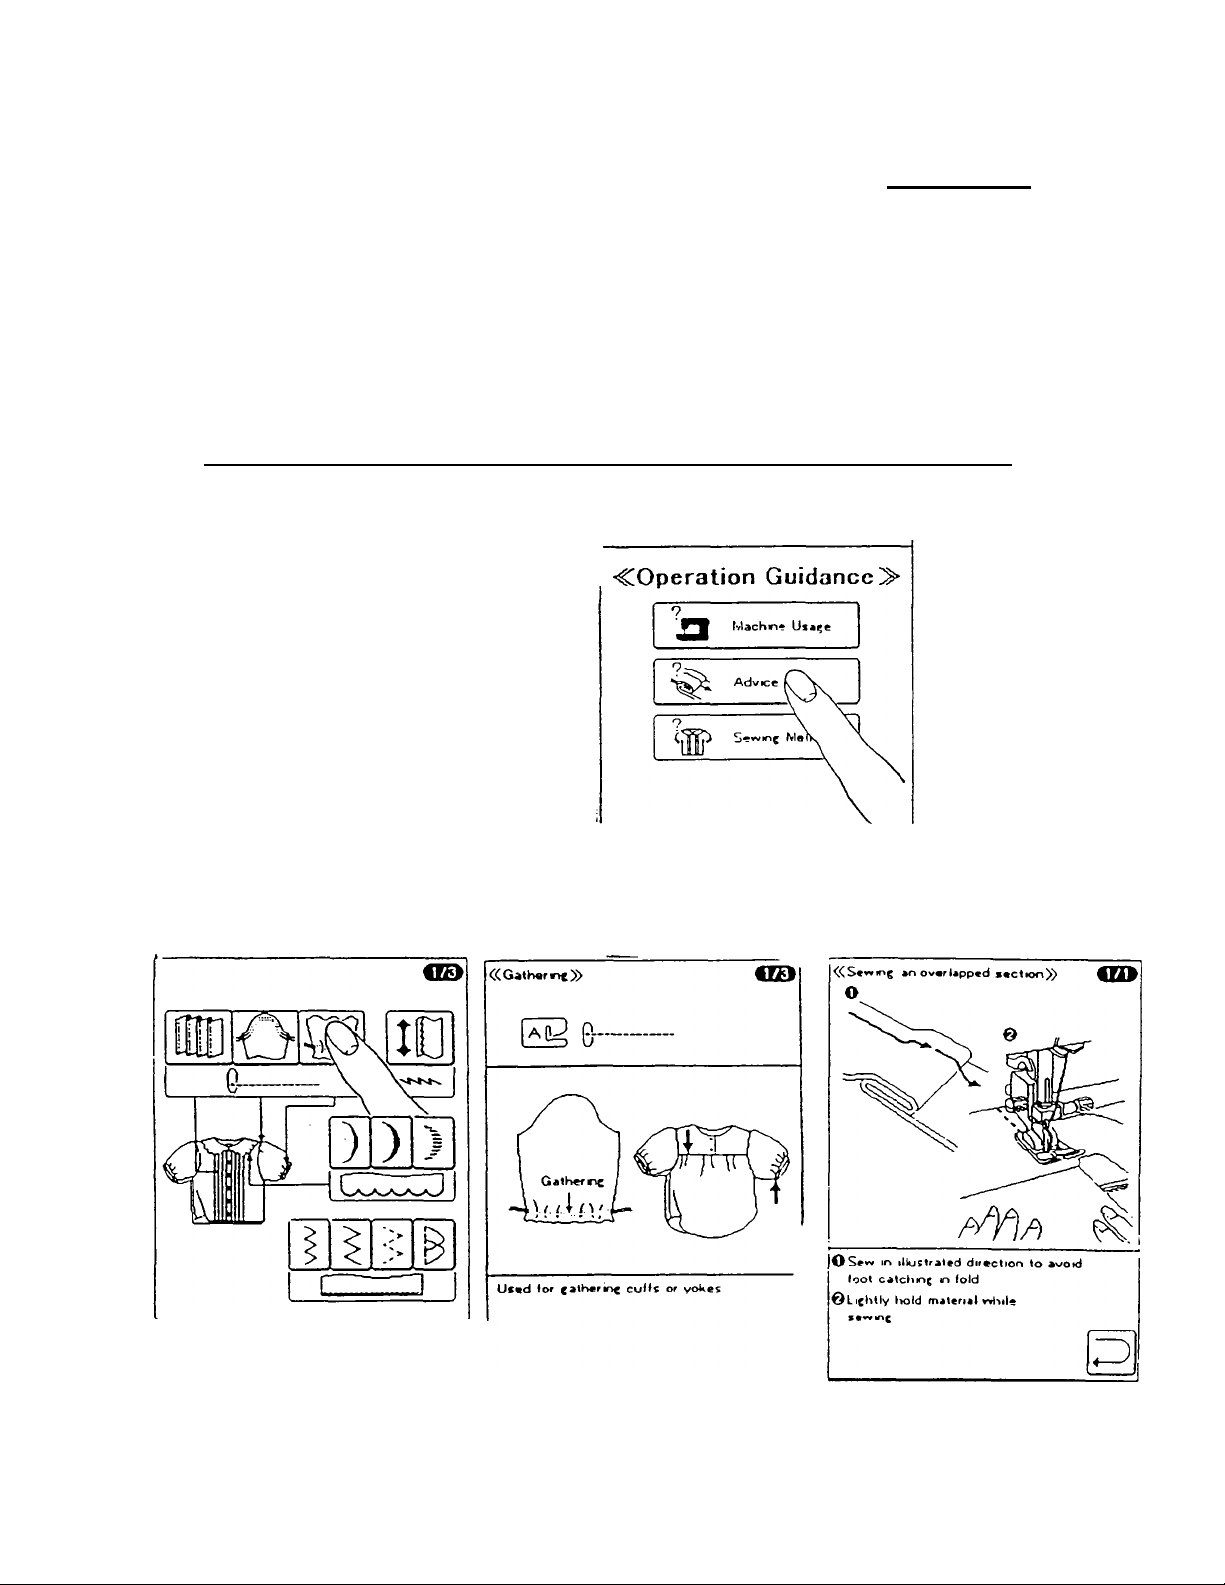
□ Turn the machine on and press anywhere on the screen
□ Press the help screen key on the bottom bar
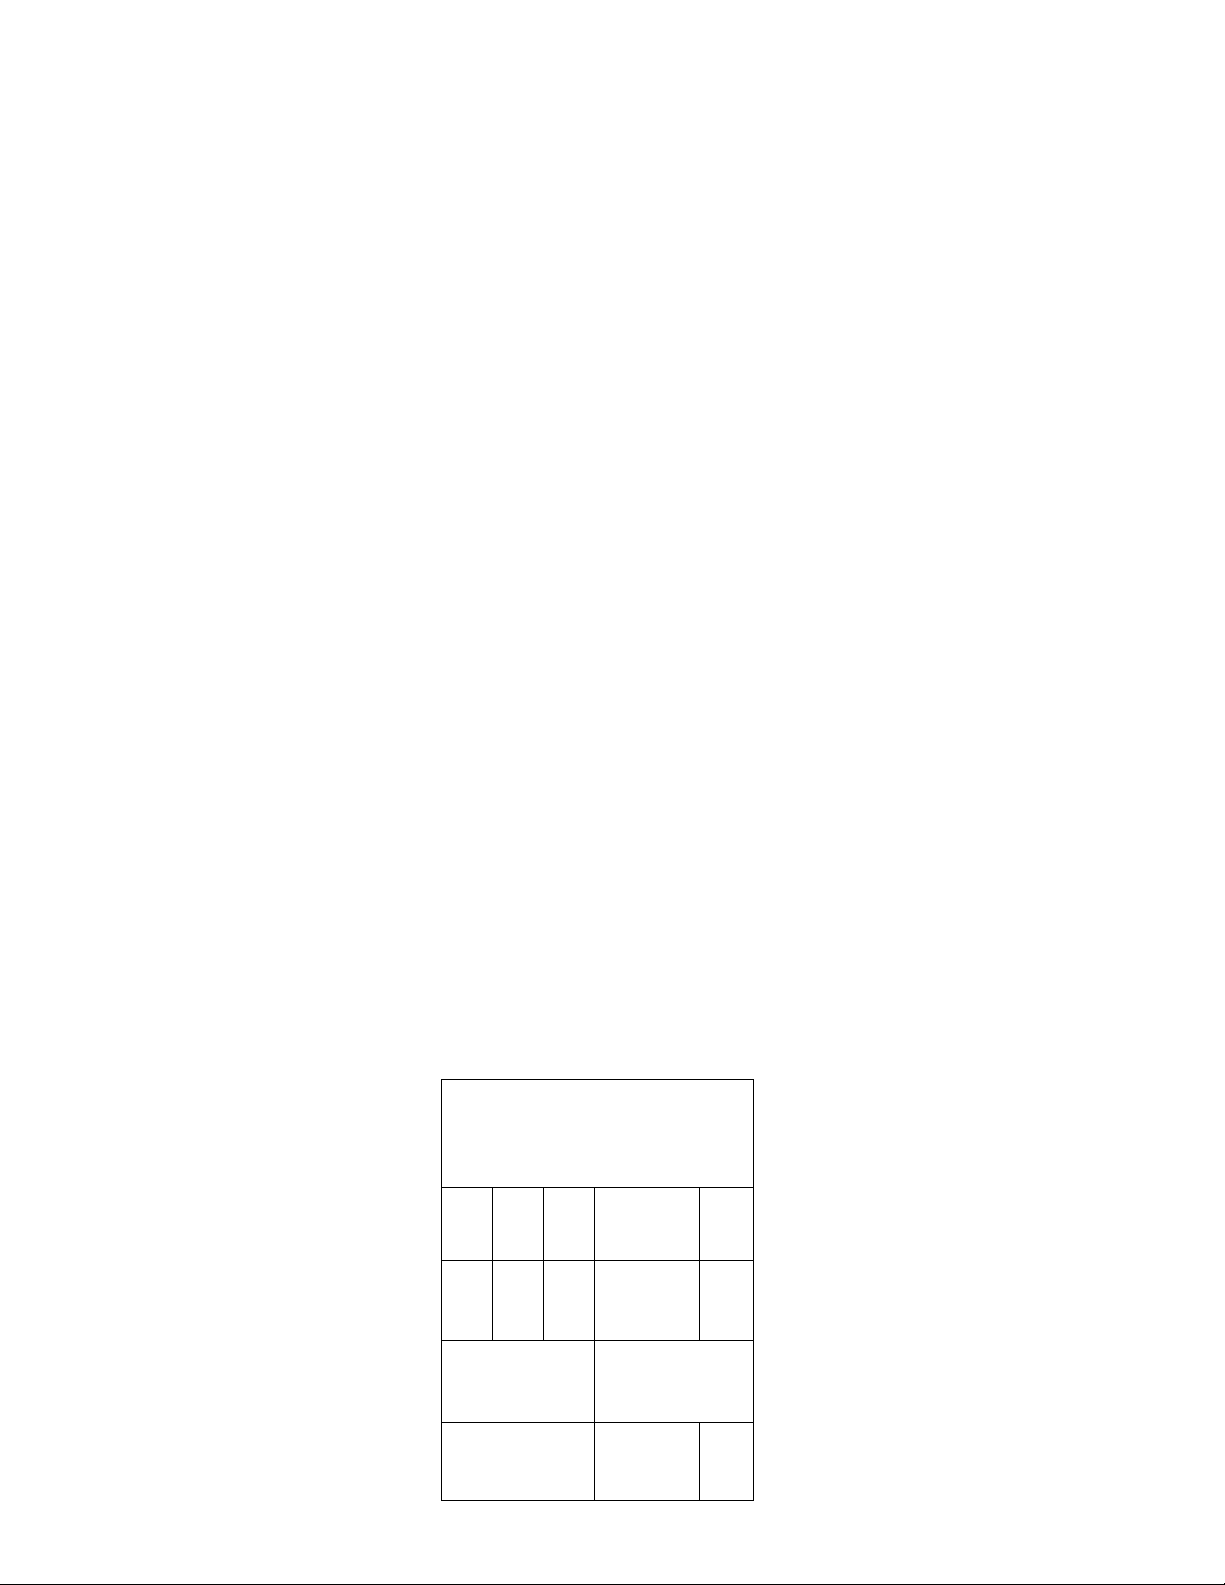
On screen are three different types of guidance
Machine usage
Help in machine set up and
for customizing the options
Advice
Obtain sewing tips
Sewing method
Obtain information on
"how to sew" methods
Each "guidance" category gives detailed information and easy-
to-understand graphics.
-5-
Page 9

On screen are information on how to
Thread needle Thread machine Change needle Wind bobbin
^IIW
1 / /
Change foot Insert bobbin Change "LCD" contrast
Embroidery preparation Basic sewing Options
•o
(Is
n
Machine usage Sewing advice Sewing method Return key
w
-6-
Page 10

□ Press the "option" key
There are two option screens.
The options will automatically be set at the "default" setting
that is under the word "AUTO" and is highlighted.
Option
«Option»
Error message indioation time.-
AUTO
— i
.Additional stitches which may be sewn.
after indioation of low bobbin.
AUTO
V
— i
.Setting of automatic backtack & thread-
cutter.
f~~] ON US©
OFF
■Welcome screen indication.
ON Q OFF
AUTO
T+n
► + I
OK
10
20
1/2
Refers to how long the error message
will stay on the screen
Refers to how many stitches the
machine will make after the
empty bobbin has shut off*
Refers to the automatic back tack and
thread trimmer. They both can be set
to always engage or not.
Applies only to regular sewing
Refers to how to remove the
screen saver (which is the
opening screen with the flowers and
fairies). If the screen saver is turned
off, the utility screen will be displayed
when the machine is turned on.
The XL-1000 has an automatic bobbin shut-off
when approx. 1/2 yard of bobbin thread remains
-7-
Page 11
□ Press the "PAGE TURNING" key to advance to next page
These settings apply only during embroidery
Option Embroidery
^“COption' Embroidery^
(-Setting sewing range confirmation.-
AUTO
V
I - -il ■
•Setting needle position adjustment.AUTO
- <m
•Setting size of letters.-
1 —■< I 7 10|l 5120 25 30 35 40 (► -f |
(-Setting density of letters.-
le:i
____________
AUTO
V
AUTO
^7"
0.5
0.6
AUTO OK
10
± + j
E+J
2/2
Refers to the speed of the
"RANGE TEST" during embroidery
Refers to number of stitches
the needle will advance or
backup each time the needle
icon is pressed*
Refers to the size of the letters
Refers to the density of the letters
*When the needle advance/backup icon is pressed, the needle will move 1
needle penetration (stitch) each time the icon is pressed the first six times.
After six single moves, set how many stitches at a time (10, 20 or up to
1000) the machine will move each time the needle advance/backup icon is
pressed.
□ Change any or all the settings on the first option page
□ Press "OK", and use the "PAGE -TURNING" key to advance to
the second screen of options
□ Change any or all the settings on the second option page
□ Press "OK", and then the "RETURN KEY" key
It is not necessary to reset options every time you turn on the machine.
-8-
Page 12
_______
Part III
Standard Machine Operation
1. Utility stitches
□ Turn the machine on and .press anywhere on the screen
□ Attach the "A" foot
□ Press the utility stitch icon
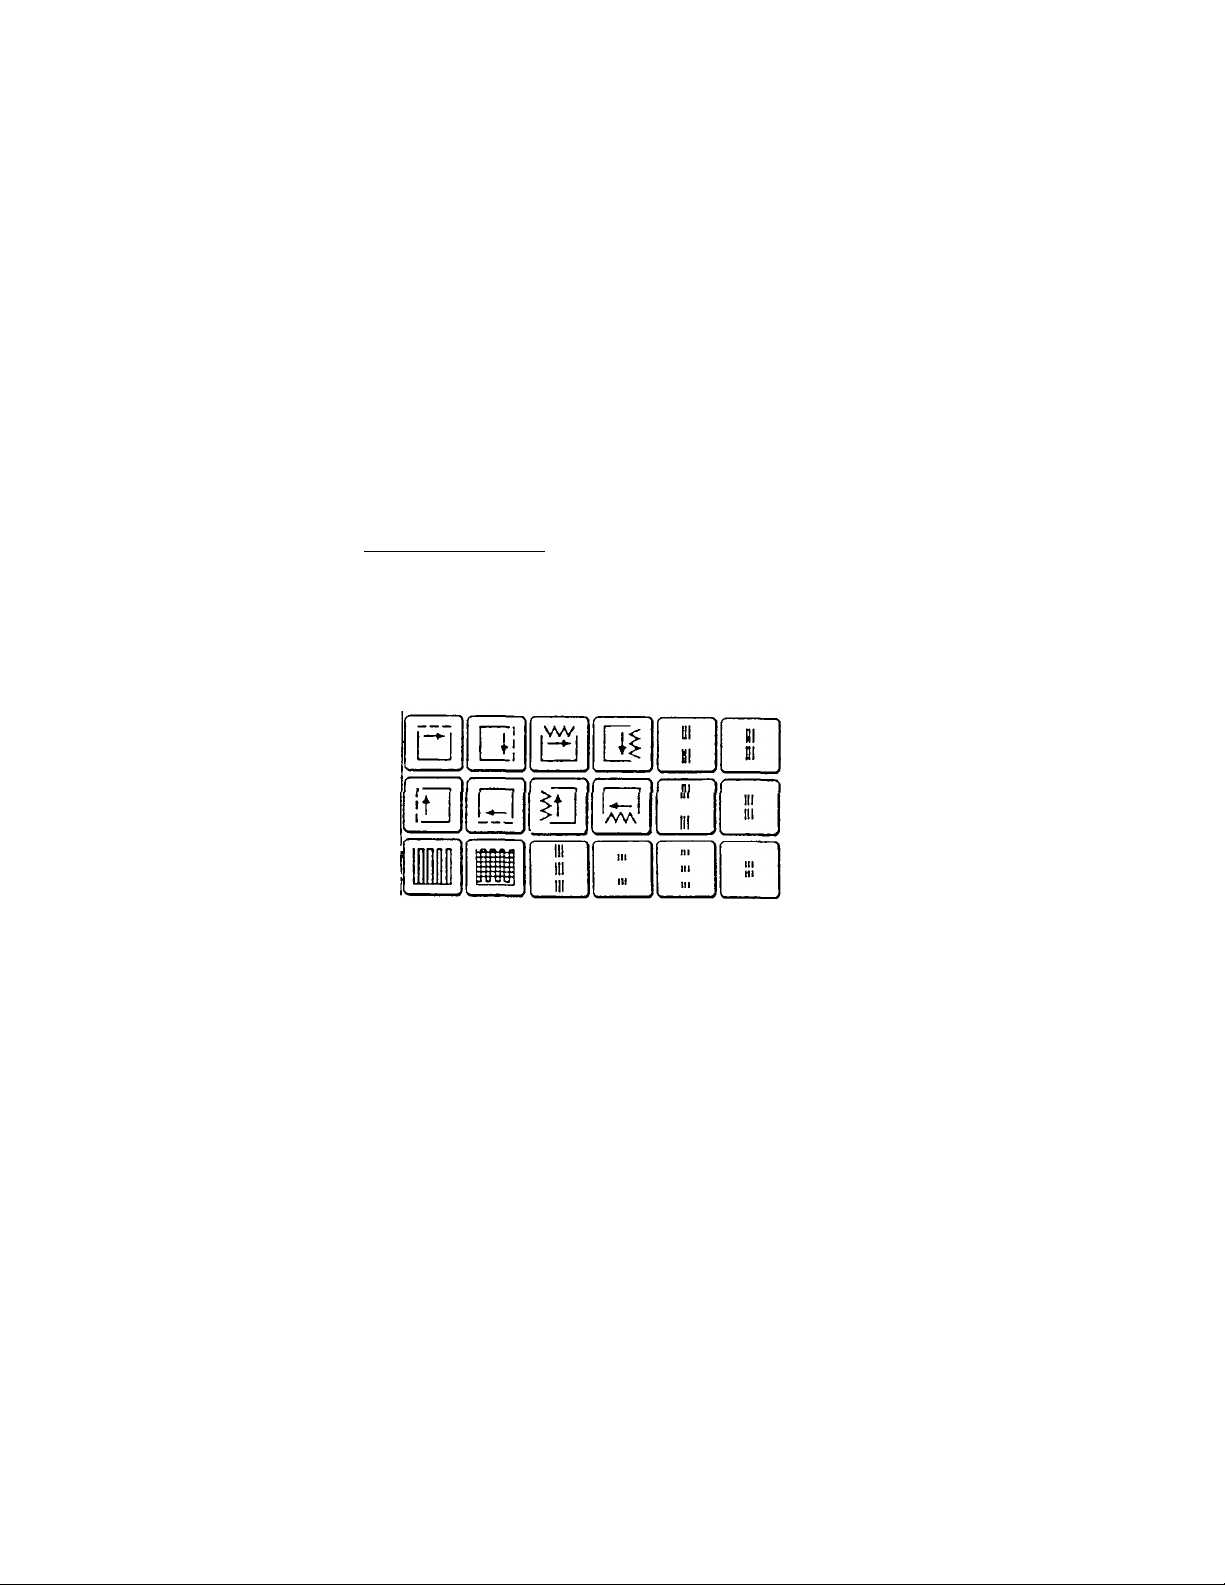
On screen are utility stitches
straight stitch with needle in left-side position
Straight stitch with needle in center position
Zigzag
Blindhem
Overedge
Super stretch stitch
©o
Multi zigzag
Serpentine stitch
Running quilting stitch
Bartack
10mm Basting
20mm Basting
XDd
Tension adjustment (HMK3^I j
Length adjustment
cp
Cp
t
•
j
1 •
^ >
')
^ >
i'
.-II lifSHII I + ) I stitch width adjustment
1
1
■
•
<’
1
t
1
r
1
I
1
lb
20
-9-
Page 13

Exercise #1 - Running quilt stitch (Utility screen)
*Singerpatented feature'
Every quiiter needs the running quilt stitch
because
this stitch emulates "hand-sewn" quilting
□ Press the running quilt stitch
□ Place colored thread in the bobbin and monofil (or light weight
thread) in the needle
□ Change stitch length to 4mm (choice of 5 different lengths)
□ Sew and no need to trim between stitches
Sewing application tip:
Use the circular stitch ruler with the
running quilt stitch to create unique designs.
-10-
Page 14
Exercise #2 - Top-stitch, choice of 8 kinds (Utility screen)
□ Use page-turning keys to advance to screen 3/3
□ Press the top-stitch on the 2nd row, 5th stitch from left
□ Sew - then clip the single running threads
□ Each stitch is locked at beginning and end of stitch
The 8 top stitches give a professional finish to
garments, quilts and crafts
-11-
Page 15
2. Buttonholes
Exercise #1 - Bar tack buttonhole
□ Press utility icon
□ Use the page-turning keys to advance to screen 2/3
□ Press the third from the left, top row, bar tack buttonhole
□ Place colored thread in top and bobbin
□ Attach buttonhole foot "E" onto machine
□ Fold the woven fabric in half, cross-wise, placing interfacing between
layers
□ Place fabric between foot and underplate
□ Place button in buttonhole foot, push slide to set buttonhole length,
remove button.
□ Lower buttonhole lever and sew
□ Machine will stop when buttonhole is complete, use thread cutter button
Exercise # 2 - Stretch buttonhole
□ Repeat the same procedure except:
□ Choose the stretch buttonhole, second row, fifth stitch from the left
a Fold the knit fabric in half, cross-wise, placing interfacing between layers
of fabric
GE>
'tel
D D
0 0 0 0 8
D
I
( 5CX ^
0D»©
\ /
(qdse)
QjpUi)
cm
•12-
Page 16

Simply decreasing the stitch length can change the
density of the zigzag stitches on any buttonhole.
This will create a satin-looking buttonhole.
Samples of buttonholes:
special note:
13-
Page 17
______________________
Part IV
Category Selection Screen
Large Motifs
Fun Faces
Fun Flowers
Animated Animals
Decorative Stitches
Cross Stitch / Heirloom
Q Turn the machine on, press anywhere on the screen
□ Use the teflon foot "T"
□ Press the "CROWN KEY" on the bottom bar
On screen are the six different categories
Large motifs (5 pages)
Fun faces
\u
y <S=i
1
5888^
Fun flowers
Animated animals
Decorative stitches (4 pages)
Cross-stitches/heirloom (6 pages)
-14-
Page 18
Special note:
All of the categories can be mixed in memory
For example: a teddy bear, a fun face, a fun flower, the worms
and the crescent stitch could all be joined together
and sewn as a single unit.
(except the cross-stitch/heirioom, they are continuous patterns).
□ Press the large motif icon
On screen are large motifs 1/5
and pattern modifier keys
HI 3 sizes: change the motif's size
Turn over key: turn over a motif or
stitch
Mirror image key: mirror image a motif
3CE
or stitch
a
%
COMERR CLR
M MEM
REV
MEM
&
À
ES
j ■ ■ ■ ■
=, Pattern position key: continuously
position an element with a choice of
six positions)
Repeat key: continuously repeat an
element or a group of elements)
Memory return key: return to the
beginning of memory sequence
REV
MEM
CLB
MEM
CORR
MEM
Memory review: review elements in
working memory
Memory clear: clear either an element
or all elements in working memory;
press key and hold 3 seconds to clear
all elements
Correct memory: correct an element in
memory
Balance key: balance a shape of a
pattern
-15-
Page 19

1. Large motifs
Exercise #1 - How to do three different size motifs
□ Press the whale motif
□ Press the 3 size key -until the largest size is highlighted
□ Press the whale motif
□ Press the 3 size key -until the middle size is highlighted
□ Press the whale motif
□ Press the 3 size key -until the smallest size is highlighted
□ Top screen: three whales, each a different size
□ Sew lengthwise across fabric
E
-16-
Page 20

Exercise #2 - How to mirror-image a pattern
□ Press "CLR MEM" until the whales are deleted
□ Press the dinosaur motif
□ Press the mirror-image key
□ Press the dinosaur again
□ Top screen: two dinosaurs facing one another
□ Sew lengthwise across fabric
-17-
Page 21

Exercise #3 - How to make a two-color motif
□ Press "CLR MEM" until the dinosaurs are deleted
□ Press page turning keys until screen 2/ 5 is shown
-all of the designs on this page can be sewn in two colors
□ Press the boat motif A
□ Press the 3-size key until the largest size is chosen El
□ Press the two-color key
□ Place a different color thread in the bobbin than in the needle
-the highlighted color on the screen is the bobbin thread.
□ Sew lengthwise across fabric
-18-
Page 22

Exercise #4 - How to do pattern positioning
□ Press "CLR MEM" until the boat is deleted from the top screen
□ Press page turning keys until page 1/5 is shown
□ Press the plane motif
□ Press the 3-size key until the smallest size is chosen
□ Press the pattern position key
-top screen shows the different layouts
Six different pattern layouts are available
□ For this exercise press the pattern position key until this
position appears: ^
□ Sew lengthwise across fabric
Each press of
position key will
indicate a different
pattern layout.
Special note:
Only a single element can be used with the pattern position key.
That element can be enlarged, reduced,
mirror imaged or turned over.
-19-
Page 23

Exercise #5 - How to repeat a pattern
□ Press the "CLR MEM" key until the plane is deleted
□ Press snowflake motif from page 1/5
□ Press the bunny motif from page 1/5 ^
□ Press 3-size key until the largest size is chosen
□ Press the repeat key
□ Sew lengthwise across fabric
The two motifs will repeat indefinitely.
A sequence of up to 40 elements can be repeated.
Tip:
Press the key a second time to deactivate the repeat.
The machine will finish sewing the pattern sequence and stop.
Very helpful feature.
-20-
Page 24

Exercise #6 - Balancing the shape of a pattern
It is recommended that a test sample of a chosen pattern be
sewn using the same fabric, interfacing and thread before sewing
on the finished project.
The balancing key
i
is found on the screen.
□ Press "CLR MEM" until all patterns are deleted from the top
screen
□ Press the balance key and begin to sew a complete trial
pattern
□ The bottom row of stitches should be horizontally lined up
□ Adjust the stitch balance dial up if the stitches are angled up
from left to right
□ Adjust the stitch balance dial down if the stitches are angled
down from left to right
□ Continue to adjust and sew the trial pattern until the bottom
row of stitches are horizontally lined up
Correct balance
Honzontal
-21-
Page 25

2. Fun faces
Exercise - How to create a fun face
□ Press "CLR MEM" until everything on top screen is deleted
a Press the "FUN FACE" icon at the top of the LCD screen.
□ Create a face by changing the hair, the shape of the mouth,
shape of the chin, and the eyes.
□ Use the arrow keys next to "HAIR" to see the 24 different
hair choices
□ Press the MOUTH icon to see the 4 different mouth choices
□ Press the CHIN icon to see the 4 different chin choices
□ Press the EYE icon to see the 6 different eye choices
□ After finishing selection for the fun face, press "OK"
-selected fun face is placed in working memory
□ Sew in the center of the fabric
-22-
Page 26

3. Fun flowers
Exercise - How to create a fun flower
□ Press "CLR MEM" until your fun face is deleted from top screen
□ Press the "FUN FLOWER" icon at the top of the LCD screen
□ Create your own flower montage by changing the flowers and
their basket.
Q Press the "FLOWER" icon to see the 5 different flower choices.
a Press the "BASKET" icon to see the 3 different basket and bow
choices.
□ After finishing selection for the fun face, press "OK"
- selected fun flower is placed in working memory.
□ Sew in the center of the fabric
-23-
Page 27

4. Animated animals
Exercise - How to make the animated animals
□ Press "CLR MEM" until your fun flower is deleted from the top
screen
□ Press the "WORM" icon at the top of the LCD screen
r~^
coii' iii:;:;:::
w
r
□ Press the large worm on left of the screen
□ Notice that the worms appear to be crawling
...........
they are animate
□ Press the repeat key, and now the worms will sew continuously
□ Sew a row of worms length-wise across the fabric
-24-
Page 28

5. Decorative stitches
Exercise #1 - How to elongate a stitch
□ Press "CLR MEM" until the worms are deleted from the top
screen
□ Press the "CROWN" icon on the top of the LCD screen
8
w
E!T
=
♦1
lx
•nil'
3e
EE
CORR
MEM
□ Press the crescent from the first screen, first row, first stitch
□ Press the crescent again
□ Press the "lx" icon until it reads "2x"
□ Press crescent, and then press lx icon until it reads "3x"
□ Press crescent, and then press lx icon until it reads "4x"
□ Press crescent, and then press lx icon until it reads "5x"
CLR
MEM
REV
MEM
□ Sew lengthwise across the fabric
Elongation of a design
Without losing the design's density
-25-
Page 29

Exercise #2 - How to do two color continuous sewing
□ Press the "CLR MEM" until the crescent stitches are deleted
from the top screen
□ Press the filled-in heart (first screen, second row, fifth stitch
from the left) ^
□ Press the tension key on the bottom bar; a pop-up screen will
appear
□ Change the length to .3 on the pop-up screen
□ Decrease the tension by one touch on the pop-up screen
□ Press the tension key again, to eliminate the pop-up screen
□ Press two-color sewing icon
□ Place a different color of thread in the bobbin than the needle
thread
□ Sew lengthwise across fabric
-26-
Page 30

Exercise #3 - How to turn over a stitch
□ Press "CLR MEM" until hearts are deleted from the top screen
□ Press "PAGE TURNING" keys until page 2/4 appears
□ Press the "moustache-looking" stitch, from the second row, fifth
stitch from left
■ 3
UJ
□ Press the turn over key
a Press the moustache again
□ Press the repeat key
□ Sew lengthwise across the fabric
n
-27-
Page 31

6. CROSS-STITCHES AND HEIRLOOM
□ Press "CLR MEM" until the top screen is clear
□ Press the "CROWN" icon at the bottom bar
□ Press the last icon on the bottom of the category selection
screen. This is the cross- and heirloom stitch category
On screen are cross- and heirloom stitches
Overedge Feather Single cross
Pin stitch
Entredeux
Turkish hem
Blanket
Binding
1
—
0
—
—
i § 1
1 —
Em
All these stitches can be modified
three sizes (7, 5 and 4 mm)
turn over
mirror image
-28-
Page 32

Exercise #1 - How to use the pin stitch to applique
Fabric preparation:
□ Fuse a heart shaped piece of fabric onto a 4"x 4" piece of
background fabric
a Press the PIN STITCH, first page, second row, first stitch
□ Press "3-size" icon until the smallest size is highlighted
□ Sew around the heart
FE
ml
^ f ^
SBEjan)
^ i
-29-
Page 33

Exercise #2 - How to use the entredeux stitch to insert lace
□ Attach the "I" foot and insert wing needle (found in white
accessory pouch)
Remember not to use the needle threader or the auto thread
cutter when using the wing needle
□ Press the ENTREDEUX stitch - first page, second row, second
stitch from the right
a Press the "3 size" key until the smallest size is darkened
□ Place the lace on top and in the center of the linen-like fabric,
and sew the ENTREDEUX stitch twice.
Once on the right side of the lace, the second time on the left
side of the lace.
□ After sewing, trim the woven fabric that is behind the lace.
The ENTREDEUX is a must for heirloom sewing
-30-
Page 34

Exercise #3 - How to use the blanket binding stitch
Fabric preparation:
□ Place two layers of wash-away soivy under the fleece, the
soivy should extend about 1 inch beyond the fleece
□ Press the BLANKET BINDING stitch; first page, second row,
fourth from the left
□ Press "3 size" icon until the largest size is darkened
□ Place top stitching thread in the bobbin and in needle
□ Sew on the edge of the fleece
a When finished remove the soivy
Note: a size 16 needle works great!
This is a popular method to create a binding
ay
[lE
mm*m
Ml
TTHflfn
E
UBE
HUE
ii
g is
[IIEII]
D3S]^
-31-
Page 35

_____
Built-in Alphabet
□ Turn machine on, and touch anywhere on the screen
Q Press the A-B-C key on the bottom bar
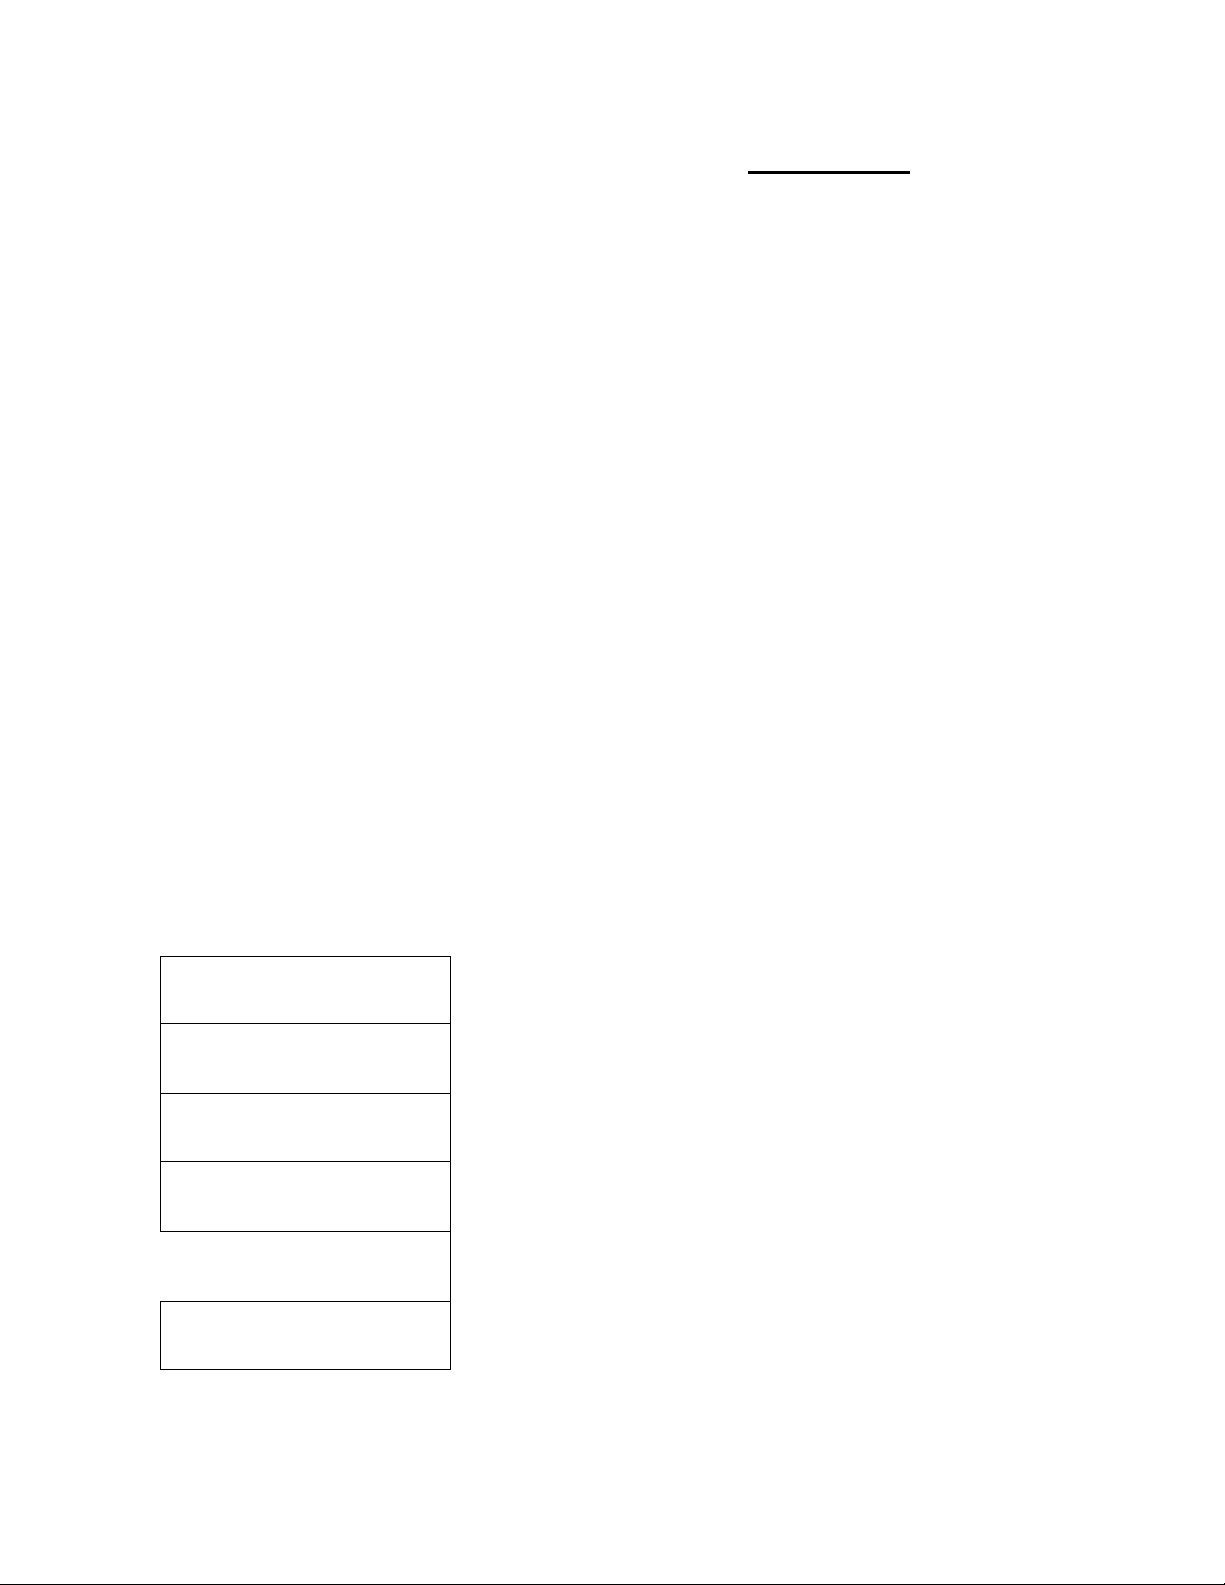
On screen are three styles of alphabet
Block letters
7mm tall
PartV
Satin script letters
15 and 25 mm tall
Script letters
7mm tall
n
-32-
Page 36

Exercise #1 - How to use the built-in block alphabet
□ Press the block ABC abc
On screen is alphabet
Each style of alphabet will have its screen.
Folders
Memory
Icon
Upper case Lower case
letters letters
ABC
A
[—I
□
V
<bc
B
p
w
12&:?
c c
J
Q F
X ^ 7
AAO
D E
^ S
Punctuations Foreign
CD
—
___
I
---
G
M N
(
_
J
fonts
Pattern position key fuse
to continuously position
a single letter; a choice of
six positions)
Repeat key (use to continuously
repeat a letter, a word or a
group of words)
Memory return key (use to
return to beginning of memory
sequence)
Memory review key (use to
review elements in working
memory)
(cORR
MEM
CLR
MEM
REV
MEM
mem) ■
Memory clear (use to clear
either a single letter or all
letters in working memory;
press key and hold for 3
seconds to clear all letters)
Correct memory (use to correct
a letter in memory)
-33-
Page 37

Part VI
Combination Embroidery and Permanent Memory
1. Combine embroidery designs
Combination embroidery is used to join various elements within
one hoop.
Sample illustrates how the machine can combine built-in
embroidery designs, embroidery cards and/or scanner cards - all
within a single hoop.
Exercise - How to do COMBINATION EMBROIDERY
Built-in borders
Built-in alphabet
Import from
Embroidery card
Finished design
is the size of the large hoop
-34-
Page 38

□ Attach the embroidery unit to the machine
- remember to have the machine turned off
□ Attach the large hoop and turn machine on.
□ Attach the "J" embroidery foot
Q There are two ways to take the machine into the embroidery
mode;
1. Push the embroidery key
or
2. Touch anywhere on the screen saver
□ Follow the "on-screen" instructions for raising presser foot and
needle
□ Screen will ask to properly position the carriage. When "OK" is
pushed, the machine will automatically center the embroidery hoop.
□ Screen appears showing the two types of embroidery
1
1 COMBINATION
EMBROIDERY
1
ABCDEF
1
□ Press COMBINATION EMBROIDERY
□ Screen appears
«COfuBNATION EIUBROIDERY2>
MULTIPLE HOOP
EMBROIDERY
r
ABC
ABCabc
DEF
□
-35-
Page 39

On screen different pattern categories
Block alphabet
Script alphabet
Euro alphabet
Special Note:
Card #1 (small alphabet) and #5 (larger alphabet) are built into
the machine, Just as is card #12 (monogram)
All cards from the XL-100 will work with the XL-1000.
Monogram
Flowers and borders
Embroidery or
scanner card
-36-
Page 40

Press
Folders
(script alphabet)
On screen script alphabet
Memory icon
(holds up to 40 elements)
Upper case
letters
ABC
id
OC
iboI2&:?
S8
J
0
r
Lower case Punctuation Foreign
letters fonts
tnrnna
matm
kAO
(?
S!
CK
/
¿J
di
Q
SC
u
Space
- ■
REV
CIR
MEM
N
Review memory (use to see all the items in working memory)
Clear (use to delete letters)
Direction icon (the ability to sew letters horizontally or vertically)
The direction that is highlighted will be the direction the
MEM
. -
machine will sew the letters
ENTER
^ ■ • K
Zj
-37-
Page 41

Note
Press "ENTER" after the entire word has been typed.
It is not necessary to press "ENTER" after each letter.
□ Press the upper case "S"
□ Press the lower case folder
□ Press "inger"
□ Press "ENTER"
"Singer" is now transferred to the layout or working memory
Color clock - time to sew
particular color/part of the
pattern
EDfT
Total clock - time it takes to
sew the entire highlighted
pattern
Designs dimension - size of
the design
Hoop - large, medium, or
small installed
REV
MEM
HELP
COWBI
Trash can - to delete entire
design (all elements)
Return key - return to last section
Combi - combine or add elements to a design
j Range - test the size of the design
Help - open the help screen
Review memory - review what is in that memory
Edit - manipulate the design: rotate, move, change size etc.
-38-
Page 42

□ Press "EDIT" - to edit or change the size of the letters
□ Press "SIZE/SPACE"
□ Press until 25mm appears
Choice of 8 different sizes
Letter sizes can be:
7,10,15, 20, 25, 30, 35 or 40 mm.
_________________________________________
^
□ Press "POSIT END" - finished adjusting the size of the letters
□ Press "POSITION/ROTATE" - to move the letters
□ Press t ARROW KEY until "Singer" is about one third from the
top of the screen
-POSIT-
SSIZ
ani(
0S5
lOIREtTnONI
ROTATE
AMX-E
ROTATE
000*
90*
□ Press "POSIT END" - finished moving the design
□ Press "EDIT END" - finished editing this sign
□ Press "COMBI" - to combine "Singer" with other designs
-39-
Page 43

□ Press "COMBI" - the screen showing the different items that
can be combined appears
«COMaNATlON EMBROIDERY»
ABCabc
a4 c
Mm
□ Press the "FLOWER/BORDER" icon
On screen the flowers and borders
3 different folders
Big single flower designs - 2 pages for a total of 8 flowers
Remember:
Back-up key will return you to the previous section.
Page turning keys will turn the pages within a section.
-40-
Page 44

1
ty
va
:::
va
W
•••
va
va
:::
va
li«
va
Й:
va
î;:
va
:::
ty
!:î
va
i i
-41-
Page 45

Continue building the design.
□ Press center "BORDER" folder
□ Use "PAGE-TURNING" keys to proceed to page 5/5
□ Choose last border on right
□ Press "ENTER"
□ Press "EDIT" - to change or edit this border
□ Press "POSITION/ROTATE" to move the border
□ Use "ARROW KEY" - to move the border as far right as
possible (machine will beep when you have reached the sewing
limits)
□ Press "POSIT END" - finished moving the border
□ Press "EDIT END" - finished editing this border
Add the same border, but move it to the other side and rotate it.
□ Press "COMBI" - to combine with another design
□ Press FLOWER/BORDER icon
□ Press BORDER folder
□ Use "PAGE-TURNING" keys to proceed to page 5/5
□ Choose last border on the right
□ Press "ENTER"
□ Press "EDIT"
□ Press "POSITION/ROTATE"
□ Press 90-degree, arid press the direction of rotation to the left
once. The angle of rotation reads "180"
-42-
Page 46

The XL-1000 has the capability to rotate
a design in either 90 or 5-degree increments.
It also can rotate to the right or to the left.
Special note:
If you try to rotate a design that is close to the frame or too big,
the machine might not accept a 90-degree rotation.
It would force the design to be sewn outside the hoop.
Since sewing outside the hoop is impossible,
the machine rejects the 90-degree rotation and automatically will
try the acceptable degree that will fit in the hoop sewing area.
□ Press "POSIT END"
□ Press "POSmON/ROTATE"
□ Use "ARROW KEY" - to move the border as far left as possible
□ Press "POSIT END"
□ Press "EDIT END"
Add a design from an embroidery card.
When inserting or removing an embroidery card the machine
does NOT need to be turned off
Q Press "COMBI"
□ Insert embroidery card
□ Press EMBROIDERY CARD icon
Use "PAGE-TURNING" keys to proceed through designs
□ Select the embroidery design of your choice
□ Press "ENTER"
□ Press "EDIT"
-43-
Page 47

□ Press "POSITION/ROTATE"
□ Press "ARROW KEYS" to position design below "Singer"
□ Press "POSIT END"
□ Press "EDIT END"
□ Press "COMBI END" and begin sewing
If the design looks as desired
The design can still be changed, before sewing it out.
How to change an element in the design.
□ Press "EDIT"
□ Press "NEXT PATTERN" until the pattern that you wish to
change is highlighted (darker than ail other patterns)
□ Options will appear: "POSITION/ROTATE"- "SIZE/SPACE"
"MIRROR"
To delete an element
□ Press the "TRASH CAN" to the right of "NEXT PATTERN".
Only the element that is highlighted will be deleted.
□ Message "DELETE PATTERN" - press "YES"
□ Message "DELETE COMPLETED" - press "OK"
To add an element
□ Press "COMBI" and proceed adding other elements.
□ When all changes are made
Press "EDIT END"
□ Press "COMBI END" and start to sew.
-44-
Page 48

2. Place design into permanent Memory
Exercise - Place the created COMBINATION DESIGN into
PERMANENT MEMORY
□ Press the "IN"-file folder key on the bottom bar
On screen are Memory Folders
Trash can - to delete a design from
memory folder
toter I I «nd or*t* kmy
cíáU««. tK U '
r«tx^n lo №•« scroofv To doloi« prooo
To rolo« pros«
fOj to
i 5),3)
"IN"-file folder - to place a design
into memory folder
Return key - return to last section
11
Screen shows 13 different file folders where designs
can be stored. If the folder is darkened, then there is
something already in that folder.
□ Press an empty file folder
□ Press the "IN"-file folder icon on screen
□ Save completed, press "OK"
When you press "OK", your design will be held
for 99 years or until you rerhove the design.
-45-
Page 49

________________________Part Vi I
Advancing or Repeating Colors in Embroidery
The XL-1000 has the ability
to advance or to repeat a particular
color or segment In a design.
Exercise - Advance past colors
□ Attach the embroidery unit to the machine
Remember to have the machine turned off
□ Attach the large hoop and turn the machine on
□ Press anywhere on the LCD screen
□ Press "OK" for carriage to move
□ Press "COMBINATION EMBROIDERY"
□ Press the "FLOWER/BORDER" icon
□ Use "PAGE TURNING" key to proceed to page 2/2
□ Choose the Rose
□ Press "ENTER"
□ To skip or advance to the third color of this design
□ Press the "HELP" key
□ Press the "SEL STEP" key
□ A "POP-UP" screen will allow you to advance steps/colors
-46-
Page 50

On screen is "SEL STEP" and "POP-UP*
ENTER - after step election
STEP RETURN - key return to previous page
SEL STEP - selection of step or color
STEP - shows the step or color number to be sewn; the number
will advance as the "SEL STEP" key is pushed
Carriage - to bring the embroidery unit carriage back to center;
this is sometimes necessary when using the needle threader.
Depending on the design, occasionally the carriage will move the
hoop to the edges. The needle threader may hit the hoop, making
it impossible to use. By pushing "CARRIAGE" the hoop moves to
a position that the needle threader can be used.)
HELP END - only when finished with advancing steps or colors
-47-
Page 51

□ Press "SEL STEP" on "POP-UP" screen, until the number 3
appears next to "STEP" icon
□ Press "ENTER"
The machine will sew only step 3 of the rose
To sew color 4
□ Press "SEL STEP" on "POP-UP" screen, until the number 4
appears next to "STEP" icon
□ Press "ENTER"
The machine will sew only step 4 of the rose
To sew color 1
□ Press "SEL STEP" on "POP-UP" screen, until the number 1
appears next to "STEP" icon
□ Press "ENTER"
The machine will sew only step 1 of the rose
Special note:
Once the "SEL STEP" feature has been used, the remaining
steps has to be entered using the "SEL STEP".
They will NOT advance automatically
To ««Wot noKi louc^
rSEL STEPJ k«v. rE^rreRЗ k«v.
5 STEP
SEL
STEP
STEP
CARRIAGE
SEL
STEP
HELP
END
-48-
Page 52

_________
Part VIII
Multiple Hoop Embroidery
Large designs are easily accomplished
with the multiple hoop embroidery function,
when patterns are too big to fit within a single hoop.
^ tor
tlTCT^ ' ty
-49-
Page 53

Exercise - How to do multiple hoop embroidery
Fabric preparation
A multi-hoop with 4 quadrants requires a piece of fabric that is at
least 24 X 16 inches
□ Draw with a water-soluble or disappearing ink pen, a long
horizontal line across the center of the fabric
□ Draw a long vertical line across the center of the fabric
The two lines should intersect in the center of the fabric and
should meet at a 90-degree angle
7^
X
V*
V-a»is
□ With machine turned off, install the embroidery unit and large
hoop, then turn machine on
□ Attach the "J" embroidery foot
□ Press anywhere on the screen or press the embroidery key
□ Press "OK" for the carriage to move
□ Press "MULTIPLE HOOP EMBROIDERY" icon
The first element will be the letters:
a Press ABCabc
□ Press vertical-sewing position
Use this key to select the direction the letters will be sewn
□ Type "HOME" in upper case block letters, then "ENTER"
-50-
Page 54

□ Press "EDIT"
□ Press "S12E/SPACE"
□ Press "+" to change the size to 40mm
Letters enlarge in increments of 5
□ Press "POSIT END"
□ Press "POSITION/ROTATE"
□ Press "ARROWS" to move "HOME"
Q Press "POSIT END", "EDIT END", "COMBI''
□ Select ABCabc
□ Press vertical-direction sewing
□ Press lower case folder
□ Type "for the" in lower case block letters
Space is at lower right side - looks like an empty box.
Q Press "ENTER"
□ Press "EDIT", press "SIZE/SPACE", change size to 30mm
□ Press "POSIT END", "EDIT END", "COMBI"
Vt I D AVS
□ Select ABCabc
□ Press vertical-direction sewing
IPX
□ Type in "HOLIDAYS" in block letters
□ Press "ENTER"
□ Press "EDIT", press "SIZE/SPACE",
□ Press "POSIT END" change size to 40mm
0
k
•«Mil
t
m
E
-"1
•♦I
□ Press "POSITION/ROTATE"
-51
Page 55

□ Press "ARROWS" to move "HOLIDAYS" as shown
□ Press "POSIT END", "EDIT END" and "COMBI"
Adding the borders in 6 sections
Section 1
□ Press the FLOWER/BORDER icon
□ Press BORDER folder
□ Choose the third border from left on the first screen "ENTER"
□ Press "EDIT"
□ Press "MIRROR"
□ Press "POSITION/ROTATE"
□ Press "ARROW KEYS" to move the border to the upper most
right corner
□ Press "POSIT END", "EDIT END" and "COMBI"
Section 2
□ Press the FLOWER/BORDER icon
□ Press BORDER folder
□ Choose the third border from left on first screen "ENTER"
□ Press "EDIT"
□ Press "POSITION/ROTATE"
□ Press "ARROW KEYS" to move the border to the upper most
left corner.
□ Press "POSIT END", "EDIT END" and "COMBI"
Section 3
□ Press the FLOWER/BORDER icon
-52-
Page 56

□ Press BORDER folder
□ Choose the third border from left on the first screen "ENTER"
□ Press "EDIT"
□ Press "POSITION /ROTATE"
□ Press 90-degree
□ Press \ right direction. Reads ANGLE ROTATE 180-degree
□ Press "POSIT END"
□ Press "POSITION/ROTATE"
□ Press "ARROW KEYS" to move the border to the lower most
right corner
□ Press "POSIT END", "EDIT END" and "COMBI"
Section 4
□ Press the FLOWER/BORDER icon
□ Press BORDER folder
□ Choose the third border from left on the first screen "ENTER"
□ Press "EDIT"
□ Press "MIRROR"
o Press "POSITION /ROTATE"
□ Press 90-degree
□ Press \ right direction. Reads ANGLE ROTATE 180-degree
□ Press "POSIT END"
□ Press "POSITION/ROTATE"
□ Press "ARROW KEYS" to move the border to the lower most
left corner
-53-
Page 57

□ Press "POSIT END", "EDIT END" and "COMBI"
Section 5
□ Press the FLOWER/BORDER icon
□ Press BORDER folder
Q Choose the second border from left on the first screen
"ENTER"
□ Press "EDIT"
a Press "POSITION/ROTATE"
□ Press 90-degree
□ Press right direction. Reads ANGLE ROTATE 90-degree
□ Press "POSIT END"
Q Press "POSITION/ROTATE"
□ Press "ARROW KEYS" to move the border to the center bottom
position
□ Press "POSIT END", "EDIT END" and "COMBI"
Section 6
□ Press the FLOWER/BORDER icon
□ Press BORDER folder
□ Choose the second border from left on first screen "ENTER"
□ Press "EDIT"
□ Press "POSITION/ROTATE"
□ Press 90-degree
□ Press left direction. Reads ANGLE ROTATE 90-degree
□ Press "POSIT END"
-54-
Page 58

□ Press "POSITION/ROTATE"
□ Press "ARROW KEYS" to move the border to the center top
position
□ Press "POSIT END", "EDIT END"
□ Press "EDIT"
□ Press "ZOOM" and touch the screen at the corner where any
two borders meet.
On screen the zoom function
Zoom function is used to get a close-up view.
To enlarge a selected area for a more detailed visual check.
A very valuable tool for editing a design.
Return key - to return to
the previous screen. In this
case the screen with
"POSITION/ROTATE". Very
helpful to be able to move
an element while in the
zoom mode.
Zoom-out key - to return to
previous touch screen
Note:
Touch zoom and get up close.
Touch zoom again and get even closer.
Touch zoom a third time and needle penetrations
are visible for detail editing. ^—
□ Press "EDIT END" when finished with changes
□ Press "MULTI-HOOP END"
-55-
Page 59

On screen how to define hoop placement
Mov« Q fr«rr>« *o
define sewing section.
This screen will ask where the frame (on screen) should be
defined. Right now it shows it defining the center of the design.
By using the "ARROW KEYS" the frame can be moved anywhere
on the design to define the area to be sewn first.
Your screen represents your fabric - with the lines at a 90-degree
drawn on it
The frame on the screen represents the area that can be sewn in
a single hoop placement. It is moved from section to section until
the entire project has been sewn. Depending on how large the
project is will determine how many frame placements are needed.
-56-
Page 60

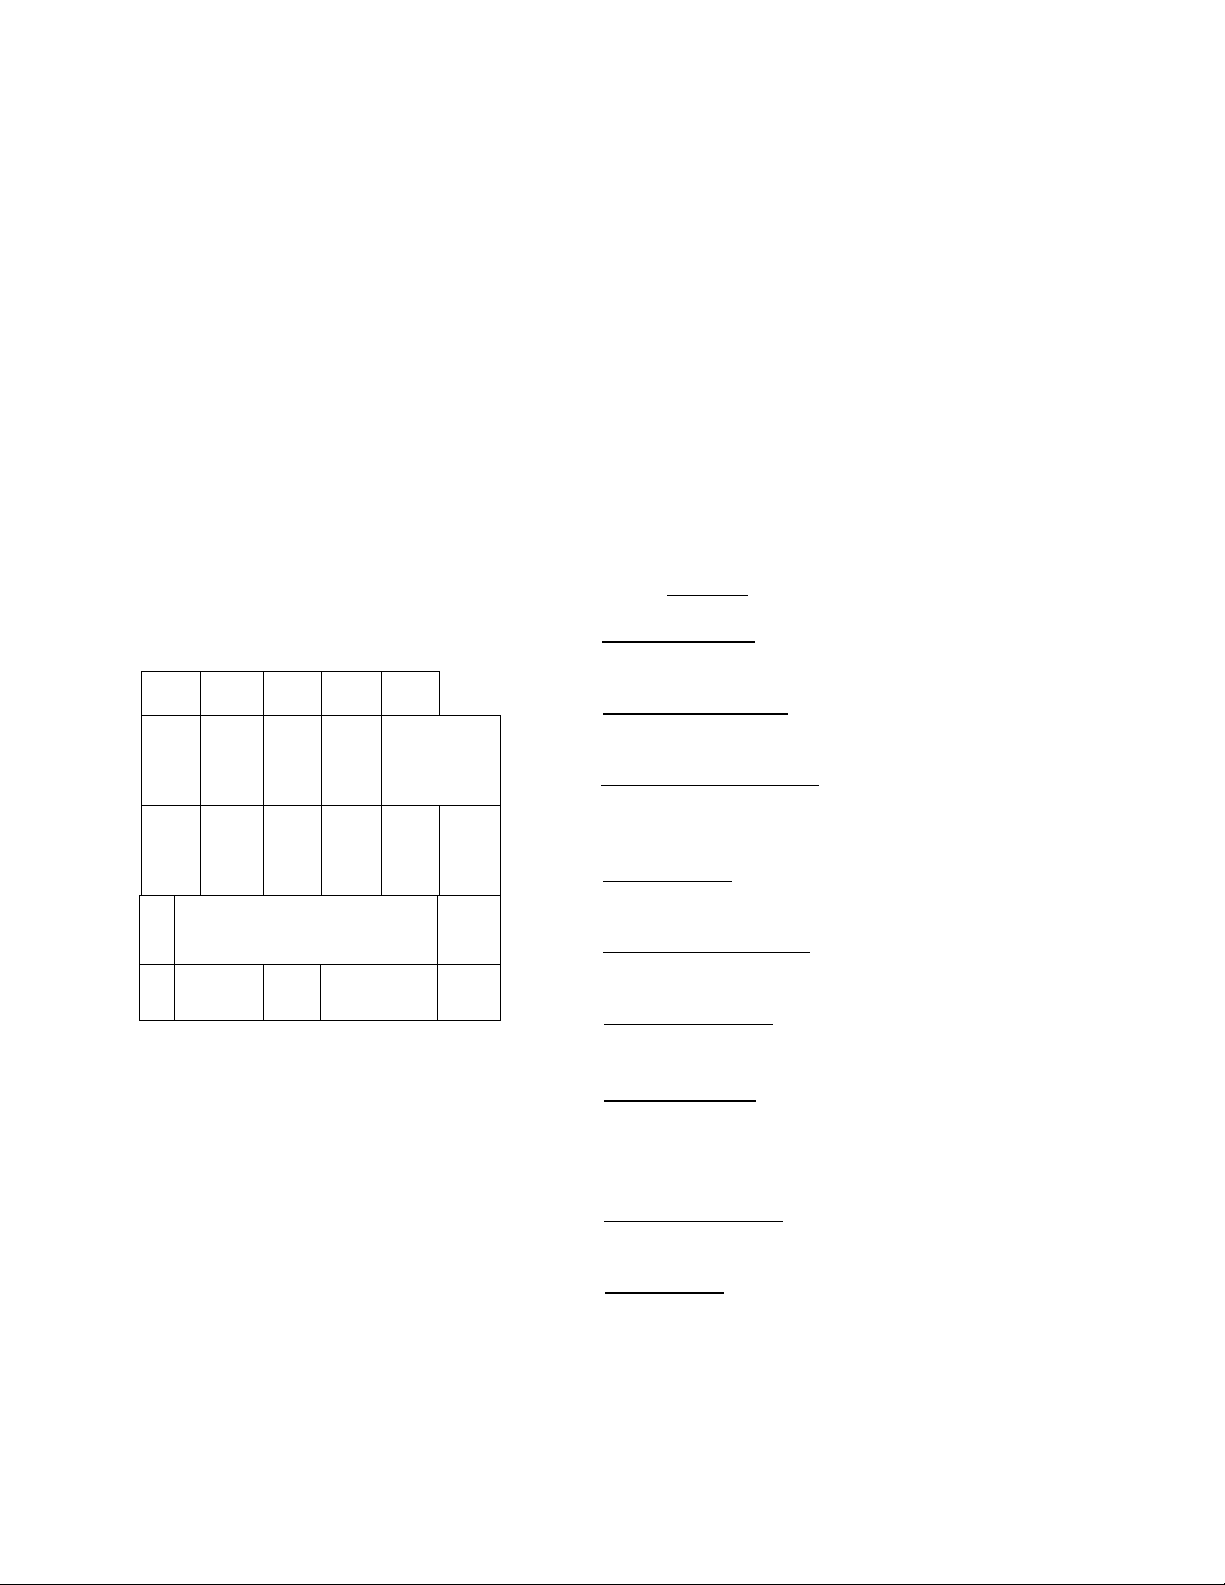
The design is 20 x 12 inches and will not fit into one hoop, and
several hoop placements are needed to cover the entire design.
This used to be a very tedious exercise that required a great deal
of skill and luck. Now it is made simple.
For this exercise we need 5 frame/hoop placements:
Individual hoop placement shown on page 61 and 62
5"
Do not be concerned if an element is only partially in the frame.
The XL-1000 will only sew designs that it can complete, it will
not attempt to sew only part of a design.
It will sew part of a word, but not part of a letter.
It will remember what has been sewn
and will not attempt to sew the letter or element again.
When placing the frame do not be concern with overlapping.
-57-
Page 61

□ Press the "ARROW KEYS" so that the frame moves to a
position like the one below:
-----------------
>1
POSI*
0Da
L
Mov« 0 fram« *.o
dsfhe sewing section
The screen now shows just the area that will be sewn in the first
frame/hoop placement. The X and Y lines on the screen are used
as guide lines. Hoop your fabric similar to the display on the
screen regarding placement of those lines within the frame.
Y
R«l«r to th« LCD
scroan Moivnf
matarUI rt ambroiòary
□ Hoop fabric
□ Insert the hoop
□ Press "OK"
-58-
Page 62

Special note:
There is a ”NO SEWING” area around
the edge of the hoop, marked by the triangles.
Make sure neither "X" nor "Y" lines fall In that area.
When securing material in
embroidery frame, take
care to install it so that
vertical and lateral
marker lines on material
align inside triangle marks
on frame, (see page 95 for
preoaration of material and
marking of lines)
After securing material in
frame, press | a» | key.
Attach embroidery frame
on embroidery frame holder
The machine needs to know where the fabric is in the hoop and
that is what the lines are used for
Touch the screen on the lower left portion on or near the X line -
a dot will appear on the screen where you touched it and the hoop
will move placing the needle close to the X line.
Turn handwheel to check that needle entry point is on the X line
Use ARROW KEYS to adjust so needle entry is ON the line and
check it is properly placed turning the handwheel to lower needle
When the needle is on the X line
Press "X-LINE" MEMO POSITION 1
The first of two points the machine needs in order to record X line
Touch the screen on the lower right hand side of the X line and
align the second needle position as above using ARROW KEYS
and checking needle entry is ON the X line turning the handwheel
-59-
Page 63

Press "X-LINE" MEMO POSITION 2
X-LINE MEMO POSITION 1 - 2 disappear from the screen
The location of the line is recorded in the machine
Record the Y-LINE
Touch the screen approximately at the place where you want the
needle to be. A dot will appear on the screen where you touched
it and the hoop will move placing the needle close to the Y line.
Use ARROW KEYS to adjust so needle entry is ON the Y line and
check it is properly placed turning the handwheel to lower needle
When the needle is on the Y line
Press "Y-LINE" MEMO POSITION 1
The first of two points the machine needs in order to record Y line
Move ARROW KEYS either up or down and at least 2 inch away
from first Y mark and repeat procedure
Press "Y-LINE" MEMO POSITION 2
The location of the Y-line is recorded in the machine
Start sewing, only the items that appear dark on the screen will
be sewn during this frame/hoop placement.
After the first frame/hoop placement is sewn, it will be necessary
to "DEFINE" a new frame/hoop placement, re-hoop fabric and to
tell the machine the new X and Y- LINE locations
-60-
Page 64

I/)
O
if)
ro
0)
u.
03
o
[£
(/)
c
<u
E
0)
o
j5
Q.
Q)
E
ro
Q.
O
o
'(/)
x:
-t->
) HO
—Z/A
^ lOL
^H^I
X
(/)
03
o
o
o
Q,
if)
-1--
VIE 1
^rvt^
-WW
- --!--
DAY^
S'
HOLIDAYS
<r
) Hoj
tty tor
i HOLI
UD
m
ic
ME
tlrcr
ME (^
tlTCT^ ' tH
DAYS f
cO
Page 65

\9
C\J
) НО'
XÍ7TK-------------7«
t®“
...
Ibr
^H^II
VIE L
----
tre——^
DAYS <
Page 66

Part IX
Memories
1. Standard machine memory
There are two types of memory used when the machine is in the
standard sewing mode;
1. WORKING MEMORY
and
2. PERMANENT MEMORY
1. WORKING MEMORY for standard machine
When an element (such as a fun face, scallop stitch or letter) is
chosen, it immediately goes into "WORKING MEMORY". The
working memory is also called the layout memory, because this is
where the operator is joining together or laying out the order of
the chosen elements.
To clear this memory, press the "CLR MEM" key. Each time the
key is pushed the last entered element will be erased. To clear all
the elements chosen, hold the "CLR MEM" key for 3 seconds.
Turning the machine off will
erase the standard machine working memory.
2. PERMANENT MEMORY for standard machine
The permanent memory has 15 file folders.
They each hold up to 40 elements.
To store in permanent memory press "IN"-file folder on the bottom
bar.
The PERMANENT MEMORY will hold for 99 years
or until removed from the file-folders
by pushing the TRASH CAN" icon.
-63-
Page 67

2. Embroidery machine memory
There are two types of memory used when the machine is in the
embroidery mode:
1. WORKING MEMORY
and
2. PERMANENT MEMORY
1 ■ WORKING MEMORY for embroidery machine
When an element is selected it goes into "WORKING MEMORY".
The working memory is also called the layout memory, because
this is where the operator is joining together or laying out the
order of the chosen elements.
To clear this memory, press the "TRASH CAN" icon.
If the machine is turned off,
or there is a power failure,
WORKING MEMORY
for the embroidery machine will stay for
12 hours
When the machine is turned back on, simply press the
"POWER FAIL"
key to retrieve the stored working memory.
COMBINATION
EMBROIDERY
ABCDEF
MULTIPLE HOOP
EMBROIDERY
ABCDEF
POSITION
Press
YES
key.
-64-
Page 68

2. PERMANENT MEMORY for embroidery machine
There are two types of Permanent memory used
A. COMPLETE or FILE-FOLDER #1
and
B. PARAMETER or FILE-FOLDERS #2-13
A. COMPLETE (file-folder #1)
Folder #1 holds 150,000
needle penetrations. The
complete memory of each
and every needle penetration,
not just the parameter or
outline of the design.
Using folder #1 it will NOT
be necessary to insert the
embroidery card if used in
the design.
____
1
i.
□
______
3
из
______
Ч
о
______
5
□ ______
u
7
13
JO
3
я
____
—1
//
—(
fj.
—1
/3
Special note:
Pictall scanner cards can only go
into complete memory - file folder #1
B. PARAMETER (file-folders #2-13) ^PATENTED FEATURE*
To maximize the storage availability, the parameter folders will
remember only the outline or the "parameter" of each design. For
example, a duck from the sampler card #2, a flower from the
floral card#3 and a built-in flower border are joined and placed
into parameter file folder #2. When file folder #2 is opened, the
machine will remember only the parameter or outline of the three
motifs and will prompt the operator to insert the appropriate
embroidery cards. Parameter memory offers unlimited storage of
designs. The machine will remember both the placement of each
design and any editing that has been done (such as mirror image,
rotation etc.).
The PERMANENT MEMORY will hold for 99 years
or until removed from the file-folders
by pushing the "trash can" icon.
-65-
 Loading...