

SINGER W1888 User Manual
INSTRUCTION MANUAL
FOR
SEWING MACHINE
»o j' ir* iv'*'r • ■ •'* ’’ A
WHITE
Call Toll Free
800-331-3164
www.wMteseM!la!^^ffl


IMPORTANT SAFETY INSTRUCTIONS
When using an elearical appliance, basic safety precautions should alwa^ be
folowed, including the following:
Read all instructions before using
(this sewing machine)
DANGER To reduce the risk of electric shock:
An appliance should never be left unattended when plugged in. Always unplug this
appliance from the electric outlet immediately after using and before cleaning.
Always unplug before retamping, Replace bulb with same type rated 15 watts.
WARNING To reduce the risk of burns, fire,
electric shock, or Injury to persons:
Operate sewing machine only when mounted in sewing machine table, case, and the
like. See the installation instructions.
1. DO not allow to be used as a toy. Close attention Is necessary when this appliance
is used by or near children.
2. Use this appliance only for Its Intended use as described in this manual. Use only
attachments recommended by the manufacturer as contained in this manual.
3. Never operate this appliance if it has a damaged cord or plug. If it is not working
properly, if it has been dropped or damaged, or dropped into water. Return the.
appliance to the nearest authorized dealer or service center for examination, repair,
electrical or mechanical adjustment. .
4. Never operate the appliance with any air openings blocked. Keep ventilation open
ings of the sewing machine and foot controller free from the accumulation of lint,
dust, and loose cloth.
5. Never drop or insert any object into any opening.
6. Do not use outdoors. _
7. Do not operate where aerosol (spray) products are being used or where oxygen is
being administered.
a To disconnect, turn all controls to the off ("0”) position, then remove plug from
outlet.
9, Do not unplug by pulling on cord. To unplug, grasp the plug, not the cord.
ia Keep fingers away from all moving parts. Special care is required around the sewing
machine needle.
11. Always use the proper needle plate. The wrong plate can cause the needle to break.
12. Do not use bent needles.
13. Do not pull or push fabric while stitching. It may deflect the needle causing it to
break.
14. Unplug the sewing machine when making any adjustments in the needle area,
such as threading needle, changing needle, threading bobbin, or changing
presser foot, etc.
15. Always unplug sewing machine from the electrical outlet when removing covers,
lubricating, or when making any other user servicing adjustments mentioned in the
instruction manual.
SAVE THESE INSTRUCTIONS

CONTENTS
Name of Pans
Accessories..........................................................................................................................................................................3
Before sewing ¡Power supply and Sewmg lamp)
Take out extension table, free arm sewing....................................................................................................................5
Winding the bobbin
Removing bobbin case and bobbin...............................................................................................................................7
Inserting bobbin into bobbin case..................................................................................................................
Inserting bobbin case mto shuttle race.........................................................................................................................8
Threading upper thread & Twin needle threading.................................................................................................... g
Drawing up bobbin thread.............................................................................................................................................10
Changing sewing directions................................
Adjusting thread tensioi.................................................................................................................................................12
Regulating the presser foot pressure.........................................................................................................................12
Drop feed........................................................................................■................................................................................13
Changing needle..............................................................................................................................................................14
Fabric. Thread. Needle table..........................................................................................................................................15
Sewing (pattern selector! and operation table........................................................................................................ .16
To start sewing...................................................................................................................................................................17
To finish seam....................................................................................................................................................................18
Straight stitch.................................................................................................................................................................... 19
Zigzag sewing....................................................................................................................................................................19
Overcasting........................................................................................................................................................................20
Stretch stitch .
Blind stitch
Button sewing. . ............................................................................................................................................................. 23
Binding...........................................................................................................
Zipper sewing.................................................................................................................................................................. 24
Button hole sewing
Hemming............................................................................................................................................................................26
Twin Needle..........................................................................................................................................
Embroidery..................................................................................................................................................................... 27
Quilter.......................................................
Seam guide.......................................................................
Maintenance (Cleaning and oiling) . ... **•••*•
Owckiftg Performance Problemi WHAT TO OQ . •». .7........................................................
...................................................
............................................
......
....................................................................................................................................................... 20
......
....................................................................................................................................................21 Si 22
..................................
..........................................................................................................1 & 2
...........................................
................................................................................................................g
...
.............................................
...
......................................................................................................
...
...................................................
...
............................................................................................28
...
..........................................................4
..........................................................
...
................................................................
...
• .....................27
...
...............................................................
.................
...
.7
...
■ • ■ 25
...
28
29
30
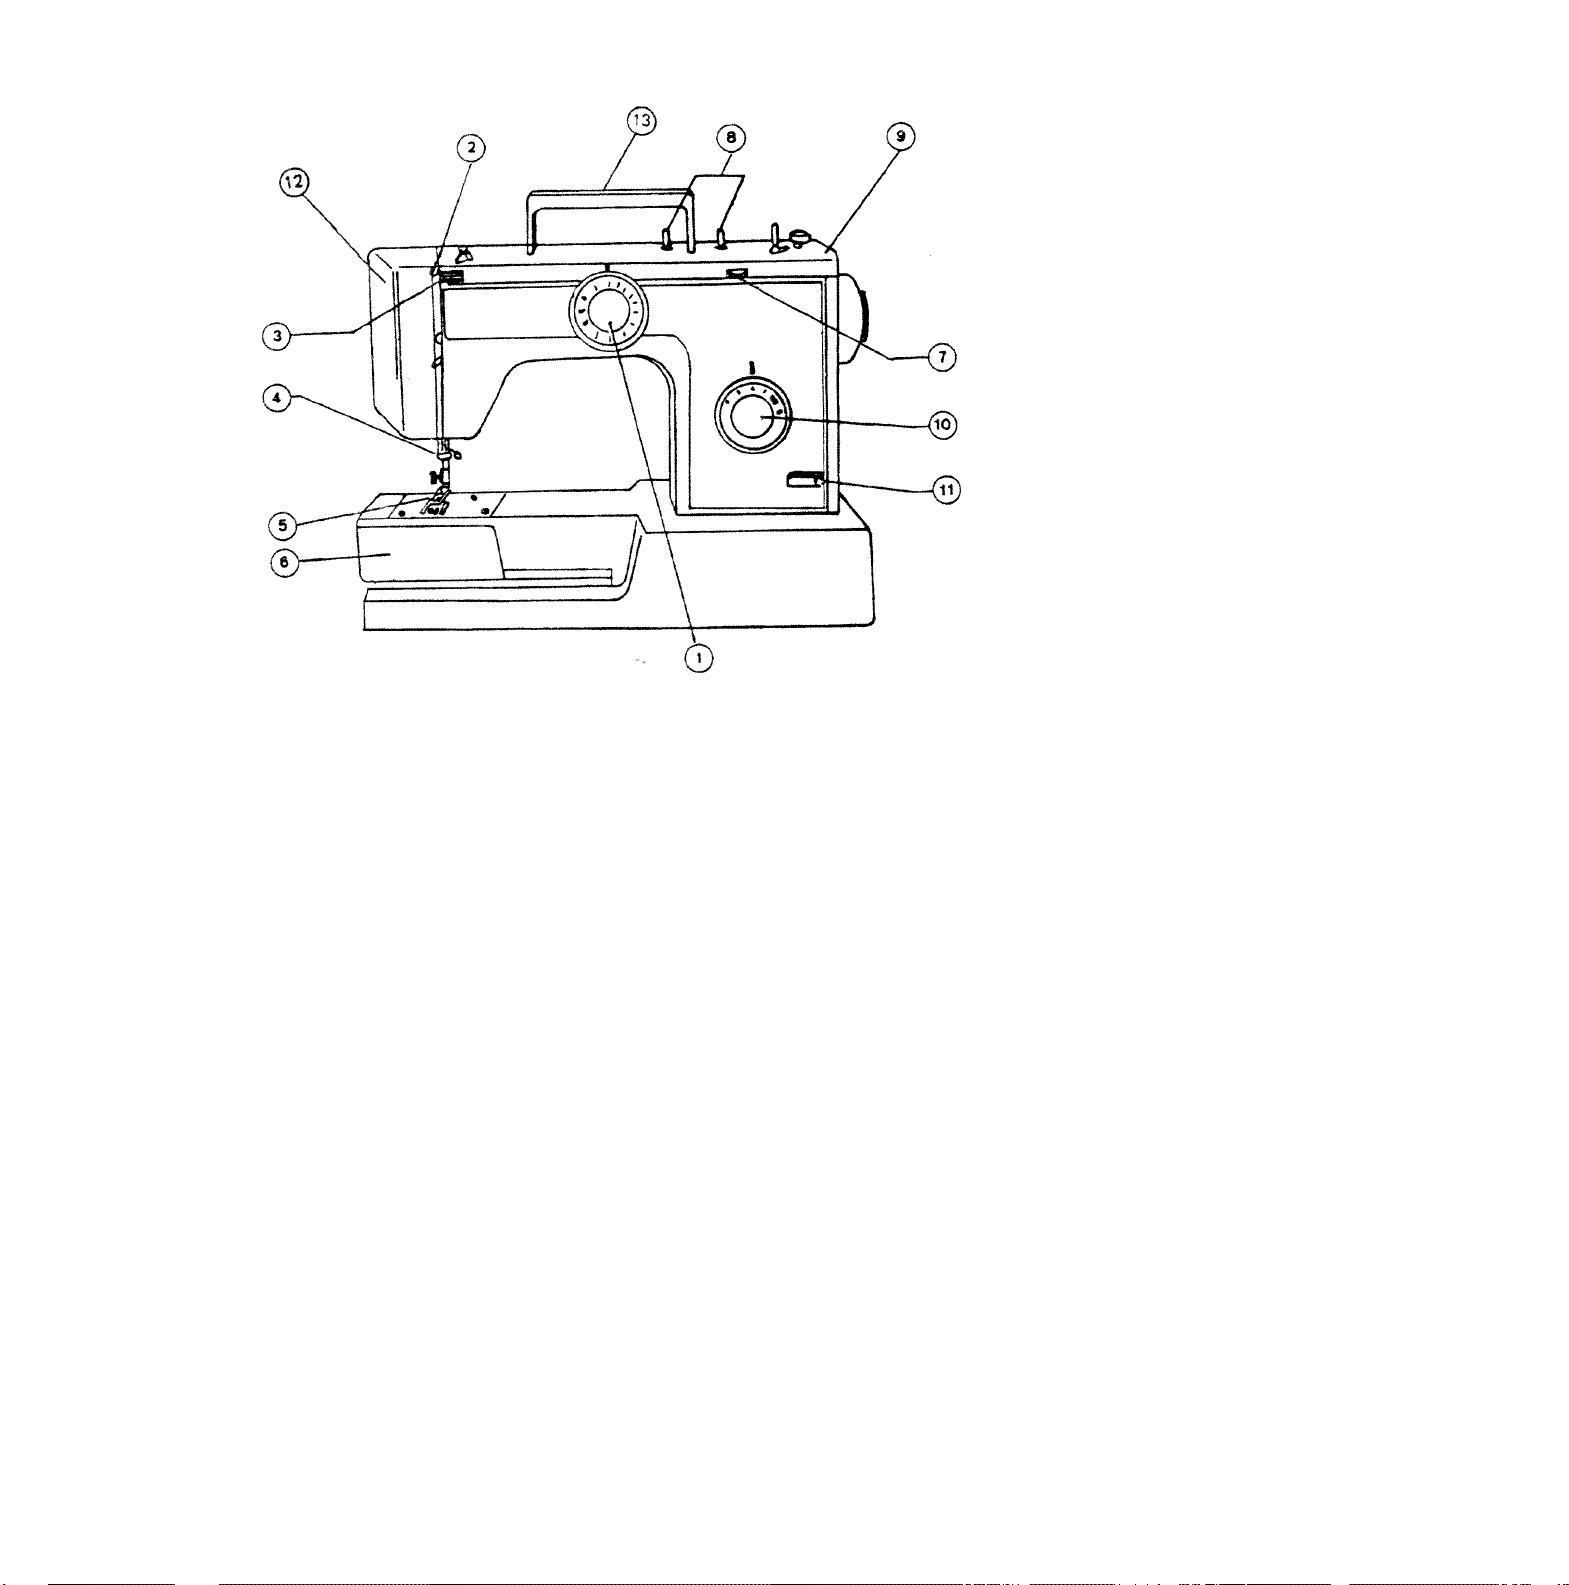
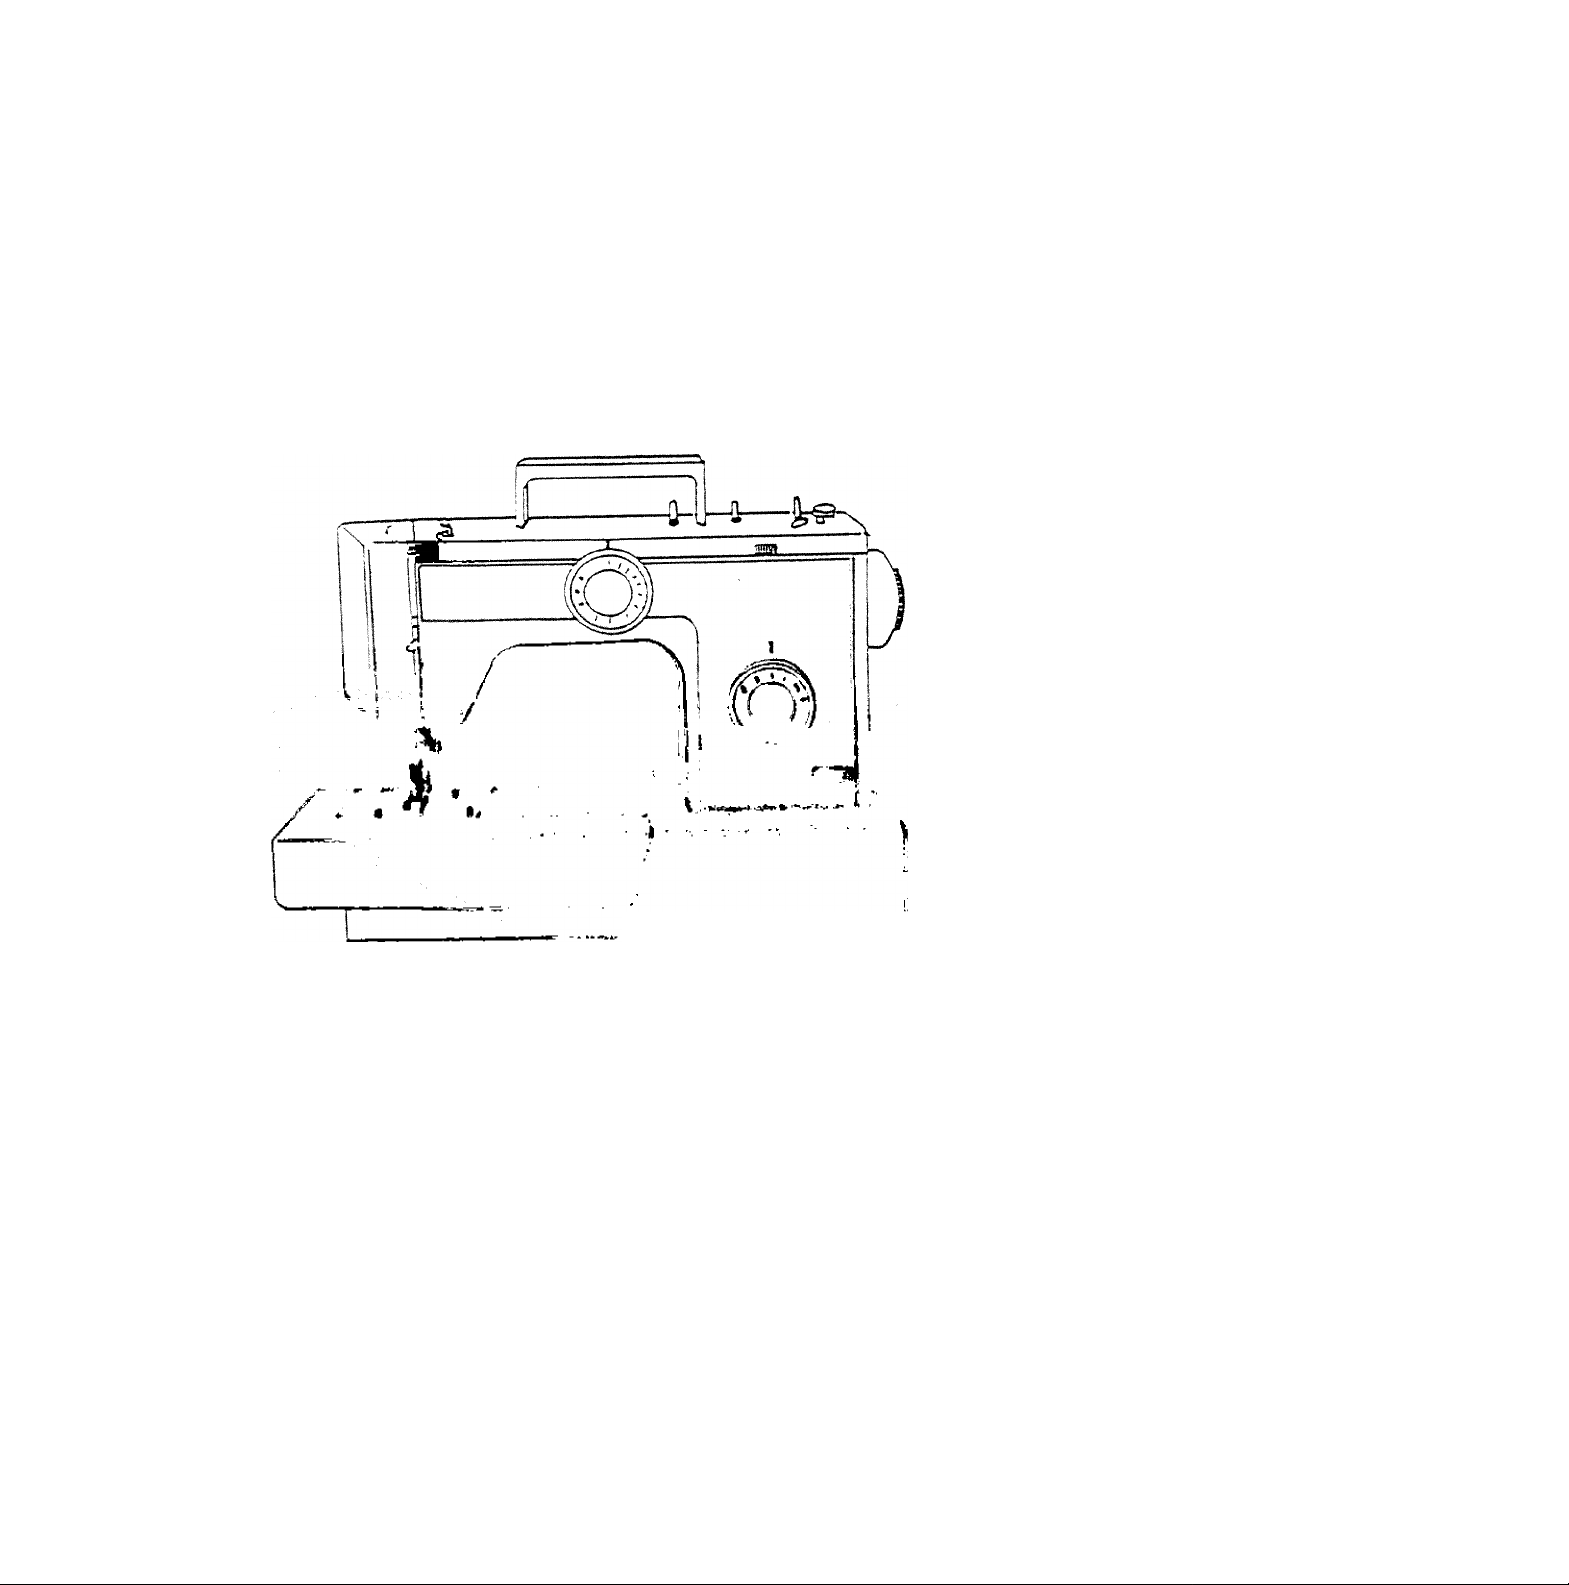
NAME OF PARTS (FRONT VIEW)
1 Pattern selector dial
2 Take up lever
3 Tread tension dial
4 Tread guide for
threading
5 Presserfoot
6 Shuttle cover
7 Zigzag Wi dth Oiat
3 Spool pin
a Top cover
10 Stitch length dial
11 Reverse button
12 Face cover
13 Handle
upper
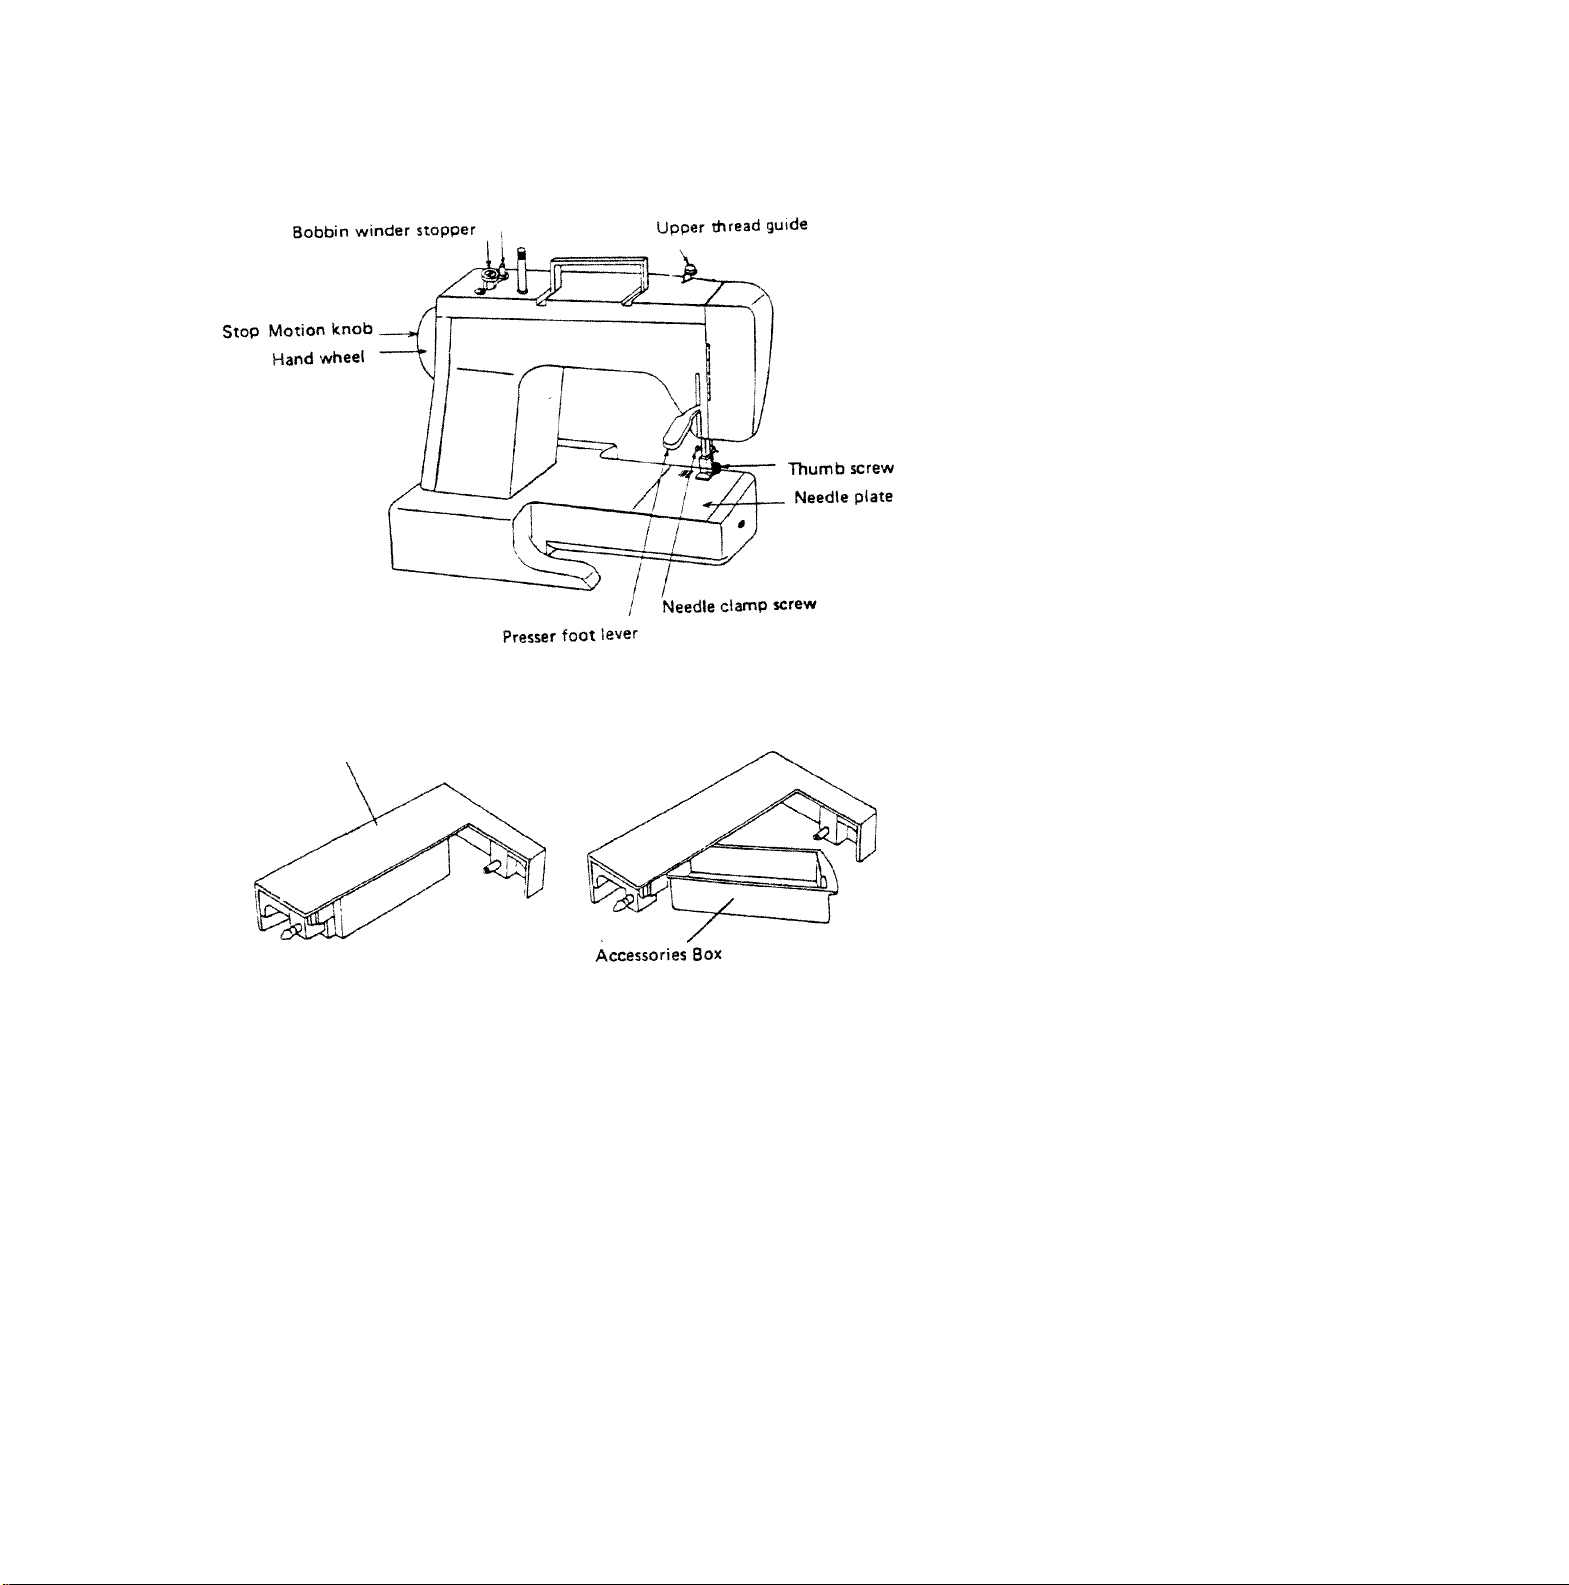
(REAR VIEW)
Bobbin winder spindle
Extension table
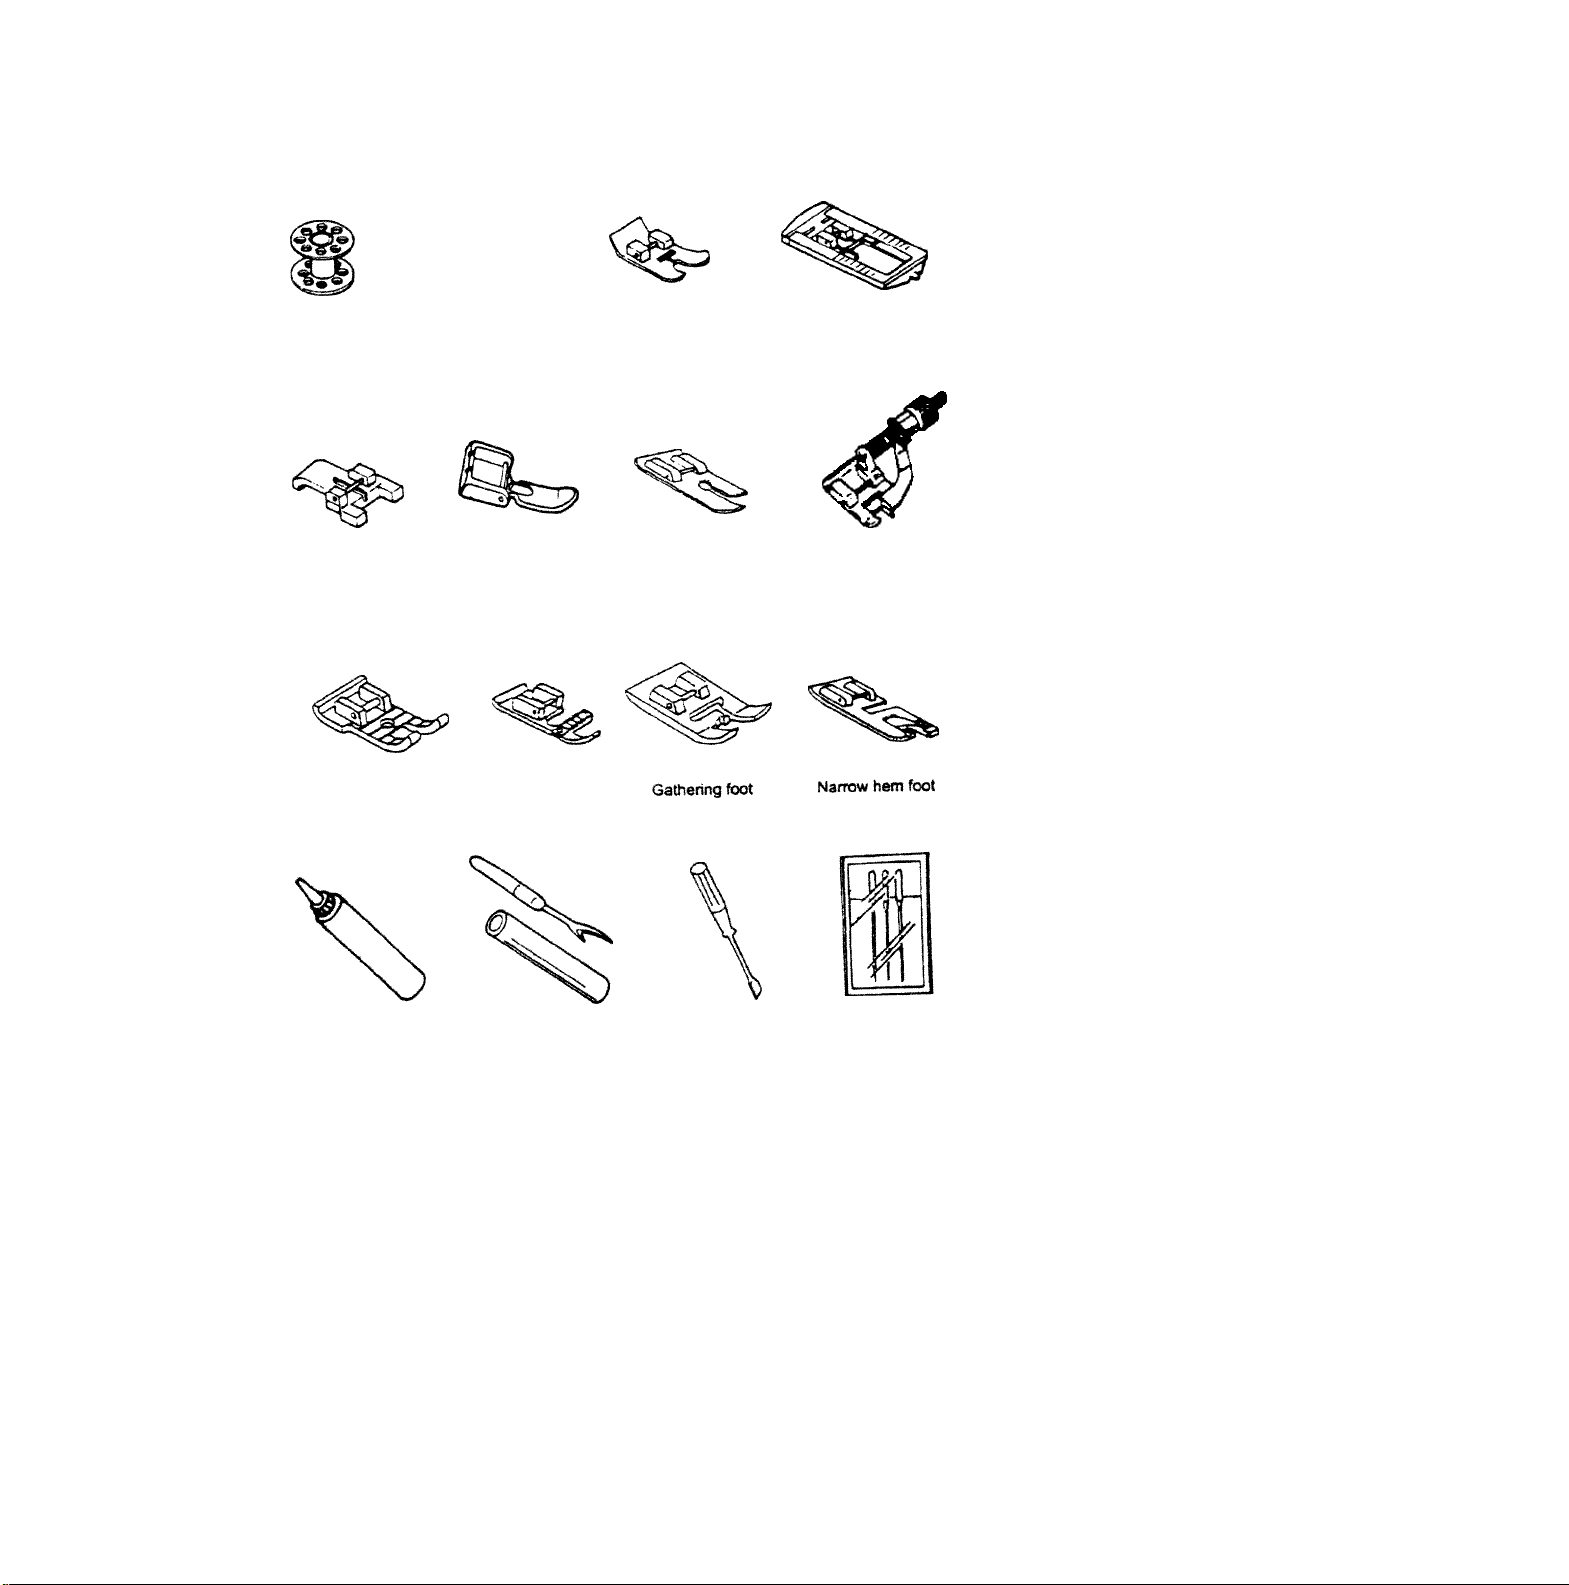
accessories
Bobbin Spool pin felt
Zigzag toot
(On machine)
Buttonhole foot
Button sew on foot Zipper foot Straight stitch foot Blind stitch foot
1/4 inch piecing fo6 t Cording foot
Machine oil Buttonhole cutter Screw driver
- 3
Needles
#11 #14
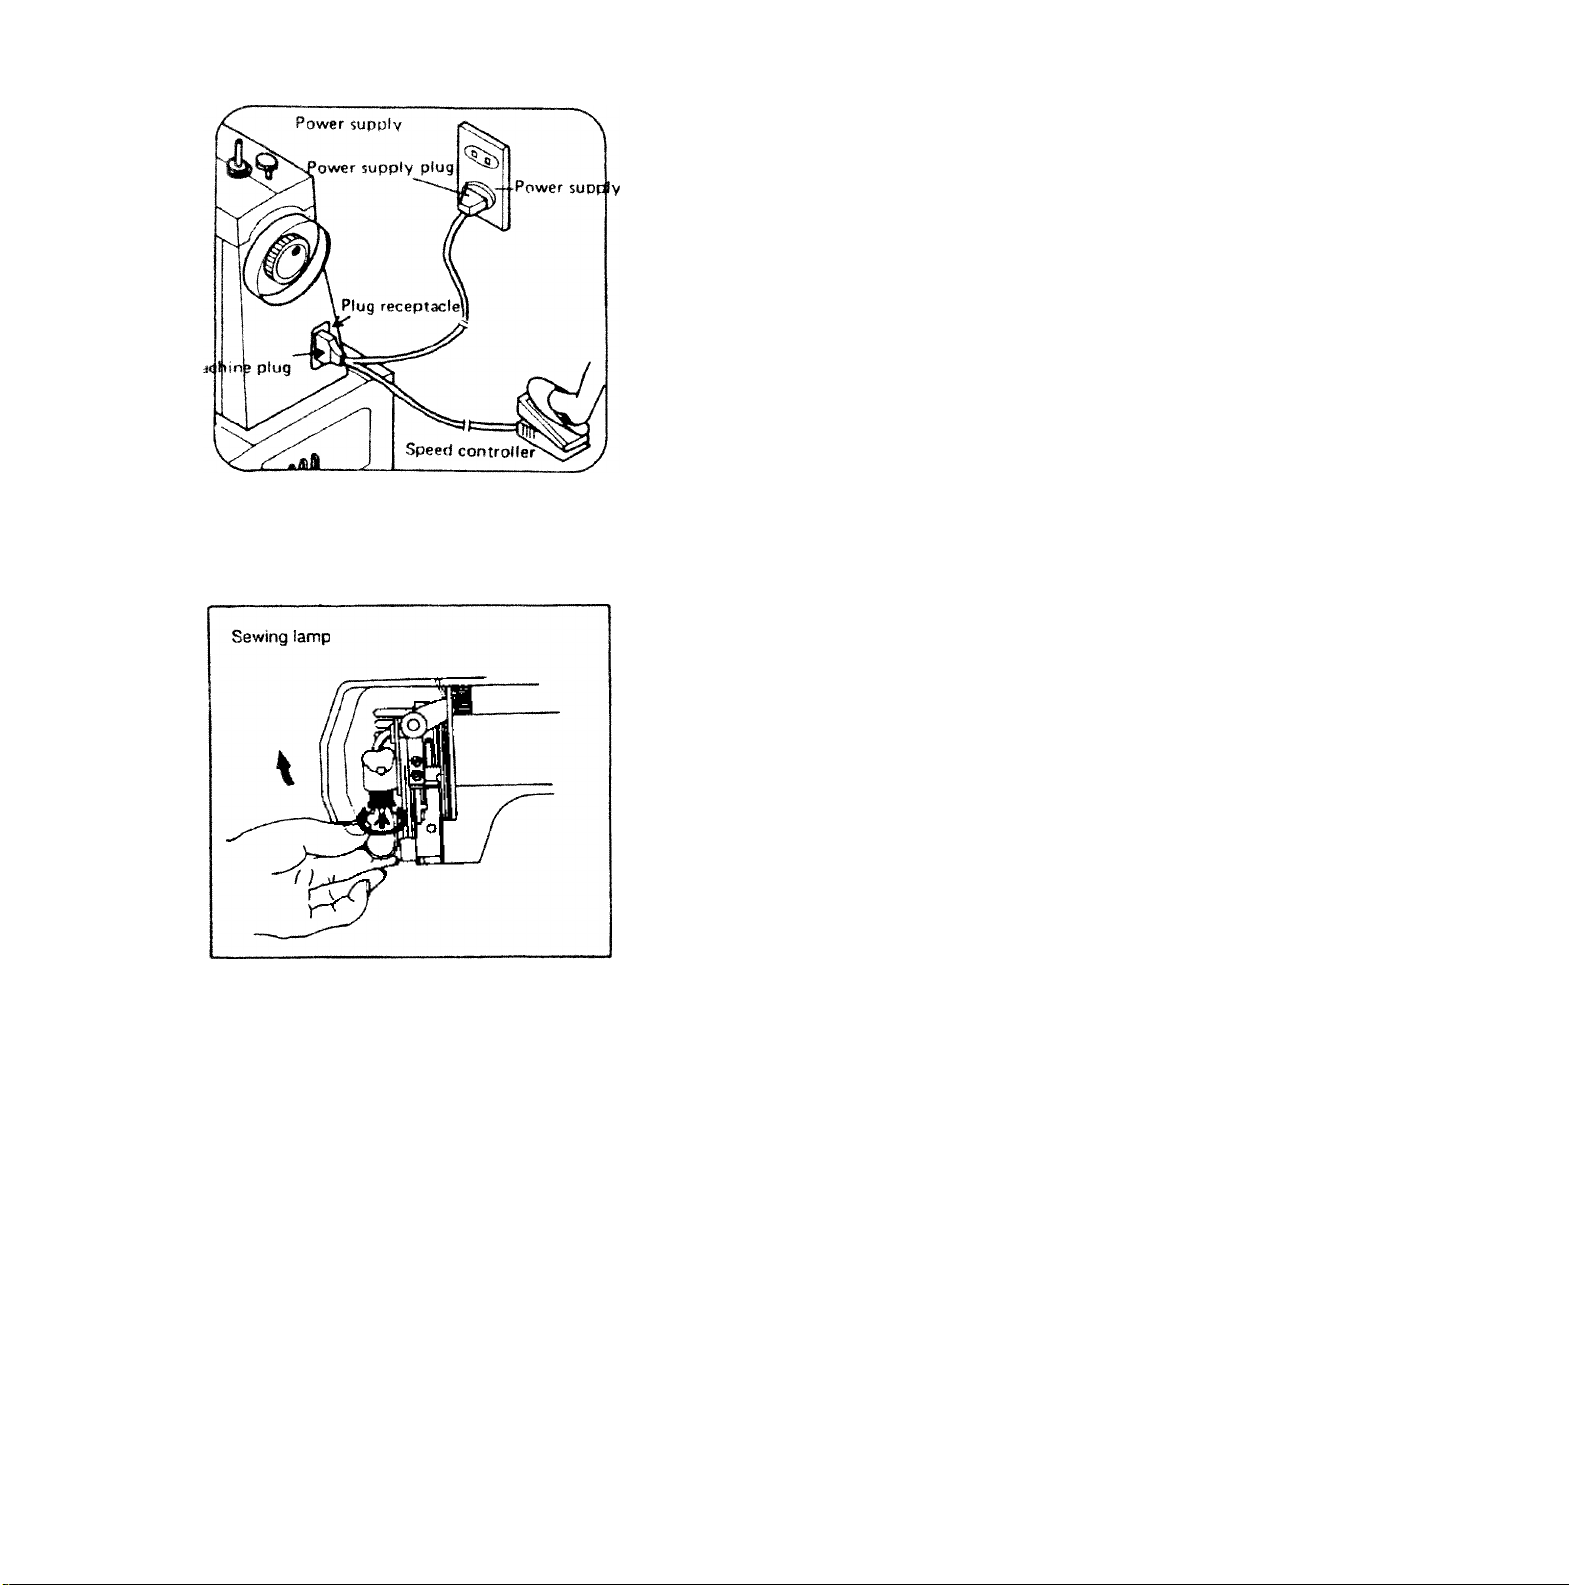
SEFORE SEWING
1. Fit plug into the macnine.
2. Plug the machine to the power
supply.
3 Sewing speed can be varied by
the foot control.
Use only FDM model KD-1902 foot
controller with sewing machine.
REMOVE Off INSTALL BULB
1. Open face cover in direction of
arrow.
2. Remove bulb by unscrew
ing it counter-clockwise.
3- install a new bulb by screwing It
in clockwise.
4. Use a screw type bulb with
i20v/15W(Max).
IMPORTANT : When leaving the sowing machine unattended, the
plug must be removed from the socket outlet.
When servicing the sewing machine, or when removing covers or
changing lamps, the machine must be disconnected from the supply
by removing the plug from the socket outlet.
_ 4 -
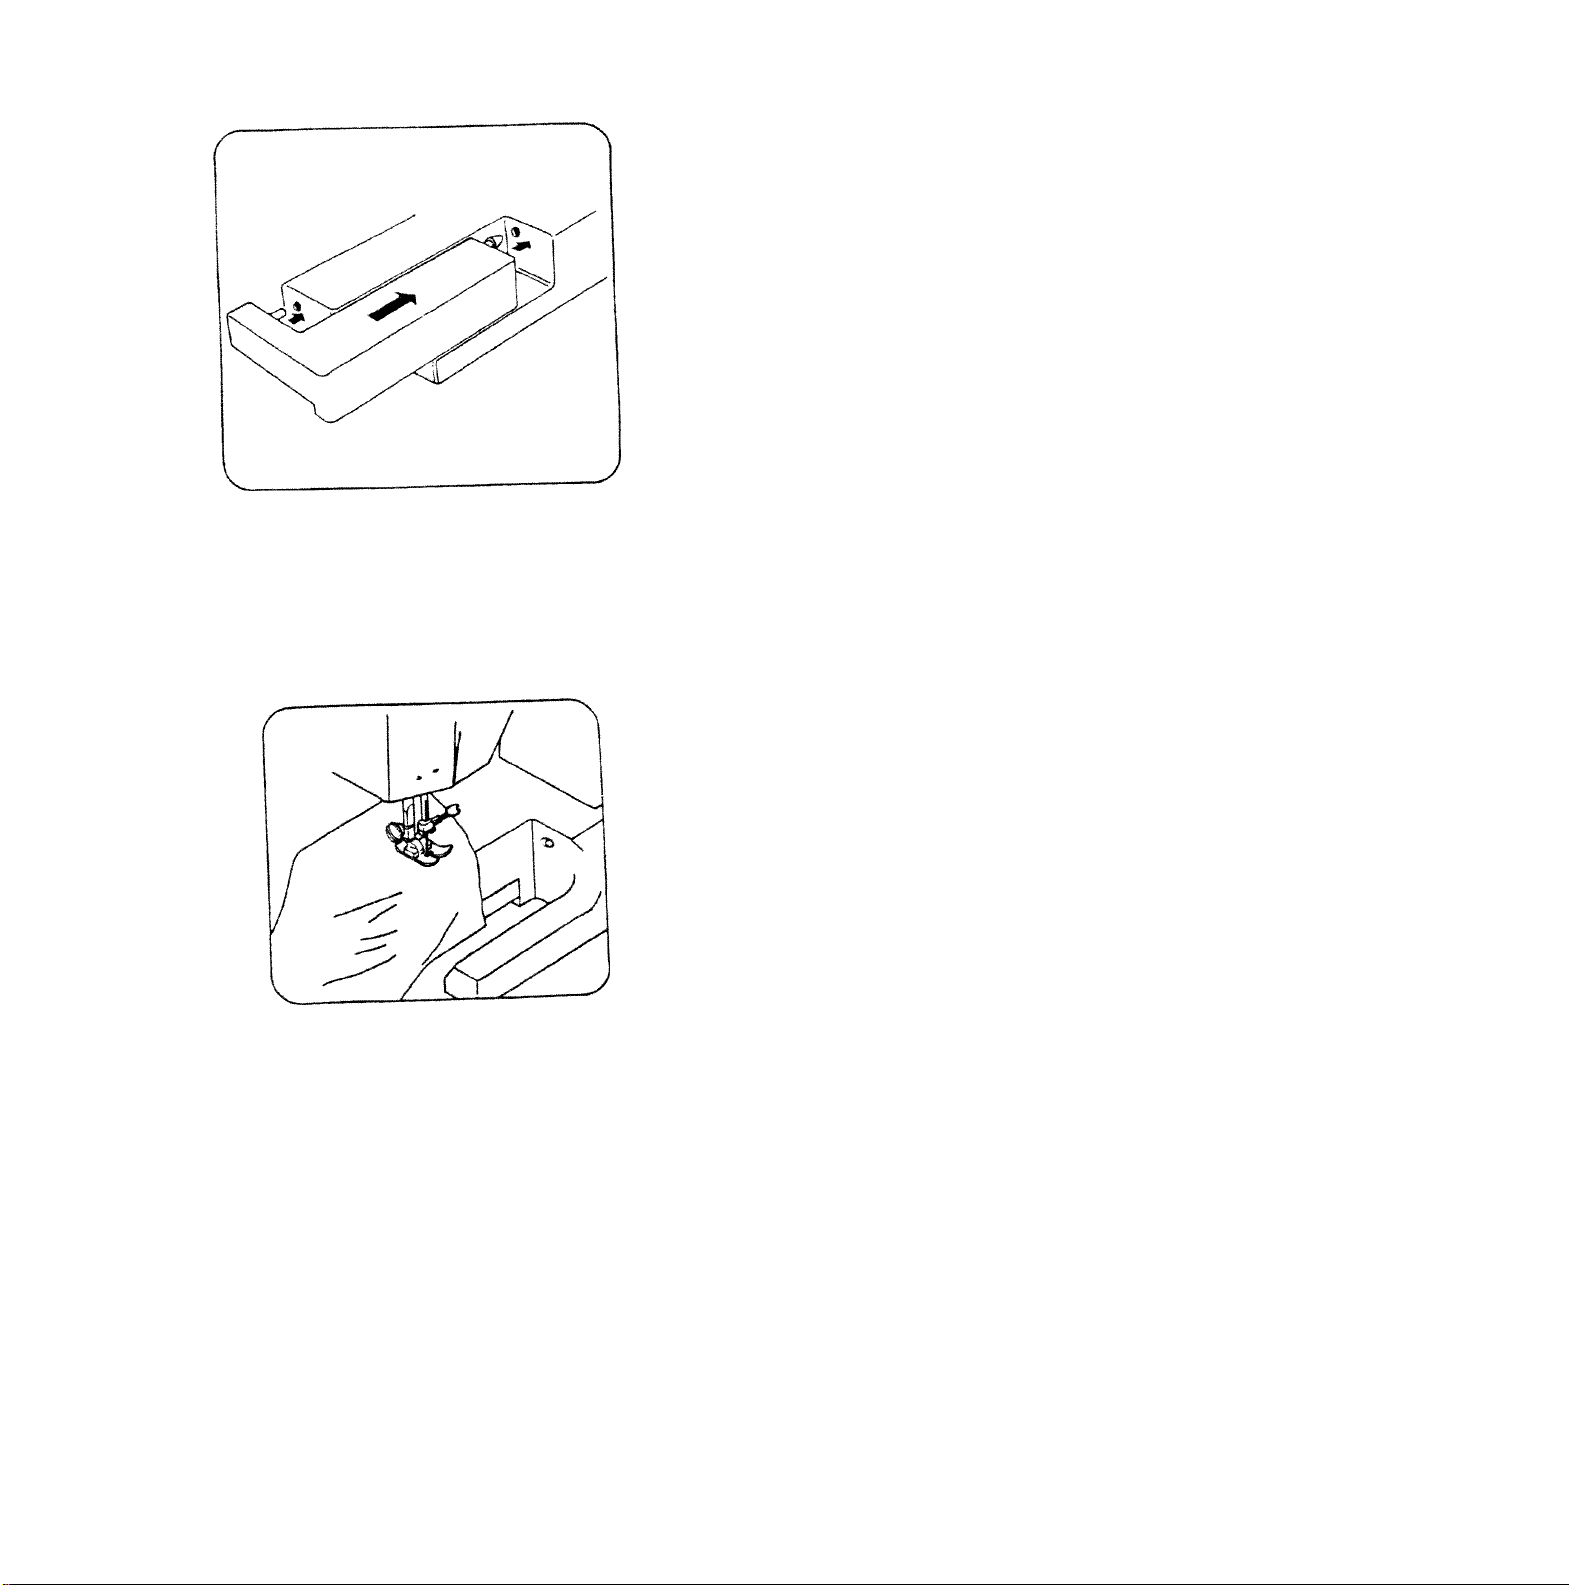
REMOVING EXTENSION TABLE
FREE-ARM SEWING
To convert the machine from fiat-bed u*
to free-arm use simply remove the ex
tension table as diown.
- S -
1. Especially useful when sewing
sleeves, pans leg, tubular
fabrics etc mwe easily.
2. To sew tubular just slip the
sleeve or pants leg on the free
arm as shown above,
3. This sewing machine can be
used as a flat bed machine,
but easily converts to free
arm machine by removing the
extension table.
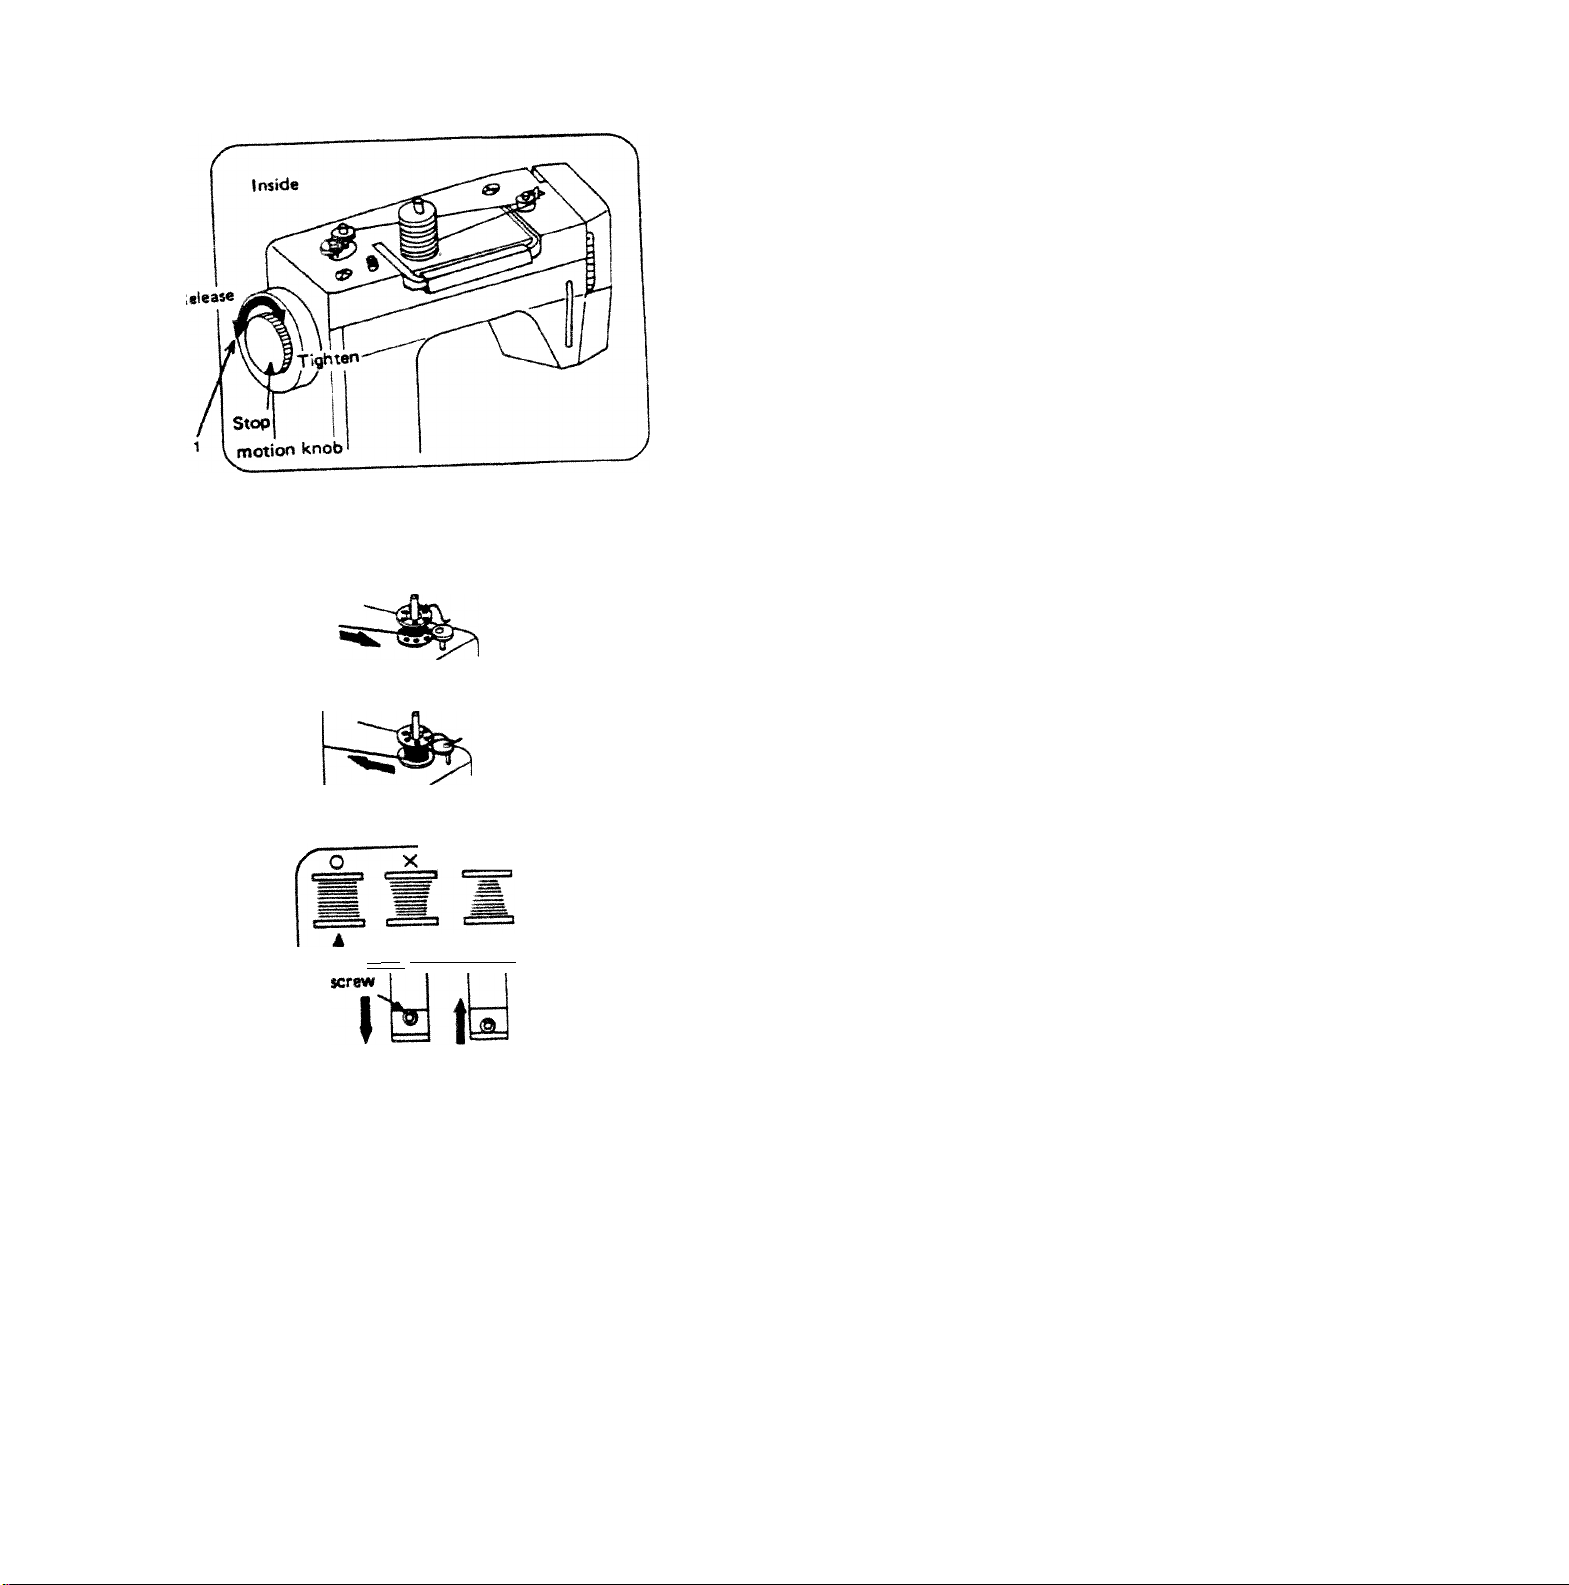
WINDING THE BOBBIN
1. Release stop motion knob.
2. Thread as shown.
3. Place bobbin onto spindle
and hand-wind thread onto
bobbin in an anti-clockwise
direction for 5 or 6 turns.
(When bobbin is filled re-tighten
stop motion knob)
/Bobbin
winder
spindle
CCNTBCt M CIl M
......
lEraja
Push bobbin winder kindle
against stopper, in direction
of arrow, and depress foot
pedal.
, When bobbin winding is com
pleted rebjm spindle to its
original position.
No»;
If the bobbin winding should be
uneven (it is factory set) the
thread guide can be raised or
lowered to achieve the correct
winding.
Remove the top cover and adjust
with a suitable tool.
— s —
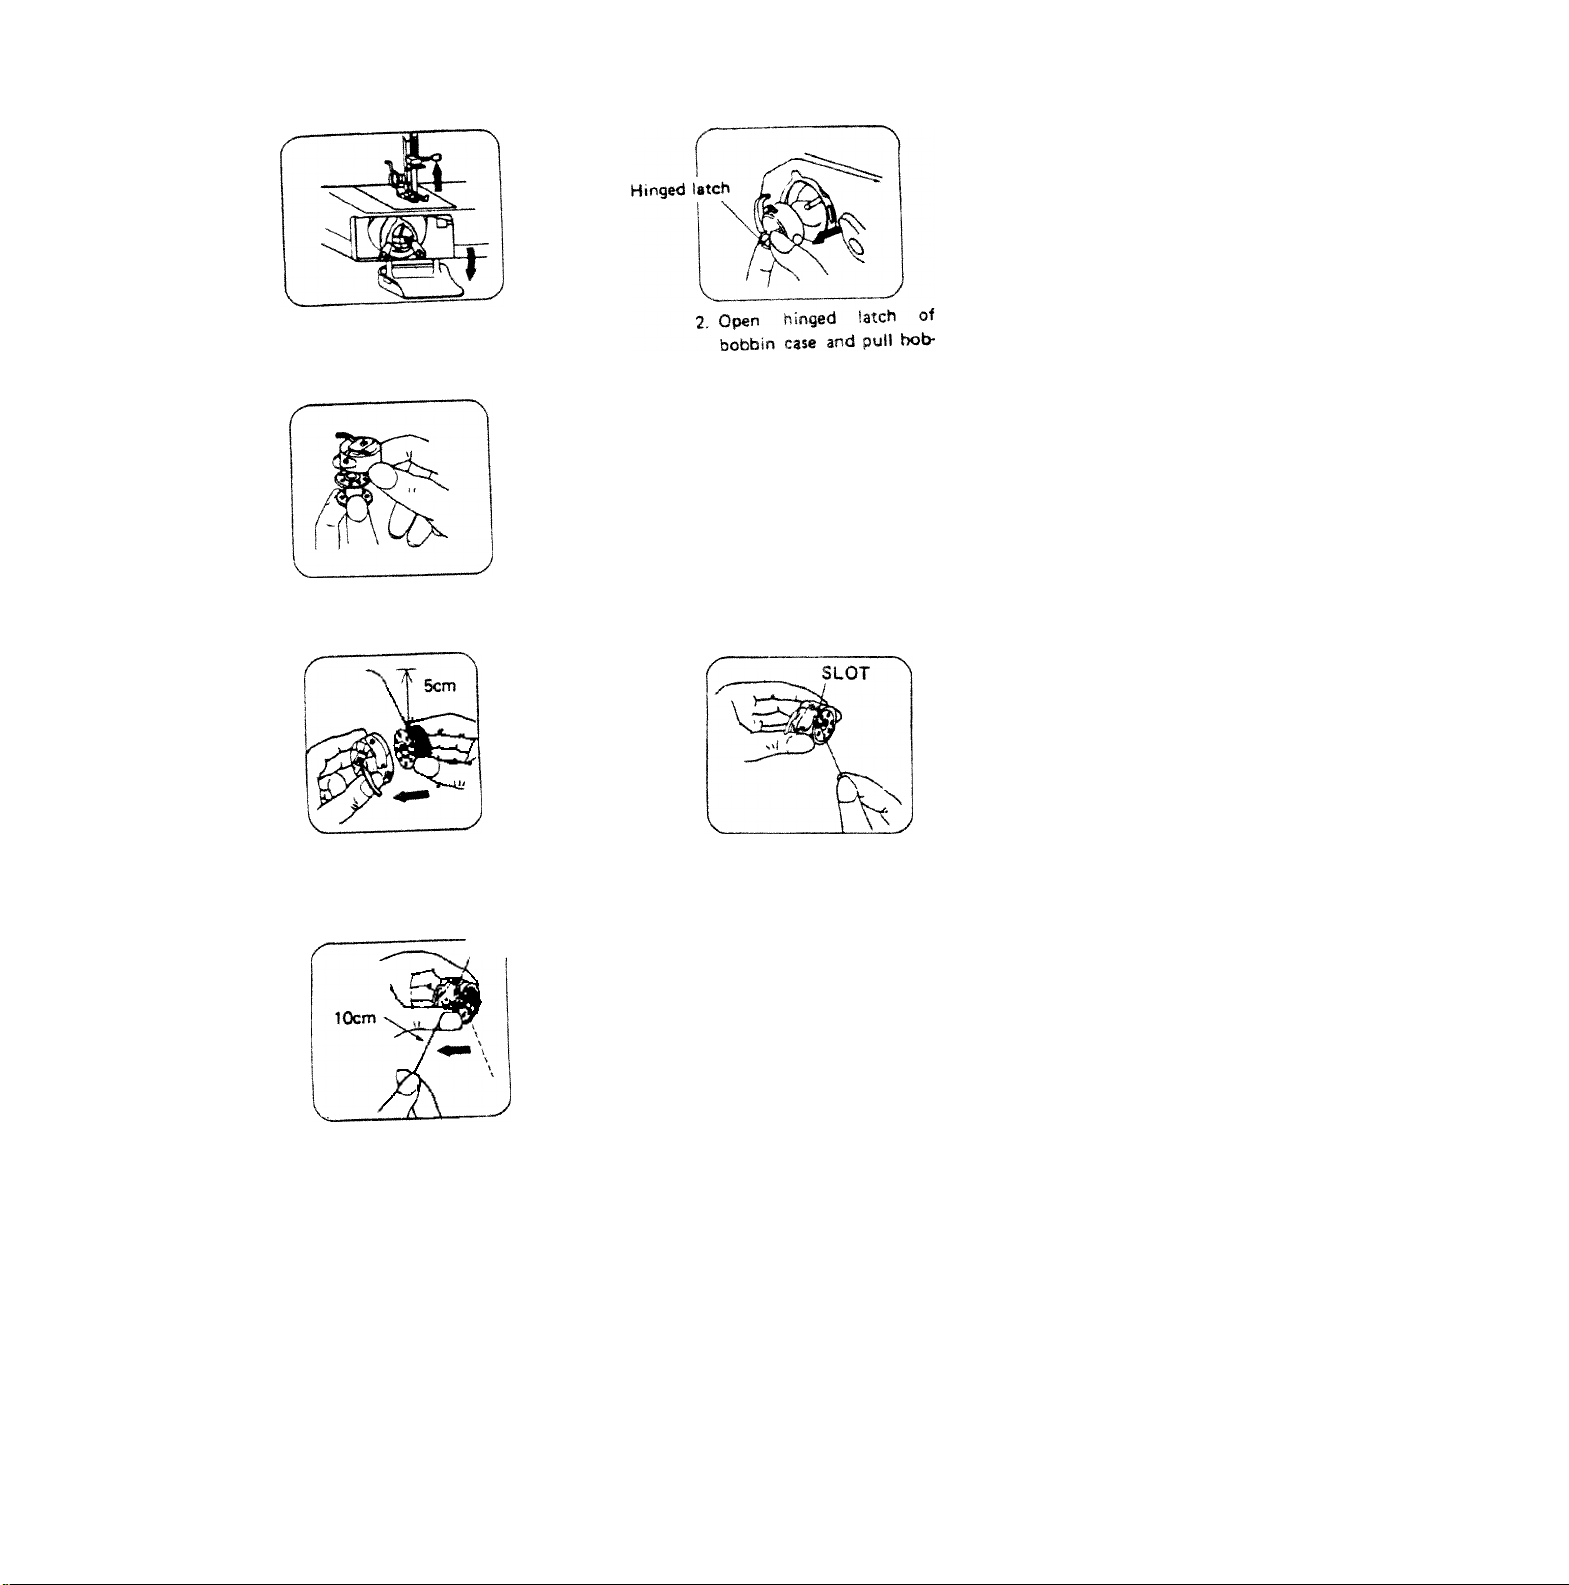
REMOVING BOBBIN CASE AND BOBBIN
1. Raise needle to its highest
position and open the
shuttle race cover.
3. Release the latch and bob
bin will fall out easily.
inserting BOBBIN INTO BOBBIN CASE
bin case out of machine.
1. Pull off 5cm of thread
from bobbin and insert it
into bobbin case as shown.
Tension spring
3. Pull into slot and under
Guide the end of thread
into slot.
tension spring and draw
out about 10 cm of
thread.
_ 7 _
 Loading...