

Page 1

How to use and care for your
SUPER ZIGZAG SEWING MACHINE
MODEL 150
Page 2

INDEX
Page
Features and Parts
To Replace the Needle..........................................................5
Needle and Thread................................................................5
Needle and Thread Size
Winding the Bobbin..............................................................7
Threading the Bobbin Case
Placing Bobbin Case in Shuttle
Threading the Machine
Straight Stitching................................................................11
Setting the Stitch Length
Sewing in Reverse...............................................................12
Adjusting the Tensions..................................................12-13
Adjusting Pressure and Feeding of Fabric
Sewing Thin or Light Weight Fabric
Creative Embroidery
..........................................................
........................................................
..................................................
............................................
.......................................................
.....................................................
.........................
............................
.....................................................
2-3-4
iQ
13
14-15
15-16
Page
Embroidering with a Hoop..................................................17
Darning................................................................................17
Making Buttonholes.......................................................18-19
6
8
9
H
Sewing on Buttons...............................................................19
Seam Gauge or Cloth Guide................................................20
Quilting................................................................................20
The Adjustable Cording and Zipper Foot...........................21
Sewing in a Zipper..............................................................21
Care and Maintenance of Your Machine
Cleaning and Oiling the Shuttle.....................................23-24
How to Change the Motor Belt......................................24-25
The Built-in Light
Unsatisfactorg Conditions-Cause and Remedies......................
......................................................................................26-27
Three Needle Position.........................................................28
...............................................................
............................
22
25
Page 3
-á
Cvî
Page 4

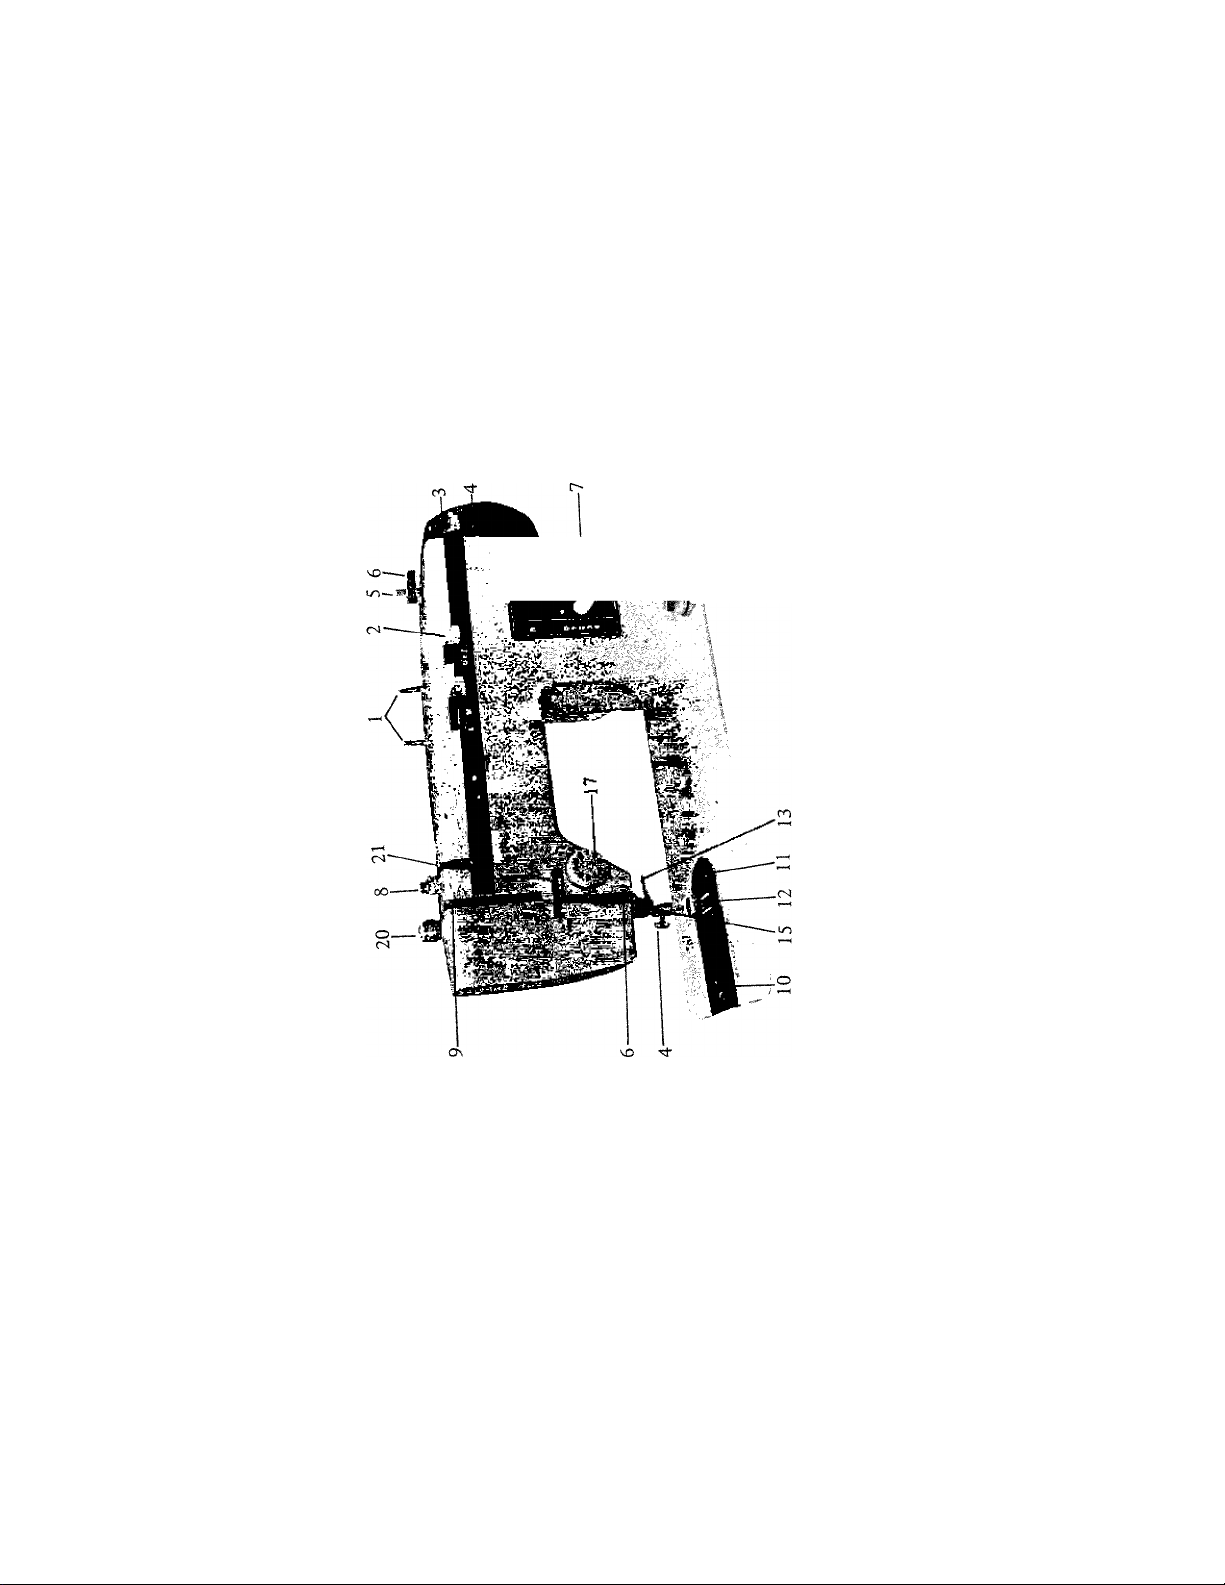
FEATURES AND PARTS
Front View
1. Spool pins
2. Zigzag width control lever
3. Balance wheel
4. Stop motion knob
5. Bobbin winder spindle
6. Bobbin winder lever
7. Stitch length lever
8. Bobbin winder thread guide
9. Drop feed knob
10. Slide plate
11. Needle plate
12.
13.
14.
15.
16.
17.
18.
19.
20.
21.
22.
Page 5
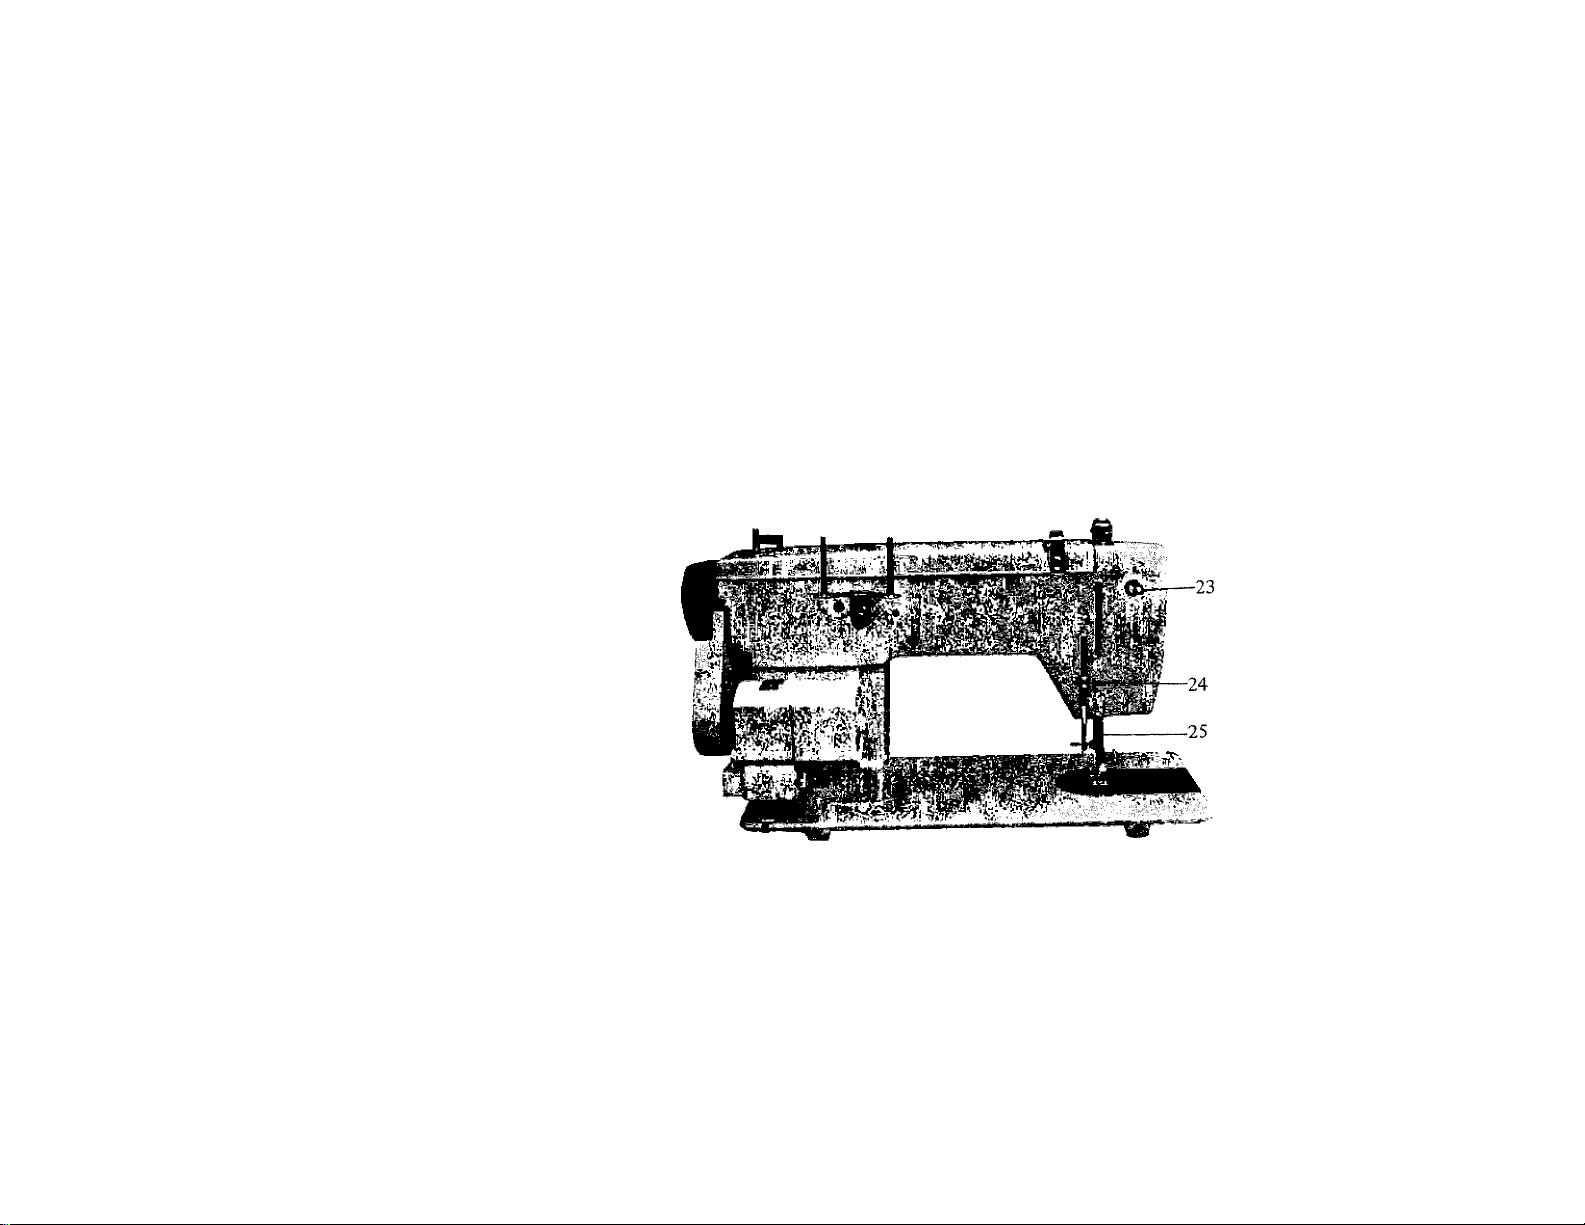
23. Light switch
24. Presser bar lifter
25. Thread cutter
FEATURES AND PARTS
(Rear View)
Page 6
TO REPLACE THE NEEDLE
aise the needle bar A to its highest point turning the balance wheel Fig. 1, toward
you y and. Loosen the needle clamp screw B. Remove the old needle and sUde
new one up, FLAT SIDE FACING TO RIGHT. ,s fa, as I, will go. Fasten
needle clamp securely with a screw driver.
bv^hTnd needle make one complete revolution of balance wheel
y and to be sure the needle is in the correct position.
NEEDLE AND THREAD
N™, use a bent needle, no, one wiU, a bltm, point, since this catses hnperf.ct
Fig. 3
J.TZZ,7 T ? T"“' “ •“
thtead in le 00^ n
mreau m the bobbm as is used on top.
FLAT
'SURFACED
SIDE
GROOVED SIDE
Page 7

NEEDLE AND THREAD SIZE
The following table will show you the size of needles generally used with various sizes of thread. The size or grade refers
to the “eye” of the needle.
Needle Cotton Mercerized or |
Fabric No. Thread Thread Nylon
Extremely heavy
tarpaulin, sacking,
canvas, duck etc.
Heavy upholstery
fabric, thicking.
denim, leatherette
Medium heavy drapery
fabric, velveteen.
suiting, felt, terry, etc.
Medium broadcloth.
percale, gingham, linen.
chintz, taffeta, sheer
wool, shantung, etc.
Sheer voile, lawn.
dimity, crepe.
handkercliief linen.
plastic film, etc.
4
3
2 to
1
0
10 |.
to
30
30
to
40
40
60
60
to
80
80
to
100
Heavy Duty
Heavy Duty
Heavy Duty
50
50
SUk
A
i
! |,
j
!
l-'l
A > 1
II'
t
f-
1
t
1
1'
t
If
i
t
1'
1
r
Very sheer chiffon.
batiste, lace, orgady.
ninon, net, marquisette, etc.
100
0
-6-
to
150
50
A
i 1
I
Page 8
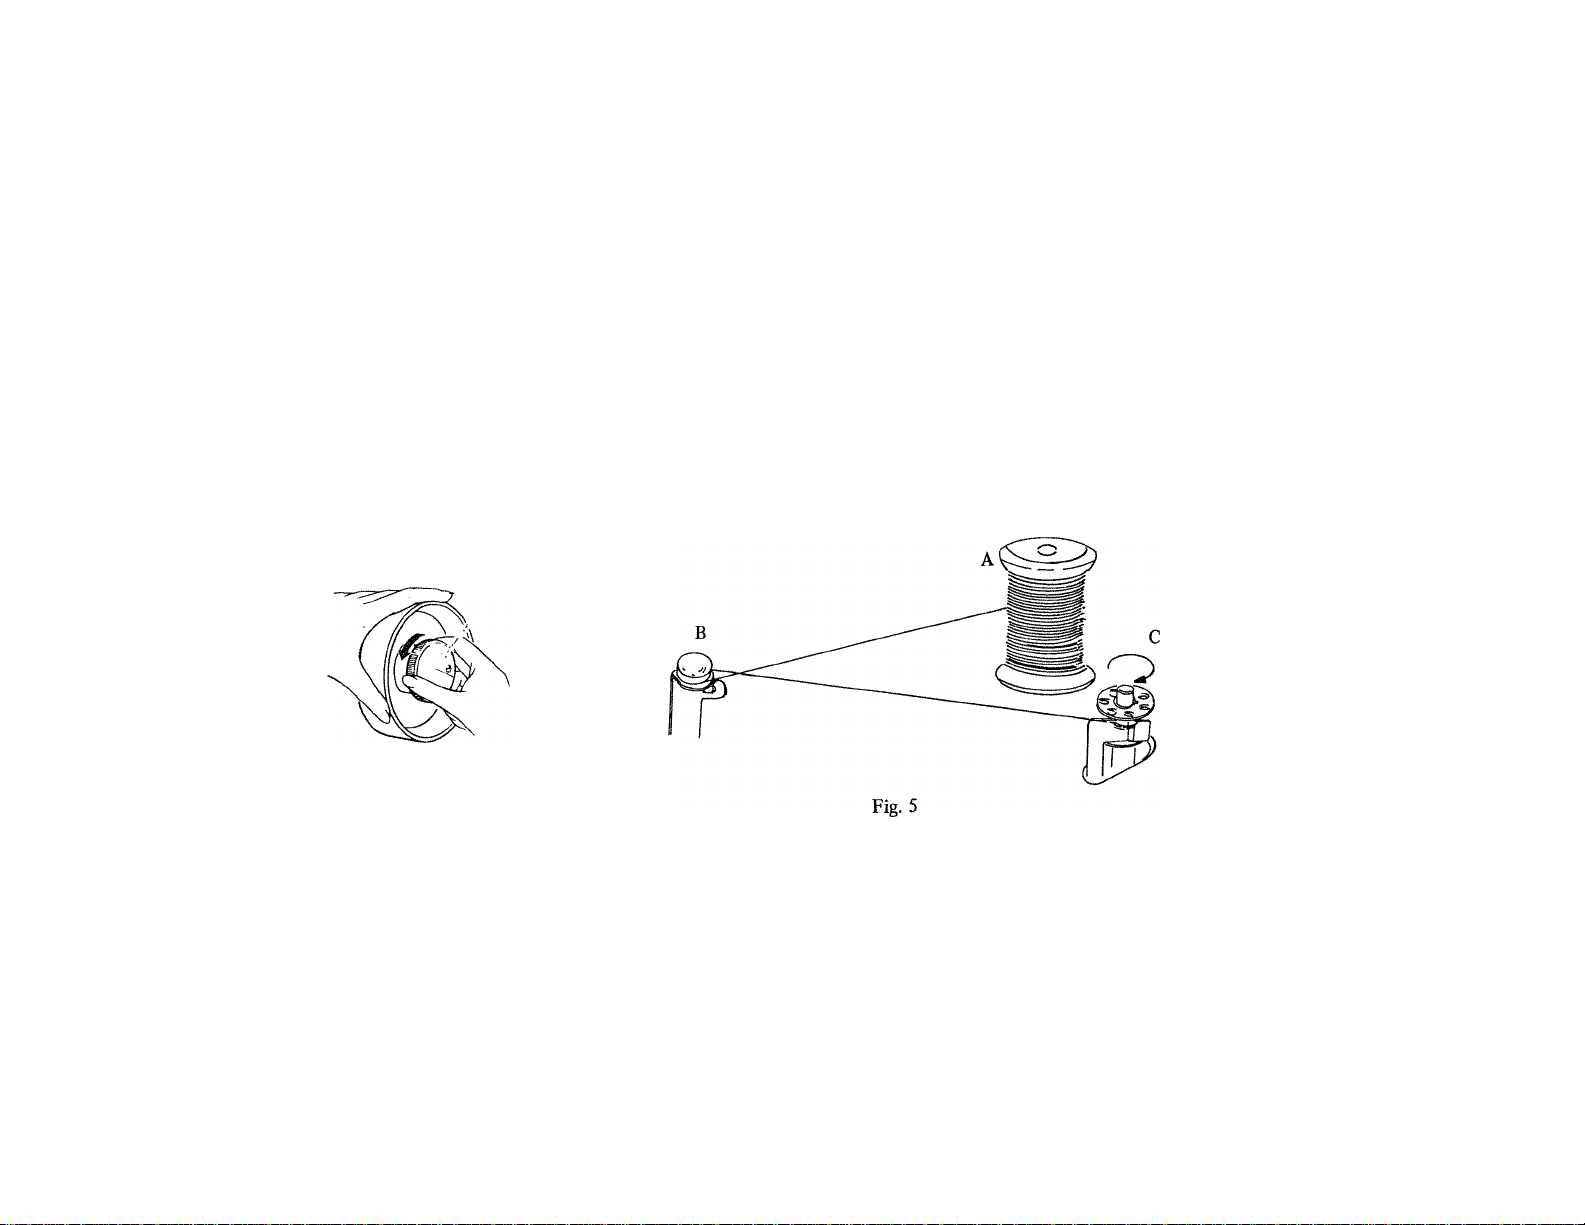
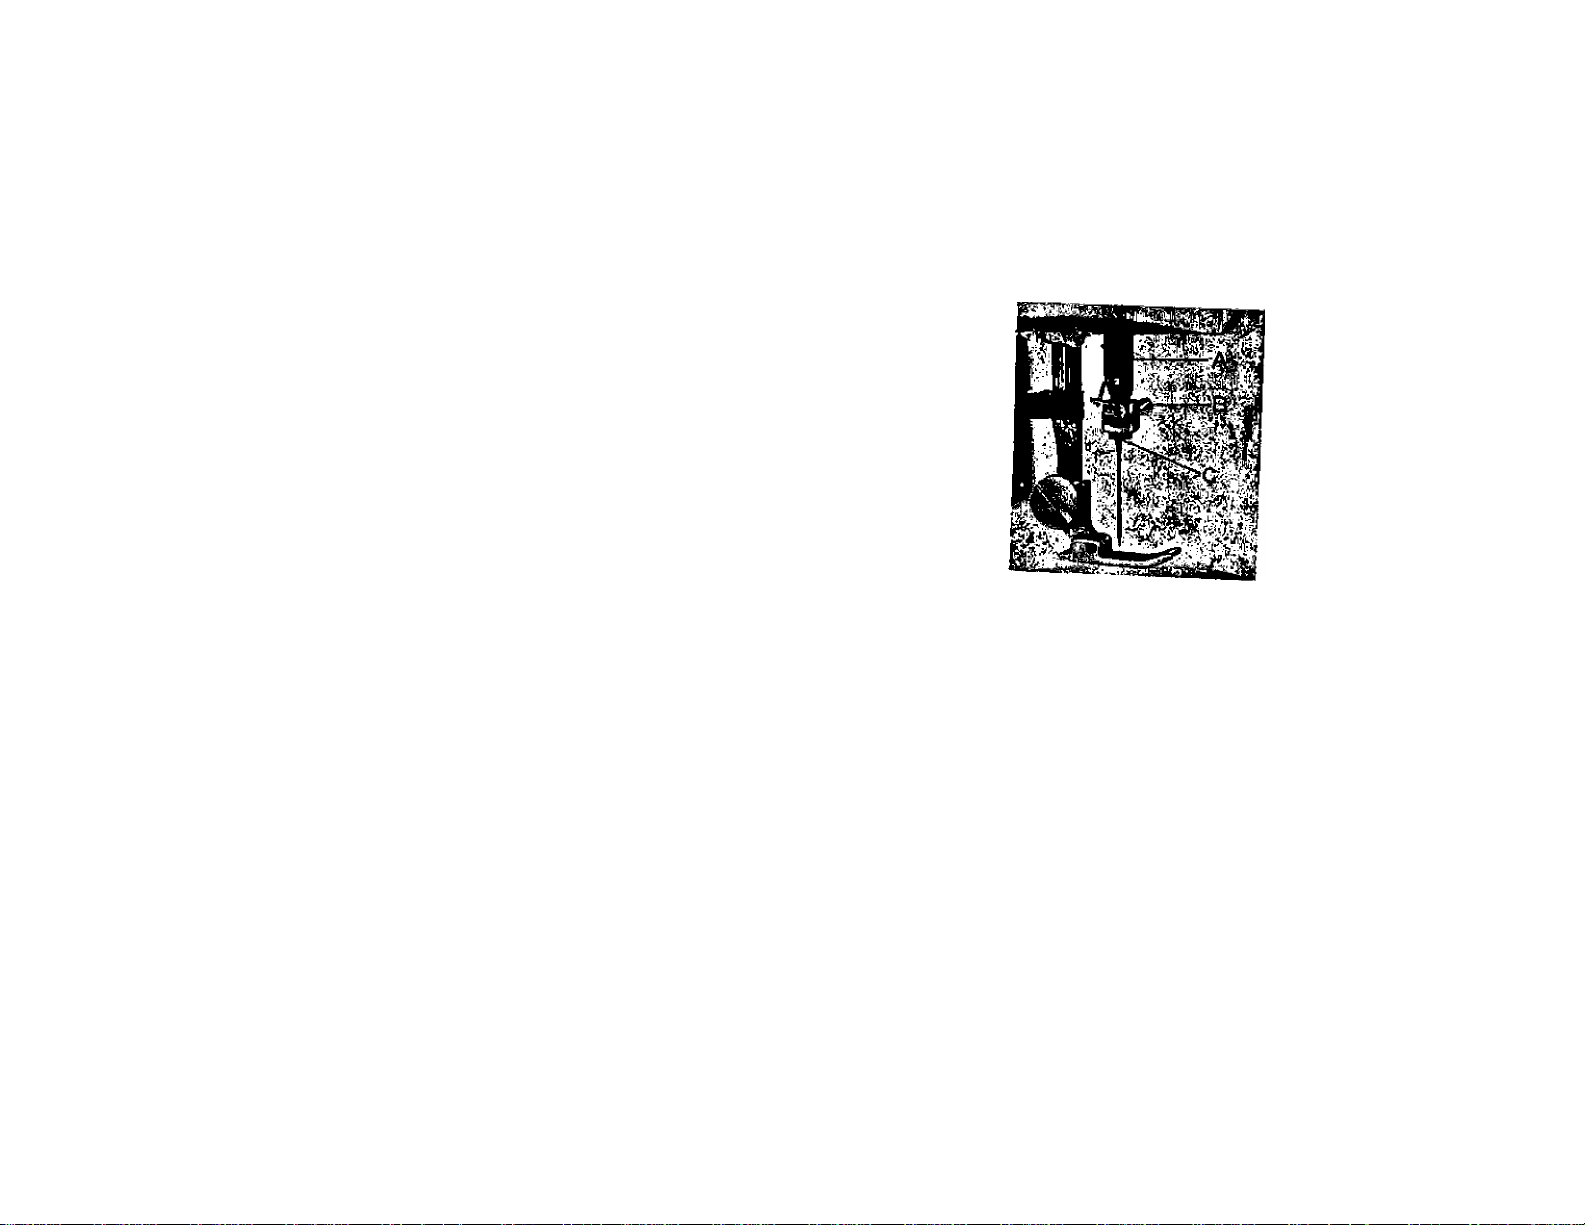
WINDING THE BOBBIN
t»d ro^dript‘fbb“® ’"'“V'” '^‘ '^»‘i“'toX»T(°Bl wms:
Fig. 4
7 -
Page 9
threading THE BOBBIN CASE
Step 1 (illustrated in Fig. g)
iioW bobbin case between th„ k
--- o";::::, T” “-
Step. 2.
insert bobbin into bobbin c
” T«-7. and d,a„i,
aod into the fort ,h '‘’™®
as shown in Pig. 8
Oie fork.eh.ped openipg of a..
Fig. 6
Fig. 7
Fig. 8
Page 10

PLACING BOBBIN CASE IN SHUTTLE
IMPORTANT; In the foUowing operations the needle must always
be above the surface of the machine. Raise tlie needle by turning
balance wheel TOWARD YOU by hand
REMOVING THE BOBBIN CASE (See Fig. 9)
Open the slide plate (10, Fig. 1) by sliding it out. With left thumb
and forefinger, open the
hinged latch (D) at the
front of the bobbin case
and hold securely as you
with-draw bobbin case
from the stud of the
shuttle body (C).
When held in the above
manner the bobbin wOl
not fall out of the
Fig. 9
bobbin case.
INSERTING THE BOBBIN CASE
After wmdmg a fresh bobbin and threading the bobbin case (See Fie 6 7 * S'» UoW i, uu-
thumb and forefinger. Keeping the protruding finger IF'» tn -n f ‘ ^
case around the stud of the shuttle body (Cl until th r ^ bobbin
never FORCE IT. Thr“ o7four inle/S r u operation is easy-
needle plate hole as shown in Fig. 11. brought up through the
-9-
Page 11

THREADING THE MACHINE (See Fig. 10 & 11)
]) Turn balance wheel toward you to raise take-up lever (F, Fig. 10)
to its highest point.
2) Place spool of thread on upper spool pin
3) Lead thread through arm thread guide B1 to B2, Fig. 10.
4) Down and around thread tension dial C from right to left.
5) Into the check spring D over thread tension dial.
6) Then down under thread bar E.
7) Up into take-up lever F from right to left.
8) Down into lower face plate thread guide G on face plate.
9) Through the needle bar thread guide H.
10) And into needle from left to right. Pull three or four inches of
thread through needle.
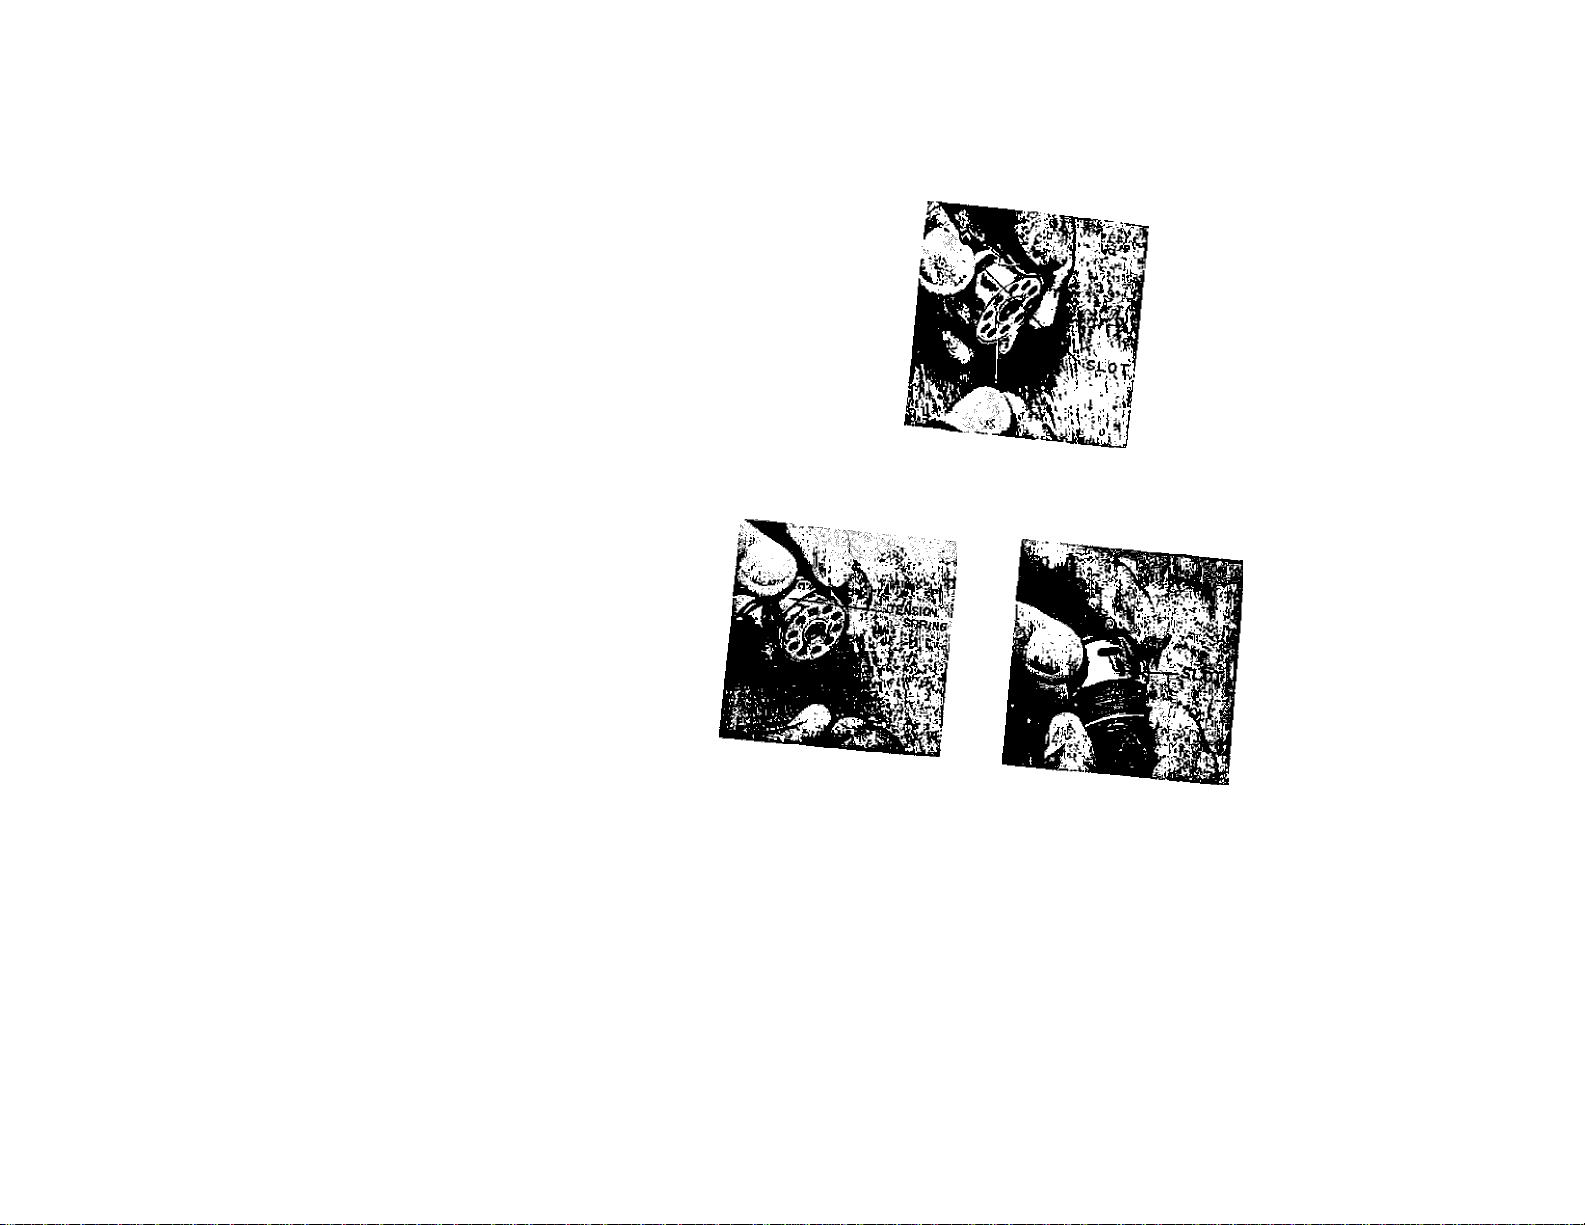
Hold the end of upper thread loosely and turn balance wheel toward you untO the needle goes all the way down and
comes back up. A loop (Fig. 11) will be formed over the lower thread which then can be pulled out straight. Place both
thread ends under the slot of the presser foot and draw toward the back of the machine, leaving both threads three or four
inches long.
Fig. 13
10
Page 12

STRAIGHT STITCHING
Be sure to set the stitch width at “0” position. Adjust lever (2) to
left side 0 position.
(Fig. 12)
SETTING THE STITCH LENGTH
The length of the stitch is regulated by lever 6 shown m Fig. 12.
Near 0 is the shortest and 4 is the longest. Set the lever to the down
to lengthen and to the up (near 0) to shorten the stitch.
STITCH LENGTH CHART Approximate
11
Fig. 12
Page 13

SEWING IN REVERSE
When you wish to sew in reverse to tie the thread at the beginning or the end of a seam, set the stitch length lever to “R”
position. The machine will sew backward. Only 4 or 5 stitches are needed to tie a seam securely.
ADJUSTING THE TENSIONS
Always adjust the upper tension with the presser foot down, as the
tension is mechanically released when it is raised. To increase the tension on
the upper thread, turn dial (Fig. 13) to the left or clockwise. To decrease,
turn to the left. The higher the number on the dial the tighter the tension.
Before adjusting lower tension be sure that the machine is threaded properly.
When it is necessary to change the bobbin tension, turn small screw (Fig.
14) on side of the bobbin case clockwise to tighten, counter-clockwise to
loosen.
12 -
Page 14

When the upper and under tentions are properly balanced, a perfect
stitch will be formed with both threads interlocking in fabric. (Fig. I's)’
ALWAYS BE SURE THAT YOUR STITCHES LOOK LIKE FIG. 15.
When the upper tension is too tight, the lower thread is pulled up
over the upper thread which is lying flat on the fabric. (Fig. 16)
When the upper tension is too loose the upper thread forms loops
over the lower thread lying flat on the fabric. (Fig. 17)
ADJUSTING PRESSURE AND FEEDING OF FABRIC
GENERAL SEWING
Usually for straight sewing and zigzag stitching, the pressure bar cap or darner release. Fig. 18, is at its lowest
position and the drop feed knob. Fig. 19. is turned to “2” position.
Fig. 16
Fig. 17
Fig. 19
Page 15

SEWING THIN OR LIGHT WEIGHT FABRIC
When lighter pressure is required to sew satisfactorily on thin silk or fflmy
material, the pr assure cap should be about half-way down. Release all the way by
pressing the snap lock, A. Fig. 20, and then press cap B down again to half-way
spot. Lower the feed slightly by turning the drop feed knob Fig. 19. to “1” posi
tion.
DARNING AND MONOGRAMMING.
In order to move the fabric freely in any direction for darning, mending and
certain kinds of free-hand embroidery, release the pressure cap B completely by
pressing down on the snap lock. A, Fig. 20. Turn the drop feed knob Fig. 19, the
feed well below the needle plate. To “0” position.
Fig. 20
PREPARING TO SEW
Have take-up lever at its highest point before starting to sew. Do not try to help the feeding by pulling the material as
this may deflect the needle and cause it to break.
NEVER RUN MACHINE WITHOUT MATERIAL UNDER PRESSER FOOT.
Place material and threads in position under the presser foot and lower the presser foot. You are now ready to begin sew
ing. By having the needle at its highest point, it is not necessary to touch the balance wheel to start the machine. You merely
press the control. The speed of the machine is regulated by increasing or decreasing the amount of pressure exerted on the
control.
14
Page 16

REMOVING THE WORK
Be sure to stop the machine when the thread take-up lever and needle bar
are located at the highest position. Now raise the presser foot and draw the
fabric back and to the left, Fig. 21-A and B. and pass the thread over the thread
cutter*
Pull down slightly, holding thread in both hands, so as not to bend the
needle.
Leve the ends of thread under the presser foot.
CREATIVE EMBROIDERY
BE SURE ZIGZAG PRESSER FOOT AND ZIGZAG NEEDLE PLATE
ARE IN PLACE.
v"‘ wmMmmmmm
...H tlip lin,is for most embroidery, is
by settioB dre sdteh le.gd. .s ne. 0 as possible without stoppmg the
^“T^th may be set auywhere from l»s. past to 0 the widest (»r
Fig. 21-A
position).
Fig. 21-B
15
Page 17

ADJUSTING THE STITCH WIDTH
move between any two wW&, ("n Jotat free^S e^mbroTd ^ y°>^ ^
desired width. ^ ® embroidery), move zigzag width control lever to the right and left hand at
EMBROIDERY PATTERNS
conttol k,er bTcW Si*» STi iSvSTcl'SarofSl'’’' *' “ “«“8 width
control. length and width end the manipulation of the zigzag width
:: iscr Sd^ia:“ rrs a? rd r *
16
Page 18

EMBROIDERING WITH A HOOP
It is easy to follow a sketched design or to work free hand
when embroidering or monogramming. (See Fig. 24)
Release the pressure from the foot by pressing down the snap
lock on the pressure release darner. Turn the drop feed knob Fig.
19 to “0” position.
Stretch the fabric in an embroidery hoop, and place under the
needle after removing the presser foot. Set the stitch width at the
size you prefer and lower the presser bar lifter. Then operate the Fig- 24
machine at a rather high speed while moving the hoop slowly with both hands. Work carefully and be sure to keep fingers out
of the path of the needle.
DARNING
Release the pressure from the foot and drop feed as directed above.
Place fabric to be mended under foot, and stitch around hole, moving the fabric firmly and slowly in any direction. Be
sure to hold the fabric taut or skipped stitches will be encountered.
TI7-
Page 19

MAKING BUTTONHOLES
Mark the beginning and end of the buttonltole on fabric with a basting line or
tailor’s chalk. Make one on scrap fabric to be sure machine adjustments are correct.
PREPARATION:
(1) Replace presser foot with buttonhole foot, Fig. 25, which provides maximum
visibility and allows closely spaced stitches to feed evenly.
(2) Set the stitch length lever 6, Fig. 1, as near to 0 as possible witliout stopping
feeding action.
(3) Set the zigzag width control lever by the size of buttonhole.
OPERATION
After finishing above preparation, set the machine as follows.
(1) Turn the drop feed knob Fig. 19. to “0” position
(2) Turn the zigzag width control lever completely to right
side, to make the upper bar tack of buttonhole. Now
sew 5 or 6 stitches.
(3) Release the zigzag width control lever to the home posi
tion.
(4) Turn the drop feed knob Fig. 19, to “2” position. And
sew the left hand side of buttonhole desired length.
(5) Keeping the needle in fabric (needle stays in the middle width position of part A Fig. 26), lift up the presser foot
and turn the fabric centering needle.
Set the presser foot down and remove the needle to the left end of buttonhole turning the balance wheel by hand.
(6) Now repeat the same way from (1) to (5) process.
(7) After finished buttonhole making, sew two or three stitches to fasten bar tack threads and prevent ravelling, by set
ting stitch length lever to 0.
(8) Cut the buttonhole opening with seam ripper, being careful not to cut the stitching.
Fig. 26
Fig. 27
M
__________
_ 18 _
Page 20

If you plan to make buttonholes on sheer or soft material, place paper under fabric
which can be torn away after stitching, it is always wise to make several buttonholes on
scraps of fabric before working on the garment.
SEWING ON BUTTONS
Remove hinged presser foot and attach button sewing foot. (See Fig. 28, 29 & 30)
Turn the drop feed knob Fig. 19. to “0” position.
Move zigzag width control lever to “ ,0 ” position to the extreme left. Place the
button so that its left hole comes directly under the needle, then gently lower the
presser foot. Move the zigzag width control lever to the right until the needle comes
exactly over the right hole of the button and set left stop. Turn the balance wheel
slowly by hand to be sure the needle clears both holes of the button. Correct width if
necessary.
When needle goes into the center of each hole, run the machine at medium speed,
4.
making five or six stitches, stopping with the needle in the left hole.
To lock the zigzag stitch and prevent ravelling, set the stitch
5.
width at 0, and take a few stitches in the same hole. If you wish
to place a rounded toothpick over the button, between the two
holes, and sew button to fabric in regular way. Remove the
toothpick and wind thread under button, forming a shank.
Fasten it. Apply the above method to sew on buttons with four
holes, hooks and snaps, etc.
Fig. 30
Fig. 29
19
Page 21

SEAM GAUGE OR CLOTH GUIDE
Use a seam gauge as guide for straight seams and even rows of
top stitching along edges of fabric. Fasten gauge with accompany
ing screw in threaded hole in bed of machine (Fig. 30). Adjust to
seam width desired.
QUILTING
The quilter (Fig. 31) will enable you to sew equidistant lines
on padded fabrics without the necessity of marking them in
advance.
1. To attach the quilter to the presser bar of the machine,
loosen the presser foot thumb screw and place the quilter
astride the presser foot. The quilter must be on top of the
presser foot when secured on the presser bar.
2. Adjust the width guide of the quilter to the desired width
and drop guide on material.
3. Sew with the quilter width guide following the previous
stitches as in Fig. 31.
Fig. 30
20-
Page 22

THE ADJUSTABLE CORDING AND
ZIPPER FOOT
This attachment is used to make and insert
covered cording, and to sew in zippers. Loosen
thumb screw to slide foot to either right or left of
needle.
CORDING. Fold bias strip of fabric over cord.
Loosen thumb screw and set foot so needle is
centered in needle hole. Machine baste cord in place
(Fig. 49).
To sew covered cord to material, reset adjust
able foot so needle stitches closer to cord, and on
edge of base fabric.
Fig. 32 -B
Fig. 32-A
SEWING IN A ZIPPER
Loosen thumb screw and slide foot so needle enters center of
needle hole. Guide metal of zipper along edge of foot (Fig. 33).
Stitching should be close to z,ipper to allow easy opening and
closing. Adjust to sew from either right or left side, whichever is
more convenient.
Fig. 33
21
Page 23

care and maintenance of your machine
OILING YOUR MACHINE
«ke.up leve, i, ™ ,1,“
two screws on cover. ^ loosening
a- app, a P„p „p„p .. p,„;,:i!:;r
Co oil moving parts inside the face nlate wh.vn i
require oiling, open plate. Oil at spots indicated i^ Fig. 36^^
Fig. 34
Fig- 35
Fig. 36
22
Page 24

CLEANING AND OILING THE SHUTTLE
The stitch forming mechanism occasionally becomes clogged with loose threads and lint. This will interfere with the
efficient operation of the machine. To remove the shuttle assembly, proceed as follows.
1, Turn the balance wheel until the needle reaches its highest position. Tilt head back on its hinges.
2. Remove bobbin case A, Fig. 38.
8. Turn the two shuttle race cover clamps B outward and remove the shuttle race cover C and shuttle body D.
4. Clean the shuttle race, the shuttle and shuttle race cover by removing all threads, lint, etc.
5. Apply a drop of oil with finger tip to outer edge of shuttle. When the cleaning has been completed, proceed as follows
to replace the shuttle assembly;
1) Turn the balance wheel until the needle reaches its highest position.
2) Place shuttle body, D against shuttle driver and adjust into position.
D
Fig. 37
Fig. 38
23
Page 25

3)
Replace shuttle race cover, C, fitting pin at lower edge into notch, and lock into
position with shuttle race cover clamps, B, making certain the clamps have been
snapped securely into position.
4)
Place bobbin into the bobbin case.
5)
Set the bobbin case into the shuttle race, fitting tongue into notch E of race
cover.
HOW TO CHANGE THE MOTOR BELT
If it should become necessary to replace the
as follows.
Fig. 39
motor belt on your machine, proceed
Remove clutch nut B in center of balance
wheel Fig. 39 by taking out small screw C.
Turn nut counter-clockwise by holding the
(take-up lever) until it can be lifted off.
2.
Before moving hand wheel, note position of
lips on washer D Fig.40Aas it will fall off
when changing the belt.
3.
Turn the screw on motor bracket (E Fig.40B)
counter-clockwise to let old belt can be
removed-from motor.
4.
Slide old belt over motor pulley Fig. 40.
5.
Pull balance wheel away from machine just
far enough to allow the belt to slip over
wheel.
6.
Put new belt in grooved section of balance
wheel and then over motor pulley.
7.
Replace washer D in original posilion.
-24-
Fig. 40-B
Page 26

8 Replace clutch nut and screw C. After doing this, turn clutch toward you to disengage sewing mechanism. If the needle
still moves up and down as you turn the balance wheel, again remove the clutch nut, give washer D a half turn and
replace the unit.
THE BUILT-IN LIGHT
FRONT SEW LIGHT
1. The lamp housing is enclosed in the hinged face place. Screw out bulb as shown in Fig.
42, and then insert the new bulb.
2. For replacement, use lO-C-7 or 7-C 7. or “night light” bulb available everywhere. Use
switch on face plate to turn this light on and off.
Fig. 42
25
Page 27

UNSATISFACTORY CONDITIONS: CAUSES AND REMEDIES
THE UPPER THREAD BREAKS
CAUSE
1. The needle is not threaded correctly.
2. The tension is too tigh t.
3. Something is wrong with the needle.
4. The thread used is too heavy for the needle.
5. Thread take-up spring is broken.
6. The needle is not set correctly.
7. The needle plate, the hook, or tlie presser foot is damaged.
THE LOWER THREAD BREAKS
1. When the lower thread is not wound correctly, it gets entangled
2. Ihe lower thread is off the tension spring of the bobbin case.
SKIPPED STITCHES
1. ' needle is not attached to the needle bar correctly
2. The needle is either bent or blunt.
3. A worn needle is used.
THE NEEDLE BREAKS
1. The needle is bent.
2. The needle is not attached properly.
3. The material is too thick or heavy.
4. The material is being pulled by the operator.
5. The needle is of inferior quality.
REMEDY
Thread the needle correctly.
Loosen it.
Replace it.
Replace it.
Replace it.
Set it correctly.
Replace it.
Wind it properly.
Put it in its proper position.
Attach it properly.
Replace it.
Replace it.
Replace it.
Attach it correctly.
Use a needle of the correct size.
Do not pull on the cloth.
Replace it with better needle.
26
Page 28

STITCHING FORMS LOOPS
CAUSE
1. The thread tension is not properly adjusted.
2. The needle is not threaded correctly and/or the bobbin is
not wound properly.
3. The weight of the material and the size of the thread are
not appropriate.
4. Thread take-up spring does not work well.
See instructions for adjustment of upper and lower iliread
tensions.
Thread the needle and/or rewind the bobbin properly.
See instructions covering the use of proper needle and
threads with varying materials.
Replace it.
REMEDY
SEAMS SHRINK OR PUCKER
1. The thread tension is too tight.
2. The pressure of the presser foot is too strong.
3. Stitches are too small for the weight of the material.
See instructions for adjustment of upper and lower thread
tensions.
See instructions for adjustment of the pressure of the
presser foot.
Adjust the stitch length.
IRREGULAR STITCHING
1. The upper and lower threads are of inferior quality. Use thread of best quality.
2. The thread is wound around the bobbin unevenly.
Rewind it.
THE MACHINE DOES NOT WORK SMOOTHLY AND IS NOISY
1. The machine is in need of oil
2. Dust and waste thread have collected in the shuttle mechanism.
3. Oil of inferior quality is used and has coagulated.
4. The tension on the belt is too tight.
Apply oil as per instructions.
See instructions pertaining to cleaning the race and shuttle.
Clean thoroughly and oil again with proper sewing machine oil
of the best quality.
Loosen the belt tension.
27
Page 29

NEEDLE POSITION SELECTOR
With the zigzag width regulator set at “0” and the needle posi
tion selector at “L”, the machine sews a straight line at the left
position.
With the needle position selector at “M” and “R” the machine
sews at the center position and the right respectively.
As the zigzag width increases, the machine sews stitching
patterns as shown here at each needle position.
L M R
28
 Loading...