

Page 1
Page 2

INDEX
Page
Features and Parts ........................................ 2 3 4
Needle and Thread Chart
Setting the Needle.................................................... 6
Winding the Bobbin ............................................... 6
Threading Bobbin Case ........................................... 7
Placing Bobbin Case in Shuttle ■ ■ ■ . 8
Upper Threading...................................................... 9
Straight Stitching
Changing Foot and Plate
Setting the Stitch Length
Stitch Length Chart
Sewing in Reverse
Adjusting the Tensions........................................... 11
Adjusting Pressure and Feed
General Sewing ............................................... 12
Light Weight Fabrics....................................... 13
Darning and Monogramming
Preparing to Sew
Bemoving the Work ............................................... 14
Creative Embroidery .............................................. 14
Satin Stitch....................................................... 14
Adjusting Stitch Width
Embroidery Patterns
Samples of Embroidery........................................... 15
Automatic Embroidery
Blind Hems
Embroidery With a Hoop ...................................... 18
..................................................
.................................................
.....................................................
.............................................................
.......................................
...............................
......................................
.......................................
..................................
........................
...................................
......................................
..........................................
10
10
11
11
11
12
13
13
15
15
16
17
Page
Darning .................................................................. 18
5
Making Buttonholes
Sewing on Buttons
How to Use Accessories
Narrow Hemmer
Lace Trimmed Hem ................................ 21
Lace Edge ....................................................... 22
French Seam
Flat Felled Seam............................................. 22
Hand Rolled Effect.......................................... 22
Quilting Guide
Seam Gauge
Care and Maintenance
Oiling ............................................................. 24
Cleaning and Oiling Shuttle
Accessories
Trouble Charts ...................................... 27 28 29
Attachments
Attachment Foot ........................................... 32
Edgestitcher
Ruffler ............................................................ 35
Binder
Hemmers
Darning Spring............................................... 34
Cording & Zipper Foot
Sewing on Zipper
............................................................
....................
............................................................
........................................................
.............................................
.................................................
.......................
..........................................
...................................................
................................................
...................................................
.........................................
................................
31 32 33 34 35 36
..................................................
..................................
.........................................
21 22 23
19
20
21
22
22
23
23
25
26
32
33
34
36
36
Page 3
Fig. 1
10
12
^0 ^'7^
t>:47c
Page 4

FEATURES AND PARTS
(Front View)
1. Pressure Release-Darner •f/c,
2. Arm Thread Guides
x/3. Cam Cover Release
4. Cam Cover
5. Zigzag Stitch Width Stops
6. Spool Pin
7. Zigzag Stitch Width Lever
8. Handwheel /b^/7 7
9. Wheel Clutch
^ 10. Bobbin Winder ^
11. Stitch Length Stops
' 12.Forward and Reverse Stitch Length
Lever $'0^70
14. Bobbin Winder Tension
15. Drop Feed Knob
16. Needle Plate-Seam Guide
17. Cover Plate
18. Presser Foot
19. Needle Clamp Screw
20. Attachment and Fool Clamp Screw
21. Thread Guide
22. Tension Regulator
23. Thread Bar
24. Light Switch J73/o
25. Take Up Lever
13, Stitch Length Stops Lock
Page 5
€
FEATURES AND PARTS
('Back View)
26. Motor
27. "V" Belt
28. Presser Bar Lifter
29. Thread Cutter
Fig. 2
30. Feed
Page 6

NEEDLE -
THREAD
- FABRIC -
STITCHING GUIDE
Fabric
Extremely heavy
tarpaulin, sacking.
canvas, duck, etc.
Heavy upholstery
fabric, ticking,
denim, leatherette
Medium heavy drapery
fabric, velveteen.
suiting, felt, terry, etc.
Medium broadcloth,
percale, gingham, linen,
chintz, taffeta, sheer
wool, shantung, etc.
Sheer voile, lawn,
dimity, crepe,
handkerchief linen.
plastic film, etc.
Very sheer chiffon.
batiste, lace, organdy.
ninon, net, marquisette, etc.
Needle
No.
4
3
2
i
0
00
Machine
Stitches
Per Inch
6
to
8
8
to
10
10
to
12 60
12
to
14
14
to
16
fPlastic film)
8 to 10
16
to
20
Cotton
Thread
10
to Heavy Duty
30
30
to Heavy Duty
40
40
to
60
to 50 A
80
80
to
100
100
to
150
Mercerized
Thread Nylon
Heavy Duty
50
50 A
Silk
or
A
Page 7
Fig. 3
SETTING THE NEEDLE
u ■ needle bar A to its
nigh^st point, turning wheel toward you by hand.
4.U needle clamp screw B and
me needle can be inserted into clamp C place
si^e to right in the needle clamp
and push it upward as far as it will go into the
needle clamp hole, tightening the needle clamp
screw securely with a screw driver.
After changing needle make one complete revolution
ot balance wheel by hand to be sure the needle is in the
correct position.
HOW TO WIND THE BOBBIN
Disengage the hand wheel (4, Fig. 4' from the stitching
turning the clutch 5 toward you or counterclocO
-."i'
k'
(;koo\'kii
blDK
Place a sdooI
thread on one of the spool pins. lead
thread through the upper thread guides
on the arm, and down through the
tension disc i'B, Fig. S' at the base of
the machine. Run end of thread through
A
u bobbin edge and plaie
bobbin C on spindle of bobbin winder
E, fitting the notch on bobbin over small
pin on spindle. Push bobbin winder
pulley against hand wheel. Hold thread
Fig. 5
end loosely and start machine slowly.
Bobbin will stop winding when it is filled. Turn clutch a
you until sewing mechanism is again engaged so that needl
when you turn the hand wheel.
Break off loose thread end used to start the winding.
vay froi
e move
Page 8

THREADING THE
BOBBIN CASE
Step 1 (illustrated in Fig. 6).
Hold bobbin case between thumb
and forefinger of left hand, so that
the slot in the edge of the bobbin
case is on top. Take the bobbin
between thumb and forefinger of
right hand so that the thread on
top leads from left to right. Step
2. Insert bobbin into bobbin case,
pull the thread into the slot of the
bobbbin case as shown in Fig.7, and
draw it under the tension spring
and into the fork-shaped opening
of the spring as shown in Fig. 8.
Fig. 6
Fig. 7
Fig. 8
Page 9
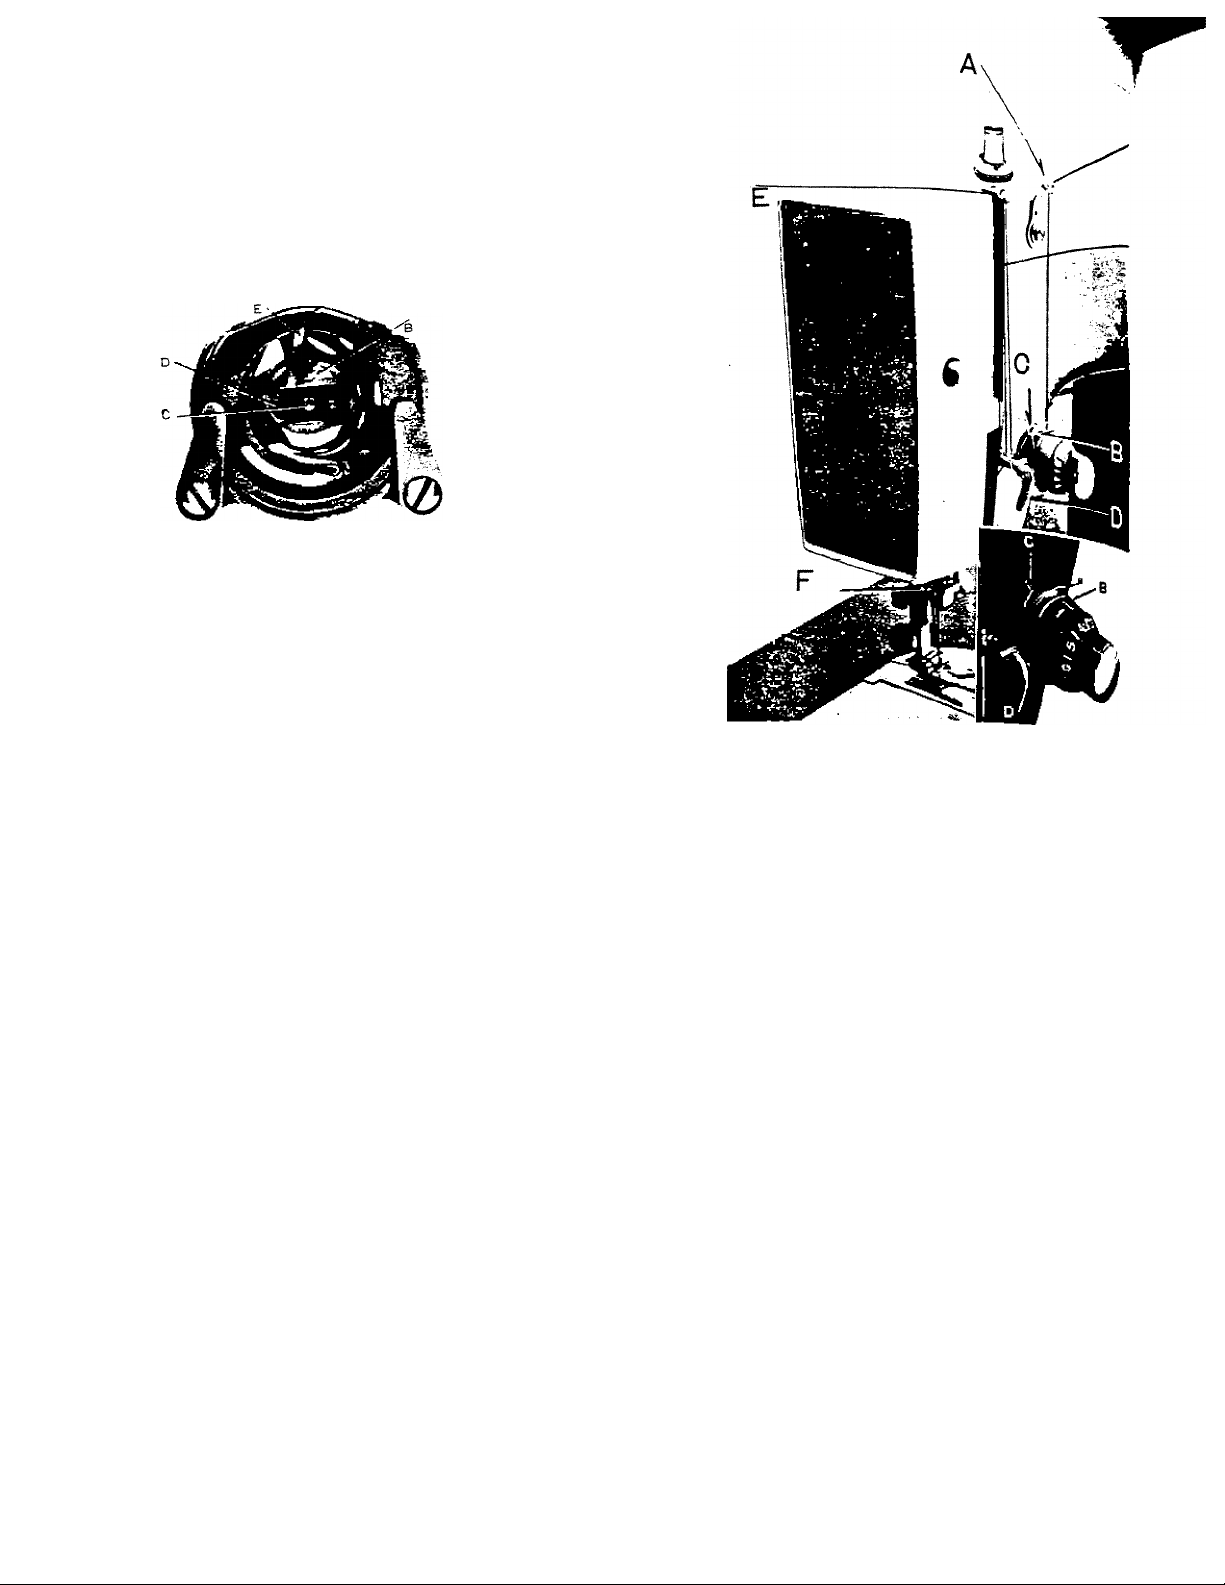
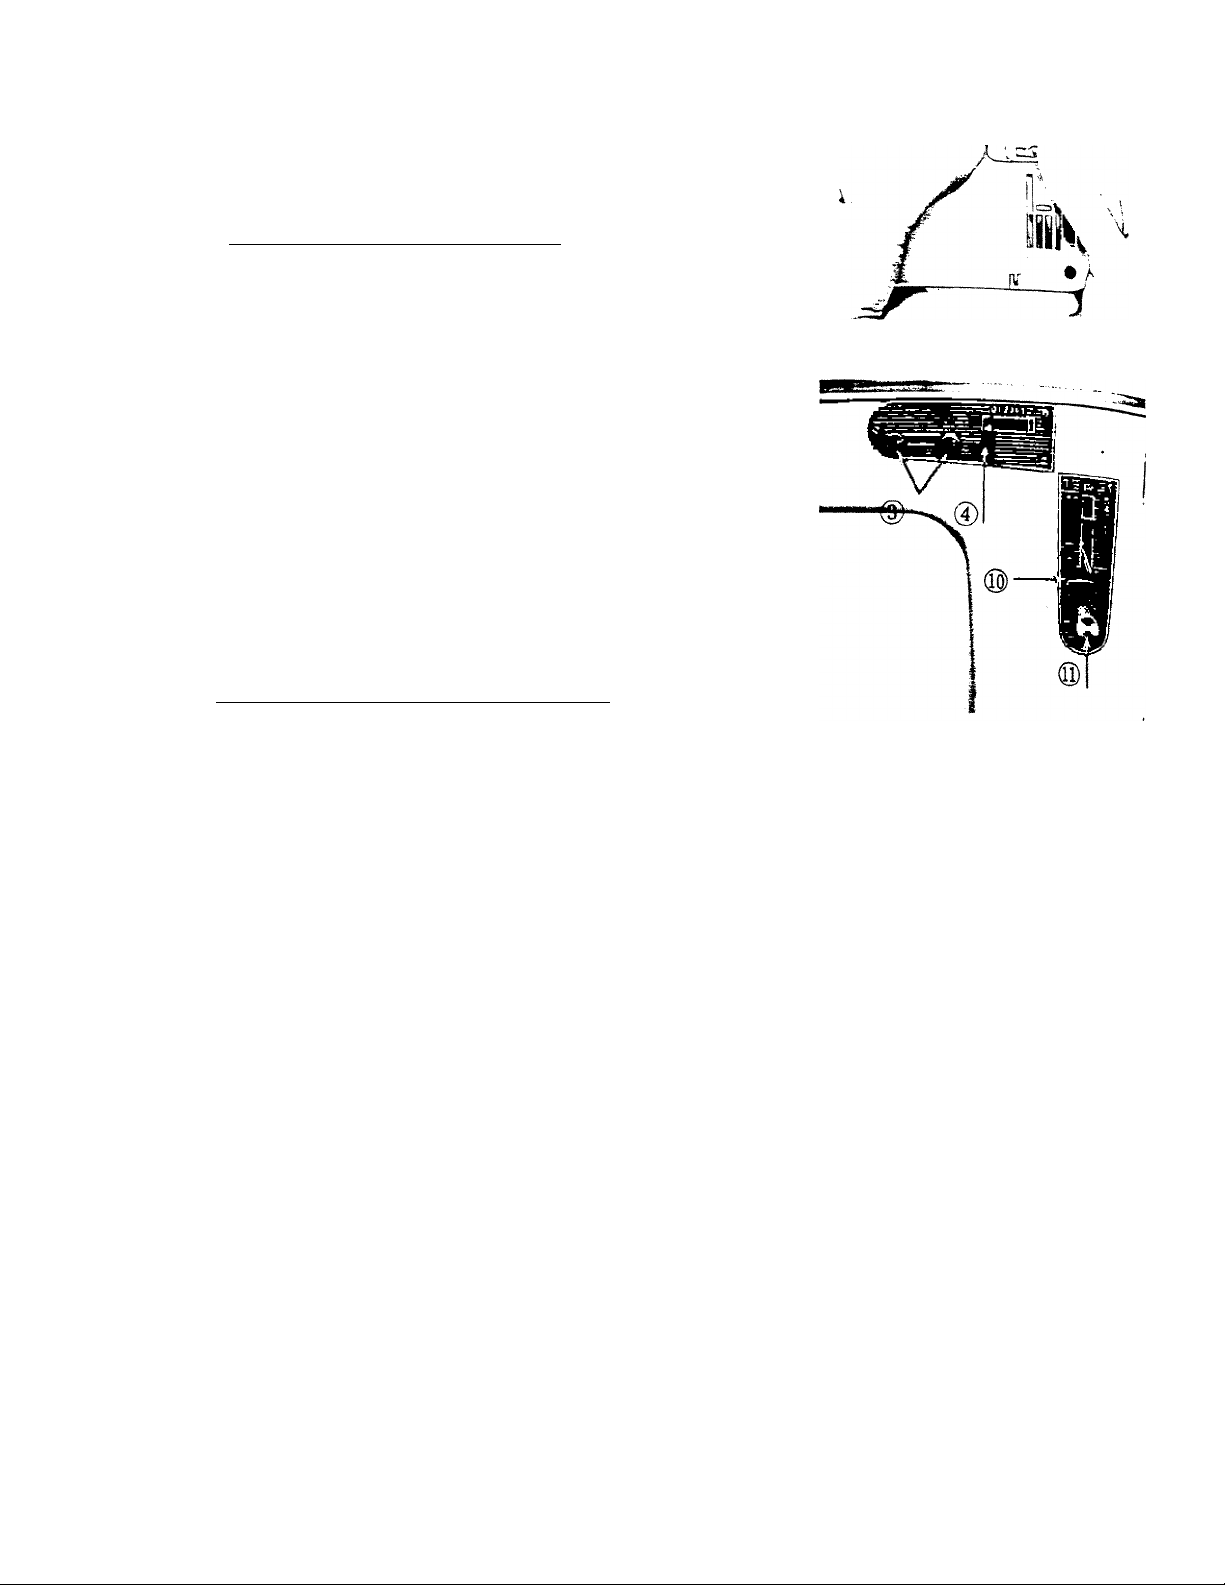
PLACING BOBBIN CASE IN SHUTTLE
Open hinged cover plate left of the needle.
(See 11, Fig. li Hold the bobbin case latch, (D;,
Fig. 9, between the thumb and forefinger of the left
hand, with at least three inches of thread running
from the top of the bobbin case to the right. Insert
and center the bobbin case on the stud of the shuttle
body, (C). Be sure
' the bobbin case
finger, 'E;, enters
the shuttle race
notch, (A).
Press the bobbin
case iB' into the
shuttle as far as
possible until latch
catches on the
center post of the
Fig. 9 shuttle.
THEN release the bobbin case latch, (D:.
Press bobbin case again after latch has been re
leased to make sure the bobbin case is locked
securely in place. Close the cover plate.
Fig. 10
Page 10
UPPER THREADING
1 T
j balance wheel toward you io raise the
2 p] needle to their highest position.
3 le Ibread on spool pin,
circuì under arm thread guide A and by
tL niotion with your left hand lead thread
* d ow ”
riohf I °^°nnd one set of tension discs B from
^ "9ht to left,
over th P^ht hand side of check spring C
6. unde, thr?!f
8. Down th
^nto rr -j guide in thread bar n again.
*° CZ “‘'*= P'o‘-
Hold a Ihread through needle. ■
_ ^ne end
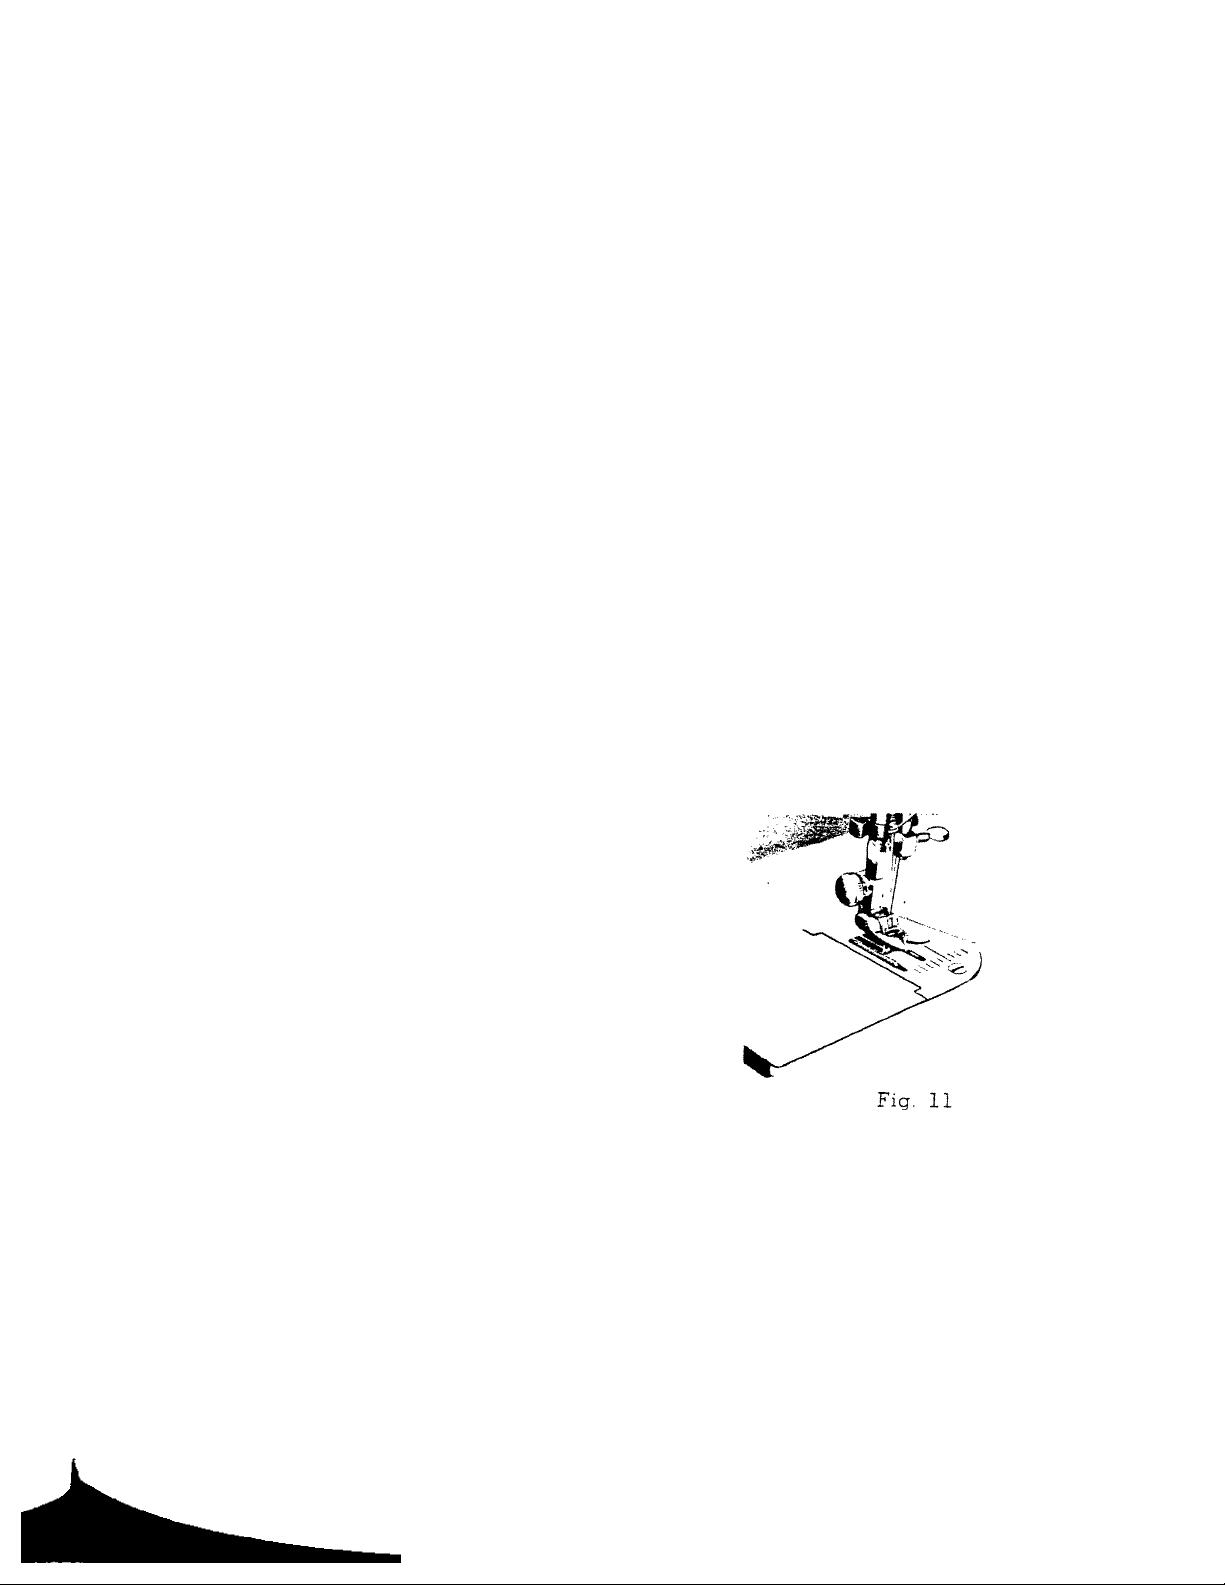
®®8le gQgg ° upper thread loosely and turn hand wheel toward you unii the
/
the uppg down and comes back up. A loop (Fig. 11) will be formed
bireadc Presser foot and draw toward the back of the machine, leaving
guide.
into f t D
^ugti needle I ■
inche '^‘Qmp guide and into needle from front to back pulling three to
(
the slot which then can be pulled out straight. Place both thread ends
or four inches long.
a
Page 11
10
STRAIGHT STITCHING
For straight sewing on fine fabric or very soft
material, you may want to use the straight stitch presser
foot and the straight stitch needle plate which are in
cluded in your accessory box. Both have narrow needle
slots.
Changing the Foot and Plate. To change presser
foot ( 18 Fig. 1; loosen thumb screw ( 20 Fig. 1) and
remove zigzag foot. Replace with hinged narrow foot
and tighten screw securely.
To change needle plate 16 Fig. 1) remove it with
jover plate from machine. Turn assembly wrong side
up. Hold needle plate in left hand and cover plate in
right (Fig, 12-Ai
Slip upper pin on cover plate out of groove on
needle plate, and pull upper portion of cover plate
away. Then lower pin can be separated from groove
as the tongue on cover plate slips out of the spring
latch on needle plate.
To attach cover plate to straight stitch plate, again
hold assembly- wrong side up. Holding cover plate in
right hand at a slight upward angle, slide lower pin in
to groove, then lift cover plate to insert tongue into
opening of spring latch. Upper pin will then slide
easily into groove.
Put plates on machine and fasten securely with
needle plate screws.
Be sure to set the stitch width at 0 or the needle
will break in striking the foot or plate. Adjust stops 3
to hold zigzag lever 2 in 0 position.
Fig- 12-A
Fig. 12-E
Page 12

Forward ^SETTING.THE STITCH LENGTH
To ad ust th stitching are both regulated by Lever 10, Fig. 12-B.
“«ease th!' .utl screw 11 and move lever 10 downward to
Tighten screw^ii '^Pward to shorten it.
, his will set the stops for both forward and reverse stitching.
STITCH LENGTH CHART (Approximate)
N
‘Araber of stitch
es_per_inch_No Feeding
55
li
Wh
en
° seotn^T ■ reverse to tie the threads at the beginning or the end
reverse unH^^r Fig. 12-B, up as far as it will go. The machine will sew
ever 10 is returned to its original position.
adjusting the tensions
-S ,• adjust th
ter.siou ■ ^ ^PPer tension with the presser foot down,
the tens' released when it is raised. To
(.-¡s Or clock^ upper thread, turn dial (Fig. 13) to
■ dumber on fi To decrease, turn to the left. The higher
^ ^^sion be The tighter the tension. Before adjusting
"*-V/ p. ^“ssarv to r*L T
-ouj., l4j Q ' . ^^snge the bobbin tension, turn small
riecBc machine is threaded properly,
side of the bobbin case clockwise to tighten,
® to loosen.
SEWING IN REVERSE
Fig. 13
Page 13

12
When the upper and under tensions are properly
balanced, a perfect stitch will be formed with both
threads interlocking in fabric i Fig. 15 .
When the upper tension is too tight, the lovver
thread is pulled up over the upper thread which is
lying flat on the fabric (Fig. 16
When the upper tension is too loose the upper
thread forms loops over the lower thread lying flat on
the fabric (Fig. 17.;.
■ ■ ADJUSTING PRESSURE "
AND FEEDING OF FABRIC
GENERAL SEWING. Usually for straight sewing and zigzao stitchinc the
cap or darner release, 21, Fig. 18, is at its lowest position and the drop feed kncb ’
HIGH, position, Fig. 19.
Fig. 14
IS turned to
Fig. 15
Fig. 16
Fig. 17
mmm
Fig. 18
Page 14

sewing thin or light weight fabrics.
13
!'** l‘lmy mate
) T
^ew satisfactorily on thin
Release all Hi' ^ ^ P^sssure cap should be about halfway
then press can R R Pressing the snap lock, A. Fig. 20,
by turnina th h^liway spot. Lower the feed
, ^^RNING "LOW" Position.
ireely in ^ ,. L)GRAMMING. In order to move the
. ot free-hand^ L®ction for darning, mending and certain
^y Pressina^^ roidery, release the pressure cap B com-
-C "^OWN" L A, Fig. 20. Turn the
’■ plate To rot drops the feed well below the
- i-ea to normal, return knob to "HIGH"
preparing to sew
Puli|„ ^®'Pp lever a*' h; V, j. •
lighter Dreqqnrc^ ■ ■ i
- IPe material до Point before starting to sew. Do not try to help the feeding
MEV P^^terial pumi oeior<
naco - "lachi
Piachir deflect the needle and cause it to break,
p’aterial and*F niaterial under presser foot.
"®Pd wheel towa^d"^^ Position under the presser foot and lower the presser foot.
^'Jin
■ Dul
Se
■ "fieni
to
pg.
By hat
the m poodle at its highest point, it is not necessary to touch the
you until the needle is at its highest point. You are now ready
^ ^^Preasing or h You merely press the control. The speed of the machine is
ecreasing the amount of pressure exerted on the control.
Page 15

14
REMOVING THE WORK
Be sure to stop the machine when the thread take-up
lever and needle bar are located at the highest position.
Now' raise the presser foot and draw the fabric back and
to the left, Fig. 21-A and B, and pass the threads over the
thread cutter.
Pull down slightly, holding thread in both hands, so as
not to bend the needle.
Leave the ends of thread under the presser foot.
CREATIVE EMBROIDERY
Be sure zigzag presser foot and zigzag needle plate are
in place. .
, The satin stitch, Fig. 22,
which is really just a very short
zigzag stitch, and the basis for 22
most embroidery, is obtained by setting the stitch length as
near 0 as possible without stopping the feeding action.
The width may be set anywhere from just past 0 to the
widest, 4-
Fig. 21-B
Page 16

I
4
the Stitch width
continuously at one width of zigzag stitching, lock stops 3 (Fig. 12B) so that
*’^oh as 2^^^^ width chosen. Should you wish to move freely between any two widths,
Oove zi '^°ing free hand embroidery or buttonholes, slide stops to 0 and 4, then
left and^s^T right. Set left stop at desired width. Then move lever to the
to rigjjf right stop at width desired. To move stops, turn knob to left to loosen and
’•‘'iths, "" '
Pro,
10 tighten.
stitch ^ short stitch length, different designs can be made by swinging
1'j.y °r zigzag lever back and forth between 0 and 4 or any other combination of
°ceed, locks at 1 and 4, 2 and 3, etc. Set a rhythm for yourself and then
jj. . ^ W'Hilo 1_____ -1 _
maching^^^.^ you will become guite skillful, varying your designs by the speed of
stitch length and width and the manipulation of the lever.
Samples
oev, , creative EMBROIDERY
^ ^ few
back f 4 width, then quickly move
to ^ short period. Count, if neces-
_____•__
A MUILilLiyM
____ ^ i y-vn PI V\Tr +Vii:i OT-»Qcari i~ii
'* ««prit 1 1
^®en ssttinn move lever slowly be
t stops at 1^' machine rather fast.
° 'i. then Gradually move lever from 1
both St quickly to 1.
^‘Szag stitchT^ length at 4. Do a few
it again feed for 3 or 4 stitches, then
‘caliy it ig y operating the feed knob rhyth-
° necessary to count stitches.
b yi’j'S.
Fig. 23
15
Page 17

16
E: Drop feed, lock stitch width at 4, take 3 or 4 stitches, leave needle m fabric lef
Pivot fabric on needle to make next daisy petal. Continue until flcv/er desi ^
- Lock threads by setting stitch width at 0 and taking 3 or 4 stitch
Ca^ 7^of
w %
S-t^
%
i:
a
if
a
:•
i---
t--.
-----
1
i
*1 1
Fig. 24
a
if <1
II i
1
i, ;
i <1
if
if
if
■es in center n*
Fig. 25
of s*
AUTOMATIC EMBROIDERY
Your machine will produce embroidery patterns automatically by inserting any one
its cams (Fig. 24) in the chamber on top of the machine. ^
1. Be sure the zigzag needle plate and zigzag presser foot are on the machine
and the zigzag stitch width stops (Fig. 25) are in the off position. *
2. To insert or remove the cam, move lever to the left-this will allow the cam
cover door to spring open.
T
itc
Page 18

17
3. Hold ■ •
zigzag stitch width lever 2 in its extreme right-hand position, place cam on
^ ^mdle, apply slight pressure while turning cam until it slips down into place.
6 Zigzag stitch width lever to its extreme left-hand position and set the stitch
stil\ prefer it, but remember that most embroidery designs require a
® length of 1 or less for best appearance.
BLIND HEMS
Fig. 26
p ^ i Presser foot and needle plate
D control knob
1 ®htch len "ll control knob at 0.
^
Si,
2, ^ If hem with folded edge is used make first fold 3/8" deep.
control knob between 2 and 3.
manner as for hand hemming.
Ste^ fold depth desired and baste 1/4" from upper edge. Press into place.
BlI^ flace dack toward right side of garment leaving 1/4" extended.
l^®ai Or, under presser foot and sew blind hem automatically.
^°tapleted.
COMPLETED
Page 19

18
EMBROIDERING WITH A HOOP
It is easy to follov/ a stamped design or to work
free hand when embroidering or monogramming.
(See Fig. 27). Release the pressure from the foot
by pressing down the snap look on the automatic
darner. Turn drop feed knob to DOWN position
(see Fig. 19).
Stretch the fabric in an embroidery hoop, and
place under the needle after removing the presser
foot. Set the stitch width at the size you prefer and
lower the presser bar lifter. Then operate the machine at a rather high speed
the hoop slowly with both hands. Work carefully and be sure to keep fing
of the needle.
'ig. 27
while
Si'S out of tha
DARNING
Release pressure from foot and drop feed as directed above.
Place fabric to be mended under foot, and stitch around hole, moving the fabric f’
and slowly in any direction. To fill in the hole, stitch from center outward, completing
stitching in fabric.
IflOvi
Path
mg
Page 20

MAKING BUTTONHOLES
niarU fU u ■ .
^ bastin “®9inning and end of the buttonhole on fabric
‘“•lowing di
^OfTA^t
1 ■
*^®6ply loot with buttonhole foot which is groove
Lower „ width, at 2 and set the stitch length near 0.
Lower need! 2 and set the stitch length near 0.
^®9innin ^ r oarefully into the mark on fabric indicating the
but(- L ^ ° buttonhole C4.;4.„u x.
bk..- ®’ ®i®P 1, Fin
‘®Uric af ■ 29, stopping mach ine with needle in
I'" ">0 presti
Ï lUr;
thp ( k using the needle as a pivot,
!? no hand wheel just enough
line or tailor's chalk. Make one on scrap
Sections below) to be sure machine adjustments are
the^ ®™6ath to prevent piling up of thread. ■ See Fig.28
Stitch to the mark for the end of the
lafaric orsr-i ,
fabric
76 eV<^
Fig. 2
19'
^ ^hile k down and move zigzag
stitchp,. ? lever at 4 width, take
fieedle o^'+
E°siti,
8
'sf, and r i i^oric and return feed to "
3
lO
Ro tack^K^^ buttonhole, step 3.
ra'v^^^ ®btch w'd' ^ and 6 above * step 4».
l^Linr, Ibe buttonhnlo ,.„'4.k 3 seam ripper, being careful not to
Id r . feed to "HIGH'
Second flitch width lever to 2.
h to 0 and take two or three stitches to fasten bar threads and
lever
five
Fig. 29
prevent
cut the
Page 21

20
If you plan, to make buttonholes on sheer or soft material place
tarlatan or paper, which can be torn away after stitching, under the
iabric. And it is always wise to make several buttonholes on scraps
of fabric before working on the garment.
For narrower buttonholes, set the stitch width at 1'and
stitch, width lever to 3 for bar tack. ‘
SEWING ON BUTTONS
1.
Hemove hinged presser foot and attach button sewincx foot
Fig. 30-A, B and Ci.
2.
Turn drop feed knob to "DOWN"
3.
Move zigzag width lever to "0" position or to the extreme left
Place the button so that its left hole comes directly under the
needle, then gently lower the presser foot. Move the zigzag
width lever to the right until the needle comes exactly over the
right hole of the button. Turn the balance wheel slowly by hand
to be sure the needle clears both holes of the button. Correct
width if necessary.
4.
When needle goes into the center of each hole, run the machine
at medium speed, making five or six stitches, stopping with
the needle in the left hole.
To lock the zigzag stitch and prevent ravelling,
set the stitch width at 0, and take a few stitches
in the same hole. If you wish you may place
a rounded toothpick over the button, between
the two holes, and sew button to fabric in
regular way.
See
©0
7i
Fig. 30-B
Page 22

Adjust til
^ric. ^ curved bar to press lightly on the
^6ttin.rr fik
Success' ^ 9uide ride on the first stitching
^hen th ^ equal distance apart.
^ to the r' attached so that the curved
** * ^ needle, it may also serve
^£AM r 9uide.
gauge CLOTH- GUIDE. _ Use the
°f ton cfu^i ^°r straight seams and even
‘'^p stitch
rSUge ’ "
. , .... along edges of fabric. Fasten
'«ith
^ ®achin ™P®^ying screw in threaded hole in
■ '..„i 'F.g, 32,. Adjust to seam w.dlh
AND MAINTENANCE OF
Hov, '^°CR MACHINE
2chl°“? machine
‘«e ** °Peratin be oiled occasionally to
of ^ ®®oothly, how often depends on
®^fore en you do.
4t
Point °uing iho '
-nj '''dicated K
»e.t arrows in Fig. 33, turn hand
"«iCl Yn X j.y. LUXil xxaiiu
‘^ew the take-up lever is at its
' On
you un+ii ,
-uernove tnm l i
covgp "^°P cover by loosening two
Fig. 33
Page 23

22
Fig, 33
LACE EDGE WITH INVISIBLE STITCHING. Hold lace 1 8 inch from raw edge on
side of fabric. Insert both in scroll as for plain narrow hem Fig. 33 . Let hem roll ov *^*'^^*
sew in lace. Press lace out flat along edge with hem turned up. It is possible to have
fullness in lace by feeding it freely under scroll. ® %
FRENCH SEAM. With right sides together, place top piece of material 1 8 inch ■ . ,
edge of lower piece. Insert in hemmer scroll, allowing hem to roll over and sew in ton 1
making French seam. i
FLAT FELLED SEAM. Open out French seam and insert rolled edge in scroll of hem !
Edgestitch to lay seam flat. ^
HAND ROLLED EFFECT. Use a narrow zigzag stitch, just wide enough
edges of the narrow, rolled hem. ,
to catch boll i
, QUILTING GUIDE. This guide for making parallel rows of stitching is attached by p]j(, .
the pronged holder between the presser foot and the presser foot thumb screw ¡Fig, 34,
Page 24

Adjust fb
i»bric. ^ curved bar to press lightly on the
1 tf
*иссечч^ 9uide ride on the first-stitching
*'^ben equal distance apart.
^
riqht T the curved part
'»¡dth gujj needle, it may also serve as a
^LOTH GUIDE. Use the
- top seams and even
‘"‘*h асе*"
-J 'Sachin screw in threaded hole in
-fig. 35). Adjust to seam width
AND MAINTENANCE OF
W r>,
ГЩ MACHINE
MACHINE
',-,„ '* °^®ratinrr ^ °nld be oiled occasionally to
!'^°'nit of „ ®®°othly^ how often depends on
•»iiL <-4i J / **
foreoiP you do.
%B| k " ^ —
■ '■ ■ ''<»55, °'^ard y.Q y arrows in Fig. 36, turn hand
"'«St . .
“'fsinfg ^Ee take-up lever is at its
wint, p„,
• ^®niOVi=> +
' cti
covej- cover by loosening two
f *^РРег part of the sewing
^‘■‘■'^
гаке-ир lever is at its
.....
..........^------
unit
23'
> -.VSk „ -
Fig. 35
Fig. 36
Page 25

24
Fig. 37
Avoid over-oiling only a drop is needed at each point.
To oil parts under the bed of the machine, tip the unit back on its hinges and
drop of oil at each point indicated in Fig. 37.
"PPly,
To oil moving parts inside the face plate, which only rarely require oilmg o
Oil at spots indicated in Fig, 38. '
Page 26

CLEANING AND OILING THE SHUTTLE
(See Figs. 39 and 40) ■
The stitch forming mechanism occasionally becomes clogged with loose threads and lint.
This will interfere with the efficient operation of the machine. Cleaning and removal of
the lint will safeguard the performance. To remove the shuttle assembly, proceed as follows.
1. Turn the balance wheel until the needle reaches its highest position. Tilt head back
on its hinges.
2. Remove bobbin case (A), Fig. 40.
3. Turn the two shuttle race cover clamps 'B' outward and remove the shuttle race cover
C' and shuttle body (D).
¿.'J
Fig. 39
Fig. 40
Page 27

26
' 5.
When
4.
Clean the shuttle race, the shuttle, and shuttle race cover by removing all threads, Imt, etc.
4.
Apply a drop of oil with finger tip to outer edge of shuttle,
the cleaning has been completed, proceed as follows to replace the shuttle assem ^.
Turn the balance wheel until the needle reaches its highest position.
1.
Place shuttle body, (Di, against shuttle driver and adjust into position. ^
2.
Replace shuttle race cover, iC,, fitting pin at lower edge into notch, and lock mti.
3.
position with shuttle race cover clamps, iB,, making certain the clamps have been
snapped securely into position.
Put bobbin into the bobbin case.
Put the bobbin case into the shuttle race, fitting tongue into notch P oi race
5.
^ u v i
ACCESSORIES
r
cove:
1 Plastic Oiler
2 Package of needles
3 Bobbins (3)
4 Felt Washers
(for spool pins)
5 Needle Plate for
Straight Sewing
6 Small Screw Driver
7 Large Screw Driver
8 Quilter Guide
9 Cloth Guide
10 Thumb Screw
11 Button Sewing Foot
12 Buttonhole Foot
13 Presser Foot for
Straight Sewing
14 Small Hemmer Foot
Page 28

TROUBLE CHART
27
Trouble
If machines
bind
Probable Cause
Thread or lint in race way
Correction
1.- With take-up lever in highest position,
tilt head back on hinges and remove
bobbin case.
RACE
2. - Turn clamps downward and remove race
cover.
3. - Remove hook.
4. - Clean thread and lint from all parts, in
cluding race.
5. - Run a drop of oil along rim of hook.
6. - Replace hook, then race cover. Snap
clamps into place.
7. - Grasp threaded bobbin case by latch
and replace, fitting tongue into notch of
race cover.
L
Page 29

28
Trouble
Probable Cause
f
Correction
Skipping
stitches
Irregular
stitches
Uneven
stitches
Bent needle
Needle placed incorrectly
in clamp
Too fine a needle for thread
' being used
Upper thread tension too
loose
Improper threading
Bobbin not wound even
Palling or holding material '
Not enough tension on '
upper thread
Poor quality thread
Needle too fine for thread
being used .
Discard and replace.
See instruction page No. 6.
See needle and thread chart, page No. 5.
Tighten upper tension.
See threading instruction, page No. 9.
Rewind bobbin.
Avoid pulling or holding material, just guide it.
Increase tension.
Try different thread.
See needle and thread chart, page No. 5.
Page 30

29
Trouble
Upper thread
breaking
Materia!
puckering
Probable Cause
Improperly threaded
Too much tension
Starting with take up in
incorrect position
Improper setting of needle
Eye of needle to sharp
Bent or blunt needle
Tensions too tight
Dull needle
Stitch length too long
Correction
Refer to threading instructions see page No.
9 and rethread machine.
.Loosen tension on upper thread by turning
thread tension knob to lower number.
Always start sewing with take up lever in
hiahest position.
Refer to needle setting instructions see
page No. 6.
Try a new needle.
Discard all blunt or bent needles and re
place with new.
See tensions adjustment page No. 11.
Change needle.
Reduce stitch length.
Page 31

3o;>
Your sewing machine comes equipped with the basic set of acces
sories described earlier in this book.
The following pages illustrate additional time saving attachments
that have been designed specifically for your machine. They are
available at modest cost from your dealer. If your dealer cannot
supply you with these items, ask him to order them fcr you by part
number. Then you v/ill be assured of receiving the genuine part
designed for best performance with your machine.
If a sewing machine dealer is not available, mail your inquiry
directly to: .
WHITE CONSOLIDATED INDUSTRIES, INC.
CLEVELAND 11, OHIO
In Canada;
WHITE CONSOLIDATED INDUSTRIES, LTD.
Ill BERMONDSEY ROAD
TORONTO 16, ONTARIO, CANADA
Page 32

SOME OF THE ATTACHMENTS AVAILABLE FOR YOUR MACHINE
«i !
-s^- »<'
31
PART :76553
PART S1403
Huffier
PART :S3;8
Attachment Foot
PART =76552
PART =4a90
Darning Spring
PART =74159
Binder
Hemmers
1
PART S76551
Cording & Zipper Foot
PART =1873 u
PART S76554
Edgestitcher
1
3T»
PART =76550
Page 33

32
In order to attach the binder, edgestitcher and the
hemmers, it is necessary to remove the presser foot and
replace it with the attachment foot, Fig. 41.
Mount binder, edgestitcher or hemmers sliding the
attachment to the left as far as possible and tighten
screw.
The mounting slot enables you to sew as close to or
as far away from the edge as desired. Just move the
attachment to the correct position before tightening the
mounting screw.
Fig. 41
THE EDGESTITCHER
The edgestitcher is used in making
lace insertions, edgings and pipings.
The slots serve as guides. To sew lace
edging to fabric, place the material you
want on top in slot, and other piece
in slot 4.
To trim with a wide piping, place
the fabric in slot 4
the fabric in slot 2 and the folded edge of the piping to the right in slot 3.
Slot 5 may be used as a guide in stitching a french seam. -
and the fold of the piping, to the left in slot 3. For a narrow piping,
Fig. 43
ATTACHMENT FOOT
place
Page 34

BINDER
This attachnisnt folds bias binding, appliss it to the edge
of material in one operation. Slots on scroll of the binder
are for corresponding widths of commercial folded bias
binding.
The open mouth of binder scroll is used for unfolded
bias strips cut 15/16 inch wide.
FOLDED BINDING (Fig. 44)
Cut a point of folded binding, insert in appropriate
slot. Draw through slot and under binder with strong pin.
Sliding binder slot to right or left.
TWO-TONE BINDING (Fig. 44)
Two bindings can be sewn on fabric edge also in one
operation. When two are used, always skip one size between
widths, inserting each in correct size slot.
HAND-CUT BIAS BINDING (Fig. 45) ’
Cut 15/16 inch bias binding fold in half for a couple
of inches. Cut binding diagonally toward end, almost to
fold. Slip fold into center of binder. Draw back until cut
opens and binding encircles open end of scroll. Test stitch
ing to be sure it is on the edge, adjust if necessary.
33
Fig. 44
Fig. 45
Page 35

34
THE SET OF HEMMERS
Before attaching any of the hemmers, be sure bobbin
thread is pulled up. Then, with hemmer in place, hold top
thread .loosely and turn handwheel one full turn toward you,
j hemmer. Grasp bobbin thread with
both hands and slip horizontally under hemmer toward back.
Bobbin thread will catch loop and carry upper thread to
back of hemmer.
Fold material in 1/8 inch for two inches along edge
hold at each end of fold. Slip fold into guide and up over
^oon (Fig. 46). Fold hem in material back of hemmer.
Draw forward to end of hem and fasten with point of needle.
Pull on threads gently as you start stitching.
DARNING SPRING
HOW TO ATTACH
Remove presser foot, unthread needle, place darner
spring, on needle and slip hook up over hub on needle clamp.
Fig. 46
PATCHING AND MONOGRAMMING
See page. No. 18 Fig. 27.
Page 36

RÜFFLER
35
Fig. 48
The ruifler will produce yards of delicate ruffling or precision pleating.
Ruffling can also be done and sewn to another piece of fabric at the same time.
This highly versatile attachment despite its wide range of use, is simple to use.
Use the ruffler for making aprons, curtains, pleating a skirt, adding fullness to the bodice of a
dress and etc.
Fig. 49
Fig. 50
Page 37

36
THE ADJUSTABLE CORDING
AND ZIPPER FOOT
This attachment is used to make and
insert covered cording, and to sew in
zippers. Loosen thumb screw to slide
foot to either right or left of needle.
CORDING. Fold bias strip of fabric
over cord. Loosen thumb screw and set
foot so needle is centered in needle
hole. Machine baste cord in place
(Fig. 52). .
To sew covered cord to material,
reset adjustable foot so needle stitches
closer to cord, and on edge of base
fabric.
Fig. 52
SEWING IN A ZIPPER
Loosen thumb screw and slide foot so needle
enters center of needle hole. Guide metal of zipper
along edge of foot (Fig. 51). Stitching should be
close to zipper to allow easy opening and closing.
Adjust to sew from either right or left side, which
ever is more convenient.
Fig. 51
 Loading...