

Page 1
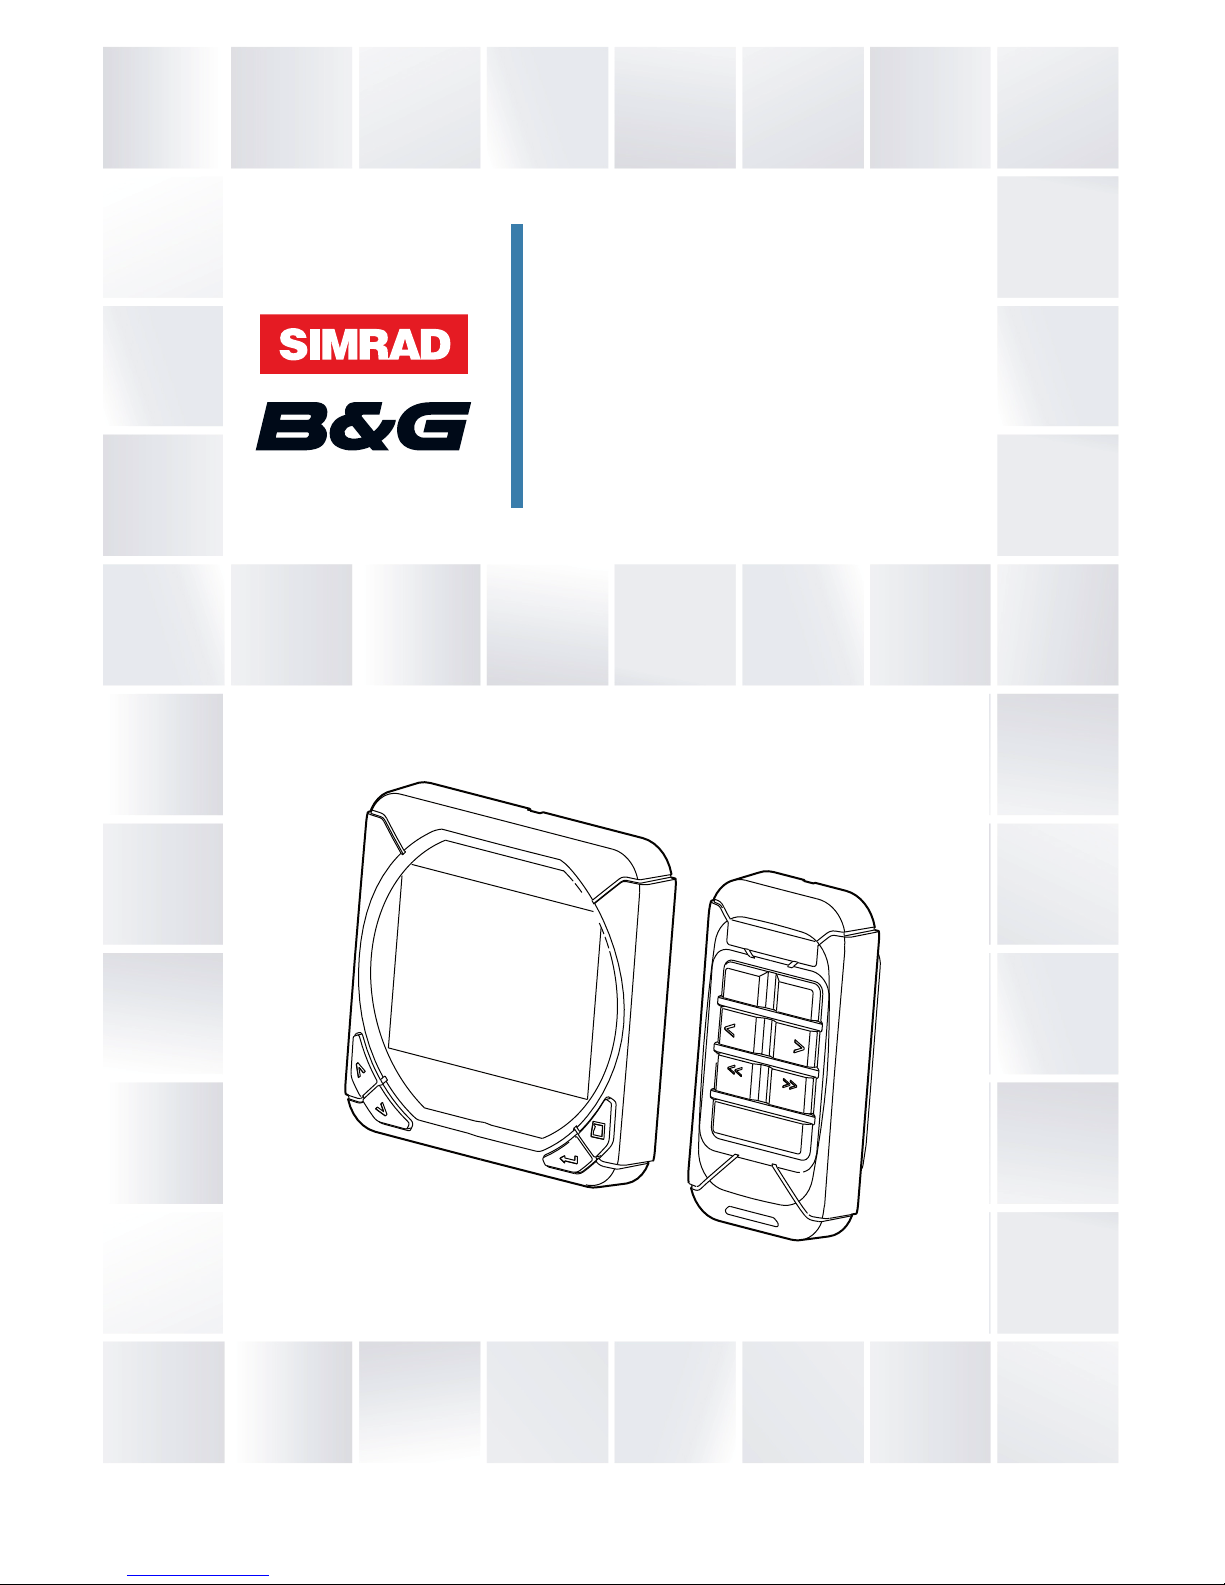
ENGLISH
IS40/Triton System
Installation Manual
MODE
STBY
1
1
10
AUTO
10
Page 2

| 1
Preface | IS40/Triton System Installation Manual
Preface
As Navico are continuously improving this product, we retain the
right to make changes to the product at any time which may not be
reflected in this version of the manual. Please contact your nearest
distributor if you require any further assistance.
It is the owner’s sole responsibility to install and use the instrument
and transducers in a manner that will not cause accidents, personal
injury or property damage. The user of this product is solely
responsible for observing safe boating practices.
NAVICO HOLDING AS AND ITS SUBSIDIARIES, BRANCHES AND
AFFILIATES DISCLAIM ALL LIABILITY FOR ANY USE OF THIS PRODUCT
IN A WAY THAT MAY CAUSE ACCIDENTS, DAMAGE OR THAT MAY
VIOLATE THE LAW.
Governing Language: This statement, any instruction manuals,
user guides and other information relating to the product
(Documentation) may be translated to, or has been translated from,
another language (Translation). In the event of any conflict between
any Translation of the Documentation, the English language
version of the Documentation will be the official version of the
Documentation.
This manual represents the product as at the time of printing.
Navico Holding AS and its subsidiaries, branches and affiliates
reserve the right to make changes to specifications without notice.
Warranty
The warranty card is supplied as a separate document.
Important text that requires special attention from the reader is
emphasized as follows:
¼ Note: Used to draw the reader’s attention to a comment or some
important information.
Warning: Used when it is necessary to warn personnel that
they should proceed carefully to prevent risk of injury and/or
damage to equipment/personnel.
Page 3
2 |
Preface | IS40/Triton System Installation Manual
Declarations and conformance
This equipment is intended for use in international waters as coastal
sea area administered by countries of the E.U. and E.E.A.
The Triton and IS40 systems comply with the following regulations:
• CEunderEMCdirective2004/108/EC
• Level2devicesoftheRadiocommunications(Electromagnetic
Compatibility)standard2008
The IS40 and Triton Display meet the technical standards in
accordance with Part 15.103 of the FCC rules.
About this manual
This manual is a reference guide for installing the Triton and IS40
system. The manual assumes that the installer has at very least, basic
knowledge of DC electrical systems, and of working with power
tools with materials such as fiberglass and wood.
An understanding of basic navigation, nautical terminology and
practices may be helpful in correct configuration of the product.
Warning: It is your sole responsibility to install and use the
instrument and transducer(s) in a manner that will not cause
accidents, personal injury or property damage. Always observe
safe boating practices.
¼ Note: The choice, location, and installation of transducers and other
components of the system are critical to the performance of the
system as intended. If in doubt, consult your dealer.
¼ Note: Global Positioning System: The Global Positioning System
(GPS) is operated by the US Government which is solely responsible
for its operation, accuracy and maintenance. The GPS is subject to
changes which could affect the accuracy and performance of all
GPS equipment anywhere in the world, including this instrument.
Page 4

| 3
Contents | IS40/Triton System Installation Manual
Contents
4 Introduction
5 Overview
6 Installation
6 Choosing a location
6 Viewing angles
7 Fitting with mounting clip
8 Fittingwithretentionbracket
8 Multipledisplays
9 Wiring
9 Introduction to NMEA 2000 (SimNet)
11 Daisy chaining the display
11 Drop cable connection of the display
12 Typical network example
13 The SG05 EVC gateway
14 Troubleshooting
15 Spares & Accessories
16 Technical Specications
16 Display
17 Dimensional drawings
Page 5

4 |
Introduction | IS40/Triton System Installation Manual
Introduction
The Triton and IS40 Display utilizes a unique bonded 4.1-inch
sunlight viewable LCD display to offer clearly read sailing
information, including wind, speed, depth, heading, autopilot status,
log, timer and much more.
High contrast and a 155˚ viewing angle provide excellent
readability, whilst the bonded display ensures there is no chance of
condensation occurring regardless of the conditions.
Power consumption is extremely low for this class of product - 155
mA at 13.5 V with backlight driven at full brightness.
Dual Micro-C connectors provide for quick and easy daisy-chain
connection - ideal for retrofit or new build. Micro-C is the industry
standard cabling used for NMEA 2000 systems.
Page 6
| 5
Overview | IS40/Triton System Installation Manual
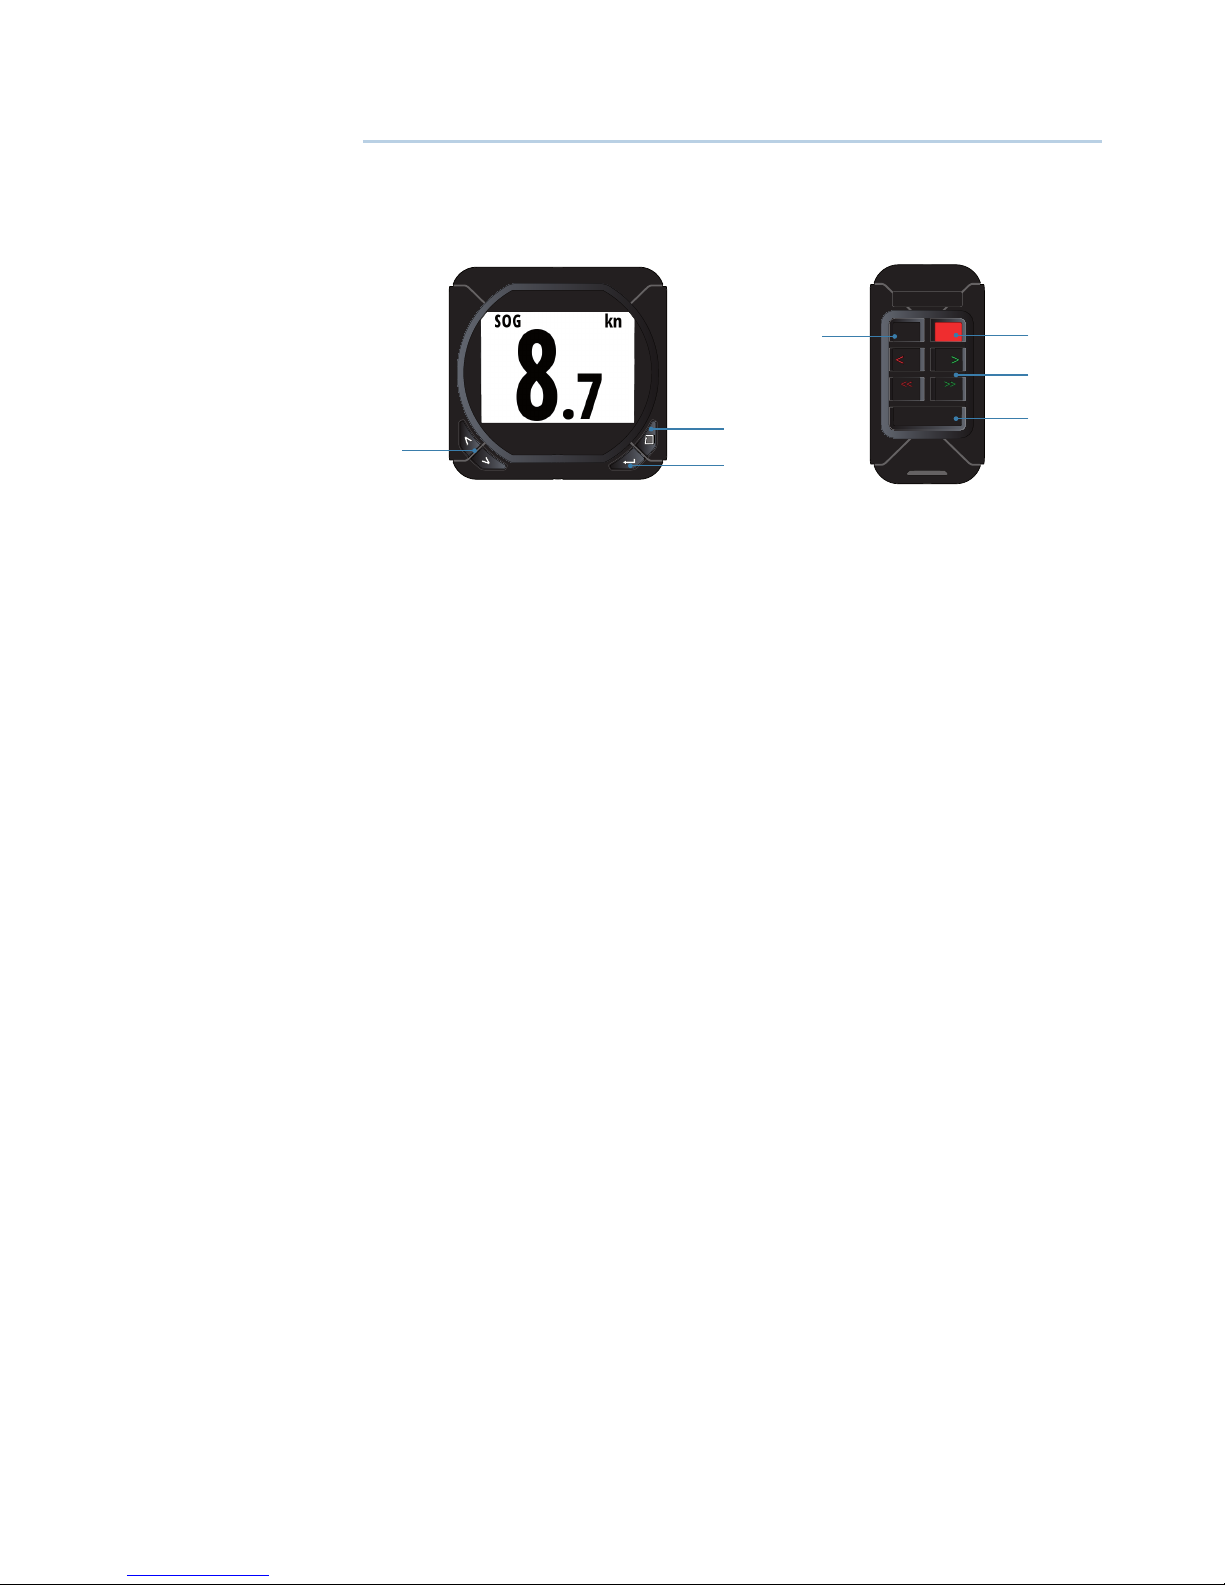
Overview
The Display and Autopilot controller
54
6
7
3
2
1
AUTO
10 10
11
MODE
STBY
1. Menu / Enter key
Used to enter the main menu, select sub menus and confirm
selection.
¼ Note: Press and holding the Enter key for 3 seconds takes you
directly to the display setup lighting level screen. If the lighting level
is set below 5 it will automatically increase to 5. Use the up and
down keys to set the desired level and press Enter to confirm.
2. Page key
Scrolls through the eight default display pages and navigates back a
step in menus.
¼ Note: the eight default display pages including Autopilot page can
be customized to display the required data.
3. Directional keys
Scrolls up and down through selected menus / set values.
4. Mode key
Changes the Autopilot mode.
5. STBY key
¼ Note: the key is labeled OFF on some models.
Changes the autopilot to Standby mode.
6. Course control keys
Changes target course / Activates Non Follow Up (NFU) mode when
in Standby mode.
7. Auto key
Changes the autopilot to AUTO mode.
Page 7

6 |
Installation | IS40/Triton System Installation Manual
Installation
The IS40/Triton display may be mounted via a flush mounting clip
or with the retention bracket attached to the rear of the unit.
Choosing a location
Choose the mounting locations carefully before you drill or cut.
The display should be mounted so that the operator can easily use
the controls and clearly see the display screen. Be sure the chosen
location allows access for routing the cables.
Ensure that any holes cut will not weaken the boat’s structure. If in
doubt, consult a qualified boat builder. Before cutting a hole in a
surface, make sure that there are no hidden electrical wires or other
parts behind the panel. Leave sufficient clearance space to connect
all relevant cables.
If multiple instruments are to be mounted in a row, ensure
measurement of space takes in to account the correct spacing
between displays.
These displays are high-contrast, anti-reflective and are easily read in
direct sunlight.
For width, height and depth requirements, please see the drawings
at the back of this manual.
Viewing angles
The IS40/Triton display offers 170 degrees viewing angle, both
horizontally and vertically. Avoid installation in locations that require
the instrument to have significant rotation of axis relative to the
deck. Users wearing polarized sun glasses may have trouble clearly
reading a screen that is at a significantly different angle to the
lenses.
Page 8

| 7
Installation | IS40/Triton System Installation Manual
Fitting with mounting clip
Use the template to cut the required size hole in the chosen
location. At the same time mark the holes to be drilled for the
fasteners. Take care to be as accurate as possible when cutting out
the mounting hole - the mounting clip should be a close, but not
tight fit in the hole. If the clip requires pressure to get in to position,
there is a high chance it will distort, and not retain the display as
well as intended.
Check that the clip lines up with the markings for the fastener
mounting holes, then drill the holes. Fasten the mounting clip in
place with the supplied screws.
The display can then be fitted by pressing into the mounting
clip aperture - a positive ‘click’ should be felt when the display
engages with the clip. Check that all four edges of the display make
good contact with the mounting surface, and apply adequate
compression to the gasket.
Page 9

8 |
Installation | IS40/Triton System Installation Manual
Fitting with retention bracket
The display may be mounted using only the mounting clip, or
may be secured additionally with the retention bracket. In order to
secure the bracket, adequate rear access must be available to fit the
fasteners.
Before fitting the display in to the mounting position, firmly wind
the threaded rods into the back of the display by hand.
Place the display in to position and fit the retention bracket,
followed by washers and fasteners.
Multiple displays
If mounting displays in a row or column, ensure that enough space
is left for the sun covers to clip on.
Even where the sun covers are not required, the correct spacing
should be used, as the displays require 3.5 mm on each side when
rotating for removal from the mounting clip.
The absolute minimum space that should be allowed for each
display is:
•
Width:123mm(4.84”)
• Height:120mm(4.72”)
Page 10

| 9
Wiring | IS40/Triton System Installation Manual
Wiring
The IS40/Triton display can be connected to either an NMEA 2000
or SimNet network. There is no separate power cable, as the unit is
powered from the network.
There are two Micro-C connectors on each display, allowing for
daisy chaining, which greatly increases the ease of connecting
multiple displays that are in close proximity, and can save in cable
weight and loom size. Note this method is approved in SimNet
networks, but not in NMEA 2000 networks.
Introduction to NMEA 2000 (SimNet)
NMEA 2000 is a combined electrical and data specification,
and is based on CAN (Controller Area Network - SAE J1939) bus
technology. NMEA 2000 permits exchange of data and commands
between the interfaced products. NMEA 2000 stipulates the use of
Micro-C and Mini-C hardware for the physical aspect of the network.
Most NMEA 2000 devices can be connected directly to the NMEA
2000 backbone and SimNet devices can be connected by using
adapter cables.
Essential network information
• NMEA 2000 is a powered network. It must have a separate 12-15 V
DC power supply protected by a 5 Amp fuse. Do not connect the
NMEA 2000 power cable to the same terminals as the start batteries,
Autopilot Computer, Radar, thruster or other high current products
•
AnNMEA2000networkconsistsofalinear“backbone”fromwhich
“dropcables”connecttoNMEA2000devices
• A single drop cable has a maximum length of 6 m (20 ft). The total
lengthofalldropcablescombinedshouldnotexceed78m(256ft)
• An NMEA 2000 networkhasamaximumcablelengthof100m(328
ft), between any two points
• An NMEA 2000 network needs to have a terminator at each end of
the backbone. A terminator can be one of the following:
• a power cable with built in terminator
• a terminated blanking plug
• a wind transducer (terminator is in the mast head
unit as opposed to mast cable).
Page 11

10 |
Wiring | IS40/Triton System Installation Manual
• Certain products have two Micro-C or SimNet connectors, which
can be made to be an in line component of the backbone.
Connecting from device to device is known as ‘daisy chaining’ This
network topology is not officially NMEA 2000 compliant.
Planning and installing a network backbone
Plan the backbone carefully.
The NMEA 2000 backbone needs to run between the locations of all
products you want to install, typically in a bow to stern layout, and
be no further than 6 m from a device to be connected.
Choose from the following components to make up your NMEA
2000 backbone:
•
Micro-Ccables:Availablelengthsfrom0.4m(1.3ft)to25m(82.5ft)
• Micro-C power cables with or without termination
• T-connector. Use at locations where you want to connect a device
by drop cable
• Wind transducer. If using a wind sensor, plan to connect this to one
end of the backbone as this has a terminator built in
• Micro-C male and Micro-C female to SimNet adaptor cables for
connecting to existing SimNet bus, or adding devices fitted with a
SimNet connector to a Micro-C network.
Power the network
An NMEA 2000 network requires its own 12 V DC power supply
protected by a 5 amp fuse or breaker.
In smaller NMEA 2000 systems, the power connection may be made
anywhere in the system,
For larger systems introduce power at a central point in the
backboneto“balance”thevoltagedropofthenetwork.Useapower
cable without termination.
¼ Note: When joining an NMEA 2000 network to a SimNet network, it
is not necessary to introduce power to both.
¼ Note: Do not connect the power cable to the same terminals as the
autopilot computer, pulse radar, bow thruster or other high current
devices - the network may be affected by voltage drop when these
devices are operated. Avoid connection to the engine starting
batteries where possible.
Page 12

| 11
Wiring | IS40/Triton System Installation Manual
Daisy chaining the display
Where displays are located close together, the supplied
interconnection cable may be used to link the displays in series. The
daisy chain should form part of the backbone. It is not advisable to
daisy chain devices off a drop cable.
2
2
1
3
3
1 1
1. IS40/Triton Display
2. Interconnection cable 0.6 m (supplied)
3. NMEA 2000 / SimNet backbone
Drop cable connection of the display
2
3 4
4
4
1
3
2
1
1. IS40/Triton Display
2. Drop cable
¼ Note: For SimNet backbone a SimNet to Micro-C adapter cable must
be used (part no. 24005729)
3. NMEA 2000 backbone
4. Micro-C T-connectors
Page 13

12 |
Wiring | IS40/Triton System Installation Manual
Typical network example
120
LTW
LTW
LTW
LTW
T
T
12V DC
¼ Notes:
• The backbone must be terminated at both ends. The wind sensor
has a built-in terminator and can be used as one of the terminators
• Daisy-chaining, as shown in this illustration, is recommended for
ease of installation. It will still be compatible with most NMEA 2000
devices but not fully comply with NMEA 2000 standard.
Page 14

| 13
Wiring | IS40/Triton System Installation Manual
The SG05 EVC gateway
The SG05 is connected to the NMEA 2000 network in place
of Autopilot computer. It connects to a Volvo Gateway for
communication with Volvo’s EVC system.
Note that rudder angle data is sourced from the EVC system and a
seperate rudder angle indicator is not required.
120
LTW
LTW
LTW
LTW
1
4
2
3
1 IS40/Triton system
2 SimNet to Micro-C adapter cable
3 SD05 SimNet - Volvo Gateway
4 Volvo Gateway (p.no. 000-1-258-001)
Page 15

14 |
Troubleshooting | IS40/Triton System Installation Manual
Troubleshooting
Issue Solution
Unit does not power up• Check that the NMEA 2000/SimNet
network has 12 V connected.
• Try connecting to a different network
cable in case power wires damaged
internally.
Unit does not show
data for a specific
source
• In the advanced setup menu, select
sources, and manually select the
required data source.
• Check the network connection on the
data source.
Unit does not show
any data from any
connected source
or
Unit data sources
intermittently drop
out.
• In the advanced setup menu, select
sources option, then select AUTO
SELECT.
• Check the Device List menu and see if
any devices are detected.
• Try connecting to a different network
cable in case data wires damaged
internally.
• In the advanced setup menu, check
the diagnostics page to see if any
errors are occurring.
• Check network topology and
termination rules are correctly
implemented.
• Disconnect other devices from
network, one-by-one, starting with
3rd party devices.
Page 16

| 15
Spares & Accessories | IS40/Triton System Installation Manual
Spares & Accessories
Part Number Description
000-10637-001 Wind sensor
000-10652-001 Wind sensor pack with 20 meter mast cable
000-10647-001 Wind sensor pack with 35 meter mast cable
000-10613-001 RC42N, Rate compass, micro-c
000-10614-001 Cable, micro-c, right angle interconnect
Sun cover, display
24005729
SimNet cable to Micro-C. Adapter cable for
SimNet products in an NMEA 2000 network
Page 17

16 |
Technical Specications | IS40/Triton System Installation Manual
Technical Specications
Display
Weight
0.28kg(0.6lbs)
Power consumption
150 mA at 13.5 V
Network load
Maximum 10 displays
Colour
Black
Size
4.1”(Diagonal)4:3Aspectratio
Type
Transmissive TFT-LCD
White LED back-light
Resolution
320 x 240 pixels
Illumination
White (day mode) / Red
(night mode)
Environmental Protection
IPX7
Safe distance to compass
0.3 m (1.0 ft.)
Temperature
Operating
0 to +55 ºC (+32 to +130 ºF)
Storage
-30to+70ºC(-22to+158ºF)
Page 18

| 17
Technical Specications | IS40/Triton System Installation Manual
Dimensional drawings
Display
118 mm (4.64")
120mm (4.72")
115 mm (4.53")
Suncover outline
123 mm (4.84")
18.9 mm (0.74")
ø84 mm (3.31")
90 mm (3.54")
17 mm (0.67")
Page 19

18 |
Technical Specications | IS40/Triton System Installation Manual
Autopilot controller
88 mm (3.5")
18 mm (0.7")
15 mm (0.6")
60 mm (2.4")
115 mm (4.5")
120 mm (5.5")
65 mm (2.5")
Suncover
outline
 Loading...