SilverStone SST-RM400 Manual

|
|
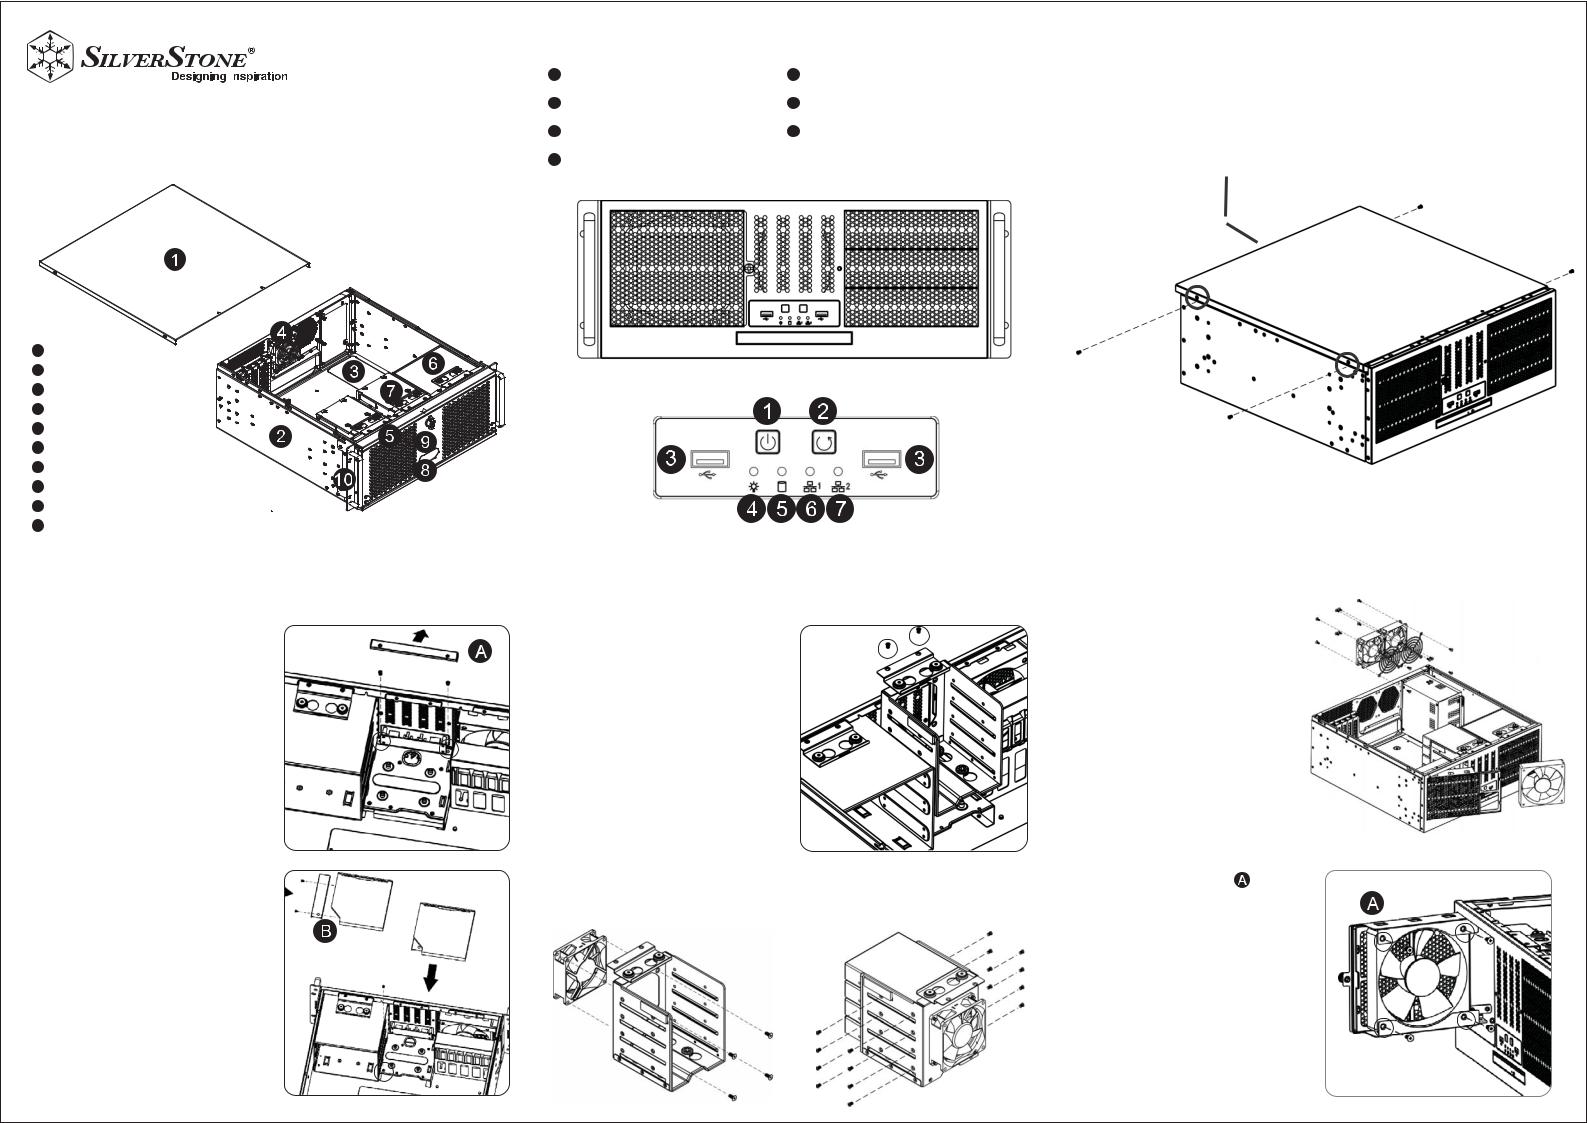
Front panel IO and indicators |
Removing the top cover |
||||
|
|
1 |
POWER ON SWITCH |
5 |
HDD ACTIVITY (GREEN) |
1. |
Release 2-screws of the top cover on each side |
|
|
||||||
RM400 |
4 |
POWER ON LED (BLUE) |
|
|
2. |
Push the top cover backward about 1” and lift it off the chassis |
|
|
LAN1 LED (GREEN) |
|
|
||||
|
|
2 |
SYSTEM RESET SWITCH |
6 |
|
|
|
|
|
4U rackmount server chassis |
USB 3.1 Gen1 x 2 ports |
7 |
LAN2 LED (GREEN) |
|
|
|
|
3 |
|
|
|||
|
|
with triple 5.25" drive bays |
|
|
|
|
|
1 TOP COVER
2 BOTTOM CHASSIS
3 OPTIONAL POWER SUPPLY
4 8CM FANS
5 12CM FAN
6 3BAYS-5.25” DRIVE CAGE
7 4BAYS-3.5” DRIVE CAGE
8 SLIM ODD DRIVE CAGE
9 FRONT PANEL IO AND INDICATORS
10 RACK HANDLES
WWW.SILVERSTONETEK.COM
Slim ODD cage assembly
Remove the slim ODD blank cover 
Loose 2-screws and remove the blank cover
Slim ODD assembly 
1.Fix the slim ODD bracket with slim ODD with 2 pcs screws
2.Insert and secure the slim ODD assembly into the drive bay with 1-screw
4bays-3.5” HDD cage and |
Cooling fan |
cooling fan assembly |
|
How to remove the drive cage |
Optional 8cm fans |
|
1. |
Loose 2 screw and lift off the drive cage |
Place the 80 x 25mm fan to the rear |
2. |
Once hard drive assembled, secure the drive |
plate of chassis |
|
cage back with the same 2-screws |
|
Optional cooling fan assembly |
3.5” HDD assembly |
Optional 12cm fan |
||
Fix 80 x 25mm fan with 4-screws |
1. |
Place the HDD in the drive bay |
1. |
Loose the thumb screw and pull the |
|
2. |
Secure HDD with screws (4 pcs - 6#32 x 6mm) |
|
fan / filter bracket |
|
|
|
2. |
Fix the 120 x 25mm cooling fan |
|
|
|
|
with 4pcs screws |
 Loading...