How it Works
Log In / Sign Up
Buy Points
How it Works
FAQ
Contact Us
Questions and Suggestions
Users
Silverline
Loading...
H
Hanging Work Light 150W
Heavy Duty Flip-Top Workbench
Heavy Duty Glue Gun
Heavy Duty Plaster Mixer
Heavy Duty Trestle
Hedge Trimmer Petrol 600mm
Hi-Spec 112113
Hi-Spec 1600W
Hobby Glue Gun
Hoist Support Arm 407455
Hot Air Gun 2000W
Hot Air Gun Adjustable 2000W
HVLP Paint Sprayer
Hydraulic Bottle Jacks
I
IDW 683 S
IDW 683 W
IDW 883 S
IDW 883 W
IDW 983 S
IDW 983 W
ILI 685.3 E
ILI 985.3 E
ILW 985.3 E
Impact Driver
INBI 985.2 E
In-Car Inverter 160W
INIT 114 E
INIT 614 E
In Line RCD 16A
INT 114 E
INT 614 E
2
Inverter 1000W
Inverter 2000W
Inverter 300W
Inverter 700W
Inverter Arc Welder
2
INW 653.2 E
J
Jump Starter Air Compressor
K
KSW 653 S
KSW 653 W
KSW 685.1 S
2
KSW 685.1 W
KSW 853 S
KSW 853 W
KSW 885.1 S
KSW 885.1 W
KSW 953 S
KSW 953 W
2
KSW 985.1 S
KSW 985.1 W
L
LAN Tester
Laser Infrared Thermometer
Laser Jigsaw
Laser Level Kit
LAW 653.2 E
Lever Hoist
LII 594 W
Live Wire Detector
Log Saw Horse
LOI 994.1 E
Long Arm Propane Torch
LOW 894.1 E
2
LOW 994.1 E
Low Energy Work Light 230V
LYW 885.1 S
LYW 885.1 W
LYW 985.1 S
LYW 985.1 W
M
MAW 685.3 E
MAW 985.3 E
Mesh Safety Visor
Metal & Voltage Detector
Metalwork Torch Kit 4pce
MICE & RAT FREE 25,Mice & Rat Free 50
Mini Glue Gun
Mini Laser Level
Mixing Drill Low Speed
MOSQUITO FREE 25
Mosquito & Insect Free 100 IPX4
MS 250
Multi-Function Rotary Tool
Multi-Head Garden System 25cc
Multi-Purpose Propane Torch Kit
Multipurpose Sharpener
MW9018B01
MWG 620 E
N
Non-Contact AC Voltage Detector
O
Oil Fluid Extractor Pump 1.5Ltr
Oil Fluid Extractor Pump 4Ltr
Oil-Free Air Compressor 24Ltr
OLE 185.1 E
OMW 653.2 E
Orbital Car Polisher
Orbital Sander 1/3 Sheet
2
Oscillating Multi-Tool
P
Palm Sander 1/4 Sheet
PAW 653 S
PAW 653 W
PAW 685.1 S
PAW 685.1 SE
Loading...
Loading...
Nothing found
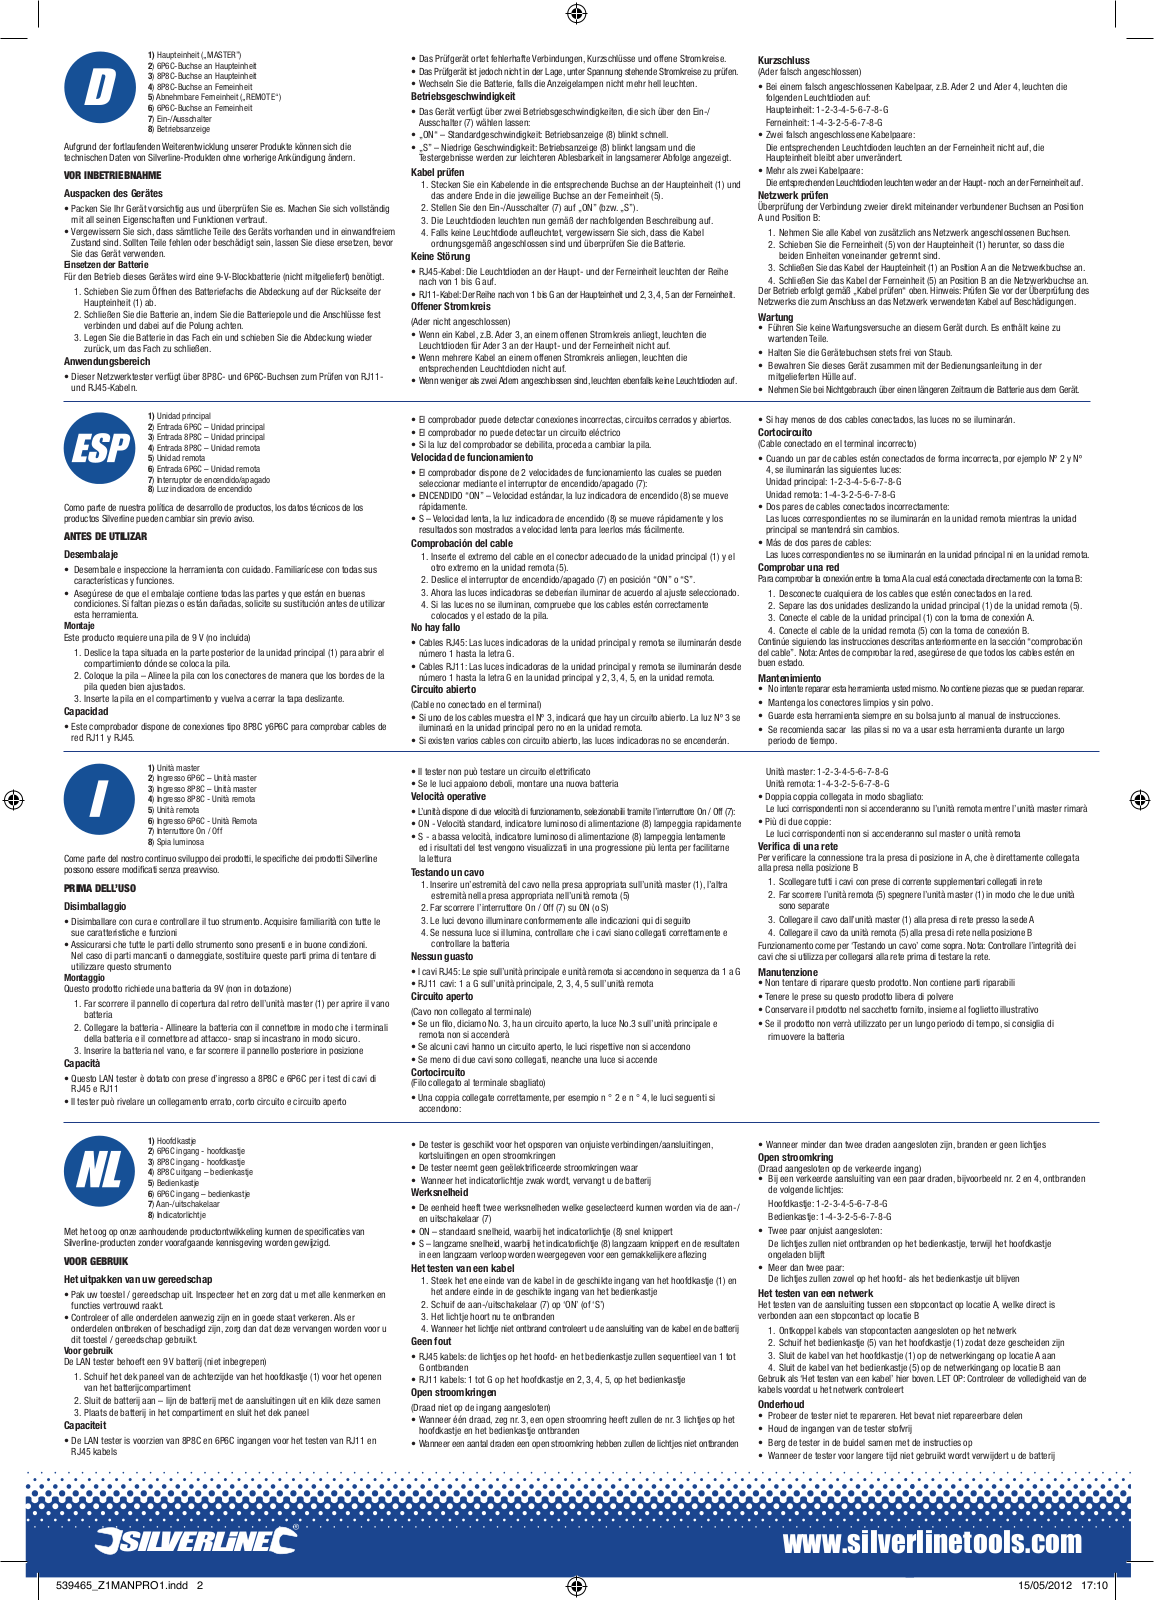
LAN Tester
User Manual [en, de, es, fr, it]
2 pgs
2.69 Mb
0
Table of contents
Loading...
Silverline LAN Tester User Manual [en, de, es, fr, it]
...
Silverline User Manual [en, de, es, fr, it]
Download
Specifications and Main Features
Frequently Asked Questions
User Manual
Download
Loading...
+
hidden pages
Unhide
You need points to download manuals.
1 point = 1 manual.
You can buy points or you can get point for every manual you upload.
Buy points
Upload your manuals