

Page 1
ELECTRIC ALL-PURPOSE SHARPENER SEAS 20 A1
ELECTRIC ALL-PURPOSE SHARPENER
Operating instructions
ЕЛЕКТРИЧЕСКО ТОЧИЛО
Ръководство за експлоатация
APARAT DE ASCUŢIT
UNIVERSAL ELECTRIC
Instrucţiuni de utilizare
UNIVERZALNI ELEKTIČNI
UREĐAJ ZA OŠTRENJE
Upute za upotrebu
IAN 95913
ELEKTRISCHER ALLESSCHÄRFER
Bedienungsanleitung
ΗΛΕΚΤΡΙΚΗ ΣΥΣΚΕΥΗ
ΑΚΟΝΙΣΜΑΤΟΣ ΓΕΝΙΚΗΣ ΧΡΗΣΗΣ
Οδηүίες χρήσης
Page 2
GB Operating instructions Page 1
HR Upute za upotrebu Stranica 11
RO Instrucţiuni de utilizare Pagina 21
BG Ръководство за експлоатация Cтраница 31
GR Οδηүίες χρήσης Σελίδα 41
DE / AT / CH Bedienungsanleitung Seite 51
Before reading, unfold the page containing the illustrations and familiarise
yourself with all functions of the device.
Prije nego što pročitate tekst, otvorite stranicu sa slikama i upoznajte se na
osnovu toga sa svim funkcijama uređaja.
Înainte de a citi instrucţiunile, priviţi imaginile şi familiarizaţi-vă cu toate funcţiile
aparatului.
Преди да прочетете отворете страницата с фигурите и след това се
запознайте с всички функции на уреда.
Πριν ξεκινήσετε την ανάγνωση, ανοίξτε τη σελίδα με τις εικόνες και εξοικειωθείτε με όλες τις λειτουργίες της συσκευής.
Klappen Sie vor dem Lesen die Seite mit den Abbildungen aus und machen
Sie sich anschließend mit allen Funktionen des Gerätes vertraut.
Page 3
C
A
E
B
D
F
Page 4

- 1 -
INDEX PAGE
Introduction 2
Intended use 2
Items supplied 2
Technical data 2
Appliance description 3
Safety instructions 3
Unpacking 5
Placement 5
Adjustment 5
Sharpening 6
Cleaning and Care 7
Maintenance 8
Disposal 9
Importer 9
Warranty and Service 9
Page 5

- 2 -
Introduction
Congratulations on the purchase of your new appliance.
You have clearly decided in favour of a quality product. These operating instructions are a part of this product. They contain important information in regard to safety, use and disposal. Before using the product, familiarise yourself
with all of these operating and safety instructions. Use the product only as described and only for the specified areas of application. In addition, pass these documents on, together with the product, to any future owner.
Intended use
This appliance is intended for the sharpening of knives, screwdrivers and scissors
in domestic households. This appliance is not intended for commercial or industrial applications.
Items supplied
1 x Electric All-Purpose Sharpener
1 x Operating Instructions
Technical data
Power consumption : 20 W max.
Mains voltage: 230 V ~, 50 Hz
Revolutions: 3000 min
-1
Protection class: II
C.O. Time: 3 min.
Page 6
- 3 -
The C.O. Time (Continuous Operation) details how long an appliance may be
used without the motor overheating and being damaged. When the specified
C.O. Time has been reached, the appliance must be switched off until the
motor has cooled itself down to room temperature (approx. 30 minutes).
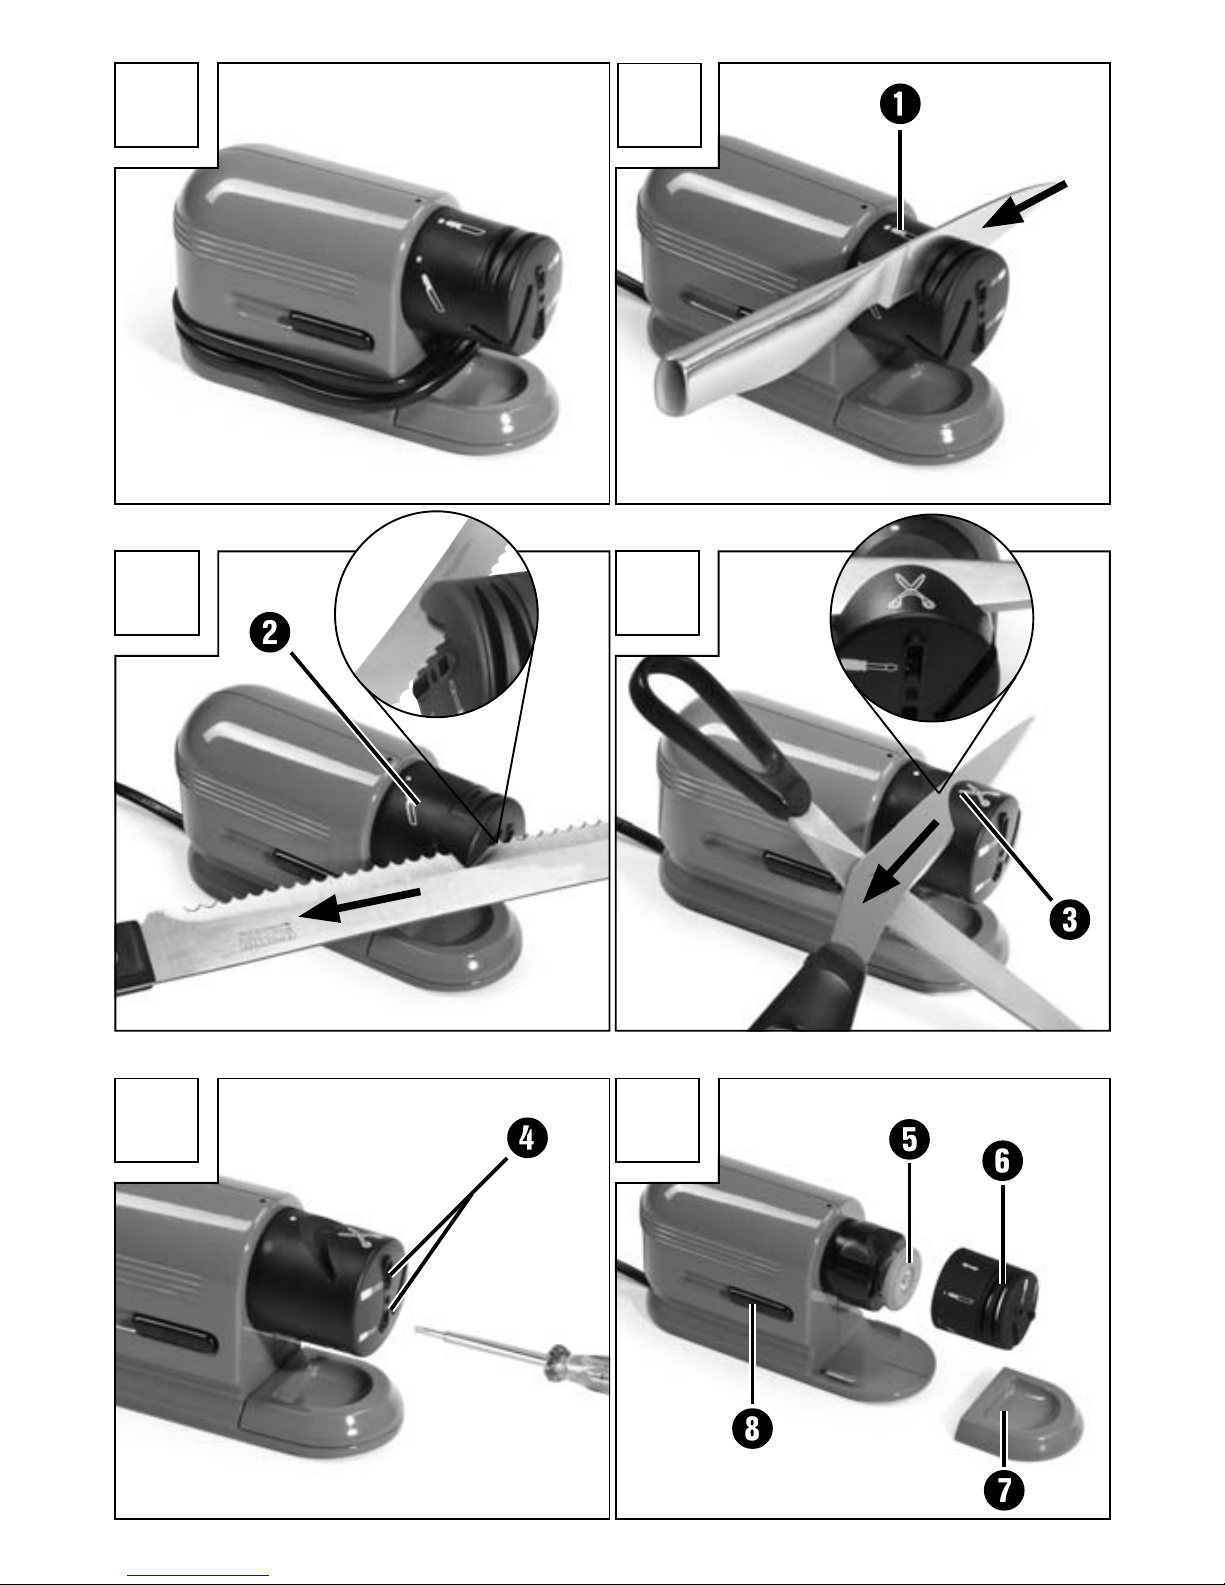
Appliance description
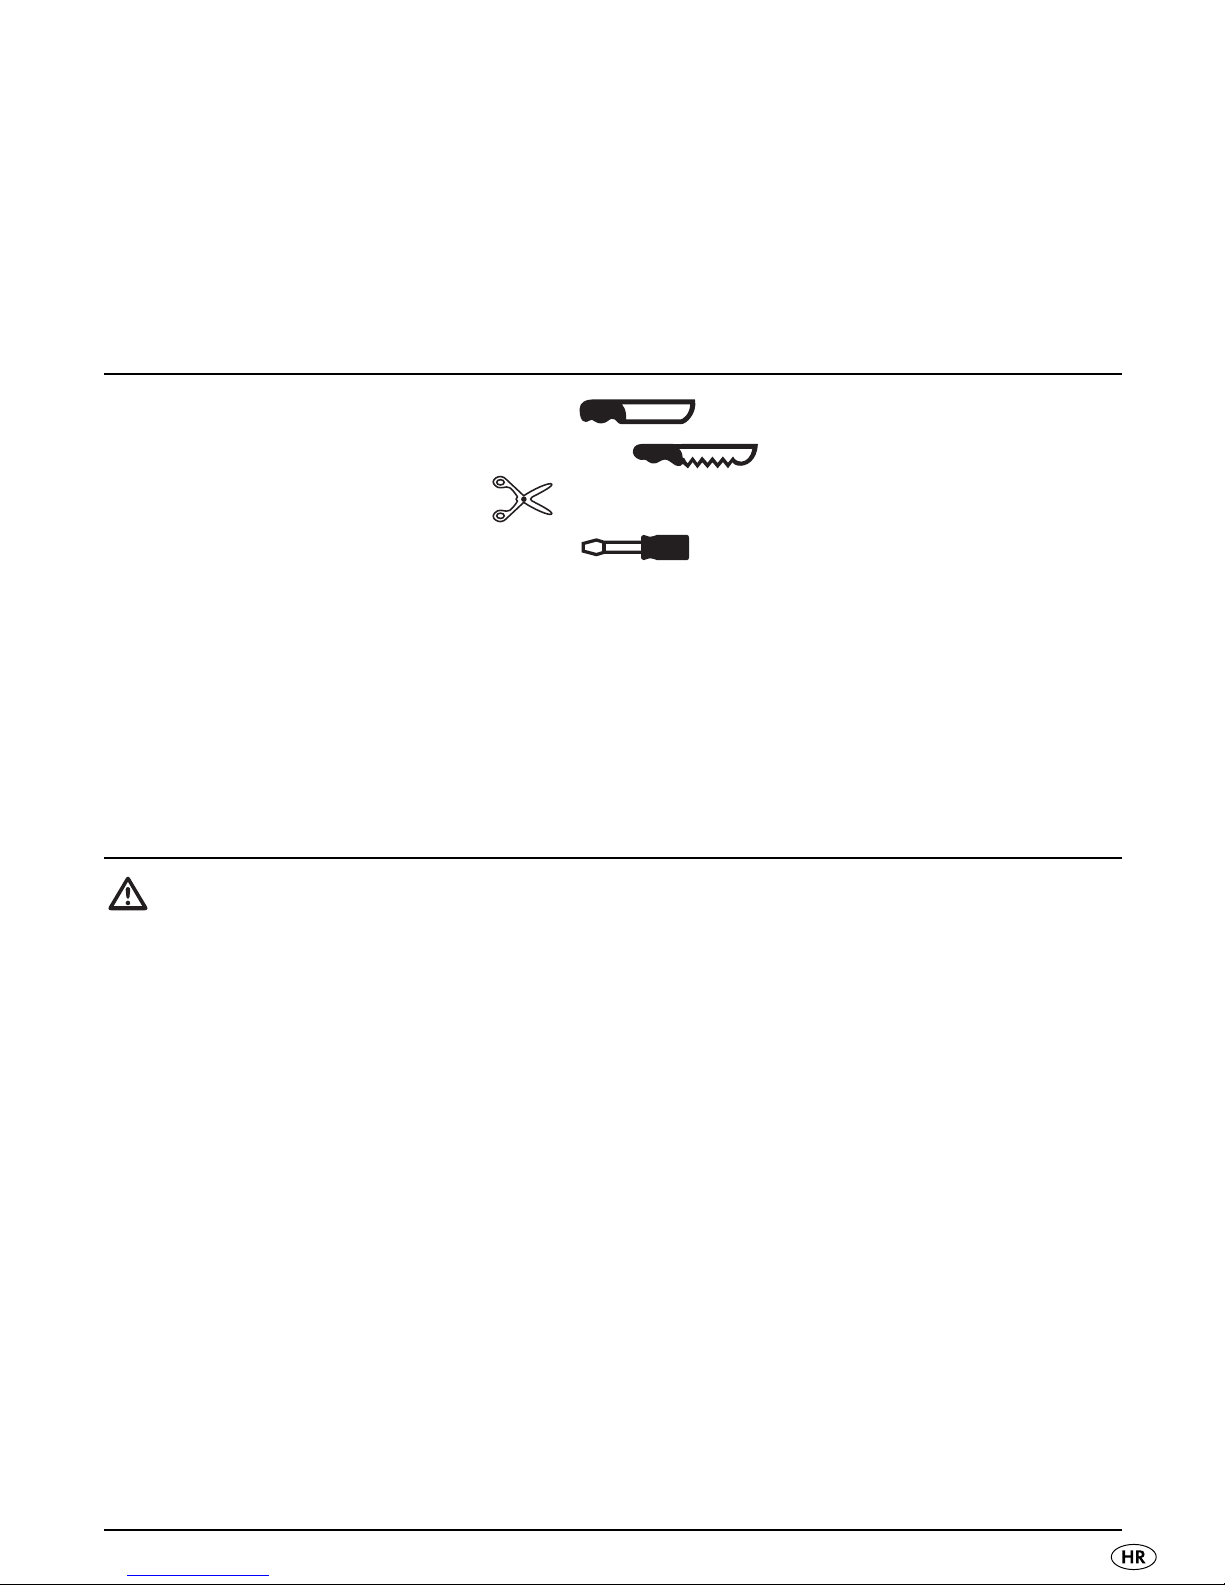
q
Function “Knife with smooth edge”
w
Function “Knife with serrated edge”
e
Function “Scissor sharpening”
r
Grinder openings for slot-screwdrivers
t
Grindstone
y
Function and protective cap
u
Abrade collector
i
Switch
Safety instructions
To avoid potentially fatal electric shocks:
• Protect the appliance against moisture. Use it only in
dry rooms, do not use it outdoors or in damp areas.
• Ensure that the power cable cannot be damaged when
the appliance is in use, particularly not by sharpened
knife or scissor blades.
• Arrange for defective power plugs and/or cables to be
replaced as soon as possible by a qualified technician
or by our Customer Service Department to avoid the
risk of injury.
• NEVER open any housing components, other than those
specified herein.
Page 7

- 4 -
• After use or during extended absences, ALWAYS remove
the plug from the power socket. For as long as the plug
is inserted in the wall socket the appliance itself is under
electrical power.
• Ensure that the power plug is at all times easily accessible,
so that it can be quickly and easily removed in the
event of potential danger or risk.
To
avoid the risks of accidents and personal injuries:
• Always check to ensure that the appliance is in a serviceable condition before taking it into use. If there is recognisable damage to the appliance it may not be used.
Arrange for it to be safety-checked by Customers Services
before using it again.
• Take steps to ensure that hair, loose clothing and parts
of the body do not come into contact with the revolving
grindstone t.
• Wear protective gloves so as to avoid injury from sharp
blades, or, if you are operating the knife sharpener with
the function and protective cap
y
removed.
• This appliance may not be used by children.
• This appliance may be used by children aged 8 over
and by persons with reduced physical, sensory or mental capabilities or lack of experience and knowledge,
provided that they are under supervision or have been
told how to use the appliance safely and are aware of
the potential risks. Children must not play with the appliance. Cleaning and user maintenance tasks must not
be carried out by children unless they are supervised.
Page 8

- 5 -
• The appliance should always be disconnected from the
mains when not supervised and before assembly, disassembly or cleaning.
• The appliance and its connecting cable must be kept
away from children.
Unpacking
• Check that all items listed are available and that they show no signs of
visible damage.
• Remove all parts from the packaging and all packaging remnants from
the items.
• Retain the packaging, either for storing the appliance or for reuse in the
event of posting it to Customer Services for repair.
• Before the first usage thoroughly clean all component parts as described
in the section "Cleaning and care".
Placement
• Place the appliance on a stable and slip-free surface.
• Then insert the plug into the power socket.
Adjustment
• To select the required sharpening function
q w e
, turn the function
and protective cap
y
until the cap perceptibly engages.
• In position
w
"Knife with serrated edge", the corresponding symbol points
to the grinder opening (See Fig. C) – however, the cap engages at the
point at the end of the symbol.
• Hold the switch
i
pressed down. The grindstone
t
revolves continuous-
ly until the switch
i
is released.
Page 9

- 6 -
Sharpening
• First present the blade when the grindstone
t
is revolving.
• Always draw the knife or scissors back, from the blade stop, in an even
movement, not in a repetitive back and forth movement – otherwise the
result will be an uneven sharpening.
• Do not apply any great pressure and always sharpen only clean blades,
so as to avoid a premature wearing-out of the grindstone.
• Always sharpen knives and scissors so that the blade is at an acute angle
to the grindstone (as alluded to in the shape of the opening). Sharpening
at the false angle can destroy any blade.
• After sharpening, remove any possible grinding remnants that may be on
the blade with a moist cloth.
Knife with smooth edge
If you have selected the setting "Knife with smooth edge"
q
(Fig. B):
• Always sharpen knives with a smooth edge on both sides – for this, left
and right side sharpening guides are available.
• In the left guide hold the knife inclined to the left, and in the right guide
inclined to the right, whilst drawing the blade through.
Knife with serrated edge
If you have selected the setting "Knife with serrated edge"
w
(Fig. C):
• Sharpen these only on the side with the serration – the draw through
direction for the knife is dependant on which side of the blade this is on.
The side with the serrated edge must be pointing in the direction of the
grindstone
t
during sharpening.
• In general, serrated blades can only be sharpened up to a point. Knifes
with a fine sawtoothing (e.g. table knives) do not require sharpening.
Page 10
- 7 -
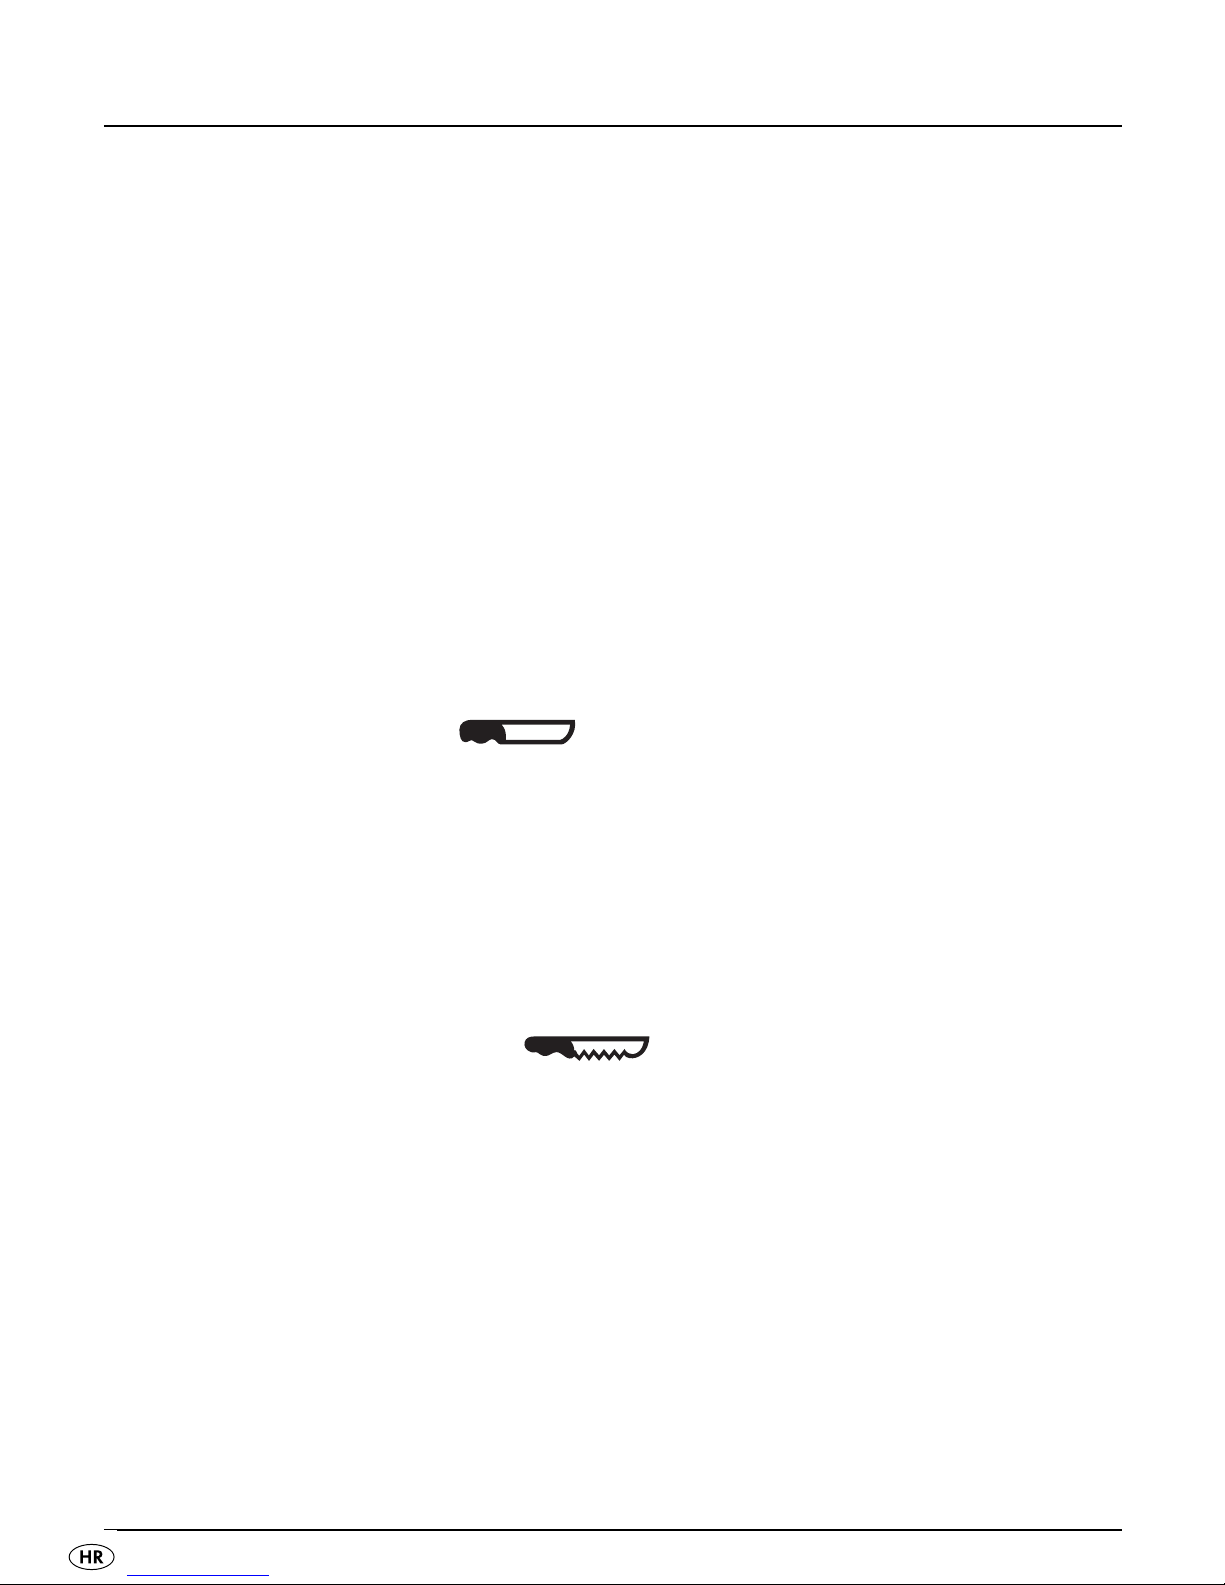
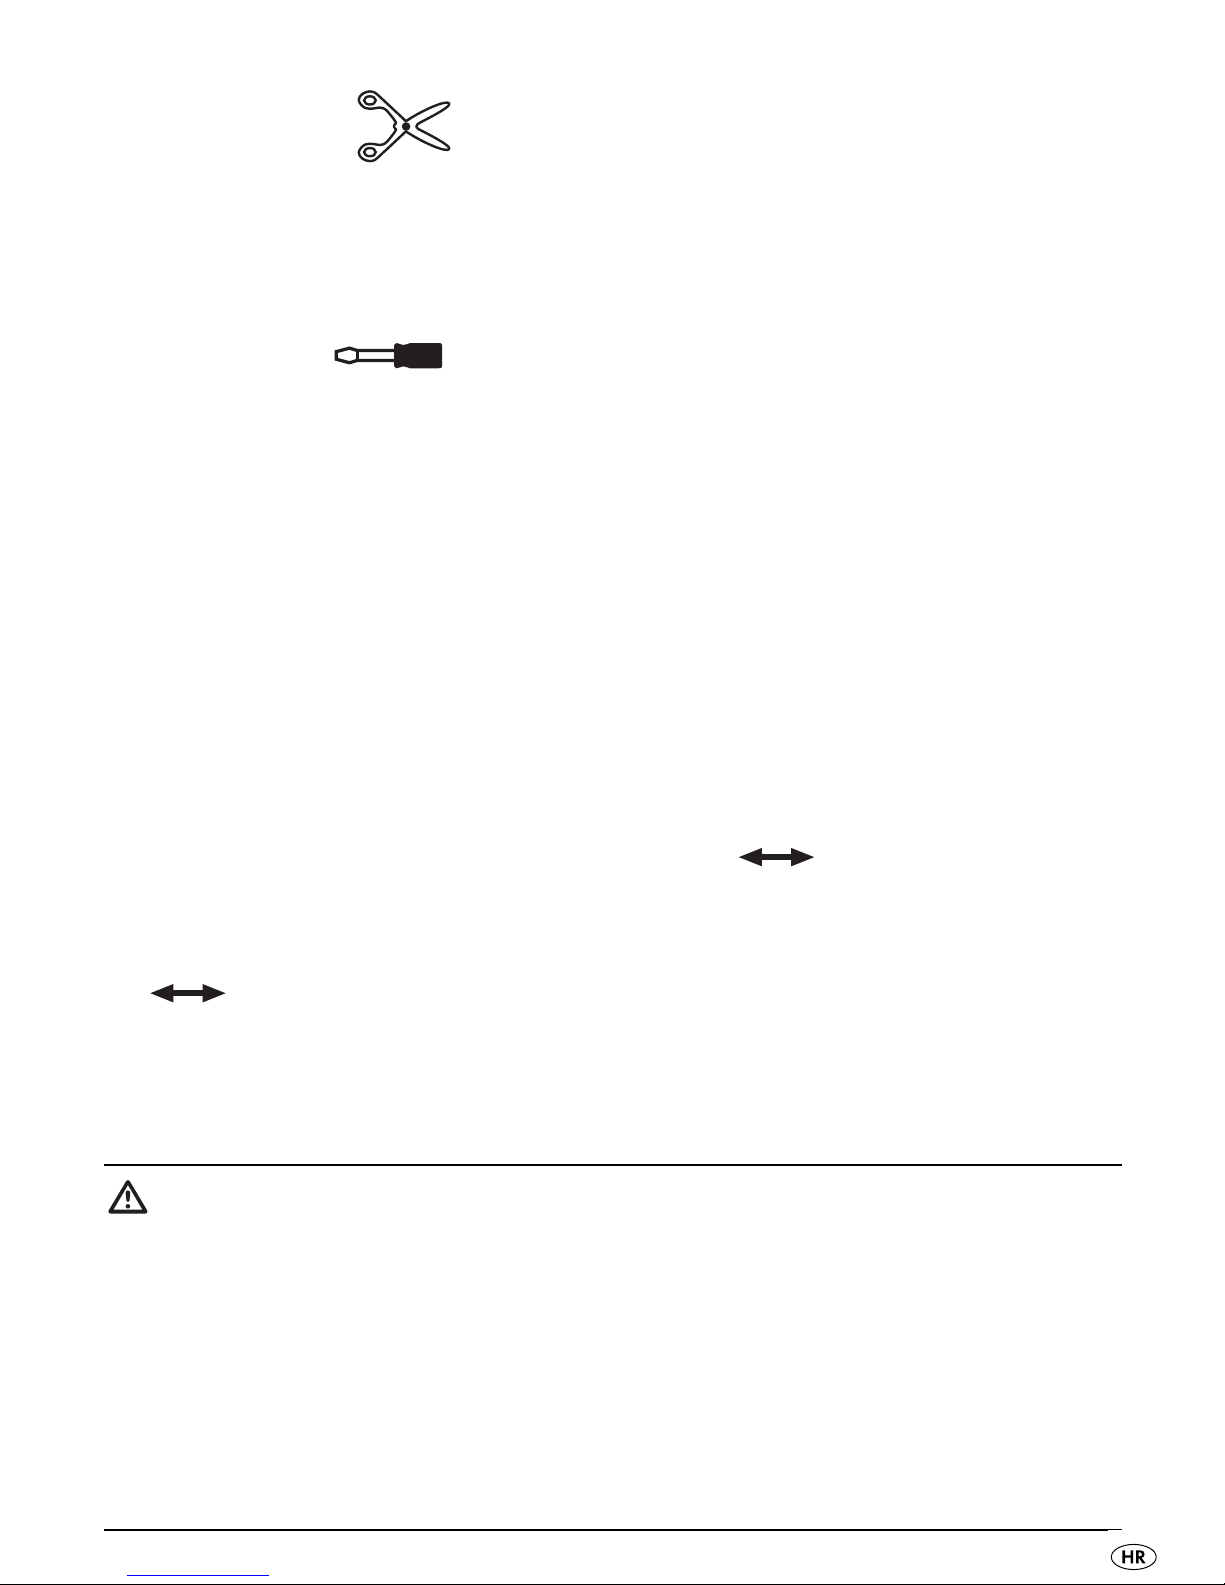
Scissor sharpening
If you have selected the setting "Scissor sharpening"
e
(Fig. D):
• Sharpen both scissor blades one after the other. For this, open the scissors
out and draw both blades, one after the other, through the guide.
Flat-head screwdriver
Should you wish to grind a slot-screwdriver
r
flat (Fig. E):
• This is possible in every position of the function and protective cap
y
.
Appropriate to its width, insert the screwdriver through one of the two grinding openings
r
on the front of the function cap (see fold-out side). The
end face of the screwdriver will now be ground level and flat.
Grinding directly on the grindstone
Certain edges can possibly be more easily sharpened directly on the grindstone
t
, without the function and protective cap y: For these cases, the
function and protective cap
y
is removable (Fig. F):
• Turn the function and protective cap
y
until the arrow is at the top.
You can now take off the function and protective cap
y
.
• To replace the function and protective cap
y
, hold it so that the arrow
is once again at the top. You can now push the function and protective
cap
y
on and secure it by turning it to the left or right.
Cleaning and Care
To avoid risks of personal injury and damage:
• Before carrying out any maintenance work, first remove the plug from the
wall socket.
• NEVER submerse the appliance in water or other liquids! These could
damage the appliance. Additionally, there is a potentially fatal risk of
electric shock should moisture come into contact with electrical components.
Page 11
- 8 -
Cleaning the appliance:
• Turn the function and protective cap
y
, until the arrow is at the
top. You can now remove the function and protective cap
y
and clean
the area around the grindstone
t
with a dry brush.
• Dismantle the abrade collector
u
and clean it with a brush and, if
necessary, a lightly moistened cloth.
• Clean the remaining parts of the appliance also with a lightly moistened
cloth, not with abrasive or aggressive detergents. They can damage the
surfaces.
• To replace the function and protective cap
y
, hold it so that the arrow
is once again at the top. You can now push the function and protective cap
y
cap on and secure it by turning it to the left or right. To conclude, reassemble the abrade collector
u
into the appliance.
Maintenance
• The appliance is maintenance-free. No form of maintenance, either on
or in the appliance, is intended for execution by the user. In the event of
malfunction or apparent damage, make contact with Customer Services.
• For storage, wrap the power cable around the appliance housing (Fig. A).
Page 12
- 9 -
Disposal
Do not dispose of the appliance in your normal domestic
waste. This product is subject to the European guideline
2012/19/EU.
Dispose of the appliance through an approved disposal centre or at your
community waste facility. Observe the currently applicable regulations.
In case of doubt, please contact your waste disposal centre.
Dispose of all packaging materials in an environmentally friendly
manner.
Importer
KOMPERNASS HANDELS GMBH
BURGSTRASSE 21
44867 BOCHUM
GERMANY
www.kompernass.com
Warranty and Service
The warranty for this appliance is for 3 years from the date of purchase. The
appliance has been manufactured with care and meticulously examined
before delivery.
Please retain your receipt as proof of purchase. In the event of a warranty
claim, please make contact by telephone with our Service Department. Only
in this way can a post-free despatch for your goods be assured.
Page 13
- 10 -
The warranty covers only claims for material and manufacturing defects, but
not for transport damage, for wearing parts or for damage to fragile components, e.g. buttons or batteries. This product is for private use only and is not
intended for commercial use.
The warranty is void in the case of abusive and improper handling, use of
force and internal tampering not carried out by our authorized service branch.
Your statutory rights are not restricted in any way by this warranty.
The warranty period will not be extended by repairs made under warranty.
This applies also to replaced and repaired parts. Any damage and defects
extant on purchase must be reported immediately after unpacking the appliance,
at the latest, two days after the purchase date. Repairs made after the expiration of the warranty period are subject to payment.
Service Great Britain
Tel.: 0871 5000 720 (£ 0.10/Min.)
E-Mail: kompernass@lidl.co.uk
Hotline availability:
Monday to Friday 08:00 - 20:00 (CET)
IAN 95913
Page 14

- 11 -
SADRŽAJ STRANA
Uvod 12
Namjena 12
Obim isporuke 12
Tehnički podaci 12
Opis uređaja 13
Sigurnosne napomene 13
Raspakiranje 15
Postavljanje 15
Podešavanje 15
Brušenje 16
Čišćenje i održavanje 17
Održavanje 18
Zbrinjavanje 19
Uvoznik 19
Jamstvo i servis 19
Page 15

- 12 -
Uvod
Srdačno čestitamo na kupnji Vašeg novog uređaja.
Time ste se odlučili za visokovrijedan proizvod. Upute za rukovanje predstavljaju sastavni dio ovog proizvoda. One sadrže važne napomene za sigurnost, uporabu i zbrinjavanje proizvoda. Prije korištenja proizvoda se upoznajte sa svim napomenama za rukovanje i sa svim sigurnosnim napomenama.
Proizvod koristite isključivo na opisani način i u navedenim područjima
primjene. Svu dokumentaciju u slučaju predaje proizvoda trećim osobama
priložite i takođe predajte.
Namjena
Ovaj proizvod je predviđen za oštrenje noževa, odvijača i škara u okviru
privatnog domaćinstva. Ovaj proizvod nije predviđen za gospodarske ili
industrijske svrhe.
Obim isporuke
1 x Univerzalni električni uređaj za oštrenje
1 x Upute za rukovanje
Tehnički podaci
Snaga: 20 W maks.
Mrežni napon: 230 V ~, 50 Hz
Okretaji: 3000 min
-1
Zaštitna klasa: II
KB-vrijeme: 3 min.
Izjava o sukladnosti za ovaj proizvod dostupna je na internet stranici
www.lidl.hr.
Page 16
- 13 -
KB-vrijeme (vrijeme kratkotrajnog pogona) označava, koliko dugo uređaj može
biti u pogonu, bez da se motor pregrije i pretrpi oštećenje. Nakon navedenog
KB-vremena uređaj mora biti isključen toliko dugo, dok se motor nije ohladio
i dostigao sobnu temperaturu (ca. 30 minuta).
Opis uređaja
q
Funkcija “Ravno brušenje noža”
w
Funkcija “Valovito brušenje noževa”
e
Funkcija “Brušenje škara”
r
Brusni otvori za obične odvijače
t
Brusni kamen
y
Funkcijska i zaštitna kapa
u
Prihvatnik za prašinu
i
Prekidač za uključivanje
Sigurnosne napomene
Da biste izbjegli opasnost uslijed strujnog udara:
• Zaštitite proizvod od vlage. Koristite ga isključivo u suhim prostorijama, ne na otvorenom prostoru niti u vlažnom okruženju.
• Obratite pažnju na to, da u pogonu ne može doći do
oštećenja mrežnog kabela, posebno ne djelovanjem
oštrica noževa ili škara.
• Oštećene mrežne utikače ili kablove neizostavno dajte
na popravak ovlaštenim stručnjacima ili servisu za kupce, kako biste izbjegli nastanak opasnosti.
• Nikada ne otvarajte dijelove kućišta, ukoliko to nije
ovdje opisano i naloženo.
Page 17
- 14 -
• Nakon uporabe ili u slučaju odsutnosti uvijek izvucite
mrežni utikač iz utičnice. Uređaj je pod mrežnim naponom, dok se utikač nalazi u mrežnoj utičnici.
• Osigurajte, da mrežni utikač u svakom trenutku bude
lako dostupan, kako biste u slučaju opasnosti isti brzo
mogli izvući iz utičnice.
Za sprječavanje opasnosti uslijed nezgode i opasnosti
ozljeđivanja:
• Prije svake uporabe prekontrolirajte besprijekorno stanje uređaja. Kada su vidljiva oštećenja uređaja, isti ne
smije više biti korišten. U tom slučaju ga prvo dajte servisu za kupce radi ispitivanja njegove sigurnosti.
• Obratite pažnju na to, da kosa, odjeća ili dijelovi tijela
ne dođu u dodir sa rotirajućim brusnim kamenom t.
• Nosite zaštitne rukavice, kako biste izbjegli ozljede
izazvane oštricama, ili kada sa uređajem radite bez
postavljene funkcijske kape y.
• Ovaj uređaj ne smije biti korišten od djece.
• Ovaj uređaj smiju koristiti djeca stara 8 godina ili više,
kao i osobe sa smanjenim fizičkim, senzornim ili mentalnim sposobnostima ili pomanjkanjem iskustva i znanja,
ukoliko su pod nadzorom ili su primile poduku o sigurnom rukovanju uređajem te su razumjele opasnosti koje
proizlaze iz uporabe uređaja. Djeca se ne smiju igrati
uređajem. Čišćenje i servisiranje ne smiju obavljati djeca bez odgovarajućeg nadzora.
Page 18

- 15 -
• Ako uređaj nije pod nadzorom, te prije sastavljanja i
rastavljanja ili čišćenja uređaja, uvijek treba izvući utikač iz mrežne utičnice.
• Uređaj i priključni kabel treba držati podalje od djece.
Raspakiranje
• Prekontrolirajte kompletnost i besprijekorno i neoštećeno stanje proizvoda.
• Odstranite sve dijelove od pakiranja, te ostatke ambalaže od proizvoda.
• Sačuvajte pakiranje, kako biste u njemu mogli čuvati uređaj dok ga ne
koristite, odnosno da biste u njemu mogli uređaj poslati na popravke.
• Očistite sve dijelove prije prve uporabe, na način opisan u poglavlju
"Čišćenje i održavanje".
Postavljanje
• Uređaj postavite na stabilnu podlogu, koja ne klizi.
• Zatim mrežni utikač utaknite u utičnicu.
Podešavanje
• Odaberite okretanjem funkcijske kape
y
željenu funkciju brušenja
q w e
,
sve dok kapa čujno ne ulegne.
• U položaju
w
“Valovito brušenje noževa” odgovarajući simbol pokazuje na
brusni otvor (vidi sliku C) - kapa će uleći u ležište na točci na kraju simbola.
• Držite prekidač za uključivanje
i
pritisnut. Brusni kamen
t
se okreće
toliko dugo, dok prekidač za uključivanje
i
ne pustite.
Page 19
- 16 -
Brušenje
• Oštrice prislonite tek kada brusni kamen
t
rotira.
• Noževe i škare uvijek ravnomjernim pokretima povlačite od kraja, a ne
natrag ili amo-tamo, jer rezultat brušenja u protivnom može ispasti neravnomjeran.
• Ne vršite prevelik pritisak i brusite isključivo čiste oštrice, kako biste spriječili
prijevremeno trošenje brusnog kamena.
• Noževe i škare uvijek oštrite tako, da oštrica bude postavljena pod malim
kutom u odnosu na brusni kamen (kao što je predodređeno oblikom otvora).
Brušenje pod pogrešnim kutom može uništiti svaku oštricu.
• Nakon brušenja pomoću vlažne krpe odstranite eventualno prisutne ostatke
brusne prašine na oštricama.
Ravno brušenje noža
Ako ste odabrali položaj
q
“Glatko brušenje noževa” (Slika B):
• Ako vršite glatko brušenje noževa, uvijek brusite obje strane – u tu svrhu
na raspolaganju stoje lijeva i desna brusna vodilica.
• Nož u lijevoj vodilici po mogućnosti držite naget na lijevu stranu, a u
desnoj vodilici na desnu stranu, dok provlačite oštricu.
Valovito brušenje noževa
Ako ste odabrali položaj
w
“Valovito brušenje noževa” (Slika C):
• Noževe valovito oštrite samo na dotičnoj strani – ovisno o tome, gdje se
oštrica nalazi, određen je smjer provlačenja noža.
Strana valovitog brušenja prilikom oštrenja mora biti okrenuta u smjeru
brusnog kamena
t
.
• Kod valovitog načina brušenja principijelno samo uvjetno može biti izvršeno naknadno oštrenje. Noževi, koji su sitno nazubljeno brušeni
(na primjer stolni noževi) ne trebaju biti naknadno brušeni.
Page 20
- 17 -
Brušenje škara
Ako ste odabrali položaj
e
“Brušenje škara” (Slika D):
• Redom naoštrite obje oštrice škara. U tu svrhu rasklapanjem otvorite škare
i jednu za drugom provucite obje oštrice kroz vodilicu.
Ravni odvijač
Ako želite običan odvijač
r
naoštriti (Slika E):
• Ovo može biti izvršeno u svakom položaju funkcijske kape
y
. U tu svrhu
utaknite odvijač ovisno o njegovoj širini kroz jedan od dva brusna otvora
r
naprijed na funkcijskoj kapi (vidi rasklopna stranica). Čeona strana odvijača
sada će biti ravno brušena.
Brušenje izravno na brusnom kamenu
Određene oštrice eventualno možete bolje bez funkcijske kape
y
neposred-
no na brusnom kamenu
t
brusiti. U tu svrhu moguće je skinuti funkcijsku
kapu
y
(Slika F):
• Okrenite funkcijsku kapu
y
, sve dok strelica ne pokazuje prema
gore. Sada možete skinuti funkcijsku kapu.
• Da biste funkcijsku kapu
y
ponovo postavili, držite je tako, da strelica
ponovo bude okrenuta prema gore. Sada možete kapu postaviti
i okretanjem blokirati na lijevoj ili desnoj strani.
Čišćenje i održavanje
Da biste spriječili nastanak opasnosti od nezgode i
oštećenja:
• Izvucite mrežni utikač iz utičnice, prije nego što vršite bilo kakve radove
na uređaju.
• Uređaj nikada ne uronite u vodu ili druge tekućine. To može dovesti do oštećenja dijelova uređaja. Osim toga može doći do opasnosti po život uslijed strujnog udara, kada vlaga dospije na električne dijelove.
Page 21

- 18 -
Čišćenje uređaja:
• Okrenite funkcijsku kapu
y
, sve dok strelica ne bude okrenuta
prema gore. Sada možete skinuti funkcijsku kapu
y
i područje oko brus-
nog kamena
t
očistiti pomoću suhog kista.
• Povlačenjem skinite prihvatnik prašine
u
i očistite ga sa kistom i eventualno
sa blago navlaženom krpom.
• Ostatak uređaja takođe očistite pomoću blago navlažene krpe, ali ne sa
ribajućim ili agresivnim sredstvima za čišćenje. To može oštetiti površine
uređaja.
• Da biste funkcijsku kapu
y
ponovo postavili, držite je tako, da strelica
ponovo bude okrenuta prema gore. Sada možete kapu
y
postaviti i okretanjem blokirati na lijevoj ili desnoj strani. Na koncu gurnite i prihvatnik prašine
u
ponovo u uređaj.
Održavanje
• Uređaj je samoodržavajući. Nisu predviđeni nikakvi radovi oko uređaja
od strane korisnika. U slučaju funkcionalnih smetnji ili vidljivih oštećenja
se obratite servisu za kupce.
• U svrhu čuvanja mrežni kabel namotajte oko kućišta uređaja (Slika A).
Page 22

- 19 -
Zbrinjavanje
Uređaj nikako ne bacajte u obično kućno smeće. Ovaj pzoizvod spada u važnost uredbe evropske direktive 2012/19/EU.
Uređaj zbrinite preko autoriziranog poduzeća za zbrinjavanje otpada ili preko Vašeg komunalnog poduzeća.
Obratite pažnju na aktualno važeće propise. U slučaju dvojbe se povežite sa
svojim mjesnim poduzećem za zbrinjavanje otpada.
Sve materijale ambalaže zbrinite na način neškodljiv za okoliš.
Uvoznik
Lidl Hrvatska d.o.o. k.d.,
p.p. 61
10020 Novi Zagreb
Proizvođač:
KOMPERNASS HANDELS GMBH
BURGSTRASSE 21
44867 BOCHUM
GERMANY
www.kompernass.com
Jamstvo i servis
Na ovaj uređaj vrijedi jamstvo u trajanju od 3 godine od datuma kupovine.
Uređaj je pažljivo proizveden i prije isporuke brižljivo kontroliran.
Molimo sačuvajte blagajnički račun kao dokaz o kupnji. Molimo da se u
slučaju ostvarivanja prava na jamstvo telefonski povežete sa Vašom servisnom
ispostavom. Samo na taj način vaša roba može biti besplatno uručena.
Page 23

- 20 -
Jamstvo vrijedi samo za greške materijala i izrade, a ne za transportne štete,
potrošne dijelove ili oštećenja lomljivih dijelova, na primjer prekidača ili baterija.
Proizvod je namijenjen isključivo za privatnu, a ne za gospodarstvenu uporabu.
U slučaju nestručnog rukovanja, rukovanja protivnog namjeni uređaja, primjene sile i zahvata, koji nisu izvršeni od strane našeg ovlaštenog servisnog
predstavništva, važenje jamstva prestaje. Vaša zakonska prava ovim jamstvom ostaju netaknuta.
Jamstveni rok se ne produžava uslijed ostvarivanja prava na jamstvo. To vrijedi i za zamijenjene i popravljene dijelove. Eventualno već prilikom kupovine
prisutna oštećenja i nedostaci moraju biti javljena neposredno nakon raspakiranja, ali najkasnije dva dana nakon datuma kupovine. Popravke vršene
nakon isteka jamstvenog roka podliježu obavezi plaćanja.
Servis Hrvatska
Tel.: 0800 777 999
E-Mail: kompernass@lidl.hr
Dostupnost deÏurne telefonske linije:
Ponedjeljak do petak od 8:00 - 20:00 sati (SEV)
IAN 95913
Page 24

R
- 21 -
CUPRINS PAGINA
Introducere 22
Scopul utilizării 22
Furnitură 22
Date tehnice 22
Descrierea aparatului 23
Indicaţii de siguranţă 23
Dezambalarea 25
Amplasarea 25
Reglarea 25
Ascuţirea 26
Curăţarea şi îngrijirea 27
Mentenanţa 28
Eliminarea aparatelor uzate 29
Importator 29
Garanţie şi service 29
Page 25

- 22 -
Introducere
Felicitări pentru cumpărarea noului dvs. aparat.
Aţi decis să alegeţi un produs de calitate superioară. Instrucţiunile de utiliza
re fac parte integrantă din acest produs. Acestea cuprind informaţii importante
privind siguranţa, utilizarea şi eliminarea aparatului. Înainte de utilizarea apa
ratului familiarizaţi vă cu toate indicaţiile privind operarea şi siguranţa.
Utilizaţi acest produs numai în modul descris şi numai în scopurile menţionate.
În cazul transmiterii aparatului unei alte persoane, predaţi i de asemenea şi
documentele aferente acestuia.
Scopul utilizării
Acest produs este destinat ascuţirii cuţitelor, şurubelniţelor şi foarfecelor pentru
uz casnic. Este interzisă utilizarea în scopuri profesionale sau industriale.
Furnitură
1 aparat de ascuţit universal electric
1 exemplar din instrucţiunile de utilizare
Date tehnice
Consum: 20 W max.
Tensiune: 230 V ~, 50 Hz
Rotaţii: 3000 min
-1
Clasa de protecţie: II
Timpul de operare continuă: 3 min.
R
Page 26

- 23 -
Timpul de operare continuă indică pentru cât timp un aparat poate fi operat
fără ca motorul să se supraîncălzească şi să se defecteze. După timpul de
operare continuă aparatul trebuie deconectat până în momentul în care
motorul atinge temperatura camerei (cca 30 de minute).
Descrierea aparatului
q
Funcţia „Cuţit cu lamă netedă”
w
Funcţia „Cuţit cu lamă ondulată”
e
Funcţia „Ascuţirea foarfecelor”
r
Găuri pentru şurubelniţă cu cap fix
t
Piatră de ascuţit
y
Capac funcţional şi de protecţie
u
Tavă pentru praf
i
Întrerupător
Indicaţii de siguranţă
Pentru evitarea pericolului prin electrocutare:
• Protejaţi aparatul împotriva umezelii. Utilizaţi aparatul
numai în încăperi uscate, niciodată în aer liber sau în
medii umede.
• Evitaţi deteriorarea cablului de alimentare în timpul
funcţionării, în special din cauza lamelor ascuţite ale
cuţitelor şi foarfecelor.
• Dacă ştecărul sau cablul de alimentare se defectează,
solicitaţi imediat repararea de către personalul specializat autorizat sau de către serviciul pentru clienţi, pentru a evita periclitările.
• Nu deschideţi componentele carcasei în lipsa instrucţiunilor în acest sens.
R
Page 27

- 24 -
• După utilizare sau în absenţa dvs. scoateţi întotdeauna
ştecărul din priză. Produsul mai este sub tensiune atât
timp cât ştecărul mai este în priză.
• Asiguraţi-vă că ştecărul este accesibil în orice moment,
pentru a-l putea scoate repede din priză în caz de pericol.
Pentru a evita pericolul de accidente sau răniri:
• Înainte de fiecare utilizare, controlaţi dacă aparatul se află
în stare ireproşabilă. Dacă se observă deteriorări, punerea în funcţiune a aparatului este
interzisă. În aceste cazuri, aparatul trebuie verificat în
privinţa siguranţei de către serviciul pentru clienţi.
• Asiguraţi-vă că părul, îmbrăcămintea largă sau membrele corpului nu se vor atinge de piatra de ascuţit
t
aflată în rotaţie.
• Purtaţi mănuşi de protecţie pentru a evita rănirea provocată de lamele ascuţite sau la utilizarea dispozitivului
de ascuţit cuţite având capacul funcţional şi de protecţie
y
detaşat.
• Nu este permisă utilizarea de către copii a acestui aparat.
• Acest aparat poate fi utilizat de copiii cu vârsta de peste
8 ani şi de persoanele cu capacităţi fizice, senzoriale
sau mentale reduse sau cu lipsă de experienţă şi/sau cunoştinţe, cu condiţia să fie supravegheate sau să li se fi explicat modul de utilizare în siguranţă şi ele să fi înţeles
posibilele pericole. Copiii nu au voie să se joace cu
aparatul. Curăţarea şi întreţinerea aparatului nu sunt
permise copiilor, fără supraveghere.
R
Page 28

- 25 -
• Atunci când nu este posibilă supravegherea şi înaintea
asamblării, dezasamblării sau curăţării,
aparatul se va scoate întotdeauna din priză.
• Aparatul şi cablul de conexiune nu se vor păstra la îndemâna copiilor.
Dezambalarea
• Verificaţi dacă produsul este complet şi dacă se află în stare ireproşabilă.
• Îndepărtaţi toate componentele ambalajului şi resturile de ambalaj de la
produs.
• Păstraţi ambalajul pentru a putea depozita aparatul atunci când nu îl
utilizaţi sau pentru a l putea expedia în vederea reparaţiilor.
• Înainte de prima folosire curăţaţi componentele conform instrucţiunilor
din capitolul „Curăţarea şi îngrijirea”
Amplasarea
• Aşezaţi aparatul pe o suprafaţă stabilă şi antiderapantă.
• Introduceţi apoi ştecărul în priză.
Reglarea
• Selectaţi funcţia de ascuţire
q w e
dorită prin rotirea capacului
funcţional şi de protecţie
y
, până la fixarea completă a capacului.
• La poziţia
w
„Cuţit cu lama ondulată” simbolul respectiv indică orificiul
de ascuţire (a se vedea fig. C) capacul se fixează în punctul de la capă
tul simbolului.
• Menţineţi apăsat întrerupătorul
i
. Piatra de ascuţit
t
se roteşte până
la eliberarea întrerupătorului
i
.
R
Page 29

- 26 -
Ascuţirea
• Aşezaţi lamele numai când piatra de ascuţit
t
începe să se rotească.
• Trageţi cuţitul şi foarfecele totdeauna de la mâner executând o mişcare
uniformă, nu înainte şi înapoi altfel lama nu va fi ascuţită uniform.
• Nu apăsaţi foarte tare şi ascuţiţi totdeauna numai lame curate pentru
a evita tocirea prematură a pietrei de ascuţit.
• Ascuţiţi cuţitele şi foarfecele astfel încât lamele acestora să formeze un
unghi drept cu planul pietrei de ascuţit (in modul indicat prin forma găurii).
Ascuţirea într un unghi greşit poate distruge orice fel de lamă.
• După ascuţire ştergeţi cu un prosop umed eventualele resturi rămase de
la ascuţire pe lame.
Cuţit cu lamă netedă
Dacă aţi selectat poziţia
q
„Cuţit cu lamă netedă” (fig. B):
• Ascuţiţi întotdeauna pe ambele părţi cuţitele cu lamă netedă în acest
scop sunt disponibile un ghidaj de ascuţire în partea stângă şi unul în
partea dreaptă.
• Atunci când deplasaţi lama, menţineţi cuţitul în ghidajul din partea stângă cât
mai înclinat spre stânga, iar în ghidajul din partea dreaptă, înclinat spre dreapta.
Cuţit cu lamă ondulată
Dacă aţi selectat poziţia
w
„Cuţit cu lamă ondulată” (fig. C):
• Ascuţiţi numai pe partea lamei ondulate direcţia de deplasare a cuţitului
este determinată de poziţia acesteia.
Latura lamei ondulate trebuie să indice în timpul ascuţiriiîn direcţiapietrei
de ascuţit
t
• De regulă lamele ondulate se ascut numai în anumite situaţii. Cuţitele cu lama
zimţată foarte fin (de exemplu cuţite de masă) nu necesită ascuţire ulterioară.
R
Page 30

- 27 -
Ascuţirea foarfecelor
Dacă aţi selectat poziţia
e
„Ascuţirea foarfecelor” (fig. D)
• Ascuţiţi succesiv cele două lame de foarfecă. Pentru aceasta deschideţi
foarfeca şi deplasaţi succesiv ambele lame prin ghidaj.
Şurubelniţa cu cap fix
Atunci când doriţi să ascuţiţi plan o şurubelniţă cu cap fix
r
(fig. E):
• Această operaţiune se poate realiza în orice poziţie a capacului funcţional şi
de protecţie
y
. În acest scop introduceţi şurubelniţa cu cap fix, în funcţie de
lăţimea acesteia, în unul din cele două ghidaje de ascuţire
r
, în partea
frontală a capacului funcţional (vezi latura de deschidere). Suprafaţa
frontală a şurubelniţei este acum ascuţită neted şi plan.
Ascuţirea direct pe piatra de abrazivă
Este posibil ca anumite lame să se ascută mai bine fără capacul funcţional şi de
protecţie
y
direct pe piatra de ascuţit t. Pentru aceasta capacul funcţional şi
de protecţie
y
se va îndepărta (fig. F):
• Rotiţi capacul funcţional şi de protecţie
y
până când săgeata se
poziţionează în partea de sus. Acum puteţi îndepărta capacul funcţional
şi de protecţie
y
.
• Pentru a monta la loc capacul funcţional şi de protecţie
y
ţineţi l astfel încât
săgeata să se poziţioneze din nou în partea de sus. Acum puteţi
monta capacul funcţional şi de protecţie
y
şi îl puteţi bloca prin rotirea
spre stânga sau spre dreapta.
Curăţarea şi îngrijirea
Pentru a evita pericolul de accidente şi pagube materiale:
• Înaintea efectuării oricăror lucrări la aparat, scoateţi ştecărul din priză.
• Nu introduceţi niciodată aparatul în apă sau în alte lichide. Pericol de
moarte prin electrocutare în cazul pătrunderii umezelii la componentele
electrice. De asemenea este posibilă deteriorarea componentelor aparatului.
R
Page 31

- 28 -
Curăţarea aparatului:
• Rotiţi capacul funcţional şi de protecţie
y
până când săgeata se
poziţionează în partea de sus. Acum puteţi îndepărta capacul funcţional
şi de protecţie
y
şi puteţi curăţa zona din jurul pietrei de ascuţit
t
cu
ajutorul unei pensule uscate.
• Scoateţi tava pentru praf
u
şi curăţaţi o cu o pensulă uscată şi, eventual,
cu un prosop uşor umezit.
• Curăţaţi celelalte componente ale aparatului tot cu un prosop uşor umezit
dar nu cu detergenţi corosivi sau agresivi. Aceştia pot ataca suprafeţele.
• Pentru a monta la loc capacul funcţional şi de protecţie
y
ţineţi l astfel încât
săgeata să se poziţioneze din nou în partea de sus. Acum puteţi
monta capacul funcţional şi de protecţie
y
şi îl puteţi bloca prin rotirea
spre stânga sau spre dreapta. La final introduceţi tava pentru praf
u
la
loc în aparat.
Mentenanţa
• Aparatul nu necesită mentenanţă. Nu există lucrări la aparat sau în aparat
care să fie executate de utilizator. În caz de erori de funcţionare sau deteri
orări vizibile adresaţi vă serviciului pentru clienţi.
• În vederea depozitării înfăşuraţi cablul de alimentare în jurul carcasei apa
ratului (Fig. A).
R
Page 32

- 29 -
Eliminarea aparatelor uzate
Nu aruncaţi aparatul sub nicio formă în gunoiul menajer
obişnuit. Acest produs face obiectul Directivei europene
2012/19/EU.
Eliminaţi aparatul prin intermediul unei firme specializate şi autorizate sau prin
intermediul serviciului local de eliminare a deşeurilor.
Respectaţi reglementările actuale în vigoare. Dacă aveţi nelămuriri, contactaţi
serviciul local de eliminare a deşeurilor.
Eliminaţi toate materialele de ambalare în mod ecologic.
Importator
KOMPERNASS HANDELS GMBH
BURGSTRASSE 21
44867 BOCHUM
GERMANY
www.kompernass.com
Garanţie şi service
Pentru acest aparat, se acordă o garanţie de 3 ani începând cu data cumpărării.
Aparatul a fost produs cu grijă şi verificat cu scrupulozitate înaintea livrării.
Păstraţi bonul de casă pentru a dovedi cumpărarea. Dacă aveţi solicitări privind
garanţia, contactaţi tele fonic centrul dumneavoastră de service. Numai astfel
poate fi asigurată o expediere gratuită a produsului dumneavoastră.
R
Page 33

- 30 -
Garanţia acoperă numai defectele de material sau de fabricaţie, nu şi deteri
orările rezultate în urma transportului, piesele de uzură sau deteriorările
apărute la componentele fragile, de ex. comutatoare sau acumulatoare. Apa
ratul este destinat numai pentru uz privat şi nu pentru o utilizare profesională.
În cazul manevrării abuzive sau necorespunzătoare, uzului de forţă şi inter
venţiilor care nu au fost realizate de către filiala noastră autorizată de service,
garanţia îşi pierde valabilitatea. Drepturile dumneavoastră legale nu sunt limi
tate prin această garanţie.
Perioada de garanţie nu este prelungită după realizarea reparaţiilor realizate
în perioada garanţie. Acest lucru este valabil şi pentru piesele înlocuite şi repa
rate. Deteriorările şi deficienţele prezente deja la cumpărare trebuie semnalate
imediat după dezambalare sau cel târziu în două zile de la data cumpărării.
Reparaţiile necesare după expirarea perioadei de garanţie se efectuează
contra cost.
Service România
Tel.: 0800896637
E-Mail: kompernass@lidl.ro
Acces linie telefonică directă:
De luni până vineri, între orele 8:00 - 20:00 (CET)
IAN 95913
R
R
Page 34

- 31 -
Съдържание Страница
Въведение 32
Предназначение 32
Окомплектовка на доставката 32
Технически характеристики 32
Описание на уреда 33
Указания за безопасност 33
Разопаковане 35
Инсталиране 35
Настройване 35
Заточване 36
Почистване и поддръжка 37
Техническо обслужване 38
Предаване за отпадъци 39
Вносител 39
Гаранция и сервиз 39
Page 35

- 32 -
Въведение
Поздравяваме ви за покупката на вашия нов уред.
Избрали сте висококачествен продукт. Ръководството за потребителя е
неразделна част от този продукт. То съдържа важни указания относно
безопасността, употребата и предаването на отпадъци. Преди да използвате
продукта се запознайте с всички указания за обслужване и безопасност.
Използвайте продукта единствено според описанието и за указаните
области на приложение. Предавайте продукта на трети лица заедно с
цялата документация.
Предназначение
Този продукт е предназначен за заточване на ножове, отвертки и ножици
в домашни условия. Този продукт не е предназначен за търговски и
промишлени цели.
Окомплектовка на доставката
1 бр. eлектрическо точило
1 бр. ръководство за потребителя
Технически характеристики
Консумирана мощност: макс. 20 W
Захранващо напрежение: 230 V ~, 50 Hz
Обороти: 3000 мин
-1
Клас на защита: II
Продължителност на
кратковременния режим: 3 мин.
Page 36

- 33 -
Продължителността на кратковременния режим показва колко време
може да се използва уредът без да прегрее и да се повреди двигателят.
След посочената продължителност на кратковременния режим уредът
трябва да се изключи, докато двигателят не се охлади на стайна
температура (около 30 мин.).
Описание на уреда
q
Функция "Нож с гладко острие"
w
Функция "Нож с назъбено острие"
e
Функция "Заточване на ножици"
r
Отвор за заточване на плоски отвертки
t
Точилен камък
y
Функционална и предпазна капачка
u
Контейнер за стружки
i
Включвател
Указания за безопасност
За да предотвратите опасност
от електрически удар:
• Пазете уреда от влага. Използвайте го само в сухи
помещения, никога на открито или във влажна среда.
• Внимавайте по време на работа кабелът да не бъде
повреден, особено от остриетата на ножовете или
ножиците.
• Повредени щепсели и кабели трябва незабавно да
се сменят от оторизирани специалисти или сервиз,
за да се избегнат опасности.
• Никога не отваряйте никакви елементи от корпуса,
освен ако тук не е посочено друго.
Page 37

- 34 -
• След употреба или ако отсъствате по-дълго време,
винаги изключвайте щепсела от контакта. В продукта
винаги има напрежение, докато щепселът е включен
в контакта.
• Погрижете се, щепселът да е достъпен по всяко
време, за да можете при опасност да го издърпате
бързо от контакта.
За да предотвратите опасност
от злополука или нараняване:
• Преди всяка употреба проверявайте дали уредът е в
изправно състояние. Ако по него се виждат повреди, не
трябва да продължавате да използвате уреда. Първо
го дайте в сервиз за проверка на безопасността.
• Внимавайте косите, свободното облекло или части
от тялото да не влизат в контакт с въртящото се
точилен камък t.
• Носете защитни ръкавици, за да избегнете наранявания
от остриетата или когато използвате уреда за заточване
на ножове със свалена функционална и предпазна
капачка y.
• Този уред не трябва да се използва от деца.
• Този уред може да се използва от деца на възраст
над 8 години, както и от лица с ограничени
психически, сетивни или умствени възможности или
без опит и знания, ако са под наблюдение или са
инструктирани по отношение на безопасната
употреба на уреда и разбират опасностите,
произтичащи от работата с него. Не допускайте
деца да играят с уреда. Почистването и
поддръжката от потребителя не трябва да се
извършват от деца, ако не са под наблюдение.
Page 38

- 35 -
• Уредът винаги трябва да се изключва от мрежата,
когато не е под наблюдение и преди сглобяване,
разглобяване или почистване.
• Уредът и захранващият кабел трябва да се държат
далеч от деца.
Разопаковане
• Проверете дали са налични всички компоненти на продукта и дали
е в безупречно и изправно състояние.
• Отстранете всички части на опаковката и остатъците от нея по продукта.
• Запазете опаковката, за да съхранявате уреда в нея, когато не го
използвате или да го върнете за ремонт.
• Почистете всички части преди първата употреба според указанията
в глава "Почистване и поддръжка".
Инсталиране
• Поставете уреда върху стабилна и нехлъзгаща се повърхност.
• След това включете щепсела в контакта.
Настройване
• За да изберете желаната функция за заточване
q w e
, въртете
функционалната и предпазна капачка
y
, докато усетите, че тя се
фиксира.
• При положение
w
“Нож с назъбено острие“ съответният символ сочи
отвора за заточване (виж фиг. С) – капачката се фиксира в точката в
края на символа.
• Дръжте включвателя
i
натиснат. Точилният камък
t
се върти, докато
отново освободите включвателя
i
.
Page 39

- 36 -
Заточване
• Поставяйте остриетата едва, когато точилният камък
t
започне да се
върти.
• Винаги издърпвайте ножовете и ножиците от опората с равномерно и
плавно движение, не ги връщайте обратно и не ги движете нагоре-надолу,
защото предметът ще се заточи неравномерно.
• Не натискайте силно и заточвайте винаги само чисти остриета, за
да предотвратите преждевременно износване на точилния камък.
• Заточвайте ножовете и ножиците винаги така, че острието да е под остър
ъгъл спрямо точилния камък (както се изисква от формата на самия
отвор). Заточването под неправилен ъгъл може да повреди всяко острие.
• След заточването отстранете остатъците от прах по острието с влажна
кърпа.
Нож с гладко острие
Ако сте избрали позиция
q
"Нож с гладко острие" (фиг. B):
• Винаги заточвайте ножовете с гладки остриета от двете страни.
За целта разполагате с ляв и десен улей за заточване.
• Докато прокарвате острието, дръжте ножа в левия улей наклонен
максимално наляво, а в десния - надясно.
Нож с назъбено острие
Ако сте избрали позиция
w
"Нож с назъбено острие" (фиг. С):
• Заточвайте ножовете само от страната с назъбеното острие. Посоката
на прокарване на ножа се определя от неговото положение.
При заточването страната с вълнообразното заточване трябва да е
обърната към точилото
t
.
• Назъбените остриета могат да се заточват само до определена степен.
Ножовете с фини зъбци (напр. ножове за хранене) не се нуждаят от
допълнително заточване.
Page 40

- 37 -
Заточване на ножици
Ако сте избрали позиция
e
"Заточване на ножици" (фиг. D):
• Заточете последователно двете остриета. За целта разтворете
ножицата и прокарайте последователно двете остриета през улея.
Плоски отвертки
Ако желаете да заострите плоска отвертка
r
(фиг. E):
• Това е възможно във всяка позиция на функционалната и предпазна
капачка
y
. За целта вкарайте шлицовата отвертка според ширината и
в един от двата отвора за заточване
r
отпред на функционалната
капачка (виж разгъващата се страница). Челната повърхност на
отвертката се заостря гладко и равно.
Директно заточване на точилен камък
Определени остриета могат се заточват по-добре без функционална и
предпазна капачка
y
директно на точилния камък t. За целта
функционалната и предпазна капачка
y
се сваля (фиг. F):
• Въртете функционалната и предпазна капачка
y
, докато стрелката
застане горе. Сега можете да свалите функционалната и
предпазна капачка
y
.
• За да поставите функционалната и предпазна капачка
y
отново,
дръжте я така, че стрелката да застане отгоре. Сега можете да
поставите функционалната и предпазна капачка
y
y и да я фиксирате
чрез завъртане наляво или надясно.
Почистване и поддръжка
За да предотвратите опасност от злополука или щети:
• Изключете щепсела от контакта, преди да извършвате каквито и да
било работи по уреда.
• Никога не потапяйте уреда във вода или други течности. Ако
електрическите компоненти се навлажнят, възниква опасност за
живота поради електрически удар. Също така частите на уреда
могат да се повредят.
Page 41

- 38 -
Почистване на уреда:
• Въртете функционалната и предпазна капачка
y
, докато стрелката
застане горе. Сега можете да свалите функционалната и
предпазна капачка
y
и да почистите зоната около точилния камък
t
със суха четка.
• Извадете контейнера за стружки
u
, почистете го с четка и ако е
необходимо, с леко навлажнена кърпа.
• Почистете и останалата част от уреда с леко навлажнена кърпа, а
не с абразивен или корозивен почистващ препарат. Той може да
разяде повърхностите.
• За да поставите функционалната и предпазна капачка
y
отново,
дръжте я така, че стрелката да застане отгоре. Сега можете да
поставите функционалната и предпазна капачка
y
и да я фиксирате
чрез завъртане наляво или надясно. Накрая върнете обратно
контейнера за стружки
u
в уреда.
Техническо обслужване
• Уредът не се нуждае от техническо обслужване. Не е предвидено
потребителят да извършва каквито е да е работи по или в уреда. При
неправилно функциониране или видими повреди се обръщайте към
сервиза.
• Когато прибирате за съхранение, навийте захранващия кабел около
корпуса на уреда (Фиг. A).
Page 42

- 39 -
Предаване за отпадъци
В никакъв случай не изхвърляйте уреда с обикновените
битови отпадъци. Този продукт подлежи на европейската
директива 2012/19/EU.
Предайте уреда в специализирано предприятие за рециклиране или
местния пункт за събиране на отпадъци.
Спазвайте действащите в момента разпоредби. В случай на съмнение
се обърнете към местния пункт за събиране на отпадъци.
Предавайте опаковъчните материали за екологично изхвърляне.
Вносител
KOMPERNASS HANDELS GMBH
BURGSTRASSE 21
44867 BOCHUM
GERMANY
www.kompernass.com
Гаранция и сервиз
За този уред вие получавате гаранция от 3 години от датата на закупуване.
Уредът е произведен старателно и е изпитан щателно преди доставката.
Запазете касовата бележка като доказателство за покупката. Ако се
наложи да използвате гаранцията, първо се обадете в сервиза. Само по
този начин може да се осигури безплатно връщане на вашата стока.
Page 43

- 40 -
Предоставянето на гаранция важи само за материални или фабрични
дефекти, но не и за транспортни щети, износващи се части или при
повреда на лесно чупливи части, напр. ключове или акумулаторни
батерии. Продуктът е предназначен единствено за лична, а не за
промишлена употреба.
При нецелесъобразна и неправилна употреба, упражняване на сила
или ремонтни дейности, които не са извършени от нашия оторизиран
сервизен филиал, гаранцията отпада. Законовите ви права не се
ограничават от тази гаранция.
Гаранционният срок не се удължава от гаранцията. Това важи и за
сменени и ремонтирани части. Евентуалните налични още при закупуването
повреди и дефекти трябва да се съобщават още при разопаковането,
но най-късно два дни след датата на закупуване. След като изтече
гаранционният срок, ремонтите се заплащат.
Сервизно обслужване България
Тел.: 00800 111 4920
Е-мейл: kompernass@lidl.bg
Работно време на горещата линия:
понеделник до петък от 8:00 ч. – 20:00 ч. (централноевропейско време)
IAN 95913
Page 44

- 41 -
Περιεχόμενα Σελίδα
Εισαγωγή 42
Σκοπός χρήσης 42
Σύνολο αποστολής 42
Τεχνικές πληροφορίες 42
Περιγραφή συσκευής 43
Υποδείξεις ασφαλείας 43
Αποσυσκευασία 45
Εγκατάσταση 45
Ρύθμιση 45
Τρόχισμα 46
Καθαρισμός και συντήρηση 47
Συντήρηση 48
Απομάκρυνση 49
Εισαγωγέας 49
Εγγύηση και σέρβις 49
Page 45

- 42 -
Εισαγωγή
Συγχαρητήρια για την αγορά της νέας σας συσκευής.
Αποφασίσατε έτσι την απόκτηση ενός προϊόντος υψηλής ποιότητας. Οι
οδηγίες χειρισμού είναι τμήμα αυτού του προϊόντος. Περιέχουν σημαντικές
υποδείξεις για την ασφάλεια, τη χρήση και την απόρριψη.Πριν από τη χρήση
του προϊόντος εξοικειωθείτε με όλες τις υποδείξεις χειρισμού και ασφάλειας.
Χρησιμοποιείτε το προϊόν μόνο όπως περιγράφεται και για τα αναφερόμενα
πεδία χρήσης. Σε περίπτωση παράδοσης του προϊόντος σε τρίτους,
παραδίδετε και όλα τα έγγραφα.
Σκοπός χρήσης
Αυτό το προϊόν προβλέπεται για το τρόχισμα μαχαιριών, κατσαβιδιών και
ψαλιδιών στο ιδιωτικό νοικοκυριό. Αυτό το προϊόν δεν προβλέπεται για
επαγγελματικούς ή βιομηχανικούς σκοπούς.
Σύνολο αποστολής
1 x Ηλεκτρική συσκευή ακονίσματος γενικής χρήσης
1 x Οδηγία χρήσεως
Τεχνικές πληροφορίες
Μέγιστη απορρόφηση ισχύος : 20 W
Τάση δικτύου: 230 V ~/ 50Hz
Περιστροφές: 3000 min
-1
Κατηγορία προστασίας : II
Χρόνος σύντομης λειτουργίας KB: 3 λεπτά
Page 46

- 43 -
Ο χρόνος σύντομης λειτουργίας δείχνει για πόσο χρόνο μπορεί κανείς να
λειτουργεί μια συσκευή χωρίς να υπερθερμανθεί το μοτέρ και χωρίς να πάθει
βλάβες. Μετά από τον δοθέντα χρόνο σύντομης λειτουργίας πρέπει να
απενεργοποιηθεί η συσκευή έως ότου το μοτέρ κρυώσει και φτάσει σε
θερμοκρασία δωματίου (περ. 30 λεπτά).
Περιγραφή συσκευής
q
Λειτουργία "Μαχαίρι με λείο τρόχισμα"
w
Λειτουργία "Μαχαίρι με κυματοειδές τρόχισμα"
e
Λειτουργία "Τρόχισμα ψαλιδιού"
r
Ανοίγματα τροχίσματος για κατσαβίδια με εγκοπή
t
Πέτρα ακονίσματος
y
Καπάκι λειτουργίας και προστασίας
u
Υποδοχή σκόνης
i
Διακόπτης on/off
Υποδείξεις ασφαλείας
Για την αποφυγή κινδύνου μέσω ηλεκτροπληξίας:
• Προστατεύετε το προϊόν από την υγρασία.
Χρησιμοποιείτε τη μόνο σε στεγνούς χώρους, όχι σε
εξωτερικό χώρο ή σε υγρό περιβάλλον.
• Προσέχετε ότι κατά τη λειτουργία, το καλώδιο δικτύου
δεν πρέπει να πάθει ζημιά, κυρίως όχι μέσω αιχμηρών
λεπίδων μαχαιριών ή ψαλιδιών.
• Τα χαλασμένα βύσματα ή καλώδια δικτύου πρέπει να
αντικαθίστανται αμέσως από εξουσιοδοτημένο ειδικό
προσωπικό ή από το τμήμα εξυπηρέτησης πελατών ώστε
να αποφεύγονται κίνδυνοι.
• Ποτέ μην ανοίγετε κανένα τμήμα του περιβλήματος,
εφόσον δεν υπάρχει σχετική οδηγία για αυτό.
Page 47

- 44 -
• Μετά τη χρήση ή σε περίπτωση απουσίας τραβάτε πάντα
το βύσμα από την πρίζα. Υπάρχει τάση δικτύου στο
προϊόν, όσο το βύσμα δικτύου βρίσκεται στην πρίζα.
• Φροντίζετε ώστε το βύσμα να είναι πάντα προσβάσιμο
ώστε να μπορείτε να το τραβήξετε από την πρίζα.
Προς αποφυγή κινδύνου ατυχημάτων και
τραυματισμού:
• Ελέγχετε πριν από κάθε χρήση τη συσκευή για την
άψογή της κατάσταση. Εάν υπάρχουν αναγνωρίσιμες
ζημιές, δεν επιτρέπεται να συνεχίσετε τη χρήση της
συσκευής. Επιτρέψτε τότε τον έλεγχο της από το τμήμα
εξυπηρέτησης πελατών σχετικά με την ασφάλεια.
• Προσέχετε ώστε να μην έρθουν σε επαφή με την
περιστρεφόμενη πέτρα ακονίσματος τα μαλλιά, χαλαρός
ρουχισμός ή τμήματα του σώματος t.
• Φοράτε προστατευτικά γάντια, ώστε να αποφεύγετε
τραυματισμούς μέσω αιχμηρών λεπίδων ή εάν λειτουργείτε
τη συσκευή τροχίσματος χωρίς καπάκι λειτουργίας y.
• Η παρούσα συσκευή δεν επιτρέπεται να χρησιμοποιείται
από παιδιά.
• Αυτή η συσκευή επιτρέπεται να χρησιμοποιείται από παιδιά
άνω των 8 ετών, καθώς και από άτομα με περιορισμένες
φυσικές, αισθητηριακές ή νοητικές ικανότητες ή ελλείψεις
από άποψη εμπειρίας και γνώσεων, εφόσον επιτηρούνται ή
έχουν ενημερωθεί αναφορικά με την ασφαλή χρήση της
συσκευής και κατανοούν τους προκύπτοντες κινδύνους.
Τα παιδιά δεν επιτρέπεται να παίζουν με τη συσκευή. Ο
καθαρισμός και η συντήρηση χρήστη δεν επιτρέπεται να
διεξάγονται από παιδιά, χωρίς επιτήρηση.
Page 48

- 45 -
• Η συσκευή πρέπει να αποσυνδέεται πάντα από το δίκτυο
όταν δεν επιτηρείται και πριν από τη συναρμολόγηση, την
αποσυναρμολόγηση ή τον καθαρισμό.
• Η συσκευή και το καλώδιο σύνδεσής της πρέπει να
φυλάσσονται μακριά από παιδιά.
Αποσυσκευασία
• Ελέγξτε το προϊόν για την πληρότητά του και για την άψογη, χωρίς ζημιές
κατάσταση.
• Απομακρύνετε όλα τα τμήματα από τη συσκευασία και τα υπολείμματα
συσκευασίας από το προϊόν.
• Φυλάξτε τη συσκευασία ώστε να τοποθετείτε τη συσκευή εκεί μέσα όταν δεν
τη χρησιμοποιείτε ή για να μπορείτε να την στείλετε σε περίπτωση επισκευών.
• Καθαρίζετε όλα τα τμήματα πριν από την πρώτη χρήση, όπως περιγράφεται
στο Κεφάλαιο “Καθαρισμός και φροντίδα”.
Εγκατάσταση
• Τοποθετήστε τη συσκευή επάνω σε μια σταθερή, αντιολισθητική βάση.
• Κατόπιν βάλτε το φις στην πρίζα.
Ρύθμιση
• Επιλέξτε μέσω περιστροφής στο καπάκι λειτουργίας
y
την επιθυμητή
λειτουργία τροχίσματος
q w e
, έως ότου το καπάκι κουμπώσει με ήχο.
• Στη θέση
w
“Μαχαίρι με κυματοειδές τρόχισμα” το αντίστοιχο σύμβολο
δείχνει στο άνοιγμα τροχίσματος (βλέπε Εικ. C) – το καπάκι κουμπώνει στο
σημείο στο τέλος του συμβόλου.
• Κρατήστε το διακόπτη on/off
i
πατημένο. Η πέτρα ακονίσματος
t
περιστρέφεται τόσο έως ότου αφήσετε πάλι το διακόπτη on/off i.
Page 49

- 46 -
Τρόχισμα
• Εφαρμόστε τις λεπίδες μόνο όταν περιστρέφεται η πέτρα ακονίσματος t.
• Τραβάτε τα μαχαίρια και ψαλίδια πάντα με ομοιόμορφη κίνηση από τον
αναστολέα άξονα, όχι πάλι προς τα πίσω ή πέρα - δώθε – αλλιώς το
αποτέλεσμα τροχίσματος θα είναι ανομοιόμορφο.
• Μην ασκείτε μεγάλη πίεση και τροχίζετε πάντα μόνο καθαρές λεπίδες ώστε
να αποφεύγετε πρόωρη φθορά της πέτρας ακονίσματος.
• Τροχίζετε πάντα τα μαχαίρια και ψαλίδια έτσι ώστε η λεπίδα να βρίσκεται στη
μυτερή γωνία στην πέτρα ακονίσματος (όπως φαίνεται μέσω της μορφής του
ανοίγματος). Τρόχισμα στη λάθος γωνία μπορεί να καταστρέψει κάθε λεπίδα.
• Απομακρύνετε μετά το τρόχισμα ενδεχόμενα υπολείμματα σκόνης
τροχίσματος στις λεπίδες, με ένα νωπό πανί.
Μαχαίρι με λείο τρόχισμα
Εάν έχετε επιλέξει τη θέση
q
“Μαχαίρι με λείο τρόχισμα” (Εικ. B):
• Τροχίζετε τα μαχαίρια με λείο τρόχισμα πάντα και από τις δύο πλευρές –
για αυτό διατίθενται μια αριστερή και μια δεξιά οδήγηση τροχίσματος.
• Κρατάτε το μαχαίρι στην αριστερή οδήγηση με όσο μεγαλύτερη κλίση προς
τα αριστερά γίνεται και στη δεξιά οδήγηση με κλίση προς τα δεξιά, όσο
τραβάτε τη λεπίδα.
Μαχαίρι με κυματοειδές τρόχισμα
Εάν έχετε επιλέξει τη θέση
w
“Μαχαίρι με κυματοειδές τρόχισμα” (Εικ. C):
• Τροχίζετε τα μαχαίρια μόνο σε εκείνη την πλευρά με την οδόντωση – ανάλογα
με το που βρίσκεται αυτή, επιτυγχάνεται η κατεύθυνση έλξης για το μαχαίρι.
Η πλευρά της οδοντωτής λεπίδας πρέπει κατά το τρόχισμα να δείχνει προς
την κατεύθυνση της πέτρας ακονίσματος
t
.
• Η οδόντωση μπορεί γενικά να επανα-τροχίζεται ανάλογα με την περίπτωση.
Μαχαίρια με τρόχισμα πριονιού με λεπτή οδόντωση δεν απαιτούν επανατρόχισμα.
Page 50

- 47 -
Τρόχισμα ψαλιδιού
Εάν έχετε επιλέξει τη θέση
e
“Τρόχισμα ψαλιδιού” (Εικ. D):
• Τροχίζετε διαδοχικά και τις δύο λεπίδες ψαλιδιού. Για αυτό ανοίξτε το
μαχαίρι και τραβήξτε διαδοχικά τις δύο λεπίδες μέσα από την οδήγηση
(βλέπε ανοιχτή πλευρά).
Κατσαβίδι με εγκοπή
Εάν θέλετε να τροχίσετε ένα κατσαβίδι με εγκοπή
r
στην επιφάνεια (Εικ. E):
• Αυτό γίνεται σε κάθε θέση του καπακιού λειτουργίας
y
. Για αυτό εισάγετε
το κατσαβίδι με εγκοπή αντίστοιχα με το πλάτος του, μέσα από ένα από τα
δύο ανοίγματα τροχίσματος
r
μπροστά, στο καπάκι λειτουργίας (βλέπε
ανοιχτή πλευρά). Η εφαπτόμενη επιφάνεια του κατσαβιδιού τροχίζεται
τώρα επίπεδα.
Τρόχισμα απευθείας στην πέτρα τροχίσματος
Ορισμένες λεπίδες μπορούν ενδεχομένως να τροχιστούν καλύτερα χωρίς καπάκι
λειτουργίας
y
απευθείας στην πέτρα ακονίσματος t: Για αυτό μπορεί να
απομακρύνεται το καπάκι λειτουργίας
y
(Εικ. F):
• Περιστρέψτε το καπάκι λειτουργίας
y
, έως ότου το βέλος βρίσκεται
επάνω. Τώρα μπορείτε να απομακρύνετε το καπάκι λειτουργίας
y
.
• Για να τοποθετήσετε πάλι το καπάκι λειτουργίας
y
, κρατήστε το έτσι ώστε
το βέλος να βρίσκεται πάλι επάνω. Τώρα μπορείτε να ωθήσετε προς
τα επάνω το καπάκι και να το ασφαλίσετε μέσω περιστροφής προς τα
αριστερά ή δεξιά.
Καθαρισμός και συντήρηση
Για να αποφύγετε κινδύνους και βλάβες:
• Τραβήξτε πρώτα το βύσμα από την πρίζα, προτού διεξάγετε οποιεσδήποτε
εργασίες στη συσκευή.
• Ποτέ μη βυθίζετε τη συσκευή στο νερό ή σε υγρά. Αυτό μπορεί να προκαλέσει
ζημιές στα τμήματα της συσκευής. Επίσης μπορεί να υπάρχει και κίνδυνος
θανάτου μέσω ηλεκτροπληξίας εάν φτάσει υγρασία σε ηλεκτρικά τμήματα.
Page 51

- 48 -
Καθαρισμός συσκευής:
• Περιστρέψτε το καπάκι λειτουργίας
y
, έως ότου το βέλος βρίσκεται
επάνω. Τώρα μπορείτε να απομακρύνετε το καπάκι λειτουργίας
y
και να
καθαρίσετε τον τομέα γύρω από την πέτρα ακονίσματος
t
με ένα στεγνό
πινέλο.
• Τραβήξτε την υποδοχή σκόνης
u
και καθαρίστε την με ένα πινέλο και εάν
απαιτείται με ένα ελαφρά νωπό πανί.
• Καθαρίζετε την υπόλοιπη συσκευή επίσης με ένα ελαφρώς νωπό πανί, όχι
με τριβικό ή επιθετικό καθαριστικό μέσο. Κάτι τέτοιο μπορεί να προσβάλει
τις επιφάνειες.
• Για να τοποθετήσετε πάλι το καπάκι λειτουργίας
y
κρατήστε το έτσι ώστε το
βέλος να βρίσκεται πάλι επάνω. Τώρα μπορείτε να ωθήσετε προς τα
επάνω το καπάκι
y
και να το ασφαλίσετε μέσω περιστροφής προς τα
αριστερά ή δεξιά. Τέλος ωθήστε και την υποδοχή σκόνης
u
πάλι στη
συσκευή.
Συντήρηση
• Η συσκευή δε χρειάζεται συντήρηση. Δεν προβλέπονται κανενός είδους
εργασίες επάνω ή μέσα στη συσκευή από το χρήστη. Σε ελαττωματικές
λειτουργίες ή σε αναγνωρίσιμες βλάβες απευθυνθείτε στο τμήμα
εξυπηρέτησης πελατών.
• Τυλίξτε το καλώδιο δικτύου για τη φύλαξη του γύρω από το περίβλημα
συσκευής (Απεικ. A).
Page 52

- 49 -
Απομάκρυνση
Σε καμία περίπτωση μην πετάξετε τη συσκευή στα οικιακά
απορρίμματα.
Αυτό το προϊόν υπόκειται στην Ευρωπαϊκή Οδηγία 2012/19/EU.
Απομακρύνετε τη συσκευή μέσω μιας εγκεκριμένης επιχείρησης απόρριψης ή
μέσω της κοινοτικής επιχείρησης απόρριψης.
Προσέχετε τις τρέχουσες ισχύουσες προδιαγραφές. Σε περίπτωση αμφιβολιών
ελάτε σε επαφή με την επιχείρηση απόρριψης.
Απομακρύνετε όλα τα υλικά συσκευασίας με έναν φιλικό προς το
περιβάλλον τρόπο.
Εισαγωγέας
KOMPERNASS HANDELS GMBH
BURGSTRASSE 21
44867 BOCHUM
GERMANY
www.kompernass.com
Εγγύηση και σέρβις
Έχετε για αυτή τη συσκευή 3 χρόνια εγγύηση από την ημερομηνία αγοράς. Η
συσκευή κατασκευάστηκε και ελέγχθηκε προσεκτικά πριν από την αποστολή.
Παρακαλούμε φυλάξτε την απόδειξη ταμείου ως απόδειξη για την αγορά.
Παρακαλούμε επικοινωνήστε τηλεφωνικά με την υπηρεσία σέρβις σε περίπτωση
εγγύησης. Μόνο έτσι μπορεί να εξασφαλιστεί μια δωρεάν αποστολή του
εμπορεύματός σας.
Page 53

- 50 -
Η απόδοση εγγύησης ισχύει μόνο για σφάλματα υλικού ή κατασκευής, όχι
όμως για ζημιές από τη μεταφορά, για εξαρτήματα φθοράς ή για βλάβες σε
εύθραυστα εξαρτήματα, π.χ. διακόπτες ή συσσωρευτές. Το προϊόν
προορίζεται μόνο για την ιδιωτική και όχι για την επαγγελματική χρήση.
Σε περίπτωση κακής μεταχείρισης και ακατάλληλης χρήσης, σε χρήση βίας
και σε παρεμβάσεις οι οποίες δεν διεξήχθησαν από το εξουσιοδοτημένο μας
τμήμα σέρβις, η εγγύηση παύει να ισχύει. Τα νομικά σας δικαιώματα δεν
περιορίζονται μέσω αυτής της εγγύησης.
Ο χρόνος εγγύησης δεν επεκτείνεται μέσω της απόδοσης εγγύησης. Αυτό
ισχύει και για εξαρτήματα τα οποία έχουν αντικατασταθεί ή επισκευαστεί.
Ενδεχόμενες ήδη υπάρχουσες κατά την αγορά, ζημιές και ελλείψεις πρέπει να
αναφέρονται αμέσως μετά την αποσυσκευασία, το αργότερο όμως δύο ημέρες
μετά την ημερομηνία αγοράς. Επισκευές που εμφανίζονται μετά τη λήξη του
χρόνου εγγύησης χρεώνονται.
Σέρβις Ελλάδα
Tel.: 801 5000 019 (0,03 EUR/Min.)
E-Mail: kompernass@lidl.gr
Τηλεφωνικό κέντρο (Hotline):
Δευτέρα έως Παρασκευή, 8:00 – 20:00 (CET)
IAN 95913
Page 54

- 51 -
Page 55

- 52 -
INHALTSVERZEICHNIS SEITE
Einleitung 52
Verwendungszweck 52
Lieferumfang 52
Technische Daten 52
Gerätebeschreibung 53
Sicherheitshinweise 53
Auspacken 55
Aufstellen 55
Einstellen 55
Schleifen 56
Reinigung und Pflege 57
Wartung 58
Entsorgen 59
Importeur 59
Garantie und Service 59
Page 56

- 53 -
Einleitung
Herzlichen Glückwunsch zum Kauf Ihres neuen Gerätes.
Sie haben sich damit für ein hochwertiges Produkt entschieden. Die Bedienungsanleitung ist Bestandteil dieses Produkts. Sie enthält wichtige Hinweise
für Sicherheit, Gebrauch und Entsorgung. Machen Sie sich vor der Benutzung des Produkts mit allen Bedien- und Sicherheitshinweisen vertraut. Benutzen Sie das Produkt nur wie beschrieben und für die angegebenen Einsatzbereiche. Händigen Sie alle Unterlagen bei Weitergabe des Produkts an
Dritte mit aus.
Verwendungszweck
Dieses Produkt ist vorgesehen zum Schärfen von Messern, Schraubendrehern
und Scheren im privaten Hausgebrauch. Dieses Produkt ist nicht vorgesehen
für gewerbliche oder industrielle Zwecke.
Lieferumfang
1 x Elektrischer Allesschärfer
1 x Bedienungsanleitung
Technische Daten
Leistungsaufnahme: 20 W max.
Netzspannung: 230 V ~, 50 Hz
Umdrehungen: 3000 min
-1
Schutzklasse: II
KB-Zeit: 3 min.
Page 57

- 54 -
Die KB-Zeit (Kurzzeitbetrieb) gibt an, wie lange man ein Gerät betreiben
kann, ohne dass der Motor überhitzt und Schaden nimmt. Nach der angegebenen KB-Zeit muss das Gerät solange ausgeschaltet werden, bis sich der
Motor auf Raumtemperatur abgekühlt hat (ca. 30 Minuten).
Gerätebeschreibung
q
Funktion “Messer mit glattem Schliff”
w
Funktion “Messer mit Wellenschliff”
e
Funktion “Scherenschliff”
r
Schleiföffnungen für Schlitz-Schraubendreher
t
Schleifstein
y
Funktions- und Schutzkappe
u
Staubmulde
i
Einschalter
Sicherheitshinweise
Um Gefahr durch elektrischen Schlag zu vermeiden:
• Schützen Sie das Produkt vor Feuchtigkeit. Verwenden Sie
es nur in trockenen Räumen, nicht im Freien oder in
feuchter Umgebung.
• Achten Sie darauf, dass im Betrieb das Netzkabel nicht
beschädigt werden kann, insbesondere nicht durch
scharfe Messer- oder Scherenklingen.
• Lassen Sie beschädigte Netzstecker oder Netzkabel sofort von autorisiertem Fachpersonal oder dem Kundenservice austauschen, um Gefährdungen zu vermeiden.
• Öffnen Sie niemals irgendwelche Gehäuseteile, soweit
nicht hier dazu angeleitet wird.
Page 58

- 55 -
• Ziehen Sie nach Gebrauch oder bei Abwesenheit immer den Netzstecker aus der Steckdose. Es liegt Netzspannung im Produkt an, solange der Netzstecker in
der Steckdose steckt.
• Sorgen Sie dafür, dass der Stecker jederzeit erreichbar
ist, um ihn bei Gefahr schnell aus der Steckdose ziehen
zu können.
Um Unfall- und Verletzungsgefahren zu vermeiden:
• Kontrollieren Sie vor jeder Verwendung das Gerät auf einwandfreien Zustand. Wenn Schäden daran erkennbar sind,
dürfen Sie das Gerät nicht weiter einsetzen. Lassen Sie es
dann erst vom Kundendienst auf Sicherheit überprüfen.
• Achten Sie darauf, dass nicht Haare, lose Kleidung oder
Körperteile in Berührung mit dem drehenden Schleifstein
t
kommen.
• Tragen Sie Schutzhandschuhe, um Verletzungen durch
scharfe Klingen zu vermeiden, oder wenn Sie den Messerschärfer mit abgenommener Funktions- und Schutzkappe
y
betreiben.
• Dieses Gerät darf nicht von Kindern benutzt werden.
• Dieses Gerät kann von Kindern ab 8 Jahren und darüber
sowie von Personen mit verringerten physischen, sensorischen oder mentalen Fähigkeiten oder Mangel an Erfahrung und Wissen benutzt werden, wenn sie beaufsichtigt
oder bezüglich des sicheren Gebrauchs des Gerätes unterwiesen wurden und die daraus resultierenden Gefahren verstehen. Kinder dürfen nicht mit dem Gerät spielen.
Reinigung und Benutzer-Wartung dürfen nicht von Kindern ohne Beaufsichtigung durchgeführt werden.
Page 59

- 56 -
• Das Gerät ist bei nicht vorhandener Aufsicht und vor
dem Zusammenbau, dem Auseinandernehmen oder
Reinigen stets vom Netz zu trennen.
• Das Gerät und seine Anschlussleitung sind von Kindern
fernzuhalten.
Auspacken
• Überprüfen Sie das Produkt auf Vollständigkeit und einwandfreien, unbeschädigten Zustand.
• Entfernen Sie alle Teile von der Verpackung und Verpackungsrückstände
vom Produkt.
• Heben Sie die Verpackung auf, um das Gerät darin bei Nichtgebrauch
aufbewahren oder bei Reparaturen zurücksenden zu können.
• Reinigen Sie alle Teile vor dem ersten Gebrauch, wie im Kapitel
“Reinigung und Pflege” beschrieben.
Aufstellen
• Stellen Sie das Gerät auf eine stabile rutschfeste Unterlage.
• Stecken Sie dann den Netzstecker in die Steckdose.
Einstellen
• Wählen Sie durch Drehen an der Funktions- und Schutzkappe
y
die ge-
wünschte Schleiffunktion
q w e
, bis die Kappe spürbar einrastet.
• Bei der Stellung
w
“Messer mit Wellenschliff” zeigt das entsprechende
Symbol auf die Schleif-Öffnung (siehe Abb. C) – die Kappe rastet an dem
Punkt am Ende des Symbols ein.
• Halten Sie den Einschalter
i
gedrückt. Der Schleifstein
t
dreht sich
solange, bis Sie den Einschalter
i
wieder loslassen.
Page 60

- 57 -
Schleifen
• Legen Sie die Klingen erst an, wenn sich der Schleifstein
t
dreht.
• Ziehen Sie die Messer und Scheren immer vom Schaftanschlag in gleichförmiger Bewegung weg, nicht wieder zurück oder hin und her – das
Schleifergebnis wird sonst ungleichmäßig.
• Üben Sie keinen starken Druck aus und schleifen Sie stets nur saubere
Klingen, um vorzeitige Abnutzung des Schleifsteins zu vermeiden.
• Schleifen Sie Messer und Scheren immer so, dass die Schneide im spitzen
Winkel zum Schleifstein steht (wie durch die Form der Öffnung vorgegeben). Schleifen im falschen Winkel kann jede Schneide zerstören.
• Entfernen Sie nach dem Schleifen eventuelle Schleifstaubrückstände auf
den Klingen mit einen feuchten Tuch.
Messer mit glattem Schliff
Wenn Sie die Stellung
q
“Messer mit glattem Schliff” gewählt haben (Abb. B):
• Schärfen Sie Messer mit glattem Schliff stets beidseitig – hierfür stehen
eine linke und eine rechte Schleifführung zur Verfügung.
• Halten Sie das Messer in der linken Führung möglichst nach links geneigt,
und in der rechten Führung nach recht geneigt, während Sie die Klinge
durchziehen.
Messer mit Wellenschliff
Wenn Sie die Stellung
w
“Messer mit Wellenschliff” gewählt haben (Abb. C):
• Schärfen Sie diese nur auf der Seite mit dem Wellenschliff – je nachdem,
wo sich dieser befindet, ergibt sich die Durchzugsrichtung für das Messer.
Die Seite des Wellenschliffs muss beim Schärfen in Richtung des Schleifsteins
t
weisen.
• Wellenschliff lässt sich generell nur bedingt nachschärfen. Messer mit feinverzahntem Sägeschliff (z.B. Tafelmesser) benötigen kein Nachschärfen.
Page 61

- 58 -
Scherenschliff
Wenn Sie die Stellung
e
“Scherenschliff” gewählt haben (Abb. D):
• Schärfen Sie nacheinander beide Scherenklingen. Hierzu klappen Sie die
Schere auf, und ziehen nacheinander beide Klingen durch die Führung.
Schlitz-Schraubendreher
Wenn Sie einen Schlitz-Schraubendreher
r
plan schleifen möchten (Abb. E):
• Dies geht in jeder Stellung der Funktions- und Schutzkappe
y
. Hierzu
stecken Sie den Schlitz-Schraubendreher entsprechend seiner Breite durch
eine der beiden Schleiföffnungen
r
vorne an der Funktionskappe (siehe
Ausklappseite). Die Stirnfläche des Schraubendrehers wird nun eben und
plan geschliffen.
Schleifen direkt am Schleifstein
Bestimmte Schneiden kann man evtl. besser ohne Funktions- und Schutzkappe
y
direkt am Schleifstein
t
schleifen. Hierzu ist die Funktions- und Schutzkap-
pe
y
abnehmbar (Abb. F):
• Drehen Sie die Funktions- und Schutzkappe
y
, bis der Pfeil oben
steht. Nun können Sie die Funktions- und Schutzkappe
y
abnehmen.
• Um die Funktions- und Schutzkappe
y
wieder aufzusetzen, halten Sie
diese so, dass der Pfeil wieder oben steht. Nun können Sie die
Funktions- und Schutzkappe
y
aufschieben und durch Drehen nach links
oder rechts verriegeln.
Reinigung und Pflege
Um Unfallgefahren und Schäden zu vermeiden:
• Ziehen Sie erst den Netzstecker aus der Steckdose, bevor Sie irgendwelche
Arbeiten an dem Gerät vornehmen.
• Tauchen Sie niemals das Gerät in Wasser oder in Flüssigkeiten. Es besteht
Lebensgefahr durch elektrischen Schlag, wenn Feuchtigkeit an elektrische
Teile gelangt. Auch können Geräteteile beschädigt werden.
Page 62

- 59 -
Gerät reinigen:
• Drehen Sie die Funktions- und Schutzkappe
y
, bis der Pfeil oben
steht. Nun können Sie die Funktions- und Schutzkappe
y
abnehmen und
den Bereich um den Schleifstein
t
mit einem trockenen Pinsel säubern.
• Ziehen Sie die Staubmulde
u
ab und reinigen Sie diese mit einem Pinsel
und ggf. einem leicht angefeuchteten Tuch.
• Reinigen Sie das übrige Gerät ebenfalls mit einem leicht angefeuchteten
Tuch, nicht mit scheuernden oder aggressiven Reinigungsmittel. Das kann
die Oberflächen angreifen.
• Um die Funktions- und Schutzkappe
y
wieder aufzusetzen, halten Sie
diese so, dass der Pfeil wieder oben steht. Nun können Sie die
Funktions- und Schutzkappe
y
aufschieben und durch Drehen nach links
oder rechts verriegeln. Schieben Sie zum Schluss auch die Staubmulde
u
wieder in das Gerät.
Wartung
• Das Gerät ist wartungsfrei. Es sind keinerlei Arbeiten am oder im Gerät
durch den Verwender vorgesehen. Wenden Sie sich bei Fehlfunktionen
oder erkennbaren Schäden an den Kundendienst.
• Wickeln Sie das Netzkabel zur Aufbewahrung um das Gerätegehäuse
(Abb. A).
Page 63

- 60 -
Entsorgen
Werfen Sie das Gerät keinesfalls in den normalen Hausmüll.
Dieses Produkt unterliegt der europäischen Richtlinie
2012/19/EU.
Entsorgen Sie das Gerät über einen zugelassenen Entsorgungsbetrieb oder
über Ihre kommunale Entsorgungseinrichtung.
Beachten Sie die aktuell geltenden Vorschriften. Setzen Sie sich im Zweifelsfall mit Ihrer Entsorgungseinrichtung in Verbindung.
Führen Sie alle Verpackungsmaterialien einer umweltgerechten
Entsorgung zu.
Importeur
KOMPERNASS HANDELS GMBH
BURGSTRASSE 21
44867 BOCHUM
GERMANY
www.kompernass.com
Garantie und Service
Sie erhalten auf dieses Gerät 3 Jahre Garantie ab Kaufdatum. Das Gerät
wurde sorgfältig produziert und vor Anlieferung gewissenhaft geprüft.
Bitte bewahren Sie den Kassenbon als Nachweis für den Kauf auf. Bitte setzen Sie sich im Garantiefall mit Ihrer Servicestelle telefonisch in Verbindung.
Nur so kann eine kostenlose Einsendung Ihrer Ware gewährleistet werden.
Page 64

- 61 -
Die Garantieleistung gilt nur für Material- oder Fabrikationsfehler, nicht aber
für Transportschäden, Verschleißteile oder für Beschädigungen an zerbrechlichen Teilen, z. B. Schalter oder Akkus. Das Produkt ist lediglich für den privaten und nicht für den gewerblichen Gebrauch bestimmt.
Bei missbräuchlicher und unsachgemäßer Behandlung, Gewaltanwendung
und bei Eingriffen, die nicht von unserer autorisierten Service-Niederlassung
vorgenommen wurden, erlischt die Garantie. Ihre gesetzlichen Rechte werden durch diese Garantie nicht eingeschränkt.
Die Garantiezeit wird durch die Gewährleistung nicht verlängert. Dies gilt
auch für ersetzte und reparierte Teile. Eventuell schon beim Kauf vorhandene
Schäden und Mängel müssen sofort nach dem Auspacken gemeldet werden,
spätestens aber zwei Tage nach Kaufdatum. Nach Ablauf der Garantiezeit
anfallende Reparaturen sind kostenpflichtig.
Service Deutschland
Tel.: 0800 5435 111
E-Mail: kompernass@lidl.de
Service Österreich
Tel.: 0820 201 222 (0,15 EUR/Min.)
E-Mail: kompernass@lidl.at
Service Schweiz
Tel.: 0842 665566 (0,08 CHF/Min.,
Mobilfunk max. 0,40 CHF/Min.)
E-Mail: kompernass@lidl.ch
Erreichbarkeit Hotline:
Montag bis Freitag von 8:00 Uhr - 20:00 Uhr (MEZ)
IAN 95913
IAN 95913
IAN 95913
Page 65

IAN 95913
KOMPERNASS HANDELS GMBH
BURGSTRASSE 21
44867 BOCHUM
DEUTSCHLAND / GERMANY
www.kompernass.com
Last Information Update · Stanje informacija · Versiunea informaţiilor
Актуалност на информацията · Έκδοση των πληροφοριών
Stand der Informationen: 11 / 2013 · Ident.-No.: SEAS20A1-092013-1
 Loading...