

Page 1
(For use with TROY WindConnect II Printer Adapters with Bluetooth® Technology)
NOTE: For best results, view this document using Adobe Acrobat Reader 5.0 or higher.
Open the Adobe Acrobat Reader navigation pane to use the links for this document.
NOTE: The X3 version of this document does not contain any links in the navigation pane.
The final copy will contain these links for the reader
Document #40xxx-110 Rev. X3
WindConnect II User’s Guide
.
Page 2

Electromagnetic Specifications
For electromagnetic specifications, refer to Appendix B in this User’s Guide.
Safety Considerations
Prior to the installation and use of this product, review all safety markings and instructions. Do not proceed beyond a WARNING or CAUTION
notice until you have understood the hazard and have taken appropriate steps.
Notice
TROY GROUP, INC. SPECIFICALLY DISCLAIMS THE IMPLIED WARRANTIES OF MERCHANTABILITY AND FITNESS OF THIS PRODUCT
FOR A PARTICULAR PURPOSE. TROY shall not be liable for any errors contained in this manual or for any damages resulting from loss of use,
data profits, or any incidental or consequential damages arising from the use of TROY products or services.
Trademarks
Windows is a trademark of Microsoft Corporation. TROY is a registered trademark of TROY Group.
Warranty
The TROY printer adapters are warranted to be free of defects in materials and workmanship for a period of five years. This period begins upon
the date of shipment if the hardware is installed by the Purchaser, or upon installation if the Hardware is installed by TROY. During the warranty
period, TROY will repair or replace the unit at no charge provided it is returned to TROY with the freight pre-paid. The warranty on repaired
products or replacement products is 30 days or the last day of the warranty of the original defective product, whichever is longer. This warranty
does not apply if the product has been damaged by accident, misuse, natural catastrophe, modification, improper service, or conditions resulting
from causes external to the product. The warranty shall be void if the TROY serial numbers have been removed.
Information and descriptions contained herein are the property of TROY Group, Inc. Such information and descriptions may not be copied,
disseminated, or distributed without the express written consent of TROY Group, Inc. This publication is subject to change without notice.
TROY Group, Inc.
2331 S. Pullman Street
Santa Ana, CA 92705
TEL: (949) 250-3280
(800) 332-6427
FAX: (949) 250-8972
http://www.troygroup.com
sales@troygroup.com
© Copyright 1992-2003 TROY Group, Inc.
Printed in the United States of America
Page 3

Table of Contents
Section 1 – Introduction
Overview...............................................................................................................................................1-1
Package Contents ................................................................................................................................1-2
Windows System Requirements.........................................................................................................1-2
PDA System Requirements.................................................................................................................1-3
About This User’s Guide ....................................................................................................................1-3
Section 2 – Hardware Installation Procedures
Before You Begin.................................................................................................................................2-1
Handling Precautions..........................................................................................................................2-1
Printer Adapter Components.............................................................................................................2-2
Installing the Hardware on the USB or Parallel Port......................................................................2-3
Verifying Successful Installation........................................................................................................2-4
Verifying the Connection to the Printer............................................................................................2-4
Section 3 – Printing to Your Bluetooth-Enabled Printer
Configuring a Windows Printer Port Using HCRP.........................................................................3-1
Configuring a Windows COM Port Using SPP................................................................................3-2
Setting Up a Printer for Use with the Printer Adapter....................................................................3-3
How to Set Up and Print from Windows XP..................................................................................3-10
Moving the Printer Adapter to Another Printer............................................................................3-13
Printing the First Job........................................................................................................................3-14
Printing Additional Jobs...................................................................................................................3-16
Configuring Other Devices Using SPP............................................................................................3-16
Printing Requirements for Other Devices.......................................................................................3-16
Printing From a PDA, Mobile Phone, or Camera Enabled with Bluetooth Technology............3-17
WindConnect II Printer Adapter with Bluetooth Technology User’s Guide -- Document #50xxx-110 Rev. X3 TOC-1
Page 4

Table of Contents
Section 4 – Configuring Your Printer Adapter
Overview...............................................................................................................................................4-1
Summary of Configuration Steps ......................................................................................................4-1
Installing the TROY Configuration Utility.......................................................................................4-1
Using the Configuration Utility..........................................................................................................4-2
Section 5 – Troubleshooting
Verifying Setup....................................................................................................................................5-1
Verifying Printer Operation...............................................................................................................5-1
Verifying Connectivity Using Bluetooth Technology.......................................................................5-2
Troubleshooting by Symptom............................................................................................................5-3
Self-Test Page Example.......................................................................................................................5-6
LED Status Indicators.........................................................................................................................5-7
Test Button Sequences ........................................................................................................................5-8
Section 6 – Where to Get Help
Customer Support Options.................................................................................................................6-1
Worldwide Web Support....................................................................................................................6-1
Contacting TROY................................................................................................................................6-1
Appendix A – Product Specifications
Appendix B – Safety and Regulatory Notices
Appendix C – Glossary
WindConnect II Printer Adapter with Bluetooth Technology User’s Guide -- Document #50xxx-110 Rev. X3 TOC-2
Page 5

Section 1 Introduction
Overview
The TROY WindConnect II printer adapter with Bluetooth® technology is a wireless print device that (depending
on the model purchased) plugs directly into the USB or parallel port of your printer. By using the WindConnect
II, you can conveniently print from a desktop or laptop computer and other devices that use Bluetooth
technology without using a cable. Please refer to the Quick-Install Guide provided in the product package for
hardware setup information. For additional information on this product, visit the TROY web site at
www.troygroup.com
This manual covers installation and configuration of the WindConnect II for use with computers, pocket PCs
(PDAs), or mobile phones that have either embedded Bluetooth technology or are equipped to use an external
adapter that uses Bluetooth technology. A troubleshooting section is also provided in the event that your
WindConnect II does not perform as specified.
The WindConnect II supports the following profiles:
Serial Port Profile (SPP)
Object Push Profile (OPP)
Hardcopy Cable Replacement Profile (HCRP)
Basic Printing Profile (BPP)
.
Basic Imaging Profile (BIP)
The WindConnect II can be used with devices that use Bluetooth technology and support one of these profiles.
NOTE: The BPP and BIP profiles are supported on selected printers (refer to the TROY web site at
http://www.troygroup.com).
NOTE: Some sending devices will automatically time out after a few minutes of inactivity. Other sending
devices will keep the connection active until forced to disconnect.
IMPORTANT
sending device.
: Other users will not be able to use the WindConnect II while the connection is active with your
WindConnect II Printer Adapter with Bluetooth Technology User’s Guide -- Document #40xxx-110 Rev. X3 1-1
Page 6

Section 1 Introduction
Package
Contents
TROY WindConnect II printer adapter with Bluetooth technology
Power supply module
Windows
®
System
Requirements
USB cable (for USB versions only)
Quick-Install Instructions (provided in the product package)
TROY WindConnect II Installation CD
Warranty Card
NOTE: All discussions, procedures, and other material in this manual concerning connection and communication
between devices, are referring to devices and software that use Bluetooth technology.
To print from a Windows-based PC, the following is required:
A PC equipped with a USB or PCMCIA card that uses Bluetooth technology. For a list of compatible
USB, PCMCIA and PC adapter cards, visit the TROY web site at http://www.troygroup.com
Vendor-supplied software for your USB or PCMCIA adapter card that supports one or more of the
supported profiles (OPP, BIP, BPP, HCRP, or SPP) is required to run your PC with the WindConnect II.
To optionally configure the WindConnect II settings using the provided TROY Configuration Utility, your system
should include the following components:
A PC with a 133 MHz or higher processor
.
Microsoft Windows 98SE, ME, 2000, or XP operating system
At least 64 MB of RAM (memory)
At least 10 MB of free hard disk space to install the software
A CD-ROM drive (to load the software)
WindConnect II Printer Adapter with Bluetooth Technology User’s Guide -- Document #40xxx-110 Rev. X3 1-2
Page 7

Section 1 Introduction
PDA System
Requirements
About This
User’s Guide
For information on printing to the WindConnect II from a Pocket PC operating system or a Palm OS-based PDA
(Personal Digital Assistant), refer to the information provided in this user’s guide or visit the TROY web site at
http://www.troygroup.com
.
This user’s guide contains information on system requirements, important safety tips, and instructions on the
following:
Installing the WindConnect II hardware
Installing the WindConnect II Configuration Utility
Configuring the WindConnect II using the Configuration Utility and software for Windows
Using the WindConnect II with a Microsoft Windows system
Using the WindConnect II with other devices that use Bluetooth technology such as mobile phones,
PDAs, and digital cameras.
WindConnect II Printer Adapter with Bluetooth Technology User’s Guide -- Document #40xxx-110 Rev. X3 1-3
Page 8

Section 2 Hardware Installation Procedures
Before You
Begin
Handling
Precautions
The TROY WindConnect II printer adapter with Bluetooth technology is preconfigured at the factory to allow you
to print right out of the box without having to first configure the device. Optionally, you can reconfigure the
device (change the device name, enable/disable the discovery feature, select security features, and update the
device’s firmware) at any time using the provided Configuration Utility (refer to Chapter 4 – Configuring Your
Printer Adapter in this user’s guide for more information).
Before installing the WindConnect II, make sure your printer functions properly. The WindConnect II supports
either a parallel or USB connection to your printer, depending on the model of WindConnect II purchased.
Ensure that you have properly installed your adapter and sending device software on the device as described in
the documentation that came with the device.
: To view a list of supported printers and Bluetooth clients, visit the TROY web site: www.troygroup.com.
NOTE
The printer adapter is designed to withstand normal handling procedures, but reasonable precautions should be
exercised during installation, particularly with regard to static discharge. Ensure that you are adequately
grounded by touching an unpainted metal portion of the printer chassis while installing the printer adapter.
WindConnect II Printer Adapter with Bluetooth Technology User’s Guide -- Document #40xxx-110 Rev. X3 2-1
Page 9

Section 2 Hardware Installation Procedures
Printer
Adapter
Components
The TROY WindConnect II hardware includes the following components:
Power connector – The power supply cable plugs into this connector.
Test button – Pressing this button for approximately one second will print a test page on the printer.
Pressing this button for at least five seconds will cause the printer adapter to enter the configuration
mode. Holding down the test button while simultaneously applying power to the device will restore the
printer adapter to factory default settings.
LED status indicators – A blue LED (Light Emitting Diode) is used to indicate connectivity and activity
status using Bluetooth technology. A bi-colored (amber/green) LED is used to indicate the operational
status of the printer adapter. A green color indicates a ready state, and an amber color indicates an error
condition. When in the configuration mode, the bi-colored LED will cycle between amber and green.
Refer to Chapter 5 – Troubleshooting in this user’s guide for detailed LED status light descriptions.
USB port – This port is used for connecting the printer adapter to a USB printer. Refer to Chapter 4 –
Configuring Your Printer Adapter for instructions on how to use the USB port (USB model only).
Parallel Port – This port is used for connecting the printer adapter to the parallel port of a printer
equipped with a 25-pin Centronics interface (parallel model only).
NOTE: If the parallel port version of the WindConnect II does not match up to the parallel port on your printer, you
may need an IEEE 1284 B-female to C-male cable adapter to connect the printer adapter to the parallel port of your
printer. The cable adapter can be ordered on the web at the following web sites or other web sites you may prefer
(www.pccables.com
, or www.blackbox.com).
WindConnect II Printer Adapter with Bluetooth Technology User’s Guide -- Document #40xxx-110 Rev. X3 2-2
Page 10

Section 2 Hardware Installation Procedures
Installing the
Hardware
onto the USB
or Parallel
Port
1. Depending on your model of printer adapter, connect the WindConnect II directly to either the USB or IEEE
1284-compliant parallel port of the printer as shown below.
• If you connect the WindConnect II to the parallel port, be sure to secure the metal locking clasps
located on each side of the parallel connector to prevent the device from being accidently
disconnected.
• If you connect the WindConnect II to the USB port of the printer, use the supplied Velcro tabs to
attach the printer adapter to the printer or other convenient surface.
2. Plug the power supply module into a suitable AC wall outlet, and then plug the power supply cable into the
WindConnect II as shown. When power is applied to the WindConnect II, the blue and green LEDs will blink
three times simultaneously as it performs self-checking diagnostics. Refer to Chapter 5 – Troubleshooting
in this user’s guide for detailed LED status light descriptions.
NOTE: Some printers supply 5 volts on pin 18 of the parallel port, which can be used to power the printer
adapter without the need for an external power supply. Refer to the owner’s manual that came with your
printer. If you are using the USB connection, the external power supply is required.
Installing the WindConnect II onto the parallel port Installing the WindConnect II using the USB connection
WindConnect II Printer Adapter with Bluetooth Technology User’s Guide -- Document #40xxx-110 Rev. X3 2-3
Page 11

Section 2 Hardware Installation Procedures
Verifying
Successful
Installation
Verifying the
Connection
to the Printer
After the WindConnect II is attached to the printer and powered ON, it will perform a brief startup sequence:
1. The bi-colored LED (amber) and the blue LED will blink three times simultaneously.
2. The bi-colored LED will alternately blink amber and green twice. The blue LED will not illuminate.
3. The bi-colored LED will illuminate green continuously, and the blue LED will blink continuously, indicating
a ready state. After connectivity has been established, the blue LED will illuminate continuously.
NOTE
: If the bi-colored LED does not illuminate green continuously after the device has finished its startup
sequence, then there may be an error. Refer to Chapter 5 – Troubleshooting in this user’s guide for help.
To verify the connection, make sure that both the WindConnect II and the printer are powered on and ready. If
the printer adapter has detected the printer and successfully set up communication with it, the green LED will
illuminate continuously. If the bi-colored LED remains amber, refer to Chapter 5 – Troubleshooting in this
user’s guide.
Then print a test page by momentarily pressing the test button on the WindConnect II for approximately one
second. If the test page prints successfully, then the WindConnect II is ready to print, providing that the client
computer and sending device are ready to print.
If the test page does not print, first check to make sure the WindConnect II is securely connected to the printer.
Also, make sure that the printer is operating properly and has a sufficient supply of paper and toner or ink.
Switch the WindConnect II off and then on again, and then try printing the self-test page again by pressing the
test button for approximately one second. If you cannot print a test page, refer to Chapter 5 – Troubleshooting
in this user’s guide.
WindConnect II Printer Adapter with Bluetooth Technology User’s Guide -- Document #40xxx-110 Rev. X3 2-4
Page 12

Section 3 Printing to a Printer Using Bluetooth Technology
Configuring a
Windows
Printer Port
Using HCRP
If you are using a PC-compatible computer with a PCMCIA card or USB adapter that has built-in Bluetooth
technology, you will need to setup your system for printing as follows:
1. Create a virtual printer port using the software provided with your PCMCIA card, USB adapter, or built-in
adapter.
2. Use the discovery program provided with your PCMCIA card, USB adapter, or built-in adapter to search for
the WindConnect II (refer to the documentation provided with your device for additional information and
available services). In some cases, you can assign a static printer port that your WindConnect II HCRP
(Hardcopy Cable Replacement Profile) service will use. Otherwise, the discovery program will automatically
assign an available printer port. Make a note of this printer port for the next step.
3. Set up the driver using the printer port assigned from Step 2.
4. Establish a connection with the WindConnect II’s HCRP service. A successful connection is usually
indicated with an icon on the service (depending on your software), and a window will appear, designating
the printer port that the connection is using. The blue LED on the WindConnect II will change from blinking
to solid when a connection is established.
NOTE: If the security option is enabled in the WindConnect II, you may be required to provide a PIN (Personal
Identification Number) before a connection is established. If a passkey is required, a passkey screen will
appear, prompting you to enter the appropriate passkey. After the correct passkey is entered, a connection is
established, and Windows will remember the successful authentication, making it unnecessary to re-enter the
passkey for subsequent connections. If an incorrect passkey is entered, the connection attempt will fail, and
the utility will return to its initial state. If the utility is unable to establish a connection with the print adapter, an
error message will be displayed, and the main window will default to its initial state. If you forgot your
passkey, perform a cold reset to restore the device to factory default conditions (no passkey) by removing
power from the device, pressing and holding the test button while reapplying power to the device. The blue
LED on the WindConnect II will illuminate when a connection is established.
5. Proceed to the section entitled “How to Set Up and Print” in this chapter.
NOTE: The WindConnect II should automatically time out after one minute of inactivity.
NOTE
: If your software does not support HCRP, you must configure your software to use the Serial Port Profile
(SPP), which functions as a virtual COM port, to print.
If your software supports printing with HCRP, use that method (refer to your software vendor’s instructions).
Most applications that use Bluetooth technology support printing using SPP. If you software does not support
HCRP, use the instructions on the following page for printing using SPP.
WindConnect II Printer Adapter with Bluetooth Technology User’s Guide -- Document #40xxx-110 Rev. X3 3-1
Page 13

Section 3 Printing to a Printer Using Bluetooth Technology
Configuring a
Windows
COM Port
Using SPP
If you are using a PC-compatible computer with a PCMCIA card or USB adapter that has built-in Bluetooth
technology, you will need to setup your system for printing as follows:
1. Create a virtual COM port using the software provided with your PCMCIA card, USB adapter, or built-in
adapter.
2. Use the discovery program provided with your PCMCIA card, USB adapter, or built-in adapter to search for
the WindConnect II (refer to the documentation provided with your device for additional information and
available services). In some cases, you can assign a static COM port that your WindConnect II serial port
service will use. Otherwise, the discovery program will automatically assign an available COM port. Make a
note of this COM port for the next step.
3. Set up the driver using the COM port assigned from Step 2.
4. Establish a connection with the WindConnect II’s serial port service. A successful connection is usually
indicated with an icon on the service (depending on your software), and a window will appear, designating
the COM port that the connection is using. The blue LED on the WindConnect II will change from blinking to
solid when a connection is established.
NOTE: If the security option is enabled in the WindConnect II, you may be required to provide a PIN (Personal
Identification Number) before a connection is established. If a passkey is required, a passkey screen will
appear, prompting you to enter the appropriate passkey. After the correct passkey is entered, a connection is
established, and Windows will remember the successful authentication, making it unnecessary to re-enter the
passkey for subsequent connections. If an incorrect passkey is entered, the connection attempt will fail, and
the utility will return to its initial state. If the utility is unable to establish a connection with the print adapter, an
error message will be displayed, and the main window will default to its initial state. If you forgot your
passkey, perform a cold reset to restore the device to factory default conditions (no passkey) by removing
power from the device, pressing and holding the test button while reapplying power to the device. The blue
LED on the WindConnect II will illuminate when a connection is established.
5. Proceed to the section entitled “Setting Up a Printer for use with the Printer Adapter” in this chapter.
NOTE: The WindConnect II should automatically time out after one minute of inactivity.
WindConnect II Printer Adapter with Bluetooth Technology User’s Guide -- Document #40xxx-110 Rev. X3 3-2
Page 14
Section 3 Printing to a Printer Using Bluetooth Technology
Setting Up a
Printer for
Use with the
Printer
Adapter
Use the following steps to install and connect to a printer using the Serial Port Profile. Be sure to use the COM
port designated by your sending device’s software.
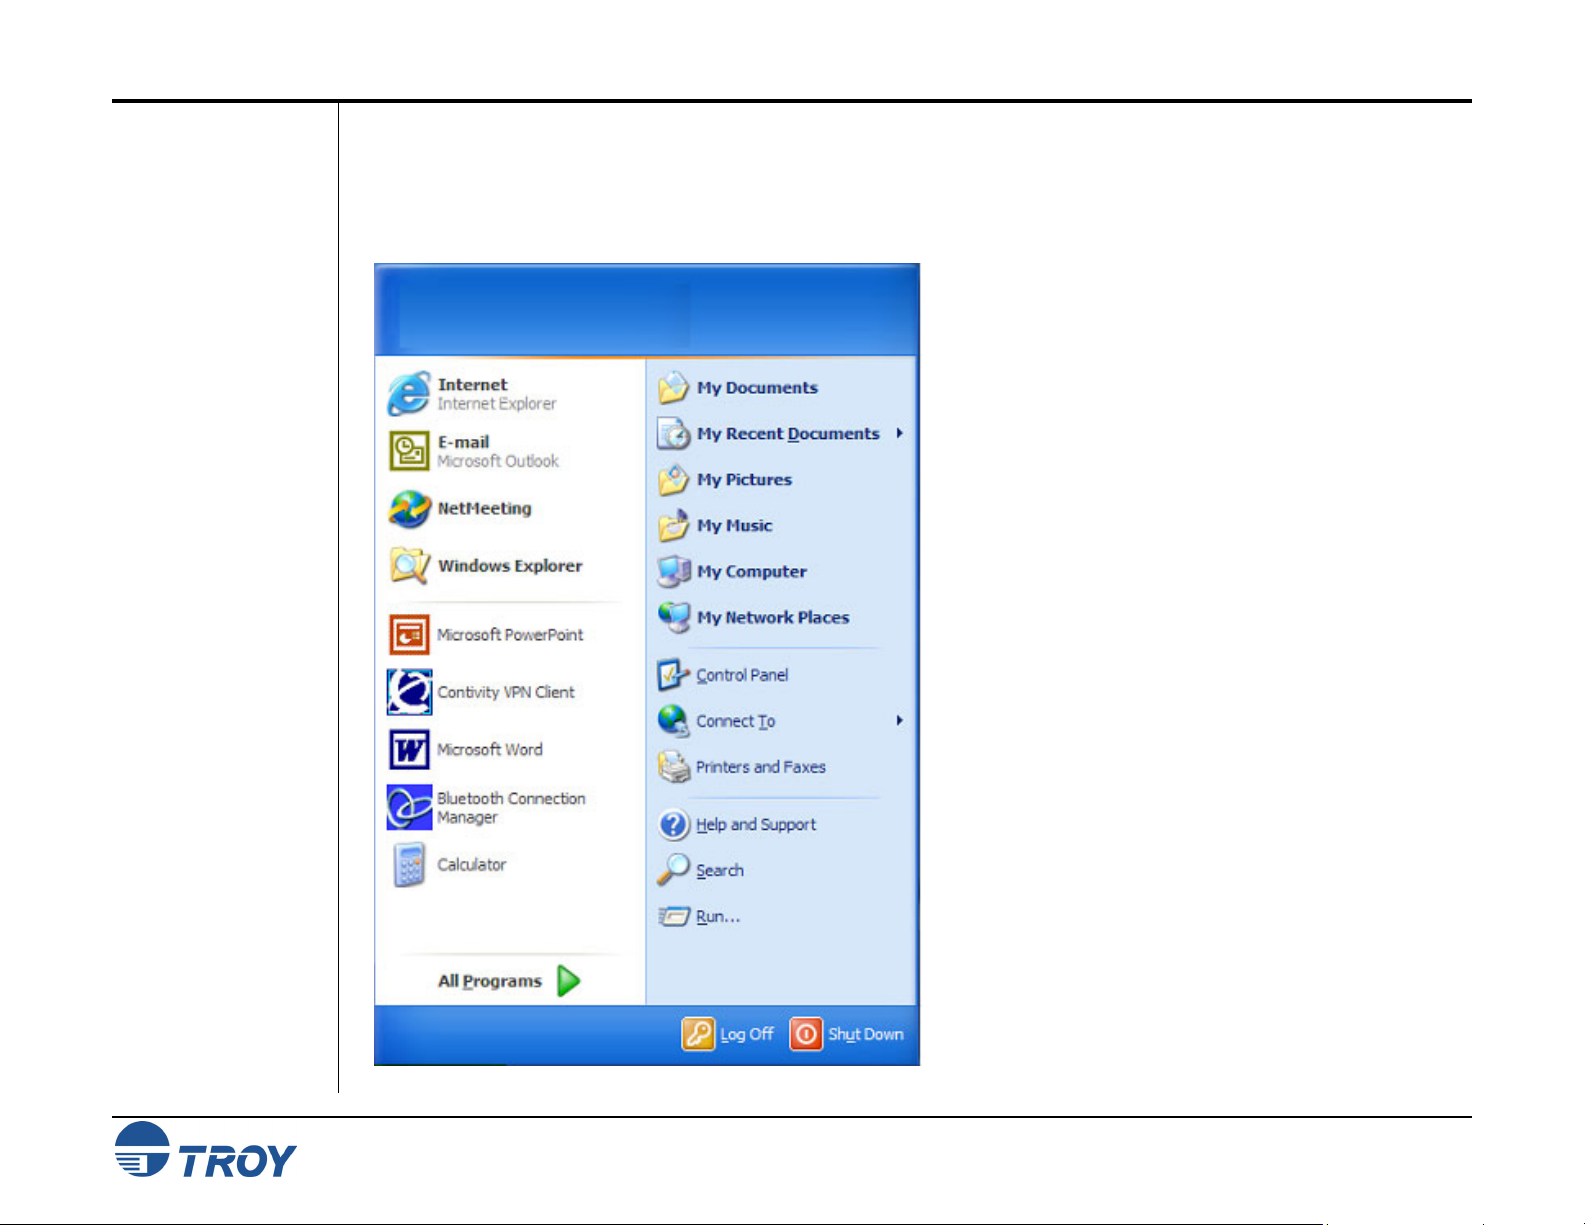
1. From the Windows desktop, click on Start, Printers and Faxes to open the printer and faxes manager
window.
WindConnect II Printer Adapter with Bluetooth Technology User’s Guide -- Document #40xxx-110 Rev. X3 3-3
Page 15
Section 3 Printing to a Printer Using Bluetooth Technology
Setting Up a
Printer for
Use with the
Printer
Adapter
(cont.)
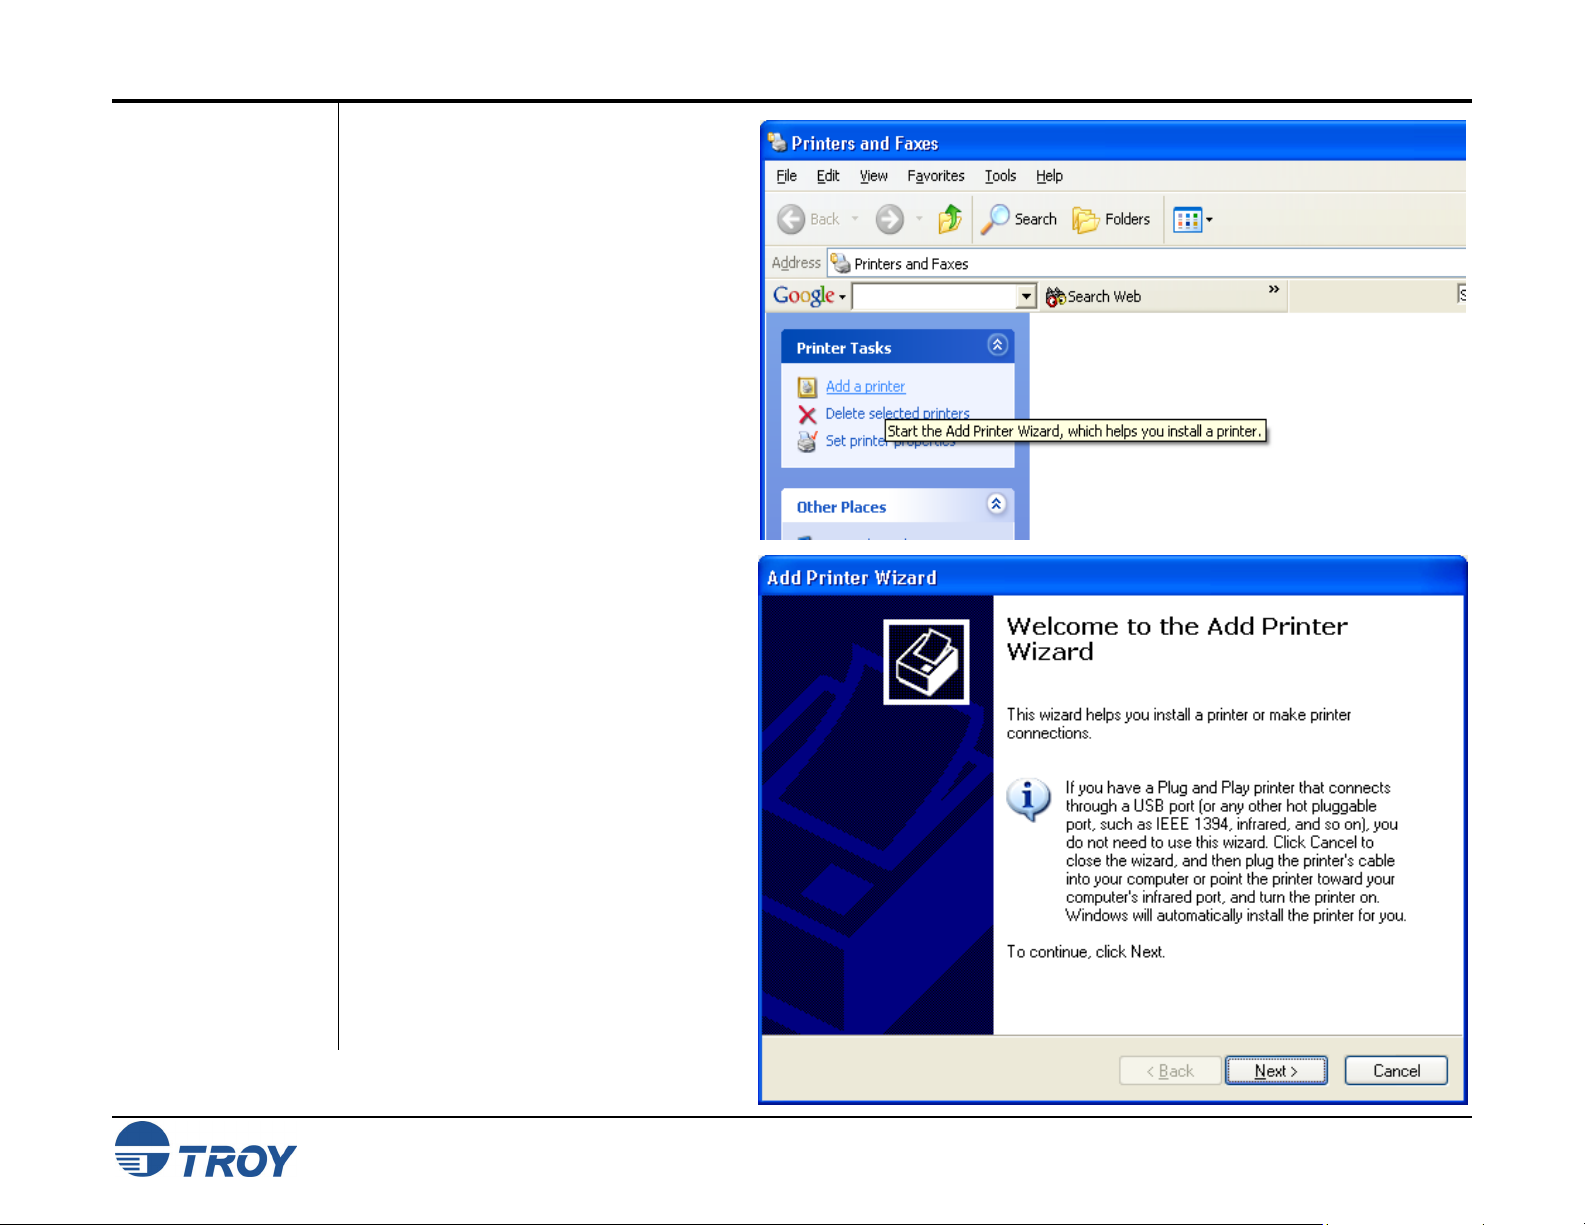
2. Click on Add a printer to launch
the Add Printer wizard. Click on
Next to continue.
WindConnect II Printer Adapter with Bluetooth Technology User’s Guide -- Document #40xxx-110 Rev. X3 3-4
Page 16

Section 3 Printing to a Printer Using Bluetooth Technology
Setting Up a
Printer for
Use with the
Printer
Adapter
(cont.)
3. Select Local printer attached to this
computer, uncheck Automatically detect
and install my Plug and Play printer,
and then click on Next.
4. Under Use the following port, select the
COM port number from the drop-down list
that was previously assigned by your
software application, and then click on
Next.
WindConnect II Printer Adapter with Bluetooth Technology User’s Guide -- Document #40xxx-110 Rev. X3 3-5
Page 17

Section 3 Printing to a Printer Using Bluetooth Technology
Setting Up a
Printer for
Use with the
Printer
Adapter
(cont.)
5. Select the manufacturer and driver of the
printer that your WindConnect II is
attached to, and then click on Next.
6. Type in a name for the printer you just
created (e.g., printer in conference room,
Dave’s printer, sales department printer,
etc.) or leave the suggested default name,
select Yes if you want to use it as your
default printer, and then click on Next.
WindConnect II Printer Adapter with Bluetooth Technology User’s Guide -- Document #40xxx-110 Rev. X3 3-6
Page 18

Section 3 Printing to a Printer Using Bluetooth Technology
Setting Up a
Printer for
Use with the
Printer
Adapter
(cont.)
7. Click on Next if you do not wish to share
this printer. Otherwise, select Share
Name, and enter a name for this printer.
8. Click on Next to print a test page;
otherwise, select No, and then click on
Next to continue.
NOTE: The device must be selected in order
for a test page to print.
WindConnect II Printer Adapter with Bluetooth Technology User’s Guide -- Document #40xxx-110 Rev. X3 3-7
Page 19

Section 3 Printing to a Printer Using Bluetooth Technology
Setting Up a
Printer for
Use with the
Printer
Adapter
(cont.)
9. Click on Finish to complete the Add Printer Wizard.
10. If the printer driver has not been previously installed, the driver files will be copied in the Windows system
folder.
WindConnect II Printer Adapter with Bluetooth Technology User’s Guide -- Document #40xxx-110 Rev. X3 3-8
Page 20

Section 3 Printing to a Printer Using Bluetooth Technology
Setting Up a
Printer for
Use with the
Printer
Adapter
(cont.)
11. Once a test page has been successfully printed, click on OK to continue. Your new printer will now be listed
in the Printers and Faxes Manager window. You are now ready to print to your WindConnect II from any
application.
WindConnect II Printer Adapter with Bluetooth Technology User’s Guide -- Document #40xxx-110 Rev. X3 3-9
Page 21

Section 3 Printing to a Printer Using Bluetooth Technology
How to Set
Up and Print
from
Windows XP
When using the Microsoft Windows XP built-in Bluetooth features (Windows XP Service Pack 1 must be
installed to use these features), the wireless printing is performed using a technology called Hardcopy Cable
Replacement Profile (HCRP), which allows automatic installation of the printer driver for your attached printer
that uses Bluetooth technology. To set up a printer using Windows XP, follow these steps:
1. From the Windows desktop, click on Start, Printers and Faxes to open the printer and faxes manager
window. Click on Add a printer to launch the Add Printer wizard.
WindConnect II Printer Adapter with Bluetooth Technology User’s Guide -- Document #40xxx-110 Rev. X3 3-10
Page 22

Section 3 Printing to a Printer Using Bluetooth Technology
How to Set
Up and Print
from
Windows XP
(cont.)
2. Click on Next to continue.
3. Select A wireless printer, and then click
on Next. The wizard will automatically
detect and install new wireless printers.
WindConnect II Printer Adapter with Bluetooth Technology User’s Guide -- Document #40xxx-110 Rev. X3 3-11
Page 23

Section 3 Printing to a Printer Using Bluetooth Technology
How to Set
Up and Print
from
Windows XP
(cont.)
4. After your wireless printer has been found by Windows, the “Welcome to the Found New Hardware Wizard”
screen will appear. Select Install the software automatically (Recommended), and then click on Next.
The hardware wizard will automatically install the required software for your wireless printer. When the
automatic installation is complete, the “Printers and Faxes” screen will appear, displaying your new wireless
printer name next to the printer icon. You can use the default printer name, or you can double-click on the
printer name and type in a new name.
WindConnect II Printer Adapter with Bluetooth Technology User’s Guide -- Document #40xxx-110 Rev. X3 3-12
Page 24

Section 3 Printing to a Printer Using Bluetooth Technology
Moving the
Printer
Adapter to
Another
Printer
Before you can automatically install the WindConnect II on another printer, you must first do the following:
1. Click on Start, and then select Control Panel.
2. Select Wireless Link.
3. Select the page name Bluetooth.
4. Select the Bluetooth Printer Adapter, and then click on Remove.
5. Close the wireless link, and then follow the instructions from above, starting on page 3-10.
WindConnect II Printer Adapter with Bluetooth Technology User’s Guide -- Document #40xxx-110 Rev. X3 3-13
Page 25

Section 3 Printing to a Printer Using Bluetooth Technology
Printing the
First Job
After performing the setup and configuration instructions described in the previous sections of this user’s guide,
you should now be able to print in the usual manner from any standard Windows application program.
1. From the menu bar of your application, click on File, and then Print.
WindConnect II Printer Adapter with Bluetooth Technology User’s Guide -- Document #40xxx-110 Rev. X3 3-14
Page 26

Section 3 Printing to a Printer Using Bluetooth Technology
Printing the
First Job
(cont.)
2. Select the printer name you created, and then click on OK. The WindConnect II’s Serial Port Profile or
Hardcopy Cable Replacement Profile will automatically establish a connection with your PC as indicated by
the connection icon, or you may need to manually start the connection in your software.
3. After the job is printed, the connection will automatically terminate, and the Bluetooth connection icon will
disappear.
WindConnect II Printer Adapter with Bluetooth Technology User’s Guide -- Document #40xxx-110 Rev. X3 3-15
Page 27

Section 3 Printing to a Printer Using Bluetooth Technology
Printing
Additional
Jobs
Configuring
Other
Devices
using SPP
Printing
Requirements
for Other
Devices
After you print the first time, your application will remember the printer you used. If you print again, the job will
be sent to the same WindConnect II-equipped printer automatically. You can either click on File, Print, and OK,
or just click on the printer icon on your application’s toolbar, and then click on OK.
If you have more than one WindConnect II installed and have added those printers in your PC, you can select a
different printer to print your document before clicking on OK. Some client adapters will require a separate COM
port to be defined for each printer. In this case, each printer that uses Bluetooth technology must use a unique
COM port in order to send the print job to the correct WindConnect II-equipped printer.
The WindConnect II is designed to allow printing from a variety of devices that use Bluetooth technology. Such
devices must support the Serial Port Profile (SPP), Object Push Profile (OPP), Hardcopy Cable Replacement
Profile (HCRP), or Basic Imaging Profile (BIP) in order to work with the WindConnect II printer adapter. Check
the documentation that came with your sending device to make sure that it supports one of these profiles.
To use the WindConnect II if the device does not have built-in Bluetooth technology support, you must first
install the appropriate hardware and software on your desktop, laptop, handheld computer, or other device that
requires printing capabilities. Follow the instructions supplied with the device. The installation program will
install a discovery program, which will include a Serial Port Profile (a port that redirects I/O from an application
program so that it travels over the wireless link instead of a serial port).
To send a job to a printer connected to a WindConnect II, you will need to setup your printing application so that
it uses the serial port profile. When you want to print over the wireless link, use the discovery program to select
the printer equipped with the WindConnect II. After you have selected the printer that use Bluetooth technology,
you can print in the normal manner just as if your device was directly cabled to the printer.
PDAs
The WindConnect II must be installed and verified as previously described.
Pocket PC or Palm
web site for more information on your particular device.
: A print application or other software solution must be installed. Refer to the vendor’s
WindConnect II Printer Adapter with Bluetooth Technology User’s Guide -- Document #40xxx-110 Rev. X3 3-16
Page 28

Section 3 Printing to a Printer Using Bluetooth Technology
Printing From
a PDA, Mobile
Phone, or
Camera
Enabled with
Bluetooth
Technology
The WindConnect II supports the Object Push Profile (OPP), which allows mobile phones and other devices that
support this profile to send files to other devices that use Bluetooth technology. If your device has the ability to
send a file directly to another device, you can send Contacts (VCard), Calendar entries (VCalendar), and JPEG
picture files to the WindConnect II that will print on most PCL 5- compatible printers. Refer to the documentation
that came with your device for instructions on sending these types of files.
Third Party Applications for the PocketPC PDA and Palm PDA:
PocketPC and Palm Operating Systems do not have a printing system built in. TROY recommends the use of
the following third-party software for printing with Bluetooth technology from PDAs. Instructions for printing can
also be found at these web sites.
PocketPC: PrintPocketCE http://www.fieldsoftware.com
PrintBoy http://www.bachmannsoftware.com
Palm: BTPrint http://www.iscomplete.com
PrintBoy http://www.bachmannsoftware.com
WindConnect II Printer Adapter with Bluetooth Technology User’s Guide -- Document #40xxx-110 Rev. X3 3-17
Page 29

Section 4 Configuring Your Printer Adapter
Overview
Summary of
Configuration
Steps
The WindConnect II is preconfigured to allow you to print right out of the box; however, you may optionally
reconfigure the device at any time using the provided TROY Configuration Utility and the instructions provided in
this chapter. The Configuration Utility allows you to change the device name, enable/disable the discovery
feature, select security features, and update the device’s firmware.
The following basic steps are required to change the configuration of your WindConnect II. A sending device
must be installed on your PC in order to access the WindConnect II.
Connect to the WindConnect II from your PC. You must use the Serial Port Profile (SPP), which will
require that you set up a COM port.
Install the TROY Configuration Utility on your PC.
Place the WindConnect II into configuration mode by pressing the test button for five seconds.
Configure the WindConnect II using the TROY Configuration Utility
Installing the
Configuration
Utility
1. Load the TROY WindConnect II Installation CD into the CD-ROM drive of your computer. The CD should
start automatically and display a menu.
NOTE: If the CD fails to start automatically, click on the Windows Start button, select Run, type D:\setup.exe,
and then click on OK to begin the installation process.
2. From the CD menu, click on Install Configuration Utility to begin the installation process. When the
Welcome window appears, click on Next to continue the installation process. Follow the prompts to install
the software.
NOTE: To exit the installation process at any time before the installation is complete, click on Cancel to stop
the installation process.
WindConnect II Printer Adapter with Bluetooth Technology User’s Guide -- Document #40xxx-110 Rev. X3 4-1
Page 30

Section 4 Configuring Your Printer Adapter
Using the
TROY
Configuration
Utility
98SE, ME, 2000,
XP)
(Windows
NOTE: To use the Microsoft Bluetooth stack, you must be running the Windows XP operating system with SP1
(Service Pack 1) installed in order to communicate with the WindConnect II.
1. Before using the TROY Configuration Utility, the WindConnect II must be placed into the configuration mode
before any of its settings can be changed. Press and hold the test button on the printer adapter for at least
five seconds until the bi-colored LED cycles between amber and green to indicate that it has entered the
configuration mode. After the printer adapter configuration is complete, the device will automatically reboot.
NOTE: You cannot print while the WindConnect II is in configuration mode.
2. From the Windows desktop, click on Start, Programs, and then click on Configuration Utility. The Port
Status tab screen will appear; however, none of the controls will be active until a connection is established
in Step 3.
WindConnect II Printer Adapter with Bluetooth Technology User’s Guide -- Document #40xxx-110 Rev. X3 4-2
Page 31

Section 4 Configuring Your Printer Adapter
Using the
Configuration
Utility (cont.)
NOTE: If the security option is enabled in the WindConnect II, you may be required to provide a PIN (Personal
Identification Number) before a connection is established. If a passkey is required, a passkey screen will appear,
prompting you to enter the appropriate passkey. After the correct passkey is entered, a connection is established,
and Windows will remember the successful authentication, making it unnecessary to re-enter the passkey for
subsequent connections. If an incorrect passkey is entered, the connection attempt will fail, and the utility will
return to its initial state. If the utility is unable to establish a connection with the print adapter, an error message
will be displayed, and the main window will default to its initial state. If you forgot your passkey, perform a cold
reset to restore the device to factory default conditions (no passkey) by removing power from the device, pressing
and holding the test button while reapplying power to the device.
Windows 98SE, ME, 2000 Operating Systems using
Non-Microsoft Bluetooth Stack:
3. Click on the Connection button, select the COM
port configured for the Serial Port Profile (SPP) on
the host computer (refer to Section 3 for setting up
a virtual COM port), and then click on OK.
NOTE: An error message “Unable to connect to the
device specified. Ensure that the device is powered on
and is in configuration mode.” could possibly appear
due to the printer and the configuration utility both
trying to use the assigned COM port simultaneously. If
this occurs, refer to Chapter 5 – Troubleshooting.
Once a connection is established with the printer
adapter, all the controls on the Port Status window will
be enabled and the current device settings will be
displayed as shown on the next page.
Windows XP Operating Systems using the
Microsoft Bluetooth Stack:
4. Click on the Connection button, select the printer
you wish to use from the displayed list, and then
click on OK. Once a connection is established with
the printer adapter, all the controls on the Port
Status window will be enabled and the current
device settings will be displayed as shown on the
next page.
WindConnect II Printer Adapter with Bluetooth Technology User’s Guide -- Document #40xxx-110 Rev. X3 4-3
Page 32

Section 4 Configuring Your Printer Adapter
Using the
Configuration
Utility (cont.)
After a COM port is selected and the connection is established, the Port Status tab window will become active.
The Printer Model field displays the name of the printer. The Printer Status field displays the operational state of
the printer. If the displayed printer status indicates an error (Out of Toner, Paper Jam, etc.), correct the problem
before proceeding. Once the printer has been restored to a ready state, click the Refresh button to view the
updated printer status. To print a test page displaying the current printer adapter settings, click the Print Test
Page button. The Parallel Port group box displays the current parallel port settings of the WindConnect II. It is
recommended that you do not change these settings.
WindConnect II Printer Adapter with Bluetooth Technology User’s Guide -- Document #40xxx-110 Rev. X3 4-4
Page 33

Section 4 Configuring Your Printer Adapter
Using the
Configuration
Utility (cont.)
4. To enable or disable the services used for the printer adapter, click on the Printer Adapter tab. The Name
edit box will display the user-defined name of the selected printer adapter. The Services group box will
display the currently selected services. It is recommended that you do not change these settings unless it
becomes necessary.
NOTE: If the host PC is using the Serial Port Profile (SPP) to print and this service is disabled (unchecked), the
printer adapter will not be able to print a job.
WindConnect II Printer Adapter with Bluetooth Technology User’s Guide -- Document #40xxx-110 Rev. X3 4-5
Page 34

Section 4 Configuring Your Printer Adapter
Using the
Configuration
Utility (cont.)
5. To access the security options for the printer adapter, click on the Device Security tab. To enable security
features, place a checkmark in the box labeled Enable Device Security. To limit access to your printer that
uses Bluetooth technology, you can choose a PIN (Personal Identification Number) of up to 16 characters in
length. Enter the desired PIN (using either 4, 8, 12, or 16 characters), and then click on Apply to save your
selection. A PIN allows you to limit access to your printer that uses Bluetooth technology by giving the PIN
to a single user or a group of specified users. All users are required to use the same PIN.
6. From the Discoverability group box, select Discoverable (default) if you want other devices that use
Bluetooth technology to find your printer, or select Non-discoverable if you do not want other sending
devices to see your printer.
NOTE: If you are sharing your printer, select “Discoverable” so that other users can find your printer. If you
select “Non-discoverable”, your printer will not be visible to anyone, including yourself. In this case, if you
forget the address of your printer, you will not be able to access your WindConnect II and will have to reset the
printer adapter to factory defaults in order to access the device and change its configuration.
7. To clear all previous
link keys, place a
checkmark in the
Clear link keys
checkbox located in
the Device Security
group box, and then
click on Apply to
finish. Clearing all
link keys will require
each device to
authenticate again.
WindConnect II Printer Adapter with Bluetooth Technology User’s Guide -- Document #40xxx-110 Rev. X3 4-6
Page 35

Section 4 Configuring Your Printer Adapter
Using the
Configuration
Utility (cont.)
8. Click on the Firmware
Upgrade tab to update
the WindConnect II
firmware. Updating the
firmware will not
change the printer
adapter’s configuration.
9. Click on the Upgrade
Firmware button to
begin the update
process. The firmware
upgrade screen will
appear.
10. Specify the location
(path) of the firmware
file (xxxxx.bin) in the
Filename field, and
then click on the
Upgrade button to load the file into the flash-file
memory area of the WindConnect II. You will
be reminded that all configuration changes that
have not been applied will be lost. Click on OK
to continue. Upon successful completion of the
firmware update process, the WindConnect II
will automatically reboot, break the Bluetooth
connection, and return to the ready state (tricolored LED illuminated as solid green). A new
connection must be established with the printer
adapter after the firmware has been updated.
Click on the Check for Upgrades button to
access the TROY web site for the latest version
of printer adapter firmware. Print a test page to view the current firmware date of your printer adapter and
compare it to the firmware file date listed on the TROY web site. Upgrade your printer adapter firmware only
if the firmware version date shown on the TROY web site is newer than the date shown on the printer
adpater configuration page.
NOTE: The latest printer adapter firmware file can be downloaded from http://www.troygroup.com.
WindConnect II Printer Adapter with Bluetooth Technology User’s Guide -- Document #40xxx-110 Rev. X3 4-7
Page 36

Section 5 Troubleshooting
Verifying
Setup
If you can print a self-test page, your WindConnect II and printer are communicating properly. If you cannot
print a self-test page, verify that the following general requirements are met:
Ensure your printer already functions properly via a USB or parallel printer cable.
Ensure the appropriate software is installed for your PCMCIA card and/or USB adapter. Ensure the
sending device is within maximum unobstructed range of 10 meters (33 feet). If your sending device is not
able to discover the WindConnect II on the first attempt, try searching for the device more than once. In
many cases a second attempt will prove successful.
Ensure the WindConnect II is in discovery mode (bi-colored LED illuminated solid green, blue LED blinking
slowly). If not, reboot the printer adapter by momentarily removing power from the device and then
restoring power again. Wait for the device to initialize.
Ensure power is supplied to the printer and the WindConnect II. Some printers can supply the required 5
volts to the WindConnect II via pin 18 on the parallel port. Check the documentation supplied with your
printer to determine if you need to use the external power supply that came with your WindConnect II.
Go to the TROY web site for more information: http://www.troygroup.com/wireless
.
Verifying
Printer
Operation
Print a test page by pressing the test button on the printer adapter for one second. If a test page prints,
your printer and WindConnect II are functioning properly.
If a test page does not print, cycle power to both the printer and WindConnect II. Wait for the printer and
WindConnect II to initialize before attempting to print a test page.
If a test page still does not print, verify that your printer is operating correctly by directly connecting your
printer to a PC via the parallel or USB connection and then printing a test page.
If you cannot get your printer to print, verify that your printer is powered on, is on line, and that no error
conditions exist (out of paper, out of toner or ink, paper jam, etc.). Correct any printer problems as needed
before continuing.
NOTE: When an error occurs on the printer, the print job will be delayed and the WindConnect II will wait
indefinitely for user intervention to clear the error condition on the printer. When the error condition is
cleared and the printer is back on line, the print job will resume.
Ensure the WindConnect II is powered up and ready (solid green LED) and is securely connected via a
USB cable or directly to the parallel port on the printer (depending on your model of WindConnect II). If
the problem persists, contact TROY technical support (refer to Chapter 6 – Where to Get Help).
WindConnect II Printer Adapter with Bluetooth Technology User’s Guide -- Document #40xxx-110 Rev. X3 5-1
Page 37

Section 5 Troubleshooting
Verifying
Connectivity
Using
Bluetooth
Technology
Verify connection activity between your sending device and the WindConnect II (the blue LED will be solid
blue when the WindConnect II is connected to a sending device). To ensure connectivity, the sending
device must be within a maximum unobstructed range of 10 meters (33 feet) of the WindConnect II.
Verify communication by going to your Bluetooth network neighborhood to see if the WindConnect II and
other devices are listed. If you can see other devices, but the WindConnect II is not listed, perform a cold
reset on the WindConnect II by removing power from the device, holding the test button down while
reapplying power to the device. A cold reset will restore all factory default settings for the device. If you do
not see any devices listed in your Bluetooth network neighborhood, check to make sure that your software
is working properly, or contact the manufacturer of your sending device.
If you can see other clients in your Bluetooth network neighborhood, but cannot see the WindConnect II
after performing a cold reset, then contact TROY technical support (refer to Chapter 6 – Where to Get
Help for detailed information).
NOTE: The sending device may remember the previous printer name the WindConnect II was connected to.
When the device names are updated, the device will still be available to print with the old name.
If you can print a test page and have verified communication from the sending device to the WindConnect
II and still cannot print a job, contact your print application vendor for assistance.
WindConnect II Printer Adapter with Bluetooth Technology User’s Guide -- Document #40xxx-110 Rev. X3 5-2
Page 38

Section 5 Troubleshooting
Troubleshooting by
Symptom
Use the following steps to help identify and resolve WindConnect II problems. Refer to the previous pages in
this chapter to ensure that the general operational conditions for the device have been met before proceeding
with the specific conditions listed in the table below. For each condition listed in the following troubleshooting
table, perform each action item in the order presented until the problem is resolved. If you cannot resolve the
problem, call TROY technical support for assistance.
Condition Action
Printer adapter
does not print a
self-test page
.
Check the printer adapter:
Verify the printer adapter is securely connected to printer via the parallel port or USB
connection (depending on the model of printer adapter being used).
Verify that the printer adapter power module is plugged in to an AC power outlet and the
power cable is plugged into the printer adapter. If the power module is plugged into a
power strip, ensure the power strip is switched ON.
Verify the printer adapter is in a ready state (solid green LED and blinking blue LED). If
the printer is ready, press the test button to print a self-test page.
If a self-test page does not print, cycle power to the printer adapter and printer, and then
try printing a test page again.
If a self-test page still does not print, perform a cold reset on the printer adapter by
removing power from the device, holding down the test button while reapplying power to
the device. A cold reset will restore the factory default settings. If you still cannot print
a test page, then proceed with the following troubleshooting checks:
Check printer
Verify the printer is powered on, is on line, and that no error conditions exist (out of
Verify printer functionality by connecting the printer directly to your computer and
:
paper, out of toner or ink, paper jam, etc.). Correct any printer problems as needed
before continuing.
printing a page from your computer.
If the problem persists, call TROY technical support.
Cannot establish
communication
with the printer
adapter using
Bluetooth
technology
WindConnect II Printer Adapter with Bluetooth Technology User’s Guide -- Document #40xxx-110 Rev. X3 5-3
View your Bluetooth Places list
If more then one WindConnect II with a similar printer name was discovered, view the
last six digits of the WindConnect II serial number (printed on the serial number label
and on the self-test page) to identify a unique printer.
:
Page 39

Section 5 Troubleshooting
Troubleshooting by
Symptom
(cont.)
No devices using
Bluetooth
technology appear
in my discovered
list
My WindConnectequipped printer
does not appear in
my list of
discovered devices
Verify operation of the WindConnect II and sending device
Verify printer adapter is powered on and is in a ready state (solid green LED and
blinking blue LED). If not, cycle power to the printer adapter.
Verify that the sending device is powered ON.
Cycle the sending device power, and try discovering the printer adapter again.
If you are within range of more than one device and no other devices that use Bluetooth
technology are found, contact the sending device manufacturer.
Verify the following conditions
Due to the client-caching scheme used in some software, the sending device may not
immediately update the printer name. The previous printer name (the last printer the
WindConnect II was attached to when the client did a search) will instead appear in your
list of discovered devices.
Ensure your WindConnect II-equipped printer is within the range (a maximum
unobstructed range of 10 meters or 33 feet).
Ensure the WindConnect II security configuration is set to “discoverable”.
Cycle the WindConnect II power, and then try discovering the printer adapter again.
Perform a cold reset on the WindConnect II to return the printer adapter to factory
default settings (the device will be set to “discoverable”). If the WindConnect II still
cannot be seen in your list of discovered devices and other devices are listed, call
TROY technical support (refer to Chapter 6 – Where to Get Help).
:
:
Cannot print to the
WindConnect II
from my software
WindConnect II Printer Adapter with Bluetooth Technology User’s Guide -- Document #40xxx-110 Rev. X3 5-4
After verifying there are no hardware or discovery problems as described above, verify the
following conditions:
Verify a print connection by sending a V-card to the printer (PIM over OBEX) or by
sending a simple text document.
Verify the WindConnect II-equipped printer is within a maximum unobstructed range of
10 meters or 33 feet. Note that the Bluetooth neighborhood will continue to show
discovered devices even after the devices have been powered OFF.
Verify sending device driver installation.
Restart your print application (a print application such as hp mobile printing is required
to print from a PDA).
Reboot your computer or PDA.
Page 40

Section 5 Troubleshooting
Troubleshooting by
Symptom
(cont.)
Cannot configure
the WindConnect II
Error Message:
“Unable to connect
to the device
specified. Ensure
that the device is
powered on and is
in configuration
mode.”
Forgot my passkey
By default, the WindConnect II should be able to print right out of the box
The WindConnect II must be run from a computer in order to configure the printer
adapter. The WindConnect II cannot be configured using a PDA.
1. Verify that the WindConnect II is plugged in to a power source.
2. Check that the WindConnect II is in configuration mode (the LEDs should be alternating
between amber and green). If not, press the Test button for five seconds to place the
WindConnect II into the configuration mode.
3. If you have configured your printer(s) to print using SPP, go into the printer properties
and temporarily assign all printers that are configured for printing with Bluetooth
technology to an unused port, such as LPT3, COM1, or COM2.
To assign a printer to an unused port::
a) Click on Start, and then select Printers and Faxes.
b) Right-click on the printer, and select Properties from the pop-up menu.
c) Select the Ports tab and temporarily assign a print port or serial port to the
printer.
d) Click on OK to finish.
NOTE: After you are finished using the configuration utility, remember to reassign the printer(s).
The WindConnect II has a limit of 50 link keys. Older link keys will roll off the link key list
Use the “Clear all existing link keys on the printer” option to erase all link keys. All link
keys will be deleted. New passkeys will have to be generated.
.
.
Your system administrator should know your passkey. If the passkey is lost, perform a
cold reset to restore the printer adapter to factory default settings. All link keys will be
lost and new passkeys will have to be generated.
WindConnect II Printer Adapter with Bluetooth Technology User’s Guide -- Document #40xxx-110 Rev. X3 5-5
Page 41

Section 5 Troubleshooting
Self-Test
Page
Example
WindConnect II Printer Adapter with Bluetooth Technology User’s Guide -- Document #40xxx-110 Rev. X3 5-6
Page 42

Section 5 Troubleshooting
LED Status
Indicators
State Bluetooth
Power on self test
Ready
No connection or
activity with Bluetooth
technology
Connection with
Bluetooth technology
Activity (RX or TX)
Printer I/O activity/self
test page
Printer adapter error,
Self test failure, Flash
update failure, USB
overcurrent
Failure to communicate
with printer (I/O error)
Configuration/Firmware
update mode
Power/Status LED
LED (blue)
Slow Blinking Blinking Green Blinks for the duration of the power on self-test.
N/A Solid Green Self-test passed. Device ready.
Slow Blinking N/A Device is waiting for a connection – no
Solid N/A Connection established.
Rapid Blinking N/A Blue LED blinks rapidly during link activity.
N/A Blinking Green USB or 1284 (parallel port) activity.
N/A Blinking Amber Any firmware or hardware failure not covered by
N/A Solid Amber Printer communication error.
N/A Amber/Green toggle Bi-colored LED toggles while in configuration
(green/amber)
connection is currently established.
other states.
mode and while the flash memory is being
reprogrammed.
Description
WindConnect II Printer Adapter with Bluetooth Technology User’s Guide -- Document #40xxx-110 Rev. X3 5-7
Page 43

Section 5 Troubleshooting
Test Button
Sequences
Command Sequence
Print a Test/Configuration
Page
Perform a Cold Reset
(restores factory defaults)
Enter Configuration/
Firmware Upgrade Mode
Press the test button for approximately one second (do not press it for more than three
seconds). A test page will print, and the bi-colored LED will blink green during printing.
Press and hold the test button while applying power to the device, and then release the
test button and allow the unit to initialize (approximately four seconds). All non-volatile
parameters will be reset to their factory default values.
Press and hold the test button for at least five seconds until the bi-colored LED cycles
between amber and green to indicate that it has entered the configuration mode. A
firmware upgrade or configuration can now be performed using the provided TROY
Configuration Utility.
After the print adapter is reprogrammed by a firmware upgrade, it will automatically
reboot and then indicate a ready state (solid green LED).
If the firmware update process fails, the print adapter will automatically reboot and then
return to the configuration mode if the flash memory was programmed incorrectly.
WindConnect II Printer Adapter with Bluetooth Technology User’s Guide -- Document #40xxx-110 Rev. X3 5-8
Page 44

Section 6 Where to Get Help
Customer
Support
Options
Worldwide
Web Support
Contacting
TROY
TROY offers several customer support options to assist you in the event you experience difficulties with your
WindConnect II Bluetooth printer adapter, including web support, telephone support, repair services, extended
warranty, and advance replacement.
The TROY web site provides answers to many common technical questions and also includes copies of product
manuals and literature, as well as utilities and firmware load images. You can visit the TROY web site at:
http://www.troygroup.com
NOTE
: Before contacting TROY technical support, please refer to Chapter 5 – Troubleshooting in this manual or
the TROY web site to isolate any problems, and be sure to write down any error messages. Also, make sure that
you have the serial number of the product (located on the product label) available when you contact TROY
technical support.
.
To contact TROY directly, use one of the following numbers:
North and South America
:
If you need to talk to one of our Technical Support Specialists, our support line is open Monday through Friday,
8 AM to 8 PM, Eastern Standard Time.
U.S. 48 contiguous States: (800) 332-6427
Canada, Alaska, Hawaii, and South America: +1-304-232-0899
E-Mail: technicalsupport@troygroup.com
Europe
:
Technical support is available in either German or English from Monday through Thursday, 9 AM to 12 PM and
1 PM to 5 PM, and on Friday from 9 AM to 12 PM and 1 PM to 4 PM.
Phone: +49 (0) 7032-9454-21
E-Mail: support@troygroup.de
Web: http://www.troygroup.de
Corporate Headquarters
:
TROY Group, Inc.
2331 South Pullman Street
Santa Ana, CA 92705 USA
(949) 250-3280
WindConnect II Printer Adapter with Bluetooth Technology User’s Guide -- Document #40xxx-110 Rev. X3 6-1
Page 45

Appendix A Product Specifications
Components Specification
Model
Processor
Flash Memory
RAM Memory
Processor Speed
Interfaces Supported
Bluetooth Profiles Supported
Power Requirements
Power Module
WindConnect II printer adapter with Bluetooth
Coldfire MCF5272
16 Mbits
64 Mbits
66 Mhz
USB 1.1 Host (full speed) or IEEE 1284 Parallel Printer Interface, Bluetooth 1.1
Serial Port Profile (SPP)
Object Push Profile (OPP)
Hardcopy Cable Replacement Profile (HCRP)
Basic Printing Profile (BPP)
Basic Imaging Profile (BIP)
270 mA at 5 volts (an additional 100 mA is required if USB power is supplied to the
printer)
Input: 120 / 220 VAC, Output: 500 mA at 5 volts
Radio Performance Specification
Minimum radiated output
power
Radiation Pattern
Frequency
VSWR (Voltage Standing Wave
Ratio)
Bluetooth Compliance (BT 1.1)
> -5 dBm
Omni-directional
79 channels, 2402 – 2480 MHz
< 2.5:1
EN 300-328, EN 301-489-1, EN 301-489-17, FCC 15.247, EN 60950, RSS-210
®
technology (parallel / USB versions)
WindConnect II Printer Adapter with Bluetooth Technology User’s Guide -- Document #40xxx-110 Rev. X3 A-1
Page 46

Appendix B Safety and Regulatory Notices
FCC
Compliance
Statement for
United States
Users
Warning
For European
Users
This equipment has been tested and found to comply within the limits for a Class B digital device pursuant to
Part 15 of the FCC Rules. These limits are designed to provide reasonable protection against harmful
interference in a residential installation. This equipment generates, uses, and can radiate radio frequency
energy and, if not installed and used in accordance with the instructions, may cause harmful interference to
radio or television reception. However, there is no guarantee that interference will not occur in a particular
installation. If this equipment does cause interference to radio and television reception, which can be determined
by turning the equipment off and on, the user is encouraged to try to correct the interference by one or more of
the following measures:
Reorient or relocate the receiving antenna
Increase the separation between the equipment and receiver
Connect the equipment to an outlet on a circuit other than the circuit bused by the receiver
Consult the dealer or an experienced radio/TV technician for help
The connection of a non-shielded equipment interface cable to this equipment will invalidate the FCC
Certification of this device and may cause interference levels which exceed the limits established by the FCC for
this equipment. It is the responsibility of the user to obtain and use a shielded equipment interface cable with
this device. If this equipment has more than one interface connector, do not leave cables connected to unused
interfaces. Changes or modifications not expressly approved by the manufacturer could void the user’s
authority to operate the equipment.
This product is in conformity with the protection requirements of EU Council Directive 89/336/EEC on the
approximation of the laws of the Member States relating to electromagnetic compatibility. TROY cannot be
responsible for any failure to satisfy the protection requirements resulting from a non-recommended modification
of the product.
This product has been tested and found to comply with the limits for Class B Information Technology Equipment
according to CISPR 22/European Standard EN55022. The limits for Class B equipment were derived for typical
residential environments to provide reasonable protection against interference with licensed communications
devices.
WindConnect II Printer Adapter with Bluetooth Technolgy User’s Guide -- Document #40xxx-110 Rev. X3 B-1
Page 47

Appendix B Safety and Regulatory Notices
For Canadian
Users
Supplemental
Information
Declaration of
Conformity
(according to
ISO/IEC Guide 22
and EN45014)
This Class B apparatus complies with Canadian ICES-003. The term “IC” before the radio certification number
only signifies that Industry of Canada technical specifications were met.
The product herewith complies with the requirements of the Low Voltage Directive 72/23/EEC and the EMC
Directive 89/336/EEC and carries the CE marking accordingly. This product was tested in a typical configuration
with TROY and other associated products.
According to 47CFR, Part 2 and 15 for Class B Personal Computers and Peripherals; and/or CPU Boards and
Power Supplies used with Class B Personal Computers:
We: TROY GROUP, INC.
Located at: 2331 South Pullman Street
Santa Ana, CA USA
Declare under sole responsibility that the product identified herein, complies with 47CFR Part 2 and 15 of the
FCC rules as a Class B digital device. Each product marketed, is identical to the representative unit tested and
found to be compliant with the standards. Records maintained continue to reflect the equipment being produced
can be expected to be within the variation accepted, due to quantity production and testing on a statistical basis
as required by 47CFR §2.909. Operation is subject to the following two conditions: (1) this device may not
cause harmful interference, and (2) this device must accept any interference received, including interference
that may cause undesired operation.
Trade Name: TROY
Type of Product: Printer Adapter
Model: WindConnect II
WindConnect II Printer Adapter with Bluetooth Technolgy User’s Guide -- Document #40xxx-110 Rev. X3 B-2
Page 48

Appendix B Safety and Regulatory Notices
Regulatory
Information
European Union (EU)
TROY hereby declares that the Bluetooth™ wireless technology built into the WindConnect II Bluetooth printer
adapter, is in compliance with the essential requirements and other relevant provisions of European Directive
1999/5/EC. The internal Bluetooth function is a Bluetooth power class 1 intended radio device using the 2.4
GHz frequency band (2.400GHz – 2.4835GHz). It is intended for wireless communication with other Bluetoothenabled devices using the Bluetooth Generic Access, Service Discovery Application, Serial Port and Object
Push Networking profiles. The internal Bluetooth wireless technology complies with all applicable regulations in
the following countries: Austria, Belgium, Denmark, Finland, Greece, Germany, Iceland, Ireland, Luxembourg,
Norway, Portugal, Spain, Sweden, Switzerland, the Netherlands and the United Kingdom.
The use of Bluetooth wireless technology in other countries than those listed above may be restricted: before
using Bluetooth products, please confirm with the frequency management authority in the country where you
plan to use it. In some situations or environments, the use of Bluetooth wireless technology might be restricted
by the proprietor of the building or responsible representatives of the organization, for example onboard
airplanes, in hospitals or in any other environment where the risk of interference with other devices or services is
perceived or identified as harmful.
If you are uncertain of the policy that applies to the use in a specific organization or environment, you are
encouraged to ask for authorization to use Bluetooth wireless technology prior to switching it on. Consult your
physician or the manufacturer of personal medical devices (pacemakers, hearing aids, etc.) regarding any
restrictions on the use of Bluetooth wireless technology.
United States of America and Canada
Tested to Comply With FCC Standards FOR HOME OR OFFICE USE. See FCC 47CFR, Part 15.19(b)(2).
This device complies with part 15 of the FCC rules and with RSS-210 / RSS-139 of the Industry Canada.
Operation is subject to the following two conditions: (1) This device may not cause harmful interference, and (2)
this device must accept any interference received, including interference that may cause undesired operation.
The radiated output power of WindConnect II wireless printer adapter is far below the FCC radio frequency
exposure limits. Nevertheless, the WindConnect II shall be used in such a manner that the potential for human
contact during normal operation is minimized. A minimum separation of 20 cm (8 inches) must be maintained
between the antenna and the person for this device to satisfy the RF exposure requirements of the FCC. Note
that any changes or modifications to this equipment not expressly approved by the manufacturer may void the
FCC authorization to operate this equipment.
Canada (IC notice)
To prevent radio interference to the licensed service, this device is intended to be operated indoors and away
from windows to provide maximum shielding. Equipment that is installed outdoors is subject to licensing.
WindConnect II Printer Adapter with Bluetooth Technolgy User’s Guide -- Document #40xxx-110 Rev. X3 B-3
Page 49

Appendix C Glossary
Terms and
Definitions
Term Definition
Authentication
Authorization
The user must verify a numeric passkey before a connection or activity can be completed.
The user must approve a connection or activity before it can be completed.
*BIP (Basic
Imaging Profile)
Bluetooth
neighborhood
or device group
Bonding (paired
devices)
*BPP (Basic
Printing Profile)
Cold Reset
Device address
Device
discovery
Device name
Discoverable
Encryption
* HCRP (Hard
Copy
Replacement
Profile)
Enables image formatting by ensuring that images are delivered or retrieved in a format that is
usable by the destination when an image exchange involves one or more limited devices that can
process only selected image formats (taken from MPI tech news web site).
A collection of devices that use Bluetooth technology.
The process of creating a trusted connection between your device and another. Once a bond is
created, the two devices become paired. A trusted device does not require authentication or
authorization.
Designed primarily for limited resource devices to allow printing of complex pictures and documents
without the need to load a different driver for each printer used.
Used to set the WindConnect II to factory defaults. To perform a cold reset, press and hold the test
button for longer than five seconds.
Unique electronic address of a Bluetooth device.
The location and recognition of another Bluetooth device.
The name provided by a Bluetooth device when it is discovered by another device.
Allows the Bluetooth client to see the WindConnect II in the “Bluetooth Neighborhood”.
A method of protecting data from being read or used by unauthorized users.
A cable replacement technology developed by the Bluetooth Special Interest Group (SIG), and is
designed to send data from the sending device to the printer using existing printer drivers to format
the data being sent to the printer.
Link key
MMS
(Multimedia
Message
Service)
WindConnect II Printer Adapter with Bluetooth Technology User’s Guide -- Document #40xxx-110 Rev. X3 C-1
A key used to securely pair devices.
A method of transmitting graphics, video clips, sound files, and short text messages over a wireless
network.
Page 50

Appendix C Glossary
Terms and
Definitions
(cont.)
NonDiscoverable
*OPP (Object
Push Profile)
Passkey
PIM (Personal
Information
Manager)
Prevents the WindConnect II from being seen in the “Bluetooth Neighborhood”.
Derived from the standards originally used for infrared communications, the Object Push Profile is
relatively easy to implement in these devices (e.g., mobile phones, PDAs).
A user code entered to authenticate connections or activities requested by other devices.
A collection of applications used to manage daily business tasks (e.g., contacts, calendars).
Profiles
Service
discovery
SMS (Short
Message
Service)
*SPP
“The Implementation of Bluetooth Printing Capabilities: A TROY Wireless White Paper” is available for viewing
at http://wireless.troygroup.com/wireless/downloads/books/whitepapers/Bluetooth%20Printing%2001-22-02.pdf
A collection of Bluetooth settings.
Used to determine which applications you have in common with other devices.
Similar to paging, SMS is a service used for sending short text messages to mobile phones.
Emulates a hardwired RS-232 serial port, such as a Windows COM port (e.g., COM3) and is,
therefore, compatible with a significant number of laptop and PDA software applications and drivers
because most Windows printer drivers support printing to a COM port.
WindConnect II Printer Adapter with Bluetooth Technology User’s Guide -- Document #40xxx-110 Rev. X3 C-2
 Loading...