

Page 1
Introduction
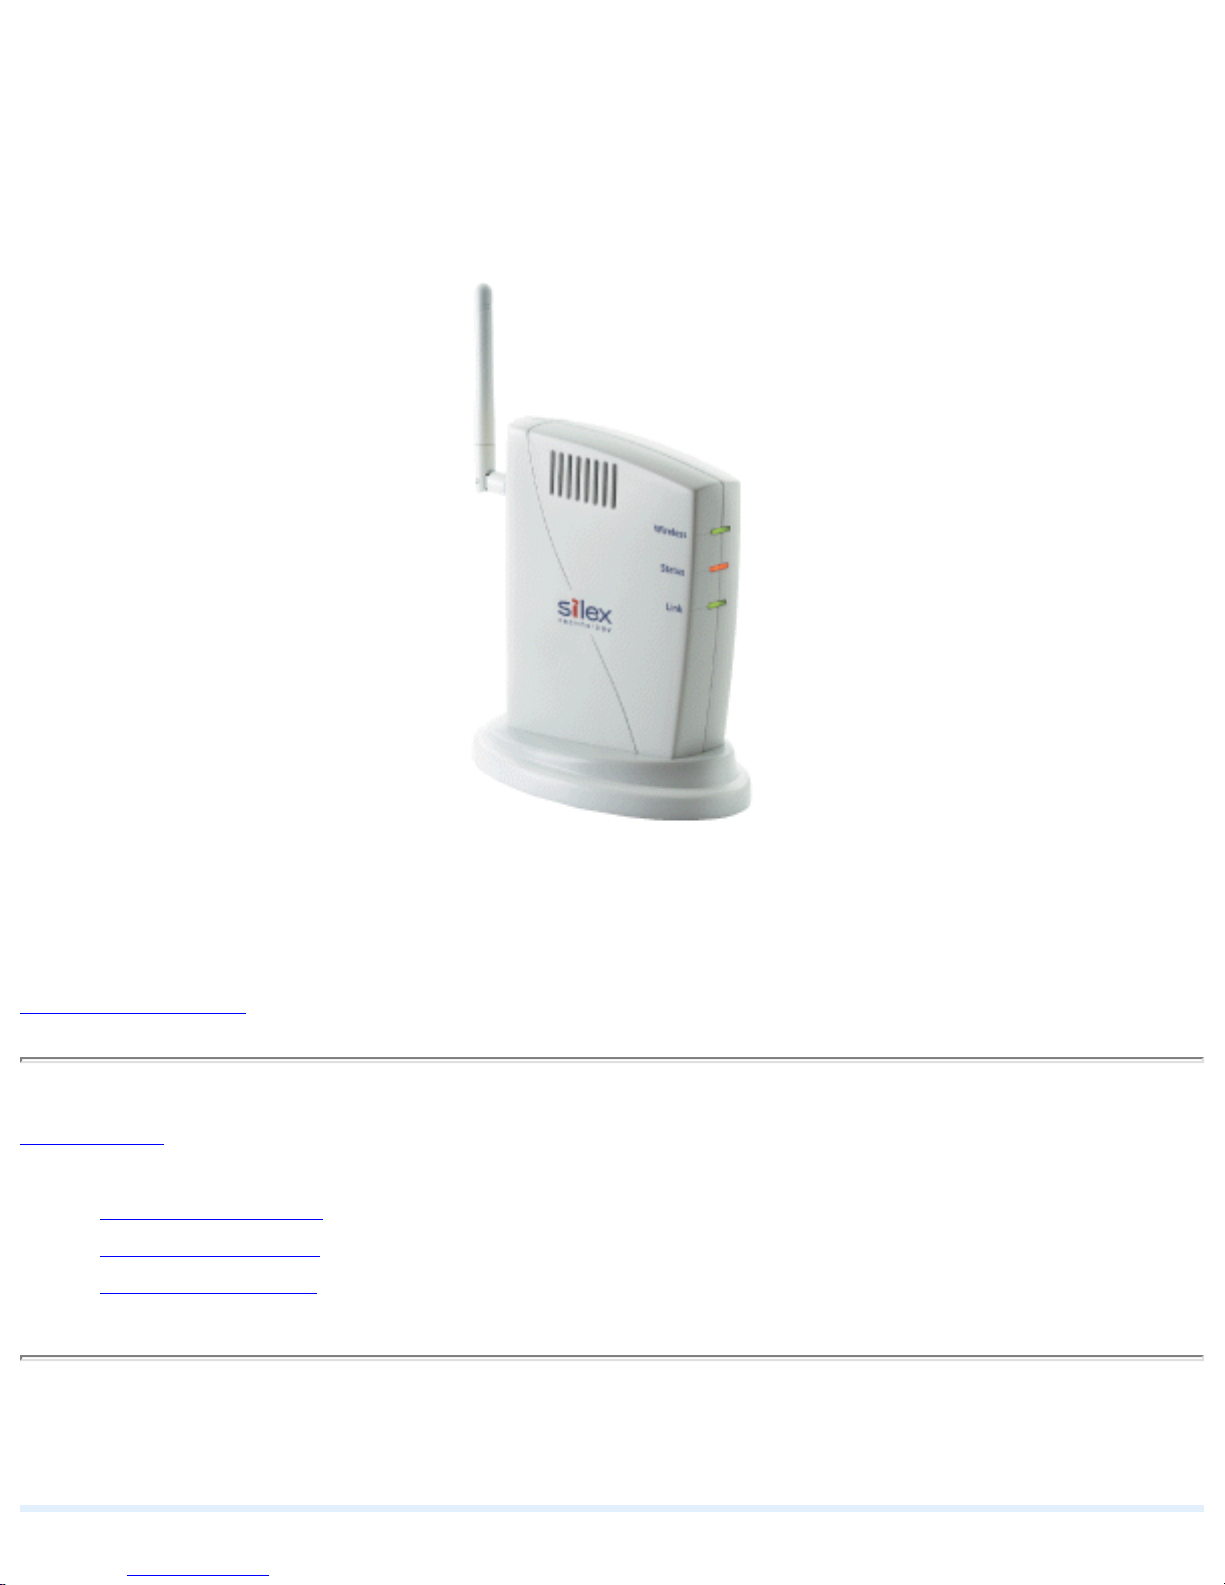
SX-WSG1
Users Manual
Thank you for purchasing the Wireless Adapter SX-WSG1.
This manual provides information on how to configure and use SX-WSG1. Please read the
Safety Instructions in this chapter before using SX-WSG1.
Introduction
● About the notation
● About this manual
● About trademarks
Introduction
file:///C|/Documents%20and%20Settings/evillegas.STA/Desktop/a/English/SXWSG1/00_0_intro_e.htm (1 of 2) [12/15/2008 10:05:27 AM]
Page 2

Introduction
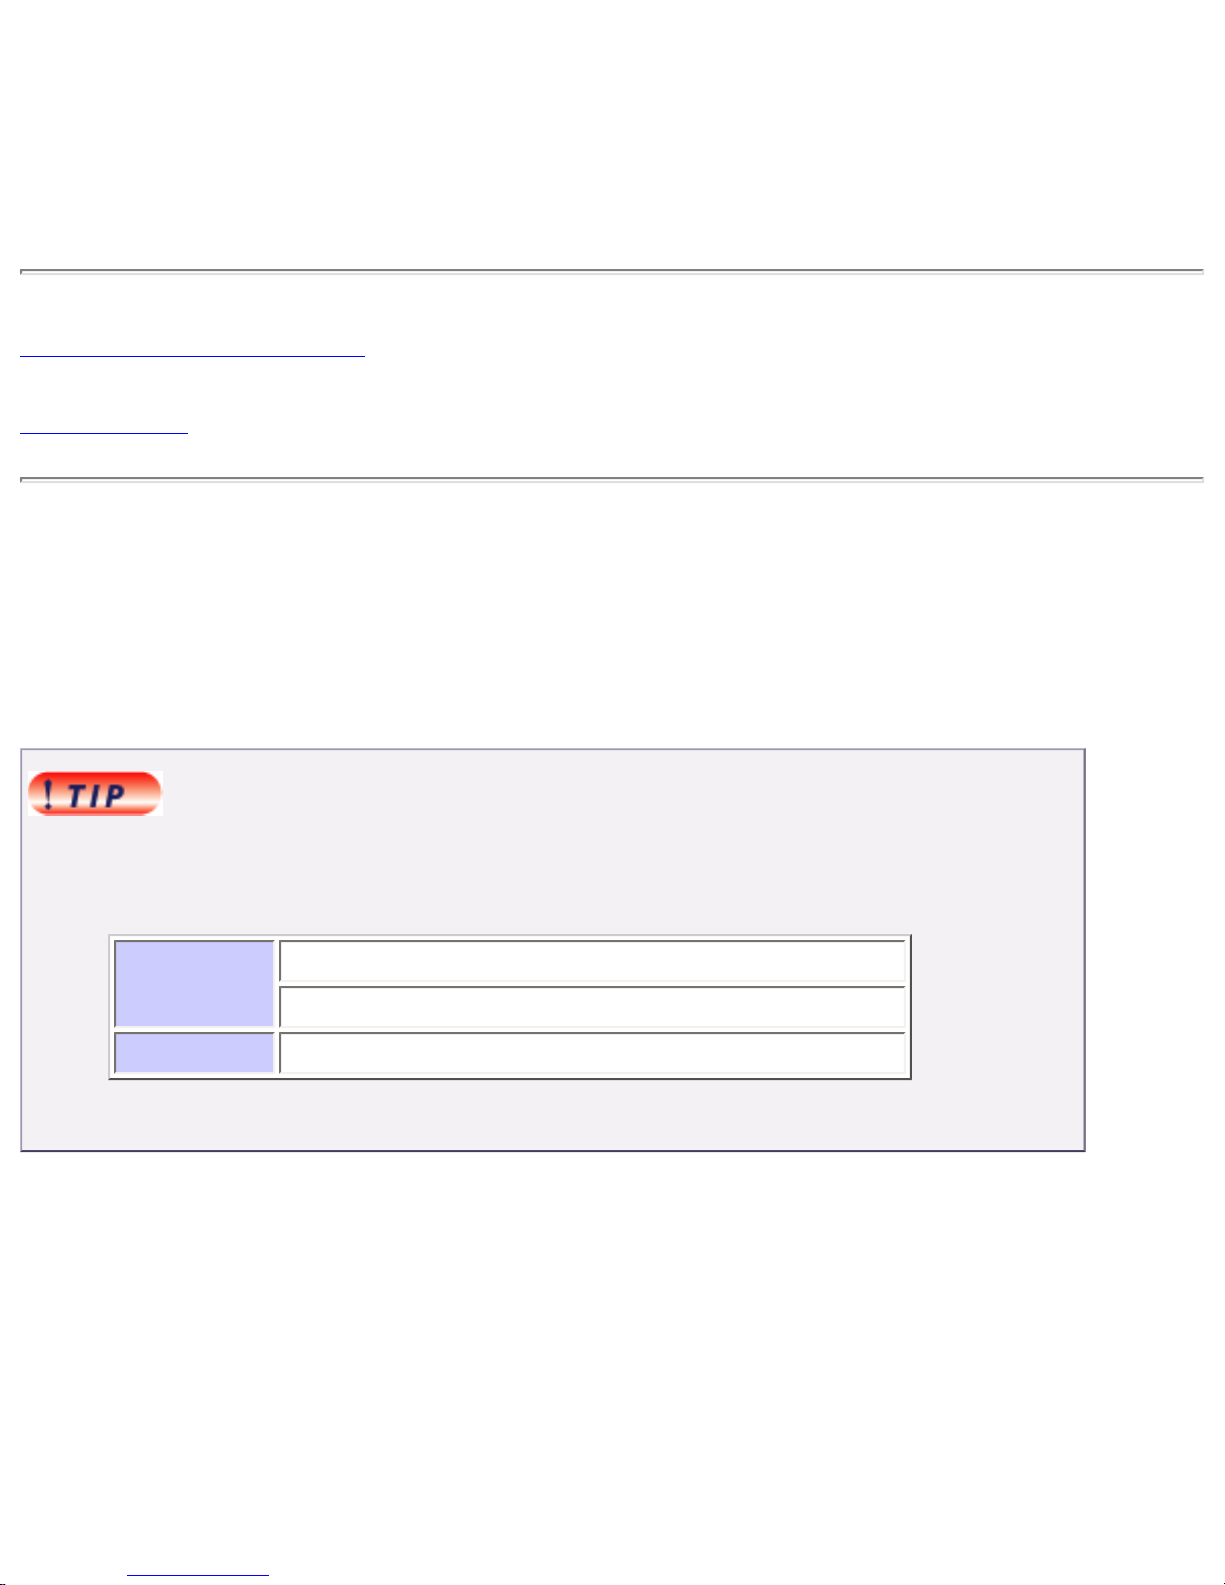
About the notation
This manual uses the following symbols to indicate specific information for operating SX-WSG1.
Be sure to carefully review before using SX-WSG1.
:
This symbol indicates important information that needs to be observed when
operating SX-WSG1. Make sure to read this information for safe and proper use.
:
This symbol indicates information that is useful when using SX-WSG1. If you
experience difficulties operating SX-WSG1, please refer to this information first.
About this manual
■ Copying all or a part of this manual without our permission is prohibited.
■ The contents of this manual may be changed without advance notice.
■ If you have any question regarding this manual or our products, please contact our
customer support.
■ Please note that the actual screens may vary from the examples in this manual. This can
be caused by different versions of operating systems on the PC, upgrades, etc.
■ This manual has been edited very carefully. However, silex technology, Inc. is not
responsible for any mistakes included in this manual or any damages, direct or indirect,
arising from the use of this manual.
About trademarks
■ SONY is either trademarks or registered trademarks of Sony Corporation.
■ Microsoft and Windows are either trademarks or registered trademarks of Microsoft
Corporation in the United States and/or other countries.
■ AirMac, AirPort, Macintosh, MacOS and Safari are registered trademarks of Apple, Inc.
■ Other brand or product names are trademarks or registered trademarks of their respective
owners.
Back to Top
file:///C|/Documents%20and%20Settings/evillegas.STA/Desktop/a/English/SXWSG1/00_0_intro_e.htm (2 of 2) [12/15/2008 10:05:27 AM]
Page 3
About SX-WSG1
About SX-WSG1
This page provides the SX-WSG1 overview and operating environments.
1.Features
2.Parts on SX-WSG1
● Parts and function
3.Notes on the radio wave
1.Features
SX-WSG1 is a Wireless Adapter which supports IEEE802.11b/g and has the following features:
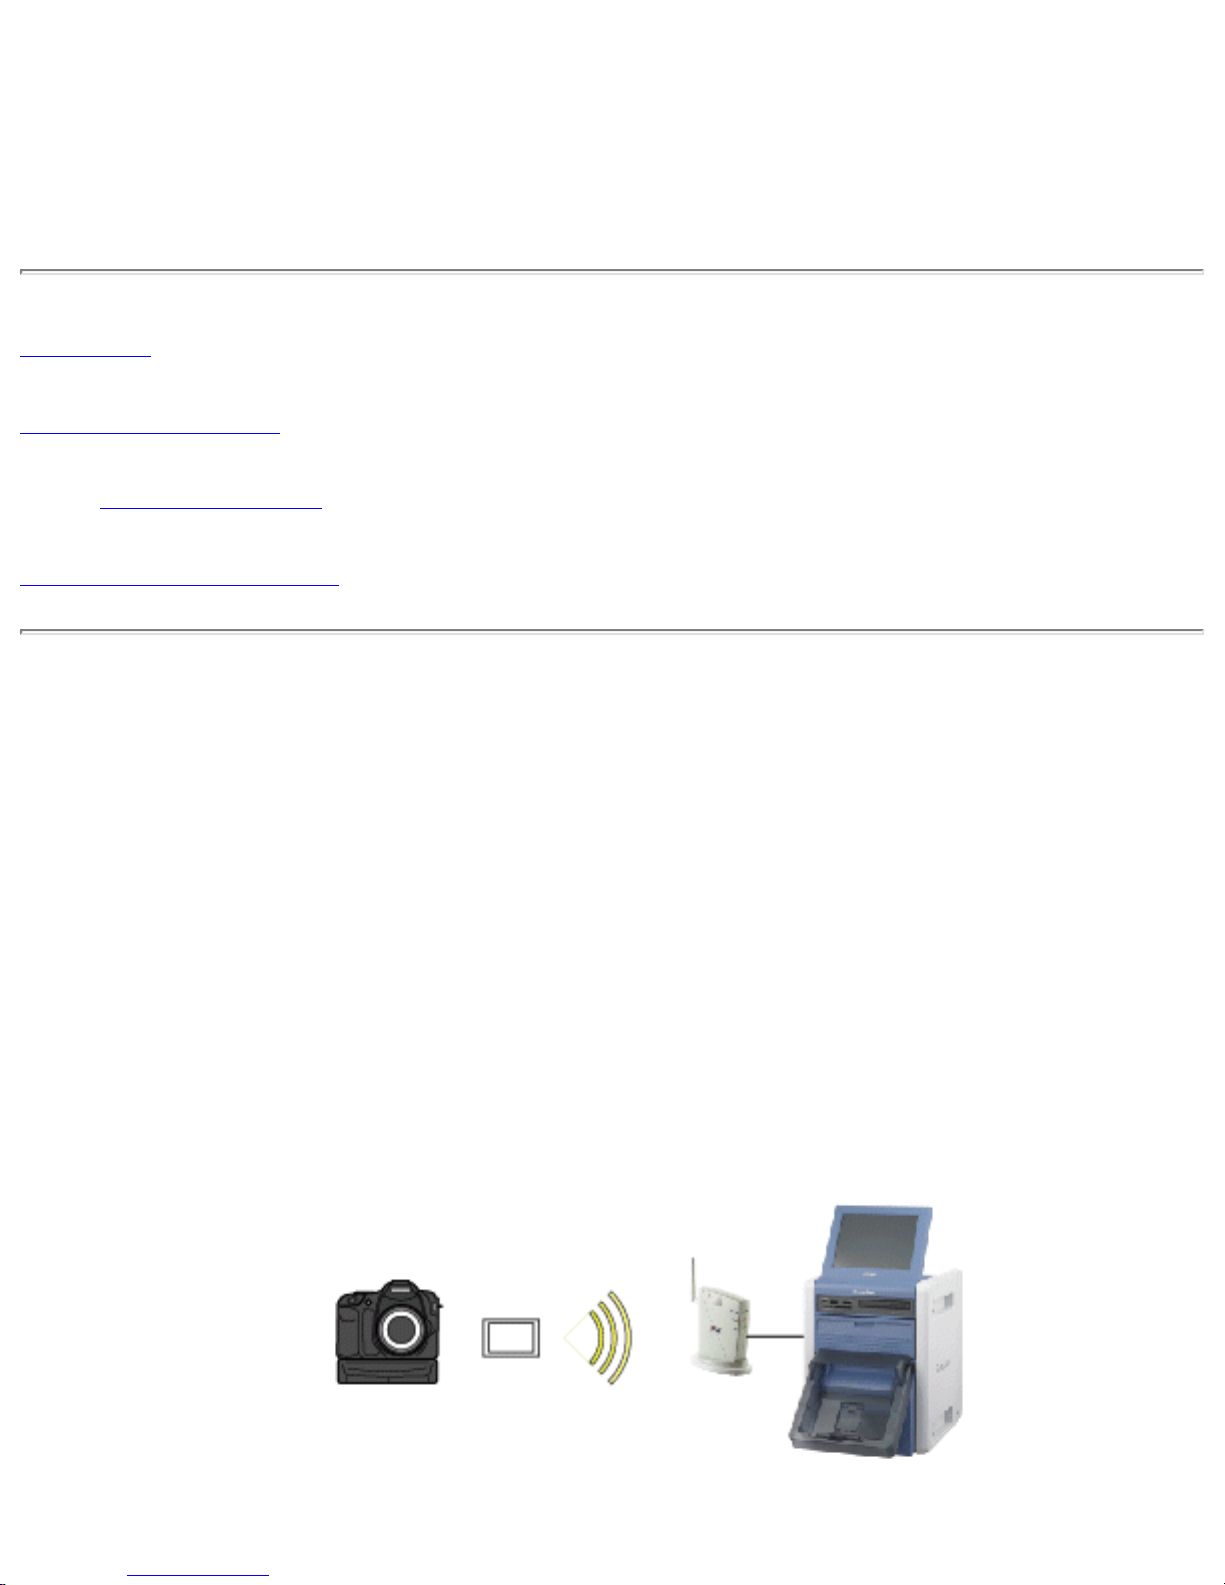
● Wireless printing directly from a digital camera is available (Camera Direct
Transfer function)
By connecting SX-WSG1 to the Digital Photo Printer which supports camera direct
transfer, the image data can directly be transferred and then printed from the digital
camera to the Digital Photo Printer via FTP.
* Only one Digital Photo Printer can be connected at a time.
* To use this function, Camera Direct Transfer mode needs to be selected at extended
function setting.
(Default Extended Function setting: Camera Direct Transfer)
file:///C|/Documents%20and%20Settings/evillegas.STA/Desktop/a/English/SXWSG1/00_3_about_e.htm (1 of 6) [12/15/2008 10:05:30 AM]
Page 4
About SX-WSG1
For details on how to print from digital camera to Digital Photo Printer wirelessly, please
visit the website below.
SONY's website:
http://www.sony.net/snaplab
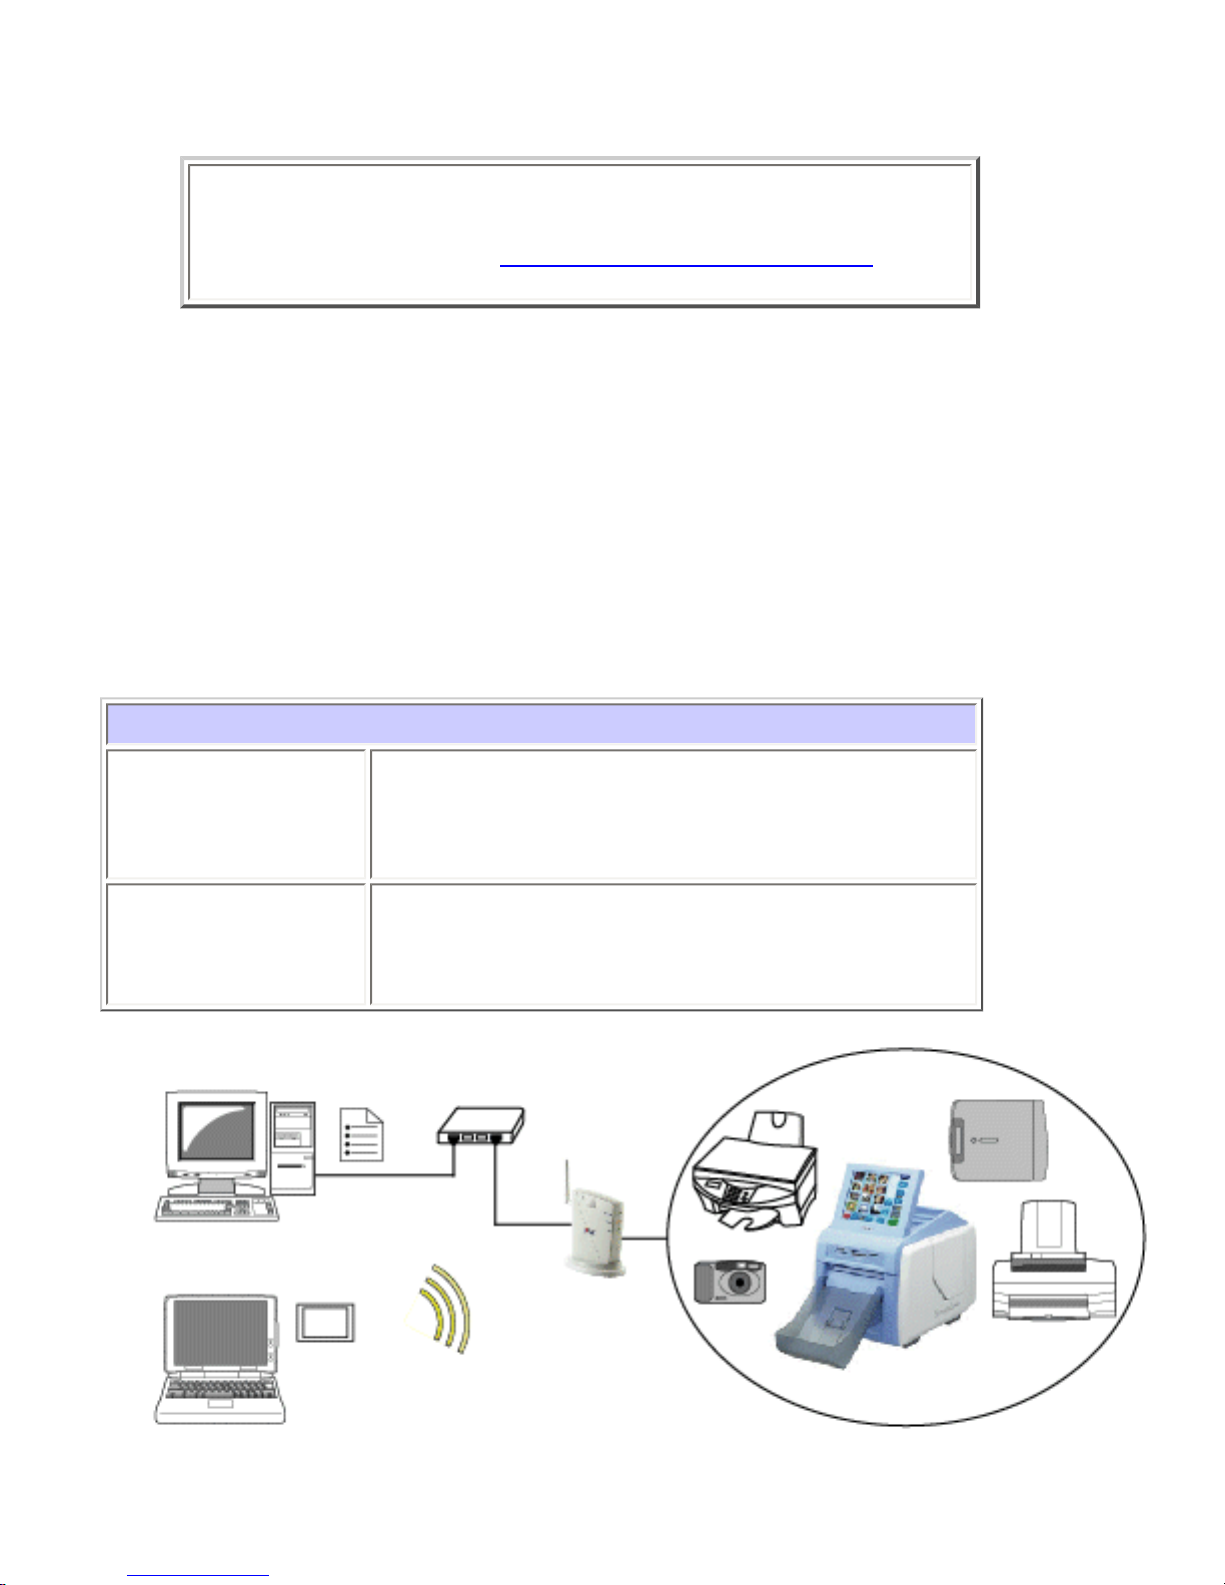
● Share various USB devices using a PC (Device Server function)
By using SX-WSG1 and the bundled utility, SX Virtual Link, you can share USB devices
such as printers, scanners, storage devices among several PCs over the network (See
the supported OS below). You can use USB devices as if they were locally connected to
your PC.
* If a USB HUB is used, several USB devices can be connected at a time.
* To use this function, Device Server mode needs to be selected at extended function
setting.
Supported OS
Windows
Windows 2000
Windows XP (32-Bit Edition / 64-Bit Edition)
Windows Vista (32-Bit Edition / 64-Bit Edition)
Macintosh
Mac OS
X <PowerPC>
Ver 10.2.7 - Ver 10.5.x
Mac OS X <Intel> Ver 10.4.4 - Ver 10.5.x
file:///C|/Documents%20and%20Settings/evillegas.STA/Desktop/a/English/SXWSG1/00_3_about_e.htm (2 of 6) [12/15/2008 10:05:30 AM]
Page 5
About SX-WSG1
The device server function has the following features:
❍ Printer auto connection
SX Virtual Link has a feature that detects print jobs and then automatically
connects to, prints to and disconnects from the printer (or USB device with a print
capability) if it is connected to SX-WSG1. You will not have to manually connect to
the printer using the SX Virtual Link before you print a job.
❍ Supports Raw/LPR/IPP printing
SX-WSG1 supports Raw mode, LPR and IPP, three of the network printing
protocols commonly used by users. When a printer is connected to SX-WSG1, you
can also use standard Windows printing.
● Digital Photo Printer status
Since the operating status of the Digital Photo Printer is displayed on SX-WSG1's Web
page, you can always check the printer status as well as ink levels from your PC.
For details on the Digital Photo Printer, please visit the below website.
SONY's website:
http://www.sony.net/snaplab
● Support IEEE802.11b/g Wireless LAN standard
IEEE802.11b/g compliance allows sharing of various USB devices over the wireless
network.
In the wireless settings, WEP, WPA(PSK) and WPA2(PSK) can be selected. For
encryption mode, WEP supports 64/128 bit, WPA supports TKIP/AES/AUTO, and WPA2
supports AES/AUTO.
● Easy configuration utility
You can configure SX-WSG1 as well as install necessary utilities by answering questions
on the Wireless Adapter Setup, which is a wizard-style utility included in the CD-ROM
that came with SX-WSG1. Since SX-WSG1 has a wired LAN port (10BASE -T/100BASETX), an easy wireless LAN configuration based on the wired connection will be available.
Also, SX-WSG1 supports the configuration method using a USB memory, which allows
you to configure even if you do not have a wired LAN environment.
file:///C|/Documents%20and%20Settings/evillegas.STA/Desktop/a/English/SXWSG1/00_3_about_e.htm (3 of 6) [12/15/2008 10:05:30 AM]
Page 6
About SX-WSG1
● Camera Direct Transfer mode and Device Server mode cannot be used at a time.
● silex technology shall not be liable for any loss or damage of data in data storage devices
resulting from the use of SX-WSG1. silex technology shall not also be liable for any leak,
manipulation, loss, or corruption of data in data storage devices connected to SX-WSG1 as a
result of improper use.
● Isochronous devices such as Web camera and USB speaker, etc. are not available.
● Depending on the USB printers (or USB devices with a print function), the Printer auto
connection feature may not be available.
● When standard Windows printing is used, the printer status from Status Monitor, which came
with the printer or MFP, is not available.
Also, if the printer supports only a print in bi-directional communication, standard Windows
printing cannot be used.
● When using standard Windows printing, up to 4 printers can be connected at a time. To
connect 5 or more, use SX Virtual Link.
● In Windows Vista, the RAW mode printing is not available. Please use LPR or IPP printing.
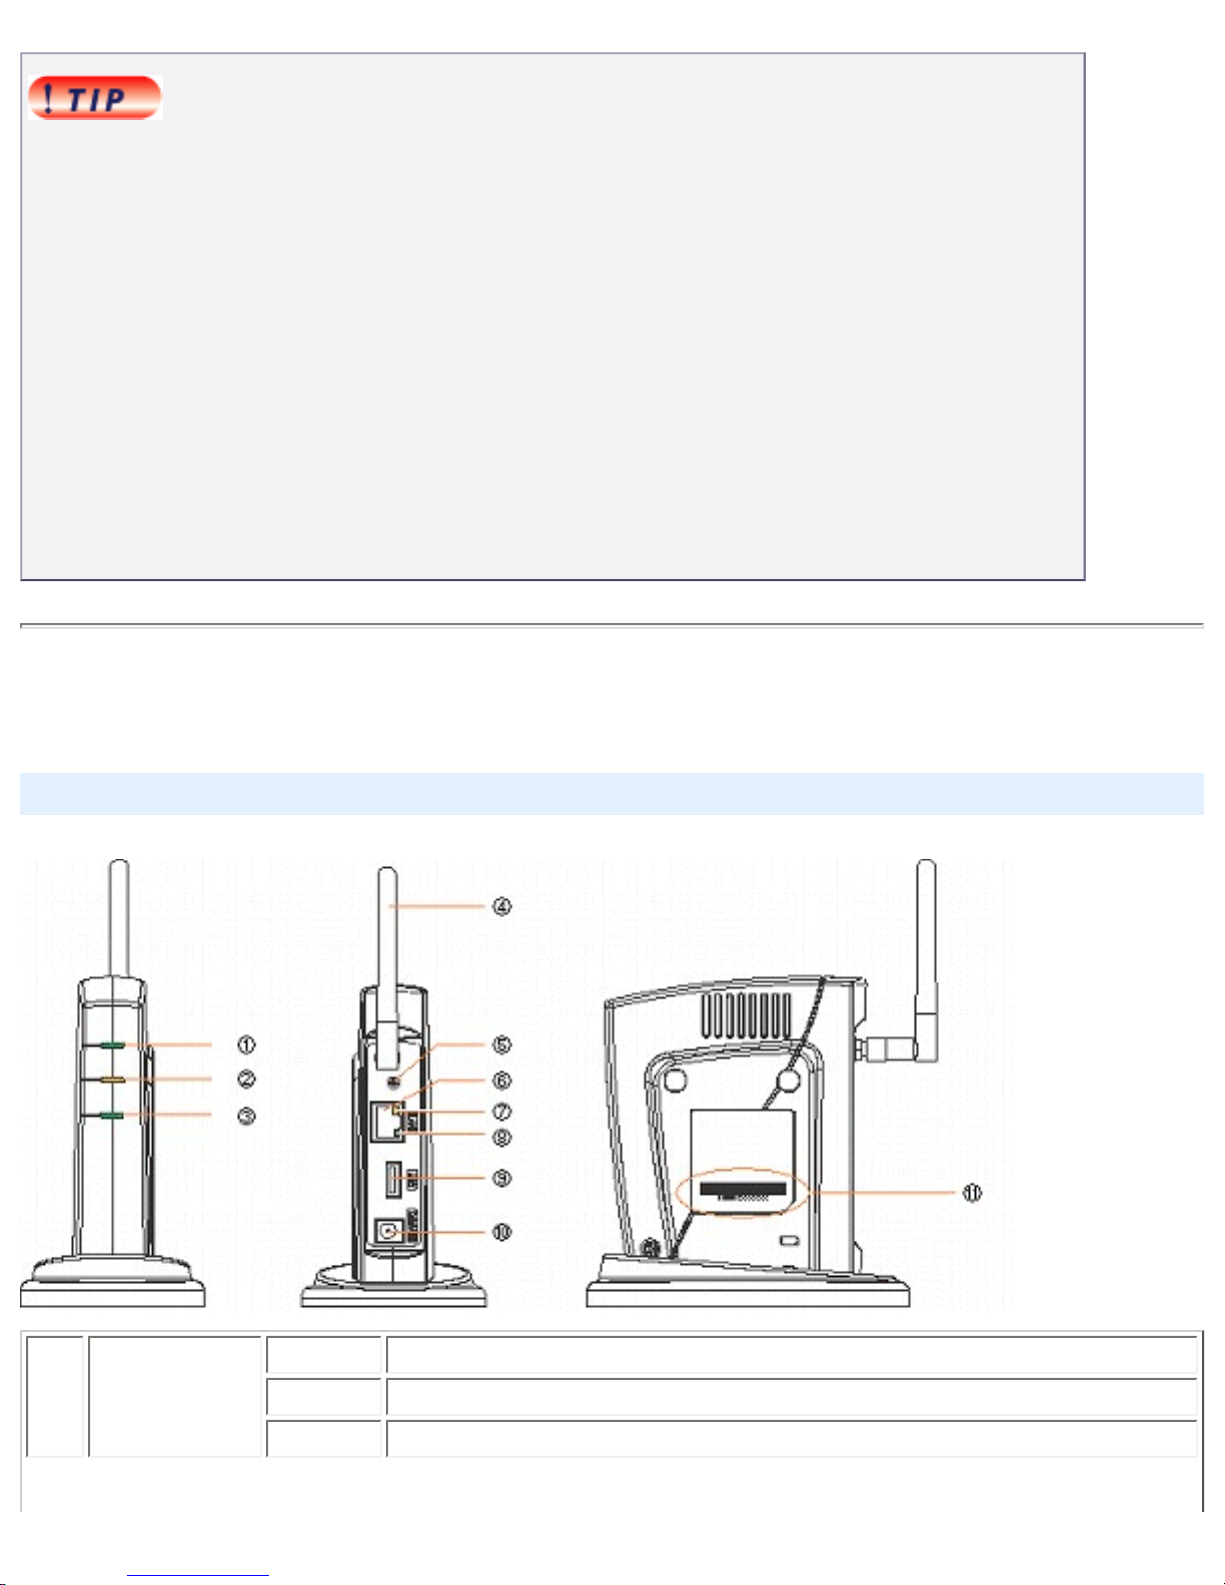
2.Parts on SX-WSG1
Parts and function
1
Wireless LED
(Green)
ON Communicating in Infrastructure mode.
Blink Communicating in Ad hoc mode.
OFF Communicating through a wired network.
file:///C|/Documents%20and%20Settings/evillegas.STA/Desktop/a/English/SXWSG1/00_3_about_e.htm (4 of 6) [12/15/2008 10:05:30 AM]
Page 7
About SX-WSG1
2
Status LED
(Orange)
Blinks during data transfer.
3
Link LED
(Green)
<For a wired network connection >
ON A network connection is established through a wired LAN.
Blink
Searching for a network connection
(Blinks when a network cable is disconnected)
< For a wireless connection >
ON
A network connection is established through a wireless LAN
(Infrastructure mode).
Blink
Searching for network connection
(Blinks when the wireless LAN settings on SX-WSG1, such as a WEP
key or SSID, does not match the wireless network)
OFF Running in wireless LAN (Ad hoc mode).
4
Wireless LAN
antenna
This antenna is used for communication through a wireless LAN.
5 Push Switch
This push switch is used to reset to the factory defaults.
For details, refer to Reset to Factory Default.
6 Network Port Connects to the network cable.
7
Status LED
(Orange)
Blinks during data transfer through a wired network.
8
Link LED
(Green)
ON A network connection is established through a wired LAN.
Blink Searching for a network connection.
OFF Running in a wireless LAN.
9 USB Port Connect a USB Cable (A Type connector).
10
Power
Connector
Connect AC adapter.
11
Ethernet
Address
The Ethernet (MAC) Address of SX-WSG1 is found on the bottom.
The last 6 digits are the SX-WSG1's serial number.
Example) If the Ethernet Address is 00:80:92:00:11:22 (noted as 008092001122)
then SX-WSG1's serial number is 001122.
3.Notes on the radio wave
Do not use SX-WSG1 near the following equipment or places.
The following equipment may use the same band. If you use SX-WSG1 near this equipment, the
radio waves from SX-WSG1 and the following devices may interfere with each other.
file:///C|/Documents%20and%20Settings/evillegas.STA/Desktop/a/English/SXWSG1/00_3_about_e.htm (5 of 6) [12/15/2008 10:05:30 AM]
Page 8

About SX-WSG1
● Microwave, scientific instruments, pacemaker or other medical equipment.
● Licensed radio station in a factory.
● Small power radio station (a non-licensed radio station).
Do not use SX-WSG1 near a cellular phone, TV or Radio.
A cellular phone, TV, and radio use a different radio band than our products. Generally if they
are used near SX-WSG1, it will not cause a problem. However, when they approximate SXWSG1, sound or image noise can happen.
If there is reinforced concrete/metal between wireless devices, they may not connect.
SX-WSG1 can connect through wood or glass, but can have trouble communicating
through reinforced concrete/metal.
Wireless Equipment for 2.4GHz band
This band of equipment is used by a microwave, industry, science, medical equipment and
licensed in room or low power (non licensed) radio stations.
● Before you use this equipment, verify that it will not interfere with other broadcasting.
● If interference happens, stop using the equipment or change the band. Contact us to
discuss ways of avoiding interference (example: create the wall).
2.4 : The frequency of this device is 2.4Ghtz
DS/OF : The modulation used is DS-SS and OFDM.
4 : The range of interference is (<=40m).
: Different channels can be used to avoid interference.
Back to Top
file:///C|/Documents%20and%20Settings/evillegas.STA/Desktop/a/English/SXWSG1/00_3_about_e.htm (6 of 6) [12/15/2008 10:05:30 AM]
Page 9
Enable Camera Direct Transfer Feature
Enable Camera Direct Transfer Feature
This page explains how to enable Camera Direct Transfer feature.
1. Check SX-WSG1 settings
2. How to use
1. Check SX-WSG1 settings
Check that the SX-WSG1 is running in the mode which allows communication with a digital
camera (Camera Direct Transfer mode) by accessing SX-WSG1's Web browser configuration
interface. The following is the method to access the Web browser configuration interface.
● To use the Web browser configuration interface, the TCP/IP settings need to be enabled, and
an IP address needs to be configured.
● We recommend the following Web browsers:
Windows
Microsoft Internet Explorer 5.5 or higher
Netscape Navigator 7.1 or higher
Mac OS Safari 1.0.3 or higher
● The following procedures are examples when Internet Explorer is used in Windows XP.
Actual screens or displays may vary depending on your Web browser.
1. Access the SX-WSG1's Web page.
Type the IP address of the SX-WSG1 in the address bar of the Web browser and press
the ENTER key.
Example) Type 192.168.20.123 and press the ENTER key.
file:///C|/Documents%20and%20Settings/evillegas.STA/Desktop/a/English/SXWSG1/04_1_ftp_http_mode_e.htm (1 of 5) [12/15/2008 10:05:31 AM]
Page 10

Enable Camera Direct Transfer Feature
● If you are not sure of the IP address, you can go back to the Wireless Adapter Search
screen in Wireless Adapter Setup and find it there. For details, refer to Configure
Through a Wired LAN (
For Windows / For Macintosh).
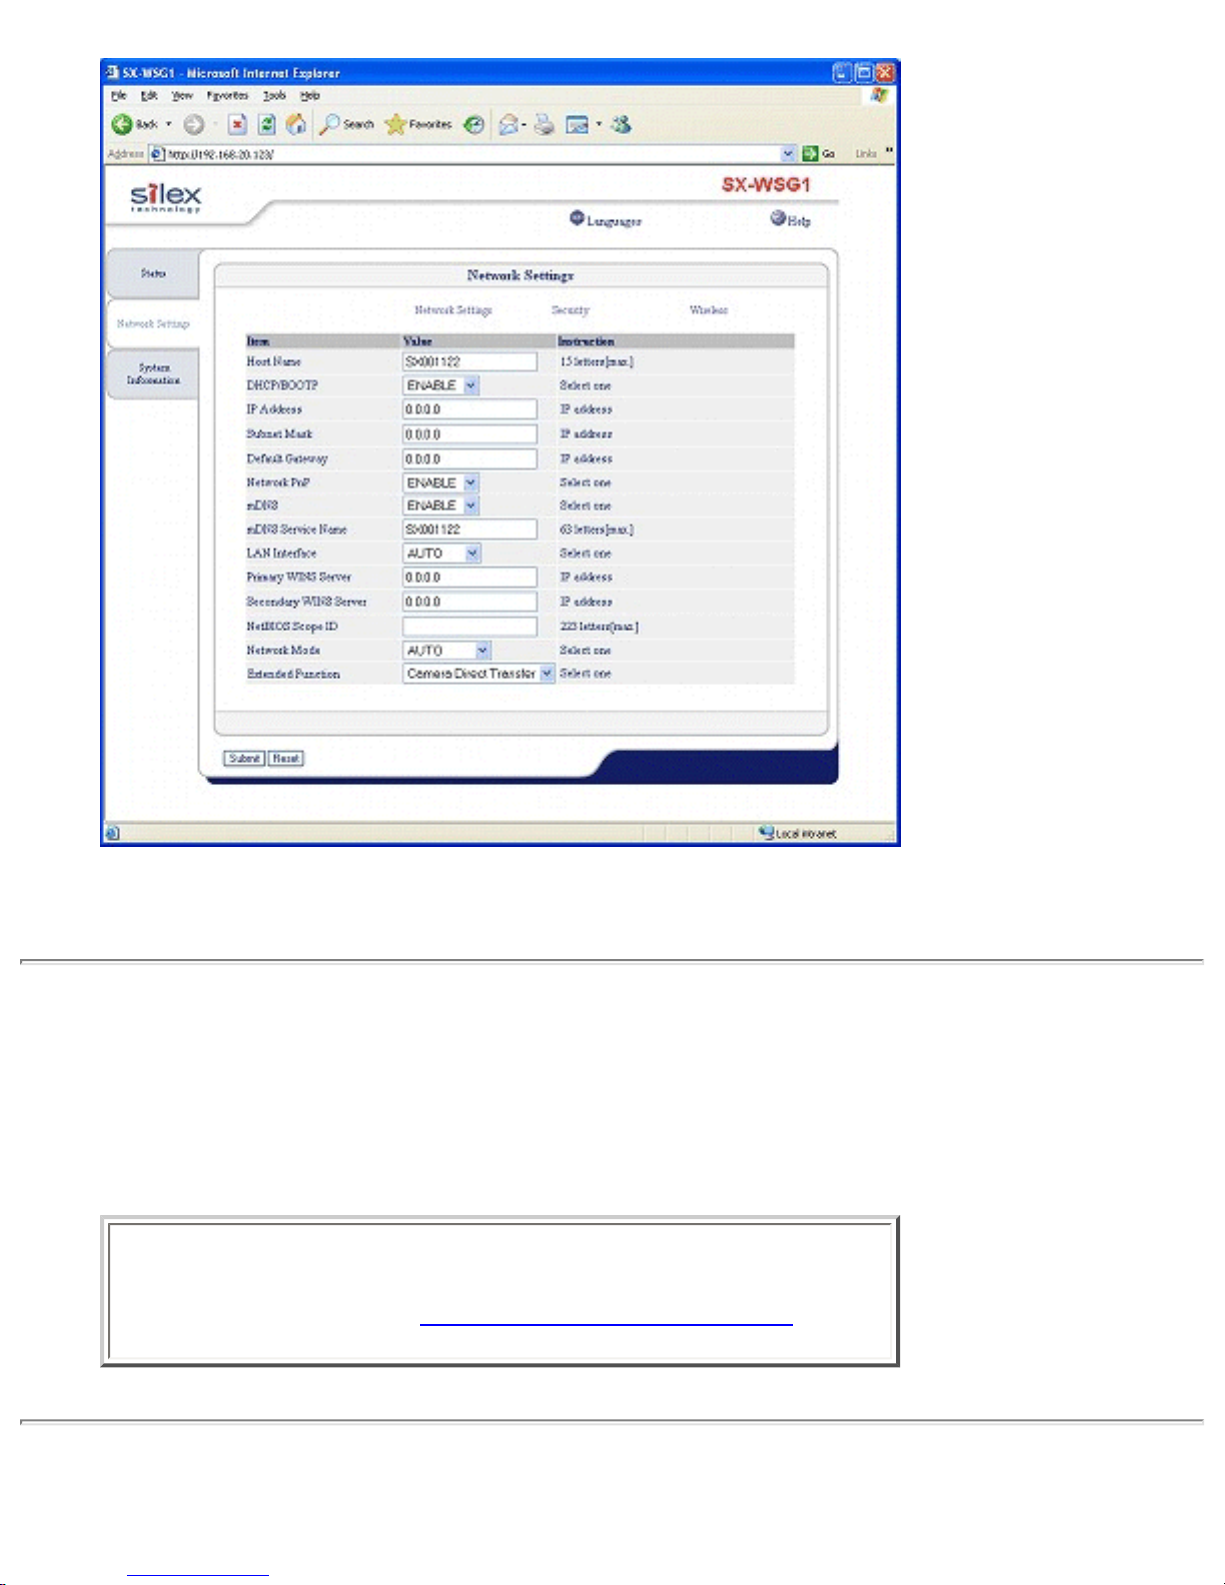
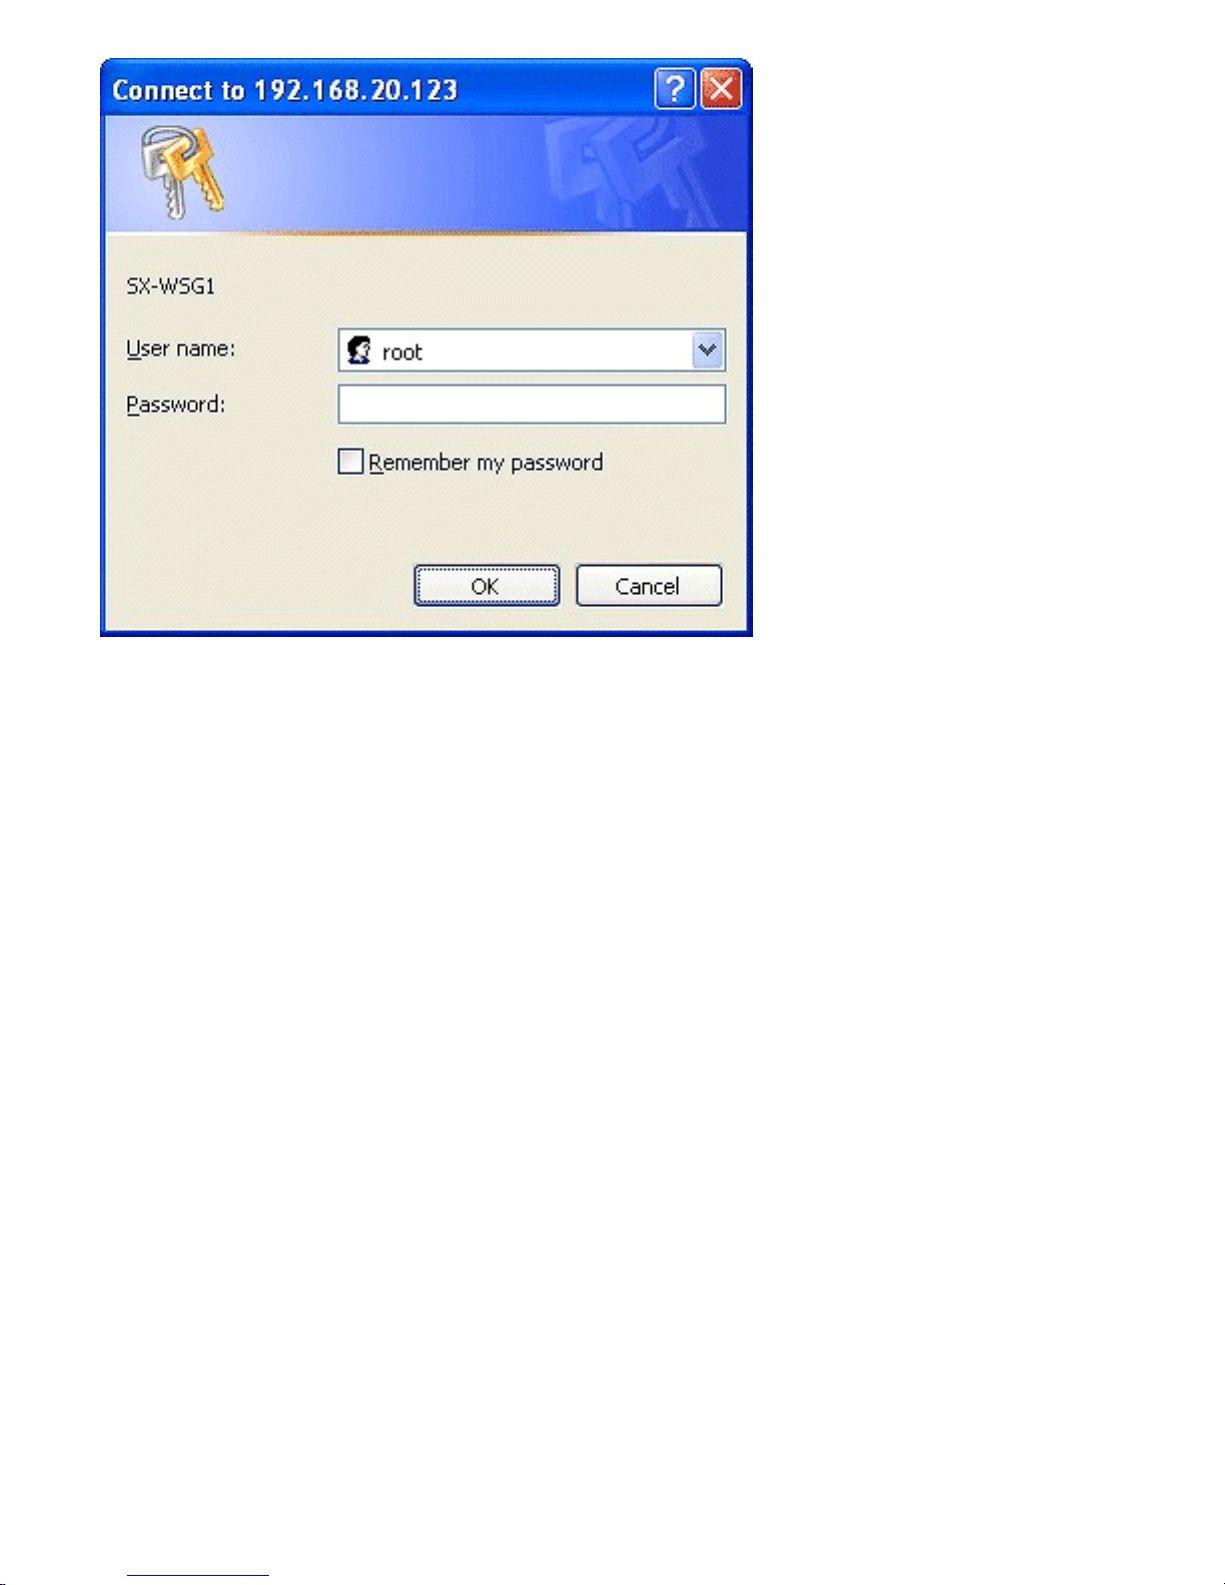
2. Click Network Settings tab. The window below is displayed.
Enter a user name (root) and password (by default, there is no password) and click OK.
file:///C|/Documents%20and%20Settings/evillegas.STA/Desktop/a/English/SXWSG1/04_1_ftp_http_mode_e.htm (2 of 5) [12/15/2008 10:05:31 AM]
Page 11

Enable Camera Direct Transfer Feature
3. Check that Camera Direct Transfer is selected at Extended Function.
If Device Server has been selected, select Camera Direct Transfer and click Submit
button.
SX-WSG1 will reboot and run in Camera Direct Transfer mode.
file:///C|/Documents%20and%20Settings/evillegas.STA/Desktop/a/English/SXWSG1/04_1_ftp_http_mode_e.htm (3 of 5) [12/15/2008 10:05:31 AM]
Page 12
Enable Camera Direct Transfer Feature
Camera Direct Transfer feature has been enabled.
2. How to use
For details on how to print from digital camera to a Digital Photo Printer wirelessly, please visit
the website below.
SONY's website:
http://www.sony.net/snaplab
file:///C|/Documents%20and%20Settings/evillegas.STA/Desktop/a/English/SXWSG1/04_1_ftp_http_mode_e.htm (4 of 5) [12/15/2008 10:05:31 AM]
Page 13

Enable Camera Direct Transfer Feature
Back to Top
file:///C|/Documents%20and%20Settings/evillegas.STA/Desktop/a/English/SXWSG1/04_1_ftp_http_mode_e.htm (5 of 5) [12/15/2008 10:05:31 AM]
Page 14
Enable Device Server Feature
Enable Device Server Feature
This page explains how to enable the Device Server feature.
To use the SX-WSG1 as a device server, you need to change the configuration is as follows.
● To use the Web browser configuration interface, the TCP/IP settings need to be enabled, and
an IP address needs to be configured.
● We recommend the following Web browsers:
Windows
Microsoft Internet Explorer 5.5 or higher
Netscape Navigator 7.1 or higher
Mac OS Safari 1.0.3 or higher
● The following procedures are examples when Internet Explorer is used in Windows XP.
Actual screens or displays may vary depending on your Web browser.
● If the Device Server feature is enabled, the digital camera connection capability will be lost.
1. Access the SX-WSG1's Web page.
Type the IP address of the SX-WSG1 in the address bar of the Web browser and press
the ENTER key.
Example) Type 192.168.20.123 and press the ENTER key.
file:///C|/Documents%20and%20Settings/evillegas.STA/Desktop/a/English/SXWSG1/04_2_ds_mode_e.htm (1 of 5) [12/15/2008 10:05:32 AM]
Page 15
Enable Device Server Feature
● If you are not sure of the IP address, you can go back to Wireless Adapter Search
screen in Wireless Adapter Setup and find it there. For details, refer to Configure
Through a Wired LAN (
For Windows / For Macintosh).
2. Click Network Settings tab. The window below is displayed.
Enter a user name (root) and password (by default, there is no password) and click OK.
file:///C|/Documents%20and%20Settings/evillegas.STA/Desktop/a/English/SXWSG1/04_2_ds_mode_e.htm (2 of 5) [12/15/2008 10:05:32 AM]
Page 16
Enable Device Server Feature
3. Select Device Server at Extended Function.
file:///C|/Documents%20and%20Settings/evillegas.STA/Desktop/a/English/SXWSG1/04_2_ds_mode_e.htm (3 of 5) [12/15/2008 10:05:32 AM]
Page 17

Enable Device Server Feature
4. Click Submit button.
file:///C|/Documents%20and%20Settings/evillegas.STA/Desktop/a/English/SXWSG1/04_2_ds_mode_e.htm (4 of 5) [12/15/2008 10:05:32 AM]
Page 18

Enable Device Server Feature
Device Server feature has been enabled.
SX-WSG1 will reboot and run as a device server.
To use the device server feature, you need to install the USB device connection utility, SX
Virtual Link.
For details on how to install SX Virtual Link, refer to Install Application (
For Windows / For
Macintosh).
If SX Virtual Link has already been installed on your PC, refer to SX Virtual Link Overview (
For
Windows / For Macintosh) for details on how to use it.
Back to Top
file:///C|/Documents%20and%20Settings/evillegas.STA/Desktop/a/English/SXWSG1/04_2_ds_mode_e.htm (5 of 5) [12/15/2008 10:05:32 AM]
Page 19

Display Digital Photo Printer Status
Display Digital Photo Printer Status
This page explains how to display the printer status for a Digital Photo Printer on SX-WSG1's
Web page.
● To use the Web browser configuration interface, the TCP/IP settings need to be enabled, and
an IP address needs to be configured.
● We recommend the following Web browsers:
Windows
Microsoft Internet Explorer 5.5 or higher
Netscape Navigator 7.1 or higher
Mac OS Safari 1.0.3 or higher
● The following procedures are examples when Internet Explorer is used in Windows XP.
Actual screens or displays may vary depending on your Web browser.
● This feature is available only when the Digital Photo Printer is connected to SX-WSG1.
1. Display Digital Photo Printer status
2. About Digital Photo Printer status
● Available printer status
● Max number of printers that can be connected
3. About Digital Photo Printer
1. Display Digital Photo Printer status
1. Access the SX-WSG1's Web page.
Type the IP address of the SX-WSG1 in the address bar of the Web browser and press
the ENTER key.
Example) Type 192.168.20.123 and press the ENTER key.
file:///C|/Documents%20and%20Settings/evillegas.STA/Desktop/a/English/SXWSG1/08_1_dfp_status_e.htm (1 of 5) [12/15/2008 10:05:33 AM]
Page 20

Display Digital Photo Printer Status
● If you are not sure of the IP address, you can go back to the Wireless Adapter Search
screen in Wireless Adapter Setup and find it there. For details, refer to Configure
Through a Wired LAN (
For Windows / For Macintosh).
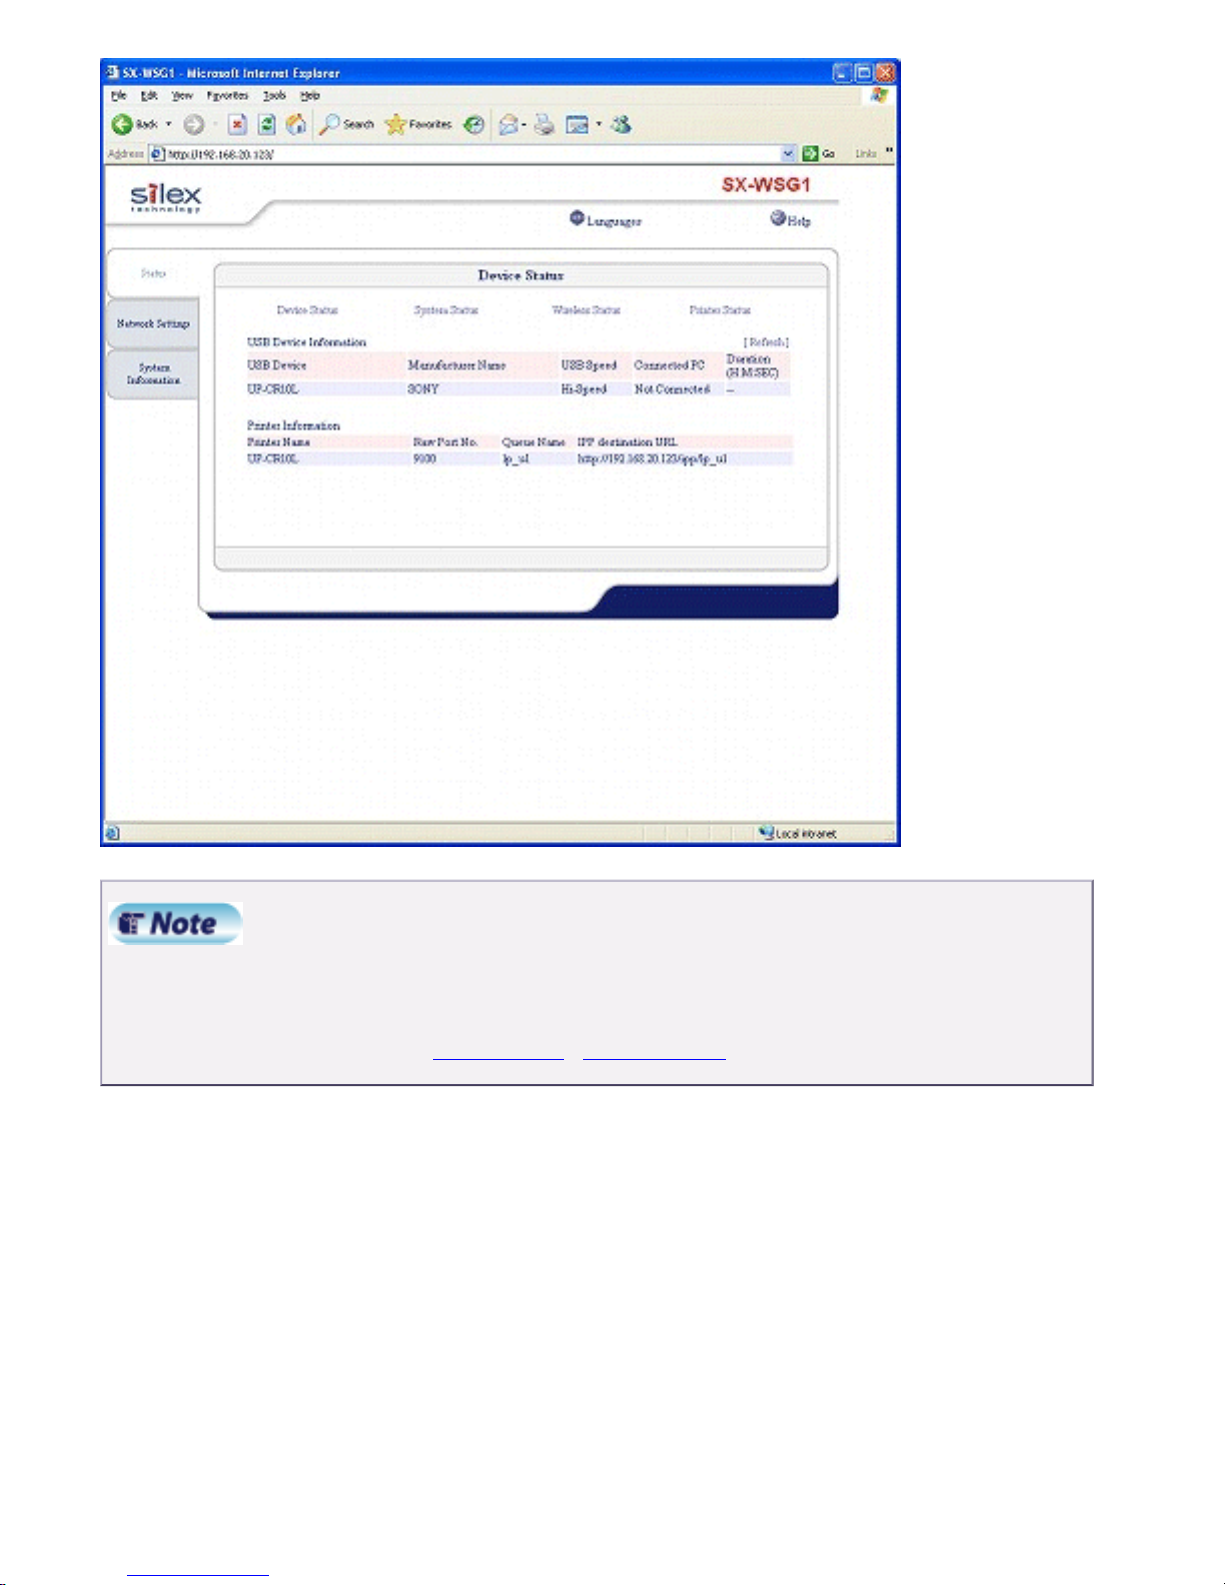
2. Click Printer Status.
file:///C|/Documents%20and%20Settings/evillegas.STA/Desktop/a/English/SXWSG1/08_1_dfp_status_e.htm (2 of 5) [12/15/2008 10:05:33 AM]
Page 21

Display Digital Photo Printer Status
The printer status for the Digital Photo Printer being connected to SX-WSG1 is displayed.
2. About Digital Photo Printer status
Available printer status
file:///C|/Documents%20and%20Settings/evillegas.STA/Desktop/a/English/SXWSG1/08_1_dfp_status_e.htm (3 of 5) [12/15/2008 10:05:33 AM]
Page 22

Display Digital Photo Printer Status
The printer status available on the Web page is as follows.
Name Status
USB Serial No. Display serial number of printer.
Paper Type Display paper type of printer.
Remaining prints Display ribbon level of printer.
Total prints Display the total number of prints.
Total prints(Thermal head) Display the total number of prints (Thermal head).
Printer status Display printer operating status. The following
messages are displayed for each status.
● Printer is ready.
● Printer is in use.
● No print media found.
● Error was detected in the printer.
Firmware Version Display the firmware version of the printer.
file:///C|/Documents%20and%20Settings/evillegas.STA/Desktop/a/English/SXWSG1/08_1_dfp_status_e.htm (4 of 5) [12/15/2008 10:05:33 AM]
Page 23

Display Digital Photo Printer Status
Max number of printers that can be connected
The max number of printers that can be connected differs depending on the extended function
setting.
Extended Function Max number of printers that can be connected
Camera Direct Transfer Only one printer can be connected.
Device Server Two or more devices can be connected. (Printer status
is available for each device.)
3. About Digital Photo Printer
For details on the Digital Photo Printer, please visit the website below.
SONY's website:
http://www.sony.net/snaplab
Back to Top
file:///C|/Documents%20and%20Settings/evillegas.STA/Desktop/a/English/SXWSG1/08_1_dfp_status_e.htm (5 of 5) [12/15/2008 10:05:33 AM]
Page 24

Specifications
Specifications
1.Hardware specifications
2.Software specifications
3.Configuration settings
● Network Settings
● Security
● Wireless
● Password
1.Hardware specifications
Operating environment
Temperature : +10°C to +35°C, +50°F to +95°F
Humidity : 20% to 80%RH (Non-condensing)
Storage environment
Temperature : -10°C to +50°C, +14°F to +122°F
Humidity : 20% to 90%RH (Non-condensing)
EMI
VCCI Class B / FCC Class B / EN55022 / EN55024
CPU
32bit RISC CPU
Memory
RAM : 8MByte
FlashROM : 2MByte
Wired network interface
10BASE-T/100BASE-TX 1 port. (automatic detection)
IEEE802.11b
Frequency 2.4GHz
Transmission
system
DS-SS
Transmission
speed
1M/2M/5.5/11M
(Automatic detection)
file:///C|/Documents%20and%20Settings/evillegas.STA/Desktop/a/English/SXWSG1/99_spec_e.htm (1 of 8) [12/15/2008 10:05:35 AM]
Page 25

Specifications
Wireless network
interface
Channel
US : 1-11ch
EU : 1-13ch
JP : 1-14ch
IEEE802.11g
Frequency 2.4GHz
Transmission
system
OFDM
Transmission
speed
6M/12M/18M/36M/48M/54M
(Automatic detection)
Channel
US : 1-11ch
EU : 1-13ch
JP : 1-13ch
Device interface
USB2.0 Hi-Speed (A Type) : 1 port
Others
Push Switch:1 button
LED
Wired
connector
area
2 10BASE/100BASE Link (Green)
Status (Orange)
Front side
3 Wireless (Green)
Status (Orange)
Link (Green)
This equipment has been tested and found to comply with the limits for a Class B digital device,
pursuant to Part 15 of the FCC Rules. These limits are designed to provide reasonable
protection against harmful interference in a residential installation. This equipment generates,
uses, and can radiate radio frequency energy and, if not installed and used in accordance with
the instructions, it may cause harmful interference to radio communications. However, there is
no guarantee that interference will not occur in a particular installation. If this equipment does
cause harmful interference to radio or television reception, which can be determined by turning
the equipment off and on, the user is encouraged to try to correct the interference by one or
more of the following measures:
- Reorient or relocate the receiving antenna.
- Increase the separation between the equipment and receiver.
- Connect the equipment into an outlet on a circuit different from that to which the receiver is
connected.
- Consult the dealer or an experienced radio/TV technician for assistance.
This device complies with Part 15 of the FCC Rules. Operation is subject to the following two
conditions: (1) This device may not cause harmful interference, and (2) this device must accept
any interference received, including interference that may cause undesired operation.
file:///C|/Documents%20and%20Settings/evillegas.STA/Desktop/a/English/SXWSG1/99_spec_e.htm (2 of 8) [12/15/2008 10:05:35 AM]
Page 26

Specifications
EN55022 Class-B
EN55024
2.Software specifications
Supported protocols
TCP/IP
FTP, HTTP, TELNET, DHCP, BOOTP, WINS, TCP,
UDP, ARP, IP, ICMP,
JCP (silex technology, Inc. proprietary protocol),
SXUPTP (silex technology, Inc. proprietary protocol),
Raw, LPD, IPP
Supported OS
Windows 2000
Windows XP (32-Bit Edition / 64-Bit Edition)
Windows Vista (32-Bit Edition / 64-Bit Edition)
Mac OS X
<PowerPC>
Ver 10.2.7〜Ver 10.5.x
Mac OS X <Intel>
Ver 10.4.4〜Ver 10.5.x
Total number of available USB
connections
15 (including USB hub)
(When using standard Windows printing, up to 4 printers
can be used at the same time. )
● Number of connections
SX-WSG1 recognizes the following configuration as 4 USB connections. The MFP has 3
embedded connections for the printer, scanner and storage. Therefore, 1 connection is for the
USB hub and 3 connections for the MFP.
file:///C|/Documents%20and%20Settings/evillegas.STA/Desktop/a/English/SXWSG1/99_spec_e.htm (3 of 8) [12/15/2008 10:05:35 AM]
Page 27

Specifications
● USB Hub connection
SX-WSG1 does not support a cascade connection. Do not connect two or more USB Hubs
between SX-WSG1 and a USB device.
3.Configuration items
The following items can be configured using a Web browser.
Network Settings
Item Description Factory default
file:///C|/Documents%20and%20Settings/evillegas.STA/Desktop/a/English/SXWSG1/99_spec_e.htm (4 of 8) [12/15/2008 10:05:35 AM]
Page 28

Specifications
Host Name Configure the host name for SX-WSG1. The host
name is used for the SX Virtual Link, WINS, etc.
Assign a unique name.
SXxxxxxx
(xxxxxx is the
last 6 digits of
the Ethernet
address)
DHCP/BOOTP Enable DHCP/BOOTP protocol operations. SX-WSG1
detects DHCP and BOOTP automatically. If more than
1 address gets returned, the IP address which is
returned first will be assigned.
ENABLE
IP Address Configure the IP address on SX-WSG1 in decimal
number, "XXX.XXX.XXX.XXX."
0.0.0.0
Subnet Mask Configure the subnet mask on SX-WSG1 in decimal
number,
"XXX.XXX.XXX.XXX." If the value is "0.0.0.0," the
subnet mask corresponding to the IP address will be
assigned automatically.
0.0.0.0
Default Gateway Configure the default gateway on SX-WSG1 in decimal
number, "XXX.XXX.XXX.XXX." "0.0.0.0" will be
disabled.
0.0.0.0
Network PnP Enable/Disable Network PnP function. ENABLE
mDNS Enable/Disable mDNS function (Apple’s Bonjour) ENABLE
mDNS Service
Name
Configure mDNS service name of SX-WSG1. This
name will be displayed when SX-WSG1 is searched
using Apple’s Bonjour. Assign a unique name.
SXxxxxxx
(xxxxxx is the
last 6 digits of
the Ethernet
address)
LAN Interface Configure the physical network type. "AUTO" is
recommended. If the LED on the hub is not turned on
when you turn on SX-WSG1, change the network type
to the network type of the HUB.
AUTO
Primary WINS
Server
Secondary WINS
Server
Configure the IP address on the WINS server (primary/
secondary) in decimal number, “xxx.xxx.xxx.xxx.”
0.0.0.0
NetBIOS Scope IDConfigure the group ID for WINS environment. The
scope ID defines the computer group ID that detects
the registered host name.
Blank
Network Mode Configure the network connection by selecting
"AUTO", "WIRED" or "WIRELESS". When you select
"AUTO", SX-WSG1 automatically detects the
connection type such as a wired connection for a LAN
cable connection or a wireless connection for a nonwired connection.
AUTO
file:///C|/Documents%20and%20Settings/evillegas.STA/Desktop/a/English/SXWSG1/99_spec_e.htm (5 of 8) [12/15/2008 10:05:35 AM]
Page 29

Specifications
Extended
Function
Configure the SX-WSG1 operating mode. Camera
Direct Transfer mode and Device Server mode can be
selected.
If Camera Direct Transfer is enabled, a print data can
be transferred directly from digital camera to Digital
Photo Printer and then printed without PC. If Device
Server is enabled, various USB devices can be shared
among several PCs over the network.
Camera Direct
transfer
Security
Item Description Factory default
IP Filter Mode Configure the IP filter operations. Available options are
"ALLOW" and "DENY." If you select "ALLOW," only the
data from the configured IP address range are
accepted. If you select "DENY," the data from the
configured IP address range cannot be received.
DENY
Filter #0-3 Configure the IP filter range. IP addresses to be filtered
can be configured to maximum 4 address ranges. If
address range configuration is not required, please
enter the address range from "0.0.0.0" to "0.0.0.0".
0.0.0.0
Wireless
Item Description Factory default
Wireless Mode Configure the wireless mode on SX-WSG1. Select
either AdHoc or Infra..
If you do not use an access point:
AdHoc also called 802.11 Ad hoc, needs SSID
configuration. A network with enhanced security can
be established because the access is allowed only
within the group sharing the SSID.
If you use an access point:
Select Infrastructure mode. This mode connects
and communicates
through the access point which has the same SSID
as SX-WSG1.
AdHoc
file:///C|/Documents%20and%20Settings/evillegas.STA/Desktop/a/English/SXWSG1/99_spec_e.htm (6 of 8) [12/15/2008 10:05:35 AM]
Page 30

Specifications
SSID Configure the SSID on SX-WSG1. Maximum 32
alphanumeric characters can be used for the
configuration.
SSID is an ID that logically distinguishes one
wireless LAN network
from another.
Whenever SSID does not match, groups cannot
communicate with each other even if those groups
use the same channel in the same communication
area.
GROUP
Channel Configure the communication channel that is used
for Ad hoc mode.
The devices should use the same channel if they
need to communicate with each other.
If the same SSID already exists, the channel setting
originally configured through it is invalidated.
11
Network
Authentication
Select the Network Authentication mode from Open,
Shared, WPA and WPA2.
Open (Open System):
Permit any access without any authorization.
Shared (Pre-Shared Key):
Grant the access to the device sharing a secret
WEP key that is
configured beforehand.
WPA ("Infrastructure" mode only):
Provide network authorization through PSK and
encrypted data transmission through TKIP/AES/
AUTO. Since the encryption key is created by
communicating with an access point, the WEP key
setting is invalidated.
WPA2 ("Infrastructure" mode only):
Provide network authorization through PSK and
encrypted data transmission through AES/AUTO.
Since the encryption key is created by
communicating with an access point, the WEP key
setting is invalidated.
Open
WEP Turn ON or turn OFF WEP on SX-WSG1.
OFF
Key Index Specify the default WEP key. 1
Key Size Specify the length of the WEP key. 64bit
Key Format Select the key format for WEP Key. Hexadecimal
file:///C|/Documents%20and%20Settings/evillegas.STA/Desktop/a/English/SXWSG1/99_spec_e.htm (7 of 8) [12/15/2008 10:05:35 AM]
Page 31

Specifications
WEP Key1 - 4 Configure the WEP Key on SX-WSG1.
Enter 10 digits (40 bit) when the key size is 64 bit.
Enter 26 hexadecimal digits (104 bit) when the key
size is 128 bit.
If the Key Format is alphanumeric Character, enter
50digit or 13 digit alphanumeric character.
0000000000000
0000000000000
Encryption Mode Select the encryption mode used for data
transmission through WPA/WPA2 from TKIP, AES
or AUTO. If you use WPA2, select AES or AUTO.
AUTO
Pre-Shared Key Enter the Pre-Shared Key. The Pre-Shared Key has
to be a string with 8-63 characters.
silex technology
Password
Item Description Factory default
Password Configure the password within 7 ASCII characters.
This is used as the authentication password for
configuration changes via the Web page.
Blank
Back to Top
file:///C|/Documents%20and%20Settings/evillegas.STA/Desktop/a/English/SXWSG1/99_spec_e.htm (8 of 8) [12/15/2008 10:05:35 AM]
Page 32

Page 33

SX-WSG1 Manual
SX-WSG1 Manual
Introduction
● Introduction
● Safety Instructions
● About SX-WSG1
● User Registration/Services
● About OpenSSL License
Configure SX-WSG1
Camera Direct Transfer
Device Server
Printer Status
Other Functions
Troubleshooting
Specification
file:///C|/Documents%20and%20Settings/evillegas.STA/Desktop/a/English/SXWSG1/contents1.htm [12/15/2008 10:05:36 AM]
Page 34

SX-WSG1 Manual
SX-WSG1 Manual
Introduction
Configure SX-WSG1
● Before Setup
Configure SX-WSG1
(for Windows)
● Configure Through a Wired LAN
● Configure Using a USB Memory
● Configure Through a Wireless LAN
● Configure Using Windows Connect
Now
Configure SX-WSG1
(for Macintosh)
● Configure Through a Wired LAN
● Configure Using a USB Memory
● Configure Through a Wireless LAN
Camera Direct Transfer
Device Server
Printer Status
Other Functions
Troubleshooting
Specification
file:///C|/Documents%20and%20Settings/evillegas.STA/Desktop/a/English/SXWSG1/contents2.htm [12/15/2008 10:05:37 AM]
Page 35

SX-WSG1 Manual
SX-WSG1 Manual
Introduction
Configure SX-WSG1
Camera Direct Transfer
● Enable Camera Direct Transfer
Feature
Device Server
Printer Status
Other Functions
Troubleshooting
Specification
file:///C|/Documents%20and%20Settings/evillegas.STA/Desktop/a/English/SXWSG1/contents3.htm [12/15/2008 10:05:38 AM]
Page 36

SX-WSG1 Manual
SX-WSG1 Manual
Introduction
Configure SX-WSG1
Camera Direct Transfer
Device Server
● Enable Device Server Feature
Install Application
● For Windows
● For Macintosh
How to Use SX Virtual Link
(for Windows)
● SX Virtual Link Overview
● SX Virtual Link Screen Descriptions
● Basic Usage
● Add to Favorites List
● Favorite Device Configuration
● Compact Mode
● SX Virtual Link Environment Settings
How to Use SX Virtual Link
(for Macintosh)
● SX Virtual Link Overview
● SX Virtual Link Screen Descriptions
● Basic Usage
● Add to Favorites List
● Favorite Device Configuration
● SX Virtual Link Environment Settings
Uninstall Application
● For Windows
● For Macintosh
Printer Status
file:///C|/Documents%20and%20Settings/evillegas.STA/Desktop/a/English/SXWSG1/contents4.htm (1 of 2) [12/15/2008 10:05:38 AM]
Page 37

SX-WSG1 Manual
Other Functions
Troubleshooting
Specification
file:///C|/Documents%20and%20Settings/evillegas.STA/Desktop/a/English/SXWSG1/contents4.htm (2 of 2) [12/15/2008 10:05:38 AM]
Page 38

SX-WSG1 Manual
SX-WSG1 Manual
Introduction
Configure SX-WSG1
Camera Direct Transfer
Device Server
Printer Status
Other Functions
Troubleshooting
● Q&A
Specification
file:///C|/Documents%20and%20Settings/evillegas.STA/Desktop/a/English/SXWSG1/contents5.htm [12/15/2008 10:05:39 AM]
Page 39

SX-WSG1 Manual
SX-WSG1 Manual
Introduction
Configure SX-WSG1
Camera Direct Transfer
Device Server
Printer Status
Other Functions
● Print with Standard Windows Printing
● Advanced Settings Using Web
Browser
● Network Plug and Play
● IP Filter
● Reset to Factory Default
Troubleshooting
Specification
file:///C|/Documents%20and%20Settings/evillegas.STA/Desktop/a/English/SXWSG1/contents6.htm [12/15/2008 10:05:39 AM]
Page 40

SX-WSG1 Manual
SX-WSG1 Manual
Introduction
Configure SX-WSG1
Camera Direct Transfer
Device Server
Printer Status
Other Functions
Troubleshooting
Specification
● Specifications
file:///C|/Documents%20and%20Settings/evillegas.STA/Desktop/a/English/SXWSG1/contents7.htm [12/15/2008 10:05:40 AM]
Page 41

SX-WSG1 Manual
SX-WSG1 Manual
Introduction
Configure SX-WSG1
Camera Direct Transfer
Device Server
Printer Status
● Display Digital Photo Printer Status
Other Functions
Troubleshooting
Specification
file:///C|/Documents%20and%20Settings/evillegas.STA/Desktop/a/English/SXWSG1/contents8.htm [12/15/2008 10:05:40 AM]
Page 42

Page 43

Page 44

Page 45

Page 46

Page 47

SX-WSG1 Users Manual
SX-WSG1 Manual
Introduction
● Introduction
● Safety Instructions
● About SX-WSG1
● User Registration/Services
● About OpenSSL License
Configure SX-WSG1
Camera Direct Transfer
Device Server
Printer Status
Other Functions
Troubleshooting
Specification
SX-WSG1
Users Manual
Thank you for purchasing the Wireless Adapter SXWSG1.
This manual provides information on how to configure
and use SX-WSG1. Please read the
Safety Instructions
in this chapter before using SX-WSG1.
Introduction
● About the notation
● About this manual
● About trademarks
file:///C|/Documents%20and%20Settings/evillegas.STA/Desktop/a/English/SXWSG1/SXWSG1.htm (1 of 3) [12/15/2008 10:05:43 AM]
Page 48

SX-WSG1 Users Manual
Introduction
About the notation
This manual uses the following symbols to indicate
specific information for operating SX-WSG1.
Be sure to carefully review before using SX-WSG1.
:
This symbol indicates important information
that needs to be observed when operating
SX-WSG1. Make sure to read this
information for safe and proper use.
:
This symbol indicates information that is
useful when using SX-WSG1. If you
experience difficulties operating SX-WSG1,
please refer to this information first.
About this manual
■ Copying all or a part of this manual without our
permission is prohibited.
■ The contents of this manual may be changed
without advance notice.
■ If you have any question regarding this manual or
our products, please contact our customer
support.
■ Please note that the actual screens may vary
from the examples in this manual. This can be
caused by different versions of operating systems
on the PC, upgrades, etc.
■ This manual has been edited very carefully.
However, silex technology, Inc. is not responsible
for any mistakes included in this manual or any
damages, direct or indirect, arising from the use
of this manual.
About trademarks
■ SONY is either trademarks or registered
trademarks of Sony Corporation.
■ Microsoft and Windows are either trademarks or
registered trademarks of Microsoft Corporation in
file:///C|/Documents%20and%20Settings/evillegas.STA/Desktop/a/English/SXWSG1/SXWSG1.htm (2 of 3) [12/15/2008 10:05:43 AM]
Page 49

SX-WSG1 Users Manual
the United States and/or other countries.
■ AirMac, AirPort, Macintosh, MacOS and Safari
are registered trademarks of Apple, Inc.
■ Other brand or product names are trademarks or
registered trademarks of their respective owners.
Back to Top
file:///C|/Documents%20and%20Settings/evillegas.STA/Desktop/a/English/SXWSG1/SXWSG1.htm (3 of 3) [12/15/2008 10:05:43 AM]
Page 50

Page 51

 Loading...