

Page 1
SIERRA VIDEO
OG-HDA-109 HD/SDI Video Distribution Amplifiers
OG-HDA-10, OG-HDA-21, & OG-HDA-22 Rear I/O
Modules
User’s Manual
Page 2

Page 3

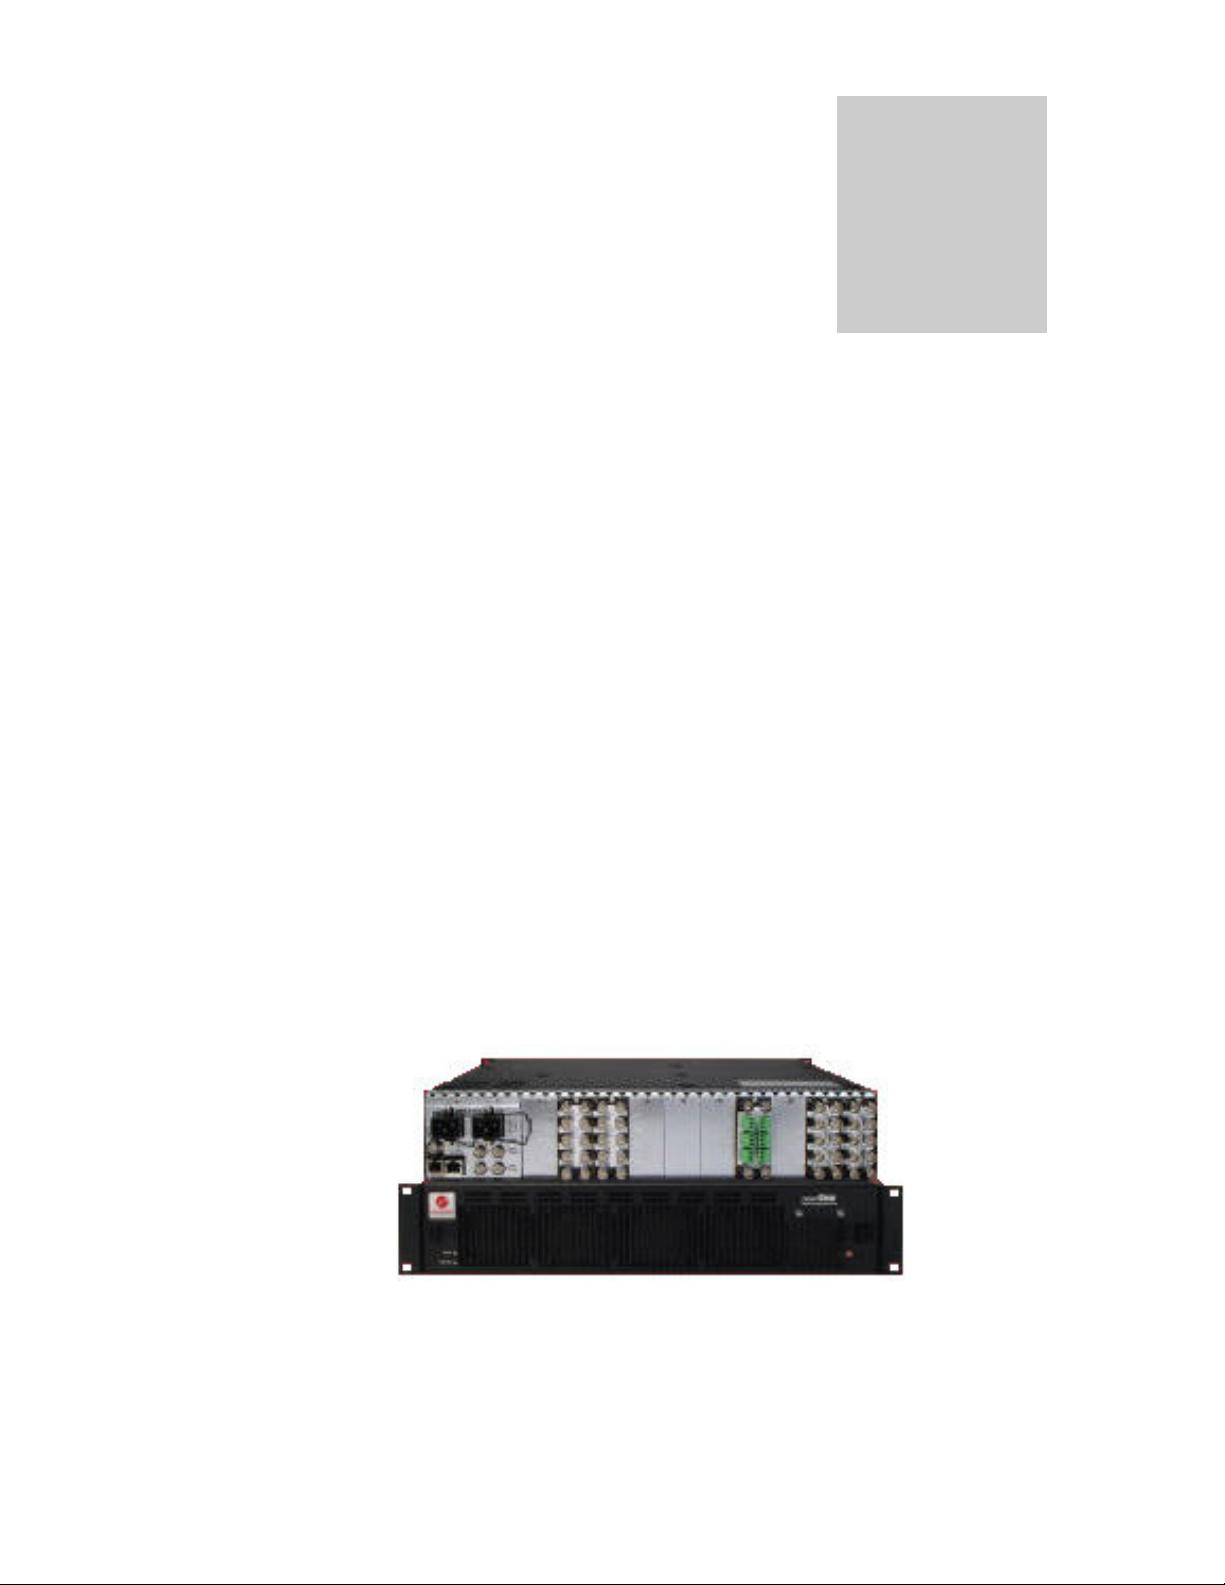
OG-HDA-109 HD/SDI VIDEO DISTRIBUTION AMPLIFIERS
User’s Manual
Sierra Video
P.O. Box 2462 Grass Valley, CA 95945
Tel: (530) 478-1000
Fax: (530) 478-1105
Email: info@sierravideo.com
Version 2.0
Publication Date: February 2012
The information contained in this manual is subject to change by Sierra Video
© Sierra Video
Page 4

Page 5

Table of
Contents
Introduction 1
Warnings & Safety Regulations 2
Warnings 2
Cautions 2
EMC Regulatory Notices 3
Delivery Damage Inspection 3
Factors Affecting Quality of Results 3
OG-HDA-109 4
Installation 7
Introduction 7
Module Mounting 7
Rear I/O Panel 7
DIP Switches 8
Video Connections 9
Dashboard Software 10
The Menu System 11
OG-HDA-109 Module 15
Block Diagrams 15
Circuit Description 16
Schematics 19
Specifications 21
Warranty 23
Page 6

Page 7
SIERRA VIDEO
Introduction
The Sierra Video OG-HDA-109 HD Video distribution amplifiers offer a high performance
solution to your video distribution needs. The modules can be removed or re-inserted
with power to the frame either on or off.
The module provides equalization and re-clocking at all SMPTE SD-HD video standard
data rates SMPTE-259M,292,424M (270 Mb/s, 1.485 Gb/s and 2.97 Gb/s.) User
definable for the bypass of re-clocking and be able to accommodate ASI/DVB signals on
8 of the 9 outputs. The OG-HAD-109 Accommodates ASI/DVB signals, on 8 outputs
(non-inverting) with output 9 inverting.
The OG-HDA-109 fits in either the 10 and 20 slot Open Gear frame and its settings can
be monitored via the Open Gear Dashboard software program. The frames provide low
voltage DC input to each module.
Chapter
1
The 10 slot frame uses a single I/O module: OG-HDA-10
Each board using this I/O has 10 BNCs available and are used to provide a 1x9 DA.
The 20 slot frame can use two different I/O modules: OG-HDA-21 or the OG-HDA-22.
The OG-HDA-21 operates just like the 10 slot frame I/O module with 10 BNCs per DA
board.
A single I/O module will consume two of the 20 slots and only accept one DA board.
The OG-HDA-22 is built to accept two DA boards. With this I/O module each DA only has
5 BNCs available on it. Only four outputs are available.
1
Page 8

SIERRA VIDEO
Warnings & Safety Regulations
The information in the following section provides important warnings and safety
guidelines for both the operator and service personnel. Specific warnings and cautions
may be found throughout this manual. Please read and follow the important safety
precautions noting especially those instructions relating to risk of fire, electrical shock and
injury to persons.
Any instructions in this manual that require opening the equipment cover or enclosure are
intended for use by qualified service personnel only. To reduce the risk of electrical
shock, do not perform any servicing other than what is contained in the operating
instructions unless you are qualified.
Warnings
Heed all warnings on the unit and in the operating instructions.
Disconnect AC power before installing any options.
Do not use this product in or near water.
This product is grounded through the grounding conductor of the power
cord. To avoid electrical shock, plug the power cord into a properly wired
receptacle before connecting inputs and outputs.
Cautions
Route power cords and other cables so that they are not likely to be
damaged, or create a hazard.
Dangerous voltages exist at several points in this product. To avoid personal
injury, do not touch unsafe connections and components when the power is
on.
To avoid fire hazard, use only the specified type, correct voltage, and
current rating of fuse. Always refer fuse replacement to qualified service
personnel.
Have qualified personnel perform safety checks after any completed service
This is an FCC class A product. In a domestic environment, this product
may cause radio interference, in which case the user may be required to take
necessary measures.
Use the proper AC voltage to supply power to the switcher. When installing
equipment, do not attach the power cord to building surfaces.
To prevent damage to equipment when replacing fuses, locate and correct
trouble that caused the fuse to blow before applying power.
Use only the recommended interconnect cables to connect the switcher to
other frames.
Follow static precautions at all times when handling the equipment.
Leave the side, top, and bottom of the frame clear for air convection cooling
and to allow room for cabling. Slot and openings in the frame are provided
for ventilation and should not be blocked.
Only an authorized Sierra Video technician should service the switchers.
Any user who makes changes or modifications to the unit without the
expressed approval of the Sierra Video will void the warranty.
2
Page 9

EMC Regulatory Notices
Federal Communications Commission (FCC) Part 15 Information: This device complies
with Part 15 of the FCC standard rules. Operation is subject to the following conditions:
This device may not cause harmful interference
This device must accept any interference received including interference that may cause
undesirable operations.
Delivery Damage Inspection
Carefully inspect the frame and exterior components to be sure that there has been no
shipping damage. Make sure all modules are seated correctly and have not detached
during shipment.
Factors Affecting Quality of Results
There are many factors affecting the quality of results when signals are transmitted from
a source to a destination.
OG-HDA-109
Signal cables — Use only the best quality cables to avoid interference and
degraded signal quality and elevated noise levels.
Sockets and connectors of the sources and destinations — Use only the
highest quality, since "zero ohm" connection resistance is the target.
Connectors should also match the required impedance (75 ohm in
video) to minimize return loss.
Amplifying circuitry — Must have quality performance when the desired
end result is high linearity, low distortion, and low noise.
Distance between sources and destinations — Plays a major role in the final
result. For long distances (over 15 meters) between sources and
destinations, special measures should be taken to avoid high frequency
cable losses. These measures include using higher quality cables and/or
adding line cable equalizing amplifiers.
Interference from neighboring electrical appliances — These can have an
adverse affect on signal quality. Balanced audio lines are less prone to
interference, but unbalanced audio should be installed away from any
main power lines, electric motors, transmitters, etc. even when the
cables are shielded.
CAUTION!
Only an authorized Sierra Video technician can service these products. Any user who
makes changes or modifications to the unit without the expressed approval of the
manufacturer will void the warranty
3
Page 10

SIERRA VIDEO
OG-HDA-109
DIP Switch
Power
Configuration P2
*Factory Use Only
4
Page 11

OG-HDA-10 & 21
Single module- 10 or 20 slot frame
OG-HDA-109
OG-HDA-22
Dual modules- 20 slot frame
5
Page 12

Page 13

SIERRA VIDEO
Installation
Introduction
Installation procedures are similar for all modules covered under this manual. Exceptions,
if any, have been noted in each of the following paragraphs.
Module Mounting
Carefully inspect the module to ensure that there has been no shipping damage. Make
sure all shipping material is removed from the module and frame.
Chapter
2
Install the module in any available slot in the frame with the ejector tab towards the
bottom. Lock the module in place with the ejector tab.
Rear I/O Panel
OG-HDA-10
The 10 slot frame uses a single I/O module: OG-HDA-10
Each board using this I/O has 10 BNCs available and are used to provide a 1x9 DA.
Note:
The 20 slot frame can use two different I/O modules: OG-HDA-21 or the OG-HDA-22.
OG-HDA-21
The OG-HDA-21 operates just like the 10 slot frame I/O module with 10 BNCs per DA
board. The board supports 1 HDA-109 module.
A single I/O module will consume two of the 20 slots and only accept one DA board.
OG-HDA-22
The OG-HDA-22 is built to accept two DA boards.
With this I/O module each DA only has 5 BNCs available on it. Only four outputs are
available
7
Page 14

SIERRA VIDEO
DIP Switches
Switch 1- EQ ON - When this switch is set to OFF it pulls RB12 high and if LOC/REM is
in LOC mode (RB14=1) then sets RD5=0to turn on LED D6 and RE6=1 to set EQ IC to
bypass. This setting will be reflected in Dashboard.
Switch 2- RELCLK ON - When this switch is set to OFF it pulls RB13 high and if
LOC/REM is in LOC mode (RB14=1) then RD6=0 to turn on LED D7 and RE0=1 to set
re-clocker IC into forced bypass mode. This setting will be reflected in Dashboard.
Switch 3- LOC/REM - When this switch is set to OFF (LOCAL position) then it pulls
RB14 high and the switch settings for EQ and RECLK BYPASS are implemented as
described above. Dashboard control of the bypass functions will be grayed out to indicate
that there is no remote control but the local switch settings for EQ and RECLK ON will be
reflected in the grayed out text. When LOC/REM switch is in the ON position (REMote),
RB14 is pulled low and the Dashboard control settings for EQ and RECLK ONwill
override the Local switch settings if different from the Local settings. If the Dashboard
and local settings are different then the OVERRIDE LED, D5, will be turned on by setting
RD4=0. Also if the Dashboard settings turn on either bypass function then the
appropriate LED for EQ and RECLK bypass will be turned on, see switch 1 & 2
description above.
In REMOTE mode, when the bypass switches match the Dashboard settings the
OVERRIDE LED will turn off. If either or both bypass switch settings are different than the
Dashboard setting then the OVERRIDE LED will be on. If the OVERRIDE LED is on and
the LOC/REM switch is set back to Local from Remote then the Local setting s are used
and Dashboard's remote settings are grayed out and replaced with the Local switch
settings.
Switch 4- SD/AUTO - The default position for this switch is the ON position and causes
the slew rate of the output drivers to be set for high slew rate for HD/3G signals and slow
slew rate for 270Mb/s SD signals. This happens automatically by setting Rate(1:0) to 00
and RB11 (SD/HD_SLEW) is set to what comes into the processor on RE3. If the RECLK
IC is bypassed and the input signal is SD then switch 4 should be set to OFF which
causes RB15=1. RB11 (SD/HD_SLEW) should be forced to 1 to force the slew to be slow
for the SD signal.
8
Page 15

Video Connections
OG-HDA-10 and OG-HDA-21
Each of these rear panels provides a single input with 9 outputs. Eight of the outputs can
pass DVB/ASI signals. The inverted output will not pass DVB/ASI signals.
OG-HDA-22
The OG-HDA-22 is built to accept two DA boards.
When the OG-HDA-22 is used then only four outputs are available
Video system interconnects are made by using 75 ohm transmissi on lines (coax cable).
The device driving the line has a “source” impedance of 75 ohms, the cable has a 75
ohm impedance and the end of the interconnect is internally terminated with 75 ohms.
The accuracy of the termination affects signal level. Use either a 1% or 0.1% termination.
Unused amplifier positions do not need a termination.
Only the outputs which are used need to be terminated.
OG-HDA-109
9
Page 16

SIERRA VIDEO
Dashboard Software
The DashBoard Control System enables you to monitor and control openGearTM frames
and controller cards from a computer. The DashBoard software and manual can b e
downloaded from the Sierra Video website (www.Sierravideo.com).
Using the Menus and Menu Descriptions
You must first install the DashBoard Control System software on your computer. Refer to
the DashBoard User Manual for software installation procedures and for using the
DashBoard interface.
10
Page 17

The Menu System
The following table describes the menus, items, and parameters available from the
DashBoard Control System software for the module.
Main Screen;
OG-HDA-109
Refresh- Refreshes date in window.
Upload- This is used for updating the software in the module (contact Sierra Video factory for
details and file).
Reboot- Reboots module.
11
Page 18

SIERRA VIDEO
Product Tab;
Module Info
Product Tab
(Read Only)
Menu Item Parameters
Product HDA-109
Supplier Sierra Video
Serial Number #####
Board Revision #####
Software Revision ####
12
Page 19

Status Tab;
Menu Item Parameters
Module Info
Status Tab
(Read Only)
OG-HDA-109
Total Power (W) Power Consumption of the Module
Board Alarms Alarm Status
Card Control Local/Remote
No Signal
Signal Type
SD-SDI
HD/3G-SDI
Unknown
Reclocker Locked/ Unlocked
13
Page 20

SIERRA VIDEO
User Settings;
14
Cell Settings
Name Append
A “user defined” name up to 32 characters can
Reclocker
Slew Rate
EQ
be entered
Auto
Off
SD
HD
Auto
SD
HD
On
Bypass
Page 21

SIERRA VIDEO
OG-HDA-109
Module
Block Diagrams
Chapter
3
15
Page 22

SIERRA VIDEO
Circuit Description
Please refer to the Block Diagram and the schematic when reading the circuit description.
HDDA 1X9
J1
DIGITAL VIDEO PATH
BLOCK DIAGRAM
RECLK_BYPASS
RECLK_MUTE
RATE0/1
Cable
EQ
/CD
EQ_MUTE
Re-Clocker
PLL_LOCK
SD/HD__SLEW
EQ_BYPASS
SD/HD
/RESET_1
SDO+
SDO2+
/RSTO_4
SDA
SCL
/RESET
/RESET
/RESET
Dual
Output
Driver
1
Dual
Output
Driver
2
Dual
Output
Driver
3
Dual
Output
Driver
4
SDO+
SDO-
SDO1+
SDO+
SDO1+
SDO+
SDO1+
SDO+
SDO1+
/FAULT
J3
(INVERTED
J2
OUTPUT)
J4
J5
J6
J7
J8
J9
J10
16
The digital path is made up of three active components. First a cable EQ stage that
automatically corrects for the loss over frequency that is caused by the cable attached to
the input. The equalized serial stream is then differentially connected to a re-clocker that
derives a clock from the data stream and then re-clocks the data stream. There can be
either two re-clocked data streams at the out of the re-clocker or one data stream and
one clock out of the re-clocker. We are using both outputs as data streams so that each
output can drive just two output drivers thus reducing the length of the line that the reclocker would have to drive and improving the matching to the PCB diff pair. Each output
driver has two differential outputs but we only use the positive output from each
differential pair because one of the requirements is that we must be able to pass
ASI/DVB signals which cannot tolerate phase inversions of its data stream. We are using
3G parts throughout that can handle 270Mb to 3G which will make it an all purpose reclocking DA.
A new rear module that has improved 3G characteristics is used that has a connector
that looks the same as all other openGear boards but has closer spacing between pins
and better high frequency performance.
Page 23

+12V
RECLK_BYPASS\
MUTE
RATE0/1
/CD
PLL_LOCK
SD/HD
SLOT ID &
REAR BRD ID
EQ_BYPASS/
MUTE
+3.3V
Regulator
RED
GRN
YLW
YLW
YLW
GRN
GRN
CURRENT &
VOLTAGE
MONITORS
+3.3V
POWER
EQ BYPASS
RE-CLK BYPASS
OVERRIDE
LOCKED
TEST
microController
RESET
CONTROLLER
BLOCK DIAGRAM
SPI
EQ ON
RECLK ON
LOC/REM
SD/AUTO
FRONT EDGE DIP SWITCH
HDDA 1X9
SD/HD__SLEW
/RSTO_4
/RESET_1
SDA \ SCL
System Clock
20MHz
CAN
Controller
OG-HDA-109
/FAULT
RJ11 / 2X3 HEADER
DEBUG/PROGRAM
PORT
CAN
Transceiver
CAN
BUS
The PIC32 microcontroller, PIC32MX340F256H, was chosen based on cost and
familiarity of the engineering staff with this device. In order to be able to communicate
over the CAN bus in the openGear frame a CAN Controller IC, MCP2515 in conjunction
with a CAN bus transceiver, SN65HVD233D, is used. The CAN Controller is controlled by
the PIC32 using the SPI2 port of the PIC.
There are two Debug / Program ports in parallel with each other. One is a RJ11
connector that is positioned at the front edge of the board and used during the board
prototype phase. The other connector, a 2X3 header, will remain on the board in
production and has the same functions as the RJ11.
There is one regulated voltage on this module, +3.3V, which is regulated with a switching
supply, U23. The +3.3V is used to power the input current sense circuit, LMP8601 and all
the other active components. use +3.3V
The regulator section has one set of resistors, R53 and R54, for the positive supply which
are used to measure the current used by the positive supply. U11, LMP8601, is used to
measure the voltage across the current sense resistors, R53 and R54. LMP8601 is made
for this type of application and can handle the high common mode voltage that the
current sense voltage is riding on
A 20MHz system clock is generated for the PIC and the CAN Controller from a crystal
oscillator using two inverters in U16. Using a single external clock source makes the start
up of the board straight forward.
17
Page 24

SIERRA VIDEO
There are six LEDs that are being driven directly from the PIC32. Each LED is turned on
by bringing the associated PIC output low. The red POWER LED is turned on by the PIC
also but the PIC's output to the LED is inverted by one of the sections of U16. This was
done so that if the PIC doesn't come up the drive output from the PIC will be high
impedance and R71 will pull the input to the U16 inverter high and the output of the
inverter will go low turning on the POWER RED LED. The POWER LED is a special case
since it has both a Red and Green LEDs. There are six conditions that can be indicated
with POWER LEDs using color and flashing sequences.
1. OFF - no power
2. ORANGE - card is starting up
3. Green - card is running with valid input and refere nce
4. GREEN WITH FLASHING ORANGE - there is a signal error (e. g. missing or
5. RED - card is not operational
invalid input or reference)
18
Page 25

SIERRA VIDEO
Schematics
Chapter
4
19
Page 26

SIERRA VIDEO
20
Page 27

SIERRA VIDEO
Specifications
Video
Data Rates 19Mbps – 2.97Gbps
Chapter
5
Data Types
Alignment Jitter < 0.2 UI, 100KHz HPF
INPUT
Level 800mV p-p +/-10% Nominal
Connector Type BNC
Impedance 75 Ohm
Return Loss <-15dB- 5 MHz to 1.5 GHz, <-10dB 1.5Ghz to 3 GHz
Cable Equalization
OUTPUT
Level 800mV p-p +/-10%
Connector Type BNC
Impedance 75 Ohm
Return Loss <-15dB- 5 MHz to 1.5 GHz, <-10dB 1.5Ghz to 3 GHz
Rise/Fall Times
SMPTE 424, 372M, 310M, 259, 344M, 292M, DVB-ASI, ITU-R
BT.601
SD>300metersforSMPTE259M‐2008,cableBelden1694A
HD,3G>100metersforSMPTE292‐2008,424M‐2006,cable
Belden1694A
< 1.5 ns, >0.4ns for SD 270 Mbps
≤ 270 ps for HD 1.5Gbps
≤ 135 ps for HD 3Gbps
21
Page 28

Page 29

SIERRA VIDEO
Chapter
6
Warranty
A. General
Buyer assumes all responsibility for ascertaining the suitability of Sierra Video (hereinafter "SVS")
products for Buyer's intended use. No product sold by SVS is designed or manufactured for use
in any manner or under any conditions other than those described in SVS's instruction manuals
and other printed material for each particular product. If any product is used or applied in a
manner or under conditions not specifically authorized by such written materials or if any product
is used by unqualified or improperly trained personnel, Buyer agrees that SVS shall have no
liability of any kind arising from such use, and Buyer agrees to indemnify and hold SVS harmless
from any claims of third parties arising from such use, and Buyer shall provide SVS with counsel
of SVS's choice to defend against such claims.
B. Limited Warranty
1. This warranty applies only to the original purchaser and is non-transferable. This
warranty begins on the date of purchase and will be in effect for five (5) years for
new equipment or and for three (3) years for "Factory Refurbished" equipment.
Power Supplies and fans are warranted for three (3) years from the date of
purchase for new equipment and two (2) years for “Factory Refurbished” units,
from the date of purchase. Buyer must obtain a Return Material Authorization
("RMA") number from SVS prior to returning a product for repair. If, in SVS' sole
discretion, the product is found to be defective during the term of this warranty,
SVS will at its option: (a) provide free replacement parts, and/or (b) repair the unit
at an SVS facility. During the warranty period, SVS will make every reasonable
effort to support critical emergencies by supplying no-cost loan equipment while
the defective unit is being repaired. SVS will provide replacement parts and/or
factory service at no charge. Buyer bears the cost of shipping products returned
to SVS under this warranty. SVS will bear the cost of shipping repaired products
or replacement parts to the Buyer.
This limited warranty shall not apply to any of SVS's goods which have been altered or which
shall have been subjected to misuse, mishandling, improper storage or negligence. The
aforementioned provisions do not extend the original warranty period of any goods which have
been replaced by SVS. This limited warranty shall not apply to any goods not of SVS's
manufacture, Buyer to be entitled only to the warranty set forth in the original manufacturer's
limited warranty.
23
Page 30

SIERRA VIDEO
THIS LIMITED WARRANTY IS EXPRESSED IN LIEU OF ALL OTHER WARRANTIES,
EXPRESS, IMPLIED OR STATUTORY, INCLUDING WITHOUT LIMITATION THE IMPLIED
WARRANTIES OF MERCHANTABILITY AND OF FITNESS FOR A PARTICULAR PURPOSE,
AND ALL OTHER OBLIGATIONS OR LIABILITIES ON SVS'S PART.
SVS neither assumes nor authorizes any other person to assume for SVS any other liabilities in
connection with the sale of products of its own manufacture.
2. SVS's liability hereunder on any claim of any kind, except as set forth herein for
any loss, injury to person or property or damage, shall in no case exceed the
price allocable to the goods which give rise to such claim.
3. In no event shall SVS be liable for any damages or injuries to person or property
if any goods do not meet the above limited warranty, including, without limitation,
incidental expenses or consequential or special damages, except as set forth in
such limited warranty. The foregoing states the exclusive remedy of Buyer and
the exclusive liability of SVS for any breach of the foregoing limited warranty.
C. Cancellation
Except as provided in paragraph B immediately above, all sales are final, and Buyer may cancel
this order or return products only upon written consent of SVS.
D. General
A. In the event of a breach of any of the terms hereof, the non-breaching party shall
be entitled to recover all of its costs, fees, and expenses, including, without
limitation, reasonable attorney's fees, from the breach party incurred as a result
of such breach, regardless of whether or not a suit is actually filed to enforce the
terms hereof.
B. The provision hereof shall be governed by the laws of the State of California
(excluding its choice of law provisions).
C. The headings are for convenience only and do not limit or amplify the terms and
provisions hereof.
D. In case any one or more of the provisions set forth herein shall be held to be
invalid, illegal, or unenforceable in any respect, the validity, legality, and
enforceability of the remaining provisions contained herein shall not in any way
be affected or impaired thereby.
E. No waiver, alteration, or modification of any of the provisions hereof shall be
binding unless in writing and signed by an authorized Officer of SVS.
NOTE:
All products returned to SVS for service must have prior approval. Return authorization
requests may be obtained from your SVS dealer.
24
 Loading...