

Page 1
S
Operating and installation instructions
en
Stop ͣ
Stop ͣ
Stop ͣ
Silver WD 1000Silver WD 1000
TOP WD 1200TOP WD 1200
Page 2

Please read this specification carefully before you use the product.
Any failure and losses caused by ignoring the above mentioned items and cautions
mentioned in the operation and installation instruction are not covered by our warr-
anty and any liability . Please keep all documents in a safe place for future referen-
ce. if you have any doubt, please contact our local service center/depot or dealer.
If you need an English user manual, please contact our local CS center/station
specified in the "Washing Machine CS network" in your washing machine package
or call our customer service free hotline (8008289828) for free supply. Thanks.
Web site:
http://www.siemens - ha.com.cn
Email:
Careline.China@BSHG.com
Address:
66. Wang Zhuang Road, Wuxi 214028,
Jiangsu Province, P. R. China
Page 3

Contents
Important information Notes on disposal
Your new machine s packaging
Your old machine
Safety precautions and warnings
Your new washer /
dryer
Environmental protection / notes on savings
Getting to know your washing machine
Programme, temperature and drying time selectors
Function buttons
On/Off
Spin stop
Spin speed
Wool
,,
,,
,,
,,
,,
. . . . . . . . . . . . . . . . . . . . . . . . . . . . . . . . . . . . . . . . . . . . . . .
,,
. . . . . . . . . . . . . . . . . . . . . . . . . . . . . . . . . . . . . . . . . . . . . .
,,
. . . . . . . . . . . . . . . . . . . . . . . . . . . . . . . . . . . . . . . . . . . . . . . .
Special functions
Programme table
,
. . . . . . . . . . . . . . . . . . . . . . . . . . . . . . . . . . . . . . .
. . . . . . . . . . . . . . . . . . . . . . . . . . . . . . . . .
,,
. . . . . . . . . . . . . . . . . . . . . . . . . . . . . . . . . . . . . . . . . . . .
. . . . . . . . . . . . . . . . . . . . . . . . . . . . . . . . . . . . . . . . . . . . .
. . . . . . . . . . . . . . . . . . . . . . . . . . . . . . . . . . . . . . . . . . . . .
. . . . . . . . . . . . . . . . . . . . . . . . . . .
. . . . . . . . . . . . . . . . . . . . . . .
. . . . . . . . . . . . . . . . . . . . . . . . . . .
. . . . . . . . . . . . . . . . .
en
Page
3
3
3
4
4
5
5
5
5
6
6
7
Notes on detergents
and preparing laundry
First wash cycle
Washing and drying
Cleaning
Maintenance
Frost protection
Troubleshooting
Installation
Detergents and fabric-care additives
Preparing laundry for washing
Practical tips
Stain removal
Preparing laundry for drying
. . . . . . . . . . . . . . . . . . . . . . . . . . . . . . . . . . . . . . . . . . . . . . . . .
. . . . . . . . . . . . . . . . . . . . . . . . . . . . . . . . . . . . . . . . . . . . . . . . .
. . . . . . . . . . . . . . . . . . . . . . . . . . . . . . . . . . . .
. . . . . . . . . . . . . . . . . . . . . . . . . . . .
. . . . . . . . . . . . . . . . . . . . . . . . . . . . . . . . . .
. . . . . . . . . . . . . . . . . . . . . . . . . . . . . . . . . . . . . . . . . . . . . . . . . . . . . . . .
Ing the door / loading the machine / closing the door
. . . . . . . . . . .
Setting the programme / starting the programme /
programme sequence / altering the programme
End of programme / switching off the machine
Cleaning your machine
Cleaning the detergent drawer
Descaling the machine
Cleaning the drum
Water inlet hose
Cleaning the pump
Cleaning the filters in the water inlet
Frost protection
Troubleshooting
Customer service
. . . . . . . . . . . . . . . . . . . . . . . . . . . . . . . . . . . . . . . .
. . . . . . . . . . . . . . . . . . . . . . . . . . . . . . . . . .
. . . . . . . . . . . . . . . . . . . . . . . . . . . . . . . . . . . . . . . .
. . . . . . . . . . . . . . . . . . . . . . . . . . . . . . . . . . . . . . . . . . . .
. . . . . . . . . . . . . . . . . . . . . . . . . . . . . . . . . . . . . . . . . . . . . .
. . . . . . . . . . . . . . . . . . . . . . . . . . . . . . . . . . . . . . . . . . . .
. . . . . . . . . . . . . . . . . . . . . . . . . . . . . .
. . . . . . . . . . . . . . . . . . . . . . . . . . . . . . . . . . . . . . . . . . . . . .
. . . . . . . . . . . . . . . . . . . . . . . . . . . . . . . . . . . . . . . . . . . . .
. . . . . . . . . . . . . . . . . . . . . . . . . . . . . . . . . . . . . . . . . . . .
Built-under or built-in appliance installation
Removing the transit bolts
Installing the machine
Aligning the machine
Water supply
Drainage
. . . . . . . . . . . . . . . . . . . . . . . . . . . . . . . . . . . . . . . . . . . . . . . . .
. . . . . . . . . . . . . . . . . . . . . . . . . . . . . . . . . . . . . . . . . . . . . . . . . . . .
Electrical connection
. . . . . . . . . . . . . . . . . . . . . . . . . . . . . . . . . . . . . .
. . . . . . . . . . . . . . . . . . . . . . . . . . . . . . . . . . . . . . . . .
. . . . . . . . . . . . . . . . . . . . . . . . . . . . . . . . . . . . . . . . .
. . . . . . . . . . . . . . . . . . . . . . . . . . . . . . . . . . . . . . . . .
. . . . . . . . . . . . . . . . . . . .
. . . . . . . . . . . . . . . . . . . .
. . . . . . . . . . . . . . . . . . . . . . . .
10
11
11
11
12
13
13
14
15
16
16
16
16
16
16
17
17
17
18
20
20
20
21
21
22
22
1
Page 4

1
2
S
Stop ͣ
Stop ͣ
Stop ͣ
3
4
5
6
7
1
9
8
10
Stop ͣ
Stop ͣ
2
11 12 13 14 15 17
Stop ͣ
3
11 12 13 14 15 17
Stop ͣ
16
Stop ͣ
Stop ͣ
16
2
Page 5

en
Notes on disposal
The new machine s packaging
! Dispose of packing materials in a respon-
sible manner.
! Keep packing materials out of reach of
children. Packing materials are not for playing.
Recycling and reusing materials saves raw
materials and reduces waste.
All packing materials used are environmentfriendly and reusable.
Cardboard boxes consist of 80% to 100% recycled paper.
Plastic wrappings are made from polythene
(PE), the tapes are made from polypropylene
(PP) and the CFC-free packing is made from
foamed polystyrene (PS). These materials are
pure hydrocarbon compounds and can be recycled.
Your old machine
! Make sure the machine is unusable when
no longer in use. Remove the plug from the
socket and cut off the power cable. Prevent
playing children from being locked in and
risking death by suffocation. Destroy the
catch on the porthole door.
The old machine contains valuable materials
which should be recycled.
Please make your contribution to the environment by guaranteeing proper disposal or recycling.
,
Safety precautions and
warnings
This machine meets all relevant safety regulations.
Before using for the first time:
! Please read the enclosed documents care-
fully before using the washing machine for
the first time. They contain important infor mation on the installation, use and safety of
the machine.
! The manufacturer does not accept liability if
these instructions are not followed.
! Please keep all documents in a safe place
for problems which may occur in the future.
! Install the machine in accordance with the
instructions (pages 20 to 22).Remove the
transit bolts and keep them in a safe place.
Safety precautions and
warnings
! The washing machine must be installed and
operated in a room with the drain.
! Make sure that the power supply system
(voltage; current; and the cable) is applicable
to the load of the applied appliance.
! In order to ensure your safety, you must plug
the cable into the socket which is connected
with the earth. And please check your socket
to make sure that it is connected with reliable
earth correctly.
! If the washing machine is visibly damaged,
do not plug it in. If you are in doubt, contact
your customer service representative or dealer.
When washing and drying:
! Operate the machine with cold tap water
only.
! Due to the use of the condensation princi ple in drying, please keep the connected
water tap open during the drying process.
! Your washing machine is designed for
domestic use only, i.e. for washing machine
washable textiles in a detergent solution and
subsequently drying them as well.
! Never use flammable; explosible; and/or
poisonous solvents, such as gasoline; alcohol
etc. as the washing lotions suitable for using
in washing machine available in the market.
! Never wash the carpet in the washing
machine.
! Never let children play with the washing
machine.
! Keep pets away from the washing machine.
! Be cautious when pumping out hot detergent
solution.
! In the course of drying, both the machine
and the laundry heat up. Do not open the
door during the drying process.
When the programme has ended:
! Do not reach into the drum while it is still
spining.
! The door of the machine can only be
ed when the selected programme has
stopped, with an indication light of door lock
illuminating, and the machine has come to
a standstill.
! Switch the machine OFF when the pro-
gramme has ended.
3
Page 6

en
Safety precautions and
warnings
Taking care of your machine:
! Do not climb onto the machine.
! Do not lean against the opened door.
! Do not expose the machine in the place with
causticity or explosibility gas (e. g.: dust,
steam and gas, etc.).
! Do not install the washing machine in a
bathroom or a room very wet.
When transporting the machine:
! Insert the transit bolts.
! Drain any water left in the machine.
! Take care when moving the machine.
Do not lift the machine by any of the protru ding parts.
Environmental protection /
notes on savings
You can increase the economy and environmental friendliness of your machine by
washing maximum loads:
Cottons+Linens 5.0 kg
Easy-care and woollens 1.5 kg
Saving energy:
Use the energy-saving programmes as
often as possible and select a lower temperature, e.g.:
Wash cottons at a temperature of 60 LC
instead of 90 LC with the Cottons+Linens
programme, Normal or
easy-care items at a temperature of 40 LC
instead of 60 LC with the Easy-care
programme, Normal.
How to save water, energy and detergent:
Do not pre-wash lightly to normally soiled
laundry.
How to save energy and time:
For lightly soiled laundry, select the short
programme appropriate to the type of
textile.
How to save detergent:
Add the correct amount of detergent according to water hardness, how dirty the
laundry is and the amount of laundry to be
washed. Observe the instructions for use
shown on the detergent packaging.
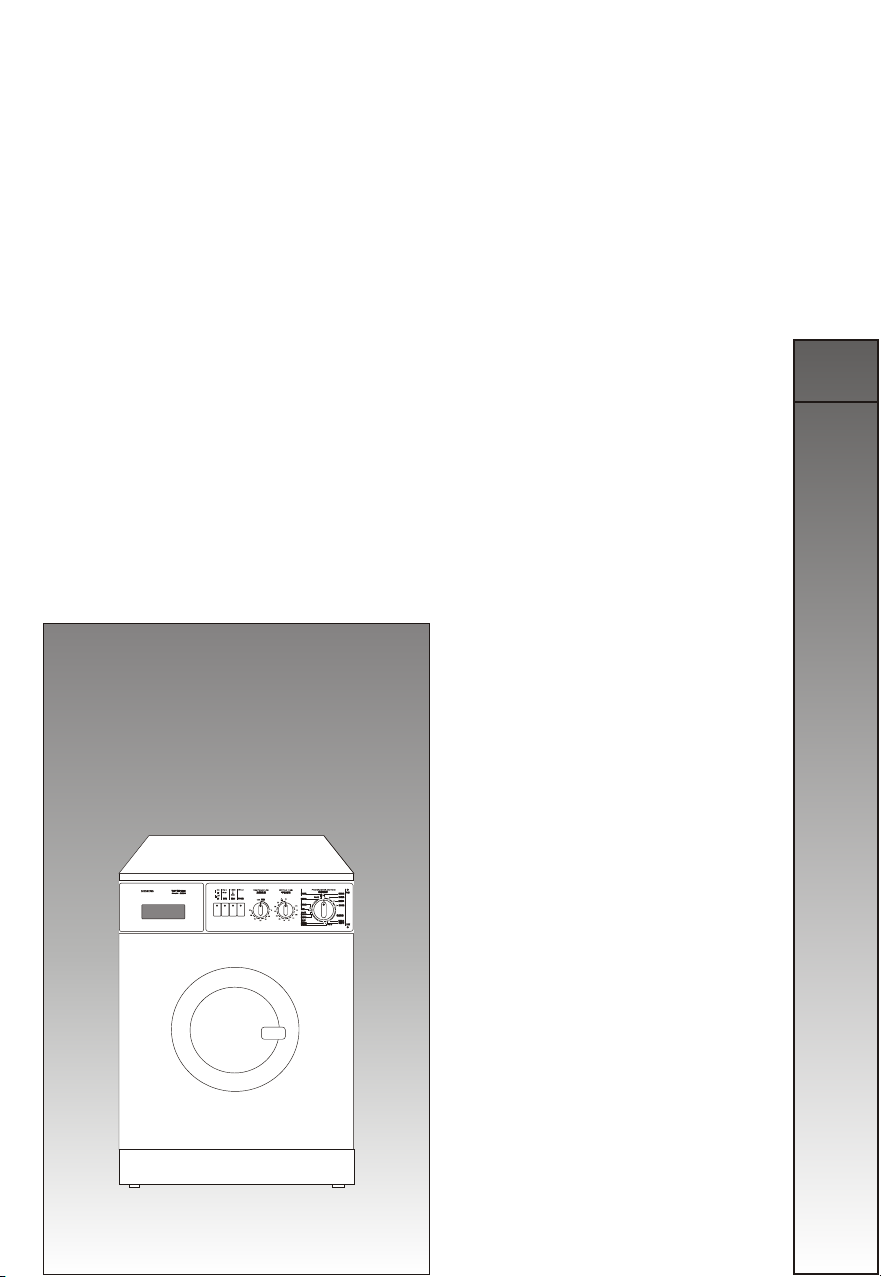
Getting to know your machine
Please look at figures 1 , 2 , 3 , 4 and 5
in these operating instructions. The item
numbers mean the following:
Fig. 1
1 Top cover
2 Detergent drawer ( Fig. 5 )
3 Control panel (printed information, symbols
or text depends on actual model)
4 Door label
5 Door for loading washing
6 Handle for opening door
7 Base cover
8 Pump (behind the base cover)
9 Adjustable feet
10 Door label
Fig. 2 , 3
,,
11 ON/OFF button
12 Additional function buttons
(depends on actual model)
13 Temperature selector
14 Timer (Drying time selector)
15 Programme selector
16 ON indicator light
17 Door lock indicator light
Fig. 4
18 Drain hose
The water inlet hose can be found on the back
of the machine.
Fig 21 shows how it should be connected.
See also Page 21.
,,
4
Page 7

en
Programme, temperature and
drying time selectors
2
Fig. ,
The programme selector is used to set the
machine to required programme, before the
,,
ON/OFF button is pressed, by turning
it clockwise until it reaches the required
programme. See programme table on pages
7 , 8 and fig. 13 .
Attention: Do not turn the progress selection knobs counter-clockwise!
The temperature selector is used to set the
washing temperature.
To ensure gentle washing, the maximum temperature of 60 LC for easy-care programmes
and 40 LC for woollens is not exceeded, even
if a higher temperature is selected.
When the laundry is to be dried in the machine,
the drying time selector must be set for the
required drying period.
To do this, turn the drying time selector clockwise (to the right).
When the drying time selector is set to ,
the drying function is switched off.
To save energy and raise drying efficiency,
please select high spin speed and do not
press Spin stop button when you use the
drying function.
3 2
,,
,,
,,
Function buttons (ON/OFF
and additional functions)
Fig. ,
ON / OFF
As soon as this button is pressed, the machine
starts the selected programme. The power indicator light illuminates.
Caution: for reasons of safety, the machine will
not run if the door is not properly closed even if
the ON light is illuminated and the ON/OFF
button has been pressed.
During the washing process the door cannot be
opened. In order to open the door, the machine
must first be switched OFF ( ON/OFF button). Make sure that the ON light is not illuminated. The door can be opened approximately
2 minutes after switching off the machine.
Spin stop
You do not want the laundry to be spun and
the water is simply to pumped out.
After press this button, please turn the
drying selector to .
1200
600
When this button is pressed, the spin speed for
the Cottons / coloureds programme is reduced
to a lower speed.
This speed is recommended for delicate
fabrics.
In the easy-care and woollens porgramme, the
machine automatically spins at the lower speed
whether the button is pressed or not.
3
1000
- Spin speed
,
600
,,
,,
,,
,,
Economy tip:
If you intend drying your laundry in the machine, select the higher spin speed - because
the more water that is spun out of the laundry,
the less time and energy is required to dry it.
5
Page 8

en
Function buttons (ON/OFF
and additional functions)
Wool
Turn the programme selector to N-Short
Cottons+Linens and press this button,
the washing will start according to the
wool wash programme.
,,
Special function
Quick wash
,,
For the small quantity, light dirt, especially
for the clothes in summer, select this function
to acquire the shorter washing time and save
water and electricity.
Sensible self-balance system
There is a sensible self-balance system in
SIEMENS washing/drying machine. When the
machine is in the spin process of dewatering,
the washing machine will automatically sense
the unbalanced load caused by the clothes. If
the load is over the setting value, the washing/
drying machine will continue the spin operation
at a lower speed(90 rpm) for dewatering, or stop
the spin operation. This function is specially
designed for protecting the machine and the
benefit of the user. See Troubleshooting .
,,
,,
6
Page 9

Programme table (TOP WD1200)
en
Always follow the
manufacturers on the
care label.
Programme
Prewash
Normal
Light
Short
Programmes for
cottons or linens
Cottons + Linens
Spin
Dry
Normal
Light
Detergent
C
L
in
and fabric
softener
Compartment I
Compartment II
dry
or
ect
laun
l
e
of
s
t
un
ure
t
o
a
r
Am
pe
m
ax.
e
T
M
A
5 kg
5 kg
B
5 kg
C
5 kg
D
F
5 kg
G
2.5 kg
H
1.5 kg
K
1.5 kg
30 - 90
60 - 90
40 - 60
30 - 40
40 - 60
30 - 40
Compartment
Additional
functions
Spin stop
Wool
Spin speed
Programme duration
(approx.) in minutes
124.5
109.5
84
58.5
6
90
69
54
Programme for
easy-care fabrics
Easy-care
Programmes for woollens
and net curtains
Woollens
= obligatory
Gentle spin
Gentle Dry
Short
Wool(Short)
Quick plus
Short spin
Rinsing
= optional
L
1.5 kg
M
1.5 kg
1.5 kg
N
N
1.5 kg
1.5 kg
Q
S
1.5 kg
R
0 - 40
0 - 40
0 - 40
3
55
36
36
31.5
3
12
7
Page 10

en
Programme table (Silver WD1000)
Always follow the
manufacturers on the
care label.
Programme
Prewash
Normal
Light
Short
Programmes for
cottons or linens
Cottons + Linens
Spin
Dry
Normal
Light
LC
in
Detergent
and fabric
softener
Compartment I
y
r
r
nd
o
t
u
c
la
f
o
sele
e
nt
r
ou
atu
m
er
A
.
x
Temp
Ma
A
5 kg
5 kg
B
5 kg
C
5 kg
D
F
5 kg
G
2.5 kg
H
1.5 kg
K
1.5 kg
30 - 90
60 - 90
40 - 60
30 - 40
40 - 60
30 - 40
Compartment II
Additional
functions
Compartment
Wool
Spin speed
Programme duration
(approx.) in minutes
124.5
109.5
84
58.5
6
90
69
54
Programme for
Programmes for woollens
= obligatory
8
Easy-care
Woollens
Gentle spin
Gentle Dry
Short
Wool(Short)
Quick plus
Short spin
Rinsing
= optional
easy-care fabrics
and net curtains
L
1.5 kg
M
1.5 kg
1.5 kg
N
N
1.5 kg
1.5 kg
Q
S
1.5 kg
R
0 - 40
0 - 40
0 - 40
3
55
36
36
31.5
3
12
Page 11

Programme table: drying
Cottons + Linens (cotton, linen)
en
Dry weight in kg
Cupboard dry
Iron dry
0.5 1.0 1.5 2.5
Drying time selector
50 - 60
40 - 50
60 - 70
50 - 60 60 - 70
Easy-care / synthetics
Dry weight in kg
Easy-care
Acrylics
Times are approximate and refer to standard
loads.
The maximum selectable drying time is 120
minutes.
0.5 1.0 1.5
Drying time selector
30 - 35 40 - 45
70 - 80
50 - 55
25 25 - 30
90
70 - 80
Programme selector
Dry
Programme selector
Gentle Dry
9
Page 12

en
Detergents and fabric-care additives
Fig. 11 , 12
You can use detergent which is suitable for
front loading automatic washing machines.
! Never use detergents for impeller type as
these produce too much foam.
! Never use solvent-based cleaning agents in
fully automatic washing machines. Explo sion hazard.
! Do not use any detergent boosters contai ning solvents or dirt and stain-removing
sprays near the machine, as these could
damage the machine.
! Always store detergents and other garment care products out of children s reach.
,
Amount of detergent
The best washing results will only be achieved
if you add the correct amount of detergent.
Observe the instructions for use shown on the
detergent packaging.
If a liquid detergent is used, take the relative
dosing device. Do not fill the detergent dispenser
beyond the MAX mark.
You can also use any measuring aids provided
with the detergents, such as dosage balls or
bags.
The amount of detergent depends on:
- water hardness
- degree of soiling
- size of the load
- amount of detergent to be added according
to its manufacturer.
Attention: When the prewash mode is selected,
do not put the liquid lotion or other liquid materials
into the compartment II, to prevent it from flowing
out immediately.
Frequent use of insufficient detergent will eventually become noticeable as follows:
- washing appears grey or not properly clean
- grey-brown stains (grease marks) appear on
the washing
- the heating elements become furred.
Too much detergent results in:
- unnecessarily high environmental pollution,
- as too much foam is produced, you will get
poor washing results.
The amount of detergent indicated on its
packaging refers to a full machine load.
For smaller loads or less soiled laundry, reduce
the amount of detergent.
Notes
Fabric softeners and conditioners
Put these into the compartment. Do not fill
beyond the MAX mark otherwise it will flow into
the machine together with the detergent at the
start of the programme. Dilute thick conditioner
with a little water (make sure to dissolve all lumps)
before pouring it into the compartment.
Bleaching agents and stain removers
In addition, certain powdered bleaching agents
and stain removers may be used on stained
fabrics.
First put the detergent and then the bleaching
powder or stain remover into compartment II.
10
Page 13

Preparing laundry for washing
en
Sorting the laundry
Sort the laundry according to the symbols
on the fabric care labels.
! Knitted garments or garments with a wool
content can only be washed in the machine
if they are marked machine-washable .
Rink of shrinking.
Only items marked with the following care symbols are suitable for washing in the machine:
cottons
coloureds
easy-care
60
machine-washable wool
Laundry marked with the following care sym bols must not be washed in the machine:
hand wash
do not wash
Sort the laundry by colour.
Wash white and coloured items separately
otherwise white washing will turn grey.
! Do not wash new coloured items together
with other laundry. Risk of discoloration.
Do not exceed the machine s maximum
capacity when sorting the laundry. Do not
overload the washer / dryer. Overloading
leads to inferior results.
Maximum washing loads:
Cottons + Linens
Easy-care, woollens
95
40 30
40 30
,
,
40
60
40
30
40
30
,
5.0 kg
1.5 kg
,,
30
Practical tips
Remove any loose items or metal objects,
such as safety pins, paper clips, etc. from
the laundry.
Brush sand, coins etc. out of pockets and
cuffs.
Close zips and button up cushion covers,
duvet covers, etc.
Remove curtain runners, or secure them in a
net bag.
Particularly delicate items, such as tights or
lace curtains, or smaller items, such as tiny
socks or handkerchiefs, should only be washed in a net bay or pillow case.
Some items are best turned inside out.
These include knitwear, trousers, T-shirts
and sweatshirts.
Make sure that wire-cup bras are machinewashable.
! Wash wire-cup bras in a pillow case which
can be securely closed with a zip or buttons.
If the wire works itself out of the cup it may
fall through the holes of the drum and cause
extensive damage.
Select a programme that starts with the prewash function to remove protein stains from
the washing.
Stain removal
If possible, stains should be removed immediately while they are still fresh, or at least pretreated.
Try soap and water first of all. Dab the material
rather than rub it.
Stubborn, dried-in stains may require several
washes before they disappear completely.
11
Page 14

en
Preparing laundry for drying
Sort the laundry according to the symbols
on the fabric care labels.
Only put items in the machine which are labelled as suitable for tumble-drying or bear the
following care symbols:
= tumble-dry at normal heat setting
= tumble-dry at low heat setting
(gentle drying)
! The following textiles should not be tumble dried:
- Fabrics marked with the care symbol
= do not tumble-dry
- Woollens or items containing wool.
Risk of shrinking!
- Delicate fabric (silk, synthetic net curtains).
Risk of creasing!
- Items containing foam rubber or similar
material.
- Items which have been treated with inflam mable solvents, such as stain removes, pe trol, paint thinners. Explosion hazard!
- Items still containing hair lacquer or similar
substances. Dangerous vapours!
- Dripping-wet laundry. Waste of energy!
Do not exceed the machine s maximum
capacity when sorting the laundry. Do not
overload the washer/dryer.
Maximum drying loads:
Cottons + Linens 2.5 kg
Easy-care
Economy tip:
Always wash a full load of cottons+linens
(5.0kg). You can then divide up the load for
tumble-drying.
,
1.5 kg
Practical tips
Only tumble-dry textiles which have been
washed, rinsed and spun.
Remove as much water as possible from
the laundry. Do not press the button for
reducing the spin speed.
Before tumble-drying, easy-care items
should also be spun using the appropriate
spin programme (see programme table).
In order to ensure uniform drying, sort the
items according to fabric type and degree
of drying required.
Easy-care items should if possible be removed from the machine while still slightly
damp and allowed to continue drying in the
open air. Over-drying may cause excessive
creasing.
Items which require ironing do not have to
be ironed immediately after they have been
tumble-dried. It is a good idea to fold or roll
them together for a while, so that any remaining moisture is evenly distributed.
12
Page 15

en
First wash cycle
Carry out the first wash cycle without laundry
to remove any water left over from the factory
tests.
1. Check that the transit bolts have been
removed from the back of the machine
(see installation instructions).
2. Turn the tap ON.
3. Pull the detergent drawer out as far as it will
go.
4. Pour half a measuring scoop of detergent
into compartment II. Do not use a special
detergent for delicates or woollens as these
will create too much foam.
5. Turn the programme selector clockwise and
set it to Cottons + Linens, Normal.
6. Set the temperature selector to 90 LC.
7. Press the ON/OFF button. The programme
is started.
8. When the programme has ended, press the
,,
ON/OFF button to switch the machine off.
,,
,,
,,
Opening the door / loading the
machine / closing the door
Open the door
Pull the handle on the door towards you
(Fig. 10 ).
Put washing into the machine
! Any items which have been pre-treated with
solvent-based cleaners, such as stain remo vers and petrol-based agents must be aired
before they are put into the machine.
Explosion hazard!
! Before loading the machine, ensure that
there are no foreign objects nor trapped
pets in the drum.
Place the washing into the drum so that it is
folded out and loose, with a mixture of large
and small items.
Close the door
! When you close the door, make sure that
nothing is caught between the door and the
rubber seal.
Close the door by pressing it shut until it
snaps into place with an audible click.
Add detergent
Turn ON the tap
The tap must remain ON while drying is taking
place, as the drying process works by
condensation.
13
Page 16

en
Setting the programme / Starting the programme /
Programme sequence / Altering the programme
Your automatic washer/dryer can be used in
three ways:
washing only
drying only
washing and drying without a break in
between
Note the following points:
For uninterrupted washing and drying, the
maximum load must be reduced to 2.5 or
1.5 kg. Furthermore, it is possible that certain
types of laundry will not be dried satisfactorily
using the non-stop mode.
The most economical way to use your auto matic washer/dryer is always to load it with
the maximum amount, both for washing and
for drying (see page 7, 8).
Setting the wash programme
1. Turn the programme selector clockwise
until it reaches the required programme
(Fig. 13 )
2. Set the temperature selector to the required
temperature.
3. Set the drying time selector to .
4. Press the buttons for any additional functions
that are required.
... continue at Starting the programme .
,,
,,
Setting the drying time
1. Set the programme selector to
or
Dry
Gentle Dry
Washing and drying without any
interruption
1. Before pressing the ON/OFF button, turn
the programme selector clockwise until it
reaches the required programme.( Fig. 13 )
2. Set the temperature selector to the required
temperature.
3. Set the drying time selector to the required
time.
4. Press the buttons for any additional functions
that are required.
,,
,,
Starting the programme
1. Make sure that the door is closed.
A safety switch prevents the machine from
operating when the door is open.
2. Press the ON/OFF button (Fig. 14 ). The
red ON indicator light and the green door
lock indicator light illuminate, a few seconds
later, the door lock light will turn off, then the
programme starts.
,,
,,
Drying programme sequence
While drying is taking place, the programme
selector remains in position.
or
Dry
The drying time selector continues to rotate
and indicates the remaining drying time. During
the last minutes of the drying programme,
the laundry cools down. The cooling-down
phase is important in order to avoid creasing.
! Do not interrupt the cooling-down phase.
Gentle Dry
Dry
= hard-wearing fabrics
Gentle Dry
2. Set the drying time selector to the required
time.
... continue at Starting the programme .
= delicate fabrics
(dry on low heat )
,,
,,
14
Altering the programme
Switch off the machine (press the ON / OFF
button). Turn the programme selector clockwise
to the new programme. Switch the machine on
again.
,,
,,
Page 17

en
End of washing programme
All programmes end automaticaly after the spin
cycle, and then door lock lamp will turn on.
Switching the machine OFF
1. When the door lock lamp is on, press the
ON/OFF button, the power indication lamp
and the door lock lamp will turn off when the
machine is shut down.
2. After appox.2 minutes you wll be able to
open the door and remove the washer clothes.
! Remove and foreign objects (paper clips,
coins, etc.) Inside the drum or trapped in the
rubber seal, otherwise there is a danger of rust
occurring.
Leave the door open slightly so that the machine
can dry out properly.
3. Reset any buttons that were pressed by
pressing them again.
4. Turn the tap OFF!
End of drying programme
The drying time selector has reached its end
position. The door can be opened.
1. Take the laundry out of the machine imme diately to prevent creasing.
This is particularly important with synthetic
fabrics..
2. Switch OFF the machine and turn off the tap.
After tumble-drying:
Cottons + Linens
- Cotton and linen items which have been
dried to iron dry should be rolled together
to prevent them from drying out completely
before they are ironed.
,,
- Cupboard dry items must be smoothed
out and folded up.
Easy-care/synthetics
- Hang shirts and blouses individually on
hangers.
,,
,,
,,
15
Page 18

en
Cleaning / Maintenance / Frost Protection
Before you begin any maintenance work,
unplug the machine or switch off the fuse.
Turn the tap off.
Cleaning your machine
! Never use solvents, as these can damage
machine components, and produce toxic
vapours. Explosion hazard!
! Never spray the machine with water.
Casing and control panel should only be cleaned with a standard, solvent-free, non-scouring
cleaning agent.
Cleaning the detergent drawer
1. Pull out the drawer out completely.
2. Press the cover of the siphon tube inside the
bucket of softeners, pull out the whole drawer.
3. Turn the siphon tube cover upward.(see figure
12 ).
4. Clean the drawer and the siphon tube with tap
water.
5. Replace the cover of the siphon tube.
6. Insert the drawer.
Descaling the machine
Descaling is not usually necessary if you use the
right amount of detergent,
! Descaling agents contain acids which can
corrode machine components and cause
discoloration of laundry.
However, if you do want to descale your
washing machine, follow the manufacturers
Instructions.
Cleaning the drum
Any rust, caused by metal objects left in the
machine, must be removed using a chlorine-free
cleaning agent (check the description of
contents on the pack). Never use steel wool.
Cleaning the pump
Fig. 15 , 16 , 17
The pump must be cleaned:
if the pump has been blocked by some
foreign object, such as a button or paper
clip,and water cannot be pumped out.
after washing very fluffy items.
Before cleaning the pump, water must be drained out of the machine. If the pump has been
blocked, up to 20 litres of water can run out so keep a bucket handy.
Cleaning procedure:
1. Remove the base cover from the front of
the machine.
! Scalding hazard. Allow hot water to cool
down.
2. Carefully unscrew the pump cover- do not
remove it completely- and let the water
drain out into a shallow container (let the
remainder drip onto a floor cloth). Repeat
the operation until there is no water left
in the machine.
3. Remove the pump cover.
4. Remove any foreign objects and fibrous
deposits. Clean the inside of the pump.
Ensure that the vanes on the pump move
freely.
5. Screw the pump cover back on.
6. Replace and close the base cover.
7. Pour approx. 2 litres of water into the
detergent drawer and start the Drain
programme. This prevents detergents from
passing unused straight into the drains the
next time the washing machine is used.
Water inlet hose
To avoid water damage, arrange for the hose to
be checked by a specialist every 5 years.
16
Page 19

Cleaning / Maintenance / Frost Protection
en
Cleaning the filters in the water inlet
Fig. 18
The filters in the water inlet must be cleaned if
no or insufficient water flows into the machine
when the tap is turned ON.
The filters are located in the hose connection at
the tap end and at the back of the machine.
Cleaning procedure:
1. Turn off the tap.
2. Set the programme selector to Cottons +
Linens, Normal and the temperature
selector to cold. Press the ON/OFF
button.
After approx. 40 seconds, switch off the
machine by pressing the ON/OFF button
again.
This removes the pressure inside the inlet
hose.
3. Unscrew the hose from the tap and rinse
the filter under running water.
4. Screw the hose back onto the tap.
5. Unscrew the hose at the back of the
machine
6. Use a pair of flat-nosed pliers to remove the
filter. Clean the filter and replace it inside
the hose connection.
7. Reconnect the hose.
8. Turn on the tap and make sure that no water
leaks at either end of the hose.
9. Turn off the tap.
,
,
,,
,,
,,
Frost protection
If the machine is located in a room which is
exposed to freezing temperatures, any residual
water in both the pump and the water inlet
hose must be drained immediately every time
the machine is used.
Draining the pump:
,,
See Cleaning the pump on page 16.
Draining the water inlet hose:
1. Turn the tap OFF.
2. Unscrew the hose from the tap and hold
the end of the hose in a container.
3. Switch ON any of the washing programmes
for approximately 40 seconds. Water left
inside the inlet hose will be drained out.
4. Screw the hose back onto the tap.
,,
17
Page 20

en
Troubleshooting
! Only qualified technicians are permitted to repair electrical appliances. Repairs done by
unauthorised persons can lead to considerable damage.
Problems
The power indicator light
does not illuminate
The door lock indicator light
does not work correctly
Power failure
Washing sequence does not
start
No washing operation
No water to be seen during
washing
Poor washing results
Foam comes out of the
detergent drawer
Foam still visible after last
rinse
Motor noise
Pump noise
Vibrations when washing
and spinning
Machine does not spin or
does not pump out the water
Possible causes / remedies
- The plug is not correctly, or only loosely, inserted into the socket.
- A fuse has blown in the domestic wiring.
- Power failure.
Door not properly closed.
If there is a power failure or a machine malfunctions, follow the
special procedure for emptying the machine of water (see Clea ning the pump , page 16), so that the laundry can be removed.
,,
ON/OFF button not pressed, door not properly closed.
The tap is OFF.
Water level is not reached.
This is not a malfunction! The water inside the machine is below
the level at which it becomes visible.
Degree of soiling was greater than usual.
Change type and amount of detergent.
Select maximum permitted temperature for fabric type.
Select a more powerful washing programme.
Too much detergent or top loading detergent was used. Switch
off the machine for approximately 5-10 minutes. To reduce the
amount of suds, put a tablespoon of fabric softener mixed with
1/2 litre water into the detergent drawer. For the next washing,
adjust the amount of detergent accordingly.
Certain detergents tend to produce more foam but this does not
affect the rinsing result.
This is not a malfunction! It is normal for noises to be heard while
the motor is running in.
This is not a malfunction! It is normal for noises to be heard from
the pump during the start or the final stage of draining the drum.
- Transit bolts were not removed. Follow the directions in the
installation instructions (page 20).
- The machine s feet were not secured in place when the
machine was installed. Realign the machine using a spirit
level, securing the machine s feet according to the installation
instructions.
Pump blocked
,,
,,
,
,
,,
The gasket is crimped
18
This may appears after installing the transport bolts. Remove the
transport bolts, operate the machine for a period of time, the gasket
will return to the original shape.
Page 21

Troubleshooting
en
Spin for dewatering at lower
speed only; or even no spin
operation
The machine does not
tumble-dry
To protect the machine, the sensible selfbalance system starts
when clothes are too light/heavy or single item causing un-balance
inside the washing machine, then the machine can only operate
at lower speed, or stop operation.
Turn off the power for about 2 minutes, open the door; and
spread the clothes out and reset the spin process.
- no drying programme set
- no drying time set or it was too short
- tap not turn ON
- door not properly closed
- pump blocked
Customer Service
Before calling the Customer Service, see
if you can correct the problem yourself.
(To do this, refer to Troubleshooting ).
If a service engineer is called out and no
fault is found with the machine, a call-out
charge will be made, even if the machine
is still under warranty.
! If you cannot correct a problem yourself,
switch off the washing machine, remove the
plug from the socket, shut off the water
supply and call Customer Service.
Customer Service will ask you for the machine s
product number (E-Nr) and the serial number (FD).
These numbers are shown on the rating plate
which can be found on the frame of the open
door and also on the identification plate, enclosed
by a thick line, on the front of the machine behind
the base cover.
,,
,,
Technical specifications
Width
Height
Depth
Weight
Capacity/
Dry weight
Connection voltage
Fuse
Water pressure
,
59.5 cm
85.0 cm
56.0cm
approx. 70 kg
see rating plate
220V / 240 V
10A
0.1-1 MPa
Make a note of your machine s numbers here:
E-Nr.
Product number Serial number
Please help to avoid unnecessary work by our
Customer Service engineers by providing the
correct product and serial numbers.
,
FD
19
Page 22

en
Built-under or built-in
appliance installation
The appliance must be built under or built in
prior to connecting the power supply.
The appliance can be built into or under a kitchen work surface. For this purpose, a recess
width of 60cm is required.
! The washing machine must only be installed
under a one-piece worktop that is permanently
attached to the surrounding cabinets.
Caution
! For safety reasons in built-under installation,
a metal cover* must be assembled by a spe cialist in place of the appliance cover plate.
* The metal cover (kit) can be obtained from a
specialist store or the Customer Service.
Removing the transit bolts
Fig. 6 , 7
! Before using the machine for the first time,
it is imperative to remove the transit bolts
from the back of the machine.
! Use the spanner provided only if a ring
spanner is unavailable.
! Caution! If the spanner slips, there is danger
of injury.
1. Undo the 4 fixing bolts A and remove them.
2. Remove the four spacers B. They will fall to
the floor when you tip the machine.
3. Insert cover caps C which you will find in
the bag containing the documentation.
! Keep the transit bolts for any future trans port (moving house).
Transport the machine only after the transit
bolts have been fitted to the back. To do
this, unscrew the back panel and proceed
in reverse order (1 and 2 above).
Installing the machine
! When installing and connecting the ma-
chine, special attention must be paid to the
safety advice and warnings which have
been identified with an exclamation mark !
Always comply with all regulations issued by
your local water and power authorities.
! Take care when lifting the machine! Risk of
injury.
! Do not lift the machine by any of the protru ding parts.
! If in doubt, have the machine connected
by a qualified specialist.
Before leaving the factory, every machine is
thoroughly tested under operating conditions.
Any moisture or residual water which you may
find in the machine or drain hose is left over
from these tests.
Installation location
To ensure the proper operation of the machine, please pay attention to the followings
when you install the machine.
! The floor should be solid and flat, never
put the machine on the soft carpet or direct
onto a wooden floor.
! Keep the environment dry and vented.
! Never put small appliances, such as micro-
wave oven on the machine.
! Keep the machine away from the flammable
equipment, such as candle; cooking stove;
liquefied gas container etc.
! Never put pressure containers on the
machine.
! Never put machine over the opening of an
uncovered drainage.
! In the case of timber beam floors, place
the machine on a water-resistant wooden
board that is at least 30 mm thick and is
screwed to the floor. If possible, the ma chine should be sited in the corner of a
room.
Secure the machine by attaching retaining
straps to the feet.
! If the machine is installed on a plinth, the
machine s feet must be secured with brack ets straps to prevent it sliding while spinning.
Fig. 9
,
20
Page 23

en
Align the machine
Fig. 8
! The machine must be perfectly level with all
four feet standing on the floor. It must not
rock from side to side.
Use a spirit level to align the machine on all
sides.
If necessary, correct the height of the machine s
feet.
1. Undo the lock nuts.
2. Adjust the height of the feet.
3. Tighten the lock nuts again firmly to ensure
that the feet remain at the same height.
Water supply - cold only
Fig. 19 , 21 , 22
For the water connection a standard coldwater line with a minimum water pressure
of 0.1 MPa is required (with tap full ON, at
least 8 liters of water must flow out in one
,
minute). If the water pressure exceeds 1 MPa,
a pressure reducing valve must be added.
! Never connect the machine to the mixer tap
of a pressureless hot-water heater.
! Caution! Connections are under full water
pressure; check for leaks with tap turned
fully ON.
! The filters at the free end of the inlet hose
and at the back of the machine should only
be removed for cleaning purposes.
! To avoid water damage, the tap must be
turned OFF after using the machine.
! The plastic nuts on the hose connections
must only be tightened by hand.
The face of the water tap must be free
of burrs and sharp edges.
21
Page 24

en
Water Supply Intallation
If you use Chinese type water inlet pipe,
water connection see fig. 19 , 21 , 22
Please observe the following install steps
carefully.
1. Pull down the block ring 2 (Fig. 22 ). Sepa rating the water pipe form the main joint.
2. Unscrew the sealing ring3.
3. Loose the four screws 4.
4. Press the main joint against the tap with
force, then fix the screws simultaneously.
5. Screw the sealing ring 3 upward to make
the connection tight and water proof.
6. Fix the end of the pipe 6 on the connection
pipe of the electrovalve.
7. Push down the block ring 2, fix the pipe
onto the water tap.
8. Open the tap at the Max. Position, checking
if there is any water leakage. If any water
leakage, then you should assemble it again.
9. The main joint can be apart from the pipe
easily. It is not necessary to disassemble
the main joint from the water tape.
The edge fo the water tape must be even.
Drainage
! When installing the machine, do not bend the
drain hose or pull on it.
! When draining into a sink the drain hose
must not slip out of the sink and fall
onto the floor. To prevent flooding, ensure
that the water is draining fast enough out
of the sink and that the plug is not restricting
the outflow.
Installation see Fig. 20
Electrical Connection
Caution
! The washing machine must only be
connected to alternating current and
using a properly installed socket outlet
with earthing contact.
! The mains voltage must correspond to the
voltage specification on the washing
machine (nameplate). Connection
specifications as well as the required fuses
are stipulated on the appliance nameplate.
! Make sure that:
- the mains plug fits the socket outlet.
- the cable cross-section is permissible.
- the earthing system is properly installed.
! The mains cable may be replaced by an
electrician only.
Replacement mains cable available from
customer service.
! Do not use multiple plugs / connectors or
extension cables.
! In the event that an earth-leakage circuit
breaker is to be used, only use types
marked with following symbol: . Only
this symbol can guarantee compliance with
all current regulations.
! Do not insert / remove the mains plug with
wet or damp hands.
! Handle the plug body only when removing
the plug from the socket.
22
Page 25

1818
4
5
76
8
23
Page 26

9
10
11
12
15
17
13
14
16
18
24
Page 27

19
21
5
4
3
20
6
2
1
22
25
Page 28

Contents of this brochure could be changed without written notice.
Product Standard:
GB 4706.1-1998
GB 4706.24-2000
GB 4706.26-2000
Part No.: 5120003356
Version: 01
Valid date: 2003.1
 Loading...