

Page 1
s
Be inspired
SL55
Page 2

Contents
1
Safety precautions ..................... 3
Overview of the phone .............. 5
Display symbols (selection) ....... 9
Getting started ......................... 11
Insert SIM card/battery ........... 11
Charge battery ....................... 12
Switch on, off / PIN entry ......... 13
Switching on your phone for the
first time ................................ 13
Signal strength ....................... 14
Standby mode ........................ 14
General instructions ................. 15
User guide ............................. 15
Menu controls ........................ 15
Security .................................... 17
Prevent accidental activation .. 18
My phone ................................. 19
Calling ...................................... 20
Dialling with number keys ...... 20
End call .................................. 20
Set volume ............................. 20
Redial previous numbers ........ 20
When the number is busy ....... 21
Accept call ............................. 21
Reject call .............................. 22
Handsfree .............................. 22
Swap ..................................... 22
Conference ............................ 24
Babysitter ............................... 25
Text entry ................................. 26
Text modules ......................... 29
è Default book .......................30
Phonebook ................................31
<New entry> .......................... 31
Call (search for an entry) ......... 32
Change entry ..........................32
Addressbook .............................34
<New entry> .......................... 34
Read/change an entry .............35
Call, search for an entry ..........36
Addressbook menu ................. 36
Voicedialling ...........................37
Groups ......................................38
Z Records .................................. 39
Z Durat/charges ........................40
] Voice mail/Mailbox ............41
] SMS .................................... 42
Writing and sending text messag-
es (SMS) .................................42
Picture&Sound ........................43
SMS to group .......................... 44
Read SMS ............................... 44
Ringtones, icons ... ................. 45
Lists .......................................45
Archive ...................................46
] MMS ................................... 47
Writing/sending
MMS messages .......................47
Receive MMS ..........................50
Read MMS ..............................50
Lists .......................................51
See also Index at the end of this User Guide
Page 3

2
Contents
] E-mail ................................. 53
Write/send e-mails .................. 53
Receive e-mail ........................ 54
Read new e-mail .................... 54
Lists ....................................... 55
] Message profiles ............... 57
SMS profile ............................ 57
MMS profile ........................... 58
E-mail settings ....................... 59
Voice message ....................... 60
CB services ............................. 60
] CB services ......................... 61
É Surf & fun ............................ 62
Internet browser (WAP) .......... 62
Games & more ....................... 65
m Setup .................................. 68
Display ................................... 68
Audio ..................................... 70
Keys ....................................... 72
Phone setup ........................... 73
Clock ..................................... 76
Connectivity ........................... 77
Security ................................. 80
Network ................................. 82
Accessories ............................ 84
ProSlide ................................. 85
~ Profiles ............................... 86
My menu .................................. 88
ç Organiser ............................ 89
Calendar ................................ 89
Alarm ..................................... 91
Tasks ......................................93
Notes .....................................94
Missed appointments ............. 95
Dictating machine ..................96
Time zones .............................97
[ Extras ..................................98
Alarm clock ............................98
Calculator ...............................98
Currency conv ........................ 99
Stopwatch ............................100
Countdown ..........................100
Camera (Accessories) ............ 101
Voice command ....................103
Remote synchronisation .......104
Fast access key ....................... 106
Ñ Filesystem ......................... 108
Print via.../Send via .... ............110
Notes A-Z ................................111
Siemens Data Suite .................119
Questions & Answers ..............121
Customer Care ........................124
Care and maintenance ...........125
Product data ........................... 126
Accessories .............................127
Battery quality statement ......129
Guarantee certificate .............130
Index .......................................131
See also Index at the end of this User Guide
Page 4
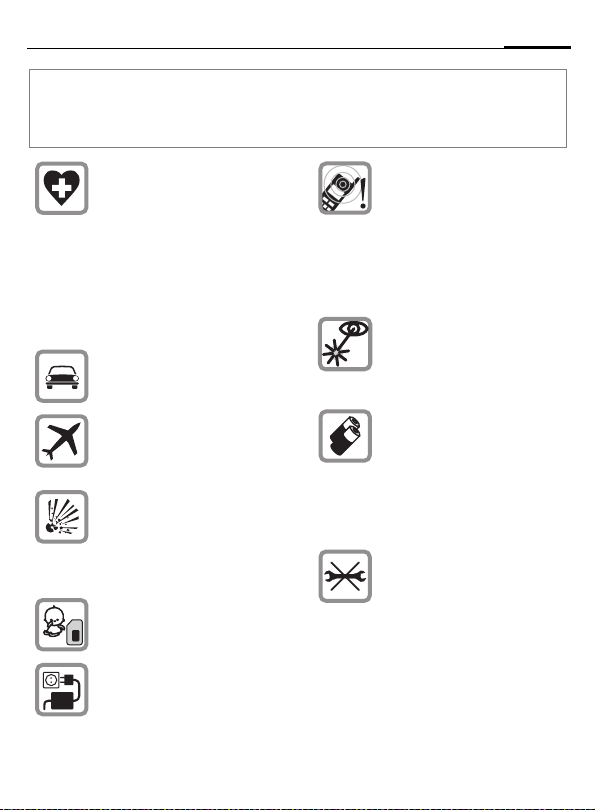
Safety precautions
Notes for parents
Read the user manual and safety instructions carefully before using the phone!
Explain the contents of the phone to your children and the risks associated with using the
phone!
When in a hospital switch off
your phone. Mobile phones can
interfere with the functioning of
medical devices such as hearing aids or pacemakers. Keep at
least 20cm/9 inches between
phone and pacemaker. When
using the mobile phone hold it to
the ear which is further away
from the pacemaker. For more
information consult your doctor.
Only use a handsfree kit while
driving (p. 84).
Mobile phones must be
switched off at all times in an aircraft. To prevent accidental activation, see (p. 87).
Switch off near petrol stations,
fuel depots, chemical plants or
blasting operations. Mobile
phones can interfere with the
operation of technical installations.
The SIM card may be removed.
Caution! Small parts could be
swallowed by children.
The mains voltage (V) specified
on the power supply unit must
not be exceeded.
Ringtones (p. 70), message
tones (p. 71) and handsfree
talking are reproduced through
the loudspeaker. Do not hold the
phone to the ear when it rings or
when you have switched on the
handsfree function (p. 22). Otherwise you could cause serious
damage to your hearing.
Do not view the activated infrared interface [Class 1 LED
product (classification under
IEC 60825-1)] with an optical
magnifier.
We recommend you only use
Siemens original batteries
(100% mercury-free) and charging devices. Otherwise considerable health risks and damage
to the product cannot be excluded. For example, the battery
may explode.
Do not open the phone. Only the
battery (100% mercury-free) or
SIM card may be replaced. You
must not open the battery under
any circumstances. Any other
changes to this device are strictly prohibited, as they will invalidate the type approval criteria
required for operation of the
unit.
3
Page 5
4
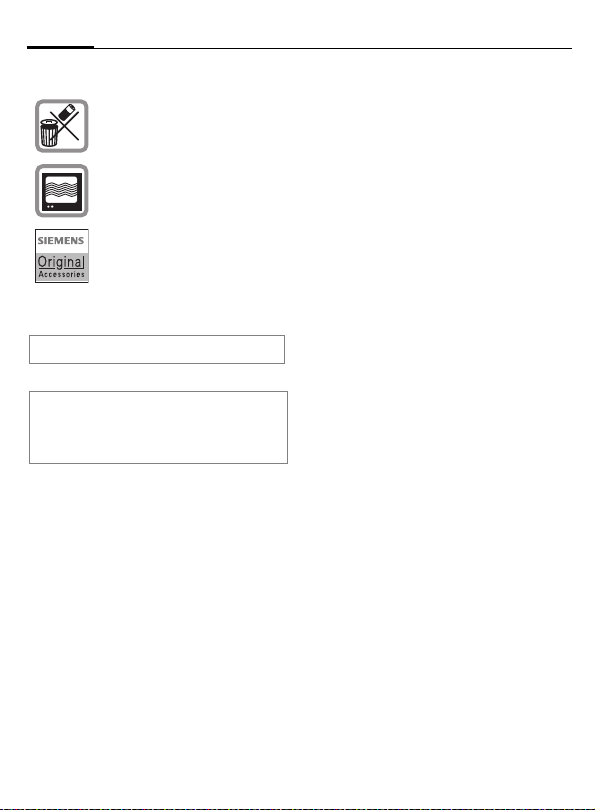
Please note:
Dispose of used batteries and
phones according to the legal
regulations.
Mobile phones can interfere
with the operation of nearby
TVs, radios or PCs.
Only use Siemens original accessories. In this way you will
avoid possible health risks and
damage to the product and ensure compliance with all relevant provisions.
Improper use invalidates the warranty!
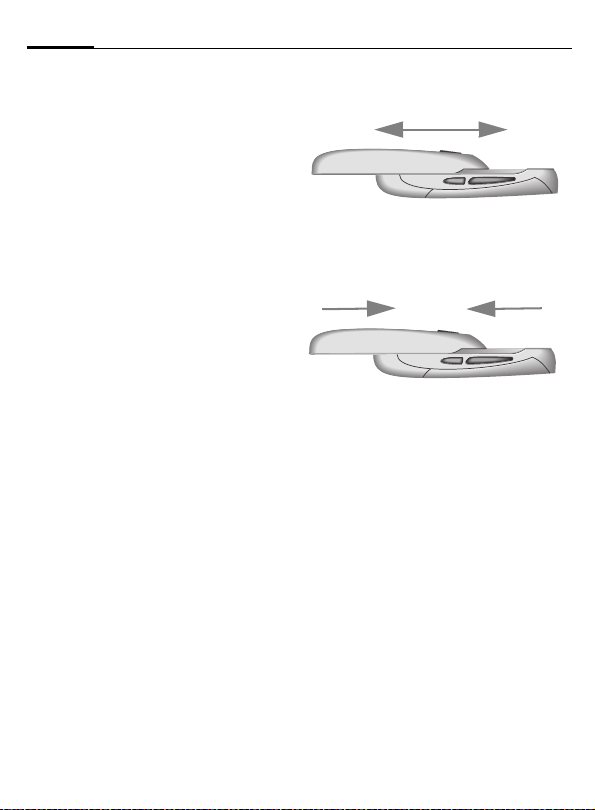
The phone may only be used if the keypad
is fully closed or fully opened; for optimum
audio quality, however, it is recommended
you open the keypad completely.
Safety precautions
Page 6
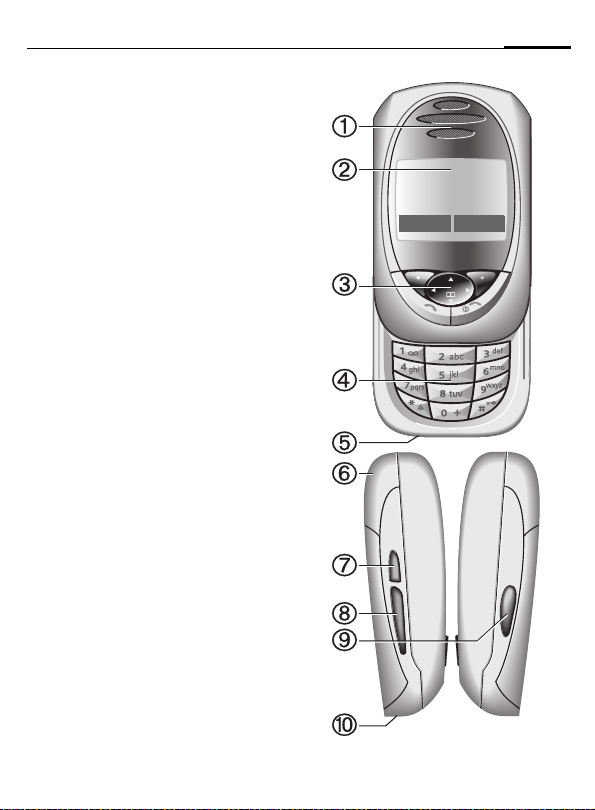
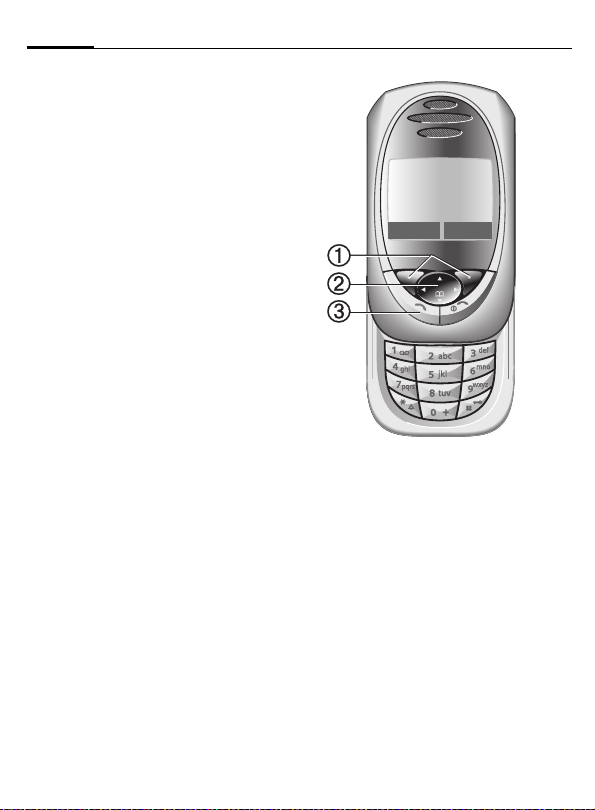
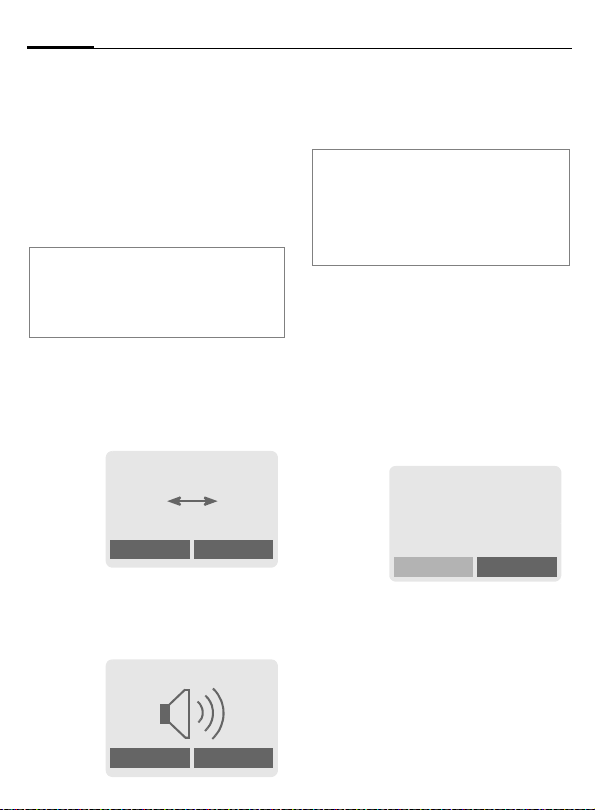
Overview of the phone
c Loudspeaker
d Display icons
Signal strength/ GPRS available/battery level.
e Control key
See next page.
f Input keys
Numbers, letters
g Microphone
h Integrated antenna
Do not interfere with the phone above the battery cover unnecessarily. This reduces the
signal quality/signal strength.
i Dictation key
(in standby mode):
Hold down : record.
Press briefly: play back.
j Plus/minus side key
• During a call: volume loud-quiet.
• In menus, lists and WAP pages: scroll up
and down.
• In standby mode:
Press side key at top briefly: show profile
selection. Hold down key at bottom: start
voice control.
k Infrared interface
(IrDA, e.g. for communication between
PC/PDA and mobile phone).
5
_ªg
Service provider
25.04.2003 12:30
d Menu
l Device interface
Connection for charger, headset etc.
Page 7
6
Overview of the phone
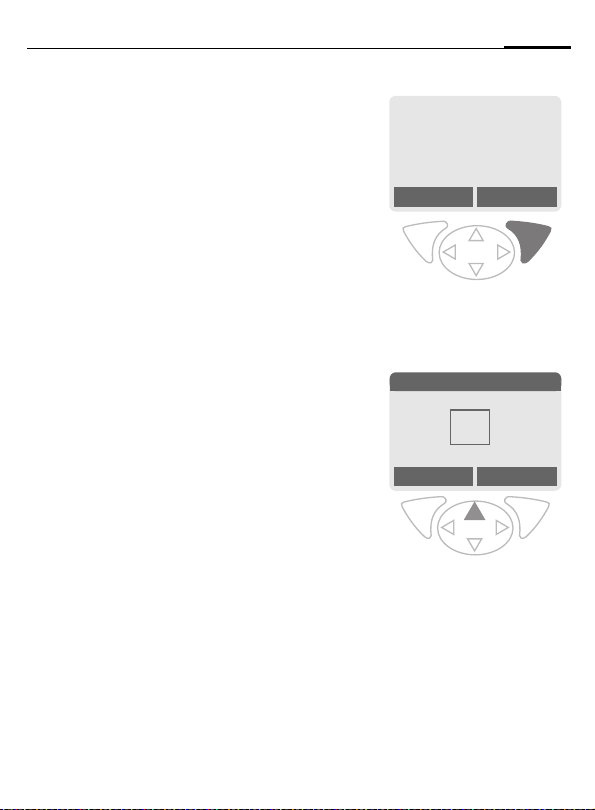
c Soft keys
The current functions of these keys are shown
in the bottom line of the display as §text§ or
symbols (e.g. d)
d Control key
In the main menu:
I Navigation.
In lists and menus:
G Scroll up/down.
D
C
During a call:
D
In standby mode:
E
F
D
C GPRS info.
e
Dial phone number/name displayed, take
calls. Show last phone numbers dialled in
standby mode.
Select function.
Menu level back.
Open call menu.
Voice control (hold down).
Open Address/Phonebook.
Open menu.
A
Call key
_ªg
Service provider
25.04.2003 12:30
d Menu
Page 8
Overview of the phone
B
c
• Switched off: hold down to switch on.
• During a conversation or in an application
• In menus: press briefly to go back a level.
• In standby mode: if the keylock is disabled,
• Keylock in standby mode, keypad closed:
d
• In standby mode: switch all audible signals
• For incoming calls: only switch off ringtones.
e
• In standby mode: Lock or unlock keys.
On/Off/End key
(except for Surf&Fun): press briefly
to finish.
Hold down to go back to standby mode.
hold down to switch off the phone if the keypad is closed.
press briefly to lock keypad.
Press briefly and confirm with §OK§ to unlock the keypad.
*
Hold down
on/off (except alarm).
#
Hold down
7
_ªg
Service provider
25.04.2003 12:30
d Menu
Note
Your phone's display is delivered with a protective film.
Remove this film before getting started.
Page 9
8
Overview of the phone
Open keypad:
• Light on.
• Keypad unlocked.
• Opening melody on (if set).
• The call is accepted.
• Alarm sound off (appointment, alarm).
Close keypad:
• Back to standby mode.
• Light off.
• Keypad locked (if set).
• Closing melody on (if set).
• The call is ended.
• The call is rejected.
• Alarm sound off (appointment, alarm).
Page 10

Display symbols (selection)
Display symbols
Signal strength.
_
Charging.
h
d
Battery charging status.
Standard directory (Phonebook/
è
Addressbook).
Call lists.
Z
Surf & Fun.
É
Organiser.
ç
Messages.
]
Profile.
~
[
Extras.
File system.
Ñ
Settings.
m
All calls are diverted.
n
Ringer off.
j
Short ring (beep) only.
k
Ringer only if caller is stored in the
l
Phonebook/Addressbook, or is a
member of a group.
Ø
Alarm set.
Alarm clock activated.
Ö
µ
Key lock activated.
Phone numbers/names:
On the SIM card.
¢
¡
On the SIM card (PIN 2 protected).
In the phone memory.
v
No network access.
²
Function activated/deactivated.
p,o
Phonebook/Addressbook.
N
ABC/
Indicates whether upper or lower-
Abc/
case letters are active.
abc
Text input with T9.
™
IrDA activated.
IrDA during transmission.
¬
«
Activated and available.
ª
Registered.
GPRS Download.
©
WAP online.
Ê
WAP via GPRS online.
Ë
Ì
WAP No network.
Headset mode.
±
Auto answer feature on.
Organiser/Extras symbols
Memo.
u
Call.
v
Appointment.
w
Dictating mach./Voice memory.
x
Birthday.
{
Alarm clock/stopwatch.
y/æ
9
Page 11

10
Soft keys
]
\
—
–
·
O
Display symbols (selection)
Message received.
Voice mail received.
Data received.
Picture received.
Melody received.
Unanswered call.
Store in Phonebook/Addressbook.
Retrieve from Phone/Addressbook.
Change Phonebook/Addressbook.
Page 12
Getting started
11
Insert SIM card/battery
The service provider supplies you
with a SIM card on which all the important data for your line is stored. If
the SIM card has been delivered in
credit-card size, snap the smaller
segment out and remove any rough
edges.
• Press the lock
battery upwards in the direction
of the arrow
• Insert the SIM card in the opening
with the contact area facing down-
wards and push gently until it engages below the holder (make
sure the angled corner is in the
correct position
p
n, then remove the
.
o
n
o
).
p
• Insert the battery in the lower
, then press downwards r
edge
q
until it engages.
r
q
Remove SIM card
Remove the battery. First push the
SIM card
for the holder and at the same time
lift it up slightly
Then remove the SIM card
completely.
Additional information
Always switch off phone before removing
the battery!
Only 3V SIM cards are supported. Please
contact your service provider, if you have
an older card.
Functions with SIM card ..................p. 118
gently through the slot
s
t
t
on the other side.
s
Page 13
12
Getting started
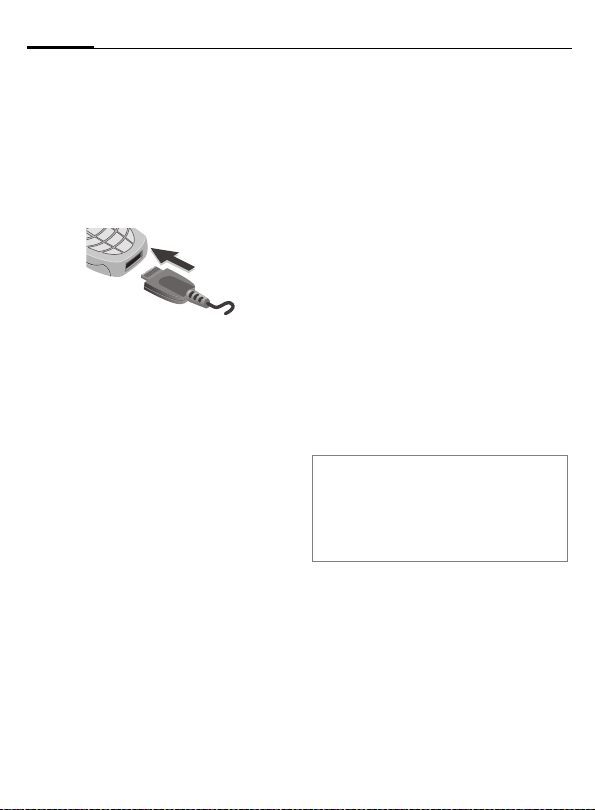
Charge battery
The battery is not fully charged
when delivered. Plug charger cable
into the bottom of the phone, plug
power supply unit into a mains power socket and charge for at least two
hours.
Display when charging is in progress
h During charging.
Charging time
An empty battery is fully charged after about 2 hours. Charging is only
possible within the temperature
range 5°C to 40°C. At 5°C above or
below, the charge icon blinks as a
warning. The mains voltage specified on the power supply unit must
not be exceeded.
Charge icon not visible
If the battery is totally discharged, no
charge icon is displayed when the
charger is plugged in. It will appear
after two hours at most. In this case
the battery is fully charged after
3-4 hours.
Only use the charger provided!
Display while in service
Charge level display during operation (empty-full):
adg
A beep sounds when the battery is
nearly empty. The battery level is only shown correctly during an unbroken charging/discharging cycle. You
should therefore not remove the bat-
tery unnecessarily and where possible
not finish the loading process early.
Additional information
The charger heats up when used for long
periods. This is normal and not dangerous.
Outside your own home network.....p. 114
Performance....................................p. 115
Page 14

Switch on, off / PIN entry
13
Activate/deactivate
B
Hold down On/Off/End key
to switch on or off.
Enter PIN
The SIM card can be protected with a
4-8 digit PIN.
J
§OK§ Confirm entry with right
Additional information
Change PIN ......................................p. 17
Other network ................................... p. 82
SIM card problems .......................... p. 116
Clear SIM card barring ...................... p. 18
Open keypad. Enter the
PIN using the number
keys. The characters
appear to ensure nobody
can read your PIN on the
display. Correct errors
with §Clear§.
Please enter your
Clear OK
soft key. Logging on to
the network will take a
few seconds.
****
PIN:
* * * *
Switching on your phone for the first time
Contrast
G
Time/date
The clock must be set to the right
time once at start-up.
§Yes§ Press.
J
§OK§ Press. The time and date
Time zones
Set the time zone for your area.
F
§Set§ ... press to set.
Additional information
If the battery is removed for longer than
seconds, the clock must be reset.
Additional clock settings ....................p. 76
Set display contrast.
Open keypad. First enter
the date (day/month/
year), then the time
(24 hours, including
seconds).
are updated.
Select the required time
zone from list ...
Page 15

14
Switch on, off / PIN entry
Phonebook or Addressbook
You can choose whether you want
to use the Phonebook on the SIM card
or the internal Addressbook as standard.
You can copy the SIM card Phonebook to the Addressbook on the
phone. Please do not interrupt this pro-
cedure. During this time do not accept
incoming calls. Follow instructions in
the display.
To copy data on the SIM card at a lat-
er time, highlight entries (see
p. 113) and copy these with the
function "Copy into 9" (Phonebook
options menu p. 32).
You can change the standard phonebook at any time (p. 30).
Signal strength
_ Strong receive signal.
^ A weak signal reduces the
call quality and may lead
to loss of the connection.
Change your location.
Emergency number
(SOS)
Only to be used in real emergencies!
By pressing the soft key §SOS§, you
can make an emergency call on any
network without a SIM card and without entering a PIN (not available in
all countries).
Standby mode
_g
Service provider
25.04.2003 12:30
d Menu
When the name of the service provider appears on the display, the
phone is in standby mode and ready for
use. If you now close the keypad, the
phone remains in standby mode.
The left soft key may have different
functions pre-assigned.
B
Hold down the On/Off/End
key to return to standby
mode from any situation.
Additional information
SIM services (optional) ...........p. 105
}
Page 16
General instructions
15
User guide
The following symbols are used to
explain operation:
J
B
A
D
< >
§Menu§
L
Enter numbers or letters.
On/Off/End key.
Call key.
Press the control key on the
side indicated.
Soft keys.
Displays a soft-key function.
Function dependent on service provider, may require
special registration.
Menu controls
The steps needed to reach a function
are shown in a condensed form in this
user guide, e.g. to display call list for
missed calls:
§Menu§
KZKCalls missed
This corresponds to:
n
§Menu§ Open menu.
o
E
_g
Service provider
25.04.2003 12:30
d Menu
From standby mode: press
right soft key.
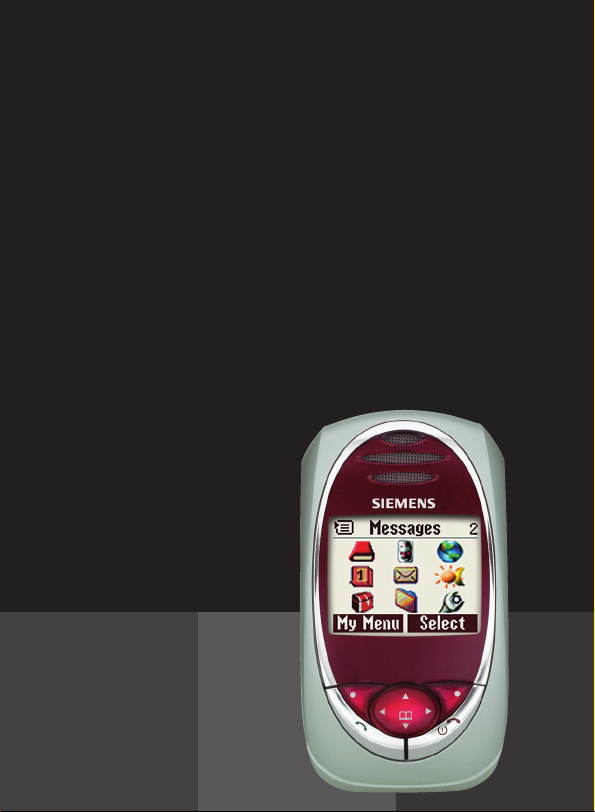
Messages 5
èZ
]
ç]~
[
My menu Select
Records Z Select.
Press top of control key.
É
Ñm
Page 17
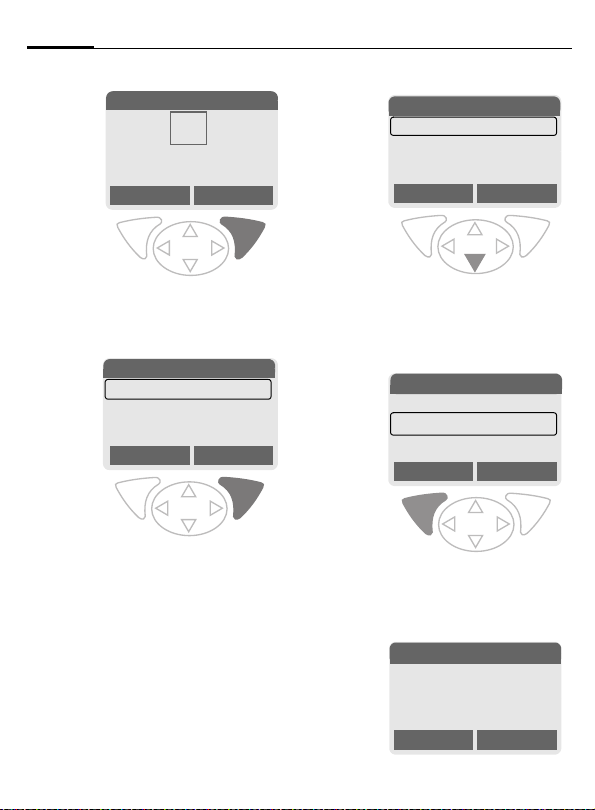
16
General instructions
p
2 Records
è
ç]~
[
My menu Select
§Select§ Press.
Press right soft key to open the
Records submenu.
Records 2-1
q
§Select§ Press.
Z
Calls missed
Calls received
Calls dialed
Press right soft key to open the
Calls missed list.
É
Z
Ñm
Select
r
F
s
§View§ Press.
t
Z
Office
+55523765489
Carol
Scroll to the required
entry.
Press control key at the bottom to scroll down.
Z
+55523765489
Carol
Service provider
Press left soft key to show
phone number with date, time
and number of calls.
n View
25.04.2003 12:30 §5§
Calls missed
View Options
Calls missed
View Options
Carol
+55523765489
OK Options
Page 18

Security
17
Codes
The phone and SIM card are protected against misuse by several security
codes.
Keep these confidential numbers in a
safe place where you can access them
again if required.
PIN
PIN2
PUK
PUK2
Phone
code
§Menu§
PIN control
The PIN is usually requested each
time the phone is switched on. You
can deactivate this feature but you
risk unauthorised use of the phone.
Some service providers do not permit deactivating the control.
Protects your SIM card (personal identification number).
This is needed to set the charge
detail display and to access additional functions requiring special SIM cards.
Key code. Used to unlock SIM
cards after the wrong PIN has
been entered repeatedly.
Protects your phone. Must be
entered at the first security
setting.
KmKSecurity
KSelect function.
§Select§ Press.
J Enter PIN.
§OK§ Confirm input.
§Change§ Press.
§OK§ Confirm.
Change PIN
You can change the PIN to any
4-8 digit number you find easier to
remember.
J Enter current PIN.
§OK§ Press.
§OK§ Enter new PIN.
J
,
§OK§ Repeat new PIN.
J
,
Change PIN2
(display only if PIN 2 is available).
Proceed as with Change PIN.
Page 19

18
Security
§Menu§KmKSecurity
KCodes
Chg.phonecode
You define and enter the phone
code (4-8 digits) when you call up a
phone-code protected function for
the first time (e.g. Babysitter p. 25).
It is then valid for all phone-code
protected functions.
Following the third unsuccessful attempt, access to the phone code and
the functions that use it is denied. If
this happens please contact Siemens
Service (p. 124).
L
Clear SIM card barring
If the PIN is entered incorrectly three
times, the SIM card is barred. Enter
the PUK (MASTER PIN), provided by
your service provider with the SIM
card, according to instructions. If the
PUK (MASTER PIN) has been lost,
please contact your service provider.
Additional information
Screensaver......................................p. 69
Key lock ............................................ p. 72
Further security settings ....................p. 80
Prevent accidental
L
activation
Even if PIN entry is deactivated (see
p. 17), confirmation is required to
switch on phone.
This prevents the phone from being
switched on accidentally, e. g. when
carried in a pocket or whilst you are
on an aircraft.
B
§OK§ Press. The phone
§Cancel§ Press or take no action.
Hold down.
Please confirm switch on
OK Cancel
switches on.
The switching-on operation is broken off.
Page 20

My phone
19
personal requirements.
Ringtones
Assign individual ringtones to caller
groups or for special dates (p. 71).
Animations, screensavers, logos, applications
Adjust your phone in the following
ways to give it a personal touch and
make it just how you want it:
Animations
Choose a start-up and closing animation (p. 69) as well as a personal
greeting (p. 69).
Screensaver
Choose an analogue clock or a personal picture (p. 69).
(Provider) logo
Choose an individual picture (p. 68)
to be displayed in standby mode.
Background image
Choose your own permanent background image (p. 68).
Applications
Download your own applications
from the Internet (p. 65).
Colour scheme
Choose a colour scheme for the entire service system (p. 68).
Where do I get what?
You can order additional ringtones,
logos and screensavers on the Internet and receive them by SMS/MMS:
www.my-siemens.com/ringtones
www.my-siemens.com/logos
www.my-siemens.com/screensaver
www.my-siemens.com/animations
Or yo u ca n dow nl oad them di rec t via
WAP:
wap.my-siemens.com
Siemens City Portal
Further applications, games and
services for your mobile phone (e.g.
a Photo Logo Composer to create
personal pictures for your Addressbook) can be found at:
www.my-siemens.com/city
The Siemens City Portal also provides
a list of countries in which these
services are available.
My menu
Create your own menu with frequently used functions, phone numbers or WAP pages (p. 88).
Page 21

20
Calling
Dialling with number keys
The phone must be switched on
(standby mode) and the keypad
must be open.
J
A
Enter number (always
with area code, if necessary with international
dialling code).
§Clear§ A short press clears
the last digit, a long press
clears the entire phone
number.
Press the Call key. The displayed phone number is
dialled.
End call
B
Or Close keypad.
Press End key briefly. The
call is ended. Press this
key even if the person on
the other end of the line
has hung up first.
Set volume
Using the plus/minus side key (press
top/bottom), adjust the volume (only possible during a call).
If a Car Kit is used, its volume setting
will not affect the usual setting on
the phone.
Redial previous numbers
To redial the phone number last
called:
A Press Call key twice.
To redial other numbers that were
dialled previously:
A Press the Call key once.
G
Pick out the required
phone number from the
list, then press ...
A ... to dial.
Additional information
Save phone number in Address-
book/Phonebook.....................p. 31, p. 34
§Options§ Call lists............................p. 39
§Hold ................................................p. 22
y menu§ Call menu......................... p. 24
§Divert§ Set divert .............................p. 73
§Handsfr.§ Handsfree .......................p. 22
Microphone on/off .............................p. 24
Voice dialling .....................................p. 37
Auto key lock .....................................p. 72
Phone number transmission off/on
(Hide ID)............................................p. 73
International dialling codes ..............p. 113
Phone number memo...................... p. 115
Control codes (DTMF)..................... p. 111
Page 22
Calling
21
When the number is busy
If the number called is busy or cannot be reached because of network
problems, several options are available (depending on the service provider). An incoming call or any other
use of the phone interrupts these
functions.
Either
Automatic Redial previous numbers
§Auto dial§ Press. The phone number
Or
Call back
§Call back§ Press. Your phone rings
Reminder
§Prompt§ Press. A beep reminds you
is automatically dialled
ten times at increasing
time intervals. End with:
B End key.
L
when the busy number is
free. Press the Call key to
dial the number.
to redial the displayed
phone number after
15 minutes.
Accept call
The phone must be switched on
(standby mode). An incoming call
will interrupt any other use of the
phone.
If the keypad is closed, press the soft
key §Mute§
current call.
to disable the ringer for the
i
+5552764556
Reply
§Reply§ Press.
Or
Reject
A Press.
Or Open keypad.
If the phone number has been trans-
mitted by the network, it is displayed. If the caller's name appears
in the Phonebook or Addressbook,
this will appear instead of the
number. If set, a picture can be displayed instead of the bell icon
(p. 34).
Warning!
Please make sure you have accepted the
call before holding the phone to your ear.
This will avoid damage to your hearing from
loud ringtones!
Page 23
22
Calling
Reject call
§Reject§ Press. The call will be di-
Or
verted if this has been set
previously.(p. 73)
B Press briefly.
Or Close keypad.
Additional information
Missed calls............................... p. 39
Accept call using any key.................. p. 72
Switch off ringer ..............................p. 116
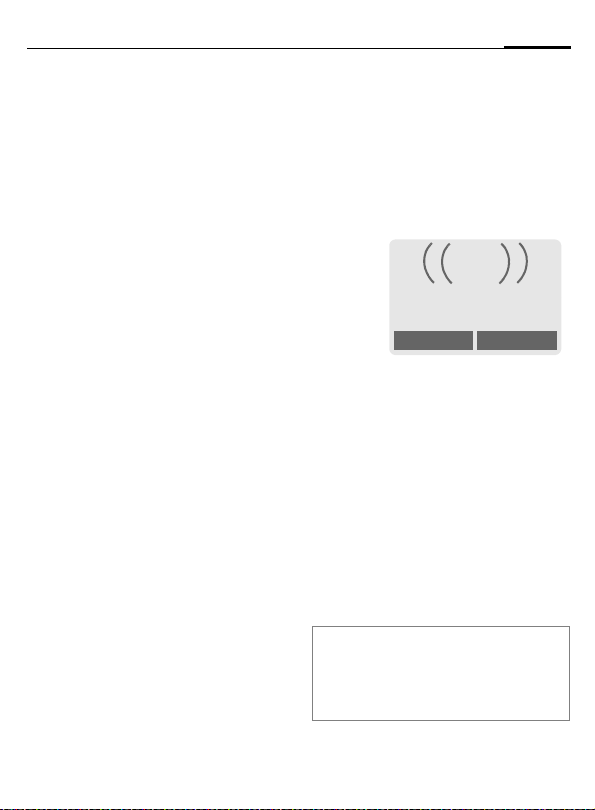
Handsfree
You can put the phone aside during
a call. You can then hear the caller
via the loudspeaker.
_g
vv
Carol
Handsfr.
§Handsfr.§ Activate handsfree
talking.
§Yes§ Switch on.
_g
Handsfr.
% menu
% menu
Use the plus/minus side key to regulate volume.
§Handsfr.§ Deactivate.
Warning!
To avoid damage to hearing always deac-
tivate "handsfree talking" before holding
the phone to your ear! This will avoid damage to hearing!
y menu§ Call menu ..........................p. 24
Swap
L
Establish a second connection
You can call another number during
a call.
y menu§ Open call menu.
Hold The current call is put on
Now dial the new number (Phonebook/Addressbook
When the new connection is established:
y menu§ Open call menu.
Swap Swap back and forth be-
hold.
_g
Connection put on hold
Back
F).
tween the calls.
Page 24

Calling
23
• End current call
B
• End both calls
End the current call and
press §Yes§. You are now
connected to the caller.
Close keypad.
Incoming calls during a call
During a call, you may be advised
that there is another call waiting.
You will hear a special tone during
the call. You may need to register for
this service with your service provider and set your phone accordingly
(p. 73).
You have the following
options:
• Accept the waiting call
§Swap§ Accept the waiting call
and put the current call on
hold To swap between
the two calls, proceed as
above.
End call
B
Press the End key
The following is displayed: "Return to call on
hold?"
Accept the waiting call by
pressing §Yes§.
Or
End the second call also
by pressing §No§.
.
• Reject waiting call
§Reject§ Reject the waiting call.
Or
§Divert§ The waiting call is
• Accept the waiting call and end the
B
§Reply§ Accept new call.
• End both calls
diverted, for example,
to mailbox.
current call
End the current call.
Close keypad.
Page 25

24
Calling
Conference
Call up to 5 parties one by one and
link them together in a conference
call. Some of the functions described
may not be supported by your service provider or may have to be enabled specially. You have established
a connection:
y menu§ Open menu and select
J
y menu§ ... Open menu and select
Repeat procedure until all participants are linked together (up to
5participants).
Hold. The current call is
put on hold.
Now dial a new number.
When the new connection is established ...
Conference. The held call is
joined.
L
End
B
Or Close keypad.
All calls in the conference
finish simultaneously
when the End key is
pressed.
Call menu
The following functions are only
available during a call:
y menu§ Open menu.
Swap
Hold
Microphone
Handsfree
Volume
Conference
Durat/
charges
Send DTMF
Call transfer
L
Main menu
Call status
(p. 22)
(p. 22)
Switch microphone on/off. If
switched off, the person on
the other end of the line
cannot hear you (muting).
* hold down.
Also:
(p. 22)
Adjust handset volume.
(See above)
Display call duration and (if
set,p. 40) costs accruing
during the call.
(p. 111)
The original call is connected to the second one.
For you, both calls are now
ended.
Access to main menu.
List all held and active calls
(e.g. conference call participants).
Page 26

Calling
25
Babysitter
If this is active, only one number can
be dialled.
Switch on
§Menu§KmKSecurity
KBabysitter
§Select§ Press.
J
The phone code (4 to 8 digits) is set
by you and entered at the first security setting.
Please don't forget the number
(see also p. 18)!
§OK§ Confirm input.
§Change§ Press.
R/J Select phone number
§OK§ Confirm "On".
Enter phone code.
from Addressbook (p. 35)
or Phonebook (p. 32) or
enter new number.
Apply
_g
Service provider
25.04.2003 12:30
Carol
Use the right soft key and
hold it down to dial (e.g.
Carol's phone number).
Switch off
# Hold down.
J Enter phone code.
§OK§ Confirm input.
§Change§ Press.
§OK§ Confirm "Off".
Page 27

26
Text entry
Enter text without T9
Press number key repeatedly until
the required letter appears. The cursor will jump forward after a brief interval. Example:
2
Ä,ä/1-9 Umlauts and numbers are
§Clear§ Press briefly to delete the
H
#
*
Press briefly once for a,
twice for b etc. The first
letter in each name is automatically written in upper case.
Hold down to write the
number, in this case 2.
displayed after the relevant letters.
letter before the cursor,
hold down to erase the
whole word.
Move the cursor
(forwards/back).
Press briefly: Swap between abc, Abc,
T9
Abc, T9ABC, 123. Status
shown in top line of display.
Hold down: All input modes
are displayed.
Press briefly: Select special
characters.
Hold down: Open input
menu.
T9
abc,
0
1
Press once/repeatedly:
. ,? ! ’ " 0 - ( ) @ / : _
Hold down: Writes 0.
Writes blank. Press twice
= jumps a line.
Special characters
*
1
)
"’ :
€@\ &#[ ] { } %~
<=>| ^§ Γ∆ΘΛΞ
πΣ ΦΨΩ
1
) Line skip
G, H Navigate to character.
§Select§ Press.
Press briefly. The symbols
chart is displayed:
¿¡ _; . , ?! +-
* /()
¤¥
$
Input menu
With text input:
*
Hold down. The input
menu is displayed:
Text format (SMS only)
Input language
Mark text
Copy/Add
£
Page 28

Text entry
27
Text input with T9
"T9" deduces the correct word from
the individual key entries by making
comparisons with an extensive dictionary.
Activate, deactivate T9
§Options§ Open text menu.
T9 input Select.
T9 preferred
§Edit§ Activate T9.
Select Input language
Select the language in which you
want to compose your message.
§Options§ Open text menu.
T9 input Select.
Input language
§Select§ Confirm, the new lan-
T9 language versions
If you want to load a dictionary in another
language, you will find a large selection to
download from the Internet as well as installation instructions under:
www.my-siemens.com/t9
Select.
Select.
guage is set. Languages
with T9 support are
marked by the T9 symbol.
Write a word using T9
Since the display changes as you proceed
it is best if you finish a word without looking at the display.
Simply press the keys once only
where the relevant letter is located.
For "hotel", for example:
press briefly for T9Abc then type
#
4 6 8 3 5
1
Do not use special characters such as
Ä but write the standard character,
e.g. A; T9 will do the rest for you.
Additional information
0
D
#
*
Press. A blank ends a
word.
Entering a full stop finishes a
word, if it is followed by a
blank. Within a word, a full stop
represents an apostrophe or
hyphen:
e.g. §provider.s§ = provider’s.
Go to the right: Ends the word.
Press briefly: Swap between
abc, Abc,
T9
top line of display.
Hold down: All input modes
are displayed.
Press briefly: Select special
characters (p. 26).
Hold down: Open input menu
(p. 26).
T9
ABC, 123. Status shown in
abc, T9Abc,
Page 29
28
Text entry
T9 word suggestions
If several options are found in the
dictionary for a key sequence
(a word), the most probable is displayed first. If the word you want has
not been recognised, the next suggestion from T9 may be correct.
The word must be §highlighted§.
Then press
»
»
If the word you want is not in the dictionary, it can also be written without T9.
To add a word to the dictionary:
§Spell§ Select.
The last suggestion is deleted and
the word may now be entered without T9 support. Press §Save§ to add it
automatically to the dictionary.
again. The displayed word
is replaced with a different word. If this word is also incorrect,
press again. Repeat until
the correct word is displayed.
™
SMS 1 748
At 8 we are ___
Spell
»
Correct a word
Words written with T9:
H
»
§Clear§ Deletes the character to
Words not written with T9:
E
§Clear§ Deletes the letter to the
J
Additional information
Within a "T9 word", individual letters may
not be edited without first removing T9. In
most cases it is better to rewrite the complete word.
T9® Text Input is licensed under one or more of
the following: U.S. Pat. Nos. 5, 818, 437, 5, 953,
541, 5, 187, 480, 5, 945, 928, and 6, 011, 554; Canadian Pat. No. 1,331,057; United Kingdom Pat.
No. 2238414B; Hong Kong Standard Pat. No.
HK0940329; Republic of Singapore Pat. No.
51383; Euro.Pat. No. 0 842 463 (96927260.8) DE/
DK, FI, FR, IT, NL, PT, ES, SE, GB; and additional
patents are pending worldwide.
Move left or right,
word by word, until
the required word is
§highlighted§.
Scroll through the T9
word suggestions again.
the left of the cursor and
displays a new possible
word!
Move letter by letter to
the left/right.
left of the cursor.
Letters are inserted at the
cursor position.
Page 30

Text entry
Text modules
Text modules can be stored in the
phone for adding to your SMS messages.
Write text modules
§Menu§K]KText modules
§Options§ Select New text.
J
§Options§ Select Save.
Use text modules
J
§Options§ Open text menu.
G
G
§Select§ Confirm. The text module
§Select§ Confirm. The text module
Write text module.
Accept the default name
or give it a new name,
then save with §OK§.
Write message.
Select Text modules.
Select text module from
the list.
is displayed.
is inserted in the message
to the right of the cursor.
29
Page 31

30
è Default book
§Menu§Kè
Select function.
K
Show entries
Entries in the standard directory (Addressbook or Phonebook) are shown
for selection.
Select a name with the
G
/
J
A
first letter and/or scroll.
The number is dialled.
<New entry>
Create new entry in standard
directory.
Phonebook (see p. 31)
Addressbook (see p. 34)
Default book
Select either Phonebook or Addressbook as your standard directory.
Your preference should be for the
Addressbook, because more entries
and functions (e.g. pictures, birthdays, several phone numbers per entry, etc.) are possible.
F
§Select§ Set as standard.
Select Phonebook or
Addressbook.
Businesscard
Create your own business card.
Send this by SMS or infrared to
another GSM phone or to a suitable
PC/printer.
If no business card has been created
yet, you will be asked for your input.
G
Last name: E-mail 2:
First name: URL:
Phone: Company:
Phone/office: Street:
Phone/mobile: Post code:
Fax: City:
Fax 2: Country:
E-Mail: Birthday:
§Save§ Press.
Additional information
The content of the business card corresponds to international standards (vCard).
· Copy numbers from Address-
§Options§ See Addressbook menu,
Move from field to field to
put in your details. You
will find explanations of
these input fields on p. 34
and p. 35.
book/Phonebook.
(p. 36).
Groups
(see p. 38)
Service numbers
(see p. 115)
Page 32

Phonebook
31
card) are managed separately from
those in the Addressbook. You can
however exchange data between
the Phonebook and the Addressbook.
<New entry>
If the Phonebook is set as standard
(Addressbook as standard, p. 30):
F
D
§Select§ Press.
G
J
Number:
Always enter phone number with
prefix.
Open Phonebook (in
standby mode).
N Phonebook Ú
<Special books>
<New entry>
Carol
O Select
<New entry> Select.
Select input fields.
Fill in the input fields described below. The maximum number of letters
available is displayed at
the top of the screen.
Name:
Enter first and/or last names.
Location:
Default: SIM
H
Select the storage location such as SIM or
Protected SIM (p. 33).
Record no.:
Each entry is automatically assigned
a record number. You can also dial
using the record number (p. 32).
H
§Save§ Press to store the new
Additional information
Change the record
number.
entry.
O Temporary swap
to Addressbook .................................p. 34
§+List International dialling code ...p. 113
Store control codes .........................p. 111
Text entry ..........................................p. 26
<Special books>:
<Own numbrs>: Enter personal phone
numbers (p. 114), <VIP numbers>:
Assign important phone numbers to group,
<SIM phonebook> (p. 33),
<Protected SIM> (p. 33),
<Service numb.> (p. 115).
Page 33

32
Phonebook
Call (search for an entry)
F
J
A
Open Phonebook.
Select a name with the
/
G
first letter and/or scroll.
Number is dialled.
Call using record no.
A record number is automatically assigned to every new entry in Phonebook.
J
#
A
Enter record number.
Press.
Press.
Change entry
G
§Options§ Press and select Change.
G
J
§Save§ Press.
Select entry in Phonebook.
Select input field.
Edit.
Phonebook menu
The following functions are available, depending on the current situation. Some functions may be applied
to the current entry as well as multiple highlighted entries:
§Options§
Page 34

Phonebook
Location:
An entry can be moved from one
storage location to another.
SIM (Standard)
Entries stored in the Phonebook on
the SIM card can also be used on other GSM phones.
Protected SIM
Phone numbers can be stored in a
protected location on a special SIM
card. The PIN 2 is needed for editing
(p. 17).
Activate with the function Only ‚
(p. 80).
L
33
Page 35

34
Addressbook
500 entries, each with a variety of
telephone and fax numbers as well
as additional address details. These
entries are managed separately from
those in the Phonebook in the phone
memory. However you can exchange data between the Addressbook and the Phonebook on the
SIM card.
<New entry>
If the Addressbook has been selected
as standard:
F
§Select§ Press.
Open Addressbook (in
standby mode).
N Addressbook Ú
<New entry>
<Groups>
Carol
Import Select
š
New entry
Last name:
§Smith§
First name:
Clear Save
§Group§ Entries can be organised
D
Phone: URL: (Internet
Phone/office: Company:
Phone/mobile: Street:
Fax: Post code:
Fax 2: City:
E-Mail: Country:
E-mail 2: Birthday: (p. 35)
Bitmap
All fields
§Save§ Save the entry.
by groups (p. 38). Select
with §Change§.
Make further entries field
by field.
address)
§Select§ Assign an individ-
ual picture to an Addressbook entry. It is displayed
if you are called by the
corresponding phone
number (see p. 108).
§Select§ Show all input
fields if the display was
previously reduced (see
p. 36, Addressbook
menu, Field setup).
J
Enter first and/or last
name.
Page 36

Addressbook
35
Additional information
<Groups> Group functions (p. 38).
Birthday After entering the date of birth,
·
§Import§ The phone is ready to receive
§+List§ Copy international dialling
O Temporarily switch to Phone-
Synchronising with a PC
Using XTNDConnect
synchronise your Addressbook with
Outlook
Using Remote sync. you can synchronise
your mobile with an organiser stored on the
Internet (p. 104).
the "reminder box" can be activated. Now you can enter the
date and time of the reminder
in the organiser calendar.
Copy data from another Addressbook entry.
multiple vCard entries via IrDA
(p. 110).
code from the list (p. 113).
book.
®
PC (p. 119) you can
®
or Lotus Notes™.
Read/change an entry
F
G
§View§ Press.
Open Addressbook
(in standby mode).
Select required entry.
N Smith, John
§Smith§, John
¿ 055512389
v 0555987654
Change
F
§Change§ Open entry.
J
§Save§ Save setting.
Right soft key:
When you jump from line to line while reading, the right soft key changes depending
on the type of data. Press this key to activate the relevant application:
§VoiceDial§ Voice dialling menu.(p. 37).
§E-mail§ Create e-mail. (p. 53).
§Link§ Visit URL (p. 62).
§Show§ Display respective picture.
Select input field.
Make changes.
§Options§
See p. 36.
Page 37

36
Addressbook
Call, search for an entry
F
J
A
If an Addressbook entry has several
numbers stored:
G
A
Open Addressbook (in
standby mode).
Select a name with the
G
/
first letter and/or scroll.
The number is dialled.
N Smith, John
¿ 0555123454
v 0555987654
À 0555222345
Select phone number.
The number is dialled.
Select
Addressbook menu
Depending on the actual situation,
different functions will be offered.
These functions can be applied to
the entry currently selected as well
as to multiple selected entries:
§Options§
View
Change
New entry
Move to ...
Open menu
Display entry.
Open the entry to edit.
Create new entry.
Assign entry to a group.
.
Copy to SIM
Delete
Delete all
Mark
Mark all
Filter
Businesscard
Voicedialling
Send/Print...
Import
Capacity
Field setup
Copy entry/entries with
name and selected phone
number to SIM card.
Delete entry.
Delete all entries after confirmation.
Switch on highlighting
mode (p. 113).
Activate highlighting mode,
all entries are highlighted
(p. 113).
Display only those Addressbook entries with the
following criteria:
• Voicedialling
•E-mail
• URL
•Birthday
•Bitmap
Define an entry as your
own business card.
Apply voice dialling to an
entry (p. 37).
(p. 110)
Import entries via IrDA™ in
vCard format.
Display maximum and
available capacity.
Select input fields for new
entry.
Page 38

Addressbook
37
Voicedialling
Dial numbers by voice command. Up
to 20 recorded names for voice dialling or voice commands (p. 103) can
be saved on the mobile (not on the
SIM card).
Record
F
J
§Options§
Voicedialling
F
§Record§ Press.
§Start§ Start recording.
A short signal sounds. Now speak
the name. After a second beep
and message in the display,
repeat the name. A beep now confirms the recording, which is saved
automatically.
Open Addressbook (in
standby mode).
Select a name with the
G
/
first letter and/or scroll.
Open menu
Select.
Choose phone numbers,
if there are more than
one.
.
Voice dialling menu
Depending on the actual situation,
different functions will be offered.
§Options§
Play
New
Delete
Delete all
Open menu.
Play back a voice command.
Record a new voice command.
Delete voice command from
an entry.
After confirmation delete all
voice commands for this
entry.
Apply voice dialling
Hold down the plus/minus side key (in
standby mode).
Now say the name. The number is
dialled.
Additional information
Noisy environments may affect voice recognition. If attempt was unsuccessful,
press the side key once more and repeat
the name.
Page 39

38
Groups
to enable you to arrange your Addressbook entries clearly. You can
rename seven groups.
F
<Groups> Select (the number of en-
G
§Options§
Rename group
Additional information
No group: Contains all Addressbook en-
tries that do not belong to a group (name
cannot be changed).
Empfangen: Contains vCard Addressbook
entries received by IrDA or SMS (name
cannot be changed).
SMS to group .................................... p. 44
Open Addressbook (in
standby mode).
tries is listed behind the
group name).
N Groups
t
Leisure (5)
Ã
Private (23)
Ä Business (11)
Open Options
Select group.
Open menu.
Select and give group a
name.
Group menu
§Options§
Open
Group symbol
Rename
group
Move
Delete all
Open menu.
Display all members of the
selected group.
§View Addressbook p. 35.
§Options See p. 36
Assign a symbol to a group,
see below.
Change name of group.
Transfer one or more highlighted entries from one group
to another.
After confirmation, delete all
members of the current
group.
Group symbol
Assign to a group a symbol that appears on the display when one of its
members calls you.
G
§Options§
Group symbol
H
§OK§ Confirm.
Select group.
Open menu.
Select.
Choose a symbol.
Page 40

Z Records
39
numbers of calls for convenient
redialling.
§Menu§
K
Z
§Select§ Press.
G Select call list.
§Select§ Press.
G Select phone number.
A Dial phone number.
Or
§View§ Display information on
10 phone numbers can be stored in
each call list:
Calls missed
The phone numbers of calls that you
have received but not answered are
stored for call back purposes.
Requirement: The network supports
the "Caller Identity" feature.
the phone number.
L
Icon for missed call (in
standby mode). Press the
control key (on the left) to
display phone number.
Calls received
Accepted calls are listed.
Requirement:
The network supports the "Caller
Identity" feature.
Calls dialed
Access to the last numbers dialled.
A
Erase records
The contents of all call lists are
deleted.
Call list menu
The call list menu can be called up if
an entry is highlighted.
§Options§ Open list menu.
View
Correct no.
Save to 9
Delete
Delete all
Fast access in standby
mode.
View entry.
Load number to display
and edit there if necessary.
Store entry in the Addressbook/Phonebook.
Delete entry after confirmation.
Delete all entries in call list
after confirmation.
L
Page 41

40
Z Durat/charges
You can display charge details and
the duration of different types of
calls while you speak, as well as setting a unit limit for outgoing calls.
§Menu§
KZKDurat/charges
Select type of call:
Last call
All calls
Remain. units
§Select§ Display the data.
Once displayed you can:
§Reset§ Clear display.
§OK§ End display.
Charge sett.
§Menu§K
Conv.
(PIN 2 prompt)
Enter the currency in which the
charge details are to be shown.
Personal rate
(PIN 2 prompt)
Enter the charges per unit/period.
Z
KDurat/charges
KCharge sett.
L
L
A/c limit
(PIN 2 prompt)
Special SIM cards allow you or the
service provider to define a credit or
a period after which the phone is
barred for outgoing calls.
§Change§ Press, enter PIN 2.
A/c limit Activate.
J
§OK§ Confirm.
Then confirm the credit or reset the
counter. The status display for prepaid cards may vary, depending on
the service provider.
Auto display
Call duration and call charges are automatically displayed for each call.
Enter number of units.
L
Page 42

] Voice mail/Mailbox
L
41
§Menu§K]KSetup
KVoice message
Most service providers supply an external voice mail service. A caller
may leave a voice message for you in
this mailbox
• if your phone is switched off or
not ready to receive,
• if you do not want to answer,
• if you are making a phone call
(and Call Waiting is not activated,
p. 73).
If voice mail is not part of your service provider's package, you will need
to register and settings may have to
be made manually. The following
description may vary slightly, depending on the service provider.
Settings:
The service provider supplies you
with two phone numbers:
Save mailbox number
Call this phone number to listen to
the voice mails left for you.
K]KSetup
§Menu§
KVoice message
/JSelect number from
·
§OK§ Confirm.
Phonebook/Addressbook
or enter/change it.
L
Save call divert number
Calls are diverted to this phone
number.
KmKPhone setup
§Menu§
KDivert
Ke. g. UnansweredKSet
Enter call divert number.
§OK§ Registration with net-
Further information on call divert
can be found on p. 73.
work. Divert will be confirmed after a few
seconds.
Listen to
A new voice mail can be announced
as follows, depending on the service
provider:
\
Or
]
Or
You receive a call with an automatic
announcement.
Call your mailbox and play the message(s) back.
1
Away from your home network you
may have to dial a different mailbox
number and enter a password before
you can listen to any messages.
Icon plus beep.
A text message announces a new voice mail.
Hold down (if necessary
enter mailbox number
once only). Confirm with
§OK§ or §Mailbox§ depending
on your service provider.
Page 43

42
] SMS
long messages (up to 760 characters) on your phone. These are
automatically composed of several
"normal" SMS messages of
160 characters each (note higher
charges).
Additionally you can insert pictures
and sounds in an SMS.
Depending on the service provider,
e-mails and faxes can also be sent
and e-mails received via SMS
(change setting if necessary, p. 57).
Writing and sending text messages (SMS)
§Menu§K]KNew SMS
J
Text input using "T9"
(p. 26) allows you to create longer messages very
quickly using just a few
key strokes.
§Clear§ Press briefly to de-
lete letter by letter, hold
down to delete an entire
word.
A Press.
/JDial number or pick out
·
from the Phonebook/Addressbook.
§Groups§ SMS to group
(p. 44).
§OK§ Confirm. Send the SMS to
§OK§ Return to Edit mode.
Display in the uppermost line:
™
abc/Abc/
ABC/123
SMS
1
739
Additional information
Insert pictures & sounds into text ......p. 43
SMS profile........................................ p. 57
A Message type, Validity period,
Service centre may be requested....p. 57
SMS status report............................p. 116
Enter special characters ....................p. 26
the service centre for
transmission. The sent
SMS is saved in the "Sent"
list.
SMS
™
We start at 8
T9 active.
Switch between upper-case/
lower-case letters and digits.
Display title.
Number of SMS messages
required.
Number of characters still
available.
739
1
Page 44

] SMS
43
Text menu
§Options§ Open text menu.
Send
Save
Picture& Sound
Text
modules
Format Line feed
Clear text
Insert
from...
T9 input
(p. 26)
Print via
IrDA
Send via ...
Enter recipient's phone
number/select from Phonebook/Addressbook, then
send.
Save composed text in draft
list.
Add pictures, animations
and sounds into message
(see following text).
Insert text module (p. 29).
Small font, Medium font,
Large font
Underline
Left, Right, Centre (align)
Mark text (highlight text us-
ing control key)
Delete the whole text.
Insert entry from Phonebook/Addressbook.
T9 preferred: Activate/de-
activate T9.
Input language: Select lan-
guage for text.
Send SMS message to a
suitable printer.
Select an SMS profile for
transmission (p. 57).
Picture&Sound
Insert pictures and sounds into
message.
J
§Options§ Open text menu at the
G
G
§Select§ Confirm.
F
When Fix animations/Fix sounds:
§Select§ the selection is added to
When Own anim./Own pictures/Own
sounds:
§Load§ the selection is displayed/
§Select§ the selection is added to
Write message.
end of a word.
Select Picture&Sound.
The menu contains:
Fix animations
Fix sounds
Own anim.
Own pictures
Own sounds
Select section.
The first entry of the
selected section is
displayed.
Scroll to entry required.
the SMS.
played back.
the SMS.
Page 45

44
T
Additional information
Playback only occurs if the destination
phone supports the EMS standard(p. 112).
In input mode, when sound is selected, it is
shown as a wildcard.
] SMS
SMS to group
You can send an SMS message as a
"circular" to a recipient group.
§Options§ Open menu.
Send Select.
§Groups§ Press. The Addressbook is
• Highlight individual entries.
• <Groups> Select, open a group and
• <Groups> Select. Select a group.
§Send§ Press. The first of the
§Send§ Transmission is started af-
opened in highlighting
mode (p. 113). There are
the following options:
highlight individual entries/all entries there.
highlighted recipients is
displayed. If this recipient
has several phone numbers, one number can be
selected.
§Skip§ Skip recipient.
ter confirmation.
Read SMS
]
Display indicates a new
SMS
.
_g
Service provider
25.04.2003 12:30
] Menu
< Press the left soft key to
read SMS message.
Date/time
el. no./sender
Message
F
§Reply§ See below.
§Options§ see p. 46.
Additional information
Pictures and sounds in SMS .............p. 43
T
Use §highlighted§ phone number/e-mail
address/WAP address ....................p. 115
25.04.2003 23:45
55536989876
Are we meeting tomorrow?
Reply Options
Scroll through message
line by line.
Message memory full ..............p. 114
Page 46

] SMS
45
Reply menu
§Reply§ Open reply menu.
Write mess.
Change
Answer is YES
Answer is NO
Call back
Delay
Thank you
When the SMS has been edited in
the edit mode, it can be saved or
sent with §Options§.
Create a new reply
text.
Edit received SMS or
add new text.
Add YES to the SMS.
Add NO to the SMS.
Add a standard text as
a reply to the SMS.
Ringtones, icons ...
You can receive ringtones, icons,
screensavers, animations and information on applications (p. 66) with
an SMS in which a link is displayed.
Please highlight this link and, by
pressing the Call key
download.
Please ensure that the HTTP profile
(p. 67) and the connection (p. 78)
are configured.
A, start the
Lists
All SMS messages are archived in
four different lists, according to their
status:
Inbox
§Menu§K]KInboxKSMS
The list of received SMS messages is
displayed.
]
Inbox
ƒ 0555123454
… Carol
… Mike
View Options
Draft
§Menu§K]KDraftKSMS
The list of not yet transmitted SMS
messages is displayed.
Unsent
§Menu§K]KUnsentKSMS
The list of concatenated SMS messages not yet completely sent is
displayed. Transmission can be
restarted.
Sent
§Menu§K]KSentKSMS
The list of sent SMS messages is
displayed.
Page 47

46
] SMS
Lists menu
Each list offers different functions:
§Options§ Open menu.
View
Reply
Delete
Delete all
Send
Change
Capacity
Mark
a.unread
Save to
9
Archive
Print via
IrDA
Send via
...
Picture&
Sound
View entry.
Directly answer incoming
SMS messages.
Delete selected SMS
messages.
Delete all SMS messages after confirmation.
Dial number or select from the
Phonebook, then send.
Open SMS message to edit.
Display free capacity on SIM
card/phone. In case of segments: number of concatenated SMS messages.
Mark message as unread.
Copy a highlighted phone
number to Phone/Addressbook.
Move SMS message to
archive.
Send SMS message to a suitable printer.
Select an SMS profile for
transmission (p. 57).
Save pictures or tones from
the SMS.
Archive
§Menu§K]KSMS archive
The list of SMS messages stored in
the phone is displayed.
Ñ\SMS
INBOX
DRAFT
UNSENT
Options Select
Unread
…
Read
ƒ
Draft
‚
Sent
„
Entry on SIM card.
¢
x
Different functions are available, depending on context:
Archive menu
§Options§ Open menu.
View
Send
Change
For further services, see Filesystem,
p. 108.
Concatenated message.
View entry.
Dial number or select from
the Phonebook, then send.
Open edit mode for
changes.
Page 48

] MMS
enables you to send texts, pictures
(also photos) and sounds in a combined message to another mobile
phone or to an e-mail address. All elements of an MMS message are
merged to form a "slide show".
Depending on your phone's settings,
you will receive either the complete
message automatically or notification that an MMS has been saved in
the network, giving sender and size
details. You may then download it to
your phone to read it.
Ask your service provider whether
this service is available. You may
need to register for this service
separately.
Writing/sending MMS messages
An MMS consists of the address
header and the content.
An MMS message can consist of a series of pages, each one of which may
include a combination of text,
sounds and pictures.
Texts can be written with the help of
T9 (p. 26).
Pictures and graphics that have been
produced with accessories such as
digital cameras can be attached in
JPEG, WBMP, GIF or GIF format. See
also Filesystem, p. 108.
47
Music is sent and received in a MIDI
file, single tones/sounds in an AMR
file. Up to 48 KB can be played back.
Navigation
G
Scroll page by page with the plus/minus side key, by pressing top/bottom.
§Menu§
Input fields:
To:
Subject: Enter MMS heading (up to
Picture: §Insert§ Press. The picture
Text: §Edit§ Press. Write text with
Sound: §Insert§ Press. The music list
Scroll line by line with the
control key.
K]KNew MMS
Ÿ MMS editor
To:
Subject: 1
º
·/
e-mail address of recipient(s).
40 characters)
list is opened for selection
(see also Filesystem,
p. 108).
the help of T9. Text menu,
see p. 48.
is opened for selection
(see also Filesystem,
p. 108).
Phone number/
J
Options
Page 49

48
] MMS
Duration: Enter length of display for
Attach other pages
§Options§ Open menu.
New slide Select.
Additional information
No more than 20 phone numbers/
addresses, (of 50 characters each) can be
addressed.
§Options§ MMS main menu ...............p. 48
Attach business card
§Options§ Open menu.
Extras Select.
individual pages (minimum 0.1 seconds).
F Scroll to Businesscard.
· Attach business card.
Attach appointment
§Options§ Open menu.
Extras Select.
F Scroll to Appointment.
é Import appointment from
calendar.
Check MMS
Check the MMS message before
sending it:
§Options§ Open menu.
Preview slide
View a single page.
Prev. message
Play back the whole MMS
in the display. Press any
key to break off.
Send MMS.
§Options§ Open menu.
Send Select.
Text menu
§Options§ Open menu.
Line feed
Save
Insert text
Clear text
T9 input
(p. 26)
Start new line.
Save MMS text.
Insert text module (p. 29).
Delete the whole text.
T9 preferred: Activate/
deactivate T9.
Input language: Select
language for text.
MMS menu
Different functions are available, depending on the context:
Page 50

] MMS
49
§Options§ Open menu.
Insert line
Save
Send
Insert from...
Clear text
New slide
Delete item
Delete slide
Preview slide
Slide list
Prev.
message
Extend address field by
one line.
Store MMS in the draft
list.
Send MMS.
Insert number from
Phonebook/Addressbook and appointments/
tasks.
Delete the whole text.
Insert new page behind
current one.
Delete element on a
page.
Delete page currently
displayed.
Playback of complete
page.
Display pages available
for selection.
Playback of complete
MMS. Press any key to
break off.
T9 input
(p. 26)
Attributes
Extras
T9 preferred: Activate/
deactivate T9.
Input language: Choose
language in which the
text is to be written.
Show Date:, Size:, Prio-
rität: of MMS.
Enter other features of
MMS and attach
Businesscard and
Appointment.
Page 51

50
] MMS
Receive MMS
‰
Indicates reception or notification of an MMS
_g
Service provider
25.04.2003 12:30
‰
.
Menu
< Press the left soft key to
read the MMS.
Depending on the setting, (p. 58)
the
• complete MMS is received.
• the notification is opened. Press
§Receiving§ to receive the complete
MMS.
Press any key to break off function.
Read MMS
§Play§ Automatic presentation
G
Scroll page by page with the plus/minus side key, by pressing top/bottom.
J
of the MMS. Use any key
to cancel.
Scroll page by page with
the control key.
Call up individual pages
directly by number key.
Attachment
A single MMS can contain several attachments.
§Options§ Open menu.
Attachment
G
§Open§ The attachment is
§Save§ The attachment is saved
Select.
Select attachment.
opened with the available
application.
under a name.
Pictures and sounds
Pictures and sounds received in an
MMS can be saved separately. To do
this, stop the MMS by pressing any
key, or alternatively scroll through to
the required page.
§Options§ Open menu.
Content Select.
Proceed as for attachments, as described
above. Show as icons at
the top of every page.
Functions for editing MMS can be found
under §Options§.
Page 52

] MMS
51
Lists
All MMS messages are saved in four
different lists:
Inbox
§Menu§K]KInboxKMMS
The list of MMS messages and notifications received is displayed. To receive an MMS subsequently, open
notification and press §Receiving§.
Draft
§Menu§K]KDraftKMMS
The list of stored drafts is displayed.
Unsent
§Menu§K]KUnsentKMMS
The list of the MMS messages not yet
completely transmitted is displayed.
Sent
§Menu§K]KSentKMMS
The list of sent MMS messages is
displayed.
Lists menu
Each list offers different functions:
§Options§ Open menu.
Play
Change
Reply
Send
Receive
MMS
Receiv.all
MMS
Forward
Delete
Delete all
Mark
a.unread
Save to 9
Attributes
Play back MMS.
Open edit mode for
changes.
Reply to MMS immediately.
Send MMS.
Start inward transmission
of MMS when only notification is highlighted (p. 58).
Start receipt of all MMS
messages.
Forward MMS to new
recipients.
Delete selected MMS
messages.
Delete all entries after
confirmation.
Mark MMS as unread.
Copy phone number/e-mail
address into Phonebook/
Addressbook.
Information on MMS is displayed:
• Sender
•Arrival time
•Subject
•Size
•Priority
Page 53

52
] MMS
Capacity
Preview
slide
Slide list
Attachment
Content
Save
Icon: Meaning
MMS unread
‰
MMS read
‡
MMS draft
†
MMS sent
MMS read and forwarded
Ý
MMS read with despatched
Þ
confirmation
Notification unread
Û
Notification read
Ü
Size of current MMS as well
as capacity still available
are shown.
Play back current page.
Display pages available for
selection.
Open list of attachments received.
Selection of page contents
to be archived, such as picture or sound.
Store MMS in outbox list.
Page 54

53
(client). You can use it to create and
receive e-mails.
Write/send e-mails
§Menu§K]KNew e-mail
Enter e-mail address
/JTo: E-mail address of
·
* Press briefly to write special charac-
ters such as @ (p. 26).
T9 helps you write e-mails (p. 26).
J
J
§Options§ Open menu.
Send Send e-mail.
recipient(s).
Cc: E-mail address for the
copy recipient.
Bcc: E-mail address for
blind copy recipients (the
other recipients are not
shown the Bcc recipient).
Attach.: See below.
Subject: Enter e-mail
heading (up to
200 characters).
Content: Enter text.
Add attachments
A file from the file system (e.g. ringtone) can be inserted in an e-mail as
an attachment (p. 108).
§Attach.§ Open file system.
Select file to be inserted.
§Mark§ Highlight file.
§OK§ Copy file as an
attachment.
E-mail editor menu
§Options§ Open menu.
Insert line
Delete line
T9 input
(p. 26)
Insert from...
Attach.
Save
Send
Send later
Extend address field by
one line.
Delete line in address field.
T9 preferred: Activate/
deactivate T9.
Input language: Select
language for text.
Insert entry from Phonebook/Addressbook.
(see above).
Save in draft list.
Establish connection with
server and send e-mail. If
necessary, select different
access (p. 78).
Transfer to outbox list to be
sent later.
Page 55

54
] E-mail
Receive e-mail
§Menu§K]KInbox
KReceive e-mail
Before an e-mail can be read, it must
be retrieved from the server. The
service provider is dialled with the
default access profile (p. 78) and all
e-mails are transmitted to the inbox
list.
Additional information
The e-mail client always receives complete
messages including header, content and, if
applicable, attachments. You can restrict
the size of the received messages (p. 59).
A maximum of 50 e-mails can be stored in
the phone. E-mail size is limited to 99 KB.
Synchronising with a PC
With XTNDConnect
synchronise your incoming/outgoing
e-mails with Outlook® or Lotus Notes™.
E-mail with attach-
”
‹
Š
Œ“
®
PC (p. 119) you can
ment
Meaning
Unread
Read
Draft
Sent
Read new e-mail
§Menu§K]KInboxKE-mail
G
§View§ The e-mail is displayed.
#
G
The left soft key offers different
functions depending on which text
area you have selected:
§Save§ Save attachment
§Reply§ Reply to sender.
§Link§ Start WAP browser and
Select e-mail.
Switch between small,
normal and large font
sizes.
Scroll line by line with the
control key.
Scroll page by page with
the plus/minus side key,
by pressing top/bottom.
E-mail addresses/phone
numbers in the message
are §highlighted§ and can be
stored in the Addressbook.
A Dial phone number or
start new e-mail.
(e.g. bitmap).
visit URL (p. 63).
Page 56

] E-mail
55
Read menu
§Options§ Open menu.
Reply
Reply to all
Forward
Change
Delete
Delete all
Font size
Save attach.
The original e-mail is retrieved. The sender is entered as recipient and can
be changed as can the
header and CC.
As above, but all recipients
are listed in the "Send to"
field.
The original e-mail is retrieved. Enter the new recipient to whom it should be
forwarded.
To edit, open e-mail in edit
mode.
Delete selected e-mail.
Delete all e-mails in the inbox or outbox.
Select font size.
The attachment is stored in
the file system (Filesystem,
p. 108).
Lists
All e-mails are stored in four different lists:
Inbox
§Menu§K]KInboxKE-mail
The list of received e-mails is
displayed.
G
§View§ The e-mail is displayed for
Draft
§Menu§K]KDraftKE-mail
The list of draft e-mails is displayed.
Unsent
§Menu§K]KUnsent
The list of not yet transmitted emails is displayed.
§Menu§
Send all e-mails queued for transmission to the server.
§Menu§
Transmit all e-mails queued for
transmission to the server and
receive all new e-mails from the
server.
Select e-mail.
reading.
KE-mail
K]KUnsent
KSend e-mail
K]KUnsent
KSend/rec. mail
Page 57

56
] E-mail
Sent
§Menu§K]KSentKE-mail
The list of transmitted e-mails is
displayed.
Lists menu
Each list offers different functions:
§Options§ Open menu.
View
Change
Reply
Reply to all
Forward
Delete
Delete all
(p. 54)
Edit e-mail.
The original e-mail is retrieved. The sender is entered as recipient and can
be changed as can the
header and CC.
As above, but all recipients
are listed in the "Send to"
field.
The original e-mail is retrieved. Enter the new recipient to whom it should be
forwarded.
Delete selected e-mail in
phone.
Delete all e-mails in phone.
Sort
Send e-mail
Receive
e-mail
Send/rec.
mail
Sort
• by subject
• by sender
• by recipient
• by date/time
• by status
Not all sort criteria are possi-
ble in all lists.
Establish connection with
server and send e-mails.
Establish connection with
server and receive incoming
e-mails.
Establish connection with
server, send e-mails and receive incoming e-mails.
Page 58

] Message profiles
57
SMS profile
§Menu§K]KSetupKSMS
Up to 5 SMS profiles can be set.
The transmission characteristics of
an SMS are defined in these. The presetting depends on the SIM card
inserted.
G Select profile.
§Options§ Open menu.
Change sett.
Service
centre
Recipient
Message
type
Select.
Enter or change the servicecentre phone numbers as
supplied by service provider.
Enter the standard recipient
for this transmission profile or
select from Phonebook.
Manual
The message type is requested for each message.
Standard text
Normal SMS message.
Fax
Transmission via SMS.
E-mail
Transmission via SMS.
New
You may need to obtain the
required code number from
your service provider.
Validity
period
Status
report
L
Direct
reply
SMS via
GPRS
L
Save aft.
send
Select the period in which the
service centre is to try to deliver the message:
Manual, 1 hour, 3 hours,
6 hours, 12 hours, 1 day,
1 week, Maximum
*) Maximum period that the
service provider permits.
You will receive confirmation
whether delivery of a message has been successful or
unsuccessful. This service
may be subject to a charge.
The reply to your SMS mes-
L
sage is handled via your service centre when Direct Answer
is activated (for information
please contact your service
provider).
Send SMS automatically by
GPRS (if available).
Requirement: GPRS is activated (p. 77). Ensure that
your service provider offers
this function.
Sent SMS messages are
saved in the Sent list.
Activate profile
G Select profile.
§Activate§ Press to activate profile.
Page 59

58
] Message profiles
MMS profile
§Menu§K]KSetup KMMS
A number of MMS profiles can be selected. The transmission characteristics of an MMS are defined in these.
G Select profile.
§Options§ Open menu.
Change sett.
Expiry time
Def.
priority
Def.
duration
Retrieval
Select.
Select the period in which
the service centre is to try to
deliver the message:
Manual, 1 hour, 3 hours,
6 hours, 12 hours, 1 day,
1 week, Maximum*
*) Maximum period that the
service provider permits.
Send priority: Medium,
High, Low
Length of display for an
MMS page (standard
requirement).
Receive complete MMS or
only notification of arrival.
Automatic
Receive complete MMS immediately.
Auto.homenet
Receive complete MMS immediately in home network
Manual
Only the notification is
received.
MMS
relaysrv.
IP settings
Conn.profile:
MMS relay URL, e.g.
http://www.webpage.com
IP address: Enter IP
address.
Port: Enter port number.
IP address: Enter IP
address.
Port: Enter port number.
These settings can be different from those of the WAP
browser.
Select or set access profile
(p. 78).
Activate profile
G Select profile.
§Activate§ Press to activate profile.
Page 60

] Message profiles
59
E-mail settings
§Menu§K]KSetup
KE-mail
KSelect function.
Before using this service, you must
set the server access and your e-mail
options. The data for these may already have been entered. If not, your
service provider will supply you with
the relevant information. See also on
the Internet at:
www.my-siemens.com/sl55
Additional information
Your service provider must support the
following protocols for successful data
exchange with the e-mail server:
POP3, IMAP4 and SMTP or eSMTP.
E-mails will be MIME-encoded for
transmission.
Encryption of e-mail transmission (SSL,
APOP) is not possible at present.
Accounts
5 accounts can be defined. If no access data have been defined for the
account, the entry card is displayed.
Alternatively:
§Options§ Press.
Change sett.
User settings
Provider
User name:
E-mail addr.: *
Reply-t.addr.:
User ID: *
Password: *
*Your service provider will supply you with this
information.
Mail settings
Downl. only
mails smaller
than
<10> KB
Leave copy on
server?
Types
POP3 server: *
Select, then:
Select provider.
Your name.
Your e-mail address,
e.g.:name@domain.abc
Additional e-mail address for replies.
Your user ID.
Your password.
Set maximum size for incoming e-mails.
E-mails remain on the
server after they have
been retrieved.
POP3 or IMAP4.
Enter Internet address if
the server type is POP3
and SMTP.
Page 61

60
] Message profiles
POP3 Port: *
IMAP4 *
IMAP4 Port: *
SMTP server: *
SMTP port: * (Default: 25)
SMTP
Authentic.:
SMTP
Password:
*Your service provider will supply you with this
information.
§OK§ Save and activate
(Default: 110)
Enter Internet address if
the server type is IMAP4
and SMTP.
(Default: 143)
Enter Internet address.
Authentication: Yes/No
A user password will be
required if "Authentication" is set to Yes.
settings.
General sett.
Enter the preset default of an e-mail
address for blind-copy recipient
(Bcc).
Activate profile
G Select profile.
§Activate§ Press to activate profile.
Voice message
These functions are described in a
separate chapter (see p. 41).
CB services
These functions are described in a
separate chapter (see p. 61).
Page 62

] CB services
61
§Menu§K]KSetup
KCB services
Some service providers offer information services (info channels, cell
broadcast). If reception is activated,
your "Topic list" will supply you with
messages on the activated topics.
Broadcast
You can activate and deactivate the
Cell Broadcast (CB) service. If the CB
service is activated, standby time for
the phone will be reduced.
Read new CB
All unread CB messages are displayed.
Topic list
Add an unrestricted number of topics to this personal list from the topic
index (Topic index).You can preset 10
entries with their channel number
(ID) and, if necessary, their names.
New topic Select.
• If no topic index (Topic index) is
available, enter a topic with its
channel number and confirm
with §OK§.
• If the topic index has already been
transmitted, select a topic and
confirm with §OK§.
Channel: Select
§Options§ Open list menu.
If a topic is selected in the list you
can view it, activate/ deactivate it,
edit it or delete it.
Auto display
CB messages are displayed in standby mode, longer messages are
scrolled automatically. This display
can be activated/deactivated for all
or only new messages.
For "full page view":
#
press
Topic index
The list of topics is displayed
for you to choose from. If nothing is
displayed, you must enter the channel numbers (ID) manually (Topic
list). Please contact your service pro-
vider for details.
CB languages
Receive Cell Broadcast messages in
only one specific language or in all
languages.
Displays
, then §View CB§.
L
p,o Topic activated/deactivated.
…
New messages received on
the topic.
ƒ Messages already read.
Page 63

62
É Surf & fun
Internet browser (WAP)
Get the latest information from the
Internet that is specifically adapted
to the display options of your phone.
In addition, you can download
games and applications to your
phone. Internet access may require
registration with the service
provider.
Internet access
§Menu§K
The browser is activated as soon as
you call up the function. The functions of the soft keys vary, depending on the internet page, for example "link" or "menu". The contents of
the option menus are also variable. If
necessary, set the way in which WAP
access should be made (see Browser
menu, Setup, Start with..., p. 63).
For example the start menu appears:
G
§Select§ Confirm.
É
KInternet
Í Start menu É
1 Home
2 Bookmarks
Resume
3
Select required function.
L
Select
Start menu
Home
Bookmarks
Resume
Inbox
Profiles
Exit browser
Additional information
Operating instructions ..................... p. 117
The connection to the provider's portal is set up. This
may be defined or pre-set
by your service provider.
Up to 50 URLs stored in
the phone for fast access.
Call up recently visited
pages that are still in
memory.
Inbox for messages from
the WAP server (WAP
push).
The list of profiles is displayed for activation/setting (p. 64).
Close browser and clear
down connection.
End connection
B
Your Internet browser is licensed by:
Hold down to clear down
the connection and to
close the browser.
Page 64

É Surf & fun
63
Browser menu
If the browser is active, the menu
can be activated as follows:
A
or
E
Home
Bookmarks
Resume
Go to...
Reload
Inbox
Disconnect
Save bitmap
More ...
Exit browser
Press
Í confirm.
The connection to the provider's portal is set up. This
may be defined or pre-set
by your service provider.
Up to 50 URLs stored in the
phone for fast access
(p. 118).
Call up most recently visited page still in memory.
Enter URL to access WAP
page directly, e.g.
wap.my-siemens.com
Select from list of most
recently visited WAP
addresses.
Reload page.
Inbox for messages from
the WAP server
(WAP push).
End connection.
Save a picture on the page.
See below.
Close browser and clear
down connection.
More ... (in menu)
Profiles
Setup Font size
Reset
About
Openwave
The list of profiles is displayed for activation/setting
(p. 64).
Protocol parameters
•Push
• Push can force online
• Timeout for unanswered
network requests
Security
• Connection prompt
• Secure prompt
• Current certificate
•CA certificates
• Private Key PINs
• Encryption
Start with...
•Start menu
• Browser menu
•Home
• Resume
• Bookmarks
Restart session and clear
cache.
Display browser version.
Page 65

64
É Surf & fun
Notes
Í Browser menu.
É Offline.
Ê Online.
Ë GPRS Online.
Ì No network.
*
Select special characters,
such as @, ~, \, see p. 26.
or
0 press repeatedly for:
. ,? ! @ / & ~ + - =
WAP profiles
§Menu§K
Preparation of the phone for WAP Internet access depends on the current
service provider:
• The settings have already been in-
• Access profiles for a number of
• The access profile must be set
If necessary, check with your service
provider for details.
É
KInternetKProfiles
stalled by provider. You can start
immediately.
providers have already been set.
Then select and activate profile.
manually.
Activate WAP profile
You can change the current profile
each time you access the Internet.
G
§Select§ Activate. The current pro-
Set WAP profile
Up to 5 WAP profiles can be set (if
not barred by provider). The entries
may vary depending on the service
provider:
Select profile.
file is selected.
G Select profile.
§Edit§ Open to make settings.
Profile name
WAP param.
IP address:
Port:
Homepage:
Due time:
Account
sett.
*) depends on service provider, if necessary
enter 2nd IP address and 2nd port
§Save§ Save settings.
Enter/change name.
Enter IP address.*
Enter port number.*
Enter homepage, if not set
by the service provider.
Time in seconds after which
a connection should be ended if no input or data exchange takes place.
Select or set access profile
(p. 78).
L
Page 66

É Surf & fun
65
Games & more
Download games and other applications. You are advised about relevant
applications on the Internet.
Once you have selected a game or
application you can start to download it immediately. Then you can
use the application.
Most applications include
instructions.
Additional information
To download applications, the WAP
profile (p. 64), HTTP profile (p. 67) and
access (p. 78) must be configured.
Java™ information .......................... p. 114
Sounds (ringer)/silent alert on/off...... p. 70
Applications and games can be
found at:
wap.my-siemens.com
or on the Internet at:
www.my-siemens.com/city
Games and applications
Applications and links that are already stored on the phone are found
under:
§Menu§
KÉKGames & more
§
\
¦ Application
§
Game
É MySiemens
Options Select
Different functions are available
depending on which entry is highlighted:
§
Carry out game/application offline
§Select§ Loadable application can
be started immediately.
¦ Load game/application online
§Select§ Only description file
(p. 114); application has
still to be loaded.
É Load link (optional)
§Internet§ The selected Internet
page is loaded.
Page 67

66
É Surf & fun
Receive information
If information required, say, by an
application that has already been installed, is received via SMS, the
symbol appears in the display. By
pressing the left soft key, the relevant application is started and the information is processed.
Additional information
The following key control is used for many
games (virtual joystick):
13
2
4
7
5
8
6
9
¦
Games&More menu
All functions required for editing and
managing your applications and
folders are found in the Options
menu:
§Options§ Open menu.
Start
Download
New folder
Delete
Start application.
An application is downloaded from the Internet and
installed.
Create and name new
folder.
Delete selected application/
folder.
Delete all
Rename
Move
HTTP
profile
Reinstall
More info
Details
Sort
Capacity
Delete all applications/folders after confirmation.
Rename highlighted applications/folders.
Move applications between
folders.
The list of profiles is displayed for activation/setting
(p. 67).
Reinstall an application
(update).
Download further instructions via Internet (WAP), if
available.
Show details of the application/folder (name, version,
size, path, producer, date).
Set sort criteria (alphabetical, time).
Display maximum and
available capacity.
Page 68

É Surf & fun
HTTP profile
§Menu§K
§Options§ Open menu
G
Preparation of the phone depends
on current service provider:
• The settings have already been in-
• Access profiles have already been
• The access profiles have to be set
If necessary, check with your service
provider for details.
É
KGames & more
Select HTTP profile.
stalled by provider. You can start
immediately.
set by your provider. Then select
and activate profile.
manually.
67
WAP can be used to download applications from
the Internet. Downloading or running applications
will not affect or change the software already installed on your Java™-enabled mobile phone.
Siemens excludes all warranty and liability claims
in respect of or in connection with any applications subsequently installed by the customer and
any software not included in the original delivery
package. This also applies to functions enabled
subsequently at the customer's instigation. The
purchaser bears sole risk for the loss of, damage
to, and any defects arising in, this device or the
applications or software and for any direct damage or consequential damage of whatever nature
resulting from the use of these applications or
software. For technical reasons, such applications or software and subsequent enabling of certain functions are lost in the event of the device
being replaced/re-supplied and may be lost if it is
repaired. In these cases the purchaser will need
to download the application again or re-enable it.
Siemens does not warranty or guarantee or accept any liability for the customer's ability to
download or enable applications again or to do so
free of charge.
Page 69

68
m Setup
Display
§Menu§KmKDisplay
KSelect function.
Language
Set the language of the display text.
When "automatic" is set, the language of your service provider is
used. If a language that you do not
understand happens to be set, the
phone can be reset to the language
of your service provider with the following input (in standby mode):
# 0 0 0 0 #
*
T9 input
(see also p. 27)
T9 preferred
Activate/deactivate intelligent text
entry.
Input language
Select language for text entry. Languages with T9 support are marked
by the T9 symbol.
Wallpaper
Set background graphic for display.
A
Logo
Choose picture to be displayed instead of the provider logo.
Color scheme
Select colour scheme for the whole
service system.
Activate colour scheme
G
§Select§ Activate.
Load colour scheme
Up to three colour schemes can be
included in the selection list. These
can be loaded by WAP, for example.
§Options§
Load Select colour scheme.
Select colour scheme.
Open menu.
Page 70

m Setup
69
Screensaver
The screensaver shows a picture in
the display when a period set by you
has elapsed. The function is ended
by an incoming call or by pressing
any key.
Enable
Style
Bitmap
Preview
Timeout
Security
Auto key lock
Additional information
You can also receive individual logos,
screensavers and animations by
SMS (p. 42), MMS (p. 47) or WAP (p. 62).
See also My phone (p. 19).
Activate/deactivate
screensaver.
Analog clock, Bitmap
or Energy saving.
Select picture in file
system.
Display screensaver.
Set period after which the
screensaver starts.
Phone-code protected termination of screensaver.
The keypad is locked
when the screensaver
starts.
Start up anim.
Select animation to be shown when
phone is switched on.
Shutdn anim.
Select animation to be shown when
phone is switched off.
Own greeting
Enter greeting to be displayed instead of animation when phone is
switched on.
§Edit§ Activate/deactivate.
J
§OK§ Confirm changes.
Delete old message and
create new message.
Big letters
You can choose between two font
sizes for the display.
Illumination
Set display light brighter/darker. The
darker the setting the longer the
standby time.
G
Press the control key repeatedly to adjust up or
down.
Contrast
Set display contrast.
G
Press the control key repeatedly to adjust up or
down.
Page 71

70
m Setup
Audio
§Menu§KmKAudio
KSelect function.
You can set the tones to match your
needs.
Ringer setting
On/Off Activate/deactivate all
Beep Reduce ringtone to a
Additional information
k
j Display: Ringer off.
Switch off ringer ..............................p. 116
Silent alert
To avoid the disturbance caused by a
ringing phone, you can activate the
silent alert function as an alternative. The silent alert can also be activated in addition to the ringer (e.g.
in noisy environments). This function is deactivated when the battery
is charged.
tones.
short signal (beep).
Display: Beep.
Volume
Set different volumes for types of
call/functions.
G
§Select§ Press. The ringtone is
G
§OK§ Confirm.
Additional information
Please make sure you have accepted the
call before holding the phone to your ear.
This will avoid damage to your hearing from
loud ringtones!
If two independent phone numbers are registered on your phone, you can set different
volumes for them (p. 116).
Select:
d Calls
Group calls
Other calls
Alarm
Alarm clock
Messages
Cell broadcast
Start melody
End melody
ProSlide (common setting for
opening and closing melody)
played.
Set volume.
Page 72

m Setup
71
§Menu§KmKAudio
KSelect function.
Melodies
Set different ringtones for types of
call/functions.
G
§Select§ Press. The melody is
G
§OK§ Confirm.
Additional information
Individual ringtones can be sent to you via
SMS (p. 42) or you can download them via
WAP (p. 62). See also My phone (p. 19).
Select:
d Calls
Group calls
Other calls
Alarm
Alarm clock
Messages
Cell broadcast
Start melody
End melody
Open. melody
Closing melody
played.
Choose ringtone.
Call screening
Only calls from phone numbers that
are in the Phonebook/Addressbook
or in a group are signalled audibly or
by silent alert. Other calls are merely
displayed.
If you do not accept these calls, they
are diverted to your mailbox
(if set, p. 73).
l
Display in standby mode:
when call screening is activated.
L
Key tones
You can set the type of acoustic key
tone:
Click or Tone or Still
Minute beep
During a call, you will hear a beep after every minute as a reminder of the
time elapsed. The recipient does not
hear this beep.
Info tones
Set service and alarm tones:
On/Off Activate/deactivate tones.
Extended If switched on, a wider
• End of menu,
• Maximum text length reached,
• Network connection broken.
range of service tones is
available, e.g.:
Page 73

72
m Setup
Keys
§Menu§KmKKeys
KSelect function.
Any to answer
Incoming calls can be accepted by
pressing any key.
B
Hold down.
).
(except
Auto key lock
If activated, the keypad is locked automatically if no key has been
pressed for one minute in standby
mode. This prevents the phone from
being used accidentally. However,
you can still be called and you can
still make an emergency call.
ProSlide lock
Enable/disable automatic keylock
when closing keypad. The keys are
always unlocked automatically when
opening the keypad.
Additional information
The keypad can also be directly locked and
unlocked in idle state.
as follows.
#
Key tones
You can set the type of acoustic key
tone:
Click or Tone or Still
Page 74

m Setup
73
Phone setup
§Menu§KmKPhone setup
KSelect function.
Call waiting
If you are registered for this service,
you can check whether it is set and
you can activate/deactivate it (see also p. 23).
Hide ID
When you make a call, your phone
number can be displayed on the recipient's display (depending on the
service provider).
To suppress this display, you can enable the "Hide ID" mode for all subsequent calls or just for the next call.
You may need to register separately
with your service provider for these
functions.
Divert
You can set the conditions under
which calls are diverted to your mailbox or other numbers.
Set up call divert (example):
The most common condition for call
divert is:
L
L
Unanswered
G
§Select§ Press.
Set Select.
J
Or
Select Unanswered (includes the Not reachable,
No reply, Busy conditions,
see below).
Enter the phone number
to which the caller will be
diverted (if not already
done)
L
· Select this phone number
from the Addressbook/
Phonebook or via §Mailbox§.
§OK§ Confirm. After a short
Alle Anrufe
All calls are diverted.
pause, the setting is confirmed by the network.
L
n Icon in top line of display
in standby mode.
Not reachable
Di ve rt o ccur s i f ph one i s s wit ch ed o ff
or is out of range.
Page 75

74
m Setup
No reply
A call is only diverted after a delay
that is determined by the network.
The period can be set to a maximum
of 30 seconds in 5 second intervals.
Busy
Divert occurs if a call is in progress. If
Call waiting is activated (p. 73), you
will hear the call waiting tone during
a call.
Receiving fax
Fax calls are diverted to a
number with a fax connection.
Receiving data
Data calls are diverted to a
phone number with a PC connection.
Status check
You can check the current divert status for all conditions.
After a short pause, the current situation is transmitted by the network
and displayed.
L
L
p Condition set.
o Not set.
s
Display if status is unknown (e.g. with a new
SIM card).
Clear all
All set diversions are cleared.
Additional information
Note that the divert is stored in the network
and not in the phone (for example when the
SIM card is changed).
Check condition or delete it
First select the condition.
§Select§ Press.
Check status
Or
Delete Select.
Reactivate divert
The last divert has been stored. Proceed as
with "Set divert". The stored phone number
is displayed. Confirm phone number.
Edit phone number
Proceed as with "Set divert". When the
stored number is displayed:
§Delete§ Press. The phone number is
Enter new number and confirm.
Select.
deleted.
L
Page 76

m Setup
75
§Menu§KmKPhone setup
KSelect function.
Fact. settings
The phone is reset to the default values (factory setting) (does not apply
to SIM card or network settings).
Alternative input in standby mode:
# 9 9 9 9 #
*
A
Filesystem
(Phone code protected)
Format
The file system memory is formatted
and all data that has been saved is
deleted, including Addressbook,
ringtones, organiser entries, etc.
Save important data in advance
(p. 119).
Clean up
The file system is defragmented.
Phone identity
The phone identity number (IMEI) is
displayed. This information may be
useful for customer service.
Alternative input in standby mode:
# 0 6 #
*
Check software version p. 116.
Auto off
The phone switches off each day at
the set time.
Activate:
§Time§ Press.
J
§OK§ Confirm.
Deactivate:
§Manual§ Press.
§OK§ Confirm.
Enter time
(24-hour clock).
Page 77

76
m Setup
Clock
§Menu§KmKClock
KSelect function.
Time/date
The clock must be set to the right
time once at start-up.
§Edit§ Press.
J
Additional information
If the battery is removed for longer than approx. 30 seconds, the clock must be reset.
Setting date format:
DD: Day (2-digit)
MM: Month (2-digit)
YYYY: Year (4-digit)
Time zones
Set the time zone for your area.
F
§Set§ ... press to set.
First enter the date (day/
month/year), then the
time (12 hours, including
seconds).
Select the required time
zone from list ...
§Options§
Set
Rename
DST
Auto timezone
L
View
Open menu
Set time zone.
Assign a new name to time
zone.
Activate/deactivate daylight
saving. When daylight saving is activated a sun icon
appears on the display.
The time zone is switched
automatically to local time
by the network.
Display the selected time
zone with name and date.
.
Date format
DD.MM.YYYY or MM/DD/YYYY
Time format
24h or 12h.
Show clock
Activate/deactivate time display in
standby mode.
Buddhist year
Switch to the Buddhist date (not on
all model variants).
Page 78

m Setup
77
Connectivity
§Menu§KmKConnectivity
KSelect function.
GPRS
(General Packet Radio Service)
GPRS is a new method for transmit-
ting data faster in the mobile network. Use GPRS and if the network
has sufficient capacity, you can be
connected to the Internet permanently. Only the actual transmission
time is charged by the network
operator.
Some service providers do not yet
support this service.
§Yes§ / §No§ Activate or deactivate
GPRS function.
Shown in display:
« Activated and available.
ª Logged on.
Connection briefly lost.
L
GPRS info
Display of information on connection status.
IrDA
Your phone has an infrared interface. You can use this to exchange
data (Addressbook entries, business
card, SMS, organiser entries) with
other devices that are also equipped
with an infrared interface.
The infrared interface is on the right
side of the phone. The distance between the two devices must not exceed 30 cm. The infrared windows of
the two devices should be placed as
close to one another as possible.
§Edit§ Activate/deactivate IrDA.
Shown on the display:
When activated.
¬ During the transfer.
Page 79

78
m Setup
§Menu§KmKConnectivity
KSelect function.
Data services
For the MMS, Wap and Mail,Java,Rms
applications at least one connection
profile must be set up and activated.
G Select profile.
§Options§ Open menu.
Change sett.
For CSD (Circuit Switched Data)
CSD settings
If it has not been pre-installed, enter
the data or enter the required settings (your service provider will supply you with information on this):
§Edit§ Press.
Dial-up
number
Call type:
Login name:
Password:
DNS1 / DNS 2:
§Save§ Save settings.
Select, then:
Select.
Enter ISP number.
Select ISDN or analogue.
Enter login name.
Enter password (shown
as a series of asterisks).
(optional).
For GPRS
(General Packet Radio Service)
GPRS settings
You can activate GPRS for the profile
and change the settings here. You
can only start to use GPRS once you
have activated GPRS on your phone
(p. 77).
§Edit§ Press.
APN:
Login name:
Password:
DNS1 / DNS 2:
§Save§ Save settings.
Select.
Enter service provider
address.
Enter login name.
Enter password (shown
as a series of asterisks).
(optional).
HTTP profile
Preparation of the phone depends
on current service provider:
• The settings have already been installed by your provider. You can
start immediately.
• Access profiles have already been
set by your provider. Then select
and activate profile.
• The access profiles must be set
manually.
If necessary, check with your service
provider for details.
Page 80

m Setup
79
§Menu§KmKConnectivity
KSelect function.
Fax/data mod.
Fax/data mode using a PC
With the phone and a connected PC,
you can transmit and receive faxes
and data. Appropriate software for
fax and data communication must
be available on your PC and there
must be a connection to the phone.
Fax and data services must be enabled by the service provider. There
are variations in fax and data reception, depending on the network.
Please ask your service provider
about this.
§Edit§ Set the required mode.
Rec fax/data
Your service provider has given
you a number for telephoning and a
fax/data number.
The call is signalled by a special ringtone and the type of call (fax or data)
is displayed.
Now start the communication program in your PC to receive the fax/
data.
L
Send vce/fax
Set this function on the phone before
transmission so that you can switch
from voice mode to fax mode.
While the connection is being set up,
the following function is available
for two seconds:
§Voice/fx§ Switch to Send vce/fax
Voice/fax rec
(Only if no special fax or data number
is available).
Start the required communication
program on your PC and select the
function on the phone during the call
(the PC will take over the connection).
End transmission
End transmission with PC software
and/or press
mode; you may now send
a fax.
.
B
L
Authentication
§Edit§ Activate encrypted WAP
dial-up (CHAP Challenge
Authentication Procedure) or deactivate it (PAP
Personal Authentication
Procedure).
Page 81

80
m Setup
Security
§Menu§KmKSecurity
KSelect function.
The phone and SIM card are protected against misuse by several security
codes.
Codes
PIN control, Change PIN, Change PIN2,
Chg.phonecode (p. 18).
Babysitter
(Phone code protected)
Only one phone number can be di-
alled. Hold down the right soft key
(p. 25).
Only ‚
(PIN 2 protected)
Dialling options are restricted to SIM-
protected phone numbers in the
Phonebook. If only area codes are
entered, relevant phone numbers
can be added to these manually
before dialling.
If the SIM card does not support PIN
2 input, the whole Phonebook can be
protected with the phone code.
L
Last 10 only
(Phone code protected)
Only phone numbers from the call
list of "dialled numbers" (p. 39) can
be dialled. This list can be filled with
phone numbers specifically for this
purpose: First delete the call list,
then create "new entries" by dialling
phone numbers and cancelling before the connection is established.
This SIM only
(Phone code protected)
By entering a phone code, the phone
can be linked to a SIM card. Operation using a different SIM card is not
possible without knowing the phone
code.
If the phone is to be used with a different SIM card, enter the phone
code when requested.
L
L
Page 82

m Setup
81
§Menu§KmKSecurity
KSelect function.
Barrings
Barring restricts the use of your SIM
card (this is not supported by all service providers). You need a 4-digit
password which your service provider will give you. You may need to
register each barring separately with
your service provider.
All outgoing
All outgoing calls except emergency
numbers 999 and 112 are barred.
Outgo internat
Only national calls can be made.
Out.int.x home
International calls are not permitted.
However you can make calls to your
home country when abroad.
All incoming
The phone is barred for all incoming
calls (forwarding of all calls to mailbox provides a similar effect).
When roaming
You do not receive calls when you
are outside your home network. This
means that no charges are incurred
for incoming calls.
L
Status check
The following information can be
displayed after a status check:
p Barring set.
o Barring not set.
s
Clear all
All barrings are deleted. A password
which the service provider will give
you is needed for this function.
Status unknown (e.g.
new SIM card).
Page 83

82
m Setup
Network
§Menu§KmKNetwork
KSelect function.
Line
This function is only displayed if it is
supported by the service provider.
Two separate phone numbers must be
registered on the phone.
Select
Select phone number in current use.
‘
Additional information
Settings for phone numbers............ p. 116
Block line
(Phone code protected)
You may limit usage to one phone
number.
Display current phone
number.
Network info
The list of GSM networks currently
available is displayed.
²
Indicates forbidden service providers (depending
on SIM card).
L
Choose network
Network search is restarted. This is
useful if you are not on your home
network or want to register on a dif-
ferent network. The network list is rebuilt when Auto network is set.
Auto network
Activate/deactivate, see also Choose
network above. If "Automatic net-
work" is activated, the next network
on the list is dialled in ranking order
of your "preferred networks". Alternatively select a different network
manually from the list of the available GSM networks.
Pref. network
Enter your preferred service providers here for when you leave your
home network (e.g. if there are differences in price).
Additional information
If the signal strength of the preferred network is inadequate when you switch on the
phone, the phone may register in a different
network. This can change when the telephone is next switched on or if another network is selected manually.
Page 84

m Setup
83
Your service provider is displayed:
§List§ Display list of preferred
Create new entry:
• Select empty line, press §Entry§,
Change/delete entry:
• Select entry, press §Change§, then
Band selection
Select either GSM 900, GSM 1800 or
GSM 1900.
networks.
then select another entry from the
list of service providers and confirm.
select another entry from the list
of service providers and confirm
or press §Clear§.
L
Fast search
When this function is active, network reconnection is speeded up
(and standby time is reduced).
§Menu§
KmKNetwork
KSelect function.
User group
Depending on service provider, you
can create groups with this service.
These can have access to internal
(company) information, for example, or special tariffs apply. The details can be clarified with your service provider.
Active
Activate/deactivate function. "User
group" must be deactivated for normal phone use (phone code, p. 17).
Select group
You can select or add groups other
than preferred groups (see below).
Code numbers for the groups are obtained from your service provider.
Outgo. access
In addition to network control for a
user group, it is possible to set
whether outgoing calls outside the
group are permitted. If the function
is deactivated, only calls within the
group are permitted.
Preferred grp
If activated, only calls within this
standard user group can be made
(depending on the network
configuration).
L
Page 85

84
m Setup
Accessories
§Menu§KmKAccessories
KSelect function.
Car Kit
Only in combination with an original
Siemens handsfree Car Kit (p. 128).
The profile is activated automatically
as soon as the phone is inserted into
the cradle.
User-definable settings
Auto answer
(factory default: off)
Calls are accepted automatically after a few seconds. Eavesdropping is
possible!
±
Auto off
(factory default: 2 hours)
The phone is powered by the car's
power supply. You can adjust the
time between switching off the ignition and the automatic switching off
of the phone.
Acoustic set2
Choose a different audio setting if
desired for your Car Kit.
Message in display.
Automatic settings:
•Permanent illumination:
switched on.
• Key lock: switched off.
• Charging the phone battery.
• Automatic activation of the Car Kit
profile when phone is inserted in
cradle.
Headset
Only in conjunction with an original
Siemens headset (p. 127). The profile is automatically activated when
headset is plugged in.
User-definable settings
Auto answer
(factory default: off)
Calls are accepted automatically after a few seconds (except where the
ring er is s witch ed off or set to be ep).
You should therefore be wearing the
headset.
Eavesdropping is possible!
Automatic setting
Accept call with Call key or PTT key
(Push To Talk), even when key lock is
activated.
Auto answer
If you do not notice that your phone has accepted a call, there is the danger that the
caller may eavesdrop.
Page 86

m Setup
ProSlide
§Menu§KmKProSlide
KSelect function.
Volume
Adjust the volume of the music
when opening and closing the
keypad.
Open. melody
Set the music to be played when the
keypad is opened.
Closing melody
Set the music to be played when the
keypad is opened.
ProSlide lock
Enable/disable automatic keylock
when closing keypad. The keys are
always unlocked automatically when
opening the keypad.
85
Page 87

86
~ Profiles
phone profile in order, for example,
to adapt the phone to the surrounding level of noise.
• Five standard profiles are provi ded
with default settings. They can
however be changed:
Normal envi.
Quiet environ.
Noisy environ.
Car Kit
Headset
• You can set two personal profiles
(<No Title>).
• The special profile Aircraft mode is
fixed and cannot be changed,
(p. 87).
Activate
§Menu§K~
G
§Activate§ Activate profile.
Select default profile or
personal profile.
¾ Normal envi.
½ Quiet environ.
¾ Noisy environ.
Activate Options
½ Active profile.
Setup
Edit a default profile or create a new
personal profile:
G Select profile.
§Options§ Open menu.
Change sett.
Select.
The list of available functions is
displayed:
Ringer setting ....................................p. 70
Volume ..............................................p. 70
Silent alert .........................................p. 70
Call screening....................................p. 71
Info tones...........................................p. 71
Key tones ..........................................p. 71
Illumination ........................................p. 69
Big letters ..........................................p. 69
When you have finished setting a
function, return to the profile menu
where you can change a further
setting.
Page 88

~ Profiles
87
Profile menu
§Options§ Open menu.
Activate
Change sett.
Copy from
Rename
Activate selected
profile.
Change profile
settings.
Copy settings from another profile.
Change personal profile (except default
profiles).
Car Kit
If a Siemens original Car Kit is used
(p. 128) the profile is activated automatically as soon as the phone is inserted into the cradle (p. 84).
Headset
If an original Siemens headset is
used (p. 127), the profile is activated
automatically as soon as the headset
is used (p. 84).
Aircraft mode
All alarms (appointments, alarm
clock) are deactivated. This profile
cannot be modified. The phone will
switch off if you select this profile.
Activate
G
§Select§ Activate profile.
Normal operation
When you switch on your phone
again, the previously set profile will
be reactivated automatically.
Scroll to Aircraft mode.
A security prompt must be
confirmed.
The phone switches itself
off automatically.
Page 89

88
My menu
§My menu§ Press.
Create your own menu with frequently used functions, phone numbers or WAP pages.
The list of 10 possible entries is preset. You can, however, change it as
you want.
Additional information
For fast access from standby mode you can
set the function My menu on the left soft
key (p. 106).
Activate
G
§Select§ Press.
Or
§Options§ Press.
Activate Select.
§Select§ Press.
Or
A
Select the required entry.
If the entry selected is
a phone number, you
can also call it with the
Call key.
Change sett.
You can replace each entry (1-10)
with another entry from the selection list of My menu.
G
§Options§ Press.
Change sett.
§Set§ Press.
G
§Set§ Press.
If you have selected a phone number
or a WAP favourite as a new entry,
the corresponding application is
started.
Select the required entry.
Select.
Select the new entry from
the selection list.
Reset all
§Options§ Press.
Reset all Select.
After confirmation and entering the
phone code, the default entries are
reset.
Page 90

ç Organiser
89
Calendar
§Menu§KçKCalendar
You can enter appointments and
tasks in the Calendar. It offers a
• monthly overview,
• weekly overview,
• daily overview.
Time and date must be set for the
Calendar to work correctly (p. 76).
Monthly overview
Tu Aug 2003 W32
Week Agenda
G
H
§Week§ Display weekly view.
§Agenda§ List of the day's appoint-
Additional information
Calendar days in bold face indicate appointments or birthdays (p. 91) on this day.
You can use the plus/minus side key on the
phone to scroll between the months or
weeks depending on the current overview.
Scroll between weeks.
Scroll between days.
ments and tasks.
Weekly overview
Tu Aug 2003 W32
MTWTFSS
Day Agenda
G
Scroll by the hour from
0:00 to 24:00 hours.
H Scroll between days.
§Day§ Display the daily over-
Daily overview
Each day is divided into six blocks of
four hours (morning + afternoon).
view.
Tu Aug 2003 W32
Month Agenda
H Scroll between days.
Additional information
Appointments are displayed
by vertical bars.
Time overlaps in appointment
entries are highlighted.
Page 91

90
ç Organiser
Agenda
§Agenda§ Select in the current over-
view.
Tue 25.04.2003
<New entry>
q 20:00 Cinema w
i 13:00 Garage v
View Options
Appointments (p. 91) and where applicable any open tasks (p. 93) for
the current day are displayed in
chronological order in the agenda.
<New entry>
Create new entry as appointment or
as task.
Options
Different functions are provided, depending on the Calendar item selected or the current organiser function:
§Options§ Open menu.
View
Activate/
Deactivate
Done
Change
New entry
Delete
Display entry.
Switch alarm on/off.
Change task to "completed".
Open the entry to edit.
Create new entry as Ap-
pointment (p. 91) or Task
(p. 93).
Delete selected entry.
Delete all
Delete until
Delete done
Mark
Mark all
Send/Print...
Import
Capacity
Delete all entries after
confirmation.
Delete all entries prior to a
certain date.
Delete all completed tasks.
Activate highlighting mode,
the entry currently selected
is highlighted (p. 113).
Activate highlighting mode,
all entries are highlighted
(p. 113).
(p. 110)
Import tasks and appointments via IrDA in vCal format (p. 110).
Display available capacity.
Page 92

ç Organiser
91
Additional information
For additional Calendar settings, see below
under Setup.
Appointment with "alarm activated".
i
Appointment with "alarm deactivated".
j
o Task.
r Priority task.
p Task completed.
q Task deadline exceeded.
Synchronising with a PC
With XTNDConnect
synchronise your appointments with
®
Outlook
or Lotus Notes™.
With Remote sync. you can synchronise
your phone with an organiser stored on the
Internet (p. 104). For this a time zone must
be set (p. 76).
®
PC (p. 119) you can
Calendar settings
§Menu§KçKCalend. setup
Birthdays
Birthdays (and other events) are
shown in bold face.
Begin of week
You can set which weekday is listed
first on the left in the monthly and
weekly overviews.
Alarm
§Menu§KçKAlarm
All appointment entries are displayed in chronological order. If an
alarm is missed it appears in the list
of missed appointments (p. 95).
List according to type
Types Types of appointments
G
§Select§ Show all entries for the
Enter new appointment
G
F
§Edit§ Browse through displays
are displayed.
Select appointment type.
selected type.
Select <New entry>.
Make the entries field by
field.
in the selection fields.
Y New entry
Type:
§Memo§
Description:
Edit Save
Page 93

92
ç Organiser
Type:
u
x
v
Memo.
Description with up to
50 characters.
Speech memo.
Record a voice memo at
the end of the input procedure (see also p. 96).
Call.
Enter phone number.
Shown with alarm.
w Meeting.
Description with up to
50 characters.
Description:
Display in the agenda list.
Location:
Location of appointment, e.g. meeting room.
Start date:
Start time:
End date:
End time:
Alarm:
§ON§ Activate alarm.
J
Enter start time of the
alarm before the appointment.
H Select:
Minutes, Hours, Days.
Reoccurrence:
Select a timeframe for repeating the
appointment:
None, Daily, Weekly, Monthly, Annual.
Enter a parameter for repeating:
Forever, Until, Occurrences (number)
If Weekly is selected, certain weekdays can be highlighted.
§Save§ Save the appointment.
The alarm is automatically
activated. If Speech memo
is selected as type, the
dictating machine is started for recording (p. 96).
Page 94

ç Organiser
93
Alarm
When the set date and time are
reached there is an audible and a visual alarm. If an alarm is missed it appears in the list of missed appointments (p. 95).
Alarm type Memo/Meeting: the text is
shown in the display.
Alarm type Call: the phone number is
displayed for dialling.
Alarm type Speech memo: playback
with dictation key.
§Pause§ The alarm stops for
§Off§ The alarm is stopped.
Additional information
Display indicating that alarms are set:
Ö
Ø
An alarm sounds even when the phone is
switched off (the phone does not switch to
standby mode). Press any key or close and
open the keypad to disable it.
Set alarm tone................................... p. 70
Clock................................................. p. 76
§Options§........................................... p. 90
5minutes.
Alarm clock.
Appointment.
Tasks
§Menu§KçKTasks
A task is displayed like an appointment in the agenda of the selected
day. However, unlike an appointment it does not require a time.
When no time is entered the task appears at the top of the list every day
until it is marked as completed.
ç Tasks
<Types>
<New entry>
o 25.04 21:15 w
Select
List according to type
<Types> Types of appointments
G
§Select§ Show entries for the se-
Enter new task
G
G
Description:
Display in the list.
Status:
Choose between: Done or Outstanding
are displayed.
Select appointment type.
lected type.
Select <New entry>.
Select appointment type
(see appointments,
p. 91).
Page 95

94
ç Organiser
Priorität:
Select between 1 (high) - 5 (low).
Default is 3.
Use date
When Yes is selected, the following
option is provided.
Due date:
Enter date.
Due time:
Enter time.
Alarm:
Enter a time (0-99) and a time unit
(minutes, hours, days) at which an
audible/visual notification of an impending task should be made.
§Save§ Save task.
Notes
§Menu§KçKNotes
Use your phone as a notepad.
ç Notes
<New entry>
Shopping list
Flight number
Select
New entry
§Select§ Press.
J
§Options§ Open menu.
Save Store entry.
Enter text, 150 characters
maximum.
Text entry menu
§Options§ Open menu.
Save
T9 input
(p. 27)
Line feed
Clear text
Send
Insert from...
Store entry.
T9 preferred: Activate/de-
activate T9.
Input language: Select
language for text.
Enter line break.
Delete note.
Send entry as SMS
message.
Insert phone number from
Addressbook.
Page 96

ç Organiser
95
Display entry
G
§View§ Open note.
Select entry.
Notes menu
§Options§ Open menu.
View
Confidential
Change
New entry
Delete
Delete until
Delete all
Mark
Mark all
Send
Import
Capacity
Display entry.
Protect note with phone
code (p. 17).
Display entry for editing.
Create new note.
Delete entry.
Delete all entries prior to a
certain date.
Delete all notes after confirmation.
Switch to highlighting mode
(p. 113).
Activate highlighting mode,
all entries are highlighted
(p. 113).
Send entry as SMS message.
Import notes via IrDA™ in
vNotes format (p. 110).
Display available capacity.
Additional information
Protect confidential data using a phone
code.
We recommend that you do not store any
passwords (PIN, TAN etc.) as notes.
A total of 500 entries can be stored (appointments, tasks, notes) in the organiser.
Enter special characters ....................p. 26
Missed appointments
§Menu§KçKMissed alarms
Events with an alarm to which you
have not reacted are listed for
reading.
Y Missed alarms
j 03.03 21:15 w
q 05.03 12:30 u
j 05.03 18:00 v
View Options
Missed appointments menu
§Options§ Open menu.
View
Delete
Delete all
Send/Print...
Display entry.
Delete entry.
Delete all entries after confirmation.
(p. 110)
Page 97

96
ç Organiser
Dictating machine
Use the dictating machine to record
short voice memos.
• Use your phone as a dictating machine when on the move.
• Record a memo as a reminder or
as a note for others.
• Add a voice memo to an alarm in
the Calendar (p. 92).
• Record a call - useful for remembering numbers or addresses.
Warning!
The use of this feature may be subject to
restrictions under criminal law.
Please inform the other party to the conversation in advance if you want to record the
conversation and please keep such recordings confidential.
You may only use this feature if the other
party to the conversation agrees.
Control using the side keys
The voice functions can be controlled quickly and easily in standby
mode using the side keys.
Record/play
back
(dictation key)
Loud
Quiet
New recording
Press the dictation key for the duration of the recording. The maximum
possible recording period is shown.
Recording starts after a short beep.
Pause
Release the dictation key for a maximum of 10 seconds to pause recording. If you press the key again, recording is resumed, otherwise it is
stopped.
Save
Recording is stopped if you release
the dictation key for more than
10 seconds.
§Stop§ End recording.
Recording is automatically saved with a time
stamp.
§Save§ Name recording.
§Save§ Save recording.
Page 98

ç Organiser
97
Play back
In standby mode, press the dictation
key briefly. If the Options menu is
set up that way, Handsfree will be
offered.
Operation with soft keys
New recording
KçKDictating machine
§Menu§
The list of recordings is opened.
<New record>
§Record§ Start recording
§Stop§ End recording.
§Save§ Name recording.
§Save§ Save recording.
Or
§Play§ Play back recording be-
Select.
§Pause§ Recording pause.
Recording is automatically saved with a time
stamp.
fore storing it.
Play back
§Menu§KçKDictating machine
The list of recordings is opened.
Dictating machine
x
<New record>
Customer query
Shopping
Select
G Select recording.
§Play§ Press.
Dictating machine menu
§Options§ Open menu.
Play
Handsfree
New record
Delete
Delete all
Rename
Time zones
§Menu§KçKTime zones
Set the time zone for where you currently are (p. 76).
Play recording back.
Activate/deactivate playback in handsfree mode.
Start new recording.
Delete selected recording.
Delete all entries after
confirmation.
Replace time/date stamp of
recording with a name.
Page 99

98
[ Extras
[
KSelect function
Alarm clock
The alarm will ring at the time set by
you, even when the phone is
switched off.
Setting
§Edit§ Display selected time and
days for alarm calls:
Set time for the alarm call
(hh:mm).
H Navigate to the days.
§Edit§ Set days for alarm calls.
§OK§ Confirm settings.
y Alarm clock
z 07:30
Mo Tu We Th Fr Sa Su
Edit On
§On§ / §Off§ Activate/deactivate the
Additional information
y Alarm clock switched on.
z Alarm clock switched off.
Ö
alarm.
Screen display in standby
mode: Alarm clock activated.
Calculator
J
J
#
Calculator functions
§. =§+ - * /§ Press the right soft key
± Toggle between "+" and "-".
% Convert to percentage.
Ï
Ð
e Exponent (max. two digits).
Special keys:
Enter number (up to
8digits).
Select calculator
function.
Repeat procedure with
other numbers.
Result is displayed.
repeatedly.
Save the number displayed.
Retrieve the number saved.
* Set decimal point.
0 Add (hold down).
Page 100

[ Extras
99
Currency conv
§Menu§K
You can calculate the exchange rates
between three different currencies.
Enter the currency
If no currency has yet been entered,
press §OK§ for first input.
Otherwise:
§Options§ Open menu
New entry Select, then if:
• Only Euro currencies:
§List§ Press and select 1st Euro
§Select§ Confirm.
[
KCurrency conv
currency:
F Select next field.
§List§ Press and select 2nd Euro
§Select§ Confirm.
§OK§ Confirm.
• Euro currencies and/or other
J
§OK§ Confirm.
J
currency.
currencies:
Enter symbols for the
currencies.
Enter exchange rate. Save
with §Options§ and §OK§.
Calculator functions
§. =§ Press right soft key
Ð
repeatedly:
Recall a saved number from
calculator.
Convert
Any combination of calculations can
be carried out between the currencies entered.
G
§Start§ Confirm.
J
#
Select a combination of
currencies from the list.
Enter amount
(up to 12 digits).
Result is displayed.
§Repeat§ Repeat conversion
with other data.
Calculator menu
§Options§
Start
New entry
Change
Delete
Delete all
Open menu
Enter value to be
calculated.
Enter two new currencies.
Change the two currencies.
Delete the two currencies.
Delete all currency pairs after confirmation.
.
 Loading...