

Siemens OpenAir GND12x.1 Series, OpenAir GND32x.1 Series, OpenAir GND22x.1 Series Installation Instructions Manual
Installation Instructions
WARNING:
CAUTION:
WARNING:
Document No. 129-402
OpenAir™ GND Serie s Electronic D amper Actuator
Designed for UL Listed Fire/Smoke and Smoke Control Dampers
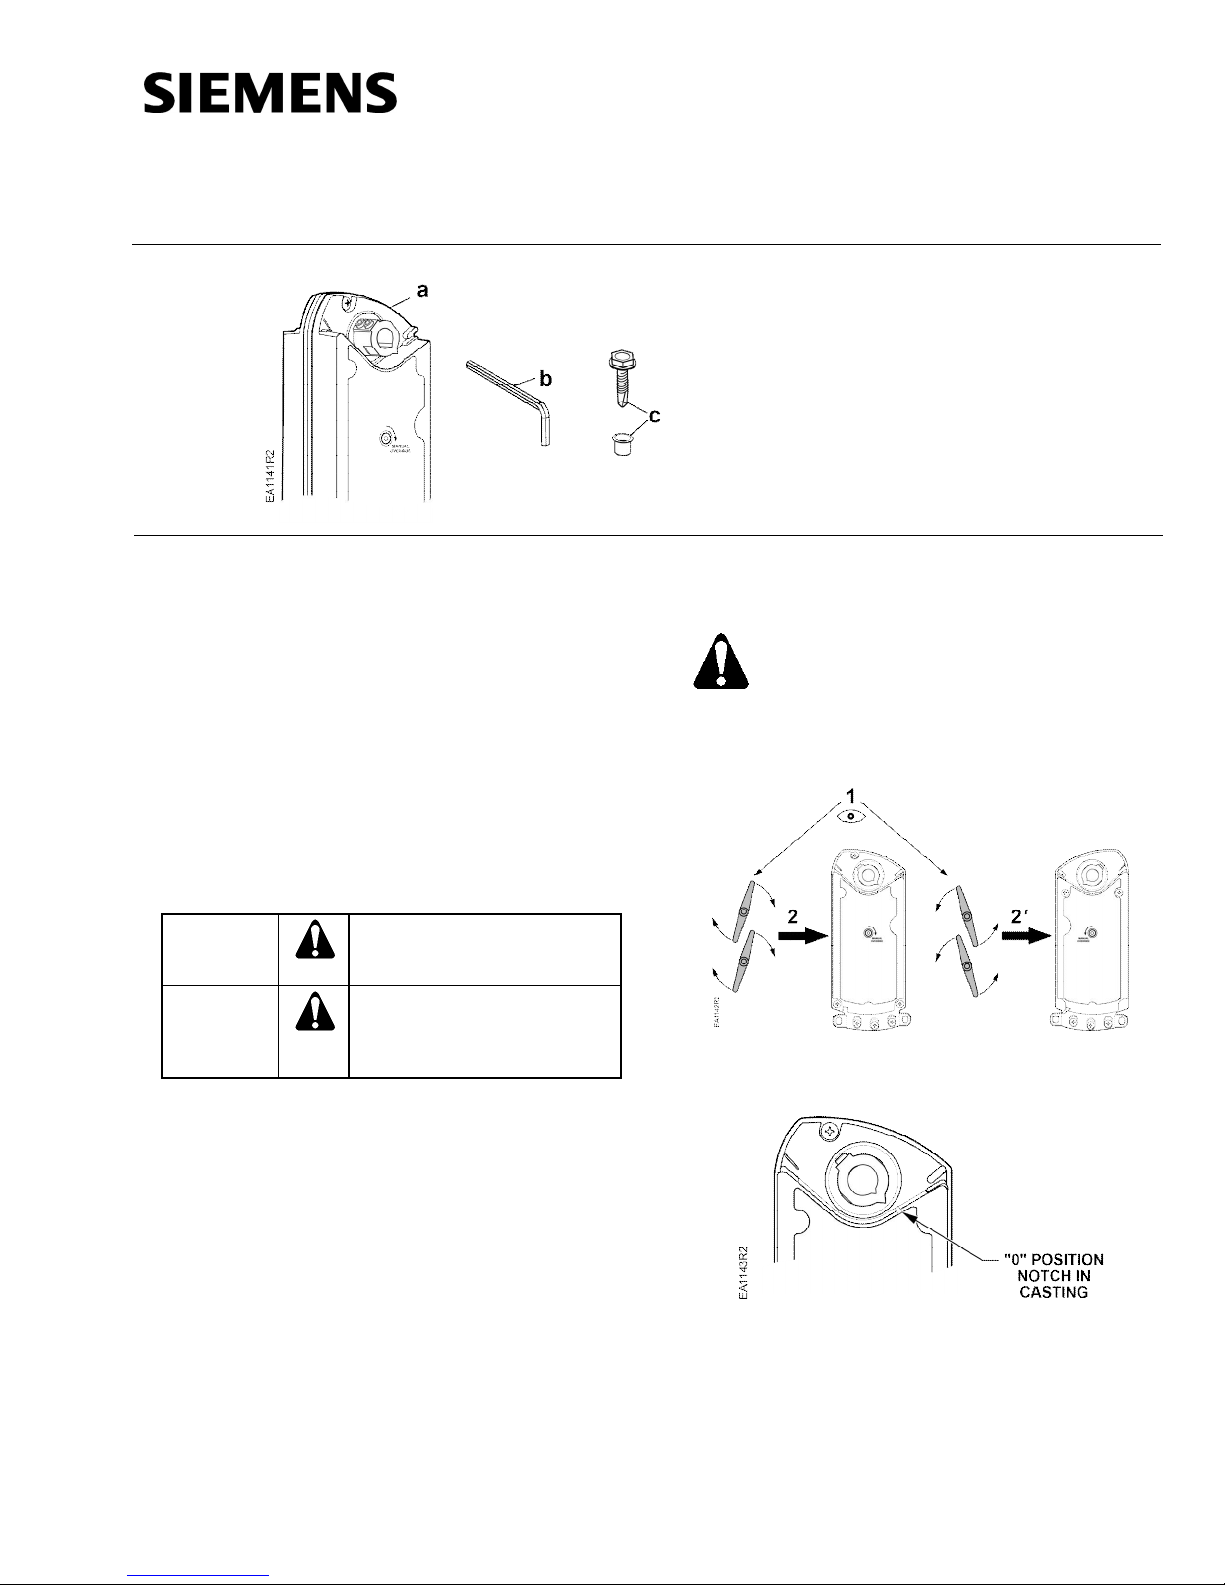
a. Actuator
b. Hex key – 3mm
c. Eyelet and 1/4-inch hex head screw
Figure 1. GND Actuator Parts.
June 6, 2018
Product Description
Step-by-step description for direct-coupled mounting
of the OpenAir GND fast-acting two-position rotary
electronic damper actuator. Actuator is intended for
control of approved fire and smoke leakage-rated
HVAC dampers.
Product Numbers
GND12x.1x
GND22x.1x
GND32x.1x
Warning/Caution Not ations
Personal injury or loss of life
may occur if you do not follow
a procedure as specified.
Equipment damage o r los s of
data may occur if you do not
follow a procedure as
specified.
Requir ed Tools
• 3 mm hex wrench (provided)
• No. 2 Phillips screwdriver
• 1/4-inch (6.4 mm) hex driver
• Marker or pencil
Prerequisites
Do not open the actuator housing.
Installation
Figure 2. Actuator Mounting Orientation.
Item Number: 129-402, Rev. DA Page 1 of 5
Figure 3. Actuator Internal End Stops.
Document No. 129-402
arrow.
Installation Instructions
June 6, 2018
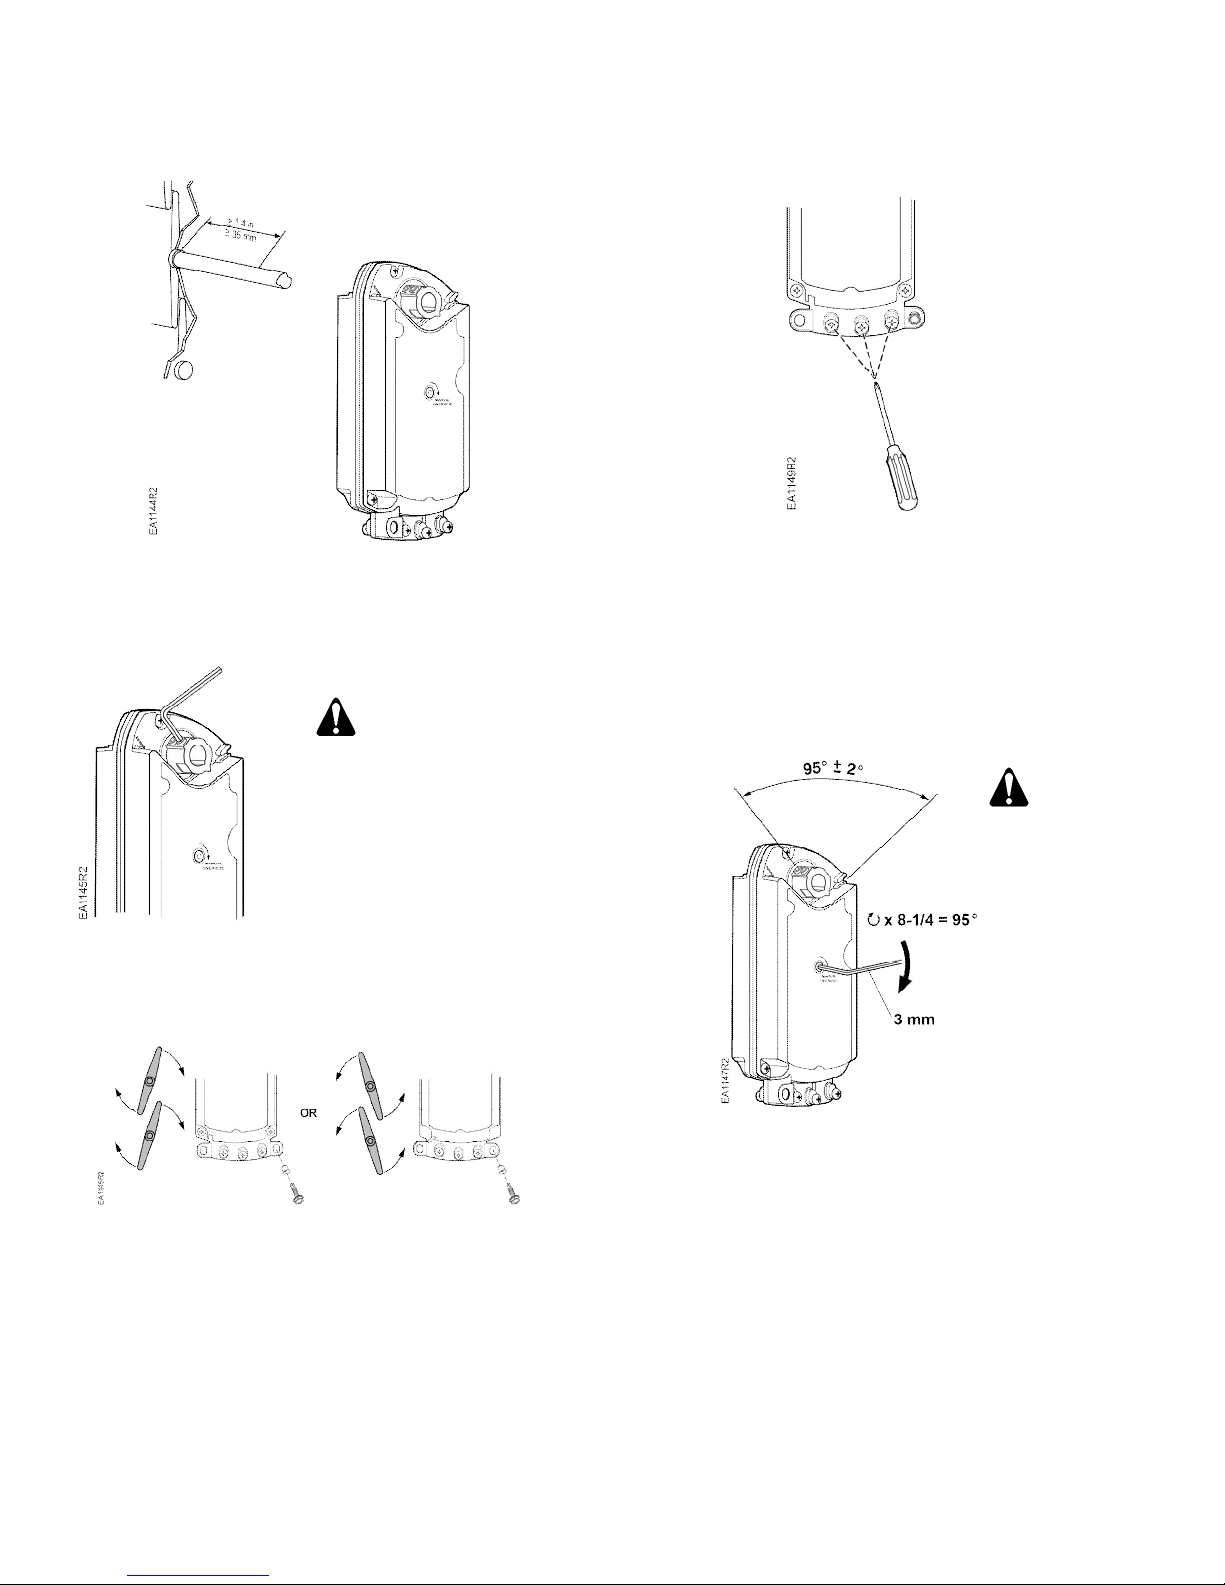
Figure 4. Shaft Length and Proper Shaft Adapter
Location.
Figure 7. Tighten Conduit Screws
(No. 2 Phillips Driver).
Manual Override
CAUTION:
Apply 60 in-lb to 90 in-lb
(7 Nm to10 Nm) maximum
torque to the shaft fixation
set screws.
All four screws must be
tightened.
Figure 5. Fasten the Shaft Adapter to
the D amper Shaf t.
Figure 6.
1. Insert the eyelet through housing ear.
2. Insert screw through eyelet and tighten using
1/4-inch (32 mm) hex dr iver.
For adjustment of the damper/actuator when there is
no power.
CAUTION:
Always turn key in
direction of the
Figure 8. Manual Override.
Page 2 of 5 Siemens Industry, Inc.
 Loading...