

Siemens IMPACT ITE Instructions And Guidance

IMPACT Custom
Instructions & Guidance

A
Introduction
1
Your NHS Audiologist will have guided you through the
use of your new hearing instruments; this booklet is
intended as a supplement to that information.
In this booklet you will find instructions about insertion,
removal and use of your hearing instrument. There are
also tips and information on proper handling, cleaning,
care and changing of the batteries. In addition, a
troubleshooting section is offered for your reference.
Your hearing improvement depends on the fit of the
hearing instrument, the type and degree of hearing
loss, and proper diagnostic testing. Of course, a hearing
instrument cannot restore normal hearing, and not
everyone will benefit equally.
Remember, a hearing instrument is a finely-tuned
device that has been specially designed and expertly
adjusted for your individual needs. Proper care and
handling will ensure the best possible performance of
your hearing instrument.
Your new hearing instrument
2

Contents
2
3
16
17
15
14
13
12
11
10
9
8
7
6
5
4
Your hearing instrument 4
Intended use 6
Handling batteries 7
Inserting and removing your hearing instrument 10
Turning your hearing instrument on and off 12
Changing the hearing program (optional) 13
The telecoil loop system (optional) 14
Volume control (optional) 15
e2e Wireless 2.0 16
Maintenance and care 17
Troubleshooting tips 20
General notes on safety 22
Disposal information 23
Your hearing instrument configuration 24
Tek wireless enhancement 25
3
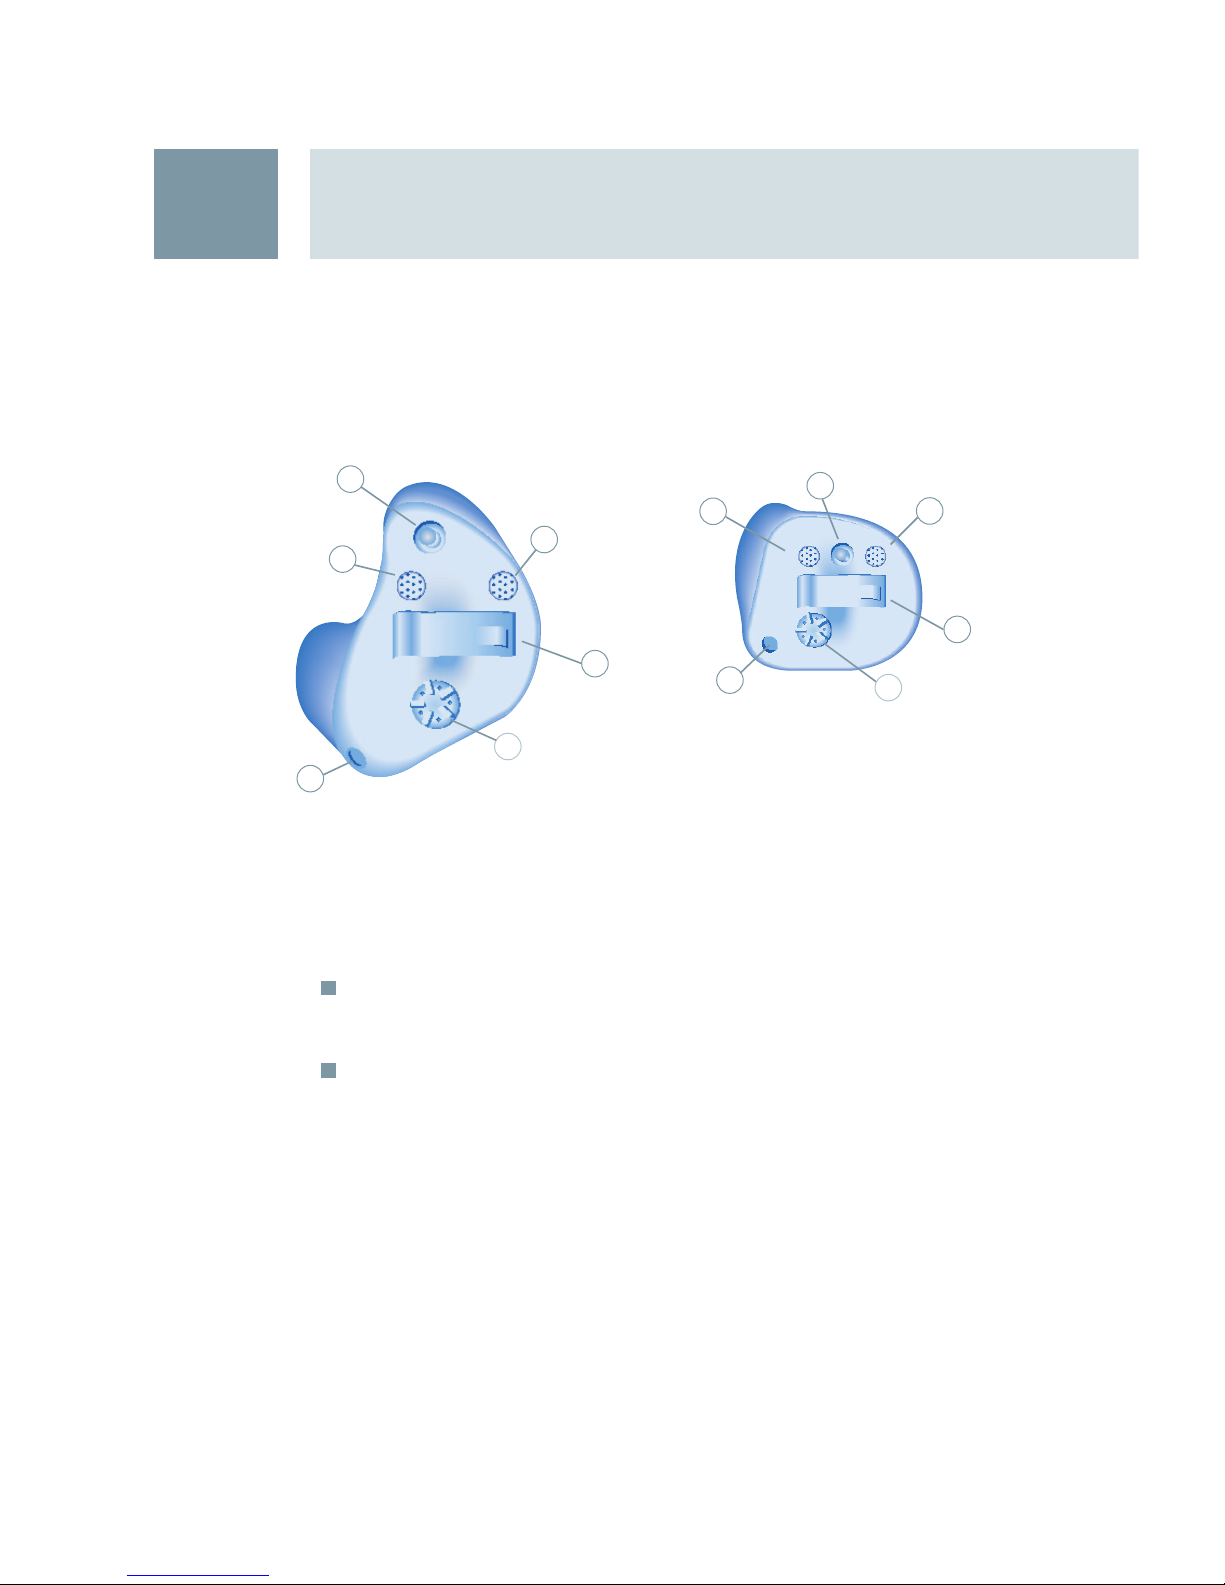
Your hearing instrument
Your hearing system is individually manufactured
according to the shape of your ear canals.
Each hearing instrument can be identified by the serial
number located on the outside of the instrument.
If the number is written in red, the hearing instrument
is for the right ear.
If the number is written in blue, the hearing instrument
is for the left ear.
3
Full Shell
(battery type: 13)
Canal
(battery type: 312)
1
2
3
4
5
6
1
2
3
4
6
5
4
3
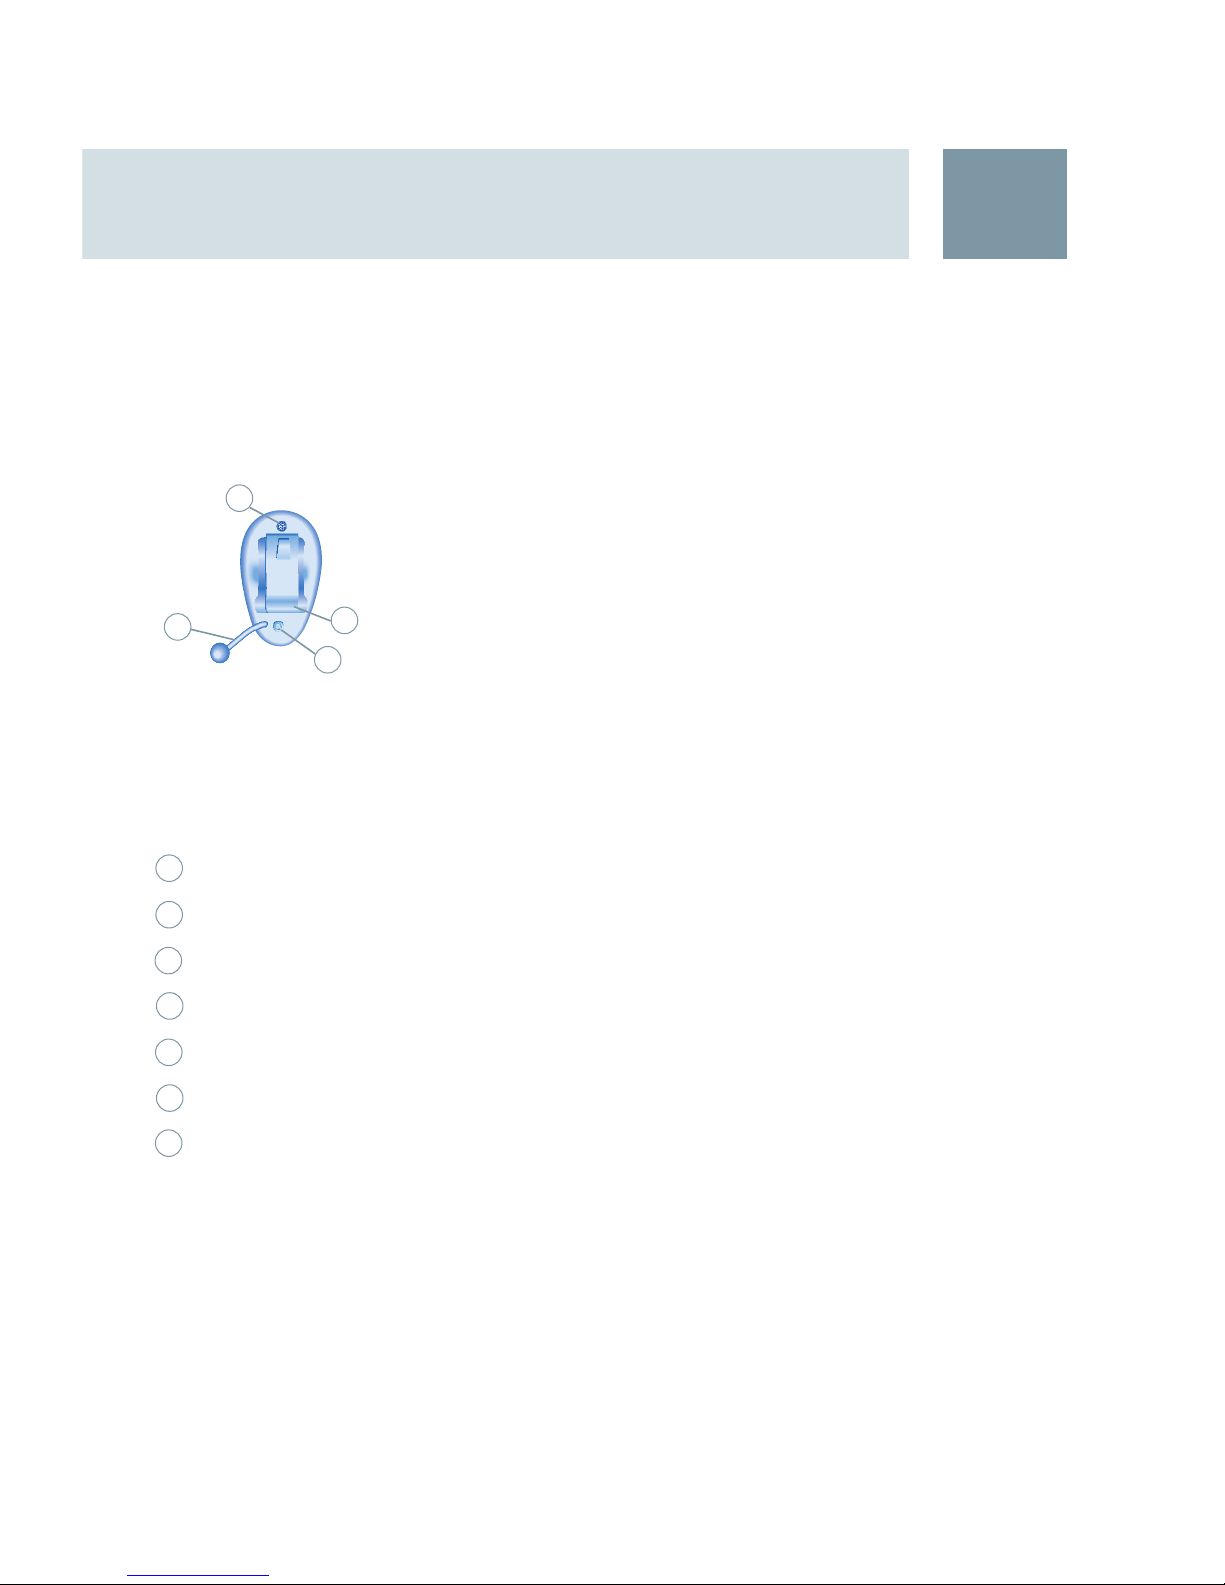
Feature
1 First microphone
2 Second microphone TwinMic
TM
(optional on Canal)
3 Battery compartment
4 Program button (optional on all models)
5 Volume control (optional on Full Shell and Canal)
6 Vent
7 Removal cord (optional on Full Shell and Canal)
CIC
(battery type: 10)
1
3
6
7
5
Intended use
Symbols:
Be aware of information marked with the warning symbol
WARNING, CAUTION or NOTICE!
WARNING points out a situation that could
lead to serious injuries,
CAUTION indicates a situation that could lead
to minor and moderate injuries.
NOTICE
NOTICE indicates possible property
damage.
Advice and tips on how to handle your
hearing instrument better.
Instruction. Indicates that something has to
be done.
Intended use
4
Hearing instruments are intended to improve the hearing
of hearing impaired persons. Diagnosis and prescription
of a hearing instrument must be performed by hearing
health specialists, e.g. ENT doctors, audiologists.
Read and follow the instructions of this user guide to
avoid injuries or damage to the hearing instrument.
6
General notes on safety
5
Handling batteries
13
312
10
NOTICE
Remove the tab on your
battery only when you are
ready to use it
The positive (+) side of
the battery is always
indicated
Always keep spare
batteries with you
Low battery indicator
Your hearing instrument may be programmed to inform
you when the battery should be replaced for best system
performance. You may hear an intermittent series of beeps
and/or experience low amplification power or volume.
Change the battery when either of these occur.
Using a remote control
If you have an optional remote control, the bat tery status can
be checked using the "battery read out" function. (See the
remote control user guide for more informa tion.)
actual size
NOTE
To preserve battery life turn your hearing
instrument off when not in use
Leaking batteries damage the instrument. Remove
batteries when the instrument is not in use for a
prolonged period of time
7
Handling batteries
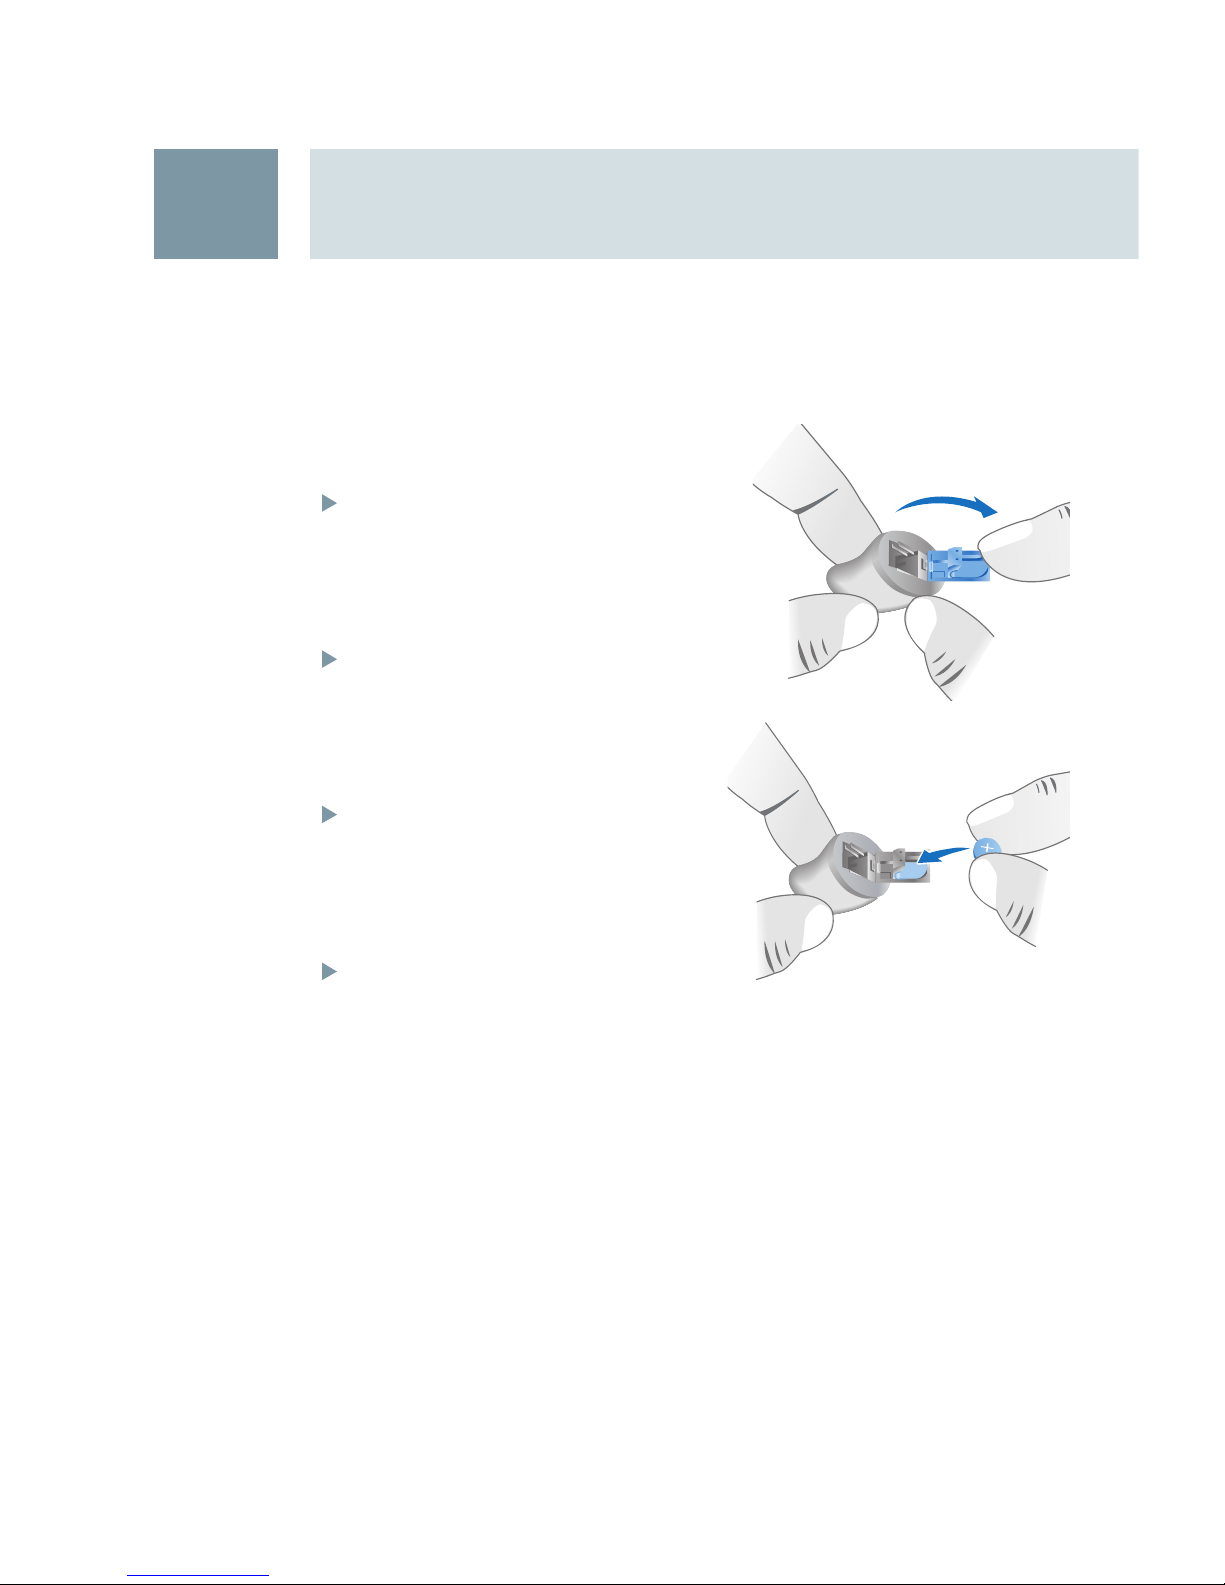
5
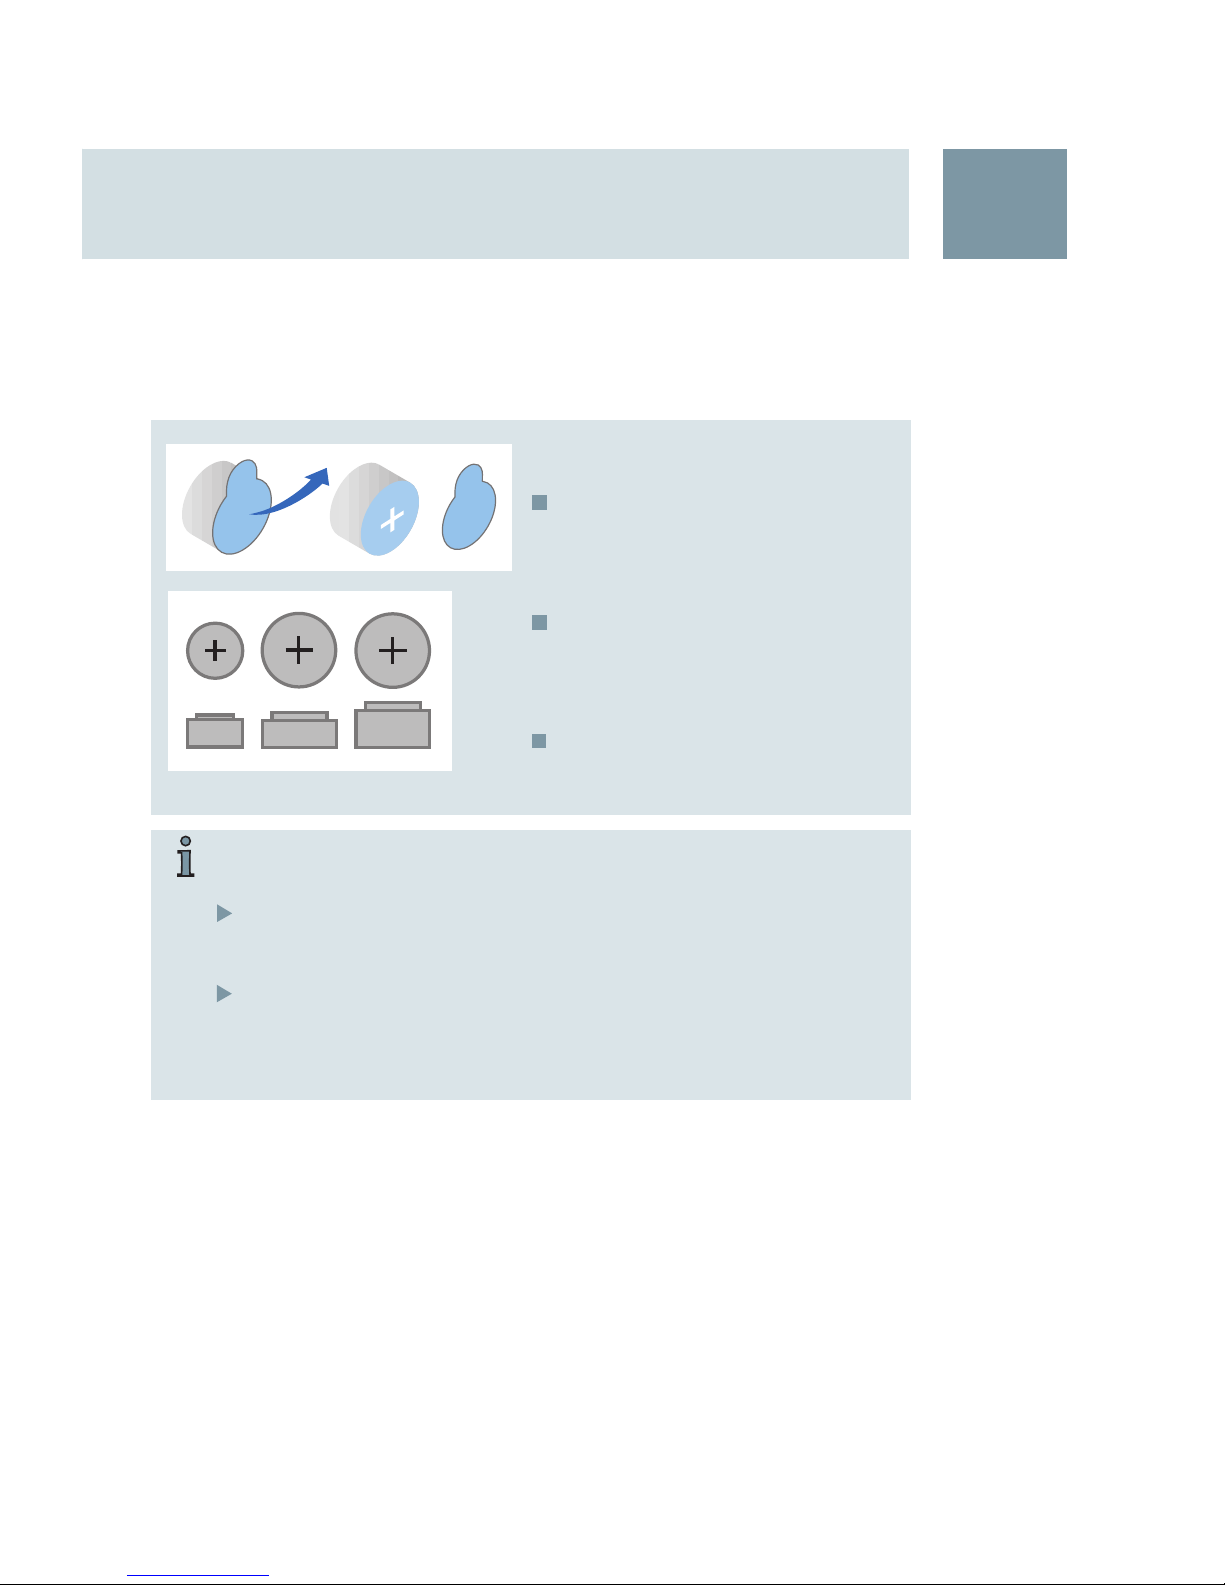
Inserting the battery:
Completely open the battery
compartment with your
fingernail as shown in the
illustration.
Insert the proper size battery
into the compartment, small
end first so that the "+" mark
is visible.
Close the battery compartment
by gently pressing the bottom
of the door upward with your
finger tip.
Do not force the door shut. If it
does not close easily, check to
see if the battery was inserted
properly.
When the battery door is
completely closed, your
hearing instrument is ready
for use.
8

5
Handling batteries
Removing the battery:
Completely open the battery compartment.
Lightly push the battery out with your finger or a
pencil, do not use any metallic implements or tools that
may damage the battery door.
NOTICE
Batteries may contain harmful substances that
pollute the environment.
Do not throw away batteries into household
waste
Dispose batteries according to national
regulations or return to your NHS Audiologist
WARNING
Choking hazard posed by small parts
Keep batteries and instruments out ot the reach of
children. If swallowed consult a physician or a
hospital immediately
If infants, small children or disabled persons need
to wear hearing instruments ensure adequate
supervision
Check the integrity of the hearing instruments
regularly
Consult your NHS Audiologist if the housing is
deformed
9
 Loading...