How it Works
Log In / Sign Up
Buy Points
How it Works
FAQ
Contact Us
Questions and Suggestions
Users
Siemens
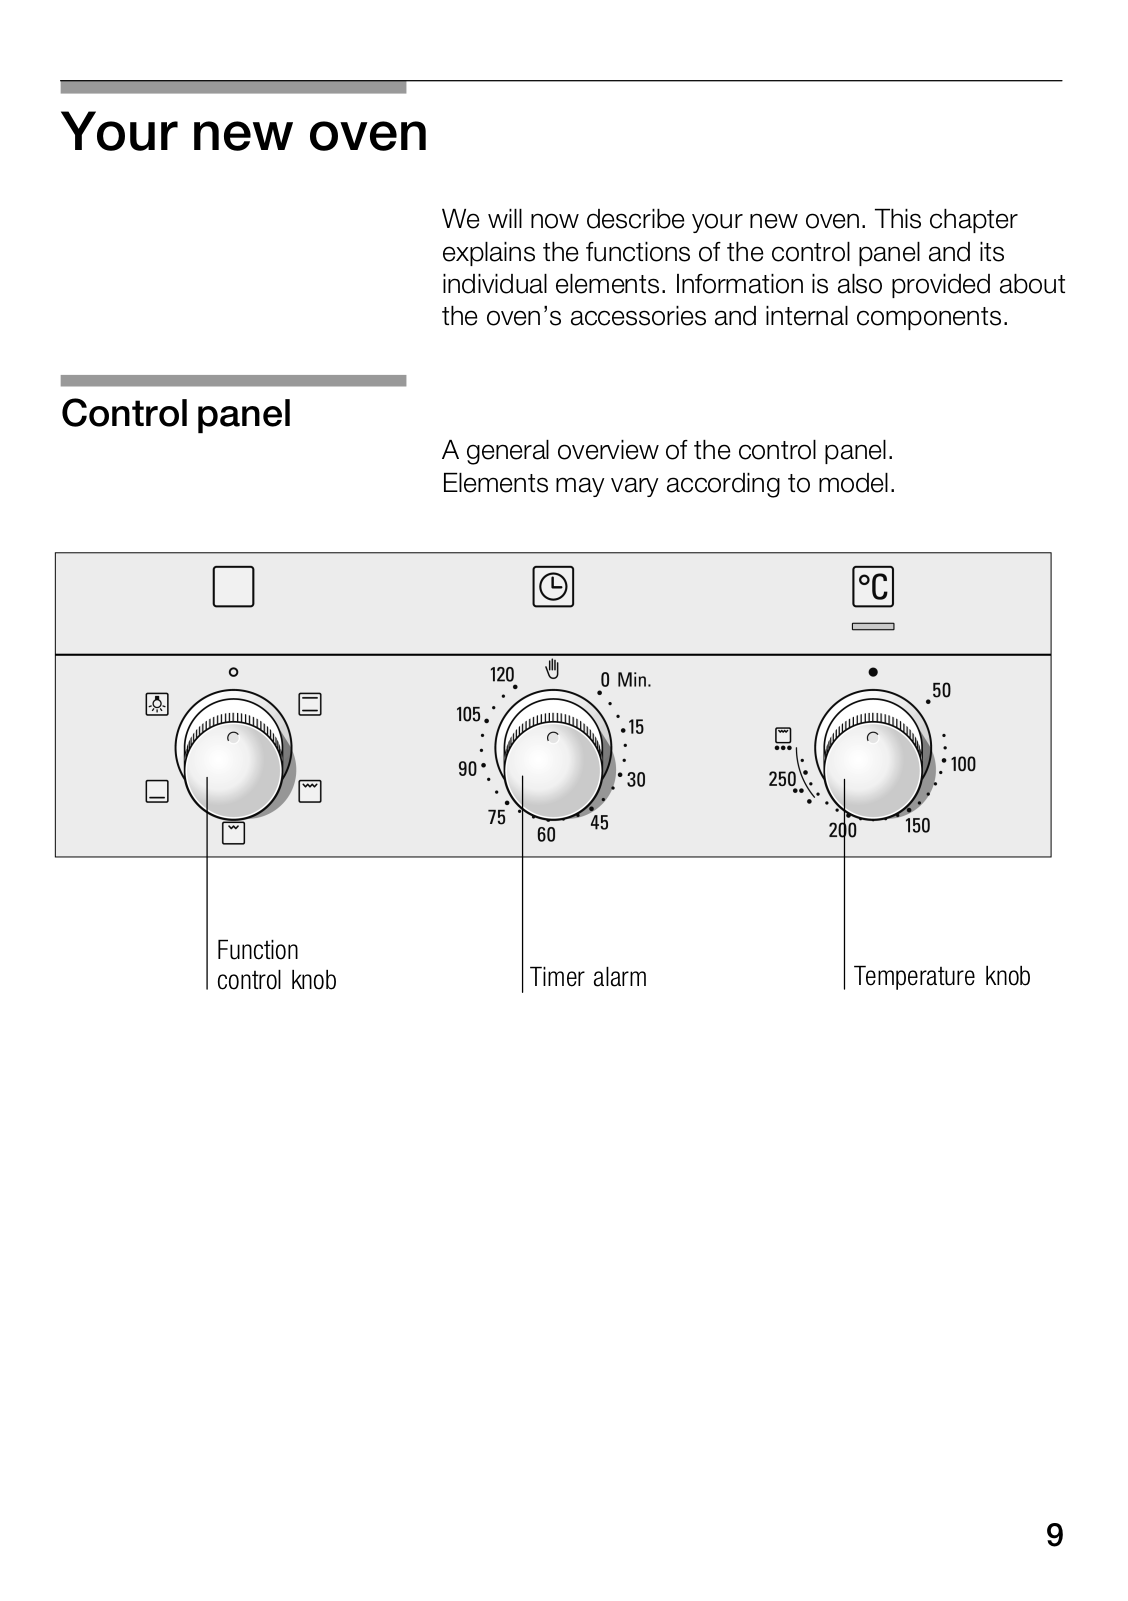
Loading...
H
HS340200E
HS340202E
HS34029EU
HS34049EU
HS34129EU
HS34149EU
HS34229EU
HS420210S
4
HS421200S
3
HS421201
4
HS421210
HS636GD.1
3
HS636GD.2
2
HS636GDS1
2
HS636GDS2
5
HS658GX.7
HS658GXS1
5
HS658GXS6
4
HS658GXS7
8
HS836GVB6
2
HS858GX*6S
HS858GXB6
3
HS858GXB6B
3
HS858GXS6
3
HS858KXB6
2
HSC 140...A
HSC 140...B
HSC 290...A
HSC 290...B
HSDII
2
HSE-6FL3R30
HSE-6FL3W30
HSE-6FL4030
HSE-6PL3W30
HSE-6PL4030
HSL6EI23
2
HSL6EI231
HSL6EW22
2
HT 8
HT-Q100
HT-Q100,HT-Q100T
HTRI-D
HTRI-M
HTRI-R
HTRI-S
HUB-4
HV110210E
3
HV110510
3
HV110510E
3
HV11AB210E
3
HV11AB510E
3
HV200510
HV20AB510
5
HV 230.10 E
HV230210
2
HV230510
2
HV23AB510
8
HV23.B..0 Series
HV330510
3
HV331ABS0
HV33AB520
5
HV33T510
2
HV541ANS0
5
HW1402P2
3
HW1402P2B
HW 140560
3
HW140560B
2
HW140562
7
HW140562/01
HW140562B
4
HW1405A2
4
HW1405A2/01
HW1405A2/02
HW1405A2/06
HW1405P2
10
HW1405P2/01
HW1405P2B
4
HW1406P2
5
HW1406P2B
2
HW140760
HW140760B
HW 140...B
HW 140 Series
HW290262
4
HW290560
4
HW290560B
HW290562
5
HW290562/01
2
HW290562/02
HW290562B
4
HW290580
HW290580B
HW290581
3
HW290581B
HW290582
3
HW290760
HW290760B
HW 290...B
HW 290 Series
HW-D450
Loading...
Loading...
Nothing found
HV11AB210E
Instructions Manual
36 pgs
979.37 Kb
0
User Manual [de]
36 pgs
986.4 Kb
0
User Manual [no]
38 pgs
1.1 Mb
0
Table of contents
Loading...
Siemens HV11AB210E, HV11AB510E Instructions Manual
...
Siemens Instructions Manual
Download
Specifications and Main Features
Frequently Asked Questions
User Manual
Download
Loading...
+
hidden pages
Unhide
You need points to download manuals.
1 point = 1 manual.
You can buy points or you can get point for every manual you upload.
Buy points
Upload your manuals