

Page 1
Company Confidential
Copyright 2004© Siemens AG
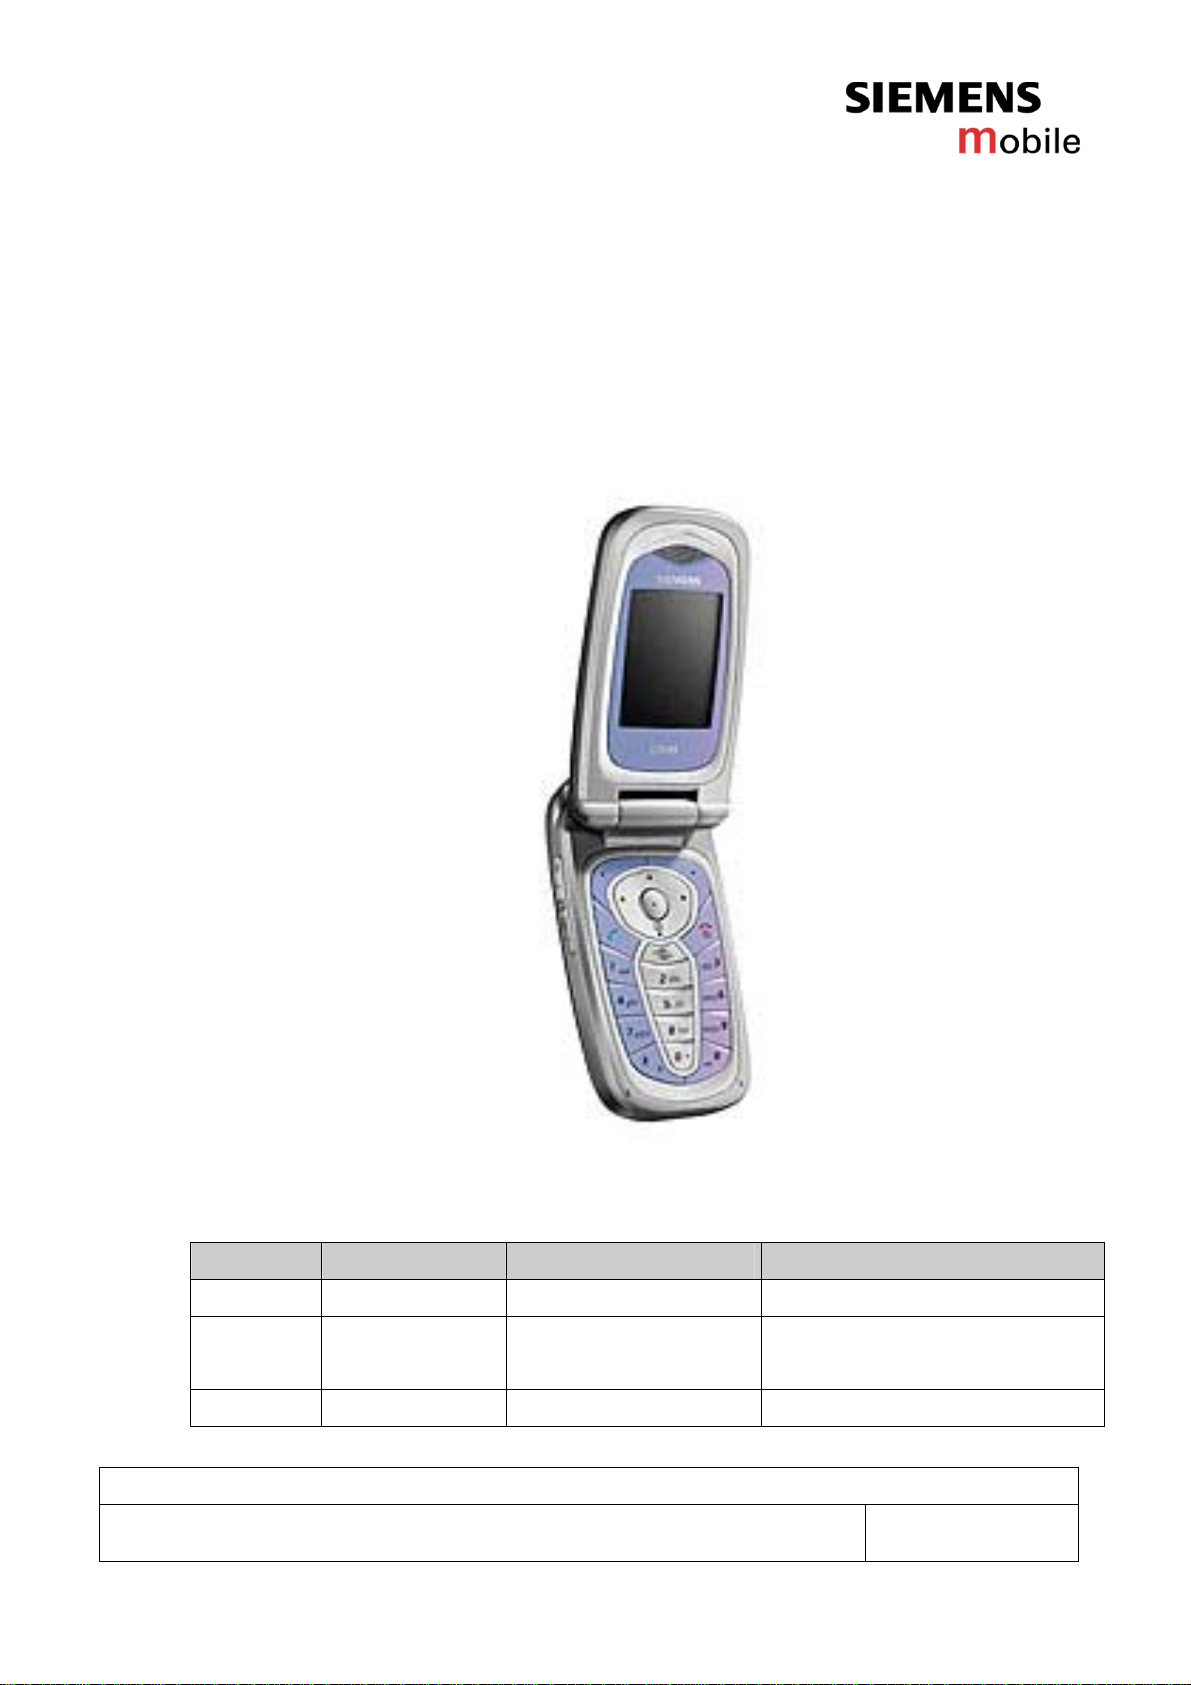
Service Rep air Documentation
Level 0-2 CFX 65
Release Date Department Notes to change
1.0 25.11.2004 ICM MP CCQ GRM T New document
1.1 24.01.2005 COM MD CC GRM T
Service Repair Documentation
Level 0-2 CFX65
- 1 -
Unlock sequence added
Explode drawing modified
V1.1
Page 2

Company Confidential
Copyright 2004© Siemens AG
Introduction
This service repair documentation is intended to carry out repairs on Siemens repair level 0-2. The
described failures shall be repaired in Siemens authorized local workshops only.
All repairs have to be carried out in an ESD protected environment and with ESD
protected equipment/ tools. For all activities the international ESD regulations have to be
considered.
Assembling/ disassembling has to be done according to the latest CFX65 Level 2 repair
documentation. It has to be ensured that each repaired mobile phone is checked according to the
latest released General Test Instruction document (both documents are available in the Technical
Support section of the C-market).
If you have any questions regarding the repair procedures or technical questions do not hesitate to
contact our technical support team in Kamp-Lintfort, Germany.
Tel.: +49 2842 95 4666
Fax: +49 2842 95 4302
e-mail: st-support@klf.siemens.de
Service Repair Documentation
Level 0-2 CFX65
- 2 -
V1.1
Page 3
Company Confidential
Copyright 2004© Siemens AG
Table of content
1. GENERAL INFORMATION .............................................................................................................. 4
2. TEST EQUIPMENT.......................................................................................................................... 8
3. WATER INDICATOR………………………………………………………………………………..… … 9
4. REPAIR DEFINITION .................................................................................................................. 100
5. LEVEL 0 TROUBLE SHOOTING GUIDE.................................................................................... 122
6. LEVEL 1 TROUBLE SHOOTING GUIDE.................................................................................... 155
7. LEVEL 2 TROUBLE SHOOTING GUIDE...................................................................................... 21
8. DISASSEMBLY.............................................................................................................................. 23
9. REASSEMBLY............................................................................................................................... 29
10. EXPLODE DRAWING ................................................................................................................... 31
11. TEST MODE................................................................................................................................332
12. UNLOCK SEQUENCE ………………………………………………………………………….……….33
Service Repair Documentation
Level 0-2 CFX65
- 3 -
V1.1
Page 4
Company Confidential
Copyright 2004© Siemens AG
1. General information
1.1 Mobile features
ITEM Specification
Frequency bands: Dual Band EGSM 900(33dBm:class 4)/
1800(30dBm:class 1)
Screen: Main:128x160 pixels; Sub:96x64 pixels
Battery: Lithium lon , 3.7V 600mAh
Weight 88 g
Size 97x48x23 mm
Talk time 200~300 minutes
Standby time 200~410 hours
Color 65K 1.8” CSTN / 96x64 Mono MSTN
Antenna Integrated dual band antenna
Ring tones 40 polyphonic
Game Java game
EMS/MMS support
Languages English/ Latin/ Chinese/ German
Charging time Maximum charge time for an empty battery
(0-5% capacity) is 3.0 hours for standard -
and travel charger.
SIM card 3V
Hinge Opening angle is 150 degrees
Temperature ranges -10oC to +55oC for operation
o
C to +85oC for storage
-40
SAR 1.0 w/kg
ESD 15kV
GPRS Class 10
WAP WAP 2.0
IrDA 115.2 kbits/sec
Memory 4M for download
Camera VGA CMOS type/ digital zoom/ self timer
Service Repair Documentation
Level 0-2 CFX65
- 4 -
V1.1
Page 5
Company Confidential
Copyright 2004© Siemens AG
External flash light support
1.2 Accessories
Basic Li-ION Battery (600mAh) EBA-630
Travel Charger (100~240V) ETC-500 (Euro)
ETC-510 (UK)
Basic Car
Pack
Car
Charger
Car Kit
Portable
Headset
PTT
Allows hands-free talking and
simultaneous charging of
CFX65
Charger for the cigarette lighter
socket
Handsfree kit with integrated
loudspeaker and microphone
and auto-answer feature.
Includes charging of CFX 65
It includes a PTT button in the
microphone to handle calls
HKB500
EEC-500
HKP-500
HHS-510
Service Repair Documentation
Level 0-2 CFX65
- 5 -
V1.1
Page 6
Company Confidential
Copyright 2004© Siemens AG
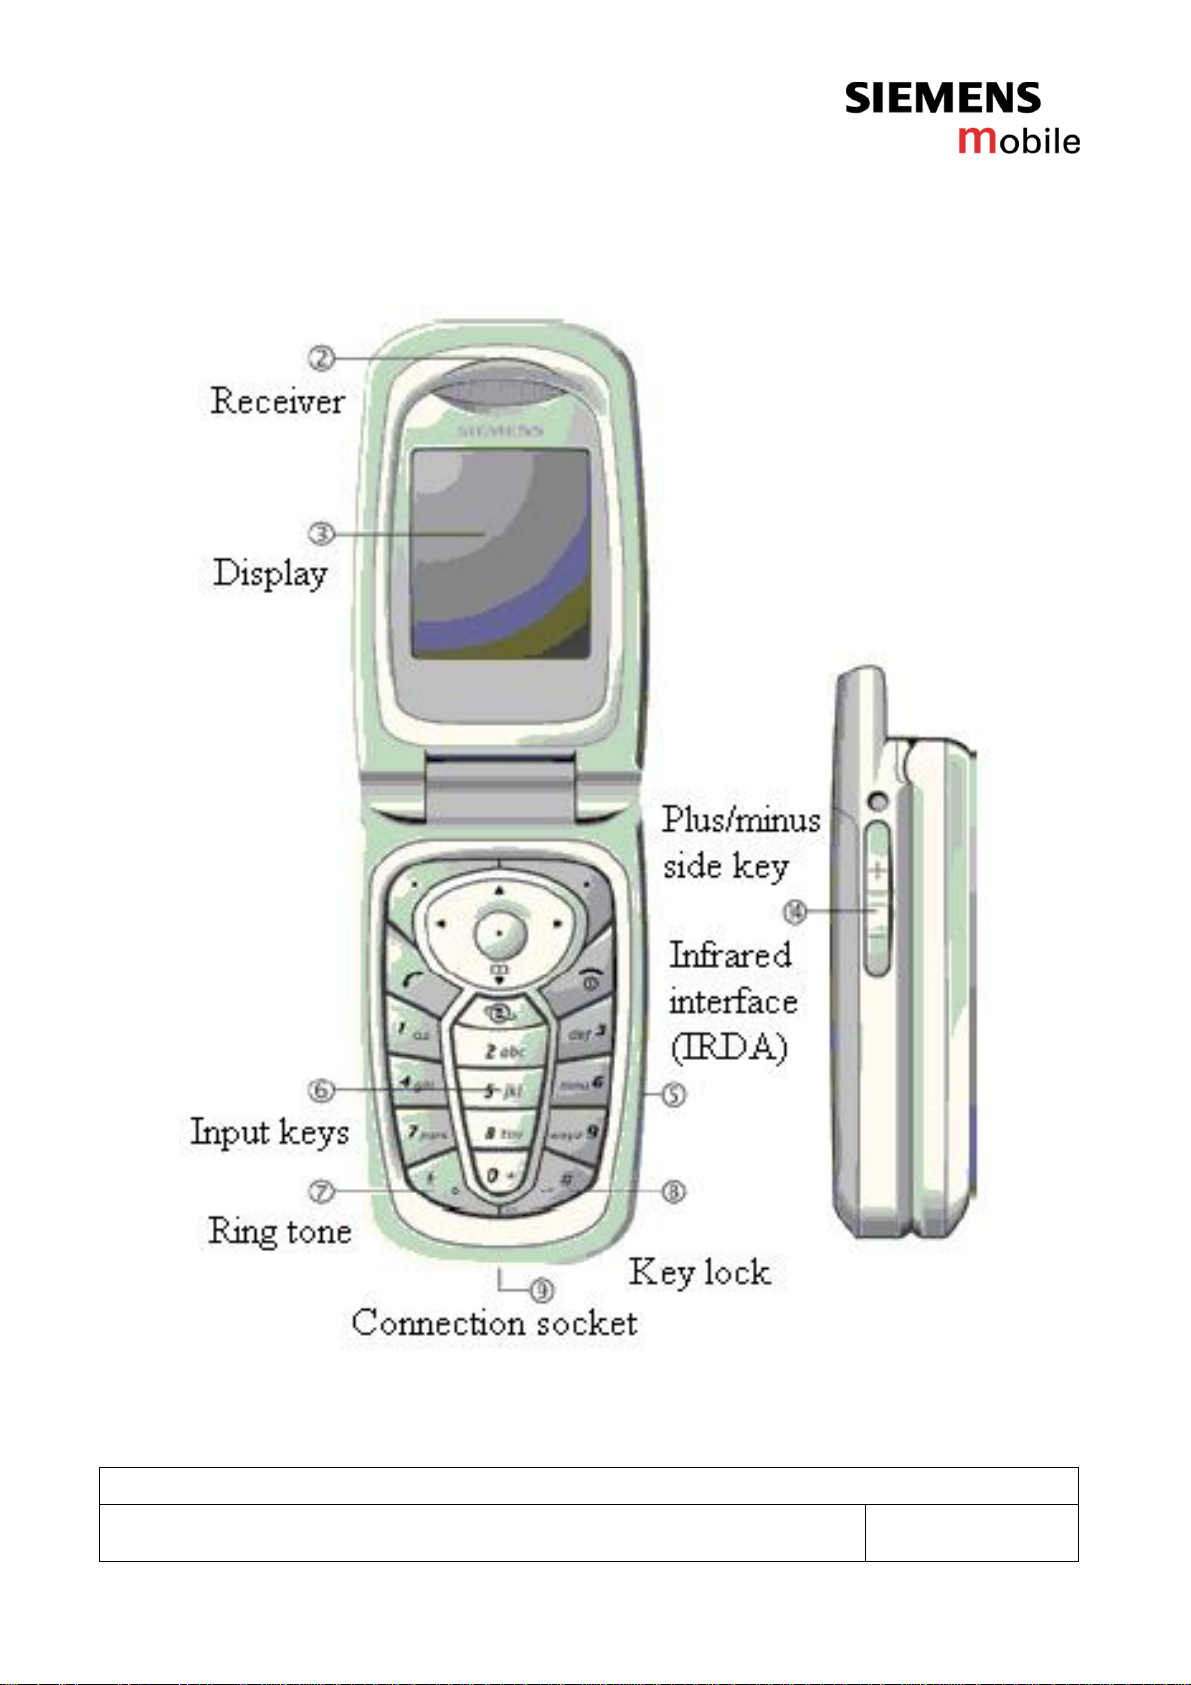
1.3 Venus visual parts list
Service Repair Documentation
Level 0-2 CFX65
- 6 -
V1.1
Page 7

Company Confidential
Copyright 2004© Siemens AG
Service Repair Documentation
Level 0-2 CFX65
- 7 -
V1.1
Page 8
Company Confidential
Copyright 2004© Siemens AG
2. Test equipment
2.1 Tool list
Level 0 / Level1 / Level 2:
1.) Test SIM
2.) Torque screwdriver
3.) Pair of tweezers
4.) Equipment defined in GRT specifications
2.2 Software download equipment
1.) Bootadapter 2000/ 2002 with accessories
2.) Flash Tool
3.) SW file (CFX65_vx.xxx for Service Tool.zip)
4.) PC with Microsoft Windows NT, 2000 or XP
2.3 Service tool
Please refer to document CFX 65 Service Tool for download of software,
mapping file, customization and FFS (up- and download).
Service Repair Documentation
Level 0-2 CFX65
- 8 -
V1.1
Page 9
Company Confidential
Copyright 2004© Siemens AG
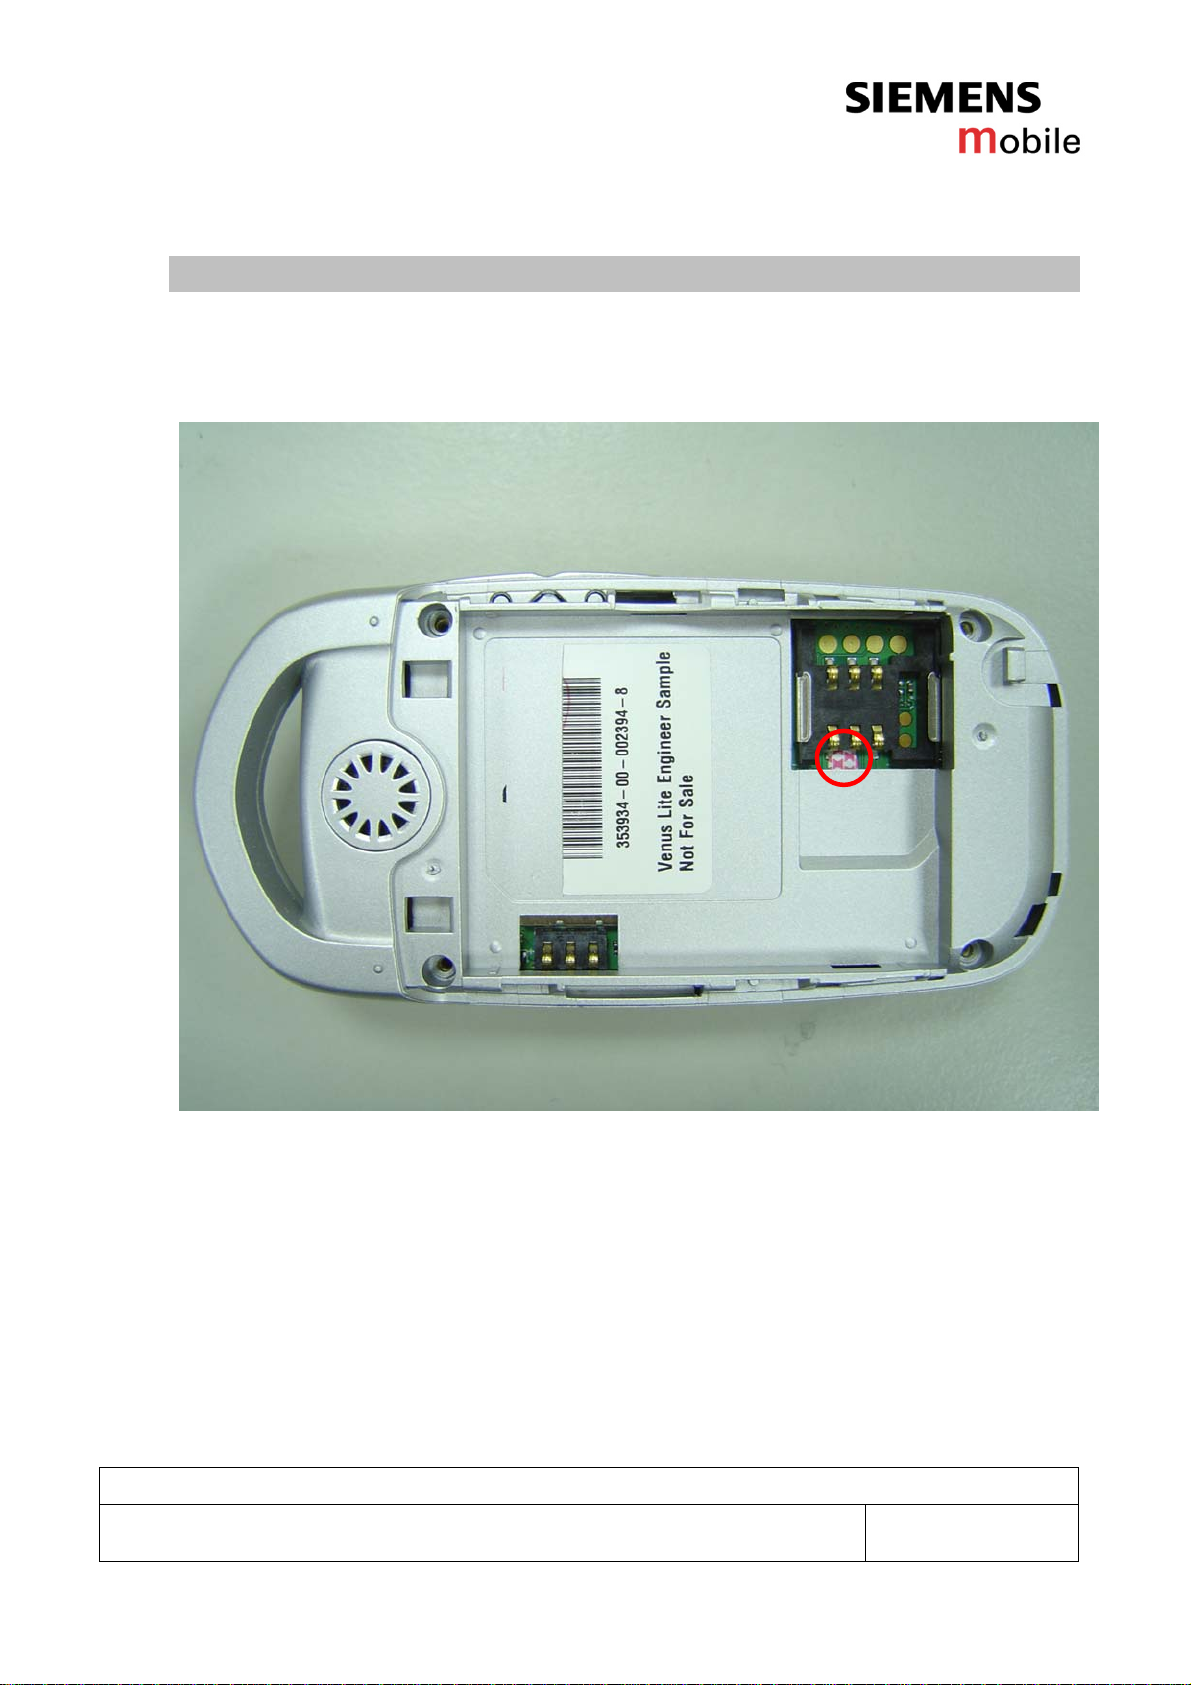
3. Water indicator
On the PCB, beside the SIM reader, is a water indicator sticked on.
This indicator becomes completely red if it is exposed to liquid.
A phone with a red water indicator is out of warranty and a repair is
charged to the customer.
Service Repair Documentation
Level 0-2 CFX65
- 9 -
V1.1
Page 10

Company Confidential
Copyright 2004© Siemens AG
4. Repair definition
Level 0: Phone is NOT disassembled. SW update, exchange of accessories,
battery and battery cover.
Level 1: Change of non-soldered components, e.g. part s of housing, antenna,
keys or keypads.
Level 2: Change of complete boards, no adjustment necessary
Repair equipment compliance requirements:
Level 0: The device must support a SW update and configuration
functionality via the SIEMENS bootadapter.
Level 2: No special equipment is required for this level. The SIEMENS
service process is using a standard GSM system tester and a
coupler board for a GoNoGo test.
L0: Phone is NOT disassembled.
Item Description Chapter
1 Battery 5
2 Battery cover 5
3 SW update 5
Service Repair Documentation
Level 0-2 CFX65
- 10 -
V1.1
Page 11

Company Confidential
Copyright 2004© Siemens AG
L1 : Change of non-soldered components
Item Description Chapter
1 LCM/B 6
2 Camera module 6
3 Top_lower cover/ top_upper cover 6
4 Bottom_lower case and keypad 6
5 Keypad and dome 6
6 Antenna/ vibrator/ microphone 6
7 Speaker 6
L2 : Change of complete boards, no adjustment necessary.
PCB module
Item Description Chapter
1 PCB 7
Service Repair Documentation
Level 0-2 CFX65
- 11 -
V1.1
Page 12

Company Confidential
Copyright 2004© Siemens AG
5. Level 0 trouble shooting guide
1. Battery
If the phone can`t be powered on, check the battery first.
1.1 Make sure it is a SIEMENS brand battery.
1.2 If the battery is dead, replace the battery (the battery voltage should be in 3.2~4.2 V).
1.3 Clean the battery connector if any dirt on it, such as oxide.
(Also the battery connector in the phone should be cleaned )
1.4 The standby current is <2.5mA
1. Remove battery cover 2. Remove battery 3. Battery pack
Push
Service Repair Documentation
Level 0-2 CFX65
- 12 -
V1.1
Page 13

Company Confidential
Copyright 2004© Siemens AG
2. Battery cover
Remove the bad cover and install a new one. Check the gap which should be less than
0.2mm.
1. Remove battery cover 2. Battery cover
Push
Service Repair Documentation
Level 0-2 CFX65
- 13 -
V1.1
Page 14

Company Confidential
Copyright 2004© Siemens AG
4. Charging voltage, power consumption :
TW09
Item
Unit
GSM900 GSM1800
Current consumption 15.42 15.24 mA
Battery life time 39 39 Hours
TW09
Talk mode
Idle mode
Item
Unit
GSM900 GSM1800
Current consumption 282.08 257.91 mA
Battery life time 127 139 Minutes
Siemens best case
Idle mode
Item
Unit
GSM900 GSM1800
Current consumption 13.60 13.66 mA
Battery life time 44 44 Hours
Siemens best case
Talk mode
Item
Unit
GSM900 GSM1800
Current consumption 105.82 107.8 mA
Battery life time 340 336 Minutes
Item
Current consumption 24.96 25.08 mA
Battery life time 24 24 Hours
Item
Current consumption 298.75 275.50 mA
Battery life time 120 130 Minutes
Travel charger: 5V, 620mA Standard charger: 5V, 400mA
Service Repair Documentation
Level 0-2 CFX65
- 14 -
Siemens worst case
Idle mode
Unit
GSM900 GSM1800
Siemens worst case
Talk mode
Unit
GSM900 GSM1800
V1.1
Page 15

Company Confidential
Copyright 2004© Siemens AG
6. Level 1 trouble shooting guide
1. LCM
1. Pry the lens slowly
and carefully
4. Remove LCM/B. 5. Install a new LCM/B.6. Do the function test
2. Remove the 3
screws
3. Pry the LCM off upper
case with a pair of
tweezers
Refer to section 10
“Test mode”
Service Repair Documentation
Level 0-2 CFX65
- 15 -
V1.1
Page 16

Company Confidential
Copyright 2004© Siemens AG
2. Camera module
1. Pry the lens slowly
and carefully
4. Remove LCM/B
2. Remove the 3
3. Pry the LCM off upper
case with a pair of
screws
tweezers
5. Replace camera
module
Service Repair Documentation
Level 0-2 CFX65
- 16 -
V1.1
Page 17

Company Confidential
Copyright 2004© Siemens AG
3. Top_lower cover / Top_upper cover
1. Pry the lens slowly
and carefully
4. Remove top_upper
cover
7. Separate top_lower
case from hinge slowly
2. Remove the 3 screws
3. Separate top_upper
cover & top_lower cover
6. Press spring bolt in the
5. Remove LCM/B
hinge
8. Install a new top_lower
case
Service Repair Documentation
Level 0-2 CFX65
- 17 -
V1.1
Page 18

Company Confidential
Copyright 2004© Siemens AG
4. Bottom_lower case and keypad
1. Remove battery
cover
Push
4. Separate bottom_upper cover &
bottom_lower cover carefully
6. Remove PCBA
2. Remove battery 3. Remove 4 screws
7. Separate keypad &
bottom_upper cover
5. Separate PCBA &
bottom_upper cover
Service Repair Documentation
Level 0-2 CFX65
- 18 -
V1.1
Page 19

Company Confidential
Copyright 2004© Siemens AG
5. Keypad dome (with fixture)
1. Dome fixture
2. Put the metal dome
3. Put the PCBA on it
sticker on the fixture
Service Repair Documentation
Level 0-2 CFX65
- 19 -
V1.1
Page 20

Company Confidential
Copyright 2004© Siemen s AG
6. Antenna, speaker, vibrator and microphone
Use a pair of tweezers to remove the certain part.
7. Speaker
1. Pry the lens slowly
and carefully
4. Remove top_upper
cover
2. Remove the 3
screws
5. Remove LCM/B 6. Change speaker
3. Separate top_upper
cover & top_lower cover
Service Repair Documentation
Level 0-2 CFX65
- 20 -
V1.1
Page 21

Company Confidential
Copyright 2004© Siemens AG
7. Level 2 trouble shooting guide
1. PCBA
1. Remove battery
cover
Push
4. Separate bottom_upper cover &
bottom_lower cover carefully
2. Remove battery 3. Remove 4 screws
5. Separate PCBA &
bottom_upper cover
6. Install a new PCBA
Service Repair Documentation
Level 0-2 CFX65
- 21 -
V1.1
Page 22

Company Confidential
Copyright 2004© Siemens AG
2. IMEI ranges:
Linkou: 353934-00-000001 to 353934-00-999999
Guanzhou: 353935-00-000001 to 353935-00-999999
SSMC: 354457-00-000001 to 354457-00-999999
Service Repair Documentation
Level 0-2 CFX65
- 22 -
V1.1
Page 23

Company Confidential
Copyright 2004© Siemens AG
8. Disassembly
Note: ESD concept; the internal circuits will be more susceptible to ESD during the
housing exchange. The construction of the internal block is designed, in the best possible
way, to protect the circuit against sparks.
The keypad must be completely closed to prevent any occurrence of an ESD disruptive
discharge.
It is a requirement for the service personnel to observe ESD protection rules while
performing service on the CFX65.
Front view of the CFX 65
Step 1
Remove the battery and cover
Back View of the CFX 65
Step 2
Pry the lens and remove it
Service Repair Documentation
Level 0-2 CFX65
- 23 -
V1.1
Page 24

Company Confidential
Copyright 2004© Siemens AG
Step 3
Remove 3 screws and pry the upper case to open
Step 4
Remove the upper cover and remov e the LCM
Service Repair Documentation
Level 0-2 CFX65
- 24 -
V1.1
Page 25

Company Confidential
Copyright 2004© Siemens AG
Step 5
Press the spring bolt in the hinge and remove
upper case
Step 6
Separate upper and lower case
Service Repair Documentation
Level 0-2 CFX65
- 25 -
V1.1
Page 26

Company Confidential
Copyright 2004© Siemens AG
Step 7
Pry to open the cover
Step 8
Separate PCBA from the back cover and remove
the keypad
Step 9 LCM
Service Repair Documentation
Level 0-2 CFX65
- 26 -
Step 10
PCBA –A
V1.1
Page 27

Company Confidential
Copyright 2004© Siemens AG
PCBA -B
Service Repair Documentation
Level 0-2 CFX65
- 27 -
V1.1
Page 28

Company Confidential
Copyright 2004© Siemens AG
Disassembled CFX 65
Service Repair Documentation
Level 0-2 CFX65
- 28 -
V1.1
Page 29

Company Confidential
Copyright 2004© Siemens AG
9. Reassembly
Step 1
Put the B to B Connector on to the lower case
and press the hinge. Assemble the upper
case with lower case.
Step 2
Put the keypad on the lower case,
then put the PCBA on the lower case .
Connect the B to B board to the PCBA.
Service Repair Documentation
Level 0-2 CFX65
- 29 -
V1.1
Page 30

Company Confidential
Copyright 2004© Siemens AG
Step 3
Put the lower case and upper case together
and connect the speaker connector to the
PCBA
Step 5
Connect the Camera to the LCM
Step 4
Insert and tighten the 4 screws (11 ± 2 cNm)
Step 6
Put the LCM on the upper case and connect the
B to B connector to LCM
Service Repair Documentation
Level 0-2 CFX65
- 30 -
V1.1
Page 31

Company Confidential
Copyright 2004© Siemens AG
Step 7
Put the upper case to lower case
Step 8
Insert and tighten the 3 screws (11 ±2 cNm)
Service Repair Documentation
Level 0-2 CFX65
- 31 -
V1.1
Page 32

Company Confidential
Copyright 2004© Siemens AG
10. Explode drawing
Service Repair Documentation
Level 0-2 CFX65
- 32 -
V1.1
Page 33

Company Confidential
Copyright 2004© Siemens AG
11. Test mode
How to enter the test mode:
1. Type *#06#
2. Press More three times
3. Scroll to desired test option with the up/ down arrow buttons
4. Press OK to enter test option
12. Unlock sequence
The unlock sequence is: *#2211*xxxxxxxx#
Remark:
The unlock sequence only works if the phone is locked.
An invalid phone code has to be entered until the phone is locked, if the sequence above
does not work at the first attempt.
In future SW releases also the standard Siemens sequence (*#0003#) will be supported.
Service Repair Documentation
Level 0-2 CFX65
- 33 -
V1.1
 Loading...