

Page 1
Microwave
Φούρνος μικροκυμάτων
Forno a microonde
Microondas
CF634AGS1 CF834AGB1
VLHPHQVKRPHEVKJURXSFRPZHOFRPH
en /TYZX[IZOUTSGT[GR
el ƝƱƴưtƲƾǃƽƫƿƴƾ .............................22
it Istruzioni per l’uso ..........................42
pt Instruções de serviço .....................62
5HJLVWHU
\RXU
SURGXFW
RQOLQH
Page 2

Page 3

en
Table of contents
enInstruction manual
8 Intended use . . . . . . . . . . . . . . . . . . . . . . . . . . . . . 4
3 Trouble shooting . . . . . . . . . . . . . . . . . . . . . . . . 16
( Important safety information . . . . . . . . . . . . . . . 4
General information . . . . . . . . . . . . . . . . . . . . . . . . . . . 4
Microwave . . . . . . . . . . . . . . . . . . . . . . . . . . . . . . . . . . 5
] Causes of damage . . . . . . . . . . . . . . . . . . . . . . . . 6
7 Environmental protection . . . . . . . . . . . . . . . . . . 7
Environmentally-friendly disposal . . . . . . . . . . . . . . . . .7
* Getting to know your appliance . . . . . . . . . . . . . 7
Control panel . . . . . . . . . . . . . . . . . . . . . . . . . . . . . . . .7
Controls . . . . . . . . . . . . . . . . . . . . . . . . . . . . . . . . . . . .7
Display . . . . . . . . . . . . . . . . . . . . . . . . . . . . . . . . . . . . . 8
Operating modes menu . . . . . . . . . . . . . . . . . . . . . . . . 8
Further information. . . . . . . . . . . . . . . . . . . . . . . . . . . . 8
Cooking compartment functions . . . . . . . . . . . . . . . . . 8
Accessories . . . . . . . . . . . . . . . . . . . . . . . . . . . . . . . . .8
K Before using for the first time. . . . . . . . . . . . . . . 9
Initial use . . . . . . . . . . . . . . . . . . . . . . . . . . . . . . . . . . . 9
Cleaning accessories. . . . . . . . . . . . . . . . . . . . . . . . . . 9
1 Operating the appliance . . . . . . . . . . . . . . . . . . . 9
Switching the appliance on and off . . . . . . . . . . . . . . . 9
Operation . . . . . . . . . . . . . . . . . . . . . . . . . . . . . . . . . . . 9
Selecting an operating mode . . . . . . . . . . . . . . . . . . . 10
4 Customer service . . . . . . . . . . . . . . . . . . . . . . . . 17
E number and FD number . . . . . . . . . . . . . . . . . . . . .17
Technical data . . . . . . . . . . . . . . . . . . . . . . . . . . . . . .17
J Tested for you in our cooking studio . . . . . . . . 18
Defrosting . . . . . . . . . . . . . . . . . . . . . . . . . . . . . . . . . .18
Defrosting, heating up or cooking frozen food . . . . . .19
Heating . . . . . . . . . . . . . . . . . . . . . . . . . . . . . . . . . . . .19
Cooking . . . . . . . . . . . . . . . . . . . . . . . . . . . . . . . . . . .20
Microwave tips . . . . . . . . . . . . . . . . . . . . . . . . . . . . . .21
E Test dishes . . . . . . . . . . . . . . . . . . . . . . . . . . . . . 21
Cooking only using the microwave. . . . . . . . . . . . . . .21
Defrosting only using the microwave . . . . . . . . . . . . .21
Produktinfo
Additional information on products, accessories,
replacement parts and services can be found at
www.siemens-home.bsh-group.com and in the online
shop www.siemens-home.bsh-group.com/eshops
^ Microwave. . . . . . . . . . . . . . . . . . . . . . . . . . . . . . 10
Cookware. . . . . . . . . . . . . . . . . . . . . . . . . . . . . . . . . . 10
Microwave power settings . . . . . . . . . . . . . . . . . . . . . 11
Setting the microwave . . . . . . . . . . . . . . . . . . . . . . . . 11
O Timer . . . . . . . . . . . . . . . . . . . . . . . . . . . . . . . . . . 12
Setting the timer. . . . . . . . . . . . . . . . . . . . . . . . . . . . . 12
P Programmes . . . . . . . . . . . . . . . . . . . . . . . . . . . . 12
Setting a programme . . . . . . . . . . . . . . . . . . . . . . . . .12
Information about the programmes . . . . . . . . . . . . . . 13
Resting time . . . . . . . . . . . . . . . . . . . . . . . . . . . . . . . .13
Programme table . . . . . . . . . . . . . . . . . . . . . . . . . . . .13
Q Basic settings. . . . . . . . . . . . . . . . . . . . . . . . . . . 14
Changing settings . . . . . . . . . . . . . . . . . . . . . . . . . . .14
List of settings . . . . . . . . . . . . . . . . . . . . . . . . . . . . . . 14
Power cut . . . . . . . . . . . . . . . . . . . . . . . . . . . . . . . . . .14
Changing the time . . . . . . . . . . . . . . . . . . . . . . . . . . . 14
D Cleaning . . . . . . . . . . . . . . . . . . . . . . . . . . . . . . . 15
Cleaning agent. . . . . . . . . . . . . . . . . . . . . . . . . . . . . . 15
3
Page 4

en Intended use
8Intended use
Intended use
Read these instructions carefully. Only then
will you be able to operate your appliance
safely and correctly. Retain the instruction
manual and installation instructions for future
use or for subsequent owners.
This appliance is only intended to be fully fitted
in a kitchen. Observe the special installation
instructions.
Check the appliance for damage after
unpacking it. Do not connect the appliance if it
has been damaged in transport.
Only a licensed professional may connect
appliances without plugs. Damage caused by
incorrect connection is not covered under
warranty.
This appliance is intended for domestic use
only. The appliance must only be used for the
preparation of food and drink. The appliance
must be supervised during operation. Only
use this appliance indoors.
This appliance is intended for use up to a
maximum height of 4000 metres above sea
level.
This appliance may be used by children over
the age of 8 years old and by persons with
reduced physical, sensory or mental
capabilities or by persons with a lack of
experience or knowledge if they are
supervised or are instructed by a person
responsible for their safety how to use the
appliance safely and have understood the
associated hazards.
Children must not play with, on, or around the
appliance. Children must not clean the
appliance or carry out general maintenance
unless they are at least 8 years old and are
being supervised.
Keep children below the age of 8 years old at
a safe distance from the appliance and power
cable.
Always slide accessories into the cooking
compartment the right way round.
(Important safety
information
Important safety information
General information
:Warning – Risk of fire!
Combustible items stored in the cooking
compartment may catch fire. Never store
combustible items in the cooking
compartment. Never open the appliance door
if there is smoke inside. Switch off the
appliance and unplug it from the mains or
switch off the circuit breaker in the fuse box.
:Warning – Risk of serious burns!
■ Accessories and ovenware become very
hot. Always use oven gloves to remove
accessories or ovenware from the cooking
compartment.
Risk of burns!
■ Alcoholic vapours may catch fire in the hot
cooking compartment. Never prepare food
containing large quantities of drinks with a
high alcohol content. Only use small
quantities of drinks with a high alcohol
content. Open the appliance door with care.
:Warning – Risk of scalding!
■ The accessible parts become hot during
operation. Never touch the hot parts. Keep
children at a safe distance.
Risk of scalding!
■ When you open the appliance door, hot
steam may escape. Open the appliance
door with care. Keep children at a safe
distance.
Risk of scalding!
■ Water in a hot cooking compartment may
create hot steam. Never pour water into the
hot cooking compartment.
:Warning – Risk of injury!
■ Scratched glass in the appliance door may
develop into a crack. Do not use a glass
scraper, sharp or abrasive cleaning aids or
detergents.
Risk of injury!
■ The hinges on the appliance door move
when opening and closing the door, and
you may be trapped. Keep your hands away
from the hinges.
4
Page 5

Important safety information en
:Warning – Risk of electric shock!
■ Incorrect repairs are dangerous. Repairs
may only be carried out and damaged
power cables replaced by one of our
trained after-sales technicians. If the
appliance is defective, unplug the appliance
from the mains or switch off the circuit
breaker in the fuse box. Contact the aftersales service.
Risk of electric shock and serious injury!
■ The cable insulation on electrical
appliances may melt when touching hot
parts of the appliance. Never bring
electrical appliance cables into contact with
hot parts of the appliance.
Risk of electric shock!
■ Do not use any high-pressure cleaners or
steam cleaners, which can result in an
electric shock.
Risk of electric shock!
■ A defective appliance may cause electric
shock. Never switch on a defective
appliance. Unplug the appliance from the
mains or switch off the circuit breaker in the
fuse box. Contact the after-sales service.
:Warning – Hazard due to magnetism!
Permanent magnets are used in the control
panel or in the control elements. They may
affect electronic implants, e.g. heart
pacemakers or insulin pumps. Wearers of
electronic implants must stay at least 10 cm
away from the control panel.
Microwave
:Warning – Risk of fire!
■ Using the appliance for anything other than
its intended purpose is dangerous and may
cause damage.
The following is not permitted: drying out
food or clothing, heating slippers, grain or
cereal pillows, sponges, damp cleaning
cloths or similar.
For example, heated slippers and grain or
cereal pillows may catch fire, even several
hours after they have been heated.The
appliance must only be used for the
preparation of food and drinks.
Risk of fire!
■ Food may catch fire. Never heat food in
heat-retaining packages.
Do not leave food heating unattended in
containers made of plastic, paper or other
combustible materials.
Do not select a microwave power or time
setting that is higher than necessary. Follow
the information provided in this instruction
manual.
Never use the microwave to dry food.
Never defrost or heat food with a low water
content, e.g. bread, at too high a microwave
power or for too long.
Risk of fire!
■ Cooking oil may catch fire. Never use the
microwave to heat cooking oil on its own.
:Warning – Risk of explosion!
Liquids and other food may explode when in
containers that have been tightly sealed.
Never heat liquids or other food in containers
that have been tightly sealed.
:Warning – Risk of burns!
■ Foods with peel or skin may burst or
explode during, or even after, heating.
Never cook eggs in their shells or reheat
hard-boiled eggs. Never cook shellfish or
crustaceans. Always prick the yolk when
baking or poaching eggs. The skin of foods
that have a peel or skin, such as apples,
tomatoes, potatoes and sausages, may
burst. Before heating, prick the peel or skin.
Risk of burns!
■ Heat is not distributed evenly through baby
food. Never heat baby food in closed
containers. Always remove the lid or teat.
Stir or shake well after the food has been
heated. Check the temperature of the food
before it is given to the child.
Risk of burns!
■ Heated food gives off heat. The ovenware
may become hot. Always use oven gloves
to remove ovenware or accessories from
the cooking compartment.
Risk of burns!
■ Airtight packaging may burst when food is
heated. Always observe the instructions on
the packaging. Always use oven gloves to
remove dishes from the cooking
compartment.
Risk of burns!
■ The accessible parts become very hot when
in operation. Never touch hot parts. Keep
children at a safe distance.
5
Page 6
en Causes of damage
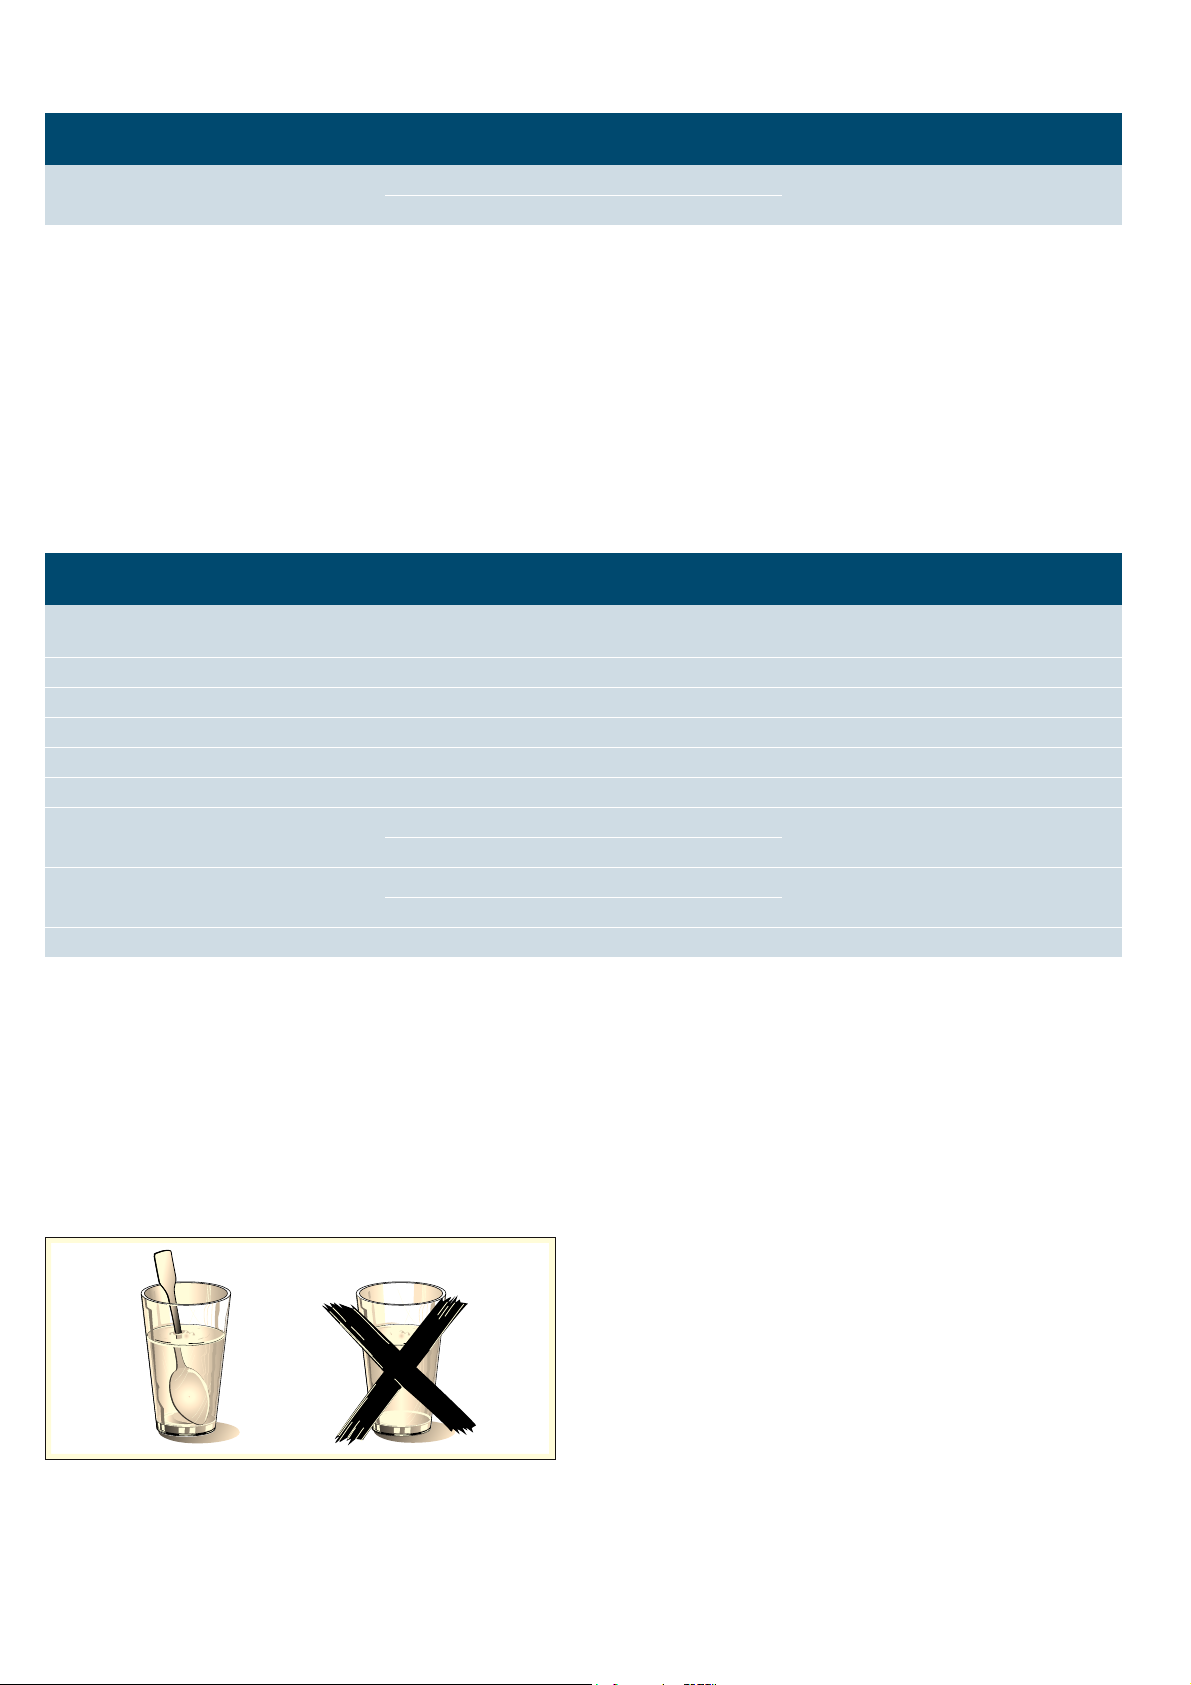
:Warning – Risk of scalding!
■ There is a possibility of delayed boiling
when a liquid is heated. This means that the
liquid reaches boiling temperature without
the usual steam bubbles rising to the
surface. Even if the container only vibrates a
little, the hot liquid may suddenly boil over
and spatter. When heating, always place a
spoon in the container. This will prevent
delayed boiling.
:Warning – Risk of injury!
■ Unsuitable ovenware may crack. Porcelain
or ceramic ovenware can have small
perforations in the handles or lids. These
perforations conceal a cavity below. Any
moisture that penetrates this cavity could
cause the ovenware to crack. Only use
microwave-safe ovenware.
Risk of injury!
■ If using the appliance in microwave mode
only, placing cookware and containers
made of metal inside the appliance may
cause sparks when the appliance is
operating. This will damage the appliance.
Never use metal containers when using the
appliance in microwave mode only.
:Warning – Risk of electric shock!
The appliance is a high-voltage appliance.
Never remove the casing.
:Warning – Risk of serious damage to
health!
■ The surface of the appliance may become
damaged if it is not cleaned properly.
Microwave energy may escape. Clean the
appliance on a regular basis, and remove
any food residue immediately. Always keep
the cooking compartment, door seal, door
and door stop clean. ~ "Cleaning"
on page 15
Risk of serious damage to health!
■ Microwave energy may escape if the
cooking compartment door or the door seal
is damaged. Never use the appliance if the
cooking compartment door or the door seal
is damaged. Contact the after-sales service.
Risk of serious damage to health!
■ Microwave energy will escape from
appliances that do not have any casing.
Never remove the casing. For any
maintenance or repair work, contact the
after-sales service.
]Causes of damage
Causes of damage
Caution!
■ Transporting the appliance: Do not carry or hold the
appliance by the door handle. The door handle
cannot support the weight of the appliance and
could break.
■ Creation of sparks: Metal – e.g. a spoon in a glass –
must be kept at least 2 cm from the cooking
compartment walls and the inside of the door.
Sparks can irreparably damage the glass on the
inside of the door.
■ Foil containers: Do not use foil containers in the
appliance. They damage the appliance by producing
sparks.
■ Operating the microwave without food: Operating the
appliance without food in the cooking compartment
may lead to overloading. Never switch on the
microwave unless there is food inside. The short
crockery test is the exception to this rule.
~ "Microwave" on page 10
■ Moisture in the cooking compartment: Over an
extended period of time, moisture in the cooking
compartment may lead to corrosion. Allow the
cooking compartment to dry after use. Do not keep
moist food in the closed cooking compartment for
extended periods of time. Do not store food in the
cooking compartment.
■ Extremely dirty seal: If the seal is very dirty, the
appliance door will no longer close properly during
operation. The fronts of adjacent units could be
damaged. Always keep the seal clean.
~ "Cleaning" on page 15
■ Cooling with the appliance door open: Only leave the
cooking compartment to cool with the door closed.
Do not trap anything in the appliance door. Even if
the door is only left open a crack, the front of nearby
furniture may become damaged over time.
■ Do not place or hang anything on the appliance door
– it is not a supporting surface. Do not place any
cookware or accessories on the appliance door.
■ Microwave popcorn: Never set the microwave output
too high. Use a maximum microwave output of 600
watts. Always place the popcorn bag on a glass
plate. The plate may jump if overloaded.
6
Page 7
Environmental protection en
7Environmental protection
Environmental protection
Environmentally-friendly disposal
Dispose of packaging in an environmentally-friendly
manner.
This appliance is labelled in accordance with
European Directive 2012/19/EU concerning
used electrical and electronic appliances
(waste electrical and electronic equipment WEEE). The guideline determines the
framework for the return and recycling of used
appliances as applicable throughout the EU.
*Getting to know your
appliance
Getting to know your appliance
In this chapter, we will explain the displays and controls.
You will also find out about the various functions of your
appliance.
Note: Depending on the appliance model, individual
details and colours may differ.
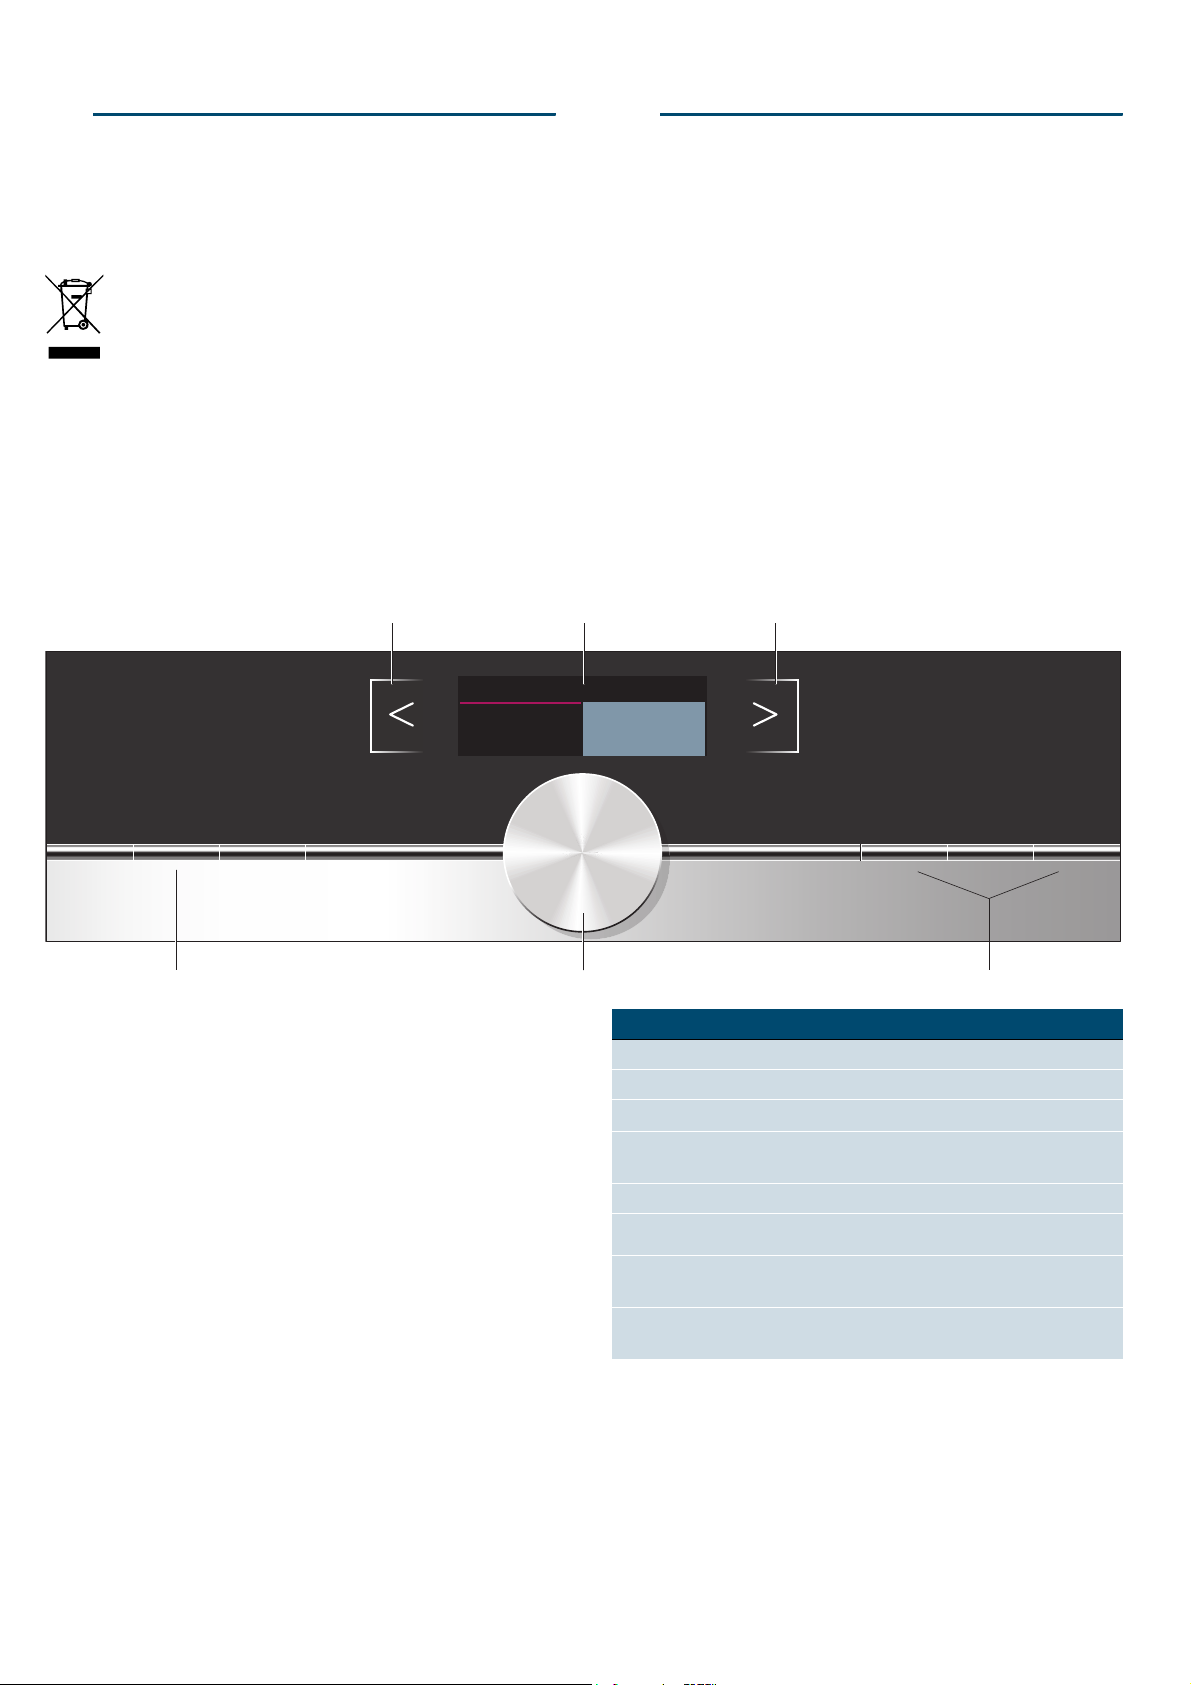
Control panel
In the control panel, you can use the various buttons,
touch fields and the rotary selector to set the required
function of the appliance. The current settings are
shown in the display.
The overview shows the control panel when the
appliance is switched on with a selected operating
mode.
##
POPGG
(
0
8
@
NFOV
Buttons
The buttons to the left and right of the rotary
selector have a pressure point. Press these
buttons to activate them.
Rotary selector
You can turn the rotary selector clockwise and
anti-clockwise.
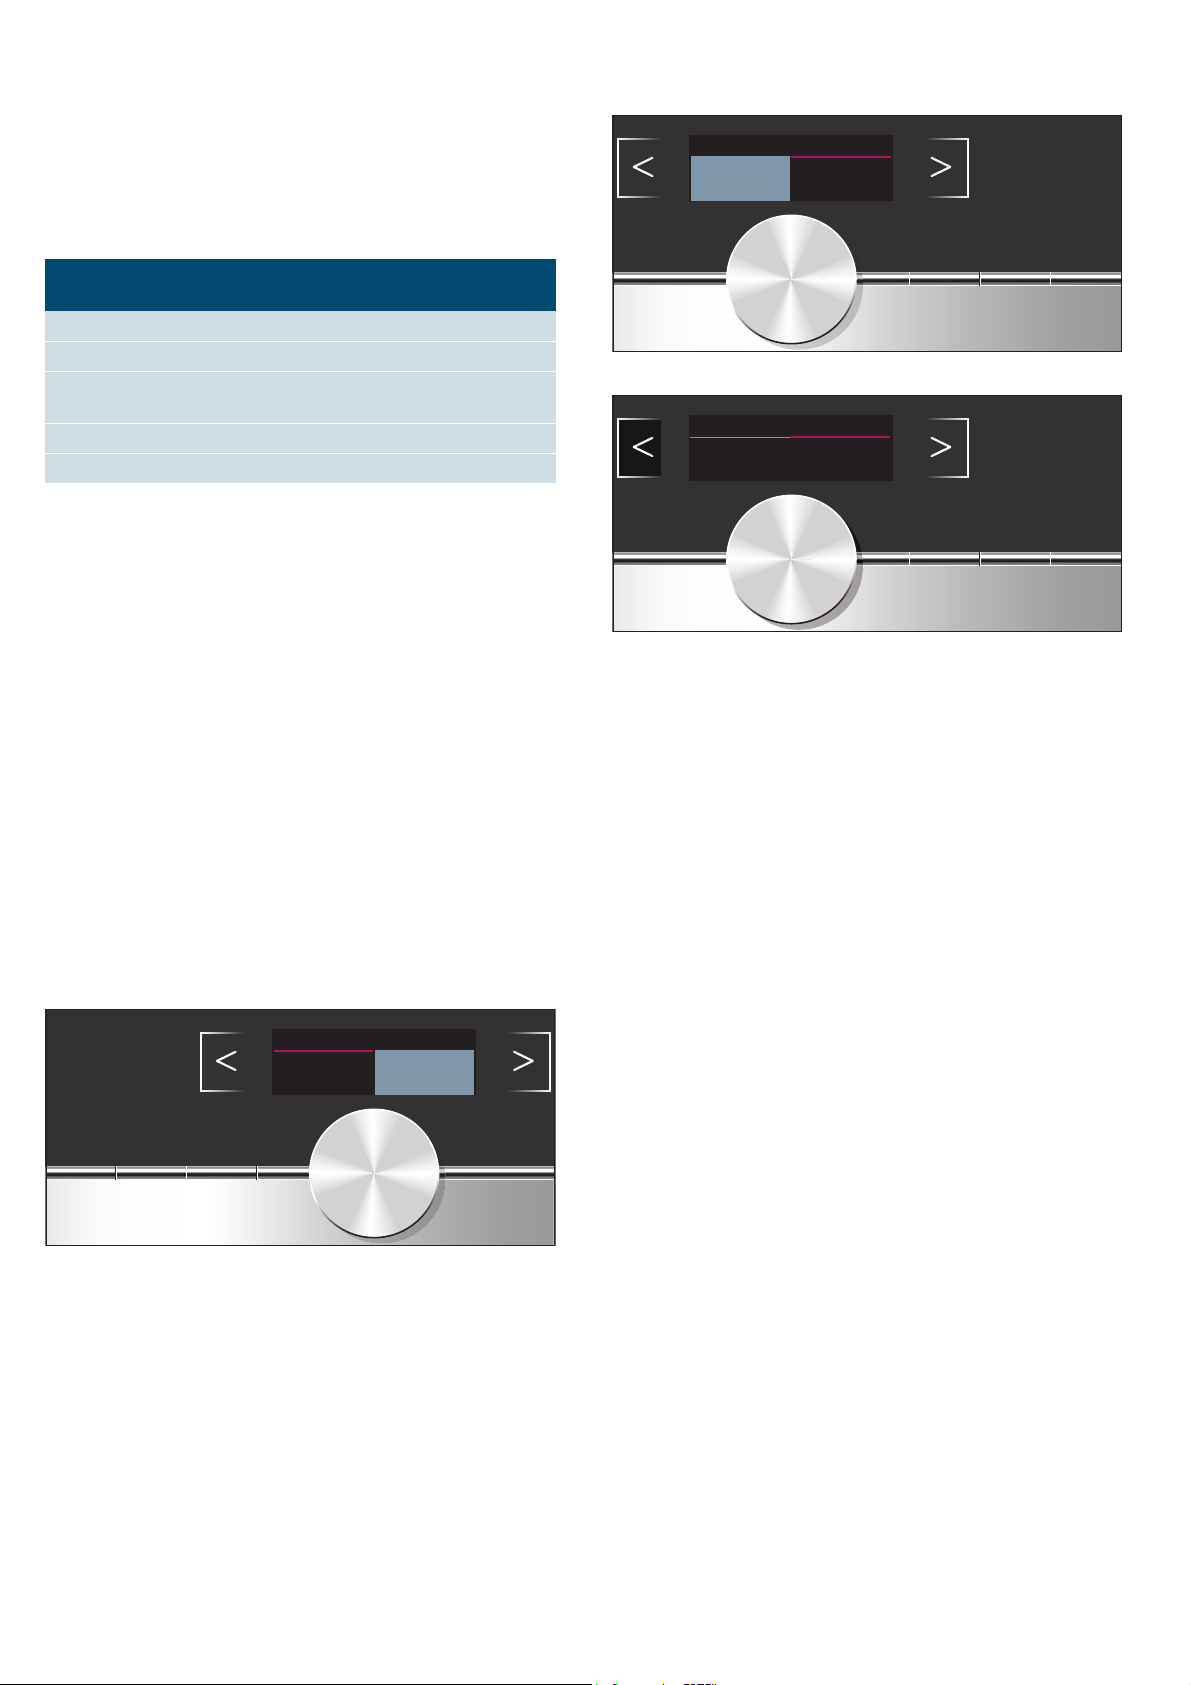
Display
You can see the current adjustment values,
options or notes in the display.
Touch fields
There are sensors under the touch fields to the left
O
¾ and right ¿ of the display. Touch the respective
arrow to select the function.
Controls
The individual controls are adapted for the various
functions of your appliance. You can set your appliance
simply and directly.
Buttons and touch fields
Here you can find a short explanation of the various
buttons and touch fields.
PLQV:
Buttons Meaning
on/off Switches the appliance on and off
menu Menu Opens the operating modes menu
l
0
start/stop Starts or pauses the operation
Touch fields
¾
¿
--------
Rotary selector
Use the rotary selector to change the operating modes
and adjustment values shown in the display.
In most selection lists, e.g. programmes, the first
selection follows the last.
In some selection lists, e.g. duration, you have to turn
the rotary selector back the other way when you reach
the minimum or maximum value.
Information Displays notes
Time-setting
option
Field to the left of
the display
Field to the right of
the display
Setting the timer
Navigates left
Navigates right
TUBSUTUPQ
7
Page 8
en Getting to know your appliance
Display
The display is structured so that the information can be
read at a glance.
The value that you can currently set is in focus. It is
displayed in white lettering with a dark background.
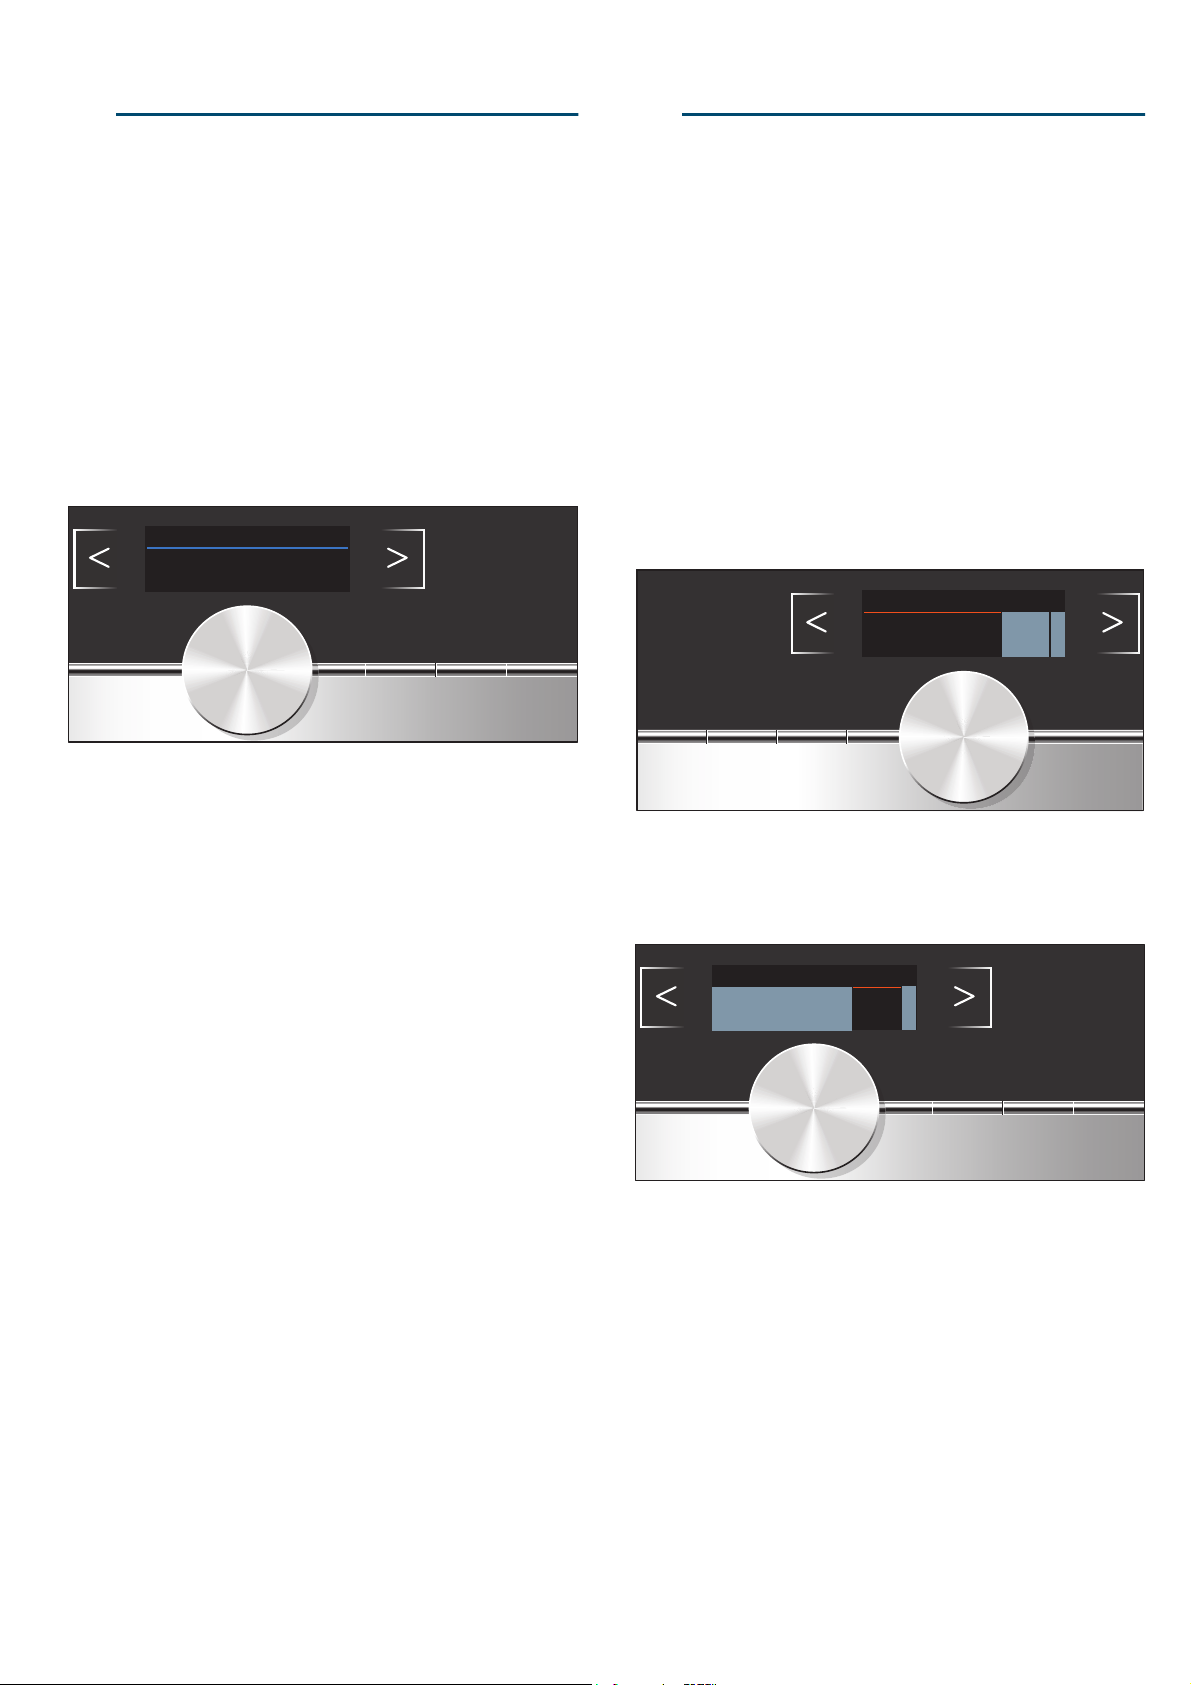
Status bar
The status bar is at the top of the display. The time,
timer duration and programme length are shown here.
Progress line
The progress line shows you how much time has
elapsed, for example. The straight line below the setting
values progresses from left to right, the longer the
operation continues to run.
Operating modes menu
The menu is divided into different operation modes. In
this way, you can quickly access the required function.
Depending on the appliance type, there are a various
number of operating modes.
Operating mode Use
Microwave Selects the microwave output
Programmes Automatic programmes
Prepares selected meals very easily
Settings ~ "Basic settings"
on page 14
--------
You can adapt your appliance's
basic settings to suit your needs.
Further information
When the operation has finished, the lighting switches
off.
Note: Opening the appliance door during operation:
The operation is suspended. After closing the door,
press the start/stop l button briefly. The operation will
then continue.
Cooling fan
The cooling fan switches on as required. The hot air
escapes above the door.
The cooling fan may continue to run for a certain time
after the operation.
Caution!
Do not cover the ventilation slots. Otherwise, the
appliance may overheat.
Notes
■ The appliance remains cool during microwave
operation. Despite this, the cooling fan will still
switch on. The fan may run on even when the
microwave operation has ended.
■ Condensation may form on the door window, interior
walls and floor. This is normal and does not
adversely affect microwave operation. Wipe away the
condensation after cooking.
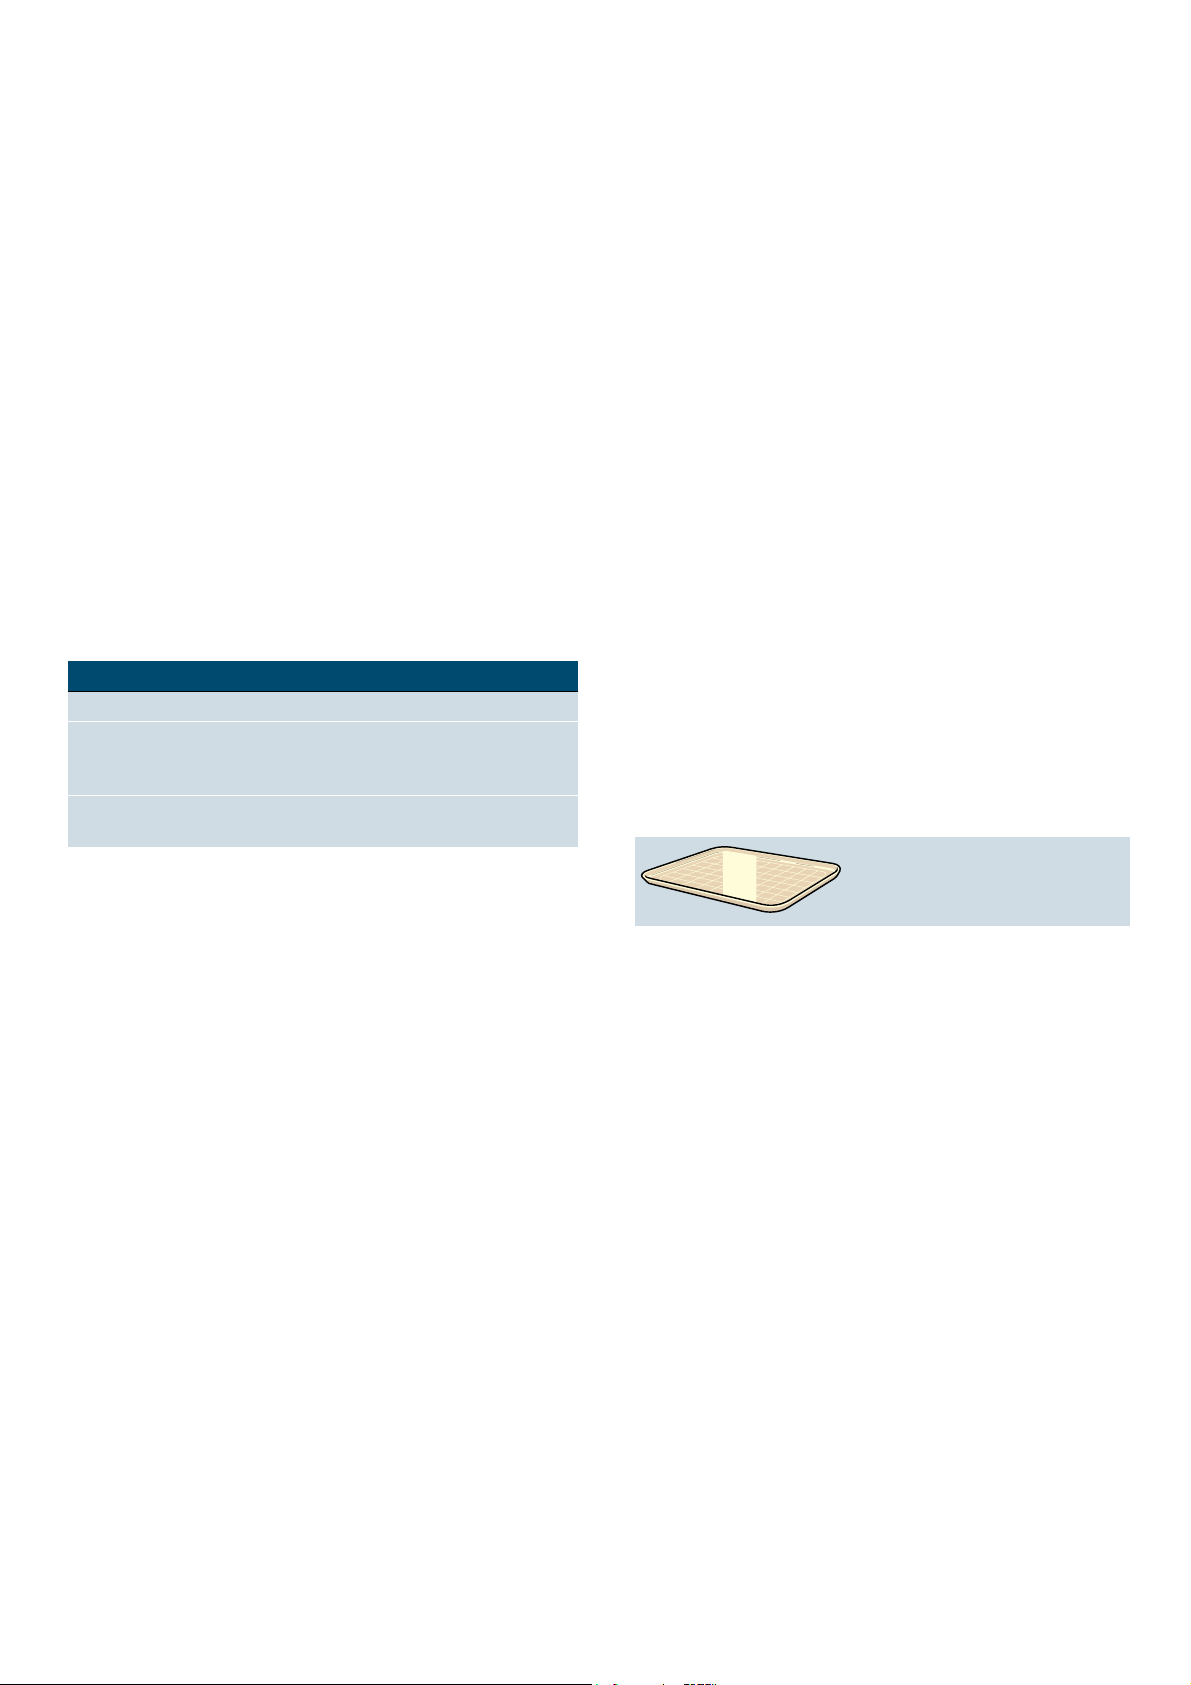
Accessories
The following accessories are included with your
appliance:
Glass tray
For defrosting and cooking food.
In most cases, the appliance provides you with notes
and further information on the action that is being
carried out. To view these, press the l button. The note
is displayed for a few seconds. Use the rotary selector
to scroll to the end of longer notes.
Some notes are displayed automatically, for example as
confirmation, or to provide an instruction or warning.
The note can be cleared by pressing the l button
again.
Cooking compartment functions
The functions in the cooking compartment make your
appliance easier to use. This, for example, enables the
cooking compartment to be well lit and a cooling fan to
prevent the appliance from overheating.
Interior lighting
When you open the appliance door, the interior lighting
switches on. If the door remains open for longer than
around five minutes, the cooking compartment lighting
switches off again. When the door is closed and
opened again, the cooking compartment lighting
switches on again.
For all operating modes, the cooking compartment
lighting switches on as soon as the operation is started.
Only use original accessories provided by your
appliance manufacturer. They are specially adapted for
your appliance.
You can buy accessories from the after-sales service,
from specialist retailers or online.
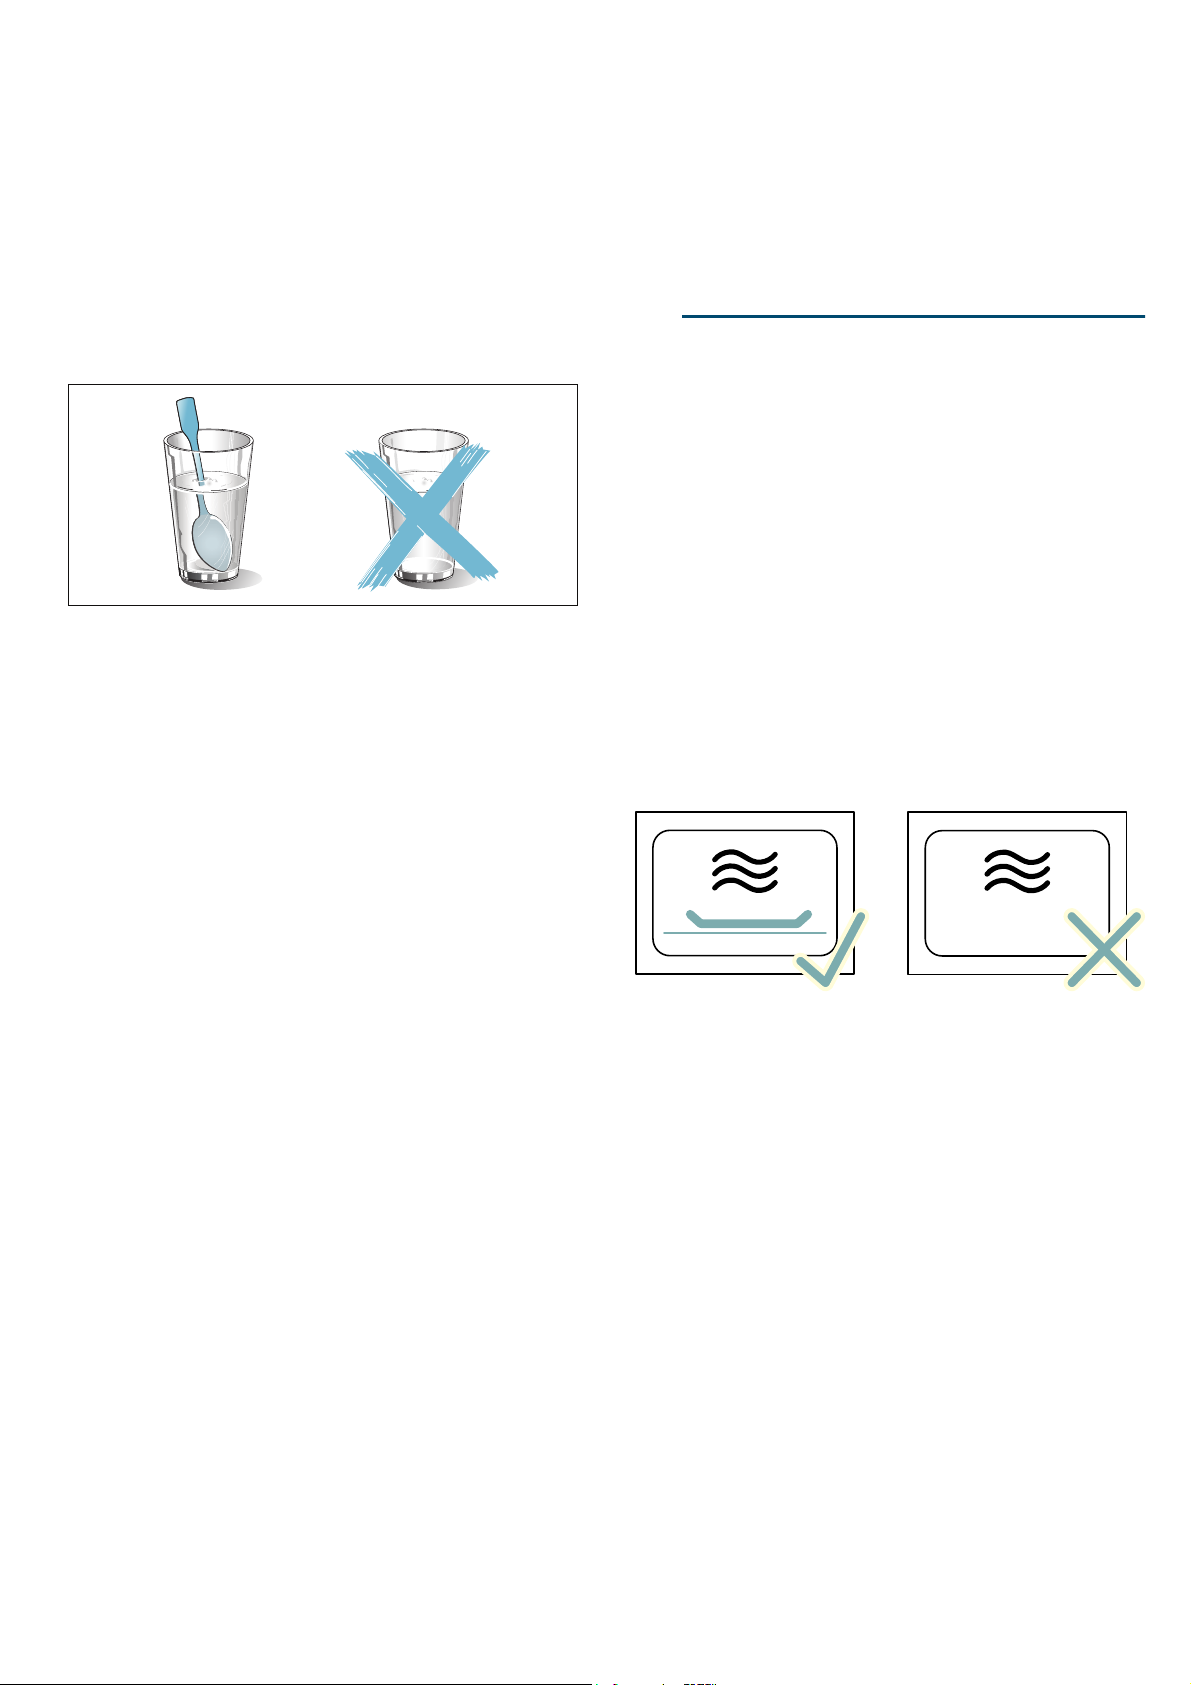
Note: Microwaveable ovenware can be placed on the
cooking compartment floor (level 0).
8
Page 9

Before using for the first time en
KBefore using for the first
time
Before using for the first time
Before you can use your new appliance, you must
make some settings.
Initial use
After connecting the appliance to the power or following
a power cut, the settings for initial use are shown in the
display. It may take a few seconds for the instruction to
appear.
Note: You can change these settings again at any time
in the basic settings.
Setting the language
1. Use the rotary selector to select the required
language.
2. Touch the ¿ arrow.
The next setting appears.
Setting the time
1. Turn the rotary selector to set the current time.
2. Touch the ¿ arrow.
Setting the date
1. Use the rotary selector to set the current day.
2. Touch the arrow ¿to confirm.
3. Use the rotary selector to set the current month.
4. Touch the arrow ¿to confirm.
5. Use the rotary selector to set the current year.
6. Touch the arrow ¿to confirm.
A note appears in the display confirming that the
initial use has been completed.
1Operating the appliance
Operating the appliance
You have already learnt about the controls and how
they work. Now we will explain how to set your
appliance. You will learn about what happens when you
switch the appliance on and off, and how to select the
operating mode.
Switching the appliance on and off
Before you are able to set the appliance, you must
switch it on.
Note: The timer can also be set when the appliance is
switched off. Some displays and notes remain visible in
the display after the appliance has been switched off.
Switch off your device when it is not being used. If no
settings are applied for a long time, the appliance
switches itself off automatically.
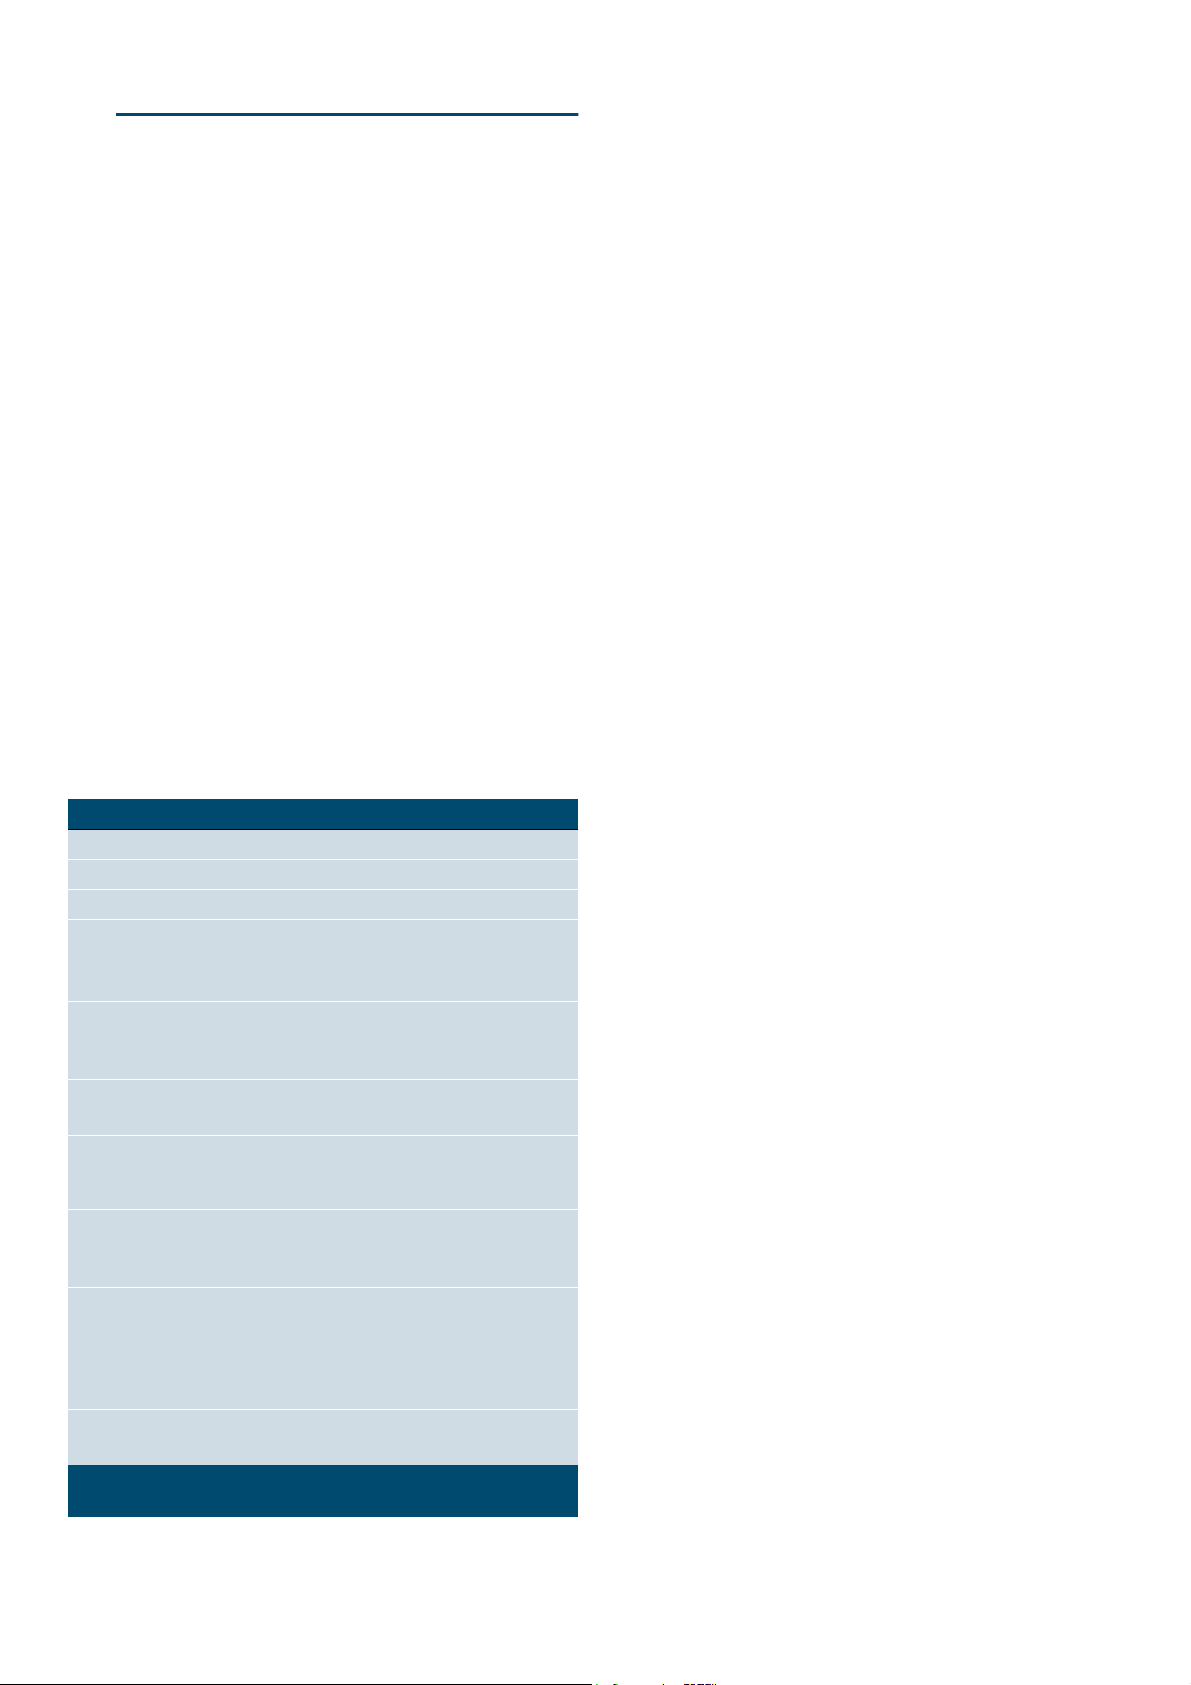
Switching on the appliance
Press the On/Off button to switch on the appliance.
The On/Off symbol above the button is illuminated in
blue.
The Siemens logo appears in the display, followed by
the maximum microwave output.
The appliance is ready to use.
You can find out how to set the operating modes in the
individual chapters.
Switching off the appliance
Use the on/off button to switch off the appliance.
The lighting above the button goes out.
Any functions that may be running are cancelled.
The time and date appear in the display.
Cleaning accessories
Before using the accessories for the first time, clean
them thoroughly using hot, soapy water and a soft cloth.
Note: You can set whether the time and date should be
displayed when the device is switched off in the basic
settings.
Operation
Some operating steps are the same for all operating
modes. In the following, you can learn about the basic
operating steps.
Starting the operation
You must press the start/stop button to start each
operation.
After the operation starts, your settings are shown in the
display. The progress line shows you how much time
has elapsed, for example.
Note: If the operation is paused due to the appliance
door being opened, the operation must be restarted
using the start/stop button after the door has been
closed.
9
Page 10

en Microwave
Pauses the operation
Use the start/stop button to pause and restart the
operation.
Press the on/off button to delete all settings.
Notes
■ Opening the appliance door also pauses the
operation.
■ The fan may continue to run after an operation is
paused or cancelled.
Selecting an operating mode
After the appliance is switched on, the default operating
mode is displayed. You can start this setting
immediately.
If you want to select a different operating mode, you
can find detailed descriptions of these modes in the
appropriate chapters.
The following always applies:
1. Press the Menu button.
The operating modes menu opens.
2. Use the rotary selector to select the required
operating mode.
Depending on the operating mode, different options
are available.
3. Use the arrow ¿ to navigate to the required
operating mode.
4. Use the rotary selector to change the selection.
Depending on the selection, change further settings.
5. Press the Start/Stop button to start.
The elapsed time appears in the display. The
settings and progress line can be seen.
Note: If you want to leave the current setting, you can
navigate back to the operating modes level using the
Menu button.
^Microwave
Microwave
You can use the microwave to cook, heat up or defrost
food quickly.
To ensure optimum use of the microwave, please
observe the notes on cookware and familiarise yourself
with the data in the application tables at the end of the
instruction manual. ~ "Tested for you in our cooking
studio" on page 18
Cookware
Not all cookware is microwavable. So that your food is
heated and the appliance is not damaged, only use
microwavable cookware.
Suitable cookware
Heat-resistant cookware made of glass, glass ceramic,
porcelain, ceramic or heat-resistant plastic are suitable.
These materials allow microwaves to pass through.
You can also use serving dishes. This saves you having
to transfer food from one dish to another. You should
only use cookware with decorative gold or silver trim if
the manufacturer guarantees that they are suitable for
use in microwaves.
Unsuitable cookware
Metal cookware is unsuitable. Metal does not allow
microwaves to pass through. Food in covered metal
containers will remain cold.
Caution!
Creation of sparks: Metal – e.g. a spoon in a glass –
must be kept at least 2 cm from the cooking
compartment walls and the inside of the door. Sparks
can irreparably damage the glass on the inside of the
door.
Cookware test
Never switch on the microwave unless there is food
inside. The short cookware test is the only exception to
this rule.
Perform the following test if you are unsure whether
your cookware is suitable for use in the microwave.
1. Heat the empty cookware at maximum power for ½
to 1 minute.
2. Check the temperature of the cookware during this
time.
The cookware should remain cold or warm to the touch.
The cookware is unsuitable if it becomes hot or sparks
are generated.
In this case, stop the test.
:Warning – Risk of burns!
The accessible parts become very hot when in
operation. Never touch hot parts. Keep children at a
safe distance.
10
Page 11
Microwave power settings
The following microwave power settings are available.
The microwave power settings do not always
correspond to the exact wattage that the appliance
uses.
Setting Food Maximum cook-
ing time
90 W For defrosting delicate foods 1 hr 30 mins
180 W For defrosting and continued cooking 1 hr 30 mins
360 W For cooking meat and for heating del-
1 hr 30 mins
icate foods
600 W For heating and cooking food 1 hr 30 mins
900 W For heating liquids 30 mins
Default value:
The appliance provides a default cooking time for each
microwave output setting. You can accept this value or
change it in the appropriate area.
The maximum setting is for heating liquids. After a
certain period, the microwave's power output is reduced
to below maximum to protect the appliance.After a
cooling period, the microwave's full power will be
available once more.
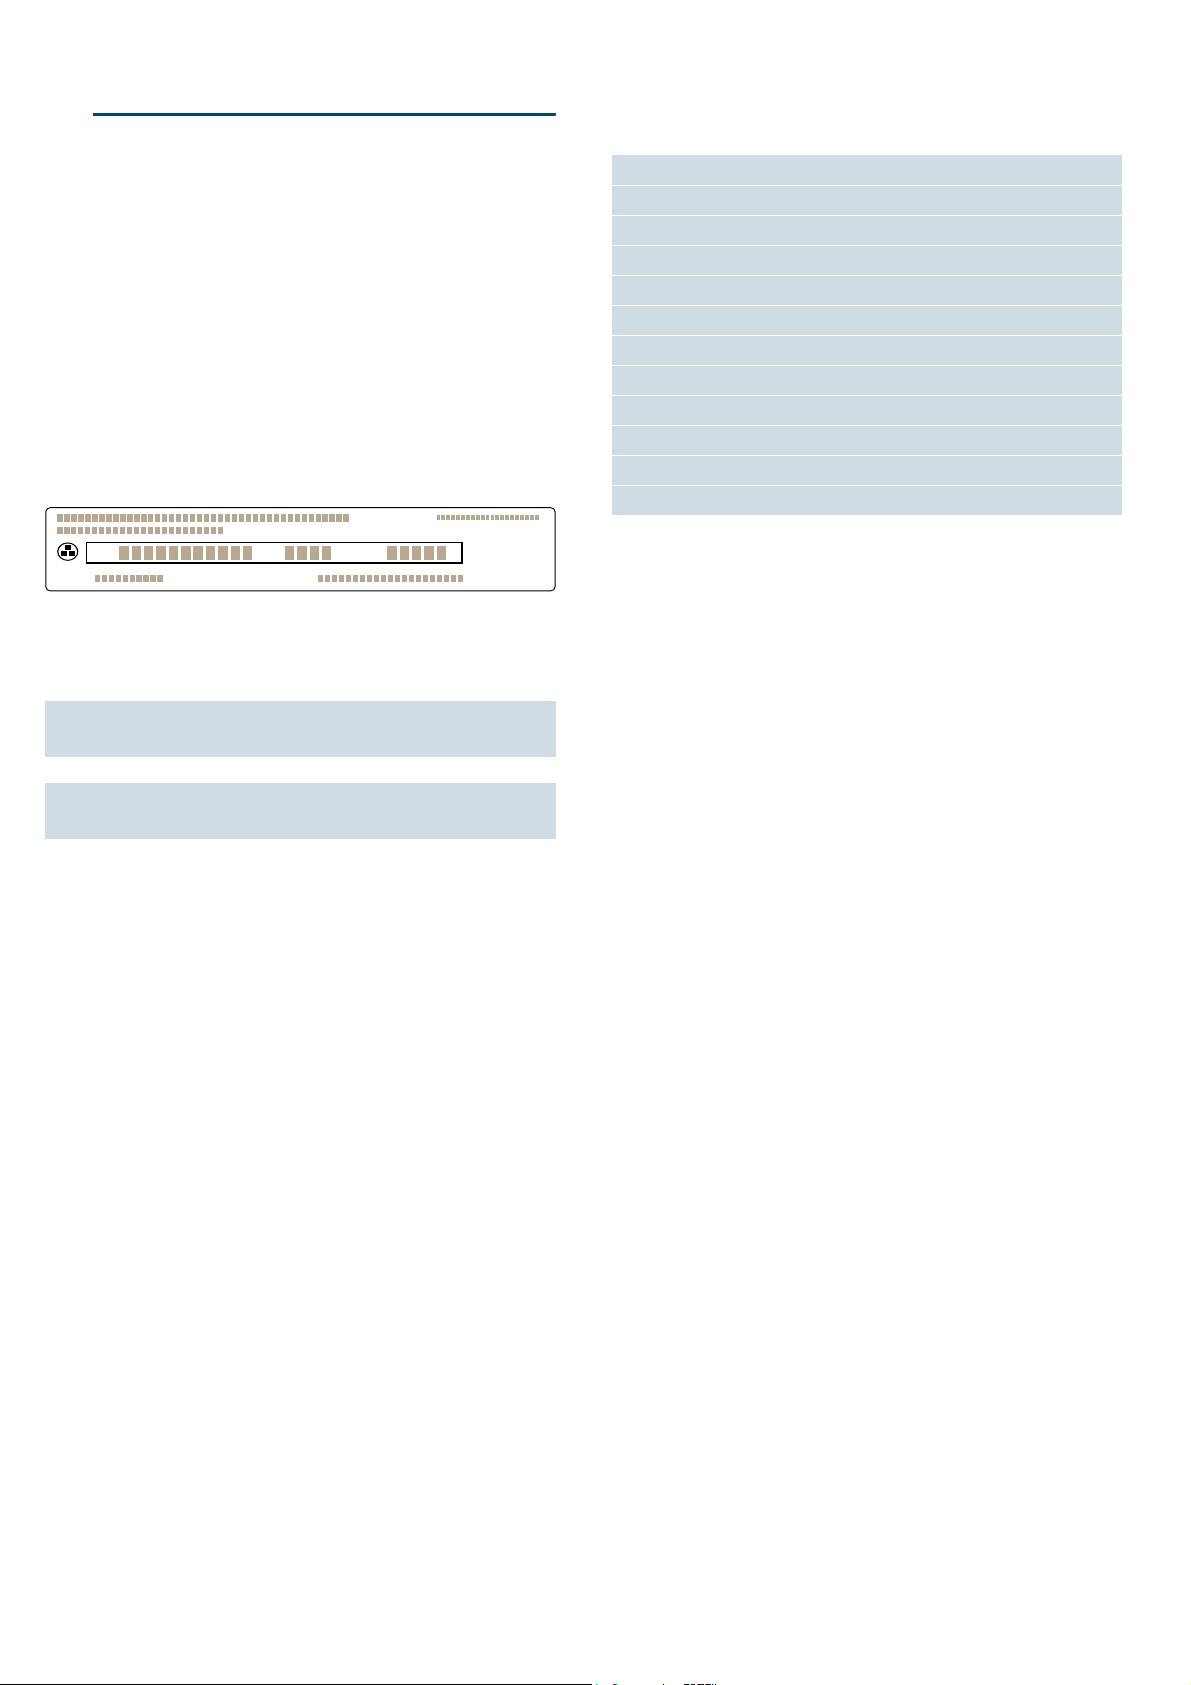
Setting the microwave
Example: Microwave output 600 W, cooking time
5 minutes.
1. Press the on/off button.
The appliance is ready to use. The maximum
microwave output and a cooking time are displayed
as default values in the display – they can be
changed at any time.
2. Use the rotary selector to select the required
microwave output.
PLQV:
Microwave en
PLQV:
5. Press the start/stop button to start.
PLQV:
TUBSUTUPQ
TUBSUTUPQ
The appliance starts the operation. The cooking time
counts down on the display.
Notes
■ When you switch on the appliance, the highest
microwave output always appears in the display as a
suggestion.
■ If you open the appliance door when the appliance
is in use, the fan may continue to run.
Cooking time elapsed
An audible signal sounds.
Operation has finished.
Stopping the audible signal early:
Touch the 0 button.
Note: After touching the 0 button, the timer function
appears; after a short time, it automatically disappears.
If you touch the 0 button again, the timer function will
disappear instantly.
POPGG
NFOV
O
The microwave output and a default cooking time
are shown in the display.
3. Touch the ¿ arrow.
The cooking time can be set.
4. Use the rotary selector to set the required cooking
time.
Press the On/Off button to switch off the appliance.
Changing the cooking time
This can be done at any time.
Use the rotary selector to change the cooking time.
The operation continues.
Changing the microwave output
This can be done at any time.
Use the ¾ arrow to change the microwave output.
Use the rotary selector to set the required microwave
output.
The cooking time remains unchanged.
The operation continues.
Note: If the set cooking time exceeds the maximum
time for the microwave output of 900 W, it is reduced
automatically. The operation stops. Press the start/stop
button to start the operation.
11
Page 12
en Timer
OTimer
Timer
You can use the timer as a kitchen timer. The timer runs
alongside other settings. You can set it at any time,
even if the device is switched off. It has its own audible
signal so that you can tell whether it is the timer or a
cooking time which has elapsed.
Setting the timer
The maximum setting is 24 hours.
The higher the value, the longer the time intervals.
1. Press the 0 button.
The timer is displayed.
2. Use the rotary selector to set the timer duration.
7LPHUPLQV
TUBSUTUPQ
PProgrammes
Programmes
You can prepare food really easily using the various
programmes. You select a programme and enter the
weight of your food. The program then applies the most
suitable settings.
Setting a programme
Example: "Defrost bread" programme, weight 250 g.
1. Press the on/off button.
The appliance is ready to use.
2. Press the menu button.
The operating modes are shown.
3. Use the rotary selector to select "Programmes".
4. Touch the ¿ arrow.
The first programme appears in the display.
5. Use the rotary selector to select "Programmes".
POPGG
NFOV
O
PLQV
J'HIURVWEUHDG
!
3. Press the 0 button to start.
Note: The timer will also start automatically after a
few seconds.
The timer duration counts down. The display switches
back after a short time. A timer symbol and the elapsed
time are shown in the status bar.
An audible signal sounds once the timer duration has
come to an end. Use the 0 button to cancel the
audible signal early.
Notes
■ The timer remains visible in the display if the
appliance is switched off.
■ If an operating mode is running, touch the 0 button
to display the timer. The timer duration is displayed
for a few seconds and can be altered.
Changing the timer
Touch the 0 button to change the timer duration. The
timer duration is displayed – use the rotary selector to
change it.
Cancelling the timer
If you want to cancel the timer, reset the duration on the
timer to zero. Once the change has been applied, the
symbol is no longer lit up.
The required programme is selected. The default
value for the weight appears in the display.
6. Touch the ¿ arrow.
The weight can be set.
7. Use the rotary selector to set the required weight.
8. Touch the ¿ arrow.
PLQV
PLQV
J%URWDXIWDXHQ
J'HIURVWEUHDG
!
!
TUBSUTUPQ
The preparation instruction is displayed.
9. Press the start/stop button to start.
The appliance starts the operation. The time counts
down on the display.
Notes
■ The cooking time is calculated by the programmes.
■ For some dishes, the display provides instructions
for turning or stirring during preparation. Follow the
information provided. Opening the appliance door
pauses the operation. After closing the appliance
door, restart the operation. If you do not turn or stir
the dish, the programme runs as normal until it
reaches the end.
12
Page 13

Programmes en
Information about the programmes
Place the food in the cold cooking compartment.
Take the food out of its packaging and weigh it. If it is
not possible to enter the exact weight, you should round
it up or down.
For the programmes, always use microwavable
cookware, for example made of glass or ceramic.
Follow the notes on cookware in the programme table.
A table of suitable types of food with appropriate weight
ranges and the accessories required can be found in
the section after the notes.
It is not possible to set a weight outside the weight
range.
Defrosting:
■ As far as possible, freeze and store food flat and in
portion-sized quantities at -18 °C.
■ Place the frozen food in flat cookware, such as a
glass or porcelain plate.
■ After defrosting in the appliance, leave the food to
continue defrosting for a further 15 to 90 minutes
until it reaches an even temperature.
■ Bread should only be defrosted in the required
amounts, as it quickly becomes stale.
■ Liquid will be produced when defrosting meat or
poultry. Drain off this liquid when turning meat and
poultry and under no circumstances use it for other
purposes or allow it to come into contact with other
foods.
■ After turning, remove any minced meat that has
already defrosted.
■ Whole poultry should be placed in the cookware
breast-side down and poultry portions skin-side
down.
Vegetables:
■ Fresh vegetables: Cut into pieces of an equal size.
Add one tablespoon of water for every 100 g
vegetables.
■ Frozen vegetables: This programme is only suitable
for blanched, not pre-cooked vegetables. It is not
suitable for frozen vegetables in cream sauce. Add 1
to 3 tablespoons of water. Do not add water to
spinach or red cabbage.
Potatoes:
■ Boiled potatoes: Cut into pieces of an equal size.
Add two tablespoons of water per 100 g of potatoes,
and salt to taste.
■ Unpeeled boiled potatoes: Use potatoes of the
same thickness. Wash the potatoes and prick the
skin. Place the wet potatoes in a dish. Do not add
water.
Rice:
■ Do not use brown or boil-in-the-bag rice.
■ Add two to two and a half times the amount of water
to the rice.
■ For very small portions, use slightly more water.
Resting time
Some dishes need to rest in the cooking compartment
after the programme has ended.
Dish Resting time
Vegetables Approx. 5 minutes
Potatoes Approx. 5 minutes. First pour off the
remaining water
Rice 5 to 10 minutes
Programme table
Programme Suitable food Weight range in kg Cookware
Defrosting
Bread* Bread, whole, round or long; sliced bread; sponge
cake, yeast cake, fruit flan, cakes without icing, cream
or gelatine
Meat* Joints, flat pieces of meat, minced meat, chicken, pou-
lard, duck
Fish* Whole fish, fish fillet, fish cutlet 0.10-1.00 kg Shallow cookware without lid
Cooking
Fresh vegetables** Cauliflower, broccoli, carrots, kohlrabi, leeks, peppers,
courgettes
Frozen vegetables** Cauliflower, broccoli, carrots, kohlrabi, red cabbage,
spinach
Potatoes** Boiled potatoes, unpeeled boiled potatoes, chopped
potatoes of the same size
Rice** Rice, long-grain rice 0.05-0.30 kg Deep cookware with lid
*) Observe the signals given when it is time to turn the food
**) Observe the signals given when it is time to stir the food
0.20-1.50 kg Shallow cookware without lid
Cooking compartment floor
0.20-2.00 kg Shallow cookware without lid
Cooking compartment floor
Cooking compartment floor
0.15-1.00 kg Cookware with lid
Cooking compartment floor
0.15-1.00 kg Cookware with lid
Cooking compartment floor
0.20-1.00 kg Cookware with lid
Cooking compartment floor
Cooking compartment floor
13
Page 14
en Basic settings
QBasic settings
Basic settings
There are various settings available to you in order to
help use your appliance effectively and simply. You can
change these settings as required.
Changing settings
1. Press the on/off button.
2. Press the menu button.
The operating modes menu opens.
3. Use the rotary selector to select "Settings".
4. Touch the ¿ arrow.
5. Use the rotary selector to change the values.
6. Use the arrow ¿ to switch to the next settings, and
change them if necessary.
7. Press the menu button to save.
"Save" or "Discard" appears on the display.
8. Use the touch fields to select which option you
require.
List of settings
This list tells you all the basic settings and how to
change them. Depending on the model of the appliance
you own, the display will show only those settings that
apply to your appliance.
You can change the following settings:
Note: Changes to the language, button tone and
display brightness settings take effect immediately. All
other changes take effect after the settings have been
saved.
--------
Power cut
The changes you make to the settings are retained
even after a power cut.
Only the settings pertaining to the initial use of the
appliance need to be implemented once again
following a power cut.
Changing the time
You can change the time in the basic settings.
For example: Changing from summer to winter time.
1. Press the On/Off button.
2. Press the Menu button.
3. Use the rotary selector to select "Settings".
4. Touch the arrow ¿ to move to "Time of day".
5. Use the rotary selector to change the time.
6. Press the Menu button.
Save or Discard appears in the display.
Setting Options
Language Set the language
Clock Set the current time
Date Sets the current date
Audible signal Short cooking time
Medium cooking time*
Long cooking time
Button tone Switched on
Switched off*
(Button tone at on/off always on)
Display brightness Scale with 5 levels
Level 3*
Clock display Digital + date*
Digital
Off
Night-time dimming Switched off**
Switched on (Display dimmed between
22:00 and 6:00)
Demo mode Switched off*
Switched on
(only displayed during the first 3 minutes
after the appliance has been reset or is
used for the first time)
Factory settings Reset
Do not reset*
* Factory setting (factory settings may vary depending on the appli-
ance model)
14
Page 15

Cleaning en
DCleaning
Cleaning
With good care and cleaning, your appliance will retain
its appearance and remain fully functioning for a long
time to come. We will explain here how you should
correctly care for and clean your appliance.
:Warning – Risk of burns!
The appliance becomes very hot. Never touch the
interior surfaces of the cooking compartment or the
heating elements. Always allow the appliance to cool
down. Keep children at a safe distance.
:Warning – Risk of electric shock!
Do not use any high-pressure cleaners or steam
cleaners, which can result in an electric shock.
:Warning – Risk of injury!
Scratched glass in the appliance door may develop into
a crack. Do not use a glass scraper, sharp or abrasive
cleaning aids or detergents.
Note: Unpleasant odours, for example after fish has
been prepared, can be removed very easily. Add a few
drops of lemon juice to a cup of water. Always place a
spoon in the container to prevent delayed boiling. Heat
the water for 1 to 2 minutes at maximum microwave
output.
Area Cleaning agent
Cooking compartment made of stainless steel
Hot soapy water or vinegar solution: Clean
using a dish cloth and then dry with a soft
cloth. Do not use oven spray or any other
aggressive oven cleaners or abrasive materials. Scouring pads, rough sponges and pan
cleaners are also unsuitable. These items
scratch the surface. Allow the interior surfaces
to dry thoroughly.
Door panels Glass cleaner: Clean with a dish cloth. Do not
use a glass scraper.
Door seal
Do not remove.
Hot soapy water: Clean with a dish cloth and
do not scour. Do not use a metal or glass
scraper for cleaning.
Cleaning agent
To ensure that the different surfaces are not damaged
by using the wrong cleaning agent, observe the
information in the table.
Do not use:
■ Harsh or abrasive cleaning agents.
■ Metal or glass scrapers to clean the door panels.
■ Metal or glass scrapers to clean the door seal.
■ Hard scouring pads or sponges.
■ Cleaning agents with a high alcohol content.
Wash new sponge cloths thoroughly before use.
Area Cleaning agent
Appliance front Hot soapy water: Clean using a dish cloth and
then dry with a soft cloth. Do not use a metal or
glass scraper for cleaning.
Display Wipe down using a microfibre cloth or a
slightly damp cloth. Do not wipe with a wet
cloth.
Stainless steel Hot soapy water: Clean using a dish cloth and
then dry with a soft cloth. Remove flecks of
limescale, grease, starch and albumin (e.g.
egg white) immediately. Corrosion can form
under such flecks. Special stainless-steel
cleaning agents are available from the aftersales service or from specialist retailers.
15
Page 16

en Trouble shooting
3Trouble shooting
Trouble shooting
If a fault occurs, there is often a simple explanation.
Before calling the after-sales service, please refer to the
fault table and attempt to correct the fault yourself.
on page 18
:Warning – Risk of electric shock!
Incorrect repairs are dangerous. Repairs may only be
carried out and damaged power cables replaced by
one of our trained after-sales technicians. If the
settings.~ "Tested for you in our cooking studio"
Tip: If a dish does not turn out exactly as you wanted,
refer to the following chapter, where you will find lots of
tips and notes relating to the optimum
appliance is defective, unplug the appliance from the
mains or switch off the circuit breaker in the fuse box.
Contact the after-sales service.
Fault table
Fault Possible cause Remedy/information
The appliance does not work or the
display is not working
The plug is not plugged into the mains Connect the appliance to the electricity supply
Power cut Check whether other kitchen appliances are working
The circuit breaker is faulty Check in the fuse box to make sure that the fuse for
the appliance is OK
Faulty operation Switch off the circuit-breaker for the appliance in the
fuse box and switch it back on after approx. 60 seconds
The appliance cannot be started The appliance door is not fully closed Close the appliance door
Food does not heat up.
The word "demo" is shown in the display.
The appliance is in demo mode Deactivate demo mode in the basic settings.
To do this, briefly disconnect the appliance from the
mains (switch off the household fuse or the circuit
breaker in the fuse box). Then deactivate demo mode
in the basic settings within 3 minutes.
The interior lighting is not working The interior lighting is faulty Call the after-sales service
Error message "Exxx"* If an error message is displayed, switch the appliance
off and on again; if the message disappears, it was a
one-off problem. If the fault occurs again or the error
message is still displayed, please contact the aftersales service and provide the fault code.
* Special features:
Error message "E0532": Open and close the appliance door.
Error message "E6501": Switch off the appliance. Wait for 10 minutes. Switch the appliance on again.
--------
16
Page 17
Customer service en
4Customer service
Customer service
Our after-sales service is there for you if your appliance
needs to be repaired. We will always find an
appropriate solution, also in order to avoid after-sales
personnel having to make unnecessary visits.
E number and FD number
When calling us, please quote the full product number
(E no.) and the production number (FD no.) so that we
can provide you with the correct advice. The rating plate
bearing these numbers can be found when you open
the appliance door.
If your appliance operates with steam, you will find the
rating plate on the right-hand side behind the panel.
=1U)'(1U
7\SH
To save time, you can make a note of the numbers for
your appliance and the telephone number of the aftersales service in the space below in case you need
them.
Technical data
Power supply 220-240 V, 50 Hz
Max. total connected load 1300 W
Microwave output setting 900 W (IEC 60705)
Microwave frequency 2450 MHz
Fuse 10 A
Dimensions (H/W/D)
- Appliance 455 x 595 x 565 mm
- Cooking compartment 236 x 445x 348 mm
VDE approved Yes
CE mark Yes
E no.
After-sales service O
FD no.
Please note that a visit from an after-sales service
engineer is not free of charge in the event that the
appliance has been misused, even during the warranty
period.
Please find the contact data of all countries in the
enclosed customer service list.
To book an engineer visit and product advice
GB 0344 892 8999
Calls charged at local or mobile rate.
IE 01450 2655
0.03 € per minute at peak. Off peak 0.0088 €
per minute.
Rely on the professionalism of the manufacturer. You
can therefore be sure that the repair is carried out by
trained service technicians who carry original spare
parts for your appliances.
This appliance corresponds to the standards EN 55011
and CISPR 11. It is a Group 2, Class B product.
Group 2 means that microwaves are produced for the
purpose of heating food. Class B states that the
appliance is suitable for private households.
17
Page 18
en Tested for you in our cooking studio
JTested for you in our
cooking studio
Tested for you in our cooking studio
Here, you can find a selection of dishes and the ideal
settings for them. We show you which microwave
output is best for your dish. There are also tips about
cookware and preparation methods.
Notes
■ The values in the table always apply to the cooking
compartment when it is cold and empty. Before
using the appliance, remove all unnecessary
cookware from the cooking compartment.
■ The times specified in the tables are only guidelines.
They will depend on the quality and composition of
the food.
■ Always use an oven cloth or oven gloves when
taking hot cookware out of the cooking
compartment.
:Warning – Risk of scalding!
When pulling out the cookware, hot liquid may overflow.
Carefully pull the cookware out of the cooking
compartment.
The following tables provide you with numerous options
and settings for the microwave.
The times given in the tables are guidelines; they
depend on the cookware used, and the quality,
temperature and consistency of the food.
Time ranges are often specified in the tables. Set the
shortest time first and then extend the time if necessary.
It may be that you have different quantities from those
specified in the tables. There is a rule of thumb for
operating the microwave: Double the amount = double
the time, half the amount = half the time.
You can place the cookware in the middle on the
cooking compartment floor. The food will then absorb
the microwaves from all sides.
Defrosting
Place the frozen food in an open container on the
cooking compartment floor.
Turn or stir the food once or twice during the defrosting
time. Large pieces of food should be turned several
times. When turning, remove any liquid that has been
produced during defrosting.
Leave defrosted items to stand at room temperature for
a further 15 to 90 minutes so that the temperature can
even out. You can remove the giblets from poultry at
this point.
Note: Place the ovenware on the cooking compartment
floor.
Dish Weight Microwave output in watts,
time in minutes
Whole pieces of beef, pork or veal (on the
bone or boned)
Meat in pieces or slices of beef, veal or pork 200 g 180 W, 5-8 mins + 90 W, 5-10 mins Separate the slices/pieces of meat when turn-
Minced meat, mixed 200 g 90 W, 10-15 mins Freeze food flat if possible;
Poultry or poultry portions 600 g 180 W, 8 mins + 90 W, 10-15 mins Turn during defrosting;
Fish fillet, fish steak or slices 400 g 180 W, 5 mins + 90 W, 10-15 mins Separate any defrosted parts
Whole fish 300 g 180 W, 3 mins + 90 W, 10-15 mins Turn during defrosting
Vegetables, e.g. peas 300 g 180 W, 10-15 mins Stir carefully during defrosting
Fruit, e.g. raspberries 300 g 180 W, 6-9 mins Stir carefully during defrosting and separate
Butter, defrosting 125 g 180 W, 1 min. + 90 W, 1-2 mins Remove all packaging
Loaf of bread 500 g 180 W, 8 mins + 90 W, 5-10 mins Turn during defrosting
Cakes, dry, e.g. sponge cake 500 g 90 W, 10-15 mins Separate the pieces of cake;
800 g 180 W, 15 mins + 90 W, 15-25 mins Turn several times
1000 g 180 W, 20 mins + 90 W, 20-30 mins
1500 g 180 W, 25 mins + 90 W, 25-30 mins
500 g 180 W, 8-11 mins + 90 W, 10-15
mins
800 g 180 W, 10 mins + 90 W, 10-15 mins
500 g 180 W, 5 mins + 90 W, 10-15 mins
1000 g 180 W, 15 mins + 90 W, 20-25 mins
1200 g 180 W, 15 mins + 90 W, 20-25 mins
600 g 180 W, 8 mins + 90 W, 15-20 mins
500 g 180 W, 8 mins + 90 W, 5-10 mins
250 g 180 W, 1 min. + 90 W, 2-4 mins
1000 g 180 W, 12 mins + 90 W, 10-20 mins
750 g 180 W, 5 mins + 90 W, 10-15 mins
Note
ing
turn several times during defrosting and
remove any minced meat that has already
defrosted
remove liquid that escapes during defrosting
any defrosted parts
only for cakes without icing, cream or crème
pâtissière
18
Page 19
Tested for you in our cooking studio en
Dish Weight Microwave output in watts,
Note
time in minutes
Cakes, moist, e.g. fruit flan, cheesecake 500 g 180 W, 5 mins + 90 W, 15-20 mins Only for cakes without icing, cream or gela-
750 g 180 W, 7 mins + 90 W, 15-20 mins
Defrosting, heating up or cooking frozen
food
Take ready meals out of the packaging. They will heat
up more quickly and evenly in microwaveable
cookware. The different components of the meal may
not require the same amount of time to heat up.
Food which lies flat will cook more quickly than food
which is piled high. You should therefore distribute the
food so that it is as flat as possible in the cookware.
Food should not be placed in layers on top of one
another.
Always cover the food. If you do not have a suitable lid
for your cookware, use a plate or special microwave
foil.
Stir or turn the food 2 or 3 times during cooking.
After heating, allow the food to stand for a further 2 to 5
minutes to allow the temperature to even out.
This will help the food retain its own distinct taste, which
means it will require less seasoning.
Note: Place the ovenware on the cooking compartment
floor.
Dish Weight Microwave output in watts,
tine
Note
cooking time in minutes
Menu, plated meal, ready meal
300-400 g 600 W, 8-13 mins Covered
(2-3 components)
Soup 400 g 600 W, 8-12 mins Cookware with lid
Stew 500 g 600 W, 10-15 mins Cookware with lid
Slices or pieces of meat in sauce, e.g. goulash 500 g 600 W, 10-15 mins Cookware with lid
Fish, e.g. fillet steaks 400 g 600 W, 10-15 mins Covered
Bakes, e.g. lasagne, cannelloni 450 g 600 W, 10-15 mins Cookware without lid
Side dishes, e.g. rice, pasta 250 g 600 W, 3-7 mins Cookware with lid, add liquid
500 g 600 W, 8-12 mins
Vegetables, e.g. peas, broccoli, carrots 300 g 600 W, 7-11 mins Cookware with lid, add 1 tbsp of water
600 g 600 W, 14-17 mins
Creamed spinach 450 g 600 W, 10-15 mins Cook without additional water
Heating
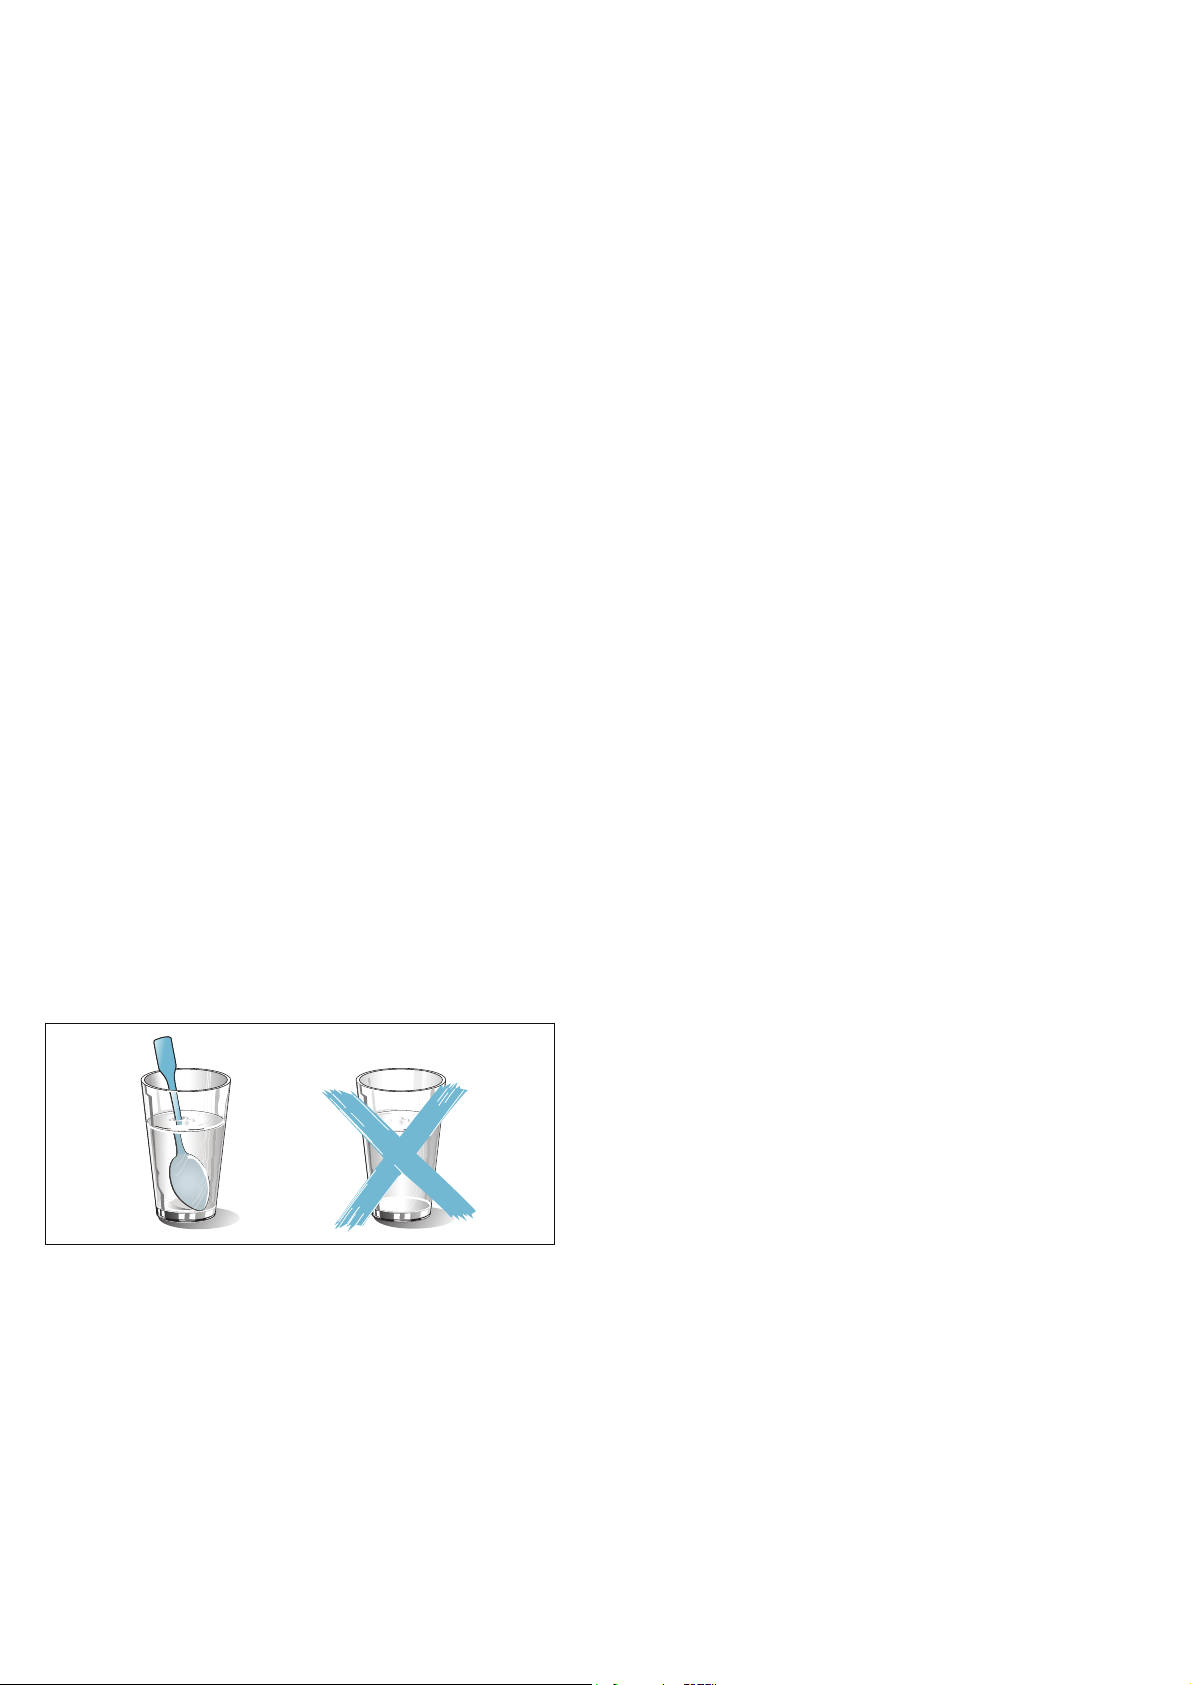
:Warning – Risk of scalding!
There is a possibility of delayed boiling when a liquid is
heated. This means that the liquid reaches boiling
temperature without the usual steam bubbles rising to
the surface. Even if the container only vibrates a little,
the hot liquid may suddenly boil over and spatter. When
heating, always place a spoon in the container. This will
prevent delayed boiling.
Caution!
Creation of sparks: Metal – e.g. a spoon in a glass –
must be kept at least 2 cm from the cooking
compartment walls and the inside of the door. Sparks
can irreparably damage the glass on the inside of the
door.
Notes
■ Take ready meals out of the packaging. They will
heat up more quickly and evenly in microwaveable
cookware. The different components of the meal
may not require the same amount of time to heat up.
■ Always cover the food. If you do not have a suitable
cover for your cookware, use a plate or special
microwave foil.
■ Stir or turn the food several times during the heating
time. Check the temperature.
■ After heating, allow the food to stand for a further 2
to 5 minutes to allow the temperature to even out.
■ Always use an oven cloth or oven gloves when
removing plates from the appliance.
Note: Place the ovenware on the cooking compartment
floor.
19
Page 20

en Tested for you in our cooking studio
Dish Amount Microwave output in watts,
Note
time in minutes
Menu, plated meal, ready meal
600 W, 5-8 mins -
(2-3 components)
Beverages 125 ml 900 W, ½-1 min. Always place a spoon in the container, do not
200 ml 900 W, 1-2 mins
overheat alcoholic drinks; check occasionally
while heating
500 ml 900 W, 3-4 mins
Baby food, e.g. baby bottles 50 ml 360 W, approx. ½ min Bottles without teat or lid; shake or stir well
100 ml 360 W, ½-1 min.
after heating and ensure that you check the
temperature
200 ml 360 W, 1-2 mins
Soup, 1 cup 175 g each 600 W, 1-2 mins -
Soup, 2 cups 175 g each 600 W, 2-3 mins -
Meat in sauce 500 g 600 W, 7-10 mins -
Stew 400 g 600 W, 5-7 mins -
800 g 600 W, 7-8 mins -
Vegetables, 1 portion 150 g 600 W, 2-3 mins -
Vegetables, 2 portions 300 g 600 W, 3-5 mins -
Cooking
■ This will help the food retain its own distinct taste,
which means it will require less seasoning.
Notes
■ Food which lies flat will cook more quickly than food
which is piled high. You should therefore distribute
the food so that it is as flat as possible in the
■ After cooking, allow the food to stand for a further 2
to 5 minutes to allow the temperature to even out.
■ Always use an oven cloth or oven gloves when
removing plates from the appliance.
cookware. Food should not be placed in layers on
top of one another.
■ Cook the food in cookware with a lid. If you do not
Note: Place the ovenware on the cooking compartment
floor.
have a suitable lid for your cookware, use a plate or
special microwave foil.
Dish Amount Microwave output in watts,
Note
time in minutes
Whole chicken, fresh, no giblets 1200 g 600 W, 25-30 mins Turn half way through the time
Fish fillet, fresh 400 g 600 W, 7-12 mins -
Fresh vegetables 250 g 600 W, 6-10 mins Cut the vegetables into pieces of equal size;
500 g 600 W, 10-15 mins
add 1 to 2 tbsp water per 100 g of vegetables;
stir while heating
Potatoes 250 g 600 W, 8-10 mins Cut the potatoes into pieces of equal size;
500 g 600 W, 10-15 mins
add 1 tbsp water for every 100 g of potatoes;
stir while heating
750 g 600 W, 15-22 mins
Rice 125 g 600 W, 4-6 mins +
Add double the amount of liquid
180 W, 12-15 mins
250 g 600 W, 6-8 mins +
180 W, 15-18 mins
Sweet foods, e.g. blancmange (instant) 500 ml 600 W, 6-8 mins Stir the blancmange thoroughly 2 to 3 times
using an egg whisk while heating
Fruit, compote 500 g 600 W, 9-12 mins Stir while heating
Microwave popcorn 100 g 600 W, 3-4 mins Always place the popcorn bag on the glass
tray;
observe the manufacturer's instructions
20
Page 21

Microwave tips
Test dishes en
You cannot find any information about the settings for the quantity of
food you have prepared.
The food has become too dry. Next time, set a shorter cooking time or select a lower microwave power set-
The time has elapsed but the food is not defrosted, hot or cooked. Set a longer time. Large quantities and food which is piled high require longer
Time has elapsed but the food is overheated at the edge but not done
in the middle.
After defrosting, the poultry or meat is defrosted on the outside but
not defrosted in the middle.
Lengthen or shorten the cooking time according to the following rule of
thumb: Double the amount = double the time, half the amount = half the time
ting. Cover the food and add more liquid.
times.
Stir it during the cooking time and next time, select a lower microwave power
setting and a longer cooking time.
Next time, select a lower microwave output setting. Turn large amounts of
poultry or meat several times.
ETest dishes
Test dishes
The quality and performance of the appliances are
tested by test institutes using the following dishes.
Cooking only using the microwave
Dish Microwave output in watts, cooking time in minutes Note
Custard, 1000 g 600 W, 11-12 mins + 180 W, 8-10 mins Pyrex dish
Sponge, 475 g 600 W, 7-9 mins Pyrex dish, dia. 22 cm
Meat loaf, 900 g 600 W, 25-30 mins Pyrex cake dish, 28 cm long
In accordance with EN 60705, IEC 60705 or DIN
44547.
Defrosting only using the microwave
Dish Microwave output in watts, defrosting time in minutes Note
Meat, 500 g "Defrost meat" programme, 500 g
or
180 W, 8 mins + 90 W, 7-10 mins
Pyrex dish, dia. 24 cm
21
Page 22

el
Πίνακας περιεχομένων
elΟδηγíες χρήσης
8 Αρμόζουσα χρήση . . . . . . . . . . . . . . . . . . . . . . . . . 23
3 Αντιμετώπιση βλαβών . . . . . . . . . . . . . . . . . . . . . 36
( Σημαντικές υποδείξεις ασφαλείας . . . . . . . . . . . 23
Γενικά . . . . . . . . . . . . . . . . . . . . . . . . . . . . . . . . . . . . . . 23
Μικροκύματα . . . . . . . . . . . . . . . . . . . . . . . . . . . . . . . . . 24
] Αιτίες των ζημιών . . . . . . . . . . . . . . . . . . . . . . . . . . 26
7 Προστασία περιβάλλοντος . . . . . . . . . . . . . . . . . . 26
Απόσυρση σύμφωνα με τους κανόνες προστασίας του
περιβάλλοντος . . . . . . . . . . . . . . . . . . . . . . . . . . . . . . . . 26
* Γνωρίστε τη συσκευή. . . . . . . . . . . . . . . . . . . . . . .27
Πεδίο χειρισμού . . . . . . . . . . . . . . . . . . . . . . . . . . . . . . . 27
Στοιχεία χειρισμού . . . . . . . . . . . . . . . . . . . . . . . . . . . . . 27
Οθόνη ενδείξεων . . . . . . . . . . . . . . . . . . . . . . . . . . . . . . 27
Μενού των τρόπων λειτουργίας . . . . . . . . . . . . . . . . . . . 28
Περισσότερες πληροφορίες . . . . . . . . . . . . . . . . . . . . . . 28
Λειτουργίες του χώρου μαγειρέματος . . . . . . . . . . . . . . 28
Εξαρτήματα . . . . . . . . . . . . . . . . . . . . . . . . . . . . . . . . . . 28
K Πριν την πρώτη χρήση . . . . . . . . . . . . . . . . . . . . . . 29
Πρώτη θέση σε λειτουργία . . . . . . . . . . . . . . . . . . . . . . . 29
Καθαρισμός των εξαρτημάτων. . . . . . . . . . . . . . . . . . . . 29
1 Χειρισμός συσκευής. . . . . . . . . . . . . . . . . . . . . . . . 29
Ενεργοποίηση και απενεργοποίηση της συσκευής . . . . . 29
Λειτουργία . . . . . . . . . . . . . . . . . . . . . . . . . . . . . . . . . . . 29
Ρύθμιση του τρόπου λειτουργίας . . . . . . . . . . . . . . . . . . 30
4 Υπηρεσία τεχνικής εξυπηρέτησης πελατών . . . 37
Αριθμός E και αριθμός FD . . . . . . . . . . . . . . . . . . . . . . . 37
Τεχνικά στοιχεία . . . . . . . . . . . . . . . . . . . . . . . . . . . . . . .37
J Δοκιμάστηκαν για εσάς, στο δικό μας εργαστήριο
μαγειρικής. . . . . . . . . . . . . . . . . . . . . . . . . . . . . . . . 38
Ξεπάγωμα . . . . . . . . . . . . . . . . . . . . . . . . . . . . . . . . . . . . 38
Ξεπάγωμα και ζέσταμα ή μαγείρεμα κατεψυγμένων
φαγητών . . . . . . . . . . . . . . . . . . . . . . . . . . . . . . . . . . . . .39
Ζέσταμα . . . . . . . . . . . . . . . . . . . . . . . . . . . . . . . . . . . . .39
Μαγείρεμα . . . . . . . . . . . . . . . . . . . . . . . . . . . . . . . . . . . 40
Συμβουλές σχετικά με τα μικροκύματα . . . . . . . . . . . . . .41
E Φαγητά δοκιμών . . . . . . . . . . . . . . . . . . . . . . . . . . 41
Μαγείρεμα με μικροκύματα "σόλο" . . . . . . . . . . . . . . . . .41
Ξεπάγωμα με μικροκύματα "σόλο". . . . . . . . . . . . . . . . . .41
Produktinfo
Περαιτέρω πληροφορίες για τα προϊόντα, τα εξαρτήματα,
τα ανταλλακτικά και το σέρβις θα βρείτε στο διαδίκτυο
(Internet): www.siemens-home.bsh-group.com και στο
online-shop: www.siemens-home.bsh-group.com/eshops
^ Ο φούρνος μικροκυμάτων. . . . . . . . . . . . . . . . . . . 30
Μαγειρικό σκεύος . . . . . . . . . . . . . . . . . . . . . . . . . . . . . 30
Βαθμίδες μικροκυμάτων . . . . . . . . . . . . . . . . . . . . . . . . 31
Ρύθμιση του φούρνου μικροκυμάτων. . . . . . . . . . . . . . . 31
O Ρολόι συναγερμ. . . . . . . . . . . . . . . . . . . . . . . . . . . .32
Ρύθμιση του ρολογιού συναγερμού . . . . . . . . . . . . . . . . 32
P Προγράμματα . . . . . . . . . . . . . . . . . . . . . . . . . . . . . 32
Ρύθμιση του προγράμματος. . . . . . . . . . . . . . . . . . . . . . 32
Υποδείξεις για τα προγράμματα. . . . . . . . . . . . . . . . . . . 33
Χρόνος ηρεμίας . . . . . . . . . . . . . . . . . . . . . . . . . . . . . . . 33
Πίνακας προγραμμάτων. . . . . . . . . . . . . . . . . . . . . . . . . 33
Q Βασικές ρυθμίσεις . . . . . . . . . . . . . . . . . . . . . . . . .34
Αλλαγή των ρυθμίσεων. . . . . . . . . . . . . . . . . . . . . . . . . . 34
Λίστα των ρυθμίσεων . . . . . . . . . . . . . . . . . . . . . . . . . . . 34
Διακοπή ρεύματος. . . . . . . . . . . . . . . . . . . . . . . . . . . . . 34
Αλλαγή της ώρας . . . . . . . . . . . . . . . . . . . . . . . . . . . . . . 34
D Καθαρισμός . . . . . . . . . . . . . . . . . . . . . . . . . . . . . . 35
Υλικά καθαρισμού . . . . . . . . . . . . . . . . . . . . . . . . . . . . . 35
22
Page 23

Αρμόζουσα χρήση el
8Αρμόζουσα χρήση
Αρμόζουσα χρήση
Διαβάστε προσεκτικά αυτές τις οδηγίες. Μόνο
τότε μπορείτε να χειριστείτε τη συσκευή
σίγουρα και σωστά. Φυλάξτε τις οδηγίες
χρήσης και συναρμολόγησης για μια αργότερη
χρήση ή για τον επόμενο ιδιοκτήτη.
Αυτή η συσκευή προορίζεται μόνο για την
τοποθέτηση. Προσέξτε τις ειδικές οδηγίες
συναρμολόγησης.
Μετά την αφαίρεση από τη συσκευασία,
ελέγξτε τη
τη μεταφορά μην την συνδέσετε.
Μόνο ένας αδειούχος εγκαταστάτης
επιτρέπεται να συνδέσει τις συσκευές χωρίς
φις. Σε περίπτωση ζημιών που οφείλονται σε
λάθος σύνδεση, δεν έχετε κανένα δικαίωμα
εγγύησης.
Αυτή η συσκευή προορίζεται μόνο για την
οικιακή χρήση και το οικιακό περιβάλλον.
Χρησιμοποιείτε τη συσκευή
παρασκευή φαγητών και ποτών. Κατά τη
διάρκεια της λειτουργίας επιτηρείτε τη
συσκευή. Χρησιμοποιείτε τη συσκευή μόνο σε
κλειστούς χώρους.
Αυτή η συσκευή προορίζεται για χρήση μέχρι
ένα μέγιστο ύψος 4.000 μέτρων πάνω από την
επιφάνεια της θάλασσας.
Αυτή η συσκευή επιτρέπεται να χρησιμοποιηθεί
από παιδιά άνω των 8 ετών και
μειωμένες φυσικές, αισθητήριες ή πνευματικές
ικανότητες ή με ανεπαρκή εμπειρία ή γνώση,
όταν επιτηρούνται ή εάν έχουν λάβει σχετικές
οδηγίες για την ασφαλή χρήση της συσκευής
από ένα άτομο που είναι υπεύθυνο για την
ασφάλειά τους και έχουν κατανοήσει τους
κινδύνους που μπορούν να προκύψουν.
Τα παιδιά
συσκευή. Ο καθαρισμός και η συντήρηση από
το χρήστη δεν επιτρέπεται να
πραγματοποιηθούν από παιδιά, εκτός εάν είναι
8 ετών και άνω και επιτηρούνται.
Κρατάτε τα παιδιά που είναι κάτω των 8 ετών
μακριά από τη συσκευή και το καλώδιο
σύνδεσης.
Τοποθετείτε τα εξαρτήματα πάντοτε σωστά
μέσα στο χώρο μαγειρέματος.
συσκευή. Σε περίπτωση ζημιάς κατά
μόνο για την
από άτομα με
δεν επιτρέπεται να παίζουν με τη
(Σημαντικές υποδείξεις
ασφαλείας
Σημαντικές υποδείξεις ασφαλείας
Γενικά
:Προειδοποίηση – Κίνδυνος πυρκαγιάς!
Τα αποθηκευμένα στο χώρο μαγειρέματος
εύφλεκτα αντικείμενα μπορούν να
αναφλεγούν. Μην τοποθετείτε ποτέ εύφλεκτα
αντικείμενα μέσα στο χώρο μαγειρέματος. Μην
ανοίγετε ποτέ την πόρτα της συσκευής, όταν
δημιουργείται καπνός μέσα στη συσκευή.
Απενεργοποιήστε τη συσκευή και τραβήξτε το
ρευματολήπτη (φις) από την πρίζα ή
κατεβάστε/ξεβιδώστε την ασφάλεια
κιβώτιο των ασφαλειών.
:Προειδοποίηση – Κίνδυνος εγκαύματος!
■ Τα εξαρτήματα ή τα σκεύη ζεσταίνονται
πάρα πολύ. Απομακρύνετε τα καυτά σκεύη
ή εξαρτήματα από το χώρο μαγειρέματος
πάντοτε με μια πιάστρα.
Κίνδυνος εγκαύματος!
■ Οι ατμοί του οινοπνεύματος μπορούν να
αναφλεγούν μέσα στον καυτό χώρο
μαγειρέματος. Μην παρασκευάζετε φαγητά
με μεγάλες ποσότητες δυνατών
οινοπνευματώδη ποτών. Χρησιμοποιείτε
μόνο μικρές ποσότητες από δυνατά
οινοπνευματώδη ποτά. Ανοίγετε προσεκτικά
την πόρτα της συσκευής.
:Προειδοποίηση – Κίνδυνος
ζεματίσματος!
■ Τα προσιτά μέρη/εξαρτήματα ζεσταίνονται
πολύ κατά τη λειτουργία. Μην ακουμπάτε
ποτέ τα καυτά μέρη/εξαρτήματα. Κρατάτε
τα παιδιά μακριά.
Κίνδυνος ζεματίσματος!
■ Κατά το άνοιγμα της πόρτας της συσκευής
μπορεί να εξέλθει καυτός ατμός. Ανοίγετε
προσεκτικά την πόρτα της συσκευής.
Κρατάτε τα παιδιά μακριά.
Κίνδυνος ζεματίσματος!
■ Με το νερό στον καυτό χώρο μαγειρέματος
μπορεί να δημιουργηθεί καυτός υδρατμός.
Μη χύνετε ποτέ νερό μέσα στον καυτό χώρο
μαγειρέματος.
:Προειδοποίηση – Κίνδυνος
τραυματισμού!
■ Το γρατσουνισμένο γυαλί της πόρτας της
συσκευής μπορεί να ραγίσει. Μη
χρησιμοποιείτε ξύστρες γυαλιού, δυνατά ή
τραχιά υλικά καθαρισμού.
Κίνδυνος τραυματισμού!
στο
23
Page 24

el Σημαντικές υποδείξεις ασφαλείας
■ Οι μεντεσέδες της πόρτας της συσκευής
κινούνται κατά το άνοιγμα και το κλείσιμο
της πόρτας και μπορεί να μαγκωθούν. Μην
απλώνετε τα χέρια σας στην περιοχή των
μεντεσέδων.
:Προειδοποίηση – Κίνδυνος
ηλεκτροπληξίας!
■ Οι ακατάλληλες επισκευές είναι επικίνδυνες.
Μόνο ένας τεχνικός του τμήματος
εξυπηρέτησης πελατών, εκπαιδευμένος από
εμάς, επιτρέπεται να εκτελέσει τις επισκευές
και να αντικαταστήσει τα χαλασμένα
καλώδια σύνδεσης. Εάν η συσκευή έχει
βλάβη, τραβήξτε το ρευματολήπτη (φις) από
την πρίζα ή κατεβάστε/ξεβιδώστε την
ασφάλεια στο κιβώτιο των ασφαλειών.
Καλέστε την υπηρεσία
τεχνικής
εξυπηρέτησης πελατών.
Κίνδυνος ηλεκτροπληξίας!
■ Στα καυτά μέρη της συσκευής μπορεί να
λιώσει η μόνωση των καλωδίων των
ηλεκτρικών συσκευών. Τα καλώδια
σύνδεσης των ηλεκτρικών συσκευών δεν
επιτρέπεται να έρθουν ποτέ σε επαφή με τα
καυτά μέρη της συσκευής.
Κίνδυνος ηλεκτροπληξίας!
■ Μια εισχώρηση υγρασίας μπορεί να
προκαλέσει μια ηλεκτροπληξία. Μη
χρησιμοποιείτε συσκευές καθαρισμού
υψηλής πίεσης ή συσκευές εκτόξευσης
ατμού.
Κίνδυνος ηλεκτροπληξίας!
■ Μια ελαττωματική συσκευή μπορεί να
προκαλέσει μια ηλεκτροπληξία. Μην
ενεργοποιείτε ποτέ μια χαλασμένη συσκευή.
Τραβήξτε το ρευματολήπτη (φις) από την
πρίζα ή κατεβάστε/ξεβιδώστε την ασφάλεια
στο κιβώτιο των ασφαλειών. Καλέστε την
υπηρεσία τεχνικής εξυπηρέτησης πελατών.
:Προειδοποίηση – Κίνδυνος λόγω
μαγνητισμού!
Στο πεδίο χειρισμού ή στα στοιχεία χειρισμού
είναι τοποθετημένοι μόνιμοι μαγνήτες. Αυτοί
μπορούν να επηρεάσουν αρνητικά τα
ηλεκτρονικά στοιχεία εμφύτευσης, π.χ.
βηματοδότες καρδιάς ή αντλίες ινσουλίνης. Ως
φορέας ηλεκτρονικών στοιχείων εμφύτευσης
τηρήστε μια ελάχιστη απόσταση 10 cm από το
πεδίο χειρισμού.
Μικροκύματα
:Προειδοποίηση – Κίνδυνος πυρκαγιάς!
■ Η μη ενδεδειγμένη χρήση της συσκευής
είναι επικίνδυνη και μπορεί να προκαλέσει
ζημιές.
Δεν επιτρέπεται το στέγνωμα από φαγητά ή
ρούχα, το ζέσταμα από παντόφλες,
σακουλάκια με σπόρους και δημητριακά,
σφουγγάρια, υγρά πανιά και παρόμοια.
Για παράδειγμα μπορούν να αναφλεγούν οι
ζεστές παντόφλες, τα ζεστά σακουλάκια με
σπόρους και δημητριακά ακόμα
και μετά
από ώρες.Χρησιμοποιείτε τη συσκευή μόνο
για την παρασκευή φαγητών και ποτών.
Κίνδυνος πυρκαγιάς!
■ Τα τρόφιμα μπορούν να αναφλεγούν. Μη
ζεσταίνετε ποτέ τρόφιμα μέσα σε
συσκευασίες για τη διατήρηση της
θερμοκρασίας.
Μη ζεσταίνετε ποτέ χωρίς επιτήρηση
τρόφιμα σε δοχεία από πλαστικό, χαρτί ή
άλλα εύφλεκτα υλικά.
Μη ρυθμίζετε ποτέ μια πολύ μεγάλη
βαθμίδα ισχύος ή πολύ μεγάλο χρόνο
μικροκυμάτων. Ακολουθήστε τα στοιχεία
που αναφέρονται σε
αυτές τις οδηγίες
χρήσης.
Μην ξηραίνετε ποτέ τα τρόφιμα στο φούρνο
μικροκυμάτων.
Μη ξεπαγώνετε ή μη ζεσταίνετε ποτέ τα
τρόφιμα με μικρή περιεκτικότητα νερού,
όπως π.χ. ψωμί, με πολύ μεγάλη βαθμίδα
ισχύος μικροκυμάτων ή για πολύ χρόνο.
Κίνδυνος πυρκαγιάς!
■ Το λάδι φαγητού μπορεί να αναφλεγεί. Μη
ζεσταίνετε ποτέ μόνο του το λάδι φαγητού
στο φούρνο μικροκυμάτων.
:Προειδοποίηση – Κίνδυνος έκρηξης!
Τα υγρά ή άλλα τρόφιμα σε ερμητικά κλειστά
δοχεία μπορούν να εκραγούν. Μη ζεσταίνετε
ποτέ υγρά ή άλλα τρόφιμα σε ερμητικά κλειστά
δοχεία.
:Προειδοποίηση – Κίνδυνος εγκαύματος!
■ Τα τρόφιμα με σκληρό κέλυφος ή πέτσα
μπορούν, κατά τη διάρκεια, αλλά επίσης
ακόμα και μετά το ζέσταμα, να σκάσουν με
δύναμη. Μη μαγειρεύετε ποτέ τα αυγά στο
κέλυφος ή μη ζεστάνετε ποτέ τα
σφιχτοβρασμένα αυγά. Μη μαγειρεύετε
ποτέ οστρακοειδή. Στα αυγά μάτια ή στα
αυγά ποσέ πρέπει πρώτα να τρυπήσετε
κρόκο. Στα τρόφιμα με σκληρό κέλυφος ή
πέτσα, όπως π.χ. μήλα, ντομάτες, πατάτες ή
λουκάνικα, είναι δυνατόν να σκάσει το
κέλυφος ή η πέτσα. Πριν το ζέσταμα
τρυπήστε το κέλυφος ή την πέτσα.
τον
24
Page 25
Σημαντικές υποδείξεις ασφαλείας el
Κίνδυνος εγκαύματος! ■ Η θερμότητα στις βρεφικές τροφές δεν
κατανέμεται ομοιόμορφα. Μη ζεσταίνετε
ποτέ βρεφικές τροφές μέσα σε κλειστά
δοχεία. Απομακρύνετε πάντοτε το καπάκι ή
το θήλαστρο. Μετά το ζέσταμα κουνάτε ή
ανακατεύετε πάντοτε καλά. Ελέγχετε τη
θερμοκρασία, προτού δώσετε την τροφή
στο παιδί.
Κίνδυνος εγκαύματος!
■ Τα ζεστά φαγητά εκλύουν θερμότητα. Έτσι
μπορούν τα μαγειρικά σκεύη να ζεσταθούν
πολύ. Απομακρύνετε τα σκεύη ή τα
εξαρτήματα από το χώρο μαγειρέματος
πάντοτε με μια πιάστρα.
Κίνδυνος εγκαύματος!
■ Σε αεροστεγώς κλεισμένα τρόφιμα μπορεί
να σκάσει η συσκευασία. Προσέχετε
πάντοτε τα στοιχεία πάνω στη συσκευασία.
Βγάζετε τα φαγητά πάντοτε με πιάστρες
κουζίνας από το χώρο μαγειρέματος.
Κίνδυνος εγκαύματος!
■ Τα προσιτά μέρη/εξαρτήματα ζεσταίνονται
πολύ κατά τη λειτουργία. Μην ακουμπάτε
ποτέ τα καυτά μέρη/εξαρτήματα. Κρατάτε
τα παιδιά μακριά.
:Προειδοποίηση – Κίνδυνος
ζεματίσματος!
■ Κατά το ζέσταμα υγρών μπορεί να προκύψει
μια επιβράδυνση βρασμού. Αυτό σημαίνει,
ότι θερμοκρασία βρασμού επιτυγχάνεται,
χωρίς να ανεβαίνουν οι χαρακτηριστικές
φυσαλίδες ατμού. Ήδη η παραμικρή δόνηση
του δοχείου μπορεί να οδηγήσει σε ξαφνική
υπερχείλιση και σε πιτσιλίσματα του καυτού
υγρού. Κατά το ζέσταμα τοποθετείτε
πάντοτε ένα κουτάλι μέσα στο δοχείο
αποφεύγεται η επιβράδυνση του βρασμού.
. Έτσι
Κίνδυνος τραυματισμού! ■ Μαγειρικά σκεύη και δοχεία από μέταλλο
μπορούν σε περίπτωση καθαρής
λειτουργίας μικροκυμάτων να οδηγήσουν
στη δημιουργία σπινθήρων. Η συσκευή
καταστρέφεται. Σε περίπτωση καθαρής
λειτουργίας μικροκυμάτων μη
χρησιμοποιείτε ποτέ μεταλλικά δοχεία.
:Προειδοποίηση – Κίνδυνος
ηλεκτροπληξίας!
Η συσκευή λειτουργεί με υψηλή τάση. Μην
αφαιρέσετε ποτέ το περίβλημα.
:Προειδοποίηση – Κίνδυνος σοβαρής
βλάβης της υγείας!
■ Σε περίπτωση ανεπαρκούς καθαρισμού
μπορεί να υποστεί ζημιά η επιφάνεια της
συσκευής. Μπορεί να εξέλθει ενέργεια
μικροκυμάτων. Καθαρίζετε τακτικά τη
συσκευή και απομακρύνετε αμέσως τα
υπολείμματα των τροφίμων. Κρατάτε το
χώρο μαγειρέματος, τη στεγανοποίηση της
πόρτας, την πόρτα και τον αναστολέα της
πόρτας πάντοτε καθαρά. ~ "Καθαρισμός"
στη σελίδα 35
Κίνδυνος σοβαρής
μαγειρέματος ή από μια χαλασμένη
στεγανοποίηση της πόρτας μπορεί να
εξέλθει ενέργεια μικροκυμάτων. Μη
χρησιμοποιείτε ποτέ τη συσκευή, όταν η
πόρτα του χώρου μαγειρέματος ή η
στεγανοποίηση της πόρτας έχουν υποστεί
ζημιά. Καλέστε την υπηρεσία τεχνικής
εξυπηρέτησης πελατών.
Κίνδυνος σοβαρής βλάβης της υγείας!
■ Στις συσκευές χωρίς κάλυμμα περιβλήματος
εξέρχεται ενέργεια μικροκυμάτων. Μην
αφαιρείτε ποτέ το κάλυμμα περιβλήματος.
Σε περίπτωση εργασιών συντήρησης ή
επισκευής καλέστε την υπηρεσία τεχνικής
εξυπηρέτησης πελατών.
βλάβης της υγείας! ■ Από μια χαλασμένη πόρτα του χώρου
:Προειδοποίηση – Κίνδυνος
τραυματισμού!
■ Το ακατάλληλο σκεύος μπορεί να ραγίσει.
Τα σκεύη από πορσελάνη και κεραμικό
υλικό μπορεί να έχουν πολύ μικρές τρύπες
στις λαβές και στα καπάκια. Πίσω από αυτές
τις τρύπες υπάρχει ένας κενός χώρος. Η
υγρασία που έχει εισχωρήσει στον κενό
χώρο μπορεί να σπάσει τα σκεύη.
Χρησιμοποιείτε μόνο σκεύη, κατάλληλα για
μικροκύματα.
25
Page 26
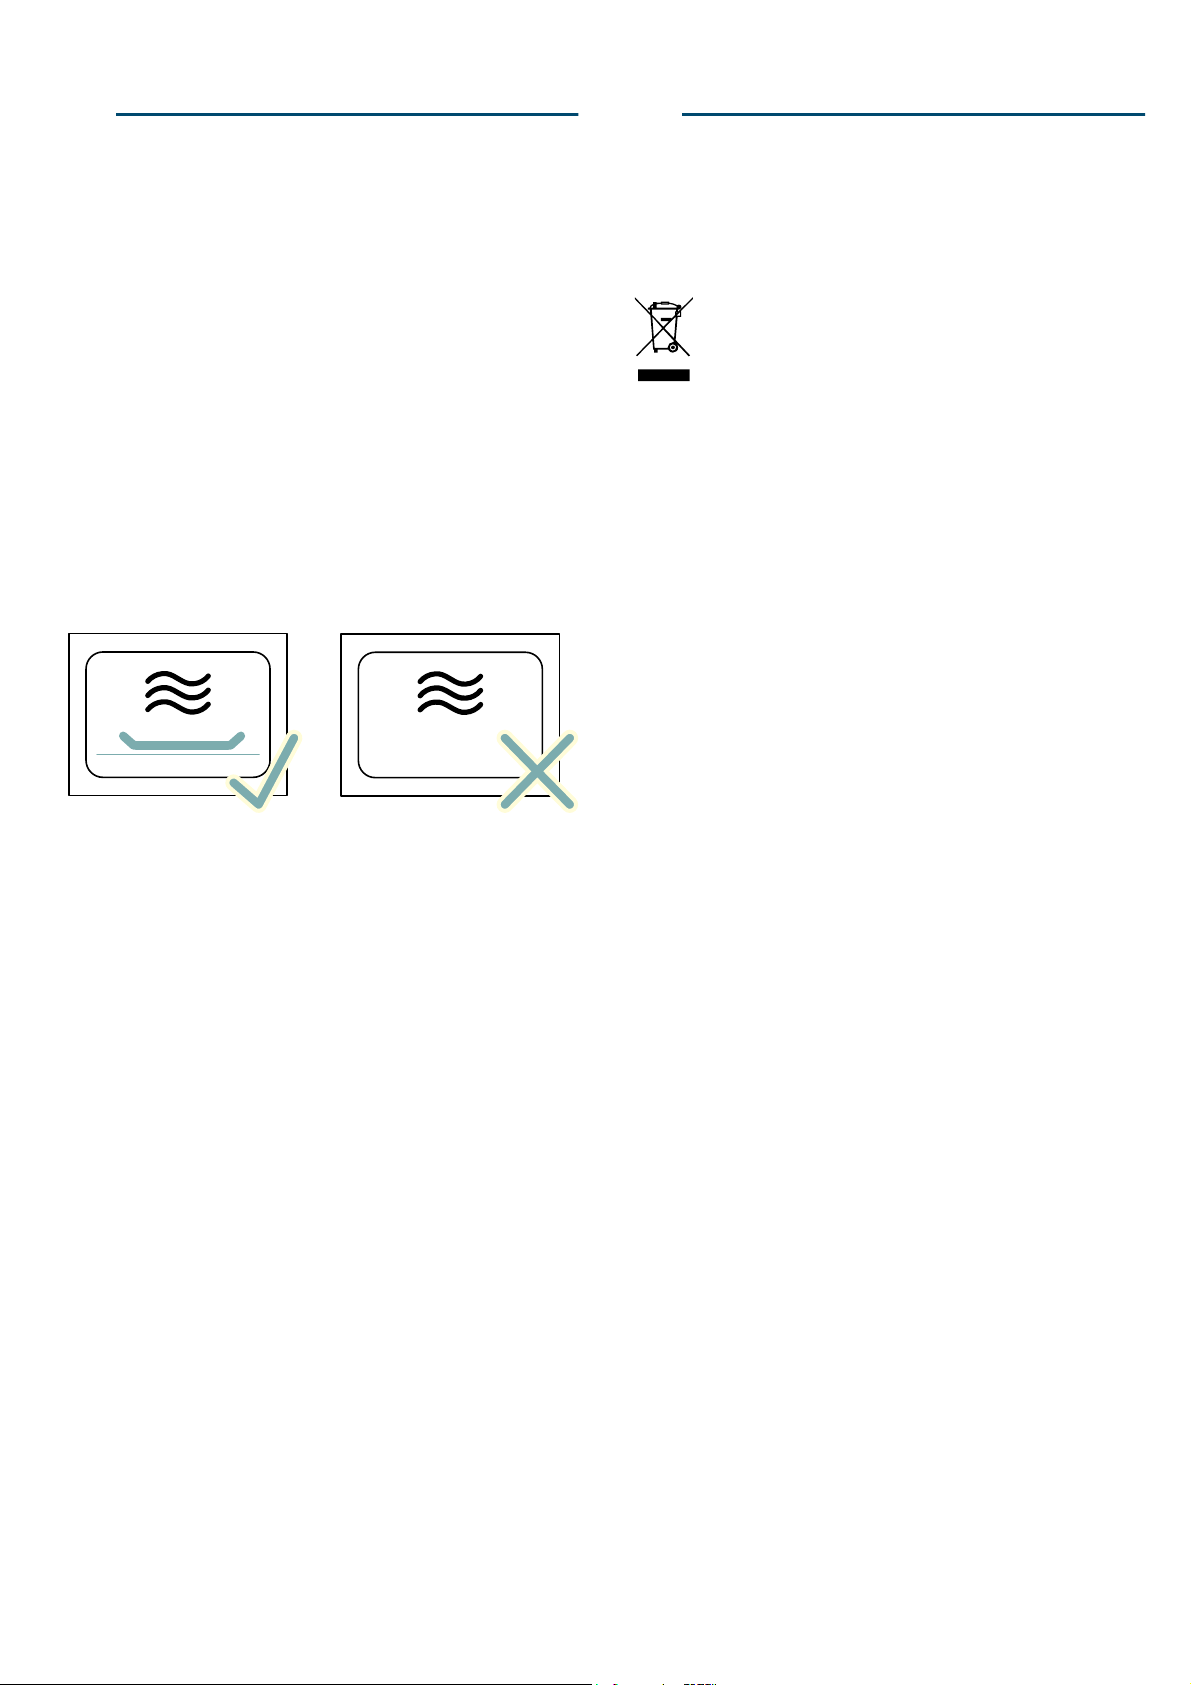
el Αιτίες των ζημιών
]Αιτίες των ζημιών
Αιτίες των ζημιών
Προσοχή!
■ Μεταφορά της συσκευής: Μη μεταφέρετε ή μην
κρατάτε τη συσκευή από τη λαβή της πόρτας. Η λαβή
της πόρτας δεν αντέχει το βάρος της συσκευής και
μπορεί να σπάσει.
■ Δημιουργία ηλεκτρικών σπινθήρων: Ένα μεταλλικό
σώμα, π.χ.το κουτάλι στο ποτήρι, πρέπει να απέχει το
λιγότερο 2 cm από τα τοιχώματα του χώρου
μαγειρέματος και την εσωτερική πλευρά της πόρτας. Οι
σπινθήρες μπορεί να καταστρέψουν το εσωτερικό γυαλί
της πόρτας.
■ Αλουμινένια μπολ: Μη χρησιμοποιείτε αλουμινένια μπολ
στη συσκευή. Στη συσκευή προκαλούνται ζημιές με τη
δημιουργία ηλεκτρικών σπινθήρων.
■ Λειτουργία μικροκυμάτων χωρίς φαγητά: Η λειτουργία
της συσκευής χωρίς φαγητά στο χώρο μαγειρέματος
οδηγεί σε υπερφόρτωση. Μην ξεκινήσετε ποτέ το
φούρνο μικροκυμάτων χωρίς φαγητά στο χώρο
μαγειρέματος. Εξαίρεση αποτελεί μια σύντομη δοκιμή
σκεύους. ~ "Ο φούρνος μικροκυμάτων"
στη σελίδα 30
7Προστασία περιβάλλοντος
Προστασία περιβάλλοντος
Απόσυρση σύμφωνα με τους κανόνες
προστασίας του περιβάλλοντος
Αποσύρετε τη συσκευασία σύμφωνα με τους κανόνες
προστασίας του περιβάλλοντος.
Αυτή η συσκευή χαρακτηρίζεται σύμφωνα με την
ευρωπαϊκή οδηγία 2012/19/ΕE περί ηλεκτρικών
και ηλεκτρονικών συσκευών (waste electrical and
electronic equipment - WEEE).
Η οδηγία προκαθορίζει τα πλαίσια για μια
απόσυρση και αξιοποίηση των παλιών συσκευών
με ισχύ σ’ όλη την ΕΕ.
■ Υγρασία στο χώρο μαγειρέματος: Η υγρασία για
μεγαλύτερο χρονικό διάστημα στο χώρο μαγειρέματος
μπορεί να οδηγήσει σε διάβρωση. Μετά τη χρήση
αφήστε το χώρο μαγειρέματος να στεγνώσει. Μην
αποθηκεύετε υγρά τρόφιμα για μεγάλη χρονική
διάρκεια στον κλειστό χώρο μαγειρέματος. Μην
αποθηκεύετε κανένα φαγητό στο χώρο μαγειρέματος.
■ Πολύ λερωμένη τσιμούχα στεγανοποίησης: Εάν η
τσιμούχα στεγανοποίησης είναι πολύ λερωμένη, δεν
κλείνει πλέον σωστά η πόρτα της συσκευής κατά τη
λειτουργία. Οι γειτονικές προσόψεις των ντουλαπιών
μπορούν να χαλάσουν.Διατηρείτε την στεγανοποίηση
πάντοτε καθαρή. ~ "Καθαρισμός" στη σελίδα 35
■ Κρύωμα με ανοιχτή πόρτα συσκευής: Αφήνετε το χώρο
μαγειρέματος να κρυώνει μόνο, όταν είναι κλειστός. Μη
μαγκώνετε τίποτα στην πόρτα της συσκευής.Ακόμα και
όταν η πόρτα είναι ανοιχτή, έστω και λίγο, μπορούν να
χαλάσουν με το πέρασμα του χρόνου οι γειτονικές
προσόψεις των ντουλαπιών.
■ Η πόρτα της συσκευής ως κάθισμα ή ως επιφάνεια
εναπόθεσης: Μην ανεβαίνετε ή μην κάθεστε στην
πόρτα της συσκευής. Μην τοποθετείτε κανένα σκεύος ή
εξάρτημα πάνω στην πόρτα της συσκευής.
■ Πόπ-κορν μικροκυμάτων: Μη ρυθμίζετε ποτέ μια πολύ
μεγάλη ισχύ μικροκυμάτων. Χρησιμοποιήστε το πολύ
600 W. Τοποθετείτε τη σακούλα του πόπ-κορν πάντοτε
πάνω σ’ ένα γυάλινο πιάτο. Ο δίσκος μπορεί να ραγίσει
λόγω υπερφόρτωσης.
26
Page 27

Γνωρίστε τη συσκευή el
*Γνωρίστε τη συσκευή
Γνωρίστε τη συσκευή
Σε αυτό το κεφάλαιο σας εξηγούμε τις ενδείξεις και τα
στοιχεία χειρισμού. Επιπλέον μαθαίνετε τις διάφορες
λειτουργίες της συσκευής σας.
Υπόδειξη: Ανάλογα με τον τύπο της συσκευής μπορεί να
υπάρχουν αποκλίσεις στο χρώμα και στις λεπτομέρειες.
POPGG
NFOV
Πεδίο χειρισμού
Μέσω του πεδίου χειρισμού ρυθμίζετε με τη βοήθεια
πλήκτρων, πεδίων αφής και ενός περιστροφικού διακόπτη
τις διάφορες λειτουργίες της συσκευής σας.Η οθόνη
ενδείξεων σας δείχνει τις τρέχουσες ρυθμίσεις.
Η επισκόπηση δείχνει το πεδίο χειρισμού στην
ενεργοποιημένη συσκευή με έναν επιλεγμένο τρόπο
λειτουργίας.
##
PLQV:
TUBSUTUPQ
Πλήκτρα
(
Τα πλήκτρα αριστερά και δεξιά από τον
περιστροφικό διακόπτη έχουν ένα σημείο πίεσης.
Πατήστε το πλήκτρο για την ενεργοποίηση.
Περιστροφικός διακόπτης
0
Μπορείτε να γυρίσετε τον περιστροφικό διακόπτη
προς τα αριστερά ή προς τα δεξιά.
Οθόνη ενδείξεων
8
Στην οθόνη ενδείξεων βλέπετε τις τρέχουσες τιμές
ρύθμισης, τις δυνατότητες επιλογής ή επίσης και τα
κείμενα υποδείξεων.
Πεδία αφής
@
Κάτω από τα πεδία αφής αριστερά
από την οθόνη ενδείξεων βρίσκονται αισθητήρες.
Πατήστε ελαφρά πάνω στο εκάστοτε βέλος για να
επιλέξετε τη λειτουργία.
¾ και δεξιά ¿
Στοιχεία χειρισμού
Τα ξεχωριστά στοιχεία χειρισμού είναι προσαρμοσμένα στις
διάφορες λειτουργίες της συσκευής σας. Έτσι μπορείτε να
ρυθμίσετε εύκολα και απευθείας τη συσκευή σας.
Πλήκτρα και πεδία αφής
Τη σημασία των διάφορων πλήκτρων και πεδίων αφής
μπορείτε να δείτε σύντομα εδώ.
Πλήκτρα Σημασία
on/off Ενεργοποίηση και απενεργοποίηση
της συσκευής
menu Μενού Άνοιγμα του μενού των τρόπων λει-
τουργίας
l
0
start/stop Εκκίνηση ή σταμάτημα της λειτουρ-
Πληροφορία Εμφάνιση των υποδείξεων
Λειτουργία χρόνου Ρύθμιση ρολογιού συναγερμού
γίας
Πεδία αφής
¾
¿
--------
Περιστροφικός διακόπτης
Με τον περιστροφικό διακόπτη αλλάζετε τους τρόπους
λειτουργίας και τις τιμές ρύθμισης, που εμφανίζονται στην
οθόνη ενδείξεων.
Στις περισσότερες λίστες επιλογής, π.χ. στα προγράμματα,
μετά το τελευταίο σημείο αρχίζει ξανά το πρώτο.
Σε μερικές λίστες επιλογής, π.χ. "Διάρκεια", πρέπει να
γυρίσετε ξανά πίσω τον περιστροφικό διακόπτη, όταν
επιτευχθεί η ελάχιστη ή η μέγιστη τιμή.
Πεδίο αριστερά από
την οθόνη ενδείξεων
Πεδίο δεξιά από την
οθόνη ενδείξεων
Πλοήγηση προς τα αριστερά
Πλοήγηση προς τα δεξιά
Οθόνη ενδείξεων
Η οθόνη ενδείξεων είναι δομημένη έτσι, ώστενα μπορείτε
να διαβάσετε τα στοιχεία με μια ματιά.
Η τιμή, που μπορείτε να ρυθμίσετε αυτή τη στιγμή, είναι
εστιασμένη. Παριστάνεται σε άσπρη γραμματοσειρά και το
φόντο είναι σκούρο.
Γραμμή κατάστασης
Η γραμμή κατάστασης βρίσκεται στο επάνω μέρος στην
οθόνη ενδείξεων.Εκεί εμφανίζεται η ώρα,
ρολογιού συναγερμού και η διάρκεια του προγράμματος.
Γραμμή προόδου
Με βάση τη γραμμή προόδου βλέπετε, π.χ πόσο έχει τρέξει
η διάρκεια. Η ευθεία γραμμή κάτω από τις τιμές ρύθμισης
γεμίζει από τα αριστερά προς τα δεξιά, όσο περισσότερο
προχωρά η τρέχουσα λειτουργία.
ο χρόνος του
27
Page 28

el Γνωρίστε τη συσκευή
Μενού των τρόπων λειτουργίας
Το μενού είναι χωρισμένο σε διάφορους τρόπους
λειτουργίας. Έτσι μπορείτε να έχετε γρήγορα πρόσβαση
στην επιθυμητή λειτουργία.
Ανάλογα με τον τύπο συσκευής υπάρχει και διαφορετικός
αριθμός τρόπων λειτουργίας.
Τρόπος λειτουργίας Χρήση
Μικροκύματα Επιλογή βαθμίδων ισχύος μικροκυ-
μάτων
Προγράμματα Αυτόματα προγράμματα
Πολύ εύκολη παρασκευή των επιλεγμένων φαγητών
Ρυθμίσεις ~ "Βασικές ρυθμίσεις"
στη σελίδα 34
Μπορείτε να προσαρμόσετε τις βασικές ρυθμίσεις της συσκευής σας
στις συνήθειές σας.
--------
Περισσότερες πληροφορίες
Στις περισσότερες περιπτώσεις η συσκευή σας προσφέρει
υποδείξεις και επιπλέον πληροφορίες για την τρέχουσα
εκτελούμενη εργασία. Πατήστε γι’ αυτό το πλήκτρο l. Η
υπόδειξη εμφανίζεται για μερικά δευτερόλεπτα. Σε
περίπτωση μεγάλων υποδείξεων, ξεφυλλίστε με τον
περιστροφικό διακόπτη μέχρι το τέλος.
Ορισμένες υποδείξεις εμφανίζονται αυτόματα, π.χ. για
επιβεβαίωση ως απαίτηση ή προειδοποίηση.
Η υπόδειξη μπορεί να απομακρυνθεί, πατώντας ξανά το
πλήκτρο
l.
Υποδείξεις
■ Στη λειτουργία μικροκυμάτων παραμένει η συσκευή
κρύα. Παρόλ’ αυτά ενεργοποιείται ο ανεμιστήρας
ψύξης. Ο ανεμιστήρας ψύξης μπορεί να συνεχίσει να
λειτουργεί ακόμα και όταν η λειτουργία μικροκυμάτων
έχει ήδη σταματήσει.
■ Στο τζάμι της πόρτας, στα εσωτερικά τοιχώματα και
στον πάτο της συσκευής μπορεί να παρουσιαστεί
υγρασία. Αυτό είναι κάτι το κανονικό, η λειτουργία των
μικροκυμάτων δεν επηρεάζεται από αυτό. Σφουγγίστε
την υγρασία μετά το μαγείρεμα.
Εξαρτήματα
Μαζί με τη συσκευή σας υπάρχουν συνημμένα τα
ακόλουθα εξαρτήματα.
Γυάλινο ταψί
Για το ξεπάγωμα και το μαγείρεμα
φαγητών.
Χρησιμοποιείτε μόνο γνήσια εξαρτήματα του
κατασκευαστή της συσκευής σας. Είναι ειδικά
προσαρμοσμένα στη δική σας συσκευή.
Τα εξαρτήματα μπορείτε να τα αγοράσετε στην υπηρεσία
εξυπηρέτησης πελατών, στα ειδικά καταστήματα ή στο
διαδίκτυο (Internet).
Υπόδειξη: Το μαγειρικό σκεύος, κατάλληλο για
μικροκύματα, μπορείτε να
χώρου μαγειρέματος (ύψος 0).
το τοποθετήσετε στον πάτο του
Λειτουργίες του χώρου μαγειρέματος
Οι λειτουργίες του χώρου μαγειρέματος διευκολύνουν τη
λειτουργία της συσκευής σας. Έτσι π.χ. φωτίζεται μια
μεγάλη περιοχή του χώρου μαγειρέματος και ένας
ανεμιστήρας ψύξης προστατεύει τη συσκευή από
υπερθέρμανση.
Φωτισμός του χώρου μαγειρέματος
Όταν ανοίγετε την πόρτα της συσκευής, ενεργοποιείται ο
φωτισμός του χώρου μαγειρέματος.Εάν παραμείνει η
πόρτα περισσότερο
ξανά ο φωτισμός του χώρου μαγειρέματος. Κλείνοντας και
ανοίγοντας ξανά την πόρτα της συσκευής, ενεργοποιείται
ξανά ο φωτισμός του χώρου μαγειρέματος.
Σε όλους τους τρόπους λειτουργίας ενεργοποιείται ο
φωτισμός του χώρου μαγειρέματος, μόλις ξεκινήσει η
λειτουργία. Όταν τελειώσει η λειτουργία, απενεργοποιείται.
Υπόδειξη: Εάν σταματήσει η λειτουργία με
πόρτας της συσκευής, πρέπει να ξεκινήσετε τη λειτουργία
μετά το κλείσιμο της πόρτας της συσκευής ξανά με το
πλήκτρο start/stop
Ανεμιστήρας ψύξης
Ο ανεμιστήρας ψύξης ενεργοποιείται σε περίπτωση που
χρειάζεται. Ο ζεστός αέρας εξέρχεται από την πόρτα.
Μετά τη λειτουργία, ο ανεμιστήρας ψύξης μπορεί να
λειτουργεί ακόμα για λίγο χρόνο.
από 5 λεπτά ανοιχτή, απενεργοποιείται
το άνοιγμα της
l.
Προσοχή!
Μην καλύπτετε τις σχισμές εξαερισμού. Διαφορετικά η
συκευή υπερθερμαίνεται.
28
Page 29

Πριν την πρώτη χρήση el
KΠριν την πρώτη χρήση
Πριν την πρώτη χρήση
Προτού μπορέσετε να χρησιμοποιήσετε την καινούργια σας
συσκευή, πρέπει να πραγματοποιήσετε μερικές ρυθμίσεις.
Πρώτη θέση σε λειτουργία
Μετά τη σύνδεση του ρεύματος ή μιας διακοπής του
ρεύματος εμφανίζονται στην οθόνη ενδείξεων οι ρυθμίσεις
για την πρώτη θέση σε λειτουργία. Μπορεί να διαρκέσει
μερικά δευτερόλεπτα, μέχρι να εμφανιστεί η απαίτηση.
Υπόδειξη: Μπορείτε να αλλάξετε οποτεδήποτε αυτές τις
ρυθμίσεις ξανά στις βασικές ρυθμίσεις.
Ρύθμιση της γλώσσας
1. Ρυθμίστε με τον περιστροφικό διακόπτη την επιθυμητή
γλώσσα.
2. Πατήστε ελαφρά το βέλος ¿.
Η επόμενη ρύθμιση εμφανίζεται.
Ρύθμιση της ώρας
1. Ρυθμίστε με τον περιστροφικό διακόπτη την τρέχουσα
ώρα.
2. Πατήστε ελαφρά το βέλος ¿
Ρύθμιση της ημερομηνίας
1. Ρυθμίστε με τον περιστροφικό διακόπτη την τρέχουσα
ημέρα.
2. Για την επιβεβαίωση πατήστε ελαφράτο βέλος ¿.
3. Ρυθμίστε με τον περιστροφικό διακόπτη τον τρέχοντα
μήνα.
4. Για την επιβεβαίωση πατήστε ελαφράτο βέλος ¿.
5. Ρυθμίστε με τον περιστροφικό διακόπτη το τρέχον έτος.
6. Για την επιβεβαίωση πατήστε ελαφράτο βέλος ¿.
Στην οθόνη ενδείξεων εμφανίζεται μια υπόδειξη, ότι η
πρώτη θέση σε λειτουργία έχει ολοκληρωθεί.
1Χειρισμός συσκευής
Χειρισμός συσκευής
Τα στοιχεία χειρισμού και τον τρόπο λειτουργίας τους τα
έχετε ήδη γνωρίσει. Τώρα σας περιγράφουμε, πώς να
ρυθμίζετε τη συσκευή σας. Μαθαίνετε, τι γίνεται κατά την
ενεργοποίηση και απενεργοποίηση και πως να ρυθμίζετε
τους τρόπους λειτουργίας.
Ενεργοποίηση και απενεργοποίηση της
συσκευής
Προτού μπορέσετε να ρυθμίσετε κάτι στη συσκευή σας,
πρέπει να την ενεργοποιήσετε.
Υπόδειξη: Το ρολόι συναγερμού μπορεί να ρυθμιστεί
επίσης με απενεργοποιημένη τη συσκευή. Μερικές
ενδείξεις και υποδείξεις παραμένουν φανερές στην οθόνη
ενδείξεων ακόμα και με απενεργοποιημένη τη συσκευή.
Όταν δε χρειάζεστε τη συσκευή σας, απενεργοποιήστε την.
Όταν για μεγαλύτερη διάρκεια
απενεργοποιείται η συσκευή αυτόματα.
Θέστε τη συσκευή σε λειτουργία
Με το πλήκτρο on/off ενεργοποιείτε τη συσκευή.
Το on/off πάνω από το πλήκτρο ανάβει μπλε.
Στην οθόνη ενδείξεων εμφανίζεται το λογότυπο Siemens
και μετά η υψηλότερη βαθμίδα ισχύος μικροκυμάτων.
Η συσκευή βρίσκεται σε ετοιμότητα λειτουργίας.
Το πως ρυθμίζετε τους τρόπους
το διαβάσετε στα ξεχωριστά κεφάλαια.
Θέση της συσκευής εκτός λειτουργίας
Με το πλήκτρο on/off απενεργοποιείτε τη συσκευή.
Ο φωτισμός πάνω από το πλήκτρο σβήνει.
Μια λειτουργία που ενδεχομένως τρέχει διακόπτεται.
Στην οθόνη ενδείξεων εμφανίζεται η ώρα και η ημερομηνία.
δεν έχει γίνει καμία ρύθμιση,
λειτουργίας, μπορείτε να
Καθαρισμός των εξαρτημάτων
Προτού χρησιμοποιήσετε τα εξαρτήματα για πρώτη φορά,
καθαρίστε τα καλά με ζεστό διάλυμα απορρυπαντικού
πιάτων και ένα μαλακό πανί καθαρισμού.
Υπόδειξη: Εάν θέλετε να εμφανίζεται η ώρα και η
ημερομηνία
μπορείτε να το καθορίστε στις βασικές ρυθμίσεις.
ή όχι στην απενεργοποιημένη συσκευή,
Λειτουργία
Μερικά βήματα χειρισμού είναι τα ίδια κατά τη λειτουργία
όλων των τρόπων λειτουργίας. Παρακάτω θα γνωρίσετε τα
βασικά βήματα χειρισμού.
Εκκίνηση της λειτουργίας
Κάθε λειτουργία πρέπει να την ξεκινήσετε με το πλήκτρο
start/stop.
Μετά την εκκίνηση εμφανίζονται στην οθόνη ενδείξεων οι
ρυθμίσεις σας. Με βάση τη γραμμή προόδου βλέπετε, π.χ
έχει τρέξει η διάρκεια.
πόσο
Υπόδειξη: Εάν σταματήσει η λειτουργία με το άνοιγμα της
πόρτας της συσκευής, πρέπει να ξεκινήσετε τη λειτουργία
μετά το κλείσιμο της πόρτας της συσκευής ξανά με το
πλήκτρο start/stop.
29
Page 30

el Ο φούρνος μικροκυμάτων
Σταμάτημα της λειτουργίας
Με το πλήκτρο start/stop μπορείτε να σταματήσετε τη
λειτουργία και να την ξεκινήσετε ξανά.
Για να σβήσετε όλες τις ρυθμίσεις, πατήστε το πλήκτρο on/
off.
Υποδείξεις
■ Με το άνοιγμα της πόρτας της συσκευής σταματάει
επίσης η λειτουργία.
■ Μετά από μια διακοπή ή σταμάτημα της λειτουργίας
μπορεί να συνεχίζει να λειτουργεί ο ανεμιστήρας ψύξης.
Ρύθμιση του τρόπου λειτουργίας
Μετά την ενεργοποίηση της συσκευής εμφανίζεται ο
ρυθμισμένος προτεινόμενος τρόπος ψησίματος. Μπορείτε
να ξεκινήσετε αυτή τη ρύθμιση αμέσως.
Εάν θέλετε να ρυθμίσετε έναν άλλο τρόπο λειτουργίας,
ακριβείς περιγραφές γι’ αυτό θα βρείτε στα αντίστοιχα
κεφάλαια.
Βασικά ισχύει:
1. Πατήστε το πλήκτρο "menu".
Το μενού των τρόπων λειτουργίας ανοίγει.
2. Επιλέξτε με τον περιστροφικό διακόπτη τον επιθυμητό
τρόπο λειτουργίας.
Ανάλογα με τον τρόπο λειτουργίας έχετε στη διάθεσή
σας διάφορες δυνατότητες επιλογής.
3. Με το βέλος ¿ περνάτε στον επιλεγμένο τρόπο
λειτουργίας.
4. Αλλάξτε με τον περιστροφικό διακόπτη την επιλογή.
Ανάλογα με την επιλογή αλλάξτε περαιτέρω ρυθμίσεις.
5. Ξεκινήστε με το πλήκτρο start/stop.
Στην οθόνη ενδείξεων εμφανίζεται η ροή του χρόνου. Οι
ρυθμίσεις και η γραμμή προόδου είναι φανερές.
Υπόδειξη: Εάν θέλετε να εγκαταλείψετε την τρέχουσα
ρύθμιση, πατώντας το πλήκτρο "menu" περνάτε ξανά στο
επίπεδο των τρόπων λειτουργίας.
^Ο φούρνος μικροκυμάτων
Ο φούρνος μικροκυμάτων
Με το φούρνο μικροκυμάτων μπορείτε να μαγειρέψετε, να
ζεστάνετε ή να ξεπαγώσετε ιδιαίτερα γρήγορα τα φαγητά
σας.
Για να εκμεταλλευτείτε ιδανικά το φούρνο μικροκυμάτων,
προσέξτε τιςυποδείξεις για τα μαγειρικά σκεύη και
προσανατολιστείτε σύμφωνα με τα στοιχεία στους πίνακες
εφαρμογών στο τέλος των οδηγιών χρήσης.
~ "Δοκιμάστηκαν για εσάς, στο δικό μας
μαγειρικής" στη σελίδα 38
Μαγειρικό σκεύος
Δεν είναι κάθε μαγειρικό σκεύος κατάλληλο για τα
μικροκύματα. Για να ζεσταθούν τα φαγητά σας και η
συσκευή να μην υποστεί ζημιά, χρησιμοποιείτε μόνο
μαγειρικά σκεύη κατάλληλα για μικροκύματα.
Κατάλληλο μαγειρικό σκεύος
Κατάλληλα είναι πυρίμαχα μαγειρικά σκεύη από γυαλί,
υαλοκεραμικό υλικό, πορσελάνη, κεραμικό ή ανθεκτικό στη
θερμότητα πλαστικό υλικό. Τα μικροκύματα
αυτά τα υλικά.
Μπορείτε να χρησιμοποιήσετε επίσης και σκεύη
σερβιρίσματος. Έτσι εξοικονομείτε χρόνο. Χρησιμοποιείτε
τα μαγειρικά σκεύη με χρυσαφένιες ή ασημένιες
διακοσμήσεις μόνο τότε, όταν ο κατασκευαστής εγγυάται,
ότι το σκεύος είναι κατάλληλο για μικροκύματα.
Ακατάλληλο μαγειρικό σκεύος
Ακατάλληλα είναι μεταλλικά σκεύη. Το μέταλλο δεν αφήνει
να περάσουν τα μικροκύματα.
κλειστά μεταλλικά δοχεία κρύα.
Προσοχή!
Δημιουργία ηλεκτρικών σπινθήρων: Ένα μεταλλικό σώμα,
π.χ.το κουτάλι στο ποτήρι, πρέπει να απέχει το λιγότερο 2
cm από τα τοιχώματα του χώρου μαγειρέματος και την
εσωτερική πλευρά της πόρτας. Οι σπινθήρες μπορεί να
καταστρέψουν το εσωτερικό γυαλί της πόρτας.
Τα φαγητά παραμένουν σε
εργαστήριο
διαπερνούν
30
Δοκιμή μαγειρικού
Μην ενεργοποιήσετε ποτέ το φούρνο μικροκυμάτων χωρίς
φαγητά. Η μόνη εξαίρεση είναι η σύντομη δοκιμή
μαγειρικού σκεύους.
Εάν δεν είστε σίγουροι(ες), ότι τα μαγειρικά σας σκεύη
είναι κατάλληλα για μικροκύματα, κάνετε την ακόλουθη
δοκιμή.
1. Τοποθετήστε το άδειο σκεύος για ½ έως 1λεπτό με τη
μέγιστη ισχύ μέσα στο χώρο μαγειρέματος.
2. Ελέγχετε ενδιάμεσα τη θερμοκρασία του σκεύους.
Το σκεύος πρέπει να παραμείνει κρύο ή να έχει τη
θερμοκρασία του χεριού.
Εάν το σκεύος έχει ζεσταθεί πολύ ή δημιουργούνται
σπινθήρες, τότε δεν είναι κατάλληλο.
Διακόψτε τη δοκιμή.
σκεύους
:Προειδοποίηση – Κίνδυνος εγκαύματος!
Τα προσιτά μέρη/εξαρτήματα ζεσταίνονται πολύ κατά τη
λειτουργία. Μην ακουμπάτε ποτέ τα καυτά μέρη/
εξαρτήματα. Κρατάτε τα παιδιά μακριά.
Page 31

Βαθμίδες μικροκυμάτων
Οι ακόλουθες βαθμίδες ισχύος μικροκυμάτων βρίσκονται
στη διάθεσή σας.
Οι βαθμίδες ισχύος μικροκυμάτων δεν αντιστοιχούν
πάντοτε στο ακριβή αριθμό των Watt, που χρησιμοποιεί η
συσκευή.
Βαθμίδα Φαγητά μέγιστη διάρκεια
90 W για το ξεπάγωμα ευαίσθητων φαγητών 1 ώρα και 30 λεπτά
180 W για το ξεπάγωμα και τη συνέχιση του
μαγειρέματος
360 W για το μαγείρεμα κρέατος και για το
ζέσταμα ευαίσθητων φαγητών
600 W για το ζέσταμα και το μαγείρεμα φαγη-
τών
900 W για το ζέσταμα υγρών 30 λεπτά
1 ώρα και 30 λεπτά
1 ώρα και 30 λεπτά
1 ώρα και 30 λεπτά
Ο φούρνος μικροκυμάτων el
PLQV:
5. Ξεκινήστε με το πλήκτρο start/stop.
PLQV:
TUBSUTUPQ
Προτεινόμενες τιμές:
Για κάθε βαθμίδα ισχύος μικροκυμάτων η συσκευή
προτείνει μια διάρκεια. Αυτές τις τιμές μπορείτε να τις
παραλάβετε ή να τις αλλάξετε στην εκάστοτε περιοχή.
μέγιστη ρύθμιση προβλέπεται για το ζέσταμα υγρών. Για
Η
την προστασία της συσκευής μειώνεται μετά από ορισμένο
χρόνο η μέγιστη ισχύς των μικροκυμάτων.Η πλήρης ισχύς
είναι ξανά διαθέσιμη μετά από ένα χρόνο ψύξης.
Ρύθμιση του φούρνου μικροκυμάτων
Παράδειγμα: Ισχύς μικροκυμάτων 600 W, διάρκεια 5
λεπτά.
1. Πατήστε το πλήκτρο on/off.
Η συσκευή βρίσκεται σε ετοιμότητα λειτουργίας. Στην
οθόνη ενδείξεων προτείνεται η μέγιστη βαθμίδα ισχύος
μικροκυμάτων και μια διάρκεια, μπορείτε να την
αλλάξετε οποτεδήποτε.
2. Επιλέξτε με τον περιστροφικό διακόπτη την επιθυμητή
βαθμίδα ισχύος μικροκυμάτων.
PLQV:
TUBSUTUPQ
Η συσκευή ξεκινά τη λειτουργία. Στην οθόνη ενδείξεων
τρέχει η χρονική διάρκεια.
Υποδείξεις
■ Όταν ενεργοποιείτε τη συσκευή εμφανίζεται στην οθόνη
ενδείξεων πάντοτε ως πρόταση η υψηλότερη βαθμίδα
ισχύος μικροκυμάτων.
■ Όταν ανοίξετε ενδιάμεσα την πόρτα της συσκευής,
μπορεί ο ανεμιστήρας να συνεχίσει να λειτουργεί.
Η διάρκεια έληξε
Ένα σήμα ηχεί.
Η λειτουργία έχει τερματιστεί.
Πρόωρος τερματισμός του σήματος:
Πατήστε ελαφρά το πλήκτρο
Υπόδειξη: Μετά το ελαφρύ πάτημα του πλήκτρου
0.
0
εμφανίζεται η λειτουργία του ρολογιού συναγερμού και
αποκρύπτεται αυτόματα μετά από λίγη ώρα.Πατήστε
ελαφρά ακόμα μια φορά το πλήκτρο
0 και η λειτουργία
του ρολογιού συναγερμού αποκρύπτεται αμέσως.
POPGG
NFOV
O
Στην οθόνη ενδείξεων εμφανίζεται η βαθμίδα ισχύος
μικροκυμάτων και μια προτεινόμενη διάρκεια.
3. Πατήστε ελαφρά το βέλος ¿.
Η διάρκεια μπορεί να ρυθμιστεί.
4. Ρυθμίστε με τον περιστροφικό διακόπτη την επιθυμητή
διάρκεια.
Απενεργοποιήστε τη συσκευή με το πλήκτρο on/off.
Αλλαγή της διάρκειας
Αυτό είναι οποτεδήποτε δυνατό.
Αλλάξτε με τον περιστροφικό διακόπτη τη χρονική
διάρκεια.
Η λειτουργία συνεχίζεται.
Αλλαγή της ισχύος μικροκυμάτων
Αυτό είναι οποτεδήποτε δυνατό.
Περάστε με το βέλος
¾ στη βαθμίδα ισχύος μικροκυμάτων.
Ρυθμίστε με τον περιστροφικό διακόπτη την επιθυμητή
βαθμίδα ισχύος μικροκυμάτων.
Η διάρκεια δεν αλλάζει.
Η λειτουργία συνεχίζεται.
Υπόδειξη: Εάν η ρυθμισμένη διάρκεια ξεπεράσει τη
μέγιστη διάρκεια για τη βαθμίδα ισχύος μικροκυμάτων 900
W, τότε μειώνετε αυτόματα. Η λειτουργία δε συνεχίζεται.
Με το πλήκτρο start/stop ξεκινήστε τη λειτουργία
31
Page 32

el Ρολόι συναγερμ.
OΡολόι συναγερμ.
Ρολόι συναγερμ.
Μπορείτε να χρησιμοποιήσετε το ρολόι συναγερμού, όπως
ένα ρολόι συναγερμού κουζίνας. Το ρολόι συναγερμού
τρέχει παράλληλα με άλλες ρυθμίσεις. Μπορείτε να
ρυθμίσετε οποτεδήποτε το ρολόι συναγερμού, ακόμα και
όταν η συσκευή είναι απενεργοποιημένη. Έχει ένα δικό του
σήμα, έτσι ώστε να ακούτε, εάν έχει λήξει το ρολόι
συναγερμού ή μια διάρκεια
Ρύθμιση του ρολογιού συναγερμού
Μπορεί να ρυθμιστούν το πολύ 24 ώρες.
Όσο υψηλότερη είναι η τιμή, τόσο πιο μεγάλα είναι τα
βήματα του χρόνου.
1. Πατήστε το πλήκτρο 0.
Το ρολόι συναγερμού εμφανίζεται.
2. Ρυθμίστε με τον περιστροφικό διακόπτη το χρόνο του
ρολογιού συναγερμού.
ơƾƺNJƸǁǃƼưƲPLQV
.
TUBSUTUPQ
PΠρογράμματα
Προγράμματα
Με τα προγράμματα μπορείτε να παρασκευάσετε πολύ
εύκολα τα φαγητά. Επιλέξτε το πρόγραμμα και δώστε το
βάρος του φαγητού. Την ιδανική ρύθμιση την αναλαμβάνει
το πρόγραμμα.
Ρύθμιση του προγράμματος
Παράδειγμα: Πρόγραμμα "Ξεπάγωμα ψωμιού", βάρος 250
γρ.
1. Πατήστε το πλήκτρο on/off.
Η συσκευή βρίσκεται σε ετοιμότητα λειτουργίας.
2. Πατήστε το πλήκτρο "menu".
Οι τρόποι λειτουργίας προβάλλονται.
3. Επιλέξτε με τον περιστροφικό διακόπτη "Προγράμματα".
4. Πατήστε ελαφρά το βέλος ¿.
Το πρώτο πρόγραμμα εμφανίζεται στην οθόνη
ενδείξεων.
5. Ρυθμίστε με τον περιστροφικό διακόπτη το επιθυμητό
πρόγραμμα.
PLQV
JƧLJƻƮƽƴƫƲLJƻư
!
3. Ξεκινήστε με το πλήκτρο 0.
Υπόδειξη: Μετά από μερικά δευτερόλεπτα ξεκινά το
ρολόι συναγερμού αυτόματα.
Ο χρόνος του ρολογιού συναγερμού τρέχει. Η ένδειξη
αλλάζει μετά από λίγη ώρα ξανά πίσω. Εμφανίζεται ένα
σύμβολο του ρολογιού συναγερμού και ο τρέχων χρόνος
στη γραμμή κατάστασης.
Όταν λήξει ο χρόνος του ρολογιού συναγερμού, ηχεί ένα
σήμα. Με το
πλήκτρο 0 μπορείτε να σβήσετε πρόωρα το
σήμα.
Υποδείξεις
■ Το ρολόι συναγερμού παραμένει φανερό στην οθόνη
ενδείξεων, όταν η συσκευή είναι απενεργοποιημένη.
■ Σε περίπτωση που τρέχει μια λειτουργία, για την επιλογή
του ρολογιού συναγερμού πατήστε ελαφρά το πλήκτρο
0. Ο χρόνος του ρολογιού συναγερμού εμφανίζεται για
λίγο και μπορεί να αλλαχτεί με τον περιστροφικό
διακόπτη.
Αλλαγή του ρολογιού συναγερμού
Για να αλλάξετε το χρόνο του ρολογιού συναγερμού,
πατήστε ελαφρά το πλήκτρο
συναγερμού εμφανίζεται και μπορεί να αλλαχτεί με τον
περιστροφικό διακόπτη.
0. Ο χρόνος του ρολογιού
POPGG
NFOV
O
Το επιθυμητό πρόγραμμα είναι επιλεγμένο. Στην οθόνη
ενδείξεων εμφανίζεται μια προτεινόμενη τιμή για το
βάρος.
6. Πατήστε ελαφρά το βέλος ¿.
Το βάρος μπορεί να ρυθμιστεί.
7. Ρυθμίστε με τον περιστροφικό διακόπτη το επιθυμητό
βάρος.
8. Πατήστε ελαφρά το βέλος ¿.
PLQV
!
TUBSUTUPQ
Εμφανίζεται η υπόδειξη παρασκευής.
9. Ξεκινήστε με το πλήκτρο start/stop.
Η συσκευή ξεκινά τη λειτουργία. Στην οθόνη ενδείξεων
τρέχει η χρονική διάρκεια.
Διακοπή του ρολογιού συναγερμού
Εάν θέλετε να διακόψετε το ρολόι συναγερμού, ρυθμίστε
το χρόνο του ρολογιού συναγερμού ξανά εντελώς πίσω.
Μετά την αποδοχή της αλλαγής δεν ανάβει πλέον το
σύμβολο.
32
Υποδείξεις
■ Η χρονική διάρκεια υπολογίζεται από τα προγράμματα.
Page 33

Προγράμματα el
■ Σε μερικά φαγητά, κατά τη διάρκεια της παρασκευής,
εμφανίζονται στην οθόνη ενδείξεων υποδείξεις για το
γύρισμα ή το ανακάτεμα. Ακολουθήστε τις υποδείξεις.
Με το άνοιγμα της πόρτας της συσκευής σταματάει η
λειτουργία. Μετά το κλείσιμο της πόρτας της συσκευής
ξεκινήστε ξανά τη λειτουργία. Εάν δε γυρίσετε ή δεν
ανακατέψετε το φαγητό
, συνεχίζει να τρέχει το
πρόγραμμα όμως κανονικά μέχρι το τέλος.
Υποδείξεις για τα προγράμματα
Τοποθετήστε τα τρόφιμα μέσα στον κρύο χώρο
μαγειρέματος.
Βγάλτε τα τρόφιμα από τη συσκευασία και ζυγίστε τα. Εάν
δεν μπορείτε να δώσετε το ακριβές βάρος,
στρογγυλοποιήστε το προς τα επάνω ή προς τα κάτω.
Χρησιμοποιείτε για τα προγράμματα πάντοτε μαγειρικό
σκεύος κατάλληλο για μικροκύματα, π.χ.από γυαλί ή
κεραμικό. Προσέξτε
σκεύη στον πίνακα προγραμμάτων.
Έναν πίνακα με κατάλληλα τρόφιμα, την εκάστοτε περιοχή
βάρους και τα απαραίτητα εξαρτήματα θα βρείτε στο
τέλος στις υποδείξεις.
Η ρύθμιση για τα βάρη που βρίσκονται έξω από την
περιοχή βάρους δεν είναι δυνατή.
Ξεπάγωμα:
■ Παγώστε και αποθηκεύστε τα τρόφιμα κατά το δυνατό
σε λεπτές μερίδες στους -18°C.
■ Τοποθετήστε τα κατεψυγμένα τρόφιμα πάνω σ’ ένα
ρηχό σκεύος, π.χ.ένα γυάλινο πιάτο ή ένα πιάτο
πορσελάνης.
■ Μετά το ξεπάγωμα αφήστε τα τρόφιμα ακόμα 15 έως
90λεπτά για την εξισορρόπηση της θερμοκρασίας.
■ Ξεπαγώστε το ψωμί μόνο στην απαραίτητη ποσότητα.
Διαφορετικά μπαγιατεύει γρήγορα.
■ Κατά το ξεπάγωμα του κρέατος ή των πουλερικών
δημιουργείται υγρό. Κατά το γύρισμα απομακρύνετε
αυτό το υγρό και σε καμία περίπτωση μην το
χρησιμοποιήσετε ή μην το αφήσετε να έρθει σε επαφή
με άλλα τρόφιμα.
■ Απομακρύνετε μετά το γύρισμα τον ήδη ξεπαγωμένο
κιμά.
γι’ αυτό τις υποδείξεις για τα μαγειρικά
■ Τοποθετήστε το ολόκληρο πουλερικό πρώτα με τη μεριά
του στήθους, τα κομμάτια πουλερικών με τη μεριά της
πέτσας πάνω στο μαγειρικό σκεύος.
Λαχανικά:
■ Φρέσκα λαχανικά: Κόψτε τα λαχανικά σε ομοιόμορφα
μεγάλα κομμάτια. Για κάθε 100 γρ. προσθέστε μία
κουταλιά νερό.
■ Κατεψυγμένα λαχανικά: Κατάλληλα είναι μόνο
ζεματισμένα, μη προμαγειρεμένα λαχανικά. Τα
καταψυγμένα λαχανικά με σάλτσα σαντιγί δεν είναι
κατάλληλα. Προσθέστε 1 έως 3 κουταλιές νερό. Στο
σπανάκι και στο κόκκινο λάχανο μην προσθέσετε νερό.
Πατάτες:
■ Βραστές πατάτες χωρίς φλούδα: Κόψτε τις σε
ομοιόμορφα μεγάλα κομμάτια. Για κάθε 100 γρ.
προσθέστε δύο κουταλιές νερό και λίγο αλάτι.
■ Βραστές πατάτες με φλούδα: Χρησιμοποιήστε πατάτες
του ιδίου μεγέθους. Πλύντε τις και τρυπήστε τη φλούδα.
Βάλτε τις πατάτες, όταν είναι ακόμα υγρές, μέσα σ’ ένα
μαγειρικό σκεύος χωρίς νερό.
Ρύζι:
■ Μη χρησιμοποιήσετε καστανό ρύζι ή ρύζι σε σακουλάκι
μαγειρέματος.
■ Προσθέστε νερό δύο έως δυόμισι φορές της ποσότητας
του ρυζιού.
■ Στις πολύ μικρές ποσότητες χρησιμοποιείτε λίγο
περισσότερο νερό.
Χρόνος ηρεμίας
Μερικά φαγητά χρειάζονται, μετά το τέλος του
προγράμματος, ακόμα λίγο χρόνο ηρεμίας στο χώρο
μαγειρέματος.
Φαγητό Χρόνος ηρεμίας
Λαχανικά περίπου 5 λεπτά.
Πατάτες: περίπου 5 λεπτά Πρώτα χύστε το νερό που
δημιουργήθηκε
Ρύζι: 5 έως 10 λεπτά
Πίνακας προγραμμάτων
Πρόγραμμα Κατάλληλα τρόφιμα Περιοχή βάρους σε κιλά Μαγειρικό σκεύος
Ξεπάγωμα
Ψωμί* Ψωμί, ολόκληρο, στρογγυλό ή μακρουλό, ψωμί σε φέτες,
κέικ, γλυκό με μαγιά, γλυκό με φρούτα, γλυκά χωρίς
γλάσο, σαντιγί ή ζελατίνη
Κρέας* Ψητό, λεπτά κομμάτια κρέατος, κιμάς, κοτόπουλο, κότα,
πάπια
Ψάρι* Ολόκληρο ψάρι, φιλέτο ψαριού, μπριζόλα ψαριού 0,10-1,00 κιλά Ρηχό, ανοιχτό μαγειρικό σκεύος
Μαγείρεμα
Φρέσκα λαχανικά** Κουνουπίδι, μπρόκολο, καρότα, γογγυλοκράμβη, πράσο,
πιπεριές, κολοκυθάκια
Κατεψυγμένα λαχανικά**
Κουνουπίδι, μπρόκολο, καρότα, γογγυλοκράμβη, κόκκινο
λάχανο, σπανάκι
*) Προσέξτε το σήμα για το γύρισμα
**) Προσέξτε το σήμα για το ανακάτεμα
0,20-1,50 κιλά Ρηχό, ανοιχτό μαγειρικό σκεύος
Πάτος του χώρου μαγειρέματος
0,20-2,00 κιλά Ρηχό, ανοιχτό μαγειρικό σκεύος
Πάτος του χώρου μαγειρέματος
Πάτος του χώρου μαγειρέματος
0,15-1,00 κιλά Κλειστό μαγειρικό σκεύος
Πάτος του χώρου μαγειρέματος
0,15-1,00 κιλά Κλειστό μαγειρικό σκεύος
Πάτος του χώρου μαγειρέματος
33
Page 34

el Βασικές ρυθμίσεις
Πρόγραμμα Κατάλληλα τρόφιμα Περιοχή βάρους σε κιλά Μαγειρικό σκεύος
Πατάτες** Πατάτες βραστές χωρίς φλούδα, πατάτες βραστές με
φλούδα, κομμάτια πατάτας ίδιου μεγέθους
0,20-1,00 κιλα Κλειστό μαγειρικό σκεύος
Πάτος του χώρου μαγειρέματος
Ρύζι** Ρύζι, ρύζι για πιλάφι 0,05-0,30 κιλα Ψηλό, κλειστό μαγειρικό σκεύος
Πάτος του χώρου μαγειρέματος
*) Προσέξτε το σήμα για το γύρισμα
**) Προσέξτε το σήμα για το ανακάτεμα
QΒασικές ρυθμίσεις
Βασικές ρυθμίσεις
Για να μπορείτε να χειριστείτε τη συσκευή σας ιδανικά και
εύκολα, έχετε στη διάθεσή σας διάφορες ρυθμίσεις.
Μπορείτε να αλλάξετε αυτές τις ρυθμίσεις, σε περίπτωση
που χρειάζεται.
Αλλαγή των ρυθμίσεων
1. Πατήστε το πλήκτρο on/off.
2. Πατήστε το πλήκτρο menu.
Το μενού των τρόπων λειτουργίας ανοίγει.
3. Επιλέξτε με τον περιστροφικό διακόπτη "Ρυθμίσεις".
4. Πατήστε ελαφρά το βέλος ¿.
5. Αλλάξτε με τον περιστροφικό διακόπτη τις τιμές.
6. Με το βέλος ¿ περνάτε πάντοτε στις επόμενες
ρυθμίσεις και τις αλλάζετε, σε περίπτωση που
χρειάζεται.
7. Για την αποθήκευση πατήστε το πλήκτρο "menu".
Στην οθόνη ενδείξεων εμφανίζεται απόρριψη ή
αποθήκευση.
8. Με τα πεδία αφής επιλέξτε αντίστοιχα.
Λίστα των ρυθμίσεων
Στη λίστα θα βρείτε όλες τις βασικές ρυθμίσεις και τις
αντίστοιχες δυνατότητες αλλαγής. Ανάλογα με τον
εξοπλισμό της συσκευής σας εμφανίζονται στην οθόνη
ενδείξεων μόνο οι ρυθμίσεις, που αντιστοιχούν στη
συσκευή σας.
Μπορείτε να αλλάξετε τις ακόλουθες ρυθμίσεις:
Ρύθμιση Επιλογή
Γλώσσα Ρύθμιση της γλώσσας
Ώρα Ρύθμιση της τρέχουσας ώρας
Ημερομηνία Ρύθμιση της τρέχουσας ημερομηνίας
Ηχητικό σήμα Μικρή διάρκεια
Μεσαία διάρκεια*
Μεγάλη διάρκεια
Ήχος πλήκτρου Ενεργοποιημένη
Απενεργοποιημένη*
Ο ήχος πλήκτρου παραμένει στο on/off)
Φωτεινότητα της οθόνης
ενδείξεων
Ένδειξη ώρας: Ψηφιακά + Ημερομηνία*
Συσκότιση νύχτας Απενεργοποιημένη*
Ρύθμιση με 5 βαθμίδες
Βαθμίδα 3*
Ψηφιακά
Off
Ενεργοποιημένη (μειωμένη φωτεινότητα οθόνης ενδείξεων μεταξύ 22:00 και 6:00)
Λειτουργία παρουσίασης Απενεργοποιημένη*
Ενεργοποιημένη
(εμφανίζεται μόνο στα πρώτα 3 λεπτά μετά
από μια επαναφορά (Reset) ή μετά την
πρώτη θέση σε λειτουργία)
Ρυθμίσεις εργοστασίου Επαναφορά
Μη επαναφορά*
* Ρυθμίσεις εργοστασίου (ανάλογα με τον τύπο της συσκευής μπορεί να
διαφέρουν οι ρυθμίσεις εργοστασίου)
Υπόδειξη: Οι αλλαγές των ρυθμίσεων για τη γλώσσα, τον
ήχο πλήκτρου και τη
φωτεινότητα της οθόνης ενδείξεων
ισχύουν αμέσως. Όλες οι άλλες ρυθμίσεις μετά την
αποθήκευση.
--------
Διακοπή ρεύματος.
Οι πραγματοποιημένες από εσάς αλλαγές των ρυθμίσεων
διατηρούνται επίσης μετά από μια διακοπή ρεύματος.
Μόνο τις ρυθμίσεις για την πρώτη θέση σε λειτουργία
πρέπει να πραγματοποιήσετε εκ νέου μετά από μια διακοπή
ρεύματος.
Αλλαγή της ώρας
Την ώρα την αλλάζετε στις βασικές ρυθμίσεις.
Παράδειγμα: Αλλαγή της ώρας από καλοκαιρινή σε
χειμερινή ώρα.
1. Πατήστε το πλήκτρο on/off.
2. Πατήστε το πλήκτρο menu.
3. Επιλέξτε με τον περιστροφικό διακόπτη "Ρυθμίσεις".
4. Πατώντας ελαφρά το βέλος ¿ περάστεστην ένδειξη
"Ώρα".
5. Αλλάξτε με τον περιστροφικό διακόπτη την ώρα.
6. Πατήστε το πλήκτρο menu.
Στην οθόνη ενδείξεων εμφανίζεται "Αποθήκευση" ή
"Απόρριψη".
34
Page 35

Καθαρισμός el
DΚαθαρισμός
Καθαρισμός
Με καλή φροντίδα και προσεκτικό καθαρισμό, διατηρεί η
συσκευή σας για πολύ χρόνο την ωραία της εμφάνιση και
τη λειτουργικότητά της. Εδώ σας εξηγούμε με ποιο τρόπο
πρέπει να φροντίζετε και να καθαρίζετε σωστά τη συσκευή
σας.
:Προειδοποίηση – Κίνδυνος εγκαύματος!
Η συσκευή ζεσταίνεται πολύ. Μην ακουμπάτε ποτέ τις
ζεστές εσωτερικές επιφάνειες του χώρου μαγειρέματος ή
τα θερμαντικά στοιχεία. Αφήνετε τη συσκευή πάντοτε να
κρυώσει. Κρατάτε τα παιδιά μακριά.
:Προειδοποίηση – Κίνδυνος ηλεκτροπληξίας!
Μια εισχώρηση υγρασίας μπορεί να προκαλέσει μια
ηλεκτροπληξία. Μη χρησιμοποιείτε συσκευές καθαρισμού
υψηλής πίεσης ή συσκευές εκτόξευσης ατμού.
:Προειδοποίηση – Κίνδυνος τραυματισμού!
Το γρατσουνισμένο γυαλί της πόρτας της συσκευής μπορεί
να ραγίσει. Μη χρησιμοποιείτε ξύστρες γυαλιού, δυνατά ή
τραχιά υλικά καθαρισμού.
Υπόδειξη: Μπορείτε να απομακρύνετε τις δυσάρεστες
οσμές, π.χ. μετά από το μαγείρεμα ψαριού, πολύ απλά.
Βάλτε μερικές σταγόνες χυμό λεμονιού σ’ ένα φλιτζάνι
νερού. Τοποθετείτε πάντοτε μέσα στο
για να αποφύγετε την επιβράδυνση του βρασμού.
Ζεσταίνετε το νερό για 1 έως 2λεπτά με τη μέγιστη ισχύ
μικροκυμάτων.
δοχείο ένα κουτάλι,
Περιοχή Υλικά καθαρισμού
Χώρος μαγειρέματος
από ανοξείδωτο
χάλυβα
Τζάμια πόρτας Υγρό καθαρισμού τζαμιών: Καθαρίστε μ’ ένα πανί
Στεγανοποίηση της
πόρτας
Μην την αφαιρέσετε!
Ζεστό διάλυμα απορρυπαντικού πιάτων ή ξιδόνερο: Καθαρίστε μ’ ένα πανί καθαρισμού και στεγνώστε μ’ ένα μαλακό πανί. Μη χρησιμοποιείτε
σπρέι ηλεκτρικού φούρνου και άλλα δυνατά απορρυπαντικά φούρνου ή υλικά τριψίματος. Ακατάλληλα είναι επίσης τα σύρματα τριψίματος, τα
τραχιά σφουγγάρια και τα καθαριστικά κατσαρολών. Αυτά τα υλικά
επιφάνεια. Αφήστε τις εσωτερικές επιφάνειες να
στεγνώσουν καλά.
καθαρισμού. Μη χρησιμοποιείτε ξύστρες γυαλιού.
Ζεστό διάλυμα απορρυπαντικού πιάτων: Καθαρίστε μ’ ένα πανί καθαρισμού, μην τρίβετε. Μη χρησιμοποιείτε ξύστρες μετάλλου ή γυαλιού για τον
καθαρισμό.
δημιουργούν γρατσουνιές στην
Υλικά καθαρισμού
Για να μην υποστούν ζημιές οι διάφορες επιφάνειες από
λάθος υλικό καθαρισμού, προσέξτε τα στοιχεία που
αναφέρονται στον πίνακα.
Μη χρησιμοποιείτε
■ ισχυρά καθαριστικά ή υλικά τριψίματος.
■ ξύστρες μετάλλου ή γυαλιού για τον καθαρισμό των
τζαμιών της πόρτας.
■ ξύστρες μετάλλου ή γυαλιού για τον καθαρισμό της
στεγανοποίησης της πόρτας.
■ σκληρά σύρματα τριψίματος και σφουγγάρια
καθαρισμού.
■ ισχυρά αλκοολούχα καθαριστικά.
Πριν τη χρήση πλύνετε καλά τα καινούργια
σφουγγαρόπανα.
Περιοχή Υλικά καθαρισμού
Μπροστινή πλευρά
συσκευής
Οθόνη ενδείξεων Σκουπίστε μ’ ένα πανί καθαρισμού από μικροΐνες ή
Ανοξείδωτος χάλυβας Ζεστό διάλυμα απορρυπαντικού πιάτων: Καθαρί-
Ζεστό διάλυμα απορρυπαντικού πιάτων: Καθαρίστε μ’ ένα πανί καθαρισμού και στεγνώστε μ’ ένα
μαλακό πανί. Μη χρησιμοποιείτε ξύστρες μετάλλου
ή γυαλιού για τον καθαρισμό.
με ένα ελαφρά υγρό πανί. Μην σκουπίσετε υγρά.
στε μ’ ένα πανί καθαρισμού και στεγνώστε μ’ ένα
μαλακό πανί. Απομακρύνετε αμέσως τους λεκέδες
από άλατα ασβεστίου, λίπος, κορν φλάουρ και
ασπράδι αυγού. Κάτω απ’ αυτούς τους λεκέδες
μπορεί να δημιουργηθεί διάβρωση. Στην υπηρεσία
τεχνικής εξυπηρέτησης πελατών ή στα ειδικά
καταστήματα μπορείτε να προμηθευτείτε τα
καθαριστικά ανοξείδωτου χάλυβα.
ειδικά
35
Page 36

el Αντιμετώπιση βλαβών
3Αντιμετώπιση βλαβών
Αντιμετώπιση βλαβών
Εάν παρουσιαστεί κάποια βλάβη, δε σημαίνει πως είναι κάτι
το σοβαρό, συχνά η αιτία είναι ασήμαντη. Προτού
καλέσετε την υπηρεσία τεχνικής εξυπηρέτησης πελατών,
προσπαθήστε με τη βοήθεια του πίνακα να διορθώσετε οι
ίδιοι τη βλάβη.
Συμβουλή: Εάν μια φορά ένα φαγητό δεν πετύχει καλά,
ανατρέξτε στο ακόλουθο κεφάλαιο. Εκεί θα βρείτε
συμβουλές και υποδείξεις για την ιδανική
πολλές
εργαστήριο μαγειρικής" στη σελίδα 38
:Προειδοποίηση – Κίνδυνος ηλεκτροπληξίας!
Οι ακατάλληλες επισκευές είναι επικίνδυνες. Μόνο ένας
τεχνικός του τμήματος εξυπηρέτησης πελατών,
εκπαιδευμένος από εμάς, επιτρέπεται να εκτελέσει τις
επισκευές και να αντικαταστήσει τα χαλασμένα καλώδια
σύνδεσης. Εάν η συσκευή έχει βλάβη, τραβήξτε το
ρευματολήπτη (φις) από την πρίζα ή κατεβάστε/ξεβιδώστε
την ασφάλεια στο κιβώτιο των ασφαλειών
υπηρεσία τεχνικής εξυπηρέτησης πελατών.
. Καλέστε την
Πίνακας βλαβών
Βλάβη Πιθανή αιτία Αντιμετώπιση/Υποδείξεις
ρύθμιση.~ "Δοκιμάστηκαν για εσάς, στο δικό μας
Η συσκευή δε λειτουργεί, καμία ένδειξη
στην οθόνη
Ο ρευματολήπτης (φις) δεν είναι συνδεδεμένος Συνδέστε τη συσκευή στο δίκτυο του ρεύματος
Διακοπή ρεύματος. Ελέγξτε, εάν λειτουργούν άλλες κουζινομηχανές
Η ασφάλεια είναι χαλασμένη Ελέγξτε στο κιβώτιο ασφαλειών, εάν η ασφάλεια για τη
συσκευή είναι εντάξει
Εσφαλμένος χειρισμός Κατεβάστε την ασφάλεια για τη συσκευή στο κιβώτιο
ασφαλειών και ανεβάστε την ξανά μετά από περίπου 60
δευτερόλεπτα
Η συσκευή δεν μπορεί να ξεκινήσει Η πόρτα της συσκευής δεν είναι εντελώς κλειστή Κλείστε την πόρτα της συσκευής
Τα τρόφιμα δε θερμαίνονται.
Στην οθόνη ενδείξεων εμφανίζεται η
λέξη "Demo".
Η συσκευή είναι στη λειτουργία επίδειξης Απενεργοποιήστε τη λειτουργία επίδειξης στις βασικές
ρυθμίσεις.
Αποσυνδέστε γι’ αυτό τη συσκευή για λίγο από το ηλεκτρικό δίκτυο (κατεβάστε/ξεβιδώστε την αντίστοιχη ασφάλεια της κατοικίας ή κλείστε το διακόπτη προστασίας στο
κιβώτιο ασφαλειών). Απενεργοποιήστε στη συνέχεια τη λειτουργία επίδειξης μέσα σε 3 λεπτά στις βασικές ρυθμίσεις.
Ο φωτισμός του χώρου μαγειρέματος δε
Ο φωτισμός του χώρου μαγειρέματος είναι ελαττωματικός Καλέστε την υπηρεσία τεχνικής εξυπηρέτησης πελατών
λειτουργεί
Μήνυμα σφάλματος "Exxx"* Σε περίπτωση ενός μηνύματος σφάλματος απενεργοποιή-
στε και ενεργοποιήστε ξανά τη συσκευή, εάν σβήσει η
ένδειξη, τότε το πρόβλημα ήταν για μία μόνο φορά. Εάν το
σφάλμα εμφανίζεται επανειλημμένα ή η ένδειξη παραμένει, ελάτε παρακαλώ σε επαφή με την υπηρεσία τεχνικής
εξυπηρέτησης πελατών και δώστε τον κωδικό σφάλματος.
* Ιδιαιτερότητες:
Μήνυμα σφάλματος "E0532": Ανοίξτε και κλείστε ξανά την πόρτα της συσκευής.
Μήνυμα σφάλματος "E6501": Θέστε τη συσκευή εκτός λειτουργίας. Περιμένετε 10 λεπτά. Θέστε τη συσκευή ξανά σε λειτουργία.
--------
36
Page 37

Υπηρεσία τεχνικής εξυπηρέτησης πελατών el
4Υπηρεσία τεχνικής
εξυπηρέτησης πελατών
Υπηρεσία τεχνικής εξυπηρέτησης πελατών
Εάν η συσκευή σας πρέπει να επισκευαστεί, η υπηρεσία
τεχνικής εξυπηρέτησης των πελατών της εταιρείας μας
βρίσκεται στη διάθεσή σας. Εμείς βρίσκουμε πάντοτε μια
κατάλληλη λύση, επίσης και για την αποφυγή των περιττών
επισκέψεων του προσωπικού της υπηρεσίας τεχνικής
εξυπηρέτησης πελατών.
Αριθμός E και αριθμός FD
Αναφέρετε στο τηλεφώνημα τον πλήρη αριθμό προϊόντος
(Αριθ. E) και τον αριθμό κατασκευής ( Αριθ. FD), για να
μπορούμε να σας βοηθήσουμε σωστά. Την πινακίδα τύπου
με τους αριθμούς μπορείτε να την βρείτε, ανοίγοντας την
πόρτα της συσκευής.
Εάν η συσκευή σας είναι εξοπλισμένη με ατμό, την
πινακίδα τύπου μπορείτε να την βρείτε
κάλυμμα.
7\SH
Για να μη χρειαστεί να ψάχνετε πολύ, σε περίπτωση που
χρειάζεται, μπορείτε να γράψετε εδώ τα στοιχεία της
συσκευής σας και τον αριθμό τηλεφώνου της υπηρεσίας
εξυπηρέτησης πελατών.
δεξιά πίσω από το
=1U)'(1U
Τεχνικά στοιχεία
Παροχή ρεύματος 220-240 V, 50 Hz
Μέγιστη συνολική συνδεδεμένη ισχύς
ρεύματος
Ισχύς μικροκυμάτων 900 W (IEC 60705)
Συχνότητα μικροκυμάτων 2450 MHz
Ασφάλεια 10 A
Διαστάσεις (Υ/Π/Β)
Συσκευή 455 x 595 x 565 mm
Χώρος μαγειρέματος 236 x 445x 348 mm
Έλεγχος VDE Ναι
Σήμα CE Ναι
1300 W
E-Nr.
Υπηρεσία εξυπηρέτησης πελατών
O
Προσέξτε, ότι η επίσκεψη του τεχνικού της υπηρεσίας
εξυπηρέτησης πελατών στη περίπτωση ενός εσφαλμένου
χειρισμού δεν είναι δωρεάν
του χρόνου της εγγύησης.
Τα στοιχεία επικοινωνίας όλων των χωρών θα τα βρείτε
στον πίνακα Υπηρεσίες τεχνικής εξυπηρέτησης πελατών
που παραδίδεται μαζί.
Εντολή επισκευής και συμβουλές σε περίπτωση
βλάβης
GR 18 182
χρέωση κλήσης προς εθνικά δίκτυα
Εμπιστευθείτε την εμπειρία του κατασκευαστή. Έτσι
εξασφαλίζετε, ότι η επισκευή γίνεται από εκπαιδευμένους
τεχνικούς του σέρβις, που
ανταλλακτικά για τη συσκευή σας.
Αυτή η συσκευή ανταποκρίνεται στο πρότυπο EN 55011 ή
CISPR 11. Είναι ένα προϊόν της ομάδας 2, τάξη B.
Ομάδα 2 σημαίνει, ότι δημιουργούνται μικροκύματα με
σκοπό τη θέρμανση των τροφίμων. Τάξη B δηλώνει, ότι η
συσκευή είναι κατάλληλη για οικιακή χρήση.
FD-Nr.
, ακόμα και κατά τη διάρκεια
είναι εξοπλισμένοι με τα γνήσια
37
Page 38

el Δοκιμάστηκαν για εσάς, στο δικό μας εργαστήριο μαγειρικής
JΔοκιμάστηκαν για εσάς,
στο δικό μας εργαστήριο
μαγειρικής
Δοκιμάστηκαν για εσάς, στο δικό μας εργαστήριο μαγειρικής
Εδώ θα βρείτε μια επιλογή από φαγητά και τις αντίστοιχες
ιδανικές ρυθμίσεις. Σας δείχνουμε, ποια βαθμίδα ισχύος
μικροκυμάτων είναι καταλληλότερη για το φαγητό σας. Θα
βρείτε συμβουλές για τα μαγειρικά σκεύη και για την
προετοιμασία.
Υποδείξεις
■ Οι τιμές των πινάκων ισχύουν πάντοτε για τον κρύο και
άδειο χώρο μαγειρέματος. Πριν τη χρήση
απομακρύνετε τα μαγειρικά σκεύη, τα οποία δε
χρειάζεστε, από το χώρο μαγειρέματος.
■ Οι τιμές του χρόνου στους πίνακες είναι ενδεικτικές
τιμές. Αυτές εξαρτώνται από την ποιότητα και τη
σύσταση των τροφίμων.
■ Χρησιμοποιείτε πάντοτε πιάστρες, όταν θέλετε να
βγάλετε καυτά μαγειρικά σκεύη από το χώρο
μαγειρέματος.
:Προειδοποίηση – Κίνδυνος ζεματίσματος!
Κατά την αφαίρεση του μαγειρικού σκεύους μπορεί να
χυθεί καυτό υγρό. Τραβήξτε έξω προσεκτικά το μαγειρικό
σκεύος από το χώρο μαγειρέματος.
Στους ακόλουθους πίνακες θα βρείτε πολλές δυνατότητες
και τιμές ρύθμισης για το φούρνο μικροκυμάτων.
Οι τιμές του χρόνου στους πίνακες είναι ενδεικτικές τιμές,
αυτές οι τιμές εξαρτώνται
ποιότητα, τη θερμοκρασία και τη σύσταση των τροφίμων.
Στους πίνακες δίνονται πολλές φορές περιοχές χρονικής
διάρκειας. Ρυθμίστε πρώτα το μικρότερο χρόνο και
παρατείνετέ τον, εάν είναι απαραίτητο.
Μπορεί να συμβεί να έχετε διαφορετικές ποσότητες, απ’
αυτές που αναφέρονται στους πίνακες. Για τη λειτουργία
μικροκυμάτων υπάρχει
ποσότητα - σχεδόν διπλάσια διάρκεια, μισή ποσότητα - μισή
διάρκεια.
Μπορείτε να τοποθετήσετε το μαγειρικό σκεύος στη μέση
πάνω στον πάτο του χώρου μαγειρέματος. Τα μικροκύματα
μπορούν έτσι να φθάσουν στα φαγητά απ’ όλες τις
πλευρές.
από το μαγειρικό σκεύος, την
ένας πρακτικός κανόνας: Διπλάσια
Ξεπάγωμα
Τοποθετήστε τα κατεψυγμένα τρόφιμα σ’ ένα ανοιχτό
δοχείο πάνω στον πάτο του χώρου μαγειρέματος.
Γυρίστε ή ανακατέψτε τα φαγητά ενδιάμεσα 1 έως 2
φορές. Τα μεγάλα κομμάτια πρέπει να τα γυρίσετε πολλές
φορές. Κατά το γύρισμα απομακρύνετε το υγρό που
δημιουργήθηκε από το ξεπάγωμα.
Αφήστε τα ξεπαγωμένα τρόφιμα να ηρεμήσουν ακόμα 15 90 λεπτά
εξισορρόπηση της θερμοκρασίας.Στα πουλερικά μπορείτε
μετά να βγάλετε τα εντόσθια.
Υπόδειξη: Τοποθετήστε το σκεύος στον πάτο του χώρου
μαγειρέματος.
σε θερμοκρασία περιβάλλοντος, για την
Φαγητό Βάρος Ισχύς μικροκυμάτων σε W,
Διάρκεια σε λεπτά
Κρέας ολόκληρο, βοδινό, χοιρινό μοσχαρίσιο (με
και χωρίς κόκκαλα)
Κρέας σε κομμάτια ή φέτες, βοδινό, χοιρινό,
μοσχαρίσιο
Κιμάς, ανάμεικτος 200 γρ. 90 W, 10-15 λεπτά Καταψύχετε κατά το δυνατό σε λεπτά κομμάτια
Πουλερικά ή κομμάτια πουλερικών 600 γρ. 180 W, 8 λεπτά + 90 W, 10-15 λεπτά Γυρίστε ενδιάμεσα.
Φιλέτο ψαριού, μπριζόλα ψαριού ή φέτες ψαριού 400 γρ. 180 W, 5 λεπτά + 90 W, 10-15 λεπτά Χωρίστε τα ξεπαγωμένα κομμάτια μεταξύ τους
Ψάρι, ολόκληρο 300 γρ. 180 W, 3 λεπτά + 90 W, 10-15 λεπτά Γυρίστε ενδιάμεσα
Λαχανικά, π.χ.αρακάς 300 γρ. 180 W, 10-15 λεπτά Ανακατέψτε ενδιάμεσα προσεκτικά
Φρούτα, π.χ.φραμπουάζ 300 γρ. 180 W, 6-9 λεπτά Ανακατέψτε ενδιάμεσα προσεκτικά, και χωρίστε
Βούτυρο, λιώσιμο 125 γρ. 180 W, 1 λεπτό + 90 W, 1-2 λεπτά Αφαιρέστε εντελώς τη συσκευασία
Ψωμί ολόκληρο 500 γρ. 180 W, 8 λεπτά + 90 W, 5-10 λεπτά Γυρίστε ενδιάμεσα
Γλυκό, στεγνό, π.χ.κέικ 500 γρ. 90 W, 10-15 λεπτά Χωρίστε τα κομμάτια του γλυκού μεταξύ τους
800 γρ. 180 W, 15 λεπτά + 90 W, 15-25 λεπτά Γυρίστε πολλές φορές
1.000 γρ. 180 W, 20 λεπτά + 90 W, 20-30 λεπτά
1.500 γρ. 180 W, 25 λεπτά + 90 W, 25-30 λεπτά
200 γρ. 180 W, 5-8 λεπτά + 90 W, 5-10 λεπτά Κατά το γύρισμα χωρίστε τα κομμάτια του κρέα-
500 γρ. 180 W, 8-11 λεπτά + 90 W, 10-15 λεπτά
800 γρ. 180 W, 10 λεπτά + 90 W, 10-15 λεπτά
500 γρ. 180 W, 5 λεπτά + 90 W, 10-15 λεπτά
1.000 γρ. 180 W, 15 λεπτά + 90 W, 20-25 λεπτά
1.200 γρ. 180 W, 15 λεπτά + 90 W, 20-25 λεπτά
600 γρ. 180 W, 8 λεπτά + 90 W, 15-20 λεπτά
500 γρ. 180 W, 8 λεπτά + 90 W, 5-10 λεπτά
250 γρ. 180 W, 1 λεπτό + 90 W, 2-4 λεπτά
1.000 γρ. 180 W, 12 λεπτά + 90 W, 10-20 λεπτά
750 γρ. 180 W, 5 λεπτά + 90 W, 10-15 λεπτά
Υπόδειξη
τος μεταξύ τους
Γυρίστε τον κιμά ενδιάμεσα πολλές φορές και
απομακρύνετε το ήδη ξεπαγωμένο κρέας
Αφαιρέστε το υγρό από το ξεπάγωμα
τα ξεπαγωμένα κομμάτια μεταξύ τους
Μόνο για γλυκά χωρίς γλάσο, σαντιγί ή κρέμα
38
Page 39

Δοκιμάστηκαν για εσάς, στο δικό μας εργαστήριο μαγειρικής el
Φαγητό Βάρος Ισχύς μικροκυμάτων σε W,
Υπόδειξη
Διάρκεια σε λεπτά
Γλυκό, ζουμερό, π.χ.γλυκό φρούτων, τούρτα
μυζήθρας
Ξεπάγωμα και ζέσταμα ή μαγείρεμα
κατεψυγμένων φαγητών
Αφαιρέστε τα έτοιμα φαγητά από τη συσκευασία. Σε
μαγειρικό σκεύος κατάλληλο για μικροκύματα ζεσταίνονται
τα φαγητά γρηγορότερα και ομοιόμορφα. Τα διαφορετικά
συστατικά του φαγητού δε ζεσταίνονται το ίδιο γρήγορα.
Τα λεπτά φαγητά μαγειρεύονται γρηγορότερα από τα
χοντρά. Γι’ αυτό κατανέμετε τα φαγητά μέσα στο σκεύος
σε μικρό κατά το δυνατόν ύψος
τα τρόφιμα το ένα πάνω στο άλλο.
. Δεν πρέπει να τοποθετείτε
500 γρ. 180 W, 5 λεπτά + 90 W, 15-20 λεπτά Μόνο για γλυκά χωρίς γλάσο, σαντιγί ή ζελατίνα
750 γρ. 180 W, 7 λεπτά + 90 W, 15-20 λεπτά
Καλύπτετε πάντοτε τα φαγητά. Εάν δεν έχετε ένα
κατάλληλο καπάκι για το σκεύος σας, χρησιμοποιήστε ένα
πιάτο ή ειδική μεμβράνη για μικροκύματα.
Ενδιάμεσα πρέπει να ανακατέψετε ή να γυρίσετε τα
φαγητά 2 - 3 φορές.
Μετά το ζέσταμα αφήστε τα φαγητά να
ηρεμήσουν για 2
έως 5λεπτά για την εξισορρόπηση της θερμοκρασίας.
Η χαρακτηριστική γεύση των φαγητών διατηρείται σε
μεγάλο βαθμό. Γι’ αυτό μπορείτε να χρησιμοποιείτε
οικονομικά το αλάτι και τα μπαχαρικά.
Υπόδειξη: Τοποθετήστε το σκεύος στον πάτο του χώρου
μαγειρέματος.
Φαγητό Βάρος Ισχύς μικροκυμάτων σε W,
Υπόδειξη
Διάρκεια σε λεπτά
Μενού, φαγητό μερίδας, έτοιμο φαγητό
300-400 γρ. 600 W, 8-13 λεπτά Καλυμμένο
(2-3 συστατικών)
Σούπα 400 γρ. 600 W, 8-12 λεπτά Κλειστό μαγειρικό σκεύος
Γιαχνί 500 γρ. 600 W, 10-15 λεπτά Κλειστό μαγειρικό σκεύος
Φέτες ή κομμάτια του κρέατος σε σάλτσα,
500 γρ. 600 W, 10-15 λεπτά Κλειστό μαγειρικό σκεύος
π.χ.γκούλας
Ψάρι, π.χ.κομμάτια φιλέτου 400 γρ. 600 W, 10-15 λεπτά Καλυμμένο
Σουφλέ, π.χ. λαζάνια, καννελόνια 450 γρ. 600 W, 10-15 λπτά Ανοιχτό μαγειρικό σκεύος
Πρόσθετα, π.χ.ρύζι, μακαρονάκια 250 γρ. 600 W, 3-7 λεπτά Κλειστό μαγειρικό σκεύος, προσθέστε υγρό
500 γρ. 600 W, 8-12 λεπτά
Λαχανικά, π.χ.αρακάς, μπρόκολο, καρότα 300 γρ. 600 W, 7-11 λεπτά Κλειστό μαγειρικό σκεύος, προσθέστε 1 κουταλιά
600 γρ. 600 W, 14-17 λεπτά
νερό
Αλεσμένο σπανάκι 450 γρ. 600 W, 10-15 λεπτά Μαγειρέψτε χωρίς προσθήκη νερού
Ζέσταμα
:Προειδοποίηση – Κίνδυνος ζεματίσματος!
Κατά το ζέσταμα υγρών μπορεί να προκύψει μια
επιβράδυνση βρασμού. Αυτό σημαίνει, ότι θερμοκρασία
βρασμού επιτυγχάνεται, χωρίς να ανεβαίνουν οι
χαρακτηριστικές φυσαλίδες ατμού. Ήδη η παραμικρή
δόνηση του δοχείου μπορεί να οδηγήσει σε ξαφνική
υπερχείλιση και σε πιτσιλίσματα του καυτού υγρού. Κατά το
ζέσταμα τοποθετείτε πάντοτε ένα κουτάλι
Έτσι αποφεύγεται η επιβράδυνση του βρασμού.
μέσα στο δοχείο.
Προσοχή!
Δημιουργία ηλεκτρικών σπινθήρων: Ένα μεταλλικό σώμα,
π.χ.το κουτάλι στο ποτήρι, πρέπει να απέχει το λιγότερο 2
cm από τα τοιχώματα του χώρου μαγειρέματος και την
εσωτερική πλευρά της πόρτας. Οι σπινθήρες μπορεί να
καταστρέψουν το εσωτερικό γυαλί της πόρτας.
Υποδείξεις
■ Αφαιρέστε τα έτοιμα φαγητά από τη συσκευασία. Σε
μαγειρικό σκεύος κατάλληλο για μικροκύματα
ζεσταίνονται τα φαγητά γρηγορότερα και ομοιόμορφα.
Τα διαφορετικά συστατικά του φαγητού δε ζεσταίνονται
το ίδιο γρήγορα.
■ Καλύπτετε πάντοτε τα φαγητά. Εάν δεν έχετε ένα
κατάλληλο καπάκι για το σκεύος σας, χρησιμοποιήστε
ένα πιάτο ή ειδική μεμβράνη για μικροκύματα.
■ Ενδιάμεσα πρέπει να ανακατέψετε ή να γυρίσετε τα
φαγητά περισσότερες φορές. Ελέγχετε τη θερμοκρασία.
■ Μετά το ζέσταμα αφήστε τα φαγητά να ηρεμήσουν για
2 έως 5λεπτά για την εξισορρόπηση της θερμοκρασίας.
■ Χρησιμοποιείτε πάντοτε κατάλληλα γάντια ή πιάστρες,
όταν θέλετε να βγάλετε τα πιατικά/μαγειρικά σκεύη.
Υπόδειξη: Τοποθετήστε το σκεύος στον πάτο του χώρου
μαγειρέματος.
39
Page 40

el Δοκιμάστηκαν για εσάς, στο δικό μας εργαστήριο μαγειρικής
Φαγητό Ποσότητα Ισχύς μικροκυμάτων σε W,
Υπόδειξη
Διάρκεια σε λεπτά
Μενού, φαγητό μερίδας, έτοιμο φαγητό
600 W, 5-8 λεπτά -
(2-3 συστατικών)
Ποτά 125 ml 900 W, ½-1 λεπτό Τοποθετείτε πάντοτε ένα κουτάλι μέσα στο
200 ml 900 W, 1-2 λεπτά
500 ml 900 W, 3-4 λεπτά
ποτήρι, μην υπερθερμαίνετε τα οινοπνευματώδη
ποτά, ελέγχετε ενδιάμεσα
Βρεφικές τροφές, π.χ.μπουκαλάκια για γάλα 50 ml 360 W, περίπου ½ λεπτό Μετά το ζέσταμα κουνήστε ή ανακατέψτε καλά
100 ml 360 W, ½-1 λεπτό
200 ml 360 W, 1-2 λεπτά
τις μικρές φιάλες χωρίς θήλαστρο ή καπάκι, ελέγξτε οπωσδήποτε τη θερμοκρασία
Σούπα 1 φλιτζάνι από 175 γρ. 600 W, 1-2 λεπτά -
Σούπα, 2 φλιτζάνια από 175 γρ. 600 W, 2-3 λπτά -
Κρέας σε σάλτσα 500 γρ. 600 W, 7-10 λεπτά -
Γιαχνί 400 γρ. 600 W, 5-7 λεπτά -
800 γρ. 600 W, 7-8 λεπτά -
Λαχανικά, 1 μερίδα 150 γρ. 600 W, 2-3 λπτά -
Λαχανικά, 2 μερίδες 300 γρ. 600 W, 3-5 λεπτά -
Μαγείρεμα
■ Η χαρακτηριστική γεύση των φαγητών διατηρείται σε
μεγάλο βαθμό. Γι’ αυτό μπορείτε να χρησιμοποιείτε
Υποδείξεις
■ Τα λεπτά φαγητά μαγειρεύονται γρηγορότερα από τα
χοντρά. Γι’ αυτό κατανέμετε τα φαγητά μέσα στο
σκεύος σε μικρό κατά το δυνατόν ύψος. Δεν πρέπει να
τοποθετείτε τα τρόφιμα το ένα πάνω στο άλλο.
■ Μαγειρεύετε τα φαγητά σε κλειστό μαγειρικό σκεύος.
οικονομικά το αλάτι και τα μπαχαρικά.
■ Μετά το μαγείρεμα αφήστε τα φαγητά να ηρεμήσουν
για 2έως 5λεπτά για την εξισορρόπηση της
θερμοκρασίας.
■ Χρησιμοποιείτε πάντοτε κατάλληλα γάντια ή πιάστρες,
όταν θέλετε να βγάλετε τα πιατικά/μαγειρικά σκεύη.
Εάν δεν έχετε ένα κατάλληλο καπάκι για το σκεύος σας,
χρησιμοποιήστε ένα πιάτο ή ειδική μεμβράνη για
μικροκύματα.
Υπόδειξη: Τοποθετήστε το σκεύος στον πάτο του χώρου
μαγειρέματος.
Φαγητό Ποσότητα Ισχύς μικροκυμάτων σε W,
Υπόδειξη
Διάρκεια σε λεπτά
Ολόκληρο κοτόπουλο, φρέσκο χωρίς εντόσθια 1.200 γρ. 600 W, 25-30 λεπτά Γυρίστε το μετά την παρέλευση του μισού χρόνου
Φιλέτο ψαριού, φρέσκο 400 γρ. 600 W, 7-12 λεπτά -
Λαχανικά, φρέσκα 250 γρ. 600 W, 6-10 λεπτά Κόψτε τα λαχανικά σε ομοιόμορφα μεγάλα κομ-
500 γρ. 600 W, 10-15 λεπτά
μάτια
Σε κάθε 100 γρ. λαχανικά προσθέστε 1 - 2 κουταλιές νερό
Ανακατεύετε ενδιάμεσα
Πατάτες 250 γρ. 600 W, 8-10 λεπτά Κόψτε τις πατάτες σε κομμάτια ίδιου μεγέθους
500 γρ. 600 W, 10-15 λεπτά
750 γρ. 600 W, 15-22 λεπτά
Ρύζι 125 γρ. 600 W, 4-6 λεπτά +
Σε κάθε 100 γρ. προσθέστε 1 κουταλιά νερό
Ανακατεύετε ενδιάμεσα
Προσθέστε τη διπλάσια ποσότητα υγρού
180 W, 12-15 λεπτά
250 γρ. 600 W, 6-8 λεπτά +
180 W, 15-18 λεπτά
Γλυκά φαγητά, π.χ.πουτίγκα (κρύα παρασκευή) 500 ml 600 W, 6-8 λεπτά Ανακατέψτε ενδιάμεσα την πουτίγκα καλά με το
χτυπητήρι 2-3 φορές
Φρούτα, κομπόστα 500 γρ. 600 W, 9-12 λεπτά Ανακατεύετε ενδιάμεσα
Πόπ-κορν για το φούρνο μικροκυμάτων 100 γρ. 600 W, 3-4 λεπτά Τοποθετείτε τη σακούλα του πόπ-κορν πάντοτε
πάνω στο γυάλινο μπολ;
Προσέξτε τα στοιχεία του κατασκευαστή
40
Page 41

Συμβουλές σχετικά με τα μικροκύματα
Φαγητά δοκιμών el
Δε μπορείτε να βρείτε κανένα στοιχείο ρύθμισης για την ποσότητα του
φαγητού που προετοιμάσατε.
Το φαγητό στέγνωσε πολύ. Ρυθμίστε την επόμενη φορά ένα μικρότερο χρόνο μαγειρέματος ή επιλέξτε μια
Μετά την παρέλευση του χρόνου το φαγητό δεν ξεπάγωσε, δε ζεστάθηκε ή
δεν ψήθηκε.
Μετά την παρέλευση του χρόνου μαγειρέματος το φαγητό είναι εξωτερικά
πολύ ζεστό, στη μέση όμως δεν είναι ακόμα έτοιμο.
Μετά το ξεπάγωμα το πουλερικό ή το κρέας είναι εξωτερικά ήδη μαγειρεμένο, αλλά στη μέση δεν έχει ακόμα ξεπαγώσει.
Αυξήστε ή μειώστε τους χρόνους μαγειρέματος σύμφωνα με τον ακόλουθο πρακτικό κανόνα: Διπλάσια ποσότητα = σχεδόν διπλάσιος χρόνος, μισή ποσότητα =
μισός χρόνος
χαμηλότερη βαθμίδα ισχύος μικροκυμάτων. Σκεπάστε το φαγητό και προσθέστε
περισσότερο υγρό.
Ρυθμίστε περισσότερο χρόνο. Οι μεγαλύτερες ποσότητες και τα χοντρά φαγητά χρειάζονται περισσότερο χρόνο.
Ανακατεύετε ενδιάμεσα και επιλέξτε την επόμενη φορά μια χαμηλότερη βαθμίδα
ισχύος και μια μεγαλύτερη διάρκεια.
Επιλέξτε την επόμενη φορά μια μικρότερη βαθμίδα ισχύος μικροκυμάτων. Γυρίζετε
πολλές φορές τις μεγάλες ποσότητες πουλερικών ή κρέατος.
EΦαγητά δοκιμών
Φαγητά δοκιμών
Η ποιότητα και η λειτουργία των συσκευών μικροκυμάτων
ελέγχονται από τα εργαστήρια δοκιμών με βάση αυτά τα
φαγητά.
Μαγείρεμα με μικροκύματα "σόλο"
Φαγητό Ισχύς μικροκυμάτων σε W, διάρκεια σε λεπτά Υπόδειξη
Μείγμα αυγών-γάλακτος, 1.000
γρ.
Παντεσπάνι, 475 γρ. 600 W, 7-9 λεπτά Φόρμα πυρέξ Ø 22 cm.
Ψητός κιμάς, 900 γρ. 600 W, 25-30 λεπτά Μακρόστενη φόρμα πυρέξ, μήκος 28 cm
600 W, 11-12 λεπτά + 180 W, 8-10 λεπτά Φόρμα πυρέξ
Σύμφωνα με το πρότυπο EN 60705, IEC 60705 ή DIN
44547.
Ξεπάγωμα με μικροκύματα "σόλο"
Φαγητό Ισχύς μικροκυμάτων σε W, διάρκεια σε λεπτά Υπόδειξη
Κρέας, 500 γρ. Πρόγραμμα "Ξεπάγωμα κρέατος", 500 γρ.
ή
180 W, 8 λεπτά + 90 W 7-10 λεπτά
Φόρμα πυρέξ Ø 24 cm
41
Page 42

it
Indice
itIstruzioni per l’uso
8 Conformità d'uso . . . . . . . . . . . . . . . . . . . . . . . . 43
3 Malfunzionamento, che fare? . . . . . . . . . . . . . . 56
( Importanti avvertenze di sicurezza . . . . . . . . . 43
In generale . . . . . . . . . . . . . . . . . . . . . . . . . . . . . . . . .43
Microonde . . . . . . . . . . . . . . . . . . . . . . . . . . . . . . . . . 44
] Cause dei danni . . . . . . . . . . . . . . . . . . . . . . . . . 46
7 Tutela dell'ambiente. . . . . . . . . . . . . . . . . . . . . . 46
Smaltimento ecocompatibile . . . . . . . . . . . . . . . . . . .46
* Conoscere l'apparecchio . . . . . . . . . . . . . . . . . 47
Pannello di comando . . . . . . . . . . . . . . . . . . . . . . . . . 47
Elementi di comando . . . . . . . . . . . . . . . . . . . . . . . . .47
Display . . . . . . . . . . . . . . . . . . . . . . . . . . . . . . . . . . . . 47
Menu delle modalità di funzionamento. . . . . . . . . . . .48
Ulteriori informazioni. . . . . . . . . . . . . . . . . . . . . . . . . . 48
Funzioni del vano di cottura . . . . . . . . . . . . . . . . . . . . 48
Accessori . . . . . . . . . . . . . . . . . . . . . . . . . . . . . . . . . . 48
K Prima di utilizzare l'apparecchio per la prima
volta . . . . . . . . . . . . . . . . . . . . . . . . . . . . . . . . . . . 49
Prima messa in funzione . . . . . . . . . . . . . . . . . . . . . . 49
Pulizia degli accessori . . . . . . . . . . . . . . . . . . . . . . . . 49
1 Uso dell'apparecchio . . . . . . . . . . . . . . . . . . . . . 49
Accensione e spegnimento dell'apparecchio. . . . . . . 49
Uso. . . . . . . . . . . . . . . . . . . . . . . . . . . . . . . . . . . . . . .49
Impostare la modalità di funzionamento. . . . . . . . . . . 50
4 Servizio assistenza clienti. . . . . . . . . . . . . . . . . 57
Codice prodotto (E) e codice di produzione (FD). . . .57
Dati tecnici . . . . . . . . . . . . . . . . . . . . . . . . . . . . . . . . .57
J Testati nel nostro laboratorio . . . . . . . . . . . . . . 58
Scongelamento. . . . . . . . . . . . . . . . . . . . . . . . . . . . . .58
Scongelare, riscaldare o cuocere prodotti surgelati . .59
Riscaldare. . . . . . . . . . . . . . . . . . . . . . . . . . . . . . . . . .59
Cottura . . . . . . . . . . . . . . . . . . . . . . . . . . . . . . . . . . . .60
Consigli per la cottura al microonde. . . . . . . . . . . . . .61
E Pietanze sperimentate . . . . . . . . . . . . . . . . . . . . 61
Cottura con microonde Solo. . . . . . . . . . . . . . . . . . . .61
Scongelamento con Microonde Solo . . . . . . . . . . . . .61
Produktinfo
Per ulteriori informazioni su prodotti, accessori, pezzi di
ricambio e servizi è possibile consultare il sito Internet
www.siemens-home.bsh-group.com e l'eShop
www.siemens-home.bsh-group.com/eshops
^ Il forno a microonde. . . . . . . . . . . . . . . . . . . . . . 50
Stoviglia . . . . . . . . . . . . . . . . . . . . . . . . . . . . . . . . . . .50
Livelli microonde . . . . . . . . . . . . . . . . . . . . . . . . . . . .51
Impostazione microonde . . . . . . . . . . . . . . . . . . . . . . 51
O Contaminuti . . . . . . . . . . . . . . . . . . . . . . . . . . . . 52
Impostazione della suoneria. . . . . . . . . . . . . . . . . . . . 52
P Programmi . . . . . . . . . . . . . . . . . . . . . . . . . . . . . 52
Impostazione del programma . . . . . . . . . . . . . . . . . .52
Avvertenze sui programmi . . . . . . . . . . . . . . . . . . . . .53
Tempo di riposo. . . . . . . . . . . . . . . . . . . . . . . . . . . . . 53
Tabella programmi . . . . . . . . . . . . . . . . . . . . . . . . . . .53
Q Impostazioni di base . . . . . . . . . . . . . . . . . . . . . 54
Modifica delle impostazioni . . . . . . . . . . . . . . . . . . . . 54
Elenco delle impostazioni. . . . . . . . . . . . . . . . . . . . . . 54
Interruzione dell’alimentazione elettrica . . . . . . . . . . .54
Modifica dell'ora . . . . . . . . . . . . . . . . . . . . . . . . . . . . .54
D Pulizia . . . . . . . . . . . . . . . . . . . . . . . . . . . . . . . . . 55
Detergenti. . . . . . . . . . . . . . . . . . . . . . . . . . . . . . . . . . 55
42
Page 43

Conformità d'uso it
8Conformità d'uso
Conformità d'uso
Leggere attentamente le presenti istruzioni per
l'uso. Solo così è possibile utilizzare
l'apparecchio in modo sicuro e corretto.
Custodire con la massima cura le presenti
istruzioni per l'uso e il montaggio in caso di un
utilizzo futuro o cessione a terzi.
Questo apparecchio è concepito
esclusivamente per l'incasso. Osservare le
speciali istruzioni di montaggio.
Controllare l'apparecchio dopo averlo
disimballato. Qualora si fossero verificati danni
da trasporto, non collegare l'apparecchio.
L'allacciamento senza spina dell'apparecchio
può essere effettuato solo da un tecnico
autorizzato. In caso di danni causati da un
allacciamento non corretto, decade il diritto di
garanzia.
Questo apparecchio è pensato
esclusivamente per l'utilizzo in abitazioni
private e in ambito domestico. Utilizzare
l'apparecchio per la preparazione di cibi e
bevande. Prestare attenzione all'apparecchio
durante il suo funzionamento. Utilizzare
l'apparecchio esclusivamente in luoghi chiusi.
Questo apparecchio è progettato solo per
l'utilizzo fino ad un'altezza di massimo 4000
metri sul livello del mare.
Questo apparecchio può essere utilizzato da
bambini di età pari o superiore a 8 anni e da
persone con ridotte facoltà fisiche, sensoriali o
mentali nonché da persone prive di sufficiente
esperienza o conoscenza dello stesso se
sorvegliate da una persona responsabile della
loro sicurezza o se istruite in merito all'utilizzo
sicuro dell'apparecchio e consapevoli degli
eventuali rischi derivanti da un utilizzo
improprio.
I bambini non devono utilizzare l'apparecchio
come un giocattolo. I bambini non devono né
pulire né utilizzare l'apparecchio da soli a
meno che non abbiano un'età superiore agli
8 anni e che siano assistiti da parte di un
adulto.
Tenere lontano dall'apparecchio e dal cavo di
alimentazione i bambini di età inferiore agli
8 anni.
(Importanti avvertenze di
sicurezza
Importanti avvertenze di sicurezza
In generale
:Avviso – Pericolo di incendio!
Gli oggetti infiammabili depositati nel vano di
cottura possono incendiarsi. Non riporre mai
oggetti infiammabili all'interno del vano di
cottura. Non aprire mai la porta
dell'apparecchio quando fuoriesce del fumo.
Disattivare l'apparecchio e staccare la spina o
il fusibile nella scatola dei fusibili.
:Avviso – Pericolo di scottature!
■ L'accessorio o la stoviglia si surriscalda.
Servirsi sempre delle presine per estrarre le
stoviglie e gli accessori caldi dal vano di
cottura.
Pericolo di scottature!
■ I vapori dell'alcol nel vano di cottura caldo
potrebbero prendere fuoco. Non cucinare
pietanze con quantità elevate di bevande
ad alta gradazione alcolica. Utilizzare
esclusivamente piccole quantità di bevande
ad alta gradazione alcolica. Aprire con
cautela la porta dell'apparecchio.
:Avviso – Pericolo di scottature!
■ Durante il funzionamento le parti scoperte
diventano molto calde. Non toccare mai le
parti ad alta temperatura. Tenere lontano i
bambini.
Pericolo di bruciature!
■ Aprendo la porta dell'apparecchio potrebbe
fuoriuscire del vapore caldo. Aprire con
cautela la porta dell'apparecchio. Tenere
lontano i bambini.
Pericolo di bruciature!
■ La presenza di acqua nel vano di cottura
caldo può causare la formazione di vapore.
Non versare mai acqua nel forno caldo
:Avviso – Pericolo di lesioni!
■ Il vetro graffiato della porta dell'apparecchio
potrebbe saltare. Non utilizzare raschietti
per vetro, né detergenti abrasivi o corrosivi.
Pericolo di lesioni!
■ Le cerniere della porta dell'apparecchio si
muovono aprendo e chiudendo la porta e
possono bloccarsi. Non toccare mai la zona
delle cerniere.
Inserire sempre correttamente gli accessori
nel vano di cottura.
43
Page 44

it Importanti avvertenze di sicurezza
:Avviso – Pericolo di scariche elettriche!
■ Gli interventi di riparazione effettuati in
modo non conforme rappresentano una
fonte di pericolo. Le riparazioni e le
sostituzioni di cavi danneggiati devono
essere effettuate esclusivamente da
personale tecnico adeguatamente istruito
dal servizio di assistenza tecnica. Se
l'apparecchio è difettoso, staccare la spina
o il fusibile nella scatola dei fusibili.
Rivolgersi al servizio di assistenza clienti.
Pericolo di scariche elettriche!
■ Se posto vicino ai componenti caldi
dell'apparecchio, l'isolamento del cavo
degli apparecchi elettronici può fondere.
Evitare il contatto tra il cavo di
allacciamento e i componenti caldi
dell'apparecchio.
Pericolo di scariche elettriche!
■ L'infiltrazione di liquido può provocare una
scarica elettrica. Non utilizzare detergenti
ad alta pressione o dispositivi a getto di
vapore.
Pericolo di scariche elettriche!
■ Un apparecchio difettoso può causare delle
scosse elettriche. Non mettere mai in
funzione un apparecchio difettoso. Togliere
la spina o disattivare il fusibile nella scatola
dei fusibili. Rivolgersi al servizio di
assistenza clienti.
:Avviso – Pericoli dovuti ai campi
magnetici!
Nel pannello di comando o negli elementi di
comando sono inseriti magneti permanenti.
Questi possono agire sugli impianti elettronici,
quali ad es. pacemaker o pompe di insulina. I
portatori di impianti elettronici devono
mantenersi a una distanza minima di 10 cm
dal pannello di comando.
Microonde
:Avviso – Pericolo di incendio!
■ L'utilizzo non conforme dell'apparecchio è
pericoloso e può causare danni.
Non è consentito asciugare alimenti e
vestiti, riscaldare le pantofole, i cuscini di
grano o di cereali, le spugnette, i panni per
la pulizia umidi e simili.
Ad esempio, le pantofole e i cuscini di
grano o di cereali riscaldati possono
incendiarsi anche dopo alcune
ore.Utilizzare l'apparecchio esclusivamente
per la preparazione di cibi e bevande.
Pericolo di incendio!
■ Gli alimenti possono prendere fuoco. Non
far mai riscaldare gli alimenti all'interno di
confezioni termiche.
Gli alimenti all'interno di contenitori in
plastica, carta o altri materiali infiammabili
devono essere tenuti sempre sotto
sorveglianza.
Non impostare mai valori troppo elevati per
la potenza microonde o per la durata di
cottura. Attenersi alle indicazioni riportate in
queste istruzioni per l'uso.
Non essiccare mai gli alimenti con la
funzione microonde.
Non scongelare o riscaldare troppo a lungo
o a una potenza microonde eccessiva gli
alimenti a basso contenuto d'acqua, come
ad es. il pane.
Pericolo di incendio!
■ L'olio può prendere fuoco. Non utilizzare
mai la funzione microonde per far scaldare
soltanto dell'olio.
:Avviso – Pericolo di esplosione!
Liquidi o altri tipi di alimenti in contenitori
chiusi possono esplodere. Non riscaldare mai
liquidi o altri tipi di alimenti in contenitori
chiusi.
:Avviso – Pericolo di scottature!
■ Gli alimenti con pelle o buccia dura
possono scoppiare durante e dopo il
riscaldamento. Non cuocere mai le uova nel
guscio o riscaldare le uova sode. Non
cuocere mai molluschi e crostacei. In caso
di uova al tegamino forare prima il tuorlo. In
caso di alimenti con pelle o buccia dura,
quali ad es. mele, pomodori, patate o
salsicce, la buccia può scoppiare. Prima di
procedere alla cottura, forare la buccia o la
pelle.
Pericolo di scottature!
■ Il calore degli alimenti per neonati non si
distribuisce in modo uniforme. Non far mai
riscaldare gli alimenti per neonati all'interno
di contenitori con coperchio. Rimuovere
sempre il coperchio o la tettarella. Una volta
terminata la fase di riscaldamento, scuotere
o mescolare sempre con cura. Controllare
la temperatura prima di dare gli alimenti al
bambino.
Pericolo di scottature!
■ Le pietanze riscaldate emettono calore. Le
stoviglie possono surriscaldarsi. Servirsi
sempre delle presine per estrarre le
stoviglie e gli accessori dal vano di cottura.
Pericolo di scottature!
■ Le confezioni ermetiche a tenuta d'aria
possono esplodere. Osservare sempre le
istruzioni riportate sulla confezione. Servirsi
sempre delle presine per estrarre le
pietanze dal vano di cottura.
44
Page 45

Importanti avvertenze di sicurezza it
Pericolo di scottature! ■ Durante il funzionamento le parti scoperte
diventano molto calde. Non toccare mai le
parti ad alta temperatura. Tenere lontano i
bambini.
:Avviso – Pericolo di bruciature!
■ Durante il riscaldamento di liquidi si può
verificare un ritardo nel processo di
ebollizione. In altri termini, la temperatura di
ebollizione viene raggiunta senza che si
formino le tipiche bollicine di vapore. Anche
un urto leggero del recipiente può causare
l'improvviso traboccare del liquido o la
formazione di spruzzi. Quando si riscalda,
aggiungere sempre un cucchiaio nel
contenitore, così si evita un ritardo nel
processo di ebollizione.
:Avviso – Rischio di gravi danni alla
salute!
■ In caso di scarsa pulizia, la superficie
dell'apparecchio può danneggiarsi. Si
potrebbe originare dell'energia a
microonde. Pulire regolarmente
l'apparecchio e rimuovere sempre i residui
delle pietanze. Tenere sempre puliti vano di
cottura, guarnizione della porta, porta e
fermaporta. ~ "Pulizia" a pagina 55
Rischio di gravi danni alla salute!
■ Se la porta del vano di cottura o la
guarnizione della porta sono danneggiate si
potrebbe originare dell'energia a
microonde. Se la porta del vano di cottura o
la guarnizione della porta sono
danneggiate, l'apparecchio non deve
essere messo in funzione. Rivolgersi al
servizio di assistenza clienti.
Rischio di gravi danni alla salute!
■ Negli apparecchi senza rivestimento
esterno fuoriesce l'energia microonde. Non
rimuovere mai il rivestimento esterno. In
caso di lavori di manutenzione o riparazione
contattare il servizio assistenza clienti.
:Avviso – Pericolo di lesioni!
■ Le stoviglie non adatte si possono
spaccare. Le stoviglie in porcellana e
ceramica possono presentare piccoli fori
sui manici e sul coperchio. Dietro questi fori
possono nascondersi cavità. Se si verifica
un'infiltrazione di liquido in queste cavità, la
stoviglia si può spaccare. Utilizzare
esclusivamente stoviglie adatte al
microonde.
Pericolo di lesioni!
■ Stoviglie e recipienti in metallo possono
causare la formazione di scintille, in caso di
funzionamento esclusivamente a
microonde. L'apparecchio viene
danneggiato. In caso di funzionamento
esclusivamente a microonde non utilizzare
mai recipienti in metallo.
:Avviso – Pericolo di scariche elettriche!
L'apparecchio è soggetto ad alta tensione.
Non rimuovere mai il rivestimento esterno
45
Page 46

it Cause dei danni
]Cause dei danni
Cause dei danni
Attenzione!
■ Trasporto dell'apparecchio: non trasportare
l'apparecchio afferrandolo dalla maniglia in quanto
questa non sopporta il peso dell'apparecchio e può
rompersi.
■ Formazione di scintille: i componenti in metallo, per
esempio i cucchiaini contenuti nei bicchieri, devono
restare a una distanza non inferiore a 2 cm dalle
pareti del vano di cottura e dal lato interno della
porta. Le scintille possono infatti danneggiare
gravemente il vetro interno della porta.
■ Vaschette in alluminio: non utilizzare vaschette in
alluminio nell'apparecchio, poiché potrebbe
danneggiarsi a causa della formazione di scintille.
■ Funzionamento a microonde senza pietanze: il
funzionamento dell'apparecchio senza pietanze
all'interno del vano di cottura comporta un
sovraccarico. Non avviare mai il forno a microonde
senza aver prima inserito gli alimenti. L'unica
eccezione consentita è quella di un breve test per le
stoviglie. ~ "Il forno a microonde" a pagina 50
7Tutela dell'ambiente
Tutela dell'ambiente
Smaltimento ecocompatibile
Si prega di smaltire le confezioni nel rispetto
dell'ambiente.
Questo apparecchio dispone di contrassegno
ai sensi della direttiva europea 2012/19/UE in
materia di apparecchi elettrici ed elettronici
(waste electrical and electronic equipment WEEE).
Questa direttiva definisce le norme per la
raccolta e il riciclaggio degli apparecchi
dismessi valide su tutto il territorio dell’Unione
Europea.
■ Umidità nel vano di cottura: un'umidità prolungata
nel vano di cottura può causare la corrosione. Dopo
avere utilizzato il vano di cottura, lasciarlo asciugare.
Non conservare alimenti umidi all'interno del vano di
cottura chiuso per periodi di tempo prolungati. Non
conservare gli alimenti all'interno del vano di cottura.
■ Guarnizione molto sporca: se la guarnizione è molto
sporca, durante il funzionamento dell'apparecchio la
porta non si chiude più correttamente. Le superfici
dei mobili adiacenti possono danneggiarsi.
Mantenere sempre pulita la guarnizione. ~ "Pulizia"
a pagina 55
■ Raffreddamento con porta dell'apparecchio aperta: il
raffreddamento del vano di cottura deve avvenire
esclusivamente con la porta chiusa. Controllare che
nulla resti incastrato nella porta dell'apparecchio.
Anche se la porta è socchiusa, con il passare del
tempo i mobili adiacenti possono danneggiarsi.
■ Utilizzo della porta dell'apparecchio come superficie
d'appoggio: non appoggiarsi alla porta
dell'apparecchio, né sedervisi sopra. Non posare
stoviglie o accessori sulla porta dell'apparecchio.
■ Popcorn al microonde: non impostare mai una
potenza microonde troppo elevata. Utilizzare al
massimo 600 watt. Appoggiare sempre la busta dei
popcorn su un piatto in vetro. Il pannello potrebbe
saltare a causa del sovraccarico.
46
Page 47

Conoscere l'apparecchio it
* Conoscere l'apparecchio
Conoscere l'apparecchio
In questo capitolo vengono illustrati gli indicatori e gli
elementi di comando. Inoltre verrete a conoscenza delle
diverse funzioni dell'apparecchio.
Avvertenza: A seconda del modello è possibile che vi
siano alcune differenze per quanto concerne colori e
vari dettagli.
POPGG
NFOV
O
Pannello di comando
Servendosi dei tasti, dei campi tattili e del selettore
girevole impostare sul pannello di comando le diverse
funzioni dell'apparecchio.Sul display vengono
visualizzate le impostazioni attuali.
La panoramica mostra il campo di comando quando
l'apparecchio è acceso con una modalità selezionata.
##
PLQVHF:
TUBSUTUPQ
Tasti
(
I tasti a destra e sinistra del selettore girevole
possono essere premuti. Premere il tasto per
confermare.
Selettore girevole
0
Il selettore girevole può essere ruotato verso
destra o verso sinistra.
Display
8
Sul display vengono visualizzati i valori di
impostazione aggiornati, le possibilità di selezione
e anche testi di avvertenza.
Campi tattili
@
Sotto ai campi tattili a sinistra ¾ e destra ¿ del
display si trovano dei sensori. Premere sulla
relativa freccia per selezionare la funzione.
Elementi di comando
I singoli elementi di comando sono armonizzati con le
diverse funzioni dell'apparecchio. Così è possibile
impostare l'apparecchio in modo semplice e diretto.
Tasti e campi tattili
Qui è spiegato brevemente il significato dei diversi tasti
e campi tattili.
Tasti Significato
on/off Accendere e spegnere l'apparec-
chio
menu Menu Aprire il menu delle modalità di
funzionamento
l
0
Informazione Visualizzare le avvertenze
Funzione durata Impostazione della suoneria
start/stop Avviare o sospendere il funziona-
mento
Campi tattili
¾
¿
--------
Selettore
Con il selettore girevole modificare le modalità di
funzionamento e i parametri di impostazione visualizzati
sul display.
Per la maggior parte degli elenchi di selezione, ad es. i
programmi, dopo l'ultimo punto si ricomincia dall'inizio.
In alcuni elenchi di selezione, ad es. la durata, riportare
indietro nuovamente il selettore girevole quando è stato
raggiunto il valore minimo o massimo.
Campo a sinistra
del display
Campo a destra
del display
Navigazione verso sinistra
Navigazione verso destra
Display
Il display è strutturato in modo tale che i dati possano
essere rilevati in uno sguardo.
Il valore che si desidera impostare al momento viene
messo in evidenza, utilizzando il colore bianco su uno
sfondo nero.
Barra di stato
La barra di stato si trova nella parte superiore del
display. Lì vengono visualizzati l'ora, il tempo del
contaminuti e la durata del programma.
47
Page 48

it Conoscere l'apparecchio
Barra di avanzamento
Dalla barra di avanzamento si può vedere a che punto
è, ad esempio, la durata. La linea diritta sotto ai valori di
impostazione si riempie da sinistra a destra man mano
che il programma in corso avanza.
Menu delle modalità di funzionamento
Il menu è suddiviso in diverse modalità di
funzionamento. In questo modo è possibile accedere
rapidamente alla funzione desiderata.
A seconda del tipo di apparecchio vi sono molte
modalità di funzionamento diverse.
Modalità di funzionamento Tipo di utilizzo
Microonde Selezionare le potenze microonde
Programmi Programmi automatici
Le pietanze selezionate possono
essere preparate con estrema
semplicità
Impostazioni ~ "Impostazioni di
base" a pagina 54
Le impostazioni di base dell'apparecchio possono essere adeguate
alle abitudini individuali
dell'utente.
--------
Ulteriori informazioni
Nella maggior parte dei casi l'apparecchio vi offre
indicazioni e ulteriori informazioni inerenti all'azione
appena eseguita. Per visualizzarle premere il tasto l.
L'informazione viene visualizzata per alcuni secondi.
Nelle indicazioni più lunghe scorrere fino alla fine con il
selettore.
Alcune indicazioni compaiono automaticamente, ad es.
per confermare, richiedere o avvisare.
L'avvertenza può essere rimossa premendo di nuovo
sul tasto l.
Funzioni del vano di cottura
Ventola di raffreddamento
La ventola di raffreddamento si attiva quando
necessario. L'aria calda fuoriesce attraverso la porta.
Dopo l'utilizzo, la ventola di raffreddamento può restare
attiva ancora per un certo periodo di tempo.
Attenzione!
Non coprire le fessure di aerazione. L'apparecchio si
surriscalderebbe.
Avvertenze
■ Durante il funzionamento a microonde, l'apparecchio
rimane freddo. Ciononostante la ventola di
raffreddamento si attiva e può continuare a
funzionare anche quando il funzionamento a
microonde è terminato.
■ Sul vetro della porta, sulle pareti interne e sulla base
può formarsi della condensa. Questo è un fenomeno
normale che non compromette il corretto
funzionamento del forno a microonde. Una volta
terminata la fase di cottura, eliminare l'acqua di
condensa.
Accessori
Insieme all'apparecchio sono forniti i seguenti
accessori:
Tegame in vetro
Per scongelare e cuocere le pietanze.
Utilizzare solo gli accessori originali del produttore
dell'apparecchio, in quanto sono particolarmente adatti
a questo apparecchio.
Gli accessori si possono acquistare presso il servizio
clienti, i rivenditori specializzati o su Internet.
Avvertenza: Le stoviglie adatte al sistema di cottura a
microonde possono essere appoggiate sulla base del
vano di cottura (livello 0).
Alcune funzioni nel vano di cottura facilitano il
funzionamento dell'apparecchio. Ad esempio, il vano
cottura viene illuminato interamente e una ventola di
raffreddamento protegge l'apparecchio da
sovrariscaldamento.
Illuminazione del vano di cottura
Quando si apre la porta dell'apparecchio, l'illuminazione
interna si attiva. Se la porta rimane aperta per più di
5 minuti, l'illuminazione interna si spegne. Se si chiude
e si apre nuovamente la porta dell'apparecchio,
l'illuminazione interna si riaccende.
Con tutte le modalità di funzionamento l'illuminazione
interna si accende non appena viene avviato
l'apparecchio. Quando il funzionamento è terminato, si
spegne.
Avvertenza: Se il funzionamento viene arrestato
aprendo la porta dell'apparecchio, deve essere
riavviato nuovamente con il tasto avvio/stop l dopo la
chiusura della porta.
48
Page 49

Prima di utilizzare l'apparecchio per la prima volta it
KPrima di utilizzare
l'apparecchio per la prima
volta
Prima di utilizzare l'apparecchio per la prima volta
Prima di poter utilizzare l'apparecchio nuovo è
necessario effettuare alcune impostazioni.
Prima messa in funzione
In seguito all'allacciamento o a una caduta di corrente
vengono visualizzate sul display le impostazioni per la
prima messa in funzione. Possono trascorrere alcuni
secondi prima che la richiesta compaia.
Avvertenza: È sempre possibile modificare
nuovamente queste impostazioni nelle impostazioni di
base.
Impostazione della lingua
1. Servendosi del selettore girevole impostare la lingua
desiderata.
2. Premere sulla freccia ¿.
Viene visualizzata l'impostazione successiva.
Impostazione dell'ora
1. Impostare l'ora attuale servendosi dell'apposito
selettore.
2. Scorrere sulla freccia ¿
Impostazione della data
1Uso dell'apparecchio
Uso dell'apparecchio
Gli elementi di comando e le modalità di funzionamento
sono già state apprese. Sono qui illustrate le
impostazione dell'apparecchio. Si apprende cosa
avviene nel momento dell'accensione e dello
spegnimento e come impostare le modalità di
funzionamento.
Accensione e spegnimento dell'apparecchio
Prima di eseguire qualsiasi impostazione, accendere
l'apparecchio.
Avvertenza: Il contaminuti può essere impostato anche
se l'apparecchio è spento. Alcuni indicatori e le
avvertenze restano visibili sul display anche ad
apparecchio spento.
Se l'apparecchio non viene utilizzato, spegnerlo. Se per
un tempo prolungato non viene eseguita alcuna
impostazione, l'apparecchio si spegne
automaticamente.
Accensione dell’apparecchio
Accendere l'apparecchio con il tasto on/off.
L'indicazione on/off sul tasto viene illuminata in blu.
Sul display compare il logo Siemens e di seguito la
potenza massima del microonde.
L’apparecchio è pronto per il funzionamento.
Per le istruzioni relative alle modalità di funzionamento,
consultare i singoli capitoli.
1. Servendosi del selettore girevole, impostare il giorno
attuale.
2. Per confermare premere sulla freccia ¿.
3. Servendosi del selettore girevole, impostare il mese
attuale.
4. Per confermare premere sulla freccia ¿.
5. Impostare l'anno attuale con il selettore.
6. Per confermare premere sulla freccia ¿.
Sul display viene indicato che la prima messa in
funzione è stata terminata.
Pulizia degli accessori
Prima di utilizzare gli accessori per la prima volta, pulirli
accuratamente con una soluzione alcalina di lavaggio
molto calda e un panno morbido.
Spegnimento dell’apparecchio
Spegnere l'apparecchio con il tasto on/off.
L'illuminazione sopra il tasto si spegne.
La funzione eventualmente in corso viene annullata.
Sul display viene visualizzata l'ora e la data.
Avvertenza: È possibile determinare nelle impostazioni
di base se devono essere visualizzate o meno l'ora e la
data quando l'apparecchio è spento.
Uso
Alcuni step operativi sono uguali in tutte le modalità di
funzionamento. Nella parte che segue sono indicati gli
step operativi basilari.
Avviare
Ogni programma deve essere avviato con il tasto start/
stop.
Dopo l'avvio le impostazioni sono visualizzate nel
display.Dalla barra di avanzamento si può vedere a che
punto è, ad esempio, la durata.
Avvertenza: Se il funzionamento viene arrestato
aprendo la porta dell'apparecchio, deve essere
riavviato nuovamente con il tasto start/stop dopo la
chiusura della porta.
49
Page 50

it Il forno a microonde
Funzione Pausa
Tramite il tasto start/stop è possibile sospendere il
funzionamento e riavviarlo.
Per cancellare tutte le impostazioni premere il tasto on/
off.
Avvertenze
■ Aprendo la porta dell'apparecchio il funzionamento
si arresta.
■ Dopo un'interruzione o annullamento del
funzionamento, la ventola di raffreddamento resta in
funzione.
Impostare la modalità di funzionamento
Dopo l'accensione dell'apparecchio compare la
modalità di funzionamento proposta come impostata. È
possibile avviare subito questa impostazione.
Se si desidera impostare una modalità diversa, le
descrizioni precise di come procedere sono indicate
nei relativi capitoli.
In generale vale quanto segue:
1. Premere il tasto Menu.
Si apre il menu delle modalità di funzionamento.
2. Selezionare la modalità di funzionamento desiderata
servendosi del selettore.
A seconda della modalità di funzionamento sono
disponibili diverse possibilità di scelta.
3. Con la freccia ¿ ottenete la modalità di
funzionamento selezionata.
4. Modificare la selezione servendosi del selettore.
A seconda della selezione effettuata possono essere
modificate ulteriori impostazioni.
5. Avviare con il tasto start/stop.
Nel display compare lo scorrere del tempo. Le
impostazioni e la linea di avanzamento sono visibili.
Avvertenza: Se si desidera abbandonare
l'impostazione attuale, tornare con il tasto Menu al
livello delle modalità di funzionamento.
^Il forno a microonde
Il forno a microonde
Con il microonde è possibile cuocere, riscaldare o
scongelare in modo particolarmente rapido le pietanze.
Per utilizzare il microonde in maniera ottimale,
osservare le avvertenze relative alle stoviglie e regolarsi
secondo le indicazioni presenti nelle tabelle poste alla
fine delle istruzioni per l'uso. ~ "Testati nel nostro
laboratorio" a pagina 58
Stoviglia
Non tutte le stoviglie sono adatte per il microonde.
Affinché le pietanze siano scaldate senza danneggiare
l'apparecchio, utilizzare solo stoviglie adatte per il
microonde.
Stoviglie adatte
Sono appropriate le stoviglie termoresistenti in vetro,
vetroceramica, porcellana, ceramica o in materiale
plastico refrattario.Questi materiali sono permeabili alle
microonde.
È anche possibile utilizzare piatti di servizio. In questo
modo non sarà più necessario travasare gli alimenti. Le
stoviglie con decorazioni dorate o argentate possono
essere utilizzate soltanto nel caso in cui il costruttore
garantisca che esse siano adatte all'uso con il forno a
microonde.
Stoviglie non adatte
Le stoviglie in metallo non sono appropriate. Il metallo
non è permeabile alle microonde. Gli alimenti posti
entro contenitori in metallo restano freddi.
Attenzione!
Formazione di scintille: i componenti in metallo, per
esempio i cucchiaini contenuti nei bicchieri, devono
restare a una distanza non inferiore a 2 cm dalle pareti
del vano di cottura e dal lato interno della porta. Le
scintille possono infatti danneggiare gravemente il vetro
interno della porta.
50
Test delle stoviglie
Non attivare mai il forno a microonde senza aver prima
inserito gli alimenti. L'unica eccezione consentita è
rappresentata dal breve test per le stoviglie.
In caso di dubbio circa l'adeguatezza delle stoviglie
all'uso nel forno a microonde, si consiglia di effettuare il
seguente test.
1. Introdurre la stoviglia vuota nel vano di cottura per ½
- 1 minuto alla massima potenza.
2. Di tanto in tanto controllare la temperatura della
stoviglia.
La stoviglia deve essere fredda o tiepida.
Nel caso in cui sia calda o qualora si formino scintille,
la stoviglia non è adatta.
Interrompere il test.
:Avviso – Pericolo di scottature!
Durante il funzionamento le parti scoperte diventano
molto calde. Non toccare mai le parti ad alta
temperatura. Tenere lontano i bambini.
Page 51

Livelli microonde
Sono disponibili le seguenti potenze del microonde.
Le potenze microonde sono livelli e non corrispondono
sempre al numero di watt preciso che utilizza
l'apparecchio.
Livello Cibi durata massima
90 W Per scongelare cibi delicati 1 ora e 30 min.
180 W per scongelare e continuare la cot-
1 ora e 30 min.
tura
360 W per cuocere la carne e riscaldare cibi
1 ora e 30 min.
delicati
600 W per riscaldare e cuocere i cibi 1 ora e 30 min.
900 W per riscaldare i liquidi 30 min.
Valori predefiniti:
L'apparecchio propone una durata per ogni potenza del
microonde. I valori proposti possono essere accettati o
modificati nella rispettiva area.
La regolazione massima è prevista per riscaldare i
liquidi. Dopo un po' di tempo, per proteggere
l'apparecchio, la potenza massima del microonde viene
ridotta. La potenza massima è di nuovo disponibile
dopo un tempo di raffreddamento.
Impostazione microonde
Esempio: potenza del microonde 600 W, durata 5
minuti.
1. Premere il tasto on/off.
L’apparecchio è pronto per il funzionamento. Sul
display vengono proposte la potenza massima del
microonde e una durata, che può essere modificata
in qualsiasi momento.
2. Con il selettore girevole selezionare la potenza
microonde desiderata.
PLQV:
Il forno a microonde it
PLQV:
5. Avviare con il tasto avvio/stop.
PLQV:
TUBSUTUPQ
TUBSUTUPQ
L'apparecchio si avvia. La durata scorre sul display.
Avvertenze
■ Quando si accende l'apparecchio appare sempre
come predefinita la potenza massima del
microonde.
■ Se nel frattempo si apre la porta del forno, la ventola
di raffreddamento può continuare a funzionare.
La durata è trascorsa
Viene emesso un segnale acustico.
Il funzionamento è terminato.
Terminare il segnale anticipatamente:
Premere il tasto 0.
Avvertenza: Dopo aver premuto il tasto 0 compare la
funzione contaminuti, che scompare automaticamente
dopo breve tempo. Premendo nuovamente il tasto 0la
funzione scompare immediatamente.
Spegnere l'apparecchio con il tasto on/off.
POPGG
NFOV
O
Sul display viene visualizzata la potenza microonde
e una durata predefinita.
3. Scorrere sulla freccia ¿.
La durata può essere impostata.
4. Impostare con il selettore girevole la durata
desiderata.
Modifica della durata
È sempre possibile eseguire la modifica.
Modificare la durata con il selettore.
L'apparecchio riprende a funzionare.
Modifica della potenza microonde
È sempre possibile eseguire la modifica.
Cambiare la potenza dei microonde con la freccia ¾.
Impostare la potenza microonde desiderata servendosi
del selettore.
La durata rimane invariata.
L'apparecchio riprende a funzionare.
Avvertenza: Se la durata impostata supera la durata
massima della potenza del microonde di 900W, essa
viene ridotta automaticamente. L'apparecchio non
riprende a funzionare.Avviare con il tasto start/stop
51
Page 52

it Contaminuti
OContaminuti
Contaminuti
Il contaminuti può essere utilizzato come un normale
timer da cucina. Il contaminuti funziona parallelamente
alle altre impostazioni. È sempre possibile impostare il
contaminuti, anche quando l'apparecchio è spento. Il
contaminuti ha un suo segnale, che viene emesso
all'ora impostata oppure al termine di certa durata.
Impostazione della suoneria
È possibile impostare al max 24 ore.
Maggiore è il valore, maggiore è l'intervallo di tempo.
1. Premere il tasto 0.
Viene visualizzato il contaminuti.
2. Impostare il tempo del contaminuti servendosi del
selettore girevole.
&RQWDPLQXWLPLQVHF
TUBSUTUPQ
PProgrammi
Programmi
Con la funzione di programmazione è possibile
preparare le pietanze con estrema semplicità. Basta
selezionare il programma e inserire il peso relativo alla
pietanza. La funzione di programmazione adotta
l'impostazione ottimale.
Impostazione del programma
Esempio: Programma "Scongelamento pane", 250 g di
peso.
1. Premere il tasto on/off.
L’apparecchio è pronto per il funzionamento.
2. Premere il tasto menu.
Vengono visualizzate le modalità di funzionamento.
3. Selezionare "Programmi" servendosi del selettore
girevole.
4. Scorrere sulla freccia ¿.
Sul display compare il primo programma.
5. Servendosi del selettore girevole, impostare il
programma desiderato.
6FRQJHODUH
LOSDQH
PLQV
J
!
3. Avviare con il tasto 0.
Avvertenza: Il contaminuti entra in funzione
automaticamente dopo alcuni secondi.
Il tempo del contaminuti inizia a scorrere. Dopo breve
tempo il display torna alla visualizzazione precedente.
Viene visualizzato il simbolo del contaminuti e lo
scorrere del tempo sulla barra di stato.
Quando il tempo del contaminuti è terminato, viene
emesso un segnale acustico. Il segnale può essere
eliminato anticipatamente con il tasto 0.
Avvertenze
■ Il contaminuti resta visibile sul display quando
l'apparecchio è spento.
■ Mentre è in corso una modalità di funzionamento,
per la selezione del contaminuti, premere sul tasto
0. Il tempo del contaminuti viene visualizzato per
un po' di tempo e può essere modificato.
Modifica del contaminuti
Per modificare il tempo del contaminuti, premere il
tasto 0. Il tempo del contaminuti viene visualizzato e
può essere modificato con il selettore.
Annullamento del contaminuti
Se si desidera annullare il contaminuti, riportarlo
indietro completamente. Dopo che la modifica è stata
accettata, il simbolo smette di lampeggiare.
POPGG
NFOV
O
Il programma desiderato è stato selezionato. Sul
display compare il valore proposto per il peso.
6. Scorrere sulla freccia ¿.
Il peso può essere impostato.
7. Impostare il peso desiderato servendosi del
selettore girevole.
PLQV
J6FRQJHODUHLOSDQH
!
8. Scorrere sulla freccia ¿.
Viene visualizzata un'avvertenza sulla preparazione.
9. Avviare con il tasto avvio/stop.
L'apparecchio si avvia. La durata scorre sul display.
Avvertenze
■ La durata viene calcolata dai programmi.
TUBSUTUPQ
52
Page 53

Programmi it
■ Per alcune pietanze, durante la preparazione,
compaiono avvertenze sul display che invitano a
girare o mescolare. Seguire tali avvertenze.
All'apertura della porta dell'apparecchio il
funzionamento si arresta. Dopo la chiusura della
porta dell'apparecchio si riavvia il funzionamento. Se
si sceglie di non girare o mescolare la pietanza, il
programma prosegue comunque normalmente fino
alla fine.
Avvertenze sui programmi
Introdurre gli alimenti nel vano di cottura freddo.
Togliere gli alimenti dalla confezione e pesarli. Se non è
possibile inserire il peso esatto, arrotondarlo per
eccesso o per difetto.
Per utilizzare i programmi occorre impiegare sempre
stoviglie adatte al sistema di cottura a microonde, per
esempio in vetro o in ceramica. Prestare attenzione alle
avvertenze relative alle stoviglie fornite nella tabella del
programma.
Al termine della sezione delle avvertenze si trova una
tabella con l'indicazione degli alimenti appropriati,
dell'ambito di peso corrispondente e delle stoviglie
richieste.
Non è possibile impostare misure di peso esterne agli
ambiti di valori indicati.
Scongelare:
■ Surgelare e conservare gli alimenti possibilmente in
piano, in porzioni appropriate e a una temperatura di
-18°C.
■ Disporre gli alimenti surgelati in stoviglie piane,
come ad esempio un piatto in vetro o in porcellana.
■ Dopo lo scongelamento, lasciare scongelare
ulteriormente il cibo per altri 15 - 90 minuti in modo
da raggiungere la temperatura ambiente.
■ Si consiglia di far scongelare soltanto la quantità di
pane realmente necessaria in quanto il pane diventa
presto raffermo.
■ Durante lo scongelamento di carne o pollame
fuoriesce del liquido. Fare sgocciolare tale liquido,
che non deve essere riutilizzato in alcun caso, né
messo a contatto con altri alimenti.
■ Estrarre la carne tritata già scongelata dopo averla
girata.
■ Il pollame intero deve essere disposto nella pentola
dalla parte del petto, mentre singoli pezzi di pollo
devono essere disposti in modo che la parte con la
pelle sia rivolta verso il basso.
Verdure:
■ Verdure fresche: tagliare in pezzi di dimensioni
uguali. Aggiungere un cucchiaio d'acqua ogni 100
g.
■ Verdure surgelate: per questo programma si può
usare soltanto della verdura sbollentata non
precotta. Le verdure surgelate con crema alla panna
non sono adatte. Aggiungere da 1 a 3 cucchiai
d'acqua. Per gli spinaci e il cavolo rosso non si deve
aggiungere acqua.
Patate:
■ Patate lesse: tagliare in pezzi di dimensioni uguali.
Aggiungere due cucchiai d'acqua e un pizzico di
sale ogni 100 g di patate.
■ Patate lesse con la buccia: utilizzare patate dello
stesso spessore e lavate. Lavarle e perforare più
volte la buccia,quindi metterle ancora bagnate in
una pentola senz'acqua.
Riso:
■ Non utilizzare riso integrale o in busta.
■ Aggiungere al riso una quantità di acqua 2 o 2,5
volte superiore.
■ Per porzioni molto ridotte, impiegare una quantità
d'acqua leggermente maggiore.
Tempo di riposo
Al termine del programma di cottura, alcuni alimenti
devono essere lasciati riposare in forno.
Pietanza Tempo di riposo
Verdura ca. 5 minuti
Patate ca. 5 minuti. Far prima scolare l'acqua for-
matasi.
Riso da 5 a 10 minuti
Tabella programmi
Programma Pietanza appropriata Campo di peso in kg Stoviglia
Scongelamento
Pane* Pane intero, rotondo o allungato, fette di pane, torte
morbide, torte lievitate, torte di frutta, torte senza
glassa, panna o gelatina
Carne* Arrosto, pezzi di carne non spessi, carne tritata, pollo,
pollo grande, anatra
Pesce* Pesce intero, filetto di pesce, cotoletta di pesce 0,10-1,00 kg Stoviglia bassa senza coperchio
Cottura
Verdure fresche** Cavolfiore, broccoli, carote, cavolo rapa, porri, pepe-
roni, zucchine
*) Prestare attenzione al segnale che indica quando girare.
**) Prestare attenzione ai segnali che indicano quando mescolare.
0,20-1,50 kg Stoviglia bassa senza coperchio
Fondo del vano di cottura
0,20-2,00 kg Stoviglia bassa senza coperchio
Fondo del vano di cottura
Fondo del vano di cottura
0,15-1,00 kg Stoviglie con coperchio
Fondo del vano di cottura
53
Page 54

it Impostazioni di base
Programma Pietanza appropriata Campo di peso in kg Stoviglia
Verdure congelate** Cavolfiore, broccoli, carote, cavolo rapa, cavolo rosso,
spinaci
Patate** Patate lessate, patate lesse con la buccia, patate a
pezzi della stessa dimensione
0,15-1,00 kg Stoviglie con coperchio
Fondo del vano di cottura
0,20-1,00 kg Stoviglie con coperchio
Fondo del vano di cottura
Riso** Riso, riso a chicco lungo 0,05-0,30 kg Stoviglia alta con coperchio
Fondo del vano di cottura
*) Prestare attenzione al segnale che indica quando girare.
**) Prestare attenzione ai segnali che indicano quando mescolare.
QImpostazioni di base
Impostazioni di base
Sono disponibili diverse impostazioni che consentono
di utilizzare l'apparecchio in modo semplice ed ottimale.
Se necessario, le impostazioni possono essere
modificate.
Modifica delle impostazioni
1. Premere il tasto on/off.
2. Premere il tasto menu.
Si apre il menu delle modalità di funzionamento.
3. Selezionare “Impostazioni” servendosi del selettore.
4. Premere sulla freccia ¿.
5. Modificare i valori servendosi del selettore.
6. Con la freccia ¿ passare sempre alle impostazioni
successive e se necessario modificarle.
7. Per salvare premere il tasto menu.
Sul display compare scartare o salvare.
8. Selezionare il comando desiderato servendosi dei
campi touch.
Spegnimento notturno Disattivato*
Attivato (Display oscurato tra le 22:00 e le
6:00)
Modalità demo Disattivato*
Attivato
(viene visualizzato solo entro i primi 3
minuti dopo un reset o dopo la prima
messa in servizio)
Impostazioni di fabbrica Ripristina
Non ripristinare*
* Impostazioni di fabbrica (a seconda del tipo di apparecchio le im-
postazioni possono essere differenti)
Avvertenza: Le modifiche delle impostazioni inerenti a
lingua, tono dei tasti e luminosità del display sono
operative da subito. Tutte le altre impostazioni sono
operative solo dopo il salvataggio.
--------
Elenco delle impostazioni
La tabella contiene tutte le impostazioni di base e le
relative possibilità di modifica. A seconda della
dotazione dell'apparecchio, sul display vengono
visualizzate solo le impostazioni adatte per il vostro
apparecchio.
È possibile modificare le seguenti impostazioni:
Impostazione Selezione
Lingua Impostazione lingua
Ora Impostazione dell'ora attuale
Data Impostazione della data attuale
Segnale acustico Breve durata
Durata media*
Durata prolung.
Tono tasti Attivato
Disattivato*
(Il tono dei tasti rimane su on/off)
Luminosità del display Impostazione mediante 5 livelli
Livello 3*
Indicatore dell'ora Digitale+data*
digitale
spento
Interruzione dell’alimentazione elettrica
Le modifiche apportate alle impostazioni restano
memorizzate anche dopo un'interruzione di corrente.
Solo le impostazioni inerenti alla prima messa in
servizio devono essere ripetute dopo un'interruzione di
corrente.
Modifica dell'ora
L'ora viene modificata dalle impostazioni di base.
Esempio: passare dall'ora legale all'ora solare.
1. Premere il tasto on/off.
2. Premere il tasto menu.
3. Selezionare "Impostazioni" servendosi del selettore.
4. Scorrere con la freccia ¿ su "Ora".
5. Modificare l'ora servendosi del selettore.
6. Premere il tasto menu.
Sul display compare Salvare o scartare.
54
Page 55

Pulizia it
DPulizia
Pulizia
Una cura e manutenzione scrupolosa contribuiscono a
mantenere a lungo l'apparecchio in buone condizioni.
Sono qui illustrate le modalità di cura e pulizia
dell'apparecchio corrette.
:Avviso – Pericolo di scottature!
L'apparecchio si surriscalda. Non sfiorare mai le
superfici interne calde del vano di cottura o le
resistenze. Lasciar sempre raffreddare l'apparecchio.
Tenere lontano i bambini.
:Avviso – Pericolo di scariche elettriche!
L'infiltrazione di liquido può provocare una scarica
elettrica. Non utilizzare detergenti ad alta pressione o
dispositivi a getto di vapore.
:Avviso – Pericolo di lesioni!
Il vetro graffiato della porta dell'apparecchio potrebbe
saltare. Non utilizzare raschietti per vetro, né detergenti
abrasivi o corrosivi.
Avvertenza: Gli odori sgradevoli, per esempio dovuti
alla preparazione di pesce, possono essere eliminati
facilmente. Aggiungere qualche goccia di succo di
limone in una tazza d'acqua. Inserire sempre un
cucchiaio nel recipiente, per evitare un ritardo nel
raggiungimento del punto di ebollizione. Far scaldare
l'acqua per ca. 1-2 minuti alla massima potenza del
microonde.
Zona Detergenti
Acciaio inox Soluzione di lavaggio calda: pulire con un
panno spugna e asciugare con un panno morbido. Rimuovere immediatamente le macchie
di calcare, grasso, amido o albume, in quanto
potrebbero corrodere la superficie. Speciali
detergenti per superfici in acciaio inox possono essere richiesti presso il servizio di assistenza tecnica o presso il proprio rivenditore
specializzato.
Vano di cottura in
acciaio inox
Soluzione di lavaggio calda oppure acqua e
aceto: pulire con un panno spugna e asciugare
con un panno morbido. Non utilizzare spray
per forno, altri detergenti aggressivi o abrasivi.
Non sono adatte neanche le spugnette abrasive, ruvide o in metallo poiché graffiano la
superficie. Fare asciugare completamente le
superfici interne.
Pannelli della porta Detergente per vetri: pulire con un panno spu-
gna. Non utilizzare raschietti per vetro.
Guarnizione della
porta
Non rimuovere!
Soluzione di lavaggio calda: pulire con un
panno spugna senza grattare. Non utilizzare
per la pulizia raschietti per metallo o per vetro.
Detergenti
Per non danneggiare le diverse superfici con l'utilizzo di
detergenti non appropriati, prestare attenzione alle
indicazioni della tabella.
Non utilizzare
■ detergenti aggressivi o abrasivi;
■ raschietti per metallo o per vetro per la pulizia del
pannello della porta;
■ raschietti per metallo o per vetro per la pulizia della
guarnizione della porta;
■ spugnette dure o abrasive.
■ detergenti a elevato contenuto di alcol.
Lavare bene le spugne nuove prima di utilizzarle.
Zona Detergenti
Lato frontale
dell'apparecchio
Display Pulire con un panno in microfibra o con un
Soluzione di lavaggio calda: pulire con un
panno spugna e asciugare con un panno morbido. Non utilizzare per la pulizia raschietti per
metallo o per vetro.
panno leggermente inumidito. Accertarsi che
non sia bagnato.
55
Page 56

it Malfunzionamento, che fare?
3Malfunzionamento, che
fare?
Malfunzionamento, che fare?
Quando si verificano anomalie, spesso si tratta di guasti
facilmente risolvibili. Prima di rivolgersi al servizio di
assistenza clienti, si prega di tentare di eliminare
autonomamente il guasto, basandosi sulle indicazioni
fornite nella tabella.
Consiglio: Se un piatto non riesce in modo ottimale,
consultare il capitolo che segue che contiene molti
Tabella dei guasti
Guasto Possibile causa Rimedio/avvertenze
L'apparecchio non funziona, nessuna
visualizzazoine nel display
Non si riesce ad avviare l'apparecchio La porta dell'apparecchio non è completamente
Gli alimenti non si riscaldano.
Sul display compare la parola "Demo".
L'illuminazione interna non funziona Illuminazione interna difettosa Rivolgersi al centro di assistenza tecnica autorizzato
Messaggio d'errore "Exxx"* In caso di messaggio d'errore spegnere e riaccen-
* Particolarità:
Messaggio di errore "E0532": Aprire la porta dell'apparecchio e richiuderla.
Messaggio di errore "E6501": Spegnere l’apparecchio. Attendere 10 minuti. Accendere di nuovo l’apparecchio.
--------
La spina non è inserita Collegare l'apparecchio alla corrente
Interruzione dell’alimentazione elettrica Controllare se gli altri elettrodomestici funzionano
Il fusibile è difettoso Verificare se il fusibile dell'apparecchio nell'apposita
Utilizzo improprio Disattivare il fusibile dell'apparecchio nell'apposita
chiusa
L'apparecchio è in modalità demo Disattivare la modalità demo nelle impostazioni di
suggerimenti e avvertenze per la preparazione delle
pietanze.~ "Testati nel nostro laboratorio" a pagina 58
:Avviso – Pericolo di scariche elettriche!
Gli interventi di riparazione effettuati in modo non
conforme rappresentano una fonte di pericolo. Le
riparazioni e le sostituzioni di cavi danneggiati devono
essere effettuate esclusivamente da personale tecnico
adeguatamente istruito dal servizio di assistenza
tecnica. Se l'apparecchio è difettoso, staccare la spina
o il fusibile nella scatola dei fusibili. Rivolgersi al servizio
di assistenza clienti.
scatola è a posto
scatola e riattivarlo dopo ca. 60 secondi
Chiudere la porta dell'apparecchio
base.
Scollegare brevemente l'apparecchio dalla rete (disattivare il fusibile generale dell'impianto o l'interruttore
differenziale all'interno della scatola dei fusibili). Disattivare successivamente la modalità demo entro 3
minuti nel menu Impostazioni di base.
dere l'apparecchio; se l'indicazione scompare, si trattava di un problema eccezionale. Se l'errore compare
ripetutamente o l'indicazione resta fissa, contattare il
servizio assistenza e trasmettere il codice errore.
56
Page 57

Servizio assistenza clienti it
4Servizio assistenza clienti
Servizio assistenza clienti
Il servizio di assistenza tecnica è a disposizione per
eventuali riparazioni. Troviamo sempre la soluzione
adatta, anche per evitare l'intervento del personale del
servizio di assistenza clienti quando non è necessario.
Codice prodotto (E) e codice di produzione
(FD)
Quando si contatta il servizio clienti indicare sempre il
codice prodotto completo (E) e il codice di produzione
(FD), in modo da poter ricevere subito un'assistenza
mirata. La targhetta con i numeri in questione si trova
aprendo lo sportello dell'apparecchio.
Se l'apparecchio è dotato del funzionamento a vapore,
la targhetta di identificazione si trova a destra nella
parte posteriore del pannello.
=1U)'(1U
7\SH
Per avere subito a disposizione le informazioni utili in
caso di necessità, si consiglia di riportare qui i dati
relativi all'apparecchio e il numero di telefono del
servizio di assistenza clienti.
Dati tecnici
Alimentazione di corrente 220-240 V, 50 Hz
Potenza massima assorbita 1300 W
Potenza microonde 900 W (IEC 60705)
Frequenza microonde 2450 MHz
Protezione 10 A
Dimensioni (h/largh./prof.)
Apparecchio 455 x 595 x 565 mm
- Vano di cottura 236 x 445 x 348 mm
Testato VDE (ente di certificazione
tedesco)
Contrassegno CE Sì
Sì
Codice prodotto (E)
Servizio di assistenza
Codice di produzione FD
clienti O
Prestare attenzione al fatto che, in caso di utilizzo
improprio, l'intervento del personale del servizio di
assistenza clienti non è gratuito anche se effettuato
durante il periodo di garanzia.
Trovate i dati di contatto di tutti i paesi nell'accluso
elenco dei centri di assistenza clienti.
Ordine di riparazione e consulenza in caso di guasti
I 800-018346
Linea verde
CH 0848 840 040
Fidatevi della competenza del Costruttore. In questo
modo avrete la garanzia di una riparazione effettuata da
tecnici qualificati del servizio assistenza e con pezzi di
ricambio originali per il vostro apparecchio.
Questo apparecchio è conforme alle norme EN 55011
o CISPR 11. Si tratta di un prodotto del gruppo 2,
classe B.
'Gruppo 2' significa che le microonde vengono
generate ai fini del riscaldamento e della cottura di
alimenti. Classe B indica che l'apparecchio è adatto
all'uso in ambito domestico.
57
Page 58

it Testati nel nostro laboratorio
JTestati nel nostro
laboratorio
Testati nel nostro laboratorio
Qui di seguito, viene proposta una selezione di pietanze
con le relative impostazioni ottimali. Viene indicata la
potenza microonde migliore per ogni piatto. Le
istruzioni sono corredate da consigli sulle stoviglie da
utilizzare e sulla preparazione dei piatti.
Avvertenze
■ I valori della tabella valgono sempre per
l'introduzione dei cibi nel vano di cottura freddo e
vuoto. Prima dell'utilizzo, rimuovere dal vano di
cottura le stoviglie non necessarie.
■ I tempi di cottura riportati nelle tabelle costituiscono
valori indicativi e dipendono dalla qualità e dalle
caratteristiche degli alimenti stessi.
■ Estrarre sempre le stoviglie calde dal vano di cottura
utilizzando una presina.
:Avviso – Pericolo di scottature!
Rimuovendo la stoviglia, potrebbe fuoriuscire del
liquido caldo. Rimuovere attentamente la stoviglia dal
vano di cottura.
Le tabelle seguenti riportano le possibilità di cottura e i
parametri di impostazione per il microonde.
I tempi di cottura riportati nelle tabelle costituiscono
valori indicativi che dipendono dal tipo di stoviglia, dalla
qualità, dalla temperatura e dalle caratteristiche degli
alimenti.
Nelle tabelle sono spesso riportati gli intervalli di tempo.
Impostare dapprima il tempo minimo e, se necessario,
prolungarlo.
I valori delle quantità indicati nelle tabelle potrebbero
essere differenti da quelli di cui si dispone. Per il
funzionamento a microonde esiste a riguardo una
regola generale: doppia quantità - quasi doppia durata,
metà quantità - metà durata.
È possibile collocare la stoviglia al centro del vano di
cottura. In questo modo, le microonde possono
raggiungere tutti i lati delle pietanze.
Scongelamento
Posizionare gli alimenti surgelati in un contenitore
aperto sul fondo del vano di cottura.
Girare o mescolare 1-2 volte gli alimenti. Le porzioni di
maggiori dimensioni devono essere girate
ripetutamente. Quando si girano gli alimenti, rimuovere
il liquido formatosi durante la fase di scongelamento.
Lasciare riposare il cibo scongelato per altri 15-90
minuti a temperatura ambiente, in modo da uniformare
la temperatura. Nel caso di pollame è possibile estrarre
le interiora.
Avvertenza: Collocare la stoviglia sul fondo del vano di
cottura.
Pietanza Peso Potenza microonde in watt,
durata in minuti
Carne intera di manzo, maiale, agnello (disossata o con osso)
Pezzi o fettine di carne di manzo, maiale,
agnello
Carne tritata, mista 200 g 90 W, 10-15 min. Se possibile surgelare in posizione piana.
Pollame o pezzi di pollo 600 g 180 W, 8 min. + 90 W, 10-15 min. Girare di tanto in tanto;
Filetto, cotoletta o fette di pesce 400 g 180 W, 5 min. + 90 W, 10-15 min. Separare le parti scongelate
Pesce intero 300 g 180 W, 3 min. + 90 W, 10-15 min. Girare di tanto in tanto
Verdure, ad es. piselli 300 g 180 W, 10-15 min. Mescolare di tanto in tanto con cautela.
Frutta, ad es. lamponi 300 g 180 W, 6-9 min. Mescolare di tanto in tanto con cautela, sepa-
Burro, sciogliere 125 g 180 W, 1 min. + 90 W, 1-2 min. Rimuovere completamente la confezione.
Pane intero 500 g 180 W, 8 min. + 90 W, 5-10 min. Girare di tanto in tanto
Dolci, asciutti, ad es. torte morbide 500 g 90 W, 10-15 min. Separare le porzioni di dolce l'una dall'altra.
800 g 180 W, 15 min. + 90 W, 15-25 min. Girare ripetutamente.
1000 g 180 W, 20 min. + 90 W, 20-30 min.
1500 g 180 W, 25 min. + 90 W, 25-30 min.
200 g 180 W, 5-8 min. + 90 W, 5-10 min. Separare i pezzi di carne girandoli
500 g 180 W, 8-11 min. + 90 W, 10-15 min.
800 g 180 W, 10 min. + 90 W, 10-15 min.
500 g 180 W, 5 min. + 90 W, 10-15 min.
1000 g 180 W, 15 min. + 90 W, 20-25 min.
1200 g 180 W, 15 min. + 90 W, 20-25 min.
600 g 180 W, 8 min. + 90 W, 15-20 min.
500 g 180 W, 8 min. + 90 W, 5-10 min.
250 g 180 W, 1 min. + 90 W, 2-4 min.
1000 g 180 W, 12 min. + 90 W, 10-20 min.
750 g 180 W, 5 min. + 90 W, 10-15 min.
Avvertenza
Nel frattempo girare ripetutamente e togliere
le porzioni di carne già scongelate.
Rimuovere il liquido formatosi durante lo
scongelamento
rare le parti scongelate.
Solo per dolci senza glassa, panna o crema
58
Page 59

Testati nel nostro laboratorio it
Pietanza Peso Potenza microonde in watt,
Avvertenza
durata in minuti
Dolci, con ripieno succoso, ad es. torta di
frutta, torta di ricotta
Scongelare, riscaldare o cuocere prodotti
surgelati
Togliere i piatti precotti dalla confezione. In una pentola
adatta al forno microonde riscaldano più rapidamente e
in modo più uniforme. I diversi componenti delle
pietanze si scaldano in tempi diversi.
Le pietanze basse si scaldano più rapidamente. Di
conseguenza, è preferibile distribuire le pietanze nella
stoviglia in uno strato più sottile possibile. Si consiglia
di non sovrapporre gli alimenti.
Pietanza Peso Potenza microonde in watt
500 g 180 W, 5 min. + 90 W, 15-20 min. Solo per dolci senza glassa, panna o gelatina.
750 g 180 W, 7 min. + 90 W, 15-20 min.
Coprire sempre gli alimenti. Se non si dispone di un
coperchio adatto, utilizzare un piatto o una pellicola
speciale adatta ai forni a microonde.
Girare o mescolare 2-3 volte durante la cottura.
Dopo aver scaldato il cibo, lasciarlo riposare per altri 2-
5 minuti in modo che la temperatura si uniformi.
Il gusto tipico degli alimenti viene conservato. Per
questo motivo non eccedere nell'uso di sale e spezie.
Avvertenza: Collocare la stoviglia sul fondo del vano di
cottura.
Avvertenza
Durata in minuti
Menu e piatti pronti o precotti
300-400 g 600 W, 8-13 min. Con coperchio
(2-3 portate)
Minestra 400 g 600 W, 8-12 min. Stoviglie con coperchio
Pasticci 500 g 600 W, 10-15 min. Stoviglie con coperchio
Fette o pezzetti di carne con sugo, ad.es. gula-
500 g 600 W, 10-15 min. Stoviglie con coperchio
sch
Pesce, ad es. filetto 400 g 600 W, 10-15 min. Con coperchio
Sformati, ad es. lasagne, cannelloni 450 g 600 W, 10-15 min. Stoviglia senza coperchio
Contorni, ad es. riso, pasta 250 g 600 W, 3-7 min. Stoviglie con coperchio, aggiungere liquido
500 g 600 W, 8-12 min.
Verdure, ad es. piselli, broccoli, carote 300 g 600 W, 7-11 min. stoviglie con coperchio; aggiungere 1 cuc-
600 g 600 W, 14-17 min.
chiaio di acqua
Spinaci con panna 450 g 600 W, 10-15 min. Cuocere senza aggiungere acqua
Riscaldare
:Avviso – Pericolo di bruciature!
Durante il riscaldamento di liquidi si può verificare un
ritardo nel processo di ebollizione. In altri termini, la
temperatura di ebollizione viene raggiunta senza che si
formino le tipiche bollicine di vapore. Anche un urto
leggero del recipiente può causare l'improvviso
traboccare del liquido o la formazione di spruzzi.
Quando si riscalda, aggiungere sempre un cucchiaio
nel contenitore, così si evita un ritardo nel processo di
ebollizione.
Attenzione!
Formazione di scintille: i componenti in metallo, per
esempio i cucchiaini contenuti nei bicchieri, devono
restare a una distanza non inferiore a 2 cm dalle pareti
del vano di cottura e dal lato interno della porta. Le
scintille possono infatti danneggiare gravemente il vetro
interno della porta.
Avvertenze
■ Togliere i piatti precotti dalla confezione. In una
pentola adatta al forno microonde riscaldano più
rapidamente e in modo più uniforme. I diversi
componenti delle pietanze si scaldano in tempi
diversi.
■ Coprire sempre gli alimenti. Se non si dispone di un
coperchio adatto, utilizzare un piatto o una pellicola
speciale adatta ai forni a microonde.
■ Girare o mescolare più volte durante la cottura.
Controllare la temperatura.
■ Dopo aver scaldato il cibo, lasciarlo riposare per altri
2-5 minuti in modo che la temperatura si uniformi.
■ Prelevare sempre le stoviglie utilizzando il guanto da
forno o le presine.
Avvertenza: Collocare la stoviglia sul fondo del vano di
cottura.
59
Page 60

it Testati nel nostro laboratorio
Pietanza Quantità Potenza microonde in watt,
Avvertenza
durata in minuti
Menu e piatti pronti o precotti
600 W, 5-8 min. -
(2-3 portate)
Bevande 125 ml 900 W, ½-1 min. Mettere sempre un cucchiaio nel contenitore,
200 ml 900 W, 1-2 min.
non riscaldare troppo le bevande alcoliche;
controllare di tanto in tanto
500 ml 900 W, 3-4 min.
Alimenti per bambini ad es. biberon 50 ml 360 W, ca. ½ min. Riscaldare il biberon senza tettarella o coper-
100 ml 360 W, ½-1 min.
200 ml 360 W, 1-2 min.
chio; terminata la fase di riscaldamento, scuotere o mescolare bene; controllare
assolutamente la temperatura.
Minestra, 1 tazza da 175 g 600 W, 1-2 min. -
Minestra, 2 tazze da 175 g 600 W, 2-3 min. -
Carne in salsa 500 g 600 W, 7-10 min. -
Pasticcio 400 g 600 W, 5-7 min. -
800 g 600 W, 7-8 min. -
Verdure, 1 porzione 150 g 600 W, 2-3 min. -
Verdure, 2 porzioni 300 g 600 W, 3-5 min. -
Cottura
■ Il gusto tipico degli alimenti viene conservato. Per
questo motivo non eccedere nell'uso di sale e
Avvertenze
■ Le pietanze basse si scaldano più rapidamente. Di
conseguenza, è preferibile distribuire le pietanze
nella stoviglia in uno strato più sottile possibile. Si
consiglia di non sovrapporre gli alimenti.
■ Coprire con un coperchio e far cuocere come
indicato. Se non si dispone di un coperchio adatto,
utilizzare un piatto o una pellicola speciale adatta ai
spezie.
■ Dopo aver cotto il cibo, lasciarlo riposare per altri 2-
5 minuti di modo che la temperatura si uniformi.
■ Prelevare sempre le stoviglie utilizzando il guanto da
forno o le presine.
Avvertenza: Collocare la stoviglia sul fondo del vano di
cottura.
forni a microonde.
Pietanza Quantità Potenza microonde in watt,
Avvertenza
durata in minuti
Pollo intero, fresco senza interiora 1200 g 600 W, 25-30 min. Girare trascorsa metà del tempo impostato.
Filetto di pesce, fresco 400 g 600 W, 7-12 min. -
Verdura, fresca 250 g 600 W, 6-10 min. Tagliare le verdure in pezzi di dimensioni
500 g 600 W, 10-15 min.
uguali;
ogni 100 g di verdure, aggiungere 1-2 cucchiai di acqua;
mescolare di tanto in tanto
Patate 250 g 600 W, 8-10 min. Tagliare le patate in pezzi di dimensioni
500 g 600 W, 10-15 min.
750 g 600 W, 15-22 min.
Riso 125 g 600 W, 4-6 min. +
uguali;
ogni 100 g aggiungere 1 cucchiaio di acqua;
mescolare di tanto in tanto
Aggiungere l'acqua in quantità doppia
180 W, 12-15 min.
250 g 600 W, 6-8 min. +
180 W, 15-18 min.
Dolci, ad es. budino (istantaneo) 500 ml 600 W, 6-8 min. Di tanto in tanto mescolare bene il budino 2-3
volte con la frusta.
Frutta, composta di frutta 500 g 600 W, 9-12 min. mescolare di tanto in tanto
Popcorn per il microonde 100 g 600 W, 3-4 min. Appoggiare sempre la busta dei popcorn su
un vassoio di vetro.;
Rispettare le istruzioni del produttore.
60
Page 61

Consigli per la cottura al microonde
Pietanze sperimentate it
Non sono indicate le impostazioni da effettuare relativamente alla
quantità di cibo che si intende preparare.
Il cibo si è asciugato troppo. La prossima volta impostare un tempo di cottura più breve o selezionare una
Al termine del tempo impostato il cibo non è ancora scongelato, caldo
o cotto.
Al termine del tempo impostato il cibo si è surriscaldato ai bordi, ma la
parte centrale non è ancora cotta.
Dopo lo scongelamento il nucleo centrale del pollame o della carne è
ancora surgelato.
Prolungare o ridurre i tempi di cottura basandosi sulla seguente regola generale: quantità raddoppiata = tempo raddoppiato, quantità dimezzata = tempo
dimezzato
potenza microonde inferiore. Coprire la pietanza e aggiungere più liquido.
Impostare un tempo più lungo. Grandi quantità e alimenti più spessi necessitano di tempi più lunghi.
Durante la cottura mescolare di tanto in tanto e la prossima volta selezionare
una potenza inferiore e un tempo di cottura più lungo.
La prossima volta selezionare una potenza microonde inferiore. Girare più
volte grandi quantità di pollame o di carne.
EPietanze sperimentate
Pietanze sperimentate
La qualità e il funzionamento degli apparecchi a
microonde sono testati da istituti di controllo sulla base
di queste ricette.
Cottura con microonde Solo
Pietanza Potenza microonde in watt, durata in minuti Avvertenza
Latte all'uovo, 1000 g 600 W, 11-12 min. + 180 W, 8-10 min. Stampo pyrex
Pan di Spagna, 475 g 600 W, 7-9 min. Stampo pyrex Ø 22 cm.
Polpettone, 900 g 600 W, 25-30 min. Teglia rettangolare in pyrex, lunghezza 28 cm
Conformi alla norma EN 60705, IEC 60705 e DIN
44547.
Scongelamento con Microonde Solo
Pietanza Potenza microonde in watt, durata in minuti Avvertenza
Carne, 500 g Programma "Scongelamento carne", 500 g
o
180 W, 8 min. + 90 W 7-10 min.
Stampo pyrex Ø 24 cm
61
Page 62

pt
Índice
ptInstruções de serviço
8 Utilização adequada. . . . . . . . . . . . . . . . . . . . . . 63
3 Defeito: O que fazer? . . . . . . . . . . . . . . . . . . . . . 76
( Instruções de segurança importantes . . . . . . . 63
Generalidades . . . . . . . . . . . . . . . . . . . . . . . . . . . . . .63
Micro-ondas . . . . . . . . . . . . . . . . . . . . . . . . . . . . . . . .64
] Causas de danos . . . . . . . . . . . . . . . . . . . . . . . . 66
7 Protecção do meio ambiente . . . . . . . . . . . . . . 66
Eliminação ecológica . . . . . . . . . . . . . . . . . . . . . . . . . 66
* Conhecer o aparelho . . . . . . . . . . . . . . . . . . . . . 67
Painel de comandos . . . . . . . . . . . . . . . . . . . . . . . . . 67
Elementos de comando . . . . . . . . . . . . . . . . . . . . . . . 67
Visor. . . . . . . . . . . . . . . . . . . . . . . . . . . . . . . . . . . . . .67
Menu "Modos de funcionamento" . . . . . . . . . . . . . . . 68
Mais informações. . . . . . . . . . . . . . . . . . . . . . . . . . . . 68
Funções do interior do aparelho . . . . . . . . . . . . . . . . 68
Acessórios . . . . . . . . . . . . . . . . . . . . . . . . . . . . . . . . .68
K Antes da primeira utilização . . . . . . . . . . . . . . . 69
Primeira colocação em funcionamento . . . . . . . . . . . 69
Limpar os acessórios. . . . . . . . . . . . . . . . . . . . . . . . . 69
1 Utilizar o aparelho . . . . . . . . . . . . . . . . . . . . . . . 69
Ligar e desligar o aparelho . . . . . . . . . . . . . . . . . . . .69
Funcionamento. . . . . . . . . . . . . . . . . . . . . . . . . . . . . .69
Regular o modo de funcionamento . . . . . . . . . . . . . .70
4 Serviços Técnicos . . . . . . . . . . . . . . . . . . . . . . . 77
Número E e número FD . . . . . . . . . . . . . . . . . . . . . . .77
Dados Técnicos . . . . . . . . . . . . . . . . . . . . . . . . . . . . .77
J Testado para si no nosso estúdio de cozinha. 78
Descongelamento. . . . . . . . . . . . . . . . . . . . . . . . . . . .78
Descongelar, aquecer ou cozinhar alimentos
ultracongelados . . . . . . . . . . . . . . . . . . . . . . . . . . . . .79
Aquecer . . . . . . . . . . . . . . . . . . . . . . . . . . . . . . . . . . .79
Cozinhar . . . . . . . . . . . . . . . . . . . . . . . . . . . . . . . . . . .80
Conselhos para a utilização do micro-ondas . . . . . . .81
E Refeições de teste . . . . . . . . . . . . . . . . . . . . . . . 81
Cozinhar apenas com micro-ondas . . . . . . . . . . . . . .81
Descongelar apenas com micro-ondas . . . . . . . . . . .81
Produktinfo
Obtenha mais informações relativas a produtos,
acessórios, peças sobresselentes e Assistência
Técnica na Internet: www.siemens-home.bsh-
group.com e na loja Online: www.siemens-home.bshgroup.com/eshops
^ O microondas . . . . . . . . . . . . . . . . . . . . . . . . . . . 70
Recipiente . . . . . . . . . . . . . . . . . . . . . . . . . . . . . . . . .70
Níveis de micro-ondas . . . . . . . . . . . . . . . . . . . . . . . .71
Regular o micro-ondas. . . . . . . . . . . . . . . . . . . . . . . .71
O Alarme . . . . . . . . . . . . . . . . . . . . . . . . . . . . . . . . . 72
Regular o temporizador . . . . . . . . . . . . . . . . . . . . . . .72
P Programas . . . . . . . . . . . . . . . . . . . . . . . . . . . . . 72
Regular um programa . . . . . . . . . . . . . . . . . . . . . . . .72
Recomendações relativas aos programas. . . . . . . . . 73
Tempo de repouso. . . . . . . . . . . . . . . . . . . . . . . . . . . 73
Tabela de programas. . . . . . . . . . . . . . . . . . . . . . . . . 73
Q Regulações base . . . . . . . . . . . . . . . . . . . . . . . . 74
Alterar as regulações . . . . . . . . . . . . . . . . . . . . . . . . .74
Lista das regulações . . . . . . . . . . . . . . . . . . . . . . . . . 74
Falha de corrente. . . . . . . . . . . . . . . . . . . . . . . . . . . . 74
Alterar a hora . . . . . . . . . . . . . . . . . . . . . . . . . . . . . . . 75
D Limpeza. . . . . . . . . . . . . . . . . . . . . . . . . . . . . . . . 75
Produto de limpeza . . . . . . . . . . . . . . . . . . . . . . . . . . 75
62
Page 63

Utilização adequada pt
8Utilização adequada
Utilização adequada
Leia atentamente o presente manual. Só
assim poderá utilizar o seu aparelho de forma
segura e correcta. Guarde as instruções de
utilização e montagem para consultas futuras
ou para futuros utilizadores.
Este aparelho destina-se apenas à montagem
embutida. Respeite as instruções de
montagem especiais.
Examine o aparelho depois de o desembalar.
Se forem detectados danos de transporte, não
ligue o aparelho.
Apenas os técnicos licenciados estão
autorizados a ligar aparelhos sem ficha. A
garantia não cobre danos causados por uma
ligação incorrecta.
Este aparelho destina-se exclusivamente a
uso privado e doméstico. Use o aparelho
apenas para a preparação de refeições e
bebidas. Vigie o aparelho durante o
funcionamento. Use o aparelho apenas em
espaços fechados.
O aparelho foi concebido para ser utilizado
até a uma altitude de 4000 metros acima do
nível do mar, no máximo.
Este aparelho pode ser usado por crianças
com mais de 8 anos e por pessoas com
limitações físicas, sensoriais ou mentais ou
com pouca experiência ou conhecimentos, se
estiverem sob vigilância de uma pessoa
responsável pela sua segurança ou tiverem
sido instruídas acerca da utilização segura do
aparelho e tiverem compreendido os perigos
decorrentes da sua utilização.
As crianças não devem brincar com o
aparelho. As tarefas de limpeza e manutenção
por parte do utilizador não devem ser
efectuadas por crianças, a não ser que
tenham mais de 8 anos e estejam sob
vigilância.
As crianças menores de 8 anos devem
manter-se afastadas do aparelho e do cabo
de ligação.
Insira sempre os acessórios com o lado
correto no interior do aparelho.
(Instruções de segurança
importantes
Instruções de segurança importantes
Generalidades
:Aviso – Perigo de incêndio!
Os objectos inflamáveis guardados no interior
do aparelho podem incendiar-se. Nunca
guarde objectos inflamáveis dentro do
aparelho. Nunca abra a porta do aparelho se
surgir fumo no interior. Desligue o aparelho e
puxe a ficha da tomada ou desligue o
disjuntor no quadro eléctrico.
:Aviso – Perigo de queimaduras!
■ Os acessórios ou recipientes ficam muito
quentes. Use sempre uma pega de cozinha
para retirar os acessórios ou recipientes
quentes do interior do aparelho.
Perigo de queimaduras!
■ Os vapores de álcool podem incendiar-se
no interior quente do aparelho. Nunca
prepare refeições com grandes
quantidades de bebidas com elevado teor
de álcool. Use apenas pequenas
quantidades de bebidas com elevado teor
de álcool. Abra a porta do aparelho com
cuidado.
:Aviso – Perigo de queimaduras!
■ As peças que se encontram acessíveis
ficam quentes durante o funcionamento do
aparelho. Nunca toque nas peças quentes.
Manter fora do alcance das crianças.
Perigo de queimaduras!
■ Ao abrir a porta do aparelho, pode sair
vapor quente. Abra a porta do aparelho
com cuidado. Mantenha as crianças
afastadas.
Perigo de queimaduras!
■ A água no interior quente do aparelho pode
transformar-se em vapor de água quente.
Nunca deite água no interior quente do
aparelho.
:Aviso – Perigo de ferimentos!
■ O vidro riscado da porta do aparelho pode
rachar. Não use raspadores de
vitrocerâmica, nem detergentes agressivos
ou abrasivos.
Perigo de ferimentos!
■ As dobradiças da porta do aparelho
movimentam-se ao abrir e fechar a porta e
pode entalar-se. Não colocar as mãos na
zona das dobradiças.
63
Page 64

pt Instruções de segurança importantes
:Aviso – Perigo de choque eléctrico!
■ As reparações indevidas são perigosas. As
reparações e substituições de cabos
danificados só podem ser efectuadas por
técnicos especializados do Serviço de
Assistência Técnica. Se o aparelho estiver
avariado, puxe a ficha da tomada ou
desligue o disjuntor no quadro eléctrico.
Contacte o Serviço de Assistência Técnica.
Perigo de choque eléctrico!
■ O isolamento dos cabos de
electrodomésticos pode derreter em
contacto com partes quentes do aparelho.
Nunca coloque os cabos de
electrodomésticos em contacto com partes
quentes do aparelho.
Perigo de choque eléctrico!
■ A humidade que se infiltra no aparelho
pode dar origem a um choque eléctrico.
Não utilize aparelhos de limpeza a alta
pressão ou de limpeza a vapor.
Perigo de choque eléctrico!
■ Um aparelho avariado pode causar
choques eléctricos. Nunca ligue um
aparelho avariado. Puxe a ficha da tomada
ou desligue o disjuntor no quadro eléctrico.
Contacte o Serviço de Assistência Técnica.
:Aviso – Perigo devido a magnetismo!
No painel de comandos ou nos elementos de
comando estão aplicados ímanes
permanentes. Estes podem afetar implantes
eletrónicos, por exemplo, pacemakers ou
bombas de insulina. Se for portador de
implantes eletrónicos, respeite uma distância
mínima de 10 cm em relação ao painel de
comandos.
Micro-ondas
:Aviso – Perigo de incêndio!
■ A utilização do aparelho para fins diferentes
daqueles a que se destina é perigosa e
pode causar danos.
Não é permitida a secagem de alimentos
ou vestuário, o aquecimento de pantufas,
almofadas de sementes ou de cereais,
esponjas, panos de limpeza húmidos e
outros artigos semelhantes.
Por exemplo, pantufas, almofadas de
sementes ou de cereais aquecidas no
aparelho podem incendiar-se mesmo após
algumas horas. Use o aparelho apenas
para a preparação de refeições e bebidas.
Perigo de incêndio!
■ Os alimentos podem incendiar-se. Nunca
aqueça alimentos dentro de embalagens
próprias para manter os alimentos quentes.
Nunca aqueça, sem vigilância, alimentos
dentro de recipientes de plástico, papel ou
outros materiais inflamáveis.
Nunca regule a potência de microondas ou
o respectivo tempo para valores
demasiado elevados. Oriente-se pelos
dados constantes neste manual de
instruções.
Nunca seque alimentos no microondas.
Nunca descongele ou aqueça alimentos
com baixo teor de água, p. ex., pão, com
uma potência muito elevada do microondas
ou durante muito tempo.
Perigo de incêndio!
■ O óleo alimentar pode incendiar-se. Nunca
aqueça óleo alimentar sozinho no
microondas.
:Aviso – Perigo de explosão!
Os líquidos ou outros alimentos aquecidos
dentro de recipientes fechados podem
explodir. Nunca aqueça líquidos ou outros
alimentos dentro de recipientes fechados.
:Aviso – Perigo de queimaduras!
■ Os alimentos com casca ou pele firme
podem rebentar durante o aquecimento, e
até mesmo depois. Nunca coza ovos com
casca nem aqueça ovos cozidos. Nunca
cozinhe crustáceos no aparelho. No caso
de ovos estrelados ou escalfados pique
previamente as gemas. A casca ou pele
dos alimentos com casca ou pele firme,
p. ex., maçãs, tomates, batatas ou
salsichas, pode rebentar. Pique a casca ou
a pele antes de os aquecer.
Perigo de queimaduras!
■ O calor não se distribui uniformemente na
comida para bebés. Nunca aqueça comida
para bebés em recipientes fechados. Retire
sempre a tampa ou a tetina. Após o
aquecimento, mexa ou agite bem. Antes de
dar o alimento à criança, verifique a
temperatura.
Perigo de queimaduras!
■ Os alimentos aquecidos emitem calor. Os
recipientes podem ficar quentes. Use
sempre uma pega de cozinha para retirar
os recipientes ou acessórios do interior do
aparelho.
Perigo de queimaduras!
■ No caso de alimentos embalados
hermeticamente, a embalagem pode
rebentar. Respeite sempre as indicações
na embalagem. Use sempre uma pega
para retirar as refeições do interior do
aparelho.
Perigo de queimaduras!
64
Page 65

Instruções de segurança importantes pt
■ As peças que se encontram acessíveis
ficam quentes durante o funcionamento do
aparelho. Nunca toque nas peças quentes.
Manter fora do alcance das crianças.
:Aviso – Perigo de queimaduras!
■ Ao aquecer líquidos, pode ocorrer uma
ebulição retardada. Ou seja, o líquido pode
alcançar o ponto de ebulição sem que
surjam as típicas bolhas de vapor. Ao agitar
o recipiente, mesmo ligeiramente, o líquido
quente pode subitamente deitar por fora e
salpicar. Ao aquecer, coloque sempre uma
colher dentro do recipiente. Assim, evita a
ebulição retardada.
■ Através da porta do aparelho ou do
respectivo vedante pode escapar energia
de microondas, se estiverem danificados.
Nunca utilize o aparelho se a porta ou o
vedante da porta estiverem danificados.
Contacte o Serviço de Assistência Técnica.
Perigo de danos graves para a saúde!
■ Os aparelhos sem cobertura da caixa
deixam escapar energia de microondas.
Nunca retire a cobertura da caixa. Para
trabalhos de manutenção ou reparação,
contacte o Serviço de Assistência Técnica.
:Aviso – Perigo de ferimentos!
■ Os recipientes impróprios podem rebentar.
Os recipientes de porcelana e cerâmica
podem ter pequenos orifícios nas pegas e
tampas. Por detrás desses orifícios
esconde-se uma cavidade. A humidade
que penetra na cavidade pode fazer
rebentar o recipiente. Use exclusivamente
recipientes próprios para microondas.
Perigo de ferimentos!
■ Louça e recipientes de metal podem
provocar faíscas no modo de microondas.
O aparelho será danificado. Nunca use
recipientes de metal no modo de
microondas.
:Aviso – Perigo de choque eléctrico!
O aparelho trabalha com alta tensão. Nunca
retire a caixa do aparelho.
:Aviso – Perigo de danos graves para a
saúde!
■ A falta de limpeza pode causar danos na
superfície do aparelho. Existe o perigo de
escapar energia de micro-ondas. Limpe o
aparelho regularmente e remova de
imediato eventuais restos de comida.
Mantenha o interior do aparelho, o vedante,
a porta e o batente da porta sempre
limpos. ~ "Limpeza" na página 75
Perigo de danos graves para a saúde!
65
Page 66

pt Causas de danos
]Causas de danos
Causas de danos
Atenção!
■ Transportar o aparelho: não transporte nem segure
o aparelho pela pega da porta. A pega não suporta
o peso do aparelho e pode partir-se.
■ Faíscas: o metal - p. ex. a colher dentro do copo -
tem de ficar afastado, pelo menos, 2 cm das
paredes do interior do aparelho e do interior da
porta. Eventuais faíscas podem danificar o vidro
interior da porta.
■ Recipientes de alumínio: Não coloque recipientes de
alumínio no interior do aparelho. As faíscas daí
resultantes danificam o aparelho.
■ Funcionamento do micro-ondas sem alimentos: O
funcionamento do aparelho sem alimentos no seu
interior causa uma sobrecarga. Nunca inicie o
micro-ondas sem alimentos no interior, à exceção
de um curto teste de loiça. ~ "O microondas"
na página 70
7Protecção do meio
ambiente
Protecção do meio ambiente
Eliminação ecológica
Elimine a embalagem de forma ecológica.
Este aparelho está marcado em conformidade
com a Directiva 2012/19/UE relativa aos
resíduos de equipamentos eléctricos e
electrónicos (waste electrical and electronic
equipment - WEEE).
A directiva estabelece o quadro para a criação
de um sistema de recolha e valorização dos
equipamentos usados válido em todos os
Estados Membros da União Europeia.
■ Humidade no interior do aparelho: a presença
prolongada de humidade no interior do aparelho
pode originar corrosão. Após a utilização deixe
secar o interior do aparelho. Não guarde alimentos
húmidos durante muito tempo dentro do aparelho
fechado. Não guarde alimentos no interior do
aparelho.
■ Vedante da porta muito sujo: se o vedante da porta
estiver muito sujo, a porta do aparelho deixa de
fechar bem durante o funcionamento. As fachadas
dos móveis contíguos podem ser
danificadas.Mantenha o vedante sempre limpo.
~ "Limpeza" na página 75
■ Deixar arrefecer com a porta do aparelho aberta:
deixe o interior do aparelho arrefecer sempre com a
porta fechada. Não entale nada na porta do
aparelho.Mesmo que a porta esteja apenas
entreaberta, as fachadas dos móveis contíguos
podem, com o tempo, ser danificadas.
■ Porta do aparelho enquanto superfície de apoio: não
se sente nem coloque nada sobre a porta do
aparelho aberta. Não coloque recipientes ou
acessórios em cima da porta do aparelho.
■ Pipocas no micro-ondas: nunca regule uma potência
de micro-ondas demasiado elevada. Utilize no
máximo 600W. Coloque o saco das pipocas sempre
dentro de um prato de vidro. O vidro pode saltar
devido a sobrecarga.
66
Page 67

Conhecer o aparelho pt
*Conhecer o aparelho
Conhecer o aparelho
Neste capítulo explicamos as indicações e os
elementos de comando. Além disso, ficará a conhecer
as diferentes funções do seu aparelho.
Conselho: Dependendo do tipo de aparelho, poderá
haver diferenças nas cores e nos pormenores.
POPGG
NFOV
O
Painel de comandos
Através do painel de comandos, regule as diferentes
funções do seu aparelho, com o auxílio de teclas,
campos de toque e um seletor rotativo. O visor indicalhe as regulações atuais.
Com o aparelho ligado, a visão geral apresenta o
painel de comandos com um modo de funcionamento
selecionado.
##
PLQV:
TUBSUTUPQ
Teclas
(
As teclas à esquerda e direita do seletor rotativo
possuem um ponto de pressão. Prima a tecla
para o acionamento.
Seletor rotativo
0
O seletor rotativo pode ser rodado para a
esquerda ou para direita.
Visor
8
No visor são apresentados os valores de
regulação atuais, as opções possíveis ou também
textos informativos.
Campos tácteis
@
Por baixo dos campos tácteis à esquerda ¾ e
direita ¿ do visor existem sensores. Toque numa
das teclas para selecionar a função.
Elementos de comando
Os elementos de comando individuais estão adaptados
às diferentes funções do aparelho. Assim, pode regular
o aparelho de forma simples e rápida.
Teclas e campos tácteis
O significado das várias teclas e campos tácteis é aqui
explicado de forma resumida.
Teclas Significado
on/off Ligar e desligar o aparelho
menu Menu Abrir o menu dos modos de fun-
cionamento
l
0
start/stop Iniciar ou parar o funcionamento
Campos de toque
Informação Visualizar indicações
Função de tempo Regular o temporizador
¾
¿
--------
Seletor rotativo
Com o seletor rotativo, pode alterar os modos de
funcionamento e os valores de regulação apresentados
no visor.
Na maioria das listas de seleção, p. ex., Programas,
após o último ponto, recomeça-se com o primeiro.
Em algumas listas de seleção, p. ex., Tempo de
duração, tem de rodar novamente o seletor rotativo
para trás, quando são alcançados os valores mínimo
ou máximo.
Campo à esquerda
do visor
Campo à direita do
visor
Navegação para a esquerda
Navegação para a direita
Visor
O visor está estruturado de modo a permitir a leitura
imediata das informações.
O valor que poderá ser regulado num determinado
momento é realçado. É apresentado com letras
brancas sobre fundo escuro.
Linha de estado
A linha de estado encontra-se na parte superior do
visor. São aí apresentadas a hora, o tempo do
temporizador e a duração do programa.
Linha de progresso
Com base na linha de progresso, visualiza o ponto de
situação atual, p. ex., do tempo de duração. A linha reta
por baixo dos valores de ajuste preenche-se da
esquerda para a direita, consoante o progresso do
funcionamento em curso.
67
Page 68

pt Conhecer o aparelho
Menu "Modos de funcionamento"
O menu está subdividido em diferentes modos de
funcionamento. Pode aceder rapidamente à função
pretendida.
Consoante o tipo de aparelho, existe um número
diferente de modos de funcionamento.
Modo de funcionamento Utilização
Micro-ondas Selecionar potências do micro-
ondas
Programas Programas automáticos
Preparar os alimentos selecionados com toda a facilidade
Regulações ~ "Regulações
base" na página 74
--------
Pode adaptar as regulações base
do aparelho aos seus hábitos.
Mais informações
Na maioria dos casos, o aparelho fornece-lhe
indicações e outras informações acerca da ação que
está a ser realizada no momento. Para o efeito, prima a
tecla l. A indicação é apresentada durante alguns
segundos. No caso de indicações mais longas, folheie
até ao fim com o seletor rotativo.
Algumas indicações aparecem automaticamente, p.
ex., para efeitos de confirmação, como solicitação ou
aviso.
A nota pode ser removida pressionando novamente a
tecla l.
Funções do interior do aparelho
Atenção!
Não tape a fenda de ventilação. Caso contrário, o
aparelho sobreaquece.
Conselhos
■ Durante o funcionamento do micro-ondas, o
aparelho permanece frio. Apesar disso, a ventoinha
de arrefecimento liga-se. Esta pode continuar a
funcionar, mesmo que o funcionamento do micro-
ondas já tenha terminado.
■ Pode surgir água de condensação no vidro da
porta, nas paredes interiores e na base. Essa
situação é normal e não afeta o funcionamento dos
micro-ondas. Depois de cozinhar os alimentos,
remova a água de condensação.
Acessórios
O seu aparelho inclui os seguintes acessórios:
Tabuleiro de vidro
Para descongelar e cozinhar alimentos.
Utilize apenas acessórios originais do fabricante do seu
aparelho, pois destinam-se especificamente ao seu
aparelho.
Poderá adquirir acessórios no Serviço de Assistência
Técnica, numa loja especializada ou através da
Internet.
Conselho: É possível colocar recipientes adequados
para micro-ondas na base do forno (nível 0).
As funções do interior do aparelho facilitam o
funcionamento do seu aparelho. Assim, toda a
superfície do interior do aparelho, p. ex., é iluminada e
uma ventoinha de arrefecimento protege o aparelho
contra um sobreaquecimento.
Iluminação do interior do aparelho
Ao abrir a porta do aparelho, a iluminação do interior
do aparelho liga-se. Se a porta permanecer aberta
durante mais de aprox. 5 minutos, a iluminação do
interior do aparelho volta a desligar-se. Se abrir e
fechar novamente a porta do aparelho, a iluminação do
interior do forno acende-se.
Em todos os modos de funcionamento, a iluminação
do interior do aparelho liga-se assim que o
funcionamento é iniciado. Quando o funcionamento
estiver concluído, desliga-se.
Conselho: Se o funcionamento for parado através da
abertura da porta do aparelho, é necessário reiniciar o
funcionamento com a tecla "start/stop" l, após o fecho
da porta do aparelho.
Ventoinha de arrefecimento
A ventoinha de arrefecimento liga em caso de
necessidade. O ar quente sai por cima da porta.
Após o funcionamento, a ventoinha de arrefecimento
pode continuar a funcionar por inércia durante um
determinado período de tempo.
68
Page 69

Antes da primeira utilização pt
KAntes da primeira
utilização
Antes da primeira utilização
Antes de poder utilizar o seu novo aparelho, é
necessário efetuar algumas regulações.
Primeira colocação em funcionamento
Após a ligação elétrica ou uma falha de corrente,
surgem no visor as regulações para a primeira
colocação em funcionamento. Pode levar alguns
segundos até aparecer a solicitação.
Conselho: Pode voltar a alterar estas regulações a
qualquer altura, nas regulações base.
Regular o idioma
1. Com o seletor rotativo, regule o idioma pretendido.
2. Toque na seta ¿.
Surge a regulação seguinte.
Acertar a hora
1. Com o seletor rotativo, acerte a hora atual.
2. Toque na seta ¿
Acertar a data
1. Acerte o dia atual com o seletor rotativo.
2. Para confirmar, toque na seta ¿.
3. Acerte o mês atual com o seletor rotativo.
4. Para confirmar, toque na seta ¿.
5. Acerte o ano atual com o seletor rotativo.
6. Para confirmar, toque na seta ¿.
No visor surge uma indicação de que a primeira
colocação em funcionamento está concluída.
Limpar os acessórios
Antes da primeira utilização, lave bem os acessórios
com uma solução de água quente e detergente e um
pano macio.
1Utilizar o aparelho
Utilizar o aparelho
Já está familiarizado com os elementos de comando e
o seu modo de funcionamento. Agora explicamos
como poderá regular o seu aparelho. Ficará a saber o
que acontece ao ligar e desligar o aparelho e como se
regulam os modos de funcionamento.
Ligar e desligar o aparelho
Antes de efetuar qualquer regulação no seu aparelho, é
necessário ligá-lo.
Conselho: O temporizador também pode ser regulado
com o aparelho desligado. Algumas indicações e
informações permanecem visíveis no visor, mesmo
com o aparelho desligado.
Se não estiver a precisar do aparelho, desligue-o. Se
não for efetuada qualquer regulação durante um
período de tempo prolongado, o aparelho desliga-se
automaticamente.
Ligar o aparelho
Ligue o aparelho com a tecla "on/off".
A indicação "on/off" por cima da tecla é iluminada a
azul.
No visor surge o logótipo Siemens e, depois disso, a
potência máxima do micro-ondas.
O aparelho está pronto a funcionar.
Consulte em cada um dos capítulos como regular os
modos de funcionamento.
Desligar o aparelho
Desligue o aparelho com a tecla "on/off".
A iluminação por cima da tecla apaga-se.
Uma função eventualmente em curso é interrompida.
A hora e a data aparecem no visor.
Conselho: Nas regulações base pode definir se a hora
e a data devem ou não ser apresentadas com o
aparelho desligado.
Funcionamento
Alguns passos de operação são iguais em todos os
modos de funcionamento. A seguir, ficará a conhecer
os passos de operação básicos.
Iniciar o funcionamento
Deve iniciar cada funcionamento com a tecla "start/
stop".
Depois de iniciar, as suas regulações são
apresentadas no visor. Com base na linha de
progresso, visualiza o ponto de situação atual, p. ex.,
do tempo de duração.
Conselho: Se o funcionamento for parado através da
abertura da porta do aparelho, é necessário reiniciar o
funcionamento com a tecla "start/stop", após o fecho
da porta do aparelho.
69
Page 70

pt O microondas
Parar o funcionamento
A tecla "start/stop" permite-lhe parar e reiniciar o
funcionamento.
Para apagar todas as regulações, prima a tecla "on/
off".
Conselhos
■ Abrindo a porta do aparelho, o funcionamento é
também parado.
■ A ventoinha de arrefecimento pode continuar a
funcionar após uma interrupção ou cancelamento
do funcionamento.
Regular o modo de funcionamento
Depois de ligar o aparelho, surge o modo de
funcionamento recomendado regulado. Pode iniciar
esta regulação de imediato.
Caso pretenda regular outro modo de funcionamento,
poderá encontrar descrições detalhadas a esse
respeito nos capítulos correspondentes.
Por norma, aplica-se o seguinte:
1. Prima a tecla "Menu".
O menu Modos de funcionamento abre-se.
2. Com o seletor rotativo, selecione o modo de
funcionamento pretendido.
Consoante o modo de funcionamento, estão
disponíveis diferentes possibilidades de seleção.
3. Com a seta ¿, acede ao modo de funcionamento
selecionado.
4. Altere a seleção com o seletor rotativo.
Altere outras regulações consoante a seleção.
5. Inicie com a tecla "start/stop".
No visor surge um período de tempo. As regulações
e a linha de progresso estão visíveis.
Conselho: Se pretender sair da regulação atual, aceda
novamente ao nível dos modos de funcionamento
através da tecla "Menu".
^O microondas
O microondas
O micro-ondas permite-lhe cozinhar, aquecer ou
descongelar os seus alimentos de forma
particularmente rápida.
Para utilizar corretamente o micro-ondas, observe as
indicações relativas aos recipientes e oriente-se pelos
dados constantes das tabelas de aplicação, no fim do
manual de instruções. ~ "Testado para si no nosso
estúdio de cozinha" na página 78
Recipiente
Nem todos os recipientes são adequados para microondas. Para que os seus alimentos sejam aquecidos e
o aparelho não fique danificado, utilize apenas
recipientes adequados para micro-ondas.
Recipientes adequados
São adequados recipientes resistentes ao calor, em
vidro, vitrocerâmica, porcelana, cerâmica ou plástico
resistente a altas temperaturas. Os micro-ondas
penetram nestes materiais.
Pode também utilizar recipientes para servir. Assim,
não precisa de realizar qualquer transferência. Utilize
recipientes com decoração em ouro ou prata apenas
se o fabricante garantir que os mesmos são
adequados para micro-ondas.
Recipientes inadequados
Recipientes metálicos são inadequados. Os microondas não penetram no metal. Em recipientes
metálicos fechados, os alimentos permanecem frios.
Atenção!
Faíscas: o metal - p. ex. a colher dentro do copo - tem
de ficar afastado, pelo menos, 2 cm das paredes do
interior do aparelho e do interior da porta. Eventuais
faíscas podem danificar o vidro interior da porta.
70
Teste de loiça
Nunca ligue o micro-ondas sem alimentos. A única
exceção é o breve teste de loiça.
Se não estiver seguro de que o seu recipiente é
adequado para micro-ondas, faça este teste.
1. Coloque o recipiente vazio no interior do aparelho,
durante ½ - 1 minuto, com potência máxima.
2. Verifique, entretanto, a temperatura do recipiente.
O recipiente deve permanecer frio ou morno.
Se ficar quente ou se surgirem faíscas, o recipiente é
inadequado.
Interrompa o teste.
:Aviso – Perigo de queimaduras!
As peças que se encontram acessíveis ficam quentes
durante o funcionamento do aparelho. Nunca toque nas
peças quentes. Manter fora do alcance das crianças.
Page 71

Níveis de micro-ondas
As seguintes potências do micro-ondas estão à sua
disposição.
As potências do micro-ondas são níveis e nem sempre
correspondem à quantidade de Watt exata que o
aparelho utiliza.
Nível Alimentos Tempo de dura-
ção máximo
90 W para descongelar alimentos sensíveis 1 h 30 min.
180 W para descongelar e continuar a leve-
1 h 30 min.
dar
360 W para cozinhar peixe e para aquecer
1 h 30 min.
alimentos sensíveis
600 W para aquecer e cozinhar alimentos 1 h 30 min.
900 W para aquecer líquidos 30 min.
Valores recomendados:
O aparelho recomenda um tempo de duração para
cada potência do micro-ondas. Pode assumir este
tempo de duração ou alterá-lo no respetivo intervalo.
A definição máxima está prevista para o aquecimento
de líquidos. Para proteger o aparelho, a potência
máxima do micro-ondas é reduzida durante algum
tempo. A potência total ficará novamente disponível
após um período de arrefecimento.
Regular o micro-ondas
Exemplo: potência do micro-ondas 600 W, tempo de
duração 5 minutos.
1. Prima a tecla "on/off".
O aparelho está pronto a funcionar. No visor são
sugeridas a potência máxima do micro-ondas e um
tempo de duração, que poderão ser alterados a
qualquer altura.
2. Selecione a potência do micro-ondas pretendida
com o seletor rotativo.
PLQV:
O microondas pt
PLQV:
5. Inicie com a tecla "start/stop".
PLQV:
TUBSUTUPQ
TUBSUTUPQ
O aparelho começa a funcionar. Inicia-se a
contagem decrescente do tempo de duração no
visor.
Conselhos
■ Ao ligar o aparelho, surge sempre no visor a
potência máxima do micro-ondas como sugestão.
■ Se, entretanto, abrir a porta do aparelho, a ventoinha
de arrefecimento pode continuar a funcionar.
Tempo de duração terminado
Ouve-se um sinal.
O funcionamento está terminado.
Terminar o sinal antecipadamente:
Toque na tecla 0.
Conselho: Depois de tocar na tecla 0, surge a função
de temporizador, que desaparece automaticamente
após um breve período de tempo. Toque novamente na
tecla 0 e a função de temporizador desaparece de
imediato.
Desligue o aparelho com a tecla "on/off".
POPGG
NFOV
O
No visor são apresentadas a potência do microondas e um tempo de duração recomendado.
3. Toque na seta ¿.
O tempo de duração pode ser regulado.
4. Com o seletor rotativo, regule o tempo de duração
pretendido.
Alterar o tempo de duração
É possível a qualquer altura.
Altere o tempo de duração com o seletor rotativo.
O funcionamento é retomado.
Alterar a potência do micro-ondas
É possível a qualquer altura.
Mude para a potência do micro-ondas com a seta ¾.
Regule a potência do micro-ondas pretendida com o
seletor rotativo.
O tempo de duração permanece inalterado.
O funcionamento é retomado.
71
Page 72

pt Alarme
Conselho: Se o tempo de duração regulado exceder o
tempo de duração máximo para a potência do microondas de 900 W, esta é automaticamente reduzida. O
funcionamento não continua. Inicie o funcionamento
com a tecla "start/stop"
OAlarme
Alarme
O temporizador pode ser utilizado como timer de
cozinha. O temporizador funciona em paralelo com
outras regulações. Pode regulá-lo a qualquer altura,
mesmo que o aparelho esteja desligado. Possui um
sinal próprio, para que ouça se o temporizador ou um
tempo de duração chegou ao fim.
Regular o temporizador
Cancelar o temporizador
Caso pretenda cancelar o temporizador, reponha
novamente por completo o tempo do temporizador.
Depois de assumida a alteração, o símbolo deixa de
estar aceso.
É possível regular, no máximo, 24 horas.
Quanto mais alto for o valor, maiores serão os
intervalos de tempo.
1. Premir a tecla 0.
É apresentado o alarme.
2. Regule o tempo do temporizador com o seletor
rotativo.
$ODUPHPLQV
3. Inicie com a tecla 0.
TUBSUTUPQ
Conselho: O temporizador também inicia o seu
funcionamento automaticamente após alguns
segundos.
O tempo de temporizador começa a decorrer. Após um
breve período de tempo, a indicação regressa ao início.
São apresentados na linha de estado um símbolo de
alarme e a contagem decrescente.
Uma vez terminado o tempo do temporizador, ouve-se
um sinal. A tecla 0 permite-lhe eliminar o sinal
antecipadamente.
PProgramas
Programas
Os programas permitem-lhe preparar refeições com
toda a facilidade. Selecione um programa e introduza o
peso dos alimentos. O programa assume a regulação
ideal.
Regular um programa
Exemplo: programa "Descongelar pão", 250 g de peso.
1. Prima a tecla "on/off".
O aparelho está pronto a funcionar.
2. Prima a tecla "Menu".
São apresentados os modos de funcionamento.
3. Selecione com o seletor rotativo "Programas".
4. Toque na seta ¿.
O primeiro programa surge no visor.
5. Regule o programa pretendido com o seletor
rotativo.
POPGG
NFOV
O
PLQV
J'HVFRQJHODUSmR
!
Conselhos
■ O temporizador permanece visível no visor, se o
aparelho estiver desligado.
■ Se já estiver em curso um modo de funcionamento,
para selecionar o temporizador, toque na tecla 0. O
tempo do temporizador é apresentado durante
algum tempo e pode ser alterado.
Alterar o temporizador
Para alterar o tempo do temporizador, toque na
tecla 0. O tempo do temporizador é apresentado e
pode ser alterado com o seletor rotativo.
72
O programa pretendido está selecionado. No visor
surge um valor recomendado para o peso.
6. Toque na seta ¿.
O peso pode ser regulado.
7. Regule o peso pretendido com o seletor rotativo.
Page 73

8. Toque na seta ¿.
PLQV
J'HVFRQJHODUSmR
!
TUBSUTUPQ
É apresentada a indicação de preparação.
9. Inicie com a tecla "start/stop".
O aparelho começa a funcionar. Inicia-se a
contagem decrescente do tempo de duração no
visor.
Conselhos
■ O tempo de duração é calculado pelos programas.
■ No caso de alguns alimentos, durante a preparação,
surgem no visor indicações para virar ou mexer.
Siga as indicações. Abrindo a porta do aparelho, o
funcionamento para. Após o fecho da porta do
aparelho, reinicie o funcionamento. Mesmo que não
vire ou mexa os alimentos, o programa continua
normalmente até ao fim.
Recomendações relativas aos programas
Coloque os alimentos no interior do aparelho frio.
Retire os alimentos da embalagem e pese-os. Se não
for possível introduzir o peso exato, arredonde-o para
cima ou para baixo.
Para os programas, utilize sempre recipientes
adequados para micro-ondas, p. ex., em vidro ou
cerâmica. Observe, a este respeito, as indicações
relativas a recipientes na tabela de programas.
No seguimento das indicações, poderá encontrar uma
tabela com os alimentos apropriados, a respetiva faixa
de peso e os recipientes necessários.
Não é possível regular pesos fora da faixa de peso.
Programas pt
■ Descongele pão apenas na quantidade necessária,
pois o pão fica duro depressa.
■ Ao descongelar carne ou aves, produz-se líquido.
Remova-o ao virar os alimentos e não o reutilize
nem o faça entrar em contacto com outros
alimentos em nenhuma circunstância.
■ Depois de virar, remova a carne picada já
descongelada.
■ Coloque a ave inteira sobre o recipiente, primeiro
com a parte do peito; no caso de pedaços de aves,
primeiro com a parte da pele.
Legumes:
■ Legumes frescos: corte em pedaços de igual
tamanho. Adicione uma colher de sopa de água por
100 g.
■ Legumes congelados: são apenas adequados os
legumes branqueados e não pré-cozidos. Legumes
ultracongelados com molho de natas são
inadequados. Adicione 1 a 3 colheres de sopa de
água. Não adicione água no caso de espinafres e
couve roxa.
Batatas:
■ Batatas cozidas: corte em pedaços de igual
tamanho. Adicione duas colheres de sopa de água
e um pouco de sal por 100 g.
■ Batatas cozidas, com pele: utilize batatas com a
mesma espessura. Lave as batatas e pique a casca.
Coloque as batatas ainda húmidas num recipiente
sem água.
Arroz:
■ Não utilize arroz integral nem de cozinhar em saco.
■ Adicione duas vezes a duas vezes e meia a
quantidade de água ao arroz.
■ No caso de porções muito pequenas, utilize um
pouco mais de água.
Tempo de repouso
Alguns alimentos necessitam ainda de um período de
repouso no interior do aparelho, após o fim do
programa.
Descongelar:
■ Congele os alimentos a -18°C, o mais planos
possível e nas porções certas.
■ Coloque os alimentos congelados num recipiente
plano, p. ex., um prato de vidro ou de porcelana.
■ Após o descongelamento, deixe os alimentos
Prato Tempo de repouso
Legumes aprox. 5 minutos
Batatas aprox. 5 minutos. Vazar previamente a
água produzida
Arroz 5 a 10 minutos
arrefecerem por mais 15 a 90 minutos, para obter o
equilíbrio térmico.
Tabela de programas
Programa Alimentos adequados Intervalo de peso em kg Recipiente
Descongelar
Pão* Pão, inteiro, redondo ou alongado, pão em fatias,
bolos de massa batida, bolos de massa lêveda, bolos
de fruta, bolos sem cobertura, natas ou gelatina
*) Observar o sinal de virar
**) Observar o sinal de mexer
0,20-1,50 kg Recipiente plano, aberto
Base do aparelho
73
Page 74

pt Regulações base
Programa Alimentos adequados Intervalo de peso em kg Recipiente
Carne* Assados, pedaços de carne planos, carne picada,
frango, pato
0,20-2,00 kg Recipiente plano, aberto
Base do aparelho
Peixe* Peixe inteiro, filetes de peixe, postas de peixe 0,10-1,00 kg Recipiente plano, aberto
Base do aparelho
Cozer
Legumes frescos** Couve-flor, brócolos, cenouras, rábano, alho-francês,
pimento, curgetes
Legumes congelados**
Couve-flor, brócolos, cenouras, rábano, couve roxa,
espinafres
Batatas** Batatas cozidas, batatas cozidas, com pele, batatas
aos pedaços de tamanho igual
0,15-1,00 kg Recipiente fechado
Base do aparelho
0,15-1,00 kg Recipiente fechado
Base do aparelho
0,20-1,00 kg Recipiente fechado
Base do aparelho
Arroz** Arroz, arroz agulha 0,05-0,30 kg Recipiente alto, fechado
Base do aparelho
*) Observar o sinal de virar
**) Observar o sinal de mexer
QRegulações base
Regulações base
Para que possa utilizar o seu aparelho de forma
perfeita e fácil, estão à sua disposição diferentes
regulações. Pode alterar estas regulações consoante
as necessidades.
Alterar as regulações
1. Prima a tecla "on/off".
2. Prima a tecla "Menu".
O menu "Modos de funcionamento" abre-se.
3. Com o seletor rotativo, selecione "Regulações".
4. Toque na seta ¿.
5. Altere os valores com o seletor rotativo.
6. Mude sempre para as regulações seguintes com a
seta ¿ e, se necessário, altere-as.
7. Para memorizar, prima a tecla "Menu".
No visor aparece "Memorizar" ou "Rejeitar".
8. Selecionar com os campos táteis em conformidade.
Lista das regulações
Na lista encontrará todas as regulações base e as
respetivas possibilidades de alteração. Consoante o
equipamento do seu aparelho, serão apresentadas no
visor apenas as regulações correspondentes ao seu
aparelho.
Pode alterar as seguintes regulações:
Som das teclas Ligado
Desligado*
(som das teclas permanece com "on/off")
Luminosidade do visor Regulação através de 5 níveis
Nível 3*
Indicação das horas Digital + Data*
Digital
Desligado
Escurecimento noturno Desligado*
Ligado (visor escurecido entre as 22:00 e
as 6:00)
Modo de demonstração Desligado*
Ligado
(indicado apenas nos primeiros 3 minutos
após uma reposição ou a primeira colocação em funcionamento)
Regulações de fábrica Repor
Não repor*
* Regulação de fábrica (as regulações de fábrica podem variar em
função do tipo de aparelho)
Conselho: As alterações das regulações relativas ao
idioma, ao som das teclas e à luminosidade do visor
têm efeitos imediatos. Todas as outras regulações só
ficam válidas depois de memorizadas.
--------
Falha de corrente
Regulação Seleção
Idioma Regular idiomas
Hora Acertar a hora atual
Data Acertar a data atual
Sinal sonoro Duração curta
Duração média*
Duração longa
74
As alterações efetuadas às regulações mantêm-se
mesmo após uma falha de corrente.
Após uma falha de corrente, apenas terá de efetuar
novamente as regulações relativas à primeira
colocação em funcionamento.
Page 75

Limpeza pt
Alterar a hora
A hora pode ser alterada nas regulações base.
Exemplo: alterar a hora de verão para a hora de
inverno.
1. Prima a tecla "on/off".
DLimpeza
Limpeza
Com uma manutenção e limpeza cuidadosas, garante
a conservação e o correto funcionamento do seu
aparelho. No presente capítulo explicar-lhe-emos como
deverá proceder à correta manutenção e limpeza do
seu aparelho.
:Aviso – Perigo de queimaduras!
O aparelho fica muito quente. Nunca toque nas
superfícies interiores quentes do aparelho, nem nas
resistências. Deixe sempre arrefecer o aparelho.
Mantenha as crianças afastadas.
:Aviso – Perigo de choque eléctrico!
A humidade que se infiltra no aparelho pode dar
origem a um choque eléctrico. Não utilize aparelhos de
limpeza a alta pressão ou de limpeza a vapor.
:Aviso – Perigo de ferimentos!
O vidro riscado da porta do aparelho pode rachar. Não
use raspadores de vitrocerâmica, nem detergentes
agressivos ou abrasivos.
Conselho: Os cheiros desagradáveis, por exemplo,
depois da confecção de peixe, podem ser eliminados
facilmente. Deite algumas gotas de sumo de limão
numa chávena com água. Coloque sempre uma colher
na chávena, a fim de evitar a ebulição retardada.
Aqueça a água durante 1 a 2 minutos com a potência
máxima do micro-ondas.
Produto de limpeza
Para que as diferentes superfícies do aparelho não
sejam danificadas pelo produto de limpeza errado,
tenha em atenção os dados constantes da tabela.
Não utilize
2. Prima a tecla "Menu".
3. Com o seletor rotativo, selecione "Regulações".
4. Toque com a seta ¿ em "Hora".
5. Altere a hora com o seletor rotativo.
6. Prima a tecla "Menu".
No visor aparece "Memorizar" ou "Rejeitar".
Zona Produto de limpeza
Frente do aparelho Solução de água quente e detergente: limpe
com um pano multiusos e seque com um pano
macio. Não utilize raspadores de metal ou para
vidros.
Visor Limpe com um pano de microfibras ou com
um pano ligeiramente humedecido. Não limpe
com água.
Aço inoxidável Solução de água quente e detergente: limpe
com um pano multiusos e seque com um pano
macio. Remova imediatamente manchas de
calcário, gordura, amido ou albumina. Sob
estas manchas pode ocorrer corrosão. No Serviço de Assistência Técnica ou numa loja especializada, poderá adquirir produtos especiais
para a limpeza de aço inoxidável.
Interior do aparelho
em aço inoxidável
Solução de água quente e detergente ou água
com vinagre: limpe com um pano multiusos e
seque com um pano macio. Não utilize spray
para fornos nem outros produtos limpa-fornos
agressivos ou produtos abrasivos. Esfregões
de palha-de-aço, esponjas com face abrasiva e
produtos para a limpeza de panelas também
não são adequados. Estes produtos riscam a
superfície. Deixe as superfícies internas secar
por completo.
Vidros da porta Limpa-vidros: Limpe com um pano multiusos.
Não utilize raspadores para vidros.
Vedante da porta
Não retirar!
Solução de água quente e detergente: limpe
com um pano multiusos, sem esfregar. Não utilize raspadores de metal ou para vidros.
■ produtos de limpeza abrasivos.
■ raspadores de metal ou para vidros para limpar os
vidros da porta.
■ raspadores de metal ou para vidros para limpar o
vedante da porta.
■ esfregões de palha-de-aço ou esponjas abrasivas.
■ produtos de limpeza com elevado teor de álcool.
Lave bem os panos de esponja novos, antes de os
utilizar.
75
Page 76

pt Defeito: O que fazer?
3Defeito: O que fazer?
Defeito: O que fazer?
Quando ocorre uma avaria, trata-se, muitas vezes, de
uma situação simples de resolver. Antes de ligar para a
assistência técnica, tente eliminar a avaria pelos seus
próprios meios, com o auxílio da tabela.
de cozinha" na página 78
:Aviso – Perigo de choque eléctrico!
As reparações indevidas são perigosas. As reparações
e substituições de cabos danificados só podem ser
efectuadas por técnicos especializados do Serviço de
Assistência Técnica. Se o aparelho estiver avariado,
regulação ideal.~ "Testado para si no nosso estúdio
Conselho: Se uma refeição não ficar confecionada
como esperado, leia o capítulo seguinte. Aí poderá
encontrar muitas sugestões e indicações sobre a
puxe a ficha da tomada ou desligue o disjuntor no
quadro eléctrico. Contacte o Serviço de Assistência
Técnica.
Tabela de anomalias
Anomalia Causa possível Solução / recomendações
O aparelho não funciona, sem indicação no visor
A ficha não está ligada à corrente Ligar o aparelho à corrente elétrica
Falha de corrente Verifique se os outros eletrodomésticos funcionam
Falha do fusível Verifique na caixa de fusíveis se o fusível correspon-
dente ao aparelho está em boas condições
Utilização incorreta Na caixa de fusíveis, desligue o fusível correspon-
dente ao aparelho e volte a ligá-lo após aprox. 60
segundos
O aparelho não liga A porta do aparelho não está totalmente fechada Fechar a porta do aparelho
O alimento não aquece.
Surge no visor a palavra "Demo".
O aparelho está no modo de demonstração Desative o modo de demonstração nas regulações
base.
Para o efeito, desligue o aparelho da corrente (desligue o disjuntor geral ou o interruptor de segurança na
caixa de fusíveis). Em seguida, desative o modo de
demonstração num espaço de 3 minutos, nas regulações base.
A iluminação do interior do aparelho
Iluminação do interior do aparelho avariada Contactar a assistência técnica
não funciona
Mensagem de erro "Exxx"* Caso surja uma mensagem de erro, desligue e volte a
ligar o aparelho; se a indicação se apagar, tratava-se
de um problema pontual. Caso o erro ocorra várias
vezes ou a indicação se mantenha, contacte a assistência técnica e forneça o código de erro.
* Particularidades:
Mensagem de erro "E0532": abra a porta do aparelho e volte a fechá-la.
Mensagem de erro "E6501": desligue o aparelho. Aguarde 10 minutos. Volte a ligar o aparelho.
--------
76
Page 77

Serviços Técnicos pt
4Serviços Técnicos
Serviços Técnicos
Se o seu aparelho precisar de ser reparado, o nosso
Serviço de Assistência Técnica está à sua disposição.
Nós encontramos sempre uma solução adequada,
também para evitar deslocações inúteis de funcionários
da assistência técnica.
Número E e número FD
Quando efetuar a chamada, indique o número
completo de produto (N.° E) e o número de fabrico
(N.° FD) do aparelho para podermos prestar um
serviço de qualidade. Encontra a placa de
características com estes números quando abre a
porta do aparelho.
Se o seu aparelho estiver equipado com vapor,
encontrará a placa de características do lado direito,
atrás do painel.
=1U)'(1U
7\SH
Para que, em caso de necessidade, não perca tempo a
procurar, poderá inserir aqui os dados do seu aparelho
e o número de telefone da assistência técnica.
Dados Técnicos
Corrente 220-240 V, 50 Hz
Potência total máx. de ligação 1300 W
Potência do micro-ondas 900 W (IEC 60705)
Frequência do micro-ondas 2450 MHz
Fusível 10 A
Dimensões (A/L/P)
- Aparelho 455 x 595 x 565mm
- Interior do aparelho 236 x 445x 348mm
Testado conforme as normas VDE Sim
Marca CE Sim
N.º E
Assistência Técnica O
N.° FD
Tenha em atenção que a deslocação do técnico da
assistência não é gratuita em caso de utilização
incorreta do aparelho, mesmo durante o período de
garantia.
Os dados para contacto com todos os países
encontram-se no índice dos Serviços Técnicos anexo.
Ordem de reparação e apoio em caso de anomalias
PT 21 4250 720
Confie na competência do fabricante. Assim, poderá ter
a certeza de que a reparação é executada por técnicos
especializados com a devida formação e com as peças
de reparação originais para o seu aparelho.
Este aparelho está em conformidade com as normas
EN 55011 e CISPR 11. Trata-se de um produto
pertencente ao grupo 2, classe B.
O facto de pertencer ao grupo 2 significa que são
utilizadas microondas para aquecer os alimentos. A
classe B significa que o aparelho foi concebido para
uso doméstico.
77
Page 78

pt Testado para si no nosso estúdio de cozinha
JTestado para si no nosso
estúdio de cozinha
Testado para si no nosso estúdio de cozinha
Nesta secção encontrará uma seleção de pratos, bem
como as regulações ideais para prepará-los.
Explicamos-lhe qual a potência de micro-ondas mais
adaptada ao prato que pretende preparar. Encontrará
também conselhos sobre os recipientes e sobre o
modo de preparação.
Conselhos
■ Os valores constantes das tabelas aplicam-se
sempre ao interior do aparelho frio e vazio. Antes da
utilização, retire os recipientes de que não necessita
do interior do aparelho.
■ Os tempos indicados nas tabelas são meros valores
de referência. Variam em função da qualidade e da
composição dos alimentos.
■ Utilize sempre pegas ao retirar recipientes quentes
do interior do aparelho.
:Aviso – Perigo de queimaduras!
Ao retirar o recipiente, pode entornar líquido quente.
Retire o recipiente com cuidado do aparelho.
Nas seguintes tabelas, encontrará muitas
possibilidades e valores de regulação para o microondas.
As indicações de tempo são valores de referência,
dependem do recipiente utilizado, bem como da
qualidade, da temperatura e das características dos
alimentos.
Nas tabelas são frequentemente indicadas escalas de
tempos. Selecione, primeiro, o tempo mais curto e
prolongue-o depois, se necessário.
Pode ser que tenha quantidades que não
correspondem às indicadas nas tabelas. Para o microondas existe uma regra empírica: dobro da quantidade
- quase o dobro do tempo, metade da quantidade metade do tempo.
Pode colocar o recipiente no centro da base do
aparelho. Desta forma, as micro-ondas conseguem
chegar aos alimentos por todos os lados.
Descongelamento
Coloque os alimentos congelados num recipiente
aberto sobre a base no interior do aparelho.
Entretanto, vire ou mexa os alimentos 1 ou 2 vezes. Os
bocados grandes devem ser virados várias vezes. Ao
virar, remova o líquido resultante da descongelação.
Depois de descongelados, deixe os alimentos
repousarem à temperatura ambiente durante 15 a 90
minutos, para uniformizar a temperatura.No caso das
aves, pode retirar então as miudezas.
Conselho: Coloque o recipiente na base do aparelho.
Prato Peso Potência de micro-ondas em watts,
Duração em minutos
Carne de vaca, vitela, porco inteira (com e
sem osso)
Carne de vaca, vitela, porco em pedaços ou
fatias
Carne mista picada 200 g 90 W, 10-15 min. congelar o mais espalmada possível.
Aves ou pedaços de aves 600 g 180 W, 8 min. + 90 W, 10-15 min. virar de vez em quando;
Filete de peixe, posta de peixe ou fatias 400 g 180 W, 5 min. + 90 W, 10-15 min. separar as partes descongeladas
Peixe inteiro 300 g 180 W, 3 min. + 90 W, 10-15 min. virar de vez em quando
Legumes, p. ex. ervilhas 300 g 180 W, 10-15 min. mexer cuidadosamente de vez em quando
Fruta, p. ex. framboesas 300 g 180 W, 6-9 min. mexer cuidadosamente de vez em quando e
Manteiga, amolecer 125 g 180 W, 1 min. + 90 W, 1-2 min. Remover a embalagem completa
Pão inteiro 500 g 180 W, 8 min. + 90 W, 5-10 min. virar de vez em quando
800 g 180 W, 15 min. + 90 W, 15- 25 min. virar várias vezes
1000 g 180 W, 20 min. + 90 W, 20-30 min.
1500 g 180 W, 25 min.+ 90 W, 25-30 min.
200 g 180 W, 5-8 min. + 90 W, 5-10 min. ao virar os pedaços de carne, separe-os
500 g 180 W, 8-11 min. + 90 W, 10-15 min.
800 g 180 W, 10 min. + 90 W, 10-15 min.
500 g 180 W, 5 min. + 90 W, 10-15 min.
1000 g 180 W, 15 min. + 90 W, 20-25 min.
1200 g 180 W, 15 min. + 90 W, 20-25 min.
600 g 180 W, 8 min. + 90 W, 15-20 min.
500 g 180 W, 8 min. + 90 W, 5-10 min.
250 g 180 W, 1 min. + 90 W, 2-4 min.
1000 g 180 W, 12 min. + 90 W, 10-20 min.
Indicação
virar de vez em quando e retirar a carne já
descongelada
remover o líquido resultante da descongelação
separar as partes descongeladas
78
Page 79

Testado para si no nosso estúdio de cozinha pt
Prato Peso Potência de micro-ondas em watts,
Indicação
Duração em minutos
Bolos, secos, p. ex. bolo de massa batida 500 g 90 W, 10-15 min. Separar os pedaços de bolo;
750 g 180 W, 5 min. + 90 W, 10-15 min.
Bolos, suculentos, p. ex. bolos de fruta, cheesecakes
Descongelar, aquecer ou cozinhar alimentos
ultracongelados
Retire a refeição pronta da embalagem. O aquecimento
num recipiente adequado para micro-ondas é mais
rápido e mais uniforme. Os vários ingredientes podem
ter tempos de aquecimento diferentes.
Os alimentos planos levam menos tempo a cozinhar do
que os mais altos. Por esta razão, distribua os
alimentos no recipiente tão planamente quanto
possível. Não sobreponha alimentos.
500 g 180 W, 5 min. + 90 W, 15-20 min. apenas para bolos sem cobertura, natas ou
750 g 180 W, 7 min. + 90 W, 15-20 min.
Tape sempre os alimentos. Se não possuir uma tampa
adequada para o recipiente, utilize um prato ou película
especial para micro-ondas.
Deve mexer ou virar os alimentos 2 ou 3 vezes durante
o tempo regulado.
Após o aquecimento, deixe os alimentos repousar
durante 2 a 5minutos, para uniformizar a temperatura.
O sabor próprio dos alimentos permanece inalterado.
Por isso, pode utilizar sal e temperos com moderação.
Conselho: Coloque o recipiente na base do aparelho.
Prato Peso Potência de micro-ondas em watts
apenas para bolos sem cobertura, natas ou
creme
gelatina
Nota
Tempo de duração em minutos
Menu, refeição confecionada, refeição pronta
300-400 g 600 W, 8-13 min. Tapado
(2-3 componentes)
Sopa 400 g 600 W, 8-12 min. Recipiente fechado
Guisados 500 g 600 W, 10-15 min. Recipiente fechado
Fatias ou pedaços de carne com molho, p. ex.
500 g 600 W, 10-15 min. Recipiente fechado
carne de vaca estufada
Peixe, p. ex. filetes 400 g 600 W, 10-15 min. Tapado
Pratos no forno, por exemplo, lasanha, Can-
450 g 600 W, 10-15 min. Recipiente aberto
nelloni
Acompanhamentos, p. ex. arroz, massa 250 g 600 W, 3-7 min. Recipiente fechado, adicionar líquido
500 g 600 W, 8-12 min.
Legumes, p. ex. ervilhas, brócolos, cenouras 300 g 600 W, 7-11min. recipiente fechado; adicionar 1colher de sopa
600 g 600 W, 14-17 min.
de água
Espinafres com natas 450 g 600 W, 10-15 min. Cozinhar sem adição de água
Aquecer
:Aviso – Perigo de queimaduras!
Ao aquecer líquidos, pode ocorrer uma ebulição
retardada. Ou seja, o líquido pode alcançar o ponto de
ebulição sem que surjam as típicas bolhas de vapor.
Ao agitar o recipiente, mesmo ligeiramente, o líquido
quente pode subitamente deitar por fora e salpicar. Ao
aquecer, coloque sempre uma colher dentro do
recipiente. Assim, evita a ebulição retardada.
Atenção!
Faíscas: o metal - p. ex. a colher dentro do copo - tem
de ficar afastado, pelo menos, 2 cm das paredes do
interior do aparelho e do interior da porta. Eventuais
faíscas podem danificar o vidro interior da porta.
Conselhos
■ Retire a refeição pronta da embalagem. O
aquecimento num recipiente adequado para microondas é mais rápido e mais uniforme. Os vários
ingredientes podem ter tempos de aquecimento
diferentes.
■ Tape sempre os alimentos. Se não possuir uma
tampa adequada para o recipiente, utilize um prato
ou película especial para micro-ondas.
■ Mexa ou vire várias vezes os alimentos durante o
tempo regulado. Verifique a temperatura.
■ Após o aquecimento, deixe os alimentos repousar
durante 2 a 5minutos, para uniformizar a
temperatura.
■ Utilize sempre luvas de cozinha ou pegas para
retirar a louça de dentro do aparelho.
79
Page 80

pt Testado para si no nosso estúdio de cozinha
Conselho: Coloque o recipiente na base do aparelho.
Prato Quantidade Potência de micro-ondas em watts,
Indicação
Duração em minutos
Menu, refeição confecionada, refeição pronta
600 W, 5-8 min. -
(2-3 componentes)
Bebidas 125 ml 900 W, ½-1 min. colocar sempre uma colher no copo, não
200 ml 900 W, 1-2 min.
aquecer demasiado as bebidas alcoólicas;
controlar de tempos a tempos
500 ml 900 W, 3-4 min.
Comida para bebés, p. ex. biberões de leite 50 ml 360 W, ca. ½ min. Biberão sem tetina nem tampa, após o aque-
100 ml 360 W, ½-1 min.
cimento, mexer ou agitar muito bem; verificar
sempre a temperatura
200 ml 360 W, 1-2 min.
Sopa, 1 tigela de 175 g
600 W, 1-2 min. -
cada
Sopa, 2 tigelas de 175 g
600 W, 2-3 min. -
cada
Carne com molho 500 g 600 W, 7-10 min. -
Guisado 400 g 600 W, 5-7 min. -
800 g 600 W, 7-8 min. -
Legumes, 1 dose 150 g 600 W, 2-3 min. -
Legumes, 2 doses 300 g 600 W, 3-5 min. -
Cozinhar
■ O sabor próprio dos alimentos permanece
inalterado. Por isso, pode utilizar sal e temperos
Conselhos
■ Os alimentos planos levam menos tempo a cozinhar
do que os mais altos. Por esta razão, distribua os
alimentos no recipiente tão planamente quanto
possível. Não sobreponha alimentos.
■ Cozinhe os alimentos num recipiente fechado. Se
com moderação.
■ Depois de cozinhados, deixe os alimentos repousar
durante 2 a 5minutos, para uniformizar a
temperatura.
■ Utilize sempre luvas de cozinha ou pegas para
retirar a louça de dentro do aparelho.
não possuir uma tampa adequada para o recipiente,
utilize um prato ou película especial para micro-
Conselho: Coloque o recipiente na base do aparelho.
ondas.
Prato Quantidade Potência de micro-ondas em watts,
Indicação
Duração em minutos
Frango inteiro, fresco, sem miúdos 1200 g 600 W, 25-30 min. virar após metade do tempo
Filete de peixe, fresco 400 g 600 W, 7-12 min. -
Legumes, frescos 250 g 600 W, 6-10 min. Cortar os legumes em pedaços do mesmo
500 g 600 W, 10-15 min.
tamanho;
por cada 100g de legumes, adicionar 1 a 2 c.
sopa de água;
mexer de tempos a tempos
Batatas 250 g 600 W, 8-10 min. Cortar as batatas em pedaços do mesmo
500 g 600 W, 10-15 min.
750 g 600 W, 15-22 min.
Arroz 125 g 600 W, 4-6 min. +
tamanho;
por cada 100 g, adicionar 1 c. sopa de água;
mexer de tempos a tempos
adicionar o dobro da quantidade de água
180 W, 12-15 min.
250 g 600 W, 6-8 min. +
180 W, 15-18 min.
Doces, p. ex., pudim (instantâneo) 500 ml 600 W, 6-8 min. Mexer bem o pudim de tempos a tempos, 2 a
3 vezes, com o batedor de claras
Fruta, compota 500 g 600 W, 9-12 min. mexer de tempos a tempos
Pipocas de micro-ondas 100 g 600 W, 3-4 min. Coloque o saco das pipocas sempre sobre o
tabuleiro de vidro.;
Respeite as instruções do fabricante.
80
Page 81

Conselhos para a utilização do micro-ondas
Refeições de teste pt
Não encontra indicações de regulação para a quantidade do cozinhado que preparou.
O cozinhado ficou demasiado seco. Da próxima vez, aplique um tempo de cozedura menor ou selecione uma
Após o fim do tempo, o prato ainda não está descongelado, quente ou
cozinhado.
Após o fim do tempo de cozedura, o cozinhado está demasiado
quente nos bordos mas no meio ainda não está pronto.
Após o descongelamento, as aves ou carne estão cozidas por fora
mas por dentro ainda não estão descongeladas.
Prolongue ou encurte o tempo de cozedura de acordo coma seguinte regra
empírica: dobro da quantidade = quse o dobro do tempo, metade da quantidade = metade do tempo
potência de micro-ondas mais baixa. Tape o cozinhado e adicione mais
líquido.
Regule um período de tempo maior. As quantidades maiores e os cozinhados
com uma altura maior necessitam de mais tempo.
Mexa, de vez em quando, e selecione, da próxima vez, uma potência mais
baixa e um maior tempo de duração.
Da próxima vez, seleccione uma potência de micro-ondas mais baixa. Vire
grandes quantidades de aves ou carne várias vezes.
ERefeições de teste
Refeições de teste
A qualidade e o funcionamento de aparelhos de microondas são testados por Institutos de Ensaio, com a
ajuda destas refeições.
Cozinhar apenas com micro-ondas
Segundo a norma EN 60705, IEC 60705 ou DIN
44547.
Prato Potência de micro-ondas em watts, tempo de duração em minu-
tos
Mistura de ovo e leite, 1000 g 600 W, 11-12 min. + 180 W, 8-10 min. Forma de pirex
Pão-de-ló, 475 g 600 W, 7-9 min. Forma de pirex com Ø22 cm.
Rolo de carne picada, 900 g 600 W, 25-30 min. Forma de bolo inglês em pirex, 28 cm de
Indicação
comprimento
Descongelar apenas com micro-ondas
Prato Potência de micro-ondas em watts, tempo de duração em minu-
tos
Carne, 500 g Programa “Descongelar carne”, 500 g
ou
180 W, 8min. + 90 W 7-10 min.
Nota
Forma de pirex, Ø 24 cm
81
Page 82

6
Page 83

6
Page 84

%6++DXVJHUlWH
&DUO:HU\6WU0QFKHQ
*(50$1<
VLHPHQVKRPHEVKJURXSFRP
%6++DXVJHUlWH*PE+6LHPHQV$*
0DQXIDFWXUHGE\%6++DXVJHUlWH*PE+XQGHU7UDGHPDUN/LFHQVHRI6LHPHQV$*
3URGRWWRGD%6++DXVJHUlWH*PE+LQTXDQWROLFHQ]LDWDULRGHOPDUFKLRGL6LHPHQV$*
)DEULFDGRSHOD%6++DXVJHUlWH*PE+VREOLFHQoDGHPDUFDFRPHUFLDOGD6LHPHQV$*
*PE+
*9001230941*
9001230941
970118(2)
 Loading...