

Page 1
222
HARTREY AVE EVANSTON.
AREA CODE 3t2/328-~000
ILL.
(60204) U.S.A.
CABLE SHUREMICRO
DATA
I
SHEET
MODELS M5D AND M6S
PROFESSIONAL DYNETIC
CARTRIDGE
(Stylus
Models
N5D
and
N6S)
I
Specifications
MODEL
NO.
M5D
M6S
33% - 45 R.P.M.
Response Frequency Characteristic:
20 to 20,000
the exacting requirements of typical high fidelity repro-
duction.
Output Voltage:
volts for
ohms. Higher values will produce a slight increase in
high frequency response.
Compliance:
Tracking Force:
Inductance:
D.C. Resistance:
Weight:
Packaged Weight:
Hz.
(See Fig.
I0 centimeters per second.
Load
3.0~
350 millihenrys. are:
.44 ounces. 12.4 grams.
I)
designed to ideally meet
Output at 1000 cycles 21 milli-
Impedance:
1
O-S
centimeters per dyne.
3 to 6 grams.
440 ohms.
3.3 ounces (95g)
USE
Microgroove
Standard
78
R.P.M.
From
27t000
STYLUS
RADIUS
I
Mil
(0.025mm)
Diamond
Mil
2.7
synthesize6 Sapphire
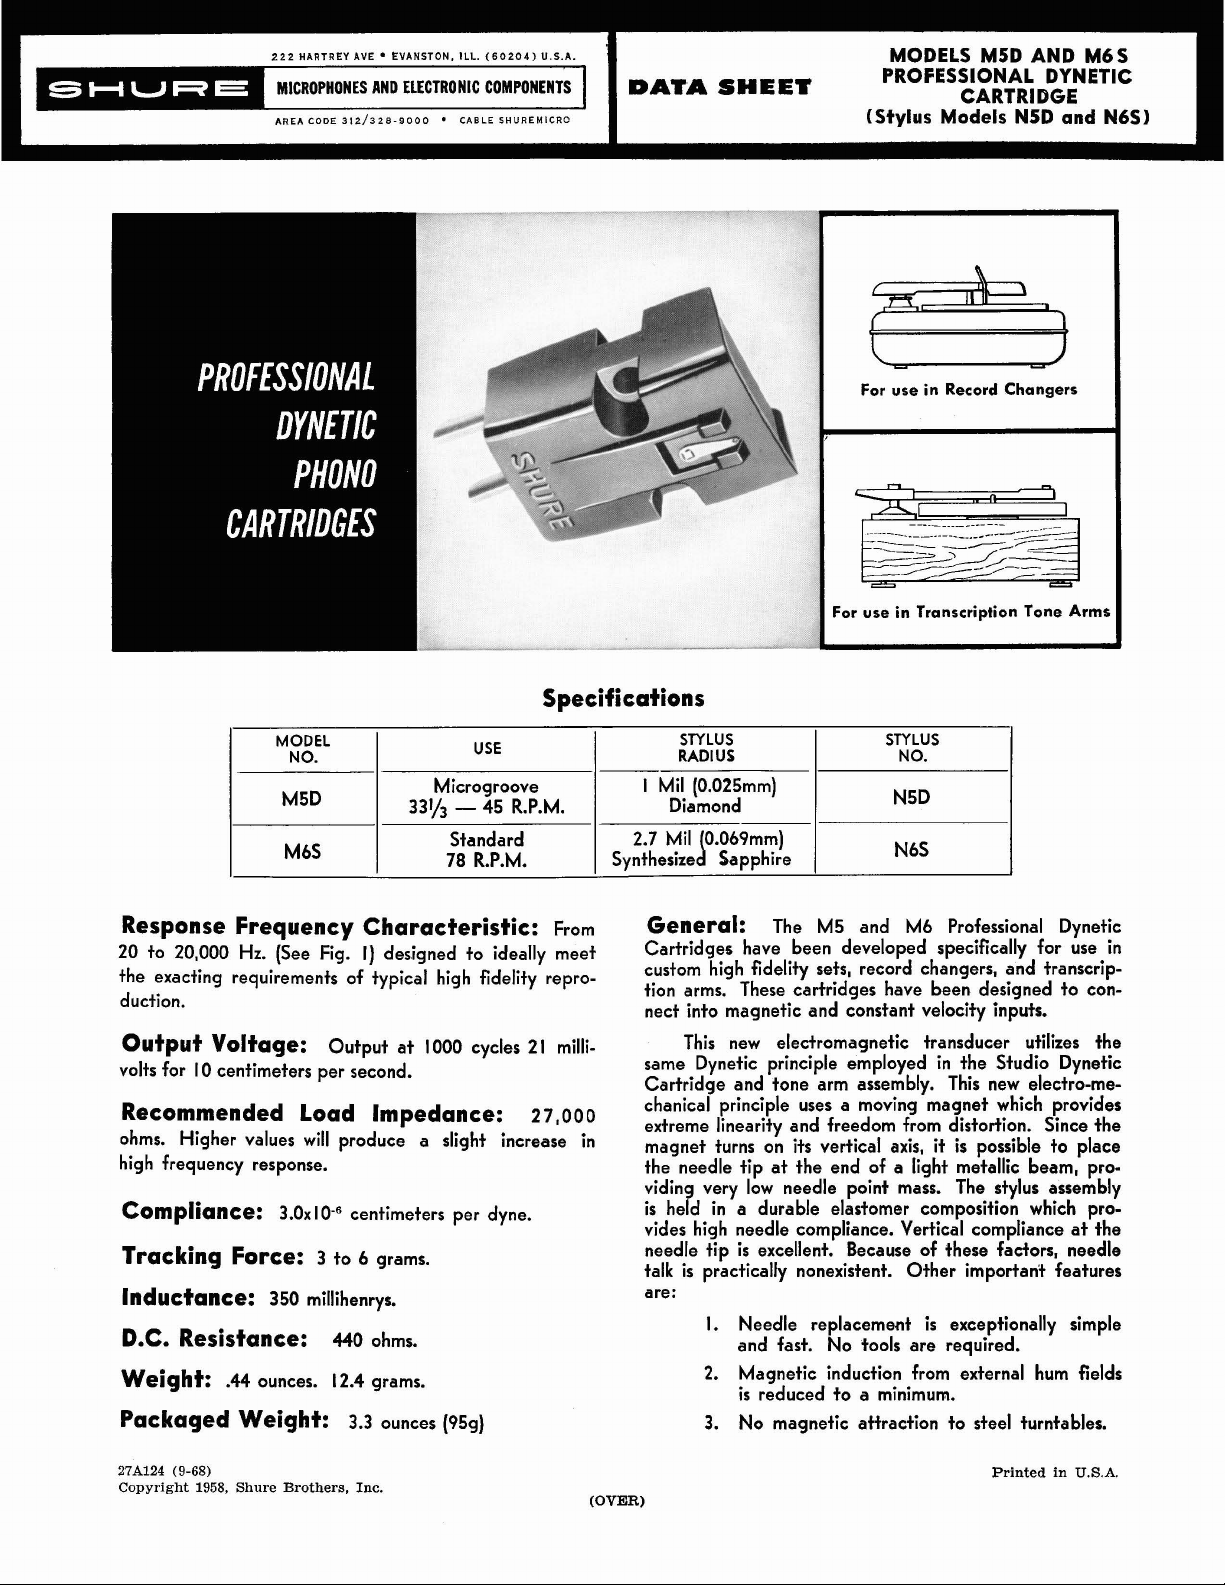
Cartridges have been developed specifically for use in
custom high fidelity sets, record changers, and transcription arms. These cartridges have been designed to connect into magnetic and constant velocity inputs.
same
Cartridae and tone arm assemblv. This new electro-mechanical principle uses a moving magnet which provides
extreme linearity and freedom from distortion. Since the
magnet
the needle
viding very
is
vides high needle compliance. Vertical compliance at the
needle
talk is practically nonexistent. Other
0.069mm)
General:
This new electromagnetic transducer utilizes the
Dynetic principle employed in the Studio Dynetic
The M5 and M6 Professional Dynetic
-
turns
on
its
vertical
tip
at the end of a liqht metallic beam, pro-
lbw needle point mass. The stylus assembly
held in a durable elastomer composition which pro-
tip
is
excellent. Because of these factors, needle
Needle replacement
I.
and fast. No tools are required.
2.
Magnetic induction from external hum fields
is
reduced to a minimum.
3. No magnetic attraction to steel turntables.
STYLUS
NO.
N5D
N6S
axis,
it
is
possible
importan* features
is
exceptionally simple
to
place
278124
(9-68)
Copyright
1958,
Shure Brothers,
Inc.
(OVER)
Printed
in
U.S.A.
Page 2
Mounting:
the standard
#3-48x5/16" long machine screws are supplied with
these cartridges for mounting purposes.
The recommended needle point force is 3 to 6
grams. When replacing magnetic cartridges, adjustment
is
generally unnecessary. Should
ment may usually be made by adjusting the counter balance or spring at the rear of the arm.
Connections:
specifically intended to be connected to preamplifiers
having magnetic or constant velocity inputs. The recommended input resistance
provide increased high frequency response. The gold
colored terminal of the cartridge must be connected to
the "hot" lead of the tone arm. The "hot" lead can be
verified
screwdriver or similar tool and the connection that produces a loud hum from the speaker is the "hot" terminal.
The silver colored terminal must be connected to the
"ground" lead of the arm.
by touching the bare lead or pin jack with a
Guarantee:
Cartridges are guaranteed to be free from electrical and
mechanical defects for one year from the date of shipment from the factory, provided all instructions are com-
plied with fully. The guarantee does not cover needle
wear nor does
from abuse or mishandling.
The M5 and M6 series cartridges have
1/2"
(12.7mm) mounting centers. Two
it
be necessary, adiust-
The M5 and M6 series cartridges are
is
27,000
The M5 and M6 Professional Dynetic
it
cover damage to the needle assembly
ohms. Higher values
Caution
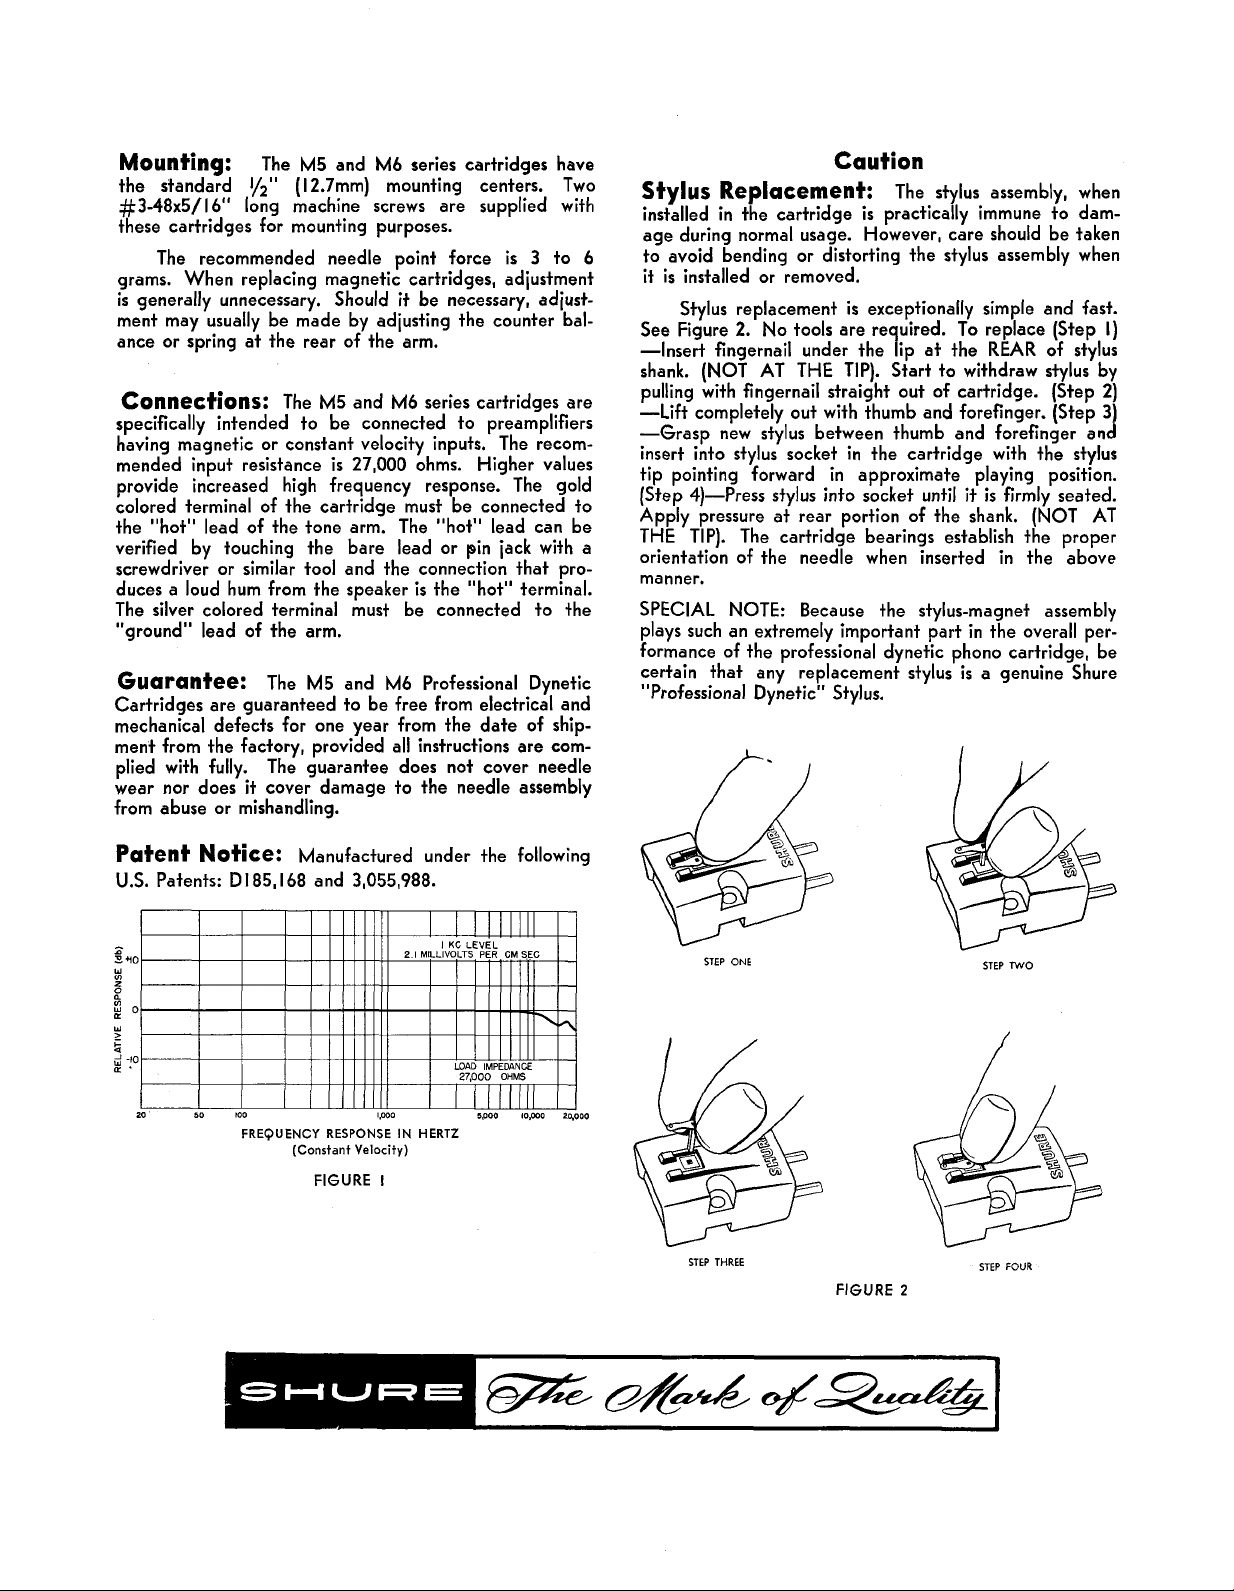
Stylus Replacement:
installed in the cartridge is practically immune to damage during normal usage. However, care should be taken
to avoid bending or distorting the stylus assembly when
it
is
installed or removed.
Stylus replacement
See Figure 2. No tools are re uired. To replace (Step
-Insert fingernail under the
shank. (NOT AT THE TIP). Start to withdraw stylus by
pulling with fingernail straight out of cartridge. (Step 2)
-Lift completely out with thumb and forefinger. (Step 3
-Grasp new stylus between thumb and forefinger
insert into stylus socket in the cartridge with the stylus
tip pointing forward in approximate playing position.
(Step 4)-Press
Apply pressure at rear portion of the shank. (NOT AT
THE TIP). The cartridge bearings establish the proper
orientation of the needle when inserted in the above
manner.
SPECIAL NOTE: Because the stylus-magnet assembly
plays such an extremely important part in the overall per-
formance of the professional
certain that any replacement stylus
"Professional
stylus into socket until
Dynetic" Stylus.
The stylus assembly, when
is
exceptionally simple and fast.
I
ip
at the REAR of stylus
it
is firmly seated.
dynetic phono cartridge, be
is
a genuine Shure
an
I)
d
Patent Notice:
U.S. Patents:
D
185,168 and 3,055,988.
FREQUENCY RESPONSE IN HERTZ
Manufactured under the following
(Constant
Velocity)
FIGURE
I
u
STEP THREE
STEP
ONE
FIGURE
STEP
TWO
STEP
FOUR
2
 Loading...