

Page 1
R-898M-A
INSTALLATION
INSTALLATION
GETTING STARTED
GETTING STARTED
QUICK START GUIDE
S
WARNING:
Before starting, read carefully all the warnings given
in the full operation manual for the safe use of your
oven.
1
2
3
15
14
13
12
11
10
9
4
5
6
7
8
1
and the wrapping shown in the diagram.
DO NOT REMOVE THE WAVEGUIDE COVER,
this can be found on the right hand side wall
inside your microwave. Please see page 4 in the
operation manual.
2. Ensure there is at least 19cm of free space
above the oven.
3. Ensure the turntable parts
are assembled as shown in
the diagram opposite.
Other Accessories
The racks can be used for
“Grilling”, “Dual Cooking” or
“Convection Cooking” of food.
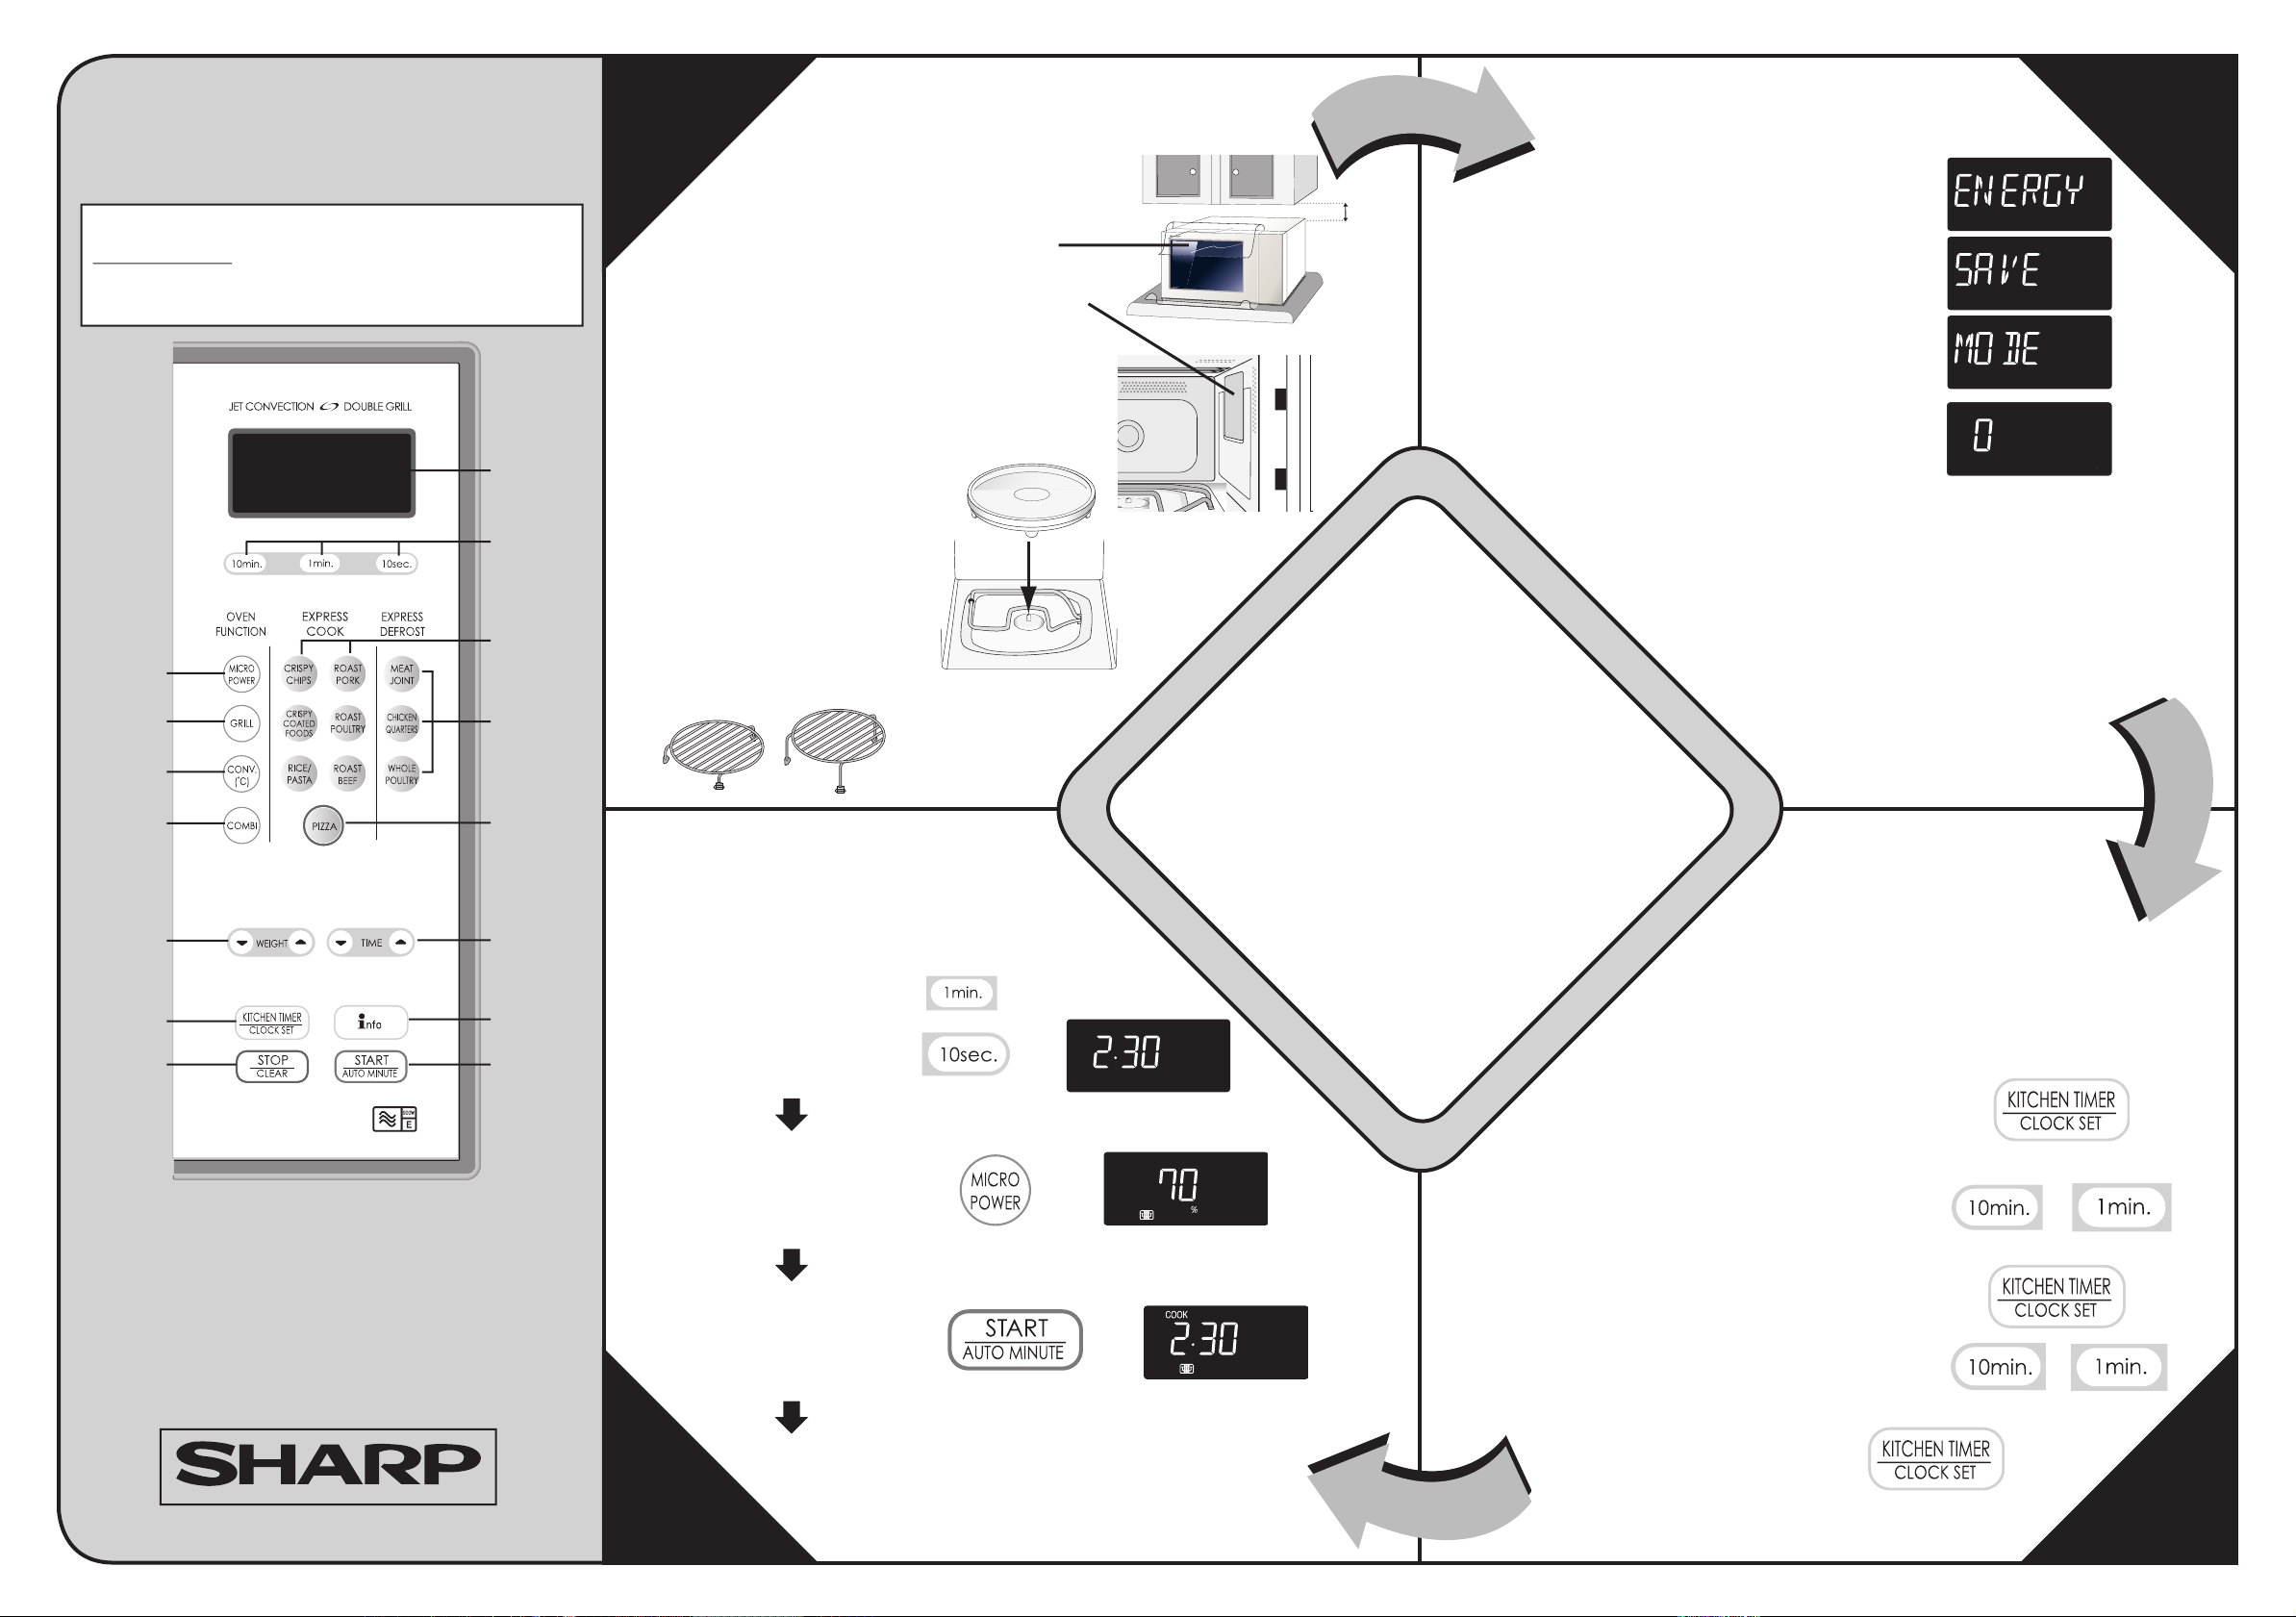
MICROWAVING
MICROWAVING
To cook for 2 minutes 30 seconds on 70%
microwave power.
1. Enter the cooking time by
pressing the 1 MIN. key
twice and the 10 SEC. key
three times.
1. Remove all packaging and
accessories from the oven, including the
feature sticker fixed to the outside of the door
x2
x3
Plug in the oven. Nothing will
appear in the display at this time.
product, please visit our Website
19cm
the message shown opposite (1).
Close the door. The display will show (2).
The oven is now ready for use.
If you want to set the clock, press the KITCHEN
TIMER/CLOCK SET key twice and follow the
instructions in Step 3 below.
IMPORTANT
If you
require any
advice or assistance
regarding your Sharp
or call our Help Line.
Website:
Open the door, the display will flash
The oven has an Energy Save mode, for details refer to page 8 of your
Operation Manual.
• The oven will default to Energy Save Mode after 3 minutes if not
used. Whilst in Energy Save Mode the display is blank and the
oven cannot be used.
• To remove Energy Save Mode, open and then close the
door, “.0” will be displayed and the oven
is ready for use.
• To remove Energy Save Mode
permanently, set the clock.
1.
2.
2
www.sharp.co.uk/customersupport
Help Line:
SETTING
SETTING
08705 274277 (U.K.)
(01) 676 0648 (Ireland)
(office hours)
Your oven is fitted with a 12 hour clock.
To set the time of day, ensure the door is closed and
follow the guidelines given below:
THE CLOCK
THE CLOCK
1 DIGITAL DISPLAY
2 TIME keys.
3 EXPRESS COOK keys
4 EXPRESS DEFROST keys
5 PIZZA key
6 LESS/MORE
7 INFO key
8 START/AUTO MINUTE key
keys
TINS-A714WRRZ-K61
9 STOP/CLEAR key
10 KITCHEN TIMER/CLOCK SET
key
11 WEIGHT UP/DOWN keys
12 COMBI key
13 CONV. (
14 GRILL key
15 MICRO POWER key
˚C) key
2. Select the power by pressing
the MICRO POWER key twice.
3. Press the START/AUTO
MINUTE key once to start
cooking.
4. The display will count down through cooking time.
x2
x1
1. Press the KITCHEN TIMER/CLOCK
SET key twice.
2. Enter the hours by pressing the
3. Press the KITCHEN TIMER/CLOCK SET key
again and enter the minutes by pressing the
TIME keys.
4. Press the KITCHEN
TIMER/CLOCK SET key
again to start the clock.
TIME keys.
x1
4 3
x2
x1
 Loading...