

Page 1

YT
<P=001>
PORTABLE CD STEREO SYSTEM
MODEL
QT-CD131H
OPERATION MANUAL
Thank you for purchasing this SHARP product.
For the best performance, read this manual carefully. It will guide you in operating your SHARP
product.
NOTE FOR USERS IN THE U.K.
The mains lead of this product is fitted with a non-rewireable (moulded) plug incorporating a 3A fuse. Should the
fuse need to be replaced, a BSI or ASTA approved BS
1362 fuse marked or and of the s ame rating as
above, which is also indicated on the pin face of the plug
must be used.
Always refit the fuse cover after replacing the fuse. Never
use the plug without the fuse cover fitted.
In the unlikely event of the socket outlet in your home
not being compatible with the plug supplied, cut-off the
mains plug and fit an appropriate type.
DANGER:
The fuse from the cut-off plug should be removed and
the cut-off plug destroyed immediately and disposed of
in a safe manner.
Under no circumstances should the cut-off plug be inserted elsewhere into a 13A socket outlet as a serious
electric shock may occur.
To fit an appropriate plug to the mains lead, follow the
instructions below:
IMPORTANT:
The wires in the mains lead are coloured in accordance
with the following code:
Blue : Neutral
Brown : Live
As the colours of the wires in the mains lead of this
product may not correspond with the coloured markings
identifying the terminals in your plug, proceed as follows:
● The wire which is coloured blue must be connected to
the plug terminal which is marked N or coloured black.
● The wire which is coloured brown must be connected
to the plug terminal which is marked L or coloured red.
Ensure that neither the brown nor the blue wire is connected to the earth terminal in your three pin plug.
Before replacing the plug cover, make sure that:
● If the new fitted plug contains a fuse, its value is the
same as that removed from the cut-off plug.
● The cord grip is clamped over the sheath of the mains
lead and not simply over the lead wires.
IF YOU HAVE ANY DOUBT, CONSULT A QUALIFIED
ELECTRICIAN.
SERVICE INFORMATION
In the unlikely event of your equipment requiring repair,
please contact the dealer or supplier from whom it was
purchased. Where this is not possible, please contact
the telephone number listed below. You will then be
given details of how to obtain service.
Please note; all calls will be charged at local rate.
Certain replacement parts and accessories may be ob-
tained from our main parts distributor.
In the unlikely event of this equipment requiring repair
during the guarantee period, you will need to provide
proof of the date of purchase to the repairing company.
Please keep your invoice or receipt, which is supplied at
the time of purchase.
- 0345-125387 -
WILLOW VALE ELECTRONICS LTD.
MANCHESTER 0161-682-1415
READING 01189-876444
QT-CD131H(SUK) TINSE0007SJZZ
Page 2
YT
<P=001>
SPECIAL NOTES
● If the model name contains a parentheses, the
letters in the parentheses indicate the colour of
the product. Operation and specifications are
unaffected.
● Recording and playback of any material may
require consent, which SHARP is unable to give.
Please refer particularly to the provisions of the
Copyright Act 1956, the Dramatic and Musical
Performers Protection Act 1958, the Performers
Protection Acts 1963 and 1972 and to any subsequent statutory enactments and orders.
● This equipment complies with the requirements
of Directives 89/336/EEC and 73/23/EEC as
amended by 93/68/EEC.
● When the FUNCTION switch is set at STAND-BY
position, mains voltage is still present inside the
unit.
Warning:
This unit contains no user serviceable parts. Never
remove covers unless qualified to do so. This unit
contains dangerous voltages, always remove mains
plug from the socket before any service operation
and when not in use for a long period.
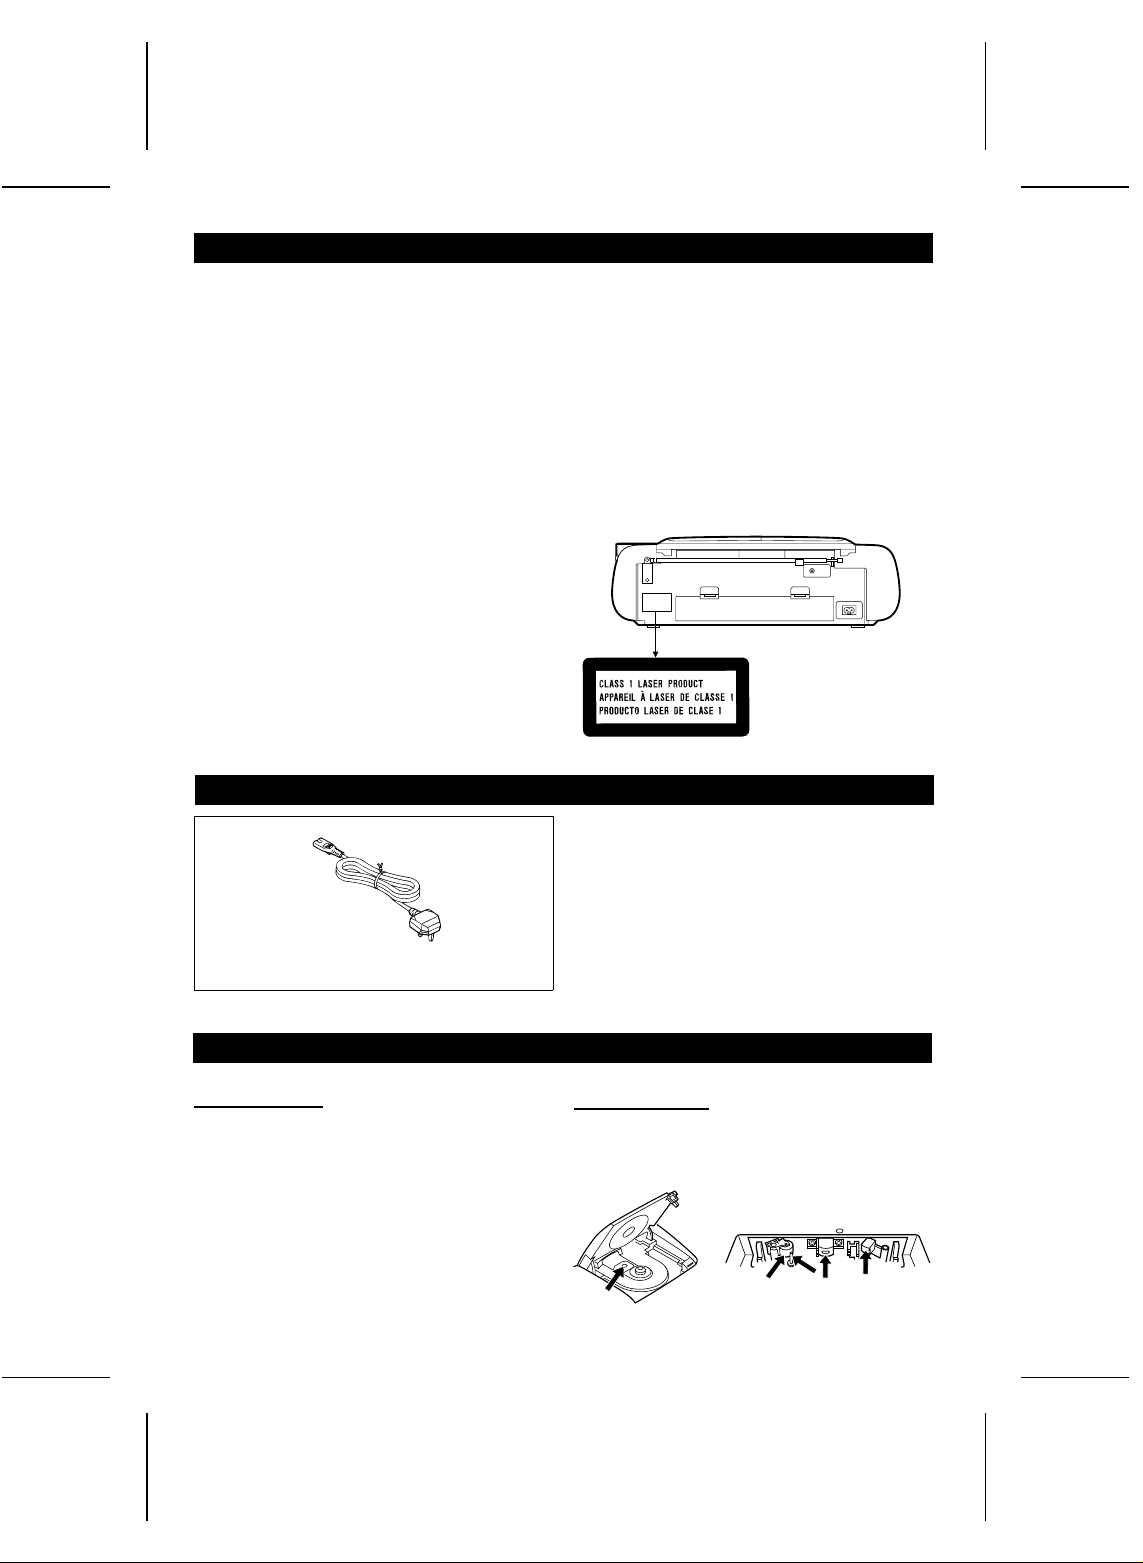
ACCESSORY
Warning:
To prevent fire or shock hazard, do not expose this
appliance to dripping or splashing liquids.
Caution:
● Use of controls, adjustments or performance of
procedures other than those specified herein
may result in hazardous radiation exposure.
As the laser beam used in this compact disc
player is harmful to the eyes, do not attempt to
disassemble the cabinet. Refer servicing to
qualified personnel only.
Parts and accessories mentioned in this operation
manual other than those in the drawing are not
included.
AC power lead × 1
MAINTENANCE
■ Internal care
● Do not touch the Laser pickup lens. If fingerprints
or dust accumulate on the pickup, clean it gently
with a dry cotton swab.
● Dirty heads, capstan or pinch roller can cause
poor sound and tape jams. Clean these parts
with a cotton swab moistened with commercial
head/pinch roller cleaner or isopropyl alcohol.
● After long use, the deck’s heads and capstan
may become magnetised, causing poor sound.
Demagnetise these parts once every 30 hours of
playing/recording by using a commercial tape
head demagnetiser. Read the demagnetiser’s
instructions carefully before use.
QT-CD131H(SUK) TINSE0007SJZZ
Note:
● The AC power lead is located in the polystyrene.
■ External care
● Periodically wipe the cabinet with a soft cloth and
a diluted soap solution, then wipe with a dry cloth.
● Do not use chemically treated cleaning cloths or
other chemicals.
1
Page 3

<P=002>
PRECAUTIONS
■ General
● Do not use oil, solvents, petrol, paint thinners or
insecticides on the unit.
● Do not expose the unit to moisture, to temperatures higher than 60˚C (140˚F) or to extreme low
temperatures.
● Keep the unit away from direct sunlight, strong
magnetic fields, excessive dust, humidity and
electronic/electrical equipment (home computers, facsimiles, etc.) which generates electrical
noise.
● Hold the AC power plug by the head when removing it from the AC socket, since pulling the
lead can damage internal wires.
● When cleaning the heads, pinch roller, etc,
remove the AC power plug from the wall socket
as the unit contains high voltages.
Do not remove the outer cover, as this may result
in electric shock. Refer internal service to your
local SHARP service facility.
● Use the unit on a firm, level surface free from
vibration, and do not place anything on the top
of the unit.
● If the unit does not work properly whilst in use,
set the FUNCTION switch to STAND-BY and
then to ON again.
● If an electrical storm is taking place near you, it
is suggested that you disconnect the AC power
lead from the AC socket for safety.
Warning:
The voltage used must be the same as that specified
on this unit. Using this product with a higher voltage
other than which is specified is dangerous and may
result in a fire or other type of accident causing
damage. SHARP will not be held responsible for any
damage resulting from use of this unit with a voltage
other than that which is specified.
■ Condensation
Sudden temperature changes, storage or operation
in an extremely humid environment may cause condensation inside the cabinet (CD pickup, tape
heads, etc.).
Condensation can cause the unit to malfunction.
If this happens, leave the power on with no disc (or
cassette) in the unit until normal playback is possible
(about 1 hour).
Warning:
CD players use a laser pickup which can damage
the eyes if viewed directly. Do not look at the pickup,
and do not touch the pickup directly.
■ AC power lead
● If the unit will not be used for a long period of
time, remove the AC power lead from the AC
socket.
● Connection of the AC power lead to the unit
disconnects the batteries.
● Never use a power lead other than the one
supplied. Use of a power lead other than the one
supplied may cause an electric shock or fire.
■ Battery use
● Insert the batteries according to the direction
indicated on the rear panel.
● Replace all old batteries with new ones at the
same time.
● Do not mix old and new batteries.
● Remove the batteries if they are weak or if the
unit will not be used for long periods of time. This
will prevent potential damage due to battery
leakage.
Caution:
● Do not use rechargeable batteries (nickel-cadmium battery, etc.).
● If the memory batteries are not inserted and the
power is disconnected, the tuner’s preset
memories will be erased.
Battery replacement:
● Replace the batteries when they become weak
and/or recording or playback is impaired.
This may occur even though radio broadcasts
are audible.
● Replace the memory batteries approximately
once a year.
■ Care of compact discs
Compact discs are fairly resistant to damage, however mistracking can occur due to an accumulation
of dirt on the disc surface.
Follow the guidelines below for maximum enjoyment
from your CD collection and player.
● Do not write on either side of the disc, particularly
the non-label side. Signals are read from the
non-label side. Do not mark this surface.
● Keep your discs away from direct sunlight, heat,
and excessive moisture.
● Always hold the CDs by the edges. Fingerprints,
dirt, or water on the CDs can cause noise or
mistracking. If a CD is dirty or does not play
properly, clean it with a soft, dry cloth, wiping
straight out from the centre, along the radius.
■ Cassette tape
● For playback, use normal or low-noise tape for
the best sound. (Metal or CrO2 tape is not recommended.)
For recording, use only normal tape.
● Do not use C-120 tapes, tapes with large
diameter reels, or poor-quality tapes, as they
may cause malfunctions.
● Before loading a tape into the cassette compartment, tighten the slack with a pen or pencil.
● Cassettes have removable tabs which prevent
accidental recording or erasing from taking
place. Removing the tab will protect the corresponding side from being erased. Cover the tab
holes with adhesive tape to erase or record
again.
2
Tab for side B (2)
Side A (1)
Tab for side A (1)
QT-CD131H(SUK) TINSE0007SJZZ
Page 4

<P=003>
AC power
To AC INPUT
FUNCTION /
STAND-BY, ON
AC 230 - 240 V, 50 Hz
PHONES
Battery power
3
4
2
1
8
2
1
● 2 "AA" size batteries
(UM/SUM-3, R6, HP-7
or similar) for Tuner
memory
● When inserting or removing the batteries ④ and ⑧,
push them towards the ë battery terminals.
● Installing the batteries incorrectly may cause the unit
to malfunction.
● 8 "D" size batteries
(UM/SUM-1, R20, HP-2
or similar)
PHONES
RECORD
6
5
STOP/EJECTF FWD REWINDPLAY
PAUSE
7
VOLUME
X-BASS
Sound control
● Volume
VOLUME
REVIEW/
DOWN
● X-BASS
X-BASS
ON
OFF
UP
STOPCUE
PLAY /
REPEAT
3
QT-CD131H(SUK) TINSE0007SJZZ
PRESET BAND MEMORY TUNING
DOWN UP DOWN UP
After use:
FUNCTION
TUNER
TAPE
Set the FUNCTION switch to
STAND-BY.
CD
ONSTAND-BY
Page 5

YT <P=001>
CD playback
1 Set the FUNCTION
2 Load a CD.
switch to CD.
CD EJECT
FUNCTION
TUNER
TAPE
● "Cd" will be displayed.
CD
ONSTAND-BY
Open
Label facing up
● The total number of tracks will be
displayed.
Note:
● When "Cd" or track number is displayed, the
power is connected.
If you will not be using the CD player, set the
FUNCTION switch to STAND-BY.
Precautions:
● Do not open the CD compartment whilst the disc
is rotating.
● If the disc is damaged, dirty, or loaded upside
down, the total number of tracks will not appear.
Clean, replace, or reload the disc properly.
● Keep foreign objects out of the CD compartment.
● Subjecting the unit to shock or vibration may
cause mistracking.
● Keep the CD compartment closed except when
loading discs.
● Playing certain compact discs at a high volume
may cause mistracking. In this case, listen at a
lower volume.
● The temperature range for playing compact discs
is recommended to be 5˚C (41˚F) - 35˚C (95˚F).
● If TV or radio interference occurs during CD
operation, move the unit away from the TV or
radio.
■ Repeat play
During playback,
To repeat all of the
tracks on the disc
To cancel repeat
play
Press
Press
again
PLAY /
REPEAT
PLAY /
REPEAT
3 Press the
PLAY/REPEAT
button.
PLAY /
REPEAT
PUSH CLOSE
● "0" will appear
Close
■ APSS (Auto Program Search System)
To move to the beginning of the next
track
To listen to the track
being played again
● To skip a number of tracks at one time, press the
UP or DOWN button repeatedly until the desired
track number is shown.
● To start playback from a desired track, press the
UP or DOWN button whilst in the stop mode to
select the track number, and then press the
PLAY/REPEAT button.
■ Cue and review
To fast forward
audibly
To fast reverse
audibly
Notes:
● If the end of the disc is reached whilst cueing, CD
operation will be paused. Press the 3 REVIEW
button for fast reverse or press the STOP button
to stop CD operation.
● If the beginning of the track is reached whilst
reviewing, the mode will automatically switch to
normal playback at that point.
and playback will
begin from track 1.
To stop
playback
During playback,
CUE UP
During playback,
DOWN REVIEW
During playback,
hold
During playback,
hold
CUE UP
DOWN REVIEW
STOP
4
QT-CD131H(SUK) TINSE0007SJZZ
Page 6

<P=002>
Radio operation
■ Manual tuning
1 Set the
FUNCTION
switch to TUNER.
FUNCTION
TAPE
TUNER
CD
ONSTAND-BY
2 Select the desired fre-
quency band. (FM ST,
FM or AM)
FM STERO
FM
ST
BAND
● To receive an FM stereo
transmission, press the
BAND button so that the "ST"
indicator on the display lights
up.
● The "j" indicator lights up
when an FM broadcast is in
stereo.
ST
FM MONO
FM
AM
AM
ST
MHz
MHz
KHz
FM
3 Press the TUNING (
X
or W) button to tune into the desired station.
TUNING
DOWN UP
● Holding it down for more than 0.5 seconds will cause the frequency to change
rapidly until the button is released.
● If the FM reception is poor, press the
BAND button so that the "ST" indicator
goes out.
● Although the reception changes to monaural, the sound becomes clearer.
● Please note that when the unit is being
tuned in the FM stereo mode, interim
station noise as well as weak stations
are suppressed. Only in the FM monaural mode, can weak and noisy stations
be received.
■ Preset tuning
You can store up to 30 stations (20 FM stations and 10 AM stations) and recall them at the push of a
button. FM stations can be recalled in either stereo or mono.
1 Perform steps 1 - 3
of the "Manual tuning" section.
2 Press the MEMORY
button.
MEMORY
3 Within 5 seconds, press the
PRESET (X or W) button until
the preset number to be programmed flashes in the display.
PRESET
DOWN UP
● The display’s "MEMORY", "station number"
and "CH" indicators will
flash.
4 Within 5 seconds, press the MEMORY button to
store that station in the selected station preset
number memory.
MEMORY
5 Repeat steps 1 - 4 to set
other preset stations, or to
change a preset station.
● 20 FM stations can be preset (preset channels 1 through 20).
● 10 AM stations can be preset (preset channels 1 through 10).
(There are no presets 11 through 20 for AM stations.)
● If the "MEMORY" and preset number indicators go out before the station is memorised, repeat the
operation from step 2.
5
QT-CD131H(SUK) TINSE0007SJZZ
Page 7

<P=003>
Radio operation (Continued)
■ To recall a memorised station
1 Set the
FUNCTION
switch to TUNER.
FUNCTION
Aerial adjustment:
FM
TAPE
TUNER
2 Select the desired fre-
quency band. (FM ST,
FM or AM)
FM STERO
CD
BAND
ONSTAND-BY
AM
FM MONO
AM
3 Press the PRESET (
X
or W) button to recall the desired preset
channel number.
FM
ST
ST
FM
AM
MHz
MHz
● The caption FM ST, FM or AM and a
KHz
frequency will appear in the display.
Notes:
● When the memory ["AA" size (UM/SUM-3, R6,
HP-7 or similar)] batteries are installed in the
unit, the memory recalls the last station received
even after changing the band selector, setting
the FUNCTION switch to STAND-BY or unplugging the unit from AC power.
● If the memory batteries are not inserted and the
power is disconnected, the tuner’s preset
memories will be erased.
● Replace the memory batteries approximately
once a year.
PRESET
DOWN UP
6
QT-CD131H(SUK) TINSE0007SJZZ
Page 8

YT
<P=001>
Tape playback
1 Set the FUNCTION
switch to TAPE.
FUNCTION
TUNER
TAPE
To stop playback
To rewind the tape
To advance the
tape
CD
ONSTAND-BY
When stopped,
When stopped,
2 Load the cassette into the cassette
compartment.
STOP/EJECT
STOP/EJECT
REWIND
F FWD
To interrupt
playback
To resume
playback
Precautions:
● Be sure not to press the PLAY and REWIND
buttons simultaneously, or the tape will become
damaged.
● Before changing from one tape operation to another, press the STOP/EJECT button.
● Do not press the PAUSE button whilst the fast
forward or rewind operations are in progress.
The F FWD or REWIND button will not be released when the tape end is reached. Once this
occurs, press the STOP/EJECT button.
3 Press the PLAY
button.
PLAY
PAUSE
PAUSE
Headphones
To PHONES
● Be sure your headphones
have a 3.5 mm (1/8")
diameter plug and are between 16 ohms and 50
ohms impedance. The
recommended impedance
is 32 ohms.
7
QT-CD131H(SUK) TINSE0007SJZZ
Page 9

<P=002>
Recording from the CD
1 Set the FUNCTION
switch to CD.
2 Load a blank cassette
into the cassette
compartment.
FUNCTION
TUNER
TAPE
● Load the disc to be
recorded.
To stop recording:
Press the STOP/EJECT button.
Note:
● If the STOP button on the CD player is pressed
whilst recording, or if the CD comes to its end,
the tape deck will not stop.
To record a specific track:
Press the UP or DOWN button on the CD player until
the desired track number is displayed, then start
recording.
CD
ONSTAND-BY
STOP/EJECT
Recording from the radio
3 Press the
RECORD
button.
4 Press the
PLAY/REPEAT
button on the
CD.
PLAY /
RECORD
Before recording:
● When recording important selections, be sure to
make a preliminary test to ensure that the desired
material is being properly recorded.
● The ALC (Automatic Record Level Control) circuit automatically controls the level of the input
signal used for recording.
● The VOLUME and X-BASS controls may be
adjusted with no effect to the recorded signal.
(Variable Sound Monitor)
● Metal and CrO2 tapes cannot be used for recor-
ding.
REPEAT
1 Set the
FUNCTION
switch to
2 Load a blank cas-
sette into the cassette compartment.
TUNER.
FUNCTION
TAPE
● Tune in to the
station to be
recorded.
To erase a recorded tape:
1 Set the FUNCTION switch to TAPE.
2 Load the tape to be erased into the cassette
compartment.
3 Press the RECORD button.
TUNER
CD
STOP/EJECT
ONSTAND-BY
QT-CD131H(SUK) TINSE0007SJZZ
3 Press the
PAUSE
button.
PAUSE
8
4 Press the
RECORD
button.
RECORD
5 Press the
PAUSE button again.
PAUSE
Page 10

<P=003>
SPECIFICATIONS
SHARP reserves the right to make design and specification changes for product improvement without prior
notice.
● General
Power source: AC 230 - 240 V, 50 Hz
Power
consumption: 11 W
Output power: MPO (Max.); 8.4 W (4.2 W + 4.2 W)
Speakers: 10 cm (4") full-range speaker x 2
Output terminal: Headphones; 16-50 ohms
Dimensions: Width; 480 mm (18-15/16")
Weight: 3.2 kg (7.1 lbs.) without batteries
DC 12 V ["D" size (UM/SUM-1, R20 or HP-2)
battery × 8]
DC 3 V [ "AA" size (UM/SUM-3, R6 or HP-7)
battery x 2 for tuner memory]
(AC operation)
RMS; 4.6 W (2.3 W + 2.3 W)
(DC operation, 10 % T.H.D.)
(recommended; 32 ohms)
Height; 153 mm (6-1/16")
Depth; 254 mm (10")
● Radio
Frequency range: FM; 87.5 - 108 MHz
AM; 522 - 1,620 kHz
● Tape recorder
Frequency
response: 50 - 14,000 Hz (Normal tape)
Signal/noise ratio: 50 dB
Wow and flutter: 0.25 % (WRMS)
Motor: DC 12 V electric governor
Bias system: AC bias
Erase system: Magnet erase
● Compact disc player
Type: Compact disc
Signal readout: Non-contact, 3-beam semi-
Audio channels: 2
Quantization: 16-bit linear quantization
Filter: 4-times oversampling digital filter
D/A converter: 1-bit D/A converter
Wow and flutter: Unmeasurable
conductor laser pickup
(less than 0.001% W. peak)
TERMS OF GUARANTEE
Sharp Electronics (UK) Ltd. ("Sharp") guarantees to provide for the repair, or at its option the
replacement, of this product subject to the conditions listed below:-
1. This guarantee shall only apply to faults which are due to inferior workmanship or materials.
It does not cover faults or damage caused by accident, misuse, fair wear and tear, neglect,
tampering with the product, or repair other than by a Service Facility appointed by Sharp.
2. As this product is intended for private domestic use only, the guarantee will not apply if the
product is used in the course of a business, trade or profession.
3. To benefit from this guarantee, any fault which occurs must be notified to Sharp, or its
appointed Service Facility within one year from the date this product was purchased. Proof
of purchase must be provided.
4. The guarantee does not cover carriage costs, jewelled styli, audio tapes, compact discs or
batteries.
5. In the unlikely event of this product requiring repair, please contact the supplier from whom it
was purchased. Where this is not possible, please contact the Sharp Customer Information
Centre on the telephone number given below.
6. No person has any authority to vary the terms or conditions of this guarantee.
7. This guarantee is offered as an additional benefit to your statutory rights, and does not affect
these rights in any way.
If you have any difficulty operating this product, or would like information on other Sharp products,
please telephone the Sharp Customer Information Centre on the number given below.
Sharp Customer Information Centre - Telephone 0345 125387
TINSE0007SJZZ
SHARP ELECTRONICS (U.K.) LTD.
Sharp House, Thorp Road, Newton Heath, Manchester, M40 5BE
SHARP CORPORATION
A9806.YT
QT-CD131H(SUK) TINSE0007SJZZ
 Loading...