

Page 1
MICRO COMPONENT SYSTEM
● Refer to the operation manual for details.
● P. OO indicates the reference page in the operation manual.
1
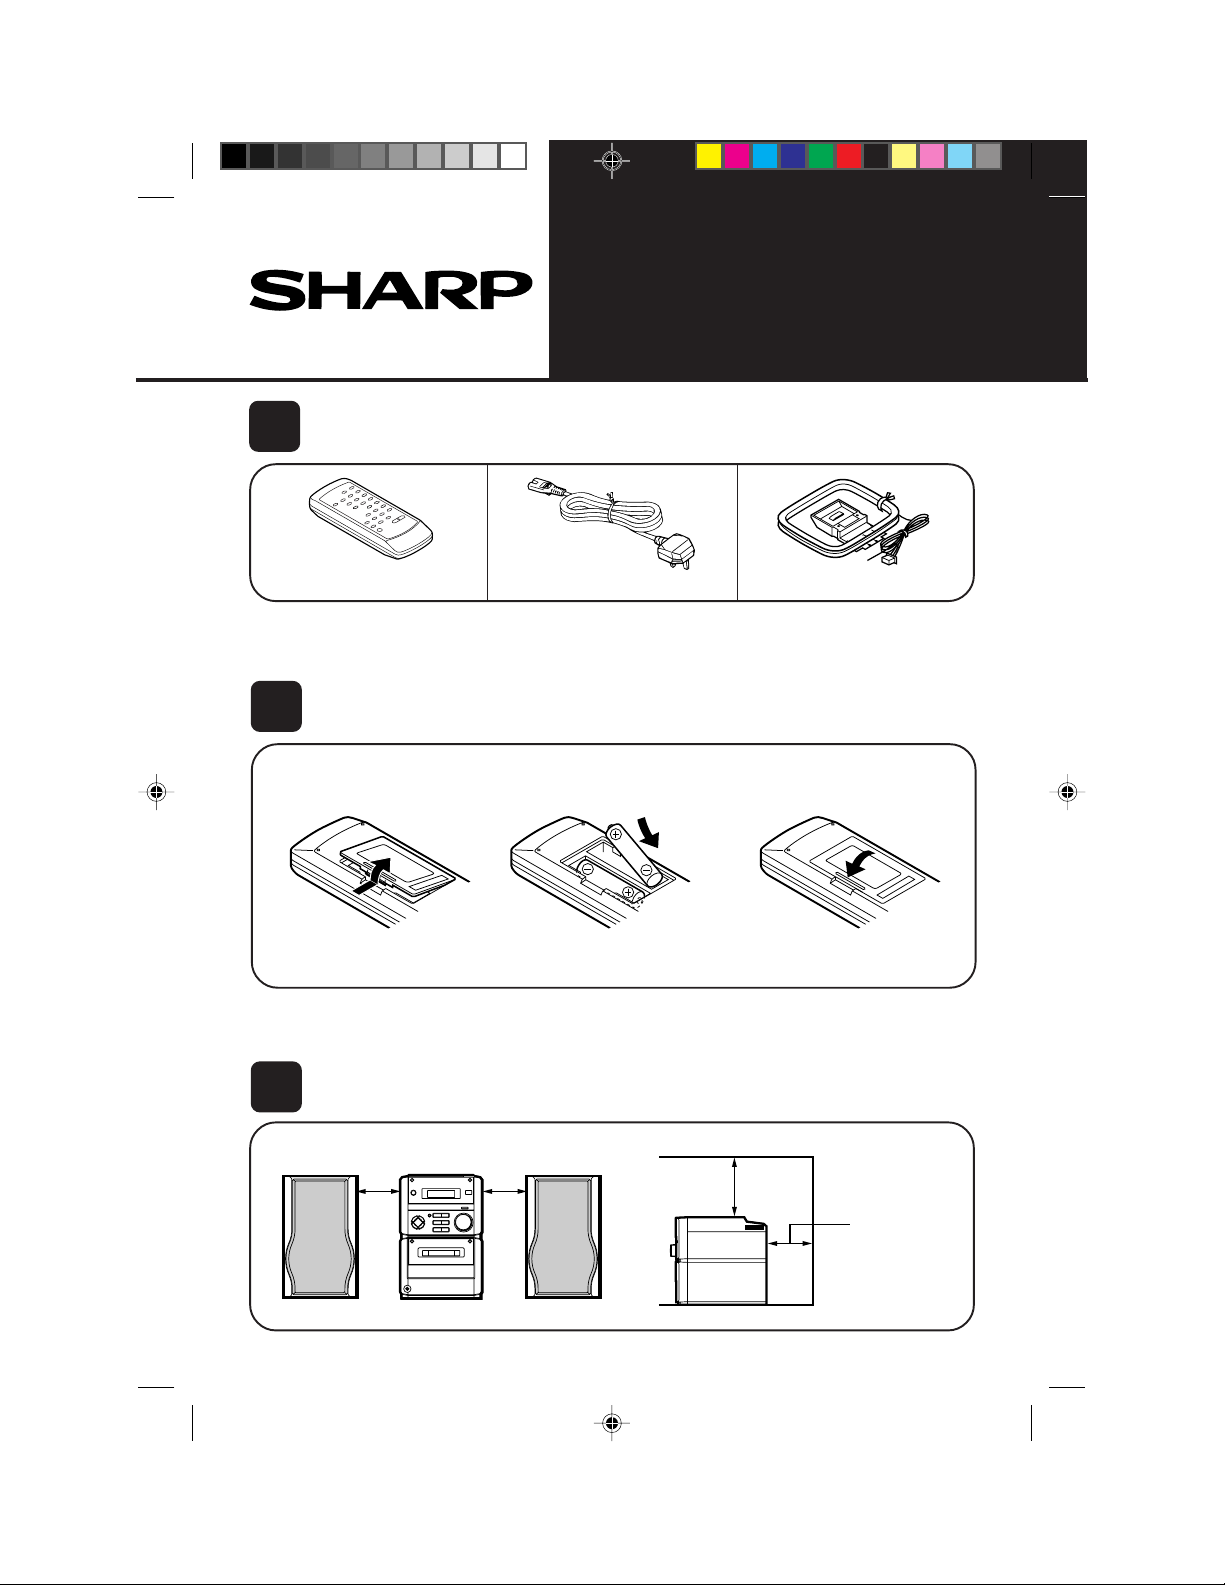
Check the supplied accessories (P. 3)
Quick Guide XL-30H
Remote control × 1
2
Putting batteries into the remote control (P. 8)
1Remove the battery
cover.
2 “AA” size batteries (UM/SUM-3, R6, HP-7 or similar)
Batteries are not included.
3
Placing the system (P. 8)
10 cm (4")
10 cm (4")
AC power lead × 1
2 Insert the batteries.
20 cm (8")
FM/AM loop aerial ×1
3 Replace the battery cover.
**XL-30H(SUK).QG 00.2.4, 4:43 PM1
10 cm (4")
1
Page 2
4
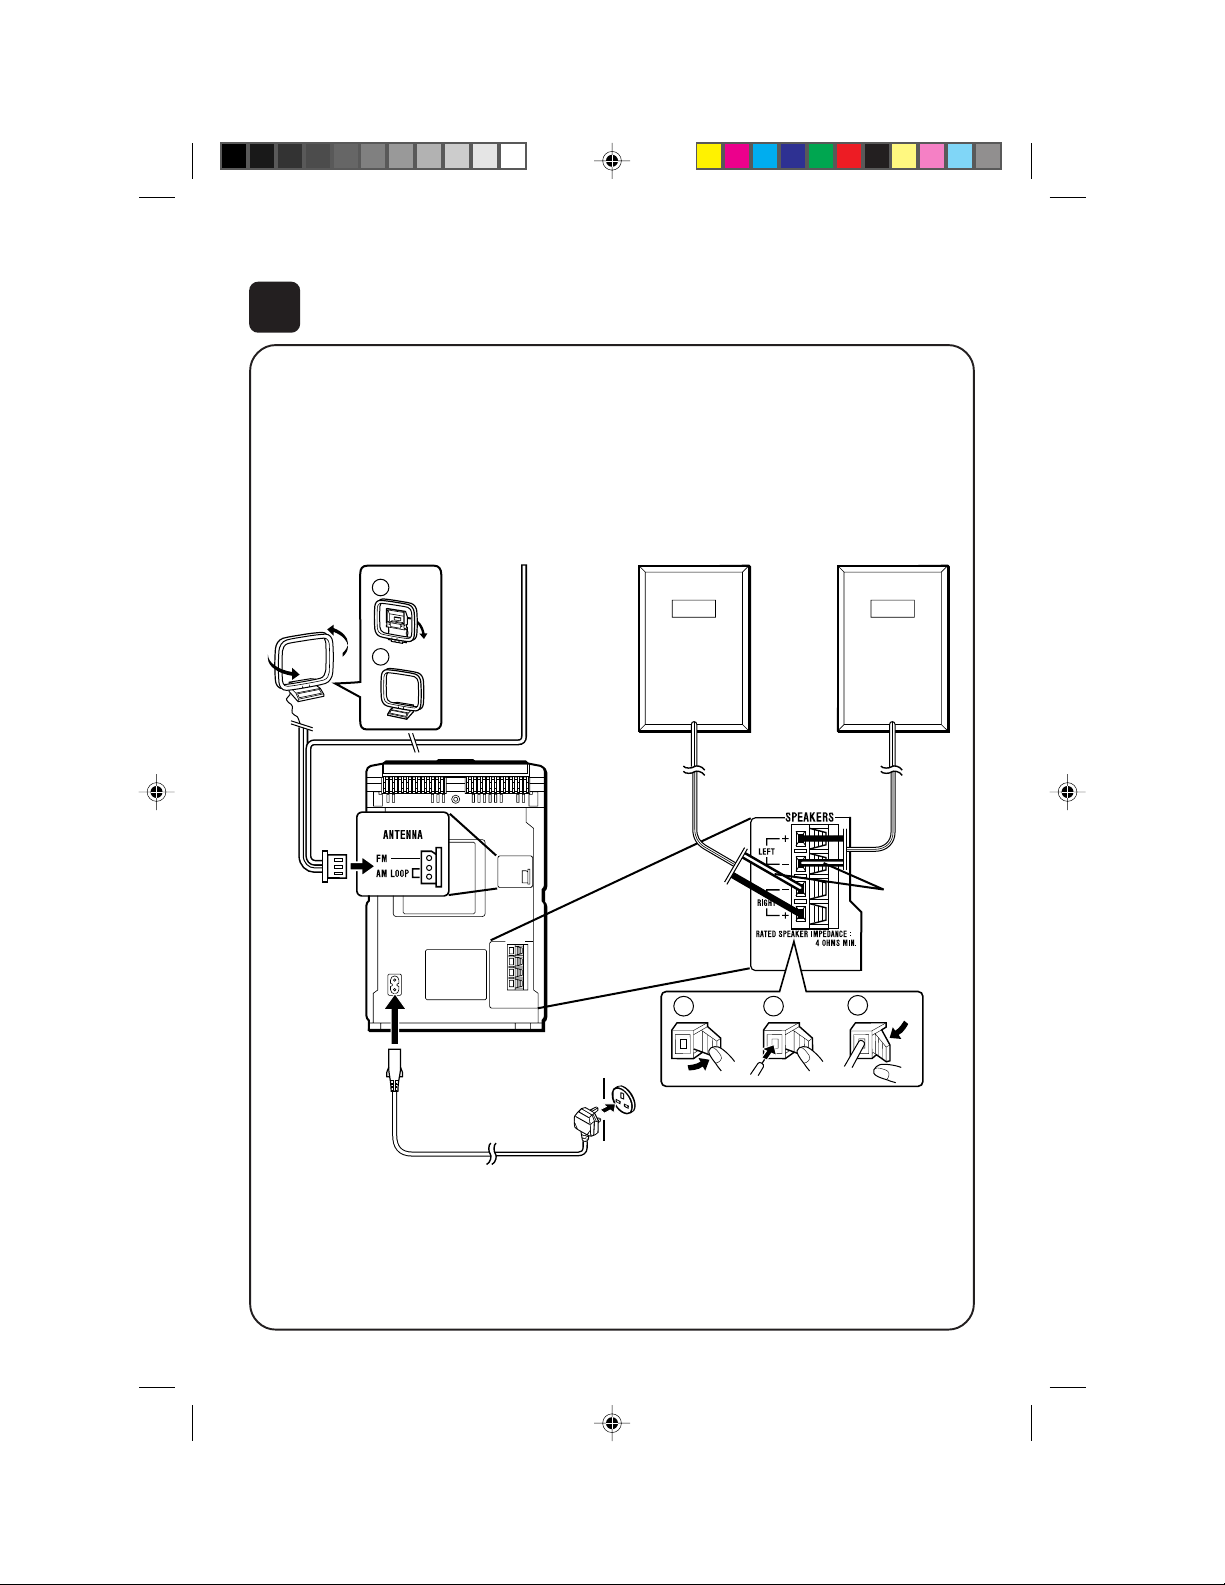
Connections (P. 7-8)
1 Connect the AM and FM aerials.
FM aerialAM loop aerial
1
2
2 Connect the speaker system.
Right speaker Left speaker
White line
1
2
3
3 Connect the AC power lead.
**XL-30H(SUK).QG 00.2.4, 4:43 PM2
AC 230 V, 50 Hz
2
Page 3

5
Listening to a CD (P. 11)
Label side up
7CD EJECT
3
1
2
6
Listening to a tape (P. 14)
1
2
4
6
7
5
6
4
3
5
PUSH
CLOSE
1 Press the ON/STAND-BY button to turn
the power on.
2 Press the FUNCTION button until “Cd” or
“no dISC” appears.
3 Press the 7 CD EJECT button to open
the CD compartment.
4 Place a CD on the spindle.
5 Close the CD compartment by pushing the
corner marked “PUSH CLOSE”.
6 Press the 0/CD 6 button.
7 Adjust the VOLUME control.
1 Press the ON/STAND-BY button to turn
the power on.
2 Press the FUNCTION button until “TP”
appears.
3 Open the cassette door by pushing the
area marked “7 PUSH EJECT”
4 Load a cassette.
5 Press the 0 button.
6 Adjust the VOLUME control.
7
Listening to the radio (P. 15)
1
3
2
**XL-30H(SUK).QG 00.2.4, 4:43 PM3
1 Press the ON/STAND-BY button to turn
the power on.
2 Press the FUNCTION button until “FM” or
4
“AM” appears.
3 Press the BAND button to select FM ST,
FM or AM.
4 Press the TUNING (X or W) button to tune
5
into a station.
5 Adjust the VOLUME control.
3
Page 4

8
Recording from a CD (P. 17)
1 Press the ON/STAND-BY button to turn
the power on.
1
4
5
2
2 Press the FUNCTION button until “Cd” or
“no dISC” appears.
3 Load a CD and a recordable cassette.
4 Press the REC PAUSE button.
5 Press the 0 button.
3
● Resetting the micro computer
If this product is subjected to strong external interference (mechanical shock, excessive static electricity, abnormal supply voltage due to lightning,
1
3
3
AC INPUT
2,3
etc.) or if it is operated incorrectly, it may malfunction or the display may not function correctly . If such
a problem occurs, do the following:
1 Press the ON/STAND-BY button to enter the
stand-by mode.
2 Unplug the AC power lead from the AC INPUT
socket on this unit.
3 Whilst pressing down the MEMORY/SET but-
ton and the 0 button, plug the AC power lead
into the AC INPUT socket on this unit.
Caution:
● The operation explained above will erase all data
stored in memory, such as clock and timer settings, and tuner and CD presets.
● CD pickup cleaning
TINSE0041SJZZ
**XL-30H(SUK).QG 00.2.4, 4:43 PM4
● Do not touch the laser pickup lens. If fingerprints
or dust accumulate on the pickup, clean it gently
with a dry cotton swab.
4
A0002.YT
 Loading...