

Page 1

FIERY PRINT CONTROLLER
FIERY PRINT CONTROLLER
MX-PEX1
MX-PEX2
FIERY PRINT CONTROLLER
MX-PEX1
MX-PEX1
MX-PEX2
MX-PEX2
This manual explains the settings on the operation panel of the machine that are affected when
the Fiery Print Controller is installed.
For the procedures for using the Fiery Print Controller, such as using the printer driver and
configuring color settings, see the manual on the CD-ROM that accompanies the Fiery Print
Controller.
Page
FIERY PRINT CONTROLLER ............................... 1
● Print functions ................................................ 1
● Operation on a machine................................. 2
● Fiery Web Tools............................................. 2
SYSTEM SETTINGS.............................................. 3
● Fiery Settings ................................................. 4
● Remote Auto Color Calibration Mode ............4
● Default Settings.............................................. 5
● Interface Settings ........................................... 5
USING SECURE PRINT ........................................ 6
DISPLAY OF FIERY PRINT JOBS ........................ 8
● Fiery screen ................................................... 8
● Job status complete screen ........................... 8
SECURITY SETTINGS .......................................... 9
●
Disabling of Print Jobs Other than Print Hold Job
● Disabling of Document Filing ......................... 9
● Document Control Setting.............................. 9
● Authority Group Registration screen ............ 10
... 9
Page 2

Warranty
While every effort has been made to make this document as accurate and helpful as possible, SHARP
Corporation makes no warranty of any kind with regard to its content. All information included herein is
subject to change without notice. SHARP is not responsible for any loss or damages, direct or indirect,
arising from or related to the use of this operation manual.
© Copyright SHARP Corporation 2006. All rights reserved. Reproduction, adaptation or translation
without prior written permission is prohibited, except as allowed under copyright laws.
Trademark Acknowledgments
Microsoft Windows operating system is a registered trademark or trademark of the Microsoft
Corporation in the U.S.A. and other countries.
Windows
2003 and Internet Explorer
U.S.A. and other countries.
All other trademarks and copyrights are the property of their respective owners.
®
2000 Professional, Windows® 2000 Server, Windows® XP Professional, Windows® Server
®
are registered trademarks or trademarks of Microsoft Corporation in the
About this manual
•The MX-PEX1 is for use with the MX-3500/4500 series. The MX-PEX2 is for use with the
MX-3500/4500 series and the MX-5500N/6200N/7000N.
•Where this manual shows the "MX-3500/4500 series", the following models are indicated:
MX-3500/4500 series: MX-3500N, MX-3501N, MX-4500N, MX-4501N
•This operation manual mainly uses illustrations of MX-5500N/6200N/7000N. The operation panel on
your model may differ slightly from the images shown in this manual.
The display screens, messages, and key names shown in the manual may differ from those on the
actual machine due to product improvements and modifications.
Page 3
FIERY PRINT CONTROLLER
By installing the Fiery Print Controller, higher quality printing becomes possible. When this is done, the
regular printer driver cannot be used and other restrictions apply to the functions of the machine.
To ensure that the machine functions correctly, keep the Fiery Print Controller powered on even when you are
not using the Fiery print function.
■ Print functions
When the Fiery Print Controller is installed, regular print functions and Fiery Print Controller print
functions are as follows:
Print functions Regular print functions
Fiery Print Controller
print functions
PCL Disabled Enabled
PS Disabled Enabled
NOTE
● For the Fiery Print Controller to operate correctly, the port number of each protocol in the network settings must
be set to the initial value.
● The Fiery Print Controller is not equipped with a scanner function. To scan, use the regular scanner function
of the machine.
● When the Fiery Print Controller is installed, the tandem print function (using two machines, one as a master
machine and one as a slave machine, to print a very large print job) cannot be used.
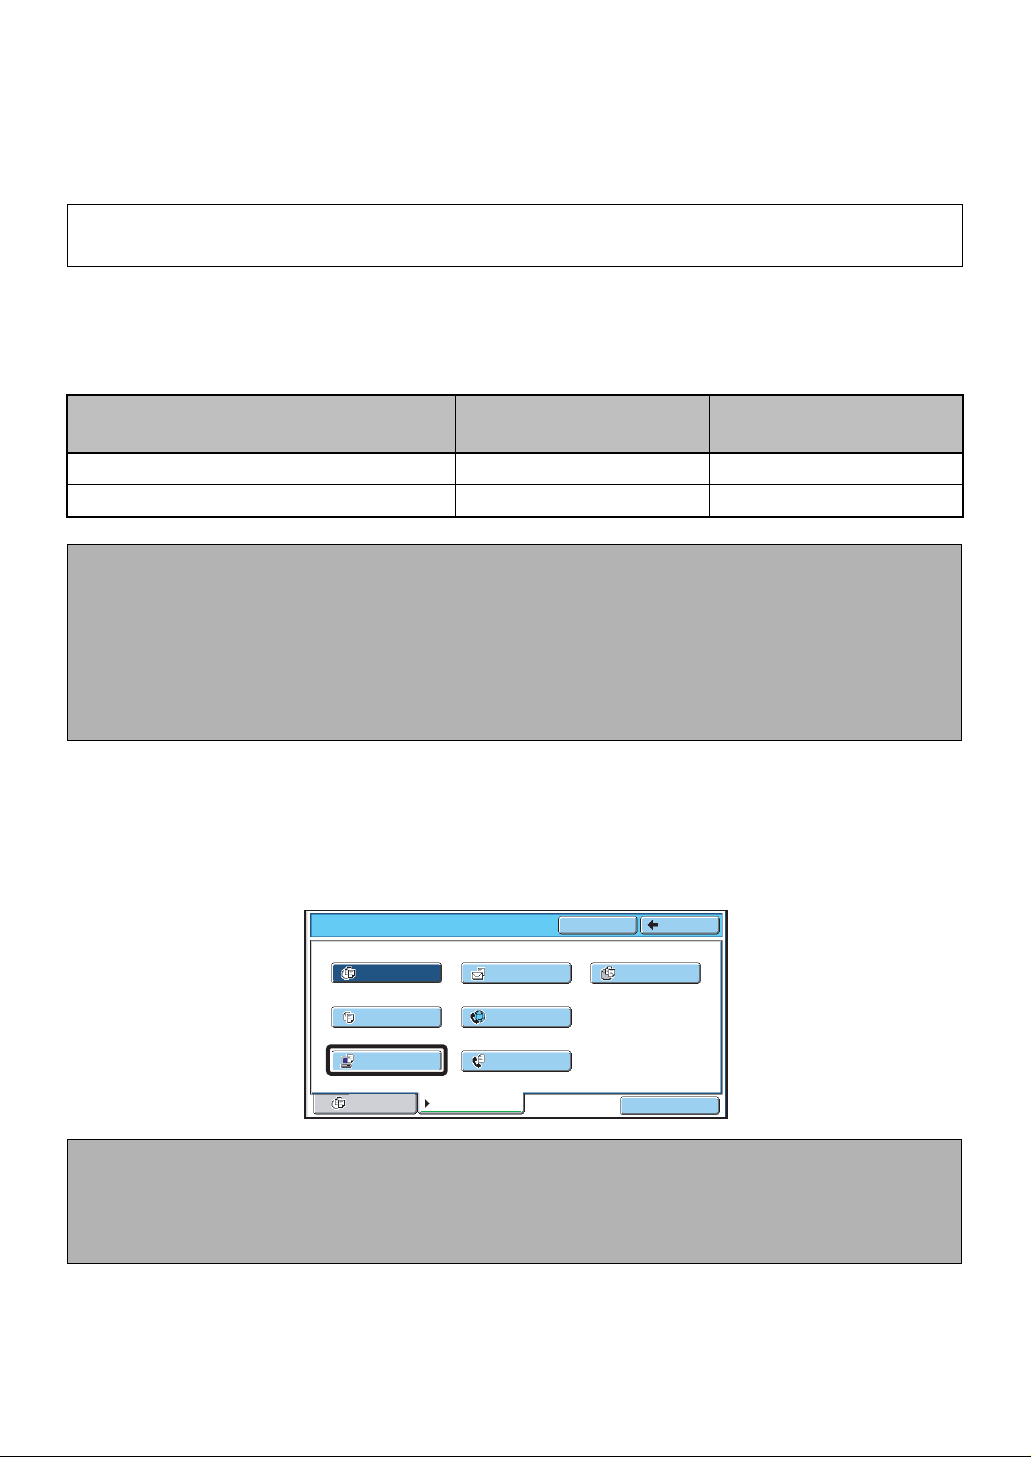
Document filing
When the Fiery Print Controller is installed, print jobs cannot be stored using the document filing function.
For this reason, the [Printer] key below will not appear in the screen that opens when the [Filter by Job]
key is touched on the operation panel. (In the Web pages of the machine, "Print" will not appear in the
[Job Classification] menu in the document filing settings ([Document Operations] - [Document Filing]).)
Main Folder
All Files
Search
Scan Scan to HDD
Back
Copy
Printer
All Files Filter by Job
Internet Fax
Fax
Batch Print
NOTE
Print jobs that were stored using the document filing function before the Fiery Print Controller was installed can
be printed by touching the [All Files] tab. (When using the Web pages of the machine, select "All Jobs" in the [Job
Classification] menu.)
1
Page 4

■ Operation on a machine
When the Fiery Print Controller is installed, operation using the operation panel changes as described
below.
System Settings
A key for Fiery Print Controller settings is added to the system settings (administrator). In addition,
certain restrictions apply to the regular system setting items. (☞ "SYSTEM SETTINGS" (page 3 of this
manual))
Secure Print
The user information in the Fiery Print Controller can be used for secure printing. (☞ "USING SECURE
PRINT" (page 6 of this manual))
Display of print jobs
A screen is added to display Fiery print jobs that are waiting to be printed. (☞ "DISPLAY OF FIERY
PRINT JOBS" (page 8 of this manual))
Security Settings
When the Fiery Print Controller is installed on a machine with the Data Security Kit installed, certain
restrictions apply to the security settings in the system settings (administrator). (☞ "SECURITY
SETTINGS" (page 9 of this manual))
■ Fiery Web Tools
When the Fiery Print Controller is installed, the button is added to the menu list in the Web
pages of the machine. When this key is clicked, "Fiery Web Tools" appears. This is used to configure
settings for the Fiery Print Controller.
For the information on Fiery Web Tools, see the manual on the CD-ROM that accompanies the Fiery
Printer Controller.
2
Page 5

SYSTEM SETTINGS
When the Fiery Print Controller is installed, the "Printer Condition Settings" do not appear in the system
settings.
The [Fiery Settings] key and [Remote Auto Color Calibration Mode] key are added to the "Printer
Settings", and restrictions apply to the previous settings.
[MX-5500N/6200N/7000N]
Touch the [Fiery] icon in the system bar and enter the administrator password, then touch the [OK] key.
(The display method differs from the previous "Printer Settings".)
Administrator Password
Enter the administrator password.(From 5 to 32 characters)
Password *****
Cancel
OK
Printer Settings(Fiery)
Fiery Settings
Remote Auto Color
Calibration Mode
OK
(1) (3)(2)
[MX-3500/4500 series]
System Settings
Printer Settings
Default Settings
Interface Settings
Fiery Settings
OK
1/2
System Settings
Printer Settings
Remote Auto Color
Calibration Mode
OK
NOTE
The additions and changes to the system settings explained in this manual also apply to the Web pages of the
machine.
2/2
3
Page 6

■ Fiery Settings
gs
p?
es
OK
p
ack
When the [Fiery Settings] key is touched, the following screen will appear. This screen allows various
settings to be selected when printing using the Fiery Print Controller.
Fiery Settin
Continue to Setu
Y
Run Setu
B
After selecting or changing Fiery settings, touch the [Back] key (MX-3500/4500 series: ) to return
to the printer settings screen.
For detailed information on the settings, see the manual on the CD-ROM that accompanies the Fiery
Print Controller.
NOTE
● When the Fiery Print Controller* is installed, configure the IP address and other network settings in the "Fiery
Settings".
* After changing the IP address in the "Fiery Settings", restart the machine. The IP address in the machine will
be automatically updated.
● When the Fiery settings screen is displayed in the operation panel, the mode select keys, Start keys ([COLOR
START] key ( ) / [BLACK & WHITE START] key ( )), [LOGOUT] key ( ), [PROGRAM] key ( ),
and [HOME] key (MX-5500N/6200N/7000N) are disabled.
● To return to the screen that appeared before the system settings were accessed, press the [CLEAR ALL] key
().
■ Remote Auto Color Calibration Mode
To use remote auto color calibration, place the color calibration pattern that was printed using EFI's
Color Wise Pro on the document glass, touch the [Remote Auto Color Calibration Mode] key to ready
the machine for scanning, and then execute scanning from your computer.
During scanning of the pattern, the message "This machine is in the remote auto color calibration mode.
Do not remove the original." will appear.
When scanning is finished, touch the [Exit] key to quit remote auto color calibration mode.
For information on the advanced settings for remote auto color calibration, see the manual on the
CD-ROM that accompanies the Fiery Print Controller.
Regular Printer Color Calibration Function
When the Fiery Print Controller is installed, the [Auto Color Calibration] ([Color Adjustments]) key does
not appear and the printer color calibration function cannot be used. Instead, the above printer color
calibration function of the Fiery Printer Controller can be used.
4
Page 7

■ Default Settings
g
:
t
Cancel
OK
gs
g
When the Fiery Print Controller is installed, certain restrictions apply to the "Default Settings" and the
screen is as indicated below.
System Settin
Default Settin
Prohibit Notice Page Printin
Bypass Tray Settings
Previously displayed settings Description
Prohibit Notice Page Printing Can be configured as usual
Prohibit Test Page Printing Not displayed
A4/Letter Size Auto Change Not displayed
Print Density Level Not displayed
Bypass Tray Settings
Job Spool Queuing Not displayed
Exclude Bypass-Tray from Auto Paper Selec
Only "Exclude Bypass-Tray from Auto
Paper Select" can be configured.
■ Interface Settings
When the Fiery Print Controller is installed, certain restrictions apply to the "Interface Settings" and the
screen changes as described below.
System Settings
Interface Settings
I/O Timeout:
Enable Network Port
Previously displayed settings Description
Hexadecimal Dump Mode Not displayed
I/O Timeout Can be configured as usual
Enable USB Port Not displayed
USB Port Emulation Switching Not displayed
Enable Network Port Can be configured as usual
Network Port Emulation Switching Not displayed
Port Switching Method Not displayed
Cancel OK
sec.(1-999)
5
Page 8

USING SECURE PRINT
A print job specified in the Fiery printer driver as a secure print job can be printed by entering the pass
code at the operation panel. (Secure Print)
Follow the steps below to perform secure printing when the Fiery Print Controller is installed.
Touch the [Secure Prn] key.
1
A list of the user names stored on the hard disk of the Fiery Print Controller for secure print will
appear.
File Retrieve Scan to HDD HDD Status Secure Prn
Folder Select
Main Folder
1
3
5
Quick File Folder
2
4
6
Search
File Store
Scan to HDD
1
10
HDD Status
MX-5500N/6200N/7000N MX-3500/4500 series
Touch the appropriate user name and enter the pass code with the numeric keys.
2
16 digits or less numbers are entered for the pass code configured in the Fiery printer driver.
Search
File Retrieve
File
Folder
Quick File
Folder
Secure
Print
When you have finished entering the pass code, touch the [OK] key.
3
When the [OK] key is touched, the pass code is sent to the Fiery Print Controller.
If the entered pass code does not exist, the message "PIN is not verified." will appear. Re-enter the
correct pass code.
Touch the [Change PRT.No.] key and set the number of copies to be printed.
4
Delete the
Data
Back
Detail
Secure Print
User Name :ABC
Print and Delete the Data
Print and Save the Data
Change PRT.No.
Delete the
Secure Print
User Name : AAA
Print and Delete the Data Change PRT.No.
Print and Save the Data
MX-5500N/6200N/7000N MX-3500/4500 series
When the [Change PRT.No.] key is touched, a screen for setting the number of prints appears.
Touch the key and set the number of prints.
To apply the number of prints stored with the print job when each print job has a different number
of prints set, select the "Apply the Number from Stored Setting of Each Job." checkbox.
When you have completed the settings, touch the [OK] key.
Back
Detail
Data
6
Page 9

Touch the [Detail] key and configure detailed settings.
5
[MX-3500/4500 series]
Select the checkboxes of the files that you wish to print from the list of displayed file names, and
then touch the [OK] key.
[MX-5500N/6200N/7000N]
In the list of displayed file names, touch the selection keys of the files that you wish to print and then
touch the [Back] key.
NOTE
● The [File Name] key can be touched to switch the order of the list between ascending and descending by file
name. The [Date] key can be touched to switch the order of the list between ascending and descending by date.
● If there are more items in the list than can be displayed on the screen, use the keys to scroll the
screen.
Touch the [Print and Delete the Data] key or the [Print and Save the Data] key to
6
print the selected files.
If you wish to have the files deleted from the hard disk of the Fiery Print Controller after printing,
touch the [Print and Delete the Data] key. If wish to store the files on the hard disk of the Fiery Print
Controller after printing, touch the [Print and Save the Data] key.
NOTE
● To delete a file, touch the [Delete the Data] key.
● To return to the user name selection screen, touch the [Back] key.
7
Page 10

DISPLAY OF FIERY PRINT JOBS
When the Fiery Print Controller is installed, print jobs are spooled to the hard drive of the Fiery Print
Controller rather than to the machine. Because the print data takes a different path, the method of
displaying print jobs in the job status screen also changes.
■ Fiery screen
When the Fiery Print Controller is installed, the [Spool] key above the job status screen selector key
changes to the [Fiery] key. When this key is touched, the following Fiery screen will appear.
Print Job Internet FaxFax JobScan to
ABC Product.xls
1
DEF Address.xls
2
GHI File.doc
3
File NameUser Name
1
1
Fiery
Job Queue
Complete
The Fiery screen shows a list of the jobs waiting to be printed in the Fiery Print Controller. You can check
the user name and file name of each job in the list. The print job at the top of the Fiery screen list appears
in the job queue and waits in the machine to be printed. The job queue always shows only the one job
that is at the top of the list in the Fiery screen.
NOTE
● The Fiery screen can only be used to view the list; it cannot be used to delete a print job. To delete a print job,
see the manual (Utilities.pdf) for CommandWorkstation. Jobs that have already been printed are not displayed.
● Operation in the job status screen that appears when the [Job Queue] key is touched is the same as when the
Fiery Print Controller is not installed.
■ Job status complete screen
To display the job status complete screen, touch [Complete] in the job status screen selector key.
This screen is used to check completed jobs and reprint completed jobs.
However, note that unlike regular print jobs, Fiery print jobs cannot be reprinted from the job status
complete screen. To reprint a print job, see the manual (Utilities.pdf) for CommandWorkstation.
8
Page 11

SECURITY SETTINGS
Allow User to Select the Print Color
When the Fiery Print Controller is installed on a machine that has the Data Security Kit installed, several
of the security functions related to printing change. For detailed information on the security settings, see
the manual that accompanies the Data Security Kit.
The security settings menu appears when the [Security Settings] key is touched in the system settings
(administrator).
■ Disabling of Print Jobs Other than Print Hold Job
When the Fiery Print Controller is installed, the "Disabling of Print Jobs Other than Print Hold Job"
checkbox does not appear in the security settings menu.
Scan to HDD
Image Send
Disabling of List Print:
Disabling of Print Jobs Other Than Print Hold Job
All Custom Setting List
Sending Address List
Document Filing Folder List
MX-5500N/6200N/7000N
■ Disabling of Document Filing
System Settings
Security Settings
Disabling of Document Filing
Disabling of List Print (User)
Disabling of Print Jobs
Other than Print Hold Job
MX-3500/4500 series
OK
4/5
Because the regular document filing function cannot be used when a printer driver for the Fiery Print
Controller is used, settings related to printing in the "Disabling of Document Filing" do not appear.
Copy
Printer
Scan to HDD
Image Send
Disabling of List Print:
All Custom Setting List
Sending Address List
MX-5500N/6200N/7000N
System Settings
Disabling of Document Filing
Copy
Printer
Scan to HDD
Quick File
Mode
MX-3500/4500 series
Sharing Mode
Confidential
Mode
OK
1/2
■ Document Control Setting
Because the document control function cannot be used when a printer driver for the Fiery Print
Controller is used, the two items below of "Document Control Setting" will not appear.
• "Document Control Print Select" > "Allow User to Select"
Document Control Setting
Printer:
Document Control Print Select:
Print Pattern Setting:
Print Color Setting:
Prints(Document Filing):
Document Control Print Select:
Always Print
Not Printing
Always Print
Allow User to Select
Always Print
MX-5500N/6200N/7000N
Cancel
OK
System Settings
Document Control Print Select(Printer)
Not Printing
Allow User to Select
Always Print
OK
MX-3500/4500 series
9
Page 12

• "Print Color Setting" > "Allow User to Select the Print Color"
Document Control Setting
Printer:
Document Control Print Select:
Print Pattern Setting:
Print Color Setting:
Prints(Document Filing):
Document Control Print Select:
Always Print
Pattern 1
Bk(Black)
Allow User to Select the Print Color
Always Print
MX-5500N/6200N/7000N
Cancel
OK
System Settings
Print Color Setting (Printer)
Bk(Black)
Allow User to Select the Print Color
C(Cyan) Y(Yellow)
OK
MX-3500/4500 series
Printing a document control pattern
The "Document Control Print Select" (Printer) screen is used to select whether or not a document
control pattern is printed on Fiery print jobs. To always print a pattern, select the [Always Print]. To never
print a pattern, select the [Not Printing].
■ Authority Group Registration screen
When the Data Security Kit is installed on a machine, the [Security] key is added to the "Authority Group
Registration" menu screen in the system settings (administrator).
When the Fiery Print Controller is installed, the "Print Jobs Other than Print Hold Job" or the "Approve
Print Jobs other than Print Hold Job" setting does not appear when the [Security] key is touched.
Print Jobs Other than Print Hold
Job :
Document Filing Approval Setting :
Copy
Printer
Scan to HDD
Image Send
Quick File Mode
Allowed
Sharing Mode
MX-5500N/6200N/7000N
Confidential Mode
Authority Group Registration / Security
No.01 Authority1
Document Filing Approval Setting
Approve Print Jobs other than Print
Hold Job
MX-3500/4500 series
OK
In addition, settings related to print mode do not appear in the document filing approval setting screen.
Print Jobs Other than Print Hold
Job :
Document Filing Approval Setting :
Copy
Printer
Scan to HDD
Image Send
Quick File Mode
Allowed
Sharing Mode
MX-5500N/6200N/7000N
Confidential Mode
Authority Group Registration / Security
No.01 Authority1
Document Filing Approval Setting
Copy
Printer
Quick File
Mode
Sharing Mode
MX-3500/4500 series
Confidential
Mode
OK
1/2
10
Page 13

SHARP CORPORATION
2006J-EN
1
 Loading...