

Page 1
PORTABLER MINI-DISC RECORDER
LECTEUR-ENREGISTREUR MINIDISC PORTABLE
BÄRBAR MINISKIVINSPELARE
REGISTRATORE DI MINIDISCHI PORTATILE
DRAAGBARE MINIDISC RECORDER
PORTABLE MINIDISC RECORDER
MODELL
MODÈLE
MODELL
MODELLO
MODEL
MODEL
MD-MT270H
BEDIENUNGSANLEITUNG
MODE D’EMPLOI
BRUKSANVISNING
MANUALE DI ISTRUZIONI
GEBRUIKSAANWIJZING
OPERATION MANUAL
for SEEG/SEN (TINSZ0873AWZZ)
DEUTSCH ······ Siehe Seiten i bis vi und
D-1 bis D-38.
FRANÇAIS ······ Se reporter aux pages i à vi et
F-1 à F-38.
SVENSKA ······ Hänvisa till sidorna i till vi och
V-1 till V-38.
ITALIANO ······ Leggere le pagine i a vi e
I-1 a I-38.
NEDERLANDS ······ Raadpleeg de bladzijden i t/m vi en
N-1 t/m N-38.
ENGLISH ······ Please refer to pages i to vi and
E-1 to E-38.
TINSZ0873AWZZ
02K N AO 1
D
Page 2
BESONDERE ANMERKUNGEN
REMARQUES SPÉCIALES
SÄRSKILDA ANMÄRKNINGAR
NOTE PARTICOLARI
BIJZONDERE OPMERKINGEN
SPECIAL NOTES
Audio-visuelles Material kann Urheberrechte umfassen, die
ohne Genehmigung des Eigentümers dieser Urheberrechte
nicht aufgenommen werden dürfen. Siehe die entsprechenden nationalen Gesetze.
Le matériel audio-visuel peut comporter des oeuvres faisant
l’objet de droits d’auteur qui ne peuvent être enregistrées
sans l’autorisation du possesseur du droit d’auteur, veuillez
vous référer aux réglementations nationales en vigueur.
Audiovisuellt material kan innehålla upphovsrättsarbete
som inte skall mångfaldigas utan tillstånd av copyrightinnehavaren. Se den tillämpliga lagen i ditt land.
Il materiale audio-visivo che fosse soggetto a copyright non
può essere registrato senza l’autorizzazione del possessore
del copyright. Si prega di attenersi alle leggi in vigore sul
territorio nazionale.
Audio-visueel materiaal kan worden beschermd door
auteursrechten, in welk geval het niet mag worden
opgenomen zonder de toestemming van de auteursrechthouder. Zie voor nadere informatie de betreffende
wetten in het land van gebruik.
Audio-visual material may consist of copyrighted works
which must not be recorded without the authority of the
owner of the copyright. Please refer to relevant law in your
country.
0103
ønsker man at tilslutte en DC-adaptor så skal def vaere en
godkendt type med indbygget sikring.
Vid anslutning till yttre likspänningskälla skall det alltid finnas
en säkring i kretsen.
Käytettäessä akkua tai mutta ulkopuolista tasajännitelähdettä
on laitteen ja jännitelähteen välillä boltava sulakkeella
varustettu adaptori.
When connecting the appliance to an external DC-source,
ensure that there is a fuse protection in the circuit.
DENNA APPARAT ÄR ANSLUTEN TILL 230 V
VÄXELSTRÖM NÄR STICKPROPPEN ÄR INSKJUTEN I
VÄGGUTTAGET. FÖR ATT FULLSTÄNDIGT KOPPLA
IFRÅN APPARATEN V.G. DRAG UT STICKPROPPEN.
Dieses Gerät entspricht den Anforderungen der EGRichtlinien 89/336/EWG und 73/23/EWG mit Änderung
93/68/EWG.
Ce matériel répond aux exigences contenues dans les
directives 89/336/CEE et 73/23/CEE modifiées par la directive 93/68/CEE.
Denna utrustning uppfyller kraven enligt riktlinjerna 89/336/
EEC och 73/23/EEC så som kompletteras av 93/68/EEC.
Quest’ apparecchio è conforme ai requisiti delle direttive
89/336/EEC e 73/23/EEC, come emendata dalla direttiva
93/68/EEC.
Dit apparaat voldoet aan de eisen van de richtlijnen 89/
336/EEG en 73/23/EEG, gewijzigd door 93/68/EEG.
This equipment complies with the requirements of Directives
89/336/EEC and 73/23/EEC as amended by 93/68/EEC.
i
for SEEG/SEN (TINSZ0873AWZZ)
Page 3
Este aparato satisface las exigencias de las Directivas
89/336/CEE y 73/23/CEE, modificadas por medio de la
93/68/CEE.
Este equipamento obedece às exigências das directivas
89/336/CEE e 73/23/CEE, na sua versão corrigida pela
directiva 93/68/CEE.
Dette udstyr overholder kravene i direktiv nr. 89/336/EEC
og 73/23/EEC med tillaeg nr. 93/68/EEC.
Dette produktet oppfyller betingelsene i direktivene 89/336/
EEC og 73/23/EEC i endringen 93/68/EEC.
Tämä laite täyttää direktiivien 89/336/EEC ja 73/23/EEC
vaatimukset, joita on muutettu direktiivillä 93/68/EEC.
0103
0103
Vorsicht:
Das Gerät weder Tropf- noch Spritzwasser aussetzen.
Ansonsten besteht die Gefahr eines Brandes oder elektrischen
Schlages. Es sollten keine mit Flüssigkeiten gefüllten
Gegenstände wie Vasen auf dem Gerät abgestellt werden.
Attention:
Pour éviter un incendie ou une secousse électrique, mettre
l’appareil à l’abri d’eau (éclaboussure, goutte). Ne pas poser
sur l’appareil un récipient contenant du liquide.
Varning:
Utsätt inte enheten för dropp eller stänk för att förhindra brand
eller elektriska stötar. Inga vätskefyllda föremål såsom vaser
bör placeras på enheten.
Attenzione:
Per prevenire incendi o scosse elettriche, non fare gocciolare
nessun liquido sull’apperecchio e non bagnarlo. Non collocarvi
sopra nessun oggetto riempito d’acqua, come per esempio
vasi.
Waarschuwing:
Stel het toestel niet bloot aan druipend of spattend water om
brand en elektrische schokken te voorkomen. Met vloeistoffen
gevulde voorwerpen, zoals vazen, mogen niet op het toestel
geplaatst worden.
Warning:
To prevent fire or shock hazard, do not expose this appliance
to dripping or splashing. No objects filled with liquids, such as
vases, shall be placed on the apparatus.
for SEEG/SEN (TINSZ0873AWZZ)
0103
ii
Page 4

Advarsel:
Til at forbygge ild og stød risiko, lad vaere med at undsaette
denne indretning for drypning eller overstaenkning.
Der må ikke anbringes nogen genstande fyldt med vand, som
for eksempel vaser, på dette apparat.
Advarsel:
For å unngå brann eller kortslutning, utsett ikke produktet for
vann eller fuktighet.
Gjenstander som inneholder væske, feks. en blomstervase, må
ikke plasseres oppå apparatet.
Varoitus:
Älä vie laitetta sateeseen tai kosteisiin tiloihin. Jos laite on
kostunut, anna sen kuivua ennen kuin käytät sitä verkkovirralla.
Nestettä sisältäviä astioita kuten esim. kukkamaljakoita ei saa
asettaa laitteen päälle.
VORSICHT:
Längeres Abspielen einer tragbaren Stereoanlage mit voller
Leistung kann das Gehör des Benutzers beschädigen.
Im Falle der Verwendung mit dem SHARP Ohrhörer
(Modellnummer: RPHOH0011AWZZ) entspricht das Modell dem
Gesetz. Bestellen Sie richtigen Ohrhörer, wenn es zur
Beschädigung kommt.
ATTENTION:
A pleine puissance, l’écoute prolongée du baladeur peut
endommager l’oreille de l’utilisateur.
Le produit est en conformité avec la loi quand il est utilisé avec
les écouteurs SHARP (modèle n˚ RPHOH0011AWZZ). Si ceuxci venaient à être endommagés, remplacez-les par des écouteurs
appropriés.
VARNING:
Lyssna till personlig stereo med full volym under längre tid kan
skada hörseln.
Modellen överenstämmer med lagstadgade bestämmelser för
användning med SHARP hörlurar (RPHOH0011AWZZ). Vid
skador beställ riktiga hörlurar.
AVVERTENZA:
L’ascolto prolungato ad alto volume di uno stereo personal può
danneggiare l’udito.
ll modello è in conformità di legge se usato con gli auricolari
SHARP (numero di modello RPHOH0011AWZZ). Ordinare nuovi
auricolari se quelli forniti si guastano.
LET OP:
Langdurig luisteren naar een stereo-geluidsinstallatie met een
hoog volume kan het gehoor beschadigen.
Dit model voldoet aan de legale vereisten bij gebruik met de
SHARP hoofdtelefoon (modelnummer RPHOH0011AWZZ).
Vervang de bijgeleverde hoofdtelefoon indien beschadigd door
een voor dit toestel geschikte hoofdtelefoon.
CAUTION:
At full power prolonged listening to a personal stereo may damage the user’s hearing.
The model is in compliance with the law in case of using it with
the SHARP earphones (model number RPHOH0011AWZZ).
Order proper earphones if it comes in to damage.
iii
for SEEG/SEN (TINSZ0873AWZZ)
Page 5
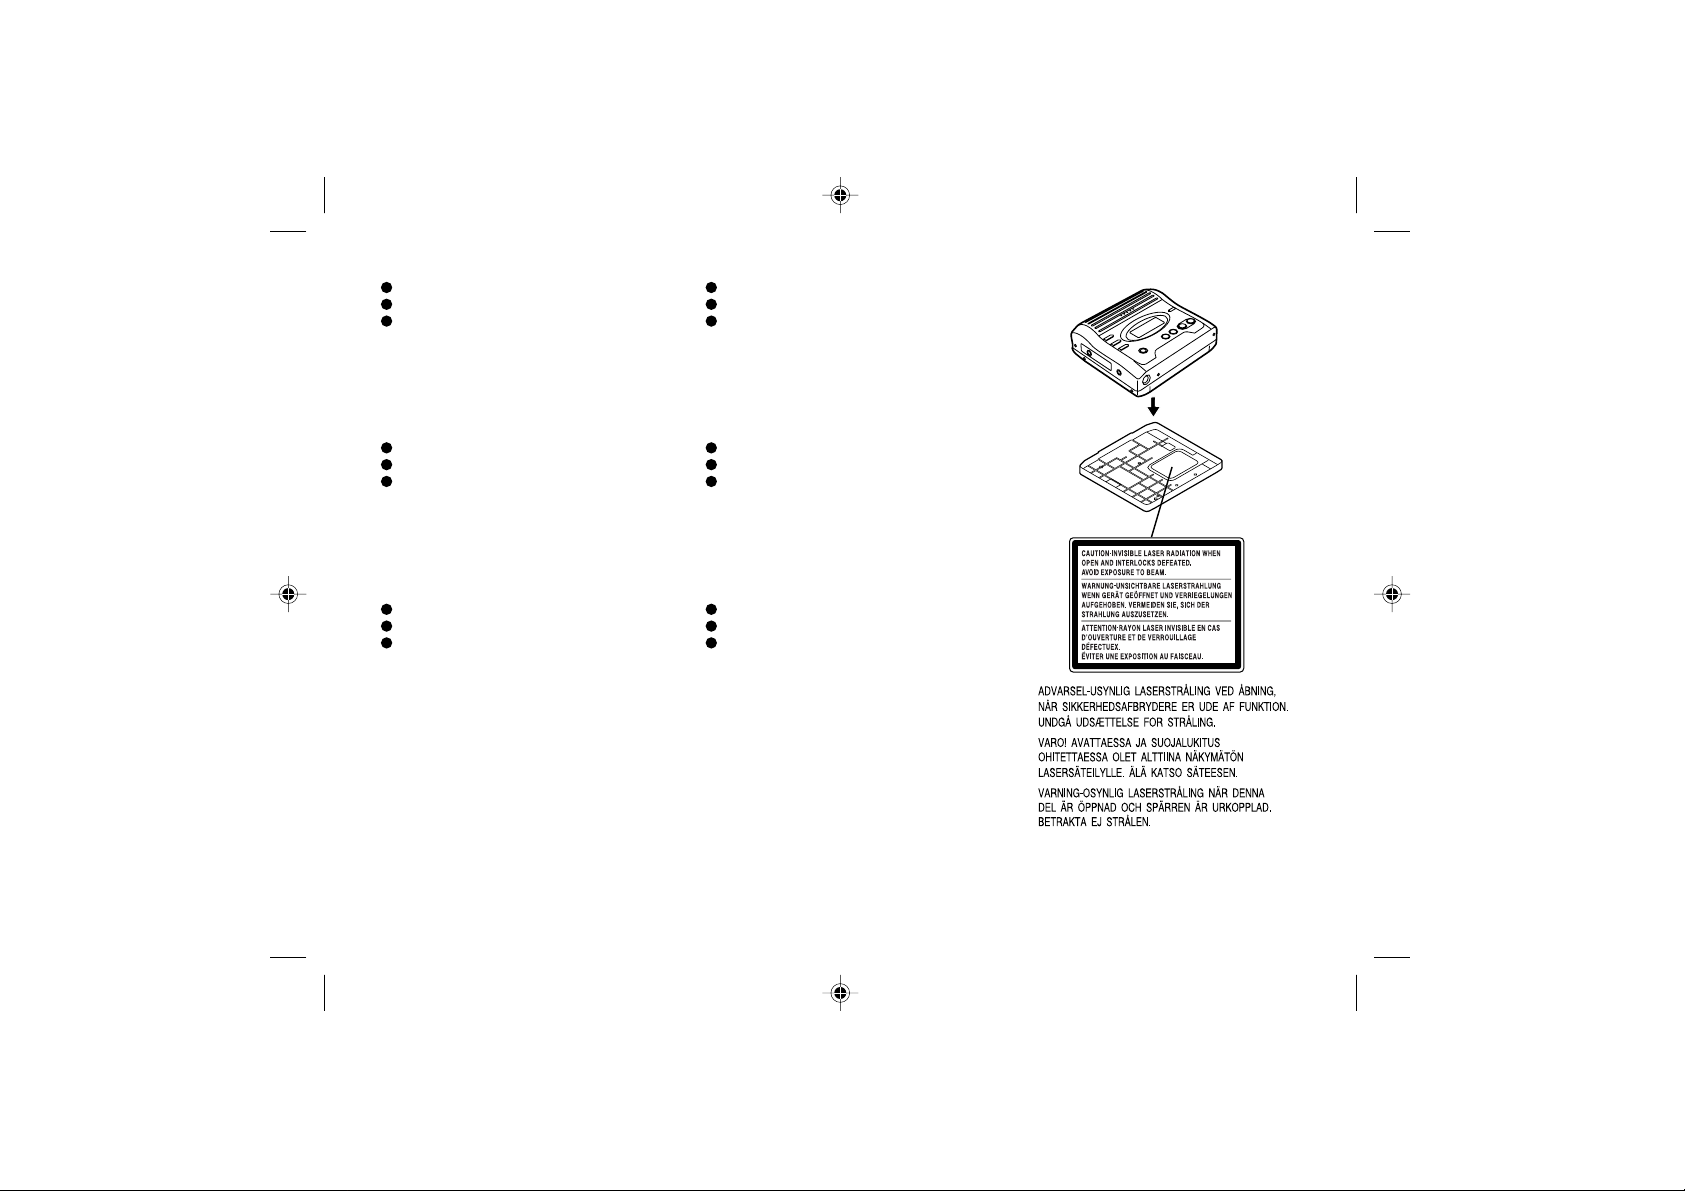
Dieses Produkt ist ein Laserprodukt der Klasse 1.
Ce produit est classifié comme étant un LASER DE CLASSE 1.
Denna produkt klassificeras som KLASS 1 LASERPRODUKT.
Questo prodotto è classificeto come CLASS 1 LASER PRODUCT.
Dit product is geclassificeerd als een KLASSE 1 LASER
PRODUCT.
This product is classified as a CLASS 1 LASER PRODUCT.
Dette produktet er klassifisert som et KLASSE 1
LASERPRODUKT.
Dette produkt er klassificeret som et KLASSE 1
LASERPRODUKT.
Tämä laite on luokiteltu LUOKAN 1 LASERLAITTEEKSI.
Denna produkt klassificeras som KLASS 1 LASERAPPARAT.
0103
0103
VORSICHT
Verwenden Sie den portablen Mini-Disc Recorder nur
entsprechend den in dieser Anleitung angegebenen
Anweisungen, und versuchen Sie nicht, den Verriegelungsschalter zu beeinträchtigen, oder machen Sie keine
andere Einstellung, da dies dazu führen kann, gefährlicher
Ausstrahlung ausgesetzt zu werden.
ATTENTION
Utiliser le lecteur-enregistreur minidisc portable en respectant
les indications données dans ce manuel et éviter l’intervention
sur le commutateur de verrouillage ou tout autre réglage. En
cas de non-respect, on s’exposera à une radiation dangereuse.
OBSERVERA
Använd den bärbara miniskivinspelaren endast i enlighet med
anvisningarna i denna bruksanvisning och försök inte påverka
låsningsströmbrytaren eller göra andra inställningar som kan
leda till risk för farlig strålning.
ATTENZIONE
Quando si usa il registratore di minidischi portatile, seguire le
istruzioni di questo manuale. Non cercare di interferire con
l’interruttore interbloccato e non effettuare altre regolazioni,
poiché ciò potrebbe provocare un’esposizione a pericolose
radiazioni.
LET OP
Gebruik deze draagbare MiniDisc-recorder alleen zoals in de
aanwijzingen in deze gebruiksaanwijzing staat vermeld.
Maak geen veranderingen in de interlockschakelaar of andere
onderdelen, daar dit mogelijk blootstelling aan gevaarlijke
stralingen veroorzaakt.
CAUTION
Use the portable minidisc recorder only in accordance with
the instructions given in this manual and do not attempt to
interfere with the interlock switch or make any other adjustment as this may result in exposure to hazardous radiation.
0103
for SEEG/SEN (TINSZ0873AWZZ)
iv
Page 6
Eigenschaften der Laserdiode
Material: GaAlAs
Wellenlänge: 785 nm
Impulszeit:
Lesemodus: 0,8 mW, kontinuierlich
Schreibmodus: max. 10 mW, 0,5 S
min. Zyklus 1,5 S
Wiederholung
Proprietà del diodo laser
Materiale: GaAlAs
Lunghezza d’onda: 785 nm
Tempo di impulso:
Modo di lettura: 0,8 mW Continua
Modo di scrittura: max 10 mW 0,5 S
ciclo minimo 1,5 S
Ripetizione
Caractéristiques de la diode laser
Matière: GaAlAs
Longueur d’onde: 785 nm
Durées de l’impulsion:
Mode de lecture: 0,8 mW (ininterrompue)
Mode d’écriture: 10 mW (maxi), 0,5 s
Cycle mini 1,5 s
Répétition
Laserdiodens egenskaper
Material: GaAlAs
Våglängd: 785 nm
Impulstider:
Läsfunktion: 0,8 mW kontinuerlig
Skrivfunktion: max. 10 mW 0,5 S
min. cykel 1,5 S
Repetition
6v
Karakteristieken van laserdiode
Materiaal: GaAlAs
Golflengte: 785 nm
Pulstijden:
Leesfunctie: 0,8 mW Doorlopend
Schrijffunctie: max. 10 mW 0,5 S
min. cycle 1,5 S
Herhaling
Laser Diode Properties
Material: GaAlAs
Wavelength: 785 nm
Pulse time:
Read mode: 0.8 mW Continuous
Write mode: max 10 mW 0.5S
min cycle 1.5S
Repetition
for SEEG/SEN (TINSZ0873AWZZ)
Page 7

VAROITUS! LAITTEEN KÄYTTÄMINEN MUULLA KUIN TÄSSÄ
KÄYTTÖOHJEESSA MAINITULLA TAVALLA SAATTAA ALTISTAA
KÄYTTÄJÄN TURVALLISUUSLUOKAN 1 YLITTÄVÄLLE
NÄKYMÄTTÖMÄLLE LASERSÄTEILYLLE.
VARNING - OM APPARATEN ANVÄNDS PÅ ANNAT SÄTT ÄN I
DENNA BRUKSANVISNING SPECIFICERAS. KAN ANVÄNDAREN
UTSÄTTAS FÖR OSYNLIG LASERSTRÅLNING, SOM
ÖVERSKRIDER GRÄNSEN FÖR LASERKLASS 1.
0103
Warnung:
Im mitgelieferten Netzadapter sind keine vom Benutzer
wartbare Teile vorhanden.
Niemals Abdeckungen entfernen, außer wenn Sie dafür
qualifiziert sind. Darin sind gefährliche Spannungen
vorhanden. Vor Ausführung von irgendwelchen Kundendienstarbeiten oder bei längerer Nichtverwendung stets den
Netzstecker aus der Netzsteckdose ziehen.
Attention:
L’adaptateur CA livré avec l’appareil contient des organes nonréparables par l’utilisateur.
À moins d’être qualifié, on ne démontera pas l’appareil qui
renferme des organes portés à haute tension. Débrancher
l’appareil avant toute réparation ou en période de non-emploi
prolongée.
Observera:
Medföljande nätadapter innehåller inga delar som kan
åtgärdas av användaren.
Tag aldrig bort höljet utan behörig kompetens. Det har farliga
spänningar. Dra alltid ur stickproppen från nätuttaget före
underhållsarbeten eller när apparaten inte ska användas under längre tid.
Avvertenza:
L’adattatore CA fornito in dotazione non contiene parti idonee
al servizio da parte dell’utente.
Non rimuovere mai le coperture se non si è qualificati a farlo.
All’interno dell’adattatore è presente un voltaggio che può
essere pericoloso. Rimuovere sempre la spina del cavo di
alimentazione dalla presa di rete prima di eseguire qualsiasi
operazione di assistenza tecnica o quando si prevede di non
utilizzare l’apparecchiatura per un lungo periodo di tempo.
Waarschuwing:
De bijgeleverde netadapter bevat geen onderdelen die door
de gebruiker kunnen worden gerepareerd.
Verwijder nooit de behuizing. Dit mag alleen door erkend
onderhoudspersoneel worden gedaan. Het inwendige van
het toestel staat onder gevaarlijke spanning. Ontkoppel altijd
de stekker van het netsnoer alvorens onderhoud aan het
toestel uit te voeren of indien u het toestel voor langere tijd
niet gebruikt.
Warning:
The supplied AC adaptor contains no user serviceable parts.
Never remove covers unless qualified to do so.
It contains dangerous voltages, always remove mains plug
from the main outlet socket before any service operation or
when not in use for a long period.
for SEEG/SEN (TINSZ0873AWZZ)
vi
Page 8

MD-MT270H
ENGLISH
ENGLISH
Introduction
Thank you for purchasing this SHARP product. For the best performance, read this manual carefully. It will guide you
in operating your SHARP product.
Contents
Important Introduction
E-1
! Important Introduction
Special Notes . . . . . . . . . . . . . . . . . . . . . . . . . . . . . . . . 2
Accessories . . . . . . . . . . . . . . . . . . . . . . . . . . . . . . . . . 2
Optional Accessories . . . . . . . . . . . . . . . . . . . . . . . . . 2
Names of Controls and Indi c a t o rs . . . . . . . . . . . . . . . 3
Precautions. . . . . . . . . . . . . . . . . . . . . . . . . . . . . . . . . . 4
! Power Source
Using with the AC Ada pt or . . . . . . . . . . . . . . . . . . . . . 5
Using with the Alkaline Ba tt e ry . . . . . . . . . . . . . . . . . 5
! Preparation
-Introduction/Contents-
Inserting a MiniDisc. . . . . . . . . . . . . . . . . . . . . . . . . . . 6
Connections. . . . . . . . . . . . . . . . . . . . . . . . . . . . . . . . .7
Before Recordi ng. . . . . . . . . . . . . . . . . . . . . . . . . . . . . 8
! Basic Operat ion
Recording . . . . . . . . . . . . . . . . . . . . . . . . . . . . . . . 9 - 10
Playback . . . . . . . . . . . . . . . . . . . . . . . . . . . . . . . 11 - 12
Page
! Useful Features
Page
Hold Function . . . . . . . . . . . . . . . . . . . . . . . . . . . . . . 13
Advanced Playback. . . . . . . . . . . . . . . . . . . . . . . 13 - 14
Advanced Recording . . . . . . . . . . . . . . . . . . . . .15 - 20
Checking Displays . . . . . . . . . . . . . . . . . . . . . . .21 - 22
! Advanced Features
Titling a MiniDisc. . . . . . . . . . . . . . . . . . . . . . . . .23 - 26
Editing a Recorded Mi niDisc . . . . . . . . . . . . . . .27 - 29
Changing Default Settin gs. . . . . . . . . . . . . . . . . . . . 30
Listening through Another System. . . . . . . . . .31 - 32
! References
Troubleshooting . . . . . . . . . . . . . . . . . . . . . . . . . 32 - 33
MiniDisc System Limitati ons. . . . . . . . . . . . . . . . . . 34
Error Messages. . . . . . . . . . . . . . . . . . . . . . . . . . 35 - 36
Maintenance . . . . . . . . . . . . . . . . . . . . . . . . . . . . . . . 37
Specifications . . . . . . . . . . . . . . . . . . . . . . . . . . . 37 - 38
02/11/7 MD_MT270H_SEEG_E1.fm
Page 9
Special Notes
" US and foreign patents licensed from Dolby Laborato-
ries.
" The AC adaptor supplied with the MD-MT270H must
not be used with other equipment.
" When recording important selections, make a prelimi-
nary test to ensure that the desired material is properly recorded.
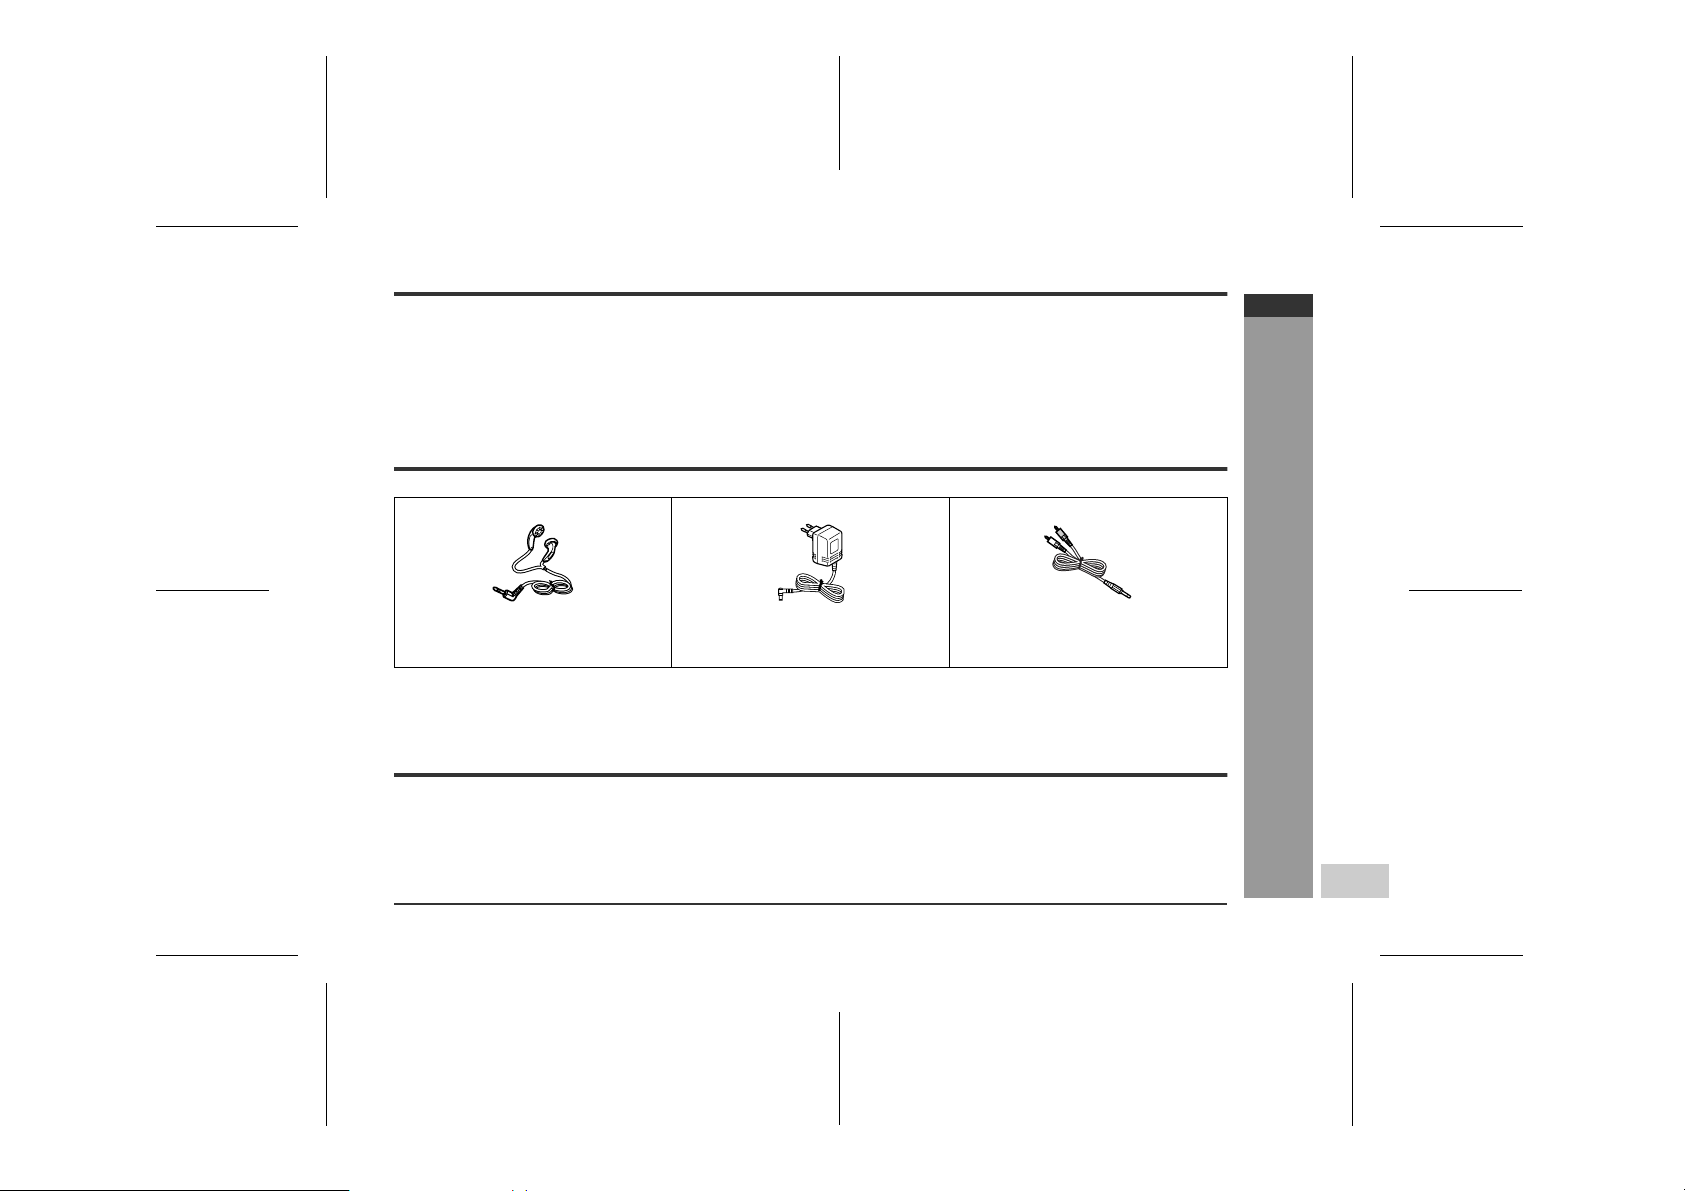
Accessories
" SHARP is not liable for damage or loss of your record-
ing arising from malfunction of this unit.
" The letters in brackets contained in the model number
indicate the colour of the product only. Operation and
specifications are unaffected.
MD-MT270H
ENGLISH
Earphones x 1 AC Adaptor (RADPA7057AWZZ) x 1 Connection Cable (for analogue re-
Notes:
" Parts and equipment mentioned in this operation manual other than those detailed above are not included.
" The AC adaptor may be different from the one in the drawing.
cording) x 1
Optional Accessories
" Car adaptor (AD-CA20X)
" Cassette adaptor (AD-CT14)
" Connection cable (for digital recording) (AD-M1DC)
" Connection cable (for digital recording) (AD-M2DC)
02/11/7 MD_MT270H_SEEG_E1.fm
Important Introduction
-Special Notes/Accessories/Optional Accessories-
E-2
Page 10
MD-MT270H
ENGLISH
Important Introduction
-Names of Controls and Indicators-
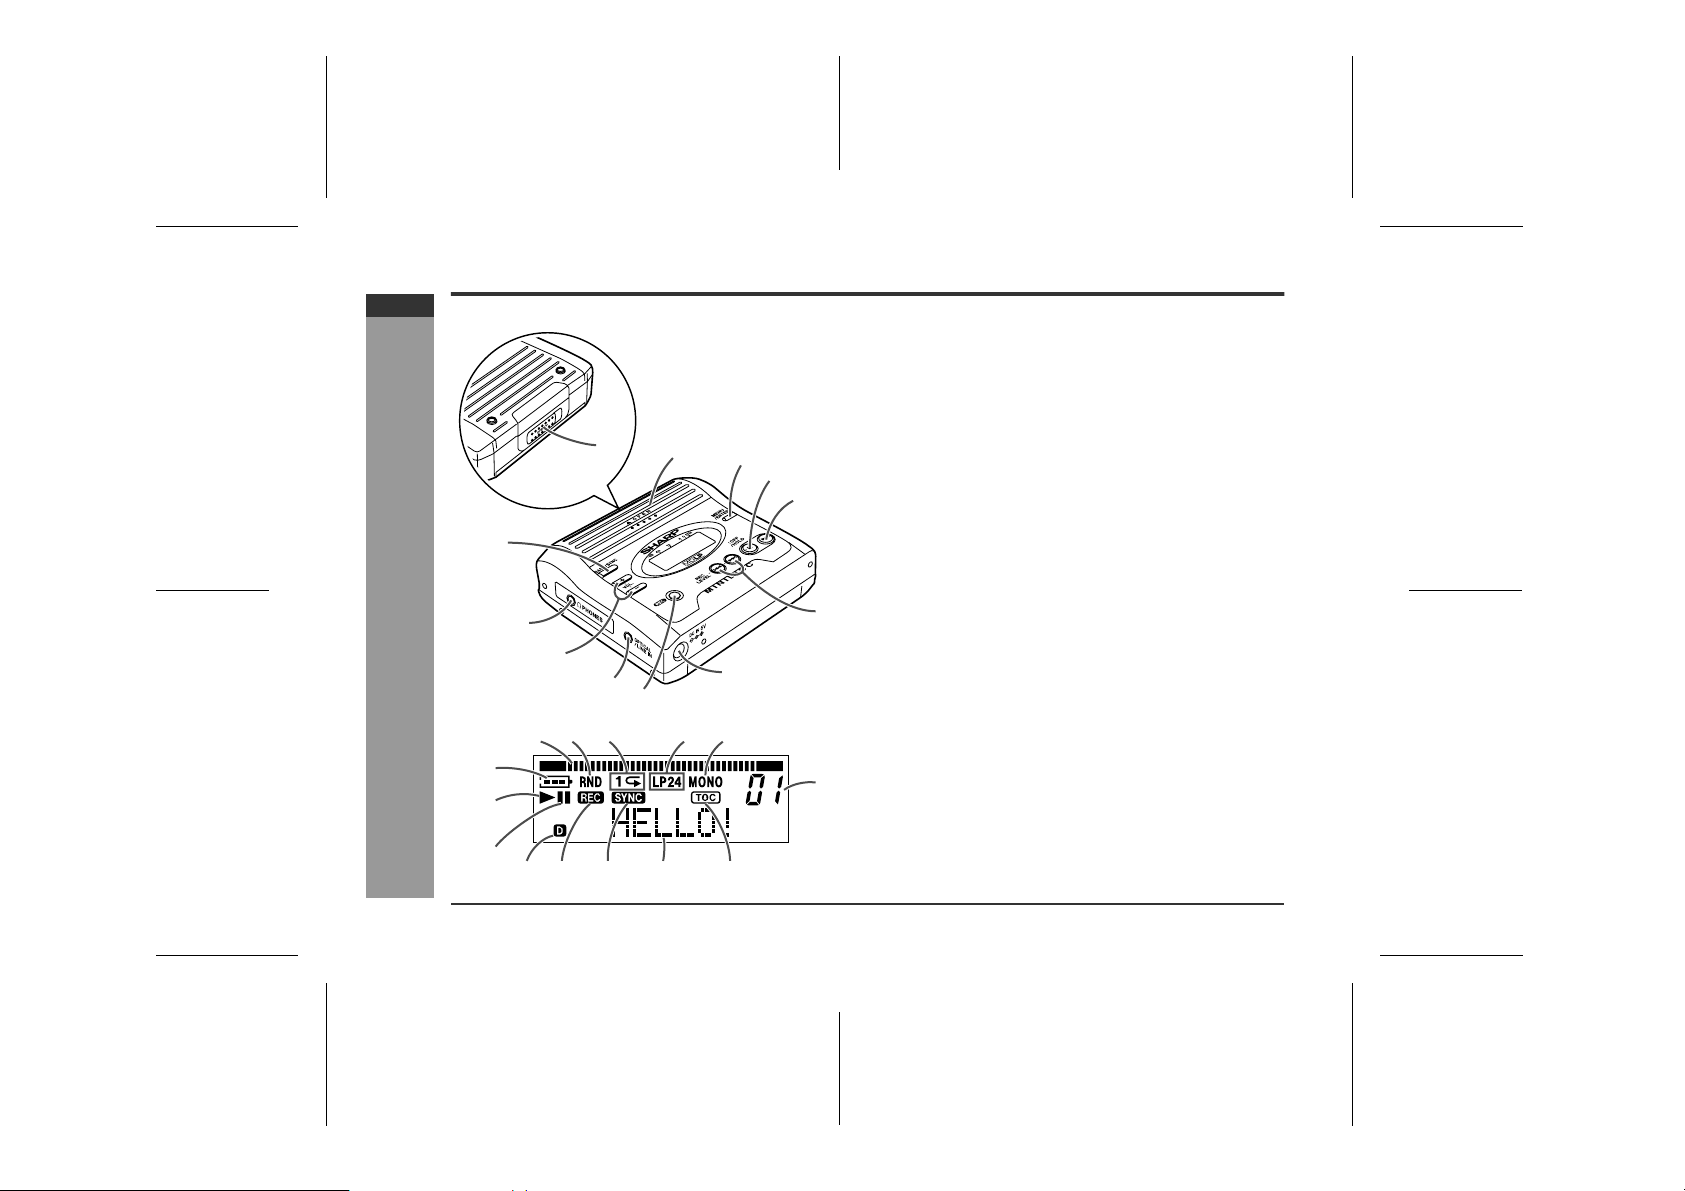
Names of Controls and Indicators
! Main unit
1.Open Lever . . . . . . . . . . . . . . . . . . . . . . . . . . . . . . 6
2.Battery Cover . . . . . . . . . . . . . . . . . . . . . . . . . . . . 5
3. Menu/E nter Button . . . . . . . . . . . . . . . 9, 14 , 23 , 30
4.Stop/Power Off/Hold Button . . . . . . . . . 10, 11, 13
5. Play/Pause Bu t ton . . . . . . . . . . . . . . . . . 10, 11, 18
1
6
7
8
9
10
123 45
6
7
8
91011 13
12
2
3
4
5
12
11
14
6.Bass/Delete/Synchro Button . . . . . . . . . 12, 17, 24
7.Earphones/Line Outp ut Socket . . . . . . . . . . 11, 31
8. Volume/Cursor Buttons . . . . . . . . . . . . . . . . 11, 25
9.Optical/Line Input Socket . . . . . . . . . . . . . . . . . . 7
10. Record/T rack Mark Button . . . . . . . . . . . . 9, 17, 19
11. 5 V DC Inp ut Socket . . . . . . . . . . . . . . . . . . . . 5, 31
12.Fast Forward/Fast Reverse/
Recording L evel/Menu Selec t/
Name Select Buttons . . . . . . . . . . . . . 9, 13, 15, 23
! Display panel
1.Level Meter
2.Random Indicator
3.Repeat Indicator
4.Long-play/Recording Mode Indicator
5.Monaural Mode Indicator
6.Battery Indicator
7.Play Indicator
8.Pause Indicator
9.Disc Name Indicator
10.Record Indicator
11.Synchro Recording Indicator
12.Character/Time Information Indicator
13.TOC Indicator
14.Track Number Indicator
Reference page
E-3
02/11/7 MD_MT270H_SEEG_E1.fm
Page 11
Precautions
! Important
" Do not wear your earphones when you are crossing
streets or near traffic.
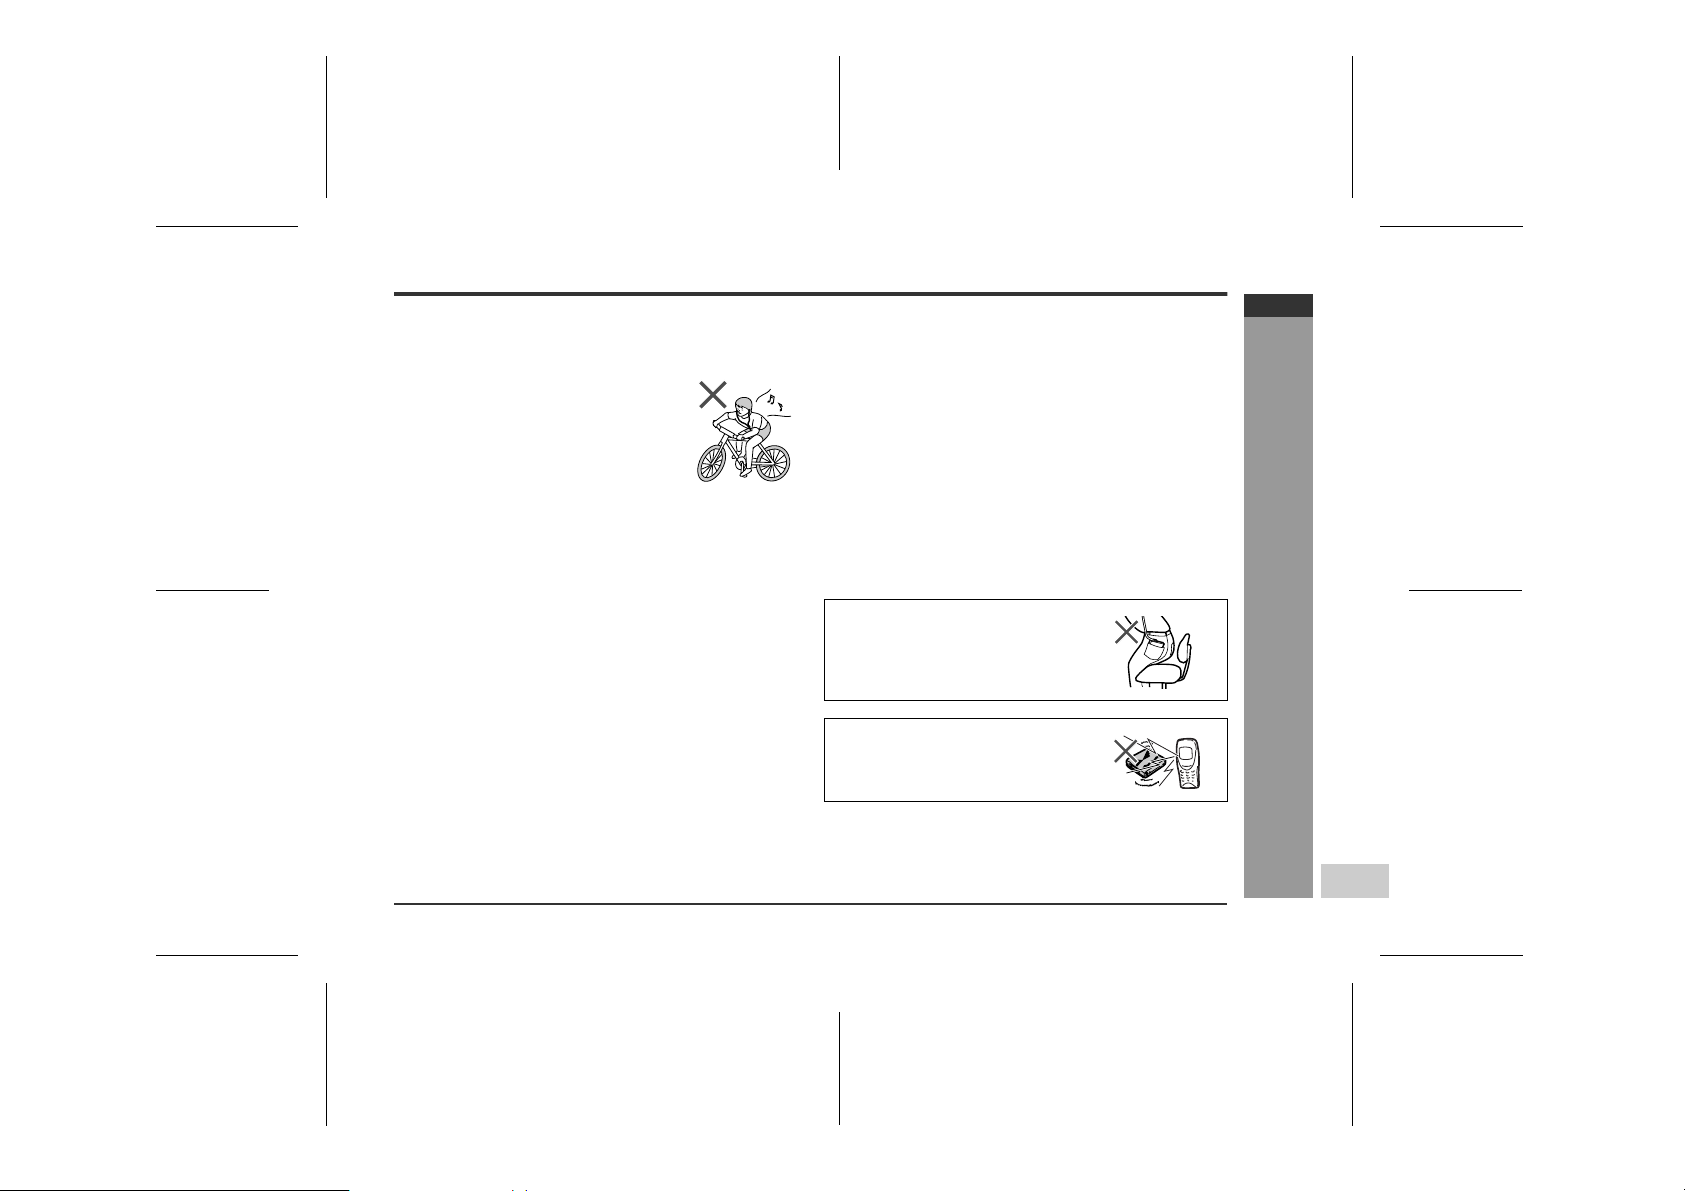
" Do not use your earphones whilst driving a
motor vehicle, it may create a traf fic hazard and may be illegal. Remember to o bey
all of the safety rules in your area.
" Do not play the unit at a high volume.
Hearing experts advise against extended
listening at high volume levels.
" If you experience ringing in your ears, reduce the volume
or discontinue use.
" No naked flame sources, such as lighted candles, should
be placed on the apparatus.
" Attention should b e drawn to th e environmenta l aspects of
battery disposal.
" The apparatus is designe d for use in moderate climate.
" This portable MD should only be used within the range of
0°C - 40°C (32°F - 104°F).
To avoid accidental electric shock or other possible
problems, observe the precautions listed below.
" Do not disassemble or modify the unit.
" Do not drop or subject the unit to shock.
" Do not use the unit near open flames.
" Do not spill liquid on the unit.
" Do not use an external power supply, other than the 5V
DC supplied with this unit, as it may damage it.
" SHARP is not responsible for damage due to improper
use. Refer all servicing to a SHARP authorised service
centre.
! Storing the unit
Avoid using or leaving the unit in the following places.
" Places exposed to direct sunlight for many hours (espe-
cially in cars with the doors and windows closed) or near
heaters. (The cabinet may deform, change colour or the
unit may malfunction.)
" Places expo sed to excessive dust .
" Places expo sed to water.
" Places where temperatures are excessively high or low.
" Places (bathrooms) where the humidity is extremely high.
" Places with strong magnetic fields such as TVs or loud-
speakers.
" Places exposed to vibration.
" Places where sand can easily enter the inside of the unit
(beaches etc.).
" If the unit is used near radio tuners or TVs, noise and/or
picture interference may result. If you experience these
problems, move the unit away from such devices.
It is not recommen de d to pu t th e p ortable MD into a rear pocket, as this
may damage the product when s itting.
Using this unit near mobile phones
may cause noise pickup. If it occurs,
move it away from them.
MD-MT270H
ENGLISH
-Precautions-
Important Introduction
02/11/7 MD_MT270H_SEEG_E1.fm
E-4
Page 12
MD-MT270H
ENGLISH
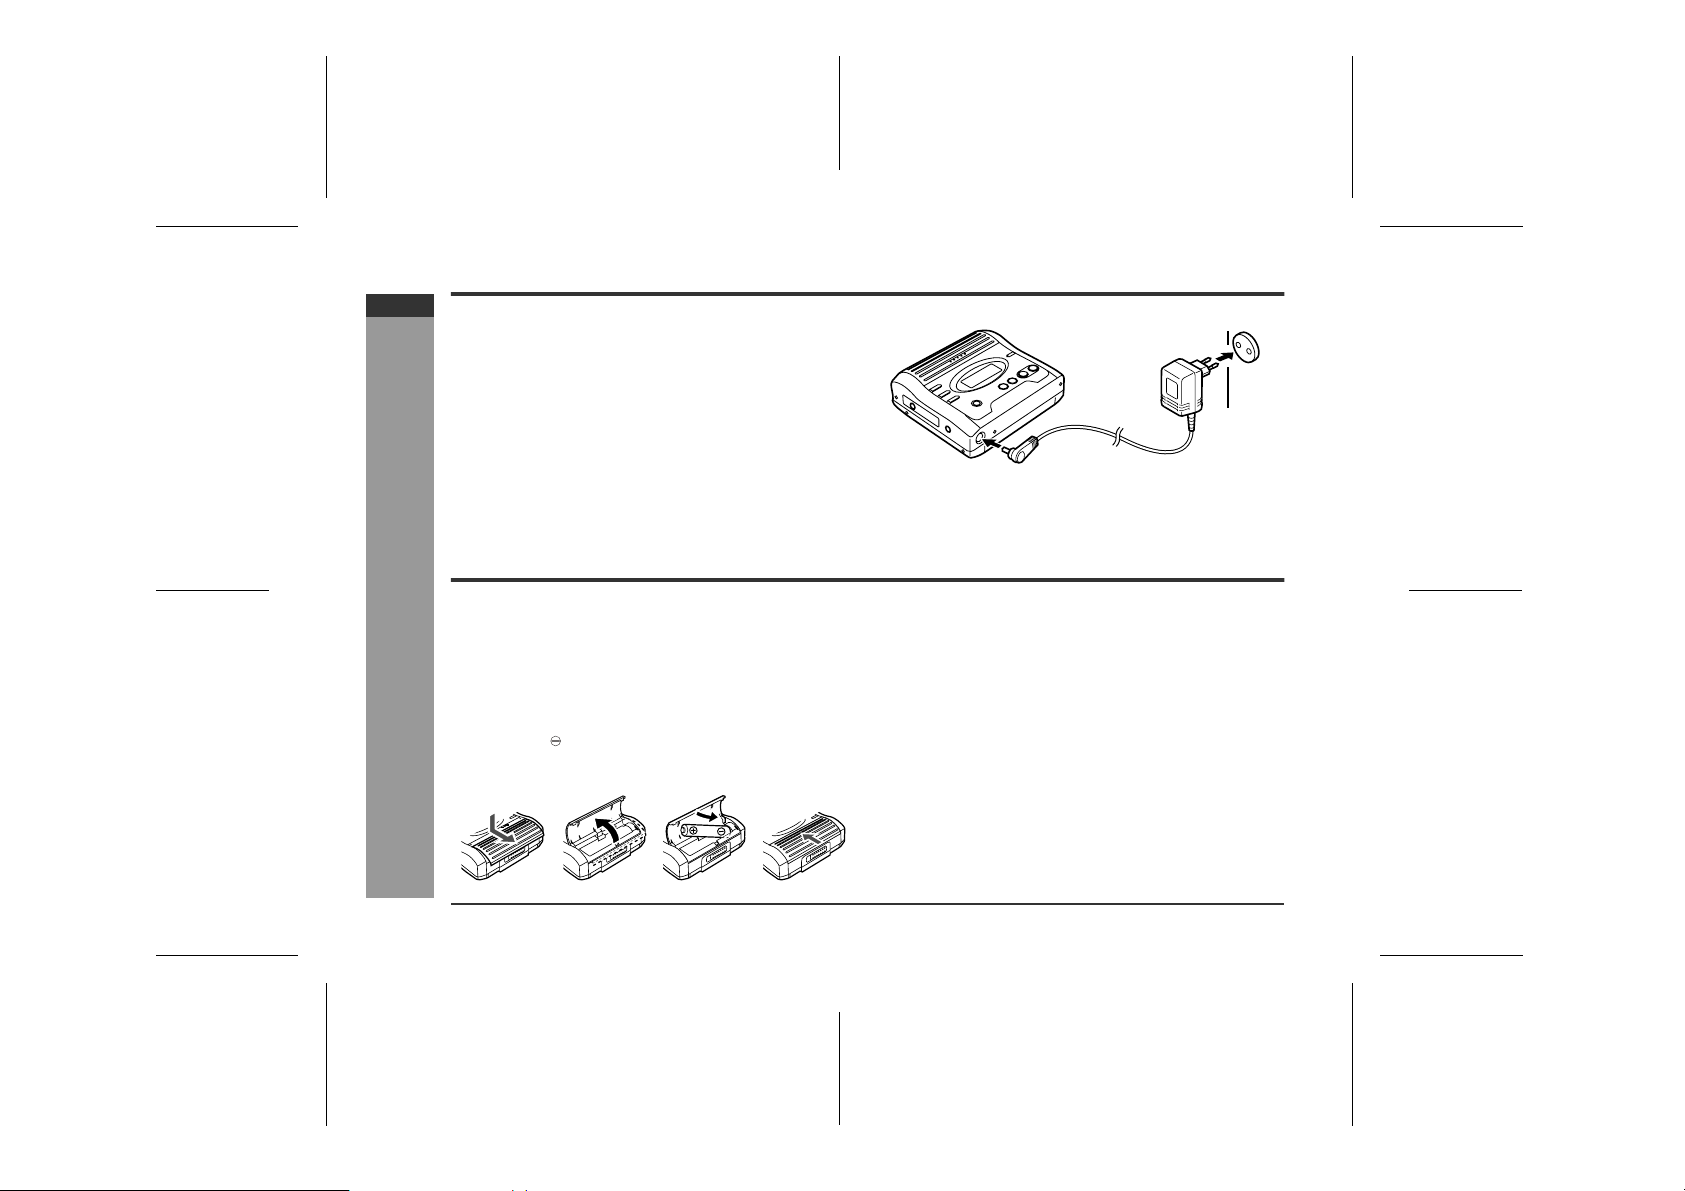
Using with the AC Adaptor
Plug the AC adaptor into the wall socket, and then insert the
plug on the other end into th e DC I N 5V socket.
Caution:
! Insert the plugs firmly.
! When the unit is not in use for extended periods, remove
the AC adaptor from the wall socket.
Note:
If power failure occurs whilst playing a disc using the AC
adaptor, disconnect it from the wall socket. Otherwise, playback may start automatically when electricity resumes.
Using with the Alkaline Battery
AC 230V,
50/60 Hz
To the DC IN 5V socket
P ower Source
E-5
Use one commercially available alkaline battery (LR6,
"AA" size).
Push and slide the battery cover.
1
Open the battery cover.
2
Insert an alkaline battery.
3
When inserting or removing the battery, push it to-
-AC Adaptor/Alkaline Battery-
wards the battery terminal.
Close the battery cover.
4
4321
Caution:
! Do not replace the battery during operation.
! Do not use a rechargeable battery (nickel-cad-
mium battery etc.).
! Remove the battery if the unit will not be used for long
periods of time. This will prevent potential damage due to
battery leakage.
! Installing the battery incorrectly may cause t he un it to mal-
function.
Note:
For information about the battery life, see "Specifications"
on page 38.
02/11/7 MD_MT270H_SEEG_E2.fm
Page 13
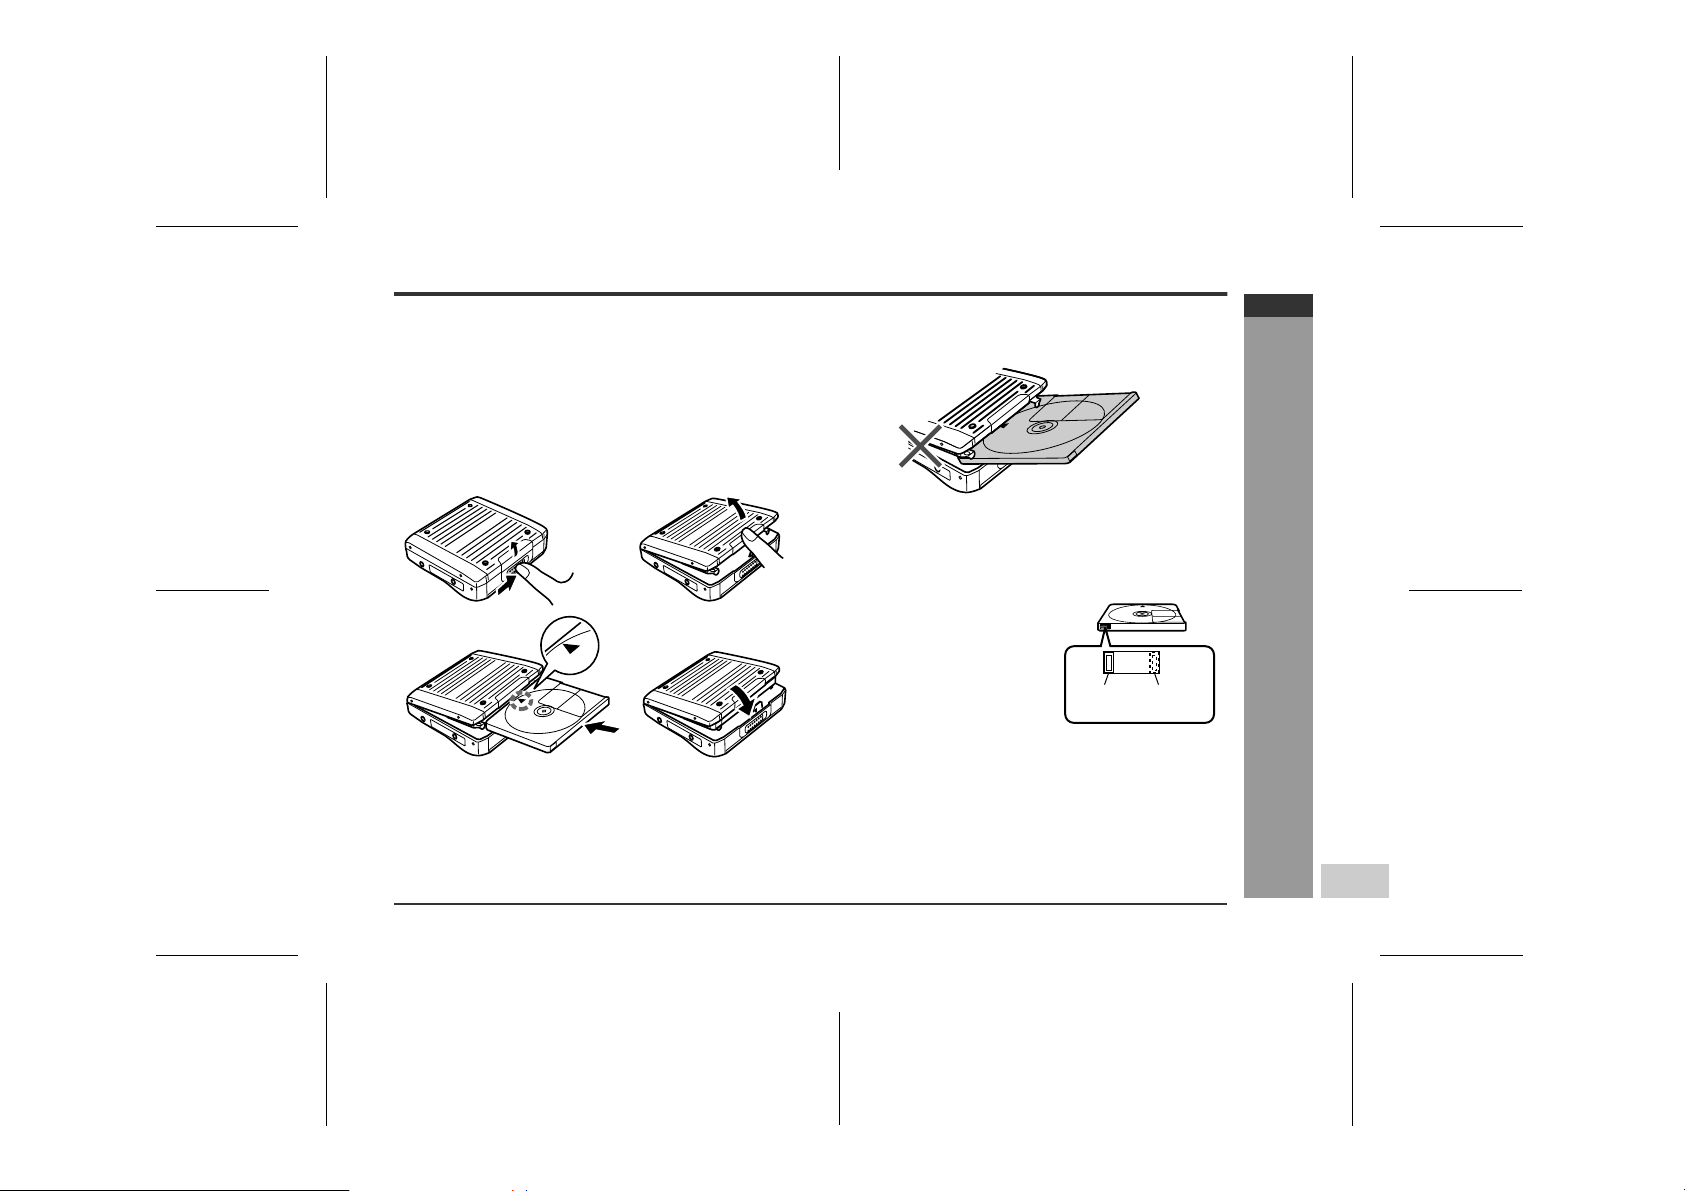
Inserting a MiniDisc
Slide the OPEN lever to release the compartment
1
door.
Lift up the compartment door.
2
Insert a MiniDisc.
3
Insert according to the direction arrow.
Close the compartment door.
4
MD-MT270H
ENGLISH
Notes:
! Do not place the MiniDisc under the holder.
12
34
! If any resistance is felt, do not force the MiniDisc into
the unit, as it may cause damage to the unit. If resistance is felt, remove the MiniDisc and reload it.
! The lid cannot be opened if "TOC" is displayed; refer
to the instruction on page 8.
! When you record on a Mini-
Disc, check that the erase
prevention tab is set to the
"Recordable" position.
Recordable
Recording
prevented
02/11/7 MD_MT270H_SEEG_E2.fm
Preparation
-Inserting a MiniDisc -
E-6
Page 14
MD-MT270H
ENGLISH
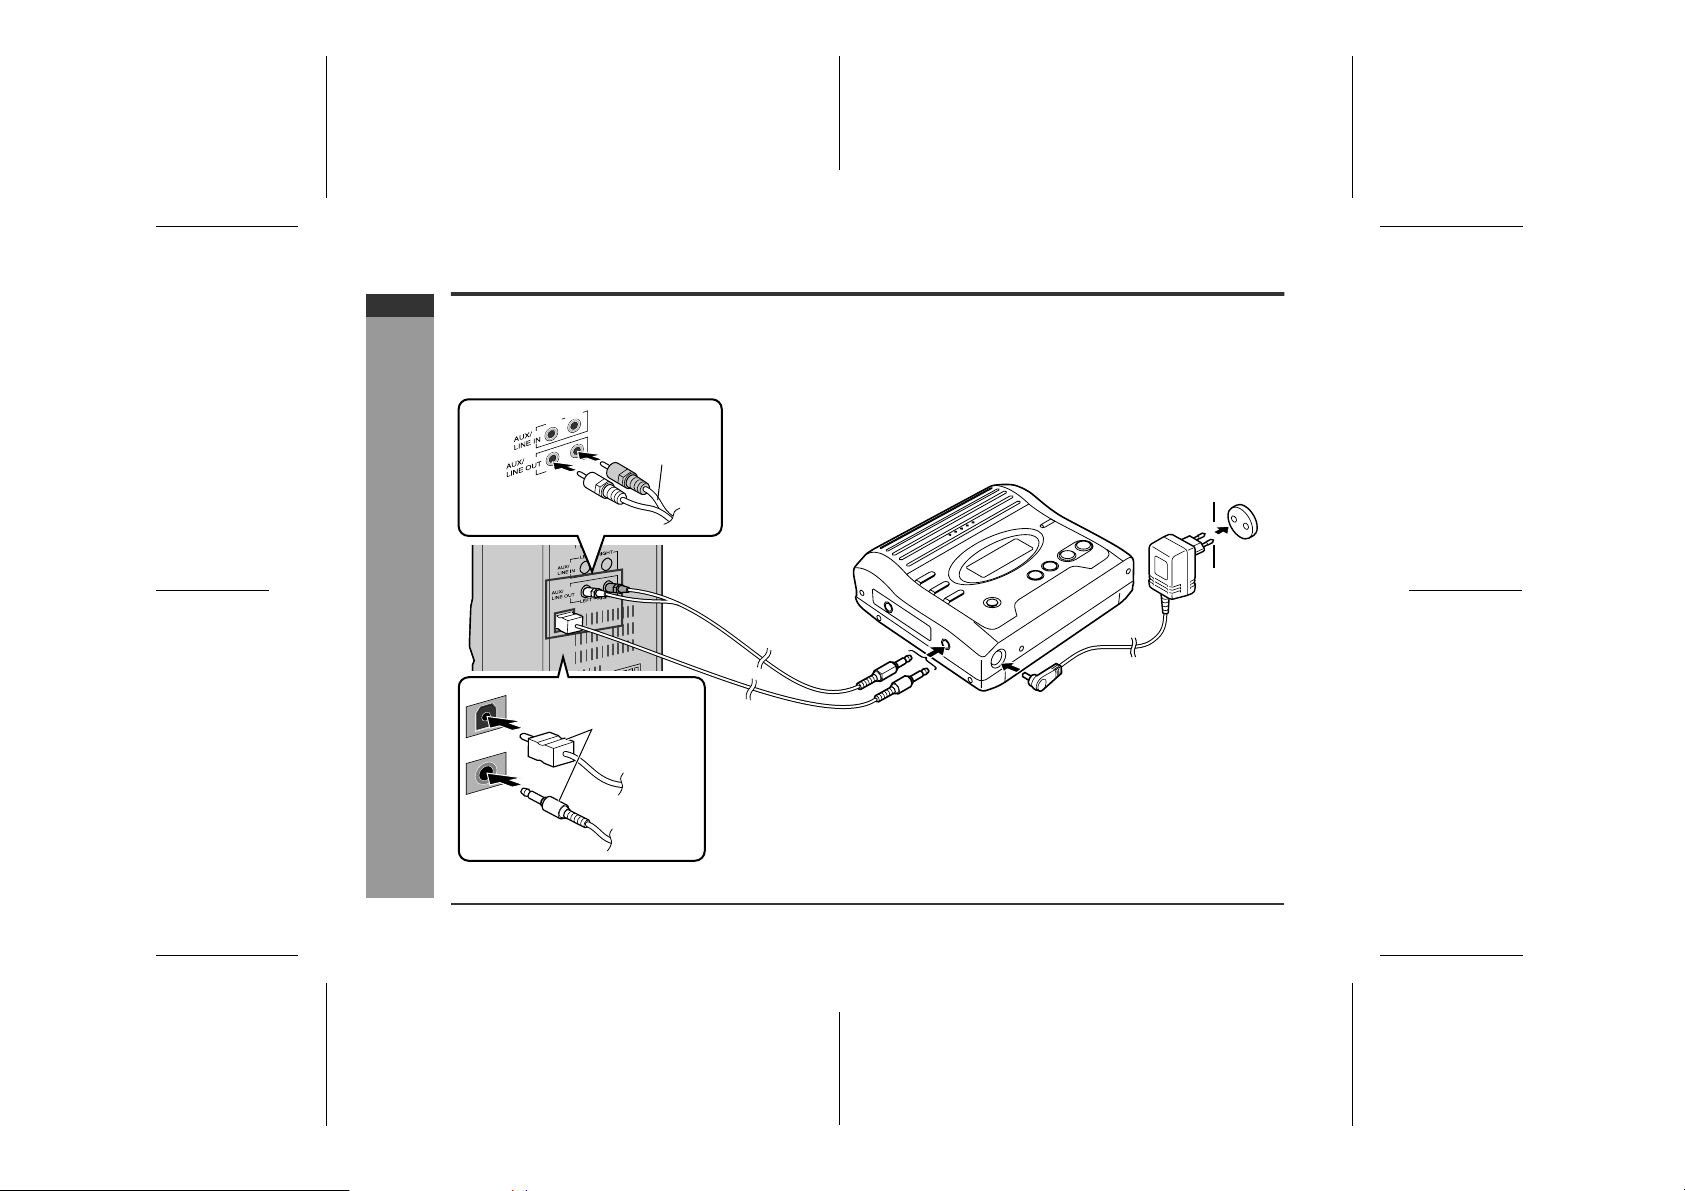
Connections
You can record your favourite CDs or tapes to MD.
When recording, it is recommended to use the AC adaptor and also install the battery. Should the power failure occur,
the power source would be automatically switched to the battery.
Red : to right
White : to left
-Connections-
Preparation
DIGITAL OUT
DIGITAL OUT
E-7
RIGHT
RIGHT
Supplied
connection
cable
LEFT
LEFT
Separately available
connection cable
AD-M1DC
AD-M2DC
■ To connect to a stereo system with "LINE OUT" or
"AUDIO OUT" sockets (analogue connection)
If the audio system has only one pair of sockets, they
are usually for input only and recording via this connection is not possible.
To the OPTICAL/
LINE IN socket
To the DC IN
5V socket
To the wall socket
AC
230V,
50/60 Hz
■ To connect to a stereo system with a "DIGITAL OUT" or
"OPTICAL OUT" socket (digital connection)
When compared with an analogue connection recording, using a digital connection will give higher quality.
Some audio systems do not have a DIGITAL OUT socket.
Check before connecting.
02/11/7 MD_MT270H_SEEG_E2.fm
Page 15
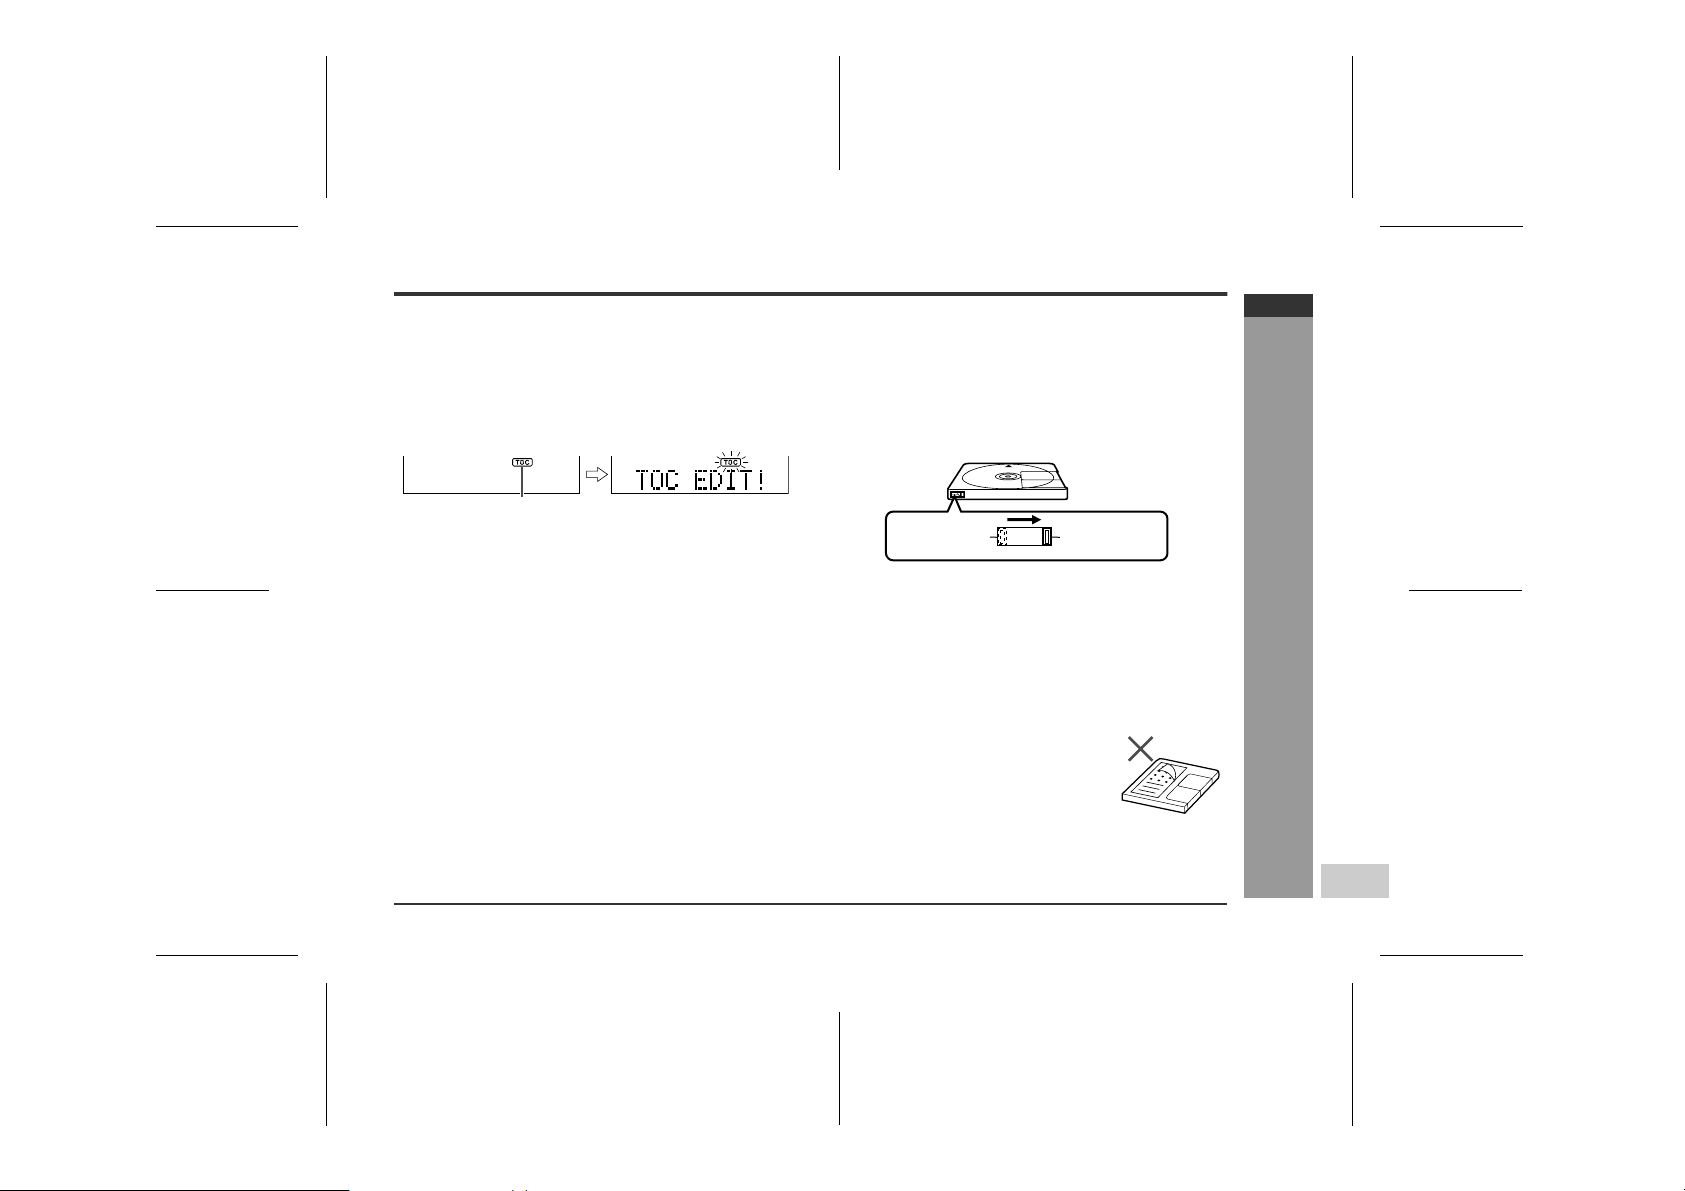
Before Recording
" About the TOC
After any recording or editing function, "TOC" (Table Of Contents) is displayed. To finalise the recording or editing function, turn the power off. During this process, "TOC" will flash
and "TOC EDIT!" will be displayed. During any recording or
editing function, the MiniDisc unit lid is locked, and the MiniDisc cannot be removed until the process is finalised.
TOC display
Warning:
If the power is removed (Battery/AC adaptor) whilst
"TOC" is displayed, the MiniDisc unit lid will remain
locked until the battery/main power is restored and the
unit is turned on. Y our new recordings or edited changes
will be lost and your MiniDisc may become unusable.
Caution:
Whilst "TOC" or "TOC EDIT!" is displayed, follow the instructions below.
- Do not jerk or bump the unit.
- Do not unplug the AC adaptor.
- Do not remove the battery.
- Do not subject the unit to shock.
Otherwise, tracks may not be recorded properly.
" To prevent recorded MiniDiscs from being
erased accidentally
Slide the accidental erase prevention tab, located on the
side of the MiniDisc, in the direction indicated by the
arrow.
The MiniDisc will then be protected against accidental
erasure.
Recordable
To add a recording to such a MiniDisc, slide the accidental erase prevention tab back to its original position.
Recording
prevented
" Helpful tip when attaching a label
When attaching a label to an MiniDisc cartridge, be sure
to note the following. If the label is not attached properly,
the MiniDisc may jam inside the unit and you may not be
able to remove it.
! If the label peels off or partially lifts
away, replace it with a new one.
! Do not put a new label on top of an ex-
isting one.
! Attach the label only in the specified
location.
MD-MT270H
ENGLISH
Preparation
-Before Recording-
02/11/7 MD_MT270H_SEEG_E2.fm
E-8
Page 16
MD-MT270H
ENGLISH
-Recording-
Basic Operation
Recording
Before recording
Cancel the hold mode.
The portable MD does not work whilst in the hold mode.
As for the details, see page 13.
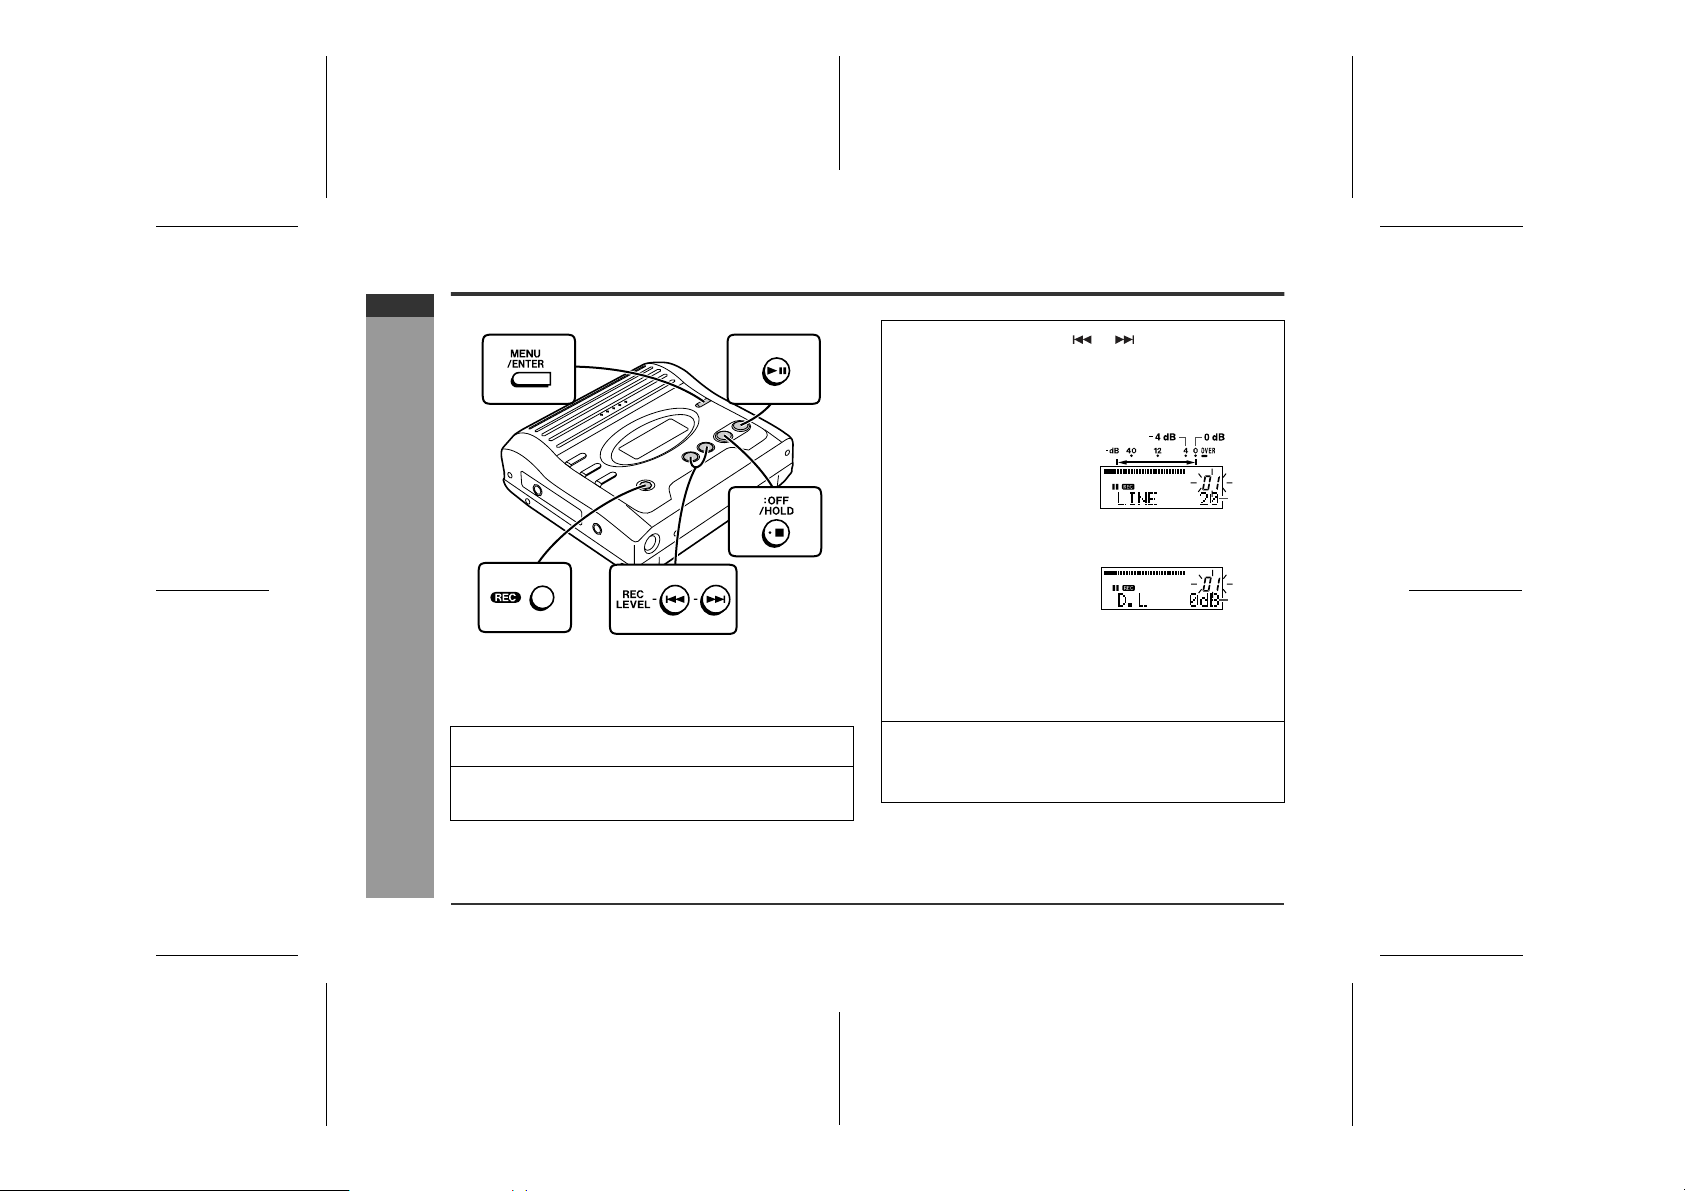
Press the REC button.
1
Begin playback on the stereo system connected to
2
this portable MD.
Press the REC LEVEL or button to adjust the
3
recording level.
Analogue recording (connecting with analogue ca-
ble)
Adjust the recording level
so that the maximum
sound volume from the
source makes the reading
swing somewhere between -4 dB and 0 dB.
Digital recording (connecting with digital cable)
You can adjust the leve l in
1 dB increments between
+ 10 dB and - 10 dB.
Once you adjust the recording level, the setting is retained even after the recording stops. (For cancellation
instructions for the digital rec ording lev el , see pag e 30.)
The sound from the earphones do se not change even
the digital recording level is adjusted.
Press the PAUSE button on the stereo s ystem to en-
4
ter the playback pause mode.
Here, you can search for the track to be recorded.
0 - 30
+ 10 dB
to
- 10 dB
E-9
02/11/7 MD_MT270H_SEEG_E3.fm
Page 17
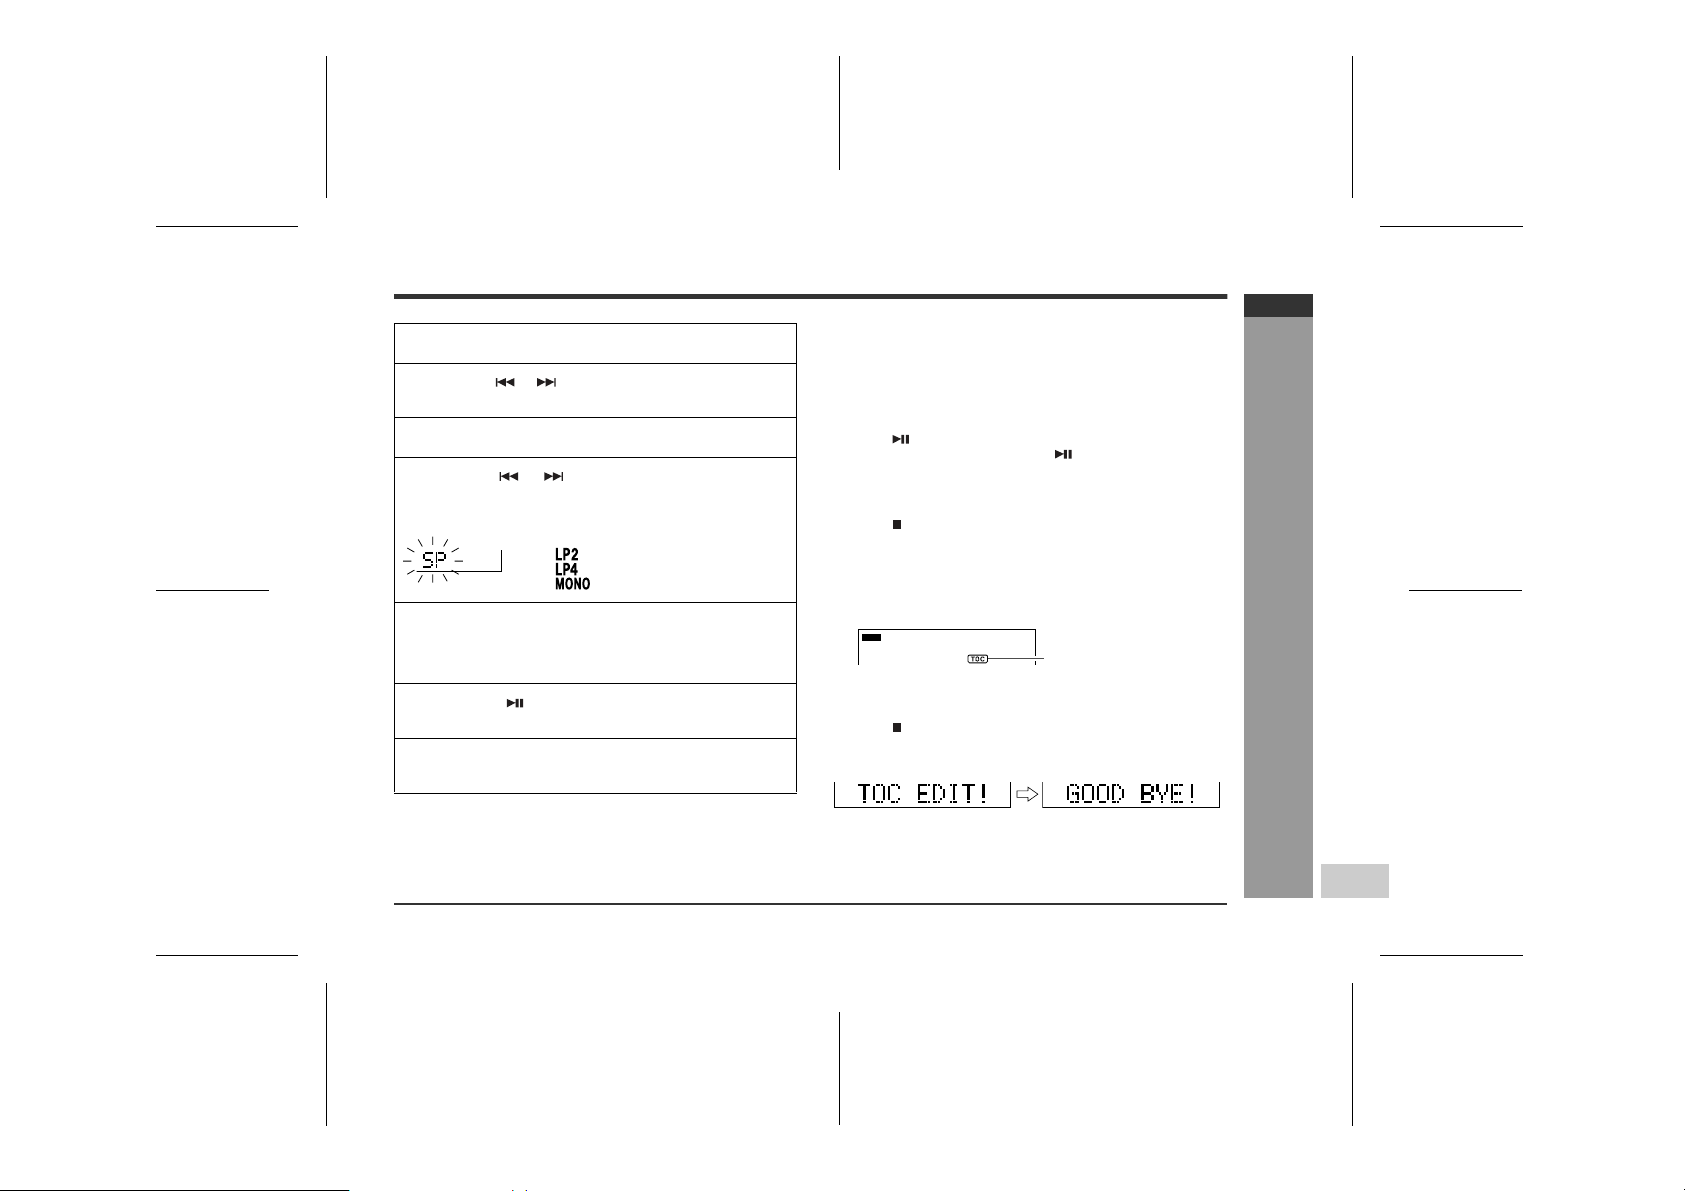
Press the MENU/ENTER button.
5
Press the or button repeatedly t o selec t "REC
6
MODE".
Press the MENU/ENTER button.
7
Press the or button repeatedly to select the
8
recording mode (page 15).
(Stereo recording)
SP
(2 times long recording)
(4 times long recording)
(Monaural recording)
Press the MENU/ENTER button.
9
The mode will be set automatically aft er 7 seconds even
if the MENU/ENTER button is not pressed.
Press the button to start the MiniDisc unit re-
10
cording.
Begin playback on the stereo system, the output
11
will be recorded.
Notes:
! Complete the operation within 7 seconds whilst selecting
the menus.
! Changing the volu me level whilst recording does not a ffect
the recording.
! You cannot adjust the bass level whilst recording.
To interrupt recording
Press the button.
! To resume recording, press the button again.
! The track number will be increased by one each time the
recording is interrupted.
To stop recording
Press the :OFF/HOLD button.
Notes:
! Whilst "TOC" is displayed, the MiniDisc recorded contents
are not yet updated.
! To prevent the new recording from being lost, it is not pos-
sible to remove the MiniDisc whilst "TOC" is displayed.
TOC display
To update the recorded contents of the MiniDisc
Press the :OFF/HOLD button whilst in the stop mode.
The power turns off after recorded contents have been
updated on the MiniDisc.
MD-MT270H
ENGLISH
-Recording-
Basic Operation
02/11/7 MD_MT270H_SEEG_E3.fm
E-10
Page 18
MD-MT270H
ENGLISH
-Playback-
Basic Operation
Playback
To the
PHONES
socket
Left
channel
L
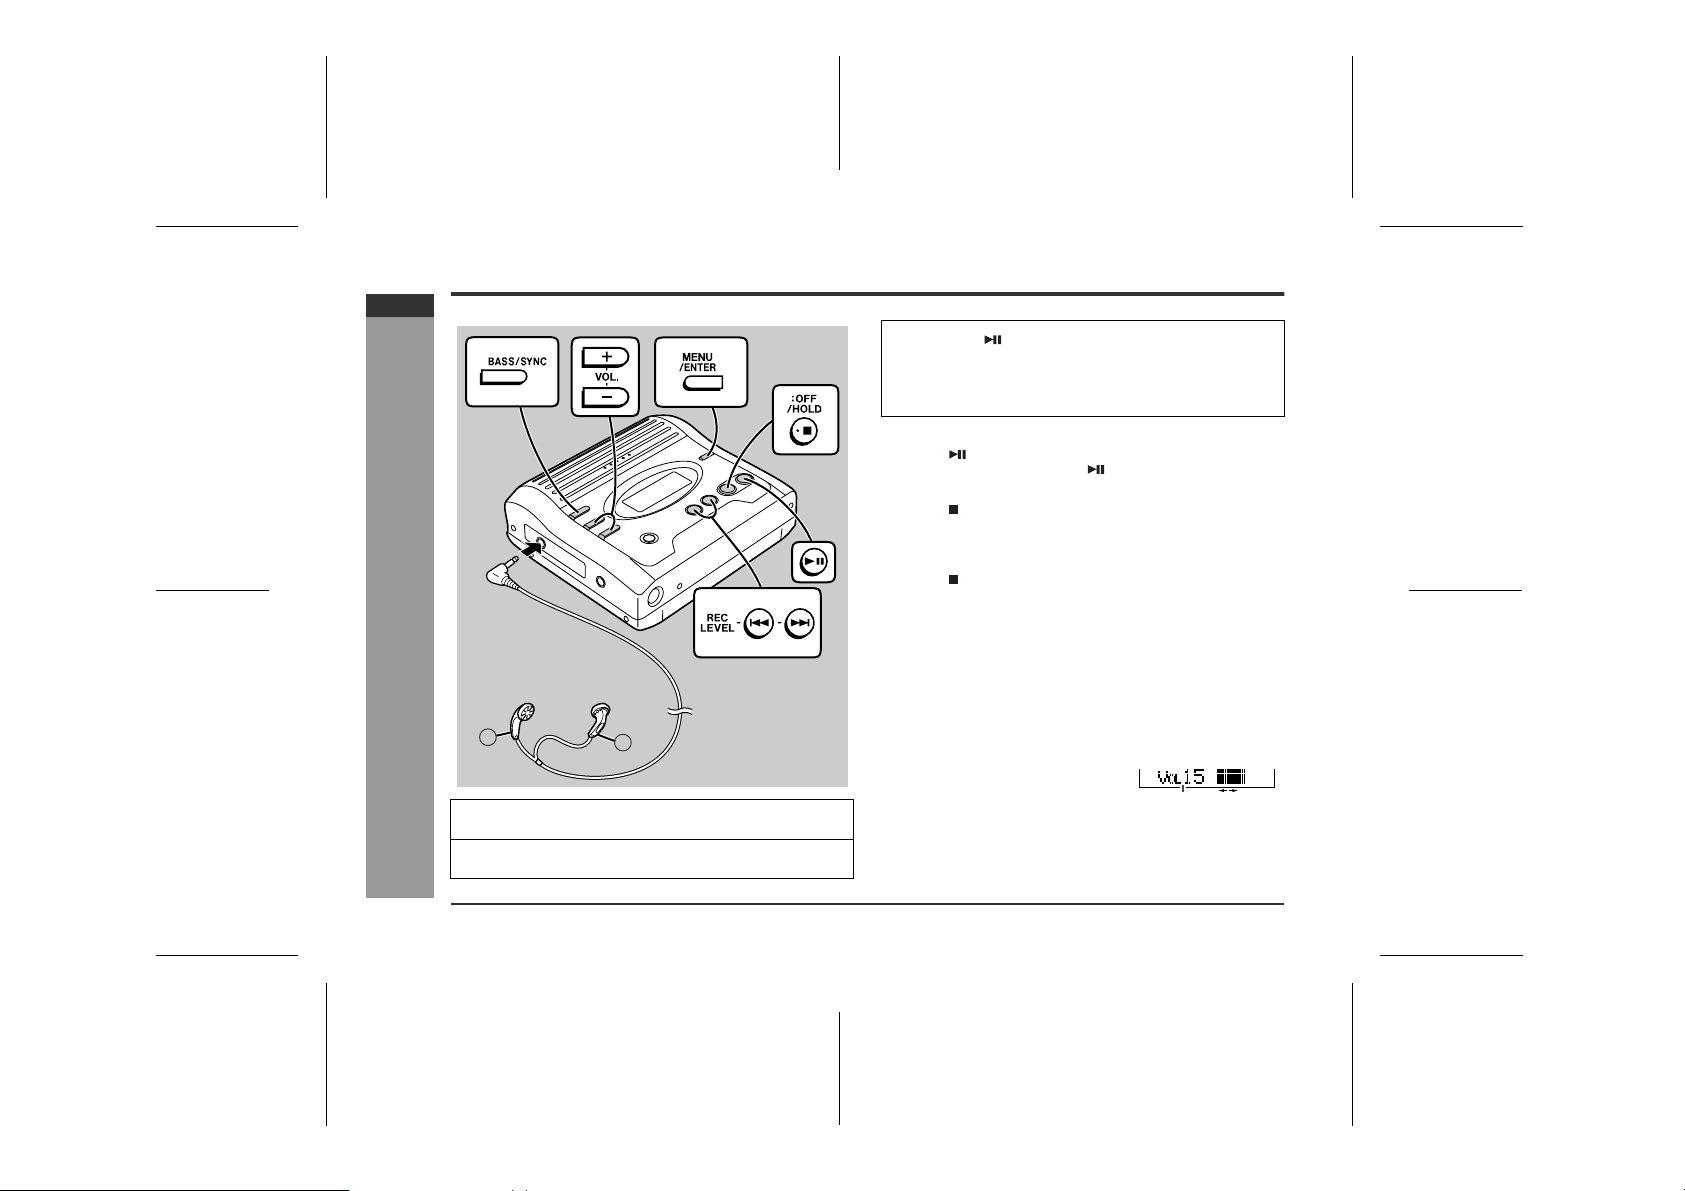
Insert the earphones p lu g into the PHON E S socket.
1
Right
channel
R
Press the button.
3
Playback starts automa ti cally wit h a playba ck only Min iDisc or a MiniDisc which is protected agains t accidental
erasure (Auto-play function).
To interrupt playback
Press the button.
To resume playback, press the button again.
To stop playback
Press the :OFF/HOLD button.
The power will turn off automatically after 2 min utes if t he u nit
is left in the stop mode.
To turn off the power
Press the :OFF /HOLD button whilst in the sto p mo d e.
Notes:
! Reduce the volume before starting to play. MiniDiscs,
compared to ordinary cassette tapes, have very little
noise. If the volume is adjusted according to your usual
expectations of noise, high volume may damage your
hearing.
! The sound escaping from your earphones may annoy
people around you. In particularly crowded places (such
as on trains or buses ), reduce the volume.
" Volume control
Press the VOL + button to incr ease
the volume and the VOL - button to
decrease the volume.
Volume (0 - 30)
E-11
Insert a Min i D isc (page 6).
2
02/11/7 MD_MT270H_SEEG_E3.fm
Page 19

" Bass control
Each time the BASS/SYNC button is pressed, the bass
response will be switched as follows.
BASS 1 Emphasised slightly.
BASS 2 Emphasised more.
BASS 3 Emphasised fully.
BASS OFF Cancelled. (Default setting)
" To adjust the bass response
You can set 3 types of bass settings (BASS 1 - BASS 3) by
adjusting low (Lo) and high (Hi) boost for each setting.
During playback, press the MENU/ENTER button.
1
Press the or button repeatedly to select
2
"SOUND ADJ".
Press the MENU/ENTER
3
button.
Press the or button
4
repeatedly to select bass
setting.
B: bass selection
Press the VOL + or VOL -
5
button to select the bass
selection from "B1" to
"B3".
(Example: to change
"BASS 3")
B1 to B3
Press the or button
6
repeatedly to select "Lo".
Press the VOL + or VOL -
7
button to adjust the low
sound setting.
Press the or button
8
repeatedly to select "Hi".
Press the VOL + or VOL -
9
button to adjust the high
sound setting.
Repeat steps 4 - 9 to change the other bass setting.
10
When the bass selection is entered, press the
11
MENU/ENTER button.
Notes:
! If you set the volume more than 23, the bass boost will be
adjusted automatically.
! When the bass sound is emphasised with the volume
level set higher than 23, the volume level will be reduced
to 22 automatically.
Lo: low sound setting
1 to 5 (default setting:3)
Hi: high sound setting
1 to 5 (default setting:3)
MD-MT270H
ENGLISH
-Playback-
Basic Operation
02/11/7 MD_MT270H_SEEG_E3.fm
E-12
Page 20
MD-MT270H
ENGLISH
Useful Features
-Hold Function/Advanced Playback-
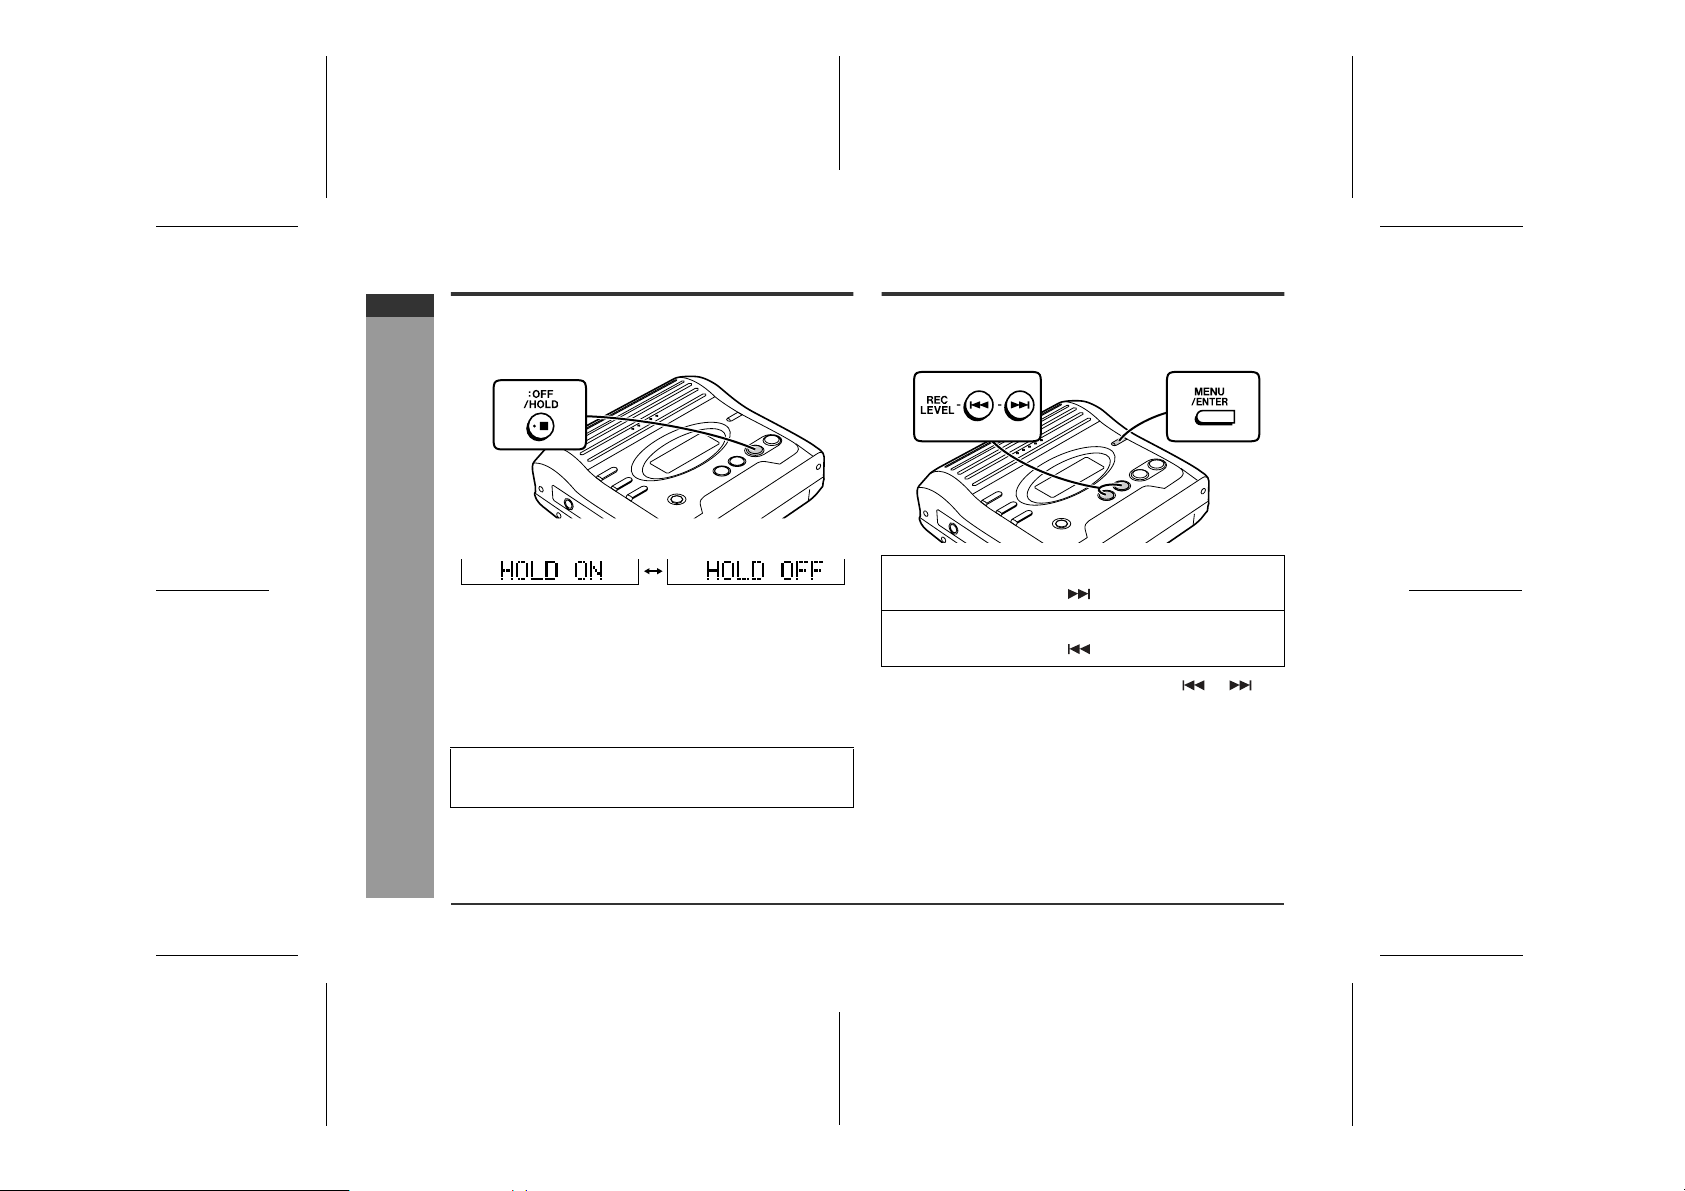
Hold Function
To prevent accidental operation, the unit can be locked in
its present condition using the Hold function. When in
Hold, no buttons are active.
Press the HOLD button for 2 seconds or more.
Hold Release
If the battery is inser ted or the AC adaptor is connected,
you can set this function even when the power is turned
off.
To cancel the hold mode
Press and hold down the HOLD button for 2 seconds or
more whilst the unit is in the hold mode.
"HOLD OFF" will be shown.
If the hold function is active whilst the power is turned
off, the power cannot be turned on by mistake and the
battery will not be drained.
Advanced Playback
! To locate the desired portion
For audible fast forward:
Press and hold down the button during playback.
For audible fast reverse:
Press and hold down the button during playback.
" Normal playback will resume when the or but-
ton is released.
" When the end of the last track is reached during fast
forward, the unit will enter the pause mode. When the
beginning of the first track is reached during fast
reverse, the unit will enter the playback mode.
E-13
02/11/7 MD_MT270H_SEEG_E4.fm
Page 21
! To locate the beginning of a track
To move to the beginning of the next track:
Press the button during playback.
To restart the track being played:
Press the button during playback.
To locate the next track:
Press the button whilst the unit is stopped.
To locate the previous trac k:
Press the button whilst the unit is stopped.
" To skip a number of tracks at one time, press the or
button repeatedly until the desired track number is
shown.
" When you press the button, playback starts from the
beginning of the trac k.
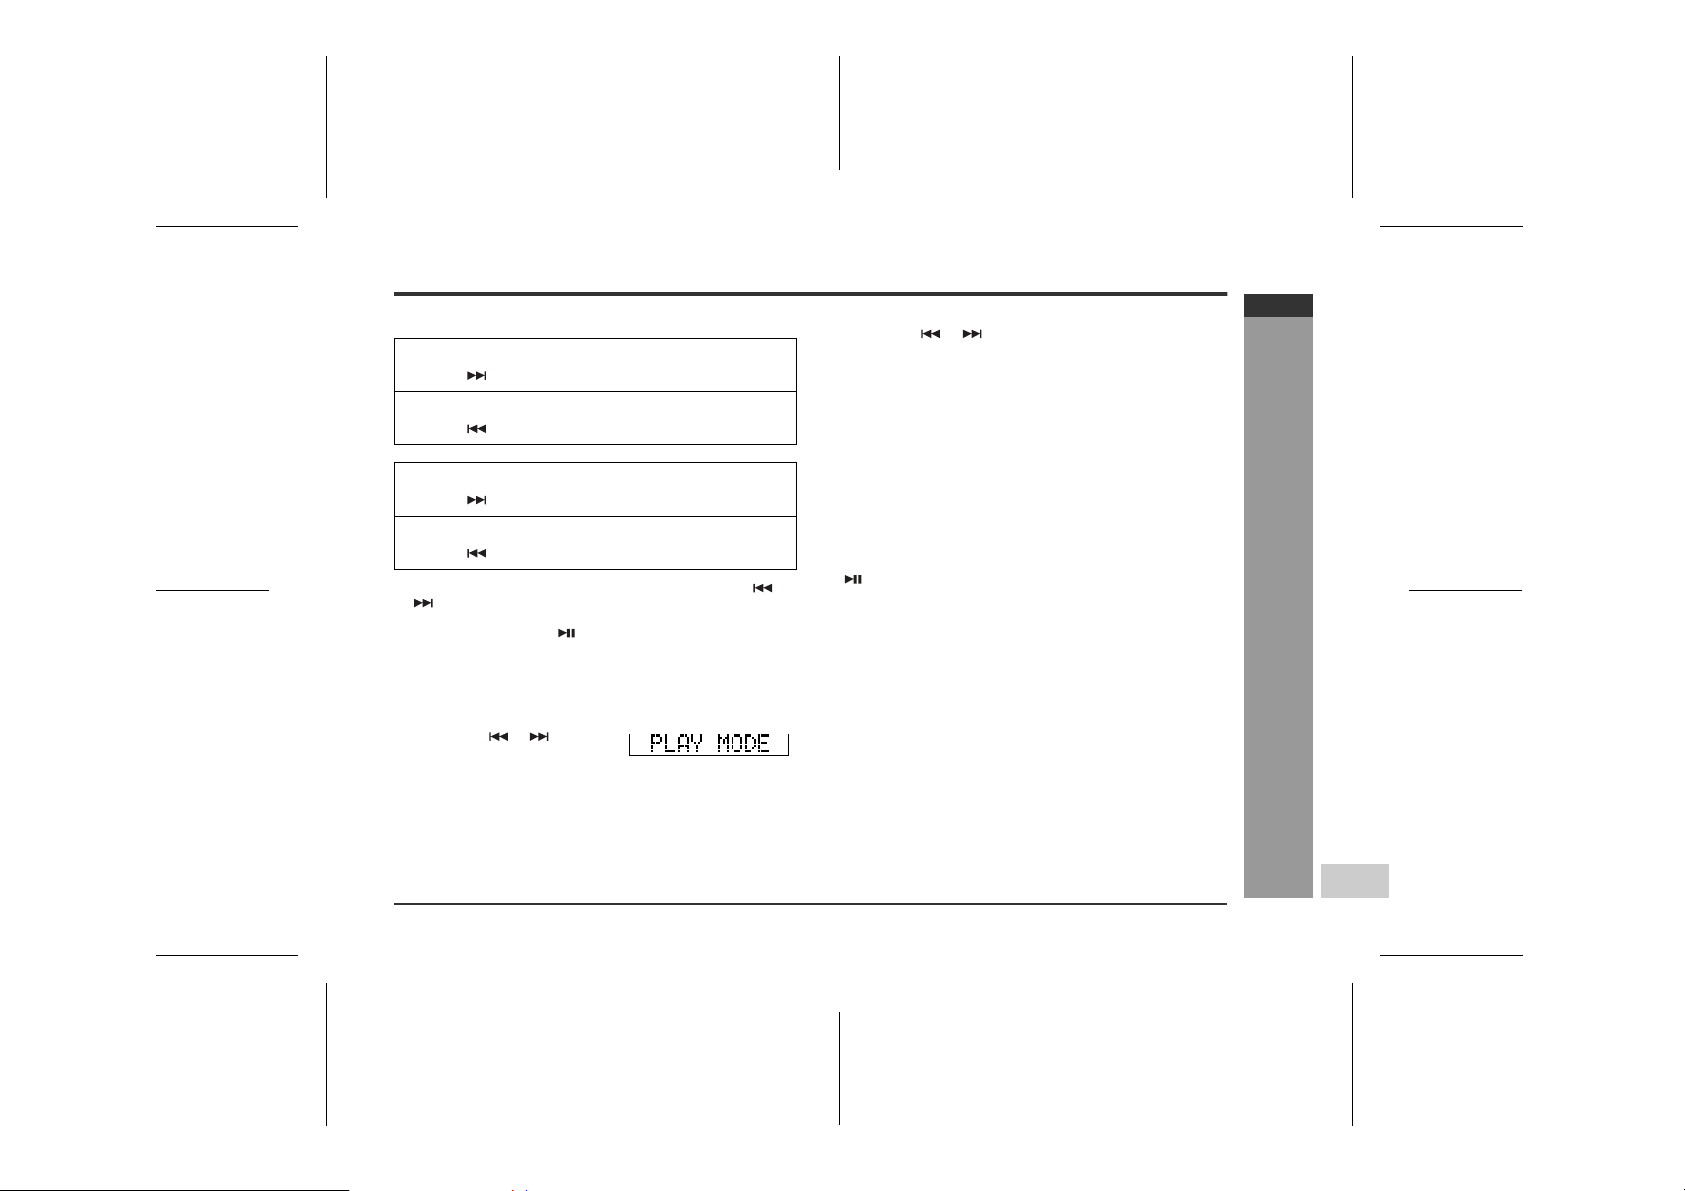
! Random play or repeat play
During playback, press the MENU/ENTER butto n.
1
Press the or button re-
2
peatedly to select "PLAY
MODE".
Press the MENU/ENTER button.
3
Press the or button repeatedly to select the de-
4
sired playback mode.
RANDOM : Random play
RANDOM REP : Repeat play of tracks in random order
ALL REPEAT : Repeat play of all of the tracks
1Tr REPEAT : Repeat play of a single track
NORMAL : Normal playback
Press the MENU/ENTER button.
5
The mode will be set automatica lly after 7 seconds even
if the MENU/ENTER button is not pressed.
Notes:
" Complete the operation within 7 seconds whilst selecting
the menus.
" If the playback mode is selected whilst stopped, press the
button to start playback.
" When "TOC" is displayed, random play or repeat play is
impossible.
" In random play, the unit will select and play tracks auto-
matically. (You cannot select the order of the tracks.) After
all of the tracks are played once in random order, the unit
will stop automatically.
" During random, random repeat, or single track repeat
play, you can forward or reverse the MiniDisc only within
the track being played.
" During random play, the unit cannot find the beginning of
any trac k which has been played.
" Repeat play lasts unt il you stop the unit.
MD-MT270H
ENGLISH
Useful Features
-Advanced Playback-
02/11/7 MD_MT270H_SEEG_E4.fm
E-14
Page 22
MD-MT270H
ENGLISH
Useful Features
-Advanced Recording-
Advanced Recording
! Long-play recording
2 times and 4 times long recording
Double or quadruple time of stereo recording is possible.
Monaural recording
In monaural, you can record twice as long as the stereo
recording.
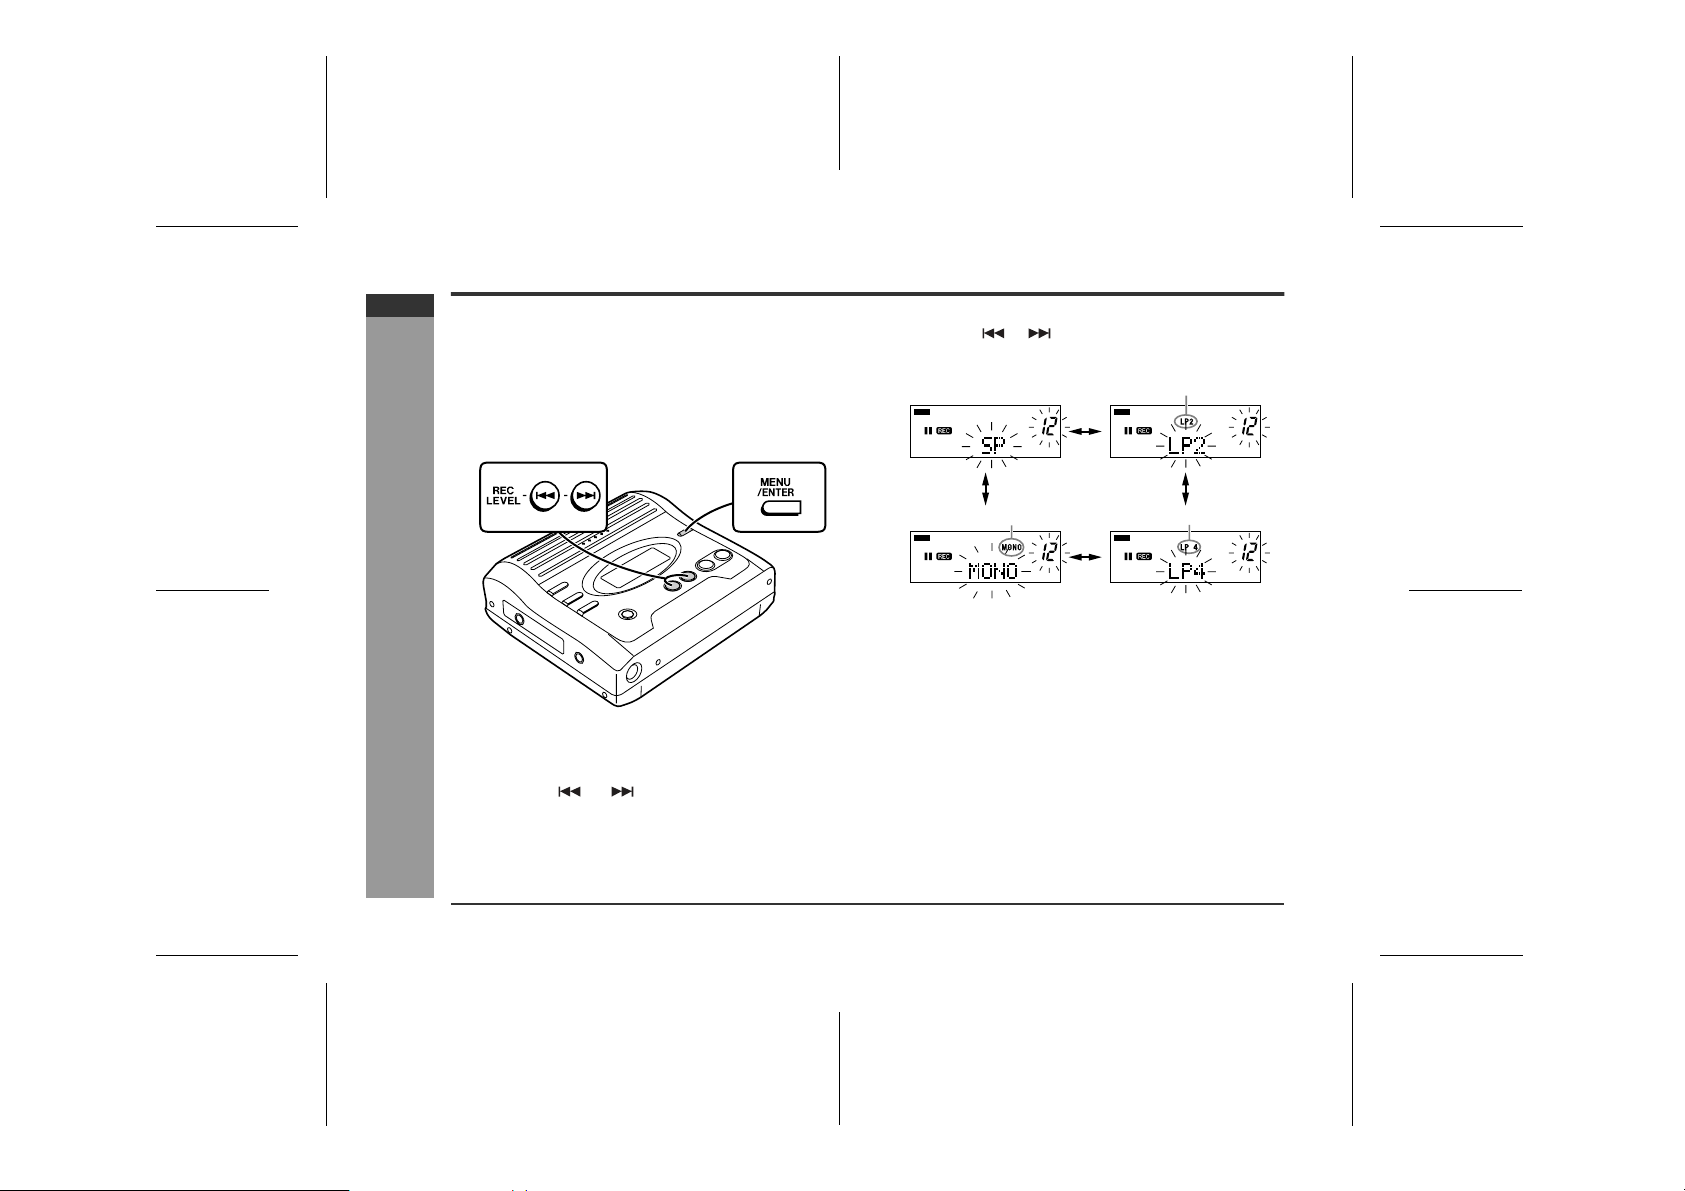
When recording is paused, press the MENU/EN-
1
TER button.
Press the or button repeatedly to select
2
"REC MODE".
Press the MENU/ENTER button.
3
Press the or button repeatedly to select the
4
desired recording mode.
Stereo recording (SP)
Press the MENU/ENTER button.
5
The mode will be set automatically after 7 seconds
even if the MENU/ENTER button is not pressed.
Start recording.
6
Notes:
" Complete the operation within 7 seconds whilst selecting
the menus.
" The recording mode remains unchanged until a new
mode is selected.
2 times long recording (LP2)
4 times long recording (LP4)Monaural recording (MONO)
E-15
02/11/7 MD_MT270H_SEEG_E4.fm
Page 23

Notes:
" In monaural recording, the sound on the right and left
channels is mixed even if the input source is in stereo.
Although you can hear the stereo sound from the earphones, the recorded sound is monaural.
" Tracks recorded in 2 times long recording and 4
times long recording modes cannot be played with
the unit that does not support these modes. On
such a unit, no soun d is heard. (The operation ma y
vary depending on the unit .)
" Tracks recorded in monaural cannot be played if
equipment do not support monaural playback.
! About ATRAC
The ATRAC (Adaptive TRansform Acoustic Coding) system compresses the sound data into 1/5 by cutting out
the inaudible sound. Since the sound is selected based
on psychoacoustics masking, the sound quality is not
impaired. This unit is equipped with the ATRAC3 compressing system that can reduce the sound data to 1/10
or 1/20 of its original size. By employing this system, 2
times and 4 times long recordings are enabled in stereo
mode.
! About the recording mode
You can select the recording mode from stereo recording,
2 times long recording, 4 times long recording, and monaural recording. Recordable time varies depending on
the recording mode. If the tracks are recorded on an 80minute MiniDisc, its recording time changes as follows:
Indication Recording mode Recording
time
SP Stereo MAX. 80 min.
LP2 2 times long (stereo) MAX. 160 min.
LP4 4 times long (stereo) MAX. 320 min.
MONO Monaural MAX. 160 min.
! Caution for 4 times long recording (LP4)
Special compression methods are used to achieve 4
times long recording. This may cause some noise to be
recorded occasionally. When the highest quality is
required, stereo or LP2 recording is recommended.
MD-MT270H
ENGLISH
Useful Features
-Advanced Recording-
02/11/7 MD_MT270H_SEEG_E4.fm
E-16
Page 24
MD-MT270H
ENGLISH
Useful Features
-Advanced Recording-
Advanced Recording (continued)
! Playback sound-actuated recording
Recording automatically starts or pauses by detecting sound
from the stereo system (Synchronised recording).
Press the REC button.
1
Begin playback on the stereo system connected to
2
this portable MD.
Press the or button to adjust the re cordi ng le v-
3
el (see page 9).
Press the PAUSE button on the stereo system to en-
4
ter the playback pause mode.
Select the starting point for your recording and press the
PAUSE button.
Press the MENU/ENTER button.
5
Press the or button repeatedly to select "REC
6
MODE".
Press the MENU/ENTER button.
7
Select the recording mode (step 4, page 15) and press
8
the MENU/ENTER button.
Press the MENU/ENTER button.
9
Press the or button repeatedly to select
10
"SYNC ON".
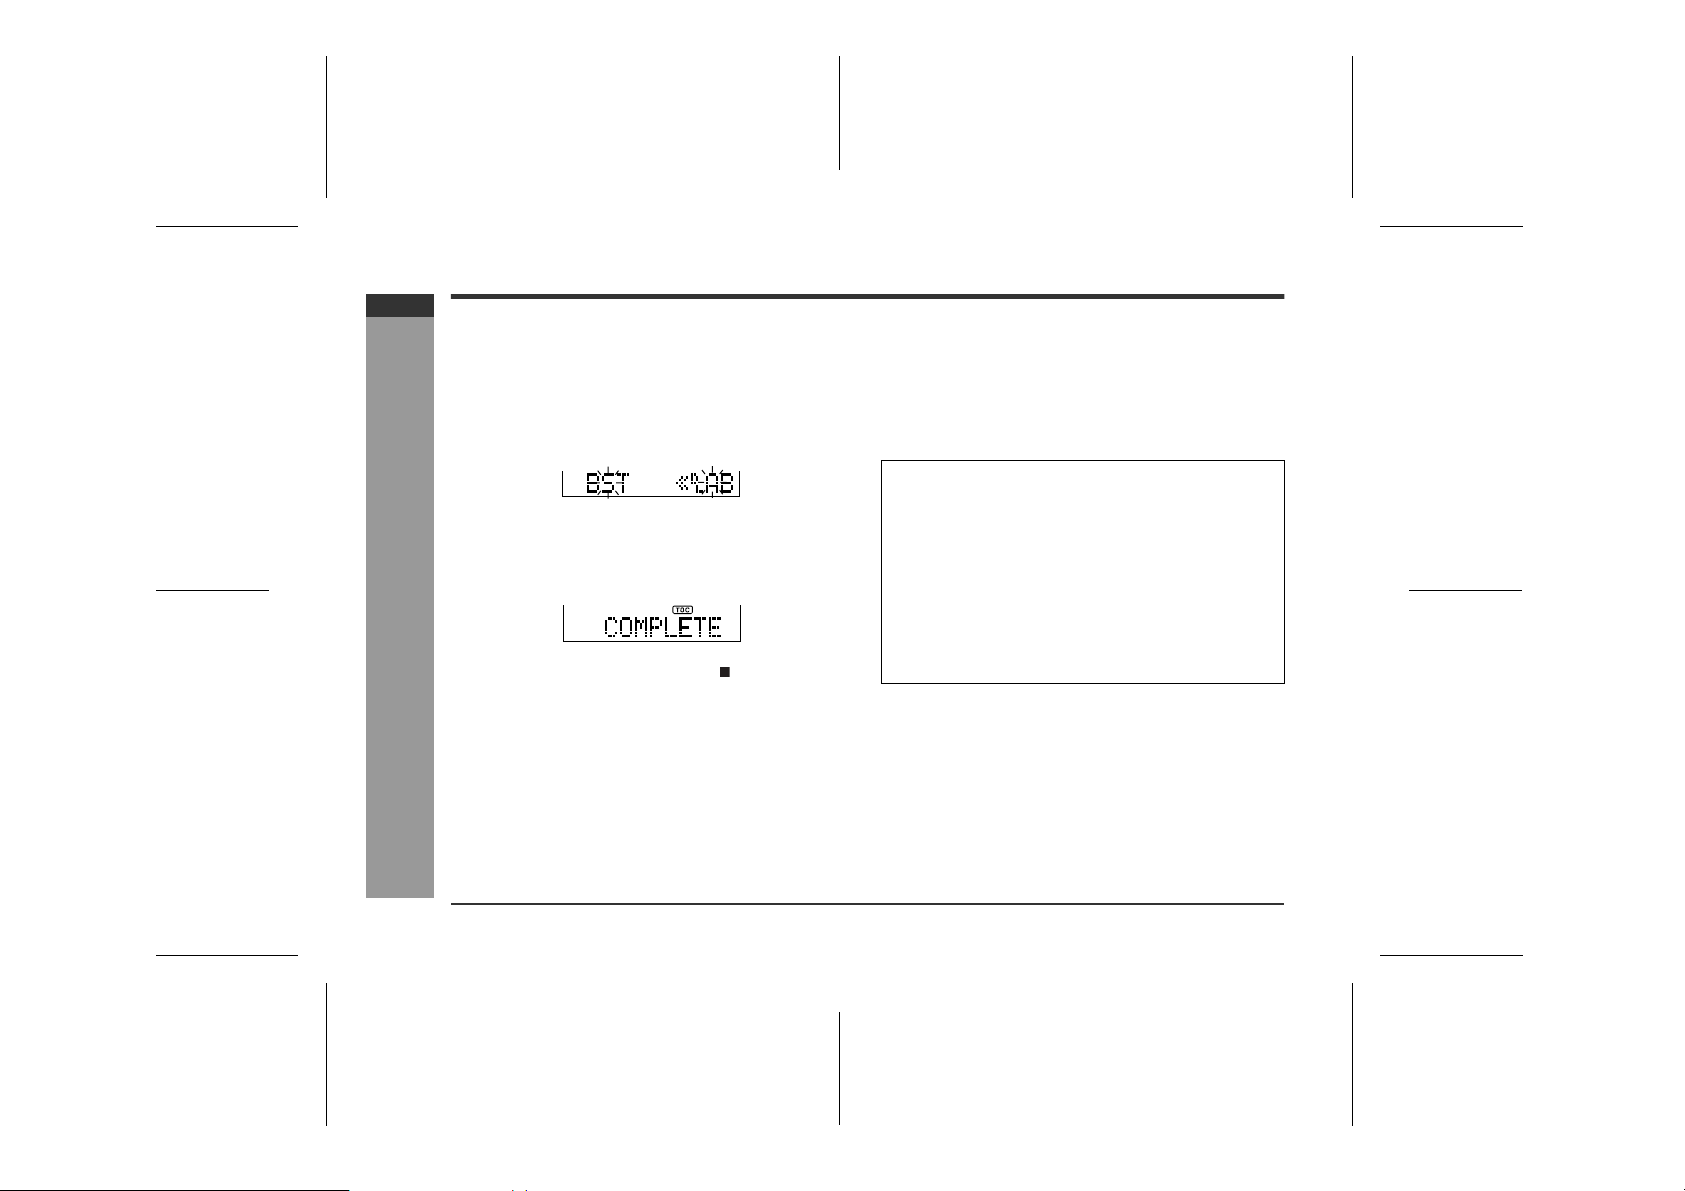
Press the MENU/ENTER button.
11
" The BASS/SYNC button can be used inste ad of steps
9 - 11.
" "SYNC" will flash.
" To cancel the operation, press the :OFF/HOLD but-
ton.
" The mode will be set automat i cally after 7 seconds
even if the MENU/ENTER button is not pressed.
Begin playback on the stereo system.
12
Recording will begin automatically.
To interrupt recording
" When the stereo system is stopped, the unit will enter the
synchro recording pause mode. When playback is
resumed, recording will also resume.
" If a silence lasts for 3 seconds or more, recording will be
paused (pause function does not work for approximately
10 seconds after recording starts). When the unit receives
sound again, recording automatically starts.
" A new track number is created when recording resumes.
E-17
02/11/7 MD_MT270H_SEEG_E4.fm
Page 25

! To start recording from the m id dle of a tra ck
You can erase a portion of a track and make a new
recording.
All of the tracks that follow the newly recorded track will
be erased.
During playback, press the button at the point
1
where you want to begin recording.
Press the REC button.
2
To cancel the operation, press the :OFF/HOLD button.
Press the MENU/ENTER button.
3
All of the tracks and track names will be erased, following
the point where the playback is paused.
Press the MENU/ENTER button again.
4
Press the or button repeatedly to select "REC
5
MODE".
Press the MENU/ENTER button.
6
Press the or button repeatedly to sel ect the re-
7
cording mode (step 4, page 15).
Press the button.
8
Recording will start.
Notes:
" Complete the operation within 7 seconds whilst selecting
the menus.
" To keep a track after the point you want to make a new
recording, move the track and then make recording after
that point. (See "Editing a Recorded MiniDisc", page 29.)
MD-MT270H
ENGLISH
Useful Features
-Advanced Recording-
02/11/7 MD_MT270H_SEEG_E4.fm
E-18
Page 26

MD-MT270H
ENGLISH
Useful Features
-Advanced Recording-
Advanced Recording (continued)
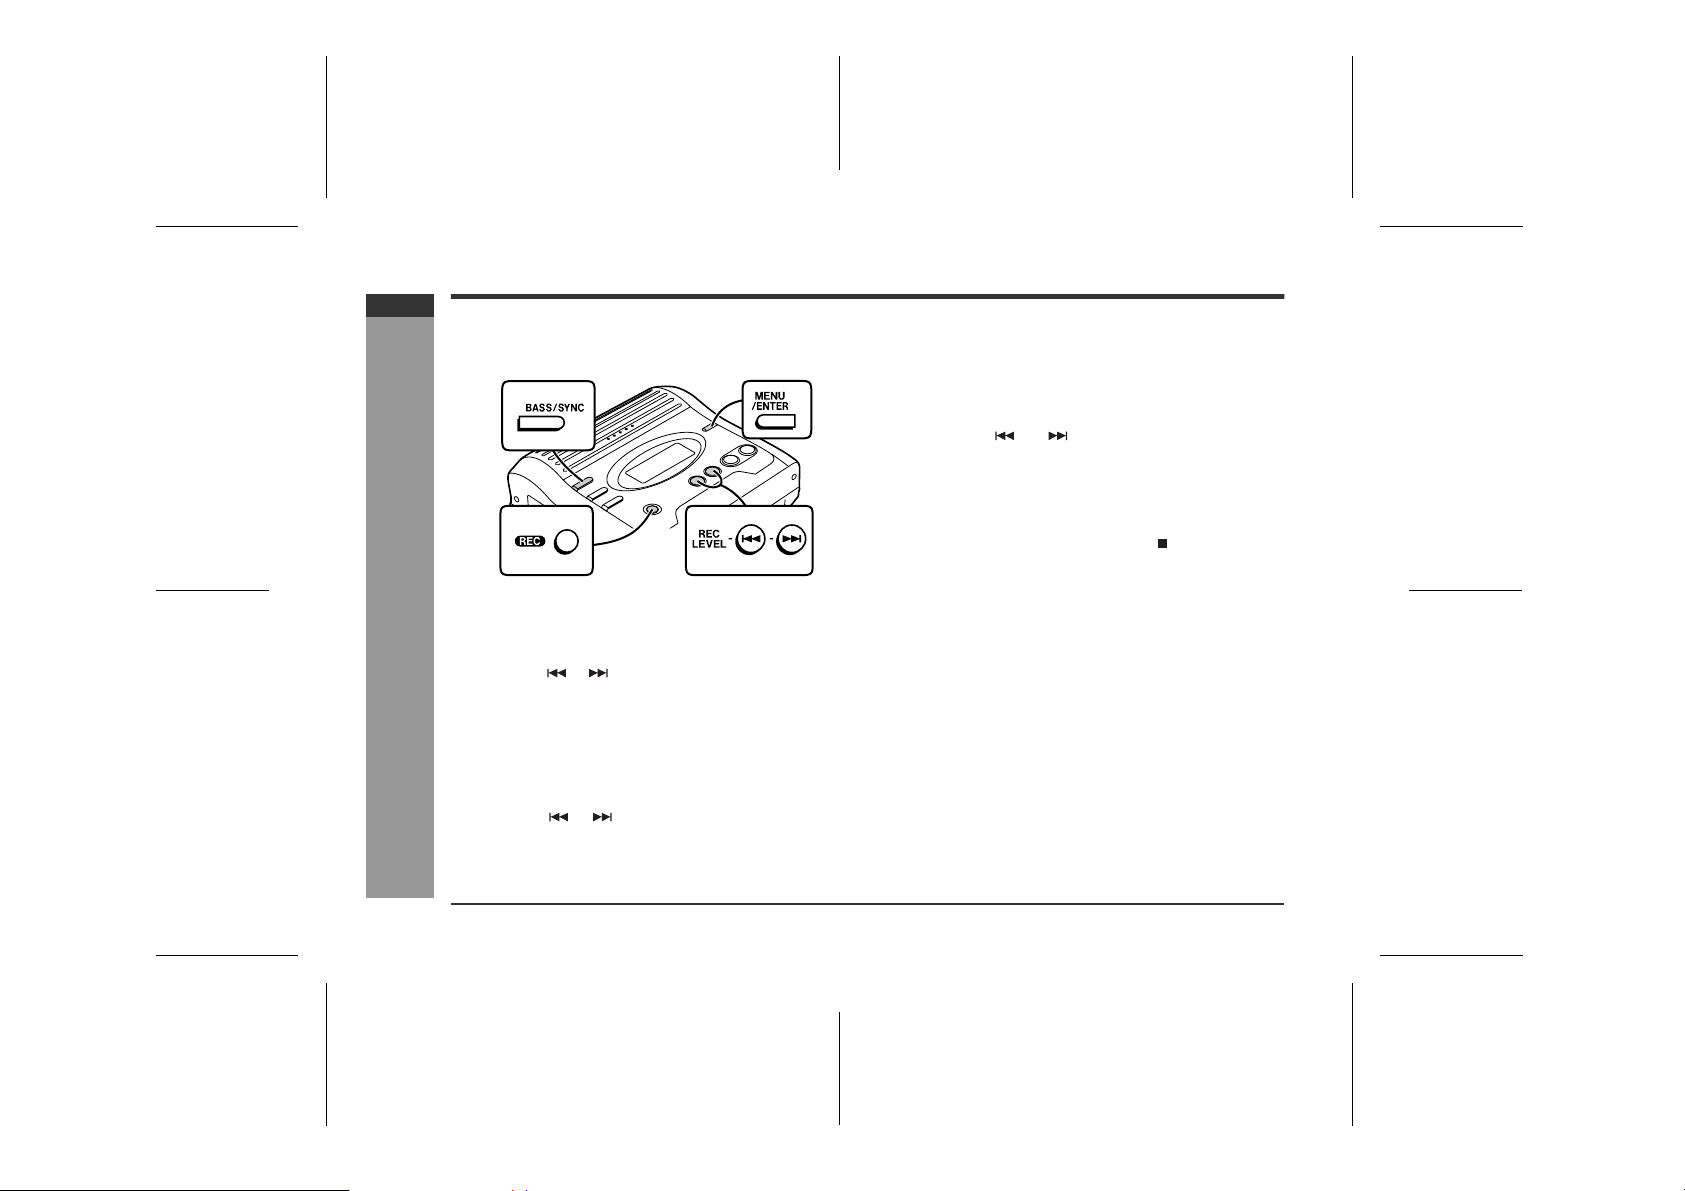
! To create your own track numbers
You can create your own track numbers at any point.
Whilst recording, press the REC button at the point
where you want to create track numbers.
The track number will be increased by one.
One track number will be added every time the REC button is pressed.
Numbering restriction
If you try to number more than 10 tracks in certain
amount of time, "SORRY" will be displayed and the operation will be disabled.
In that case, wait until the next operation can be
resumed.
In stereo recording Within 40 seconds
In 2 times long recording Within 80 seconds
In 4 times long recording Within 160 seconds
In monaural recording Within 80 seconds
! Recording tracks as a single track
You can record several pieces of music as a single track
by disabling the auto marker function.
When recording is paused or whilst recording...
Press the MENU/ENTER button.
1
Press the or button repeatedly to select
2
"MARK".
Press the MENU/ENTER button.
3
Press the or button to select "MARK OFF".
4
Press the MENU/ENTER button.
5
Notes:
" Complete the operation within 7 seconds whilst select-
ing the menus.
" When making digital recordings using a CD player or
an MiniDisc player, track numbers will be created automatically regardless of the setting of the auto mar ker
function.
E-19
02/11/7 MD_MT270H_SEEG_E4.fm
Page 27
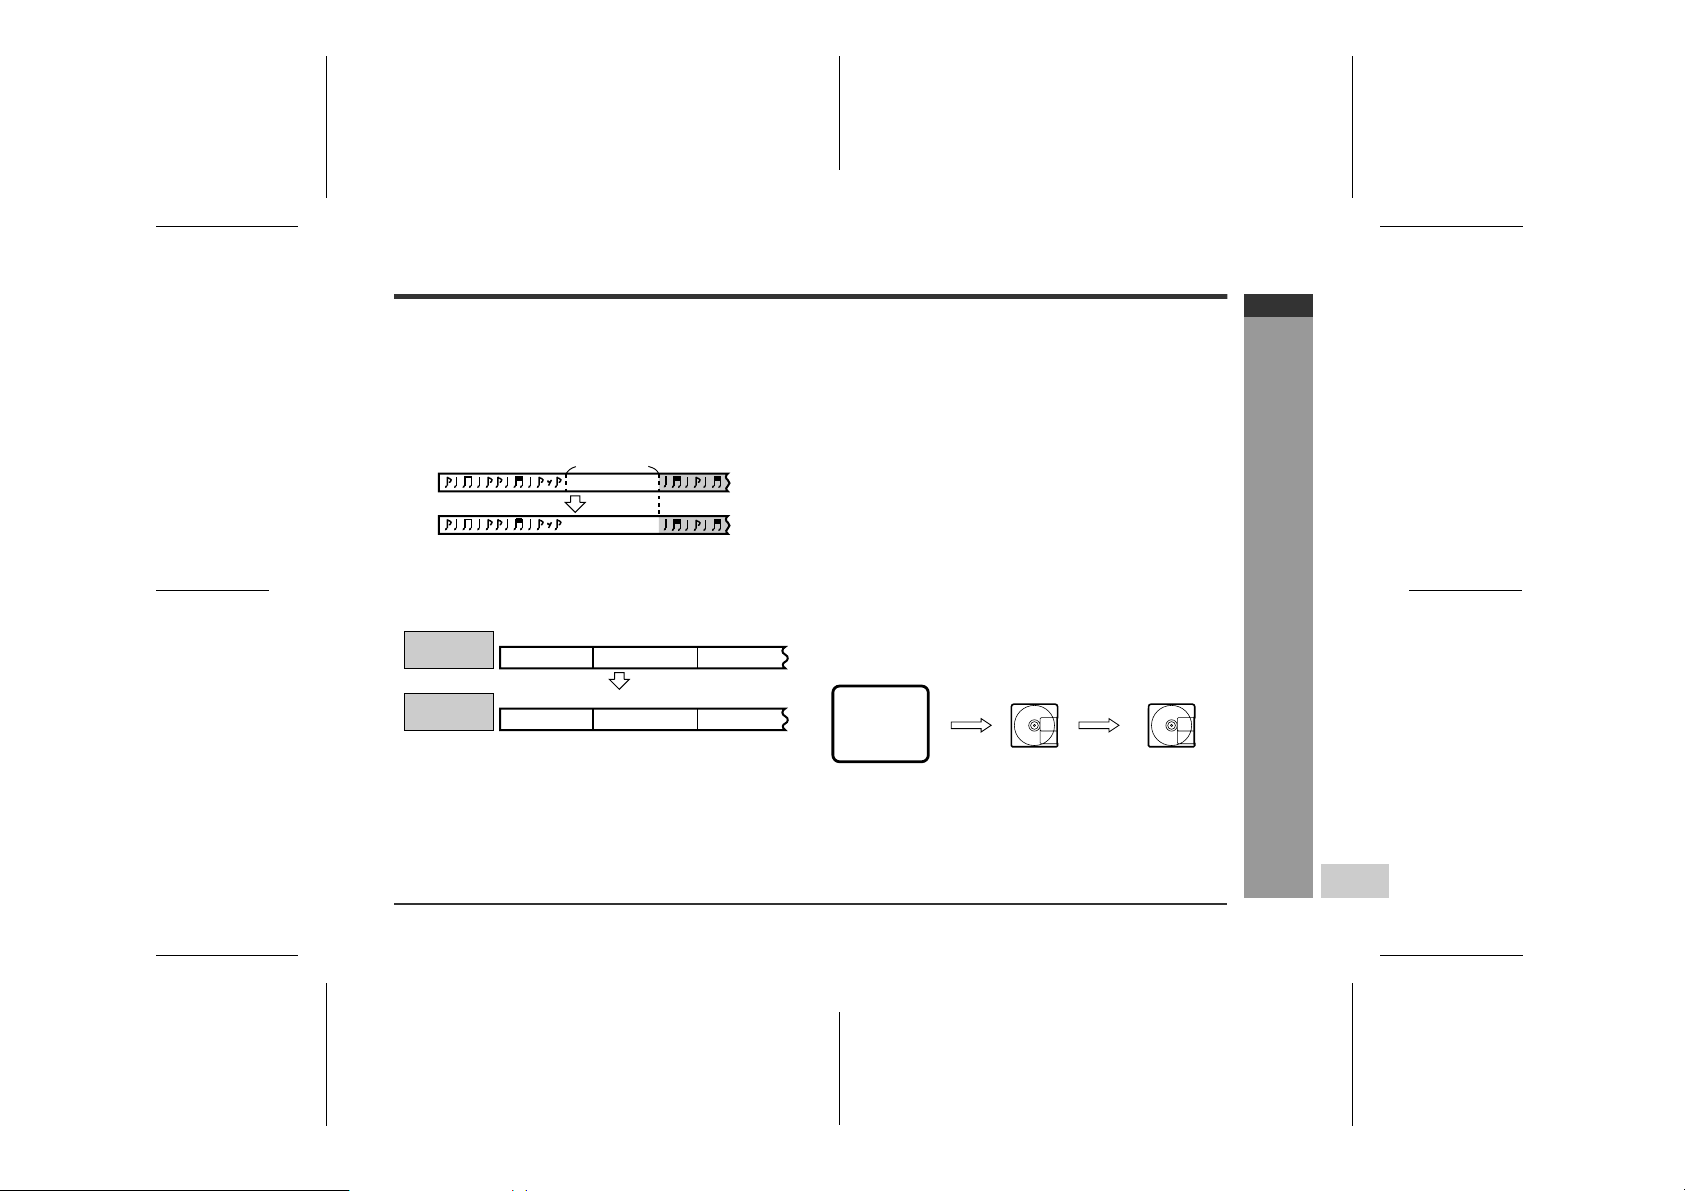
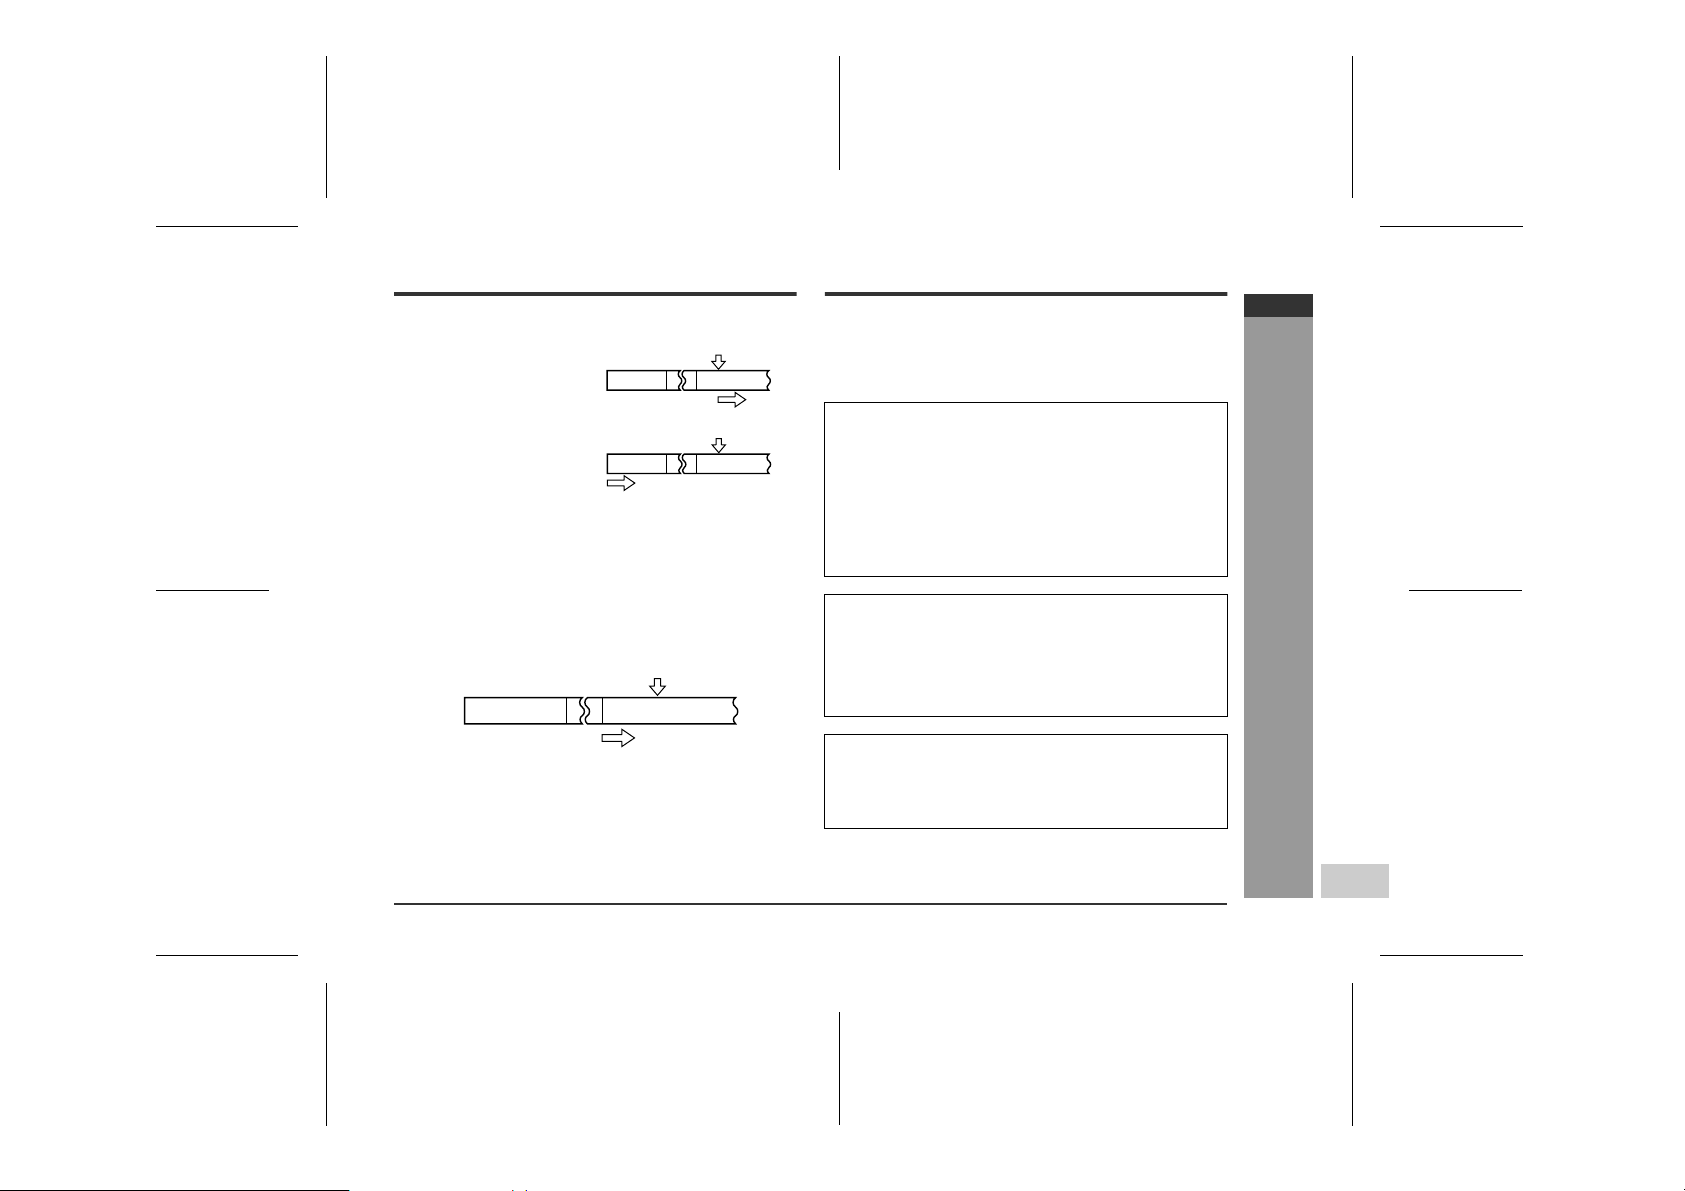
! About tr ack numbers
1. Track numbers are created automatically during recording via the analogue connection when a silence of
1 second or more is detected (Auto marker function).
A series of tracks can be recorded as one by disabling
the auto marker function (see page 19).
About
1 second
Silence
First track
When recording from a CD or a MiniDisc using the digital
2.
connection, track numbers will be created at the same
points as on the CD or MiniDisc (Synchro marker fu nction).
Playback
side
Recording
side
" Track numbers may not be created in proper places,
depending on the source to be recorded from, such as
signals with noise.
" The track numbers on the playback side may not
match the track numbers recorded on the MiniDisc.
First track
Track A
First track
Track A
Second track Third track
Track B
Track B
Second track
Track C
Third trackSecond track
Track C
" When recording, if a programmed playback is per-
formed by the source or playback is performed by
selecting tracks manually, the MiniDisc track numbers
may not be the same as on the source.
" Track numbers may not be created properly, depend-
ing on the connected stereo system.
! About sampling rate converter
This portable MD incorporates a sampling rate converter
so that it can record from digital radios or DAT tape
recorders.
! Note for digital recording
You cannot copy a MiniDisc that you recorded from digital
inputs to another MiniDisc or DAT. It is prevented by the
SCMS (Serial Copy Management System). Recording
from analogue inputs is not affected.
Digital signals Digitally recorded
CD player,
MiniDisc
player,
etc.
MiniDisc
Digital
connection
Cannot record
Digital
connection
MD-MT270H
ENGLISH
Useful Features
-Advanced Recording-
02/11/7 MD_MT270H_SEEG_E4.fm
E-20
Page 28

MD-MT270H
ENGLISH
-Checking Displays-
Useful Features
Checking Displays
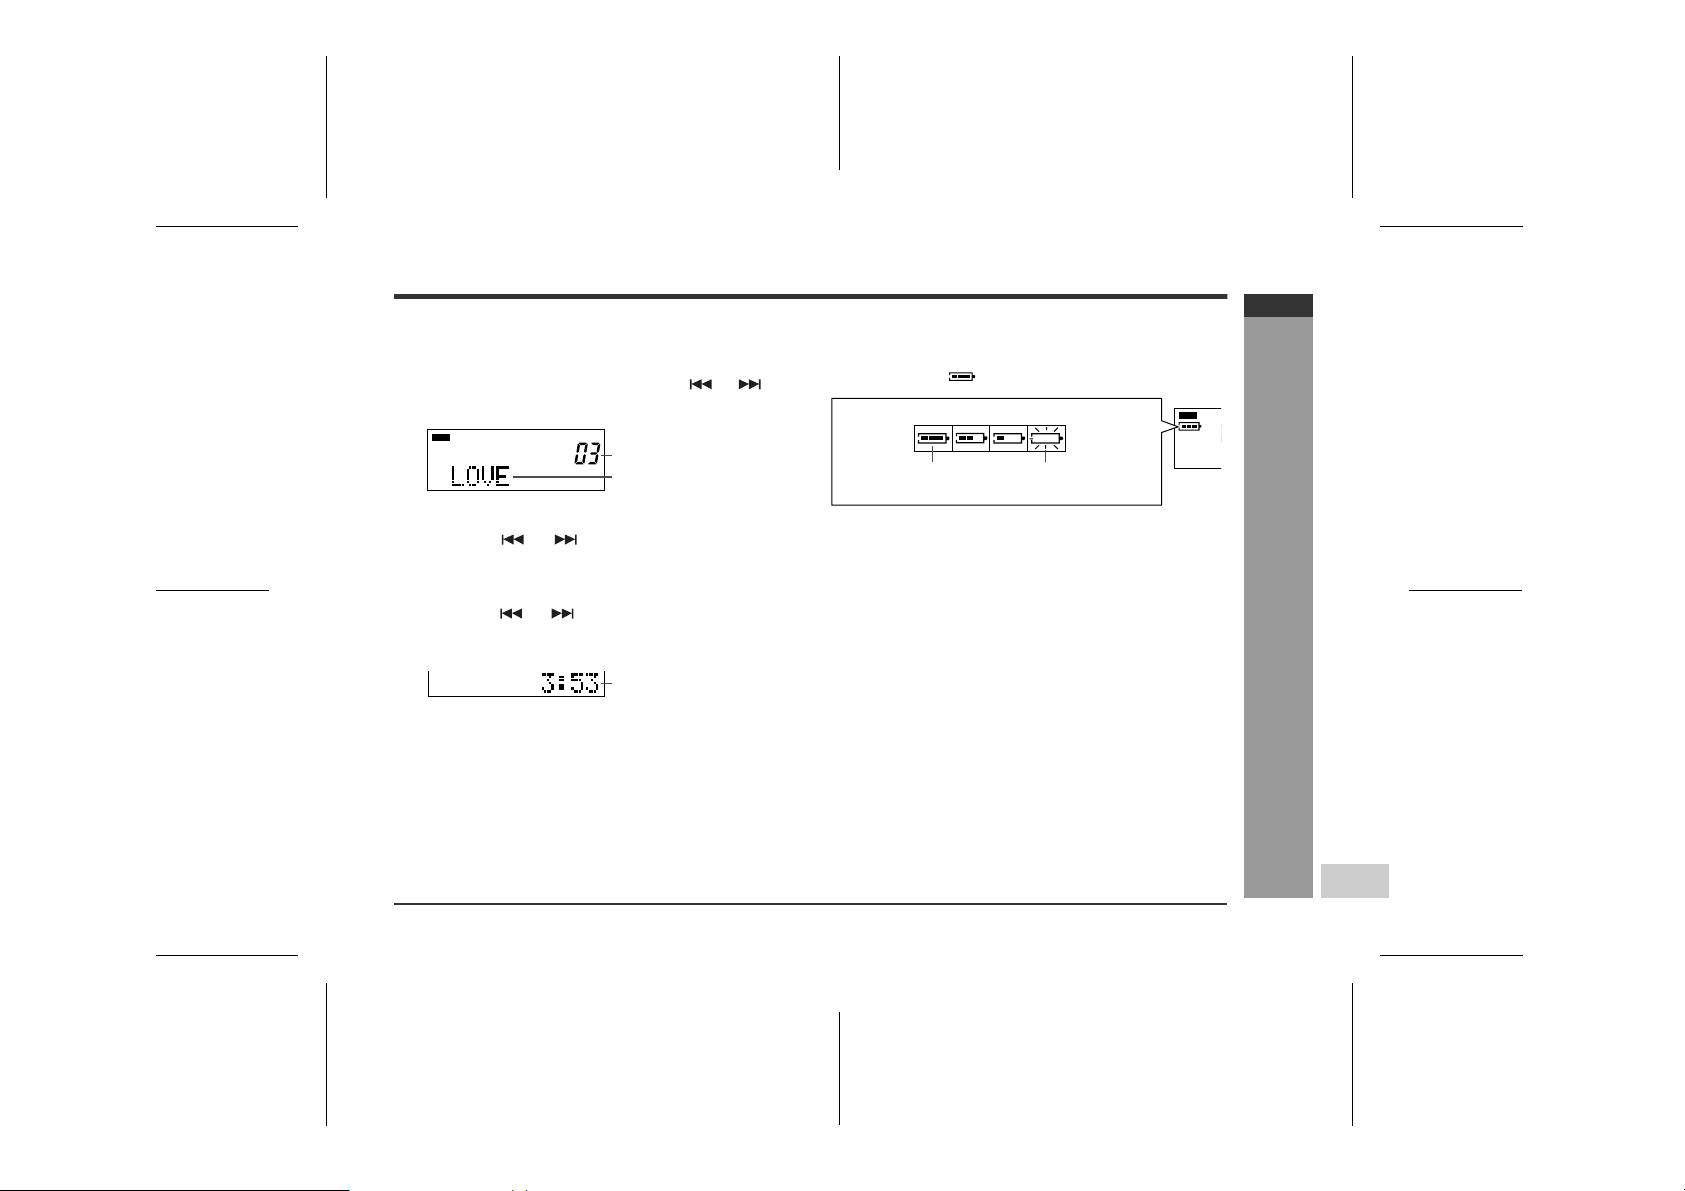
! To check the elapsed tim e and remaining
time of the track
During playback, press the MENU/ENTER button.
1
Press the or button repeatedly to select "DIS-
2
PLAY".
Press the MENU/ENTER button.
3
Press the or button.
4
Each time the or button is
pressed, the display will change
as follows.
Track number
Track name
Elapsed playback time
Remaining playback time
Notes:
" Complete the operation within 7 seconds whilst selecting
the menus.
" If the disc name or the track name was not originally
recorded on the MiniDisc, "NO NAME" will be displayed.
" Elapsed playback time and remaining playback time may
be different from the actual time.
" The selected display will not change even after the disc is
replaced.
A
B
C
D
! To check the remaining recording time and
the total playing time
Whilst in the stop mode, press the ME NU/E NTER but-
1
ton.
Press the or button repeatedly to select "DIS-
2
PLAY".
Press the MENU/ENTER button.
3
Press the or button.
4
Each time the or button is
pressed, the display will change
as follows.
Total number of tracks
Disc name
Remaining recording time
Total playing time
" Remaining recording time varies depending on the set re-
cording mode.
" Remaining recording time will not be displayed with a pl ay-
back only MiniDisc.
A
A
B
B
C
D
E-21
02/11/7 MD_MT270H_SEEG_E4.fm
Page 29
! To display the playing time of an individual
track
Whilst in the stop mode, press the or but-
1
ton to display the track number and track name.
Press the MENU/ENTER button.
2
Press the or button repeatedly to select
3
"DISPLAY".
Press the MENU/ENTER button.
4
Press the or button to se lect the playing
5
time.
Press the MENU/ENTER button.
6
Track number
Track name
Playing time
! Checking the remaining amount of battery
level
The remaining amount of battery level is shown by the
battery indicator ( ) during operation.
How to read the battery indicator
When the battery
level is high
" When the battery level is v ery low, the battery indicator
will flash. Replace the alkaline battery with a new one.
" When the battery has run out completely, "BATT
EMPTY" will appear. Then, the power will be disconnected automatically.
Notes:
" The battery indicator will not correctly display the
remaining capacity for approximately 10 seconds after
the power has been turned on.
" When the AC adaptor or a separately available car
adaptor is used, the battery indicator will not be
shown.
" The number of bars shown in the battery indicator may
increase or decrease, depending on the operation
being performed. This is normal.
When the battery
level is very low
MD-MT270H
ENGLISH
Useful Features
-Checking Displays-
02/11/7 MD_MT270H_SEEG_E4.fm
E-22
Page 30

MD-MT270H
ENGLISH
Titling a MiniDisc
! Creating disc and track names
Load a MiniDisc to be named. A playback only or recording prevented MiniDisc cannot be edited.
1
2
3
4
5
<Disc name> <Track name>
Whilst in the stop
mode, press the MENU/
ENTER button.
Press the or button repeatedly to select
"EDIT".
Press the MENU/ENTER button.
<Disc name> <Track name>
Press the or button repeatedly to select
"DISC NAME".
Press the MENU/ENTER button.
-Titling a MiniDisc-
Advanced Features
" The unit will enter the character input mode.
" To cancel the operation, press the :OFF/HOLD
button.
Cursor
Whilst in the pause
mode, press the MENU/
ENTER butt o n.
Press the or button repeatedly to select
"TRACK NAME".
Press the button repeatedly to select the type
6
of characters.
(Capital letters) (Lower-case letters) (Numbers and symbols)
The first 3 characters in the group of the selected
characters will be displayed for about 1 second.
Press the or button repeatedly to select the
7
letter.
Press the MENU/ENTER button to enter it.
8
Position where the next letter will be entered
Note:
Complete the operation within 7 seconds whilst selecting the menus.
E-23
02/11/7 MD_MT270H_SEEG_E5.fm
Page 31

To enter more letters, repeat steps 6 - 8.
9
When the name is completely entered, press and
10
hold down the MENU/ENTER but ton for 2 seconds
or more.
" "TOC" will be displayed. To write the updated con-
tents to the MiniDisc, press the :OFF/HOLD button.
" You cannot remove the MiniDisc whilst "TOC" is
displayed. "TOC" will not disappear until the recorded contents have been updated.
! Characters (symbols )
Capital letters
D
A C D E F G H
B
L
S U V W X Y ZT
Lower-case letters
D
a c d e f g h
b
L
s u v w x y zt
Numbers and symbols
D
1 3 4 5 6 7 8
2
L
+
)
*
D
L
(Delete) : erases a character.
:
/.,
(Space) : indicates a space.
I J K L M
.,
/
i j k l m
.,
/
9 0
<; =
! " #
O
$
%
&
_
`
@>?
MD-MT270H
ENGLISH
! To erase a character
Press the VOL + or VOL - button to move the cursor to
the character you want to erase, and then press the
BASS/SYNC button.
You can also erase a character by selecting "DL" and
pressing the MENU/ENTER button.
! To enter a space
Press the VOL+ button to move the cursor to the right.
Space
Note:
One disc name and up to 255 track names can be created per disc (a maximum of 100 characters for the disc
and each track name and a total of 1,700 characters can
RNQP
be entered. However, if any tracks are recorded in the 2
times or 4 times long recording mode, the number of
characters to be entered is decreased, since the informa-
rn o qp
tion of the recording mode is stored by the track).
(
'
-Titling a MiniDisc-
Advanced Features
02/11/7 MD_MT270H_SEEG_E5.fm
E-24
Page 32
MD-MT270H
ENGLISH
Titling a MiniDisc (continued)
! To add characters ! Stamping titles from another MiniDisc
Put the unit in the character input mode.
1
(Perform steps 1 - 5 on page 23.)
Press the VOL + or VOL - button to move the cur-
2
sor to the character before which you want to add
a new character.
Select the character to add.
3
(Perform steps 6 - 8 on page 23.)
Press and hold down the MENU/EN TER but ton f or
4
2 seconds or more.
" "TOC" will be displayed. To write the updated con-
-Titling a MiniDisc-
Advanced Features
tents to the MiniDisc, press the :OFF/HOLD button.
" You cannot remove the MiniDisc whilst "TOC" is
displayed. "TOC" will not disappear until the recorded contents have been updated.
Before stamping
When there are 2 MiniDiscs on which the same tracks
are recorded, you can transfer the character information
(disc and track names) of the Master MiniDisc to another
MiniDisc (for stamping).
1. What is a master MiniDisc?
A recordable MiniDisc that contains tracks and character information. (You cannot transfer the information
from a playback-only MiniDisc.)
2. What is a MiniDisc for stamping?
A MiniDisc that contains the same tracks in the same order as the master MiniDisc. (Make sure that the total
number of tracks of the master MiniDisc and the one for
stamping are the same.)
E-25
02/11/7 MD_MT270H_SEEG_E5.fm
Page 33
Master MiniDisc operation Operation of the MiniDisc for stamping
Insert a master MiniDisc.
1
Do not mistake the master MiniDisc for the target one.
Whilst in the stop mode, press the MENU/ENTER but-
2
ton.
Press the or button repeatedly to select "EDIT".
3
Press the MENU/ENTER button.
4
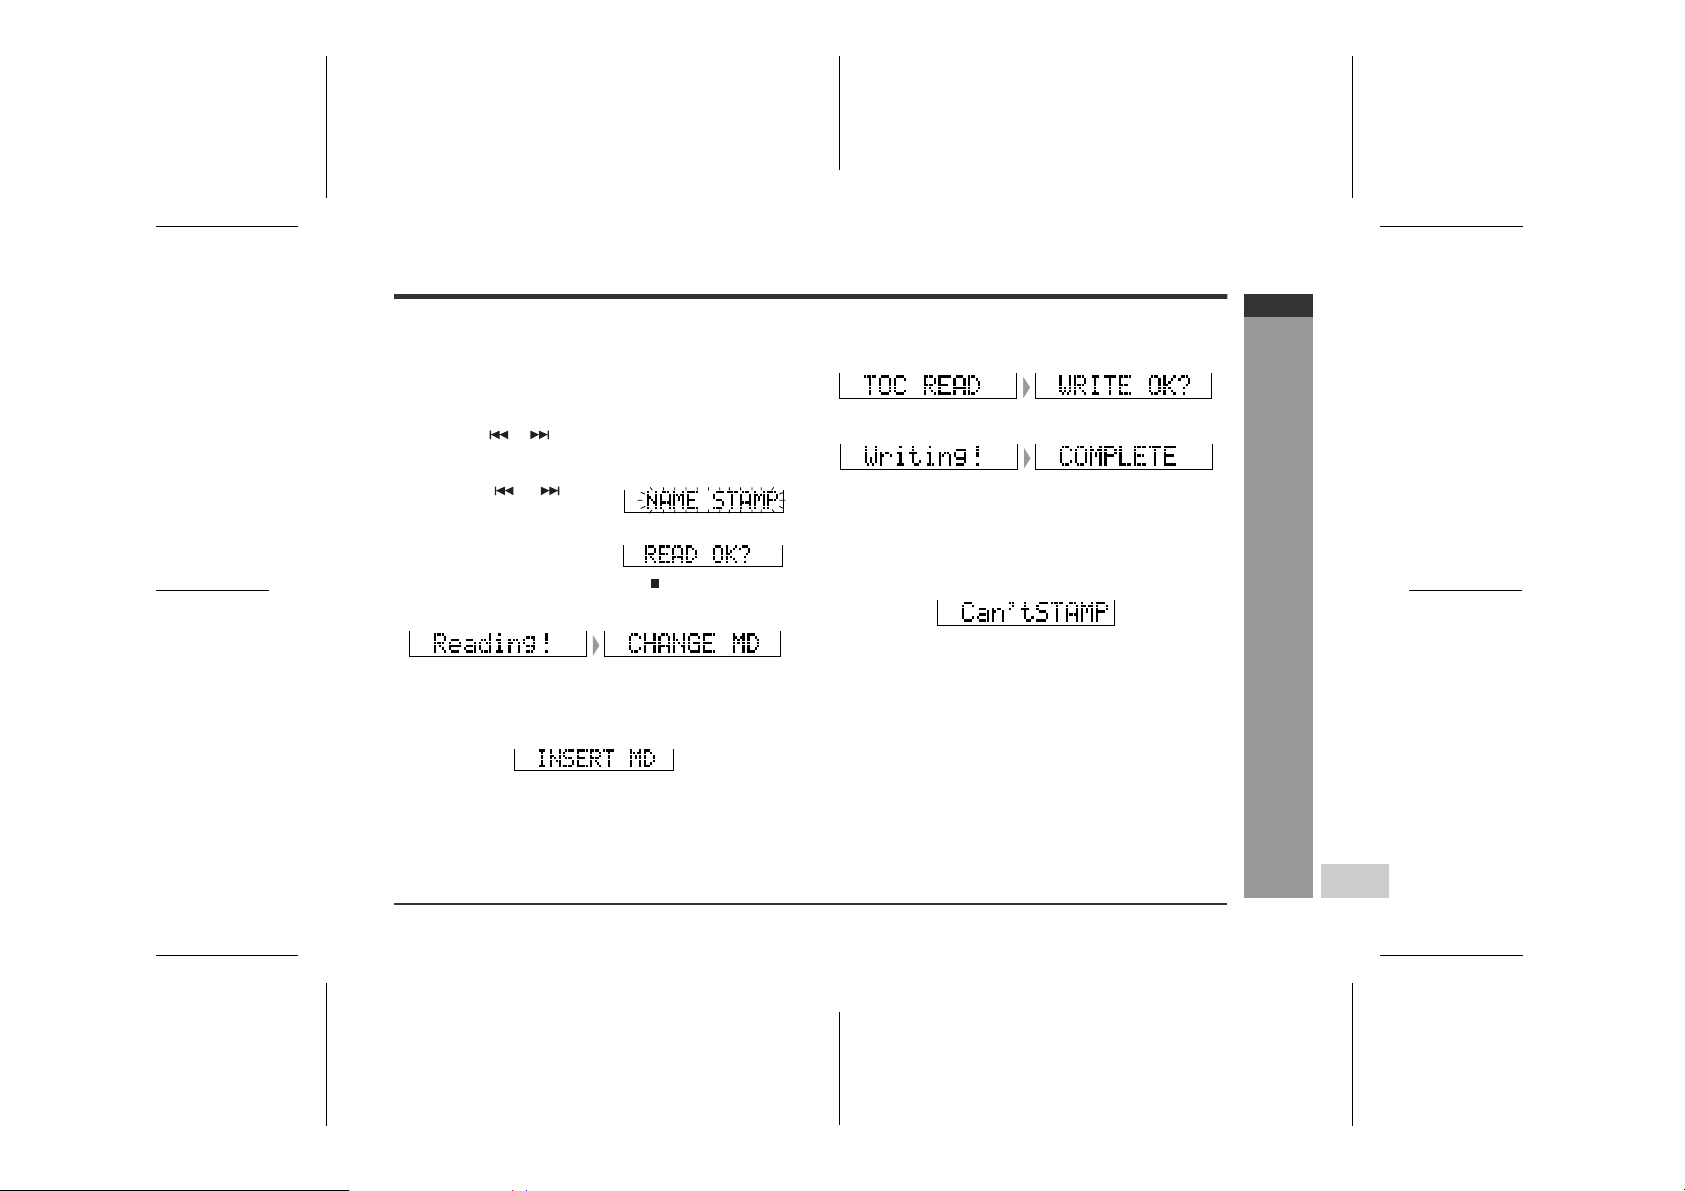
Press the or button
5
repeatedly to sele ct "NAME
STAMP".
Press the MENU/ENTER
6
button.
To cancel the operation, press the :OFF/HOLD button.
Press the MENU/ENTER button.
7
When the unit displays "CHANGE MD", remove the
8
master MiniDisc.
Remove it without turning o ff the power. O r, the operatio n
will be cancelled.
Load a MiniDisc for stamping.
9
Press the MENU/ENTER button.
10
The unit will fini sh recording t he character inf ormation and
enter the stop mode.
Note:
If the total number of tracks on the master MiniDisc does
not match that on the MiniDisc for stamping, the unit will
display "Can'tSTAMP" and tur n off.
If this happens, adjust the total number of tracks on the
newly recorded MiniDisc using the edit operation.
MD-MT270H
ENGLISH
-Titling a MiniDisc-
Advanced Features
02/11/7 MD_MT270H_SEEG_E5.fm
E-26
Page 34
MD-MT270H
ENGLISH
Editing a Recorded MiniDisc
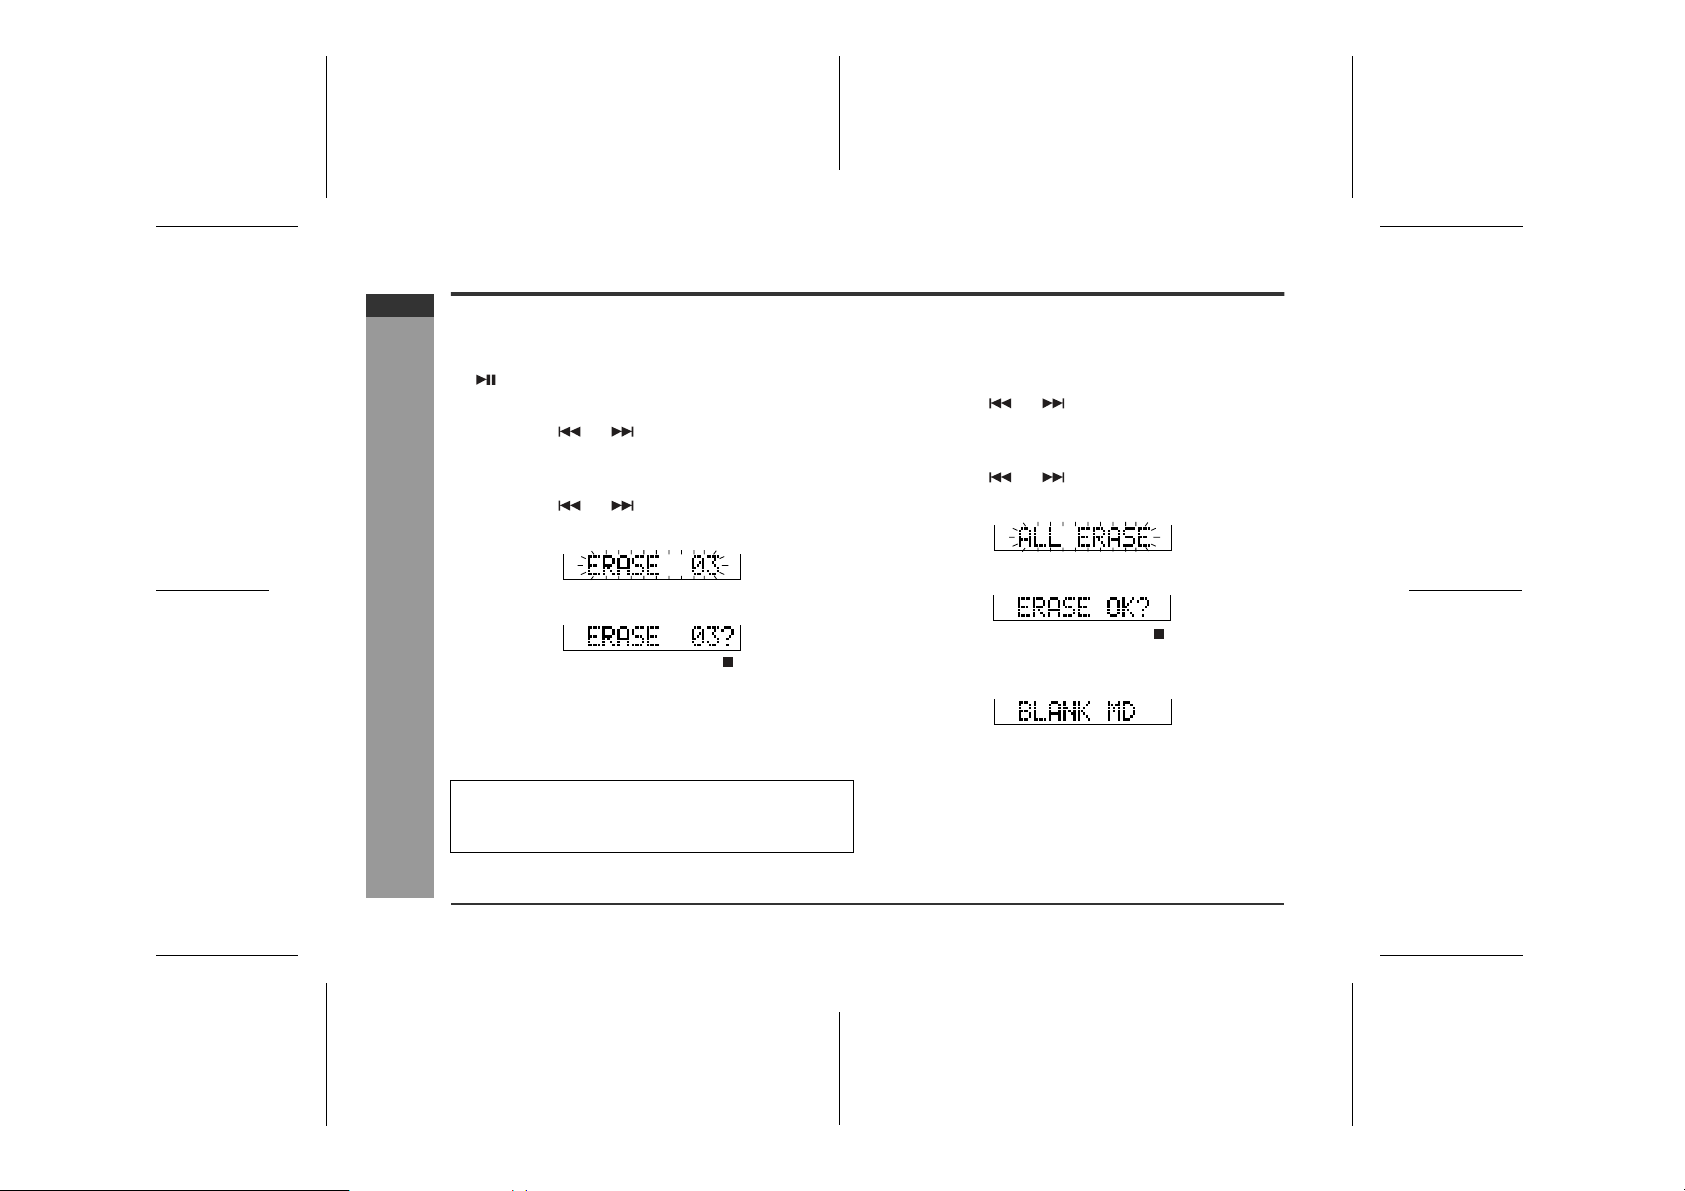
! To erase one track at a time ! To erase all of the tracks at once
Start playing the track to be erased, and press the
1
button.
Press the MENU/ENTER button.
2
Press the or button repeatedly to select
3
"EDIT".
Press the MENU/ENTER button.
4
Press the or button repeatedly to select
5
"ERASE".
Press the MENU/ENTER button.
6
To cancel the operation, press the :OFF/HOLD button.
Press the MENU/ENTER button again.
7
Advanced Features
The track will be erased.
-Editing a Recorded MiniDisc-
To erase other tracks, repeat steps 1 - 7.
8
Note:
Complete the operation within 7 seconds whilst selecting the menus.
E-27
Whilst in the stop mode, press the MENU/ENTER
1
button.
Press the or button repeatedly to select
2
"EDIT".
Press the MENU/ENTER button.
3
Press the or button repeatedly to select
4
"ALL ERASE".
Press the MENU/ENTER button.
5
To cancel the operation, press the :OFF/HOLD button.
Press the MENU/ENTER button again.
6
All of the tracks will be erased.
Caution:
Once a track has been erased, it cannot be recovered. Check the track number before erasing it.
02/11/7 MD_MT270H_SEEG_E5.fm
Page 35
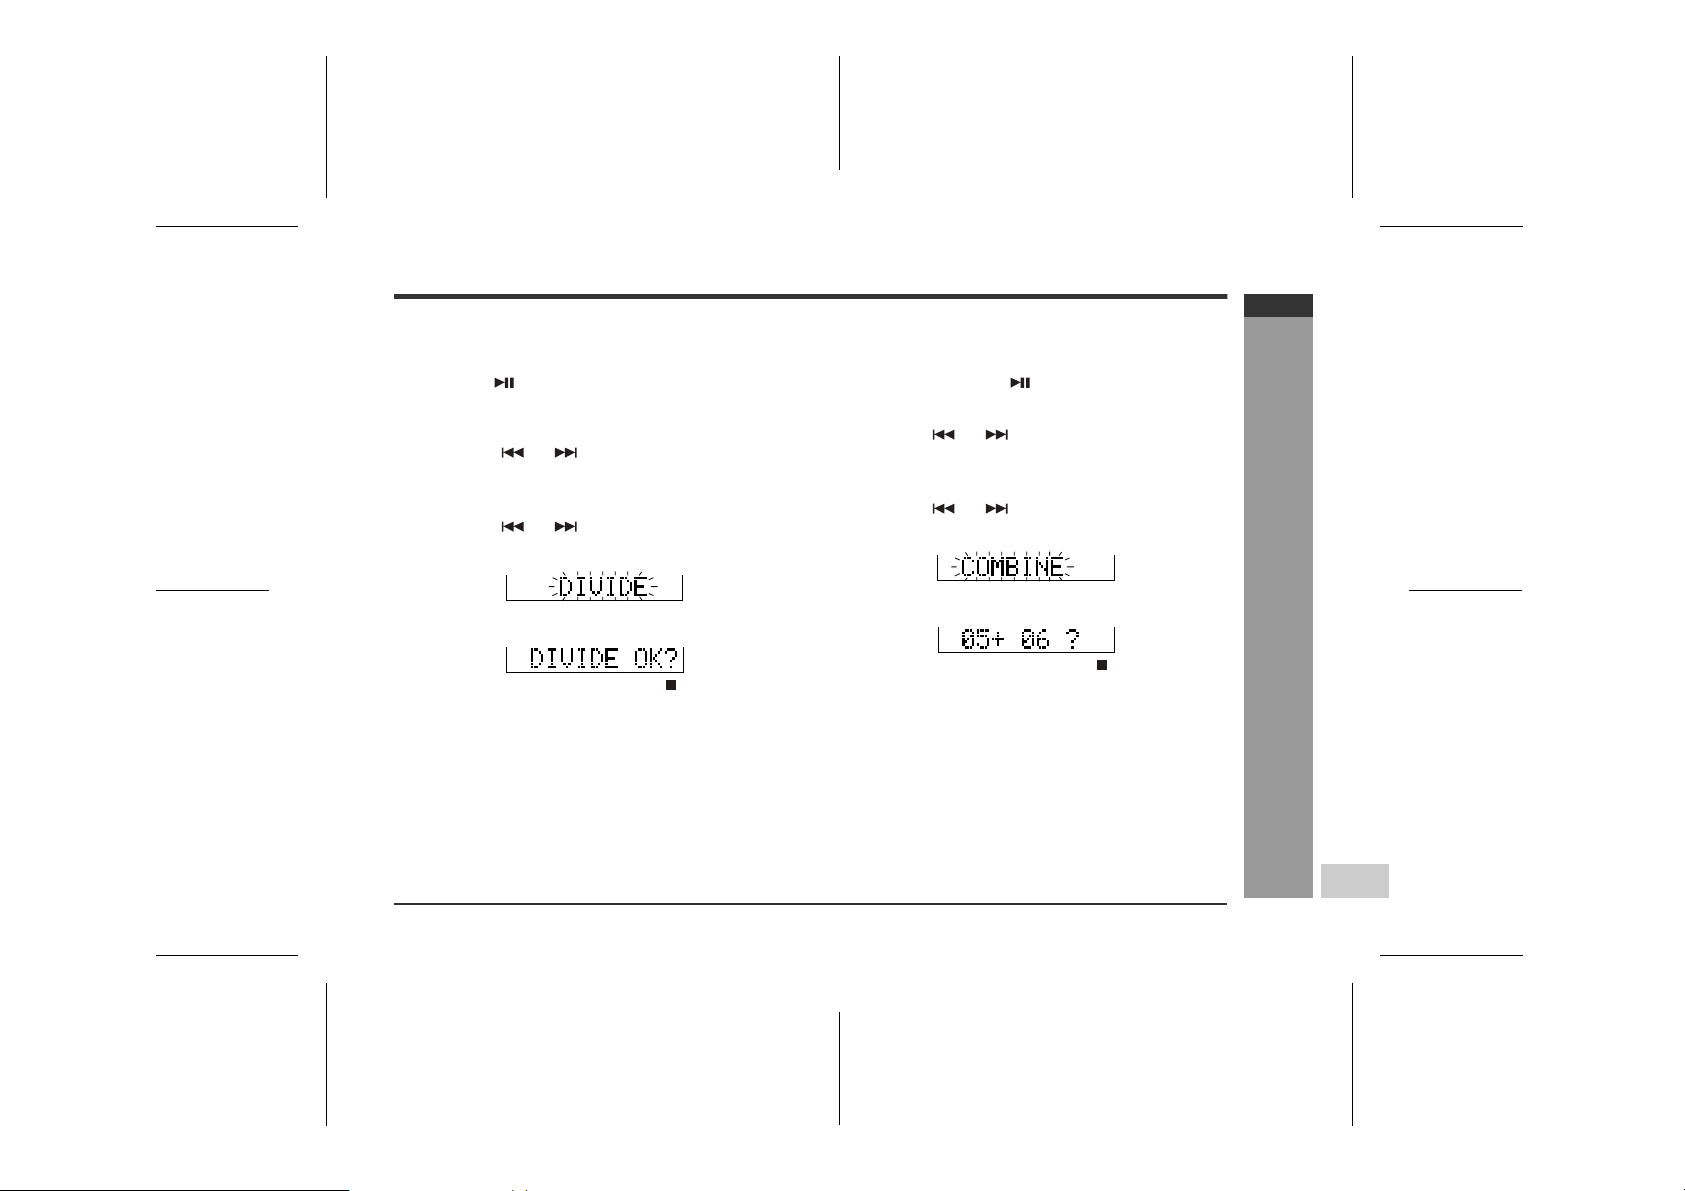
! To divide a track ! To combine tracks
MD-MT270H
ENGLISH
Start playing the track to be divided into two.
1
Press the button at the point where you want to
divide the track.
Press the MENU/ENTER button.
2
Press the or button repeatedly to select
3
"EDIT".
Press the MENU/ENTER button.
4
Press the or button repeatedly to select
5
"DIVIDE".
Press the MENU/ENTER button.
6
To cancel the operation, press the :OFF/HOLD button.
Press the MENU/ENTER button again.
7
The track will be divided into two tracks, and the unit
will be paused at the beginning of the second of the
two new tracks.
Start playing the latter of the two tracks to be com-
1
bined, and press the button.
Press the MENU/ENTER button.
2
Press the or button repeatedly to select
3
"EDIT".
Press the MENU/ENTER button.
4
Press the or button repeatedly to select
5
"COMBINE".
Press the MENU/ENTER button.
6
To cancel the operation, press the :OFF/HOLD button.
Press the MENU/ENTER button again.
7
The two tracks will be combined, and the unit will be
paused at the beginning of the combined track.
Advanced Features
-Editing a Recorded MiniDisc-
E-28
02/11/7 MD_MT270H_SEEG_E5.fm
Page 36

MD-MT270H
ENGLISH
Editing a Recorded MiniDisc (continued)
! To move a track
Play the track to be moved, and press the but-
1
ton.
Press the MENU/ENTER button.
2
Press the or button repeatedly to select
3
"EDIT".
Press the MENU/ENTER button.
4
Press the or button repeatedly to select
5
"MOVE".
Press the MENU/ENTER button.
6
To cancel the operation, press the :OFF/HOLD button.
Press the or button to select the direction.
7
Advanced Features
-Editing a Recorded MiniDisc-
Press the MENU/ENTER button again.
8
The track will be moved, and the unit will be paused at
the beginning of the track.
When a track has a name before dividing:
The two new tracks wil l ha v e t he same name. Ho wever, in
the "TOC FULL" condition, the second track may not be
named.
Total number of tracks that can be divided:
Each disc can hold up to 255 tracks. Howev er, even if the
number of assigned tracks has not reached 255, it might
not be possible to make any further divisions of tracks.
To combine two non-adjacent tracks:
First, put the two tracks next to each other in the order
you want using the MOVE function. Then combine them
using the COMBINE function.
When one or both tracks to be combined have a
name:
The first track name will be used. However, when the first
track does not have a name, the second track name will
be used.
In the following cases, tracks may not be combined.
" Tracks recorded by different input modes/sources can-
not be combined.
Example:
Digital recorded track and analogue recorded track.
Different recording modes (stereo recording, 2 times
long recording, 4 times long recording, monaural recording).
" Tracks whose recording time is less than 12 seconds.
E-29
02/11/7 MD_MT270H_SEEG_E5.fm
Page 37

Changing Default Settings
Whilst in the stop mode ...
With a MiniDisc inserted , press the MENU/ENTER but-
1
ton for 2 seconds or more. "SET UP" will appear.
When you release the button, "BEEP" will flash.
Press the or button to select the menu.
2
Press the MENU/ENTER button to display the setting
3
item.
Press the or button to select the setting items.
4
Press the MENU/ENTER button.
5
MENU SETTING ITEM
BEEP (Confirm a ti o n
sound)
AUTO PLAY (Auto play) A-PLAY ON* Set.
POWER SAVE (Auto
power save)
D-LEVEL (Digital recording level)
(*) indicates default setting.
BEEP ON* Beep
BEEP OFF Silent
A-PLAY OFF Cancelled.
AUTO Psave* Set.
Psave OFF Cancelled.
D.L MODE 1* Setting re-
D.L MODE 2 Cancelled.
tained.
! Beep sound
You c an eliminate the confirmation sound that beeps when
you press a button.
! Auto play
You can make the unit not play automatically when you insert
a playback-only MiniDisc or an accidental erasure protected
MiniDisc.
! Auto power save
When the unit is used in a place exposed to much vibration,
sound skipping can be decreased by cancelling the auto
power save function. (Battery will drain faster.)
What is auto power save function?
During playback , maxim um 40 second s (in stereo) of mu si cal
information is stored. Auto power save function automatically
adjusts the storage time between 5 and 40 seconds to
reduce the power consumption. If this function is cancelled,
the storage time cannot be adjusted.
" If this unit is used with the AC adaptor, the storage time
will be 40 seconds regardless of th e settings.
" The storage time varies depending on the recording
mode.
! Digital recording level
"D.L MODE 1"
The digital recording level you set will be kept even after
cancelling recording.
"D.L MODE 2"
Every time you cancel recording, the level will return to
[D.L 0dB].
MD-MT270H
ENGLISH
Advanced Features
-Changing Default Settings-
02/11/7 MD_MT270H_SEEG_E5.fm
E-30
Page 38

MD-MT270H
ENGLISH
Listening through Another System
! Listening through a stereo system
! Listening through a car stereo
To the LINE INPUT sockets
Notes:
Advanced Features
" It is recommended that the volume level of the Mini-
Disc unit be set to maximum when listening through a
stereo system.
-Listening through Another System-
" When recording with a stereo system, eliminate the
confirmation sound (page 30). Otherwise, it will also
be recorded.
" The recording will be made in the analogue mode.
" Character information will not be recorded.
E-31
White:
To the left
Red:
To the right
To the PHONES socket
Separately
available
cassette
adaptor
(AD-CT14)
Separately
available
car adaptor
(AD-CA20X)
To the
PHONES socket
Notes:
" Adjust the volume of both this portable MD and a car
stereo.
" Do not operate this portable MD whilst you drive a car.
It may distract your attention and cause a traffic accident.
" Do not use any car adaptor except for the separately
available AD-CA20X.
" Remove the batter y when you power the unit from the
car battery.
To the DC IN 5V socket
02/11/7 MD_MT270H_SEEG_E5.fm
Page 39
! Resuming auto play
When you stop and then restart playback, without removing the disc, playbac k will
resume from the point at
which the disc was stopped.
Once you remove the MiniDisc, playback star ts from the
first track.
The unit provides the following functions when you
use it with the separately available car adaptor (ADCA20X) (when the battery is removed):
1. When you turn off the engine, the power of this portable
MD also turns off. (It may not work with some types of
cars.)
2. When you restart the engine, playback starts from the
beginning of the stopped track.
First track
First track
First track
Playing
Stopped track
Playing
Stopping
Stopped track
Playing
Stopping
Stopped track
Stopping
Troubleshooting
Many potential "problems " can be resolved by the owner
without calling a service technician. If something seems to
be wrong with this product, check the following before calling your auth orised SHA R P d ealer or serv ice centre.
The unit does not turn on.
" Is the AC adaptor disconnected?
" Is the battery exhausted?
" Is the unit in the hold mode?
" Has condensation fo rmed inside the unit?
" Is the unit being influ enced by mec hanic al shoc k or by
static electricity?
No sound is heard from the earphones.
" Is the volume set too low?
" Are the earphones plugged in?
" Are you trying t o play a MiniDisc wit h data on it ins tead
of a MiniDisc containing music?
When the operation buttons are presse d, the unit does
not respond.
" Is the unit in the hold mode?
" Is the battery exhausted?
MD-MT270H
ENGLISH
References
-Troubleshooting-
02/11/7 MD_MT270H_SEEG_E6.fm
E-32
Page 40

MD-MT270H
ENGLISH
References
-Troubleshooting-
Troubleshooting (continued)
Some sounds are skipped.
" Is the battery exhausted?
" Is the unit being subjected to excessive vibration?
The MiniDisc cannot be ejected.
" Has the track number or chara cter information been
written on the disc yet?
" Is the unit in the recording or editing mode?
Recording and editing are impossible.
" Is the MiniDisc protected against accidental erasure?
" Is the unit connected properly to the other equipment?
" Is the AC adaptor unplugged or did a power failure oc-
cur whilst recording or editing?
" Is the unit in the hold mode?
" Is an optical signal be ing output from the stereo sys-
tem? Read the operati on manual fo r the stereo s ystem.
! If trouble occurs
When this product is subjected to strong external interference (mechanical shock, excessive static electricity,
abnormal supply voltage due to lightning, etc.) or if it is
operated incorrectly, it may malfunction.
If such a problem occurs, do the following:
1. Unplug the AC adaptor from the wall socket.
2. Remove the battery.
3. Leave the unit completely unpowered for approximately
30 seconds.
4. Plug the AC adaptor back into the wall socket and reoperate the unit.
! Moisture condensation
When the unit has condensation inside, the disc signals
cannot be read, and the unit may not function properly.
In the following cases, condensation may form inside the
unit.
" Shortly after turning on a heater.
" When the unit is placed in a room where there is
excessive steam or moisture.
" When the unit is moved from a cool place to a warm
place.
To remove condensation:
Remove the MiniDisc and leave the unit for approximately 1 hour. The condensation should evaporate and
the unit will work properly.
E-33
02/11/7 MD_MT270H_SEEG_E6.fm
Page 41

MiniDisc System Limitations
The unit may have the following symptoms whilst recording or editing. The unit is not out of order.
SYMPTOM LIMITATIONS
"DISC FULL" or "TOC FULL" appears
even though the MiniDisc still has recording time left.
The remaining recording time does not
increase even though you erased
tracks.
The total of the recorded time and the
remaining time does not match the maximum recordable time.
Combine function does not work. A MiniDisc on which recording and editing are repeated may not al-
Sound skips in fast reverse/forward. If one track is divided and recorded in separate places on a repeat-
A track number is created in the middle
of a track.
More than 255 tracks (maximum) cannot be recorded regardless of
the recording time. If the MiniDisc is recorded or edited repeatedly or
if it has scratches (recording skips scratched parts), you may not be
able to record the maximum tracks above.
The unit does not count non-recorded portions that last 12 or fewer
seconds to display the remaining recording time. The time may not
increase even if you erase short tracks.
One cluster (approximately 2 seconds) is the minimum unit for recording. For example, a 3-second track uses 2 clusters (approximately 4 seconds). Therefore, the actual recordable time may be shorter
than the displayed time.
low the combine function.
edly recorded or edited MiniDisc, sound may skip.
A track number may be created if there are scratches or dust on the
MiniDisc.
MD-MT270H
ENGLISH
References
-MiniDisc System Limitations-
02/11/7 MD_MT270H_SEEG_E6.fm
E-34
Page 42

MD-MT270H
ENGLISH
References
-Error Messages-
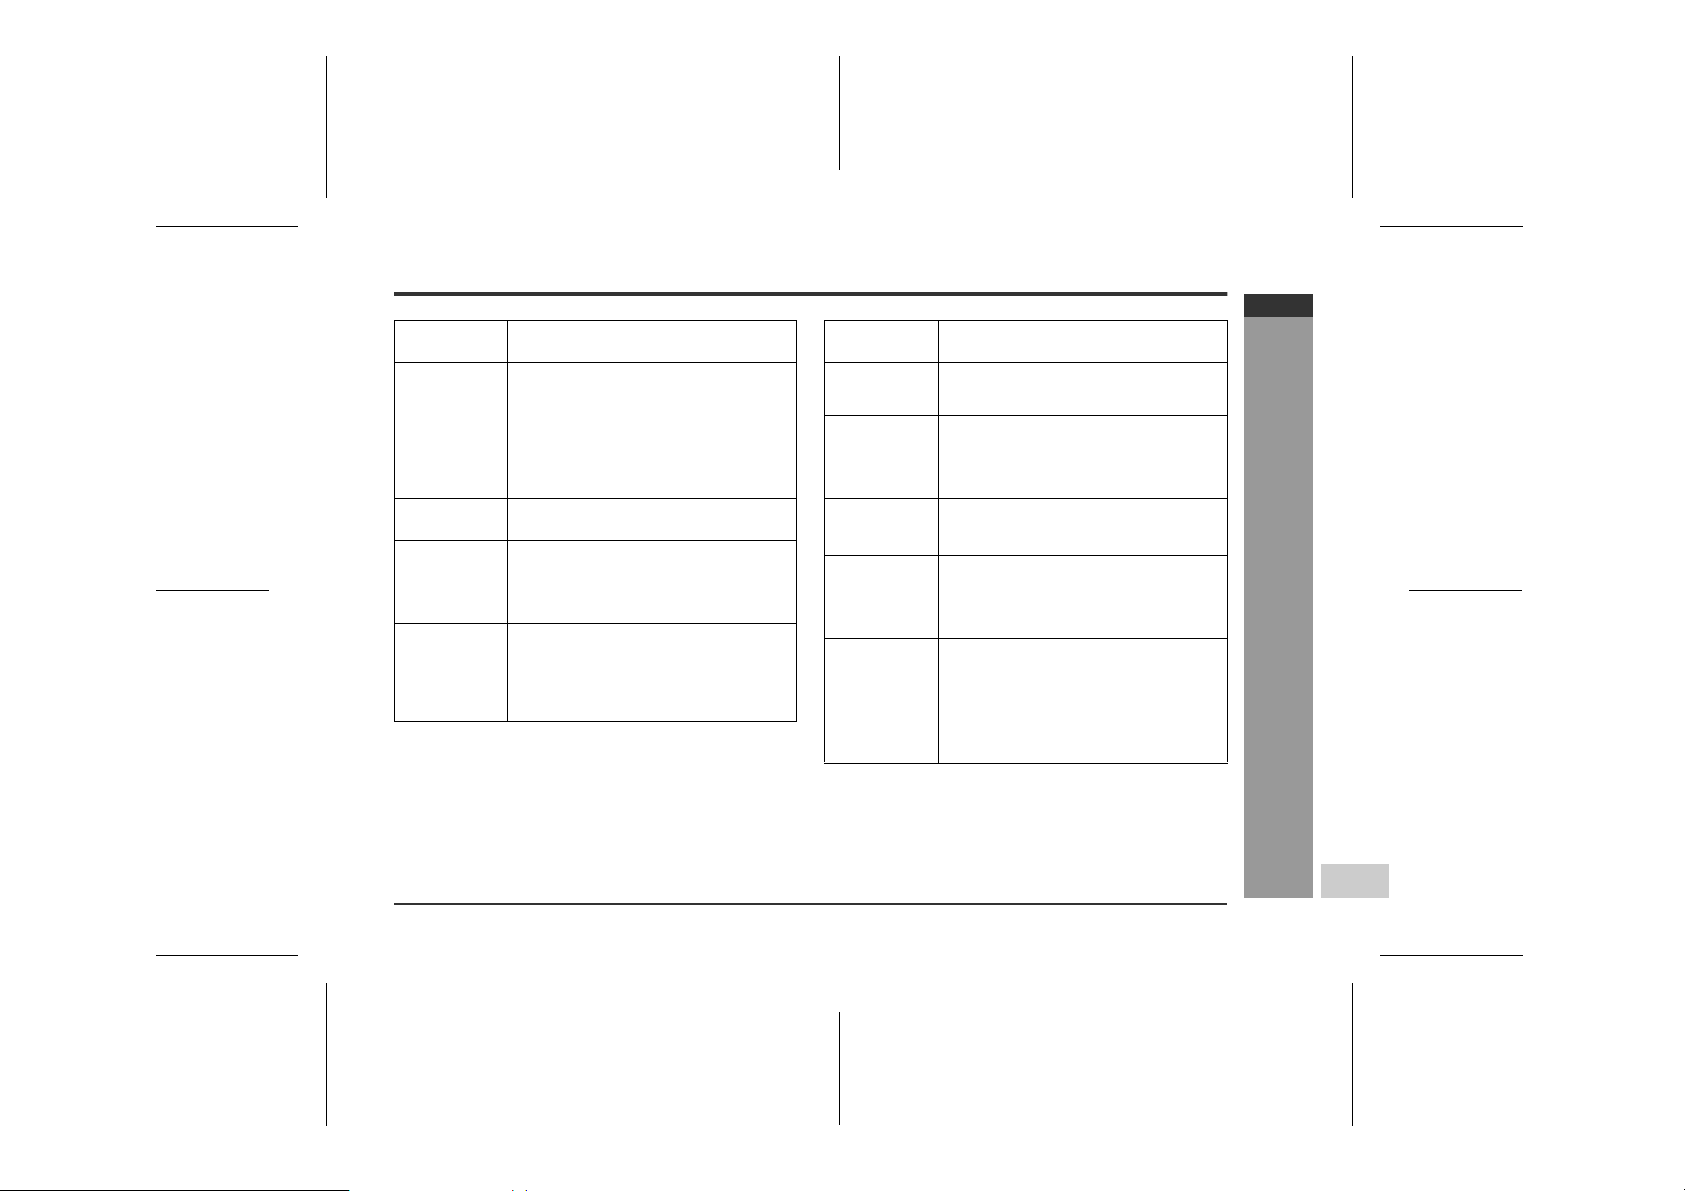
Error Messages
ERROR MES-
SAGES
BATT EMPTY " The battery has run down.
BLANK MD " Nothing is recorded.
(Replace the disc with a recorded disc. )
Can't COPY " You tried to record from a copy prohib-
Can't EDIT " A track cannot be edited.
Can't PLAY " You tried to play back a track that can -
Can't READ (*) " The disc data cannot be read because
Can't REC " Recording cannot be performed cor-
ited MiniDisc.
(Record using the analogue cable. )
" You tried to record signals other than
music (such as data).
(Change the stop posi tion of t he tra ck and
then edit it.)
not be played with this equipment.
the disc is damaged.
(Reload the Minidisc or replace it with an-
other one.)
rectly due to vibration or shock.
MEANING
ERROR MES-
SAGES
Can'tSTAMP " Stamp function does not work.
(Check the num b e r of tracks.)
Can'tWRITE " Cannot save the TOC information cor-
DEFECT! " The disc is scratched.
DISC FULL " The disc is out of recording spac e.
Er-MD (**) " The microprocessor has reported a
HOLD " The unit is in the hold mode.
LOCKED " You removed a MiniDisc whilst record-
NO DISC " A disc has not been loaded.
rectly to a MiniDisc.
(If the recorded sound is no t r ight , ret ry re cording or replace the disc with a recordable one.)
system fault and the unit is out of or der.
(To have it repaired, go to the distributor
where you purchased the unit. )
ing or editing.
(Turn off the power before removing the
MiniDisc.)
MEANING
A number or symbol appears in (*) position.
E-35
02/11/7 MD_MT270H_SEEG_E6.fm
Page 43
ERROR MES-
SAGES
NO SIGNAL " Poor connection of the digital cable.
" No output signal comes out from the
connected unit.
(Use the AC power for the c onnected u nit.)
" The input signal has i mproper sampling
frequency.
PLAY MD " You tried to record on a playback-only
PROTECTED " The write protection tab of a MiniDisc is
SORRY " Since a track number is curre ntly being
disc.
set to the protected position.
" You tried to record on a playback-o nly
disc.
located or updated, the unit cannot ac-
cept your command.
(Wait for a while and try the operation
again.)
MEANING
ERROR MES-
SAGES
TEMP OVER " The temperature is too high.
(Turn off the power, and wait for a while.)
TOC FORM
(**)
TOC FULL " There is no space left for recording
Tr. Protect " The track has been protected from be-
? DISC " A disc which contains data other than
" There is an error in the recording sig-
nal.
(Erase all of the tracks, and then record
again.)
character information (track names,
disc names, etc.).
ing erased.
(Edit the track with the device on whic h it
was recorded.)
music was played.
(A disc which contains nonmusic dat a cannot be played.)
" There is an error in the signal rec orded
on the disc.
MEANING
A number or symbol appears in (*) position.
MD-MT270H
ENGLISH
References
-Error Messages-
02/11/7 MD_MT270H_SEEG_E6.fm
E-36
Page 44

MD-MT270H
ENGLISH
References
-Maintenance/Specifications-
Maintenance
! Cleaning
When the unit becomes dirty
Clean it with a soft cloth. When the unit is excessively
dirty, use a soft cloth dampened in water (external surfaces only).
Clean the plugs and the connecting sockets.
If the plugs or sockets are dirty, noise may be
heard. Cleaning will prevent noise.
Caution:
" Do not use chemicals for cleaning (petrol, paint thin-
ner, etc.). It may damage the cabinet finish.
" Do not apply oil to the inside of the unit. It may cause
malfunctions.
Specifications
As a part of our policy of continuous improvement,
SHARP reserves the right to make design and specification changes for product improvement without prior notice. The performance specification figures indicated are
nominal values of production units. There may be some
deviations from these values in individual units.
Power source: DC 5 V: AC adaptor (AC 230
DC 1.5 V: Commercially avail-
DC 4.5 V: Optional car adaptor,
Power consumption: 7 W (AC adaptor)
Output power: RMS: 20 mW (10 mW + 10 mW)
Dimensions: Width: 83 mm (3-9/32")
Weight: 107 g (0.24 lbs.) without battery
Input socket:
Output socket: Earphones (impedance: 32
(0.2 % T.H.D.)
Height: 28 mm (1-1/8")
Depth: 77 mm (3-1/32")
Line/optical digital
ohms)
V, 50/60 Hz)
able, "AA" size
(LR6), alkaline battery x 1
AD-CA20X (for cars
with a 12-24 V DC
negative earth electrical system)
E-37
02/11/7 MD_MT270H_SEEG_E6.fm
Page 45

Type: Portable MiniDisc recorder
Signal readout: Non-contact, 3-beam semicon-
Audio channels: Stereo 2 channels/monaural 1
Frequency response: 20 - 20,000 Hz ( 3 dB)
Rotation speed: Approx. 400 - 1,800 rpm CLV
Error correction: ACIRC (Advanced Cross Inter-
Coding: ATRAC/ATRAC3 (Adaptive
Recording method: Magnetic modulation overwrite
Sampling frequency: 44.1 kHz (32 kHz and 48 kHz sig-
Wow and flutter: Unmeasurable (less than 0.001
Input sensitivity:
LINE
ductor laser pickup
channel
leave Reed-Solomon Code)
TRansform Acoustic Coding),
24-bit computed type
method
nals are converted to 44.1 kHz,
and then recorded.)
% W. peak)
Reference input
Input impedance
level
100 mV 20 k ohms
Output level:
Specified output
Earphones
LINE 250 mV (-12
Battery life:
When using a commercially available, high capacity, "AA"
size (LR6), alkaline battery
Stereo Continuous recording: Approx. 8.5 hours
2 times
long
4 times
long
" The continuous recording time is for analogue inputs
when the volume level is set to "VOL 0".
" The continuous play time shows the value when the vol-
ume level is set to "VOL 15".
" The above values are the standard values when the unit is
used at an ambient temperature of 25°C (77°F).
" The operating time when using an alkaline battery may be
different, depending on the type and manufacturer of the
battery, and on the operating temperature.
- 10 mW + 10 mW32 ohms
dB)
Continuous play: Approx. 33 ho urs
Continuous recording: Approx. 12 hours
Continuous play: Approx. 44 ho urs
Continuous recording: Approx. 18 hours
Continuous play: Approx. 52 ho urs
Maximum output level
- 10 k ohms
Load impedance
MD-MT270H
ENGLISH
References
-Specifications-
02/11/7 MD_MT270H_SEEG_E6.fm
E-38
Page 46

SHARP CORPORATION
TINSZ0873AWZZ
8
for SEEG/SEN (TINSZ0873AWZZ)
02K N AO 1
D
Page 47

MD-MT270H
PORTABLE MINIDISC RECORDER
for SEEG/SEN (TINSZ0873AWZZ)
 Loading...