

Page 1
VCR/DVD RECORDER
COMBINATION
MODEL
DV-RW250H
OPERATION MANUAL
DIGITAL VIDEO
•
The region number
2
for this recorder is 2
If you require any advice or assistance regarding
your Sharp product, please visit our web-site
www.sharp.co.uk/customersupport. Customers
without Internet access may telephone 08705 274277
during office hours(or (01) 6760648 if telephoning
from Ireland).
Page 2
SPECIAL NOTE FOR USERS IN THE U.K.
The mains lead of this product is fitted with a non-rewireable (moulded) plug incorporating a 5A fuse. Should the fuse need
to be replaced, a or approved BS 1362 fuse marked or and of the same rating as above, which is also indicated on
the pin face of the plug, must be used. Always refit the fuse cover after replacing the fuse. Never use the plug without the
fuse cover fitted. In the unlikely event of the socket outlet in your home not being compatible with the plug supplied, cut-off
the mains plug and fit an appropriate type.
DANGER: The fuse from the cut-off plug should be removed and the cut-off plug destroyed immediately and disposed of in
To fit an appropriate plug to the mains lead, follow the instructions below:
IMPORTANT: The wires in the mains lead are coloured in accordance with the following code:
As the colours of the wires in the mains lead of this product may not correspond with the coloured markings identifying the
terminals in your plug, proceed as follows:
- The wire which is coloured blue must be connected to the plug terminal which is marked N or coloured black.
- The wire which is coloured brown must be connected to the plug terminal which is marked L or coloured red.
Ensure that neither the brown nor the blue wire is connected to the earth terminal in your three-pin plug.
Before replacing the plug cover make sure that:
- If the new fitted plug contains a fuse, its value is the same as that removed from the cut-off plug.
- The cord grip is clamped over the sheath of the mains lead and not simply over the lead wires.
IF YOU HAVE ANY DOUBT, CONSULT A QUALIFIED ELECTRICIAN.
a safe manner.
Under no circumstances should the cut-off plug be inserted elsewhere into a 13A socket outlet, as a serious
electric shock may occur.
Blue: Neutral
Brown: Live
2
Page 3
SAFETY INFORMATION
Note:
This VCR/DVD can be used only where the power
supply is AC 240V, 50Hz. It cannot be used
elsewhere.
CAUTION:
USE OF CONTROLS OR ADJUSTMENTS OR
PERFORMANCE OF PROCEDURES OTHER
THAN THOSE SPECIFIED HEREIN MAY RESULT IN HAZARDOUS RADIATION EXPOSURE.
AS THE LASER BEAM USED IN THIS VCR/DVD IS
HARMFUL TO THE EYES, DO NOT ATTEMPT TO
DISASSEMBLE THE CABINET. REFER SERVICING TO QUALIFIED PERSONNEL ONLY.
WARNING:
TO REDUCE THE RISK OF FIRE OR ELECTRIC
SHOCK, DO NOT EXPOSE THIS EQUIPMENT
TO RAIN OR MOISTURE.
TO REDUCE THE RISK OF FIRE OR ELECTRIC
SHOCK, AND ANNOYING INTERFERENCE, USE
THE RECOMMENDED ACCESSORIES ONLY.
Power Cord Protection
To avoid any malfunctions of the VCR/DVD, and to
protect against electric shock, fire or personal injury,
please observe the following.
• Hold the plug firmly when connecting or
disconnecting the AC power cord.
• Keep the AC power cord away from heating
appliances.
• Never put any heavy object on the AC power cord.
• Do not attempt to repair or reconstruct the AC power
cord in any way.
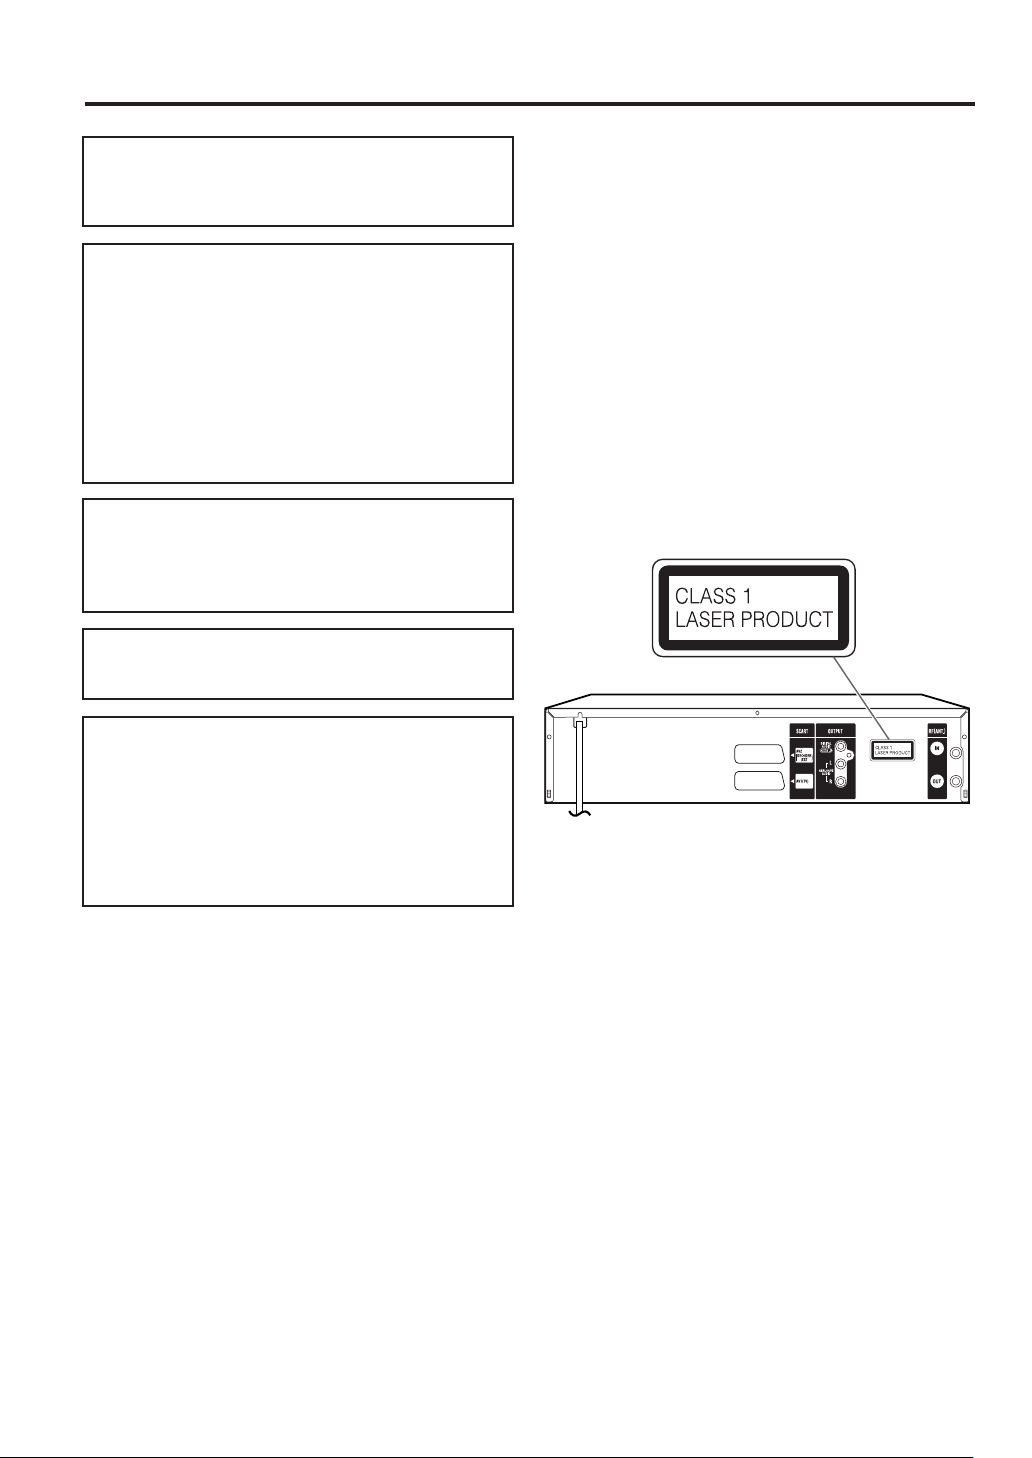
• This Player is classified as a CLASS 1 LASER
product.
• The CLASS 1 LASER PRODUCT label is located on
the rear cover.
• This product contains a low power laser device. To
ensure continued safety do not remove any cover or
attempt to gain access to the inside of the product.
Refer all servicing to qualified personnel.
Laser Diode Properties
Material: DVD: GaAs
Wave length: DVD: 660nm
Emission Duration: DVD: Pulse
Laser output: Max. DVD: 120mW
CD: GaAs
CD: 780nm
CD: Continuous
CD: 8.5mW
3
Page 4

Contents
Before using your unit
SAFETY INFORMATION .......................................... 3
Precautions ............................................................... 6
Accessories ............................................................... 7
Features ....................................................................8
Disc ........................................................................... 9
Handling discs ....................................................... 9
Discs which can be played back ............................ 9
Discs on which video can be recorded ................ 10
Recording format ................................................. 10
Disc playback in other players ............................. 11
Parts and functions ................................................. 12
Front .................................................................... 12
Rear .....................................................................12
Display window ....................................................13
Remote control .................................................... 14
Basic connections ................................................... 16
Playback connection ............................................... 16
Automatic TV tuning and clock setting ....................18
Various settings
SETUP MENU ......................................................... 19
Using the SETUP MENU ..................................... 19
Setting the language ............................................... 20
OSD LANGUAGE ................................................20
DVD MENU..........................................................20
AUDIO ................................................................. 20
SUBTITLE............................................................20
Setting the parental control ..................................... 21
Selecting parental control .................................... 21
Temporarily cancelling parental control ............... 21
Setting the clock ...................................................... 22
Setting the disc .......................................................22
REFORMAT ......................................................... 22
NEW DISC FORMAT ...........................................23
FINALISE ............................................................. 23
PROTECT DISC .................................................. 23
UNDO FINALISE ................................................. 23
Other (SYSTEM SETUP) ........................................24
DIMMER (Brightness of the display window) ...... 24
DISPLAY/CALL (Turning the screen display
“ON” or “OFF”) ....................................................24
Setting the screen ................................................... 24
TV SCREEN ........................................................ 24
STILL MODE .......................................................25
NO NOISE BACKGROUND ................................ 25
BRIGHTNESS ..................................................... 25
DVD OUTPUT ..................................................... 25
AV3 INPUT .......................................................... 25
Setting the audio ..................................................... 26
DRC .....................................................................26
VIRTUAL SURROUND (Spatializer N-2-2
EXTERNAL AUDIO INPUT .................................. 26
NICAM ................................................................. 26
DOLBY DIGITAL OUTPUT .................................. 26
Setting the recording ...............................................26
INITIAL REC TO .................................................. 26
INITIAL REC MODE ............................................ 26
AUTO CHAPTER.................................................27
INDEX PICTURE .................................................27
BILINGUAL RECORDING ................................... 27
Setting the JPEG INTERVAL .................................. 27
JPEG INTERVAL ................................................. 27
Setting the channel ................................................. 28
Automatic station presetting ................................ 28
To skip a channel position ................................... 28
Replace TV station positions ............................... 29
Manual TV station presetting ...............................29
TM
) ....... 26
Disc playback
Playback procedure ................................................ 30
Playback by selecting a title ....................................31
Checking media information ................................... 32
Special playback ..................................................... 33
Fast forward playback .........................................33
Review playback .................................................. 33
Still playback ........................................................ 33
Frame advance .................................................... 33
Slow motion playback ..........................................33
Locating a chapter or track .................................. 33
Commercial skip......................................................34
Locating a specific scene ........................................34
Repeat playback ..................................................... 35
One touch repeat .................................................35
A-B repeat playback ............................................ 35
Title, Chapter repeat playback ............................. 35
Title selection .......................................................... 36
DVD menu...............................................................36
Changing angles ..................................................... 37
Zooming .................................................................. 37
Changing soundtrack language .............................. 38
Subtitles .................................................................. 38
Various operations on CD .......................................39
MP3/WMA/JPEG playback ..................................... 41
4
Page 5
Contents
Tape playback
Loading and unloading a cassette tape .................. 44
Cassette tape playback ........................................... 45
Special playback ..................................................... 46
Picture search ...................................................... 46
Still picture ........................................................... 46
Slow motion ......................................................... 46
Frame by Frame picture ...................................... 46
Adjusting tracking condition .................................46
Repeat playback ..................................................46
Commercial skip .................................................. 46
To display VCR operation status ......................... 46
ZERO RETURN function.........................................47
Video index search system ..................................... 47
Recording
Read this before recording on disc ......................... 48
Types of disc........................................................48
Recording modes ................................................48
Disc remaining time ............................................. 49
Images that cannot be recorded ..........................49
Recording a TV program ......................................... 50
One-touch Timer Recording (OTR) ......................... 52
Timer recording .......................................................53
Stereo recording and playback ............................... 56
Dubbing
Dubbing a tape onto a disc ..................................... 72
Dubbing a disc onto a tape ..................................... 73
Dubbing using other equipment .............................. 74
Additional information
Glossary ..................................................................76
Language code list ..................................................78
Error/Warning message list ..................................... 79
Problems and troubleshooting ................................ 80
Video head cleaning................................................81
Specifications ..........................................................82
Editing the disc
Editing the disc ........................................................ 57
Editing a playlist ...................................................... 58
Creating a playlist ................................................ 58
Changing a title name .......................................... 59
Erasing a scene (Edit title) ................................... 60
Combining the title ...............................................62
Erasing a playlist .................................................63
Editing an original title .............................................64
Adding a chapter mark ........................................64
Combining chapters ............................................. 65
Changing an original title name ........................... 66
Erasing a scene (Edit title) ................................... 67
Erasing an original title ........................................ 68
Changing a disc name ............................................ 69
Changing a disc name .........................................69
Using the keyboard screen ..................................70
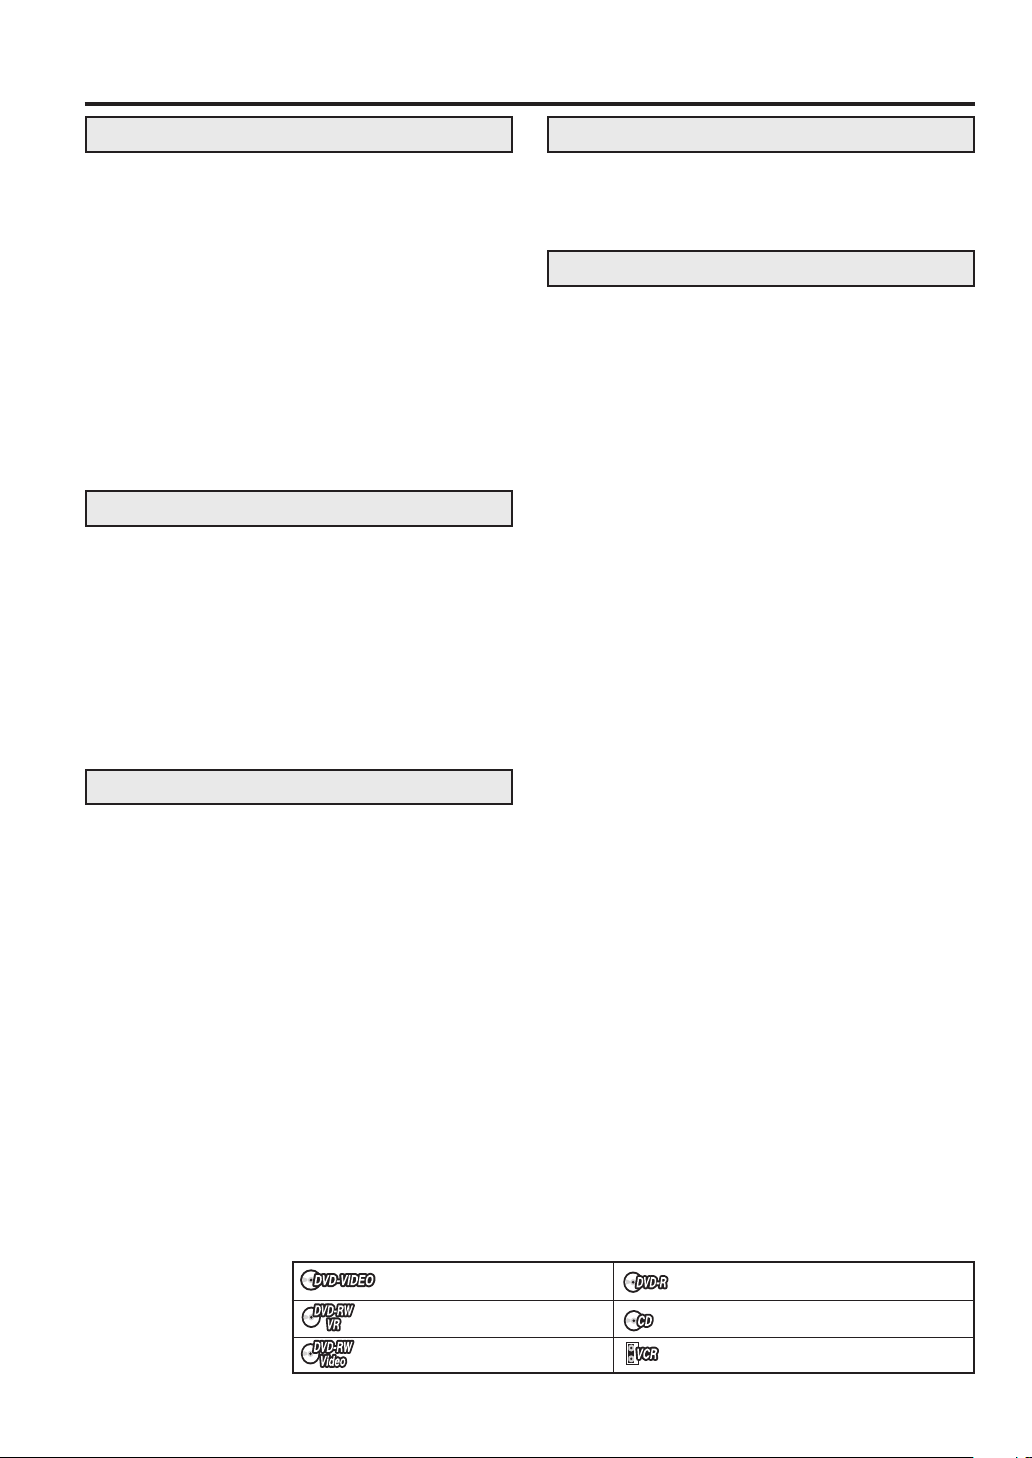
Media mark
Each applicable media are indicated using the symbol shown below.
: DVD-Video : DVD-R
: DVD-RW in VR mode : Audio/Video CD and CD-R/CD-RW
: DVD-RW in Video mode : Video tape
5
Page 6

PrecautionsPrecautions
Important Warning
Please read this page carefully before attempting to operate your VCR/DVD.
Follow Instructions – All operating and maintenance
instructions should be followed and warnings adhered
to.
Cleaning – Unplug this product from the wall socket
before cleaning. Do not use liquid or aerosol cleaners.
Accessories – Do not use accessories not recom-
mended in this operation manual as they may be
hazardous.
Water and Moisture – Hazard of electric shock – Do
not use this product near water or in rainy/moist situations.
Placing or Moving – Do not place on an unstable cart,
stand, tripod, bracket or table. The product may fall,
causing serious injury to a child or adult, and serious
damage to the product. A product and cart combination
should be moved with care. Quick stops, excessive
force, and uneven surfaces may cause the product and
cart combination to overturn.
Power Cord Protection – Power cords should be
routed so that they are not likely to be walked on or
pinched by items placed upon or against them. Pay
particular attention to plugs and the point from which
the cords exit the product.
Lightning – For added protection of this product
during a lightning storm, or when it is left unattended
and unused for long periods of time, disconnect it from
the wall socket. This will prevent damage to the product due to lightning and power-line surges.
Overloading – Do not overload wall sockets and
extension cords as this can result in risk of fire or
electric shock.
Objects and Liquid – Never allow objects of any kind
or liquids to be pushed/spilled into this product through
openings as they may come into contact with dangerous voltage or other hazards. Do not place any objects,
such as vases or lighted candles on the product.
Servicing – Do not attempt to service this product
yourself as opening or removing covers may expose
you to dangerous voltage points or other hazards.
Refer all servicing to qualified service personnel.
Damage Requiring Service – Disconnect this prod-
uct from the wall socket and all power sources including batteries, and refer servicing to qualified service
personnel under the following conditions:
a) When the power-supply cord or plug is damaged.
b) If any liquid has been spilled onto, or objects have
fallen into the product.
c) If the product has been exposed to rain or water.
d) If the product does not operate normally even if
you follow the operation manual. Adjust only those
controls that are covered by the operation manual.
Improper adjustment of other controls may result
in damage and will often require extensive work by
a qualified technician to restore the product to its
normal operating condition.
e) If the product has been dropped or the cabinet has
been damaged.
f) When the product exhibits a distinct change in
performance. This indicates a need for service.
Replacement Parts – When replacement parts are
required, be sure the service technician has used
replacement parts that are specified or that have the
same characteristics as the original part. Unauthorised substitutions may result in fire, electric shock or
other hazards.
Safety Check – Upon completion of any service or
repairs to this product, ask the service technician to
perform safety checks to determine that the product is
in safe operating order.
Moisture Condensation - DO NOT OPERATE
THIS VCR/DVD FOR AT LEAST TWO OR THREE
HOURS WHEN MOISTURE IN THE AIR CONDENSES ON THE VCR/DVD.
WHAT IS MOISTURE CONDENSATION?
When cold liquid is poured into a glass, for example,
water vapour in the air will condense on the surface of
the glass. This is called moisture condensation.
MOISTURE WILL CONDENSE ON THE UNIT IN THE
FOLLOWING CASES;
• When you move this VCR/DVD from a cold to a
warm place.
• After heating a cold room or under extremely humid
conditions.
WHEN YOU EXPERIENCE THE ABOVE CONDITIONS;
Plug the power cord into the wall socket, turn on the
unit and leave at room temperature until moisture
condensation disappears. Depending on the surrounding conditions, this may take from two or three hours.
6
Page 7
Precautions
Copyright
* Recording and playback of any material may require consent. Please refer particularly to the provisions of
the copyright Act 1956, the Dramatic and Musical Performers Protection Act 1958, the Performers Protection Acts 1963 and 1972 and to any subsequent statutory enactments and orders.
* This product incorporates copyright protection technology that is protected by method claims of certain U.S.
patents and other intellectual property rights owned by Macrovision Corporation and other rights owners.
Use of this copyright protection technology must be authorised by Macrovision Corporation and is intended
for home and other limited viewing uses only unless otherwise authorised by Macrovision Corporation.
Reverse engineering or disassembly is prohibited.
Apparatus Claims of U.S. Patent Nos. 4,631,603, 4,577,216, 4,819,098 and 4,907,093 licensed for
limited viewing uses only.
* Manufactured under license from Dolby Laboratories. “Dolby” and the double-D symbol are trademarks of
Dolby Laboratories.
* “DTS” and “DTS Digital Out” are trademarks of Digital Theater Systems, Inc.
* Unauthorised recording of copyrighted television programs, films, video cassettes and other materials may
infringe the rights of copyright owners and be contrary to copyright laws.
* Certain audio features of this product manufactured under a license from Desper Products, Inc.
N-2-2™ and the circle-in-square device are trademarks owned by Desper Products, Inc.
Spatializer
®
,
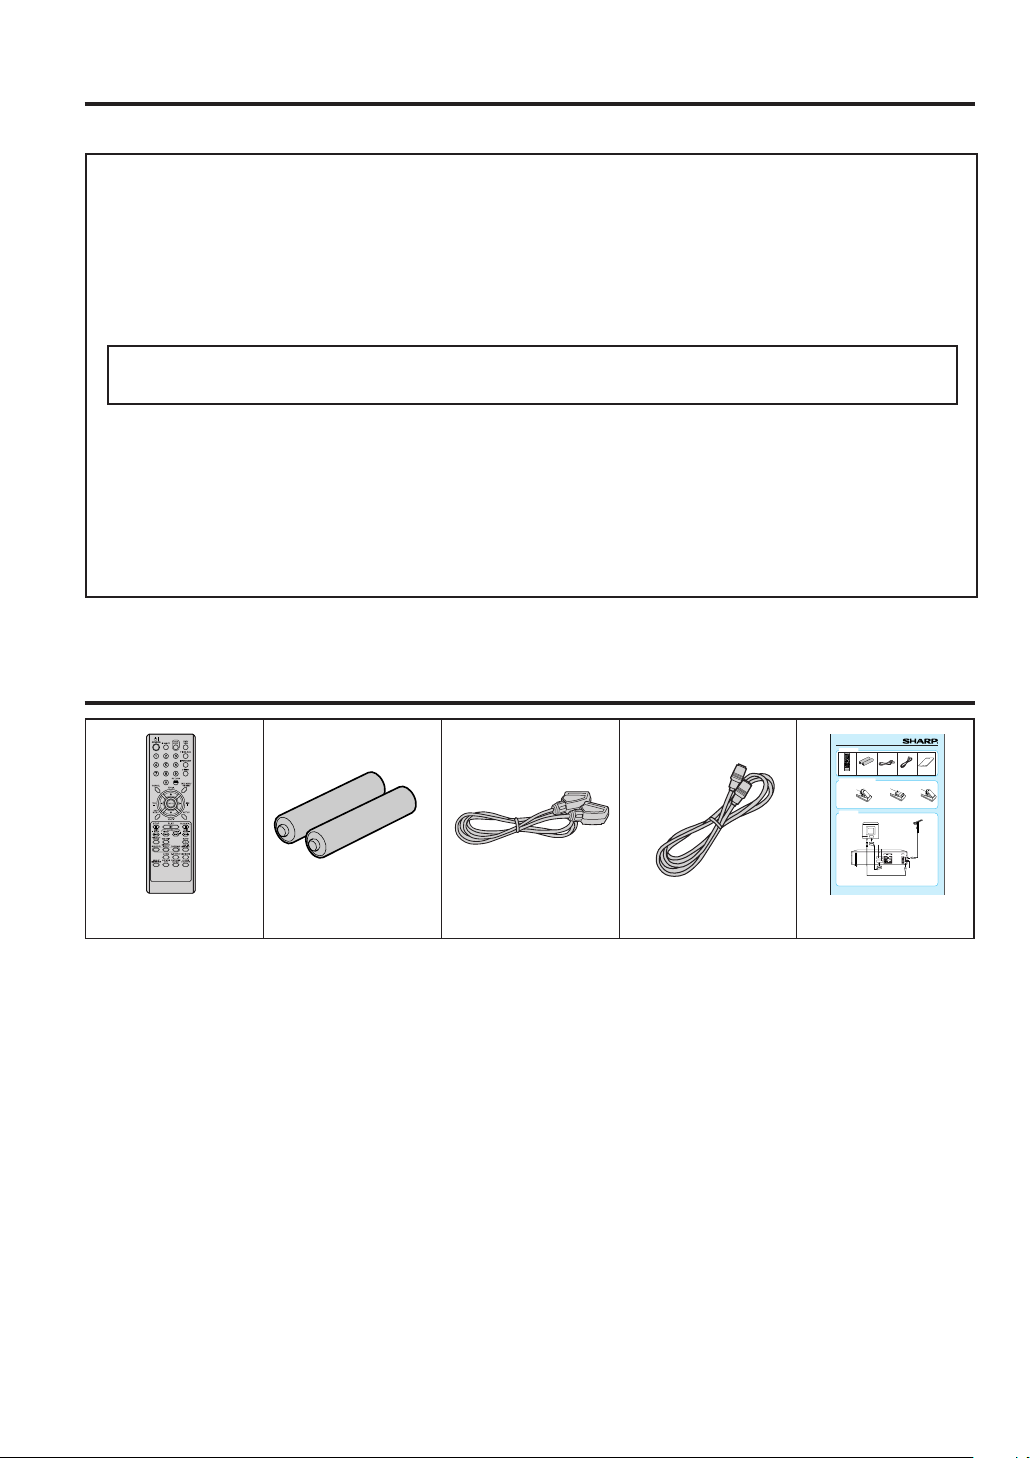
Accessories
Two “AAA” size (UM/
Remote control unit
SUM-4) batteries for
the remote control unit
21 pin scart cable 75 ohm coaxial cable
Quick Start Guide for DV-RW250H
Accessories
Two AAA size (UM/
SUM-4) batteries for
21 pin scart cable
75 ohm coaxial cable
Remote control unit
the remote control unit
How to install the batteries
Use micro batteries type
AAA size (UM/SUM-4)
.
Open the battery
compartment
cover in the
direction of the
arrow.
Connection
Disconnect all antenna wires from the rear of your TV and connect as follows.
AC power cord 240V/50 Hz
If you connect as shown above, set the TV to its AV channel (this may be labelled EXT / AUX etc.)
Replace the
Install two AAA
compartment
batteries (sup-
paying
cover.
plied),
attention to the
polarity diagram in
the battery
compartment.
Operation Manual
TV
Antenna
Antenna-Input
To Scart socket
VCR/DECODER (VIDEO IN/OUT) Scart Socket (AV2)
RGB OUT / Composite IN/OUT
Scart socket (AV1)
VCR/DVD
RF-Input (from house antenna)
RF-Output (to TV)
Supplied Scart cable
Supplied Coaxial cable
1
Quick start guide
7
Page 8
Features
Not only can you playback and record video tapes, but
you can also playback DVD discs or make recordings
using DVD-RW/DVD-R discs with this unit. In addition,
you can edit the programs you have recorded.
Playback function
A realistic, powerful, Movie Theater sound
When connected to Dolby Digital and DTS compliant
devices, you can enjoy realistic, powerful surround
sound.
Playback the scene you want to see immediately
As DVDs do not require rewinding like video tapes, you
can get to the scene you wish to watch immediately. A
variety of search functions allow you to find the scene
you wish to watch.
Title menu
As thumbnail images are displayed in the title menu,
you can find the title you want to play back quickly.
The title list appears on finalised DVD-RW disc (re-
•
corded in the Video mode) and DVD-R disc.
Video CD/SVCD and MP3/WMA/JPEG playback
Edit function
Editing recorded material without changing
the original titles
You can create a playlist based on the original titles.
The playlist won’t affect the original titles. If you erase
the playlist, the original titles remain. It is recommended
to create and edit the playlist to prevent important titles
from being erased accidentally.
Chapter mark
You can add (or delete) a chapter mark to (from) the
original title. This function is useful when searching for
the scene you wish to watch that you have marked with
the Chapter mark function.
Erasing scenes
You can erase an unnecessary scene from the created
playlist or the original titles.
Combining titles
You can combine several original titles or playlists to a
separate playlist.
Video CD/SVCD/MP3/WMA files can be played back.
Also, you can display JPEG files on the TV screen and
enjoy them as a slide show.
Recording function
Timer recording
The timer recording system allows you to select the
date, time and channel and record the desired programs. Up to 8 timer programs within a month can be
stored in this unit.
One-touch Timer Recording (OTR)
The One-touch Timer Recording feature provides a
simple and convenient way to make a timed recording.
Dubbing function
Dubbing a tape onto a disc or a disc onto a
tape
With just this one unit, you can dub however you like,
from video tape to disc, or from disc to video tape.
•
Dubbing cannot be carried out when attempting to
copy a “copy guarded” video tape or disc.
8
Page 9

Disc
Handling discs
Removing the Disc from its case
Be sure to hold the disc by its edges. Do not touch the
surface of the disc.
Take the disc carefully from its case.
• Do not scratch the disc.
• Do not get dirt on the surface of the disc.
• Do not stick labels or adhesive tapes on the disc.
• Do not drop or bend the disc.
Storing discs
• Store the disc in the case to avoid any risk of
scratches, dirt or damage.
• Do not leave the disc exposed to direct sunlight or in
hot or humid places.
Cleaning discs
Wipe the disc with a clean, dry cloth from the centre
outward toward the edges.
• Do not wipe the disc in a circular motion around the
centre.
• Do not use liquid or aerosol cleaners.
Region management information
This unit is designed and manufactured to support the
region management information that is recorded on a
DVD disc. If the region number written on the DVD disc
does not correspond to the region number of this unit,
this unit cannot play that disc.
• The region number of this unit is “2”.
• The unit will play DVD-Video discs marked with la-
bels containing “2” or “ALL”.
Example:
2
Operating DVD-Video
• Some operations of DVD-Video may be prohibited
by the manufacturer, or some operation methods or
functions of the DVD-Video may be different from the
description in this manual.
• If you attempt an operation that is prohibited by either the disc or the unit, a “
the TV monitor. For operations prohibited by the disc,
see the information that came with the disc.
• When the menu screen or the operation guide appears during disc playback, follow the displayed information.
” mark will appear on
Discs which can be played back
In this unit, use only discs that meet the standard, such
as those bearing the below logo marks on the disc label
surface. If you use a non-standard disc, we cannot guarantee playback. Even if such a disc can be played back,
we cannot guarantee the image or sound quality.
The DVD logo is a registered trademark.
Media type
DVD-Video
DVD-RW Ver.1.0 Ver.1.1
Ver.1.1 CPRM support
Ver.1.2 CPRM support
DVD-R Ver.2.0
Video CD/SVCD
Audio CD*
CD-R/CD-RW
* This unit is designed to playback music Compact Discs (CD) that
conform to the CD standard. CDs that contain (copy-restriction) signals to protect copyrights cannot be played back.
Logo mark
DIGITAL VIDEO
l
Discs which cannot be played back
The discs listed below cannot be played back in general. Even if one of these can be played back, it may
not be played back correctly. If a disc is played back by
mistake, extensively loud sounds may blow the speakers or may damage the hearing of those in hearing
range. Do not playback the discs listed below.
CDG, Photo-CD, CD-ROM, CD-TEXT, CD-EXTRA,
SACD, PD, DVD-ROM, DVD-RAM, DVD+R/RW,
DVD audio, etc.
The following DVD-Video discs may not be played
back on this unit:
• DVD-Video that do not have the region number “2”
or “ALL”.
• SECAM DVD-Video.
• Prohibited or business-use DVD-Video.
CD-R/CD-RWs cannot be played back for the following reasons.
• Compatibility of the disc and this unit.
• Compatibility of the disc and the recorder used.
• Unfinalised discs.
Do not playback the following discs. Playback of
these discs may cause a failure.
• Discs on which paper, labels or stickers are affixed.
• Discs that have sticky areas left by adhesive tape.
• Special-shaped discs.
9
Page 10

Disc
Discs on which video can be recorded
To record video with this unit, use the discs below:
Media type Logo mark
DVD-RW Ver.1.0 Ver.1.1
Ver.1.1 CPRM support
Ver.1.2 CPRM support
DVD-R Ver.2.0
DVD-RW
• The disc can be erased and used again about 1,000
times.
• Only the VR mode can be used for Ver.1.0 discs.
• With Ver.1.1 and later discs, you can record by se-
lecting the VR mode or Video mode.
• When you record in the VR mode, you can repeatedly record and erase. By erasing unnecessary titles,
you effectively increase remaining time.
• When you record in the Video mode, you can record
until the disc becomes full.
• When you use the Video mode, you can newly record
on the disc by formatting the disc. However, if the
disc is formatted, all the recorded contents will be
erased.
DVD-R
• You can record on the disc only in the Video mode.
• You can record until the disc becomes full.
• Finalising the discs allows playback on other DVD
players. However, the finalised discs can no longer
be recorded.
• Discs can be recorded to repeatedly until they are
finalised.
NOTES:
• There are some players that cannot playback discs
that were recorded with this unit. We cannot guarantee the playback with other units.
• This unit cannot record on DVD-R and DVD-RW discs
that are 8 cm in diameter.
• This unit cannot record on CD-R or CD-RW.
Recording format
This unit has two modes for formatting discs for recording: VR mode and Video mode.
When a blank, new disc is loaded into this unit, the
automatic format function starts to format the disc. (For
the disc format setting in this step, see page 23.)
VR mode
• This mode can be used for DVD-RW.
• In this mode, the discs can be recorded and edited
repeatedly.
• The disc recorded in this mode can be played back
with other DVD-RW-compatible players.
• When a Ver.1.1 and later CPRM disc is used, you
can record a “Copy Once” program (see page 49).
Video mode
• This mode can be used for DVD-R and DVD-RW
(Ver.1.1 and later).
• When you finalise the disc after recording, the disc
recorded with this unit can be played back with other
DVD players.
• Recording, editing or playback of an unfinalised disc
can be done only with this unit. However, there are
some limitation to editing operations.
• In this mode, you cannot record a “Copy Once” program (see page 49).
• When you record a TV program of a bilingual broadcast, only one of the audio modes can be recorded.
You have to select it.
Format modes that can be used with each disc
The usable format depends on the media type as shown
in the below table.
Media type
DVD-RW
(Ver.1.0)
DVD-RW
(Ver.1.1 and
later)
DVD-R
(Ver.2.0 and later)
Format
VR mode
VR mode
Video mode
Video mode
Available functions
Playback, recording and
editing (Original/playlist)
Playback, recording and
editing (Original/playlist)
Playback and recording
Editing (with limitation)
Playback and recording
Editing (with limitation)
10
Page 11
Disc
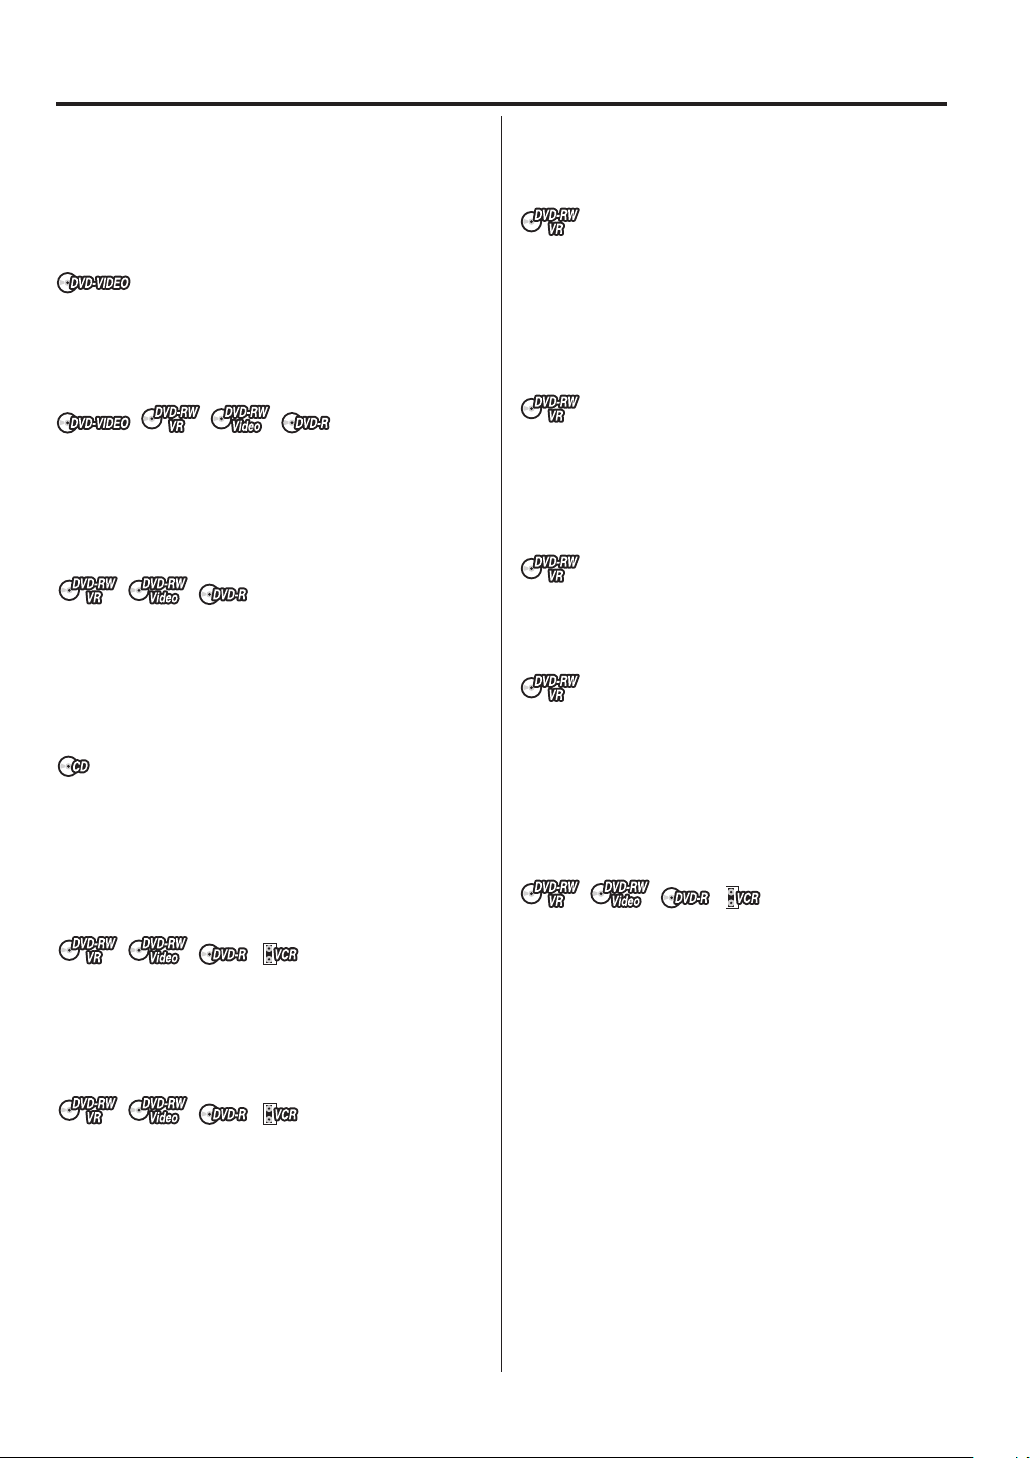
Title/Chapter/Track
A DVD-Video has large partitions called “Titles”, and
smaller partitions within them called “Chapters”.
A music CD has other partitions called “Tracks”. A number is allotted to each partition and these numbers are
called “title numbers”, “chapter numbers” or “track num-
bers”.
DVD DISC
TITLE1 TITLE2
CHAPTER 1
TRACK 1 TRACK 2 TRACK 3 TRACK 4 TRACK 5
CHAPTER 2 CHAPTER 2 CHAPTER 3CHAPTER 1
Audio-CD
When recording in the VR mode
One-time recording is set to 1 title (1 chapter). However, if you stop recording temporarily or erase scenes
by editing, the chapter will automatically be partitioned.
The interval between chapters can be specified. (See
page 27.)
When recording in the Video mode
One-time recording is set to 1 title. In recording, chapters are set automatically. The interval between chapters can be specified. (See page 27.)
NOTES:
• The title, chapter and track are numbered, but some
discs may not record the numbers.
• Recording on DVD-R/RW in the Video mode is a new
standard approved at the 2000 DVD forum. Conformity to this standard varies with each DVD player
manufacturer. Some models of DVD player or DVDROM drive, therefore, will not playback recorded videos.
Disc playback in other players
A disc recorded in this unit can be finalised. The disc
can be played back in other players that can playback
DVD-RW and DVD-R.
For more information on finalisation, see “FINALISE”
in “Setting the disc” (page 23).
When recording in the VR mode
Even if a disc recorded in the VR mode is finalised, you
can record or edit by cancelling the finalisation. (See
“UNDO FINALISE” on page 23.)
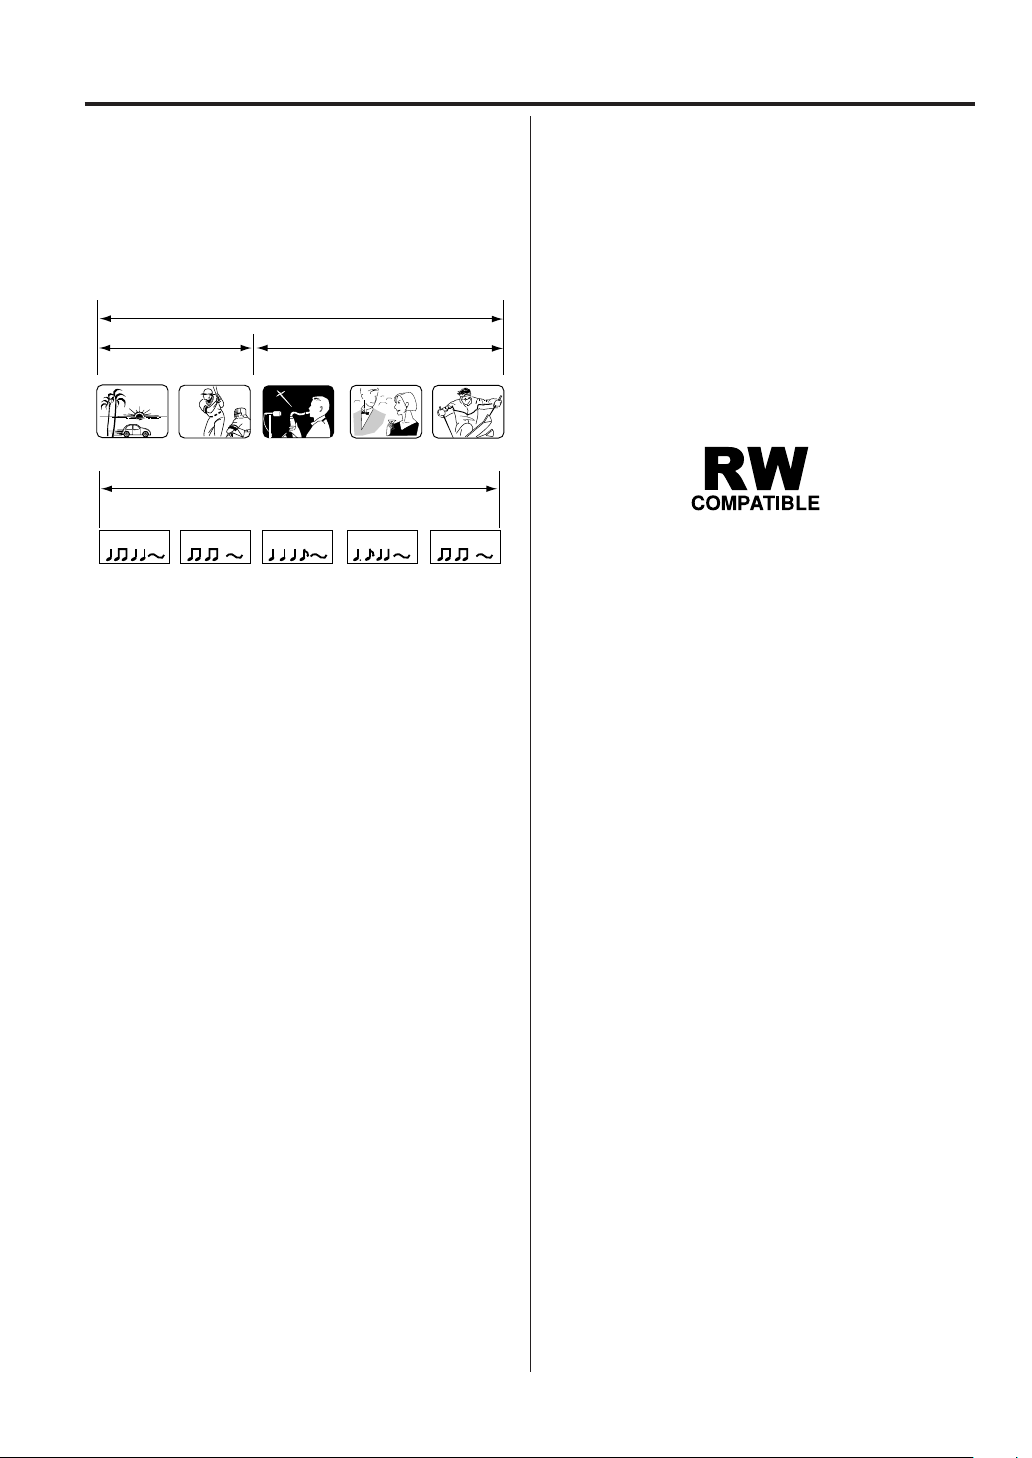
When you playback the disc with another player, make
sure that the DVD player supports DVD-RW and bears
the following mark.
When recording in the Video mode
When a disc recorded in the Video mode is finalised, it
cannot be recorded onto any more. Therefore, before
finalisation, be sure to perform all desired recording.
After finalisation, a title list that can be used by the DVD
player is automatically created.
NOTES:
• The finalisation process may require from a few minutes up to 1 hour depending on the disc type and the
amount of free space on the disc.
• A DVD-RW Ver.1.1 recorded in the Video mode cannot be recorded or edited after finalisation, but if you
format the disc by erasing all the content, you can
again record on this disc.
• A finalised disc may not play because of the condition of the DVD or the compatibility with the player
used for playback.
• Some players may not playback the discs recorded
with this unit. We cannot guarantee the playback using other players.
11
Page 12

Parts and functions
Front
FF (Fast Forward) button
Cassette Loading Slot
OPERATE button
AUDIO (L/R)/VIDEO
IN (AV3) jacks
Rear
VCR indicator
Display window
VCR/DVD button
EJECT button
DVD S-VIDEO IN (AV3) jack
Disc tray
PLAY button
REW (Rewind) button
STOP button
OPEN/CLOSE button
REC/OTR button
DVD indicator
CHANNEL
/ buttons
12
AC power cord
DECODER/EXTERNAL Scart socket (AV2)
DVD COAXIAL DIGITAL
AUDIO OUT jack
DVD AUDIO (L/R) OUT jacks
TV Scart socket (AV1)
RF IN jack
RF OUT jack
Page 13

Parts and functions
Display window
2
1 3
No. Display Description
4
1
XP/SP/LP/SLP
SP/LP
2
VR
VCR
10:00
3
01
2CH
TRK 002
CD
CD-R
CD-RW
DVD
DVD-R
DVD-RW
H00M00S
Lights during video tape playback.
Video tape is temporarily stopped.
Lights during video tape recording.
Timer recording display.
4 DVD recording modes. XP, SP, LP or SLP can be selected in turn by pressing the REC MODE/SPEED repeatedly.
2 VCR recording modes. SP or LP can be selected in turn by pressing the REC MODE/SPEED repeatedly.
Appears when a CD is inserted.
Appears when a CD-R is inserted.
Appears when a CD-RW is inserted.
Appears when a DVD-Video is inserted.
Appears when a DVD-R is inserted.
Appears when a DVD-RW is inserted.
Appears when a DVD-RW in VR mode is inserted. When the disc is set to video mode, VR does not appear.
Appears when the tuner built into this unit is selected. When you press TV/VCR, VCR disappears.
Video tape is in the unit.
Clock display (Colon [ : ] flashes).
Counter display in hour/minute/second for VCR/DVD, minute/second for CD.
TV channel display.
Track number display for CD.
A1/A2/A3
4
NOTE:
Some discs may not playback correctly, or chapter number, playback time, etc may not be displayed.
The external input channel (A1, A2, or A3) display.
Lights during playback of DVD and CD. Flashes in auto resume.
DVD or CD is temporarily stopped.
Lights during DVD recording.
13
Page 14

Remote control
Page
OPERATE Turns power on/off. 19
EJECT Ejects the cassette tapes. 44
OPEN/CLOSE Opens or Closes the tray. 30
DVD/VCR
0-9 Direct channel selection of TV. 50, 52
TIMER REC Sets the unit to start recording at a preset time. 55
INPUT SELECT Scart input or AV-Front input. 74, 75
DISPLAY Displays VCR or DVD operation status. 32, 46, 59
RETURN Close the menu window. 19, 42
CANCEL Deletes the Timer recording program. 55
TITLE MENU/TOP MENU
CH /
/ Cursor buttons.
TRK (TRACKING) +/–
/ Cursor buttons.
ENTER Option selection in the menu.
DVD MENU Displays the menu of the DVD disc. 31, 36
SETUP Displays the setup menu. 19, 53
STOP Stop. 30, 45, 51
PLAY Playback. 30, 45
PAUSE/STILL Still picture/Recording pause on/off. 33, 46, 51
SKIP /
INDEX – /+ Searches for the INDEX mark of a tape. 47
REW/SEARCH – Rewind/Review playback. 33, 45, 46
F.FWD/SEARCH + Fast Forward/Forward search playback. 33, 45, 46
ONE TOUCH REPEAT
CM SKIP Skips commercial breaks. 34, 46
SLOW Slow motion playback. 33, 46
REC/OTR Recording/OTR. 50, 52, 74
REC MODE/SPEED Selects the recording mode. 50, 52, 72
DUBBING Copies VCR to DVD or DVD to VCR. 72, 73
AUDIO
AUDIO SELECT
ZOOM Zoom (for DVD/VIDEO CD). 37, 43
A-B REPEAT Repeats playback between A and B. (DVD/CD) 35
ZERO RETURN
ANGLE Changes playback angle of a DVD disc. 37, 43
COUNTER RESET Resets the counter to 00H00M00S.47
SUBTITLE Selects subtitles of the DVD disc. 38
ATR Digital AUTO TRACKING. 46
PLAY MODE Displays the playback mode. 34
REPEAT Repeats playback. 35, 46
CLOCK/COUNTER Changes the front panel display mode. 47
Switches to operation between VCR and DVD.
Setting input. 20, 34, 70
Entering a password. 21
Cancels input data in the setting mode. 20, 71
Displays titles of a DVD disc. 31, 36, 39, 58
Channel selection for VCR. 50, 52
Manual tracking in the playback mode for VCR. 46
Skips chapters in the forward or reverse direction.
Skips the DVD playback back 10 seconds. 35
Changes the soundtrack language of the DVD. 38
Switches sound between mono and stereo. 56
Stops the tape when the counter reaches 00H00M00S.47
30, 45, 72, 73
33, 43, 66
14
Page 15
Remote control
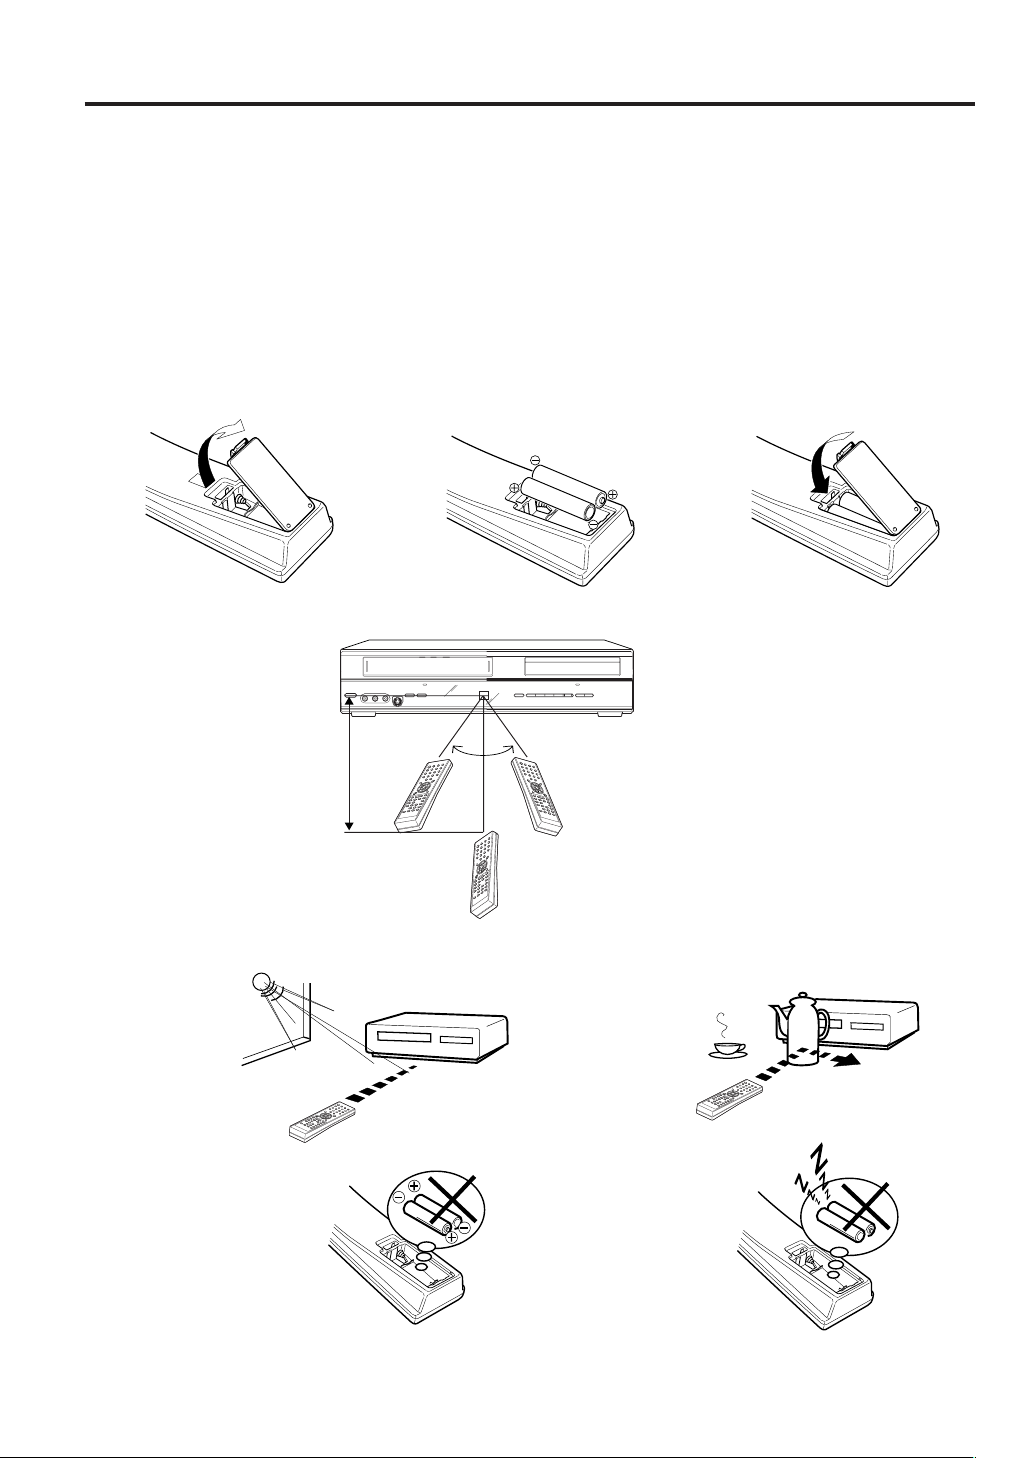
How to install the batteries
Use micro batteries type “AAA” Size (UM/SUM-4).
These batteries are offered as carbon / zinc-type or as alkaline-type. You may use both, but do not mix types. The
alkaline type lasts longer compared to the carbon / zinc type but is more expensive.
Note: Flat, weak batteries will leak. Corrosive electrolyte will damage the remote control handset.
Leak proof batteries will not leak immediately when they are flat. As long as the handset is still working, there is
no danger of leakage. To prevent damage, remove the batteries if you do not use the handset for several
months.
Damage because of leakage is not covered by the guarantee.
Open the battery compartment
1
cover in the direction of the
arrow.
Distance of Remote
Control Operation
approx.
5m
Install two “AAA” batteries
23
(supplied),
polarity diagram in the battery
compartment.
paying attention to the
Effective angle:
approx. 60°
Point the remote
control directly at the
remote sensor.
Replace the compartment
cover.
The remote control handset will not work properly in the following cases:
If bright sunlight
directly beams
onto the unit
front.
If the batteries have not
been installed according to
their polarities.
If an obstacle is
placed between the
unit and the handset.
If the batteries are
weak.
15
Page 16

Basic connections
Connect your VCR/DVD to your main aerial and TV set as shown in the illustration. When you have finished making
these connections, connect your VCR/DVD to the mains power supply (240V / 50Hz).
TV
Antenna
Antenna-Input
To Scart socket
DECODER/EXTERNAL Scart Socket (AV2)
VCR/DVD
AC power cord 240V/50 Hz
Supplied Scart cable
TV Scart socket (AV1)
RF-Input (from house antenna)
RF-Output (to TV)
Supplied Coaxial cable
Connecting this unit to your TV using the SCART connections
In addition to the coaxial cable connection, you should also connect the supplied SCART cable from the VCR/DVD
to your TV as shown. As well as transferring the high quality pictures and sound to your TV, the SCART connection
can automatically switch the TV to its AV channel for playback.
Some TVs may not allow automatic switching to the AV input channel. In this case you should
manually select the AV input setting on your TV's controls when playing through this unit.
Playback connection
The exact arrangement you use to interconnect various video and audio components to the VCR/DVD is dependent
on the model and features of each component. Check the Operation Manual provided with each component for the
location of SCART socket.
Connection to a Satellite Receiver
If a Satellite Receiver is used, we recommend the following configuration:
Satellite
Antenna
Satellite
Receiver
VCR/DVD
TV
SCART-cable (supplied)
SCART-cable (not supplied)
To record from Satellite Receiver press INPUT SELECT on the remote control of the VCR/DVD. “A1” will
appear on the front display. Select the particular satellite channel on the Satellite Receiver.
16
Page 17
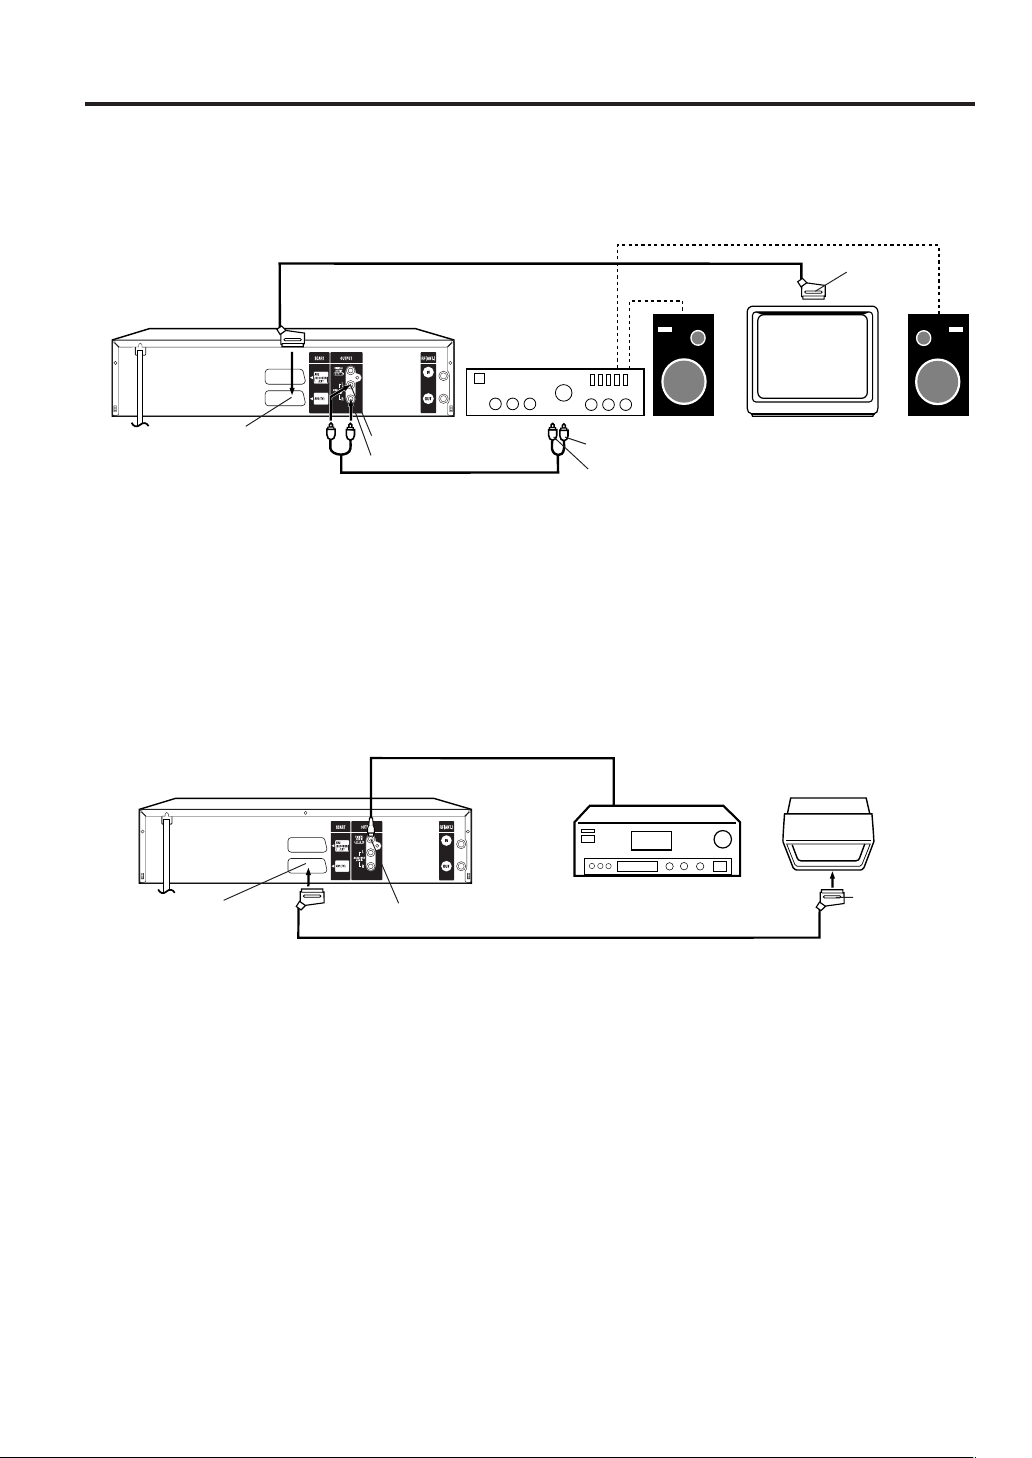
Playback connection
Connect to a Stereo Amplifier with Audio Output
If your VCR/DVD is connected to a stereo amplifier, the video soundtrack can output through the loudspeakers of
the stereo system.
SCART-cable (supplied)
To SCART
VCR/DVD
Stereo Amplifier
input
TV Scart socket (AV1)
Audio (L) Output
Audio (R) Output
AUDIO Cord (not supplied)
To Audio (L) Input
To Audio (R) Input
TV
Connect to an AV Amplifier with built-in digital surround
If you are using an Amplifier with a built-in digital surround as follows, you can enjoy the various audio systems
such as Dolby Digital and DTS by using the Coaxial Digital Output.
Use this connection to connect an:
• AV amplifier with built-in *Dolby Digital decoder
• AV amplifier with built-in *DTS decoder
VCR/DVD
TV Scart socket (AV1)
Coaxial digital cable (not supplied)
Coaxial digital
Audio Output
SCART-cable (supplied)
AV Amplifier with
built-in various
decoder as above
TV
To SCART
input
NOTES:
• The COAXIAL jack only outputs the audio from the DVD section.
VHS signal is output only from the SCART-sockets and AUDIO L/R jacks.
• When you make the connections above, do not set DOLBY DIGITAL to DOLBY DIGITAL or DTS to ON on the AV
Amplifier. If you do, a loud noise will suddenly come out from the speakers, affecting your ears or causing the
speakers to be damaged.
• DTS audio is only output via the COAXIAL output jack. You therefore need to connect this unit to a suitable DTS
decoder in order to hear the audio from DTS discs.
When playing DTS-encoded CDs, only noise will be heard from the speakers or analogue stereo outputs.
• Some DTS decoders which do not support DVD-DTS interface may not work properly with the unit.
17
Page 18
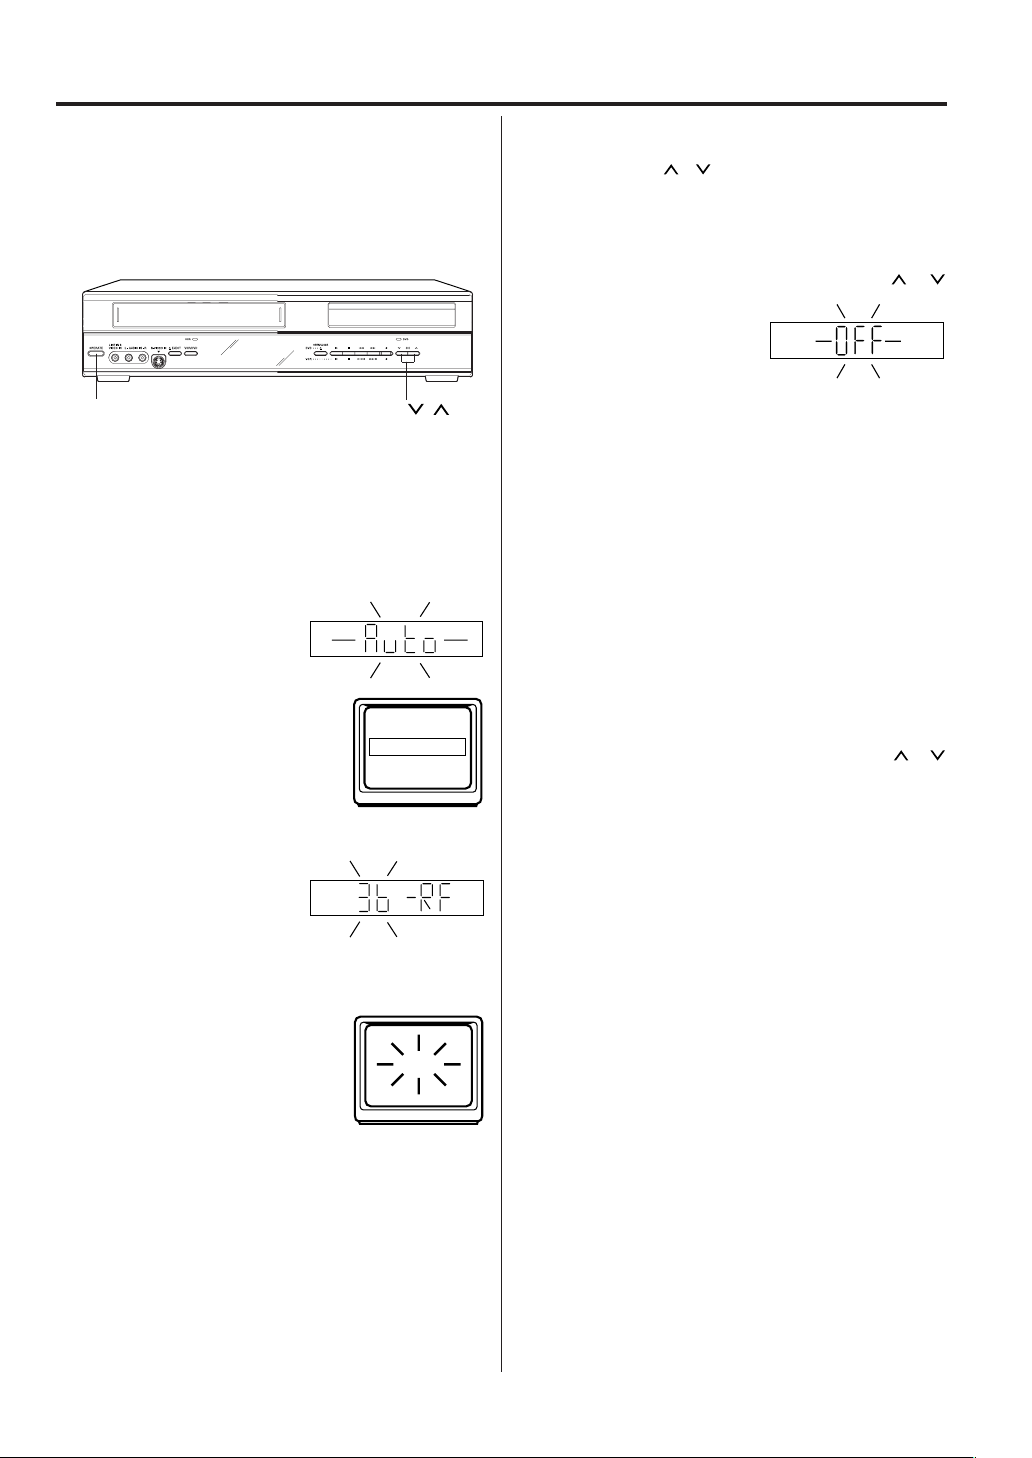
Automatic TV tuning and clock setting
Plug in your unit into the mains supply and it will start to
automatically tune itself in and set the correct date and
time. After setting itself up, you must set the TV to the
video channel.
ONLY WHEN YOU PLUG IN THIS UNIT FOR THE
FIRST TIME, THE AUTOMATIC SETUP WILL BE
AVAILABLE.
OPERATE
Preparation:
• Make sure that your unit is connected properly to the
TV.
• If a satellite receiver is connected with the coaxial
lead, make sure it’s switched ON and set to SKY ONE.
• Turn on the TV and select the channel you wish to
allocate for video use.
Plug in your unit's plug into
1
the mains supply. “Auto”
will start to flash in the unit
display. And also “AUTO
TUNING” will be displayed
on the TV screen. Your
unit will automatically tune
itself in and set the correct
time and date (This may
take approx. 4 minutes).
/
CH
AUTO TUNING
If there is interference from an adjacent broadcast
4
channel in the picture (wavy lines, picture roll, etc.),
press the CH
any other RF channel between 23 and 69, retuning your TV until the word “TEST” flashes on the
TV screen. If you connected a satellite receiver as
explained on page 16, you must switch off the
VCR’s transmitter. Press the unit’s CH
buttons repeatedly until
OFF appears in the
display window (OFF will
appear after 69 or before
23).
Press the OPERATE button to turn OFF the unit.
5
Now the TV is tuned to your unit.
NOTES:
•
The unit automatically corrects the clock setting every
hour and automatically adjusts the clock setting for
Daylight Saving Time.
• Your unit will tune the TV stations as follows.
CH 1 BBC 1 CH 5 Channel 5
CH 2 BBC 2 CH 6 Satellite
CH 3 ITV CH 7 etc.
CH 4 Channel 4
• If you want to change the RF output channel or switch
to “OFF”, press and hold the OPERATE button on the
front of your unit in the Standby mode until the current
RF output channel appears. Press the CH
buttons on your unit to select the RF channel you
desire.
/ buttons on your unit to select
/
/
Press and hold the OPER-
2
ATE button on the front of
your unit in the Standby
mode until RF output
channel “36” will appear in
the unit display.
If you have used a 21PIN
3
scart lead you now, simply select the AV channel
on your TV and go to step
5. Tune the TV in the
same way as tuning in a
TV broadcast station until the word “TEST” flashes
on the TV screen. Refer to the TV operating instructions for tuning. Now the output from the unit
is tuned to this channel. Whenever you want to play
back a tape, select this channel.
18
CH
TEST
 Loading...