

ENREGISTREUR DE DVD
2
•
The region number
for this recorder is 2
AVEC DISQUE DUR
DVD RECORDER
WITH HARD DISC
DV-HR350F
DV-HR300F
MODE D’EMPLOI
OPERATION MANUAL
FRANÇAIS
ENGLISH
This equipment complies with the requirements of Directives 89/336/EEC and 73/23/EEC as
amended by 93/68/EEC.
Dieses Gerät entspricht den Anforderungen der EG-Richtlinien 89/336/EWG und 73/23/EWG mit
Änderung 93/68/EWG.
Ce matériel répond aux exigences contenues dans les directives 89/336/CEE et 73/23/CEE
modifiées par la directive 93/68/CEE.
Dit apparaat voldoet aan de eisen van de richtlijnen 89/336/EEG en 73/23/EEG, gewijzigd door
93/68/EEG.
Dette udstyr overholder kravene i direktiv nr. 89/336/EEC og 73/23/EEC med tillæg nr. 93/68/EEC.
Quest’ apparecchio è conforme ai requisiti delle direttive 89/336/EEC e 73/23/EEC, come
emendata dalla direttiva 93/68/EEC.
Este equipamento obedece às exigências das directivas 89/336/CEE e 73/23/CEE, na sua versão
corrigida pela directiva 93/68/CEE.
Este aparato satisface las exigencias de las Directivas 89/336/CEE y 73/23/CEE, modificadas por
medio de la 93/68/CEE.
Denna utrustning uppfyller kraven enligt riktlinjerna 89/336/EEC och 73/23/EEC så som
kompletteras av
93/68/EEC.
Dette produktet oppfyller betingelsene i direktivene 89/336/EEC og 73/23/EEC i endringen 93/68/
EEC.
Tämä laite täyttää direktiivien 89/336/EEC ja 73/23/EEC vaatimukset, joita on muutettu direktiivillä
93/68/EEC.
OPERATION MANUAL ENGLISH
SAFETY INFORMATION
Note:
This Recorder can be used only where the power
supply is AC 220V-240V, 50Hz. It cannot be used
elsewhere.
CAUTION:
USE OF CONTROLS OR ADJUSTMENTS OR
PERFORMANCE OF PROCEDURES OTHER
THAN THOSE SPECIFIED HEREIN MAY RESULT
IN HAZARDOUS RADIATION EXPOSURE.
AS THE LASER BEAM USED IN THIS RECORDER
IS HARMFUL TO THE EYES, DO NOT ATTEMPT
TO DISASSEMBLE THE CABINET. REFER
SERVICING TO QUALIFIED PERSONNEL ONLY.
WARNING:
TO REDUCE THE RISK OF FIRE OR ELECTRIC
SHOCK, DO NOT EXPOSE THIS EQUIPMENT TO
RAIN OR MOISTURE.
TO REDUCE THE RISK OF FIRE OR ELECTRIC
SHOCK, AND ANNOYING INTERFERENCE, USE
THE RECOMMENDED ACCESSORIES ONLY.
Power Cord Protection
To avoid any malfunctions of the Recorder, and to
protect against electric shock, fire or personal injury,
please observe the following.
• Hold the plug firmly when connecting or
disconnecting the AC power cord.
• Keep the AC power cord away from heating
appliances.
• Never put any heavy object on the AC power cord.
• Do not attempt to repair or reconstruct the AC power
cord in any way.
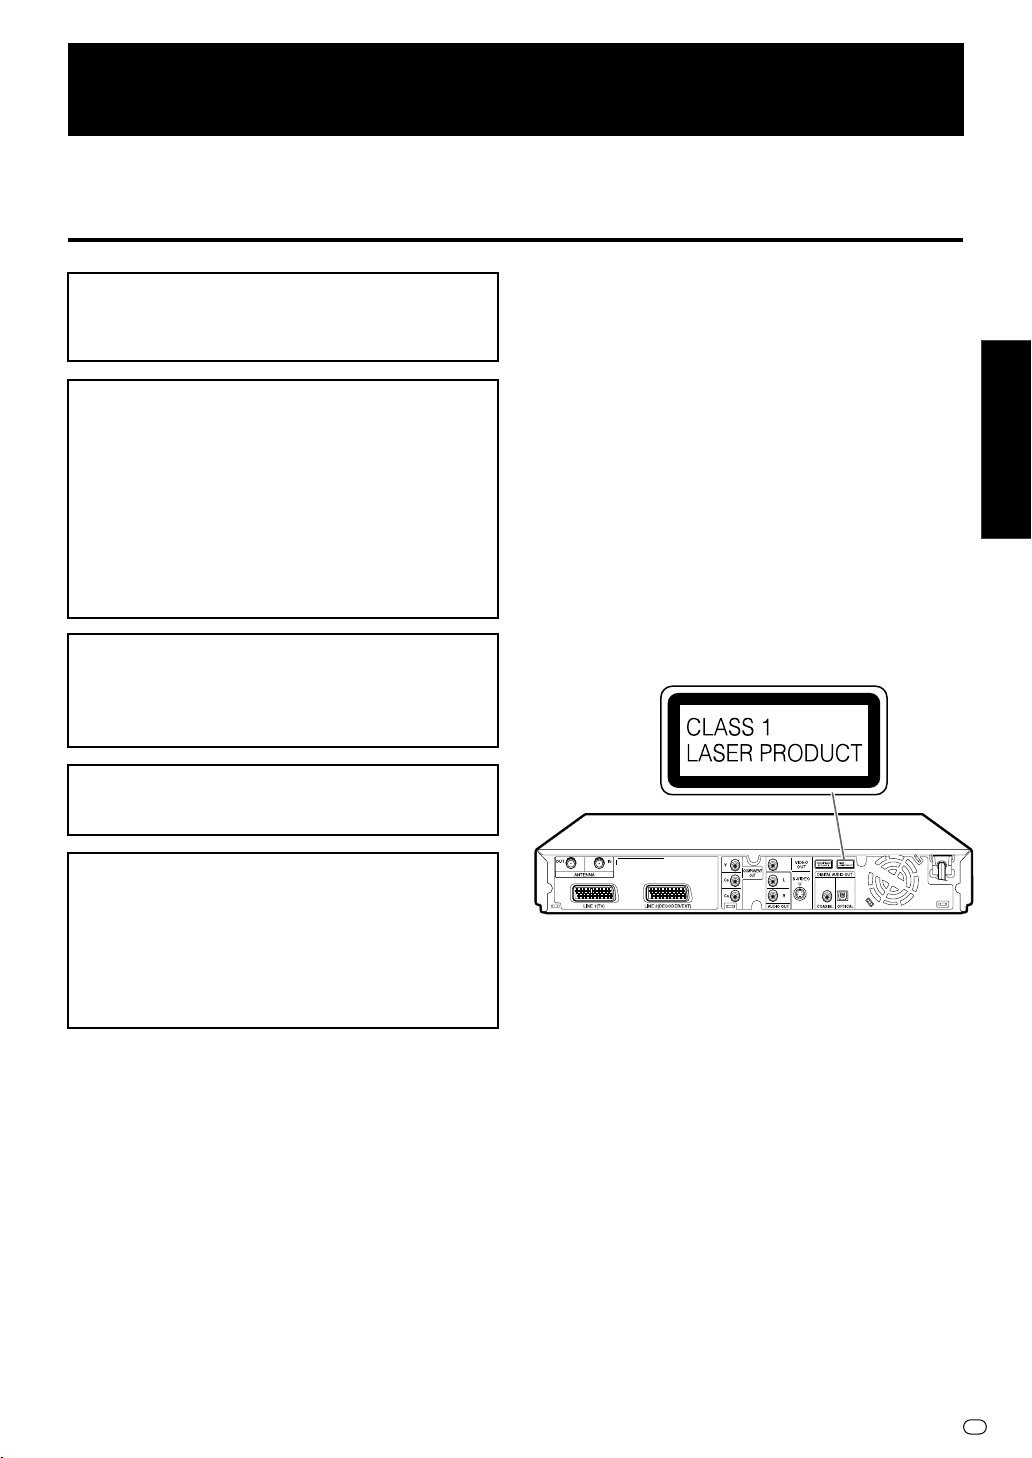
• This Recorder is classified as a CLASS 1 LASER
product.
• The CLASS 1 LASER PRODUCT label is located on
the rear cover.
• This product contains a low power laser device. To
ensure continued safety do not remove any cover or
attempt to gain access to the inside of the product.
Refer all servicing to qualified personnel.
ENGLISH
Laser Diode Properties
Material: DVD: AlGaInP
CD: GaAlAs
Wave length: DVD: 658nm
CD: 784nm
Emission Duration: Pulse
Laser output: Max. DVD: 100mW
CD: 255mW
GB
1

Contents
SAFETY INFORMATION .............................. 1
Features ....................................................... 4
Accessories ................................................. 5
Precautions about Using This Product ..... 6
About Hard Disc (HDD) ............................... 8
Recording Format .......................................................... 8
Unrecordable Material .................................................... 8
Hard Disc Operation (Recording/Playback/Time Shift
Recording) ................................................................... 8
Initialization .................................................................... 8
CPRM (control) Information ........................................... 8
About DVD ................................................... 9
Types of Discs that Can Be Used with This Recorder ... 9
Discs that Cannot Be Used with This Recorder ............. 9
Types of Discs for Recording ......................................... 10
Recording Formats ........................................................ 11
Recording Time .............................................................. 11
Disc Remaining Time ..................................................... 11
Using the Proper Disc .................................................... 12
Unrecordable Material .................................................... 12
Initialization and Finalization ..................... 13
Initialization (Formatting) ................................................ 13
Allowing Discs to Be Played Back
with Other DVD Players (Finalization) ......................... 13
About the Contents of the Disc ................. 13
Title, Chapter and Track ................................................. 13
Icons Used on DVD Video Disc Case ............................ 14
The Icons Used in This Operation Manual..................... 14
Important Information ................................. 15
Disc Precautions ............................................................ 15
Copyright ........................................................................ 15
Cautions Regarding Recording ...................................... 15
Major Components...................................... 16
Main Unit (Front) ............................................................ 16
Front Panel Display ........................................................ 16
Main Unit (Rear) ............................................................. 16
Remote Control Unit ...................................................... 17
Loading the Batteries ..................................................... 18
Operating a TV Using the Remote Control (Universal
Remote Control) .......................................................... 19
Setting the Remote Control Code .................................. 19
Basic Connection ........................................ 20
Connection Using Antenna Cables and SCART Cables ..
Using Other Types of Video Output ............................... 21
Auto Installation .............................................
Turning the Power On .................................................... 22
Using the AUTO INSTALLATION for initial setting ......... 22
20
22
About START MENU ................................... 24
About START MENU ...................................................... 24
Basic START MENU Operation ..................................... 24
Clock Setting ............................................... 25
Clock Setting .................................................................. 25
Channel Setting ........................................... 26
Channel Setting ............................................................. 26
Channel Sort .................................................................. 26
Deleting Channels .......................................................... 27
Re-naming Channels ..................................................... 27
Display Information..................................... 28
Content of TV Screen Display........................................ 28
Checking the Channel, Remaining Time of HDD and
Number of Titles .......................................................... 28
Checking the Channel, Remaining Time of DVD and
Number of Titles .......................................................... 29
Switching Front Panel Display ....................................... 29
Preparation to Operate This Recorder ...... 30
Time Shift Viewing/Chasing Playback ...... 31
Time Shift Viewing ......................................................... 32
Chasing Playback .......................................................... 32
Recording to HDD ....................................... 33
Direct Recording to HDD ............................................... 34
Setting the Record End Time during Direct Recording
(Simple Recording Timer)............................................ 34
Recording to DVD ....................................... 35
Loading Disc .................................................................. 35
Direct Recording to DVD ................................................ 35
Setting Recording Mode (HDD/DVD) ......... 37
HDD Recording Mode and Recording Time................... 37
DVD-RW/R Recording Mode and Recording Time ........ 37
Setting the Manual Recording Mode (MN) ..................... 38
Direct Recording the TV programme you are watching . 38
Timer Recording.......................................... 39
Timer Recording with SHOWVIEW® system ...................... 39
Timer Recording by Specifying Date,
Time and Channel ....................................................... 41
Confirm, Change and Cancel a Timer Programme ........ 43
Dubbing (HDD/DVD) .................................... 44
Dubbing Method and Dubbing Types ............................. 44
Limitation during Dubbing .............................................. 44
Dubbing (HDD↔DVD)/High Speed Dubbing
(HDD→DVD) ................................................................ 46
Eliminating Problems (Recording, Timer
Recording, Dubbing) ............................ 48
HDD Playback .............................................. 50
Playback ........................................................................ 50
Playback from REC LIST ............................................... 51
Playback by Selecting Title Number (Direct Playback) .. 52
Other Types of Playback ................................................ 53
DVD/CD Playback ........................................ 55
Loading Disc .................................................................. 55
DVD-RW/R Playback ..................................................... 55
DVD Video Playback...................................................... 56
Audio CD/Video CD Playback........................................ 56
Other Types of Playback ................................................ 57
Playback by Selecting with the Menu in the DVD .......... 59
MP3 File Playback ....................................... 60
To Play Another File (music title) during Playback ......... 60
To Skip the File during Playback .................................... 60
GB
2

Contents
Settings During Playback ........................... 61
Function Control ............................................................. 61
Simultaneous Recording/Playback
Function ................................................. 63
Viewing the Programme Being Recorded from the
Beginning while Recording to HDD (Chasing
Playback) ..................................................................... 63
DVD/CD Playback during HDD Recording (Simultaneous
Recording/Playback) ................................................... 63
Playing Back a Title on the HDD during DVD Recording
(Simultaneous Recording/Playback) ........................... 63
Viewing Another Programme Recorded on HDD while
Recording to HDD (Simultaneous Recording/
Playback) ..................................................................... 63
Function Menu............................................. 64
How to Use the FUNCTION MENU ............................... 64
Editing (HDD/DVD) ...................................... 65
About Editing .................................................................. 65
Editing Procedure .......................................................... 65
Switching between Original and Play List (Play Lists can
be created only for HDD or VR mode) ........................ 66
Editing an Original Title (HDD/DVD) .......... 67
Erasing Unnecessary Scenes from an Original Title
(ERASE SCENE)......................................................... 67
Inputting/Changing Title Name
(CHANGE TITLE NAME) ............................................. 69
Changing Thumbnail (CHANGE THUMBNAIL) ............. 70
Making Sections in a Title (DIVIDE CHAPTER)............. 71
Combining Chapters Together
(COMBINE CHAPTERS) ............................................. 72
Disabling Title Edit and Erase (TITLE PROTECT) ......... 72
Erasing All Titles............................................................. 73
Erasing by Selecting a Title (or Chapter) ....................... 73
Editing a Play List (HDD/DVD) ................... 74
Creating a Play List ........................................................ 74
Adding a Scene from an Original to a Play List
(ADD SCENE) ............................................................. 75
Changing the Title Sequence (MOVE TITLE) ................ 77
Erasing Unnecessary Scenes (ERASE SCENE) ........... 78
Inputting/Changing Title Name
(CHANGE TITLE NAME) ............................................. 78
Changing Thumbnail (CHANGE THUMBNAIL) ............. 78
Making Sections in a Title (DIVIDE CHAPTER)............. 78
Combining Chapters Together
(COMBINE CHAPTERS) ............................................. 78
Enjoying High Quality Sounds................... 79
Playing 2 Channel Audio with an Analogue Connection ..
Playing Dolby Digital, DTS or MPEG Audio with a
Digital Connection
Playing 2 Channel Audio with a Digital Connection .........
........................................................ 79
79
80
Recording from External Equipment......... 81
Recording from a Digital Camcorder Using i.LINK ......... 81
Recording from a Camcorder (VCR) Using an Analogue
Connection .................................................................. 83
Function Setting .......................................... 84
Functions under OTHER SETTINGS 1 .......................... 84
REC. FUNCTION ........................................................... 84
Basic Operation for REC. FUNCTION Setting ............... 85
VIEW/PLAY SETTING ................................................... 86
Basic Operation for VIEW/PLAY SETTING.................... 87
ADJUSTMENT ............................................................... 88
Basic Operation for ADJUSTMENT Setting ................... 91
Functions under OTHER SETTINGS 2 .......................... 92
MODE SETTING ............................................................ 92
Basic Operation for MODE SETTING ............................ 93
MANUAL TUNING ......................................................... 94
CHANNEL SORT ........................................................... 94
CLOCK SETTING .......................................................... 94
Initialization .................................................................... 95
Finalization ..................................................................... 95
INITIALIZE ..................................................................... 95
FINALIZE ....................................................................... 95
Basic Operation for INITIALIZE/FINALIZE ..................... 96
Troubleshooting .......................................... 97
On-screen Error Messages ........................ 100
Glossary ....................................................... 103
Specifications .............................................. 106
GB
3
Features
DVD-RW/R recording/playback
1
with outstanding compatibility
• This Recorder is compatible with digital recording
on rewritable DVD-RW discs and one-time recordable DVD-R discs. It has two recording formats: “VR
(Video Recording) mode” which has a wealth of
editing functions, and “Video mode” which can be
played back with existing DVD players. This lets you
enjoy recording and dubbing to suit your purpose.
High picture quality design (Used
2
in all hard disc and DVD modes)
VBR (Variable Bit Rate) recording
• Constantly maintains optimal high picture quality by
varying the bit rate (amount of video data) for each
scene depending on the video content (e.g. whether
movement is fast or slow).
A variety of hard disc t DVD
3
dubbing functions
1High speed dubbing*
Enables high speed dubbing from hard disc to DVD
so you can enjoy creating your own video library.
*1
For high speed dubbing, use discs conforming to DVD-RW
Ver. 1.1/2g or DVD-R Ver. 2.0/4g.
2Rate conversion dubbing
The mode can be selected from 32 levels just like
recording mode. This enables recording at the
optimal picture quality, given the remaining empty
space on the disc.
3Exact dubbing
This automatically adjusts to the optimal record
mode so that the material is dubbed exactly into the
remaining area on the disc.
The time normally required for a programme of an hour
on High Speed Dubbing to a double speed compatible
disc
Recording Mode
FINE
SP
LP
EP
1
Speed
Approx. 2g
Approx. 4g
Approx. 8g
Approx. 12g
Time Required
Approx. 30 min
Approx. 15 min
Approx. 7.5 min
Approx. 5 min
“Time Shift Viewing”, “Chasing
4
Playback” and “Simultaneous
Recording/Playback” —functions
you can only get with a hard disc
1Time shift viewing
While you are watching a programme, the phone
rings.… At times like this, you can pause the
programme being broadcast at the press of a
button, and then watch the rest of the programme
at your leisure after you finish your phone call. You
can also switch to the current broadcast scene just
by pressing ■STOP/LIVE button.
2Chasing playback
You return home earlier than expected while timer
recording is in progress…. At times like this, you
don’t have to wait for recording to end. You can
immediately view the programme from the beginning.
3Simultaneous recording/playback
Even while recording to the hard disc, you can
enjoy playback of a DVD, or programmes already
recorded on hard disc. You don’t have to wait for
recording to finish.
Comprehensive editing functions
5
(Only titles recorded on the hard disc or in VR
mode on DVD-RW can be edited.)
1Play list edit
This lets you gather only the needed parts (i.e. a
“Play List”) from a recorded original video (title). You
can rearrange scenes and combine them with other
scenes, or rearrange titles. This is convenient when
you want to dub and save only the necessary
scenes and titles.
2Chapter edit
This lets you divide a title into chapter units during
recording/playback or using the edit screen. After
dividing, a list of recordings (thumbnails) can be
displayed in chapter units, so you can copy, erase
or dub to the play list in chapter units.
3Erase Scene
This lets you erase unnecessary scenes. This is
convenient when you want to cut out the commercials in a recorded programme before dubbing.
4Batch erasing of titles/chapters
Titles and chapters which become unnecessary
after editing can be batch erased by selecting them
from the list of recordings (thumbnails).
5Edit undo function*
If you mistakenly erase data during editing, this
function lets you restore it to its immediately
preceding state, just like “Undo” on a PC, so you
can edit worry-free.
2
*
Edit undo can only be used once. It only works when
“UNDO” is assigned to a coloured button (green) displayed on the screen.
2
GB
4
Features
Simple operation and user-friendly
6
design using a new remote control
1START MENU
Press START MENU button on the remote control,
and display the list of main functions on the screen.
After that, you can operate by using the Cursor
buttons and SET/ENTER button on the remote
control, so this Recorder can be used easily even
by a person who is unfamiliar with operation.
2Coloured buttons
The remote control has coloured buttons with four
different colours. Functions are displayed in four
different colours on the screen, and the Recorder
can be operated by directly designating these
functions.
3Luminous buttons
Luminous buttons are used for key control buttons
on the remote control so they are easy to see in the
dark.
Digital connection (i.LINK) with a
7
digital video/audio source equipment
• The DV IN terminal allows you to capture, edit and
store material from a digital camcorder equipped
with a DV terminal.
MP3 file playback
8
• This Recorder allows you to playback MP3 files
recorded on CD-RW/R.
SHOWVIEW*3 system
9
• The SHOWVIEW system allows you to programme
your Recorder for timer recording simply by inputting the S
SHOWVIEW numbers are listed in most newspapers,
television guides, and local CATV listings. Simply by
inputting this S
programme your Recorder for timer recording,
eliminating the need to input programme start time,
stop time, channel, date and other information
which is necessary for ordinary timer programming.
3
*
SHOWVIEW is a registered trademark of Gemstar Development Corporation. The SHOWVIEW system is manufactured
under licence from Gemstar Development Corporation.
HOWVIEW Programming number. The
HOWVIEW number, you can
Accessories
Remote control unit
Two R-03 size batteries
(“AAA” size, UM/SUM-4)
for the remote control unit
Video/audio cable Round coaxial cable
GB
5
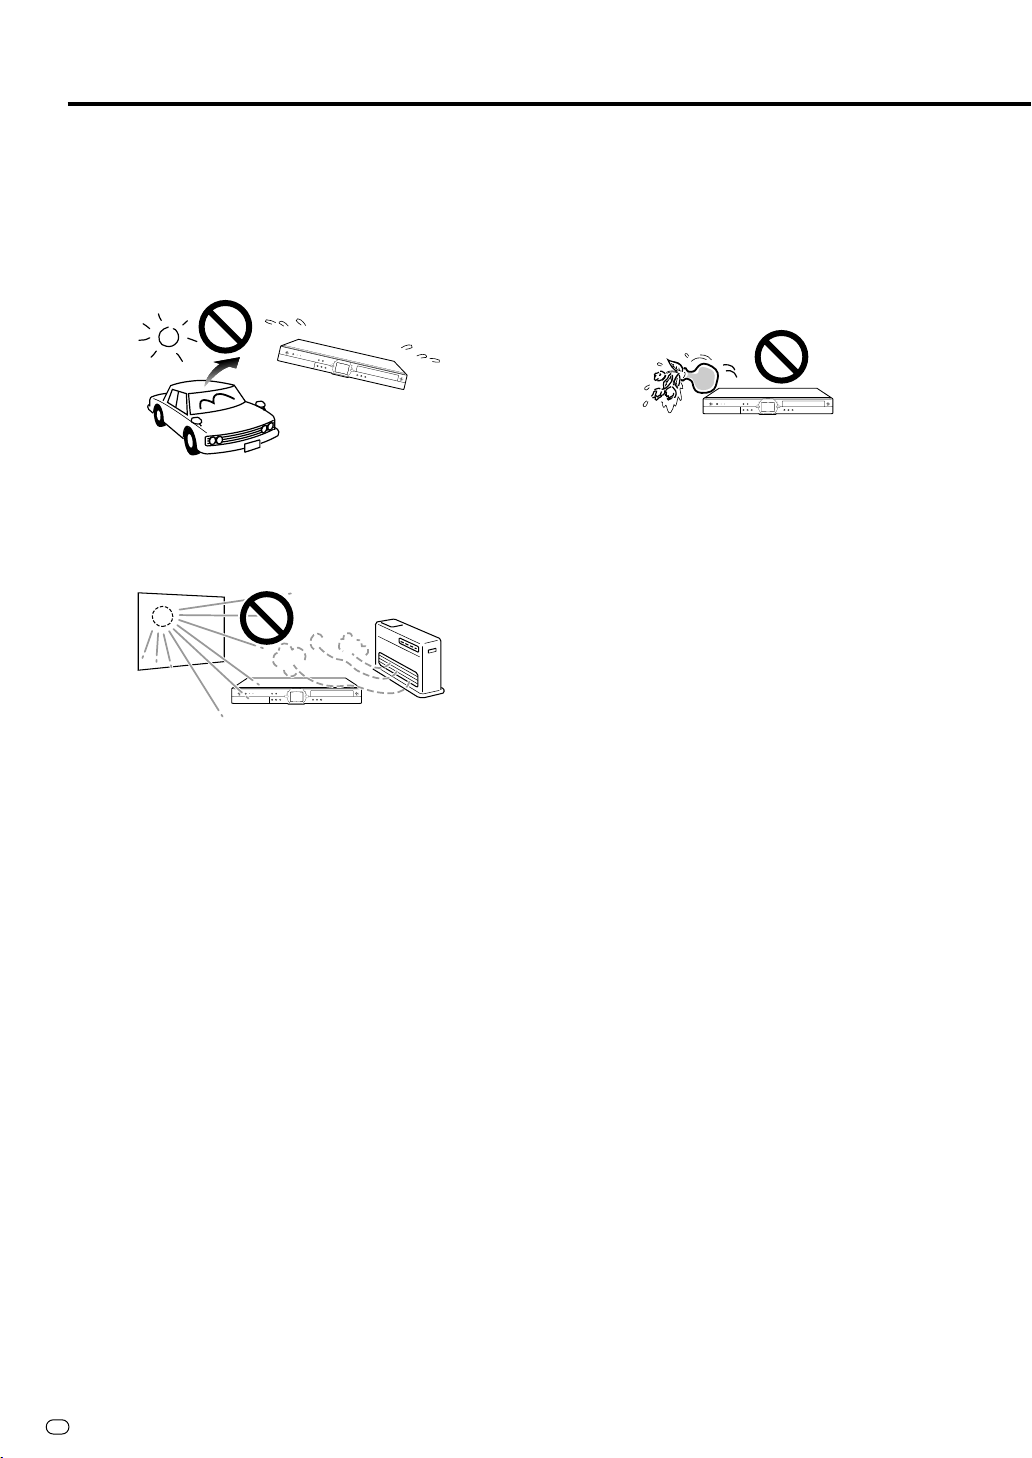
Precautions about Using This Product
Do not use at locations at high
temperature.
• If you leave this equipment at a location which rises to an
abnormally high temperature (like the inside of a car with
the windows shut), this may cause deformation of the
cabinet or malfunction. Be very careful not to allow the
area abound the Recorder or discs to reach a high
temperature.
• Do not place the Recorder on any equipment which gets
hot.
• Do not place at a location which is exposed to direct
sunlight, or near a heater. Be careful because doing so
will have an adverse effect on the cabinet and components.
Do not remove the cabinets.
• Do not remove the Recorder cabinets. Touching parts
inside the cabinet could result in electric shock and/or
damage to the Recorder. For service and adjustment
inside the cabinet, please contact the nearest service
centre approved by Sharp.
Do not cover the fan or ventilation holes on the back of the Recorder.
• When setting up the Recorder, do not cover the fan or
ventilation holes on the rear of the Recorder. This will
interfere with the cooling fan and cause malfunction. Be
especially careful of this point when housing the Recorder
in a TV stand or AV rack.
• Do not use the Recorder on carpets, or on a bed or sofa,
or wrap the Recorder in cloth or other material. This will
interfere with the cooling fan and cause malfunction.
Do not place objects on the Recorder.
• Do not place any objects, such as vases or lighted
candles on the top of the Recorder.
• Set up at a location where there is adequate space above
the Recorder
• Do not place a TV or other heavy object on the Recorder.
Doing so may result in problems like noise appearing on
the screen, or deformation of the cabinet.
Keep away from magnetic objects.
• Keep the Recorder away from strong magnetic objects.
Handle the Recorder carefully.
• Do not drop the Recorder, or subject it to strong impact or
vibration. Doing so will cause malfunction. Be careful
when carrying or moving the Recorder.
No fingers or other objects inside
• Do not put any foreign object on the disc tray.
When moving or shipping the
Recorder
• Remove the disc before wrapping the Recorder. In case
you will not be using the Recorder for a while, remove the
disc, and turn off the power.
Dew formation
• Dew may form on the surface of and inside the Recorder
if you suddenly carry it from a cold location to a warm
location, or use it in a cold room where heating has just
been turned on (i.e. on a winter morning). If dew forms,
let the Recorder sit with the power off until the dew
disappears. Using the Recorder with dew formation
present may cause malfunction.(See page 15.)
Avoid dust and smoke.
• Do not place the Recorder at a location which is unstable,
subject to heavy vibration or where there is a lot of dust or
tobacco smoke. Doing so may cause malfunction or
accidents.
Set up the Recorder so it is horizontal.
• Do not stand the Recorder up vertically or place it upside
down. Doing so will cause malfunction.
GB
6

Precautions about Using This Product
Upkeep of cabinet
• The cabinet surface employs a lot of plastic. Do not wipe
these surfaces with benzene or thinner because this may
cause deterioration or paint peeling.
• Do not apply volatile liquids like insecticide to the
cabinet. Also, do not allow long-term contact with
materials like rubber, vinyl products or synthetic leather.
Doing so may cause problems like paint peeling.
• Do not affix stickers or tape to the Recorder. Doing so
may cause cabinet discolouration or damage.
• If the cabinet or front panel display gets dirty, gently wipe
it off with soft cloth like flannel. If it is extremely dirty, soak
a cloth in neutral detergent diluted with water, wring the
cloth well, wipe, and then wipe again with a dry cloth.
Using powerful cleaners may cause discolouration,
deterioration or paint peeling. We recommend testing any
cleaners at an inconspicuous location on the Recorder.
Electromagnetic interference
• If you use a mobile phone or other electronic equipment
near the Recorder, video may be disturbed or become
noisy during playback or recording due to electromagnetic interference.
Antenna
• To avoid the effects of radio interference, set up the
antenna at a location away from busy roads, electric
wires for train, electric transmission lines and neon signs.
This is effective for preventing electric shock accidents in
the unlikely event that antenna falls down.
• Do not make the antenna line unnecessarily long, or
bundle it. Be careful because doing so will cause the
picture to be unstable.
• The antenna is exposed to the weather, so be careful to
periodically check and replace it. This will ensure a
beautiful picture. Antennas are particularly susceptible to
damage at locations with heavy smoke and soot, and
locations exposed to sea breeze.
Hard disc (HDD)
• This Recorder records programmes onto a hard disc
(HDD). The hard disc is equipped with a safety mechanism to protect data from impact, vibration and dust.
However, to prevent loss of recorded data, you should be
particularly careful of the following points:
• Do not subject the Recorder to any impact.
• Do not use at a location which is unstable or subject to
vibration.
• Do not move the Recorder while the power is on.
• Do not unplug the power cord from the AC outlet
during recording or playback. First turn power “OFF”,
and then unplug the power cord from the AC outlet.
• Do not use at a location with abrupt temperature
variation (variation of more than 10°C per hour).
• The Recorder will malfunction if used at a cold location
(5°C or less) or an extremely hot location (35°C or
higher).
• If you carry the Recorder from a cold location to a
warm location, let the Recorder sit for a while before
using it.
• In the unlikely event that the hard disc (HDD) malfunctions for some reason, you cannot replace it by yourself. If
you disassemble the Recorder you will void the warranty.
Please contact the nearest service centre approved by
Sharp. We cannot provide compensation for data content
if data is lost or not recorded.
Connected equipment
• Read carefully the “Precautions for Use” in the operation
manual for any equipment connected to the Recorder.
Power conservation
• When you are finished using the Recorder, conserve
power by turning power off. If you go on a trip, or
otherwise will not use the Recorder for a long time,
unplug the power cord from the AC outlet to ensure
safety.
Requests regarding setup
• Do not cover the fan or ventilation holes on the back of
the Recorder. Doing so will interfere with heat radiation
and cause malfunction.
Notes about use
• The Recorder and cabinet may become a little hot,
depending on the use environment when using this
Recorder. This is not a malfunction.
• When unplugging the power cord (to move the Recorder,
etc.), first turn off power (STANDBY indicator on the front
of the Recorder lights up red) to protect the hard disc
(HDD).
• When power is turned on, the fan will rotate to cool the
Recorder.
• Immediately after plugging the power cord into an AC
outlet, or after recovery from a power failure, the unit may
fail to operate for more than ten seconds because the
Recorder is performing system adjustment.
Notes about this operation
manual
• In this operation manual, the terms “the Recorder”, “this
Recorder” or “your Recorder” refer to the “DV-HR350F/
DV-HR300F DVD Recorder with Hard Disc”.
• The screen displays and Recorder illustrations given in
this operation manual are for explanatory purposes, and
may differ somewhat from the actual screen and Recorder.
GB
7

About Hard Disc (HDD)
This Recorder has a built in hard disc (abbreviated
“HDD”) for recording and playback. Beware of the
following points when setting up and using the Recorder.
Failure to observe precautions may cause damage to the
HDD itself or its content, failure of the disc to operate, or
recording of noise.
• Do not subject to any vibration or impact.
• Do not place at a cramped location which might block the
cooling fan or ventilation port on the back of the Recorder.
• Do not place at a location with severe temperature
variation.
s If the Recorder is set up at a location with severe
temperature variation, dew may form on and inside the
Recorder. If the Recorder is used with internal dew
formation present, this may cause HDD damage or
malfunction. We recommend keeping variation in room
temperature within 10˚C per hour.
• Do not place at a location with high humidity.
• Place the Recorder horizontally, never at an incline.
• When the power is on, do not unplug the power cord from
the AC outlet, turn off the breaker for the area where the
Recorder is set up, or move the Recorder.
s When moving the Recorder, first turn off the power and
then unplug the power cord from the AC outlet.
Recording Format
■ HDD recording is done using the variable bit rate
format for more efficient recording.
The following phenomena may occur.
With the variable bit rate format, the remaining amount
which can be recorded may increase or decrease relative
to the display of the remaining amount of HDD space.
• When the display indicates that the remaining amount of
HDD space is low, first delete unnecessary programmes,
and then record with an extra margin in the amount of
remaining space.
• Even if you delete a programme, the remaining amount
may not increase by the amount of deleted time. When
recording new video, record with an extra margin in the
amount of remaining space.
• With this Recorder, part of the HDD capacity is used as a
system management area.
Unrecordable Material
• This Recorder is equipped with a copy guard function
that prevents recording of video software or broadcast
programmes that contain a signal that restricts copying in
accordance with copyrights and so forth.
• In the case a copy guard signal is contained in a source
video that occurs partway through recording, recording is
paused at that point. Recording resumes when the copy
guard signal is no longer present, while no recordings will
be made for the part where the copy prevention signal is
present.
In the unlikely event that there is some problem like loss
of recorded video or audio content due to a HDD
malfunction, please be aware beforehand that Sharp will
bear no responsibility to compensate for the content
which could not be recorded or edited, for the loss of
recorded or edited video, or for other related direct or
indirect damages.
■ If a power failure occurs
• The content being recorded or timer recorded will be
damaged if power failure occurs.
• The content being played back may be damaged.
■ For important recording
• If the HDD malfunctions, the content recorded on the
HDD may be lost. If you wish to save content permanently, we recommend copying or moving the content
to DVD-RW or DVD-R.
NOTE
• If a message indicating a HDD error is displayed (such as
“CANNOT OPERATE DUE TO HDD ERROR.”) and the
HDD has malfunctioned, you cannot replace the HDD by
yourself. If you disassemble the Recorder, the warranty
will become void. Also, recovery of data is impossible. If
playback is possible, re-record the recorded content onto
a DVD-RW/R disc, and contact your nearest service
centre approved by Sharp.
Hard Disc Operation
(Recording / Playback / Time Shift
Recording)
• If the Recorder is used in a cold location (a location at
low temperature), the drive will only allow live viewing
after power is turned on until the HDD is ready. During
this time, the Recorder will not allow Time Shift Viewing,
recording, display of recording lists or playback of
recorded programmes. Please wait until the HDD is
ready.
Initialization
• Initialization erases all video recorded on the HDD. Be
sure to dub important recordings onto DVD-RW/R discs
before initializing.
CPRM (control) Information
• There are 3 types of copy control signals: “Copy Freely”,
“Copy Once” and “Copy Never”.
“Copy Never” programmes cannot be recorded on HDD.
When a “Copy Once” enabled programme is copied from
HDD to DVD-RW, the video is not copied — it is moved
from the HDD to the DVD-RW (i.e. the content recorded
on the HDD is erased).
GB
8
About DVD
Types of Discs that Can Be
Used with This Recorder
•
Since this Recorder is compatible with the PAL format, use
discs that contain the letters “PAL” on the disc or package.
NTSC and PAL-60 signals cannot be recorded.
(A black screen is shown when NTSC or PAL-60
signals are input to the external input.)
•
The following discs can be played back and recorded with
this Recorder. Do not use an 8 cm (3") adapter (for CDs).
• Use discs that are compatible with standards as indicated by the presence of the following logo marks on the
disc label. Playback of discs not complying with these
standards is not guaranteed. In addition, image quality or
sound quality is not guaranteed even if such discs are
able to be played back.
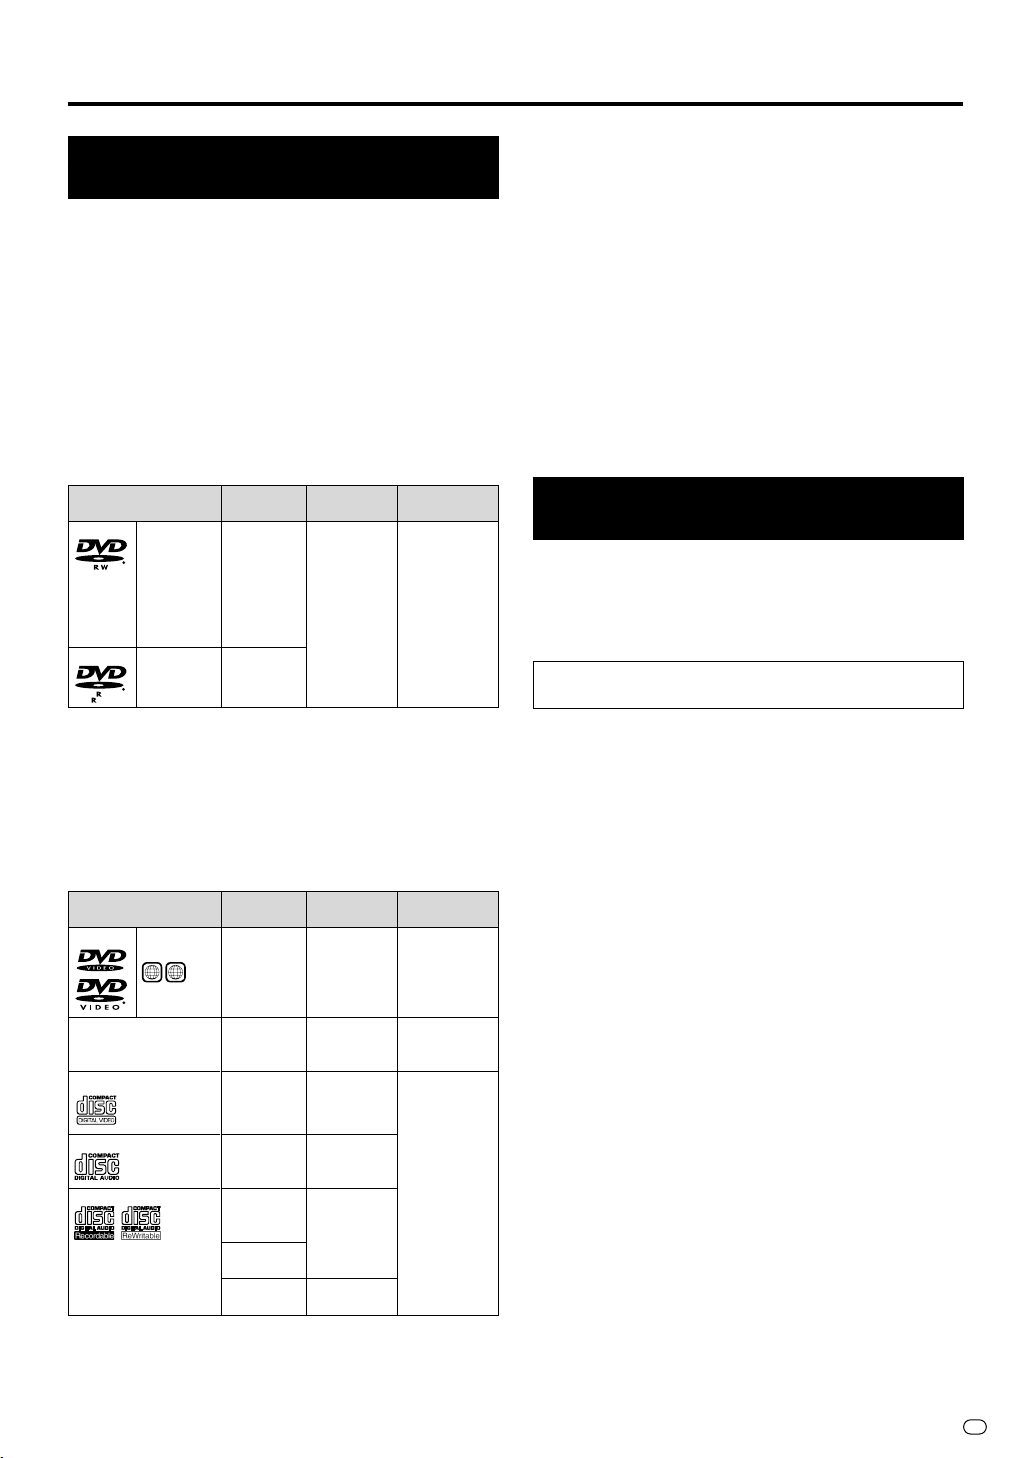
Discs For Recording and Playback
VR mode
Video mode
*1
*1
Video mode
*3
Recording
Format
Disc Type
DVD-RW
DVD-R
*1
*2
•Ver.1.1
•Ver.1.1
(CPRM
compatible)
•Ver.1.1/2g
(CPRM
compatible)
•Ver.2.0
•Ver.2.0/4g
4.7
“Copy Once” broadcasts and other programmes that
can be recorded only once can be recorded.
DVD-RW/R 8 cm (3") single-sided, single-layer discs can
only be used for recording in the Video mode. Some
discs of this type may not be able to be recorded.
*3
Not compatible with 4g high speed dubbing. When high
speed dubbing is used, the system will switch to 2g.
Discs for Playback (Playback Only)
Disc Type
DVD Video Region
DVD+RW/DVD+R
Video CD
Audio CD
CD-RW/CD-R
*4
number
ALL
2
*4
This Recorder has been designed on the premise of
playing back Audio CDs that comply with CD (Compact
Disc) standards. CDs containing a signal for the purpose
of protecting copyrights (copy control signal) may not be
able to be played back with this Recorder.
Recording
Format
Video mode
Video mode
(finalized disc
only)
Video CD
Audio CD
(CD-DA)
Audio CD
(CD-DA)
MP3 file
Video CD
Contents
Audio + Video
(Movie)
Contents
Audio + Video
(Movie)
Audio + Video
(Movie)
Audio + Video
(Movie)
Audio
Audio
Audio + Video
(Movie)
Disc Size
12 cm (5"),
single-sided/
double-sided,
single layer disc
8 cm (3"), singlesided, single
layer disc
Disc Size
12 cm (5")
8 cm (3")
12 cm (5")
12 cm (5")
8 cm (3")
• DVD video players and discs have region numbers,
which dictate the regions in which a disc can be played.
The region number for this product is 2. (Discs marked
ALL will play in any player.)
• DVD Video operations and functions may be different
from the explanations in this manual and some operations
may be prohibited due to disc manufacturer’s setting.
• If “CANNOT OPERATE THIS FUNCTION.” or “THIS
OPERATION IS PROHIBITED BY THE DISC.” is displayed,
either the disc or Recorder is prohibiting the function.
Read the disc’s manual along with this manual.
• If a menu screen or operating instructions are displayed
during playback of a disc, follow the operating procedure
displayed.
• This Recorder conforms to the PAL colour system. Also
you can play discs recorded with the NTSC system via a
PAL system TV set.
• JPEG files cannot be played back.
Discs that Cannot Be Used with
This Recorder
■ The following discs are unable to be played back or
are not played back properly on this Recorder. If such
a disc is mistakenly played back, the speakers may
*2
be damaged due to the large volume. Never attempt
to play back such discs.
CDG, Photo CD, CD-ROM, CD-TEXT, CD-EXTRA, SVCD,
SACD, PD, CDV, CVD, DVD-ROM, DVD-RAM, DVD-Audio
■ Discs with unusual shapes cannot be played.
• Discs with unusual shapes (heart-shaped or hexagonal
discs, etc.) cannot be used. The use of such discs will
cause a fault.
■ The following DVD video discs cannot be played.
• Discs not containing “2” or “ALL” for the region number
(discs sold outside the authorized marketing area).
*5
• Discs produced illegally.
• Discs recorded for commercial use.
*5
The region number for this product is 2.
■ The following DVD-RW/R, DVD+RW/R discs cannot be
played.
• Discs on which data has not been recorded cannot be
played back.
• Discs may not be played back depending on the
recorder used for recording.
■ The following Audio CD discs cannot be played.
• Discs containing a signal for the purpose of protecting
copyrights (copy control signal) may not be played
back with this Recorder.
• This Recorder has been designed on the premise of
playing back Audio CDs that comply with CD (Compact Disc) standards.
■ The following CD-RW/R discs cannot be played.
• Discs on which data has not been recorded cannot be
played back.
• Non-finalized discs cannot be played back.
• Discs recorded in a format other than a Video CD/
Audio CD and MP3 file format
*6
cannot be played back.
• Discs may not be played back depending on their
recording status or the status of the disc itself.
• Discs may not be played back depending on their
compatibility with this Recorder or the recorder used
for recording.
GB
9
About DVD
*6
About MP3 file format
MP3 files are audio data compressed in MPEG1 Audio
layer 3 file format. “MP3 files” have “.mp3” as extensions.
(Some files that have “.mp3” extensions or files that have
not been recorded in MP3 format will produce noise or
cannot be played.)
ÆÆ
Æ Playing MP3 discs
ÆÆ
• The MP3 files are not played in the order they were
recorded.
• The maximum number of layers which can be
recognized, including files and folders, is 8.
• Some multi-session discs cannot be played.
• It is recommended to record data at a lower speed as
data recorded at fast speed can produce noise and
may not be able to be played.
• The more folders there are, the longer the reading
time.
• Depending on the folder tree, reading MP3 files can
take time.
• Folder or track (file) names are limited to 8 characters.
Folder or track (file) names that go over 8 characters
will be abbreviated. (Certain letters or symbols in
folder names or title name may not be displayed.)
• The playing time may not be correctly displayed
during MP3 file playback.
ÆÆ
Æ The following files cannot be played on this
ÆÆ
Recorder.
• Discs that have more than 257 folders or 1,000 files.
• When both Audio CD format and MP3 files format are
recorded on a disc. (The disc is recognized to be an
Audio CD and only tracks in the Audio CD format are
played back.)
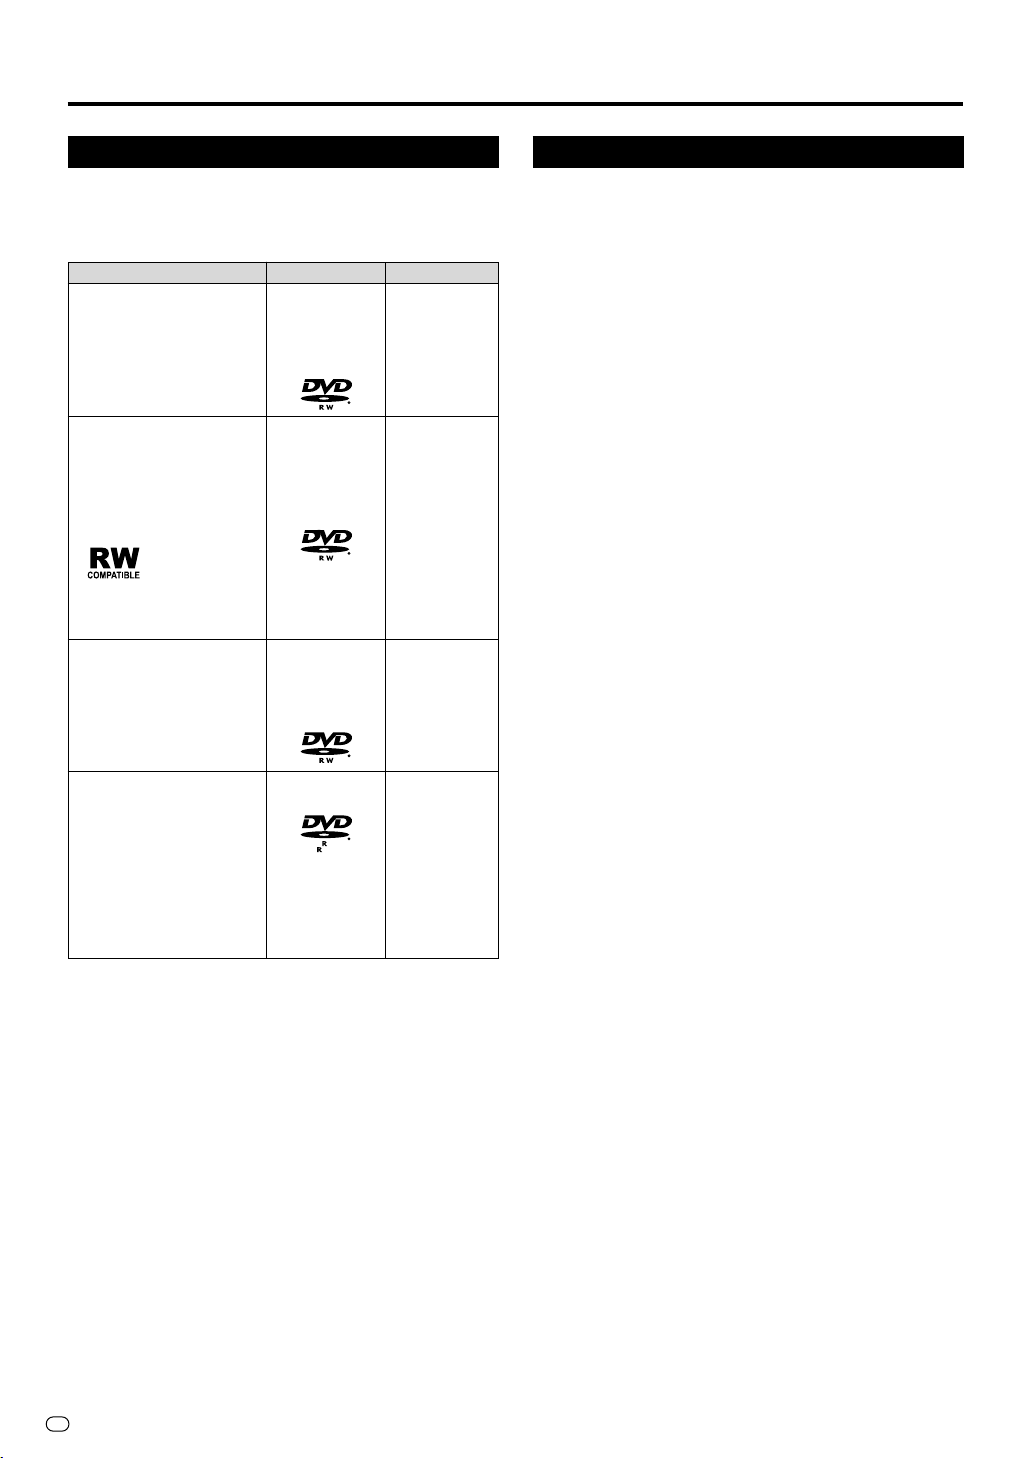
Types of Discs for Recording
• DVD-RW and DVD-R discs can be recorded with this
Recorder. The recording format that can be selected may
vary according to the disc version and type of disc.
• Make sure to use a disc that has the words “For Video” or
“For Recording” on the disc or disc jacket for recording
and playback with this Recorder.
Disc Type
DVD-RW Ver. 1.1
DVD-RW Ver. 1.1
(CPRM)
DVD-RW Ver. 1.1/2g
(CPRM)
DVD-R Ver. 2.0
DVD-R Ver. 2.0/4g
DVD-RW Discs
• DVD-RW discs are available in Ver. 1.1, Ver. 1.1
(CPRM compatible) or Ver. 1.1/2g (CPRM
compatible).
• When a disc has been recorded in the VR mode, it
can be recorded and erased repeatedly. Erasure also
allows the recording time to be increased.
• When a disc has been recorded in the Video mode,
additional recording is possible until the disc is full.
The recording time does not increase*7 even if titles
are erased, but if the disc is initialized (see pages 13
and 95) full recording time is possible.
*7
Recording time can only be increased when the last
title is erased (titles cannot be erased after a disc
has been finalized).
Recording Format
VR mode
×
—
Video mode
×
×
DVD-R Discs
• DVD-R discs can only be recorded in the Video
mode.
• Although additional recordings can be made until the
disc is full, disc space does not increase even if titles
are erased (because erasure here refers only to
making the titles not visible).
• Although these discs can be played back with other
DVD players once they have been finalized, the discs
can no longer be recorded or erased after they have
been finalized.
• Discs can be additionally recorded and edited with
this Recorder only until they are finalized.
GB
10
About DVD
Recording Formats
• There are two recording formats available with this
Recorder: the VR mode and the Video mode.
• The recording format that can be selected may differ
depending on the disc. Refer to the section on Types of
Discs for Recording (page 10).
• Recording in the VR mode and Video mode cannot be
mixed on one disc.
VR (Video Recording) Mode
The VR mode is the basic DVD-RW recording format,
and lets you enjoy the various editing functions
available with this Recorder.
• When a disc has been recorded in the VR mode, it can
be recorded and erased repeatedly. Erasure also allows
the recording time to be increased.
• Recorded discs can only be played back with DVD-RW
compatible DVD players
• “Copy Once” programmes can also be recorded*9.
*8
• Although there are some cases in which the disc must
be finalized, the disc can be recorded and erased
after it has been finalized.
• DVD-RW compatible DVD players have the following
indication.
DVD players with this indication have the function of
being able to play back DVD-RW discs recorded in
the VR mode with a DVD recorder.
*9
When using a DVD-RW Ver. 1.1 disc (CPRM compatible).
Recorded programmes cannot be played back with
other DVD players (including DVD-RW players) or DVD
recorders not compatible with CPRM.
Video Mode
This recording format is compatible with commercially
available DVD players and DVD-ROM drives.
• Discs recorded in the Video mode cannot be recorded
repeatedly or their content overwritten.
• When recording in the Video mode, discs can be played
back, additionally recorded and edited only with this
Recorder until they are finalized. Editing functions are
limited.
• Discs recorded in the Video mode can be played back
with other DVD players by finalizing them after recording.
(However, this does not guarantee that these discs can
be played back on all DVD players.)
• Recordings onto DVD-RW/R discs using the Video mode
employ a new standard approved by the DVD Forum in
2000, and compatibility with this standard is left to the
discretion of the respective DVD player manufacturer.
Consequently, there are some models of DVD players
and DVD-ROM drives that are unable to play back DVDRW/R discs.
• “Copy Once” programmes cannot be recorded.
*8
.
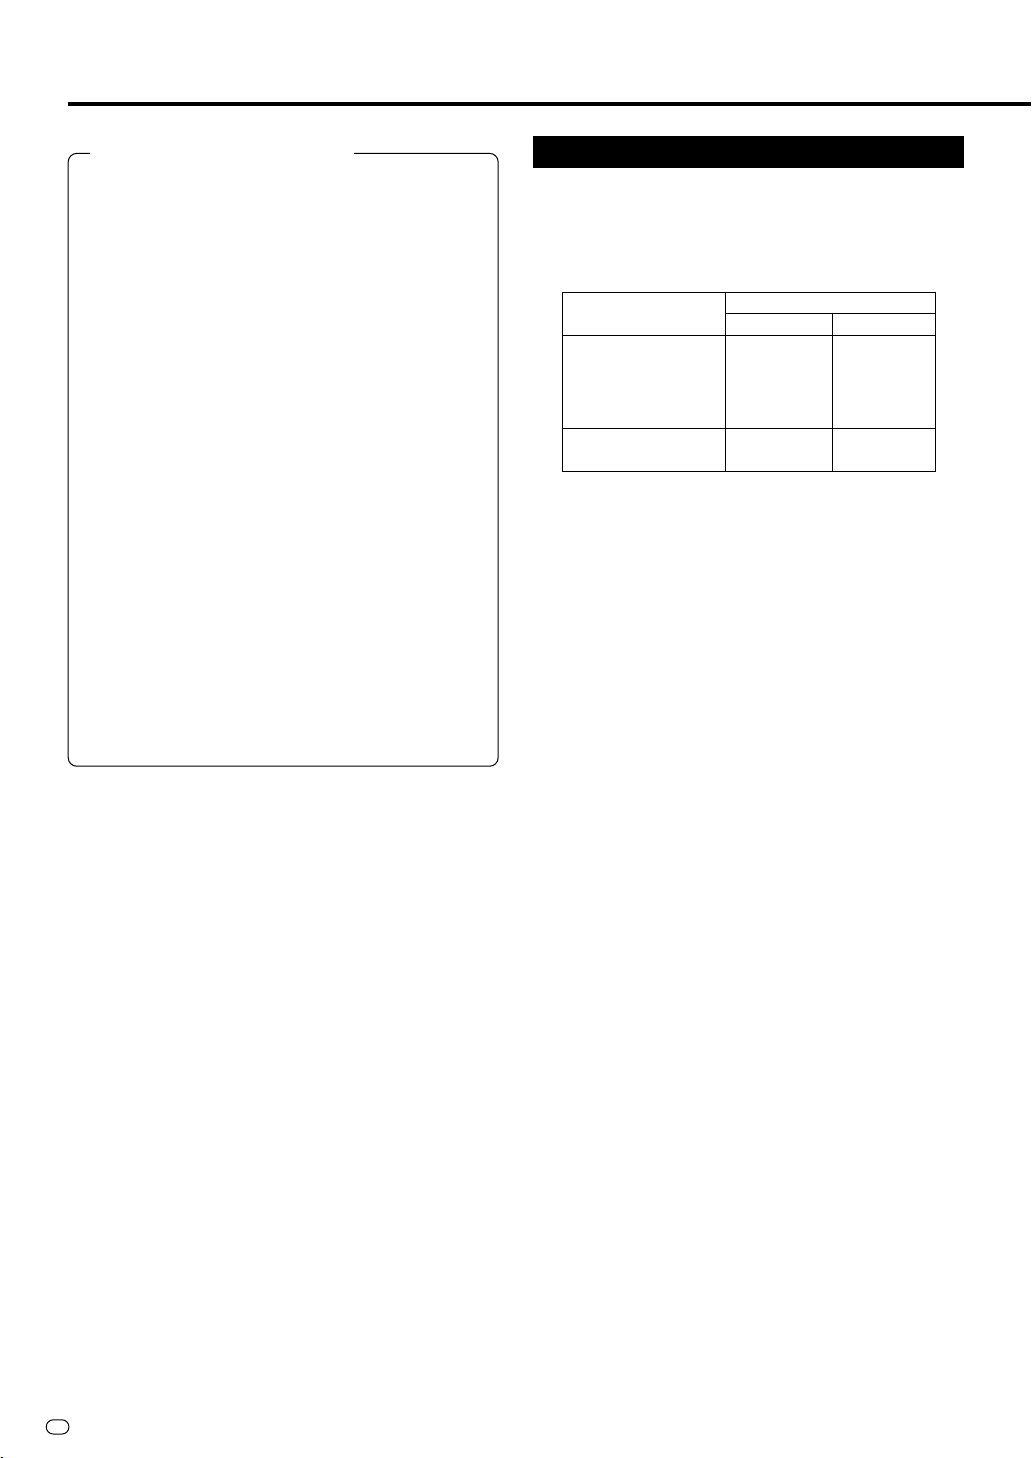
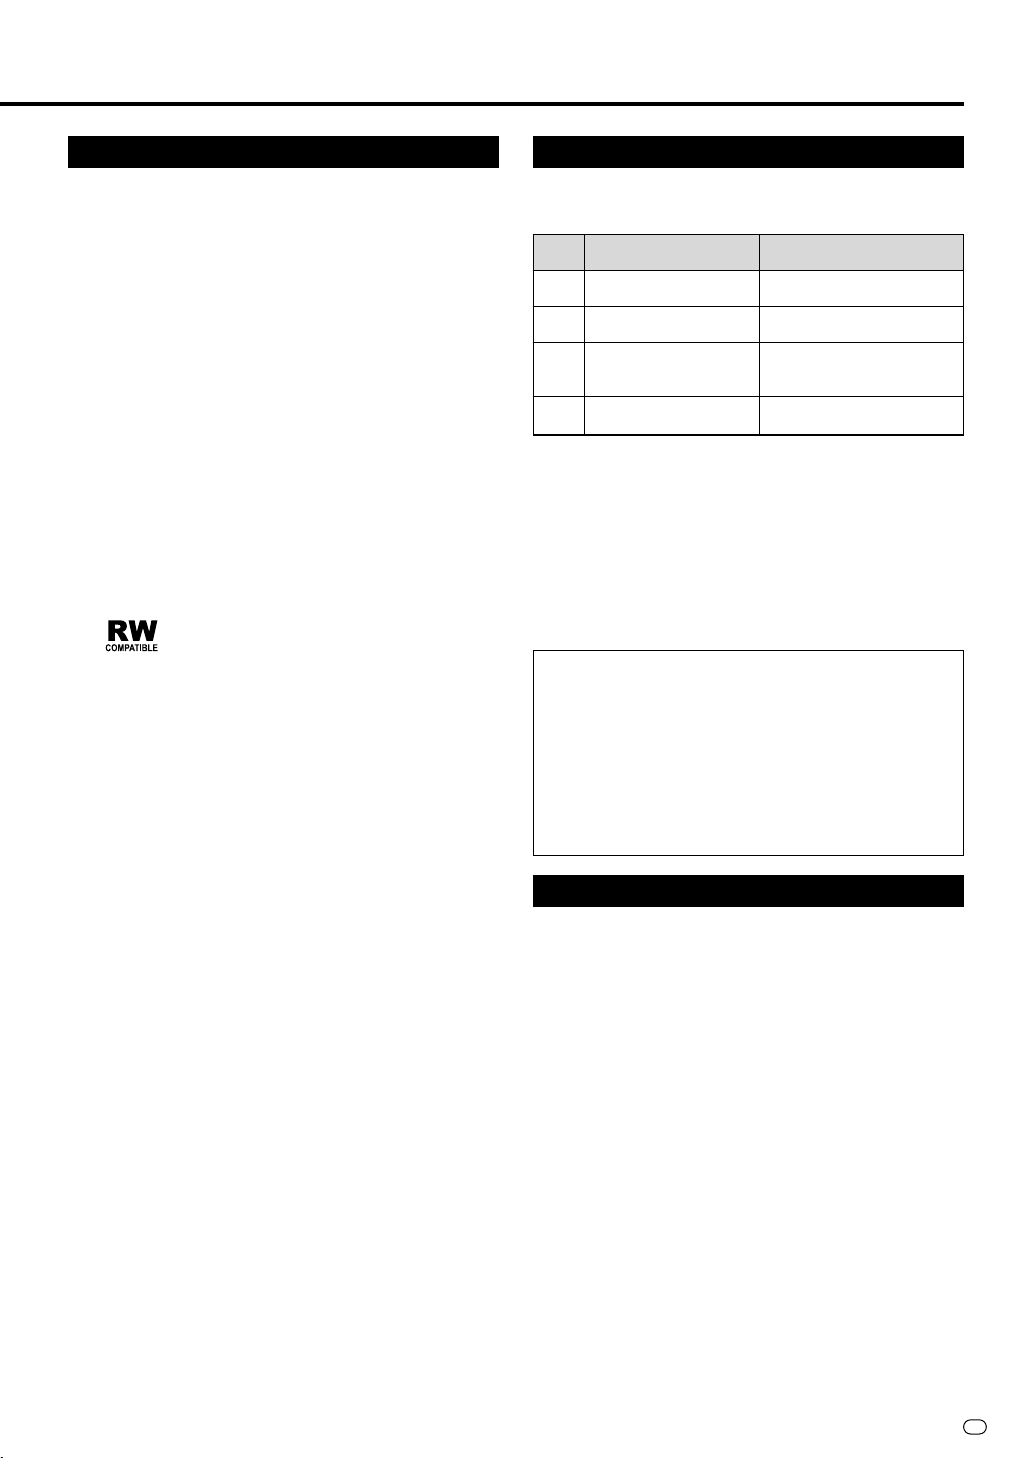
Recording Time
• The recording mode that can be set varies according to
the recording format. Refer to the table below for the
applicable recording mode.
Recording
Mode
FINE
SP
LP
EP
Recordable Time
About 60 minutes
About 120 minutes
About 240 minutes
About 360 minutes
Description
When you want to record highquality images.
This is the standard recording
mode.
When you want to record for a long
period of time with slightly lower
image quality.
When you want to place priority on
recording time.
• Recordable time is based on the recording time when
using a 4.7 GB disc. Since recording capacity varies
according to the recorded material, there may be cases
where there is much more disc space remaining on the
disc when recording is completed.
• Refer to page 37 about the recordable times when you
choose “MN” (manual) Recording mode.
* Since recording to DVD is performed using VBR (variable
bit rate, refer to the section on VBR Control on page 105)
with the exception of some recording modes, recording
time varies according to the material to be recorded.
• Recordable time may be shorter than that indicated above in
the case of recording material of poor image quality such as
broadcasts from televisions with poor reception.
• This does not guarantee the length of recording time. Actual
recording time may be shorter than that indicated above
depending on image quality and other aspects.
• The total of recording time and remaining time may not always
agree with the recordable time of the recording mode.
• Block-like images may become conspicuous during scenes
containing rapid movement due to the characteristics of digital
image compression technology.
Disc Remaining Time
ÆÆ
Æ VR mode
ÆÆ
• Additional recordings can be made as long as there is
available space on the disc. (Additional recordings
can also be made after the disc is finalized.)
• Erasing unnecessary recordings lets you increase the
remaining time on the disc. (The disc can also be
erased after it has been finalized.)
• When a Play List (see page 74) is created, disc space
will not increase even if portions of titles or titles of
Play List are erased.
ÆÆ
Æ Video mode
ÆÆ
• Additional recordings can be made with this Recorder
provided there is available space on the disc until the
disc is finalized.
• In case you record on a DVD-RW disc, recordable
time will increase if you erase the last recorded title
unless you finalize the DVD-RW disc.
• In case you record on a DVD-R disc, recordable time
will not increase even if you erase titles (see page 73).
(The erase function only hides the title, it does not
actually erase it. It does not actually delete the
recorded contents.)
11
GB
About DVD
Using the Proper Disc
Select the disc and recording format to be used
according to the objective of the recording.
Select the disc and recording format by referring
to the table below.
Objective
•
When you want to play
back a recorded disc with
a DVD player or DVD
Video compatible PC
• When you want to
repeatedly record and
erase a recorded disc
• When you want to edit
a disc recorded with
this Recorder
• When playing back with
a DVD-RW compatible
player with the
following indication
• When you want to
repeatedly record and
erase a recorded disc
• When you want to
record a “Copy Once”
satellite broadcast, etc.
Disc Used
Recordable
DVD-RW disc
Ver. 1.1 or Ver.
1.1 (CPRM
compatible)
Recordable
DVD-RW disc
Ver. 1.1 or
Ver. 1.1
(CPRM
compatible)
Recordable
DVD-RW disc
Ver. 1.1
(CPRM
compatible)
Recording Format
Video mode
recording
+
finalization
VR mode
recording
+
(finalization)
VR mode
recording
Unrecordable Material
ÆÆ
Æ This Recorder is equipped with a copy guard
ÆÆ
function that prevents recording of video software
or broadcast programmes that contain a signal that
restricts copying in accordance with copyrights and
so forth.
Example:
• DVD videos
• PPV (pay-per-view) broadcasts
ÆÆ
Æ The proper image may not be obtained in the case
ÆÆ
a copy guard signal is contained in the images
input from equipment connected to the external
input jacks (LINE 1, LINE 2, LINE IN 3 or DV IN) of
this Recorder.
Example:
• Images not output at proper brightness
• Incorrect output of picture size and other data
Connect such equipment directly to your TV
without going through this Recorder.
ÆÆ
Æ In the case a copy guard signal is contained in a
ÆÆ
source video that occurs part way through recording, recording is paused at that point. Recording
resumes when the copy guard signal is no longer
present, while no recordings will be made for the
part where the copy prevention signal is present.
When you want to play
•
back a recorded disc with
a DVD player or DVD
Video compatible PC
• When not re-recording a
recorded disc (when
making a permanent
recording or when you
do not want the
recording to be erased)
Recordable
DVD-R disc
4.7
Video mode
recording
+
finalization
GB
12

Initialization and Finalization
Initialization (Formatting)
Initialization is required when using DVD-RW discs in the Video mode. (See page 95 for details about Initialization.)
When an unused DVD-RW disc is placed in the Recorder immediately after the disc has been purchased, the Recorder is set
to automatically begin initializing in the VR mode. The settings can also be changed so that discs are initialized in the Video
mode (page 95).
When using a DVD-RW disc in the Video mode without changing this setting, initialize the disc in the Video mode after first
completing initialization in the VR mode (page 95).
• Initialization causes the entire previously recorded contents of the disc to be erased.
• It takes about 1 minute to 1 minute and 30 seconds for initialization to be completed.
Allowing Discs to Be Played Back with Other DVD Players (Finalization)
Discs must always be finalized in order to play them back with another DVD player after having been recorded in
the Video mode. (See page 95 for details about Finalization)
Finalize discs on which all recordings have been completed so that they can be viewed with another DVD player or a DVD
Video compatible PC. Discs that are not finalized may not be able to be played back with other DVD players or DVD Video
compatible PCs. (However, this does not guarantee that finalized discs can be played back on all DVD players or DVD Video
compatible PCs.)
• Finalizing a DVD-R disc prevents all recording and editing of that disc.
• Although DVD-RW discs can be re-recorded by initializing even after they have been recorded in the Video mode and
finalized, all previously recorded contents are erased.
• Finalization is required if a disc recorded in the VR mode cannot be played back with a DVD-RW compatible player. (Discs
formatted in the VR mode can be recorded and edited even after finalization.)
• Finalization takes from several minutes to about an hour. (Processing takes longer if there is considerable available space
on the disc.)
The following operations may cause malfunction.
• Operating discs recorded or edited by this Recorder in a DVD recorder or PC’s DVD drive manufactured by other manufacturers.
• Using the discs in above situation again with this Recorder.
• Operating discs recorded or edited by a DVD recorder or PC’s DVD drive made by other manufacturers than the one for
this Recorder.
About the Contents of the Disc
Title, Chapter and Track
• DVDs are divided into “Titles” and “Chapters”. If the disc
has more than one movie on it, each movie would be a
separate “Title”. “Chapters”, on the other hand, are
subdivisions of titles. (See Example 1.)
• Video CDs and Audio CDs are divided into “Tracks”. You
can think of a “Track” as one tune on an Audio CD. (See
Example 2.)
Recording on a DVD-RW/R disc
• One recording is treated as one title and the chapters will
be inserted automatically every 10 minutes. You can
choose the chapter interval from the following: 10
minutes, 15 minutes, 30 minutes, or off (page 84).
• Each title, chapter and track will be numbered in order.
Title, chapter and track may not be numbered in some
discs.
Recording on a DVD-RW disc in VR mode
• When you pause during recording or erase the scene using edit function, chapter marks will be inserted automatically. You
can also insert chapter marks at your favorite scenes (page 71).
Recording in Video mode
• You cannot insert chapter marks at your favorite scenes.
Example 1: DVD
Title 1
Chapter 1 Chapter 2 Chapter 3
Example 2: Video CD or Audio CD
Track 1 Track 2 Track 3 Track 4 Track 5
Title 2
Chapter 1 Chapter 2
13
GB
About the Contents of the Disc
Icons Used on DVD Video Disc Case
When you buy a DVD Video disc, the back of the disc case
usually contains various information about the contents of
the disc.
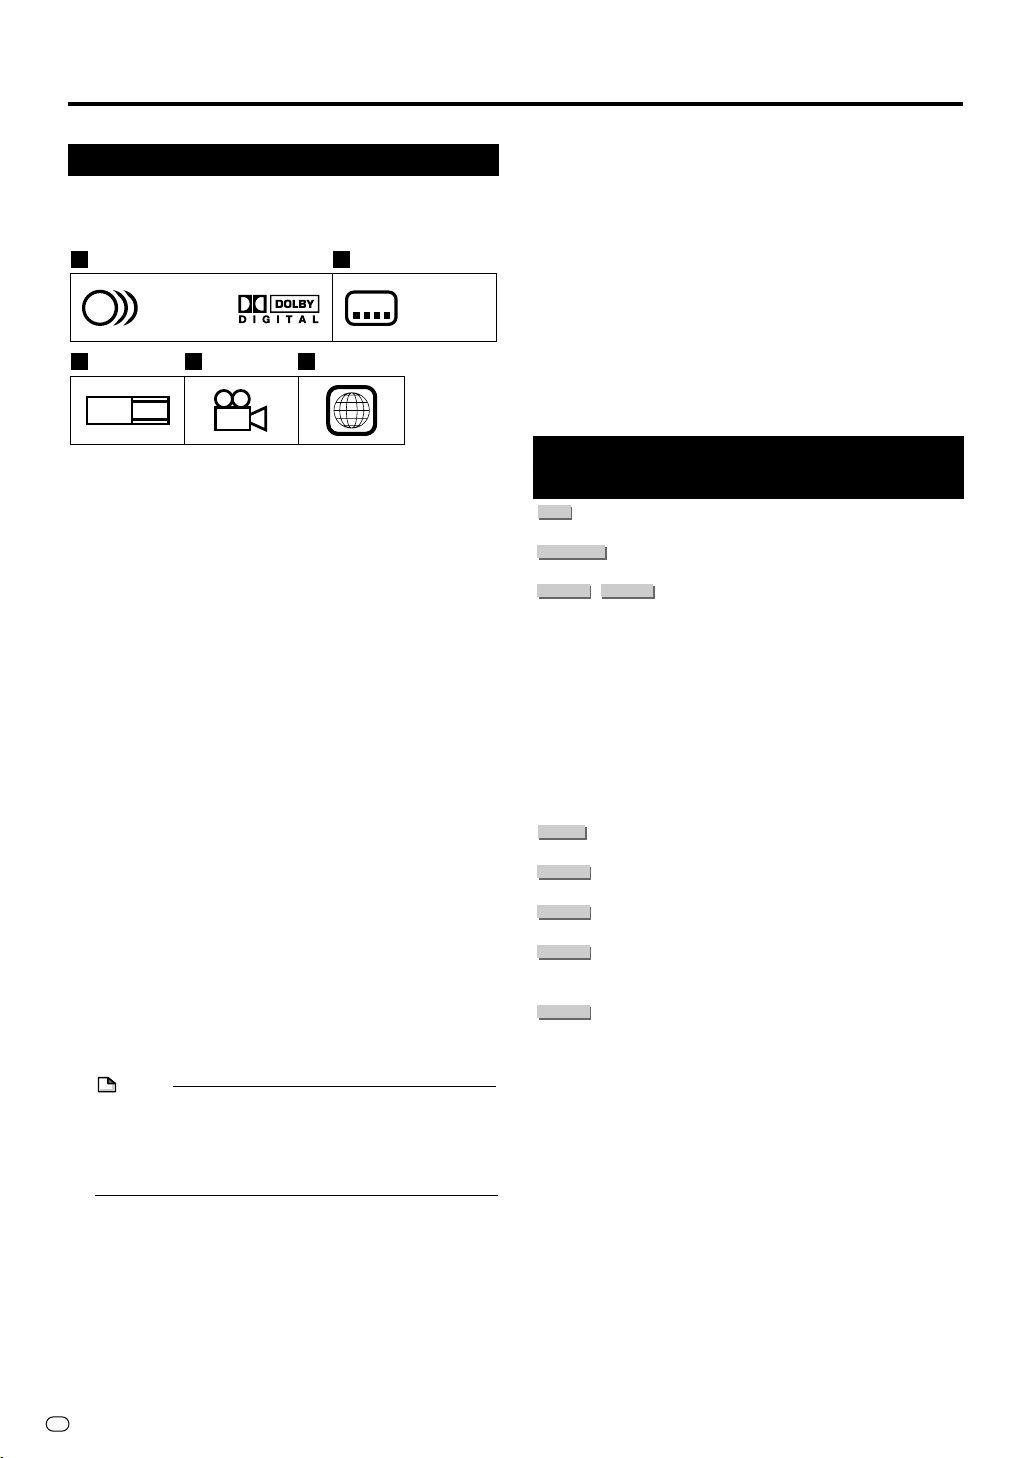
1 2
1. English
2
2. Chinese
3 4 5
LB
16:9
z Audio tracks and audio formats
DVD discs can contain up to 8 separate tracks with a
different language on each. The first in the list is the
original track.
This section also details the audio format of each
soundtrack—Dolby Digital, DTS, MPEG etc.
Dolby Digital
A sound system developed by Dolby Laboratories Inc.
that gives movie theatre ambience to audio output when
the Recorder is connected to a Dolby Digital processor
or amplifier.
DTS
DTS is a digital sound system developed by Digital
Theater Systems for use in cinemas. This system uses 6
audio channels and provides accurate sound field
positioning and realistic acoustics. (By connecting a
DTS Digital Surround decoder, you can also listen to
DTS Digital Surround sound.)
Linear PCM
Linear PCM is a signal recording format used for Audio
CDs.
The sound on Audio CDs is recorded at 44.1 kHz with
16 bits. (On DVD discs, sound is recorded at between
48 kHz with 16 bits and 96 kHz with 24 bits.)
MPEG
MPEG Audio gives movie theatre ambience to audio
output when the Recorder is connected to an MPEG
Audio 5.1 channel processor or amplifier.
NOTE
• This Recorder supports 2-channel(L/R) audio and
5.1ch(Multi-channel) MPEG Audio 1/2(only when the
DIGITAL AUDIO Output COAXIAL jack is used for
connection). It does not support 7.1 channel MPEG
Audio Version 2.0.
2
213
546
2
1. English
2. Chinese
x Subtitle languages
This indicates the kind of subtitles.
c Screen aspect ratio
Movies are shot in a variety of screen modes.
v Camera angle
Recorded onto some DVD discs are scenes which have
been simultaneously shot from a number of different
angles (the same scene is shot from the front, from the
left side, from the right side, etc.).
b Region code
This indicates the region code (playable region
number).
The Icons Used in This
Operation Manual
HDD
...................... Indicates the functions that can be
DVD VIDEO
DVD-RW
VR MODE
DVD-R
VIDEO CD
AUDIO CD
CD-R
CD-RW
.............. Indicates the functions that can be
DVD-RW
VIDEO MODE
................... Indicates the functions that can be
.................. Indicates the functions that can be
.................. Indicates the functions that can be
.................. Indicates the functions that can be
MP3
.................. Indicates the functions that can be
MP3
performed for the hard disc.
performed for DVD Video discs.
... Indicates the functions that can be
performed for DVD-RW discs.
VR MODE:
• Indicates that the function will
operate when recording in VR mode
or playing back a disc recorded in
VR mode.
VIDEO MODE:
• Indicates that the function will
operate when recording in Video
mode or playing back a disc
recorded in Video mode.
performed for DVD-R discs.
performed for Video CDs.
performed for Audio CDs.
performed for CD-R discs in MP3
format.
performed for CD-RW discs in MP3
format.
GB
14

Important Information
Disc Precautions
Be Careful of Scratches and Dust
• DVD-RW and DVD-R discs are sensitive to dust, fingerprints and especially scratches. A scratched disc may
not be able to be recorded, or important data recorded
may not be able to be played back. Handle discs with
care and store them in a safe place.
Proper Disc Storage
Place the disc in the centre of
the disc case and store the
case and disc upright.
Avoid storing discs in locations
subject to direct sunlight, next
to heating appliances or in
locations of high humidity.
Do not drop discs or subject
them to strong vibrations or
impacts.
Avoid storing discs in locations
where there are large amounts
of dust or locations where mold
tends to grow easily.
Handling Precautions
• If the surface is soiled, wipe gently with a soft, damp
(water only) cloth. When wiping discs, always move the
cloth from the centre hole toward the outer edge.
• Do not use record cleaning sprays, benzene, thinner,
static electricity prevention liquids or any other solvent.
• Do not touch the surface.
• Do not stick paper or adhesive labels to the disc.
• If the playing surface of a disc is soiled or scratched, the
Recorder may decide that the disc is incompatible and
eject the disc tray, or it may fail to play the disc correctly.
Wipe any soiling off the playing surface with a soft cloth.
Cleaning the Pick Up Lens
• Never use commercially available cleaning discs. The
use of these discs can damage the lens.
• Request cleaning of the lens to the nearest service centre
approved by Sharp.
Warning of Dew Formation
• Dew may form on pick up lens or disc in the following
conditions:
• Immediately after a heater has been turned on.
• In a steamy or very humid room.
• When the Recorder is suddenly moved from a cold
environment to a warm one.
When dew forms:
It becomes difficult for the Recorder to read the signals
on the disc and prevents the Recorder from operating
properly.
To remove dew:
Take out the disc and leave the recorder with the power
off until the dew disappears. Using the recorder with
dew formation may cause malfunction.
Copyright
• Audio-visual material may consist of copyrighted works
which must not be recorded without the authority of the
owner of the copyright. Please refer to relevant laws in
your country.
• This product incorporates copyright protection technology
that is protected by method claims of certain U.S. patents
and other intellectual property right owned by Macrovision
Corporation and other rights owners. Use of this copyright
protection technology must be authorized by Macrovision
Corporation, and is intended for home and other limited
viewing uses only unless otherwise authorized by
Macrovision Corporation. Reverse engineering or
disassembly is prohibited.
Apparatus Claims of U.S. Patent Nos. 4,631,603,
4,577,216, 4,819,098 and 4,907,093 licensed for
limited viewing uses only.
• Manufactured under license from Dolby Laboratories.
“Dolby” and the double-D symbol are trademarks of
Dolby Laboratories.
•“DTS” and “DTS Digital Out” are trademarks of Digital
Theater Systems, Inc.
• Certain audio features of this product manufactured
under a license from Desper Products, Inc.
N-2-2™ and the circle-in-square device are trademarks
owned by Desper Products, Inc.
• The DVD logo is a registered trademark.
• i.LINK refers to the IEEE 1394-1995 industry specification
and extensions thereof. The logo is used for products
compliant with the i.LINK standard.
•
• S
is a trademark.
HOWVIEW is a registered trademark of Gemstar
Development Corporation. The SHOWVIEW System is
manufactured under licence from Gemstar Development
Corporation.
Spatializer
®
Cautions Regarding Recording
ÆÆ
Æ Always Make Sure to Test Record First
ÆÆ
• Make a test recording with a DVD-RW disc first before
making any important recordings to confirm whether
or not the recorded material is recorded properly.
ÆÆ
Æ Compensation for Recordings
ÆÆ
• In the event a recording is unable to be made due to a
problem with this Recorder or a disc, or due to an
external factor such as a power failure or condensation of moisture and so forth, the manufacturer is not
responsible for compensation for unrecorded contents
or incidental damages.
15
GB
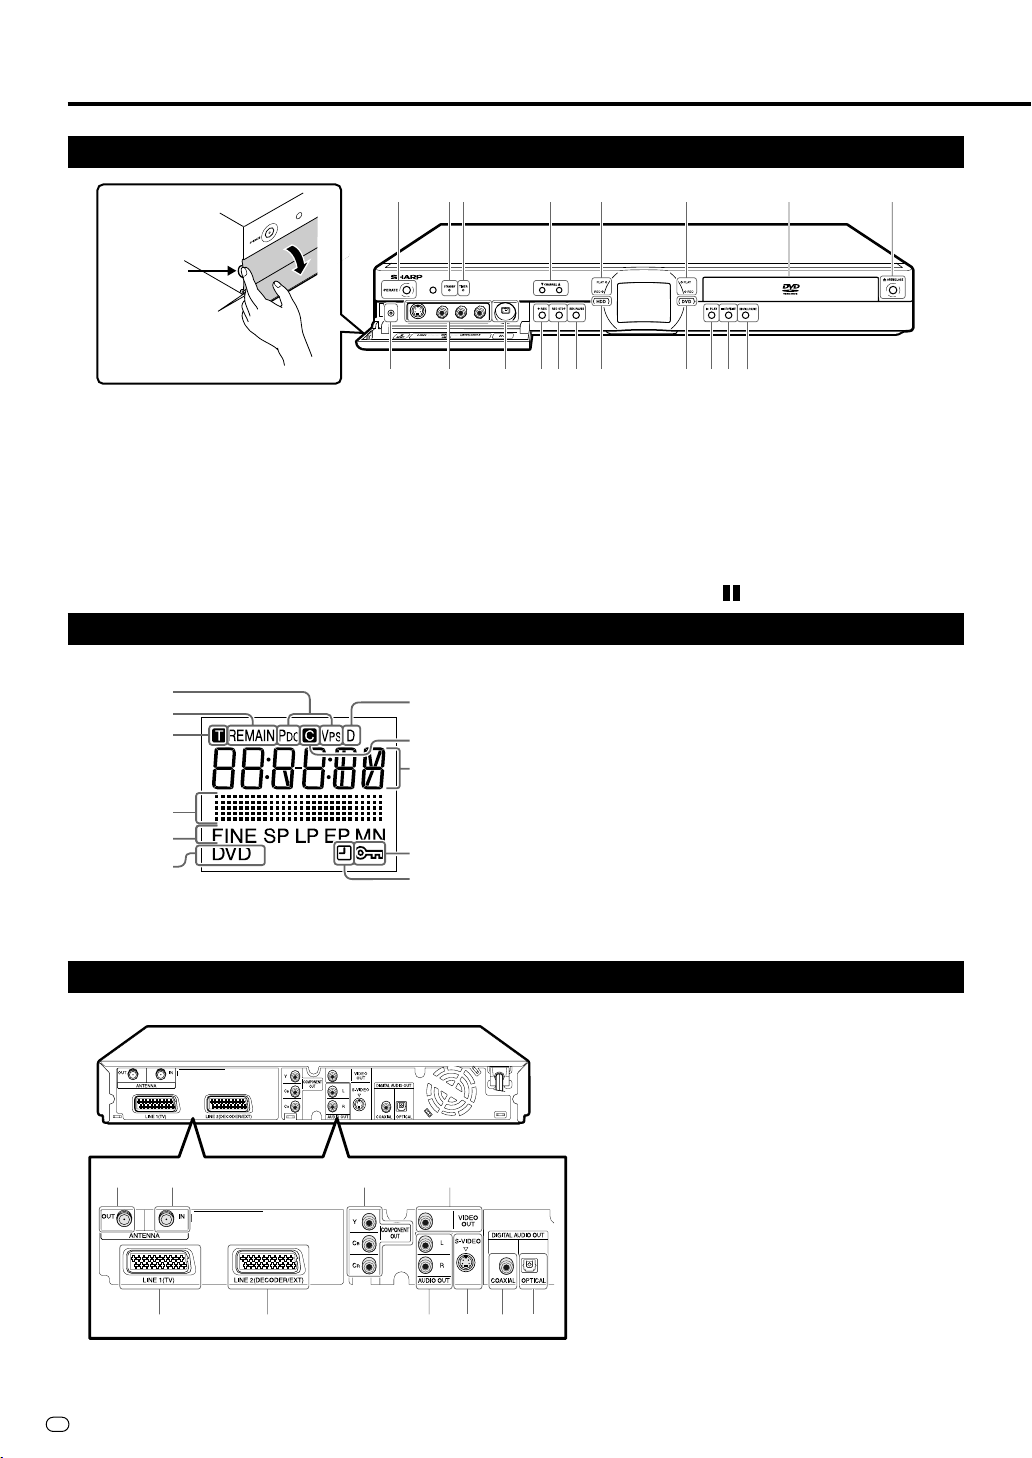
Major Components
Main Unit (Front)
1
2 3 4 5 6 87
To open the
front door, lay
your finger on
this part and pull
toward you.
10 11 12 13 14 15 16 17 18 19
9
1 OPERATE (p. 22)
2 STANDBY indicator (p. 22)
3 TIMER indicator (p. 40)
4 CHANNEL "/'
5 PLAY/REC indicators
(for HDD) (pp. 34, 50)
6 PLAY/REC indicators
(for DVD) (pp. 36, 55)
Front Panel Display
7 Disc tray (p. 35)
8 OPEN/CLOSE (p. 35)
9 RESET (p. 99)
10
LINE IN 3 (p. 83)
• AUDIO Input jacks
• VIDEO Input jack
• S-VIDEO Input jack
11 DV IN terminal (p. 81)
ÆÆ
12
Æ REC (p. 34)
ÆÆ
13 REC STOP (p. 34)
14 REC PAUSE (p. 34)
15 HDD (p. 30)
16 DVD (p. 30)
||
17
| PLAY (p. 50)
||
18 ■ STOP/LIVE (pp. 32, 50)
19 STILL/PAUSE (pp. 32, 53)
1
2
3
7
8
9
4
5
6
10
11
Main Unit (Rear)
1 2 56
3 478910
1 PDC/VPS indicator
2 Disc Remaining Time indicator (p. 29)
3 Title indicator (p. 29)
4 Dubbing indicator (p. 47)
5 Recording Mode indicator (p. 34)
6 DVD indicator (p. 20)
7 Decoder indicator
8 Chapter indicator (p. 29)
9 Information Display (p. 29)
10 Tamper Proof indicator (p. 33)
11 Simple Recording Timer indicator (p. 34)
1 ANTENNA OUT jack (p. 20)
2 ANTENNA IN jack (p. 20)
3 21-pin Euro-SCART (LINE 1 (TV)) (p. 20)
4 21-pin Euro-SCART (LINE 2
(DECODER/EXT)) (p. 20)
5 COMPONENT Video Output jacks
(p. 21)
6 VIDEO Output jack (p. 21)
7 AUDIO Output jacks (p. 79)
8 S-VIDEO Output jack (p. 21)
9 DIGITAL AUDIO Output COAXIAL jack
(p. 79)
10 DIGITAL AUDIO Output OPTICAL
terminal (p. 79)
GB
16

Remote Control Unit
1
2
3
4
5
6
7
8
9
10
11
12
13
14
15
16
17
18
NOTE
• Buttons marked with “*” are made of
luminous rubber for easy visibility even in
the dark. (The degree of brightness will
decrease as time passes.)
19
20
21
22
23
24
25
26
27
28
29
30
31
32
33
34
35
36
37
4238
4339
4440
4541
46
Major Components
1 OPERATE (p. 22)
2 OPEN/CLOSE (p. 35)
3 Number buttons (pp. 19, 39)
4 TV/DVD (p. 20)
5 TIMER ON/OFF (p. 40)
6 TIME SHIFT (p. 32)
7* START MENU (p. 24)
8* HDD (p. 30)
9* REC LIST/DVD TITLE (pp. 51, 59)
10* Cursor buttons (' /" /\ /|) (pp. 22, 24)
11* EXIT (p. 24)
12 Blue (A), Red (B), Green (C), Yellow (D) (p. 51)
13* REV (pp. 32, 53, 57)
14* STILL/PAUSE (pp. 32, 53, 57)
15* ■ STOP/LIVE (pp. 32, 50, 56)
16 F.ADV , SKIP (pp. 53, 56, 57)
ÆÆ
17
Æ REC (pp. 34, 36)
ÆÆ
18 REC STOP (pp. 34, 36)
19 TV CONTROL buttons (p. 19)
20 CH " /'
21 DIRECT (p. 52)
22 SHOWVIEW (p. 39)
23 ERASE (pp. 39, 43)
24 DUBBING (p. 46)
25 P IN P (p. 63)
26 INPUT/ Repeat (pp. 54, 57, 82)
27* DVD (p. 30)
28* ORIGINAL/PLAY LIST / DVD MENU
(pp. 51, 59, 66)
29* SET/ENTER (pp. 22, 24)
30* n RETURN (p. 24)
31* | PLAY (pp. 32, 50, 56)
32* FWD (pp. 32, 53, 57)
33* SLOW (pp. 53, 57)
34 REPLAY (pp. 53, 57)
35 SKIP SEARCH (pp. 53, 57)
36 REC MODE / ZOOM (pp. 34, 36, 54, 58)
37 REC PAUSE (pp. 34, 36)
38 ANGLE (p. 58)
39 FUNCTION (p. 61)
40 DIRECT REC TV (p. 38)
41 CHAPTER MARK / RGB OFF
(pp. 21, 34, 36, 50, 55)
42 AUDIO (pp. 28, 54, 58)
43 SUBTITLE (p. 58)
44 DISPLAY / BACKLIGHT (p. 29)
45 ON SCREEN (p. 28)
46 TAMPER PROOF (p. 33)
17
GB
Major Components
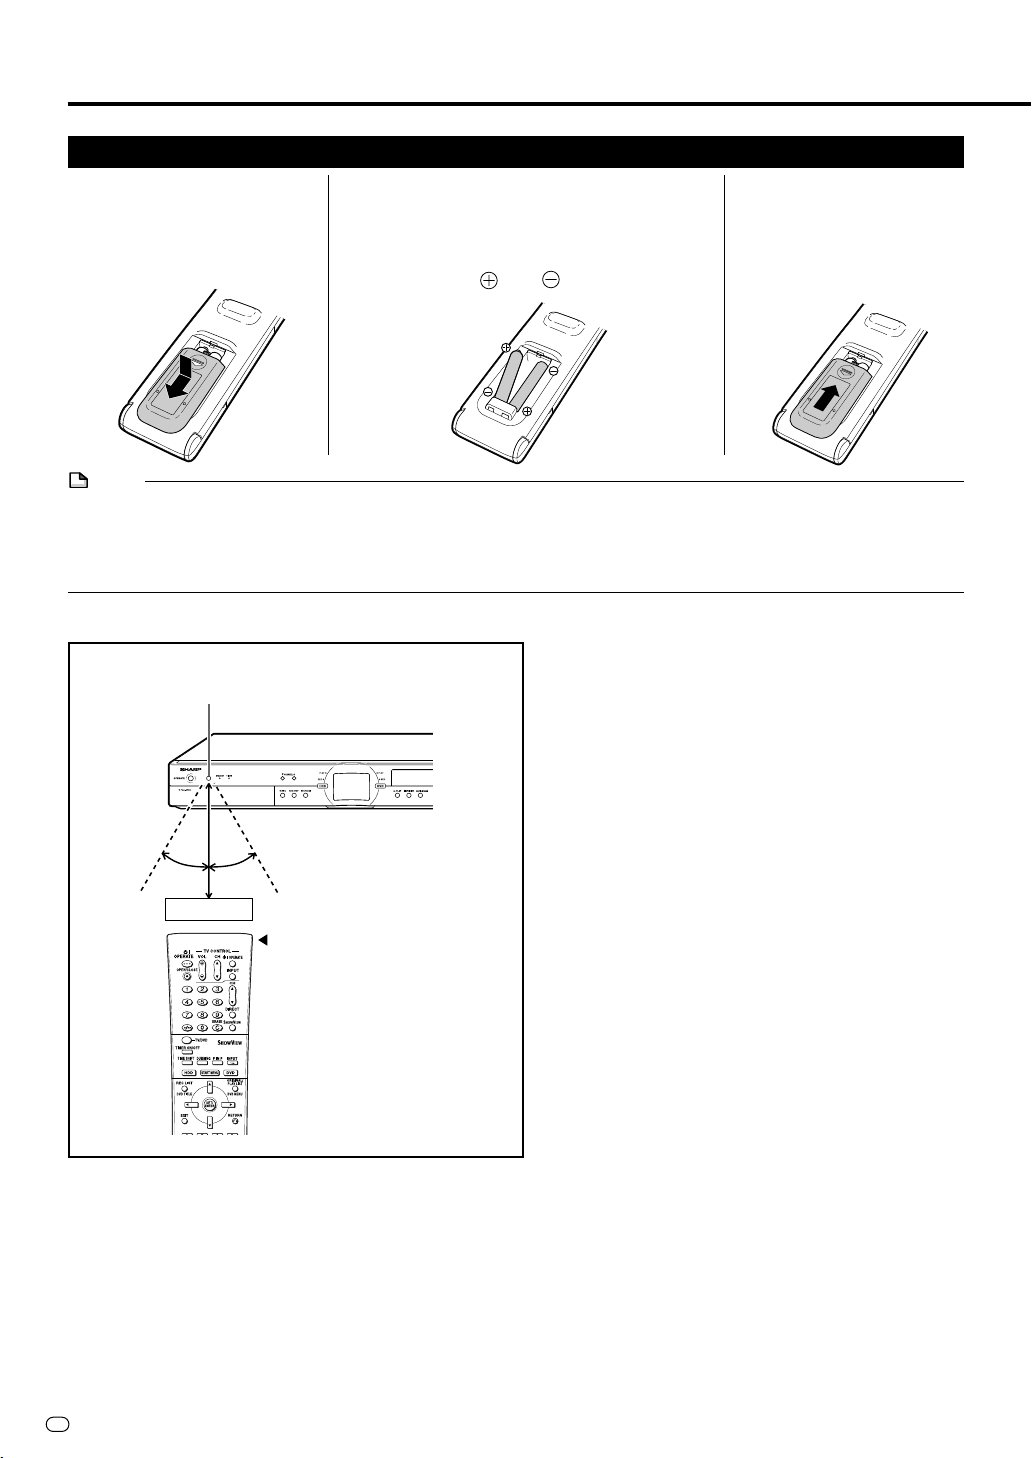
Loading the Batteries
1
While pressing Y down,
slide the battery cover in
the direction of the
arrow.
NOTE
• Do not subject the remote control unit to shock, water or excessive humidity.
• The remote control unit may not function if the Recorder’s remote sensor is in direct sunlight or any other strong light.
• Incorrect use of batteries may cause them to leak or burst. Read the battery warnings and use the batteries properly.
• Do not mix old and new batteries, or mix different brands.
• Remove the batteries if you will not use the remote control unit for an extended period of time.
2
Load the batteries.
Load the two R-03 size batteries (“AAA”
size, UM/SUM-4) supplied with the
remote control unit. Make sure that the
battery poles
as indicated.
and are positioned
3
Slide the battery cover
in the direction of the
arrow until it clicks.
Operating range of remote control
Remote sensor
About 30°
About 30°
Front 7m
Remote control
unit
GB
18
Major Components
CHANNEL
''
""
' /
"
''
""
Front display
panel
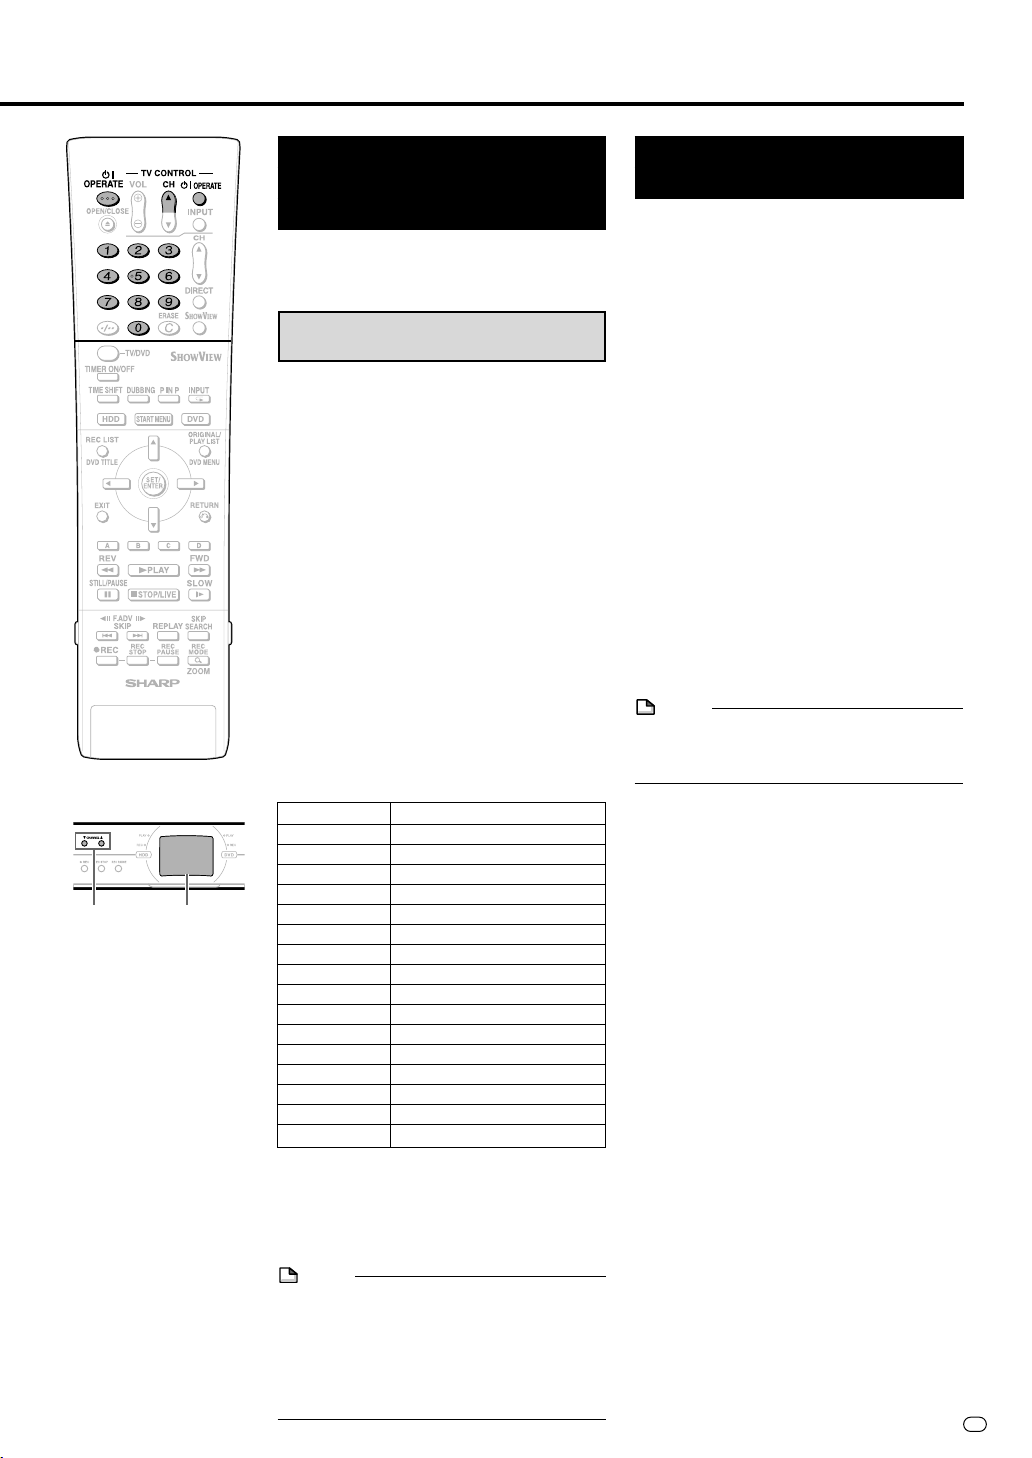
Operating a TV Using the
Remote Control
(
Universal Remote Control
The Universal Remote Control may operate the
basic functions of 16 different types of TVs.
To enter the Manufacturer’s Code for your TV,
follow the instructions below.
There is no guarantee that the universal
remote control will function with your TV.
Setting the
Manufacturer’s Code
1
Press OPERATE and CH ' of
TV CONTROL simultaneously.
2
Enter the 2-digit Manufacturer’s
Code with the Number buttons
(Ex. 02-“0”, “2”) within 10
seconds after releasing OPER-
ATE and CH ' of TV CONTROL.
3
Point the remote control unit
towards the TV and then press
OPERATE of TV CONTROL.
• If the TV turns on/off, setup was
successful. If not, repeat the procedure using another code.
See the list below for the Manufacturer’s Code
and the buttons which work.
TV Brand Manufacturer's Code
FERGUSON 07
GRUNDIG 06
HITACHI 13
ITT NOKIA 08
JVC 15
MITSUBISHI 16
PANASONIC 1 11
PANASONIC 2 12
PHILIPS 03
SANYO 14
SHARP 1 01
SHARP 2 02
SONY 09
THOMSON 1 04
THOMSON 2 05
TOSHIBA 10
TV function control
• TV Power: OPERATE
• TV Channel up/down: CH
• TV Volume up/down: VOL +/-
• TV-AV Selector: INPUT
NOTE
• If the batteries in the remote control unit are
changed, the code settings must be reentered.
• Some brands have more than one code
listed above, due to changes in the codes.
In such cases, try another code to find the
code that operates your TV.
''
' /
''
""
"
""
Setting the Remote
Control Code
• Two types of remote control codes operate
)
this Recorder: RC-1 and RC-2. If you
operate this Recorder by remote control
along with another SHARP DVD recorder or
DVD player placed next to it simultaneously, switching the remote control code
(both the Recorder and remote control) to
one of the signals (RC-1 or RC-2) will let
you operate only with this Recorder.
• Make sure to set the Recorder and remote
control to the same remote code. You can
not operate the Recorder if they are not set
to the same code.
Setting the Remote Control Code of the Remote
Example: Setting the code to “RC-2”.
1
Press and hold OPERATE and 2
together for more than 5 seconds.
2
Press OPERATE of this Recorder
to see if you can turn it on/off.
• If you cannot, go to step 3.
NOTE
• The remote control code of the remote
becomes “RC-1” when you change the
batteries.
Setting the Remote Control Code of the Recorder
3
Press OPERATE to turn off the
Recorder.
4
Press and hold CHANNEL " and
CHANNEL ' on the Recorder
together for more than 5 seconds.
• Each time this operation is performed,
the code of the Recorder toggles
between “RC-1” and “RC-2”. The front
panel display changes as the code
changes.
• Press OPERATE on the remote
control to see if you can turn on/off
the Recorder.
If remote control does not
work
Press OPERATE on the remote control and
check the front panel display (RC-1 or RC-2).
Set the remote control code according to the
display and press OPERATE to see if you
can turn on/off the Recorder.
19
GB
Basic Connection
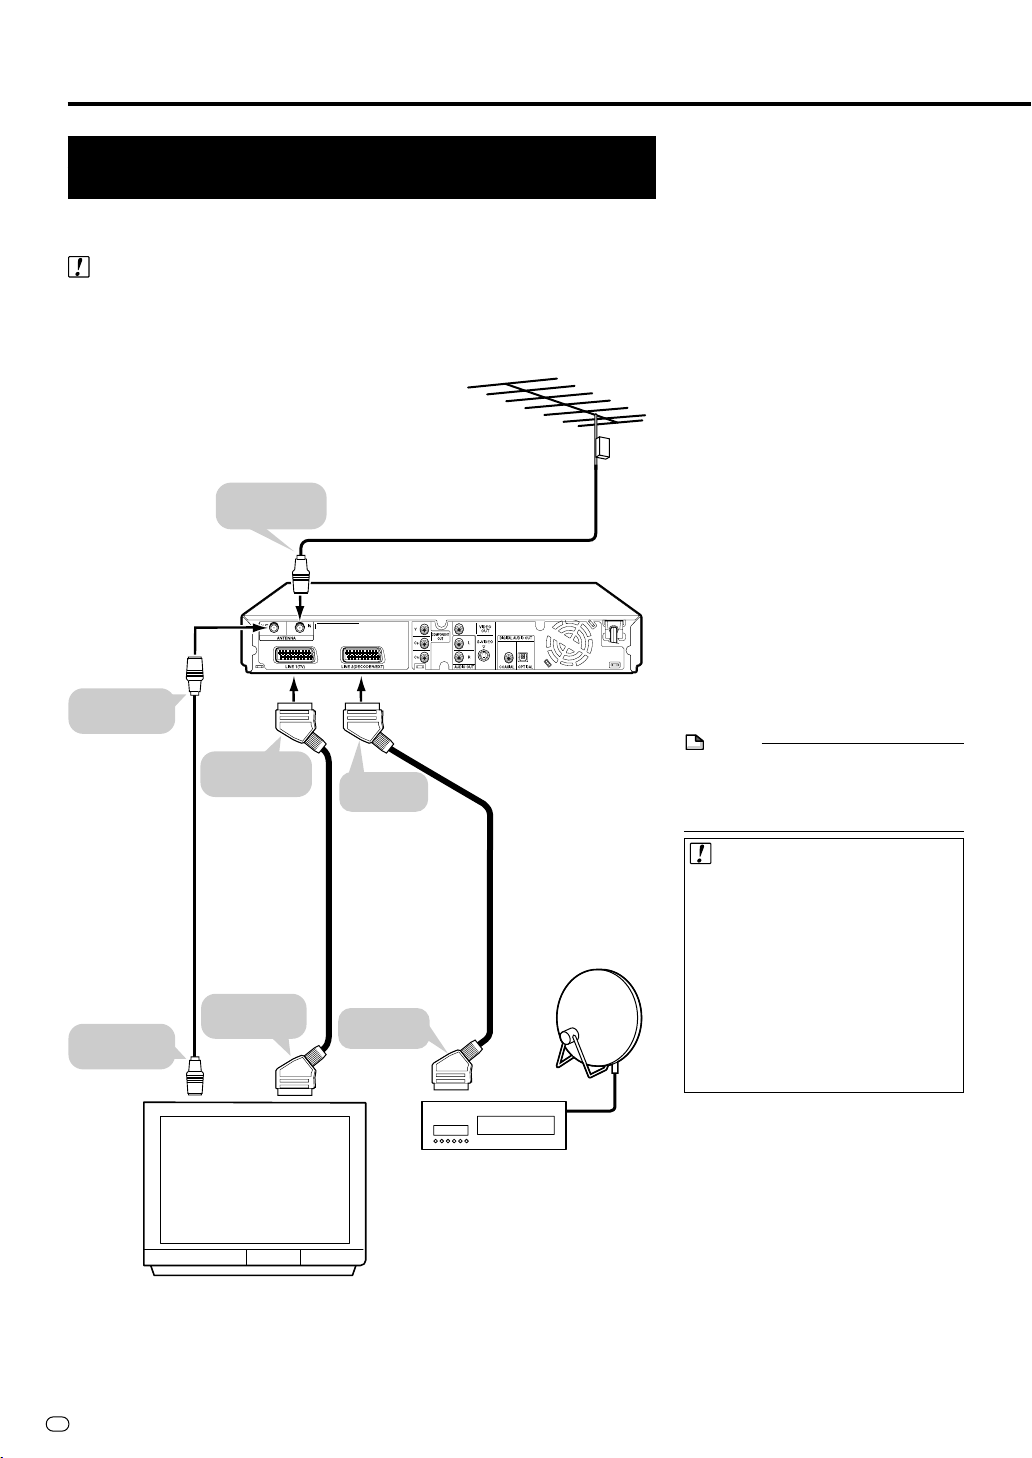
Connection Using Antenna Cables and SCART
Cables
The following connection is the basic connection to watch or record TV
programmes.
Important!
• Be sure to turn off and unplug from the AC outlet this Recorder and all
equipment before connecting the cables.
• Read through the operation manual for the equipment to be connected.
To ANTENNA
OUT jack
To ANTENNA
IN jack
To LINE 1(TV)
SCART
2
3
Antenna cable
(commercially available)
To LINE 2
SCART
1
The Recorder
1
Connect the TV antenna
cable to the ANTENNA IN
jack on the rear of this
Recorder.
2
Connect the ANTENNA
OUT jack on the rear of
this Recorder to the
antenna input jack on your
TV using the supplied
coaxial cable.
3
Connect the LINE 1(TV)
jack on the rear of this
Recorder to the SCART
input jack on your TV
using the SCART cable
(commercially available).
When connecting with your
Satellite receiver or
decoder
4
Connect the LINE 2(DECODER/EXT) jack on the
rear of this Recorder to the
SCART output jack on your
Satellite receiver or
decoder using the SCART
cable (commercially
available).
NOTE
• To connect using S-video or
component cables, see “Using
Other Types of Video Output” on
page 21.
Coaxial cable
(supplied)
To antenna
input jack
GB
20
TV
SCART cable
(commercially
available)
To SCART
input
SCART cable
(commercially
available)
4
To SCART
output
Decoder or Satellite System
Important!
• When connecting to your TV using
SCART cable:
When playing back HDD/DVD, the
recorder side input is selected
automatically. When the channel is
changed at the TV side under this
setting, the selection is normally
changed to the reception channel,
but it may not be changed for
certain TV models. If this happens,
press the TV/DVD button on the
remote control.
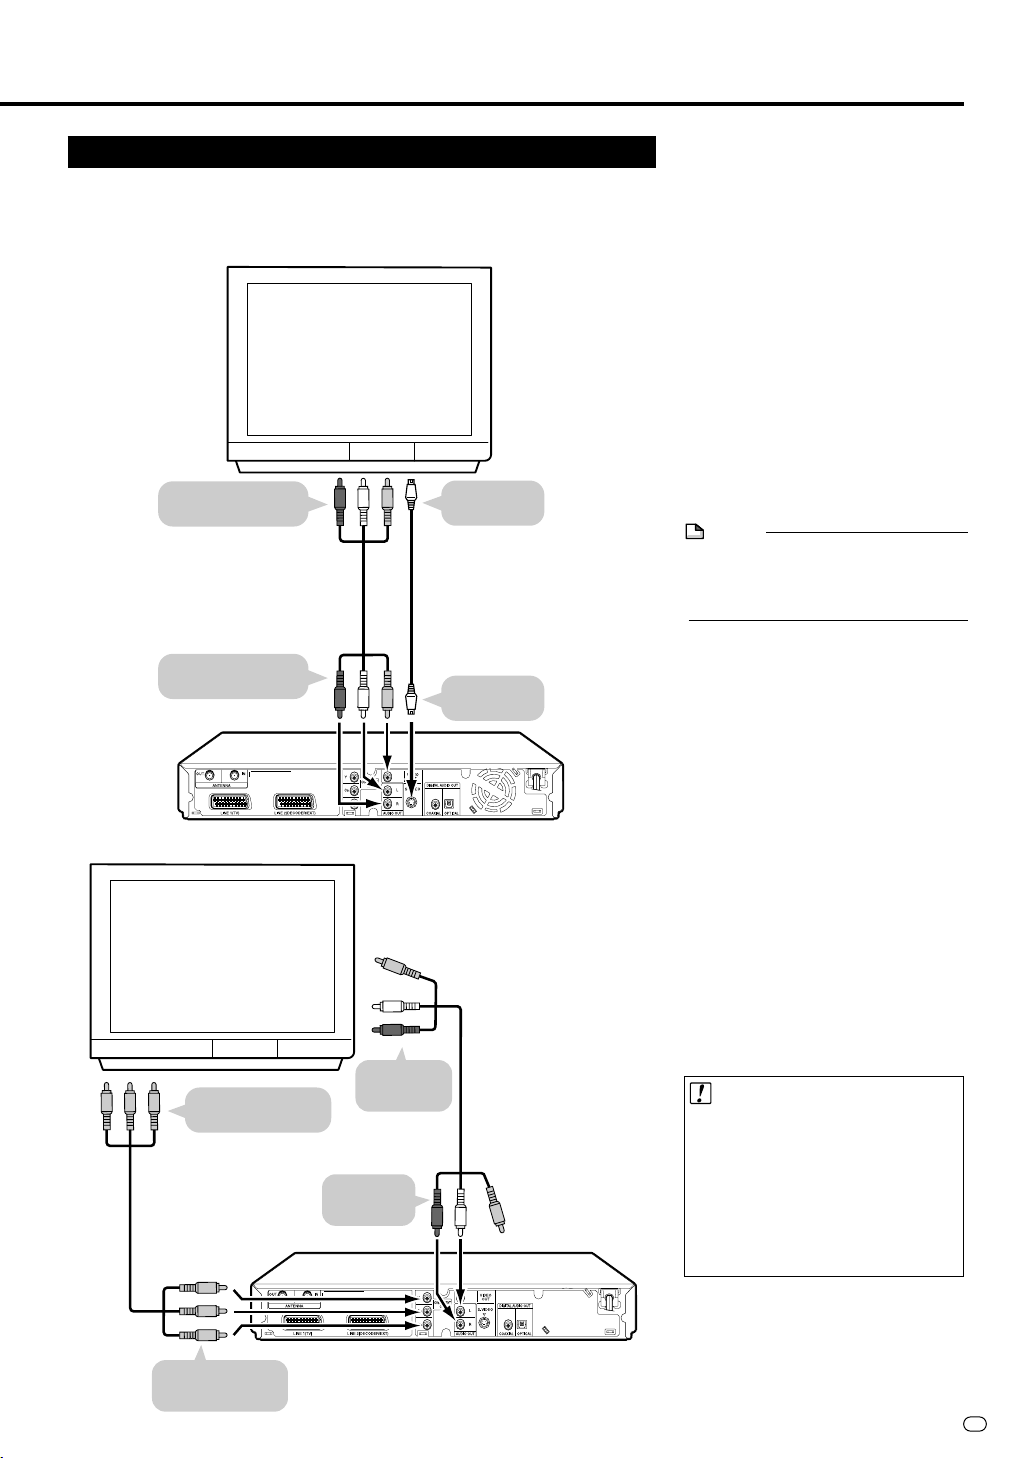
Using Other Types of Video Output
In order to view clearer DVD images, it is recommended that you use a commercially available S-video or component video cable when connecting your TV to the
video output.
TV
To video/audio
input jacks
or
Video/Audio cable
(supplied)
To S-video
input jack
S-video cable
(commercially available)
Basic Connection
Connecting Using
an S-video or Video
Cable and Audio
Cable
Connect the S-VIDEO or VIDEO
Output jack on this Recorder to
the S-video or video input jack
on your TV using an S-video
cable (commercially available)
or Video/Audio cable (supplied).
NOTE
• When connecting both S-video
cable and Video/Audio cable to the
Recorder, the image of S-video
cable is displayed.
To VIDEO/AUDIO
output jacks
The Recorder
TV
Component video cable
(commercially available)
To component
input jacks
The Recorder
To audio
input jacks
To AUDIO
output jacks
To S-VIDEO
output jack
Video/Audio cable
(supplied)
Connecting Using
the component
Video Cable
Connect the COMPONENT OUT
jacks on this Recorder to the
component input jacks on your
TV using a component video
cable (commercially available).
Important!
• When using this connection:
If the option under “START MENU”
- “OTHER SETTINGS 2” - “MODE
SETTING” - “L1 OUT” is changed
to “RGB”, no picture is displayed
on the TV. In this case, hold down
the RGB OFF button on the remote
control (under the cover) for more
than 2 seconds.
To COMPONENT
OUT jacks
21
GB
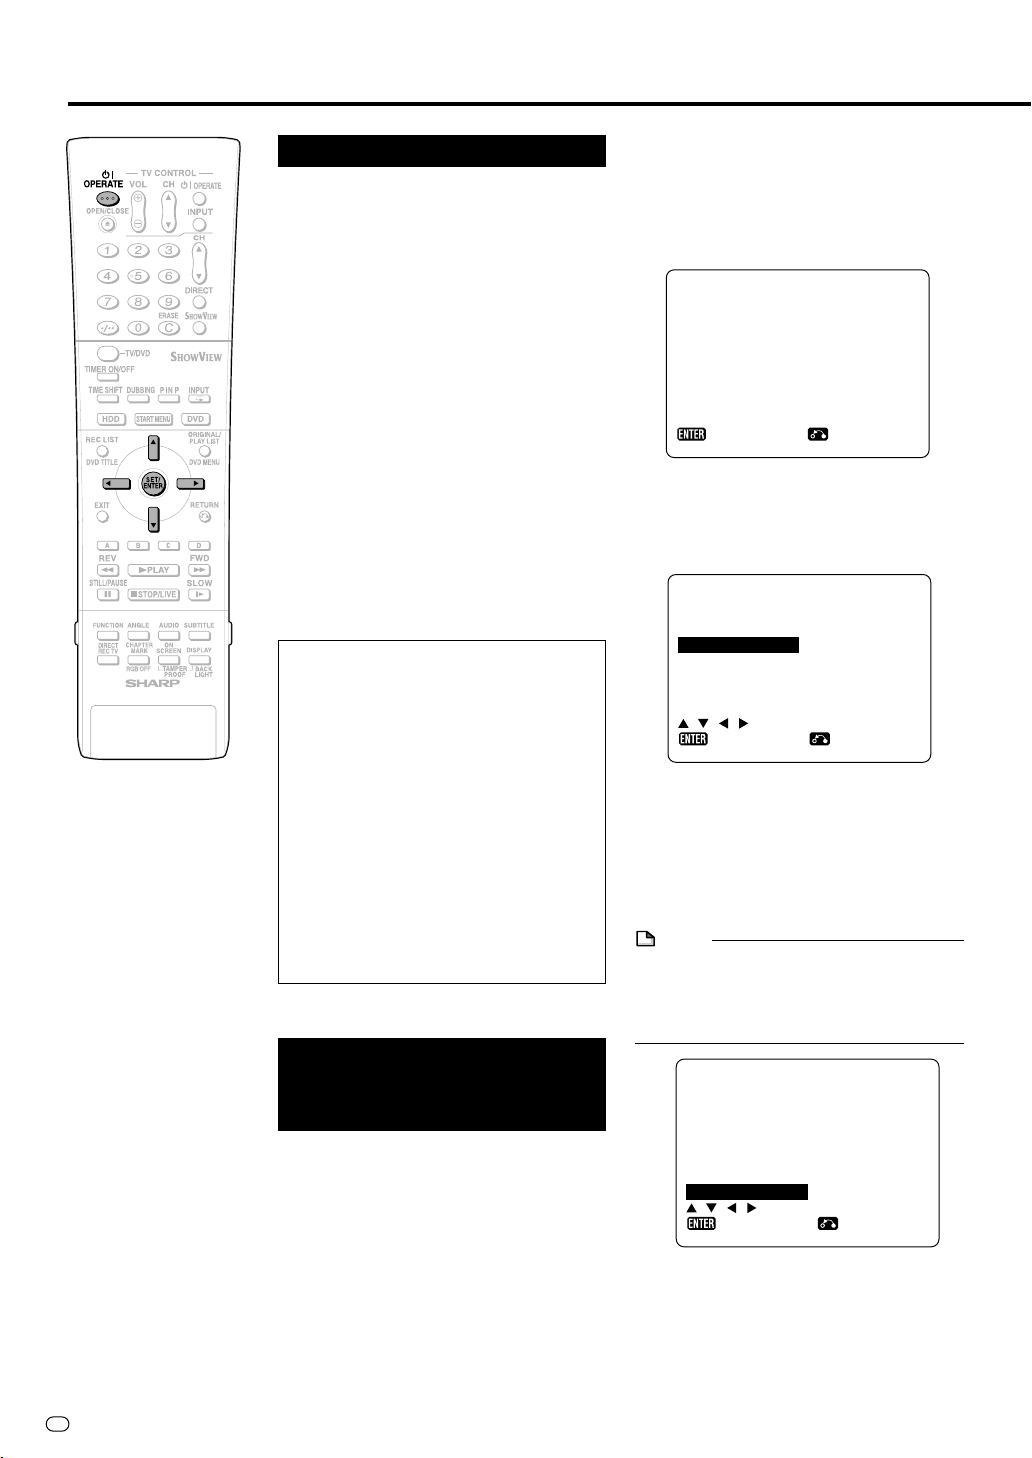
Auto Installation
Turning the Power On
Press OPERATE on the remote
control or Recorder to turn on the
power of Recorder.
• When you turn on power, the HDD button
and DVD button on the front of Recorder
will blink. If either the HDD or DVD button is
blinking, system processing is in progress,
so wait until the button lights up.
•
When the Recorder power is turned on for the
first time after purchase, the “AUTO
INSTALLATION” screen is displayed.
Follow
the procedure shown on pages 22, 23.
To Turn the Power Off
Press OPERATE on the remote
control or Recorder to turn off power.
• The HDD or DVD button on the front of
Recorder will go out, and the STANDBY
indicator will light up.
• If you press OPERATE again immediately
after turning off, the Recorder may not turn
on. If this happens, wait a while and then
turn on power again.
About the Power Supply
• Do not unplug the power cord immediately after you plug it into the AC outlet
(less than about 15 seconds after
plugging in). In very rare cases, this
may cause the memory to revert to its
initial state, and all timer programmes
will be erased. If you pull out the power
plug while power is on, it will take a
while for the hard disc to get ready
when you turn on power the next time.
During this time you can only view live
broadcasts.
• If you turn on power in a low-tempe
rature environment, only live broadcast
viewing is possible until the hard disc
(HDD) reaches its operating temperature.
Using the AUTO
INSTALLATION
for initial setting
When the Recorder power is turned on for the
first time after purchase, the “AUTO
INSTALLATION” screen is displayed. You can
use the “AUTO INSTALLATION” function for
easy initial settings regarding On-Screen
Display language, TV channel, etc. From the
second time on, the “AUTO INSTALLATION”
screen will not appear.
Preparation
• Turn on the power of TV and switch to the
AV input used to connect to the Recorder.
1
Press OPERATE for the first time
after purchase.
I N S TA L L A T I ON
SU I VEZ LES I NST
APPUYEZ TOUC
POUR DEPART .
• The “INSTALLATION AUTO (AUTO
INSTALLATION)” screen is displayed.
2
Press SET/ENTER to continue
with the installation.
LANGUE
ENGL I SH ESPA
DEUT SCH SV EN
FRANÇAIS NEDE
ITALIANO
:SÉ LECT .
• The “LANGUE (LANGUAGE)” screen
is displayed.
3
Select the On-Screen Display
language you want to display on
the screen using ' / " / \ / |,
then press SET/ENTER.
NOTE
• If changing the On-Screen Display
language, use AUTO INSTALLATION again.
See the information under “Important” on
page 23 for details on the AUTO
INSTALLATION procedure.
COUNTRY
A
B
DK
FIN
D
NL
F O
:SELECT
• The “COUNTRY” screen is displayed.
AUTO
RUCT I ONS
HE ENTER
:RETURN:ENTER
ÑOL
SKA
RLANDS
:RETOUR:ENTRÉ E
I
N
P
E
S
CH
THERS
:RETURN:ENTER
GB
22
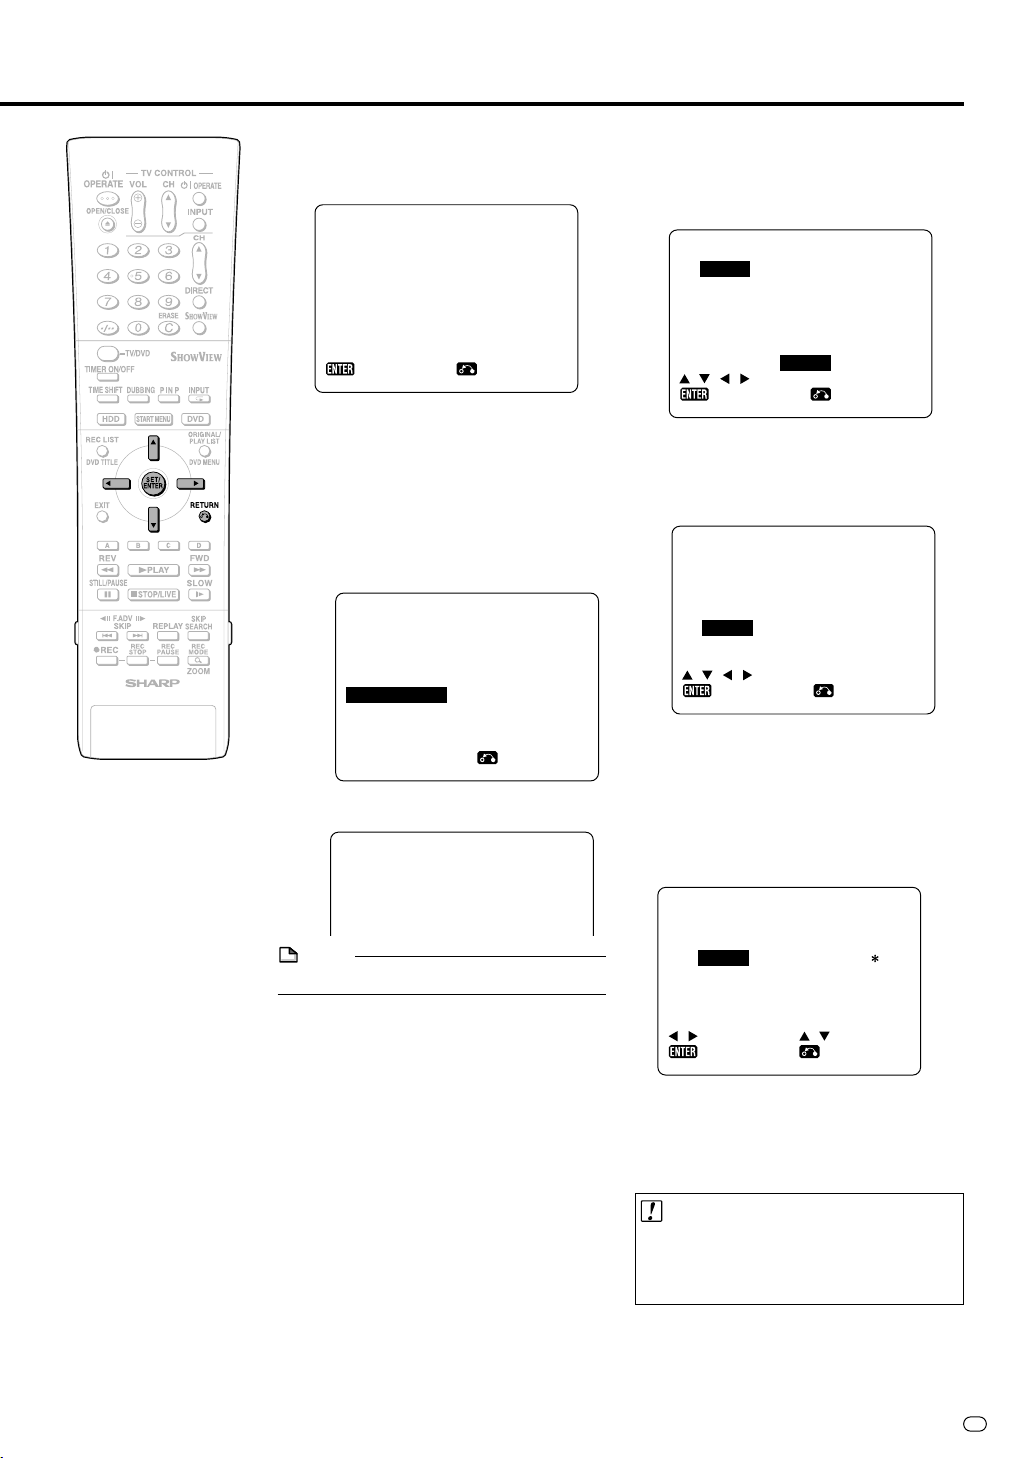
4
Select the country where you live
using ' / " / \ / | , then press
SET/ENTER.
PLEASE BE SURE T
AER I AL /SCART CAB
CONN EC TED .
PRESS ENTER TO C
5
Ensure your Aerial cable or SCART
HE
LE IS
ONT I N UE .
:RETURN:ENTER
cable is connected to the Recorder,
then press SET/ENTER to confirm.
6
All available terrestrial channels
will be automatically installed.
■ When connecting with Aerial
cable
AUTOMA T I C TUNI NG
PLEASE WAIT.
------
1CH02
.
--------
:NEXT
■ When connecting with SCART
cable
PLEASE WAIT.
PR 25
NOTE
• A maximum of 84 channels can be set.
7
Once Automatic Tuning is complete, the MOVE menu screen will
appear showing all the channels
the Recorder was able to tune in.
Auto Installation
8
If you want to move any channels,
press ' / " / \ / | to highlight
the channel to be moved. Then
press SET/ENTER to confirm.
MOV E
1 ARD 7WDR3
2ZDF 8BR
3R TL 1 9 NDR3
4RTL 2 10KAB
5SAT1 1 1CH02
6PRC7 12E3
SELECTED : ARD
:SELECT
9
Press ' / " / \ / | to highlight
the new position for the channel.
Then press SET/ENTER to
confirm.
1ZDF 7WDR3
2RTL 1 8BR
3RTL 2 9NDR3
4SAT 1 1 0KAB
5 ARD 11CH02
6PR07 1 2E3
:SELECT
10
If any more channels are to be
moved, repeat step 8 to 9.
11
Press RETURN (NEXT) to display
the “CLOCK” setting screen.
• The “CLOCK” screen will appear.
Refer to “Clock Setting” on page 25.
: SELECT
12
After setting the clock, press
CLOCK
TIME DATE
0:00 1/01
:ENTER
SET/ENTER to end the AUTO
INSTALLATION procedure.
-
MOV E
-
13SAT3
3
14S1
15S2
16S3
17S4
18ST099
13SAT3
3
14S1
15S2
16S3
17S4
18ST099
YEAR
04
:CHANGE
:RETURN
:RETURN:ENTER
:NEXT:ENTER
1/5
1/5
Important!
•
You can perform the AUTO INSTALLATION
function afterward by holding down
CHANNEL
''
' and DVD on the front of the
''
Recorder for more than 2 seconds.
23
GB

About START MENU
About START MENU
With this Recorder, you can call up functions
like Playback, Edit and Other Settings from
the “START MENU”.
For details on operation procedures, see the
page explaining each option.
1
START MENU [REC LIST
REC LIST
DISPLAYS LIST OF RECORDED TITLES FOR PLAYBACK
TIMER
4
7
1 REC LIST
Playing back with REC LIST… page 51
Calling up various functions… page 51
2 EDIT/ERASE
Editing with the Original Title List/
Play List… page 67
Erasing all recorded titles… page 73
Erasing selected titles… page 73
Protecting titles from erasure… page 72
3 DUBBING
High speed dubbing… page 46
Rate conversion dubbing… page 46
4 TIMER PROGRAM/CHECK
Timer recording with S
Timer recording by designating date and
time… page 41
Checking/Changing timer settings… page 43
5 INITIALIZE/FINALIZE
DVD/HDD initialization… page 95
DVD finalization… page 95
6 OTHER SETTINGS 1
Recording function setting… page 84
Viewing/Play setting… page 86
Adjustment… page 88
7 OTHER SETTINGS 2
Mode setting… page 92
Manual tuning… page 94
Channel sort… page 94
Clock setting… page 94
8 INFORMATION… page 33
PROGRAM/
CHECK
OTHER
SETTINGS 2
23
]
EDIT/
ERASE
INITIALIZE/
FINALIZE
INFORMATION
HOWVIEW®… page 39
DUBBING
OTHER
SETTINGS 1
82:0121/52
Basic START MENU
Operation
1
Press START MENU to display
the “START MENU” screen.
START MENU [REC LIST
DISPLAYS LIST OF RECORDED TITLES FOR PLAYBACK
5
6
2
Press ' / " / \ / | to select an
8
option.
Example: When “OTHER SETTINGS 1”
is selected
START MENU [OTHER SETTINGS 1
3
Press SET/ENTER to enter the
selected option.
• The screen for the selected option will
appear.
• Operate using
ENTER.
OTHER SETTINGS 1 [REC. FUNCTION
REC. FUNCTION VIEW/PLAY SETTING ADJUSTMENT
AUTO CHAPTER
EXACT RECORDING
REC. AUDIO FORMAT
EXTERNAL AUDIO
VIDEO MODE AUDIO
MANUAL REC. MODE
4
Press START MENU or EXIT to
quit the START MENU.
• The “START MENU” screen will close,
and the screen will return to normal.
NOTE
• If you perform no operation, the “START
MENU” screen will disappear after about 1
minute.
• This operation will not work at the
following times:
During playback, during Time Shift
Viewing, during display of the REC LIST,
and at the erase screen.
• If you make a mistake in operation and
want to start over, press RETURN to go
back to the preceding screen.
]
REC LIST
TIMER
PROGRAM/
CHECK
REC LIST
TIMER
PROGRAM/
CHECK
OTHER
SETTINGS 2
INITIALIZE/
]
INITIALIZE/
DISPLAYS SET ITEMS BEFORE REC/PLAYBACK
INFORMATION
''
' /
''
FINALIZE
FINALIZE
]
EDIT/
ERASE
EDIT/
ERASE
""
" /
""
DUBBING
SETTINGS 1
DUBBING
SETTINGS 1
\\
||
\ /
| and SET/
\\
||
82:0121/52
OTHER
82:0121/52
OTHER
82:0121/52
GB
24
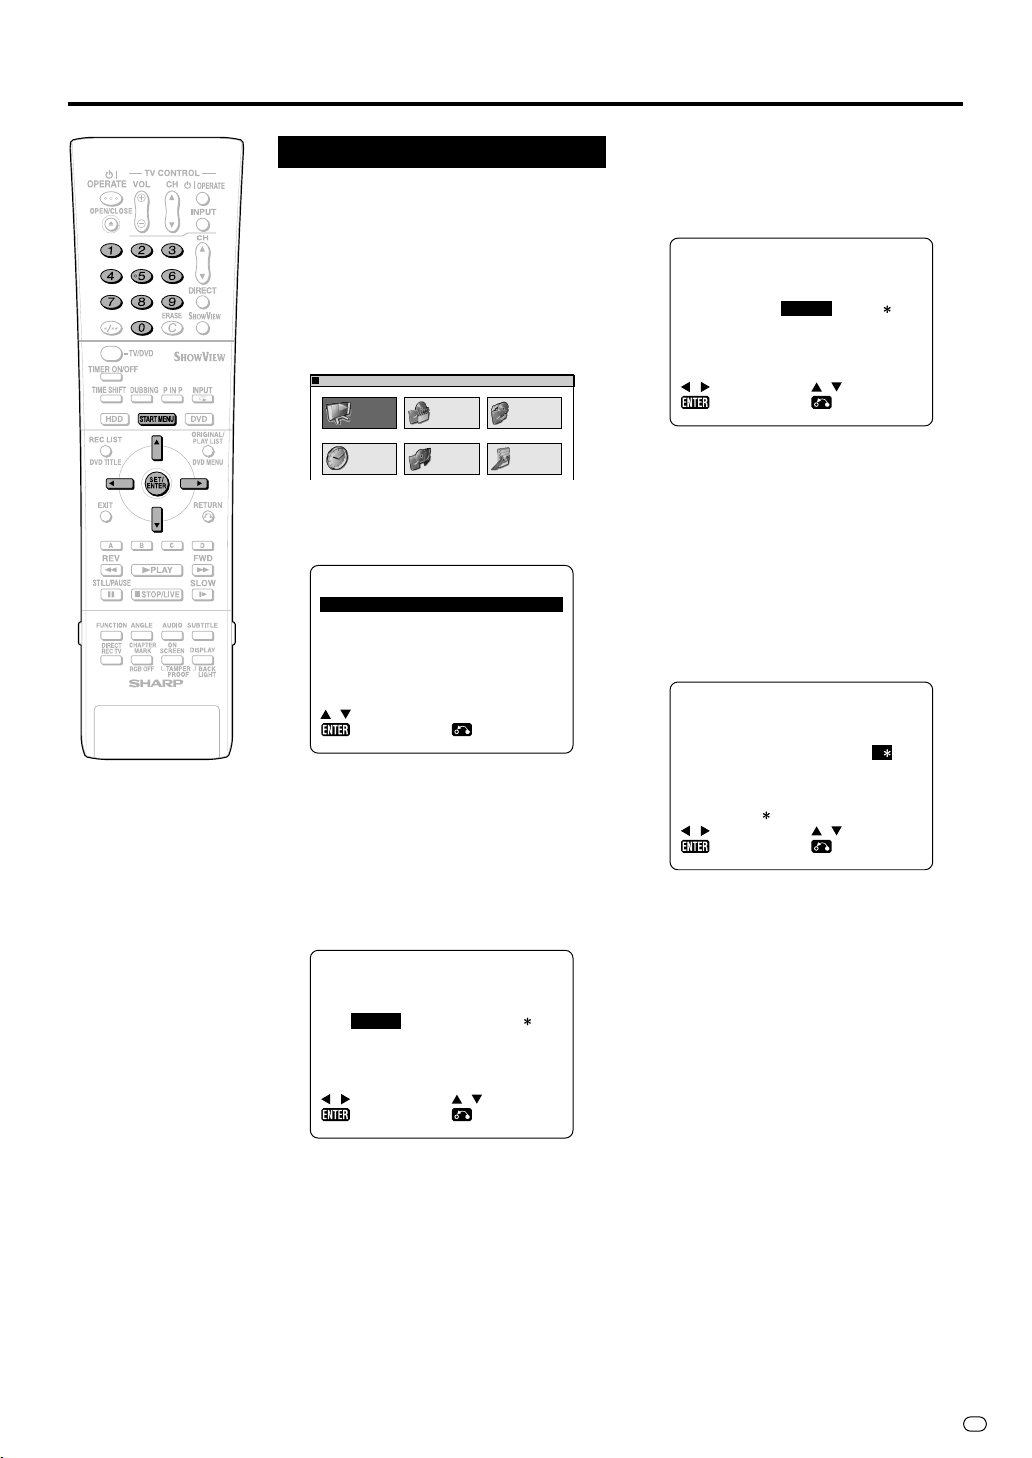
Clock Setting
Clock Setting
The clock will normally be set using the VPS/
PDC information when your Recorder
automatically tunes in the broadcast
channels. If for any reason the VPS/PDC
signals are not present, your Recorder will not
be able to set the clock. This procedure will
allow you to set the clock.
1
Press START MENU to display
the “START MENU” screen.
REC LIST
TIMER
PROGRAM/
CHECK
]
START MENU [REC LIST
DISPLAYS LIST OF RECORDED TITLES FOR PLAYBACK
2
Press ' / " / \ / | to select
“OTHER SETTINGS 2”, then press
SET/ENTER.
MODE SE T T I NG
MAN UA L T UN I NG
CHANNE L SOR T
CLOCK SETT ING
: SELECT
3
Press ' / " to select “CLOCK
SETTING”, then press SET/
ENTER.
4
Enter the time using the Number
buttons or ' / " .
• If the minutes or hours are less than
10, enter leading 0.
ERASE
INITIALIZE/
FINALIZE
EDIT/
5
Press \ / | to select “DATE”,
then enter the date using the
Number buttons or ' / " .
• For example, for 1st April press 0 1 0
4.
DUBBING
OTHER
SETTINGS 1
82:0121/52
DAT E : DAY / MONTH
: SELECT
6
Press
CLOCK
TIME DATE
20 : 30 1/04
:ENTER
\ / |
to select “YEAR”. Enter
YEAR
04
:CHANGE
:RETURN
the last two digits of the year using
the Number buttons or
• For example, for 2005 press 0 5.
7
: RE TURN:ENTER
Auto Clock Setting
Press \ / | to select “
' / " to change between auto
clock on/off (“
“OFF”).
TIME DATE
20 : 30 1 / 04
ADJ UST : AUTO
: SELECT
:ENTER
8
Press SET/ENTER to confirm.
∗∗
∗” is “ON”, “–” is
∗∗
CLOCK
' / " .
∗∗
∗”. Press
∗∗
YEAR
05
-
:OFF
:CHANGE
:RETURN
TIME DATE
15 : 06 1/01
: SELECT
CLOCK
:ENTER
YEAR
04
:CHANGE
: RE TURN
25
GB
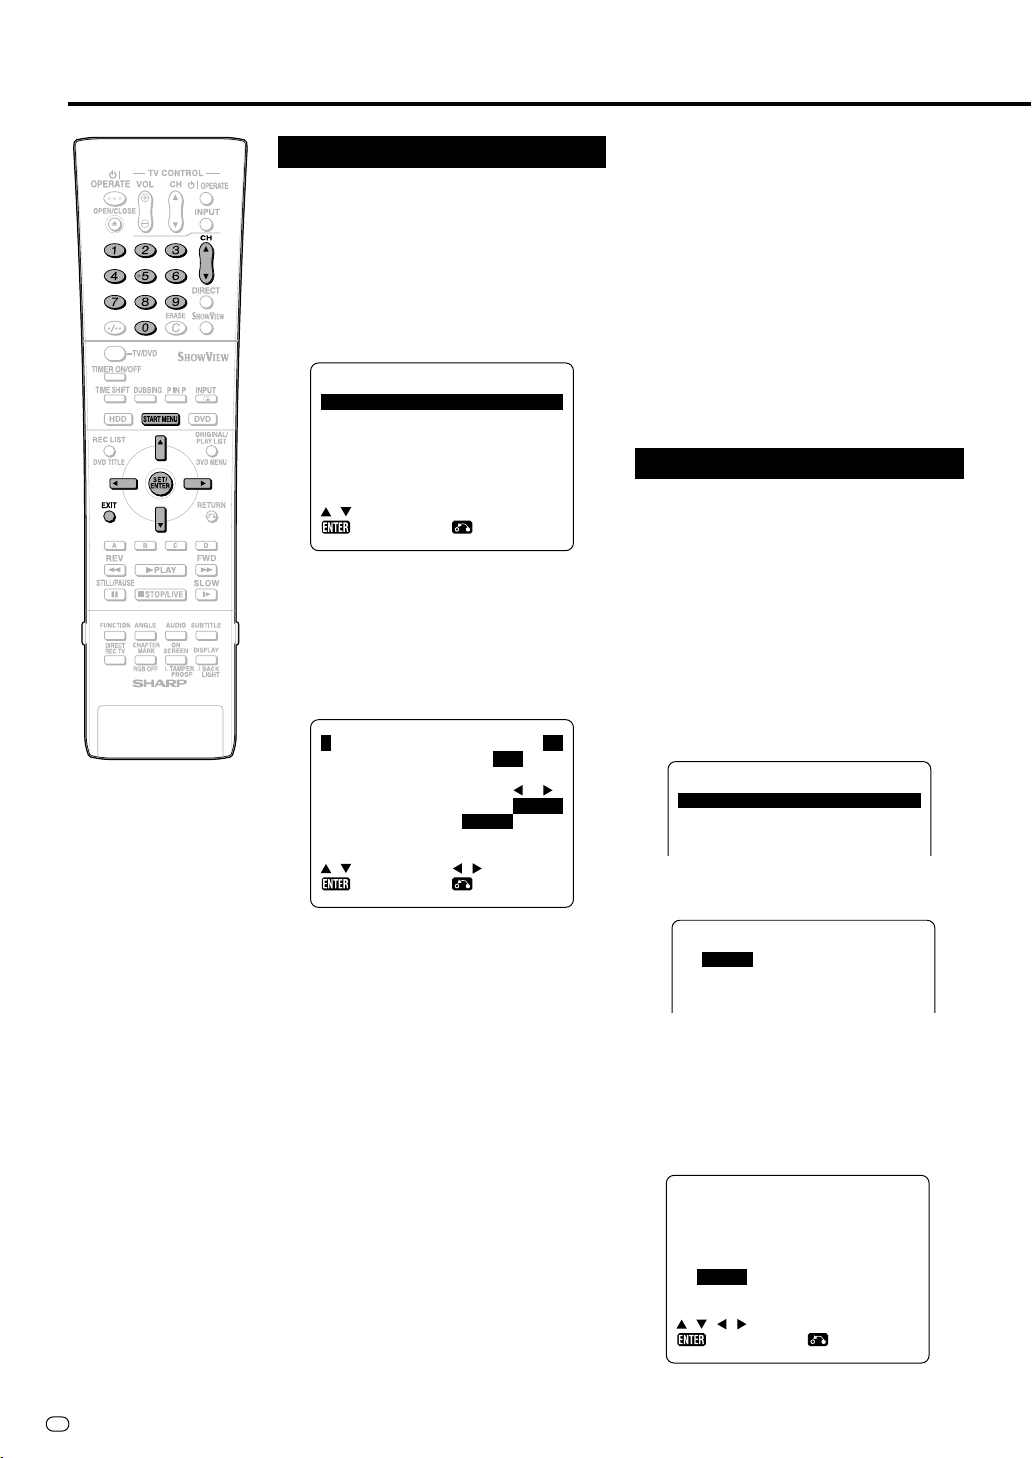
Channel Setting
Channel Setting
This Recorder can receive a maximum of 84
channels by presetting the channels into
memory.
1
Press START MENU to display
the “START MENU” screen.
2
Press ' / " / \ / | to select
“OTHER SETTINGS 2”, then press
SET/ENTER.
MODE SE T T I NG
MAN UA L T UN I NG
CHANNE L SOR T
CLOCK SETT ING
: SELECT
3
Press ' / " to select “MANUAL
TUNING”, then press SET/
ENTER.
4
Press ' / " to select “PRESET”,
then press \ / | to choose the
required preset channel.
➞
PRESE T
SYSTEM
CHANNEL
FINE TUNING
DECODER O
SK I P O
: SELECT
:ENTER
:RETURN:ENTER
AAA 84
N OFF
N OFF
:CHANGE
:RETURN
L B/G
CH2 5
9
Press ' / " to select “SKIP”,
then press \ / | to select “ON” or
“OFF”.
• The SKIP function determines
whether the channel can be selected
when using the CH
the Number buttons.
10
Press SET/ENTER to store this
''
""
' /
" instead of
''
""
channel. The Recorder will increment to the next channel up.
• If any more channels are to be tuned
in, repeat this procedure.
• Once all the channels have been
tuned in. Press START MENU or
EXIT to return to the normal screen.
Channel Sort
When your Recorder tunes in broadcast
channels automatically, it sorts them into a
standard order using internal information. You
can change the order of the channel with the
following procedure.
1
Press START MENU to display
the “START MENU” screen.
2
Press ' / " / \ / | to select
“OTHER SETTINGS 2”, then press
SET/ENTER.
3
Press ' / " to select “CHANNEL
SORT”, then press SET/ENTER.
CHANNEL SO
MOV E
CANCE L
NAME
4
Press ' / " to select “MOVE”,
then press SET/ENTER.
RT
5
Press ' / " to select “SYSTEM”,
then press \ / | to select “L” or
“B/G”.
6
Press ' / " to select
“CHANNEL”, then press \ / | to
start tuning in either direction.
• If it is not the desired channel, press
\\
||
\ /
| to continue tuning.
\\
||
7
Press ' / " to select “FINE
TUNING”. Then press and hold \ /
| until the sharpest colour picture
1 ARD 7WDR3
2ZDF 8BR
3RTL 1 9NDR3
4RTL 2 10KAB
5
Press ' / " / \ / | to highlight the
channel to be moved. Then press
SET/ENTER.
6
Press ' / " / \ / | to highlight the
new position for the channel. Then
press SET/ENTER.
MOV E
-
3
13SAT3
14S1
15S2
16S3
1/5
is obtained.
8
Press ' / " to select “DECODER”. This is preset to “OFF”.
If you connect a decoder, you
must use \/ | to turn the decoder
function “ON”.
GB
26
1ZDF 7WDR3
2RTL 1 8BR
3RTL 2 9NDR3
4SAT1 1 0KAB
5 ARD 11CH02
6PR07 1 2E3
:SELECT
MOV E
-
3
1/5
13SAT3
14S1
15S2
16S3
17S4
18ST099
:RETURN:ENTER
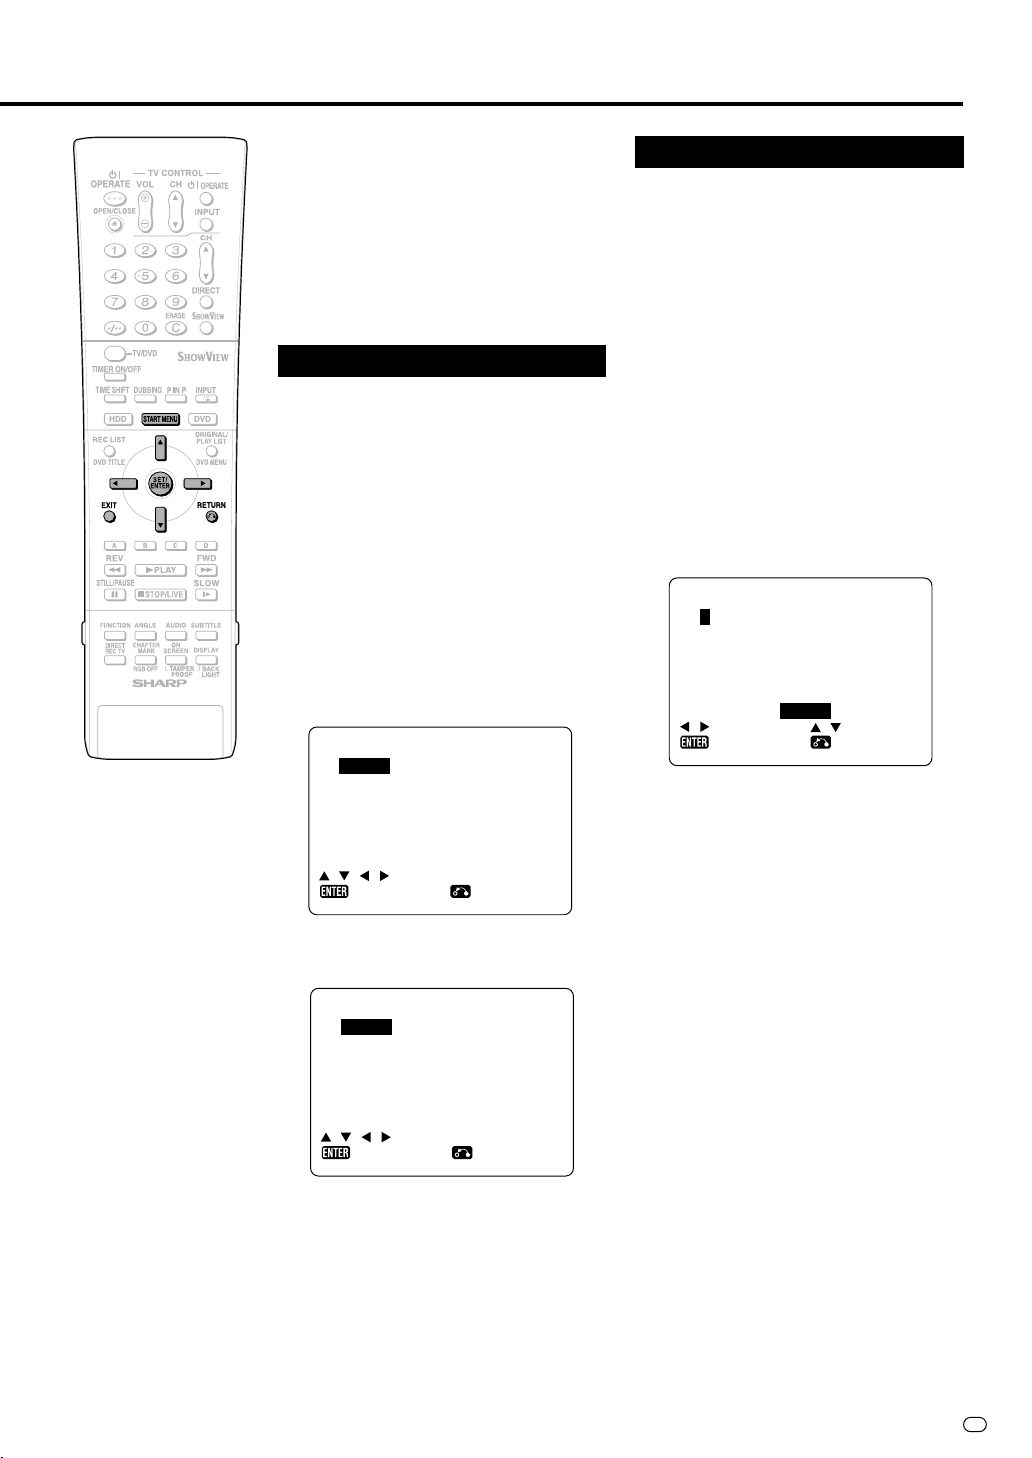
7
If any more channels are to be
moved, repeat the procedure from
step
5
to 6.
8
When all the channels are in your
preferred order, either press
RETURN to return to the
“CHANNEL SORT” screen or
press START MENU or EXIT to
return to the normal screen.
Deleting Channels
If there is a channel you want to delete from
the Recorder memory, follow the procedure
below.
1
Press START MENU to display
the “START MENU” screen.
2
Press ' / " / \ / | to select
“OTHER SETTINGS 2”, then press
SET/ENTER.
3
Press ' / " to select “CHANNEL
SORT”, then press SET/ENTER.
4
Press ' / " to select “CANCEL”,
then press SET/ENTER.
5
Press ' / " / \ / | to highlight the
channel to be cancelled.
1 ARD 7WDR3
2ZDF 8BR
3R TL 1 9 NDR3
4RTL2 1 0KAB
5SAT1 1 1CH02
6PR07 1 2E3
:SELECT
6
Press SET/ENTER twice to
CANCEL
-
3
cancel the channel.
1 ZDF 7BR-3
2R TL 1 8 NDR3
3RTL2 9KAB
4SAT1 1 0CH02
5PR07 1 1E3
6WDR3 1 2S AT 3
:SELECT
CANCEL
1/5
13SAT3
14S1
15S2
16S3
17S4
18ST099
:RETURN:ENTER
1/5
13S1
14S2
15S3
16S4
17ST099
18
:RETURN:ENTER
Channel Setting
Re-naming Channels
When your Recorder tunes in broadcast
channels automatically, it names them using
the VPS/PDC information. You can change the
name of the channel with the following
procedure.
1
Press START MENU to display
the “START MENU” screen.
2
Press ' / " / \ / | to select
“OTHER SETTINGS 2”, then press
SET/ENTER.
3
Press ' / " to select “CHANNEL
SORT”, then press SET/ENTER.
4
Press ' / " to select “NAME”,
then press SET/ENTER.
5
Press ' / " / \ / | to highlight the
channel to be re-named. Then
press SET/ENTER.
1 ARD 7WDR3
2ZDF 8BR
3R TL 1 9 NDR3
4RTL 2 10KAB
5SAT1 1 1CH02
6PR07 1 2E3
SELECTED : ARD
6
To enter a new channel name use
NAME
-
3
:SELECT :CHANGE
' / " to scroll through the
characters and \/ | to move to
the next position. Then press
SET/ENTER.
7
If any more channels are to be renamed, repeat the procedure from
step 5 to 6.
8
When all the channels are named
correctly, either press RETURN
to return to the “CHANNEL SORT”
screen or press START MENU or
EXIT to return to the normal
screen.
1/5
13SAT3
14S1
15S2
16S3
17S4
18ST099
:RETURN:ENTER
7
When all the channels you wish
have been cancelled, either press
RETURN to return to the
“CHANNEL SORT” screen or
press START MENU or EXIT to
return to the normal screen.
27
GB
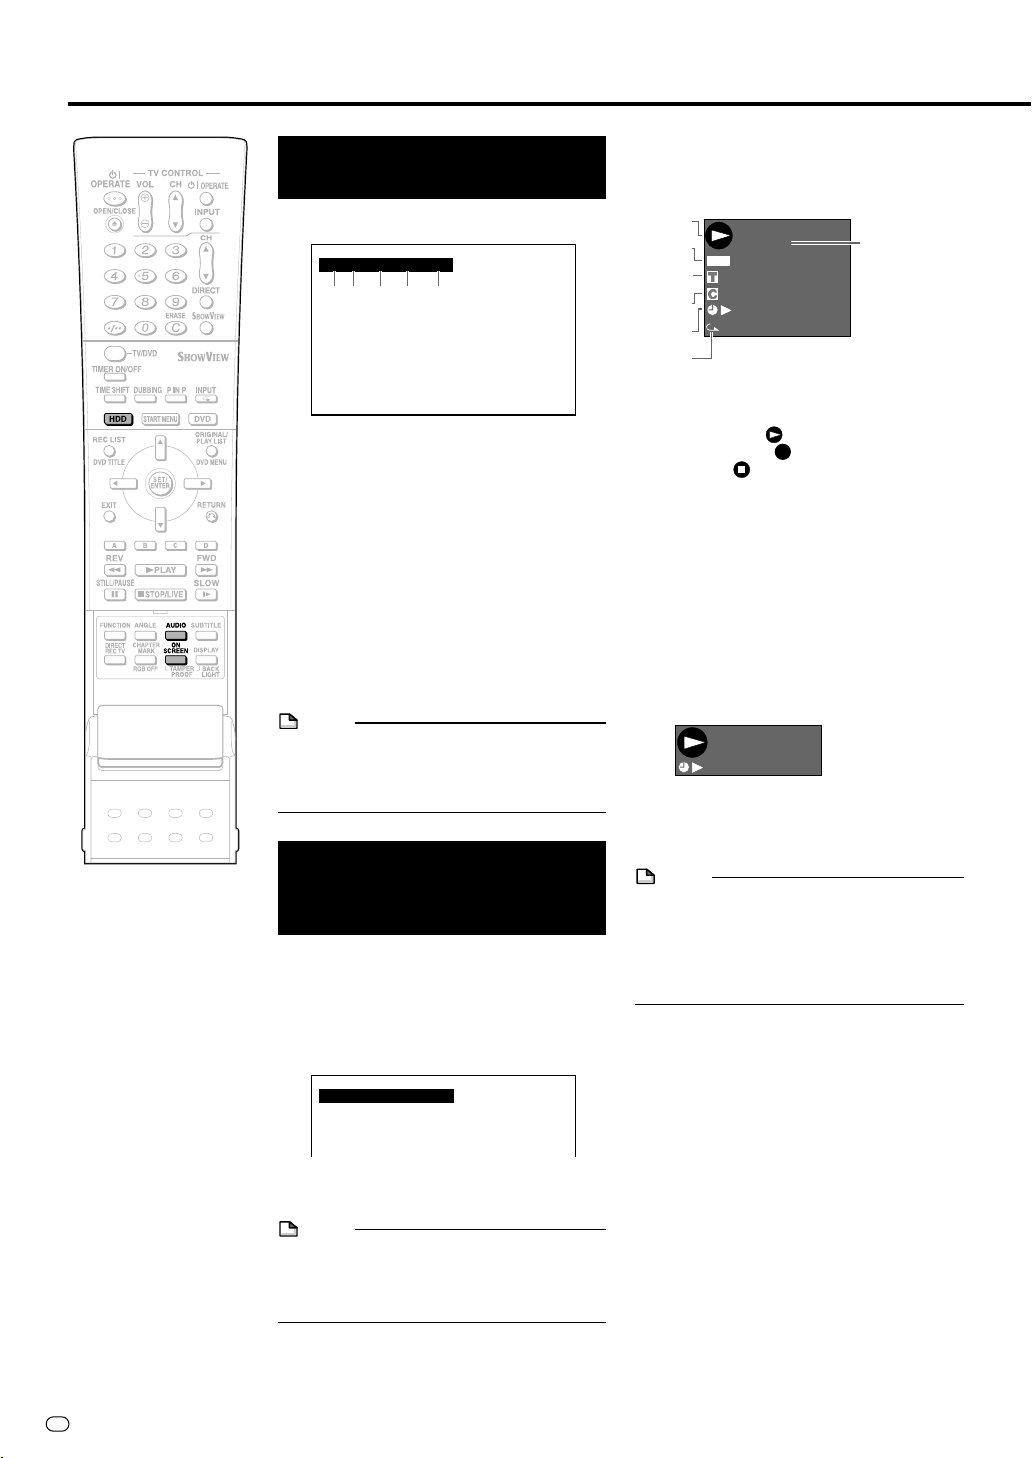
Display Information
Content of TV Screen
Display
When the power is turned on or the channel is
switched.
PR 2 ARDRLNICAM STEREO
12 4 53
Display automatically
disappears in 3 seconds.
1 Preset channel
2 Channel name
3 NICAM signal reception
4 Stereo/Bilingual (I/II ) signal reception
5 Audio output mode display
Monitor Output when Receiving a Stereo or Bilingual
Broadcast
When receiving a stereo or bilingual
broadcast, press AUDIO to change the audio
output mode to select Monitor Output. See
the table on page 93 for details.
NOTE
• When the signal is weak (hard to hear) in a
stereo broadcast, press AUDIO to turn off
“L R” display on the TV screen and change
the audio output mode to MONO.
Checking the Channel,
Remaining Time of HDD
and Number of Titles
When HDD button on the front of the
Recorder is lit (HDD mode)
1
Press ON SCREEN (under the
cover) or HDD.
• Channel information is displayed.
2
Press ON SCREEN (under the
cover) or HDD again.
• The HDD information screen is
displayed.
2
3
4
5
6
HD
ORIN
G
FINE
19h10
REMAIN
1
/
33
4
/
6
00:00:28
TIATPEREE TL
ALDI
m
1
7
1 Original title playback/Play List play-
back indicator
2 Mode display
• Playback:
• Recording:
• Stop:
3 Recording mode and remaining
(recordable) time
4 Current title number/Total number of
titles
5 Current chapter number/Total number of
chapters
6 Counter
7 Repeat Playback indicator
3
Press ON SCREEN (under the
REC
cover) or HDD again.
• The screen changes to the counter
display.
HDD
ORIGINAL
00:00:51
4
Press ON SCREEN (under the
cover) or HDD again.
• Display is turned off.
NOTE
• The HDD information screen (step
automatically disappear in 1 minute.
• The counter display (step 3) will not
disappear automatically. Press ON
SCREEN (under the cover) or HDD to turn
it off.
2
) will
PR 2 ARDRLNICAM STEREO
• The channel information display will
automatically turn off in 5 seconds.
NOTE
• The channel information cannot be viewed
during playback, Time Shift Viewing,
Chasing Playback, or Simultaneous
Recording.
GB
28
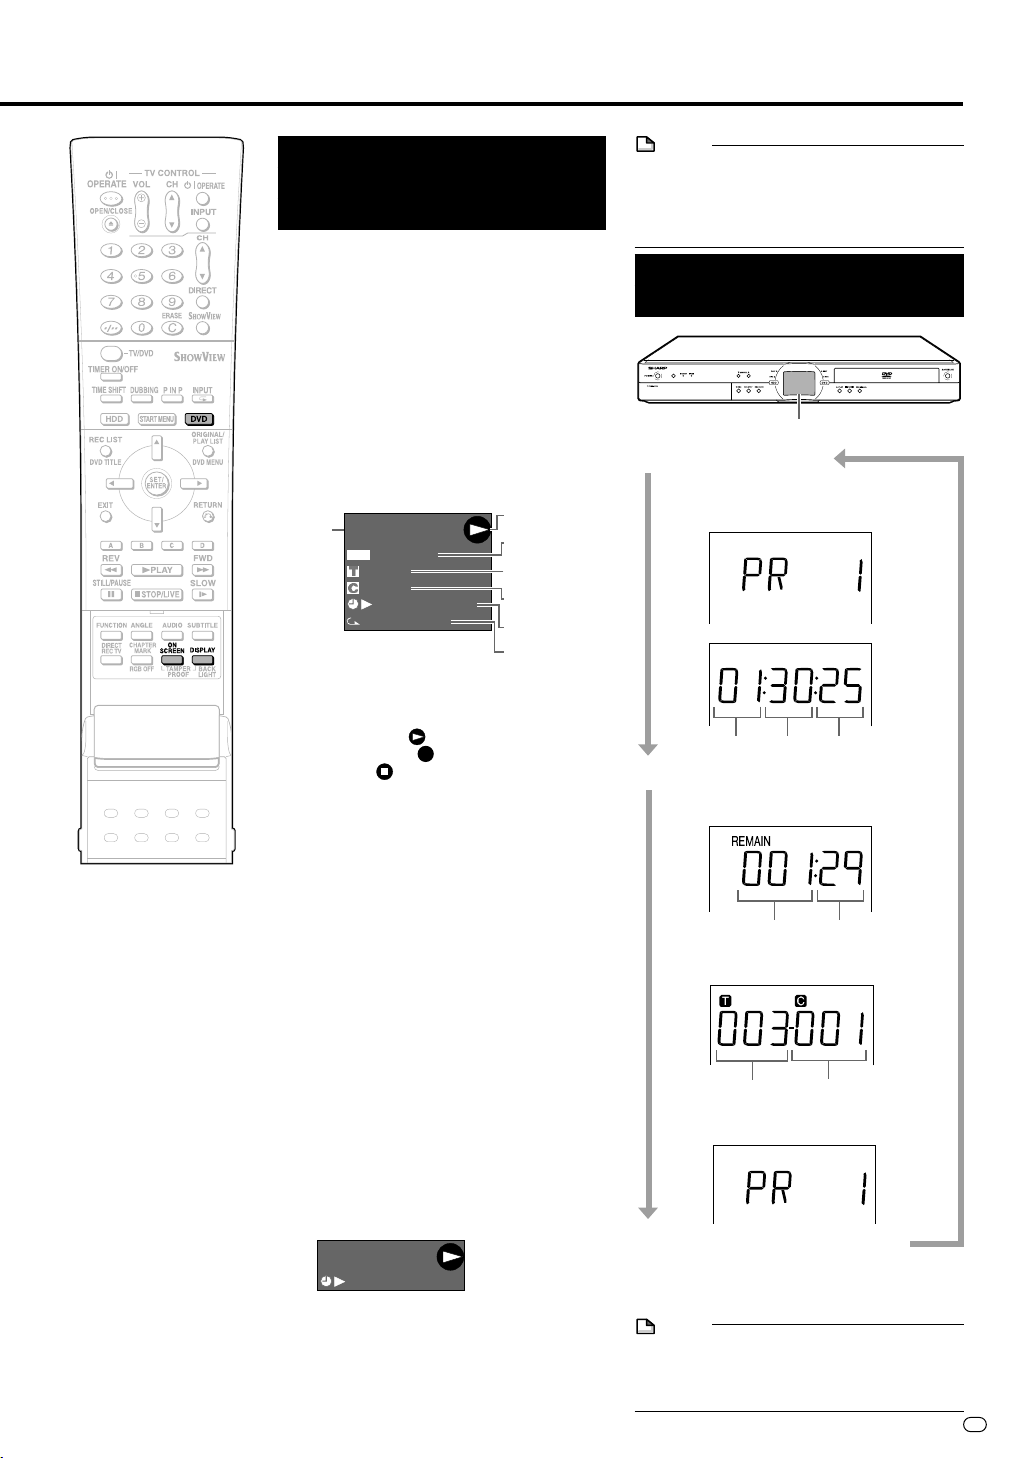
Display Information
Checking the Channel,
Remaining Time
of DVD
and Number of Titles
When DVD button on the front of the
Recorder is lit (DVD mode)
1
Press ON SCREEN (under the
cover) or DVD.
• Channel information is displayed.
• The channel information display will
automatically turn off in 5 seconds.
2
Press ON SCREEN (under the
cover) or DVD again.
• The DVD information screen is
displayed.
DVD-RW
1
ORVRINALI
G
FINE
REMAIN 0h49m
1
/
7
1
/
1
00:00:12
TIATPEREE TL
1 Disc type, recording format, original title
playback/Play List playback indicators
2 Mode display
• Playback:
• Recording:
• Stop:
3 Recording mode and remaining
(recordable) time
•“FINALIZED” indicator when a
finalized disc is played back.
4 Current title number/Total number of
titles
• Total number of titles (Stop mode)
• Title number currently played back
(Playback mode)
• Title number currently recorded
(Recording mode)
5 Current chapter number/Total number of
chapters
• Total number of chapters (Stop mode)
• Chapter number currently played
back (Playback mode)
• Chapter number currently recorded
(Recording mode)
6 Counter
7 Repeat Playback indicator
3
Press ON SCREEN (under the
REC
cover) or DVD again.
• The screen changes to the counter
display.
DVD-RW
ORVRINALI
G
00:00:26
4
Press ON SCREEN (under the
cover) or DVD again.
• Display is turned off.
2
3
4
5
6
7
NOTE
• The DVD information screen (step
automatically disappear in 1 minute.
• The counter display (step 3) will not dis-
appear automatically. Press ON SCREEN
(under the cover) or DVD to turn it off.
2
) will
Switching Front Panel
Display
Front panel display
1
Turn the power on.
• Channel display (when watching TV)
• Counter display (during playback/
recording)
Hour
2
Press DISPLAY (under the cover).
• Remaining time display (when
watching TV)
Hour
• Current title number and chapter
number (during playback)
Current title Current chapter
• Channel currently recorded (during
recording)
3
Press DISPLAY (under the
cover) again.
• The screen returns to the display in
step 1.
NOTE
•
Because of technical reasons the time counter
is rounding up or down during the time
counting process. Therefore small deviations
of the time display are normal.
Minute
Second
Minute
29
GB

Preparation to Operate This Recorder
HDD
DVD-RW
VR MODE
DVD-RW
VIDEO MODE
DVD-R
VIDEO Plus
+
DVD VIDEO
VIDEO CD AUDIO CD CD-R
CD-RW
MP3
MP3
Buttons used for this operation.
Buttons with the same name on the Recorder and
remote control will perform the same operation.
Buttons on Remote Control
Buttons on Recorder
4
1
Turn on the power of TV.
Operating HDD
Press .
• The HDD button on the front of the
Recorder lights up, and HDD
operation is enabled.
Operating DVD
2
Switch TV input to the AV
input used to connect to the
Recorder.
Press .
• The DVD button on the front of the
Recorder lights up, and DVD
operation is enabled.
Recording and Playback
3
Press to turn the
• Refer to pages 33 to 63 for details
about recording and playback.
Recorder on.
• TV broadcast will be displayed.
NOTE
• After turning on power, both the HDD and DVD buttons
on the front of the Recorder will blink for a moment while
the Recorder is getting ready. Perform this operation
after the HDD button lights up.
GB
30

Time Shift Viewing/Chasing Playback
With this Recorder, you can enjoy Time Shift Viewing and Chasing Playback—distinctive features of a HDD.
1 Time Shift Viewing
While you are watching a programme, the phone rings.... At
times like this, you can pause the programme at the press of
a button and watch the rest later.
NOTE
• Some programmes may not allow you to time shift view
due to copyright of the programmes.
• Programmes recorded for Time Shift Viewing will be
erased automatically if Time Shift Viewing is cancelled.
Time Shift Viewing (Pause)
You can pause during sudden phone call or when you want
to take a note. In such cases press TIME SHIFT to pause.
||
Press
| PLAY to watch the rest of the programme.
||
Pause
scene
Time shift recording
Press
TIME SHIFT.
Press
Press ■ STOP/LIVE to return to the current (live) broadcast.
(Time shift recording stops at this point. Recorded
programmes will be erased automatically.)
Current
scene (live)
||
| PLAY.
||
2 Chasing Playback
You return home earlier than expected while timer recording
is in progress.... At times like this, you can watch the
programme from the beginning without having to wait for the
recording to finish.
Chasing Playback (Pause➔Play)
||
Press
| PLAY during recording or timer recording to watch
||
the recorded programme from the beginning.
Current
scene (live)
Recording continuesRecording
Playback from beginning
||
Press
| PLAY.
||
Playback starts from the beginning of the
programme. (Recording continues)
NOTE
• When remaining capacity of HDD during Time Shift
Viewing is gone, Time Shift Viewing will be cancelled. The
current (live) broadcast will be displayed and the
programmes recorded for Time Shift Viewing will be
erased. You cannot view the recorded part of the
programme.
• A message will be displayed 5 minutes before timer
recording starts. If you are time shift viewing, it will stop 3
minutes later.
Fast Reverse/Forward Playback
If you press G REV or J FWD during Time Shift
Viewing or Chasing Playback, Fast Reverse/Forward
Playback starts.
If you press G REV (or J FWD) again, the speed of
Fast Reverse/Forward Playback changes as shown below.
(You cannot listen to audio during Fast Reverse/Forward
Playback.)
(Approx. 2g)
NOTE
• If you perform Fast Forward Playback during Time Shift
Viewing or Chasing Playback, the Recorder will automatically switch to the playback screen when Fast Forward
Playback reaches about 30 seconds before the live
broadcast. The timing that goes automatically back to
playback mode will slightly differ depending on the speed
of Fast Forward and Recording Mode.
• When the unit automatically goes back to normal
Playback during
Fast Forward Playback up to the point of the live broadcast by performing or .
(Approx. 8g) (Approx. 32g)(Approx. 8g)
, you can still view the programme in
31
GB

Time Shift Viewing/Chasing Playback
Time Shift Viewing
HDD
1
Press TIME SHIFT while
viewing a programme.
• Pause screen will be displayed in a
few seconds.
Pause icon
(This will become a square icon during
Time Shift Viewing.)
• Press ■ STOP/LIVE to return to
current (live) broadcast.
2
Press | PLAY.
• Playback starts from the position you
paused.
Play icon
• Press FSTILL/PAUSE to pause
playback (Still Playback).
To cancel Still Playback, press
FSTILL/PAUSE or |PLAY.
Press
GG
G REV or
GG
3
during Time Shift Viewing.
• Each time you press the buttons, the
Fast Reverse/Forward Playback
speed changes as shown below.
(Approx. 2g)
JJ
J FWD
JJ
(Approx. 32g)(Approx. 8g)
Chasing Playback
HDD
1
Press | PLAY during recording.
• Playback starts from the beginning of
the programme being recorded.
(Chasing Playback)
• Press FSTILL/PAUSE to pause
playback (Still Playback).
To cancel Still Playback, press
FSTILL/PAUSE or |PLAY.
Press
GG
G REV or
GG
2
during Chasing Playback.
• Each time you press the buttons, the
Fast Reverse/Forward Playback
speed changes as shown below.
(Approx. 2g)
Example: When J FWD is pressed
once
Fast Forward Playback 2✕ icon
• Press
3
Press ■STOP/LIVE to return to
||
| PLAY to return to the normal
||
playback speed.
the live broadcast which is being
recorded.
JJ
J FWD
JJ
(Approx. 32g)(Approx. 8g)
Example: When
once
Fast Forward Playback 2✕ icon
• Press |PLAY to return to the normal
playback speed.
4
Press ■STOP/LIVE to return to
J FWD is pressed
the current (live) broadcast.
• Time Shift Viewing will be cancelled,
and the automatically recorded
content will be erased.
NOTE
• Time shift viewing will stop in the following
cases.
• TIME SHIFT or ■ STOP/LIVE is
pressed.
• HDD remaining capacity is gone.
• The broadcast whose recording is
prohibited is received.
GB
32

Recording to HDD
This section explains recording on the
hard disc (HDD). (For information on
recording to DVD, see page 35.)
Confirming Remaining Time
for Recording
To confirm on TV screen
• Press ON SCREEN (under the cover).
To confirm on front display panel
• Press DISPLAY (under the cover).
Confirming Remaining Time
HD
ORIN
ALDI
G
FINE
This display means
that you can record
20 hours more in
FINE mode.
• During live programme viewing or HDD
playback, remaining time of recording in
the selected recording mode will be
displayed.
• During HDD recording, remaining time of
recording in the currently selected
recording mode will be displayed.
REMAIN 20h0m
10
10
00:00:00
Guide to Recordable Length
of Time
Recording Mode
Recording mode
Recording time
(DV-HR350F)
Recording time
(DV-HR300F)
• Remaining time for recording differs
according to the recording mode.
• Recordable time might be less than above
figures depending on the programme to be
recorded.
• MN (manual) recording mode setting
allows you to select the picture quality from
among 32 levels on the “MANUAL REC.
MODE” screen (page 37).
FINE
30 hr
20 hr
SP
50 hr
33 hr
LP
100 hr
67 hr
EP
150 hr
100 hr
Monitoring a Programme
Being Recorded while Playing Back a Disc (page 63)
• Picture in picture
This lets you monitor a programme being
recorded, while playing back a disc, using
the Simultaneous Recording/Playback
function.
Dubbing (page 44)
• Titles recorded on HDD can be saved by
dubbing them to DVD-RW/R. (You can also
dub from DVD-RW/R to HDD.)
• You can batch dub up to 5 programmes.
Recording Programmes to
HDD for High Speed Dubbing from HDD to DVD-RW/R
in Video Mode
• High Speed Dubbing Priority
Normally, recording onto HDD is done
using own format, but recording can also
be done using a format for high speed
dubbing onto DVDs formatted in Video
mode.
To perform high speed dubbing onto a
DVD in Video mode, set “HI SP DUB
PRIORITY” to “YES” and then record. (See
page 45.)
Chasing Playback (page 32)
• This lets you playback and watch a
programme from the beginning while it is
being recorded on HDD.
Simultaneous Recording/
Playback (page 63)
• This lets you playback and watch a
programme recorded on HDD, or a DVD or
CD, while recording another programme on
HDD.
Cutting out Commercials
(pages 67, 78)
• After recording is finished, you can cut out
commercials and other unnecessary
scenes by calling up the Erase Scene
function.
(Commercials cannot be cut out automati-
cally during recording.)
Tamper Proof
• You can set Tamper Proof to prevent
operations by mistake during recording or
timer recording.
1 Press and hold TAMPER PROOF (ON
SCREEN and DISPLAY together) for
more than 2 seconds.
2 Each time you perform this operation,
the function is activated or deactivated.
• If you try to operate the Recorder while
Tamper Proof is set, “ ” blinks in the front
display panel and tells you that Tamper
Proof is set.
Information
• When there is a report message (e.g. when
a timer recording was not successfully
performed), the Recorder displays an onscreen message telling that there is a
report message.
Check the report message by selecting
“INFORMATION” on the “START MENU”.
33
GB

Recording to HDD
Direct Recording to HDD
HDD
Explained below is the standard procedure
for recording the programme being viewed
onto HDD.
• A maximum of 12 hours can be recorded
onto HDD in one direct recording session.
• A maximum of 199 programmes can be
recorded (saved) onto HDD.
NOTE
• The content being recorded will not be
recorded if power failure occurs or if power
cord is accidentally unplugged.
* Also direct recording to a DVD-RW/R is
possible (page 35).
Preparation for Direct Recording
• When you record NICAM broadcast, set
“NICAM” setting to “AUTO” (see page 92).
• When recording to the HDD, the recorded
data is the same as that recorded to a
DVD-RW in VR mode.
1
Press HDD to select HDD mode.
• The HDD button on the front of the
Recorder lights up.
• HDD mode is selected automatically
when the power is turned on.
2
Press the Number buttons or
CH' / " to select the channel to
be recorded.
3
Press REC MODE to select the
recording mode.
• The recording mode changes as
shown below each time the button is
pressed.
FINE SP LP EP MNgg
6
7
•
• You cannot record programmes whose
• Timer recording cannot be performed
Inserting Chapter Marks
Manually during Recording
Press CHAPTER MARK (under the cover).
•
• You cannot insert chapter marks during
Setting the Record End
Time during Direct
Recording (Simple
REC PAUSE icon
Press REC PAUSE to resume
recording.
Press REC STOP to stop recording.
•“DATA IS BEING RECORDED TO
DISC.” displays on TV screen and
recording stops.
NOTE
Data is still written to the disc after recording
is stopped, and so you may be unable to
start the next recording immediately.
recording is prohibited.
during direct recording. To perform timer
recording, stop direct recording before the
preset time for timer recording.
“RECORDED CHAPTER MARK. ” is
displayed and chapter mark will be inserted.
Simultaneous Recording/Playback.
Recording Timer)
• Recording mode set by selecting
“MNgg” is the recording mode set
on the “MANUAL REC. MODE” Select
screen (page 38).
4
ÆÆ
Press
Æ REC during broadcast
ÆÆ
viewing.
• Recording begins and REC icon
displays in TV screen.
•
REC indicator (for HDD) on the front of
Recorder is lit red during recording.
REC icon
HD
REC
ORIN
ALDI
G
FINE
REMAIN 19h8m
/
1
1
1
/
1
00:19:30
5
Press REC PAUSE to pause
recording.
• Record Pause does not work during
Chasing Playback.
• During pause, the REC indicator (for
HDD) on the front of the Recorder
blinks.
GB
34
HDD
1
ÆÆ
Press
Æ REC on the remote
ÆÆ
control during recording.
• The “SET STOP TIME” screen is
displayed.
2
Press ' / " to set the end time.
• The end time can be set in units of 15
minutes.
• Total recording time cannot exceed
12 hours so the end time has to be
set accordingly.
• Press EXIT to stop setting midway
through.
SET STOP TIME.
STOP TIME 10 :
3
Press SET/ENTER.
• The record end time is set, and the
Simple Recording Timer indicator
(clock mark) lights up on the front
display panel.
30
ENTER
SELECT ENTER

Recording to DVD
This section explains recording on the
DVD (For information on recording to
HDD, see page 33.)
Checking Remaining Time
and Other Information
Press ON SCREEN (under the cover) during
DVD playback or recording.
• Disc capacity and the number of recorded
titles, etc. are displayed. It is recommended to confirm before recording.
DVD-RW
ORVRINALI
G
FINE
REMAIN 0h30m
2
10
00:00:00
•“REMAIN 0h0m” or nothing will be
displayed when an unrecordable disc is
set.
NOTE
• Disc remaining time display is approximate
measure of disc capacity. There may be
space left in disc capacity after recording.
(Remaining time during recording and after
recording might not be the same.)
Disc capacity
Number of titles
Number of
chapters
Simultaneous Recording/
Playback (page 63)
• HDD playback is possible while recording
or timer recording to DVD.
Dubbing (page 44)
• Dubbing titles recorded on DVD to HDD or
titles recorded on HDD to DVD-RW/R are
possible.
• Exact Dubbing: Automatically selects the
appropriate recording mode according to
the remaining capacity of DVD when
dubbing titles recorded on HDD to DVD.
Not Enough Disc Capacity
• Exact Recording (page 84)
Exact recording functions when the
selected recording mode is not appropriate
to fit the programme to the disc when you
timer record.
• Alternate Recording (page 89)
Alternate recording functions when you
forget to load a DVD for timer recording. It
automatically timer records the programme
to HDD.
Cutting TV Commercials
(page 67)
• You can cut unwanted scenes like TV
commercials by using the ERASE SCENE
function after the recording. (Cannot cut TV
commercials automatically.)
• You cannot cut scenes when you record
programmes by Video mode to DVD-RW or
DVD-R.
Tamper Proof
• You can set Tamper Proof to prevent
operations by mistake during recording or
timer recording.
1 Press and hold TAMPER PROOF (ON
SCREEN and DISPLAY together) for
more than 2 seconds.
2 Each time you perform this operation,
the function is activated or deactivated.
• If you try to operate the Recorder while
Tamper Proof is set, “
display panel and tells you that Tamper
Proof is set.
” blinks in the front
Loading Disc
1
Press OPERATE to turn the
power on.
2
Press OPEN/CLOSE on the
Recorder to open the disc tray.
OPEN/CLOSE
OPERATE
3
Load disc on the disc tray.
O
P
E
R
A
T
E
• Insert the disc with the label face up.
• In case of disc recorded on both
sides, face the side you want to
record down.
4
Press OPEN/CLOSE to close the
disc tray.
Direct Recording to DVD
DVD-RW
VR MODE
Explained below is the standard procedure
for recording the programme being viewed
onto DVD.
• You can create a maximum of 99 original
• Record in VR mode when you want to edit
Preparation for Direct Recording
• When you record NICAM broadcast, set
1
DVD-RW
VIDEO MODE
titles.
later. Edit functions will be limited when you
record in Video mode.
“NICAM” setting to “AUTO” (see page 92).
DVD-R
Press DVD to select DVD mode.
• The DV D button on the front of the
Recorder lights up.
• When the power is turned on, HDD
mode is selected automatically.
35
GB

Recording to DVD
2
3
4
5
6
7
8
Set a DVD-RW or DVD-R disc.
• When a new DVD-RW disc not
initialized yet is set, VR mode
initializing starts automatically. When
initializing is over, you can start
recording.
• When you want to re-initialize in Video
mode, select “DVD VIDEO MODE
INIT.” screen (page 95).
• When you want to initialize in Video
mode from the beginning, select
“AUTO INITIALIZING” screen (page
95).
Press Number buttons or CH ' /
" to select the channel to record.
Press REC MODE to select the
desired recording mode.
• The recording mode changes as
shown below each time the button is
pressed.
FINE SP LP EP MNgg
• Recording mode set when “MNgg”
is selected is the recording mode set
on the “MANUAL REC. MODE”
screen (page 38).
Press ● REC.
• Recording begins and REC icon is
displayed.
• The REC indicator (for DVD) on the
front of the Recorder is lit red during
recording.
DVD-RW
ORVRINALI
G
FINE
REMAIN 1h0m
1
/
1
/
00:00:01
REC
1
1
Press REC PAUSE to pause
recording.
• Pause will not function during timer
recording.
• The REC indicator (for DVD) on the
front of the Recorder blinks during
Recording Pause mode.
Press REC PAUSE to resume
recording.
Press REC STOP to stop
recording.
•“DATA IS BEING RECORDED TO
DISC.” displays on TV screen and
recording stops.
NOTE
Data is still written to the disc after recording
•
is stopped, and so you may be unable to
start the next recording immediately.
• Press ON SCREEN (under the cover) to
confirm remaining time of DVD or check
the counter display during recording.
• You cannot record programmes which
prohibit recording.
• Recording either stops or pauses automatically in the following cases.
—Programme which prohibits recording is
on air.
—Unable to continue recording for some
reason.
• Timer recording cannot be performed
during direct recording. To perform timer
recording, stop direct recording before the
preset time for timer recording.
You may not be able to record on disc
edited by other recorder.
• If a disc edited by other DVD recorder has
more than 999 chapter marks, it cannot be
edited (or recorded) with this Recorder.
• If a disc edited by other DVD recorder has
added or erased scenes 51 times or more
per title or the disc is protected, it cannot
be edited (or recorded) with this Recorder.
About Recording to DVD in Video Mode
• In case you are recording to DVD in Video
mode and recording stops due to power
failure etc., recorded contents a few
minutes before the stop may not be
recorded.
• For details on limitation during recording in
Video mode, see page 45 too.
Inserting Chapter Marks
Manually during Recording
Press CHAPTER MARK (under the cover).
•“RECORDED CHAPTER MARK.” displays
and chapter mark is recorded.
• You can only record chapter marks
manually when recording to DVD-RW (VR
mode).
• You cannot record chapter marks manually
when recording to DVD-RW (Video mode)
or DVD-R, or during Simultaneous Recording/Playback.
Setting Record End Time
during Direct Recording
• You can set record end time during direct
recording to DVD. For details see “Setting
the Record End Time during Direct
Recording (Simple Recording Timer)” on
page 34.
• Stop recording first when you take out
the disc.
GB
36
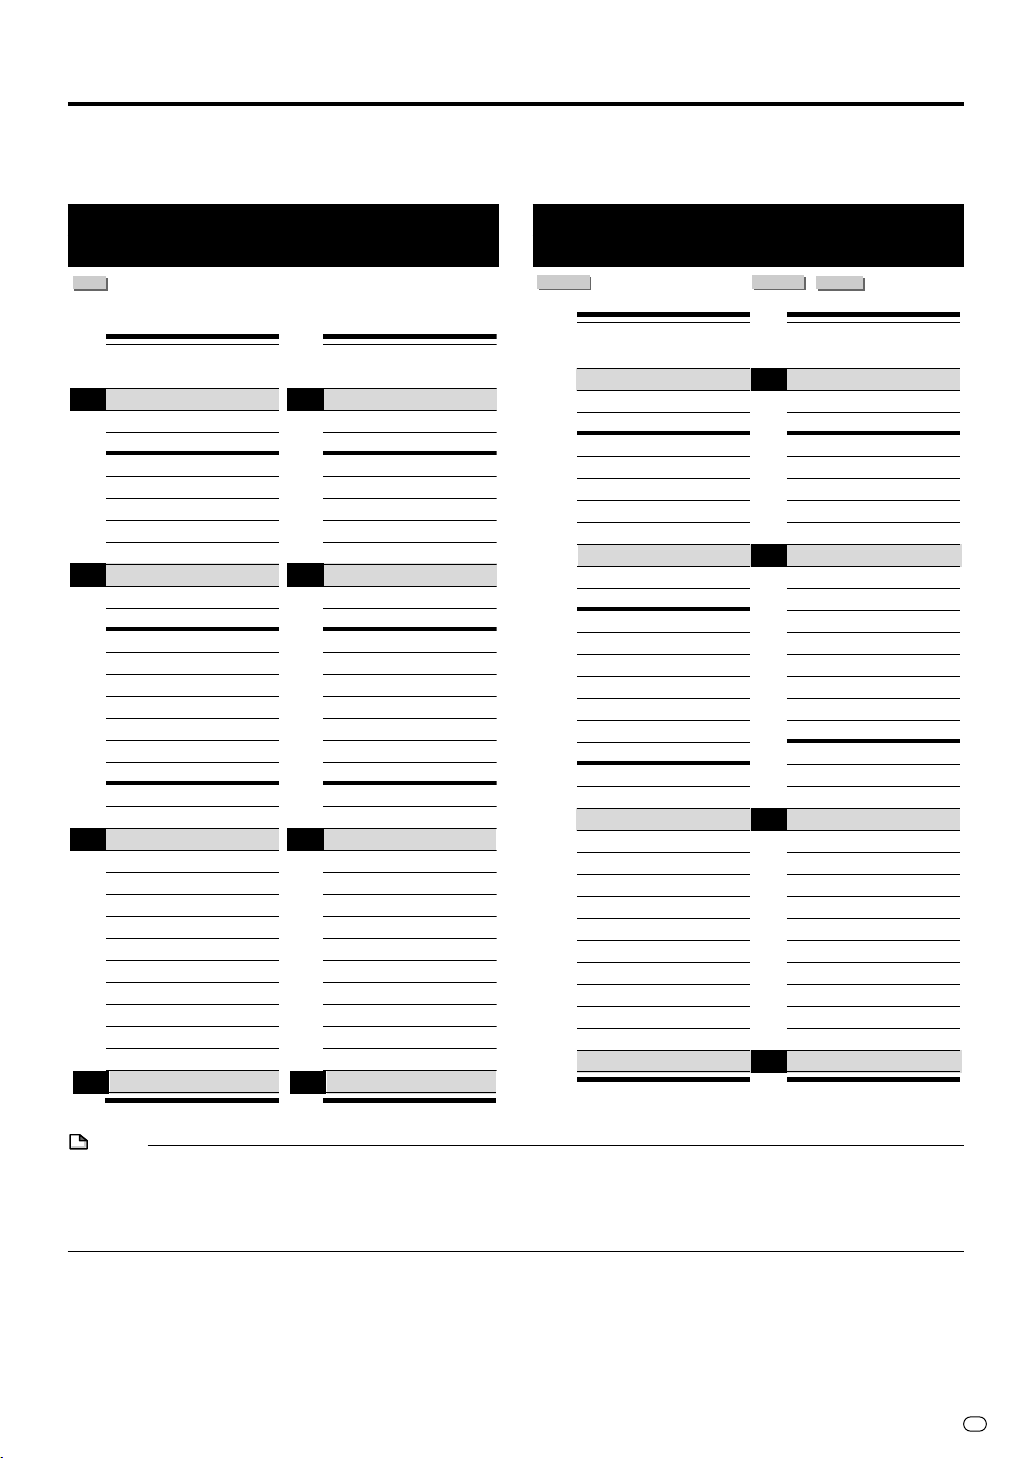
Setting Recording Mode (HDD/DVD)
• HDD recording time is approximate measure. DVD recording time is approximate measure using 4.7GB disc.
•
This does not guarantee the length of recording time. Actual recording time may be shorter than that indicated below depending
on image quality and other aspects.
HDD Recording Mode and
Recording Time
HDD
DV-HR300FDV-HR350F
Recording Recording
Mode Time (approx.)
MN1 150 Hr
EP
MN2 144 Hr
MN3 137 Hr
MN4 131 Hr
MN5 125 Hr
MN6 119 Hr
MN7 112 Hr
MN8 106 Hr
LP
MN9 100 Hr
MN10 96 Hr
MN11 92 Hr
MN12 88 Hr
MN13 83 Hr
MN14 79 Hr
MN15 75 Hr
MN16 71 Hr
MN17 67 Hr
MN18 63 Hr
MN19 58 Hr
MN20 54 Hr
MN21 50 Hr
SP
MN22 48 Hr
MN23 46 Hr
MN24 44 Hr
MN25 42 Hr
MN26 40 Hr
MN27 38 Hr
MN28 35 Hr
MN29 34 Hr
MN30 33 Hr
MN31 32 Hr
MN32 30 Hr
FINE
Recording Recording
Mode Time (approx.)
MN1 100 Hr
EP
MN2 96 Hr
MN3 91 Hr
MN4 87 Hr
MN5 83 Hr
MN6 79 Hr
MN7 75 Hr
MN8 71 Hr
LP
MN9 67 Hr
MN10 64 Hr
MN11 61 Hr
MN12 58 Hr
MN13 55 Hr
MN14 53 Hr
MN15 50 Hr
MN16 47 Hr
MN17 44 Hr
MN18 42 Hr
MN19 39 Hr
MN20 36 Hr
MN21 33 Hr
SP
MN22 32 Hr
MN23 30 Hr
MN24 29 Hr
MN25 28 Hr
MN26 26 Hr
MN27 25 Hr
MN28 24 Hr
MN29 23 Hr
MN30 22 Hr
MN31 21 Hr
MN32 20 Hr
FINE
DVD-RW/R Recording Mode
and Recording Time
DVD-RW
VR MODE
Recording Recording
Mode Time (approx.)
MN1 360 Min
MN2 345 Min
MN3 330 Min
MN4 315 Min
MN5 300 Min
MN6 285 Min
MN7 270 Min
MN8 255 Min
MN9 240 Min
MN10 230 Min
MN11 220 Min
MN12 210 Min
MN13 200 Min
MN14 190 Min
MN15 180 Min
MN16 170 Min
MN17 160 Min
MN18 150 Min
MN19 140 Min
MN20 130 Min
MN21 120 Min
MN22 110 Min
MN23 105 Min
MN24 100 Min
MN25 95 Min
MN26 90 Min
MN27 85 Min
MN28 80 Min
MN29 75 Min
MN30 70 Min
MN31 65 Min
MN32 60 Min
DVD-RW
VIDEO MODE
EP
LP
SP
FINE
DVD-R
Recording Recording
Mode Time (approx.)
MN1 360 Min
MN2 345 Min
MN3 330 Min
MN4 315 Min
MN5 300 Min
MN6 285 Min
MN7 270 Min
MN8 255 Min
MN9 240 Min
MN10 230 Min
MN11 220 Min
MN12 210 Min
MN13 200 Min
MN14 190 Min
MN15 180 Min
MN16 170 Min
MN17 160 Min
MN18 150 Min
MN19 140 Min
MN20 130 Min
MN21 120 Min
MN22 110 Min
MN23 105 Min
MN24 100 Min
MN25 95 Min
MN26 90 Min
MN27 85 Min
MN28 80 Min
MN29 75 Min
MN30 70 Min
MN31 65 Min
MN32 60 Min
NOTE
• Higher recording mode means higher picture quality and lower recording mode means longer recording time.
• Picture quality of recorded content changes distinctively if the recording mode changes from the recording modes right
below the bold lines in left chart and recording modes right above the bold lines. The positions of the bold lines differ
among HDD, DVD-RW (VR Mode) and DVD-RW/R (Video Mode).
With MN22-32, VBR recording has a large effect, so the actual recording time will be longer.
•
37
GB

Setting Recording Mode (HDD/DVD)
Setting the Manual
Recording Mode (MN)
DVD-RW
HDD
VR MODE
You can set the manual recording mode
which is used when you select “MN XX” with
REC MODE.
1
Press START MENU to display
the “START MENU” screen.
2
Press ' / " / \ / | to select
“OTHER SETTINGS 1”, then press
SET/ENTER.
3
Press \ / | to select “REC.
FUNCTION”.
4
Press ' / " to select “MANUAL
REC. MODE”, then press SET/
ENTER.
OTHER SETTINGS 1[REC. FUNCTION ] 82:0121/52
REC. FUNCTION VIEW/PLAY SETTING ADJUSTMENT
AUTO CHAPTER
EXACT RECORDING
REC . AUDIO FORMAT
EXTERNAL AUDIO
VIDEO MODE AUDIO
MANUAL REC. MODE
5
Press \ / | to select the desired
recording mode, then press SET/
ENTER.
• Refer to the table on page 37.
OTHER SETTINGS 1[MANUAL REC. MODE
ABLE TO SELECT 1 OF 32 LEVELS OF PICTURE QUALITY IN
MANUAL REC. MODE WHEN USING RECORDING MODE SWITCH.
EP LP SP FINE
DVD-RW
VIDEO MODE
DVD-R
]
82:0121/52
Direct Recording the TV
programme you are
watching
DVD-RW
HDD
VR MODE
Important!
•
This function is available only when
connecting to your TV using SCART cable.
You can record the TV programme you are
watching with easy operation.
1
Press DVD or HDD to select the
recording disc.
2
Press DIRECT REC TV (under
the cover) to start recording.
3
Press REC STOP to stop recording.
DVD-RW
VIDEO MODE
DVD-R
NOTE
When playing back a DVD-RW/R disc
(Video Mode) recorded with the recorder
using a DVD player.
• When you playback a disc recorded with
the manual mode of the recorder using a
DVD player, it may not be able to playback
depending on the model (some particular
modes cannot be played back).
GB
38

Timer Recording
Timer Recording with
SHOWVIEW® system
DVD-RW
HDD
VR MODE
The operation method is the same for both
HDD and DVD.
•
The S
programme your Recorder for timer recording
simply by inputting the S
•
The S
newspapers, television guides, and local
CATV listings. Simply by inputting this
S
HOWVIEW
Recorder for timer recording, eliminating the
need to input programme start time, stop
time, channel, date and other information
usually necessary for timer recording.
• Up to 16 timer programs can be stored.
(This includes Timer Program.)
Preparation to Use SHOWVIEW system
• Check that the clock is displaying the
correct time.
• If the TIMER indicator on the front of the
Recorder is lit, press TIMER ON/OFF to
turn off the TIMER indicator and to set the
TIMER STANDBY mode to off.
1
Press SHOWVIEW (button) to
display the “SHOWVIEW” setting
screen.
SHOWV I EW S YST EM
➞
SH OWV I EW N O .
: S EL ECT 0 9
2
Press Number buttons to enter
the SHOWVIEW number.
• Press ERASE if you make a mistake
3
Press " , then use \ / | to select
“ONCE”, “WEEKLY” or “DAILY”.
• If you want to make additional
DVD-RW
VIDEO MODE
®
HOWVIEW
system allows you to
HOWVIEW
numbers are listed in most
DVD-R
HOWVIEW
number.
number, you can program your
-
-
ONCE WEEKLY
:ENTER
DA I L Y
:INPUT
:RETURN
in the SHOWVIEW number. Each time
you press the button, one digit will be
erased.
recordings at the same time each day
or week, select “DAILY” or “WEEKLY”
as appropriate.
4
Press SET/ENTER to confirm.
DATE PR START S
25/ 12
W--12:35 1
--/-- -- -:--
--/-- -- -:--
--
/
-- -- -:--
PR : PRESET
: SELECT
1/4
TOP
3:05 F H
-:-- ---
-:-- ---
-
:
-- ---
:CHANGE
:RETURN:ENTER
NOTE
•“ERROR” will appear if you have entered a
number that is not a correct SHOWVIEW
number. If this happens press ERASE to
delete the numbers as required and enter
the correct SHOWVIEW number.
• Check that the menu list agrees with the
times shown in the TV listing. If it does not,
press ERASE to return to the SHOWVIEW
system menu, then enter the correct
SHOWVIEW number.
The first time that you use the SHOWVIEW
system to make a recording on each
channel preset, “PR” may be highlighted
on the On-Screen Display.
5
Enter the channel button you
want to record using ' / " or
Number buttons.
• For Example to record a programme
on channel 8 press 0 8.
6
Press \ / | to select “START
(time)” / “STOP (time)” then use
' / " or the Number buttons to
change the time if necessary.
• When entering less than 10 hours or
minutes add a “0” before the number, for
example for 12:05 start, press 1 2 0 5.
7
Press | to select “REC. MODE”,
then use \ / | to select the
recording mode.
➞
REC . MODE
F:FINE S:SP L:
M:MANUAL
VPS / PDC
:ON
REC . MED IA
H:HDD D:DVD
: SELECT
:ENTER
-
(1 32)
:OFF
LP E :EP
➞
32
:CHANGE
: RE TURN
When “M:MANUAL (1~32)” is
selected:
• Select the recording mode with
then press SET/ENTER. (The
recording mode can be selected from
32 levels.)
\\
\/
\\
||
|,
||
39
GB

Timer Recording
GB
40
8
Press ' / " to select “VPS/PDC”,
then use \ / | to turn the VPS/
PDC setting ON(“
9
Press ' / " to select “REC.
∗∗
∗”)/OFF(“-”).
∗∗
MEDIA”, then use \ / | to select
the recording disc (“H:HDD” or
“D:DVD”).
10
Press SET/ENTER to confirm.
DATE PR START S
25/12W 8 12:05 1
--/-- -- -:--
--
/
-- -- -:--
--
/
-- -- -:--
: SELECT
:ENTER
11
Press SET/ENTER.
SHOWV I EW S YST EM
➞
SH OWV I EW N O .
ONCE WEEKLY
: S EL ECT 0 9
:ENTER
TOP
3:05 S D
-:-- ---
-
:
-- ---
-
:
-- ---
:CHANGE
:RETURN
-
-
DA I L Y
:INPUT
:RETURN
• The SHOWVIEW screen is displayed. If
you want to enter further SHOWVIEW
system recordings repeat this
procedure.
12
When you have completed
entering the timer settings, press
START MENU or EXIT to exit
from the “S
13
(When you select “D:DVD” in step
9
, ensure the recordable DVD-RW/
HOWVIEW” screen.
R is inserted into the Recorder)
Press TIMER ON/OFF to place
the Recorder in TIMER STANDBY
mode.
• The TIMER indicator on the front of
the Recorder lights up.
OPERATE
• The channel cannot be changed
during TIMER STANDBY mode. To
change the channel, set TIMER
STANDBY to off.
1/4
•
You can also access the S
HOWVIEW
system
menu by performing the following procedure:
1 Press START MENU.
''
""
\\
2 Press
' /
''
||
" /
\ /
| to select “TIMER
""
\\
||
PROGRAM/CHECK”, then press SET/
ENTER.
''
3 Press
""
' /
" to select “S
''
""
HOWVIEW”, then
press SET/ENTER.
1
4 Continue from step
of this procedure.
5 Press START MENU or EXIT to exit from
timer recording.
•
VPS/PDC is a signal broadcast by some TV
stations which adjusts the start and stop time
of your Recorder recording. This ensures that
if there is a change in broadcast time for your
programme the Recorder will still record the
whole programme.
It is essential that the start time as it
appears in the TV listing is used to
programme the Recorder, as this information is used to identify the VPS/PDC signal
corresponding to your programme.
•
Even if recording by timer programming is
completed, since the Recorder is VPS/PDC
system compatible, the power may remain
on internally (blue background output, LCD
backlight off), but it will be turned off around
4 AM the next day or three hours after
recording is complete.
• Data is still written to the disc after first
timer recording is stopped, the first part of
the next programme may not be recorded.
• During recording, press REC STOP to
cancel the recording. If there are further
recordings to be made, the Recorder will
not return to TIMER STANDBY mode.
• When you set a DVD as recording media,
timer recording will not start during disc
playback. If “ALTERNATE RECORDING” is
set to “YES”, the programme will be timer
recorded to HDD.
•
Timer recording will not start during dubbing.
•
Manual recording and editing cannot be
performed during timer standby.
Convenient Functions When Recording to
DVD
Exact Recording (page 84)
• If you set EXACT RECORDING to “YES”,
the Recorder will automatically adjust the
recording mode of timer recording so the
recorded programs will fit on one disc.
Alternate Recording (page 89)
• You can record timer programs to HDD
automatically when Exact Recording
cannot fit the programmes on one disc.
• Alternate Recording will also function when
you forgot to insert the disc for recording.
To check, change or cancel
timer settings
• See page 43.
To stop recording while
timer recording is in
progress
•
If you press REC STOP, “TIMER RECORDING IS IN PROGRESS, IF YOU PRESS THE
REC. STOP BUTTON ONCE MORE, TIMER
RECORDING CANCELS AND RECORDING
STOPS.” will appear on the screen. Even
that message goes out of the screen,
pressing REC STOP one more time will
stop the recording.

Timer Recording by
Specifying Date, Time
and Channel
DVD-RW
HDD
VR MODE
The operation method is the same for both
HDD and DVD.
• You can timer record up to 16 programmes
scheduled within a year, including
SHOWVIEW system.
• You can consecutively record up to 12
hours to HDD.
Preparation for Timer Recording
• Check that the clock is displaying the
correct time.
• If the TIMER indicator on the front of the
Recorder is lit, press TIMER ON/OFF to
turn off the TIMER indicator and to set the
TIMER STANDBY mode to off.
For Example:Recording a programme on
channel 8 from 12:05 to 13:05 on
December 25th.
1
Press START MENU to display
the “START MENU” screen.
2
Press ' / " / \ / | to select
“TIMER PROGRAM/CHECK”, then
press SET/ENTER.
DVD-RW
VIDEO MODE
DVD-R
Timer Recording
4
Press SET/ENTER to display
today’s date.
DATE PR START S
25/ 12
--
--
--
DAT E : DAY / MON TH
: SELECT
• Press
-- - --
/
-- -- -:--
/
-- -- -:--
/
-- -- -:--
:ENTER
''
""
' /
" or Number buttons to
''
""
change the date if you want.
• If you use the Number buttons, enter
two digits for the day, then two for the
month. For example for December
25th, press 2 5 (25th), then 1 2
(December).
5
When the correct date for your
recording is shown, press | to
move to the next setting.
DATE PR START S
25/ 12
--/-- -- -:--
--/-- -- -:--
--
W
: SELECT
-- -:--
/
-- -- -:-:ONCE
:WEEKLY D :D
TOP
-:--
-:-- ---
-
-
TOP
-
-:-- ---
-:-- ---
-
AILY
:
-- ---
:
-- ---
:CHANGE
:RETURN
:--F H
:
-- ---
:CHANGE
:RETURN:ENTER
1/4
F H
1/4
SHOWV I EW
TIMER
: SELECT
3
Press ' / " to select “TIMER”,
: RE TURN:ENTER
then press SET/ENTER.
DATE PR START S
--/-- -- - --
/
-- -- -:--
--
--
/
-- -- -:--
--
/
-- -- -:--
ERASE :CANCEL
: SELECT
2/4
:ENTER
TOP
-:-- ---
:
-- ---
-
-
:
-- ---
-
:
-- ---
:RETURN
1/4
6
If you want to make additional
recordings at the same time each
day or week, press ' / " to select
“D”(DAILY) or “W”(WEEKLY).
Then press | to move to the next
setting.
7
Press ' / " or the Number
buttons to enter the channel
number. Then press | to move to
the next setting.
• For example to record a programme
on channel 8, press 0 8.
8
Press ' / " or the Number
buttons to enter the start time,
hours first, then minutes then
press |.
• When entering less than 10 hours or
minutes add a “0” before the number,
for example for 12:05 start, press 1 2
0 5.
DATE PR S TART S
25/12W 8 12:05 1
--/-- -- -:--
--/-- -- -:--
--
/
-- -- -:--
: SELECT
TOP
2:05 F H
-:-- ---
-:-- ---
-
:
:CHANGE
:RETURN:ENTER
-- ---
1/4
41
GB
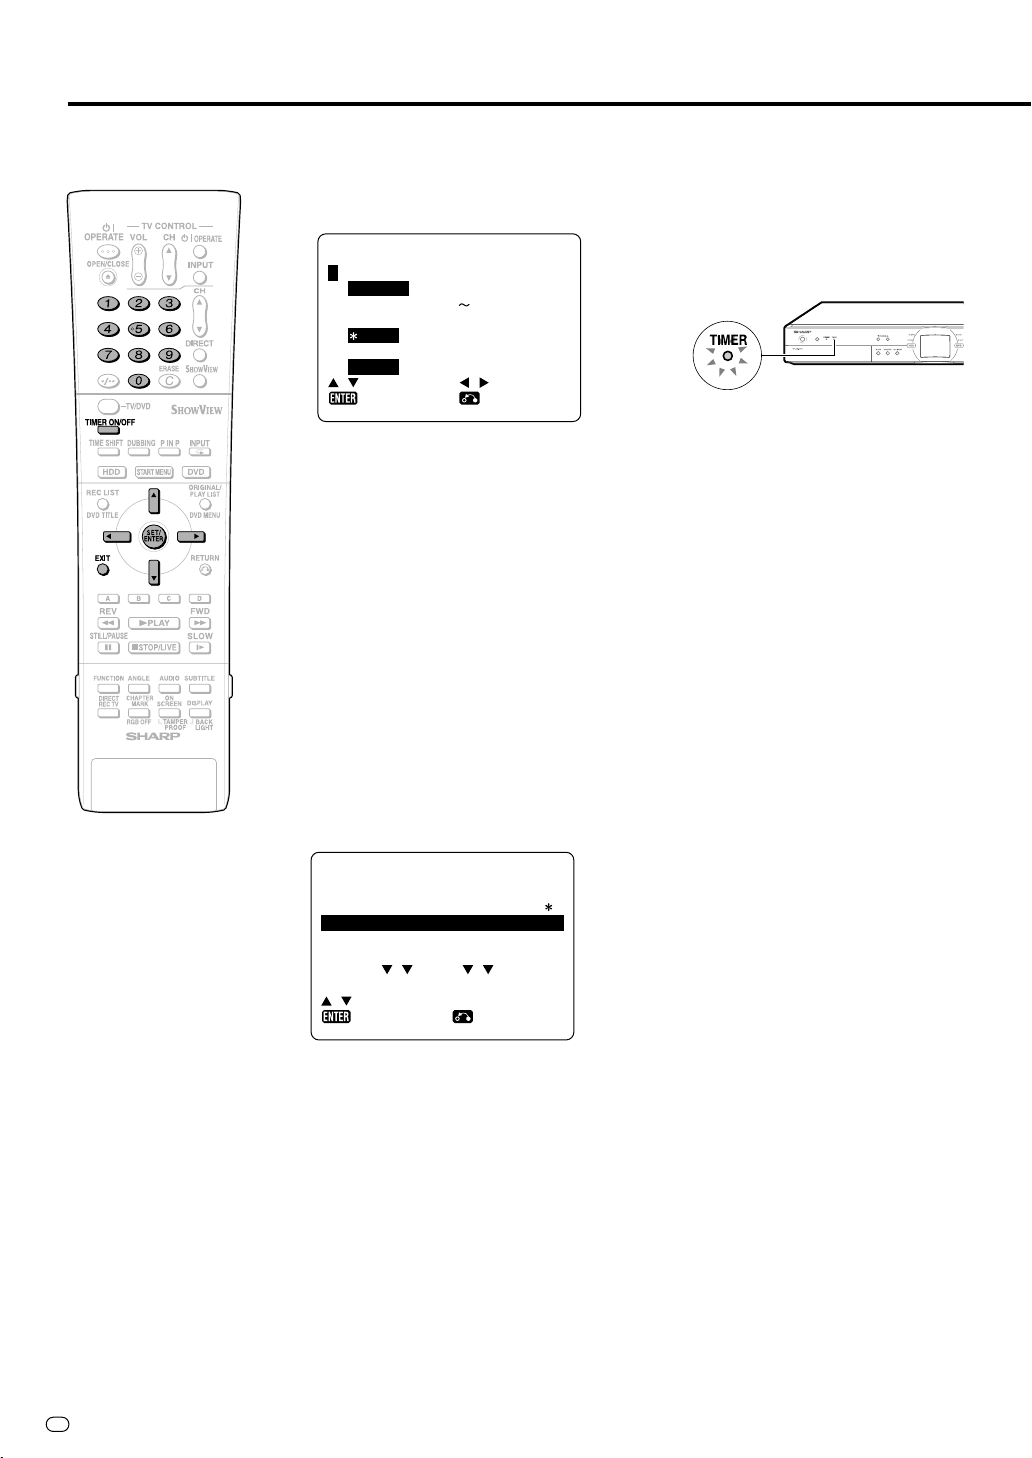
Timer Recording
9
10
11
12
13
Press ' / " or the Number
buttons to enter the stop time,
then press |.
• For example for 13:05 stop, press 1 3
0 5.
➞
REC . MODE
F:FINE S:SP L:
M : MA NU AL ( 1 ✤ 32 )
VPS / PDC
:ON
-
REC . MED IA
H:HDD D:DVD
: SELECT
:OFF
:ENTER
LP E :EP
➞
16
:CHANGE
:RETURN
Press ' / " to select “REC.
MODE”, then use \ / | to select
the recording mode.
When “M:MANUAL (1~32)” is
selected:
• Select the recording mode with \ / |,
then press SET/ENTER. (The
recording mode can be selected from
32 levels.)
Press ' / " to select “VPS/PDC”,
then use \ / | to turn the VPS/
PDC setting ON(“
∗∗
∗”)/OFF
∗∗
(“-”).
Press ' / " to select “REC.
MEDIA”, then use \ / | to select
the recording disc (“H:HDD” or
“D:DVD”), then press SET/
ENTER.
DATE PR START S
25/12W 8 12:05 1
--/-- -- -:--
--
/
-- -- -:--
--
/
-- -- -:--
2/4
ERASE :CANCEL
: SELECT
:ENTER
• If any more timer recordings are to be
set, repeat step 4 to 12.
1/4
TOP
3:05 S D
-:-- ---
-
:
-- ---
-
:
-- ---
: RE TURN
When you have completed
entering the timer settings, press
START MENU or EXIT to exit
from the “START MENU” screen.
14
(When you select “D:DVD” in step
12
, ensure the recordable DVD-
RW/R is inserted into the
Recorder) Press TIMER ON/OFF
to place the Recorder in TIMER
STANDBY mode.
• The TIMER indicator on the front of
the Recorder lights up.
OPERATE
• The channel cannot be changed
during TIMER STANDBY mode. To
change the channel, set TIMER
STANDBY to off.
• VPS/PDC is a signal broadcast by some TV
stations which adjusts the start and stop
time of your Recorder recording. This
ensures that if there is a change in
broadcast time for your programme the
Recorder will still record the whole
programme.
It is essential that the start time as it
appears in the TV listing is used to
programme the Recorder, as this information is used to identify the VPS/PDC signal
corresponding to your programme.
•
Even if recording by timer programming is
completed, since the Recorder is VPS/PDC
system compatible, the power may remain
on internally (blue background output, LCD
backlight off), but it will be turned off around
4 AM the next day or three hours after
recording is complete.
• Data is still written to the disc after first
timer recording is stopped, the first part of
the next programme may not be recorded.
• During recording, press REC STOP to
cancel the recording. If there are further
recordings to be made, the Recorder will
not return to TIMER STANDBY mode.
• When you set a DVD as recording media,
timer recording will not start during disc
playback. If “ALTERNATE RECORDING” is
set to “YES”, the programme will be timer
recorded to HDD.
•
Timer recording will not start during dubbing.
•
Manual recording and editing cannot be
performed during timer standby.
GB
42

Timer Recording
Confirm, Change and
Cancel a Timer Programme
DVD-RW
HDD
VR MODE
The operation method is the same for both
HDD and DVD.
Confirming
You can confirm on the Timer setting screen a
list of all timer programmes that are already
set.
Preparations for timer confirmation
• If the TIMER indicator on the front of the
Recorder is lit, press TIMER ON/OFF to
turn off the TIMER indicator and to set the
TIMER STANDBY mode to off.
1
Press START MENU to display
the “START MENU” screen.
2
Press ' / " / \ / | to select
“TIMER PROGRAM/CHECK”, then
press SET/ENTER.
3
Press ' / " to select “TIMER”.
Press SET/ENTER to confirm.
• All the timer recordings in the
DATE PR START S
25/12W 8 12:05 1
--/-- -- -:--
--
--
ERASE :CANCEL
: SELECT
DVD-RW
VIDEO MODE
DVD-R
Recorder’s memory will be shown.
1/4
TOP
3:05 S D
-:-- ---
/
-- -- -:--
/
-- -- -:--
2/4
:ENTER
-
:
-- ---
-
:
-- ---
:RETURN
Changing
1
Follow steps 1 to 3 of
“Confirming” described left.
2
Press ' / " to highlight the timer
recording you want to change,
then press SET/ENTER to select.
3
Press \ / | to highlight the setting
to be changed and correct it by
using ' / " / \ / | or the Number
buttons.
DATE PR S TART S
26/ 12W 8 12: 05 1
--/-- -- -:--
--
/
-- -- -:--
--
/
-- -- -:--
2/4
ERASE :CANCEL
: SELECT
:ENTER
4
When all corrections are complete
TOP
3:05 S D
-:-- ---
-
:
-- ---
-
:
-- ---
:RETURN
press SET/ENTER to confirm,
then press START MENU or
EXIT to exit.
Cancelling
1
Follow steps 1 to 3 of
“Confirming” described left.
2
Press ' / " to highlight the timer
recording to be cancelled, then
press ERASE.
1/4
4
If the settings are correct, press
START MENU or EXIT to exit.
DATE PR S TART S
--/-- -- -:--
--
/
-- -- -:--
/
-- -- -:-- -:-- ---
--
--
/
-- -- -:--
2/4
ERASE :CANCEL
: SELECT
:ENTER
3
Press START MENU or EXIT to
1/4
TOP
-:-- ---
-
:
-- ---
-
:
-- ---
:RETURN
exit.
NOTE
• If there are some programmes to be
recorded, do not forget to press TIMER
ON/OFF to return the Recorder to TIMER
STANDBY mode.
43
GB

Dubbing (HDD/DVD)
Dubbing Method and Dubbing
Types
You can dub from HDD to DVD and DVD to HDD. It is
recommended to dub important programmes recorded on
HDD to DVD for safe keeping.
• Can dub up to five titles (programmes) in one session.
• Cannot dub programmes that are not recorded properly.
High Speed Dubbing
• Copy titles recorded to HDD without any change of image
quality and recording length. This Recorder can perform
high speed dubbing with no loss of image quality of data
so there is no degradation.
• Time to dub varies according to the recording mode of
title (programme) to dub or type of disc you use.
• When a blank 2X speed compatible disc is initialized with
other DVD recorder, dubbing may be done at 1X speed
even if high speed dubbing is selected.
Example: Approximate time it takes to dub when you dub
programme 1 hour long
Recording Mode of Source Title
Required time
Using a 2✕-speed
compatible disc
Using a 1✕-speed
compatible disc
• Even if DVD-R is compatible to 4✕ speed dubbing the
Recorder will handle as disc compatible to 2✕ speed
dubbing.
• If you perform high-speed dubbing of a “Copy Once”
programme, dubbing will not be done at 2✕-speed, even
if you use a 2✕-speed compatible disc.
Rate Conversion Dubbing (Constant Speed)
• Plays back titles of HDD and dubs to DVD-RW/R or plays
back titles of DVD-RW/R and dubs to HDD.
• Selects picture quality (recording mode) for dubbing. You
can select among 32 levels of recording modes so it is
convenient when you want to fit the programmes into one
disc.
• You can select among 32 levels of recording mode by
using Manual setting but picture quality will not exceed
the quality of original.
• Time to dub is about the same as time required to record
the title in the beginning.
NOTE
• You cannot operate other functions while dubbing.
—Timer programming will not start while dubbing.
—You cannot record to HDD or playback titles on HDD
while dubbing.
FINE SP LP EP
Approx.
30 min
Approx.
60 min
Approx.
15 min
Approx.
30 min
Approx.
7.5 min
Approx.
15 min
Approx.
5 min
Approx.
10 min
Limitation during Dubbing
Stopping Dubbing in the Middle
• When dubbing “Copy Once” enabled programme from
HDD to DVD-RW (CPRM compatible) is stopped in the
middle, the part that was dubbed will be erased from
HDD. If you restart the dubbing, you can dub the
remaining part as a different title but overlap between title
dubbed before and after the stop might be off.
Dubbing Titles Including “Copy Once” En-
abled Programme
• When dubbing titles including “Copy Once” enabled
programme on HDD to DVD-RW, use DVD-RW (VR mode)
Ver. 1.1 CPRM compatible disc.
•“Copy Once” enabled programme recorded to HDD will
move (recorded programme will be erased after the
move) to DVD-RW. (You cannot dub in Video mode even if
you use DVD-RW Ver. 1.1 CPRM compatible disc.)
NOTE
• Even if you select “HIGH SPEED DUBBING”, you may not
be able to increase the speed of dubbing from 1✕
depending on titles you want to dub and type of disc.
• When title on HDD that includes “Copy Once” enabled
title is divided into several chapters, you can add all the
chapters to dubbing list by adding one of the chapters to
dubbing list.
Dubbing Direction and Dubbing
Speed
Dubbing
Direction
HDD→DVD-RW
(VR mode)
HDD→DVD-RW/R
(Video mode)
DVD-RW/R→HDD
✕ Can dub.
— Cannot dub.
√ Can High Speed Dub the recorded title if it is recorded
using “HI SP DUB PRIORITY”.
*1 Can just move the original title if that title is “Copy Once”
enabled.
*2 Cannot dub “Copy Once” enabled title.
Dubbing
Speed
Constant Speed
(Rate Conversion
Dubbing)
*1
✕
✕
*2
✕ —
High Speed
(High Speed
Dubbing)
*1
✕
√
GB
44

Dubbing (HDD/DVD)
Title Name and Chapter Mark Copied
during Dubbing
• Title name and chapter mark are as follows:
Rate Conversion Dubbing
HDD↔DVD (VR mode)
HDD→DVD (Video mode)
DVD (Video mode)→HDD
High Speed Dubbing
HDD→DVD (VR mode)
HDD→DVD (Video mode)
✕ Can dub.
— Cannot dub.
*1 Chapter mark of the dubbed title will not be copied
when you dub from HDD to DVD-RW/R (Video mode)
using rate conversion dubbing function. The chapters
will be inserted according to the setting of auto chapter
(either “10 min”, “15 min”, or “30 min”).
*2 You cannot dub from a finalized DVD-RW/R (Video
mode) to HDD.
*3 During dubbing from HDD to DVD-RW/R (Video mode)
maximum chapter marks that could be dubbed using
high speed dubbing is 99 per title.
• Thumbnail will not be dubbed.
Title Name
✕✕
✕
*2
✕
Title Name
✕✕
Chapter
Mark
*1
—
—
Chapter
Mark
*3
✕✕
High Speed Dubbing
Limitations on High Speed Dubbing when
Dubbing from HDD to DVD (Video Mode)
• During high speed dubbing, you cannot monitor the
programme being dubbed on the TV screen.
• If you stop high speed dubbing in the middle of process
the recorded title might be erased.
• You cannot high speed dub from a play list.
“HIGH SPEED DUBBING PRIORITY” (page 89)
• This function enables high-speed dubbing in both Video
mode and VR mode.
• If a title is recorded with “HI SP DUB PRIORITY” set to
“NO”, you cannot perform high-speed dubbing in Video
mode. Use “RATE CONVERSION DUBBING” (page 46).
(This setting is unnecessary when performing high speed
dubbing into VR mode.)
• Cancel “HIGH SPEED DUBBING PRIORITY” when you
want to edit frames of programmes recorded to HDD
using “HIGH SPEED DUBBING PRIORITY”. You can edit
the frames after the cancellation.
• You cannot set “HIGH SPEED DUBBING PRIORITY” again
to the programme that cancelled “HIGH SPEED DUBBING
PRIORITY” once.
• You cannot record 16:9 and 4:3 screen size images in one
title.
• The Recorder continues to dub the title in same screen
size when it started dubbing even in case the screen size
of title changed in the middle.
• When you record a programme with bilingual broadcast
with “HI SP DUB PRIORITY” set to “YES”, either “L CH” or
“R CH” audio is recorded. See page 93 for details.
• When recording 16:9 size image in LP, EP, or MN1-17
recording modes, the image will be recorded as 4:3
(squeezed).
Rate Conversion Dubbing
Limitation of Rate Conversion Dubbing
•“DOLBY VIRTUAL SURROUND” (page 62) will be set to
“OFF” when rate conversion dubbing is used.
•“DD OUTPUT LEVEL” (page 88) is set to “NO” when rate
conversion dubbing is used.
• The image might look longer vertically when you dub 16:9
image from HDD to DVD-RW/R (Video mode) using rate
conversion dubbing. In such case, adjust TV setting to
correct the playback image.
• Chapter marks might shift slightly when dubbed using
rate conversion dubbing.
Dubbing from HDD to DVD
Limitation when Dubbing from HDD to DVDRW/R (Video Mode)
You cannot dub from HDD to DVD-RW/R in following cases:
• Total number of titles in DVD-RW/R reached 99 or total
number of chapters reached 999.
• HDD or DVD-RW/R is either recording or playing back.
Dubbing from DVD to HDD
You cannot dub from DVD-RW/R to HDD in
following cases:
• Not enough HDD capacity. (When there is not enough
capacity in HDD, the Recorder will continue the dubbing
until there is no more capacity.)
• Total number of titles in HDD reached 199 or total number
of chapters reached 999.
• HDD or DVD-RW/R is either recording or playing back.
• When you try to do this, dubbing will be suspended.
When you dub a title that has both “Copy Once” and
“Copy Freely” enabled programmes, only the “Copy
Freely” enabled programme will be dubbed.
• You cannot dub a “Copy Once” enabled programme
recorded on a DVD-RW to the HDD.
Dubbing from DVD to HDD
• You can only dub programmes of DVD-RW/R (VR mode)
to HDD. You cannot dub a disc that used another
recorder.
• You cannot dub a DVD-RW/R (Video mode) disc recorded
with this Recorder after it has been finalized.
If you cancel the finalization in DVD-RW (Video mode)
disc, you can dub programmes.
45
GB

Dubbing (HDD/DVD)
Dubbing (HDD↔DVD)/
High Speed Dubbing
(HDD→DVD)
DVD-RW
HDD
• You can choose titles and chapters as the
unit to dub.
1
When dubbing from HDD to
DVD
Load a recordable disc onto the
disc tray, then press HDD.
• Load the disc formatted in either VR
• The HDD button on the front of the
When dubbing from DVD to
HDD
Load a disc that recorded the title
you want to dub, then press DVD.
• The DVD button on the front of the
2
Press DUBBING.
• You can select “DUBBING” in START
• Screen of step 4 will display when
3
Press ' / " to select “HIGH
SPEED DUBBING” or “RATE
CONVERSION DUBBING”, then
press SET/ENTER.
• Screen of step 5 will display when
Dubbing from HDD to DVD
• When the DVD-RW/R is in Video
4
Press ' / " to select the recording mode (picture quality), then
press SET/ENTER.
DUBBING HDD ORIGINAL s DVD
VR MODE
DVD-RW
VIDEO MODE
DVD-R
mode or Video mode.
Recorder lights up.
Recorder lights up.
MENU to dub.
you dub from DVD to HDD.
you select “HIGH SPEED DUBBING”.
mode, if a title has been recorded
with HI SP DUB PRIORITY setting set
to “NO”, then select “RATE CONVERSION DUBBING”.
82:0121/52
SELECT THE RECORDING MODE.
FINE (HIGH QUALITY)
SP (STANDARD)
LP (2X)
EP (3X)
MANUAL SETTING (MN)
EXACT DUBBING
ABLE TO MANUALLY SELECT
1 OF 32 LEVELS.
SELECT PICTURE QUALITY BASED
ON REMAINING DVD CAPACITY.
When “MANUAL SETTING (MN)” is
selected:
\\
• Set picture quality with
||
\ /
|, then press
\\
||
SET/ENTER. (Picture quality can be
selected from 32 levels.)
DUBBING HDD ORIGINAL s DVD
ABLE TO SELECT 1 OF 32 LEVELS OF PICTURE QUALITY IN
MANUAL REC. MODE BASED ON REMAINING CAPACITY.
EP LP SP FINE
82:0121/52
Selecting Exact Dubbing
• Select Exact Dubbing when there are
multiple titles (up to 5) you want to dub and
you know you cannot fit all into one disc.
The Recorder will select the appropriate
recording mode and fit all titles into one
disc (maximum 6 hours).
• You cannot set recording mode to each
titles when you select exact dubbing.
• You cannot dub titles in higher quality than
the original.
• The Recorder will lower the recording
mode when there is not enough capacity in
the disc to dub compared to the length of
all the titles (programmes). Be aware that
original “Copy Once” enabled programme
will be erased after dubbing.
5
Press ' / " / \ / | to select the
title to dub, then press SET/
ENTER.
• Setting toggles between “dubbing”
and “dubbing cancelled” each time
you press SET/ENTER.
• Select more titles when you want to
dub multiple titles. (You can dub up to
5 titles at once.)
DUBBING HDD ORIGINAL s DVD
SELECTED TIME: 0h 10m DVD REMAN: 2h10m
EL33TITRP:
ENIF
01/EUT50000:22:32
OFNI:ELTIT
1 2
ENTER
SELECT SET TITLE TO DUB
TITLE LIST CHAPTER NEXT STEP
3
654
82:0121/52
Dubbing mark displays to selected titles.
Numbers will be assigned in order of
selection and dubbing will start according to the numbers assigned.
6
Press Yellow (D) (NEXT STEP).
7
Press SET/ENTER at the
confirmation screen.
• Dubbing start.
• You cannot select “EXACT DUBBING”
when you dub from DVD to HDD.
GB
46

To Stop Dubbing
Press DUBBING.
• You can also stop dubbing by
pressing ■STOP/LIVE or REC STOP.
NOTE
Dubbing Titles Recorded to HDD to
Multiple DVDs
• Operate Edit (page 74) to create Play List
and dub Play List as a unit. (Example:
Dubbing programmes more than 6 hours
long like a Christmas special in recording
mode you set.) If the original is dubbed as
is using a recording mode other than
“EXACT DUBBING”, the title will be
dubbed (moved) until the disc is full. (For a
“Copy Once” enabled programme, the
dubbed part will be erased automatically
from the HDD.) Take out the dubbed disc
and load a new one to continue dubbing.
• In case you want to divide and dub a
“Copy Once” enabled programme to
several discs, stop dubbing manually and
reload the disc.
Front Panel Display during
Dubbing
• PLAY indicator of media of original source
and REC indicator of media to dub light up
during dubbing.
• Front display panel shows dubbing
movement in orange during dubbing.
Example: Dubbing a programme from HDD
to DVD.
Dubbing (HDD/DVD)
Dubbing indicator
47
GB

Eliminating problems (Recording, Timer Recording, Dubbing)
When You Cannot Record
Problem Suggested Solution
• No disc in the Recorder.
• Unrecordable disc is loaded.
• Not enough disc capacity.
• Recorder cannot identify the disc.
• Disc is protected.
• Not enough HDD capacity.
• In the middle of dubbing.
When You Cannot Dub
Problem Suggested Solution
• Title protection is set to copy once
enabled title (programme).
• No disc in the Recorder.
• Unrecordable disc is loaded.
• Not enough disc capacity.
• Recorder cannot identify the disc.
• Disc is protected.
• Not enough HDD capacity.
• In the middle of recording/playback.
• Recorded “Copy Once” enabled title
(programme) to DVD.
• Load recordable DVD.
• Load recordable DVD with enough capacity.
• Cancel disc protection or change to new DVD for recording.
• Erase recorded programmes you don’t want from HDD to
create necessary capacity to record.
• You cannot record during dubbing. Stop dubbing before
recording.
• You cannot dub Copy Once enabled title (programme) that is
title protected.
• Load recordable DVD.
• Load recordable DVD with enough capacity.
• Cancel disc protection or change to new recordable DVD.
• Erase recorded programmes you don’t want from HDD to
create necessary capacity to record.
• You cannot dub during recording/playback.
•“Copy Once” enabled title (programme) or title with signal
that prohibits copying recorded to DVD cannot be dubbed to
HDD.
When You Cannot High Speed Dub
Problem Suggested Solution
• No disc in the Recorder.
• Unrecordable disc is loaded.
• Not enough disc capacity.
• Recorder cannot identify the disc.
• Disc is protected.
• Trying to high speed dub from HDD to
DVD in Video mode.
• Cannot High Speed Dub although
“HIGH SPEED DUBBING” is selected.
• Load recordable DVD.
• Load recordable DVD with enough capacity.
• Cancel disc protection or change to new recordable DVD.
• You cannot high speed dub from HDD to DVD in Video mode
if “HI SP DUB PRIORITY” was not set to “YES” when the
original title was recorded to HDD.
• Use 2X-speed compatible disc.
• High speed dubbing of “Copy Once” enabled title will take
longer than normal high speed dubbing.
GB
48

Eliminating problems (Recording, Timer Recording, Dubbing)
When You Cannot Timer Record
Problem Suggested Solution
• No disc in the Recorder.
• Unrecordable disc is loaded.
• Not enough disc capacity.
• Recorder cannot identify the disc.
• Disc is protected.
• Not enough HDD capacity.
• Number of timer programmes set has
reached the limit.
• Dubbing recorded title.
• Playing back the DVD.
• In the middle of direct recording.
NOTE
• If you set multiple timers, and the programmed times overlap, or the end time of the previous timer is the same as the start
time of the next timer, timer recording will begin after the preceding timer recording finishes. There will be a delay of up to 1
minute before the next timer recording begins.
• Load recordable DVD.
• Load recordable DVD with enough capacity.
• Cancel disc protection or change to new recordable DVD for
recording.
• Erase recorded programmes you don’t want from HDD to
create necessary capacity to record.
• Erase unnecessary timer programmes.
• Timer recording does not work during dubbing. Stop dub-
bing before timer recording.
• Stop playing back the DVD more than 3 minutes before timer
recording starts. If you don’t stop playback until timer
recording start time, timer recording will not start.
• Timer recording does not function during direct recording.
Stop direct recording before the preset start time for timer
recording.
49
GB

HDD Playback
REC LIST: If you select the programme you
want to watch from the list of recorded
programmes (REC LIST) and press SET/
ENTER, playback will begin.
NOTE
• To display the counter during playback,
press ON SCREEN (page 28).
To playback edited video:
• When playing back video which has been
edited (for example, by making a play list),
use Seamless Playback for smoother
connection between scenes.
• For details on Seamless Playback settings,
see page 89.
Playback
HDD
1
Press HDD to select HDD mode.
• The HDD button on the front of the
Recorder lights up.
• HDD mode is selected automatically
when the power is turned on.
SWITCHED TO HDD MODE.
NOTE
• The final few seconds may not be played
back, depending on how the recording was
stopped.
• The end position of the programme played
back may be shifted slightly from the
position where recording was stopped
during recording.
Resume playback function
• If you press
resume from the point where it was
previously stopped.
• To playback from the beginning, press
■STOP/LIVE again and then press
||
|PLAY.
||
||
|PLAY again, playback will
||
Inserting Chapter Marks
during Playback
• You can insert chapter marks by pressing
CHAPTER MARK (under the cover).
Chapter marks are inserted after the
message “RECORDED CHAPTER MARK.”
appears.
• You cannot insert chapter marks during
Simultaneous Recording/Playback.
NOTE
• To playback a play list created by editing,
press ORIGINAL/PLAY LIST.
Each time this button is pressed, the
setting will toggle between “ORIGINAL”
(original titles) and “PLAY LIST”.
2
Press |PLAY.
• PLAY indicator (for HDD) on the front
of Recorder is lit green during
playback.
HD
ORIN
ALDI
G
FINE
RE
MA
18h5 9mIN
1
/
38
4
/
6
00:20: 00
• To fast forward or fast reverse: Press
JFWD or GREV during playback.
Each time these buttons are pressed,
the speed cycles through the
following settings:
||
Press
|PLAY to return to normal
||
playback.
(Approx. 2g)
3
Press ■STOP/LIVE to stop
(Approx. 32g)(Approx. 8g)
playback.
GB
50

HDD Playback
Playback from REC LIST
HDD
1
Press HDD to select HDD mode.
• The HDD button on the front of the
Recorder lights up.
• HDD mode is selected automatically
when the power is turned on.
2
Press REC LIST to display REC
LIST (THUMBNAIL).
• The REC LIST can also be displayed
from the START MENU (see page 24).
• To switch between Original Title List
and Play List, press ORIGINAL/PLAY
LIST. Each time the button is
pressed, “ORIGINAL” (original titles)
or “PLAY LIST” is selected in turn.
ORIGINAL PLAY LIST
REC LIST
(HDD: ORIGINAL)
EL33TITRP:
ENIF
01/TAS20000:02:12
OFNI:ELTIT
1 2
• If you press Blue (A) (TITLE LIST),
you can switch to title list.
TITLE LIST
REC LIST
(HDD ORIGINAL)
EL33TITRP:
ENIF
01/TAS2
OFNI:ELTIT
BACK TITLE REC. DATE START TIME
PR33 FINE
1
PR33 FINE
2
PR33 FINE
3
PR33 FINE
4
PR33 FINE
5
PR33 FINE
6
NEXT FROM NEW
THUMBNAIL SORT FUNC. MENU
SELECT
ENTER
B
3
654
0000:02:12
n
ENTER RETURN
00:02
00:02
00:02
00:02
00:02
00:02
About REC LIST
When the REC LIST is displayed, you can use
the following functions by pressing Blue (A)
or Red (B) on the remote control.
• Switch between Thumbnail screen and Title
Name List screen by pressing Blue (A).
• When Thumbnail screen is selected, switch
between Title List and Chapter List by
pressing Red (B).
Chapters in selected title will be displayed
in Chapter List.
• Sort the Title List in the “From New”, “From
Old” or “Title Name (alphabetical)” order.
1 Press Red (B).
\\
2 Press
||
\ /
| to select “FROM NEW”,
\\
||
“FROM OLD” or “TITLE NAME”, then
press SET/ENTER.
Icons Displayed in Title Info
82:0121/52
06 MINSAT01/2
06 MINSAT0/9
06 MINSAT011/61
06 MINSAT011/32
06 MINSAT0/03
06 MINSAT11/6
Field of REC LIST
NEW TITLE
Displays HDD only.
(Will not display in case you playback,
edit, or set Title Protection.)
TITLE PROTECTION
(HDD, DVD-RW [VR mode] only)
“Copy Once” enabled Programme
(Copy Restricted) (HDD only)
High Speed Dubbing Priority setting
(HDD only)
82:0121/52
• Press Blue (A) (THUMBNAIL) to
switch from title list to thumbnail.
3
Press ' / "/ \ / | to select the
programme you want to watch.
Thumbnail screen: Press
switch pages.
Title Name List screen: Press
select a title name.
4
Press SET/ENTER or |PLAY.
• Playback begins.
To Stop Playback
Press ■STOP/LIVE.
''
' /
''
""
" to
""
''
' /
''
""
" to
""
51
GB

HDD Playback
Playback by Selecting
Title Number (Direct Playback)
HDD
You can start playback from the title you want
to see.
1
Press HDD to select HDD mode.
• The HDD button on the front of the
Recorder lights up.
2
Press DIRECT while playback
stops or during playback.
3
Press ' / " to select the title
number you want to see, then
press SET/ENTER.
Title number currently
selected
1 /38
• Playback starts from the beginning of
the selected title.
NOTE
• You can select the title number to play
back by using Function Control screen
(page 61).
GB
52

HDD Playback
Other Types of Playback
HDD
• This section explains other types of HDD
playback operations.
Fast Forward/Reverse
(Search)
Use to fast forward/reverse programmes
being played.
Press
JJ
JFWD or
JJ
1
playback.
Example: When
• The search speed will cycle as
follows each time you press the
button.
(Approx. 2g)
2
Press |PLAY to cancel the
search.
• Search will be cancelled and
playback screen displays.
• You cannot fast forward or fast
reverse from one title and continue to
another title.
• When you fast forward or fast reverse
to the end or beginning of the title,
normal playback screen displays
automatically.
GG
GREV during
GG
JJ
JFWD is pressed
JJ
(Approx. 32g)(Approx. 8g)
Still Picture Playback/
Frame Advance Playback
This feature enables still playback and frame
advance playback.
1
Press FSTILL/PAUSE during
playback.
• Playback pauses.
• PLAY indicator (for HDD) on the front
of Recorder blinks during Still Picture
Playback.
2
Press
LL
Lor
LL
KK
Kto advance or
KK
reverse playback image frame by
frame.
• Press Lto advance one frame.
Press Kto reverse one frame.
3
Press |PLAY to return to normal
playback.
Skip Search
This lets you skip about 30 seconds ahead.
This is convenient when you want to skip
commercials while viewing.
Press SKIP SEARCH during play-
back.
• You can skip approximately 30 seconds
forward each time you press the button.
• The maximum interval you can skip at one
time is 120 seconds (4 button presses).
• Skip Search will not work during Time Shift
Viewing.
Skipping to Next Chapter
You can skip the chapter using this function.
KK
Press
Kor
KK
• Press Lto go to the start of the next
chapter.
• Press Konce to return to the start of
current chapter (track). If you press it again
(within about 5 seconds), it will skip to the
beginning of the previous chapter (track).
• This function does not work during Time
Shift Viewing.
LL
Lduring playback.
LL
Slow Playback
This lets you playback video at slow speed.
1
Press SLOW during playback.
• The slow playback speed will cycle
as follows each time you press the
button.
(Approx.
1
/
16
g)(Approx.
1
(Approx.
/
2
g)
2
Press |PLAY to return to normal
1
/
8
g)
playback.
• You cannot perform slow playback
over a boundary between titles. At
the end of the title, slow playback will
be cancelled and normal playback
will be selected automatically.
Replay
This lets you skip about 10 seconds back.
This is convenient for replaying a short scene
you missed.
Press REPLAY during playback.
• Playback reverses approximately 10
seconds, then starts again.
• Replay will not work during Time Shift
Viewing.
53
GB

HDD Playback
Switching Audio
You can change the audio output channel
during HDD playback.
Each time AUDIO is pressed, the
audio channels change.
• The way audio channels change differs
depending on the sound recorded on HDD.
See the table on page 93 for details.
NOTE
• When you play a programme recorded in
stereo or monaural, and if you are listening
to the BIT STREAM sound via the digital
output jack, you cannot select the audio
channel. Set “DIGITAL AUDIO OUT” to
“PCM” (see page 88), or if you want to
change the audio channel, listen via the
analogue output jacks.
Zoom
You can magnify your favorite section.
Press ZOOM during playback.
ZOOM: 1
• Each time you press this button, the zoom
setting cycles in the following sequence:
ZOOM: 1 (approx. 1.2✕) → ZOOM: 2
(approx. 1.5✕) → ZOOM: 3 (approx. 2.0✕)
→ OFF: (No display).
• You can move the enlarged part with
""
\\
||
" /
\ /
|.
""
\\
• Zoom will not work during Time Shift
To return to the normal screen, press
||
Viewing.
ZOOM a few times and cancel Zoom mode.
''
' /
''
Repeat Playback of a Title
or Chapter (Repeat Playback)
1
Play back the title or chapter you
want to repeat.
4
Press SET/ENTER.
Example: Repeat playback of a title
(TITLE)
TITLE REPEAT
5
Press (INPUT) to return to
normal playback.
A-B Repeat Playback
(Repeat Playback of a
Specified Part)
1
Press (INPUT) during
playback.
2
Press \ / | to select “A-B”, then
press SET/ENTER.
3
Press SET/ENTER when you
reach the scene you want to start
Repeat Playback.
• The start point of the part (A) will be
memorized.
SELECT TYPE OF REPEAT PLAYBACK.
CHAPTER A-BTITLE
ENTER
SET REPEAT START POINT
4
Press SET/ENTER when you
reach the scene you want to end
Repeat Playback.
• The end point of the part (B) will be
memorized and the Repeat Playback
for the specified part (A-B) starts.
5
Press (INPUT) to return to
normal playback.
NOTE
• For A-B Repeat Playback, set the start and
end points within the same title.
SET START PT
2
Press (INPUT).
3
Press \ / | to select the type of
Repeat Playback.
• TITLE: Repeats the title currently
playing back.
• CHAPTER: Repeats the chapter
currently playing back.
• A-B: Repeats the specified scene of
title or chapter.
SELECT TYPE OF REPEAT PLAYBACK.
CHAPTERTITLE A-B
ENTER
\ | SELECT
• Press RETURN to cancel without
setting the type of Repeat Playback.
GB
54
ENTER

DVD/CD Playback
This section explains playback of DVD-RW/R
discs recorded with this Recorder, commercially available DVD Video discs (like movies)
and CDs.
• To playback a DVD-RW/R recorded with
this Recorder, select the title to be played
back, and then start playback.
• Display the list of initial images (thumbnails) for each title, and select a title. (REC
LIST)
Loading Disc
1
Press OPERATE to turn the
power on.
2
Press OPEN/CLOSE to open the
disc tray.
OPEN/CLOSE
OPERATE
DVD
3
Load a disc on the disc tray.
O
P
E
R
A
T
E
• Insert the disc with the label face up.
• In case of disc recorded on both
sides, face the side you want to view
down.
4
Press OPEN/CLOSE to close the
disc tray.
DVD-RW/R Playback
DVD-RW
VR MODE
DVD-RW
VIDEO MODE
DVD-R
4
Press ' / " / \ / | to select the
title (or chapter) you wish to view.
REC LIST(DVD ORIGINAL)
EL33TITRP:
ENIF
0001:61:61
11/0NOM1
OFNI:ELTIT
1 2
5
Press SET/ENTER or |PLAY.
• Playback will begin from the selected
title (chapter).
• PLAY indicator (for DVD) on the front
of Recorder is lit green during
playback.
6
To stop playback, press ■STOP/
3
654
82:0121/52
LIVE.
To Record a Chapter Mark
during Playback
Press CHAPTER MARK (under the
cover).
• The message “RECORDED CHAPTER
MARK.” is displayed, and the chapter mark
is recorded.
• Chapter marks can be set during playback
only with DVD-RW (VR mode).
• Chapter marks cannot be set manually for
DVD-RW (Video mode), DVD-R or during
Simultaneous Recording/Playback.
NOTE
• If a title was set with another DVD recorder,
and it contains characters which cannot be
displayed with this Recorder, then “
is displayed (up to 64 characters max.).
• If you play back a play list on a disc
recorded with another DVD recorder and 1
title is 12 hours or more in length, only 12
hours of that title will be played back.
****
....
”
1
Press DVD to select DVD mode.
• The DVD button on the front of the
Recorder lights up.
• HDD mode is selected automatically
when the power is turned on.
SWITCHED TO DVD/CD MODE.
2
Load the disc you want to play
back.
3
Press REC LIST to display the
REC LIST (thumbnail) screen.
• See page 51 for details on how to use
the REC LIST.
• If the loaded disc has a play list and
you press ORIGINAL/PLAY LIST, the
screen will switch to the play list
(page 66).
Playback by Selecting Title
• To play back a disc recorded and finalized
in Video mode, press DVD TITLE, display
the TITLE LIST screen, and select a title to
play back.
DVD-RW
VIDEO MODE
1
2
3
DVD-R
Press DVD to select DVD mode.
• The DVD button on the front of the
Recorder lights up.
• HDD mode is selected automatically
when the power is turned on.
Load a disc recorded in Video
mode.
Press DVD TITLE.
• The TITLE LIST screen is displayed.
Continued on Next Page
|||
55
GB

DVD/CD Playback
4
5
6
NOTE
• If a disc recorded in Video mode has been
finalized (pages 13, 95), a menu screen will
be created automatically to enable
playback with other DVD players. For that
reason, the menu screen is different before
and after finalization.
• If a title was set with another DVD recorder,
and it contains characters which cannot be
displayed with this Recorder, then “
is displayed (up to 64 characters max.).
If there is a timer programme which is set
to record on DVD:
• A message to that effect will be displayed 5
minutes prior to the start of the timer
recording. If that happens, stop DVD
playback and load the disc for recording.
• The timer recording will be cancelled at the
start time of the timer recording if DVD
playback is still in progress.
Resume playback function
• If you press
resume from the point where it stopped the
previous time. To playback from the
beginning, cancel resume mode by
pressing ■STOP/LIVE then press
(Resume playback will be cancelled when
you open the disc tray, turn the power off,
or switch to HDD.)
• Resume playback function does not work
during video CD playback.
DVD Video Playback
DVD VIDEO
1
2
Press ' / " to select the title.
Press SET/ENTER.
• Playback of the selected title will
begin.
To stop playback, press ■STOP/
LIVE.
....
****
||
|PLAY next, playback will
||
||
|PLAY.
||
Press DVD and load a disc.
• The DVD button on the front of the
Recorder lights up.
• Playback may begin automatically,
depending on the disc.
Press |PLAY.
• Playback begins from the first title.
• The menu may be displayed first,
depending on the disc. Perform
playback operation by following the
directions on the screen.
• To stop playback, press
■STOP/LIVE.
Audio CD/Video CD Playback
VIDEO CD AUDIO CD
Preparation
Press DVD and load a disc.
• The DV D button on the front of the
Recorder lights up.
Playback from the beginning
1
Press |PLAY.
• Playback begins from the first track.
2
To stop playback, press ■STOP/
”
LIVE.
Playback by selecting the
track
11
1
1 Press DIRECT.
11
22
2 Select the track number to be
22
played back using the Number
buttons, then press SET/
ENTER.
• Playback starts from the selected
track.
Example: To select the 12th song
(track), press 1, then 2.
• You can also select the track by
pressing
• DIRECT does not work when playing
back a video CD with PBC on.
2
To stop playback, press ■STOP/
''
' /
''
""
" .
""
LIVE.
Video CD (with PBC)
Playback
• Some video CD discs have Playback
Control (PBC) function which guides the
playback by the menu displayed.
Video CD (with PBC)
If you press
menu displays. The functions of button
changes in the following manner during the
playback operation using the menu.
Lbecomes the “NEXT” button.
•
• Kbecomes the “PREVIOUS” button.
Select the track number to be played back
from the menu using the Number buttons and
play back the track.
Example: To select the 5th track, press 0,
then 5.
(Operation method may differ depending on
the disc. Refer to the manual of the video
CD.)
Turning off PBC function when playing
back a PBC compatible video CD
Playback begins from track 1 when JFWD
is pressed before the menu is displayed after
you load a disc. Playback will follow the track
order like an audio CD.
* If you want to turn the PBC to “ON” when
playing back the CD with PBC off, press
■STOP/LIVE twice and then press
to display the menu.
||
|PLAY after you load a disc, the
||
||
|PLAY
||
GB
56

DVD/CD Playback
Other Types of Playback
DVD-RW
VR MODE
AUDIO CD
• This section explains other types of DVD
Fast Forward/Reverse
(Search)
Fast Forward/Reverse functions when
JFWD or GREV is pressed during
playback.
Example: When
• The search speed will cycle as follows
Skipping to the Beginning
of a Chapter (Track)
Skipping (to the beginning of a chapter or
track) functions when Lor Kis
pressed during playback.
Slow Playback
Slow Playback functions when SLOW is
pressed during playback.
DVD-RW
VIDEO MODE
playback operations.
each time you press the button.
When playing back a DVD
(Approx. 2g)
When playing back a video CD or audio
CD
(Approx. 2g)
DVD-R
JFWD is pressed
(Approx. 8g)
DVD VIDEO
(Approx. 32g)(Approx. 8g)
VIDEO CD
Playback by Selecting a
Title (Track) Number (Direct
Playback)
Press DIRECT, then select title (track) number
to play back. See page 52 for details.
Repeat Playback of a Title
or Chapter (Repeat Playback)
1
Play back the title or chapter you
want to repeat.
2
Press (INPUT).
3
Press \ / | to select the type of
Repeat Playback.
• TITLE: Repeats the title currently
playing back.
• CHAPTER: Repeats the chapter
currently playing back.
• A-B: Repeats the specified scene of
title or chapter.
SELECT TYPE OF REPEAT PLAYBACK.
CHAPTERTITLE A-B
ENTER
\ | SELECT
• Press RETURN to cancel without
setting the type of Repeat Playback.
4
Press SET/ENTER.
Example: Repeat playback of a title
(TITLE)
TITLE REPEAT
ENTER
(Approx.
1
/
2
g)
1
/
8
g)
(Approx.
1
/
16
g)(Approx.
Still Picture Playback/
Frame Advance Playback
• Still Picture Playback functions when
FF
FSTILL/PAUSE is pressed during
FF
playback. (If you are playing back an audio
CD, the CD will pause.)
• Frame Advance/Reverse Playback
functions when Lor Kis pressed
during Still Picture Playback.
• Frame Reverse Playback will not work
with DVD-RW (Video mode), DVD-R,
DVD Video and Video CD discs.
• PLAY indicator (for DVD) on the front of
Recorder blinks during Still Picture
Playback.
Skip Search
Playback skips 30 seconds ahead when
SKIP SEARCH is pressed during playback.
Replay
Playback reverses 10 seconds when
REPLAY is pressed during playback.
5
Press (INPUT) to return to
normal playback.
A-B Repeat Playback
(Repeat Playback of a
Specified Part)
1
Press (INPUT) during
playback.
2
Press \ / | to select “A-B”, then
press SET/ENTER.
3
Press SET/ENTER when you
reach the scene you want to start
Repeat Playback.
• The start point of the part (A) will be
memorized.
SELECT TYPE OF REPEAT PLAYBACK.
CHAPTERTITLE A-B
ENTER
SET REPEAT START POINT
SET START PT
57
GB

DVD/CD Playback
4
5
Function Control
You can do things like specify a title or
chapter, and adjust settings for video and
audio if you press FUNCTION (under the
cover) during playback. (For details see page
61.)
Switching Audio
You can change the audio output channel
using the AUDIO button (under the cover).
Each time AUDIO is pressed, the
audio channels change as follows:
AUDIO CD
DVD VIDEO
The sound number which is currently played
back will be displayed.
DVD-RW
VR MODE
The sound you can select varies depending
on the sound recorded on the disc. (page 93)
• When recording bilingual broadcast or
stereo, the way audio channel changes
may differ depending on the recorded
sound. See the table on page 93 for details.
NOTE
•
When you play a programme recorded in
stereo or monaural, and if you are listening
to the BIT STREAM sound via the digital
output jack, you cannot select the audio
channel. Set “DIGITAL AUDIO OUTPUT” to
“PCM” (see page 88), or if you want to
change the audio channel, listen via the
analogue output jacks.
Press SET/ENTER when you
reach the scene you want to end
Repeat Playback.
• The end point of the part (B) will be
memorized and the Repeat Playback
for the specified part (A-B) starts.
Press (INPUT) to return to
normal playback.
VIDEO CD
LRL+R
DVD-RW
VIDEO MODE
DVD-R
2
Press ' / " to select the subtitles
you want to see.
• You can select by pressing SUBTITLE.
• The display indicates the subtitle
number currently being played back,
and the subtitles appear.
• To hide the subtitles, press
few times and select “OFF”.
You can also select “OFF” by
pressing SUBTITLE or
''
' /
''
\\
\ /
\\
""
" .
""
||
| a
||
Zoom
You can magnify your favorite section by
pressing ZOOM during playback.
• Each time you press this button, the zoom
setting cycles in the following sequence:
ZOOM: 1 (approx. 1.2✕)→ZOOM: 2
(approx. 1.5✕)→ZOOM: 3 (approx.
2.0✕)→OFF (No display)
• You can move the enlarged part with
""
\\
||
" /
\ /
|.
""
\\
||
ZOOM: 1
''
' /
''
Switching Angle
DVD VIDEO
If multiple angles are recorded, you can
switch between them.
Press ANGLE (under the cover)
during playback.
• The display indicates the angle number
currently being played back. Each time you
press this button, the angle switches.
• The angle can also be switched by
pressing
•“✕✕” is displayed if a disc is recorded with
only one angle.
To return to the previous angle, press ANGLE
(under the cover) a few times to select the
original angle.
''
' /
''
""
" .
""
1
Switching Subtitles
DVD VIDEO
If subtitles are provided in multiple languages, you can switch between them.
1
Press SUBTITLE (under the
cover) during playback.
• The display indicates the subtitle
number currently being played back,
and the subtitles appear.
•“✕✕” is displayed if a disc has no
subtitles.
GB
58
NOTE
• The following operations will not work when
playing back an audio CD:
Slow Playback, Frame Advance/Reverse
Display of functions
• The display for subtitle, angle or audio
automatically disappears after 10 seconds.
The display can also be hidden by
pressing SET/ENTER.
Switching between functions
• You can switch subtitle, angle and audio at
the Function Control screen (page 61).
• Operation for each function varies depending on the disc. See the manual for the
disc.

DVD/CD Playback
Fast Forward/Reverse
• You cannot perform Fast Forward/Fast
Reverse over a boundary between titles.
At the end or beginning of the title, Fast
Forward/Fast Reverse will be cancelled
and normal playback will be selected
automatically.
• Audio is not played back during Fast
Forward and Fast Reverse.
• Subtitles are not played back with DVD
video discs and video CDs during Fast
Forward and Fast Reverse.
• Depending on the disc and the scene
being played back, the Recorder may not
operate at the speed listed in this manual
when performing Fast Forward.
Slow Playback
• You cannot perform Slow Playback over a
boundary between titles. At the end of the
title, Slow Playback will be cancelled and
normal playback will be selected
automatically.
Repeat Playback
• Repeat Playback will not work during PBC
playback of a video CD with PBC (Playback Control).
• Repeat Playback may be forbidden
depending on the disc.
• A-B Repeat Playback may not work in
multi-angle scenes.
• For A-B Repeat Playback, set the start and
end points within the same title.
Playback by Selecting
with the Menu in the DVD
DVD-RW
VIDEO MODE
• This section explains how to play back a
• Titles listed in the title menu, and a disc
Playback by Selecting a
Title from the Title Menu
1
DVD-R
DVD video disc with a top menu or disc
menu.
guide (for options like subtitles and audio
languages) are given in the disc menu.
DVD VIDEO
Press DVD TITLE.
• The title menu screen is displayed.
TITLE
MENU
2
Press ' / " / \ / | to select the
title, then press SET/ENTER.
• The selected title is played back.
NOTE
• The procedure explained on this page is
the basic operation procedure. Procedures
vary depending on the DVD video disc, so
operate by following the instructions in the
DVD video disc manual, or the instructions
displayed on the screen.
• A title menu is not displayed for a DVD-R/
RW (Video mode) if it has not been
finalized.
Title menu
• With some DVD discs, the title menu may
be explained using the name “Top Menu”.
For the button explained as the top menu
key, use DVD TITLE on the remote control.
• If no title menu is available, the title menu
will not display even if DVD TITLE is
pressed.
Using the Disc Menu
Example: Select “SUBTITLE LANGUAGE”.
1
Press DVD MENU.
MENU
1 AUDIO LANGUAGE
2 SUBTITLE LANGUAGE
3 AUDIO
• The disc menu screen is displayed.
2
Press ' / " to select “SUBTITLE
LANGUAGE”.
3
Press SET/ENTER.
• Screen to select subtitle language is
displayed.
4
Press ' / " to select the subtitle
language.
SUBTITLE LANGUAGE
1 English
2 Español
3 Français
12
Jazz
3
Classic
4
Latin
Rock
5
Press SET/ENTER.
59
GB
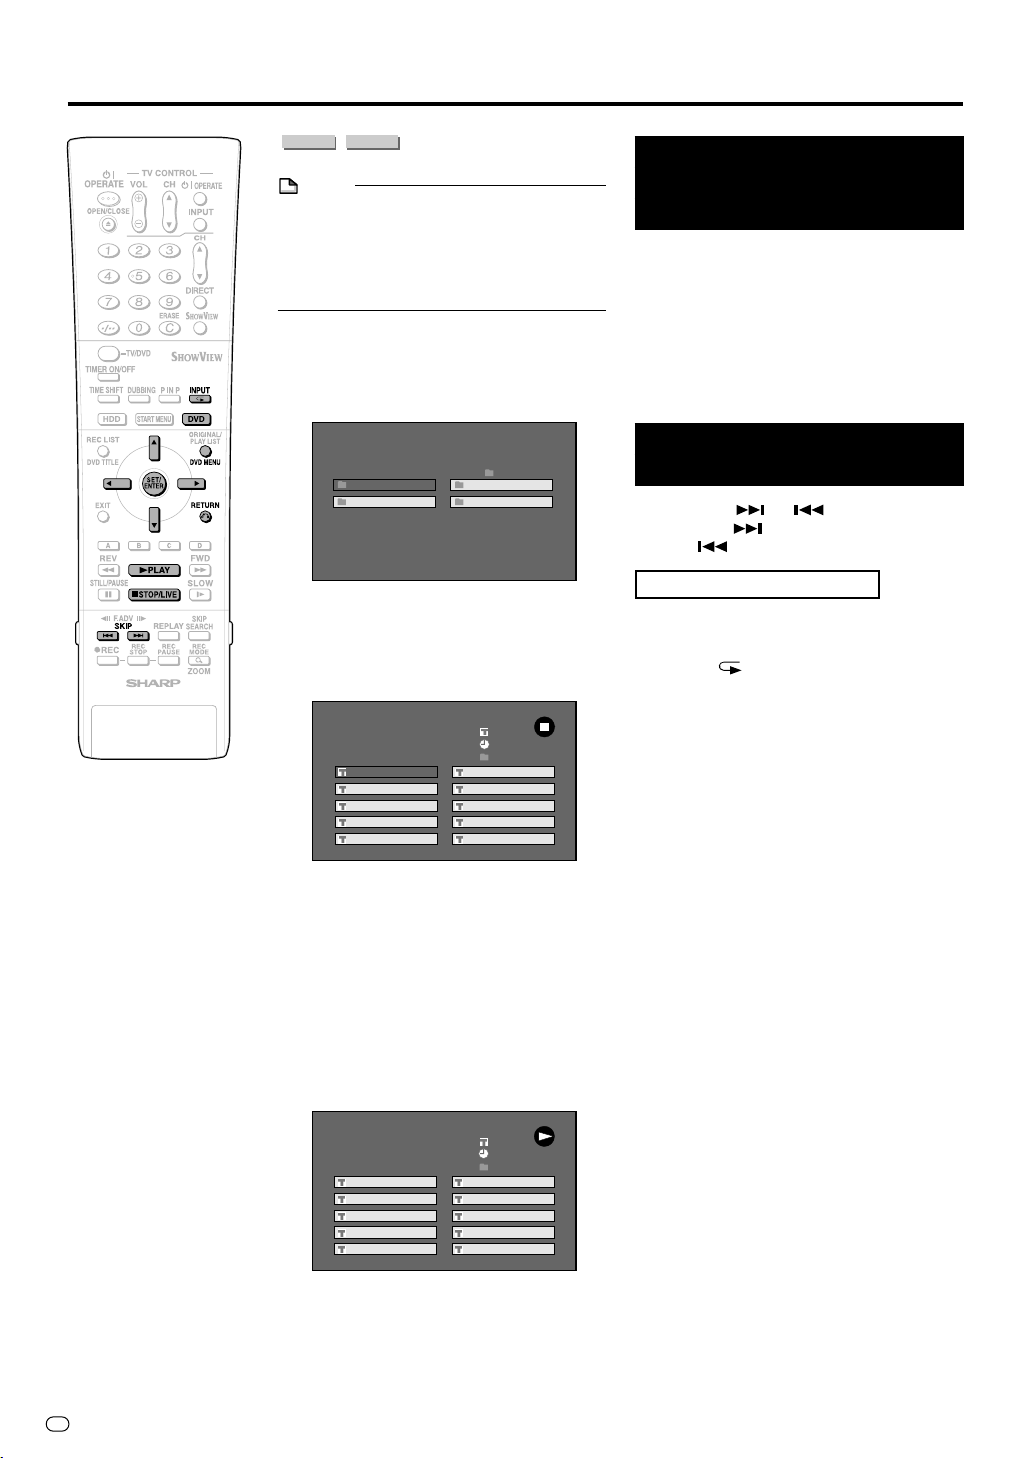
MP3 File Playback
CD-R
CD-RW
MP3
NOTE
• When the DV input is selected, discs
cannot be played back if “DV LINK” is set
to “ON”. You can enjoy other sounds by
switching to other channels.
• See page 10 for details about the MP3 file
format.
1
Press DVD to select DVD mode.
2
Load an MP3 recorded CD-R or
the CD-RW, then press DVD
MENU.
3
Press ' / " / \ / | to select the
folder you want to play, then
press SET/ENTER.
• The file (music title) in the folder is
MP3
CD MP3
1 WOLF
3 ANGEL 1 4 TRISH 1
displayed on the file selection screen.
1 YOUNG
3 MAIN 4 BAY
5 BARDEN 6 QUEEN
7 BEACHES 8 VICTORIA
9 YORK 10 KING
14
2 SHARK 1
CD MP3
51/1
--:--:-WOLF
2 ANDREW
To Play Another File
(music title) during
Playback
1
Press ■STOP/LIVE to stop
playback.
2
Press ' / " / \ / | to select the file
(music title) you want to play, then
press SET/ENTER.
• The chosen file (music title) will be
played.
To Skip the File during
Playback
Press SKIP or SKIP.
• Press SKIP to skip forward.
• Press SKIP to skip backward.
While the MP3 disc is playing
• Time Search is disabled.
• Programmed Playback is disabled.
• It is possible to repeat one track by
pressing (INPUT).
• Dolby Virtual Surround does not operate.
• Press RETURN to return to the folder
selection screen.
• If you press |PLAY after selecting
the folder, the playback screen is
displayed, and the files in that folder
will be played from the beginning
repeatedly.
4
Press ' / " / \ / | to select the file
(music title) you want to play and
then press SET/ENTER.
• Playback will start from the selected
file (music title).
CD MP3
51/1
00:11:00
1 YOUNG
3 MAIN
5 BARDEN 6 QUEEN
7 BEACHES 8 VICTORIA
9 YORK 10 KING
5
Press ■STOP/LIVE to stop
WOLF
2 ANDREW
4 BAY
playback.
GB
60

Settings During Playback
Function Control
DVD-RW
HDD
VR MODE
This lets you make various settings at once,
like subtitle and angle setting, and title
selection for Direct Playback.
Depending on your preferences, you can
adjust video and enjoy audio with a greater
sense of presence. Operation is the same for
HDD and DVD.
Function Control screen
n
1 Playback status display
Shows the operation status and the drive or
disc type.
2 Setting items
Selects a title or chapter for playback, or
performs video/audio settings.
3 Operation guide display
Provides help on how to operate with the
remote control buttons.
4 Bit rate display
Displays the data rate of the video appearing
on the TV screen.
DVD-RW
VIDEO MODE
ENTER
SELECT ENTER
RETURN
DVD-R
DVD VIDEO
VIDEO
BIT RATE
0510
DVD VIDEO
1/3
5/25
00: 00: 00
2 ENGLISH
1
1
5. 1ch
OFF
OFF
OFF
Mbps
34
Function Control Operation
Procedure
1
Press FUNCTION (under the
cover) during playback.
• The Function Control screen is
displayed on the TV.
DVD VIDEO
VIDEO
1
2
ENTER
ENTER
SELECT
n
RETURN
2
Press ' / " to select setting
items, then press SET/ENTER.
• For a description of each setting item,
see “Functions which can be set”
(page 62).
ENTER
ENTER
SELECT
n
RETURN
3
Press ' / " / \ / | to set, then
press SET/ENTER.
• Operation may vary depending on
the setting item. Operate by following
the operation guide instructions on
the screen.
4
Press RETURN or FUNCTION
(under the cover) to close the
Function Control screen.
BIT RATE
0510
DVD VIDEO
VIDEO
BIT RATE
0510
1/3
5/25
00: 00: 00
2 ENGLISH
1
1
5. 1ch
OFF
OFF
OFF
Mbps
1/3
5/25
00: 00: 00
2 ENGLISH
1
1
5. 1ch
OFF
OFF
OFF
Mbps
NOTE
• If “✕✕” is displayed for an option like title
number or subtitles, the disc has no titles
or subtitles which can be selected.
• When you press DIRECT or SUBTITLE, the
Function Control screen is closed.
• If you set to the Function Control screen
during playback of a DVD video, it may be
impossible to operate according to the
instructions from the DVD video. In cases
like this, operate again after cancelling the
Function Control screen.
Continued on Next Page
|||
61
GB

Settings During Playback
Functions which can be set
Title Number (Direct Title Skip)
• Shows the title number being played back. You can
skip to the start of the title.
Chapter Number (Direct Chapter Skip)
• Shows the chapter number being played back. You
can skip to the start of the chapter.
Playback Elapsed Time (Direct Time
Skip)
• Shows the elapsed time from the beginning of the disc
to the present.
This lets you skip based on time.
\\
• Press
Second, then press
SET/ENTER to start playback from that set time.
||
\ /
| to move to the field of Hour, Minute,
\\
||
''
""
' /
" to set the time. Press
''
""
Subtitle Language
• Shows the currently selected subtitle language.
If subtitles are provided in other languages, you can
switch to your preferred language.
Angle Number
• Shows the currently selected angle number.
If the video is recorded with multiple angles, you can
switch the angle.
Audio
• Shows the currently selected type of audio.
You can select the desired type of audio.
Digital Gamma
• If a video is dark and hard to see, you can brighten the
dark parts for easier viewing by setting Digital Gamma.
Set this when watching discs with many dark scenes
(i.e. movie and concert discs), and when viewing a
disc in a bright room. This lets you see dark parts
better and enjoy video with a greater sense of depth.
''
• Press
to set the level. Then press SET/ENTER.
• Digital Gamma can be set to three different levels.
""
' /
" to select “ON” or “OFF”, then press
''
""
\\
\ /
\\
||
|
||
Dolby Virtual Surround
• Lets you enjoy surround audio via analogue connection with a stereo type (2ch) TV or audio equipment.
• Even if you use a digital connection, Dolby Virtual
Surround will work in the following cases.
– When playing back linear PCM audio from a DVD.
– When playing back Dolby Digital audio while
DIGITAL AUDIO OUTPUT (page 88) is set to “PCM”.
• This Recorder uses a Spatializer System* for Dolby
Digital Surround.
* Certain audio features of this product manufactured
under a license from Desper Products, Inc.
Spatializer
are trademarks owned by Desper Products, Inc.
• If audio recorded monaurally is played back with
Dolby Virtual Surround ON, the audio level may
decrease, making it hard to hear. If this happens, turn
Dolby Virtual Surround OFF.
• Dolby Virtual Surround will not work in the following
cases:
– While watching a TV broadcast or external input.
– Multi-karaoke audio from a karaoke disc, 96 kHz 24-
bit linear PCM audio, or DTS audio.
• If you set Dolby Virtual Surround to “ON” and audio
sounds funny during playback, set it to “OFF”.
• There are no level settings.
®
N-2-2™ and the circle-in-square device
Digital Super Picture
• Emphasizes and enhances definition of details and
contours in the video. This reduces noise and makes
video easier to see.
''
• Press
to set the level. Then press SET/ENTER.
• There is one setting level on the “soft” side and 3
setting levels on the “sharp” side.
• If you want to enjoy a more defined picture (with
detailed pictures), press
Digital Super Picture. For old movies or videos with a
lot of noise, you can reduce noise for an easier to see
picture by pressing
Digital Super Picture.
GB
62
""
' /
" to select “ON” or “OFF”, then press
''
""
||
| while “ON” is displayed for
||
\\
\ while “ON” is displayed for
\\
\\
\ /
\\
NOTE
• These functions cannot be used with all discs.
||
|
||

Simultaneous Recording/Playback Function
DVD-RW
HDD
VR MODE
VIDEO CD AUDIO CD
Plays back from HDD, DVD or CD while
recording a programme onto HDD.
DVD-RW
VIDEO MODE
DVD-R
DVD VIDEO
Viewing the Programme
Being Recorded from the
Beginning while
Recording to HDD
(Chasing Playback)
1
Press |PLAY during recording.
• The programme being recorded will
play back from the beginning.
2
(Approx. 2g)
3
GG
Press
G REV or
GG
during Chasing Playback.
• Each time you press the buttons, the
Fast Reverse/Forward Playback
speed changes as shown below.
Example: When J FWD is pressed
once
Fast Forward Playback 2✕ icon
• Press
Press ■STOP/LIVE to return to
the live broadcast which is being
recorded.
• Press REC STOP to watch normal
• For details on Chasing Playback, see
||
| PLAY to return to the normal
||
playback speed.
playback.
pages 31, 32.
JJ
J FWD
JJ
(Approx. 32g)(Approx. 8g)
DVD/CD Playback during
HDD Recording
(Simultaneous Recording/
Playback)
1
Press DVD during HDD recording.
• The DVD button on the front of the
Recorder lights up.
2
Load a DVD or CD, then press
|PLAY.
• You can watch/listen to a DVD/CD
while continuing recording to HDD.
Playing Back a Title on
the HDD during DVD
Recording (Simultaneous
Recording/Playback)
1
Press HDD during DVD recording.
• The HDD button on the front of the
Recorder lights up.
2
Play back the title in the HDD.
Viewing Another
Programme Recorded on
HDD while Recording to
HDD
(Simultaneous Recording/
Playback)
1
Press REC LIST during recording.
• The REC LIST (list of recorded
programmes) is displayed.
2
Press ' / " / \ / | to select
programme you want to watch,
then press SET/ENTER.
• For details on programme list
operation, see page 51.
NOTE
• Recording to HDD continues even while
playing back another programme on the
HDD or a DVD/CD.
• ■STOP/LIVE is the button for stopping
playback. Recording will not stop. To stop
recording, press REC STOP.
• You cannot play back a DVD-RW/R while
recording to that same DVD-RW/R.
• You cannot start recording during playback
from HDD, DVD or CD.
• During Simultaneous Record/Playback, the
recording conditions may have an effect
on playback, but recording will still be done
correctly.
Checking the Programme
Being Recorded during
Playback Using the Simultaneous Recording/Playback Function (Picture in
Picture)
• Press P IN P on the remote control.
A small picture is displayed on the
playback screen, so you can check the
programme being recorded (or the
programme which is stopped).
• Picture in Picture will not work during audio
CD playback.
63
GB

Function Menu
How to Use the
FUNCTION MENU
HDD
Allows you to call up “HI SP DUB PRIORITY”
from REC LIST and cancel High Speed
Dubbing Priority setting.
• The FUNCTION MENU can be called up
during HDD playback.
1
Press REC LIST or select REC
LIST in “START MENU” screen.
• The “REC LIST” screen is displayed.
2
Press ' / " / \ / | to select the
title you wish to cancel High
Speed Dubbing Priority setting
for.
3
Press YELLOW (D).
• The FUNCTION MENU is displayed
with the cursor at “HI SP DUB
PRIORITY”.
4
Press SET/ENTER.
5
Press \ / | to select “YES”, then
press SET/ENTER.
• Select “NO” if you do not wish to
cancel High Speed Dubbing Priority
setting.
REC LIST
EL33TITRP:
ENIF
01/NOM4
HI SP DUB PRIORITY
OFNI:ELTIT
0001:61:61
45:921/52
CANCEL PRIORITY HIGH SPEED DUBBING
FOR THIS TITLE? CANNOT SET AGAIN
AFTER CANCELED.
YES NO
n
ENTER
SELECT
6
Press EXIT to quit FUNCTION
ENTER RETURN
MENU.
NOTE
• This feature cancels High Speed Dubbing
Priority setting for the title recorded with “HI
SP DUB PRIORITY” set to “YES”. When this
is cancelled, limitations during editing are
relaxed, but the original state cannot be
restored.
GB
64

Editing (HDD/DVD)
About Editing
Content that can be edited and editing operations vary
according to the recording mode.
Recordings on HDD, or on DVD-RW in
VR mode
You can do various types of editing with this Recorder alone.
For example it is possible to create a compilation of your
favorite videos by gathering your favorite scenes from
recorded titles, moving scenes within a specified range, or
erasing unnecessary scenes. You can edit original videos
you have recorded into a Play List without changing the
content of the original videos.
NOTE
• If disc protection is set for a DVD-RW, it cannot be edited.
ORIGINAL
• A recorded video (title) in as is form is called an
ORIGINAL. A single recording (from record start to stop)
forms a single title.
PLAY LIST
• A title created by editing based on originals is called a
PLAY LIST. A play list can be remade any number of
times.
Play List
1
2
3
4
OriginalOriginalOriginal
Editing Procedure
Basic procedure for editing an original title
recorded in VR mode
Load a disc.
Select the title to be edited, and edit.
• Erasing Unnecessary Scenes from an Original Title
(ERASE SCENE) (page 67).
• Inputting/Changing Title Name (CHANGE TITLE
NAME) (page 69).
• Changing Thumbnail (CHANGE THUMBNAIL) (page
70).
• Making Sections in a Title (DIVIDE CHAPTER) (page
71).
• Combining Chapters Together (COMBINE CHAPTERS)
(page 72).
• Disabling Title Edit and Erase (TITLE PROTECT) (page
72).
• Erasing All Titles (page 73).
• Erasing by Selecting a Title (or Chapter) (page 73).
Basic procedure for editing titles recorded in VR
mode after making a Play List
Load a disc.
Create a Play List.
• Creating from Original Titles (page 74).
• Creating from Part of an Original (page 74).
NOTE
• A Play List is a list which describes the playback sequence of originals, and it does not actually copy the
originals. This makes it possible to perform editing while
using only a little disc space.
Recordings on DVD-RW/R in Video
mode
The following content can be edited.
• Input (change) title name (page 69)
• Erase title (page 73)
NOTE
• ERASE TITLE for a recording in Video mode will change
settings so that the “erased” title cannot be seen in the
REC LIST, but this does not mean that the video is actually
erased. (Free time on the disc will not increase. With a
DVD-RW recorded in Video mode, free time on the disc
will increase when the title recorded last is erased.)
• Editing is not possible if the disc has been finalized (page
95). With a DVD-RW, editing is possible again if finalization
is cancelled.
• Additional recording and editing can be done using only
this Recorder until the disc is finalized.
Select and edit the created Play List.
• Erasing All Titles (page 73).
• Erasing by Selecting a Title (or Chapter) (page 73).
• Adding a Scene from an Original to a Play List (ADD
SCENE) (page 75).
• Changing the Title Sequence (MOVE TITLE) (page 77).
• Erasing Unnecessary Scenes (ERASE SCENE) (page
78).
• Inputting/Changing Title Name (CHANGE TITLE
NAME) (page 78).
• Changing Thumbnail (CHANGE THUMBNAIL) (page
78).
• Making Sections in a Title (DIVIDE CHAPTER) (page
78).
• Combining Chapters Together (COMBINE CHAPTERS)
(page 78).
NOTE
Editing cannot be done in the following cases.
• Play Lists cannot be created for discs recorded in Video
mode.
• Play Lists cannot be created for recordings on DVD-R.
• Finalized DVD-RWs (Video mode) cannot be edited.
(Editing can be enabled by cancelling finalization.)
• A Play List cannot be created from original titles/chapters
containing a “Copy Once” enabled programme which is
recorded on HDD.
65
GB

Editing (HDD/DVD)
Edit Screen
Title being
edited
2
01
00:00: 02
00
SPECIFY ERASE
RANGE
82:0121/52
Chapter
being edited
Time being
(HDD ORIGINAL)
EDIT
ERASE SCENE
CHANGE TITLE NAME
CHANGE THUMBNAIL
DIVIDE CHAPTER
EL33TITRP:
ENIF
01/NOM4
OFNI:ELTIT
0041:02:02
edited
PLAY
ENTER
SET START POINTPLAYBACK
Frame being
edited
• There is no frame display for titles recorded
(dubbed) with high speed dubbing priority,
or for titles recorded (dubbed) in Video
mode.
Seamless Playback
This enables smooth playback at the
transitions between edited video scenes.
(However, a shift of about one second may
arise at the transitions, and part of the scene
may not appear.) (Page 89)
• Set this function by selecting: “START
MENU”→“OTHER SETTINGS 1” → “ADJUSTMENT” → “OPTION SETTING” →
“SEAMLESS PLAYBACK”.
High Speed Dubbing Priority
If a title is recorded onto HDD using high
speed dubbing priority, editing cannot be
done at the frame level. To perform editing at
the frame level, set “HI SP DUB PRIORITY” to
“NO” (pages 45, 89).
• Set this function by displaying “REC LIST”
and then selecting in order of: “FUNCTION
MENU” → “HI SP DUB PRIORITY”.
• If you have recorded a title with HI SP DUB
PRIORITY set to “YES”, and you want to
edit that title in frame units, cancel HI SP
DUB PRIORITY (page 64).
You cannot set “HI SP DUB PRIORITY” to
the title again once you cancel.
NOTE
• When you perform editing like adding a
chapter mark or erasing a scene, a slight
discrepancy may arise between the “EDIT”
screen and actually edited video.
• If you play back a disc edited at the frame
level with another DVD recorder, there may
be a shift in the start or end point, or the
screen may show a different thumbnail.
Switching between
Original and Play List
(Play Lists can be created only
for HDD or VR mode)
Switching when the Recorder power is on
ORIGINAL/PLAY LIST
Press ORIGINAL/PLAY LIST in the
stopped state. Each time this button is
pressed, the setting will toggle between
ORIGINAL and PLAY LIST.
REMAIN 20h0m
HD
ORIN
ALDI
G
FINE
REMAIN 20h0m
10
10
00:00:00
NOTE
• If recording is done while switched to play
list, the system will automatically switch
back to original.
Switching at the REC LIST
ORIGINAL/PLAY LIST
Press ORIGINAL/PLAY LIST at the REC
LIST. Each time this button is pressed,
the setting will toggle between ORIGINAL
and PLAY LIST.
REC LIST
(DVD ORIGINAL)
EL33TITRP:
ENIF
01/NOM4
OFNI:ELTIT
1 2
Switching at Edit screen
ORIGINAL/PLAY LIST
Press ORIGINAL/PLAY LIST at the
“EDIT” screen. Each time this button is
pressed, the setting will toggle between
ORIGINAL and PLAY LIST.
EDIT
(DVD ORIGINAL)
EL33TITRP:
ENIF
01/NOM4
OFNI:ELTIT
1 2
NOTE
• If a Play List has not been created, the
“SELECT EDIT OR CREATE PLAYLIST”
screen appears.
0001:61:61
0001:61:61
DVD-RW
ORVRINALI
G
FINE
REMAIN 1h0m
/
1
1
/
00:00:00
3
654
3
654
1
1
82:0121/52
82:0121/52
GB
66
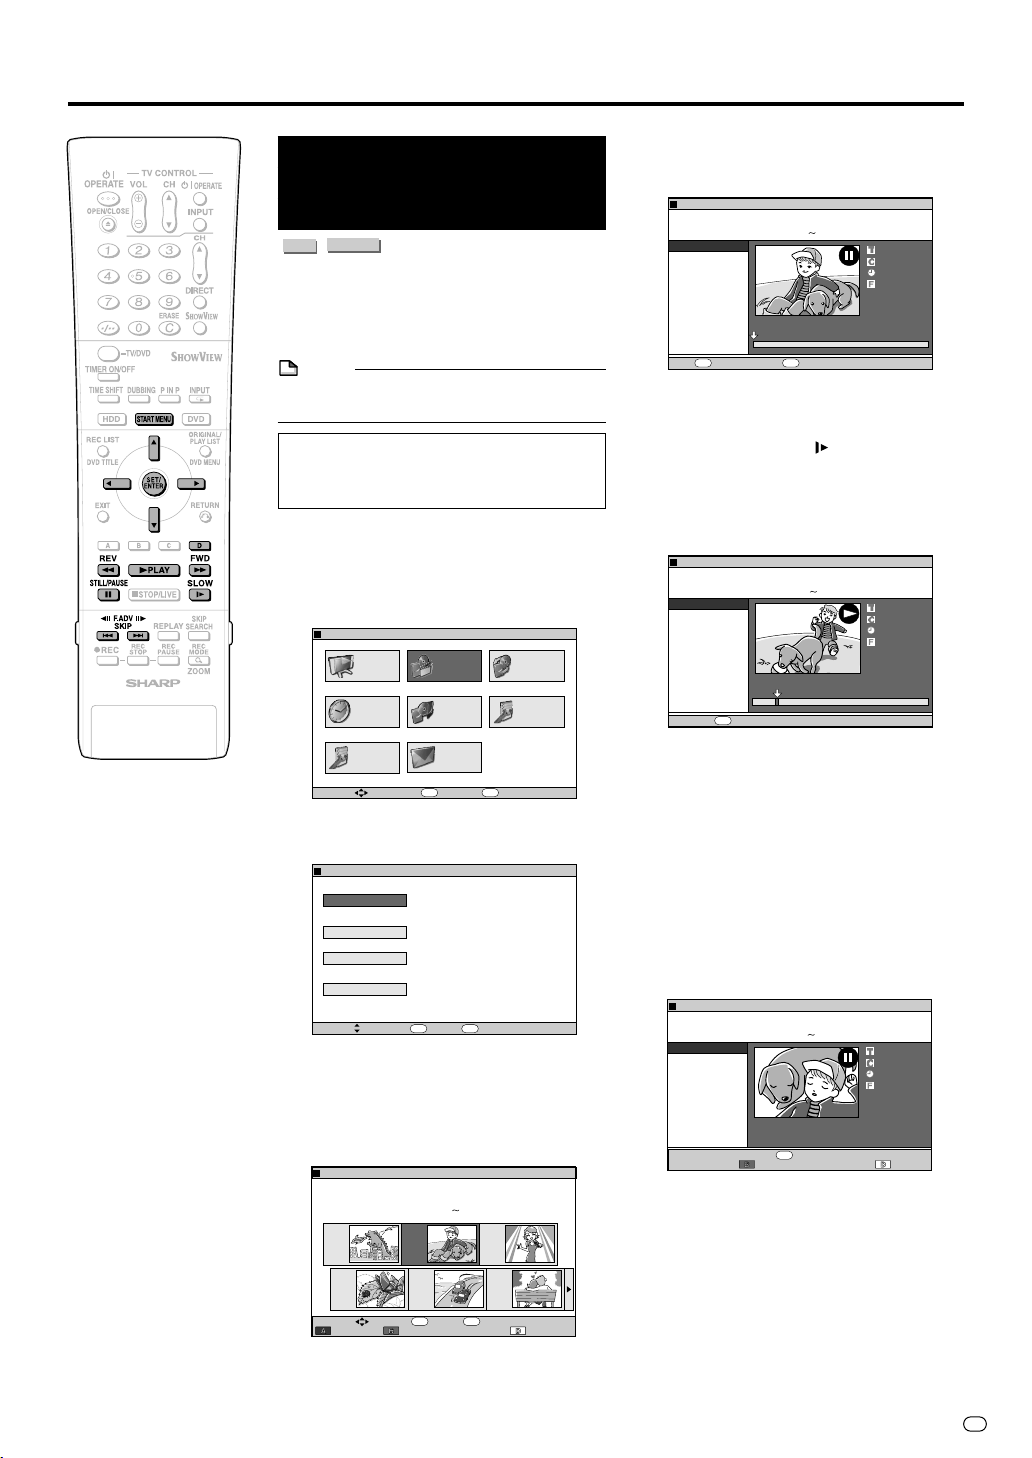
Editing an Original Title (HDD/DVD)
5
Erasing Unnecessary
Scenes from an Original
Title (ERASE SCENE)
DVD-RW
HDD
VR MODE
Selects a scene from an original video and
erase it.
• To erase all titles, see page 73.
• To erase by title (or chapter), see page 73.
NOTE
• Scenes cannot be erased on DVD-RW/R
(Video mode) discs.
Before Starting Editing
• Switch to the drive (HDD or DVD) to
be edited.
1
Press START MENU to display
“START MENU” screen.
2
Press ' / " / \ / | to select “EDIT/
ERASE”, then press SET/ENTER.
START MENU[EDIT/ERASE
3
Press ' / " to select “EDIT”, then
press SET/ENTER.
EDIT/ERASE
ERASE ALL TITLES
ERASE TITLES
TITLE PROTECT/OFF
• The Original Edit Title List screen
appears.
4
Press ' / " / \ / | to select the
title to edit, then press Yellow
(D) (EDIT MENU).
EDIT
(HDD ORIGINAL)
1 2
TITLE LIST
]
REC LIST
EDITS/ERASES RECORDED TITLES
TIMER
PROGRAM/
CHECK
OTHER
SETTINGS 2
SELECT ENTER RETURN
EDIT
SELECT ENTER RETURN
EL33TITRP:
01/NOM4
OFNI:ELTIT
SELECT
CHAPTER EDIT MENU
EDIT/
ERASE
INITIALIZE/
FINALIZE
INFORMATION
ENTER
DELETES SCENE,
CREATES/EDITS PLAYLIST.
ERASES ALL TITLES ON DISC
(EXCEPT PROTECTED TITLES).
ERASES SELECTED TITLES.
DISABLES EDIT/ERASE TITLES.
n
ENTER
ENIF
9041:02:02
n
ENTER
ENTER RETURN
n
82:0121/52
DUBBING
OTHER
SETTINGS 1
82:0121/52
82:0121/52
3
654
Press ' / " to select “ERASE
SCENE”, then press SET/ENTER.
• The selected title is paused.
EDIT
(HDD ORIGINAL)
EL33TITRP:
ENIF
9041:02:02
01/NOM4
OFNI:ELTIT
ERASE SCENE
CHANGE TITLE NAME
CHANGE THUMBNAIL
DIVIDE CHAPTER
SPECIFY ERASE
RANGE
PLAY
6
Press |PLAY to start playback.
ENTER
SET START POINTPLAYBACK
• Find the scene to be erased using
JFWD, GREV, FSTILL/PAUSE,
K, L, or SLOW.
7
Press SET/ENTER when you
reach the scene to be erased.
• The erase start point is set. (Title
playback continues.)
(HDD ORIGINAL)
EDIT
EL33TITRP:
ENIF
01/NOM4
ERASE SCENE
CHANGE TITLE NAME
CHANGE THUMBNAIL
DIVIDE CHAPTER
ENTER
OFNI:ELTIT
SET END POINT
9041:02:02
SPECIFY ERASE
RANGE
• When the start point is set to near the
beginning of a chapter, the beginning
of the chapter will be selected as the
start point. To make the original
designated start point effective, set it
again after combining up with the
chapter just before. (page 72)
8
Press SET/ENTER when you
reach the end of scene to be
erased.
• The erase end point is set. (The title
will pause.)
EDIT
(HDD ORIGINAL)
EL33TITRP:
ENIF
01/NOM4
OFNI:ELTIT
ERASE SCENE
CHANGE TITLE NAME
CHANGE THUMBNAIL
DIVIDE CHAPTER
• When the end point is set to near the
end of a chapter, the end of the
chapter will be selected as the end
point. To make the original
designated end point effective, set it
again after combining up with the
chapter just after. (page 72)
9041:02:02
CONFIRMCONTENT
AFTER ERASING?
n
RETURN
CONFIRMING ERASE
2
01
00: 00: 00
00
2
01
00:00 :12
00
2
01
00:00 :32
00
82:0121/52
82:0121/52
82:0121/52
• Edit Menu Screen appears.
Continued on Next Page
|||
67
GB

Editing an Original Title (HDD/DVD)
9
Press Red (B) (CONFIRMING) to
confirm the contents.
• The title is played back without the
scene to be erased.
Press Yellow (D) (ERASE) to
erase.
• Go to step 10.
• Press RETURN to cancel scene
erase.
10
Press \ to select “YES”, then
press SET/ENTER.
EDIT
(HDD ORIGINAL)
EL33TITRP:
01/NO
4
ERASE SCENE
CHANGE TITLE NAME
CHANGE THUMBNAIL
DIVIDE CHAPTER
OFNI:ELTIT
SELECT ENTER RETURN
ENIF
M
9041:02:02
ERASE THIS SCENE?
YES NO
ENTER
n
82:0121/52
• Erase begins.
When erase completes, the screen in
step 5 appears.
• If “C (UNDO)” is displayed, you can
undo edit by pressing Green (C).
• To quit scene erase, press RETURN.
Then the edit screen appears.
11
Press EXIT to exit from Edit
mode.
NOTE
Selecting start and end points for scene
erase
• You cannot set a range shorter than 3
seconds.
• Once you erase a section of an original, it
is completely erased. It cannot be restored,
so be very careful and confirm before
erasing.
• Scenes can only be added and erased a
maximum of 50 times per title.
• If scenes have been added 51 or more
times to a disc using another DVD recorder.
Editing (Recording) may not function.
Searching for the Start
Point and End Point Scenes
The following playback operations are
available when searching for the start point
and end point scenes.
Playback
• If you press
title will be played back.
Skipping to the start of a chapter
• If the scene to be selected is in another title
or chapter, first search for the title or
chapter using
Searching for scenes in a chapter
•
GREV and JFWD are convenient for
searching for a scene in a chapter.
Pause
• When you reach a scene near the start
point or end point, press
to pause. This will make it easier to find the
scene. The start and end points may shift
slightly.
Frame Advance/Reverse
• If you press
will start Frame Advance Playback. If you
press K, it will start Frame Reverse
Playback.
Final selection of scene
• To select a scene more accurately, use
slow playback starting a little before the
scene to be selected. This will keep you
from going beyond the scene.
If you press
can select a scene at your leisure during
slow playback of the video.
||
|PLAY, the currently paused
||
Kor L.
FSTILL/PAUSE
Lafter pause, the video
SLOW after pausing, you
GB
68

Editing an Original Title (HDD/DVD)
Inputting/Changing Title
Name (CHANGE TITLE
NAME)
DVD-RW
HDD
VR MODE
• When you record, a title name including the
date, time and channel number is automatically created.
You can freely change this title name.
• You can input up to a maximum of 64
characters.
To input, perform the following steps in
order: “Select characters to be changed”
→ “Delete unnecessary characters
(characters to be changed)” → “Input new
characters”.
NOTE
• Title names cannot be changed in finalized
Video mode discs.
Before Starting Editing
• Switch to the drive (HDD or DVD) to
be edited.
1
Press START MENU.
2
Press ' / " / \ / | to select “EDIT/
ERASE”, then press SET/ENTER.
START MENU[EDIT/ERASE
3
Press ' / " to select “EDIT”,
then press SET/ENTER.
EDIT/ERASE
ERASE ALL TITLES
11
4
1 Press ' / " / \ / | to select the
11
title to edit.
22
2
Press Yellow (D) (EDIT MENU).
22
• Edit Menu screen appears.
EDIT
11
5
1 Press ' / " to select
11
“CHANGE TITLE NAME”.
EDIT
ERASE SCENE
CHANGE TITLE NAME
CHANGE THUMBNAIL
DIVIDE CHAPTER
22
2 Press SET/ENTER.
22
• Title Name Change screen appears.
VIDEO MODE
REC LIST
EDITS/ERASES RECORDED TITLES
TIMER
PROGRAM/
CHECK
EDIT
(HDD ORIGINAL)
EL33TITRP:
OFNI:ELTIT
1 2
SELECT
TITLE LIST
(HDD ORIGINAL)
EL33TITRP:
OFNI:ELTIT
DVD-RW
01/NOM4
01/NOM4
DVD-R
]
EDIT/
ERASE
INITIALIZE/
FINALIZE
DELETES SCENE,
CREATES/EDITS PLAYLIST.
ERASES ALL TITLES ON DISC
(EXCEPT PROTECTED TITLES).
ENIF
0001:61:61
n
ENTER
ENTER RETURN
CHAPTER EDIT MENU
ENIF
0001:61:61
CHANGE TITLE NAME.
DUBBING
SETTINGS 1
3
654
82:0121/52
OTHER
82:0121/52
82:0121/52
82:0121/52
6
Change Title Name.
Input field (Displays title name.
Can input and change title name.)
Cursor (Displays the position
to input characters.)
Displays input characters.
Select when you switch
between capital letters
and small letters.
EDIT
(HDD ORIGINAL)
EL33TITRP:
ENIF
0001:61:61
M
4
OFNI:ELTIT
01/NO
PR 33 FINE 2004/4/10 16:00
A
B
C
D
N
O
P
Q
R
À
Á
Â
Ã
Ñ
Ò
Ó
Ô
0
1
2
3
'
*
&
/
SELECT ENTER
BACK SPACE
''
Press
' /
''
select the character to
be input.
11
1 Press Red (B) or Green (C) to
11
|
.
J
K
L
H
U
Ç
Ø
7
^
\\
\ /
\\
I
V
È
Ù
8
W
É
Ú
9
||
| to
||
M
(
X
Y
Z
Ê
Ë
Ì
Í
Û
Ü
-
+
<
=
{
|
}
ERASE
ERASE ALL RETURN
E
F
G
S
T
Æ
Ä
Å
Ö
Õ
4
5
6
[
]
\
ENTER
BACK FORWARD SPACE
""
" /
""
,
?
!
)
:
;
small
#
Î
Ï
%
ß
$
_
>
END
"
˜
i
n
Select when you
complete inputting
character.
select the character to change.
• When you want to insert characters,
move the cursor to the position you
want to insert by pressing Red (B) or
Green (C).
22
2 Press Blue (A) to erase the
22
character to change.
World Rail
7
Press ' / " / \ / | to select the
character to input, then press
SET/ENTER.
• Inputs character in input field.
• To switch between capital and small
letters, select “CAPS” or “small”, then
press SET/ENTER.
8
Input title letters by repeating step
7
.
• Press Blue (A) (BACK SPACE) to
erase text to the left of the cursor, a
character at a time.
• Press Red (B) (BACK) to move the
cursor back one space.
• Press Green (C) (FORWARD) to move
the cursor forward one space.
• Press Yellow (D) (SPACE) to input a
space.
• The maximum number of characters
you can input is 64.
9
Press ' / " / \ / | to select “END”
and then press SET/ENTER
After input is finished.
• The new title is set, and the screen in
step 5 displays.
Press Green (C) (UNDO) to
return to the previously set title.
• The title returns to original name.
• Operate according to the instructions
of the screen.
10
Press EXIT to quit editing.
• Edit mode will terminate.
82:0121/52
GB
69

Editing an Original Title (HDD/DVD)
Changing Thumbnail
(CHANGE THUMBNAIL)
DVD-RW
HDD
VR MODE
Changes the still frame picture displayed at
the Thumbnail screen of the REC LIST to your
favorite scene within the title.
Before Starting Editing
• Switch to the drive (HDD or DVD) to
be edited.
1
Press START MENU.
2
Press ' / " / \ / | to select “EDIT/
ERASE”, then press SET/
ENTER.
START MENU[EDIT/ERASE
3
Press ' / " to select “EDIT”,
then press SET/ENTER.
EDIT/ERASE
ERASE ALL TITLES
ERASE TITLES
TITLE PROTECT/OFF
• The Original Edit Title List Screen
appears.
4
Press ' / " / \ / | to select the
title to edit, then press Yellow
(D) (EDIT MENU).
EDIT
(HDD ORIGINAL)
1 2
TITLE LIST
• Edit Menu screen appears.
]
REC LIST
EDITS/ERASES RECORDED TITLES
TIMER
PROGRAM/
CHECK
OTHER
SETTINGS 2
SELECT ENTER RETURN
EDIT
SELECT ENTER RETURN
EL33TITRP:
01/NOM4
OFNI:ELTIT
SELECT
CHAPTER EDIT MENU
EDIT/
ERASE
INITIALIZE/
FINALIZE
INFORMATION
ENTER
DELETES SCENE,
CREATES/EDITS PLAYLIST.
ERASES ALL TITLES ON DISC
(EXCEPT PROTECTED TITLES).
ERASES SELECTED TITLES.
DISABLES EDIT/ERASE TITLES.
n
ENTER
ENIF
9041:02:02
n
ENTER
ENTER RETURN
n
DUBBING
OTHER
SETTINGS 1
3
654
11
5
1 Press ' / " to select
11
“CHANGE THUMBNAIL”.
EDIT
(HDD ORIGINAL)
EL33TITRP:
ENIF
01/NOM4
OFNI:ELTIT
ERASE SCENE
CHANGE TITLE NAME
CHANGE THUMBNAIL
DIVIDE CHAPTER
22
2 Press SET/ENTER.
22
6
Press |PLAY to start playback.
(HDD ORIGINAL)
EDIT
EL33TITRP:
OFNI:ELTIT
SCENE ERASE
CHANGE TITLE NAME
CHANGE THUMBNAIL
DIVIDE CHAPTERS
82:0121/52
9041:02:02
ENIF
01/NOM4
9041:02:02
1
00
00: 00: 00
00
SELECT SCENE FOR
THUMBNAIL
1
01
00: 00:12
14
SELECT SCENE FOR
THUMBNAIL
82:0121/52
82:0121/52
• Find the scene you want to use as a
thumbnail using JFWD, GREV,
FSTILL/PAUSE, K, L, or
SLOW.
7
Press SET/ENTER when you
reach the scene you want to use
as a thumbnail.
• Playback is paused.
(HDD ORIGINAL)
EDIT
EL33TITRP:
ENIF
01/NOM4
82:0121/52
8
OFNI:ELTIT
ERASE SCENE
CHANGE TITLE NAME
CHANGE THUMBNAIL
DIVIDE CHAPTER
11
1 If this is the screen you want,
11
9041:02:02
PUT THIS
SCENE IN THE
THUMBNAIL?
YES NO
1
01
00: 00:41
12
82:0121/52
select “YES” by pressing \ / |.
• If you select “NO”, you can return to
step 5 and select the scene again.
22
2 Press SET/ENTER.
22
• The new Thumbnail screen is set, and
the system returns to the screen in
step 5.
82:0121/52
Press Green (C) (UNDO) to
return to the previously set
thumbnail.
• Operate according to the instructions
of the screen.
9
Press EXIT to quit Thumbnail
edit.
• Edit mode will terminate.
GB
70

Editing an Original Title (HDD/DVD)
Making Sections in a Title
(DIVIDE CHAPTER)
DVD-RW
HDD
VR MODE
Divides a title into multiple chapters and
make editing and dubbing of chapter as unit
easier.
• You can set chapter divisions by pressing
CHAPTER MARK (under the cover)
during recording or playback.
Before Starting Editing
• Switch to the drive (HDD or DVD) to
be edited.
1
Press START MENU.
2
Press ' / " / \ / | to select “EDIT/
ERASE”, then press SET/ENTER.
START MENU[EDIT/ERASE
3
Press ' / " to select “EDIT”,
then press SET/ENTER.
EDIT/ERASE
ERASE ALL TITLES
ERASE TITLES
TITLE PROTECT/OFF
4
Press ' / " / \ / | to select the
title to edit, then press Yellow
(D) (EDIT MENU).
EDIT
(HDD ORIGINAL)
1 2
]
REC LIST
EDITS/ERASES RECORDED TITLES
TIMER
PROGRAM/
CHECK
OTHER
SETTINGS 2
DELETES SCENE,
EDIT
CREATES/EDITS PLAYLIST.
ERASES ALL TITLES ON DISC
(EXCEPT PROTECTED TITLES).
ERASES SELECTED TITLES.
DISABLES EDIT/ERASE TITLES.
EL33TITRP:
ENIF
01/NOM4
OFNI:ELTIT
EDIT/
ERASE
INITIALIZE/
FINALIZE
INFORMATION
9041:02:02
82:0121/52
DUBBING
OTHER
SETTINGS 1
82:0121/52
82:0121/52
3
6
Press |PLAY to start playback.
EDIT
(HDD ORIGINAL)
EL33TITRP:
ENIF
01/NOM4
ERASE SCENE
CHANGE TITLE NAME
CHANGE THUMBNAIL
DIVIDE CHAPTER
OFNI:ELTIT
9041:02:02
2
01
00:00:01
04
SELECT POSITION
TO DIVIDE
THIS CHAPTER
• Find the scene to erase using
JFWD, GREV, FSTILL/PAUSE,
K, L, or SLOW on the
remote comtrol.
7
Press SET/ENTER at the point
where you want to divide.
(HDD ORIGINAL)
EDIT
EL33TITRP:
ENIF
01/NOM4
OFNI:ELTIT
ERASE SCENE
CHANGE TITLE NAME
CHANGE THUMBNAIL
DIVIDE CHAPTER
8
Press \ / | to select “YES”, then
9041:02:02
DIVIDE CHAPTER?
YES NO
1
01
00: 00:12
04
press SET/ENTER.
• To continue dividing, repeat steps
to 7.
To cancel a chapter division,
press Green (C) (UNDO).
• Operate according to the instructions
on the screen.
9
Press EXIT to quit editing.
• Edit mode will terminate.
NOTE
• Divide a chapter to make it 3 or more
seconds. You cannot divide a chapter into a
section which is less than 3 seconds.
82:0121/52
82:0121/52
5
5
Press ' / " to select “DIVIDE
CHAPTER”, then press
SET/ENTER.
EDIT
(HDD ORIGINAL)
EL33TITRP:
ENIF
01/NOM4
ERASE SCENE
CHANGE TITLE NAME
CHANGE THUMBNAIL
DIVIDE CHAPTER
OFNI:ELTIT
9041:02:02
654
2
01
00: 00:00
04
SELECT POSITION
TO DIVIDE
THIS CHAPTER
82:0121/52
GB
71
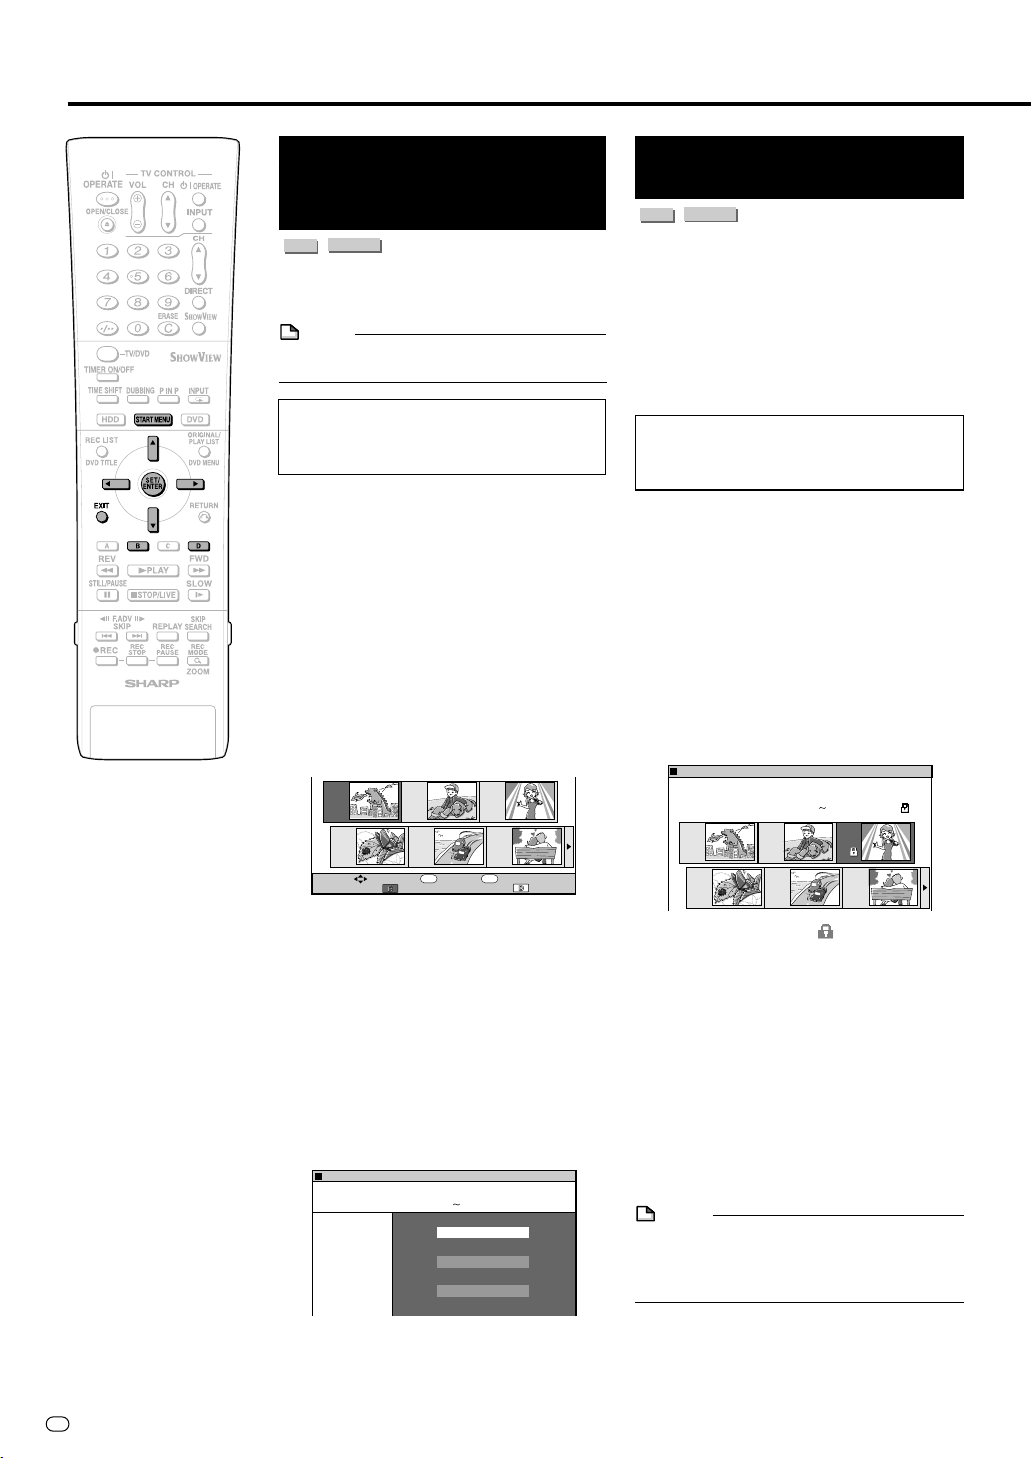
Editing an Original Title (HDD/DVD)
Combining Chapters
Together
(COMBINE CHAPTERS)
DVD-RW
HDD
VR MODE
Combines two adjacent chapters into a single
chapter.
NOTE
• You cannot combine chapters automatically recorded when a scene was erased.
Before Starting Editing
• Switch to the drive (HDD or DVD) to
be edited.
1
Select “EDIT/ERASE” in “START
MENU” screen, then press SET/
ENTER.
2
Press ' / " to select “EDIT”,
then press SET/ENTER.
3
Press ' / " / \ / | to select the
title you wish to edit.
4
Press Red (B) (CHAPTER) to
select Chapter Thumbnail screen.
5
Press ' / " / \ / | to select the
chapter to combine, then press
Yellow (D) (EDIT MENU).
1 2
3
654
Disabling Title Edit and
Erase (TITLE PROTECT)
DVD-RW
HDD
VR MODE
Disables edit and erase so you cannot
mistakenly change or erase the content of a
title.
Lets you safely save a disc for which editing
is in progress.
• This operation will not work with Video
mode discs.
• Titles created with Play List (page 74)
cannot be protected.
Before Starting Editing
• Switch to the drive (HDD or DVD) to
be edited.
1
Select “EDIT/ERASE” in “START
MENU” screen, then press SET/
ENTER.
2
Press ' / " to select “TITLE
PROTECT/OFF”, then press SET/
ENTER.
3
Press ' / " / \ / | to select the
title to protect, then press SET/
ENTER.
• Each time the button is pressed, the
setting toggles between “PROTECT”
and “UNPROTECT”.
TITLE PROTECT OR NOT
12
EL33TITRP:
OFNI:ELTIT
(HDD ORIGINAL)
ENIF
01/3DEW1
0001:61:61
3
82:0121/52
ENTER
SELECT
TITLE
6
Press SET/ENTER.
7
Press ' / " to select combine
procedure you prefer, then press
SET/ENTER.
• Select from: “COMBINE W/PREV”,
“COMBINE W/NEXT” or “DON’T
COMBINE”.
• If you select “COMBINE W/PREV” or
“COMBINE W/NEXT”, the two
chapters will join, and Chapter
Thumbnail screen is displayed.
• If you select “DON’T COMBINE”, the
previous screen displays.
EDIT
(HDD ORIGINAL)
EL33TITRP:
ENIF
01/NOM4
OFNI:ELTIT
COMBINE CHAPTERS
8
Press EXIT to exit from Edit
mode.
GB
72
n
ENTER RETURN
0001:61:61
COMBINE W/PREV
COMBINE W/PREV CHAP
COMBINE W/NEXT
COMBINE W/NEXT CHAP
DON'T COMBINE
DO NOT COMBINE CHAPS.
EDIT MENU
• The protect mark is attached to
protected titles.
(The protect mark can be confirmed
at either the “REC LIST” screen or
“EDIT” screen.)
4
Press EXIT to exit from Edit
mode.
To Cancel Title Protect
1
Select the title protected in step
above, and press SET/ENTER.
82:0121/52
• Title protect is cancelled, and the
protect mark disappears.
NOTE
• If “DVD DISC PROTECTION” is set for a
DVD-RW (VR mode) disc, protection cannot
be cancelled for individual titles. Cancel
“DVD DISC PROTECTION” (page 90).
2
Press EXIT to exit from Edit
mode.
654
3

Editing an Original Title (HDD/DVD)
Erasing All Titles
DVD-RW
HDD
VR MODE
This erases the entire contents of a HDD or
DVD-RW. (Except titles for which title protect
has been set.)
You can erase the following:
• HDD (ORIGINAL):
Erases all titles recorded on the HDD.
When originals are erased, play lists are
also erased.
• HDD (PLAY LIST):
Erases all play lists created on the HDD.
Even if play lists are erased, the original
titles are not erased.
• DVD (ORIGINAL):
Erases all titles recorded on DVD. When
originals are erased, play lists are also
erased.
• DVD (PLAY LIST):
Erases all play lists created on DVD. Even if
play lists are erased, the original titles are
not erased.
NOTE
• When a Video mode disc is finalized, you
can no longer erase all titles.
Before Starting Editing
• Switch to the drive (HDD or DVD) to
be edited.
1
Select “EDIT/ERASE” in “START
MENU” screen, then press SET/
ENTER.
2
Press ' / " to select “ERASE
ALL TITLES”, then press SET/
ENTER.
3
Press ' / " to select what you
want to erase, then press SET/
ENTER.
ERASE ALL TITLES
4
Press \ / | to select “YES”, then
press SET/ENTER.
• Carefully confirm before executing
• If you select “NO” and enter, the
5
Press SET/ENTER.
• All titles (or play lists) are erased, and
6
Press EXIT to exit from Edit
mode.
DVD-RW
VIDEO MODE
SELECT AN ITEM BELOW TO ERASE ALL TITLES.
erase.
screen in step 3 appears.
the screen in step 3 appears.
To restore the erased content, press
Green (C) (CNL ERASE). Operate
according to the instructions on the
screen. (Note: You can only undo
once, to the state immediately before
the last erase.)
HDD (ORIGINAL)
HDD (PLAYLIST)
DVD-R
82:0121/52
Erasing by Selecting a
Title (or Chapter)
DVD-RW
HDD
VR MODE
Allows you to select titles to erase, and erase
them in a batch.
• When erasing original titles:
If original titles are erased, those titles will
also be erased from play lists.
• When erasing play lists:
Even if play lists are erased, the original
titles will not be erased.
NOTE
• Up to a maximum of 20 titles (chapters)
can be selected at one time.
• When a Video mode disc is finalized, you
can no longer select and erase titles.
• You cannot erase chapters in DVD-RW/R
discs (Video mode).
Before Starting Editing
• Switch to the drive (HDD or DVD) to
be edited.
1
Select “EDIT/ERASE” in “START
MENU” screen, then press SET/
ENTER.
2
Press ' / " to select “ERASE
TITLES”, then press SET/ENTER.
3
Press ' / " / \ / | to select titles
to erase.
• If you press Red (B) (CHAPTER), the
4
Press SET/ENTER.
• If there are other titles (chapters) you
5
Press Yellow (D) (ERASE).
6
Press \ / | to select “YES”.
•
• If you select “NO” and enter, operate
7
Press SET/ENTER.
•
• To cancel erase, press Green (C)
• Operate according to the instructions
8
Press EXIT to exit from Edit mode.
DVD-RW
VIDEO MODE
screen will switch to the chapter
thumbnail display so you can select
and erase chapters.
wish to erase, select with
and press SET/ENTER.
Once a title (chapter) has been erased,
it cannot be restored. Carefully confirm
before executing erase.
from step 4 again.
All selected titles (chapters) are erased.
(CNL ERASE).
on the screen.
DVD-R
''
' /
''
""
" /
""
\\
\ /
\\
73
||
|
||
GB

Editing a Play List (HDD/DVD)
11
5
1 Press ' / " to select “COPY
Creating a Play List
DVD-RW
HDD
VR MODE
You can create a Play List by copying a title
or chapter units from an original. Also you can
select your favorite scenes from originals, and
compile them into a Play List.
NOTE
• Operations like “COPY TITLE/CHAPTER”
and “COPY SPECIFIED SCENE” do not
actually copy the original titles. These
operations merely write the information
“make this original title a title in the play
list”. Therefore, you can edit without
decreasing free space in the disc or
touching the original titles.
• When creating a play list from original titles,
the original title’s thumbnail and chapter
mark information are not copied.
• You cannot create a play list of “Copy
Once” titles (programme) recorded on
HDD.
Before Starting Editing
• Switch to the drive (HDD or DVD) to
be edited.
Creating from Original
Titles
Makes a single original title into a play list
title.
1
Select “EDIT/ERASE” in “START
MENU” screen, then press SET/
ENTER.
2
Press ' / " to select “EDIT”, then
press SET/ENTER.
3
Press ORIGINAL/PLAY LIST to
the “PLAY LIST” screen.
• The screen switches to the Play List
Edit Screen.
• There still is no title at this point, so a
“NEW” title frame with no image is
displayed.
• To create a new Play List later, select
the “NEW” title frame.
EDIT
(HDD PLAYLIST)
SELECT EDIT OR CREATE PLAYLIST
NEW
82:0121/52
11
TITLE/CHAPTER”.
22
2 Press SET/ENTER.
22
•“REC LIST” (Thumbnail) screen of the
original appears.
11
6
1 Press ' / " / \ / | to select title
11
to copy.
EDIT
(HDD ORIGINAL)
EL33TITRP:
ENIF
01/NOM4
OFNI:ELTIT
1 2
9041:02:02
3
654
• To select a chapter, press Red (B)
(CHAPTER).
22
2 Press SET/ENTER.
22
• The selected title (chapter) becomes
a Play List title.
Creating from Part of an
Original
You can select a desired scene from an
original title, and make it into a Play List title.
1
Perform steps
from Original Titles” in the left
column.
11
2
1 Press ' / " to select “COPY
11
SPECIFIED SCENE”.
22
2 Press SET/ENTER.
22
3
Press ' / " / \ / | to select title to
copy, then press SET/ENTER.
• To select from a chapter, press Red
(B) (CHAPTER) and select the
chapter.
4
Press |PLAY to start playback.
• Find the scene to copy using
FSTILL/PAUSE, JFWD, GREW,
K, L, or SLOW.
5
Press SET/ENTER at the place
where you want to start copying.
EDIT
(HDD ORIGINAL)
EL33TITRP:
OFNI:ELTIT
CREATE NEW
1-4
ENIF
9041:02:0201/NOM4
of “Creating
2
01
00: 00: 12
00
SPECIFY A RANGE
TO COPY.
82:0121/52
82:0121/52
ENTER
SET END POINT
• If you fast reverse to a scene prior to
4
Press SET/ENTER.
(HDD PLAYLIST)
EDIT
SPECIFY THE RANGE TO SET PLAYLIST
FROM THE ORIGINAL THEN CREATE PLAYLIST.
SELECT ORIGINAL TITLE/CHAPTER AND ADD IT.
SELECT A SCENE FROM ORIGINAL VIDEO
AND ADD IT.
GB
74
COPY TITLE/CHAPTER
COPY SPECIFIED SCENE
n
ENTER
SELECT ENTER PREVIOUS
82:0121/52
the start point, the start point will be
cancelled.
• When the start point is set to near the
beginning of a chapter, the beginning
of the chapter will be selected as the
start point. To make the original
designated start point effective, set it
again after combining up with the
chapter just before. (page 72)

Editing a Play List (HDD/DVD)
6
Find the place where you want to
end copying, then press SET/
ENTER.
• If you press RETURN, you can
reselect the start point.
EDIT
(HDD ORIGINAL)
EL33TITRP:
ENIF
01/NOM4
CREATE NEW
OFNI:ELTIT
0041:02:02
• When the end point is set to near the
end of a chapter, the end of the
chapter will be selected as the end
point. To make the original
designated end point effective, set it
again after linking up with the chapter
just before. (page 72)
7
Press Red (B) (CONFIRMING) to
confirm the content.
Press Yellow (D) (CREATE) to
execute copy.
Go to step
• You can reselect the end point by
pressing RETURN.
11
8
1 Press \ / | to select “YES”.
11
22
2 Press SET/ENTER.
22
• One play list title is created.
NOTE
Selecting start or end point to add a scene.
• You cannot set a range shorter than 3
seconds.
8
.
SAVE AS A NEW PLAYLIST?
YES NO
n
ENTER
SELECT ENTER RETURN
1
07
00: 00: 32
14
CONFIRM CONTENT?
82:0121/52
Adding a Scene from an
Original to a Play List
(ADD SCENE)
DVD-RW
HDD
VR MODE
Adds video selected from an original to the
end of play list titles.
NOTE
• The selected scene cannot be added if
adding it will make the title longer than 12
hours.
• Scenes can be added as long as the
length of the title after adding is less than
the maximum of 12 hours.
Before Starting Editing
• Switch to the drive (HDD or DVD) to
be edited.
1
Select “EDIT/ERASE” in “START
MENU” screen, then press SET/
ENTER.
2
Press ' / " to select “EDIT”,
then press SET/ENTER.
11
3
1 Press ORIGINAL/PLAY LIST
11
to switch to “PLAY LIST”
screen.
22
2 Press ' / " / \ / | to select title
22
to edit.
EDIT
(HDD PLAYLIST)
EL33TITRP:
ENIF
01/NOM4
OFNI:ELTIT
NEW
33
3 Press Yellow (D) (EDIT
33
MENU).
9041:02:02
1
2
543
82:0121/52
4
Press ' / " to select “ADD
SCENE” then press SET/
ENTER.
EDIT
(HDD PLAYLIST)
EL33TITRP:
ENIF
9041:02:02
01/NOM4
OFNI:ELTIT
ERASE SCENE
CHANGE TITLE NAME
CHANGE THUMBNAIL
DIVIDE CHAPTER
ADD SCENE
MOVE TITLE
SELECT ENTER RETURN
ADD CHAPTER/TITLE
SELECT ORIGINAL TITLE/CHAPTER AND ADD IT
SPECIFY SCENE TO ADD
SELECT A SCENE FROM ORIGINAL VIDEO AND
ADD IT
ENTER
Continued on Next Page
82:0121/52
n
|||
GB
75

Editing a Play List (HDD/DVD)
5
Adding a Title or Chapter
11
1 Select “ADD CHAPTER/TITLE”,
11
then press SET/ENTER.
22
2 Select a title (chapter) at the
22
title (chapter) list, then press
SET/ENTER. Go to step
Specifying and Adding a
Scene
• Select “SPECIFY SCENE TO
ADD”, then press SET/ENTER.
Go to step
EDIT
(HDD PLAYLIST)
ERASE SCENE
CHANGE TITLE NAME
CHANGE THUMBNAIL
DIVIDE CHAPTER
ADD SCENE
MOVE TITLE
6
Press ' / " / \ / | to select title
(chapter) to edit, then press SET/
ENTER.
• The selected title (chapter) pauses.
(HDD ORIGINAL)
EDIT
OFNI:ELTIT
ERASE SCENE
CHANGE TITLE NAME
CHANGE THUMBNAIL
DIVIDE CHAPTER
ADD SCENE
MOVE TITLE
PLAY
11
7
1 Press |PLAY to start playback.
11
• Find the scene to add using FSTILL/
PAUSE, JFWD, GREV, K,
L, or SLOW.
EDIT
(HDD ORIGINAL)
ERASE SCENE
CHANGE TITLE NAME
CHANGE THUMBNAIL
DIVIDE CHAPTER
ADD SCENE
MOVE TITLE
PLAY
22
2 Press SET/ENTER at the start
22
point of the scene you want to
add.
ERASE SCENE
CHANGE TITLE NAME
CHANGE THUMBNAIL
DIVIDE CHAPTER
ADD SCENE
MOVE TITLE
ENTER
• If you fast reverse to a scene prior to
the start point, the start point will be
cancelled.
6
.
EL33TITRP:
ENIF
01/NOM4
OFNI:ELTIT
SELECT ENTER RETURN
EL33TITRP:
EL33TITRP:
OFNI:ELTIT
SET END POINT
9041:02:02
ADD CHAPTER/TITLE
SELECT ORIGINAL TITLE/CHAPTER AND ADD IT
SPECIFY SCENE TO ADD
SELECT A SCENE FROM ORIGINAL VIDEO AND
ADD IT
n
ENTER
ENIF
01/NOM4
9041:02:02
ENTER
SET START POINTPLAYBACK
ENIF
01/NOM4
0041:02:02
ENTER
SET START POINTPLAYBACK
SPECIFY RANGE
TO ADD.
SPECIFY RANGE
TO ADD.
SPECIFY RANGE
TO ADD.
2
01
00: 00:00
04
2
01
00: 00:12
00
2
01
00:00 :32
09
• When the start point is set to near the
beginning of a chapter, the beginning
of the chapter will be selected as the
start point. To make the original
designated start point effective, set it
again after combining up with the
chapter just before. (page 72)
9
.
8
Press SET/ENTER at the end of
the scene you want to add.
• Press RETURN to reselect the start
point of the scene. You can press
RETURN to reselect the end point
even after it is already set.
82:0121/52
ERASE SCENE
CHANGE TITLE NAME
CHANGE THUMBNAIL
DIVIDE CHAPTER
ADD SCENE
MOVE TITLE
n
RETURN
CONFIRMING ADD
2
01
00:00: 32
09
CONFIRM CONTENT?
• When the end point is set to near the
end of a chapter, the end of the
chapter will be selected as the end
point. To make the original
designated end point effective, set it
again after combining up with the
chapter just before. (page 72)
9
82:0121/52
Press Red (B) (CONFIRMING) to
confirm the content.
Press Yellow (D) (ADD) to add.
• If you press Red (B) (CONFIRMING),
you can test play the added scene,
from the start point to the end point. It
may take about one minute for the
confirm screen to appear.
• Press Yellow (D) (ADD) to add.
11
10
1 Press \/ | to select “YES”.
11
22
2 Press SET/ENTER.
22
• The scene is added after the selected
title, and stored as a new title of the
82:0121/52
play list.
11
Press EXIT to exit from EDIT
mode.
• A chapter mark is automatically set at
the start point where the scene is
added.
NOTE
• When adding a scene, select a scene
which continues for at least 3 seconds.
Scenes shorter than 3 seconds cannot be
added.
• Scenes can only be added and erased a
maximum of 50 times per title.
• If you press G REV or Kand reverse
beyond the start point after setting a start
point, the start point will cancel.
• If scenes have been added or erased 51 or
more times to a single title in a disc using
another DVD recorder, Editing (Recording)
may not function.
GB
76

Editing a Play List (HDD/DVD)
Changing the Title
Sequence (MOVE TITLE)
DVD-RW
HDD
VR MODE
Freely changes the sequence of titles.
EDIT
(HDD PLAYLIST)
SELECT EDIT OR CREATE PLAYLIST
1
NEW
ENTER
SELECT ENTER RETURN
TITLE LIST CHAPTER EDIT MENU
Before Starting Editing
• Switch to the drive (HDD or DVD) to
be edited.
1
Select “EDIT/ERASE” in “START
MENU” screen, then press SET/
ENTER.
2
Press ' / " to select “EDIT”,
then press SET/ENTER.
11
3
1 Press ORIGINAL/PLAY LIST
11
to switch to “PLAY LIST”
screen.
22
2 Press ' / " / \ / | to select title
22
to edit.
EDIT
(HDD PLAYLIST)
EL33TITRP:
ENIF
01/NOM4
OFNI:ELTIT
1
NEW
ENTER
SELECT
TITLE LIST
CHAPTER
2
543
n
0001:61:61
2
543
n
ENTER RETURN
EDIT MENU
6
Press SET/ENTER.
• If a point prior to the selected title is
selected as the destination, the title
will move to the point immediately
prior to the selected title.
• Press Green (C) (UNDO) to restore to
the state before the movement.
82:0121/52
Operate according to the instructions
on the screen.
EDIT
(HDD PLAYLIST)
EL33TITRP:
ENIF
01/DEW6
OFNI:ELTIT
12
SELECT
TITLE LIST
EDIT
(HDD PLAYLIST)
EL33TITRP:
OFNI:ELTIT
12
TITLE LIST
01/NO
M
4
0001:61:61
ENTER
ENTER RETURN
ENIF
0001:61:61
n
RETURN
UNDO
3
654
n
3
654
82:0121/52
82:0121/52
Example: If Title 3 is selected and the
destination cursor is set to Title 1, Title 3
is moved to the spot in front of Title 1.
82:0121/52
• If a point after the selected title is
selected as the destination, the title
will move to the point immediately
after the selected title.
EDIT
(HDD PLAYLIST)
EL33TITRP:
ENIF
01/UHT7
OFNI:ELTIT
12
9001:02:02
3
654
82:0121/52
33
3 Press Yellow (D) (EDIT
33
MENU).
4
Press ' / " to select “MOVE
TITLE”, then press SET/ENTER.
5
Press ' / " / \ / | to select the
thumbnail to move the title to.
EDIT
(HDD PLAYLIST)
EL33TITRP:
ENIF
01/IRF8
OFNI:ELTIT
1 2
SELECT
TITLE LIST
Selected title Cursor on the
0001:61:61
ENTER
n
ENTER RETURN
thumbnail to move
the selected title to
3
654
ENTER
SELECT
TITLE LIST
EDIT
(HDD PLAYLIST)
EL33TITRP:
ENIF
01/DE
W
6
OFNI:ELTIT
12
82:0121/52
TITLE LIST
n
n
ENTER RETURN
0001:61:61
3
RETURN
UNDO
82:0121/52
654
Example: If Title 3 is selected and the
destination cursor is set to Title 4, Title 3
is moved to the spot after Title 4.
7
Press EXIT to exit from EDIT
mode.
GB
77

Editing a Play List (HDD/DVD)
Erasing Unnecessary
Scenes (ERASE SCENE)
DVD-RW
HDD
VR MODE
Selects and erases unnecessary scenes.
Even if you erase a scene in a play list, this
will not affect the original video.
1
Select “EDIT” at the “EDIT/
ERASE” in START MENU, then
press SET/ENTER.
• The Thumbnail screen appears.
2
Press ORIGINAL/PLAY LIST to
display “PLAY LIST” (Thumbnail)
screen.
3
Erase the scene using the same
operation used for erasing an
original scene (step
step 11 on page 68).
4
on page 67-
Inputting/Changing
Title Name
(CHANGE TITLE NAME)
DVD-RW
HDD
VR MODE
You can input up to 64 characters.
1
Select “EDIT” at the “EDIT/
ERASE” in START MENU, then
press SET/ENTER.
• The Thumbnail screen appears.
2
Press ORIGINAL/PLAY LIST to
display “PLAY LIST” (Thumbnail)
screen.
3
Change or input the title name
using the same operation used for
changing or inputting an original
title (steps
4 -10
on page 69).
Changing Thumbnail
(CHANGE THUMBNAIL)
DVD-RW
HDD
VR MODE
Changes the image of title displayed in REC
LIST to a scene you like in the title.
1
Select “EDIT” at the “EDIT/
ERASE” in START MENU, then
press SET/ENTER.
• The Thumbnail screen appears.
2
Press ORIGINAL/PLAY LIST to
display “PLAY LIST” (Thumbnail)
screen.
3
Change the thumbnail using the
same operation used for changing
an original thumbnail (steps
on page 70).
4
-
Making Sections in a Title
(DIVIDE CHAPTER)
DVD-RW
HDD
VR MODE
Divides a title into multiple chapters. This
makes editing and dubbing in chapter units
more convenient.
1
Select “EDIT” at the “EDIT/
ERASE” in START MENU, then
press SET/ENTER.
• The Thumbnail screen appears.
2
Press ORIGINAL/PLAY LIST to
display “PLAY LIST” (Thumbnail)
screen.
3
Divide a title into chapters using
the same operation used for
chapter division of originals
(steps
4 -9
on page 71).
Combining Chapters
Together
(COMBINE CHAPTERS)
DVD-RW
HDD
VR MODE
This lets you combine two adjacent chapters
into a single chapter.
1
Select “EDIT” at the “EDIT/
ERASE” in START MENU, then
press SET/ENTER.
• The Thumbnail screen appears.
2
Press ORIGINAL/PLAY LIST to
display “PLAY LIST” (Thumbnail)
screen.
3
Combine chapters using the same
operation used for chapter
combination of originals (steps
-8, left column on page 72).
NOTE
• You cannot combine chapters automatically recorded when a scene was erased,
or chapters recorded due to adding (with
ADD SCENE).
9
3
GB
78

Enjoying High Quality Sounds
Playing 2 Channel Audio with an
Analogue Connection
The Recorder
To AUDIO
(Red)
Audio equipment, etc.
Jack and Plug Colours
Audio Left: White
Audio Right: Red
NOTE
• When connecting audio equipment using analogue
connection, we recommend that you set “DD OUTPUT
LEVEL” to “NO” (see page 88).
If you set to “YES”, audio may sound abnormal during
disc playback.
Output jacks
(White)
Audio cable
(commercially available)
To amplifier
audio input jacks
(White)(Red)
Playing Dolby Digital,
DTS or MPEG Audio with a
Digital Connection
• Connecting an amplifier with a Dolby Digital/DTS/MPEG
Audio digital surround processor or a Dolby Digital/DTS/
MPEG Audio digital surround amplifier to the Recorder’s
coaxial or optical DIGITAL AUDIO Output jack (terminal)
provides richer, more powerful audio play.
• To enjoy DTS Digital Surround audio, select DTS audio at
the disc menu during DVD playback, or select DTS audio
using the AUDIO button (under the cover) of the remote
control.
■ Connection to a processor or amplifier with an optical
or coaxial digital input jack (terminal)
The Recorder
DIGITAL AUDIO Output
COAXIAL jack
To DIGITAL
AUDIO Output
COAXIAL jack
Coaxial digital cable
(commercially available)
To coaxial digital
input jack
To DIGITAL
AUDIO Output
OPTICAL terminal
Optical digital cable
or
(commercially available)
To optical digital
input terminal
Dolby Digital/DTS/MPEG
Audio processor or amplifier
Important!
• When using this connection, set “DIGITAL AUDIO
OUTPUT” to “BIT STREAM” (see page 88).
NOTE
• To play a disc recorded with DTS, you need to use DTS
processor or amplifier.
• This connection is not possible if the processor or
amplifier to which you want to connect does not have an
optical or coaxial digital input jack (terminal).
• Refer to the operation manual for the processor or
amplifier for information about connecting to it.
79
GB

Enjoying High Quality Sounds
Playing 2 Channel Audio with a
Digital Connection
The Recorder
DIGITAL AUDIO Output
COAXIAL jack
To DIGITAL
AUDIO Output
COAXIAL jack
Coaxial digital cable
(commercially available)
To coaxial digital
input jack
Audio equipment with an
optical or coaxial digital
input terminal
Important!
• When using this connection, set “DIGITAL AUDIO
OUTPUT” to “PCM” (see page 88).
To DIGITAL
AUDIO Output
OPTICAL terminal
Optical digital cable
or
(commercially available)
To optical digital
input terminal
Digital Connection to an MD Recorder or
Other Audio Equipment without a Dolby
Digital Decoder
Audio CD or Video CD
• You can enjoy these discs by playing them back by the
ordinary playback procedure. (The normal audio output
is not played back for discs recorded with DTS.)
DVD Video Disc
• There is no audio signal generated for DVD video discs
recorded with DTS. A processor or amplifier equipped
with a DTS Surround decoder function is required to enjoy
DTS audio.
Digital Connection to an MD Recorder to Record a CD
• When you are using a digital connection to record
the contents of a CD to an MD, the track numbers of
the CD may not match the track numbers recorded
to the MD.
GB
80

Recording from External Equipment
Recording from a Digital
Camcorder Using i.LINK
DVD-RW
HDD
VR MODE
• When this Recorder is connected with a DV-format
camcorder using a DV cable, you can record and edit
with minimal deterioration of picture and sound quality
using a digital signal.
• You can also display an operation panel for digital
camcorder control on the screen, and operate using the
buttons on the panel. This allows easy recording onto
disc. Record after first performing “DV SETTING” (page
90) at the START MENU.
* i.LINK is a function that lets you control other equipment
by input and output of video, audio, data and control
signals between equipment having an i.LINK terminal.
* i.LINK refers to the IEEE1394-1995 industry specification
and extensions thereof. The
compliant with the i.LINK standard.
* i.LINK
NOTE
• The DV IN terminal of this Recorder only enables input of
DV-format camcorders (DVC-SD signals). It is not
compatible with satellite receivers or Digital VHS video
recorders since they employ a different format.
• To connect the Recorder with a digital camcorder, set
digital camcorder POWER to “PLAY (Video side)”, and
connect while in the stopped state. If the DV is connected
when POWER is set to “RECORD (Camera side)”, or
when tape has been played back, the DV link will not
work correctly.
• There are some digital camcorders which cannot be
operated using the On-Screen Control Panel of this
Recorder, even if you set “DV LINK” under “DV SETTING”
to “ON”. In cases like this, set “DV LINK” to “OFF”. (page
90)
• When this Recorder is connected to a camcorder
equipped with a DV terminal, the signal may not be input
to this Recorder depending on the camcorder. When this
happens, use an analogue connection (page 83).
• The DV IN terminal is not compatible with connection to a
PC.
• This Recorder cannot be controlled from other equipment
connected to the DV IN terminal.
• Only one camcorder can be connected to this Recorder
using the DV IN terminal.
• Connect this Recorder and the camcorder directly. The
DV signal will not be input if the camcorder is connected
to this Recorder through other equipment with a DV IN
terminal.
DVD-RW
is a trademark.
VIDEO MODE
DVD-R
logo is used for products
Input of Video, Audio and Data Signals
Æ Date and time data as well as the contents of cassette
memory cannot be recorded with this Recorder.
Æ Video and audio signals of protected material or
“Copy Once” material cannot be recorded.
Æ Monaural audio cannot be input through the DV IN
terminal.
Audio Mode
Digital camcorders typically have the following two audio
modes.
16-bit (48 kHz)
Although this yields high sound quality, only one stereo
audio signal can be processed.
12-bit (32 kHz)
Two stereo signals can be processed. In general,
overdubbed audio is recorded in Stereo 2.
Æ This Recorder allows listening or recording of either
Stereo 1 or Stereo 2 audio if the input audio is in the 12-bit
audio mode.
Æ This Recorder is unable to process 44.1 kHz input audio
signals.
Connecting a Digital Camcorder
Using the DV IN Terminal (i.LINK)
Refer to the user’s manual provided with the camcorder for
information on the procedure for connecting the camcorder
with this Recorder.
The Recorder
To DV IN terminal
Digital camcorder
DV cable
(commercially available)
Before connecting, set the power
switch of the digital camcorder to
“Video (Playback)” and stop the
camcorder.
To DV terminal
81
GB

Recording from External Equipment
Recording with This Recorder (DV
Capture)
1
Press HDD or DVD to select the media to
record to.
2
Select audio to be input from the digital
camcorder.
• Before starting recording, check setting of “DV
AUDIO INPUT” using “DV SETTING” (page 90).
3
Press INPUT to select “DV”.
• The setting will cycle as follows each time you press
the button.
L1 (IN 1)
TV channels DV (DV IN)
4
Perform digital camcorder playback.
• Press
• If you press EXIT on the remote control, the On-
5
Press ●REC when you reach the scene you
''
""
\\
' /
" /
\ /
''
the On-screen Control Panel, then press SET/
ENTER to operate.
When “DV LINK” is set to “ON”
DV LINK (ENABLES CONTROL OF DV CAMCORDER)
PLAYBACK
00 : 00 : 10
Select
start playback, then press SET/ENTER.
screen Control Panel will disappear. To display it
again, press ON SCREEN (under the cover).
| to select the desired button on
""
\\
SELECT ENTER
||
| on the On-screen Control Panel to
||
want to start recording.
• The Recorder will start recording.
6
Press REC PAUSE when you want to pause
recording.
• Press REC PAUSE again to cancel pause.
7
Press REC STOP when you want to stop
(end) recording.
NOTE
• Material protected with a copy guard cannot be recorded.
• Date and time data as well as the contents of cassette
memory cannot be recorded.
• There are some digital camcorders which cannot be
operated using the On-screen Control Panel, even when
“DV LINK” is set to “ON”. In such cases, set it to “OFF”.
(See page 90.)
||
||
PLAYBACK
ENTER
L2 (IN 2)
EXIT
L3 (IN 3)
EXIT
Important!
Abnormal images may be recorded or the Recorder
enters the Pause mode when any of the following
occur during DV capture.
• When the connected equipment plays back a portion
where nothing is recorded or video containing a copy
guard signal.
• When the DV cable is disconnected or the camcorder
power is turned off during DV capture.
• When playback from the camcorder is stopped.
GB
82

Recording from External Equipment
Recording from a Camcorder
(VCR) Using an Analogue
Connection
DVD-RW
HDD
VR MODE
Material from a camcorder can be recorded with this
Recorder using an analog connection. You can capture
video by connecting a camcorder or VCR to the LINE IN 1,
2 or 3 jacks of this Recorder.
NOTE
• More vivid images can be viewed by connecting the SVIDEO input jack on this Recorder with the S-video output
jack on the camcorder using an S-video cable.
• Some camcorders may be required to be connected
using a special cable.
• Refer to the operation manual provided with the
camcorder for further information on the procedure for
connecting the camcorder.
• Material protected with a copy guard cannot be recorded. It may be impossible to get the correct video,
even if you just view without recording.
• Date and time as well as the contents of cassette memory
cannot be recorded with this Recorder.
• If you input video from an external device to this Recorder, there will be a slight difference in image quality
between the video viewed from the external device
directly on the TV, and video viewed as external input to
the Recorder.
Example:
To record by connecting a camcorder to the LINE IN 3
jacks.
DVD-RW
VIDEO MODE
The Recorder
DVD-R
1
Press HDD or DVD to select the media to
record to.
2
Select audio to be input from the external
device.
To record to HDD
• Switch audio of the external device to the audio you
want to capture.
To record to DVD
• Select audio using “EXTERNAL AUDIO” (page 84).
• Select “L CH” or “R CH” with “VIDEO MODE
AUDIO” (page 84) to record in Video mode.
3
Press INPUT to set the connection to external input channel (example: L3).
• The setting will cycle as follows each time you press
the button.
L1 (IN 1)
TV channels DV (DV IN)
4
Play back the camcorder or VCR.
5
Press ●REC when you reach the scene you
L2 (IN 2)
L3 (IN 3)
want to start recording.
• The Recorder starts recording.
6
Press REC PAUSE when you want to pause
recording.
• Press REC PAUSE again to cancel Pause mode.
7
Press REC STOP when you want to stop
(end) recording.
To S-VIDEO
input jack
S-video cable
(commercially
available)
To S-video
output jack
To VIDEO/AUDIO
input jacks
Video/audio cable
(provided with camcorder or
commercially available)
To video/audio
output jack
Camcorder
83
GB

Function Setting
Functions under OTHER SETTINGS 1
This section explains various settings relating to recording and playback which can be used to get more out of the Recorder.
• For details about each setting, see the corresponding pages.
REC. FUNCTION s page 84
VIEW/PLAY SETTING s page 86
ADJUSTMENT s page 88
REC. FUNCTION
AUTO CHAPTER
• This sets the interval of automatic chapter setting during recording.
• Chapter marks set on a DVD-RW/R in Video mode cannot be combined by editing, so
select an appropriate interval.
EXACT RECORDING
• This function works when timer recording (SHOWVIEW/Timer Programme) onto DVD-RW/
R. If disc capacity runs low, and the programme cannot be recorded to the end, this
function will automatically change the recording mode so the programme will fit.
(The recording mode set in above situation will have lower picture quality than the
originally set recording mode.)
• If there is very little disc capacity left on the disc, the programme may not fit even if
Exact Recording is set.
• When recording in EP or MN1 mode, there is no lower recording mode, so Exact
Recording will not work.
10 (10 min interval)
15 (15 min interval)
30 (30 min interval)
–– (off)
YES
NO
REC. AUDIO FORMAT
• PCM: If you record by setting the recording mode to “FINE” or “MN32”, you can record
audio as PCM (uncompressed) audio which can be played back with 2ch audio
equipment.
* This will not work when recording with the recording mode set to anything other than
“FINE” or “MN32”.
* Recording is done with a recording mode whose image quality is slightly lower than
FINE mode recorded with the “MPEG” setting.
• When making a PCM recording of bilingual sound, only the audio selected in “VIDEO
MODE AUDIO” is recorded.
• MPEG: Records audio as MPEG audio.
EXTERNAL AUDIO
• This selects audio to be input from an external device.
* Be sure to always select “BILINGUAL” when recording bilingual sound. If you select
“STEREO” when recording, the audio for the left channel (“L CH”) and right channel
(“R CH”) will be heard together during playback.
* When recording bilingual sound, you can switch between the left channel (“L CH”)
and right channel (“R CH”) during playback in VR mode. In Video mode, only the
audio set in “VIDEO MODE AUDIO” is recorded.
VIDEO MODE AUDIO
• This selects whether to record the left channel (“L CH”) or right channel (“R CH”) when
recording (or dubbing) bilingual sound to DVD-RW/R in Video mode.
* This does not apply when recording from the DV IN terminal.
MANUAL REC. MODE
• If you set by selecting one of the 32 picture quality levels for “MN”, recording will be
done at that picture quality when “MN” is selected using REC MODE on the remote
control. For details, see page 37.
PCM
MPEG
STEREO
BILINGUAL
L CH
R CH
32 levels
GB
84

Basic Operation for
REC. FUNCTION Setting
This operation is available in both HDD mode
and DVD mode.
Example: Setting “EXTERNAL AUDIO” under
“REC. FUNCTION”
11
1
1 Press START MENU to
11
display “START MENU” screen.
22
2 Press ' / " / \ / | to select
22
“OTHER SETTINGS 1”, then
press SET/ENTER.
START MENU[OTHER SETTINGS 1
REC LIST
TIMER
PROGRAM/
CHECK
OTHER
SETTINGS 2
2
Press \ / | to select “REC.
FUNCTION”.
OTHER SETTING 1[REC. FUNCTION
REC. FUNCTION VIEW/PLAY SETTING ADJUSTMENT
AUTO CHAPTER
EXACT RECORDING
REC. AUDIO FORMAT
EXTERNAL AUDIO
VIDEO MODE AUDIO
MANUAL REC. MODE
]
EDIT/
ERASE
INITIALIZE/
FINALIZE
DISPLAYS SET ITEMS BEFORE REC/PLAYBACK
INFORMATION
]
DUBBING
OTHER
SETTINGS 1
82:0121/52
82:0121/52
Function Setting
3
Press ' / " to select “EXTERNAL
AUDIO”, then press SET/ENTER.
OTHER SETTINGS 1[REC. FUNCTION
REC. FUNCTION VIEW/PLAY SETTING
AUTO CHAPTER
EXACT RECORDING
REC. AUDIO FORMAT
EXTERNAL AUDIO
VIDEO MODE AUDIO
MANUAL REC. MODE
4
Press \ / | to select the option
]
ADJUSTMENT
you want to set, then press SET/
ENTER.
OTHER SETTINGS 1[EXTERNAL AUDIO
SELECT EXTERNAL AUDIO MODE WHEN
RECORDING FROM EXTERNAL EQUIPMENT.
SELECT ENTER RETURN
5
Press EXIT to exit from External
]
STEREO BILINGUAL
ENTER
n
Audio Setting.
82:0121/52
82:0121/52
85
GB

Function Setting
VIEW/PLAY SETTING
PASSWORD
SETTING
DVD PLAY
SETTING
PASSWORD
• This sets the password for setting or changing Parental Control.
PARENTAL CONTROL
• This lets you set Parental Control depending on disc content.
• Level 1: For most restricted viewing → Level 8: For adult viewing
(The smaller the number, the greater the level of restriction.)
• When “PARENTAL CONTROL” is set to “OFF”, DVD discs can be
played back regardless of the parental level.
• Parental Control cannot be set if a password has not been set.
4 digit number
OFF, LEVEL:1-8
COUNTRY CODE
* Refer to the Country
Code List below.
DISC LANGUAGE
• This lets you select the language for subtitle, audio and menu
displayed on the screen.
Country Code List
USA UK HOLLAND HONG KONG TAIWAN
CANADA ITALY NORWAY SINGAPORE PHILIPPINE
JAPAN SPAIN DENMARK THAILAND AUSTRALIA
GERMANY SWISS FINLAND MALAYSIA RUSSIA
FRANCE SWEDEN BELGIUM INDONESIA CHINA
Language Code List
AA Afar
AB Abkhazian
AF Afrikaans
AM Ameharic
AR Arabic
AS Assamese
AY Aymara
AZ Azerbaijani
BA Bashkir
BE Byelorussian
BG Bulgarian
BH Bihari
BI Bislama
BN Bengali, Bangla
BO Tibetan
BR Breton
CA Catalan
CO Corsican
CS Czech
CY Welsh
DA Danish
DE German
DZ Bhutani
EL Greek
EN English
EO Esperanto
ES Spanish
ET Estonian
EU Basque
FA Persian
FI Finnish
FJ Fiji
FO Faroese
FR French
FY Frisian
GA Irish
GD Scots Gaelic
GL Galician
GN Guarani
GU Gujarati
HA Hausa
HI Hindi
HR Croatian
HU Hungarian
HY Armenian
IA Interlingua
IE Interlingue
IK Inupiak
IN Indonesian
IS Icelandic
IT Italian
IW Hebrew
JA Japanese
JI Yiddish
JW Javanese
KA Georgian
KK Kazakh
KL Greenlandic
KM Cambodian
KN Kannada
KO Korean
KS Kashmiri
KU Kurdish
KY Kirghiz
LA Latin
LN Lingala
LO Laothian
LT Lithuanian
LV Latvian, Lettish
MG Malagasy
MI Maori
MK Macedonian
ML Malayalam
MN Mongolian
MO Moldavian
MR Marathi
MS Malay
MT Maltese
MY Burmese
NA Nauru
NE Nepali
NL Dutch
NO Norwegian
OC Occitan
OM Afan (Oromo)
OR Oriya
PA Panjabi
PL Polish
PS Pashto, Pushto
PT Portuguese
QU Quechua
RM Rhaeto-Romance
RN Kirundi
RO Romanian
RU Russian
RW Kinyarwanda
SA Sanskrit
SD Sindhi
SG Sangho
SH Serbo-Croatian
SI Singhalese
SK Slovak
SL Slovenian
SM Samoan
SN Shona
SO Somali
SQ Albanian
SR Serbian
SS Siswat
ST Sesotho
SU Sundanese
SV Swedish
SUBTITLE
AUDIO
MENU
* Refer to the
Language Code
List below.
SW Swahili
TA Tamil
TE Telugu
TG Tajik
TH Thai
TI Tigrinya
TK Turkmen
TL Tagalog
TN Setswana
TO Tonga
TR Turkish
TS Tsonga
TT Tatar
TW Twi
UK Ukrainian
UR Urdu
UZ Uzbek
VI Vietnamese
VO Volapük
WO Wolof
XH Xhosa
YO Yoruba
ZH Chinese
ZU Zulu
GB
86

Function Setting
Basic Operation for
VIEW/PLAY SETTING
This operation is available in both HDD mode
and DVD mode.
Example: Setting “DVD PLAY SETTING”
under “VIEW/PLAY SETTING”
11
1
1 Press START MENU to
11
display “START MENU” screen.
22
2 Press ' / " / \ / | to select
22
“OTHER SETTINGS 1”, then
press SET/ENTER.
START MENU[OTHER SETTINGS 1
REC LIST
TIMER
PROGRAM/
CHECK
OTHER
SETTINGS 2
2
Press \ / | to select “VIEW/PLAY
SETTING”, then press SET/
ENTER.
OTHER SETTINGS 1[VIEW/PLAY SETTING
REC. FUNCTION VIEW/PLAY SETTING ADJUSTMENT
3
Press ' / " to select “DVD PLAY
SETTING”, then press SET/
ENTER.
OTHER SETTINGS 1[VIEW/PLAY SETTING
REC. FUNCTION VIEW/PLAY SETTING ADJUSTMENT
]
EDIT/
ERASE
INITIALIZE/
FINALIZE
DISPLAYS SET ITEMS BEFORE REC/PLAYBACK
INFORMATION
]
PASSWORD SETTING
DVD PLAY SETTING
]
PASSWORD SETTING
DVD PLAY SETTING
DUBBING
OTHER
SETTINGS 1
82:0121/52
82:0121/52
82:0121/52
Password Setting
11
1 Select “PASSWORD SETTING” in
11
step 3, then press SET/ENTER.
22
2 Press \/ | to select “YES”, then
22
press SET/ENTER.
33
3 Press Number buttons to input 4
33
digit password, then press SET/
ENTER.
44
4 Press Number buttons to input
44
password for confirmation, then
press SET/ENTER.
55
5 Press SET/ENTER at the “OK”
55
screen.
NOTE
If you forget your password
• If you forget your password, and you wish
to return the password to its initial state,
press ■STOP/LIVE 4 times in a row at the
Password Setting screen.
Disc Language Setting
• You can set subtitle language, audio
language and menu language.
11
1 Select “DISC LANGUAGE” in step
11
4
, then press SET/ENTER.
22
2 Press \/ | to select subtitle
22
language, then press SET/ENTER.
33
3 Press \/ | to select audio lan-
33
guage, then press SET/ENTER.
44
4 Press \/ | to select menu lan-
44
guage, then press SET/ENTER.
4
Press ' / " to select “PAREN-
TAL CONTROL”, then press
SET/ENTER.
• The password input screen appears.
It changes to the following screen
after you input your password and
press SET/ENTER.
OTHER SETTINGS 1[DVD PLAY SETTING
PARENTAL CONTROL
DISC LANGUAGE
SELECT
5
Press \ / | to select the desired
]
SETS THE PARENTAL CONTROL OF DVD VIDEO
SET THE PARENTAL CONTROL LEVEL
OFF
SET THE COUNTRY CODE
FRANCE
n
ENTER
ENTER RETURN
parental control level, then press
SET/ENTER.
6
Press \ / | to select the country
code, then press SET/ENTER.
7
Press EXIT to exit from Parental
Control Setting screen.
82:0121/52
GB
87
Function Setting
ADJUSTMENT
VIDEO/
AUDIO SETTING
TV MODE
• If you switch your TV (i.e. because you have bought a new one) and
the screen size of the connected TV changes, you will have to change
the “TV MODE” setting.
• You can set the screen aspect ratio of the connected TV, and adjust
video output.
• Select “TV MODE” from “VIDEO/AUDIO SETTING”.
WIDE 16:9: Select this when connecting with a TV with a 16:9
NORMAL 4:3: Select this when connecting with a TV with a 4:3 screen
LETTER BOX: If you connect with a TV whose screen aspect ratio is
PAN SCAN: If you connect with a TV whose screen aspect ratio is
screen aspect ratio.
aspect ratio.
4:3 and playback a DVD with 16:9 video, the video will
be played back with black bands at the top and bottom,
while maintaining the 16:9 ratio.
4:3 and playback a DVD with 16:9 video, the video will
be played back with the left and right sides of the image
cut off to display in 4:3 screen aspect ratio.
(This function works if the disc is labeled for 4:3PS.)
DIGITAL AUDIO OUTPUT
• You can set this to enjoy Dolby Digital sound, DTS or MPEG sound
when connecting with digital input compatible device using Digital
cable.
PCM: This setting is for when you digitally connect with 2ch
BIT STREAM
audio device or an MD recorder. This changes Dolby
Digital sound, DTS or MPEG sound to PCM
(uncompressed) output which can be played back with
2ch audio device.
:This setting is for when you digitally connect with audio
device which is compatible with Dolby Digital sound,
DTS or MPEG sound.
WIDE 16:9
NORMAL 4:3
LETTER BOX
PAN SCAN
PCM
BIT STREAM
You can also enjoy DTS audio if you connect with an
amplifier or other component which is compatible with
DTS digital surround.
NOTE
• When a DTS signal is input, the data is output as a bit
stream even if “DIGITAL AUDIO OUTPUT” is set to
“PCM”.
DD OUTPUT LEVEL
• This lets you adjust the range between the loudest and softest sound
(dynamic range), and play back at the average volume. Use this
when it is hard to hear dialog.
NO: This outputs recorded audio as is.
YES*: This raises the average volume when playing back
* Lower the volume before setting. If you do not do so, the speaker
may emit a loud sound, or excessive input may be applied to the
speaker.
GB
88
Dolby Digital audio so that the volume sounds the same
as an audio CD. (If the audio sounds abnormal, set to
“NO”.)
NO
YES

ADJUSTMENT
Function Setting
VIDEO/
AUDIO SETTING
OPTION
SETTING
DNR (DIGITAL NOISE REDUCTION)
• This lets you reduce noise for an easier to view picture when noise in
the played back image is bothering you. It is recommended to set this
to “ON” when playing back video recorded in long play modes like LP
mode or EP mode, and to “OFF” when playing back discs with little
noise (like DVD video).
HI SP DUB PRIORITY
• To perform high speed dubbing from the HDD to a DVD in Video
mode, set this to “YES” before recording to the HDD.
• If you wish to edit in frame units, set this to “NO”. For details of “HIGH
SPEED DUBBING PRIORITY”, refer to page 45.
SEAMLESS PLAYBACK
• This setting is for smoother playback of the transitions between
scenes when you have edited an original title or play list. (The
transition point may shift about one second.)
ALTERNATE RECORDING
• This function is for switching recording to HDD when you originally set
to record to DVD-RW/R but could not because of the disc situation.
This function works in the following cases.
* 1 When there is not enough disc capacity left in DVD.
2 When a disc which cannot record is loaded.
3 When you forget to load a disc.
4 When a disc is playing within 2 minutes prior to the start of timer
recording.
* In case 1, when the remaining capacity of HDD is less than
that of DVD, the recording will continue on to DVD.
ON
OFF
YES
NO
YES
NO
YES
NO
Continued on Next Page
|||
89
GB

Function Setting
ADJUSTMENT
OPTION
SETTING
LCD BACKLIGHT REC.
• This sets whether to turn the LCD backlight on or off during timer
recording.
NO:
This sets so that the LCD backlight remains lit, even during timer
recording.
YES:
This lets you turn off the LCD backlight only when the power is off
(standby state) and timer recording starts. It is convenient to set this,
for example, when the light disturbs your sleep.
AUTO POWER OFF
• This sets the Recorder so that power is automatically shut off if it is in
stopped state for about 3 hours.
BLUE SCREEN
• This lets you set so that noise on the TV screen is automatically
switched to a blue screen if you select a channel whose broadcast is
finished, or a channel with no broadcast.
DV SETTING
• This lets you operate the connected digital camcorder from the
Recorder when capturing video into the Recorder via a DV connection. You can also select the type of audio to be captured from the
camcorder.
DV LINK
OFF:
Select this when you cannot operate the camcorder properly with
the On-screen Control Panel.
ON:
This lets you operate the camcorder using the On-screen Control
Panel.
DV AUDIO INPUT
STEREO 1*:
This lets you capture audio you recorded with the camcorder.
STEREO 2*:
This lets you capture camcorder’s audio you recorded using after
recording.
STEREO 1 + STEREO 2*:
This lets you simultaneously capture audio from stereo 1 and audio
from stereo 2.
* When the connected digital camcorder’s audio output is set to 16
bit, this setting will be invalid.
NO
YES
YES
NO
OFF
ON
DV LINK
OFF
ON
DV AUDIO INPUT
STEREO 1
STEREO 2
STEREO 1
+ STEREO 2
DVD DISC PROTECTION
• This protects the disc so you do not mistakenly record on it or erase
its content.
GB
90
NOT PROTECT
PROTECT

Basic Operation for
ADJUSTMENT Setting
Example: Setting “VIDEO/AUDIO SETTING”
under “ADJUSTMENT”
11
1
1 Press START MENU to
11
display START MENU screen.
22
2 Press ' / " / \ / | to select
22
“OTHER SETTINGS 1”, then
press SET/ENTER.
START MENU[OTHER SETTINGS 1
REC LIST
TIMER
PROGRAM/
CHECK
OTHER
SETTINGS 2
2
Press \ / | to select “ADJUST-
MENT”.
OTHER SETTINGS 1[ADJUSTMENT
REC. FUNCTION VIEW/PLAY SETTING ADJUSTMENT
]
EDIT/
ERASE
INITIALIZE/
FINALIZE
DISPLAYS SET ITEMS BEFORE REC/PLAYBACK
INFORMATION
]
DUBBING
SETTINGS 1
VIDEO/AUDIO SETTING
OPTION SETTING
OTHER
82:0121/52
82:0121/52
Function Setting
3
Press ' / " to select the setting
you want to set, then press SET/
ENTER.
OTHER SETTINGS 1[ADJUSTMENT
REC. FUNCTION VIEW/PLAY SETTING ADJUSTMENT
11
4
1 Press ' / " to select the item
11
]
VIDEO/AUDIO SETTING
OPTION SETTING
you want to select, then press
SET/ENTER.
SELECT TV MODE
WIDE 16:9
ENTER
ENTER RETURN
]
NORMAL 4:3
n
OTHER SETTINGS 1[VIDEO/AUDIO SETTING
TV MODE
DIGITAL AUDIO OUTPUT
DD OUTPUT LEVEL
DNR
SELECT
22
2 Press \ / | to select the de-
22
sired option, then press SET/
ENTER.
5
Press EXIT to exit.
82:0121/52
82:0121/52
91
GB

Function Setting
Functions under OTHER SETTINGS 2
This section explains various settings relating to input/output of video/audio signal, TV channel preset and clock.
• For details about each setting, see the corresponding pages.
MODE SETTING s page 92
MANUAL TUNING s page 94
CHANNEL SORT s page 94
CLOCK SETTING s page 94
MODE SETTING
NICAM
• This recorder can receive and record NICAM or A2 broadcasts. NICAM broadcasts
will be received when “AUTO” is selected in the NICAM setting. Depending on the
received programme, some NICAM or A2 broadcasts may not be in stereo.
L1 OUT
• This sets the type of video signal output from L1 (TV) according to the specification of
connected TV.
NOTE
• To view an RGB output video, press the TV/DVD button on the remote control and
switch to DVD mode.
AUTO
OFF
Y/C
RGB
COMP.
L2 IN
• This sets the type of video signal input from L2 (DECODER/EXT).
Y/C
COMP.
GB
92

Function Setting
Basic Operation for
MODE SETTING
Example: Setting “NICAM” under “MODE
SETTING”
1
Press START MENU to display
the “START MENU” screen.
2
Press ' / " / \ / | to select
“OTHER SETTINGS 2”, then press
SET/ENTER.
3
Press ' / " to select “MODE
SETTING”, then press SET/
ENTER to confirm.
• The MODE menu is displayed with
NICAM selected.
NICAM
➞
L1 OUT
L2 IN
: SELECT
:ENTER
4
Press\ / | to select “OFF”.
5
Press SET/ENTER to confirm
and return to the menu screen.
6
Press START MENU or EXIT to
exit to normal screen.
AUTO
Y/C
Y/C
:CHANGE
:RETURN
About NICAM/A2
This recorder can receive and record NICAM
or A2 broadcasts. NICAM broadcasts will be
received when “AUTO” is selected in the
NICAM setting. Depending on the received
programme, some NICAM or A2 broadcasts
may not be in stereo.
NICAM Broadcast
The monitor output listed in the table shows
the audio output mode. The contents of audio
recording are different between VR mode and
Video mode. See the tables below for details.
About audio recording
Broadcast
NICAM/A2
STEREO
NICAM/A2
BILINGUAL
NICAM/A2
MONO
· When making a PCM recording of bilingual sound, only
the audio selected in “VIDEO MODE AUDIO” is
recorded.
· When recording audio in the PCM format with the
recording mode set to “FINE” or “MN32”, audio is
recorded in the same format as recorded to DVD-RW/R
disc in Video mode.
· When a disc recorded in monaural audio is playback,
monaural audio is played back even though “STEREO”
is displayed on the screen.
EXTERNAL AUDIO
VIDEO MODE AUDIO
STEREO
BILINGUAL
L
BILINGUAL
R
STEREO
BILINGUAL
L
BILINGUAL
R
STEREO
BILINGUAL
L
BILINGUAL
R
About audio selection
Broadcast
NICAM
STEREO
NICAM
BILINGUAL
NICAM
MONO
STEREO
(Except
NICAM)
BILINGUAL
(Except
NICAM)
MONO
(Except
NICAM)
* Audio mode is selected with the AUDIO button on the
remote control.
Audio Mode*
Displayed
on screen
MONO
L R
L R
L
R
MONO
MONO
L R
L R
L
R
MONO
RECORDING AUDIO
VR MODE
L
L
L
L
L
L
L
MONO
MONO
MONO
Display of
Display of
Broadcast
Received
Received
NICAM
–
STEREO
NICAM
L R
STEREO
NICAM
L R
I/II
NICAM
L
I/II
NICAM
R
I/II
NICAM
–
STEREO
–
STEREO
L R
I/II
L R
I/II
L
I/II
R
–
–
R
R
R
R
R
R
R
MONO
MONO
MONO
Audio
VIDEO MODE
LR
L
R
L
R
L
R
L
R
L
L
R
R
MONO
MONO
MONO
MONO
MONO
MONO
Audio
Output
LR
L+R
L+R
L
R
L
R
L
L
R
R
MONO
MONO
L+R
L+R
L
R
L
R
L
L
R
R
MONO
MONO
93
GB

Function Setting
MANUAL TUNING*
1
PRESET
• This lets you preset the channels into memory. A maximum of 84 channels can be
preset.
SYSTEM
• This lets you select the broadcast system (PAL-B/G, SECAM-L).
CHANNEL
• For details, see “Channel Setting” on page 26.
FINE TUNING
• This lets you obtain sharp colour picture.
DECODER
• If there have a separate decoder connected to the L2 terminal of the Recorder, set this
function to “ON” in order to record the unscrambled signal and/or watch it on your TV.
SKIP
''
• This determines whether the channel can be selected when using CH
Number buttons.
1
For details, see page 26.
*
""
' /
" instead of
''
""
1 - 84
L
B/G
CHXX
ON
OFF
ON
OFF
CHANNEL SORT*
2
MOVE
• When your Recorder tunes in broadcast channels automatically, it sorts them into a
standard order using internal information. The “MOVE” function lets you change the
order of the channel.
CANCEL
• This lets you delete a channel from the Recorder memory.
NAME
• When your Recorder tunes in broadcast channels automatically, it names them using
the VPS/PDC information. The “NAME” function lets you change the name of the
channel.
*2 For details, see pages 26, 27.
CLOCK SETTING*
3
CLOCK
• The clock will normally be set using the VPS/PDC information when your Recorder
automatically tunes in the broadcast channels. If for any reason the VPS/PDC signals
are not present, your Recorder will not be able to set the clock. The “CLOCK” function
lets you set the clock manually.
3
For details, see page 25.
*
GB
94
TIME:XX:XX(24H)
DATE:Day/Month
YEAR:XX
ADJUST:
∗:AUTO/-:OFF

Function Setting
Initialization
Before recording to DVD-RW, initialize the disc in VR mode
or Video mode.
You can also initialize the HDD. Initialize the HDD only after
dubbing important recordings onto DVD-RW/R disc(s).
INITIALIZE
INITIALIZE
DVD VR MODE INIT.
• When recording with a DVD-RW in VR mode, initialize in VR mode
before you start recording.
(When you initialize, all of the recorded content of the disc is erased.
Before initializing, check the content of the disc so that you do not
erase any content you need.)
• You cannot initialize if “DVD DISC PROTECTION” is set to
“PROTECT”. (page 90)
DVD VIDEO MODE INIT.
• When recording with a DVD-RW disc in Video mode, initialize in Video
mode before you start recording.
(When you initialize, all of the recorded content of the disc is erased.
Before initializing, check the content of the disc so that you do not
erase any content you need.)
• You cannot erase with DVD-R disc.
AUTO INITIALIZE
• This sets the Recorder so it automatically initializes any unused DVDRW discs which are loaded into the Recorder.
You can initialize in either VR mode or Video mode.
Finalization
Finalization is done so that a recorded DVD-RW/R disc can
be played back with other recorders.
YES
NO
YES
NO
VR
VIDEO
FINALIZE
DVD
FINALIZE
HDD INITIALIZE
• If an HDD error message is displayed, or if you wish to return the HDD
to the state it was in when the Recorder was purchased, initialize the
HDD. All recorded video will be erased. (If you use the “ERASE ALL
TITLES” function to erase the titles, protected titles will remain, but if
you use the HDD initializing function, all titles will be erased.)
Dub any important recordings to DVD-RW/R disc(s) before initializing
the HDD.
DVD FINALIZE
• Set this when you want to playback a VR mode or Video mode disc
using another recorder capable of playback.
If you finalize a recording on DVD-R disc, you will not be able to
record any more on the disc.
• Finalization can take anywhere from a few minutes to one hour.
During finalization, all types of operation are disabled (including
turning off power and removing the disc).
• Do not unplug the power cord during finalization. Doing so may make
the disc unusable.
UNDO DVD FINALIZE
• This resets a finalized DVD-RW disc so you can record on it again.
YES
NO
YES
NO
YES
NO
95
GB

Function Setting
Basic Operation for
INTIALIZE/FINALIZE
Example: Setting “DVD VR MODE INIT.” (VR
mode)
1
2
11
1 Press START MENU to
11
display “START MENU” screen.
22
2 Press ' / " / \ / | to select
22
“INITIALIZE/FINALIZE”, then
press SET/ENTER.
START MENU[INITIALIZE/FINALIZE
REC LIST
TIMER
PROGRAM/
CHECK
INITIALIZES HDD/DVD AND FINALIZES DVD
OTHER
SETTINGS 2
]
EDIT/
ERASE
INITIALIZE/
FINALIZE
INFORMATION
DUBBING
OTHER
SETTINGS 1
Press ' / " to select “INITIALIZE” or “FINALIZE”, then press
SET/ENTER.
INITIALIZE/FINALIZE
INITIALIZE
DVD FINALIZE
REVERTS DISC TO UNUSED STATE
(ALL STORED DATA ERASED).
ENABLES PLAYBACK OF RECORDED
DVD DISC ON OTHER DVD PLAYERS.
11
4
1 Press \ / | to select “YES”,
11
then press SET/ENTER.
• Initializing (or finalizing) will be
executed.
INITIALIZE
DVD VR MODE INIT.
DVD VIDEO MODE INIT.
AUTO INITIALIZE
HDD INITIALIZE
82:0121/52
INITIALIZE
DVD VR MODE INIT.
DVD VIDEO MODE INIT.
AUTO INITIALIZE
HDD INITIALIZE
82:0121/52
• Initializing (or finalizing) will be
INITIALIZING...
INITIALIZING COMPLETED.
ENTER
ENTER
OK
82:0121/52
82:0121/52
completed.
22
2 Press SET/ENTER.
22
• Screen in step 2 appears.
5
Press EXIT to exit from
“INITIALIZE/FINALIZE” screen.
n
ENTER
SELECT ENTER RETURN
3
Press ' / " to select “DVD VR
MODE INIT.”, then press SET/
ENTER.
INITIALIZE
DVD VR MODE INIT.
DVD VIDEO MODE INIT.
AUTO INITIALIZE
HDD INITIALIZE
AFTER RECORDING, IT IS POSSIBLE TO
USE A VARIETY OF EDITING FUNCTIONS
TO CUSTOMIZE YOUR VIDEO.
INITIALIZE DVD?
ENTER
SELECT
YES NO
n
ENTER RETURN
NOTE
• Finalization processing will take anywhere
from a few minutes to about an hour.
(Processing will take time if there is a lot of
empty space or if there are many titles on
82:0121/52
the DVD disc.)
GB
96

Troubleshooting
The following problems do not always suggest a defect or malfunction of this Recorder.
Perform the checks listed below before calling customer service tel. no. 0820 856 333.
Problem Suggested Solution
The Recorder power does not turn on.
The Recorder sounds like it is operating, even when power is
turned off.
The disc is automatically ejected after closing the disc tray.
No picture.
The Recorder does not play a disc.
Settings have disappeared.
Screen freezes and operation buttons do not work.
The remote control does not work.
No sound or sound is distorted.
The picture from external input is distorted.
The screen is stretched vertically or
horizontally.
A disc recorded using this Recorder cannot be played back
on another DVD player.
•
Is the power cord firmly plugged into the AC outlet?
•
If the power cord is plugged into the outlet, unplug it once, wait about one minute, and then plug it in again.
Then turn power on.
•
This is the sound the Recorder makes during operation like timer recording.
•
Make sure that the disc is loaded properly (aligned in disc tray and label-side up).
•
Take out the disc and clean it.
•
Make sure that region number on the disc match the region number in this Recorder.
•
Make sure that the disc is playable.
•
Make sure that the cables are connected correctly.
•
Make sure that the connected TV or the AV amplifier is set to the correct input.
•
Take out the disc and clean it.
•
Make sure that region number on the disc match the region number in this Recorder.
•
Take out the disc and clean it.
•
Make sure that the disc is loaded properly (aligned in disc tray and label-side up).
•
Make sure that region number on the disc match the region number in this Recorder.
•
Remove the dew in the Recorder.
•
Check that the disc is recorded in PAL format.
•
The Recorder cannot playback video which was not recorded normally.
•
Proper playback may be impossible due to the state of the disc recording, a scratched, warped or dirty disc, the
state of the pick-up, or compatibility issues between this Recorder and the disc being used.
•
If, while its power is on, the Recorder is unplugged (or there is a power failure) for more than about 1 hour, the
settings will be lost. Make sure that you turn off the Recorder before unplugging the power cord.
•
Press
■STOP/LIVE
•
Turn off the power and turn on the power again.
•
If power does not go off, press the
•
Is the Tamper Proof function active?(Page 33)
•
Set the remote control and the Recorder to the same remote control code.(Page 19)
•
Use the remote control within its operating range.
•
Replace the batteries.
•
If the volume of TV or amplifier is set to minimum, turn the volume up.
•
There is no sound during still mode, slow motion playback, fast forward and fast reverse.
•
DVD audio recorded in DTS is only output from the DIGITAL AUDIO Output terminals. Connect a DTScompatible digital amplifier or decoder to the DIGITAL AUDIO Output OPTICAL or COAXIAL terminal on this
Recorder.
•
Check that the audio cable is connected correctly.
•
Check that the cable plugs are clean.
•
Take out the disc and clean it.
•
Audio may not be output depending on the audio recording status, such as when audio other than an audio
signal or non-standard audio is recorded for the audio content of the disc.
•
If the signal is copy-protected, you cannot connect via this Recorder. Connect the external equipment directly
to your TV.
•
Set the TV mode according to the TV you are connecting.(Page 88)
•
If the above operation does not set the TV mode, set it using the functions of the connected TV.
•
Check that the disc is finalized when the disc is in video mode.
•
Some players will not play even a finalized disc.
•
If the disc was recorded in VR mode, it can only be played back with an RW compatible player. (In some
cases, the disc must be finalized.)
and restart playback.
RESET
button inside the front door of the Recorder.(Page 99)
97
GB

Troubleshooting
Problem Suggested Solution
The playback screen will be disturbed if DVD video is recorded
to a VCR, or played back through a VCR.
TV operates incorrectly.
Recording stops.
You recorded, but nothing was recorded on disc.
Cannot record, or recording stops while in progress.
When a digital camcorder is connected to the DV IN terminal,
video from the camcorder does not appear, or there is no
sound, or the system operates incorrectly.
Cannot operate the digital camcorder connected to the DV IN
terminal.
There is no video and no audio.
There is just audio with no video.
Horizontally wide video appears vertically tall, or black bands
appear at the top and bottom of the screen.
Square noise (mosaic) appears on the screen.
Video stops.
Left and right channels of audio are reversed, or sound comes
out of only one side.
DVD disc does not play back automatically.
•
This Recorder is compatible with the copy guard of analogue copy protect system. Some discs contain a
copy prohibiting signal. If you try to playback such a disc through a VCR, or record to a VCR and playback,
copy guard will prevent normal playback.
•
Some TVs with wireless remote control capability may operate incorrectly when using the remote control of
this Recorder. Use such TV away from this Recorder.
•
Recording may stop temporarily at parts where recording is impossible (due to scratches or disc fouling,
etc.). When recording starts again, the starting part will be recorded as another title. If the disc is in a
condition where recording is impossible, it is ejected.
•
When the recording is interrupted, you might lose a few minutes of the recorded content immediately before
the interrupted point.
•
If you record a channel with no broadcast (i.e. where the broadcast has ended), recording will be done with
no video. Likewise, if you record a channel with poor reception, recording may be done with no video.
•
Clean the disc.
•
Check whether there is enough empty space on the disc being recorded to.
•
Check whether the disc is protected.
•
Check whether the number of original titles is 199 (for the HDD) or 99 (for a DVD-RW/R).
•
Check whether you are trying to record video whose recording is prohibited.
•
Check whether there was a power failure while waiting for (or during) timer recording.
•
Clean the disc.
•
Proper playback may be impossible due to a scratched, warped or dirty disc, the state of the pick-up, or
compatibility issues between this Recorder and the disc being used.
•
Check connections.
•
Turn off the power of both the Recorder and camcorder once, and then turn it on again.
•
Reconnect DV cable.
•
Try setting “DV LINK” to “OFF” using “DV SETTING” screen.(Page 90)
•
Switch input audio using “DV SETTING” screen.(Page 90)
•
Set “DV LINK” to “ON” using “DV SETTING” screen. You can operate using the On-screen Control Panel.
•
Operation may be impossible, depending on the connected camcorder.
•
Is the power cord unplugged from the AC outlet?
•
Is power in the “OFF” state?
•
Does the broadcast have no video or audio?
•
Has the Recorder been switched to external input?
•
Is the connection cable for video output connected properly?
•
Is “TV MODE” set to match the connected TV? (Page 88)
•
If you are using a wide TV, is the “TV MODE” set to “WIDE”? (Page 88)
•
Pictures in blocks may be conspicuous in scenes with rapid movement due to the characteristics of digital
image compression technology.
•
Has the Recorder been subjected to shock or impact? Are you using it at an unstable location? The Recorder
will stop if it senses shock or vibration.
•
The picture may be disturbed in very rare cases due to the characteristics of the HDD. This is not a
malfunction.
•
Are left and right audio cables connected to the opposite terminal, or is one side disconnected?
•
Has HDD been selected instead of DVD? Playback will start automatically by switching to DVD.
•
Have you set a DVD video disc that has an automatic playback function?
Continued on Next Page
GB
98
|||
 Loading...