

Page 1
1
Check the supplied accessories
MINI COMPONENT SYSTEM
Quick Guide CD-PC651H
Remote control x 1
2
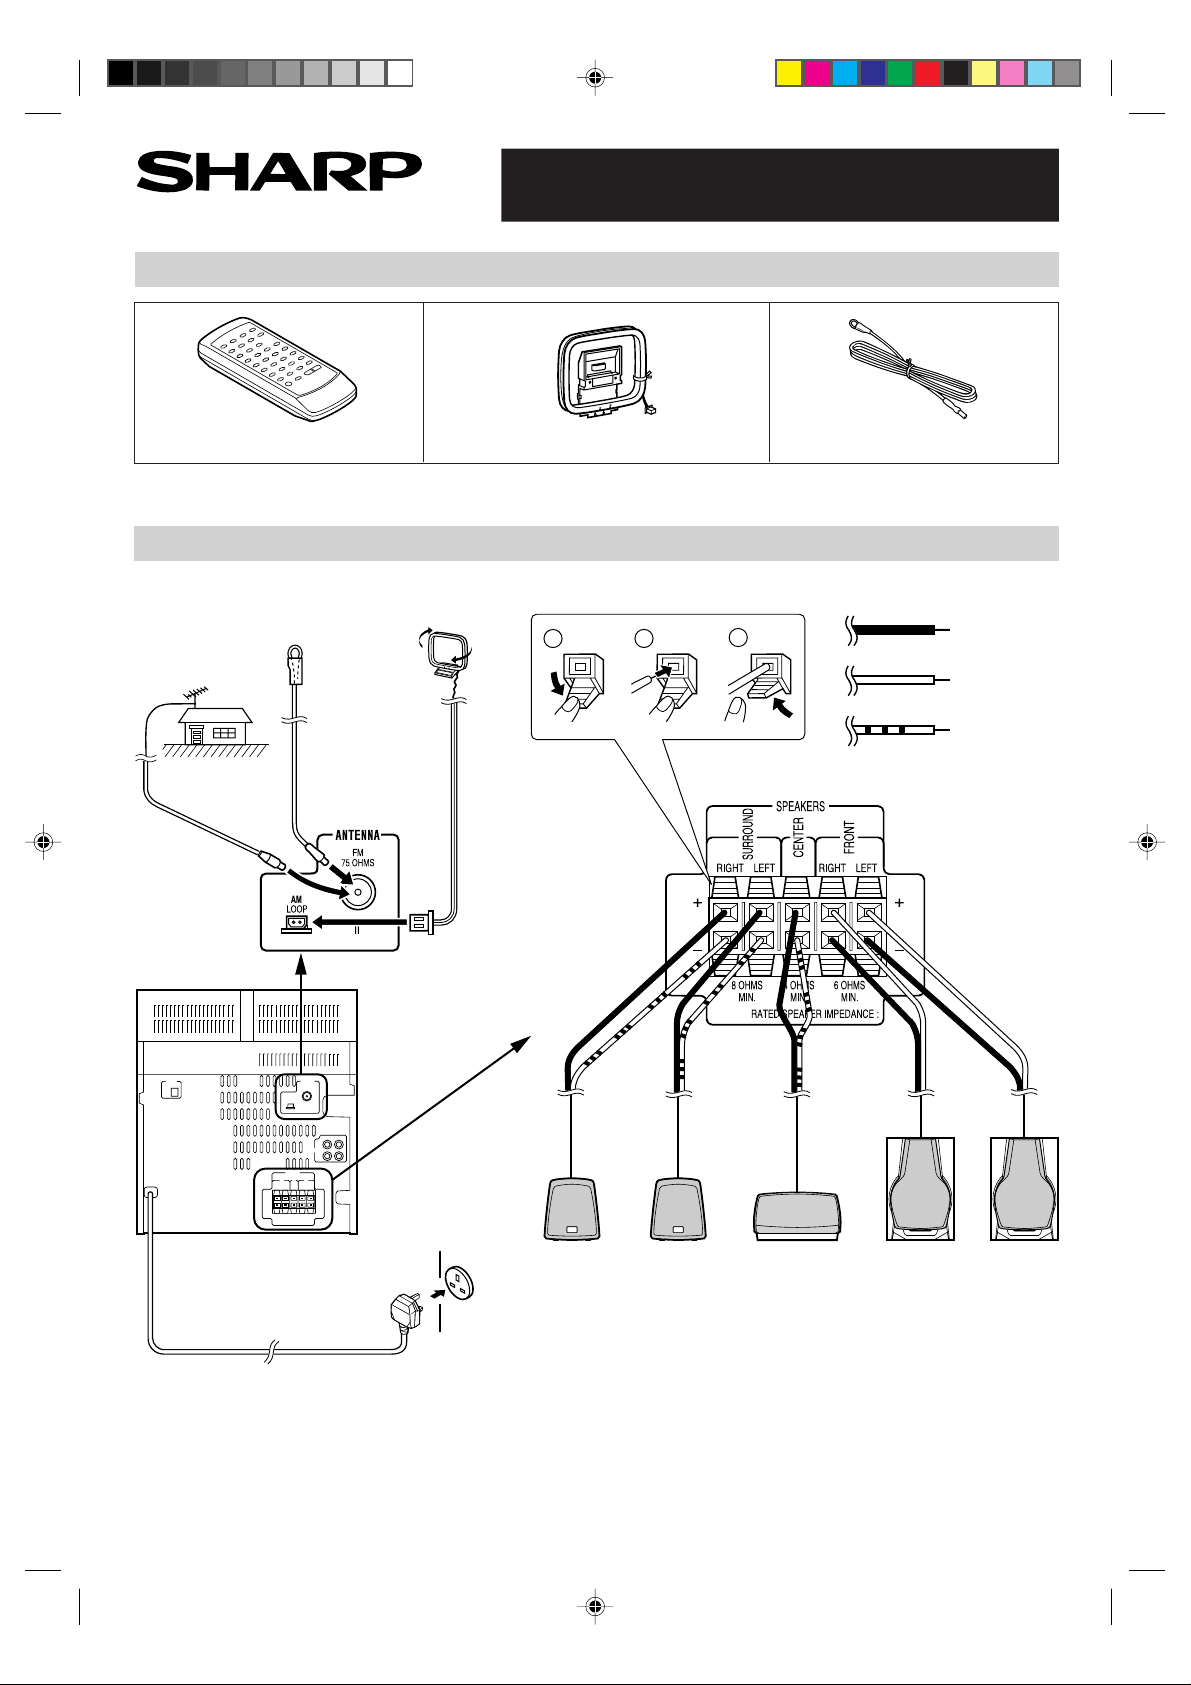
Connection
External FM Aerial
FM Aerial
AM Loop Aerial
AM loop aerial x 1
■ Speaker connection■ Aerial connection
1
2
FM aerial x 1
3
Black
Red
White line
*Quick651H.pm6E 99.8.4, 10:38 AM1
AC 230 V, 50 Hz
Surround
speaker
(Right)
1
Surround
speaker
(Left)
Centre
speaker
Front
speaker
(Right)
Front
speaker
(Left)
Page 2
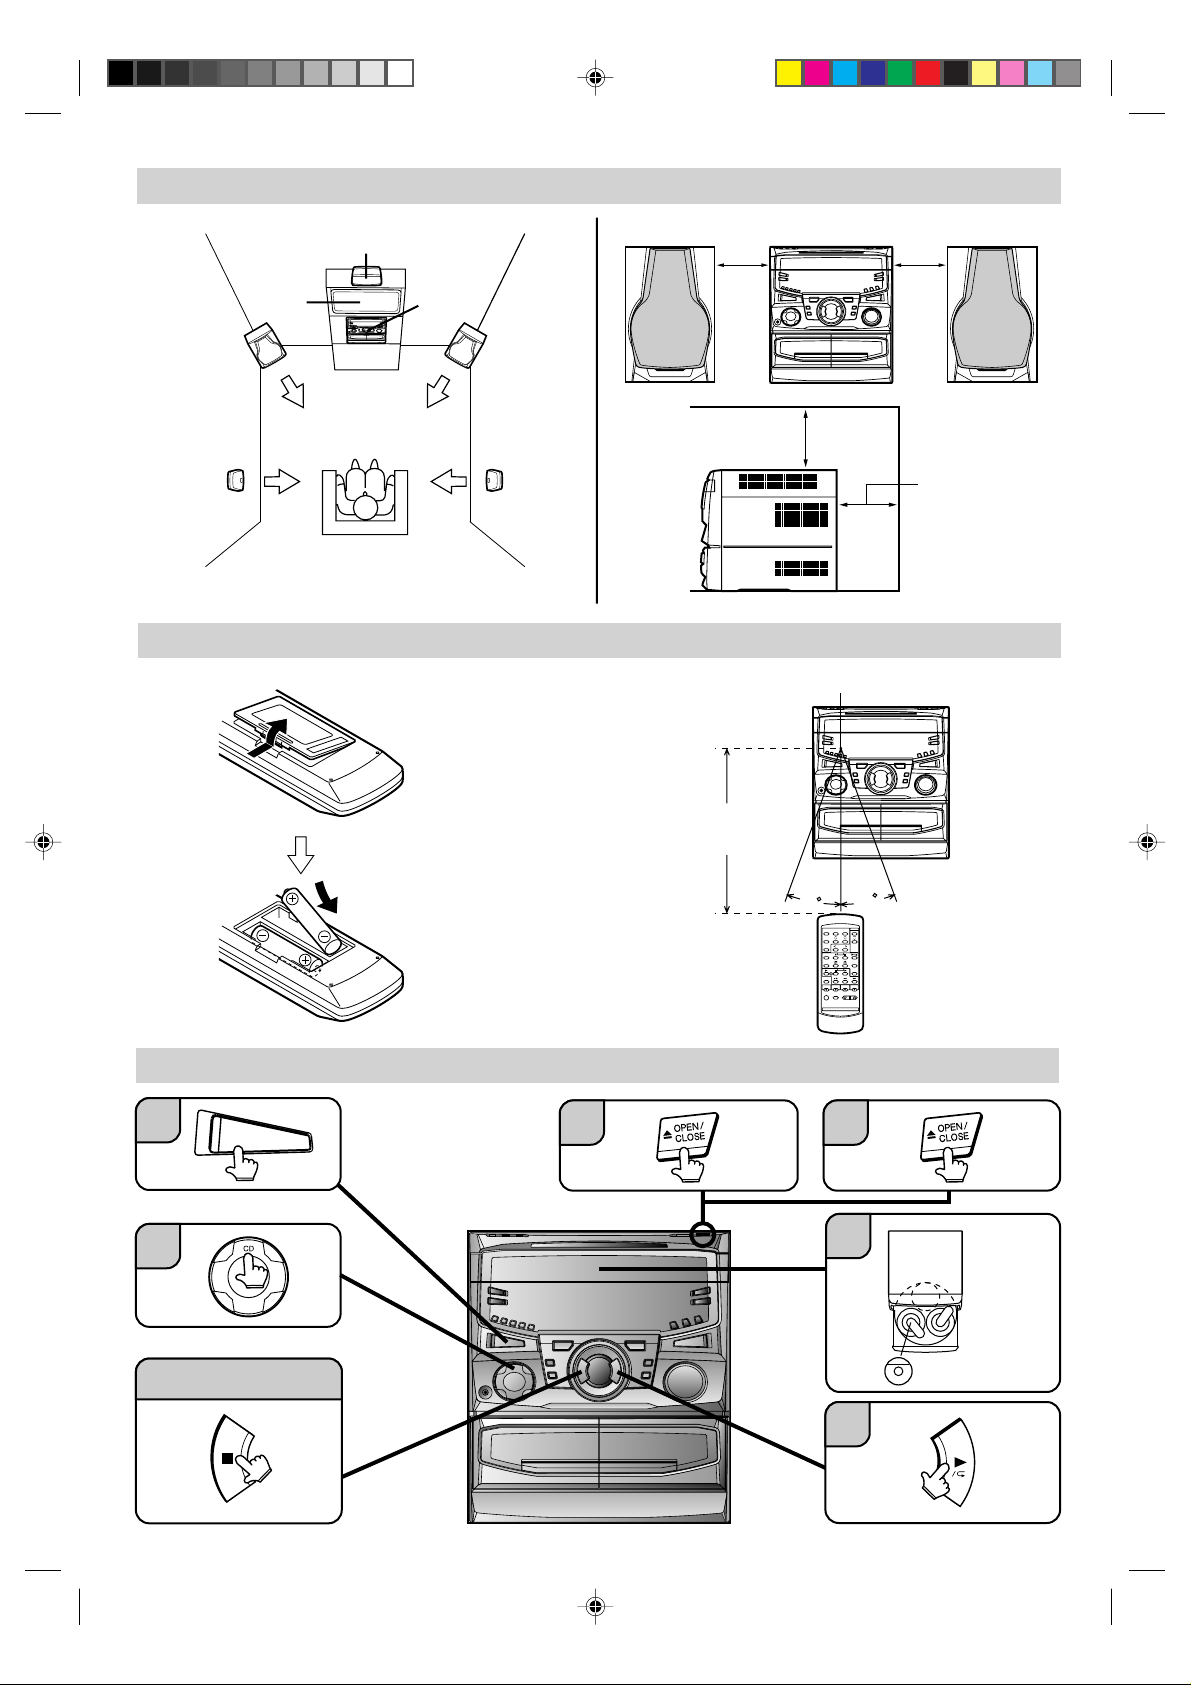
3
Placing the speaker system
Centre
speaker
TV
Front
speaker
(Left)
Surround
speaker
(Left)
4
How to use the remote control
Main
unit
2 “AA” size batteries
(UM/SUM-3, R6, HP-7
or similar).
Front
speaker
(Right)
Surround
speaker
(Right)
10 cm (4") 10 cm (4")
10 cm (4")
10 cm (4")
Remote Sensor
5
Listening to a CD
1
ON/STAND-BY
2
To stop playback
Batteries are not included.
0.2 m - 6 m
(8" - 20')
15
15
53
4
Label facing up
*Quick651H.pm6E 99.8.4, 10:38 AM2
6
2
Page 3

6
Listening to a tape
1
ON/STAND-BY
2
To stop playback
7
Listening to the radio
1
ON/STAND-BY
4
3
TAPE 1 TAPE 2
PUSH EJECT
Close the cassette door
completely until it is locked.
Tune into the desired
3
station.
PUSH EJECT
Select “FM ST”,
2
“FM” or “AM”.
8
Recording from CDs
1
ON/STAND-BY
2
To stop recording
4
5
Load the desired disc
3
and a cassette.
*Quick651H.pm6E 99.8.4, 10:38 AM3
TAPE 2
3
Page 4

9
Sound control
■ Volume
VOLUME
■ Extra bass (X-BASS) ■ Balance
■ Pre-programmed equalizer
FLAT HEAVY-1
SOFT-2 SOFT-1
(Remote control operation)
HEAVY-2
VOCAL
1 ~ 10
Resetting the microcomputer
If this product is subjected to strong external interference (mechanical shock, excessive static electricity, abnormal
supply voltage due to lightning, etc.) or if it is operated incorrectly, it may malfunction or the display may not function
correctly. If such a problem occurs, do the following:
2
1
ON/STAND-BY
Press the
ON/STAND-BY button to
enter the stand-by mode.
(pressing down)
ON/STAND-BY
Whilst pressing down the / button
and the / button at the same time,
then hold down the ON/STAND-BY button
for at least 1 second.
Caution:
The operation explained above will erase all data stored in memory including clock and timer settings, and tuner and
CD presets.
CD pickup cleaning
Clean the dust or stain on the CD pickup lens using a
●
commercial cleaning disc (brush type).
Cleaning disc
*Quick651H.pm6E 99.8.4, 10:38 AM4
TINSE0275AWZZ A9908.HK
4
 Loading...