

Sharp CD-MPX100E User Manual
MODEL
CD-MPX100E
MINI COMPONENT SYSTEM
This Quick Start Guide will help you to correctly install and
operate your system.
2
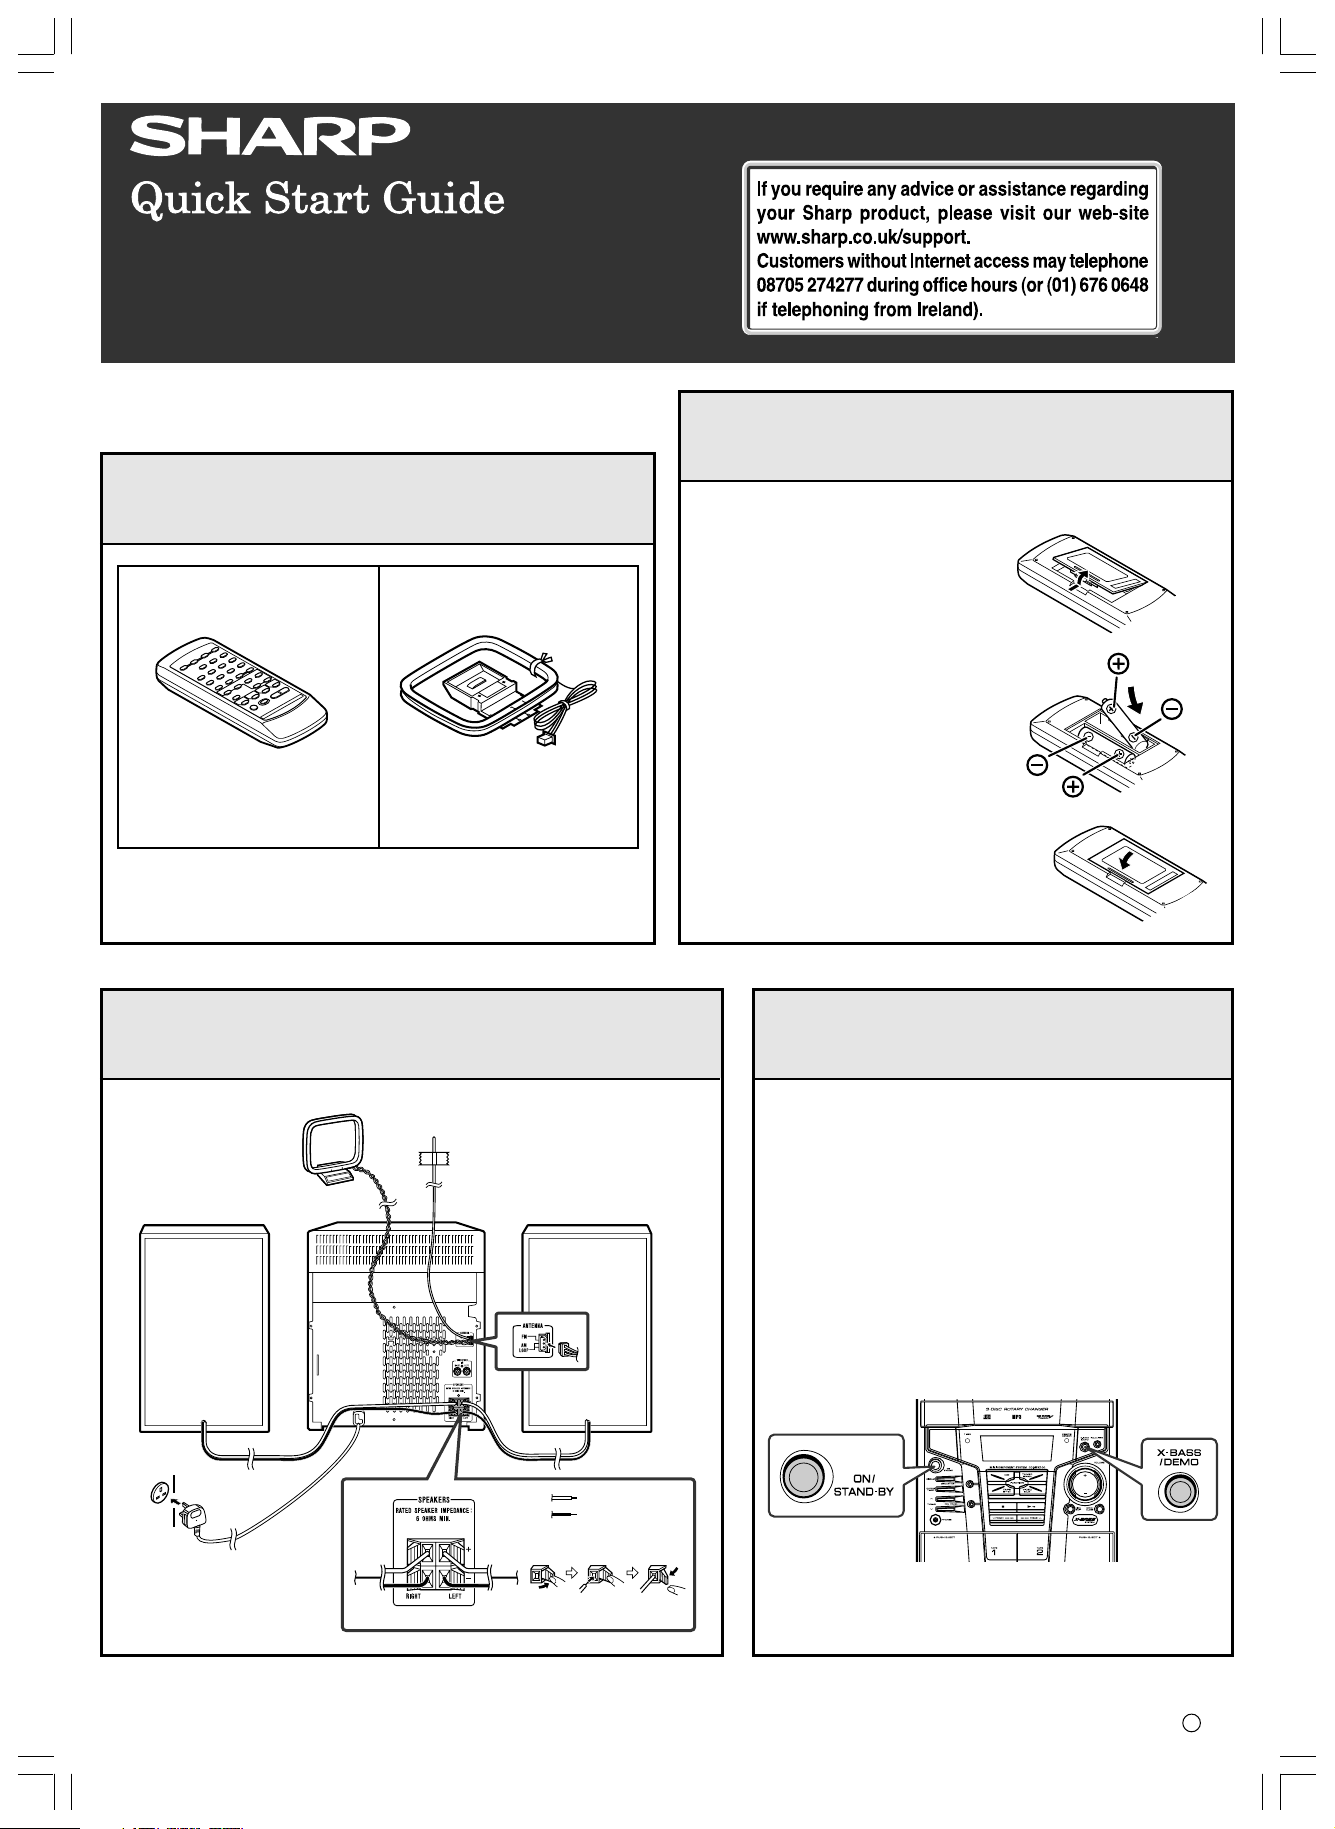
Remote control battery installation
1
Accessories
Remote control × 1
3
System connections
FM/AM loop aerial × 1
Use 2 “AA” size batteries (UM/SUM-3, R6, HP-7 or similar).
Batteries are not included.
1 Open the battery cover.
2 Insert the batteries as shown.
3 Close the cover.
4
Turn on your system
Wall socket
(AC 230 - 240 V, 50 Hz)
AM loop aerial
FM aerial
The first time the unit is plugged in, the unit will
enter the demonstration mode. You will see words
scroll.
Left speakerRight speaker
1 Press the X-BASS/DEMO button to cancel the dem-
onstration mode.
2 Press the ON/STAND-BY button to turn the power
on.
Red
Black
XL-MPX100E_QG 15/03/2005, 11:09 am1
TINSEA092AWZZ
05D R AS 1

Listening to a CD or MP3/WMA diisc Listening to a cassette tape
1 Press the ON/STAND-BY button to turn the power on.
2 Press the CD button.
3 Press the OPEN/CLOSE button to open the disc tray.
4 Place the disc on the disc tray, label side up.
When loading a third disc, press the DISC SKIP button to turn the
disc tray, then place the disc in the open position.
12 cm (5”)
8 cm (3”)
5 Press the OPEN/CLOSE button to close the disc tray.
6 To select the disc you want to listen to first, press one of the
1- 3 buttons on the remote control.
7 Press the / button to start playback.
Listening to the radio
1 Press the ON/STAND-BY button to turn the power on.
2 Open the cassette compart-
ment by pushing the area
marked “
”.
3 Load a cassette into the
TAPE 1 compartment or
TAPE 2 compartment with
the side to be played facing
towards you.
TAPE 1
TAPE 2
4 Press the tape (1 2) button to select the cassette you want to
listen to.
5 Press the / button to start
playback.
Tape play indicator
■ If trouble occurs
When this product is subjected to strong external interference (mechanical
shock, excessive static electricity, abnormal supply voltage due to
lightning, etc) or if it is operated incorrectly, it may malfunction.
DISPLAY
MINI COMPONENT SYSTEM CD-MPX100W
1 Press the ON/STAND-BY button to turn the power on.
2 Press the TUNER (BAND) button repeatedly to select the desired
frequency band (FM or AM).
3 Press the TUNING ( or ) button to tune in to the desired station.
When the TUNING button is pressed for more than 0.5 seconds,
scanning will start automatically and the tuner will stop at the first
receivable broadcast station.
To receive an FM stereo transmission:
Press the TUNER (BAND) button to display the “ST” indicator.
● “
” will appear when an FM broadcast is in stereo.
FM stereo mode indicator
FM stereo receiving indicator
If such a problem occurs, do the following:
1. Set the unit to the stand-by mode and turn the power on again.
2. If the unit is not restored in the previous operation, unplug and
plug in the unit, and then turn the power on.
Note:
If neither operation above restores the unit, clear all the memory by
resetting it.
■ Clearing all the memory (reset)
1. Press the ON/STAND-BY button to enter the power stand-by
mode.
2. Whilst pressing down the
X-BASS/DEMO button, press the REC PAUSE button until “CLEAR
AL” appears.
Caution:
This operation will erase all data stored in memory including clock, timer
settings, tuner preset, and CD programme.
PRESET
■ Maintenance
Routine maintenance is required for continued optimum
performance, refer to the operation manual.
button and the
XL-MPX100E_QG 15/03/2005, 11:09 am2
 Loading...