

ENGLISH
MODEL
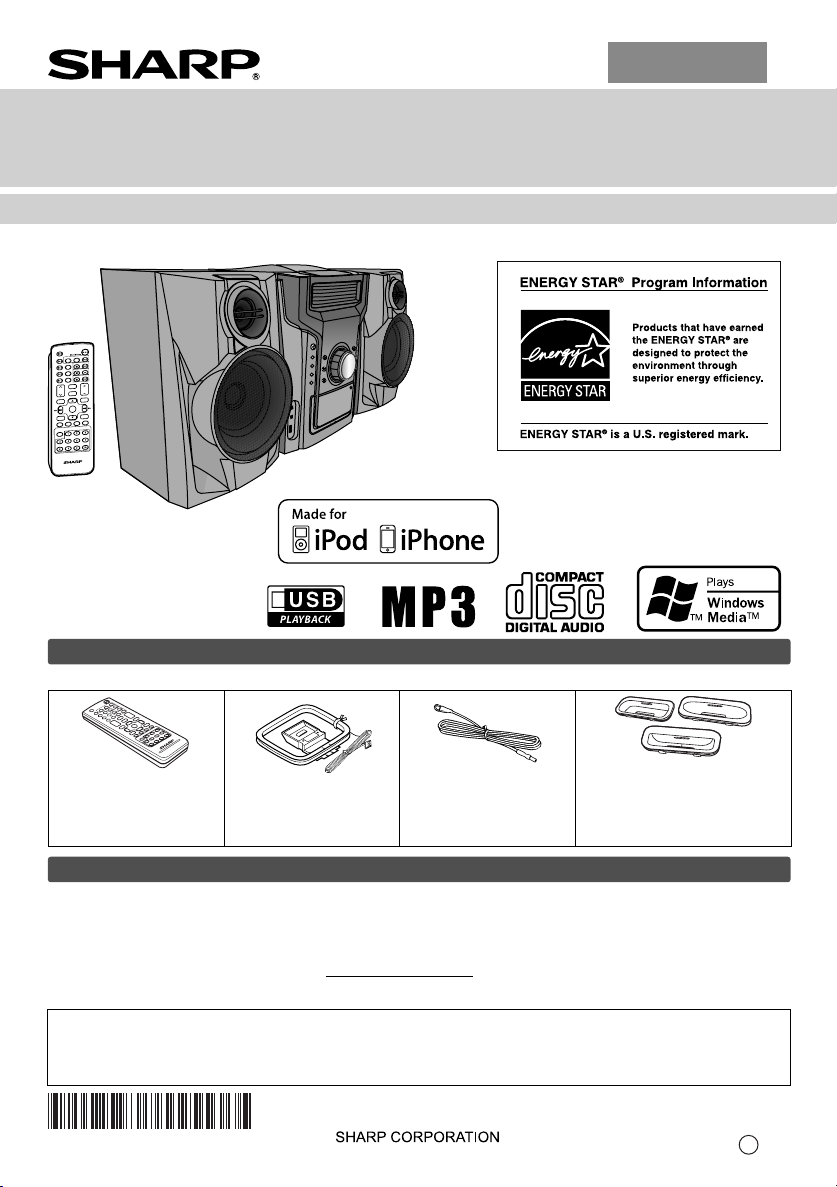
CD-DH950P
MINI COMPONENT SYSTEM
OPERATION MANUAL
CD-DH950P Mini Component System consisting of CD-DH950P (main unit) and CP-DH950P (speaker system).
Y
TAND-B
ON/S
MENU
Y
DISPLA
(TV OUT)
CD
Y
LA
DISP
TAPE
TUNER(BAND)
USB
AUDIO IN
X-BASS
L
VO
BASS/TREBLE
TUNING
Y MODE
PLA
FOLDER
PRESET
ENTER
Y
R
T
MEMO
PRESE
CLOCK/TIMER
SLEEP
DIMMER CLEAR
DEMO
MUTE
iPhone, iPod, iPod classic, iPod nano, and
iPod touch are trademarks of Apple Inc.,
registered in the U.S. and other countries.
Accessories
Please confi rm that only the following accessories are included.
Remote control x 1
(RRMCGA255AWSA)
AM loop antenna x 1
(QANTL0005AWZZ)
FM antenna x 1
(92LFANT1535A)
iPhone® adaptor x 3
(GCOVAA238AWSA - No 12)
(GCOVAA239AWSA - No 15)
(GCOVAA294AWSA - No 19)
Special Note
Supply of this product does not convey a license nor imply any right to distribute content created with this product in
revenue-generating broadcast systems (terrestrial, satellite, cable and/or other distribution channels), revenue generating
streaming applications (via Internet, intranets and/or other networks), other revenue-generating content distribution
systems (pay-audio or audio-on-demand applications and the like) or on revenue-generating physical media (compact
discs, digital versatile discs, semiconductor chips, hard drives, memory cards and the like). An independent license for
such use is required. For details, please visit http://mp3licensing.com
MPEG Layer-3 audio coding technology licensed from Fraunhofer IIS and Thomson.
“Made for iPod” and “Made for iPhone” mean that an electronic accessory has been designed to connect specifi cally
to iPod or iPhone, respectively, and has been certifi ed by the developer to meet Apple performance standards. Apple
is not responsible for the operation of this device or its compliance with safety and regulatory standards. Please note
that the use of this accessory with iPod or iPhone may affect wireless performance.
Printed in Malaysia
TINSZA921AWZZ
11C R MW
1

SPECIAL NOTES
CAUTION: TO REDUCE THE RISK OF ELECTRIC SHOCK, DO
NOT REMOVE COVER (OR BACK). NO USER-SERVICEABLE
PARTS INSIDE. REFER SERVICING TO QUALIFIED SERVICE
PERSONNEL.
Explanation of Graphical Symbols:
WARNING : TO REDUCE THE RISK OF FIRE OR ELECTRIC
SHOCK, DO NOT EXPOSE THIS APPLIANCE TO RAIN OR
MOISTURE.
This product is classifi ed as a CLASS 1 LASER PRODUCT
Caution - Use of any controls, adjustments or procedures
other than those specifi ed herein may result in hazardous
radiation exposure.
Note to CATV system installer:
This reminder is provided to call the CATV system installer’s
attention to Article 820 of the National Electrical Code that
provides guidelines for proper grounding and, in particular,
specifi es that the cable ground shall be connected to the
grounding system of the building, as close to the point of cable
entry as practical.
NOTE
This equipment has been tested and found to comply with
the limits for a Class B digital device, pursuant to Part 15
of the FCC Rules. These limits are designed to provide
reasonable protection against harmful interference in a
residential installation. This equipment generates, uses,
and can radiate radio frequency energy and, if not installed
and used in accordance with the instructions, may cause
harmful interference to radio communications. However,
there is no guarantee that interference will not occur in a
particular installation. If this equipment does cause harmful
interference to radio or television reception, which can be
determined by turning the equipment off and on, the user
is encouraged to try to correct the interference by one or
more of the following measures:
Reorient or relocate the receiving antenna. O
Increase the separation between the equipment and O
receiver.
Connect the equipment into an outlet on a circuit O
different from that to which the receiver is connected.
Consult the dealer or an experienced radio/TV O
technician for help.
WARNING
FCC Regulations state that any unauthorized changes or
modifi cations to this equipment not expressly approved by
the manufacturer could void the user’s authority to operate
this equipment.
The lightning fl ash with arrowhead symbol,
within an equilateral triangle, is intended to
alert the user to the presence of uninsulated
“dangerous voltage” within the product’s
enclosure that may be of suffi cient
magnitude to constitute a risk of electric
shock to persons.
The exclamation point within an equilateral
triangle is intended to alert the user to
the presence of important operating and
maintenance (servicing) instructions in the
literature accompanying the appliance.
For your assistance in reporting this unit in case of loss or theft,
please record below the model number and serial number which
are located on the rear of the unit. Please retain this information.
Model number ..............................................
Serial number ..............................................
Date of purchase ..............................................
Place of purchase ..............................................
FOR YOUR RECORDS
IMPORTANT SAFETY INSTRUCTIONS
Electricity is used to perform many useful functions, but
it can also cause personal injuries and property damage
if improperly handled. This product has been engineered
and manufactured with the highest priority on safety.
However, improper use can result in electric shock and/or
fi re. In order to prevent potential danger, please observe
the following instructions when installing, operating and
cleaning the product. To ensure your safety and prolong
the service life of this product, please read the following
precautions carefully before use.
1) Read these instructions.
2) Keep these instructions.
3) Heed all warnings.
4) Follow all instructions.
5) Do not use this apparatus near water.
6) Clean only with dry cloth.
7) Do not block any ventilation openings. Install in
accordance with the manufacturer’s instructions.
8) Do not install near any heat sources such as radiators,
heat registers, stoves, or other apparatus (including
amplifi ers) that produce heat.
9) Do not defeat the safety purpose of the polarized or
grounding-type plug. A polarized plug has two blades
with one wider than the other. A grounding type plug
has two blades and a third grounding prong. The wide
blade or the third prong are provided for your safety. If
the provided plug does not fi t into your outlet, consult
an electrician for replacement of the obsolete outlet.
10) Protect the power cord from being walked on or
pinched particularly at plugs, convenience receptacles,
and the point where they exit from the apparatus.
11) Only use attachments/accessories specifi ed by the
manufacturer.
12) Use only with the cart, stand, tripod,
bracket, or table specifi ed by the
manufacturer, or sold with the apparatus.
When a cart is used, use caution when
moving the cart/apparatus combination
to avoid injury from tip-over.
13) Unplug this apparatus during lightning storms or when
unused for long periods of time.
14) Refer all servicing to qualifi ed service personnel.
Servicing is required when the apparatus has been
damaged in any way, such as power-supply cord or
plug is damaged, liquid has been spilled or objects
have fallen into the apparatus, the apparatus has
been exposed to rain or moisture, does not operate
normally, or has been dropped.
E-1
IMPORTANT SAFETY INSTRUCTIONS (continued)
Additional Safety Information
15) Power Sources - This product should be operated
only from the type of power source indicated on the
marking label. If you are not sure of the type of power
supply to your home, consult your product dealer or
local power company. For product intended to operate
from battery power, or other sources, refer to the
operating instructions.
16) Overloading - Do not overload wall outlets, extension
cords, or integral convenience receptacles as this can
result in a risk of fi re or electric shock.
17) Object and Liquid Entry - Never push objects of any
kind into this product through openings as they may
touch dangerous voltage points or short-out parts that
could result in a fi re or electric shock. Never spill liquid
of any kind on the product.
18) Damage Requiring Service - Unplug this product from
the wall outlet and refer servicing to qualifi ed service
personnel under the following conditions:
When the AC cord or plug is damaged,a)
If liquid has been spilled, or objects have fallen b)
into the product,
If the product has been exposed to rain or water,c)
If the product does not operate normally by d)
following the operating instructions. Adjust only
those controls that are covered by the operating
instructions as an improper adjustment of other
controls may result in damage and will often
require extensive work by a qualifi ed technician
to restore the product to its normal operation,
If the product has been dropped or damaged in e)
any way, and
When the product exhibits a distinct change in f)
performance - this indicates a need for service.
19) Replacement Parts - When replacement parts are
required, be sure the service technician has used
replacement parts specifi ed by the manufacturer or
have the same characteristics as the original part.
Unauthorized substitutions may result in fi re, electric
shock, or other hazards.
20) Safety Check - Upon completion of any service or
repairs to this product, ask the service technician to
perform safety checks to determine that the product is
in proper operating condition.
21) Wall or ceiling mounting - When mounting the product
on a wall or ceiling, be sure to install the product
according to the method recommended by the
manufacturer.
22) Power Lines - An outside antenna system should not
be located in the vicinity of overhead power lines or
other electric light or power circuits, or where it can
fall into such power lines or circuits. When installing
an outside antenna system, extreme care should
be taken to keep from touching such power lines or
circuits as contact with them might be fatal.
23) Protective Attachment Plug - The product is equipped
with an attachment plug having overload protection.
This is a safety feature. See Instruction Manual
for replacement or resetting of protective device.
If replacement of the plug is required, be sure the
service technician has used a replacement plug
specifi ed by the manufacturer that has the same
overload protection as the original plug.
24) Stand - Do not place the product on an unstable
E-2
cart, stand, tripod or table. Placing the product on an
unstable base can cause the product to fall, resulting
in serious personal injuries as well as damage to the
product. Use only a cart, stand, tripod, bracket or
table recommended by the manufacturer or sold with
the product. When mounting the product on a wall,
be sure to follow the manufacturer’s instructions. Use
only the mounting hardware recommended by the
manufacturer.
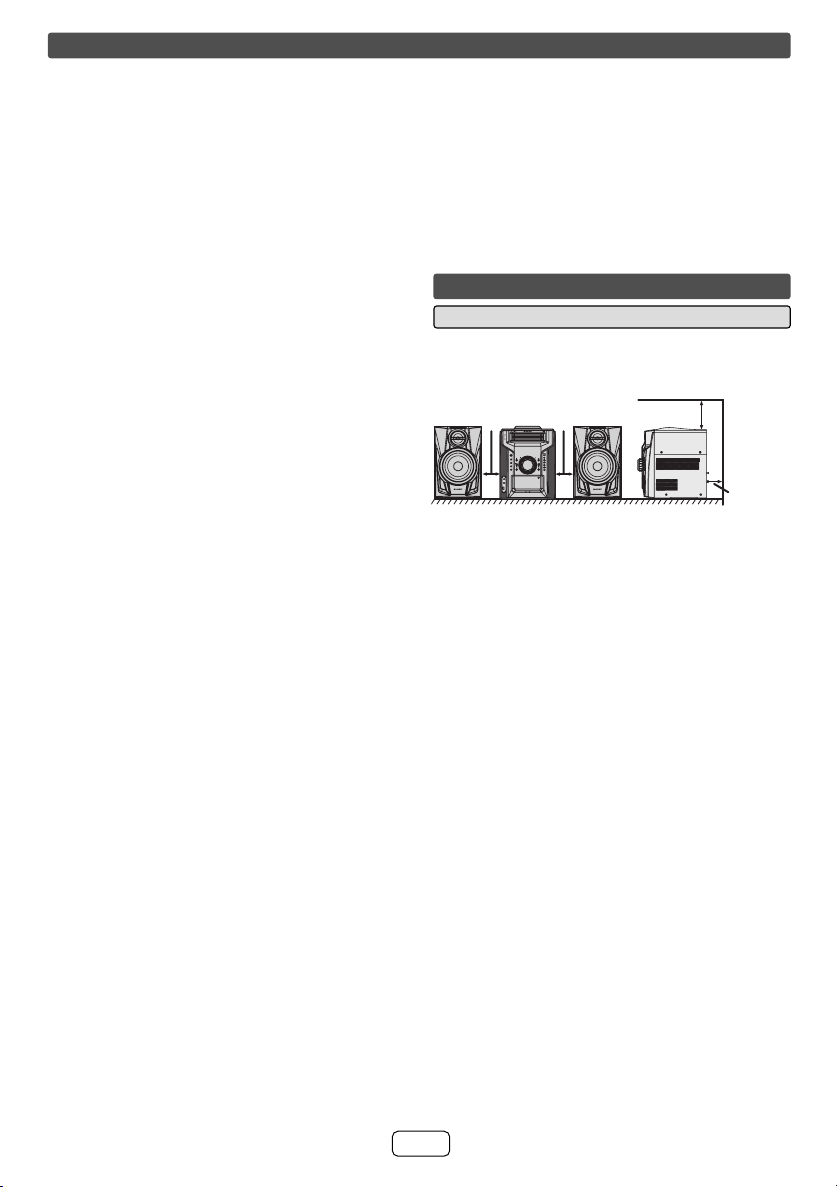
Precautions
General Q
Please ensure that the equipment is positioned in a O
well ventilated area and ensure that there is at least
4" (10 cm) of free space along the sides, top and back
of the equipment.
4" (10 cm) 4" (10 cm)
5
4
3
5
2
4
1
3
2
1
MINI COMPONENT SYSTEM
CD-DH950P
REMOTE
TIMER
SENSOR
TIMER
POWER
ON/ STAND-BY
OPEN / CLOSE
VOL.
VOL.
iPod/iPhone
CD
5
5
CD
4
4
TUNER
3
(BAND)
3
TAPE
TUNING
PRESET
2
2
AUDIO IN
USB
1
1
RECORD/PLAYBACKPLAYBACK (PLAY & STOP)
AUDIO
PHONES
IN
The unit will start the tape initialization when plugged O
in to the AC outlet. During this process, initializing
sound will be heard and the unit cannot be turned on.
Wait until the process is fi nished.
Use the unit on a fi rm, level surface free from O
vibration.
Place the speakers at least 12" (30 cm) away from O
any CRT TV to avoid color variations across the TV
screen. If the variations persist, move the speakers
further away from the TV. LCD TV is not prone to such
variation.
Keep the unit away from direct sunlight, strong magnetic O
fi elds, excessive dust, humidity and electronic/electrical
equipment (home computers, facsimiles, etc.) which
generate electrical noise.
Do not place anything on top of the unit. O
Do not expose the unit to moisture, to temperatures O
higher than 140˚F (60˚C) or to extremely low
temperatures.
If your system does not work properly, disconnect the O
AC power cord from the AC outlet. Plug the AC power
cord back in, and then turn on your system.
In case of an electrical storm, unplug the unit for O
safety.
Hold the AC power plug by the head when removing O
it from the AC outlet, as pulling the cord can damage
internal wires.
The AC power plug is used as a disconnect device and O
shall always remain readily operable.
Do not remove the outer cover, as this may result O
in electric shock. Refer internal service to your
local SHARP service facility.
This unit should only be used within the range of O
41˚F - 95˚F (5˚C - 35˚C).
4" (10 cm)
4" (10 cm)

For U.S. customer only
CONSUMER LIMITED WARRANTY
SHARP ELECTRONICS CORPORATION warrants to the first consumer purchaser that this Sharp brand product (the
"Product"), when ship in its original container, will be free from defective workmanship and materials, and agrees that it will,
at its option, either repair the defect or replace the defective Product or part thereof with a new or remanufactured equivalent
at no charge to the purchaser for parts or labor for the period(s) set forth below.
This warranty does not apply to any appearance items of the Product nor to the additional excluded item(s) set forth below
nor to any Product the exterior of which has been damaged or defaced, which has been subjected to improper voltage or
other misuse, abnormal service or handling, or which has been altered or modified in design or construction.
In order to enforce the rights under this limited warranty, the purchaser should follow the steps set forth below and provide
proof of purchase to the servicer.
The limited warranty described herein is in addition to whatever implied warranties may be granted to purchasers by law.
ALL IMPLIED WARRANTIES INCLUDING THE WARRANTIES OF MERCHANTABILITY AND FITNESS FOR USE ARE
LIMITED TO THE PERIOD(S) FROM THE DATE OF PURCHASE SET FORTH BELOW. Some states do not allow
limitations on how long an implied warranty lasts, so the above limitation may not apply to you.
Neither the sales personnel of the seller nor any other person is authorized to make any warranties other than those
described herein, or to extend the duration of any warranties beyond the time period described herein on behalf of Sharp.
The warranties described herein shall be the sole and exclusive warranties granted by Sharp and shall be the sole and
exclusive remedy available to the purchaser. Correction of defects, in the manner and for the period of time described
herein, shall constitute complete fulfillment of all liabilities and responsibilities of Sharp to the purchaser with respect to the
Product, and shall constitute full satisfaction of all claims, whether based on contract, negligence, strict liability or otherwise.
In no event shall Sharp be liable, or in any way responsible, for any damages or defects in the Product which were caused
by repairs or attempted repairs performed by anyone other than an authorized servicer. Nor shall Sharp be liable or in any
way responsible for any incidental or consequential economic or property damage. Some states do not allow the exclusion
of incidental or consequential damages, so the above exclusion may not apply to you.
THIS WARRANTY GIVES YOU SPECIFIC LEGAL RIGHTS. YOU MAY ALSO HAVE OTHER RIGHTS WHICH VARY
FROM STATE TO STATE.
Model Specific Section
Your Product Model Number & Description:
Warranty Period for this Product:
Additional Item(s) Excluded from Warranty Coverage
(if any):
Where to Obtain Service:
What to do to Obtain Service:
TO OBTAIN SUPPLY, ACCESSORY OR PRODUCT INFORMATION, CALL 1-800-BE-SHARP
SHARP ELECTRONICS CORPORATION
Sharp Plaza, Mahwah, New Jersey 07495-1163
CD-DH950P Mini Component System
(Be sure to have this information available when you need
service for your Product.)
One (1) year parts and labor from the date of purchase.
Non-functional accessories, supplies, and consumable
items.
At a Sharp Authorized Servicer located in the United States.
To find a location of the nearest Sharp Authorized Servicer,
call Sharp toll free at 1-800-BE-SHARP.
Ship prepaid or carry in your Product to a Sharp Authorized
Servicer. Be sure to have Proof of Purchase available. If
you ship the Product, be sure it is insured and packaged
securely.
Precautions (continued)
Warning:
The voltage used must be the same as that specifi ed on
this unit. Using this product with a higher voltage other than
that which is specifi ed is dangerous and may result in a fi re
or other type of accident causing damage. SHARP will not
be held responsible for any damage resulting from use of
this unit with a voltage other than that which is specifi ed.
Volume control Q
The sound level at a given volume setting depends on
speaker effi ciency, location and various other factors. It is
advisable to avoid exposure to high volume levels, which
occurs while turning the unit on with the volume control
setting up high, or while continually listening at high
volumes. Excessive sound pressure from earphones and
headphones can cause hearing loss.
System connection
Speaker connection Q
Use speakers with an impedance of 6 ohms or more, O
as lower impedance speakers can damage the unit.
Do not make a mistake when connecting the right and O
left speakers. The right speaker is the one on the right
side when you face the unit.
Insert the speaker plug fully with the lever side facing O
to the top.
Hold the speaker plug when removing it from the unit. O
Pulling the wire may cause malfunction to the unit.
Do not stand or sit on the speakers. You may be O
injured.
Do not allow any objects to fall into or to be placed in O
the bass refl ex duct.
E-3
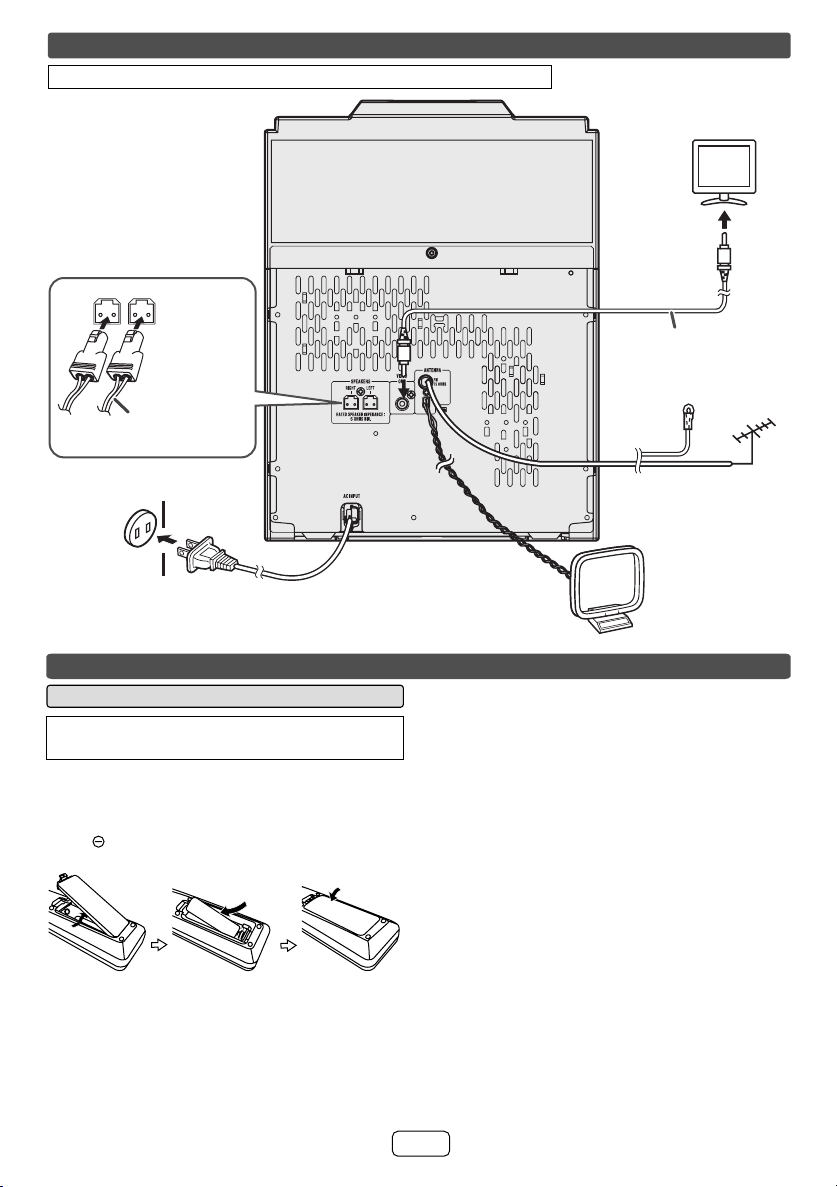
System connections (continued)
Make sure to unplug the AC power cord before making any connections.
To video input
jack
TV
Plug in with
the lever side
facing to the
top.
Wire
AC outlet (AC 120 V ~ 60 Hz)
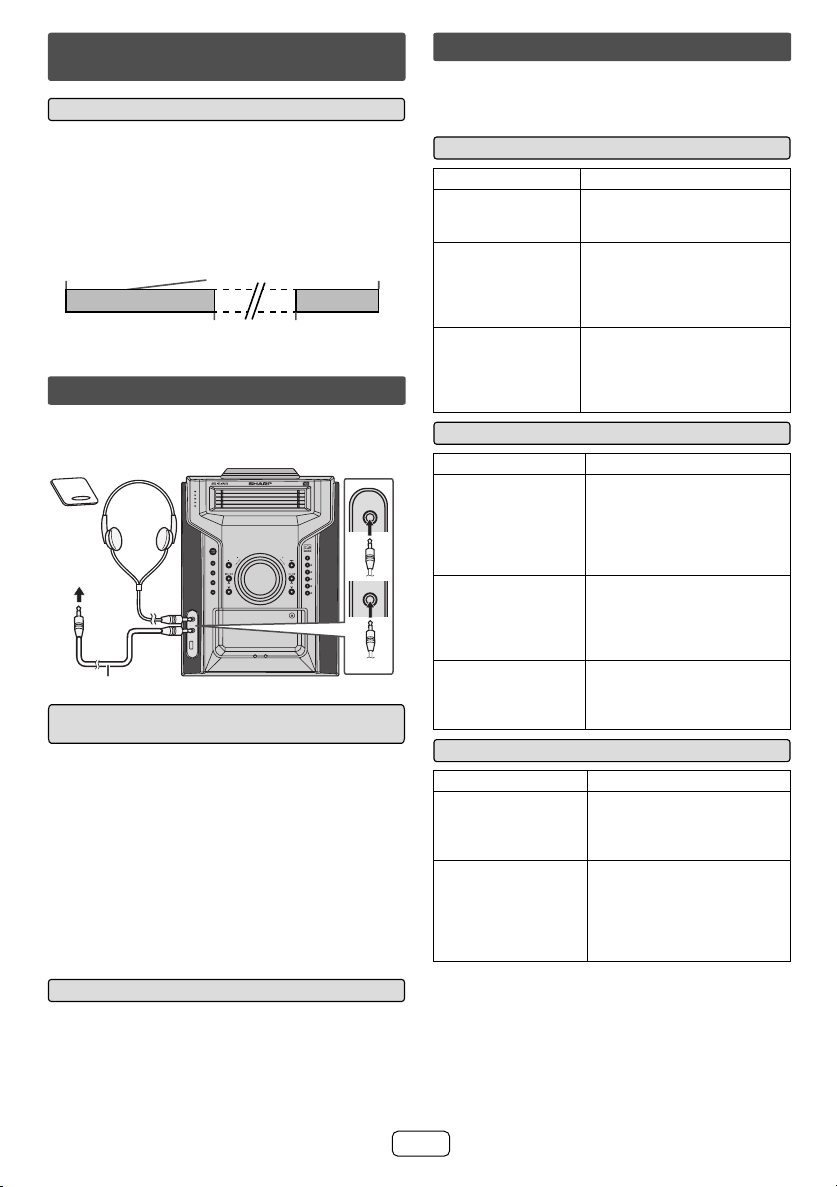
Remote control
Battery installation Q
Use 1 “AA” size battery (UM/SUM-3, R6, HP-7 or
similar). Battery is not included.
1
Open the battery cover.
Insert the battery according to the direction indicated 2
in the battery compartment.
When inserting or removing the battery, push it toward
the battery terminal.
Close the battery cover.3
Video cable
(not supplied)
FM antenna
External FM
antenna for
better reception
(not supplied)
AM loop antenna
Caution:
Remove the battery if the unit will not be used for a O
long period of time. This will prevent potential damage
due to battery leakage.
Do not use rechargeable batteries (nickel-cadmium O
battery, etc.).
Installing the battery incorrectly may cause the unit to O
malfunction.
Batteries (battery pack or batteries installed) shall not O
be exposed to excessive heat such as sunshine, fi re
or the like.
Notes concerning use:
Replace the battery if the operating distance is reduced O
or if the operation becomes erratic.
Periodically clean the transmitter on the remote control O
and the sensor on the unit with a soft cloth.
Exposing the sensor on the unit to strong light may O
interfere with operation. Change the lighting or the
direction of the unit.
Keep the remote control away from moisture, heat, O
shock, and vibrations.
E-4

General control
POWER
ON/ STAND-BY
iPod/iPhone
CD
TUNER
(BAND)
TAPE
AUDIO IN
USB
X-BASS
BASS/TREBLE
DIMMER
DEMO
MUTE
To turn the power on Q
The fi rst time the unit is plugged in, the unit will enter the
demonstration mode.
Function Main unit
Power on/
off
Demo on/
off
Display brightness control Q
To dim the display brightness, press the DIMMER button
on the remote control.
Volume auto fade-in Q
If you turn off and on the main unit with the volume set to
27 or higher, the volume starts at 16 and fades in to the
last set level.
Volume control Q
Turn the volume knob toward VOL +/– (on main unit) or
press VOL +/– (on remote control) to increase or decrease
the volume.
5
4
3
2
1
TIMER
POWER
ON/ STAND-BY
iPod/iPhone
CD
TUNER
(BAND)
TAPE
AUDIO IN
USB
POWER
ON/ STAND-BY
____
TUNING
MINI COMPONENT SYSTEM
CD-DH950P
VOL.
DISPLAY
(TV OUT)
DISPLAY
TUNER(BAND)
AUDIO IN
X-BASS
BASS/TREBLE
TUNING VOL
FOLDER
PRESET
ENTER
PRESET
CLOCK/TIMER
DEMO
DIMMER CLEAR SLEEP
MUTE
REMOTE
SENSOR
OPEN / CLOSE
VOL.
PRESET
ON/STAND-BY
MENU
CD
TAPE
USB
PLAY MODE
MEMORY
Remote
control
ON/STAND-BY
DEMO
VOL.
5
4
3
2
1
ON/STAND-BY
Operation
Press to turn the
power on or to
go to stand-by
mode.
Press to enter to
demonstration on
or off mode.
VOL.
VOL
Bass control (X-BASS) Q
When the power is fi rst turned on, the unit will enter the
extra bass mode which emphasizes the bass frequencies,
and “X-BASS” will appear. To cancel the extra bass mode,
press the X-BASS button.
Bass control Q
Press the BASS/TREBLE button to select “BASS”.1
Within 5 seconds, press the VOLUME (+ or -) button 2
to adjust the bass.
Treble control Q
Press the BASS/TREBLE button to select “TREBLE”.1
Within 5 seconds, press the VOLUME (+ or -) button to 2
adjust the treble.
Auto power on function Q
When you press any of the following buttons, the unit turns
on.
®
/iPhone, CD, USB, AUDIO IN, TUNER (BAND),
iPod O
TAPE button (main unit/remote control): Selected
function is activated.
O button (main unit): The unit turns on and playback
of the last function will start (iPod/iPhone, CD, USB,
AUDIO IN, TUNER (BAND), TAPE).
iPod/iPhone O
on and the iPod/ iPhone playback starts (regardless of
the last function).
CD O
and the CD playback starts (regardless of the last
function).
TAPE O
and the TAPE playback starts (regardless of the last
function).
USB O
and the USB playback starts (regardless of the last
button (remote control): The unit turns
button (remote control): The unit turns on
button (remote control): The unit turns on
button (remote control): The unit turns on
function).
Auto power off function Q
The main unit will enter the stand-by mode (when iPod/
iPhone is not docked) after 15 minutes of inactivity during:
iPod/iPhone: No connection.
AUDIO IN: No detection of input signal or very low sound
audibility.
TUNER: No reception of broadcast signal.
CD / USB / TAPE: In the stop mode.
Note:
However, if iPod/iPhone is docked, the unit will begin
charging.
“CHARGING” will be displayed.
E-5

Listening to the iPod or iPhone
iPhone and iPod operations
Made for:
iPhone 4
O
iPhone 3GS
O
iPhone 3G
O
iPhone
O
iPod touch (4
O
iPod touch (3
O
iPod touch (2
O
Caution:
Please update your iPod unit to the latest software version
from Apple’s homepage before using it.
Notes:
Once the iPod or iPhone is connected to the unit it will O
begin charging.
The iPod or iPhone unit cannot be charged during USB O
mode.
The message “This accessory is not made to work with O
iPhone” or similar, may appear on the iPhone screen
when:
- battery is low.
- the iPhone is not properly docked (eg. slanting).
If this occurs, remove and re-dock the iPhone.
This product is made for iPhone. To prevent random O
interference when iPhone is docked, the headphone
output is disabled, and “HP INVALID” will be displayed.
You may also experience brief audio interference during
incoming calls.
th
generation)
rd
generation)
nd
generation)
iPod touch (1
O
iPod classic
O
iPod nano (6
O
iPod nano (5
O
iPod nano (4
O
iPod nano (3
O
iPod nano (2
O
iPod and iPhone adaptor connection Q
Notes:
Please use the adaptor supplied with your iPod or O
iPhone unit.
You can use an audio cable to connect your iPod to the O
AUDIO IN jack if:
1. your iPod adaptor does not fi t into the iPod dock on
the main unit.
2. you have an iPod that does not have an iPod
adaptor.
3. you have an iPod that does not have an iPod 30 pin
connector.
iPhone
Adaptor No.
12
15
15
19
iPhone
Description
iPhone 4GB & 8GB & 16GB
iPhone 3G 8GB & 16GB
iPhone 3GS 16GB & 32GB
iPhone 4 16GB & 32GB
To insert iPod or iPhone adaptor Q
Insert the iPod or iPhone adaptor into the unit and connect
your iPod or iPhone.
iPhone
adaptor
iPhone dock
iPhone
iPhone
(
bottom
)
st
generation)
th
generation)
th
generation)
th
generation)
rd
generation)
nd
generation)
Capacity
iPhone
connector
To remove iPod or iPhone adaptor Q
Insert the tip of a screwdriver (“-” type, small)
into the adaptor hole as shown and lift upward
to remove.
iPod or iPhone playback Q
Press the ON/STAND-BY button to turn the power on.1
Press the iPod/iPhone button to select iPod or iPhone 2
function.
Insert iPod or iPhone unit in iPod or iPhone dock of
3
main unit. “DOCK OK” will be displayed.
Press the
4 (iPod or iPhone ) button to start
playback.
Note:
iPod and iPhone cannot be played back via USB cable and
connection, “NO SUPPORT” will be displayed.
iPhone playback Q
Sound will only switch from iPhone to the main unit after O
authentication process is completed in approximately
10 seconds.
Incoming calls will pause the playback. O
Once the calls are answered, the conversation can O
only be heard through the built-in iPhone speaker. Turn
on the iPhone speaker or undock the iPhone to start
conversation.
To disconnect iPod or iPhone Q
Simply remove the iPod or iPhone from the iPod or iPhone
dock. It is safe to do so even during playback.
Navigating the iPod or iPhone menus Q
Press the MENU button to view the menu on iPod 1
or iPhone unit. Press it again to go back to previous
menu.
2 or ) button to select an item on
Use the PRESET (
the menu and then press ENTER button.
Note:
When navigating the iPod or iPhone menu with remote
control, do not operate any of the buttons on the iPod or
iPhone unit. The volume level is adjusted by turning the
volume knob on main unit or pressing the VOL (+ or –)
button on the remote control. Adjusting the volume on the
iPod unit gives no effect.
iPod or iPhone operation
The operations described below depend on the generation
iPod or iPhone you are using.
System on operation
When the main unit is powered on, the iPod or iPhone
unit will automatically power on when docked in the unit
(including TIMER function).
System off (stand-by operation)
When the main unit is turned to stand-by mode, the
docked iPod or iPhone unit will automatically turn to standby mode.
Dock connector
E-6

Listening to the iPod or iPhone (continued)
Various iPod or iPhone functions Q
Main
Function
Play
Pause
Track up/
down
Fast
forward/
reverse
Back light/
TV OUT
Repeat
Shuffl e
Menu
Enter
Cursor
Up/Down
Watching videos on a TV connected to Q
iPod or iPhone
Press and hold the DISPLAY button for more than 2 seconds 1
until “TV OUT ON” appear on display.
Press the ENTER button to start playback.2
Notes:
If the TV Out setting is already turned On at video menu,
O
the video is automatically displayed on the TV screen when
ENTER key is pressed.
To return to watching video on iPod or iPhone screen, press
O
the MENU button to enter video menu. Then press and hold
the DISPLAY button for more than 2 seconds until “TV OUT
OFF” appears.
During iPod or iPhone video playback, pressing the DISPLAY
O
button will not toggle video out display between iPod or iPhone
and TV.
Caution:
Unplug all accessories for the iPod or iPhone before inserting
O
it into the iPod or iPhone dock.
Stop button ( O) at main unit is invalid during iPod or iPhone
function.
unit
____
____
____
____
____
Remote
control
DISPLAY
(TV OUT)
PLAY MODE
MENU
ENTER
PRESET
PRESET
Operation
Press in the pause mode.
Press in the playback mode.
Press in the playback or
pause mode. If you press the
button in the pause mode,
press the
the desired track.
Press and hold down in the
playback mode. Release the
button to resume playback.
iPod back light ON. Press
and hold this button for more
than 2 seconds until “TV
OUT ON” or “TV OUT OFF”
appear to toggle the video
out display between iPod
or TV.
button to start
Press to toggle repeat mode.
Press and hold down to
toggle shuffl e mode.
Press to view the iPod menu
during iPod function.
Press to confi rm the
selection.
Press to select the iPod
menu.
Listening to a CD or MP3/WMA discListening to a CD or MP3/WMA disc
POWER
ON/ STAND-BY
CD
5
4
3
2
1
MINI COMPONENT SYSTEM
CD-DH950P
TIMER
POWER
ON/ STAND-BY
VOL.
VOL.
iPod/iPhone
CD
TUNER
(BAND)
TAPE
TUNING
AUDIO IN
USB
Disc playback Q
Press the ON/STAND-BY button to turn the power on.1
Press the CD button.2
Press the 3 1 button and within 5 seconds, press the OPEN/
CLOSE button to open the disc tray 1.
Place the disc on the disc tray 1, label side up.
4
Press OPEN/CLOSE button to close the disc tray 1. 5
You can place discs on the trays 2 - 5 by following steps 6
3 - 5.
Press the
7 button to start playback.
Notes for CD or MP3/WMA discs:
Track up/track down is possible only within individual discs.
O
When the beginning of the fi rst track is reached during fast
O
reverse, the unit will enter the playback mode.
Rewritable multi-session discs with unfi nished writing, can
O
still be played.
Various disc functions Q
Function
Pause
Track up/
Track
down
Fast
forward/
Fast
reverse
Main
To specify a disc to play Q
You can play a disc by specifying the disc number.
Press one of the
1 1 - 5
buttons to select the desired
disc.
Within 5 seconds, press the 2 (CD ) button.
Playback will begin from track 1 on the chosen disc. O
After the last track on the last disc is played, the unit stops O
automatically.
PRESET
unit
REMOTE
SENSOR
OPEN / CLOSE
5
4
3
2
1
OPEN / CLOSE
Remote
control
ON/STAND-BY
DISPLAY
MENU
(TV OUT)
DISPLAY
CD
TUNER(BAND)
DISPLAY
TAPE
AUDIO IN
USB
X-BASS
BASS/TREBLE
TUNING VOL
5
4
3
2
1
PLAY MODE
FOLDER
PRESET
ENTER
PLAY MODE
PRESET
CLOCK/TIMER
MEMORY
DEMO
DIMMER CLEAR SLEEP
MUTE
Operation
Press in the playback
mode. Press the
button to resume playback
from the paused point.
Press in the playback or
stop mode. If you press the
button in the stop mode,
press the
start the desired track.
button to
Press and hold down in the
playback mode. Release
the button to resume
playback.
Selected disc number
E-7

Listening to a CD or MP3/WMA disc (continued)
Note:
If a disc tray with no disc is selected, playback will not start
and the disc indicator will disappear.
To stop playback: Press the
(CD ) button.
Direct track search Q
By using the numeric buttons, the desired tracks on the
current disc can be played.
Use the numeric buttons on the remote control to select
the desired track while playing the selected disc.
The numeric buttons allow you to select up to number 9. O
When selecting number 10 or higher, use the “+10” button. O
A. For example, to choose 13
1
Press the “+10” button.
Press the “1” and then “3” 2
button.
B. For example, to choose 130
Press the “+10” button twice.
1
Press the “1”, “3” and “0” button.2
Notes:
A track number higher than the number of tracks on the O
disc cannot be selected.
During random play, direct search is not possible. O
Selected track number
Repeat play Q
Repeat play can play all 5 discs, all tracks on a chosen
disc, single track on a chosen disc, or a programmed
sequence continuously.
To repeat one track:
Press the PLAY MODE button once. Press the
To repeat one disc:
Press the PLAY MODE button twice. Press the
) button.
To repeat all tracks on up to 5 discs:
Press the PLAY MODE button 3 times. Press the
) button.
To repeat desired tracks:
Perform steps 1 - 6 in “Programmed play” section on page
8 and then press the PLAY MODE button.
To cancel repeat play:
Press the PLAY MODE button again until “
button.
(CD
(CD
” disappear.
Random play Q
The tracks on the disc(s) can be played in random order
automatically.
To random play all tracks on up to 5 discs:
Press the PLAY MODE button for 2 seconds on the remote
control and then press the
To cancel random play:
Press the PLAY MODE button.
“R” will disappear.
Notes:
If you press the O button during random play, you can
move to the next track by the random operation. On the
other hand, the button does not allow you to move
to the previous track. The beginning of the track being
played will be located.
In random play, the unit will select and play tracks O
automatically. (You cannot select the order of the tracks.)
Caution:
After performing repeat or random play, be sure to press
the (CD ) button. Otherwise, the disc(s) will play
continuously.
(CD ) button.
E-8
Programmed play Q
You can choose up to 32 selections for playback in the
order you like.
While in the stop mode,
1
press the MEMORY button
to enter the programming
save mode.
Press one of the 2 1 - 5 buttons to select the
desired disc.
Press the numeric buttons on the remote control or
3
or button to select the desired track.
Press the MEMORY button to save the track number.
4
Repeat steps 2 - 4 for other tracks. Up to 32 tracks can 5
be programmed. If you want to check the programmed
tracks, press the MEMORY button repeatedly.
If you make a mistake, the programmed tracks can be
cleared by pressing the CLEAR button.
6 (CD ) button to start playback.
Press the
Programmed play (MP3/WMA) Q
While in the stop mode, 1
press the MEMORY
button to enter the
programing save mode.
Press one of the 2 1 - 5 buttons to select the
desired disc.
Press the PRESET
3 ( or ) button on the remote
control to select the desired folder.
Then press the
to select the desired tracks.
Press the MEMORY button to save the folder and
4
track number.
Repeat steps 3 - 4 for other folder/tracks. Up to 32 5
tracks can be programmed.
Press the 6 (CD/USB ) button to start playback.
To cancel the programmed play mode:
During programmed stop mode, press the
button. The display will show “MEM CLEAR” and all the
programmed contents will be cleared.
Adding tracks to the program:
If a program has been previously stored, the “MEMORY”
indicator will be displayed.
Press the MEMORY button. Then follow steps 3 - 4 to add
tracks.
Notes:
When a disc is ejected, the program is automatically O
canceled.
If you press the ON/STAND-BY button to enter the O
stand-by mode or change the function from CD to
another, the programmed selections will be cleared.
During the program operation, random play is not O
possible.
Do not mix CD with MP3/WMA discs during O
programming.
or button on the remote control
(CD )

Listening to USB mass storage device/MP3 player
DISPLAY
DISPLAY
(TV OUT)
DISPLAY
FOLDER
TUNER(BAND)
TUNING VOL
FOLDER
CLOCK/TIMER
DEMO
MUTE
AUDIO IN
X-BASS
BASS/TREBLE
PRESET
ENTER
PRESET
DIMMER CLEAR SLEEP
CD
TUNER
AUDIO IN
USB
USB
Note:
This product is not compatible with MTP and AAC fi le systems
from USB mass storage device or MP3 player.
(BAND)
TAPE
TUNING
AUDIO IN
USB
USB
ON/STAND-BY
MENU
CD
TAPE
USB
PLAY MODE
MEMORY
PRESET
ENTER
PRESET
To play back USB/MP3 player with folder Q
mode off
Press the USB button on main unit to select USB function. 1
Connect the USB memory device that has MP3/WMA format
fi les on the unit. When the USB memory is connected to the
main unit, the device information will be displayed.
2 or
Select desired fi le to be played back by pressing the
button.
Press3 the (USB ) button. Playback will start and the
fi le name will be displayed.
O
Title, Artist and Album name are displayed if they are
recorded in the USB memory device.
Display content can be changed by pressing the DISPLAY
O
button.
Note:
To pause playback:
Press the (USB ) button.
To play back USB/MP3 player with folder Q
mode on
Press the USB button on main unit to select USB function. 1
Connect the USB memory device that has MP3/WMA format
fi les on the unit. When the USB memory is connected to the
main unit, the device information will be displayed.
Press the FOLDER button, and press the PRESET (
2 or )
button to select desired playback folder. To start playback with
folder mode on, go to step 4.
3 or
Select desired fi le to be played back by pressing the
button.
Press the
4 (USB ) button. Playback will start and the
fi le name will be displayed.
Title, Artist and Album name are displayed if they O
are recorded in the USB memory device.
Display content can be changed by pressing the O
DISPLAY button.
To remove USB memory device Q
Press the 1 (USB ) button to stop playback.
2
Disconnect USB memory device from the USB terminal.
Notes:
O
SHARP will not be held liable for the loss of data while the
USB memory device is connected to the audio system.
Files compressed in MP3 and/or WMA format can be played
O
back when connected to the USB terminal.
This USB memory’s format supports FAT 16 or FAT 32.
O
SHARP cannot guarantee that all USB memory devices will
O
work on this audio system.
USB cable is not recommended for use in this audio system
O
to connect to USB memory device. Use of the USB cable will
affect the performance of this audio system.
This USB memory cannot be operated via USB hub.
O
The USB terminal in this unit is not intended for a PC
O
connection but is used for music streaming with a USB
memory device.
External HDD-storage cannot be played back via USB
O
terminal.
If the data inside the USB memory is large, it may take longer
O
time for the data to be read.
This product can play WMA and MP3 fi les. It will automatically
O
detect the fi le type being played. If unplayable fi le is played on
this product, “NO SUPPORT” is indicated and the fi le will be
automatically skipped. This will take a few seconds. If abnormal
indications appear on the display due to the unspecifi ed fi le,
turn off the unit and then turn it on again.
O
This product relates to USB mass storage devices and MP3
players. It may however face some irregularities due to various
unforeseen reasons from some devices. Should this happen,
turn off the unit and then turn it on again.
The USB port is only intended for direct connection to a USB
O
memory device without any cable.
During CD function, MP3 player will not be charging.
O
Advanced USB playback
The following functions are the same as CD operations:
Direct track search ..................................................................8
Repeat play ..............................................................................8
Random play ............................................................................8
Programmed play (MP3/WMA) ................................................8
Note:
If USB memory device is not connected, “NO MEDIA” will be
shown on the display.
Notes:
O
This unit only supports “MPEG-1 Audio Layer-3” format.
(Sampling Frequency is 32, 44.1, 48kHz)
O
Playback order for MP3 fi les may differ depending on the
writing software used during fi le download.
O
Bitrate which is supported by MP3 is 32~320 kbps, WMA is
64~160 kbps.
O
For MP3/WMA fi les, please put “.MP3” “.WMA” extension.
Files cannot be played back if there is no MP3/WMA
extension.
O
Playlists are not supported on this unit.
This unit can display Folder Name or File Name up to 32
O
characters.
O
Maximum total number of MP3/WMA fi les is 65025.
Total number of folders read is 999 including folder with non
O
player fi les. However, the display shows only folder with MP3
fi les.
O
The display playback time may not be displayed correctly
when playing back a variable bitrate fi le.
O
The ID3TAG information supported are TITLE, ARTIST and
ALBUM only. Title name, artist name and album name can
be displayed by pressing the DISPLAY button during fi le
playback or pause mode.
O
WMA meta tag also supports title, artist and album name
which are recorded in WMA fi les. Copyright protected WMA
fi les cannot be played back.
E-9
Page

Listening to the radio
OPEN / CLOSE
TUNER
(BAND)
TAPE
TUNING
Tuning Q
Press the ON/STAND-BY button to turn the power on.1
Press the TUNER (BAND) button repeatedly to select 2
the desired frequency band (FM or AM).
3 or ) button to tune in to the
Press the TUNING (
desired station.
Manual tuning:
Press the TUNING (
required to tune in to the desired station.
Auto tuning:
When the TUNING (
than 0.5 seconds, scanning will start automatically
and the tuner will stop at the fi rst receivable broadcast
station.
Notes:
When radio interference occurs, auto scan tuning may O
stop automatically at that point.
Auto scan tuning will skip weak signal stations. O
To stop the auto tuning, press the TUNING ( O
button again.
To receive an FM stereo transmission:
Press the TUNER (BAND) button to display the “ST” O
indicator.
“ O
” will appear when an FM broadcast is in stereo.
If the FM reception is weak, press the TUNER (BAND) O
button to extinguish the “ST” indicator. The reception
changes to monaural, and the sound becomes
clearer.
5
4
3
2
1
TIMER
POWER
ON/ STAND-BY
iPod/iPhone
CD
TUNER
(BAND)
TAPE
TUNING
AUDIO IN
USB
TUNER(BAND)
TUNING
PRESET
MINI COMPONENT SYSTEM
CD-DH950P
REMOTE
SENSOR
OPEN / CLOSE
VOL.
VOL.
5
4
3
PRESET
2
1
PRESET
DISPLAY
(TV OUT)
DISPLAY
TUNER(BAND)
AUDIO IN
X-BASS
BASS/TREBLE
TUNING VOL
FOLDER
PRESET
ENTER
PRESET
CLOCK/TIMER
DEMO
DIMMER CLEAR SLEEP
MUTE
ON/STAND-BY
MENU
CD
TAPE
USB
PLAY MODE
MEMORY
TAPE
MEMORY
PRESET
or ) button as many times as
or ) button is pressed for more
or )
Memorizing a station Q
You can store 40 AM and FM stations in memory and
recall them at the push of a button. (Preset tuning)
1
Perform steps 1 - 3 in “Tuning”.
Press the MEMORY 2
button to enter the
preset tuning saving
mode.
3 or ) button
Within 30 seconds, press the PRESET (
to select the preset channel number. Store the stations
in memory, in order, starting with preset channel 1.
4
Within 30 seconds, press the MEMORY button to
store that station in memory. If the “MEMORY” and
preset number indicators disappear before the station
is memorized, repeat the operation from step 2.
5
Repeat steps 1 - 4 to set other stations, or to change
a preset station. When a new station is stored in the
memory, the station previously memorized for that
preset channel number will be erased.
Note:
The backup function protects the memorized stations for a
few hours should there be a power failure or the AC power
cord become disconnected.
To recall a memorized station Q
Press the PRESET ( or ) button for less than 0.5
seconds to select the desired station.
To scan the preset stations Q
The stations saved in the memory can be scanned
automatically. (Preset memory scan)
1 or ) button for more than
Press the PRESET (
0.5 seconds. The preset number will fl ash and the
programmed stations will be tuned in sequentially, for
5 seconds each.
2 or ) button again when the
Press the PRESET (
desired station is located.
To erase entire preset memory Q
Press the ON/STAND-BY button to enter the stand-by 1
mode.
2
While pressing down the OPEN / CLOSE button and
TUNING button, press the TUNER (BAND) button
until “TUNER CLEAR” appears.
OPEN / CLOSE
TUNING
TAPE
TUNER
(BAND)
E-10

Listening to a cassette tape
O
Before playback:
For playback, use normal or low-noise O
tapes for the best sound. (Metal or
2
tapes are not recommended.)
CrO
Do not use C-120 tapes or poor-quality O
tapes, as they may cause malfunctions.
Before loading a tape into the cassette compartment, O
tighten the slack with a pen or a pencil.
Tape playback Q
Press the ON/STAND-BY button to turn the power on.1
Open the cassette compartment 2
by pushing the area marked “ ”.
Load a cassette into the 3
TAPE compartment with
the side to be played facing
toward you.
4
Press the TAPE / TUNER
button repeatedly to select
TAPE.
Press the 5 (TAPE ) button to start playback.
Various tape functions Q
Function
Main
unit
Stop
Fast
forward/
rewind
Caution:
Before remove the cassette or changing from one tape O
operation to another, press the
If a power failure occurs during tape operation, the O
tape head will remain engaged with the tape and the
cassette door will not open. In this case, wait until the
power is restored.
Remote
control
TAPE
Cleaning the tape-handling parts Q
Dirty heads, capstans or pinch rollers can cause poor O
sound and tape jams. Clean these parts with a cotton
swab moistened with commercial head/pinch roller
cleaner or isopropyl alcohol.
When cleaning the heads, pinch rollers, etc., unplug O
the unit which contains high voltages.
A Playback head
B Capstan
C Pinch roller
After long use, the deck’s heads and capstans may O
become magnetized, causing poor sound. Demagnetize
these parts once every 30 hours of playing/recording
time by using a commercial tape head demagnetizer.
Read the demagnetizer’s instructions carefully before
use.
TAPE 1
VOL.
iPod/iPhone
CD
R
TUNE
(BAND)
E
TAP
TUNING
AUDIO IN
USB
Operation
Press in the
playback, fast
forward or fast
rewind mode.
Press in the
playback or stop
mode.
(TAPE ) button.
B
A
Setting the clock (Remote control only)
In this example, the clock is set for the 12-hour (AM 12:00)
display.
1
Press the ON/STAND-BY button to turn the power on.
Press the CLOCK/TIMER button.2
Within 10 seconds, press the MEMORY button.3
Press the 4 or button to select 12-hour or
24-hour display and then press the MEMORY button.
“AM 12:00”
“AM 0:00
VOL.
5
4
3
2
PRESET
1
“0:00”
Press the 5 or button to adjust the hour and
The 12-hour display will appear.
(AM 12:00 - PM 11:59)
”
The 12-hour display will appear.
(AM 0:00 - PM 11:59)
The 24-hour display will appear.
(0:00 - 23:59)
then press the MEMORY button.
6 or button to adjust the minutes
Press the
and then press the MEMORY button.
Press the
time by 1 minute. Hold it down to change the time in
or button once to advance the
5-minutes intervals.
To confi rm the time display:
Press the CLOCK/TIMER button. The time display will
appear for about 10 seconds.
Note:
The “CLOCK” will appear or time will fl ash to confi rm the
time display when the AC power supply is restored after a
power failure or unplugging the unit. If incorrect, readjust
the clock as follows.
To readjust the clock:
Perform “Setting the clock” from step 1. If “CLOCK” does
not appear in step 3, step 4 (for selecting the 12-hour or
24-hour display) will be skipped.
To change the 12-hour or 24-hour display:
1
Clear all the programmed contents. [Refer to “Factory
reset, clearing all memory” on page 14 for details.]
2
Perform “Setting the clock” from step 1 onwards.
Timer and sleep operation (Remote control only)
Once timer:
Once timer play works for one time only at a preset time.
Daily timer:
Daily timer play works at the same preset time every day.
For example, set the timer as a wake-up call every
morning.
Using the once timer and daily timer in combination:
For example, use the once timer to listen to a radio
program, and use the daily timer to wake up.
C
E-11

Timer and sleep operation (Remote control only) (continued)
1 minute or more
Once timerDaily timer
Start Stop Start Stop
Timer playback Q
Before setting timer:
Check that the clock is set to the correct time. If it is 1
not set, you cannot use the timer function.
For timer playback: Plug in USB, dock iPod/iPhone, 2
load discs or tape to be played.
Press the ON/STAND-BY button to turn the power on.1
Press and hold the CLOCK/TIMER button.2
Within 10 seconds, press the 3 or button
to select “ONCE” or “DAILY”, and press the MEMORY
button. Set the clock to the correct time if “ONCE” or
“DAILY” does not appear.
Within 10 seconds, press the
4 or button to select
“ONCE SET” or “DAILY SET”, and press the MEMORY
button.
5 or button and then
To adjust the hour, press the
press the MEMORY button.
To adjust the minutes, press the
6 or button and
then press the MEMORY button.
Set the time to fi nish as in steps 5 and 6 above.
7
To select the timer playback source (CD, TUNER, USB, 8
iPhone/iPod, TAPE or AUDIO IN), press the or
button. Press the MEMORY button.
When you select the tuner, select a station by pressing
the
or button, and then press the MEMORY
button. If a station has not been programmed, “NO
PRESET” will be displayed and timer setting will be
canceled.
Adjust the volume using the VOLUME control, and then
9
press the MEMORY button. Do not turn the volume up
too high.
10
Press the ON/STAND-BY button to enter the power
stand-by mode. The “TIMER” indicator lights up and
the unit is ready for timer playback.
5
4
3
2
1
MINI COMPONENT SYSTEM
CD-DH950P
TIMER
POWER
ON/ STAND-BY
VOL.
iPod/iPhone
CD
TUNER
(BAND)
TAPE
TUNING
AUDIO IN
USB
When the preset time is reached, playback will start. 11
The volume will increase gradually until it reaches the
preset volume. The “” or “DAILY” indicator will blink
during timer playback.
12
When the timer end time is reached, the system will
enter the power stand-by mode automatically.
Once timer:
The timer will be canceled.
Daily timer:
The timer operates at the same time every day. It
will continue until the daily timer setting is canceled.
Cancel the daily timer when it is not in use.
REMOTE
SENSOR
OPEN / CLOSE
VOL.
5
4
3
PRESET
2
1
Notes:
When performing timer playback using another unit O
connected to the USB terminal or AUDIO IN jack,
select “USB” or “AUDIO IN” in step 8.
This unit will turn on or enter the power stand-by mode O
automatically. However, the connected unit will not
turn on or off. To stop the timer playback, follow step
“Canceling the timer setting” of this page.
Checking the timer setting:
Turn the power on and press and hold down the
1
CLOCK/TIMER button.
Within 10 seconds, press the 2 or button to select
“ONCE” or “DAILY”, and press the MEMORY button.
Within 10 seconds, press the 3 or button to
select “ONCE CALL” or “DAILY CALL”, and press the
MEMORY button.
Canceling the timer setting:
Turn the power on and press and hold down the
1
CLOCK/TIMER button.
Within 10 seconds, press the 2 or button to select
“ONCE” or “DAILY”, and press the MEMORY button.
Within 10 seconds, press the 3 or button to select
“ONCE OFF” or “DAILY OFF”, and press the MEMORY
button. Timer will be canceled (the setting will not be
canceled).
Reusing the memorized timer setting:
The timer setting will be memorized once it is entered. To
reuse the same setting, perform the following operations.
Turn the power on and press and hold down the
1
CLOCK/TIMER button.
Within 10 seconds, press the 2 or button to select
“ONCE” or “DAILY”, and press the MEMORY button.
Within 10 seconds, press the 3 or button to select
“ONCE ON” or “DAILY ON”, and press the MEMORY
button.
Press the ON/STAND-BY button to enter the power 4
stand-by mode.
Sleep operation Q
The iPod, Audio In, radio, CD, MP3/WMA disc, USB and
cassette tape can all be turned off automatically.
1
Play back the desired sound source.
Press the SLEEP button.2
Within 10 seconds, press the SLEEP button repeatedly 3
to select the time and then press the MEMORY
button.
4
“SLEEP” will appear.
The unit will enter the power stand-by mode 5
automatically after the preset time has elapsed. The
volume will be turned down 1 minute before the sleep
operation fi nishes.
To confi rm the remaining sleep time:
1
While “SLEEP” is indicated, press the SLEEP button.
To cancel the sleep operation:
Press the ON/STAND-BY button while “SLEEP” is
indicated. To cancel the sleep operation without setting the
unit to the stand-by mode, proceed as follows.
1
While “SLEEP” is indicated, press the SLEEP button.
Within 10 seconds, press the SLEEP button repeatedly 2
to select “SLEEP OFF” and then press the MEMORY
button.
10
20 30 ....... 80 90
E-12
Timer and sleep operation (Remote
control only) (continued)
To use timer and sleep operation together Q
Sleep and timer playback:
For example, you can fall asleep listening to the radio and
wake up to CD in the next morning.
Set the sleep time (see above, steps 1 - 5).
1
While the sleep timer is set, set the timer playback 2
(steps 2 - 10, page 12).
Sleep timer
setting
Timer playback
setting
Sleep operation will
automatically stop
End time
Desired time10 - 90 minutes
Timer playback
start time
Enhancing your system
The connection cord is not included. Purchase a
commercially available cord as shown below.
Portable audio
player, etc.
5
4
3
2
1
To the
line
output
jack
MINI COMPONENT SYSTEM
CD-DH950P
TIMER
POWER
ON/ STAND-BY
VOL.
iPod/iPhone
CD
TUNER
(BAND)
TAPE
TUNING
AUDIO IN
USB
PHONES
AUDIO IN
USB
REMOTE
SENSOR
OPEN / CLOSE
VOL.
PRESET
Audio cable (not supplied)
Listening to the playback sounds of Q
portable audio player, etc.
Connect a portable audio player etc. to the front AUDIO 1
IN jack.
2
Press the ON/STAND-BY button to turn the power on.
Press the AUDIO IN/USB button repeatedly to select 3
AUDIO IN.
4
Play the connected equipment.
If volume level of the connected device is too high,
sound distortion may occur. Should this happen, lower
the volume of the connected device.
If volume level is too low, increase the volume of the
connected device.
Note:
To prevent noise interference, place the unit away from the
television.
Headphones Q
Before plugging in or unplugging the headphones, O
reduce the volume.
Be sure your headphones have a 1/8" (3.5 mm) diameter O
plug and impedance between 16 and 50 ohms. The
recommended impedance is 32 ohms.
Plugging in the headphones disconnects the speakers O
automatically. Adjust the volume using the VOLUME
control.
PHONES
5
4
3
2
AUDIO IN
1
E-13
Troubleshooting chart
Many potential problems can be resolved by the owner
without calling a service technician. If something is wrong
with this product, check the following before calling your
authorized SHARP dealer or service center.
General Q
Symptom Possible cause
The clock is not set O
to the correct time.
When a button is O
pressed, the unit
does not respond.
No sound is heard. O Is the volume level set to “0”? O
CD player Q
Symptom Possible cause
Playback does not O
start.
Playback stops in O
the middle or is not
performed properly.
Playback sounds O
are skipped, or
stopped in the
middle of a track.
“ER-CD21” O
appears on the
display.
Cassette deck Q
Symptom Possible cause
Sound skipping. O
Cannot hear treble. O
Sound fl uctuation. O
Cannot remove the O
tape.
Did a power failure occur? O
Reset the clock. (Refer page
11)
Set the unit to the power O
stand-by mode and then turn
it back on.
If the unit still malfunctions, O
reset it. (Refer page 14)
Are the headphones O
connected?
Are the speaker wires O
disconnected?
Is the disc loaded upside O
down?
Does the disc satisfy the O
standards?
Is the disc distorted or O
scratched?
Is the unit located near O
excessive vibrations?
Is the disc very dirty? O
Has condensation formed O
inside the unit?
Is the disc tray stopped with O
force? Set the unit to the
power stand-by mode and
then turn it back on.
Is there any slack? O
Is the tape stretched? O
Are the capstans, pinch O
rollers, or heads dirty?
If a power failure occurs O
during playback, the heads
remain engaged with the
tape. Do not open the
compartment with great
force.

Troubleshooting chart (continued)
Remote control Q
Symptom Possible cause
The remote control O
does not operate.
Tuner Q
Symptom Possible cause
The radio makes O
unusual noises
continuously.
iPod and iPhone Q
Symptom Possible cause
No sound is O
produced.
No image
appears on the
TV/monitor.
iPod or iPhone O
will not charge.
“This accessory O
is not made
to work with
iPhone” or
similar, appears
on iPhone
screen.
Is the AC power cord of the O
unit plugged in?
Is the battery polarity correct? O
Is the battery dead? O
Is the distance or angle O
incorrect?
Does the remote control O
sensor receive strong light?
Is the unit placed near the TV O
or computer?
Is the FM antenna or AM loop O
antenna placed properly?
Move the antenna away from
the AC power cord if it is
located nearby.
The iPod or iPhone is not O
playing.
The iPod or iPhone is not O
properly connected to the
unit.
Is the AC power cord of the O
unit plugged in?
The video cable is not O
properly connected.
The TV/monitor’s input O
selection is not properly set.
The iPod TV out feature has O
not been set to output video.
The iPod or iPhone is not O
making full contact with the
connector.
The iPod or iPhone is not O
supported.
Refer to page 6 for O
compatible models.
The iPhone battery is low. O
Please charge the iPhone.
iPhone is not properly O
docked.
If problem occurs Q
When this product is subjected to strong external
interference (mechanical shock, excessive static electricity,
abnormal supply voltage due to lightning, etc.) or if it is
operated incorrectly, it may malfunction.
If such a problem occurs, do the following:
1
Set the unit to the stand-by mode and turn the power
on again.
If the unit is not restored in the previous operation,
2
unplug and plug in the unit again, and then turn the
power on.
Note:
If neither operation above restores the unit, clear all the
memory by resetting it.
Factory reset, clearing all memory Q
Press the ON/STAND-BY button to enter the power 1
stand-by mode.
While pressing down the OPEN/CLOSE button and
2
the button, press the CD button until “CLEAR ALL”
appears.
OPEN / CLOSE
Caution:
This operation will erase all data stored in memory including
clock, timer settings, tuner preset, and CD program.
CD
Condensation Q
Sudden temperature changes, storage or operation in an
extremely humid environment may cause condensation
inside the cabinet (CD pickup, tape heads, etc.) or on the
transmitter on the remote control. Condensation can cause
the unit to malfunction. If this happens, leave the power on
with no disc (or cassette) in the unit until normal playback
is possible (about 1 hour). Wipe off any condensation on
the transmitter with a soft cloth before operating the unit.
Before transporting the unit Q
Remove the iPhone/iPod, USB memory device and disc
from the unit. Then, set the unit to the power stand-by mode.
Carrying the unit with iPhone/iPod or USB memory device
left docked or discs left inside might damage the unit.
Maintenance
Cleaning the cabinet Q
Periodically wipe the cabinet with a soft cloth and a diluted
soap solution, then with a dry cloth.
Caution:
Do not use chemicals for cleaning (gasoline, paint thinner, O
etc.). It may damage the cabinet.
Do not apply oil to the inside of the unit. It may cause O
malfunctions.
Cleaning the CD pickup lens Q
In order to ensure proper operation of the CD player,
preventative maintenance (cleaning of the laser pickup
lens) should be performed periodically. Lens cleaners are
commercially available. Contact your local CD software
dealer for options.
E-14

Specifi cations
As part of our policy of continuous improvement, SHARP reserves
the right to make design and specifi cation changes for product
improvement without prior notice. The performance specifi cation
fi gures indicated are nominal values of production units. There
may be some deviations from these values in individual units.
General Q
Power source
Power consumption
Dimensions
Weight
Amplifi er Q
Output power
Output terminals
Input terminals
Tuner Q
Frequency range
CD player Q
Type
Signal readout
D/A converter
Frequency response
Dynamic range
AC 120 V ~ 60 Hz
70 W
Width: 10 - 1/4" (260 mm)
Height: 13 - 9/16" (344 mm)
Depth: 13 - 19/32" (345 mm)
10.8 lbs. (4.9 kg)
RMS: Total 240 W (120 W per
channel into 6 ohms at
1 kHz, 10% Total harmonic
distortion.)
FTC: 85 W minimum RMS per
channel into 6 ohms from
200 Hz to 20 kHz, 10%
Total harmonic distortion.
Front Speakers: 6 ohms
Headphones: 16 - 50 ohms
(recommended: 32 ohms)
Video output : 1 Vp-p
Audio In (audio signal):
500 mV/47 k ohms
FM: 87.5 - 108.0 MHz
AM: 530 - 1,710 kHz
5-disc multi-play compact disc
player
Non-contact, 3-beam
semiconductor laser pickup
1-bit D/A converter
20 - 20,000 Hz
90 dB (1 kHz)
USB Q
USB host interface
Support fi le
Bitrate support
Other
File system support
Speaker Q
Type
Maximum input power
Rated input power
Impedance
Dimensions
Weight
Complies with USB 1.1 (Full
Speed)/2.0 Mass Storage Class.
Support Bulk only and CBI
protocol.
MPEG 1 Layer 3
WMA (Non DRM)
MP3 (32 ~ 320 kbps)
WMA (64 ~ 160 kbps)
Maximum total number of MP3/
WMA fi les is 65025.
Maximum total number of folders is
999 INCLUSIVE of root directory.
The ID3TAG information supported
are TITLE, ARTIST and ALBUM
only.
Supports ID3TAG version 1 and
version 2.
Support USB devices with
Microsoft Windows/DOS/FAT 12/
FAT 16/ FAT 32.
2 kbyte block length for sector.
2-way type speaker system
2” (5 cm) tweeter
5 - 1/8” (13 cm) woofer
240 W
120 W
6 ohms
Width: 8 - 11/16" (220 mm)
Height: 13 - 1/16" (332 mm)
Depth: 8 - 3/4" (222 mm)
6.8 lbs. (3.1 kg) / each
Cassette deck Q
Frequency response
Signal/noise ratio
Wow and fl utter
Tape speed
Heads
50 - 14,000 Hz (normal tape)
50 dB (playback)
0.35% (WRMS)
4.76 cm/sec. (1 - 7/8 ips)
Playback
E-15
 Loading...