

Page 1
AR-PB2
[5] Printer Driver Configuration
1. PCL5E Printer Driver
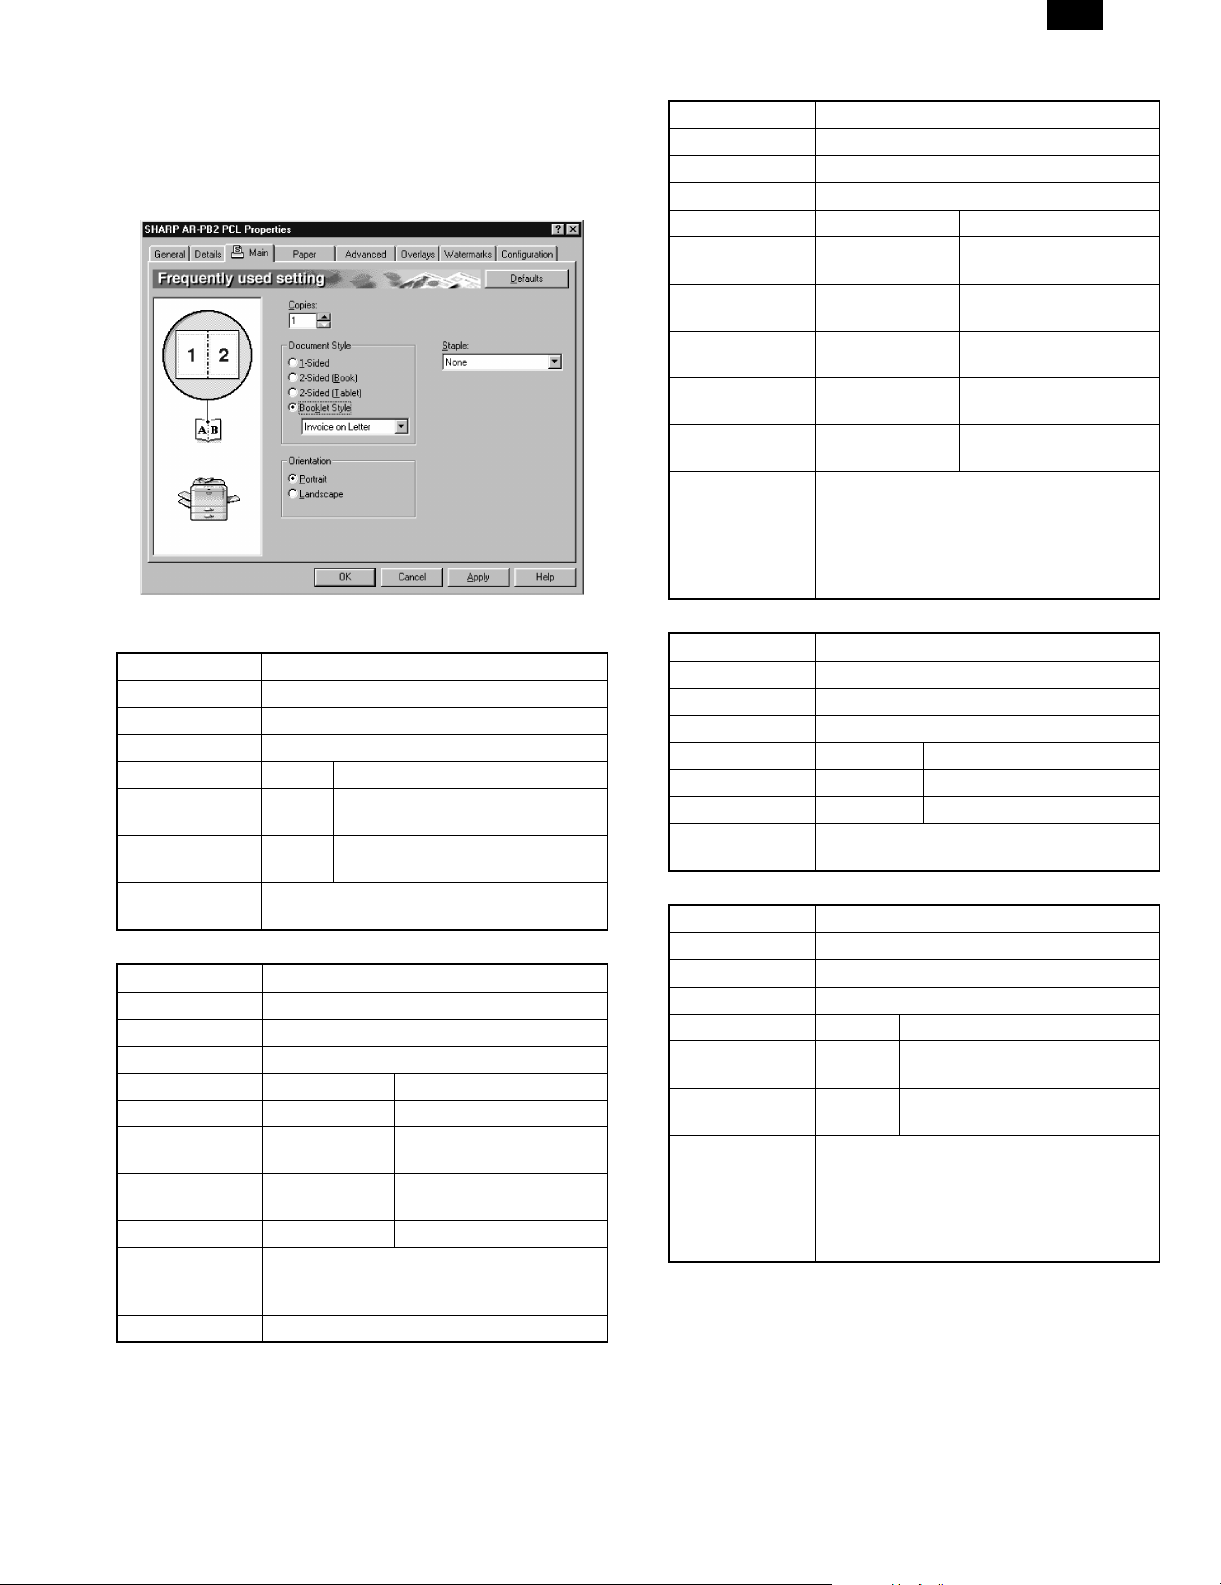
[Main] Tab
1) Setting the Number of Copies
Function name Setting the number of copies
Tab Main
Name Copies
Control Spin box
Display Function
Minimum value* 1 The number of copies will be set to
1.
Maximum value 999 The number of copies will be set to
999.
Operation The number of copies will be set.
The default value is 1.
2) Setting Duplex Print Function
Function name Setting Duplex print function
Tab Main
Name Document Style
Control List box
Display Function
Value* 1-Sided Simplex print
Value 2-Sided(Book) Duplex print of Book
binding
Value 2-Sided(Tablet) Duplex print of Tablet
binding
Value Booklet Booklet print
Operation Duplex print function will be set. At the time of
Booklet printing, the list box for setting paper
size will be displayed.
Remarks For Booklet print.
3) Setting Paper Size of Booklet Function
Function name Setting paper size of Booklet function
Tab Main
Name
Control List box
Display Function
Value* Invoice on Letter The 4-page original will
be printed on a Letter.
Value Letter on Ledger The 4-page original will
be printed on a Ledger.
Value A4 on A3 The 4-page original will
be printed on an A3.
Value A5 on A4 The 4-page original will
be printed on an A4.
Value B5 on B4 The 4-page original will
be printed on an B4.
Operation When booklet style is selected in Duplex
Print Function. This item is displayed.
The paper size of Booklet function will be set.
If this function is selected, Booklet on Letter,
etc will be displayed in the paper size column
of an application program.
4) Selecting Print Orientation
Function name Selecting print orientation
Tab Main
Name Orientation
Control Radio button
Display Function
Value* Portrait Portrait printing.
Value Landscape Landscape printing.
Operation The operation of paper at the time of printing
will be selected.
5) Setting Staple Function
Function name Setting Staple function
Tab Main
Name Stapling
Control List box
Value* None Stapling will not be executed.
Value 1Staple Stapling will be executed at 1
place.
Value 2Staple Stapling will be executed at 2
places.
Operation The number of Stapling will be set.
The stapling position will be determined by
setting the number of stapling.
This function will be displayed if Finisher that
has these functions is connected. And it
becomes possible to set this function.
5 – 1
Page 2
AR-PB2
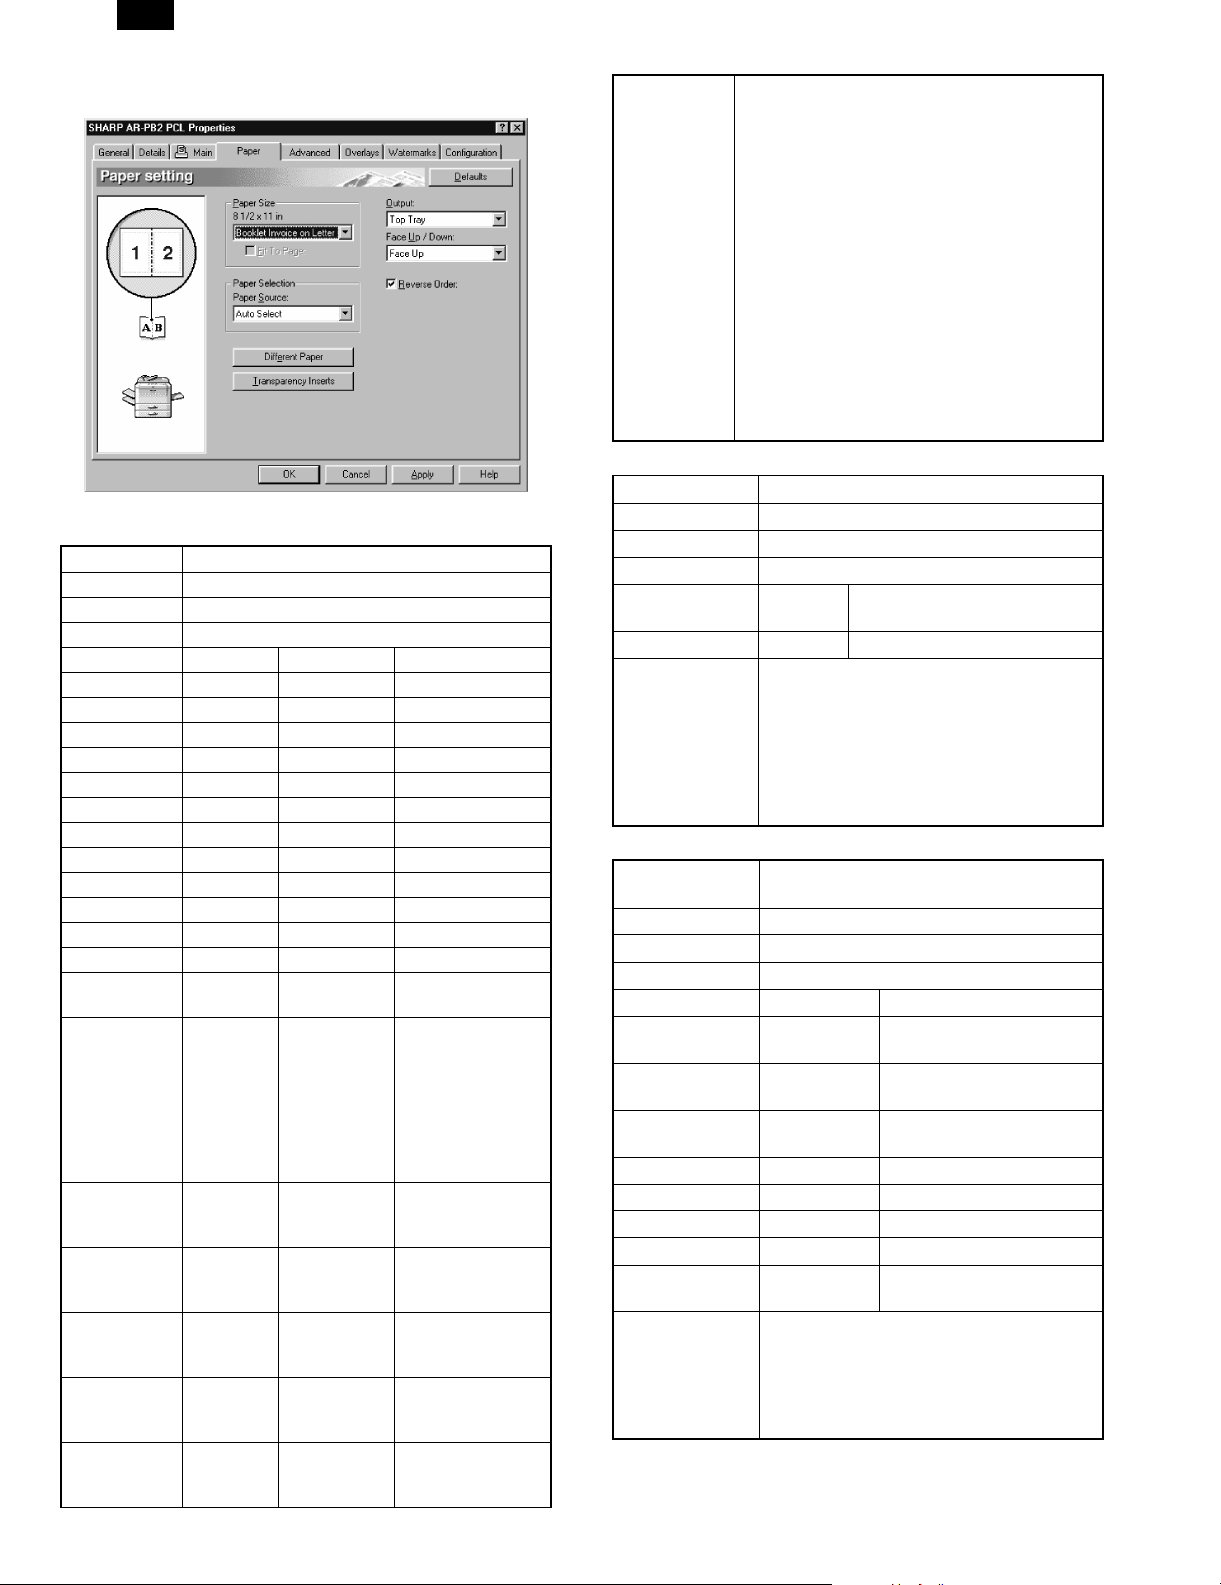
Paper Tab
1) Setting Paper Size to be used for Print
Function name Setting paper size to be used for print.
Tab Paper
Name(note2) Paper Size
Control List box
Display 1 Display 2 Contents
Value* Letter 8 1/2 × 11 Selecting Letter
Value Legal 8 1/2 × 14 Selecting Legal
Value Ledger 11 × 17 Selecting Ledger
Value Executive 7 1/4 × 10 1/2 Selecting Executive
Value Invoice 5 1/2 × 8 1/2 Selecting Invoice
Value Foolscap 8 1/2 × 13 Selecting Foolscap
Value A4 210 × 297 mm Selecting JIS A4
Value A3 297 × 420 mm Selecting JIS A3
Value A5 148 × 210 mm Selecting JIS A5
Value A6 105 × 148 mm Selecting JIS A6
Value B4 257 × 364 mm Selecting JIS B4
Value B5 182 × 257 mm Selecting JIS B5
Value Japanese
Post Card
Value Custom
Paper Size
Value(note1) Booklet
Invoice on
Letter
Value(note1) Booklet
Letter on
Ledger
Value(note1) Booklet A4
on A3
Value(note1) Booklet A5
on A4
Value(note1) Booklet B5
on B4
100 × 148 mm Selecting Japanese
Post Card
Selecting
User-defined paper
size When Custom
Paper Size is
selected, the
display of
"millimeters" will be
default.
8 1/2 × 11 The 4-page original
will be printed on a
Letter size paper.
11 × 17 The 4-page original
will be printed on a
Ledger size paper.
297 × 420 mm The 4-page original
will be printed on an
A3 size paper.
210 × 297 mm The 4-page original
will be printed on an
A4 size paper.
257 × 364 mm The 4-page original
will be printed on an
B4 size paper.
Operation The paper size to be used for printing will be
selected by the name of paper. In the List box,
the name of paper will be displayed with the
contents of the Display 1 column. At the above of
the List box, the paper size will be displayed with
the contents of the Display 2.
If user-defined size paper is selected, the dialog
box to set the actual paper size will be displayed.
If Fit to Page function is selected, this paper size
will be the intended paper size. For the size of
each paper, print area, etc.
For printer driver, Portrait and Landscape will not
be differentiated.
Note 1 When the booklet function is selected in
"Duplex Print function, only these paper sizes are
appeared. And the value is corresponded to
designated value in "Setting Paper Size of Booklet
Function.
2) Fit to Page Function
Function name Fit to Page function
Tab Paper
Name Fit to Paper Size
Control Check box
Value* No Check Fit to Page function will not be
used.
Value Check Fit to Page function will be used.
Operation If this checkbox is checked, Fit to Page
function will be executed. Fit to Page function
is to enlarge/reduce the original to be printed
according to the paper size to be printed. The
paper size is selected in "Setting Paper Size
to be used for Print".
Note 2 if this function is selected, "Physical
Paper Size" will be displayed in this position.
3) Setting Paper Input Tray to be used for Printing
Function name Setting Paper Input Tray to be used for
printing
Tab Paper
Name Paper Source
Control List box
Display Contents
Value* Auto Select Paper Input Tray will be
automatically selected.
Value Bypass Tray Manual Feed Paper Input
Tray will be selected.
Value Bypass
Tray(manual)
Value Tray 1 Tray 1 will be selected.
Value Tray 2 Tray 2 will be selected.
Value Tray 3 Tray 3 will be selected.
Value Tray 4 Tray 4 will be selected.
Value Large
Capacity Tray
Operation Paper to be used for printing will be selected
by the name of Paper Input Tray.
In the List box, the name of Paper Input Tray
will be displayed with the contents of Display.
If the intended Paper Input Tray is not
installed, the value will not be displayed.
Manual Feed Paper Input
Tray(Wait) will be Selected.
A Large Capacity Tray will
be selected.
5 – 2
Page 3
AR-PB2
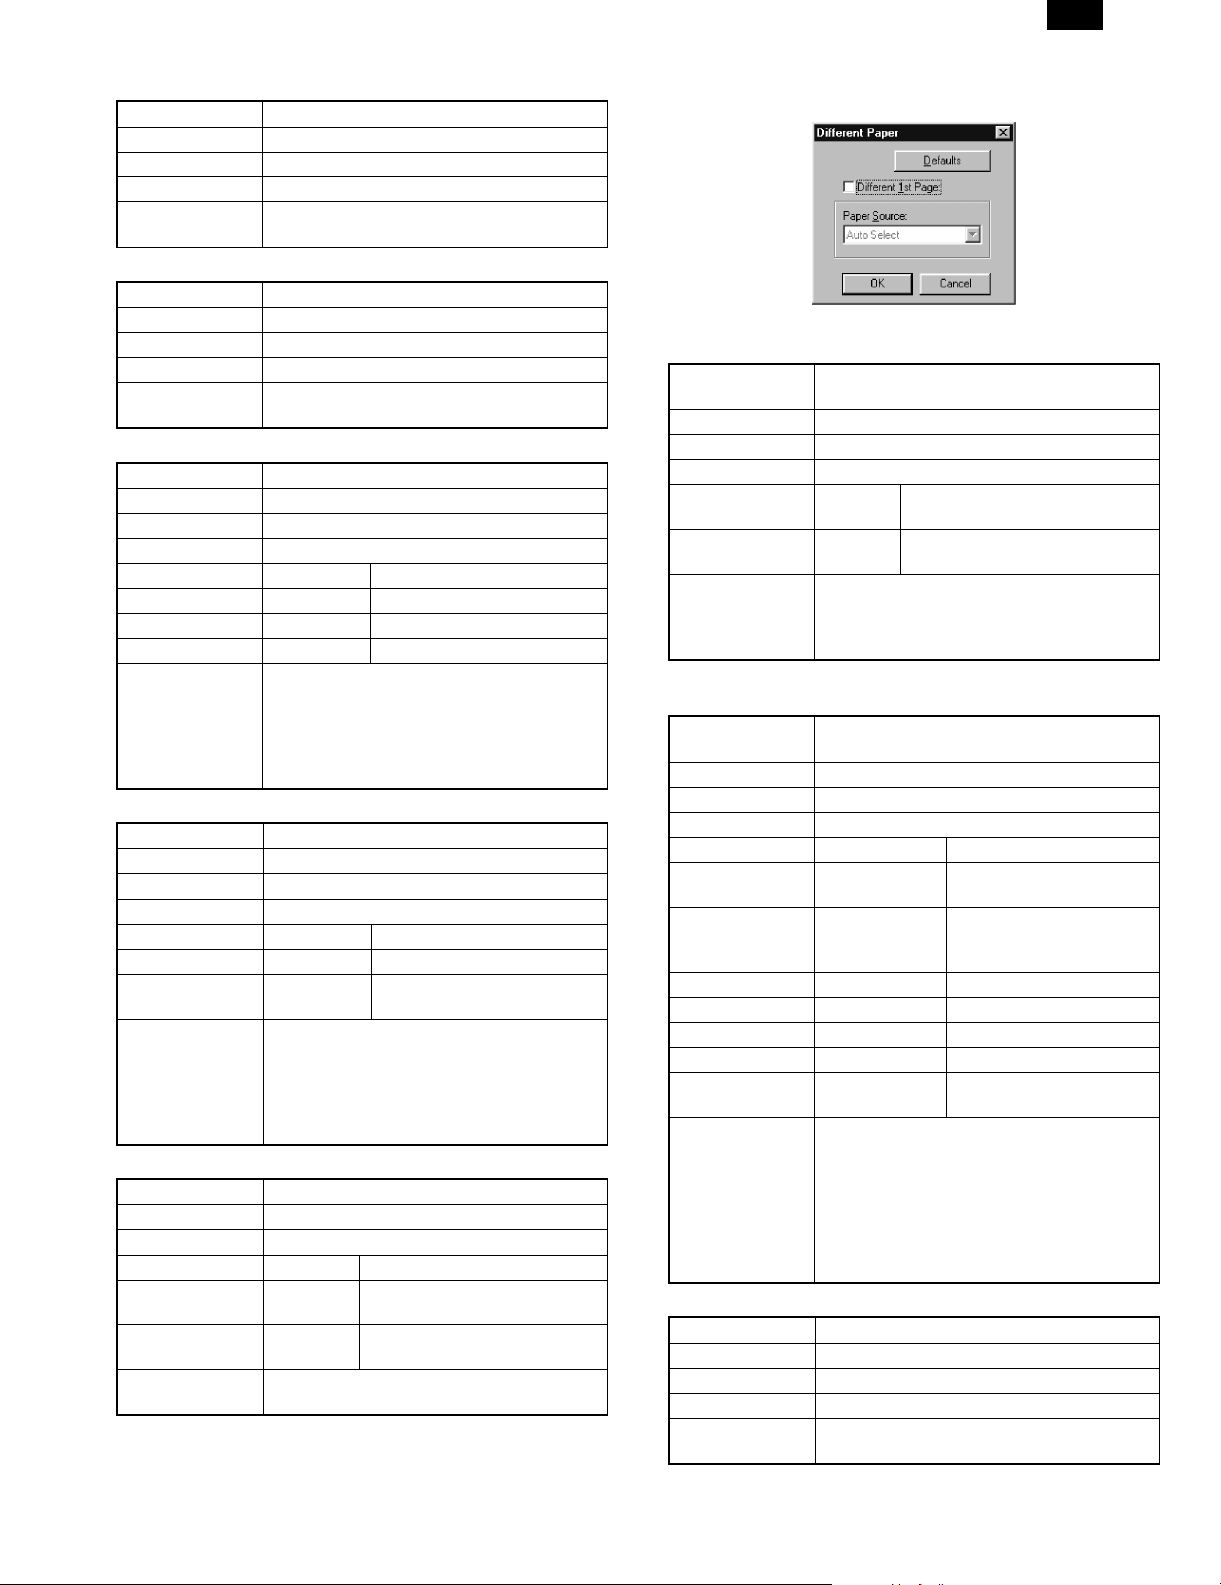
4) Starting the Selection of Different Paper
Function name Starting the selection of Different Paper
Tab Paper
Name Different Paper
Control Button
Operation If this button is pressed, Different Paper
dialog box will be displayed.
5) Starting the Selection of Transparency Inserts
Function name Starting the selection of Transparency Inserts
Tab Paper
Name Transparency Inserts
Control Button
Operation If this button is pressed, Interleave dialog box
will be displayed.
6) Selecting Paper Output Tray
Function name Selecting Paper Output Tray
Tab Paper
Name Output
Control List box
Display Contents
Value* Top Tray Output to Top Tray
Value Second Tray Output to Second Tray.
Value Offset Tray Output to Offset Tray.
Operation Paper Output Tray to be used for outputting
the print result will be selected by the name.
In the List box, the name of Paper Output
Tray will be displayed with the contents of
Display. If the intended Paper Output Tray is
not installed, the value will not be displayed.
7) Setting the way to Output Paper
Function name Setting the way to output paper
Tab Paper
Name Face Up/Down
Control List box
Display Contents
Value* Face Up Paper will be output Face Up.
Value Face Down Paper will be output Face
Down.
Operation The way to output the printed paper will be
selected.
In the List box, that will be displayed with the
contents of Display column.
If the intended way to output paper is not
supported, the value will not be displayed.
8) Setting Paper Output Order of Print Job
Function name Setting Output Order of Print Job
Tab Paper
Name Reverse Order
Control Check box
Value No check The paper output of Print Job
will be normal order.
Value* Check The paper output of Print Job
will be reverse order.
Operation The paper output order of Print Job will be
selected.
Different Paper
1) Checked/Unchecked the Setting of Different Paper
Function name Checked/Unchecked the setting of Different
Paper
Dialog Different Paper dialog box
Name Different 1st Page
Control Check box
Value* No check Setting of Different Paper is
checked.
Value Check Setting of Different Paper is
unchecked.
Operation If this checkbox is checked, the setting of
2) Setting Paper Input Tray to be Used for Printing
Different Paper
Function name Setting Paper Input Tray to be used for
Dialog Different Paper dialog box
Name Paper Source
Control List box
Value* Bypass Tray Manual Feed Paper Input
Value Bypass
Value Tray 1 Tray1 will be selected.
Value Tray 2 Tray2 will be selected.
Value Tray 3 Tray3 will be selected.
Value Tray 4 Tray4 will be selected.
Value Large Capacity
Operation The paper to be used for printing the front
3) Selecting Paper for Different Paper Print
Function name Selecting paper for Different Paper print
Dialog Different Paper dialog box
Name OK
Control Button
Operation If this button is pressed, the dialog box will be
Different Paper will be activated and the
specific Paper Input Tray can be selected
only for the 1st page of print Job.
printing Different Paper
Display Contents
Tray will be selected.
Tray(manual)
Tray
cover will be selected by the name of Paper
Input Tray.
In the List box, the name of Paper Input Tray
will be displayed with the contents of the
Display column.
If the intended Paper Input Tray is not
installed, the value will not be displayed.
closed with the setting contents enabled.
Manual Feed Paper Input
Tray (Wait) will be
selected.
Large Capacity Tray will
be selected.
5 – 3
Page 4
AR-PB2
4) Selecting Paper for Different Paper Print
Function name Selecting paper for Different Paper print
Dialog Different Paper dialog box
Name Cancel
Control Button
Operation If this button is pressed, the dialog box will be
closed with the setting contents disabled.
5) Selecting Paper for Different Paper Print
Function name Selecting paper for Different Paper print
Dialog Different Paper dialog box
Name Defaults
Control Button
Operation If this button is pressed, all the setting
contents of the dialog box will be returned to
the default value.
Transparency Inserts Dialog Box
1) Setting Paper for Interleave Print
Function Name Setting paper for interleave print
Dialog Transparency Inserts dialog box
Name Transparency Inserts
Control Check box
Value* No check No paper setting for Interleave
Print
Value Check Paper setting for Interleave Print
Operation If this checkbox is checked, the setting of
Interleave print will be activated and it
becomes possible to set paper for each page
of Print Job.
And, this is checked,
"If this "Check box" is checked, Paper Source
in the Paper tab will be forced and fixed to
"Bypass Tray (manual)".
2) Selection of Interleave page print state
Function name Selection of Interleave page state
Dialog Transparency Inserts dialog box
Name
Control Radio button
Display Function
Value* Printed Interleave page will be printed.
Value Blank Interleave print will not be printed.
Operation With this radio button, it is specified whether
to print Interleave page or to remain blank.
3) Setting Paper Input Tray to be used for Interleave Print
Function name Setting Paper Input Tray to be used for
Dialog Transparency Inserts dialog box
Name Paper Source
Control List box
Value* Tray 1 Tray 1 will be selected.
Value Tray 2 Tray 2 will be selected.
Value Tray 3 Tray 3 will be selected.
Value Tray 4 Tray 4 will be selected.
Value Large
Operation The paper to be used for Interleave Print will
Interleave Print
Display Contents
A large volume paper feed
Capacity Tray
be selected by the name of Paper Input Tray.
In list box, the name of Paper Input Tray will
be displayed with the contents of Display.
If the Paper Input Tray is not installed, the
value will not be displayed.
tray will be selected.
4) Closing Dialog Box with the setting contents enabled
Function name Closing Dialog Box with the setting contents
Dialog Transparency Inserts dialog box
Name OK
Control Button
Operation If this button is pressed, the dialog box will be
enabled
closed with the setting contents enabled.
5) Closing Dialog Box with the setting contents disabled
Function name Closing Dialog Box with the setting contents
Dialog Transparency Inserts dialog box
Name Cancel
Control Button
Operation If this button is pressed, the dialog box will be
disabled.
closed with the setting contents disabled.
6) Initialization of the contents of Dialog Box
Function name Initialization of the contents of Dialog Box
Dialog Transparency Inserts dialog box
Name Defaults
Control Button
Operation If this button is pressed, all the setting
contents of Dialog Box will be returned to the
default value.
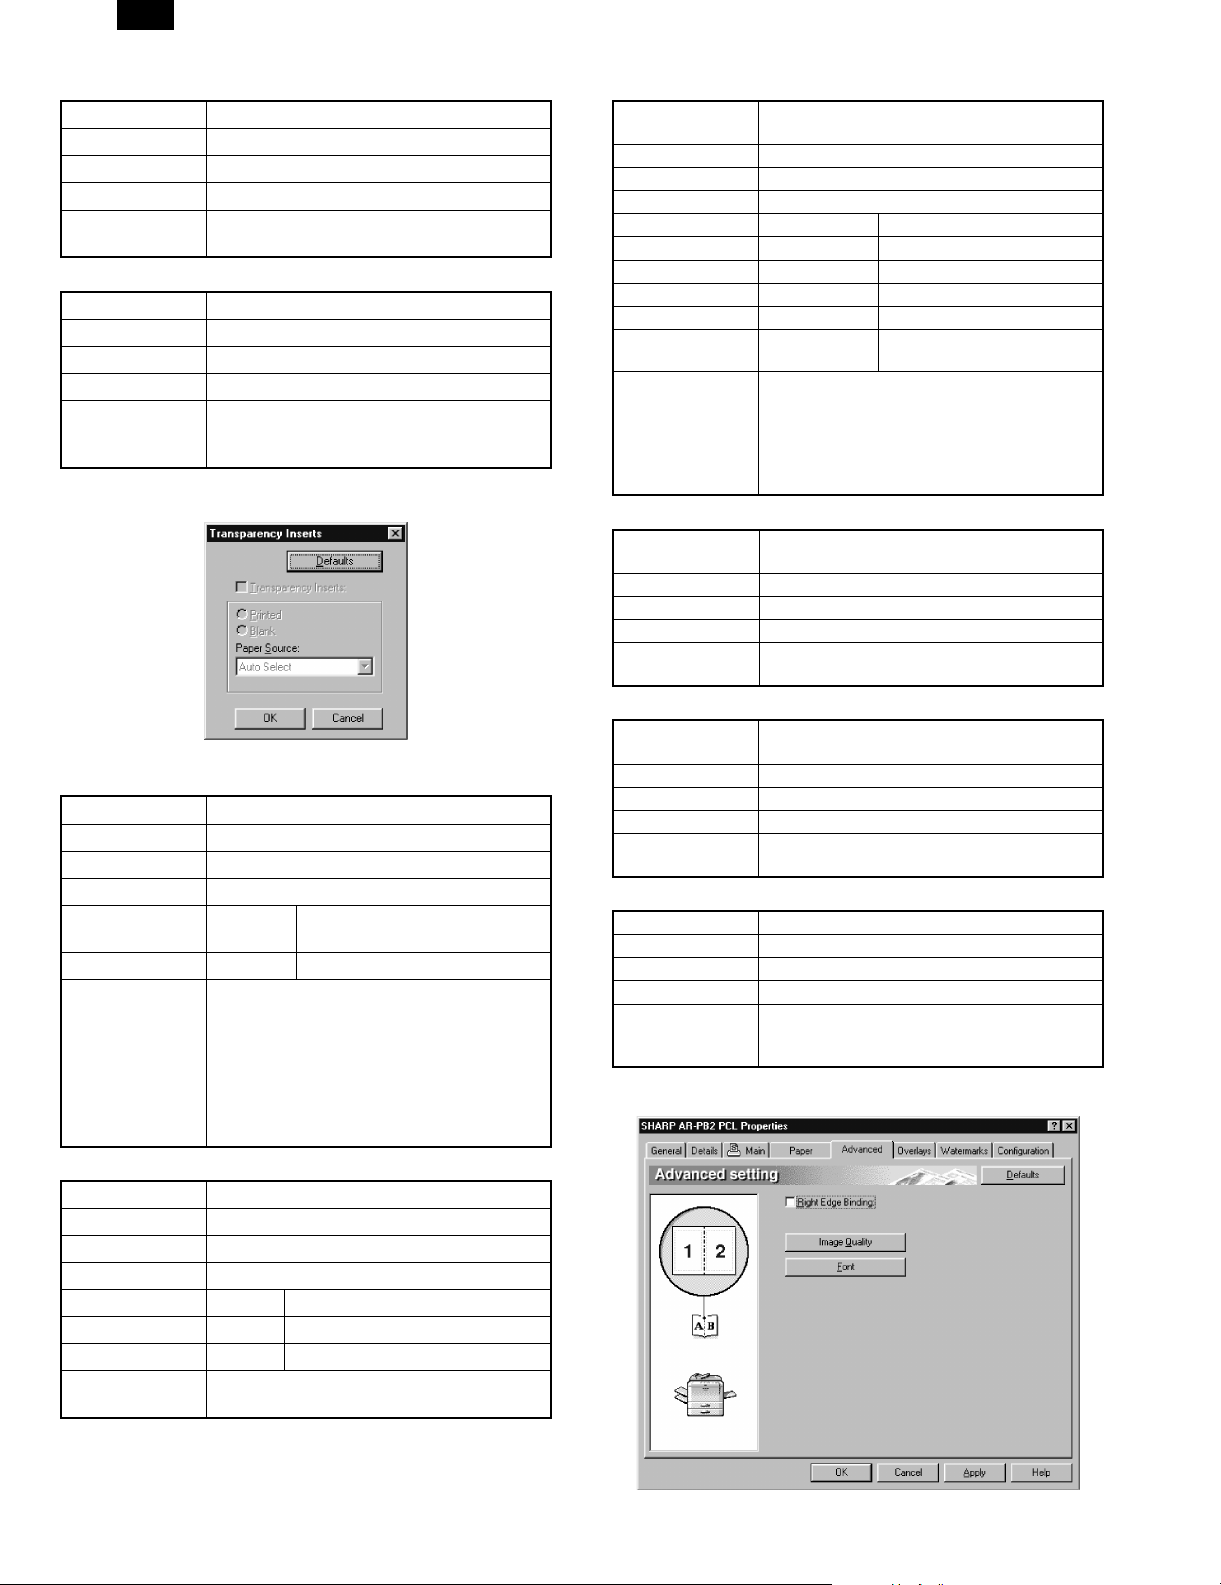
[Advanced] Tab
5 – 4
Page 5
AR-PB2
1) Binding Edge Setting
Function name Binding Edge Setting
Tab Advanced
Name Right Edge Binding
Control Check box
Value* No check Right Edge Binding
Value Check Left Edge Binding
Operation The binding edge will be selected.
2) Starting Image Quality Dialog Box
Function name Start Image Quality Dialog Box
Tab Advanced
Name Image Quality
Control Button
Operation If this button is pressed, Image Quality Dialog
Box will be displayed.
3) Starting Font Dialog Box
Function name Starting Font Dialog Box
Tab Advanced
Name Font
Control Button
Operation If this button is pressed, Font Dialog Box will
be pressed.
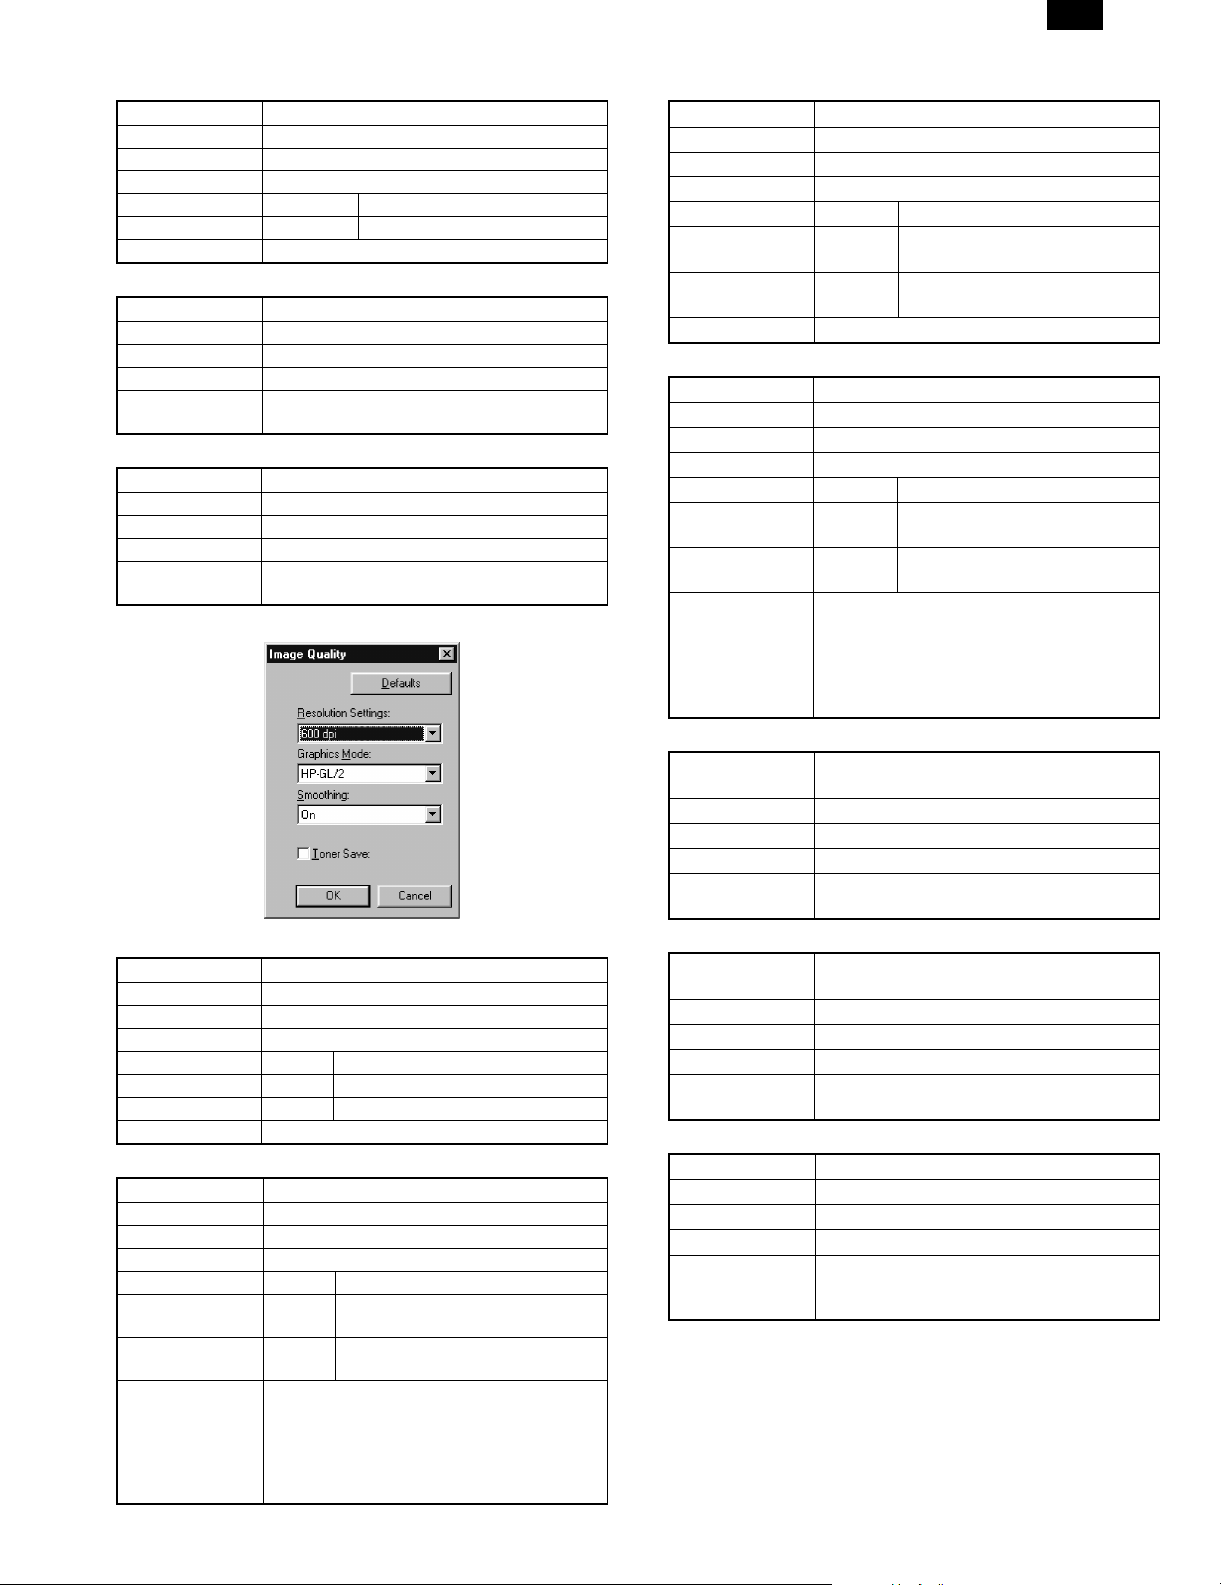
[Image Quality] Dialog box
1) Setting Print Resolution
Function name Setting print resolution
Dialog Image Quality Dialog Box
Name Resolution Settings
Control List box
Display Contents
Value* 600DPI With 600DPI, printed.
Value 300DPI With 300DPI, printed.
Operation Print resolution will be set.
2) Setting whether to execute or stop Smoothing
Function name Setting whether to execute or stop Smoothing
Dialog Image Quality Dialog Box
Name Smoothing
Control List box
Display Contents
Value* On Smoothing function will be
executed.
Value Off Smoothing function will not be
executed.
Operation Whether to execute or stop Smoothing will be
selected.
Depending on a machine, this function is not
implemented. In this case, if [Smoothing]
checkbox of [Configuration] tab is OFF, this
item will not be displayed.
3) Setting the Graphics Print Method
Function name Setting the Graphics Print Method
Dialog Image Quality Dialog Box
Name Graphics Mode
Control List box
Display Contents
Value* Raster Raster Graphics will be used to
print.
Value HP-GL/2 HP-GL/2 command will be used
to print.
Operation The Graphics print method will be set.
4) Use of Toner Save function
Function name Use of Toner Save function
Dialog Image Quality Dialog Box
Name Toner Save
Control Check
Display Contents
Value* No
check
Value Check Toner Save function will not be
Operation Whether to use Toner Save function or not
will be selected.
Depending on a machine, this function is not
implemented. In this case, if [Smoothing]
checkbox of [Configuration] tab is OFF, this
item will not be displayed.
Toner Save function will not be
used.
used.
5) Closing Dialog Box with the setting contents enabled
Function name Closing Dialog Box with the setting contents
enabled
Dialog Image Quality Dialog Box
Name OK
Control Button
Operation If this button is pressed, the dialog box will be
closed with the setting contents enabled.
6) Closing Dialog Box with the setting contents disabled
Function name Closing Dialog Box with the setting contents
disabled
Dialog Image Quality Dialog Box
Name Cancel
Control Button
Operation If this button is pressed, the dialog box will be
closed with the setting contents disabled.
7) Initialization of the contents of Dialog Box
Function name Initialization of the contents of Dialog Box
Dialog Image Quality Dialog Box
Name Defaults
Control Button
Operation If this button is pressed, all the setting
contents of Dialog Box will be returned to the
default value.
5 – 5
Page 6
AR-PB2
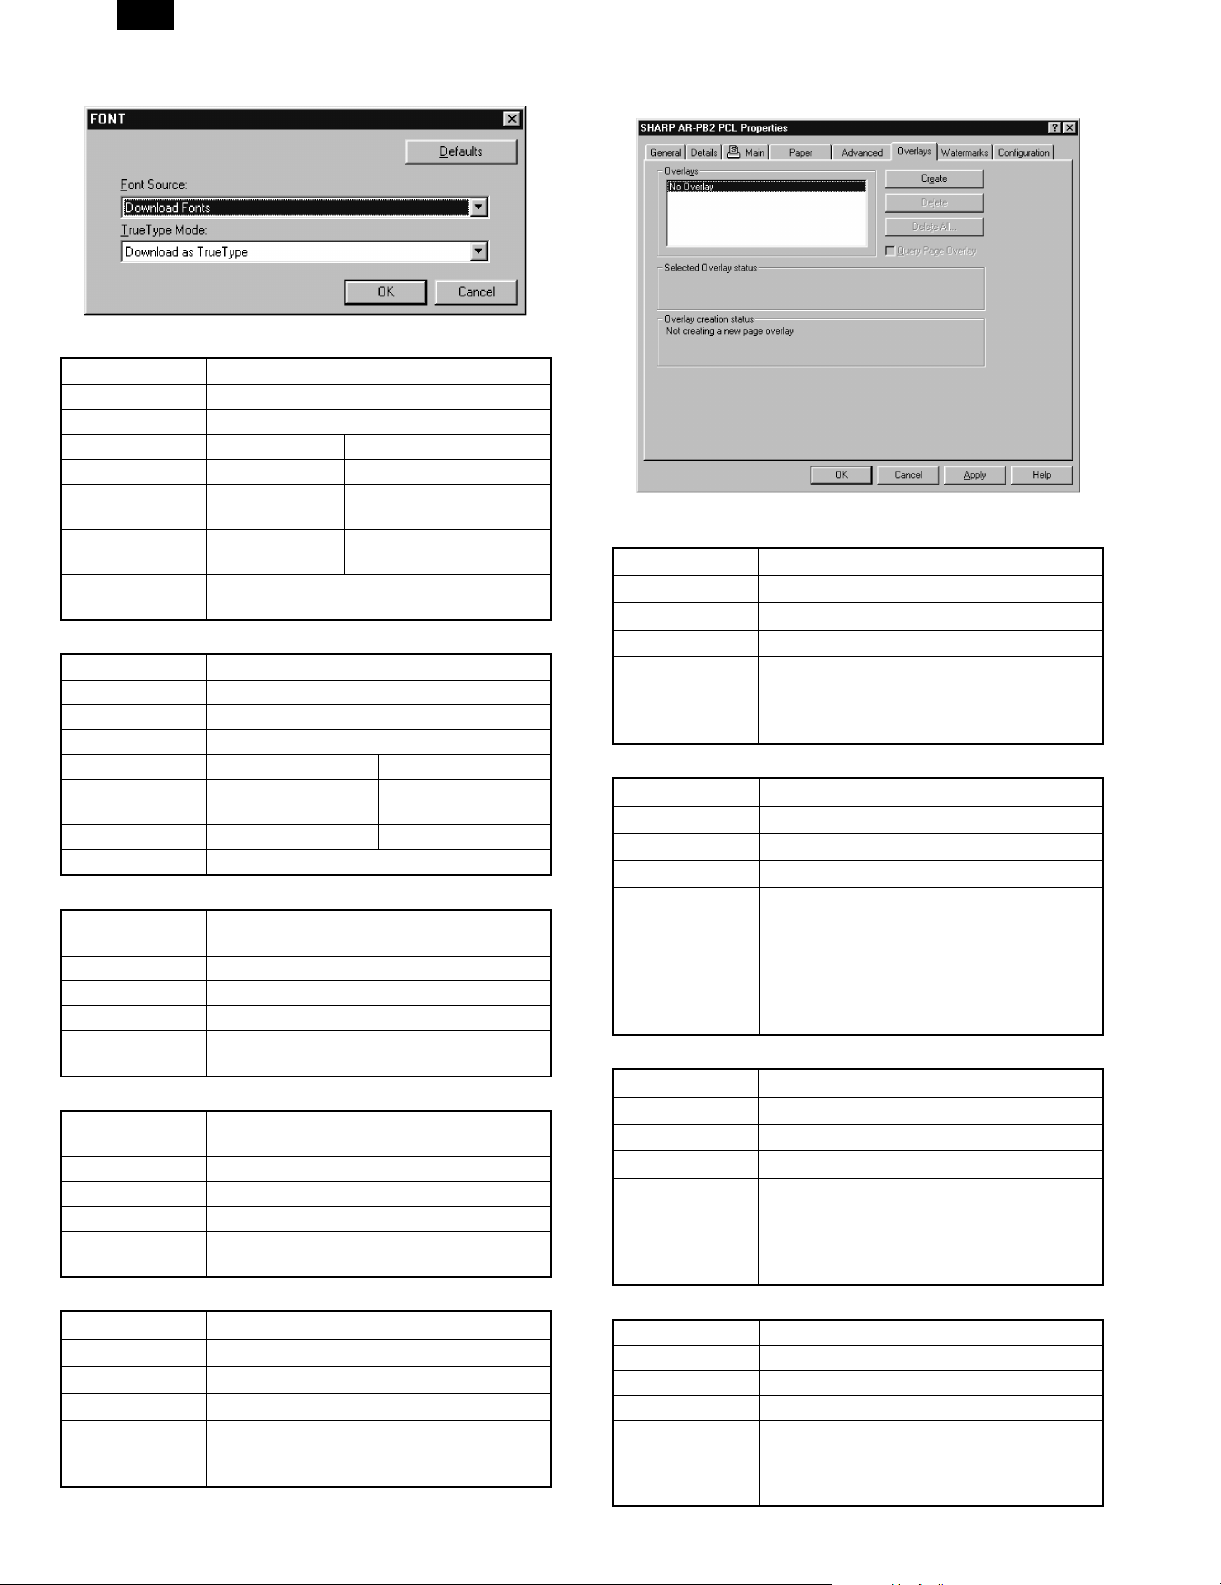
Font Dialog Box
1) Setting the position of a font to be used
Function name Setting the position of a font to be used
Dialog Font Dialog Box
Name Font Source
Control List box
Display Contents
Value* Resident Fonts The fonts built in a printer
will be used.
Value Download Fonts All fonts will be
downloaded.
Operation The place to store a font to be used for
printing will be selected.
2) Setting the TrueType font print method
Function name Setting the TrueType font print method
Dialog Font Dialog Box
Name TrueType Mode
Control List box
Display Contents
Value* Download as
TrueType
Value Download as Bitmap Print as Bitmap
Operation TrueType font print method will be selected.
3) Closing Dialog Box with the setting contents enabled
Function name Closing Dialog Box with the setting contents
enabled
Dialog Font Dialog Box
Name OK
Control Button
Operation If this button is pressed, the dialog box will be
closed with the setting contents enabled.
4) Closing Dialog Box with the setting contents disabled
Function name Closing Dialog Box with the setting contents
disabled
Dialog Font Dialog Box
Name Cancel
Control Button
Operation If this button is pressed, the dialog box will be
closed with the setting contents disabled.
5) Initialization of the contents of Dialog Box
Function name Initialization of the contents of Dialog Box
Dialog Font Dialog Box
Name Defaults
Control Button
Operation If this button is pressed, all the setting
contents of Dialog Box will be returned to the
default value.
Download as font
Overlays Tab
1) Displaying Overlays File
Function name Displaying Overlays File
Dialog Overlays
Name Overlays
Control Frame
Operation Overlays files registered within this frame will
be displayed.
One of them is selected and displayed with
reversed.
2) Creating Overlays File
Function name Creating Overlays File
Dialog Overlays
Name Create
Control Button
Operation If this button is pressed, Select file dialog box
to create Overlays file will be displayed.
In the dialog box, the file of extension "ovp"
can be created as Overlays data file.
Then the next Print Job after closing the
dialog box will be written in the Overlays file
created.
3) Deleting Overlays file
Function name Deleting Overlays File
Dialog Overlays
Name Delete
Control Button
Operation If this button is pressed, the dialog box to
confirm if you are sure to want to delete the
Overlays file currently selected. If [OK] is
pressed, the Overlays file selected at this
point will be deleted.
4) Deleting All Overlays File
Function name Deleting All Overlays File
Dialog Overlays
Name Delete All
Control Button
Operation If this button is pressed, the dialog box to
confirm if you are sure to want to delete all
the Overlays file. If [OK] is pressed, all the
Overlays file will be deleted
5 – 6
Page 7
AR-PB2
5) Query whether to use Overlays file
Function name Query whether to use Overlays file
Dialog Overlays
Name Query Page Overlay
Control Check box
Value* No check Always Overlays will be
executed.
Value Check Whether to execute Overlays
will be queried.
Operation If this checkbox is checked, every time
printing is executed, the query is made
whether to execute Overlays.
6) Displaying the selected Overlays File
Function name Displaying Overlays file selected
Dialog Overlays
Name Selected Overlay Status
Control Frame
Operation The state of the selected Overlays file will be
displayed within this frame.
The file name including full path and macro
ID will be included there.
7) Displaying the Status of Creating Overlays File
Function name Displaying the status of creating Overlays file
Dialog Overlays
Name Overlay Creation Status
Control Frame
Operation The condition of creating Overlays file will be
displayed within this frame.
If it is in the middle of creation, that it is being
created will be displayed.
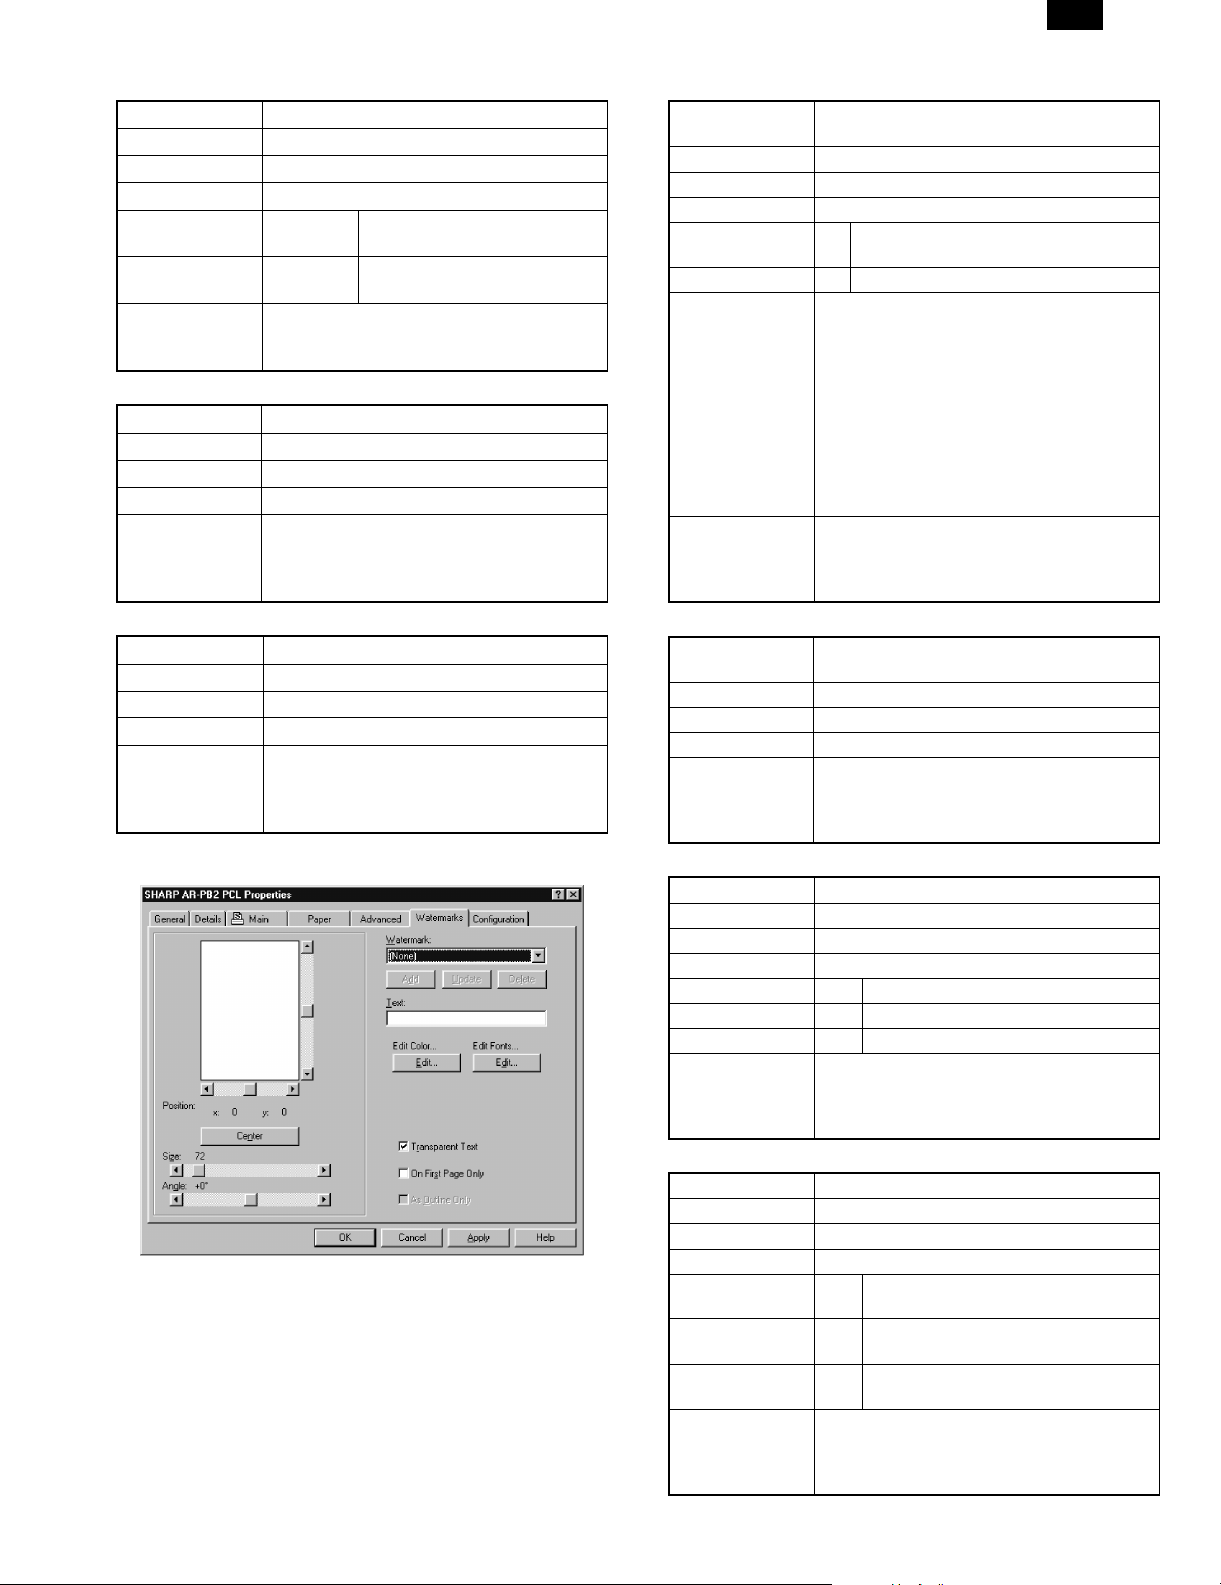
[WaterMark] tab
1) Selecting the print position of WaterMark strings
Function name Selecting the print position of WaterMark
strings
Tab WaterMark
Name Position x y
Control Slide bar
Default value(X)* 0 Printed at the center of horizontal
direction
Default value(Y)* 0 Printed at the center of vertical direction
Operation This item specifies the print position of
WaterMark strings.
The print position will be determined by using
the slide bar for horizontal direction (x) and
vertical direction (y) respectively.
For each direction, the print position will be
determined.
As to the value displayed, the center is 0 and
the left edge or upper edge is the minimum
value of –200 while right edge or lower edge
is the maximum value of 200.
Remarks The paper is surrounded by 2 slid bars when
displayed.
The paper size and the print orientation at
this point are not included in the display.
2) Returning the print position of WaterMark to center
Function name Returning the print position of WaterMark
strings to the center
Tab WaterMark
Name Center
Control Button
Operation This item set the print position of WaterMark
strings to the center.
If this button is pressed, for both directions,
the print position will return to 0.
3) Selecting t he si ze of characters of WaterMark strings
Function name Selecting the size of characters of WaterMark
Tab WaterMark
Name Size
Control Slide bar
Minimum value 6 6 point characters will be used.
Maximum value 900 900 point characters will be used.
Default value* 72 72 point characters will be used.
Operation This item specifies the size of characters of
WaterMark strings in the units of point. This
value and the font size selected in the item of
font selection will be associated.
4) Selecting the print angle of WaterMark strings
Function name Selecting the print angle of WaterMark strings
Tab WaterMark
Name Angle
Control Slide bar
Minimum value –90 Turning 90 words counterclockwise
from a horizontal position.
Maximum value +90 Turning 90 words clockwise from a
horizontal position.
Default value* 0 Printing WaterMark strings on a
horizontal position.
Operation This item selects the angle to turn WaterMark
strings.
The strings will be turned with the center a
reference point.
5 – 7
Page 8

AR-PB2
5) Selecting WaterMark strings
Function name Selecting WaterMark strings
Tab WaterMark
Name Watermark:
Control List box
Value* (none) No Watermark
Value TOP SECRET Strings TOP SECRET will
be used for Watermark.
Value CONFIDENTIAL Strings CONFIDENTIAL
will be used for
Watermark.
Value DRAFT Strings DRAFT will be
used for Watermark.
Value ORIGINAL Strings ORIGINAL will be
used for Watermark.
Value COPY Strings COPY will be
used for Watermark.
Operation This item selects the strings to be used for
WaterMark print. The above values are set at
the time of shipment. The values will be
added/deleted by pressing [Add]/[Update]
buttons. The strings to be used for
WaterMark print will be displayed in the
values.
6) Adding WaterMark strings
Function name Adding WaterMark strings
Tab Watermarks
Name Add
Control Button
Operation This item adds new WaterMark strings.
If this button is pressed, the contents of the
Watermarks tab at this pint will be added.
7) Updating WaterMark Strings
Function name Updating WaterMark strings
Tab Watermarks
Name Update
Control Button
Operation This item updates the contents of WaterMark
strings.
If this button is pressed, the contents of the
Watermarks tab at this point will be replaced
by the strings specified in " Selecting
WaterMark strings".
8) Deleting WaterMark Strings
Function name Deleting WaterMark strings
Tab Watermarks
Name Delete
Control Button
Operation This item deletes the contents of WaterMark
strings.
If this button is pressed, the contents of the
Watermarks tab at this point will be deleted.
9) Editing WaterMark Strings
Function name Editing WaterMark strings
Tab Watermarks
Name Text
Control Edit box
Operation This item edits the contents of WaterMark
strings.
With this Edit box, the strings to be used for
WaterMark print can be edited.
The shortest string is 0 character. The
longest string is 100 characters.
10) Setting Color of WaterMark Strings
Function name Setting the color of WaterMark strings
Tab Watermarks
Name Edit Color...
Control Button
Operation This item selects the color of WaterMark
strings.
If this button is pressed, the Windows
Common Dialog Box to specify colors will be
displayed and the color specified there will be
the color of WaterMark strings.
Although AR-PB2 is a monochrome printer, it
is possible to specify colors. What affects the
actual print is the specification of the
brightness of the color by the slider control at
the right end of the dialog box.
11) Setting of Font of WaterMark Strings
Function name Setting of font of WaterMark Strings
Tab Watermarks
Name Edit Fonts...
Control Button
Operation This item selects the font of WaterMark
strings.
If this button is pressed, the Windows
Common Dialog Box to specify the font will
be displayed and the font specified there will
be the font of WaterMark strings.
12) Watermark Print with Transparency and Overwriting
Function name Watermark print with transparency and
overwriting
Tab Watermarks
Name Transparent Text
Control Check box
Display Contents
Value No check Watermark print with
transparency
Value* Check Watermark print with overwriting
Operation This item specifies whether Watermark print
with transparency or with overwriting. If print
with transparency is selected, Watermark
print becomes transparent and an original
can be read.
13) Selecting Page to Execute Watermark Print
Function name Selecting the page to execute Watermark
print
Tab Watermarks
Name On First Page Only
Control Check box
Display Contents
Value* No check Watermark print will be executed
for all pages.
Value Check Watermark print will be executed
for only the 1st page.
Operation This item specifies whether to do Watermark
print for all pages or only for the 1st page of
each Print JOB.
5 – 8
Page 9

AR-PB2
[Configuration] Tab
1) Setting Option Tray Connection
Function name Setting Option Tray Connection
Tab Configuration
Name Input Tray Options
Control Radio button
Display Function
Value* (None) Option Tray is not connected.
Value 1 Tray Desk 1 Tray Desk is connected.
Value 2 Tray Desk 2 Tray Desk is connected.
Operation The Option Tray connected will be set.
2) Setting Large Capacity Tray Connection
Function name Setting Large Capacity Tray Connection
Tab Configuration
Name Large Capacity Tray
Control Check box
Display Contents
Value* No check Large Capacity Tray is not
connected.
Value Check Large Capacity Tray is
connected.
Value This item is used for setting the connection of
Large Capacity Tray.
3) Setting Duplex Unit
Function name Setting Duplex Unit
Tab Configuration
Name Duplex Unit
Control Check box
Display Contents
Value* No check Duplex unit is not built in.
Value Check Duplex unit is built in.
Operation This item is used for setting the built-in status
of Duplex Unit.
4) Setting Extended Imaging Feature
Function name Setting Extended Imaging Feature
Tab Configuration
Name Extended Imaging Feature
Control Check box
Display Contents
Value* No check Smoothing function cannot be
used.
Value Check Smoothing function can be used.
Operation This item is used for setting the status of
Smoothing function.
5) Selecting Finisher
Function name Selecting Finisher
Tab Configuration
Name Output Tray Options:
Control List box
Display Contents
Value* (none) No finisher
Value 2 Tray Finisher Connected to 2 Tray
Finisher
Value 3 Tray Finisher Connected to 3 Tray
Finisher
Operation This item is used for selecting Finisher
connected.
6) Setting Installed RAM Capacity
Function name Setting Installed RAM Capacity
Tab Configuration
Name Installed RAM:
Control List box
Display Contents
Value* 16MB RAM 16MB RAM is installed.
Value 32MB RAM 32MB RAM is installed.
Value 48MB RAM 48MB RAM is installed.
Value 64MB RAM 64MB RAM is installed.
Value 80MB RAM 80MB RAM is installed.
Operation This item is used for setting the Installed
RAM capacity.
7) Displaying About Dialog Box
Function name Displaying About dialog box
Tab Configuration
Name About
Control Button
Operation If this button is pressed, About dialog box
including the copyright of the printer driver,
etc. will be displayed. The contents are as
follows:
5 – 9
Page 10

AR-PB2
2. PostScript Printer Driver (Windows)
[Main] Tab
1) Setting the Number of Copies
Function name Setting the number of copies
Tab Main
Name Copies
Control Spin box
Display Function
Minimum value* 1 The number of copies will be set to
Maximum value 999 The number of copies will be set to
Operation The number of copies will be set.
The default value is 1.
2) Setting Duplex Print Function
Function name Setting Duplex print function
Tab Main
Name Document Style
Control List box
Value* 1-Sided Simplex print
Value 2-Sided (Book) Duplex print of Book
Value 2-Sided
(Tablet)
Value Booklet Booklet print
Operation Duplex print function will be set. At the time of
Booklet printing, the list box for setting paper
size will be displayed.
Remarks Booklet function cannot coexist with multi
page(N-Up)print.
1.
999.
Display Function
binding
Duplex print of Tablet
binding
3) Setting Paper Size of Booklet Function
Function name Setting paper size of Booklet function
Tab
Name
Control List box
Display Function
Value* Booklet on Letter The 4-page original will
be printed on Letter.
Value Booklet on Ledger The 4-page original will
be printed on Ledger.
Value Booklet on A4 The 4-page original will
be printed on A4.
Value Booklet on A3 The 4-page original will
be printed on A3.
Value Booklet on B4 The 4-page original will
be printed on B4.
Operation The paper size of Booklet function will be set.
If this function is selected, Booklet on Letter,
etc will be displayed in the paper size column
of an application program.
4) Selecting Print Orientation
Function name Selecting print orientation
Tab Main
Name Orientation
Control Radio button
Display Function
Value* Portrait Portrait printing.
Value Landscape Landscape printing.
Operation The operation of paper at the time of printing
will be selected.
5) Setting Staple Function
Function name Setting Staple function
Tab Main
Name Stapling
Control List box
Value* None Stapling will not be executed.
Value 1Staple Stapling will be executed at 1 place.
Value 2Staple Stapling will be executed at 2
places.
Operation The number of Stapling will be set.
In AR-PB2 Printing System, the stapling
position will be determined by setting the
number of stapling.
This function will be displayed if Finisher that
has these functions is connected. And it
becomes possible to set this function.
5 – 10
Page 11

AR-PB2
6) Setting Multi Page Function
Function name Setting Multi page function
Tab Main
Name N-up Printing
Control List box
Value* 1-Up Multi page function will not be used.
Value 2-Up 2 page original will be printed on 1
sheet.
Value 4-Up 4 page original will be printed on 1
sheet.
Value 6-Up 6 page original will be printed on 1
sheet.
Value 8-Up 8 page original will be printed on 1
sheet.
Value 9-Up 9 page original will be printed on 1
sheet.
Value 16-Up 16 page original will be printed on 1
sheet.
Operation Multi page function will be set. The size of an
original will be automatically reduced and
then printed.
The layout on the print of each original will be
in the order of Z characters.
7) Setting Frame Print of Multi Page Function
Function name Setting frame print of Multi Page function
Tab Main
Name Border
Control Check box
Value* No check Frame print
Value Check No frame print
Operation If the checkbox is checked, the frame print of
Multi Page Function will be performed.
Paper Tab
1) Setting Paper Size to be used for Print
Function name Setting paper size to be used for print.
Tab Paper
Name Paper Size
Control List box
Display 1 Display 2 Contents
Value* Letter 8 1/2 × 11 Selecting Letter
Value Legal 8 1/2 × 14 Selecting Legal
Value Ledger 11 × 17 Selecting Ledger
Value Executive 7 1/4 × 10 1/2 Selecting Executive
Value Invoice 5 1/2 × 8 1/2 Selecting Invoice
Value Foolscap 8 1/2 × 13 Selecting Foolscap
Value A4 210 × 297 mm Selecting JIS A4
Value A3 297 × 420 mm Selecting JIS A3
Value A5 210 × 148 mm Selecting JIS A5
Value A6 105 × 148 mm Selecting JIS A6
Value B4 257 × 364 mm Selecting JIS B4
Value B5 257 × 182 mm Selecting JIS B5
Value Japanese
Post Card
Value Custom
Paper Size
Operation The paper size to be used for printing will be
selected by the name of paper.
In the List box, the name of paper will be
displayed with the contents of the Display 1
column. At the above of the List box, the paper
size will be displayed with the contents of the
Display 2.
If user-defined size paper is selected, the dialog
box to set the actual paper size will be displayed.
If Fit to Page function is selected, this paper size
will be the intended paper size.
100 × 148 mm Selecting Japanese
Post Card
Selecting
User-defined paper
size
When Custom Paper
Size is selected, the
display of
"millimeters" will be
default.
2) Fit to Page Function
Function name Fit to Page function
Tab Paper
Name Fit to Paper Size
Control Check box
Value* No Check Fit to Page function will not be
used.
Value Check Fit to Page function will be used.
Operation If this checkbox is checked , Fit to Page function
will be executed. Fit to Page function is to
enlarge/reduce the original to be printed
according to the paper size to be printed.
If this function is selected, "Selecting the
intended size of Fit to Page" in another item will
be displayed.
5 – 11
Page 12

AR-PB2
3) Setting Paper Input Tray to be used for Printing
Function name Setting Paper Input Tray to be used for
Tab Paper
Name Paper Source
Control List box
Value* Auto Select Paper Input Tray will be
Value Bypass Tray Manual Feed Paper Input
Value Bypass Tray
Value Tray 1 Tray 1 will be selected.
Value Tray 2 Tray 2 will be selected.
Value Tray 3 Tray 3 will be selected.
Value Tray 4 Tray 4 will be selected.
Value Large
Operation Paper to be used for printing will be selected
printing
Display Contents
automatically selected.
Tray will be selected.
Manual Feed Paper Input
(manual)
Capacity Tray
by the name of Paper Input Tray.
In the List box, the name of Paper Input Tray
will be displayed with the contents of Display.
If the intended Paper Input Tray is not
installed, the value will not be displayed.
Tray(Wait) will be Selected.
A Large Capacity Tray will
be selected.
4) Starting the Selection of Different Paper
Function name Starting the selection of Different Paper
Tab Paper
Name Different Paper
Control Button
Operation If this button is pressed, Different Paper
dialog box will be displayed.
5) Starting the Selection of Interleave
Function name Starting the selection of Interleave
Tab Paper
Name Transparency Inserts
Control Button
Operation If this button is pressed, Interleave dialog box
will be displayed.
6) Selecting Paper Output Tray
Function name Selecting Paper Output Tray
Tab Paper
Name Output
Control List box
Display Contents
Value* Top Tray Output to Top Tray
Value Second Tray Output to Second Tray.
Value Offset Tray Output to Offset Tray.
Operation Paper Output Tray to be used for outputting
the print result will be selected by the name.
In the List box, the name of Paper Output
Tray will be displayed with the contents of
Display. If the intended Paper Output Tray is
not installed, the value will not be displayed.
7) Setting the way to Output Paper
Function name Setting the way to output paper
Tab Paper
Name Face Up/Down
Control List box
Display Contents
Value* Face Up Paper will be output Face Up.
Value Face Down Paper will be output Face
Down.
Operation The way to output the printed paper will be
selected.
In the List box, that will be displayed with the
contents of Display column.
If the intended way to output paper is not
supported, the value will not be displayed.
8) Setting Paper Output Order of Print Job
Function name Setting Output Order of Print Job
Tab Paper
Name Reverse Order
Control Check box
Value No check The paper output of Print Job
will be normal order.
Value* Check The paper output of Print Job
will be reverse order.
Operation The paper output order of Print Job will be
selected.
Different Paper
1) Checked/Unchecked the Setting of Different Paper
Function name Checked/Unchecked the setting of Different
Paper
Dialog Different Paper dialog box
Name Different 1st Page
Control Check box
Value* No check Setting of Different Paper is
checked.
Value Check Setting of Different Paper is
unchecked.
Operation If this checkbox is checked, the setting of
Different Paper will be activated and the
specific Paper Input Tray can be selected
only for the 1st page of print Job.
5 – 12
Page 13

AR-PB2
2) Setting Paper Input Tray to be Used for Printing
Different Paper
Function name Setting Paper Input Tray to be used for
Dialog Different Paper dialog box
Name Paper Source
Control List box
Value* Bypass Tray Manual Feed Paper Input
Value Bypass
Value Tray 1 Tray1 will be selected.
Value Tray 2 Tray2 will be selected.
Value Tray 3 Tray3 will be selected.
Value Tray 4 Tray4 will be selected.
Value Large
Operation The paper to be used for printing the front
printing Different Paper
Display Contents
Tray will be selected.
Manual Feed Paper Input
Tray(manual)
Capacity Tray
cover will be selected by the name of Paper
Input Tray.
In the List box, the name of Paper Input Tray
will be displayed with the contents of the
Display column.
If the intended Paper Input Tray is not
installed, the value will not be displayed.
Tray (Wait) will be selected.
Large Capacity Tray will be
selected.
3) Selecting Paper for Different Paper Print
Function name Selecting paper for Different Paper print
Dialog Different Paper dialog box
Name OK
Control Button
Operation If this button is pressed, the dialog box will be
closed with the setting contents enabled.
4) Selecting Paper for Different Paper Print
Function name Selecting paper for Different Paper print
Dialog Different Paper dialog box
Name Cancel
Control Button
Operation If this button is pressed, the dialog box will be
closed with the setting contents disabled.
5) Selecting Paper for Different Paper Print
Function name Selecting paper for Different Paper print
Dialog Different Paper dialog box
Name Defaults
Control Button
Operation If this button is pressed, all the setting
contents of the dialog box will be returned to
the default value.
Interleave Dialog Box
1) Setting Paper for Interleave Print
Function Name Setting paper for interleave print
Dialog Transparency Inserts dialog box
Name Transparency Inserts
Control Check box
Value* No check No paper setting for Interleave
Print
Value Check Paper setting for Interleave Print
Operation If this checkbox is checked, the setting of
Interleave print will be activated and it
becomes possible to set paper for each page
of Print Job.
"If this "Check box" is checked, Paper Source
in the Paper tab will be fixed to "Bypass
Tray(manual)".
2) Selection of Interleave page print state
Function name Selection of Interleave page state
Dialog Select Transparency Inserts dialog box
Name
Control Radio button
Display Function
Value* Printed Interleave page will be printed.
Value Blank Interleave print will not be printed.
Operation With this radio button, it is specified whether
to print Interleave page or to remain blank.
3) Setting Paper Input Tray to be used for Interleave Print
Function name Setting Paper Input Tray to be used for
Dialog Select Transparency Inserts dialog box
Name Paper Source
Control List box
Value* Tray 1 Tray 1 will be selected.
Value Tray 2 Tray 2 will be selected.
Value Tray 3 Tray 3 will be selected.
Value Tray 4 Tray 4 will be selected.
Value Large
Operation The paper to be used for Interleave Print will
Interleave Print
Display Contents
A large volume paper feed
Capacity Tray
be selected by the name of Paper Input Tray.
In list box, the name of Paper Input Tray will
be displayed with the contents of Display.
If the Paper Input Tray is not installed, the
value will not be displayed.
tray will be selected.
5 – 13
Page 14

AR-PB2
4) Closing Dialog Box with the setting contents enabled
Function name Closing Dialog Box with the setting contents
enabled
Dialog Select Transparency Inserts dialog box
Name OK
Control Button
Operation If this button is pressed, the dialog box will be
closed with the setting contents enabled.
5) Closing Dialog Box with the setting contents disabled
Function name Closing Dialog Box with the setting contents
disabled.
Dialog Select Transparency Inserts dialog box
Name Cancel
Control Button
Operation If this button is pressed, the dialog box will be
closed with the setting contents disabled.
6) Initialization of the contents of Dialog Box
Function name Initialization of the contents of Dialog Box
Dialog Select Interleave page dialog box
Name Defaults
Control Button
Operation If this button is pressed, all the setting
contents of Dialog Box will be returned to the
default value.
[Advanced] Tab
1) Binding Edge Setting
Function name Binding Edge Setting
Tab Advanced
Name Right Edge Binding
Control Check box
Value* No check Right Edge Binding
Value Check Left Edge Binding
Operation The binding edge will be selected.
2) Starting Image Quality Dialog Box
Function name Start Image Quality Dialog Box
Tab Advanced
Name Image Quality
Control Button
Operation If this button is pressed, Image Quality Dialog
Box will be displayed.
3) Starting Font Dialog Box
Function name Starting Font Dialog Box
Tab Advanced
Name Font
Control Button
Operation If this button is pressed, Font Dialog Box will
be pressed.
4) Position flipping control frame
Function name Position flipping control frame
Tab Advanced
Name Mirror Image
Control Frame
Operation Position flipping controls are put inside of this
frame
5) Vertical position flipping control
Function name Vertical position flipping control
Tab Advanced
Name Vertical
Control Check box
Value* No check Normal printing
Value Check Vertical position flipped print
Operation When this checkbox is checked, print out is in
vertical mirror imaged.
6) Horizontal position flipping control
Function name Horizontal position flipping control
Tab Advanced
Name Horizontal
Control Check box
Value* No check Normal printing
Value Check Horizontal position flipped print
Operation When this checkbox is checked, print out is in
Horizontal mirror imaged.
7) Negative Image printing control
Function name Negative Image printing control
Tab Advanced
Name Negative Image
Control Check box
Value* No check Normal printing
Value Check Negative Imaged print
Operation When this checkbox is checked, print out is in
inverted brightness imaged.
8) PS Error Infomation control
Function name PS Error Infomation control
Tab Advanced
Name PS Error Infomation
Control Check box
Value* No check No print PS Error Information
Value Check Print PS Error Information
Operation A setting is made whether to print PostScript
Error information or not when an error
occurred at a printer during printing.
5 – 14
Page 15

AR-PB2
9) PS Pass-through control
Function name PS Pass-through control
Tab Advanced
Name PS Pass-through
Control Check box
Value* No check Printer driver controlled PS
code and the setting.
Value Check Application controlled PS code
and the setting.
Operation Depending on an application, some output
PS code independently. And so PS code
cannot be controlled at the printer dirver side.
In this case, the settings at the driver side
such as N-Up, Watermark, etc. do not
function correctly. By removing this check, it
becomes possible for the printer driver to
controll PS code and the setting at the driver
side becomes enabled.
[Image Quality] Dialog box
1) Setting Print Resolution
Function name Setting print resolution
Dialog Image Quality Dialog Box
Name Resolution Settings
Control List box
Display Contents
Value* 600DPI With 600DPI, printed.
Value 300DPI With 300DPI, printed.
Operation Print resolution will be set.
2) Setting whether to execute or stop Smoothing
Function name Setting whether to execute or stop Smoothing
Dialog Image Quality Dialog Box
Name Smoothing
Control List box
Display Contents
Value* On Smoothing function will be
executed.
Value Off Smoothing function will not be
executed.
Operation Whether to execute or stop Smoothing will be
selected.
Depending on a machine, this function is not
implemented. In this case, if [Smoothing]
checkbox of [Configuration] tab is OFF, this
item will not be displayed.
3) Setting the types of HalfTone Print
Function name Setting the types of Half Tone print
Dialog Image Quality Dialog Box
Name Screen Frequency
Control Spin box
Display Function
Value* 60.0 No dithering
Minimum Value 0.1 Minimum value for the number of
lines per inch of the pattern.
Maximum Value 360.0 Maximum value for the number of
lines per inch of the pattern.
Operation Specifies values for the number of lines per
inch of the pattern.
4) Setting the types of HalfTone Print
Function name Setting the types of Half Tone print
Dialog Image Quality Dialog Box
Name Screen Angle
Control Spin box
Display Function
Value* 45.0 No dithering
Minimum Value 0.0 Minimum values for the number of
angle of the pattern.
Maximum Value 360.0 Maximum values for the number of
angle of the pattern.
Operation Specifies values for the number of angle of
the pattern.
5) Use of Toner Save function
Function name Use of Toner Save function
Dialog Image Quality Dialog Box
Name Toner Save
Control Check
Display Contents
Value* No check Toner Save function will not be
used.
Value Check Toner Save function will not be
used.
Operation Whether to use Toner Save function or not
will be selected.
Depending on a machine, this function is not
implemented. In this case, if [Smoothing]
checkbox of [Configuration] tab is OFF, this
item will not be displayed.
6) Closing DialogBox with the setting contents enabled
Function name Closing Dialog Box with the setting contents
enabled
Dialog Image Quality Dialog Box
Name OK
Control Button
Operation If this button is pressed, the dialog box will be
closed with the setting contents enabled.
5 – 15
Page 16

AR-PB2
7) Closing Dialog Box with the setting contents disabled
Function name Closing Dialog Box with the setting contents
Dialog Image Quality Dialog Box
Name Cancel
Control Button
Operation If this button is pressed, the dialog box will be
disabled
closed with the setting contents disabled.
8) Initialization of the contents of Dialog Box
Function name Initialization of the contents of Dialog Box
Dialog Image Quality Dialog Box
Name Defaults
Control Button
Operation If this button is pressed, all the setting
contents of Dialog Box will be returned to the
default value.
Font Dialog Box
1) Setting the position of a font to be used
Function name Setting the position of a font to be used
Dialog Font Dialog Box
Name Font Source
Control List box
Display Contents
Value* Resident
Fonts
Value Download
Fonts
Operation The place to store a font to be used for
printing will be selected.
2) Setting the TrueType font print method
Function name Setting the TrueType font print method
Dialog Font Dialog Box
Name Send TrueType Fonts as
Control List box
Value* Download as
Adobe(Type 1)
Value Download as
Bitmap(Type 3)
Value Download as True
Type(Type 42)
Operation TrueType font print transmission method will
be selected.
All fonts will be selected from
printer font.
All fonts will be downloaded.
Display Contents
Use outline format
Use bitmap format
Use TrueType 42
format
3) Closing Dialog Box with the setting contents enabled
Function name Closing Dialog Box with the setting contents
enabled
Dialog Font Dialog Box
Name OK
Control Button
Operation If this button is pressed, the dialog box will be
closed with the setting contents enabled.
4) Closing Dialog Box with the setting contents disabled
Function name Closing Dialog Box with the setting contents
disabled
Dialog Font Dialog Box
Name Cancel
Control Button
Operation If this button is pressed, the dialog box will be
closed with the setting contents disabled.
5) Initialization of the contents of Dialog Box
Function name Initialization of the contents of Dialog Box
Dialog Font Dialog Box
Name Defaults
Control Button
Operation If this button is pressed, all the setting
contents of Dialog Box will be returned to the
default value.
[WaterMark] tab
5 – 16
Page 17

AR-PB2
1) Selecting the print position of WaterMark strings
Function name Seelcting the print position of WaterMark
strings
Tab WaterMark
Name Position x y
Control Slide bar
Default value(X)* 0 Printed at the center of horizontal
direction
Default value(Y)* 0 Printed at the center of vertical direction
Operation This item specifies the print position of
WaterMark strings.
The print position will be determined by using
the slide bar for horizontal direction (x) and
vertical direction (y) respectively.
For each direction, the print position will be
determined.
As to the value displayed, the center is 0 and
the left edge or upper edge is the minimum
value of –200 while right edge or lower edge
is the maximum value of 200.
Remarks The paper is surrounded by 2 slid bars when
displayed. Among the contents of WaterMark
to be executed, (1) to (7) will be included
there.
The paper size and the print orientation at
this point are not included in the display.
2) Returning the print position of WaterMark to center
Function name Returning the print position of WaterMark
strings to the center
Tab WaterMark
Name Canter
Control Button
Operation This item set the print position of WaterMark
strings to the center.
If this button is pressed, for both directions,
the print position will return to 0.
3) Selecting t he size of characters of WaterMark str in gs
Function name Selecting the size of characters of WaterMark
Tab WaterMark
Name Size
Control Slide bar
Minimum value 6 6 point characters will be used.
Maximum value 900 900 point characters will be used.
Default value* 72 72 point characters will be used.
Operation This item specifies the size of characters of
WaterMark strings in the units of point. This
value and the font size selected in the item of
font selection will be associated.
4) Selecting the print angle of WaterMark strings
Function name Selecting the print angle of WaterMark strings
Tab WaterMark
Name Angle
Control Slide bar
Minimum value –90 Turning 90 words counterclockwise
from a horizontal position.
Maximum value +90 Turning 90 words clockwise from a
horizontal position.
Default value* 0 Printing WaterMark strings on a
horizontal position.
Operation This item selects the angle to turn WaterMark
strings.
The strings will be turned with the center a
reference point.
5) Selecting WaterMark strings
Function name Selecting WaterMark strings
Tab WaterMark
Name Watermark:
Control List box
Value* (none) No Watermark
Value TOP SECRET Strings TOP SECRET
will be used for
Watermark.
Value CONFIDENTIAL Strings CONFIDENTIAL
will be used for
Watermark.
Value DRAFT Strings DRAFT will be
used for Watermark.
Value ORIGINAL Strings ORIGINAL will be
used for Watermark.
Value COPY Strings COPY will be
used for Watermark.
Operation This item selects the strings to be used for
WaterMark print. The above values are set at
the time of shipment. The values will be
added/deleted by pressing [Add]/[Update]
buttons. The strings to be used for
WaterMark print will be displayed in the
values.
6) Adding WaterMark strings
Function name Adding WaterMark strings
Tab Watermarks
Name Add
Control Button
Operation This item adds new WaterMark strings.
If this button is pressed, the contents of the
Watermarks tab at this pint will be added.
7) Updating WaterMark Strings
Function name Updating WaterMark strings
Tab Watermarks
Name Update
Control Button
Operation This item updates the contents of WaterMark
strings.
If this button is pressed, the contents of the
Watermarks tab at this point will be replaced
by the strings specified in " Selecting
WaterMark strings".
8) Deleting WaterMark Strings
Function name Deleting WaterMark strings
Tab Watermarks
Name Update
Control Button
Operation This item deletes the contents of WaterMark
strings.
If this button is pressed, the contents of the
Watermarks tab at this point will be replaced
by the strings specified in " Selecting
WaterMark strings".
5 – 17
Page 18

AR-PB2
9) Editing WaterMark Strings
Function name Editing WaterMark strings
Tab Watermarks
Name Text
Control Edit box
Operation This item edits the contents of WaterMark
strings.
With this Edit box, the strings to be used for
WaterMark print can be edited.
The shortest string is 0 character. The
longest string is 100 characters.
10) Setting Color of WaterMark Strings
Function name Setting the color of WaterMark strings
Tab Watermarks
Name Edit Color...
Control Button
Operation This item selects the color of WaterMark
strings.
If this button is pressed, the Windows
Common Dialog Box to specify colors will be
displayed and the color specified there will be
the color of WaterMark strings.
Although AR-PB2 Printing System is a
monochrome printer, it is possible to specify
colors. What affects the actual print is the
specification of the brightness of the color by
the slider control at the right end of the dialog
box.
11) Setting of Font of WaterMark Strings
Function name Setting of font of WaterMark Strings
Tab Watermarks
Name Edit Fonts...
Control Button
Operation This item selects the font of WaterMark
strings.
If this button is pressed, the Windows
Common Dialog Box to specify the font will
be displayed and the color specified there will
be the font of WaterMark strings.
13) Selecting Page to Execute Watermark Print
Function name Selecting the page to execute Watermark
print
Tab Watermarks
Name On First Page Only
Control Check box
Display Contents
Value* No check Watermark print will be
executed for all pages.
Value Check Watermark print will be
executed for only the 1st page.
Operation This item specifies whether to do Watermark
print for all pages or only for the 1st page of
each Print JOB.
14) Specifying Outline Print of Watermark Print
Function name Specifying outline print of Watermark print
Tab Watermarks
Name As Outline Only
Control Check box
Display Contents
Value* No check Normal Watermark print will be
performed.
Value Check Only the outline will be printed
in Watermark print.
Operation This item specifies whether to print only the
outline or to do normal printing for Watermark
print.
This item is enabled only when Watermark
print is print with overwriting.
[Configuration] Tab
12) Watermark Print with Transparency and Overwriting
Function name Watermark print with transparency and
overwriting
Tab Watermarks
Name Transparent Text
Contorol Check box
Display Contents
Value No check Watermark print with
transparency
Value* Check Watermark print with overwriting
Operation This item specifies whether Watermark print
with transparency or with overwriting. If print
with transparency is selected, Watermark
print becomes transparent and an original
can be read.
1) Setting Option Tray Connection
Function name Setting Option Tray Connection
Tab Configuration
Name Input Tray Options
Control Radio button
Display Function
Value* (None) Option Tray is not connected.
Value 1 Tray Desk 1 Tray Desk is connected.
Value 2 Tray Desk 2 Tray Desk is connected.
Operation The Option Tray connected will be set.
5 – 18
Page 19

AR-PB2
2) Setting Large Capacity Tray Connection
Function name Setting Large Capacity Tray Connection
Tab Configuration
Name Large Capacity Tray
Control Check box
Display Contents
Value* No check Large Capacity Tray is not
connected.
Value Check Large Capacity Tray is
connected.
Value This item is used for setting the connection of
Large Capacity Tray.
3) Setting Duplex Unit
Function name Setting Duplex Unit
Tab Configuration
Name Duplex Module
Control Check box
Display Contents
Value* No check Duplex unit is not built in.
Value Check Duplex unit is built in.
Operation This item is used for setting the built-in status
of Duplex Unit.
6) Setting Installed RAM Capacity
Function name Setting Installed RAM Capacity
Tab Configuration
Name Installed RAM:
Control List box
Display Contents
Value* 16MB RAM 16MB RAM is installed.
Value 32MB RAM 32MB RAM is installed.
Value 48MB RAM 48MB RAM is installed.
Value 64MB RAM 64MB RAM is installed.
Value 80MB RAM 80MB RAM is installed.
Operation This item is used for setting the Installed
RAM capacity.
7) Displaying About Dialog Box
Function name Displaying About dialog box
Tab Configuration
Name About
Control Button
Operation If this button is pressed, About dialog box
including the copyright of the printer driver,
etc. will be displayed. The contents are as
follows:
4) Setting Smoothing Function
Function name Setting Smoothing function
Tab Configuration
Name Smoothing
Control Check box
Display Contents
Value* No check Smoothing function cannot be
Value Check Smoothing function can be
Operation This item is used for setting the status of
Smoothing function.
used.
used.
5) Selecting Finisher
Function name Selecting Finisher
Tab Configuration
Name Output Tray Options:
Control List box
Display Contents
Value* (none) No finisher
Value 2 Tray Finisher Connected to 2 Tray
Value 3 Tray Finisher Connected to 3 Tray
Operation This item is used for selecting Finisher
connected.
Finisher
Finisher
5 – 19
Page 20

AR-PB2
3. PostScript PPD Printer Dr ive r (Win dows)
1) Paper Size
Name Name
Letter A5
Legal A6
Ledger Hagaki
Executive B4
Invoice B5
A4 Foolscap
A3 Custom page
2) Copies
Range Display Default Function
Minimum 1 * Multi copy count is set to 1
sheet
Maximam 999 Multi copy count is set to 999
sheets
3) Orientation
Display Default Function
Portrait, * Portrait (0 degree rotation)
Landscape, Landscape (270 Degree
clockwise rotation)
Rotated Landscape Rotated Landscape (90 Degree
clockwise rotation)
4) Layout
Display Default Function
1 up, * 1 page image is printed on a
sheet
2 up 2 page image is printed on a
sheet
4 up 4 page image is printed on a
sheet
5) Paper Source
Display Default Function
Auto Select Tray * Paper source is defined
automatically.
Manual feed Manual feed is selected.
Bypass tray Bypass tray feed is selected
Tray 1 Tray 1 feed is selected
Tray 2 Tray 2 feed is selected
Tray 3 Tray 3 feed is selected
Tray 4 Tray 4 feed is selected
LCT LCT feed is selected
6) Duplex mode setting
This item describes duplex printing condition.
Dialog [More Paper Options] dialog
Display Default Function
None * Simplex printing
Flip on long edge Duplex printing with long edge
flipping.
Flip on short edge Duplex printing with short edge
flipping.
7) Output Component
Display Default Contents
2 Exit Tray * 2 Exit Tray is installed.
2 tray finisher 2 tray finisher is installed.
3 tray finisher 3 tray finisher is installed.
8) Large Capacity Tray configuration setting
Display Default Contents
Not Installed * LCT is not installed
Installed LCT is installed
9) Drawer Desk Stand configuration setting
Display Default Contents
Not Installed * No drawer desk is installed.
1 tray drawer desk
is Installed
2 tray drawer desk
is Installed
A 1 tray drawer desk is installed.
A 2 tray drawer desk is installed.
10) Duplex unit configuration setting
Display Default Contents
Not Installed * ADU is not installed.
Installed ADU is installed.
11) Installed memory setting
Display Default Contents
Standard 16MB * 16MB RAM is installed.
32MB Total RAM 32MB RAM is installed
48MB Total RAM 48MB RAM is installed
64MB Total RAM 64MB RAM is installed
80MB Total RAM 80MB RAM is installed
12) Staple selection
Display Default Contents
No stapling * No stapling is executed.
One stapling/3
Tray Finisher
Two stapling/3
Tray Finisher
One stapling/2
Tray Finisher
One stapling is executed with 3 tray
finisher
Two stapling is executed with 3 tray
finisher
One stapling is executed with 2 tray
finisher
13) Paper Delivery selection
Display Default Contents
Top Tray(Face-Up)/2 Exit Trays: * Top Tray
Face-Up
2 Exit Trays
Second Tray(Face-Up)/2 Exit Trays: Second Tray
Top Tray(Face-Up)/2Tray Finisher: Top Tray
Second Tray (Offset) (Face-Up)/
2Tray Finisher:
Top Tray(Face-Up)/3Tray Finisher: Top Tray
Second Tray(Face-Up)/3Tray Finisher: Second Tray
Offset Tray(Face-Up)/3 Tray Finisher: Offset Tray
Face-Up
2 Exit Trays
Face-Up
2Tray Finisher:
Second Tray
(Offset)
Face-Up
2Tray Finisher
Face-Up
3Tray Finisher
Face-Up
3Tray Finisher
Face-Up
3 Tray Finisher
5 – 20
Page 21

AR-PB2
Display Default Contents
Offset Tray(Face-Down)/3Tray
Finisher:
Second Tray (Offset) (Face-Down)/
2Tray Finisher:
Top Tray(Face-Down)/3Tray Finisher: Top Tray
Second Tray(Face-Down)/3Tray
Finisher:
Offset Tray
Face-Down
3Tray Finisher
Second Tray
(Offset)
Face-Down
2Tray Finisher
Face-Down
3Tray Finisher
Second Tray
Face-Down
3Tray Finisher
14) Toner save mode selection
Display Default Contents
Disable * Toner save printing is not used.
Enable Toner save printing is used.
15) Smoothing selection
Display Default Contents
Enable Edge smoothing function is used.
Disable * Edge smoothing function is not used.
16) Resolution Setting
Display Default Contents
600DPI * 600DPI printing is selected.
300DPI 300DPI printing is selected.
17) Screen angle setting
Range Display Default Function
Minimum 0 Screen angle is set to 0 degree
Maximum 360 Screen angle is set to 360
degree
Default 45 * Screen angle is set to 45
degree
21) Negative Image printing
Display Default Contents
Unchecked * Normal (Positive) image printing.
Checked Negative image printing.
22) Mirror Image printing
Display Default Contents
Unchecked * Normal image printing.
Checked horizontally mirror image printing.
23) Scaling
Range Display Default Function
Minimum 25 scaling rate is set to 25%
Maximum 400 scaling rate is set to 400%
Default 100 * scaling rate is set to 10%
24) Correct Order Printing
Display Default Contents
Disable * Correct order printing is selected.
Enable Reverse order printing is selected.
25) Smoothing Mechanism Setting
Display Default Contents
Not Installed * Smoothing function is not installed.
Installed Smoothing function is installed.
26) Staple position
Display Default Contents
Short Edge
Binding
Long Edge
Binding
* Short edge staple
Long edge staple
18) Screen frequency setting
Range Display Default Function
Minimum 0.1 Screen frequency is set to 0.1
cycle/inch.
Maximun 360 Screen frequency is set to 360
cycle/inch.
Default 60 * Screen frequency is set to 60
cycle/inch.
19) Job Timeout
Range Display Default Function
Minimum 0 * Length of Job Timeout as set
to infinity.
Maximum 999 Length of Job Timeout as set
to 999 seconds.
20) Wait Timeout
Range Display Default Function
Minimum 0 Length of wait Timeout as set
to infinity.
Maximum 999 Length of wait Timeout as set
to 999 seconds.
Default 240 * Length of wait Timeout as set
to 240 seconds.
5 – 21
 Loading...